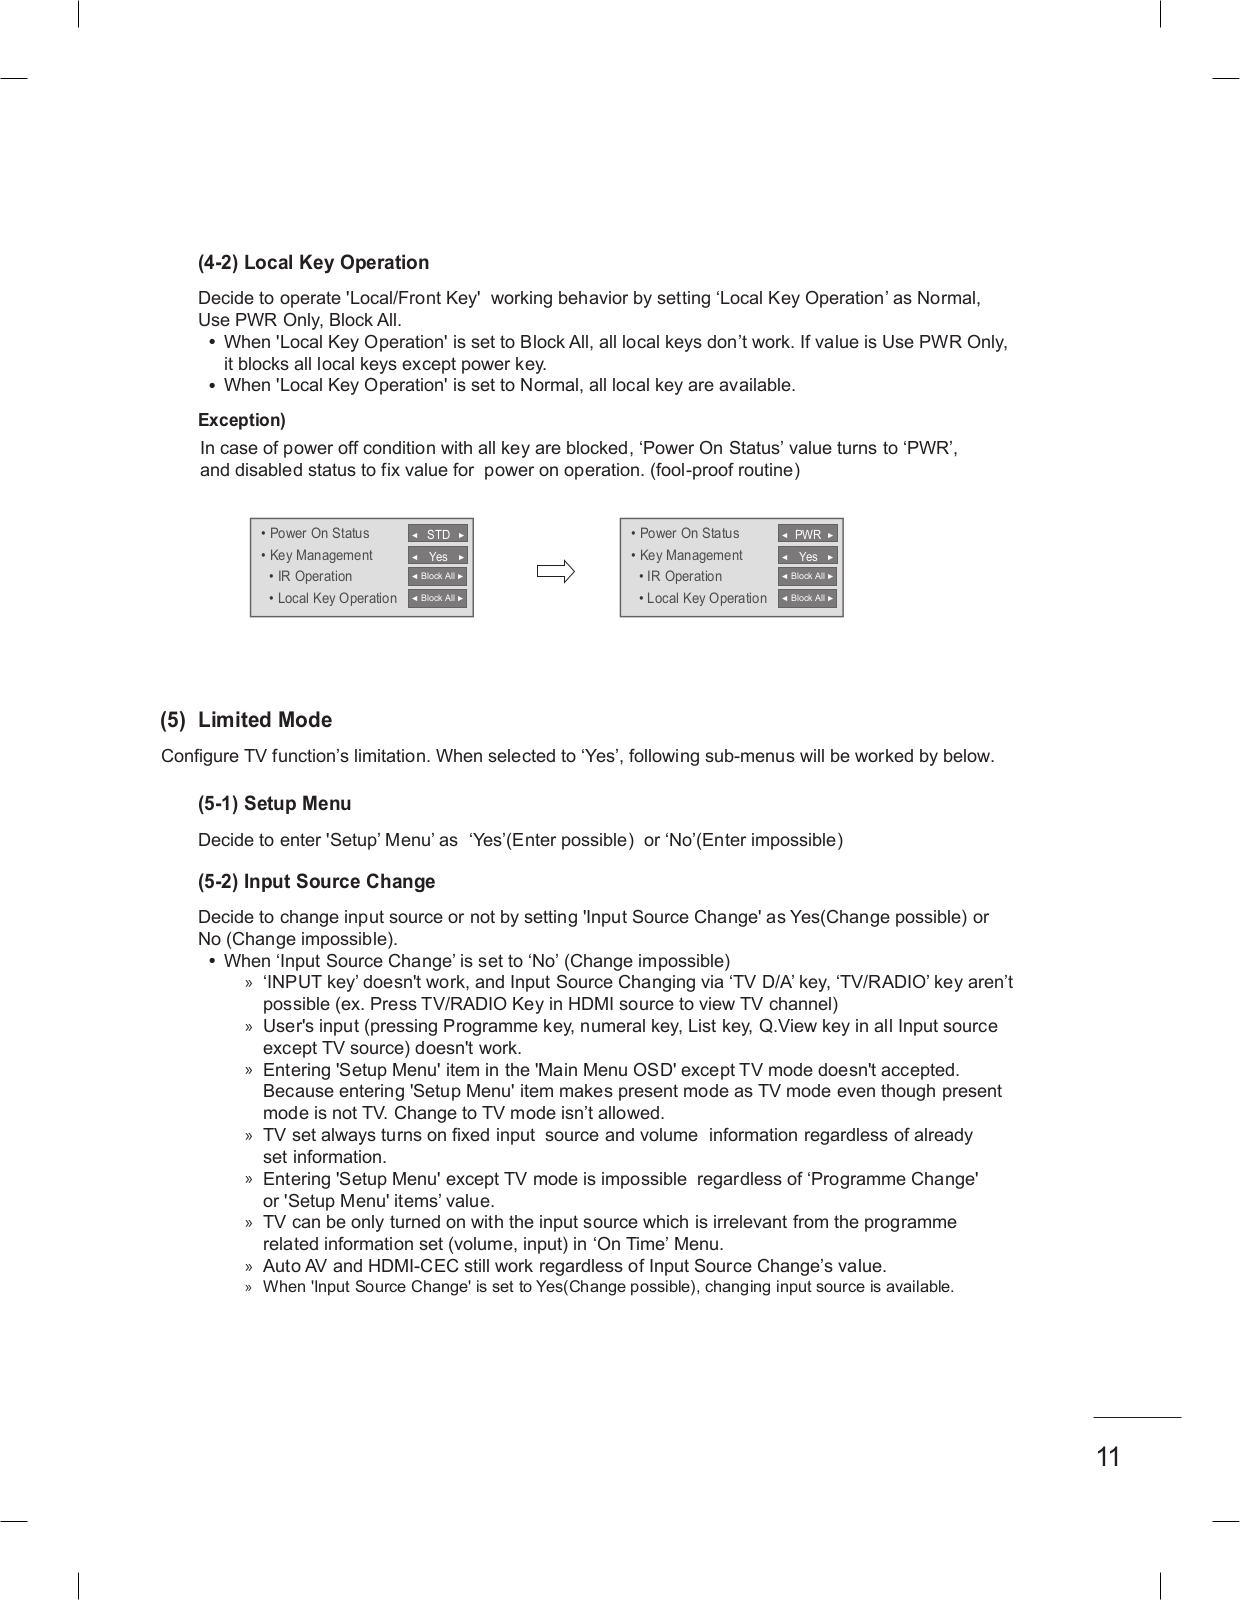
How it Works
Log In / Sign Up
Buy Points
How it Works
FAQ
Contact Us
Questions and Suggestions
Users
LG
Loading...
#
39LN570R-ZA
11
39LN570S-ZA
11
39LN570S-ZE
11
39LN570U-ZA
11
39LN570V-ZA
11
39LN570V-ZE
11
39LN5730
39LN5750
5
39LN5750UH
39LN5758
39LN5758-ZE
11
39LN575S
6
39LN575S-ZE
11
39LN575V
3
39LN575V-ZE
11
39LN5778
2
39LN5778-ZK
11
39LN577S
2
39LN577S-ZK
11
39LN577V
39LN577V-ZK
11
39LN5788-ZE
11
39LN578S-ZE
11
39LN578V
2
39LN578V-ZE
11
39LP360H
39LP360H-ZA
3
39LP361H-ZA
39LP620H
3
39LP620H-UH
2
39LP62xH
39LP630H
3
39LP630H-ZA
39LP631H
39LP631H-ZA
39LP632H
2
39LP632H-ZA
39LP645H
4
39LP645H-UH
2
39LW750H
2
39LW750H-ZB
39LY330C-ZA
2
39LY331C-ZA
39LY340C
3
39LY340C-UA
39LY340C-ZA
39LY340H
3
39LY341C-ZA
39LY345C-ZA
2
39LY54
39LY540H
5
39LY540H-TA
39LY540H-ZA
2
39LY540S
2
39LY540S-ZA
39LY541H
2
39LY541H-ZA
39LY560H
3
39LY570H
3
39LY750H
5
39LY750H-ZA
2
39LY751H
2
39LY751H-ZA
39LY760H
3
39LY760H-ZA
2
39LY761H
2
39LY761H-ZA
3D4K
3D Blu-ray™ DVD Home Cinema System
7
3D Blu-ray LHB655
3G1XINBTS
3G1XOUTBTS
3LB5D
2
3LY9
400G
402LG
4063GH220
4063GH221
40JL9100
40k
40LF5700
2
40LF5700-SA
40LF57 Series
3
402
4000
4003
4010
4015
2
4 42 2L G5 50
4 47 7L G5 50
40002
40121
40141
40147
40311
40318
40445
40448
4065528
4065529
Loading...
Loading...
Nothing found
39LY540H
INSTALLATION INSTRUCTIONS
47 pgs
4.19 Mb
0
Owner's Manual
52 pgs
9.02 Mb
0
Owner’s Manual
67 pgs
13.83 Mb
0
Owner’s Manual [ar]
67 pgs
14.36 Mb
0
User Guide [de]
65 pgs
18.56 Mb
0
Table of contents
Loading...
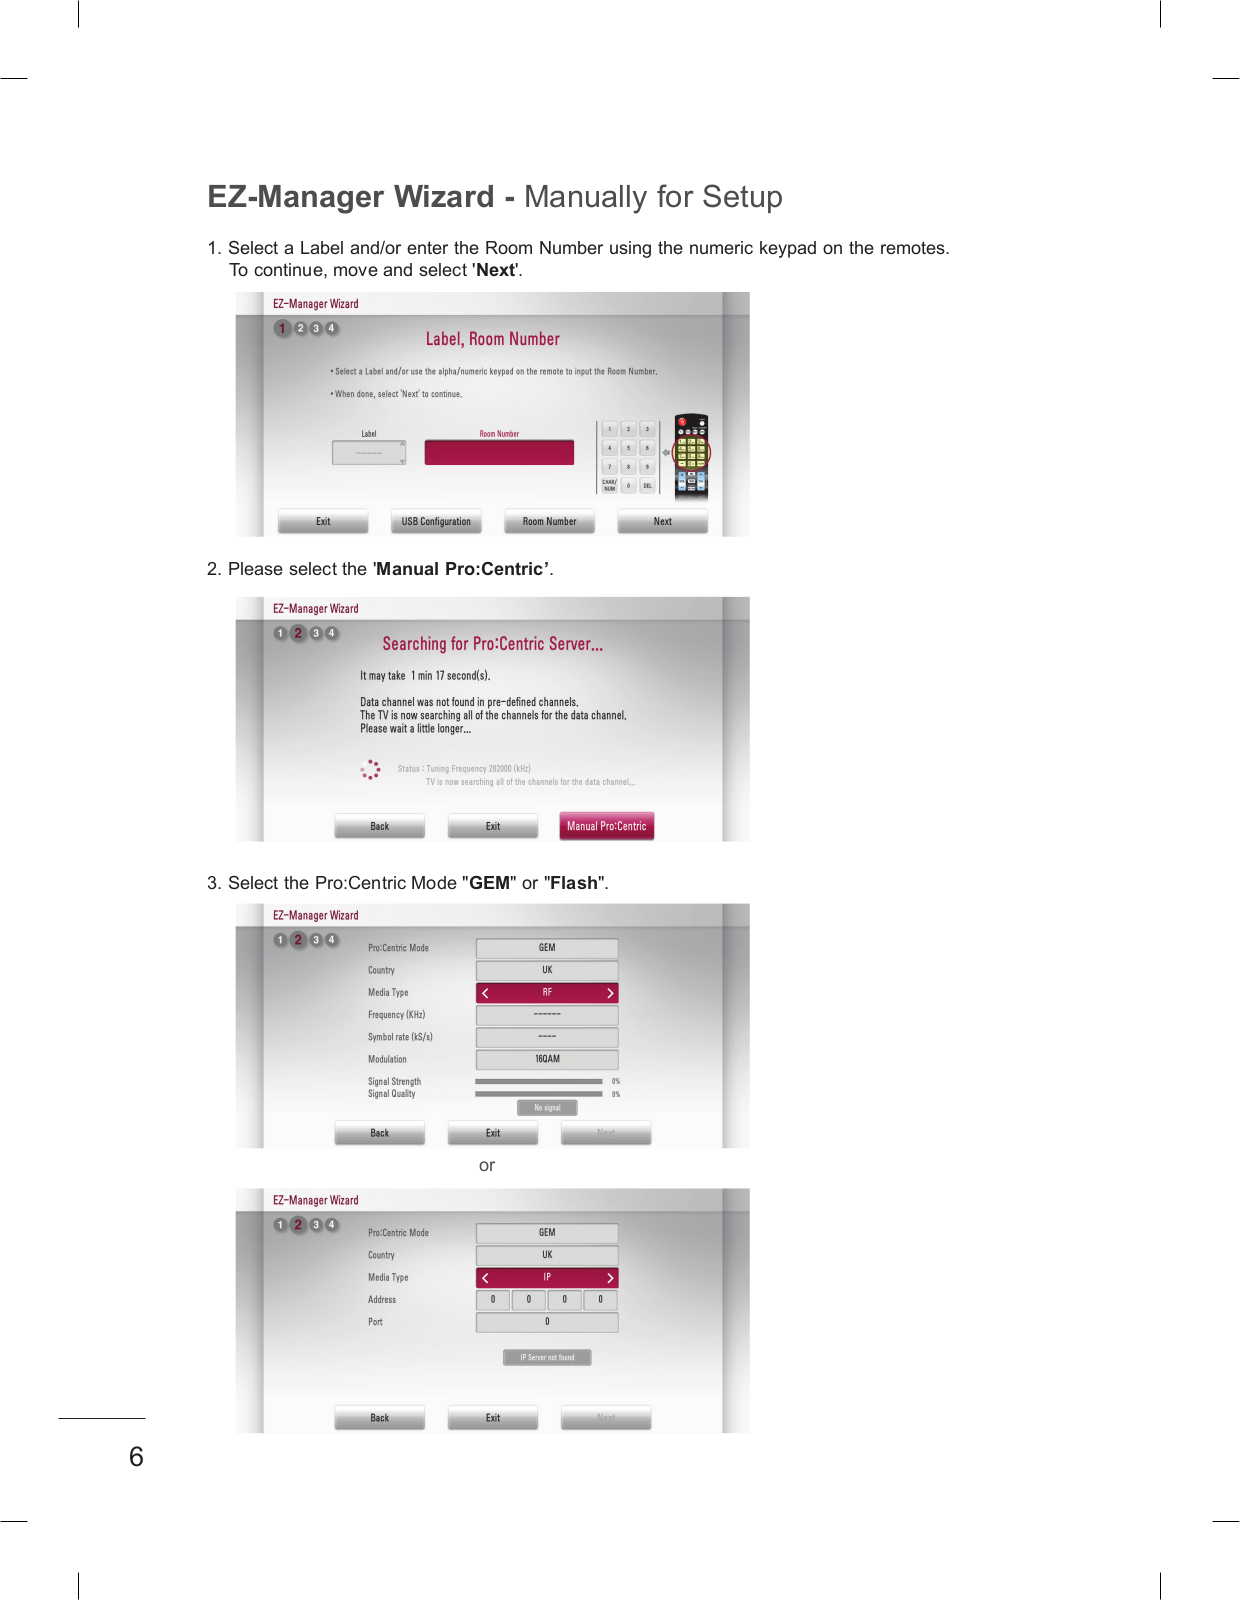
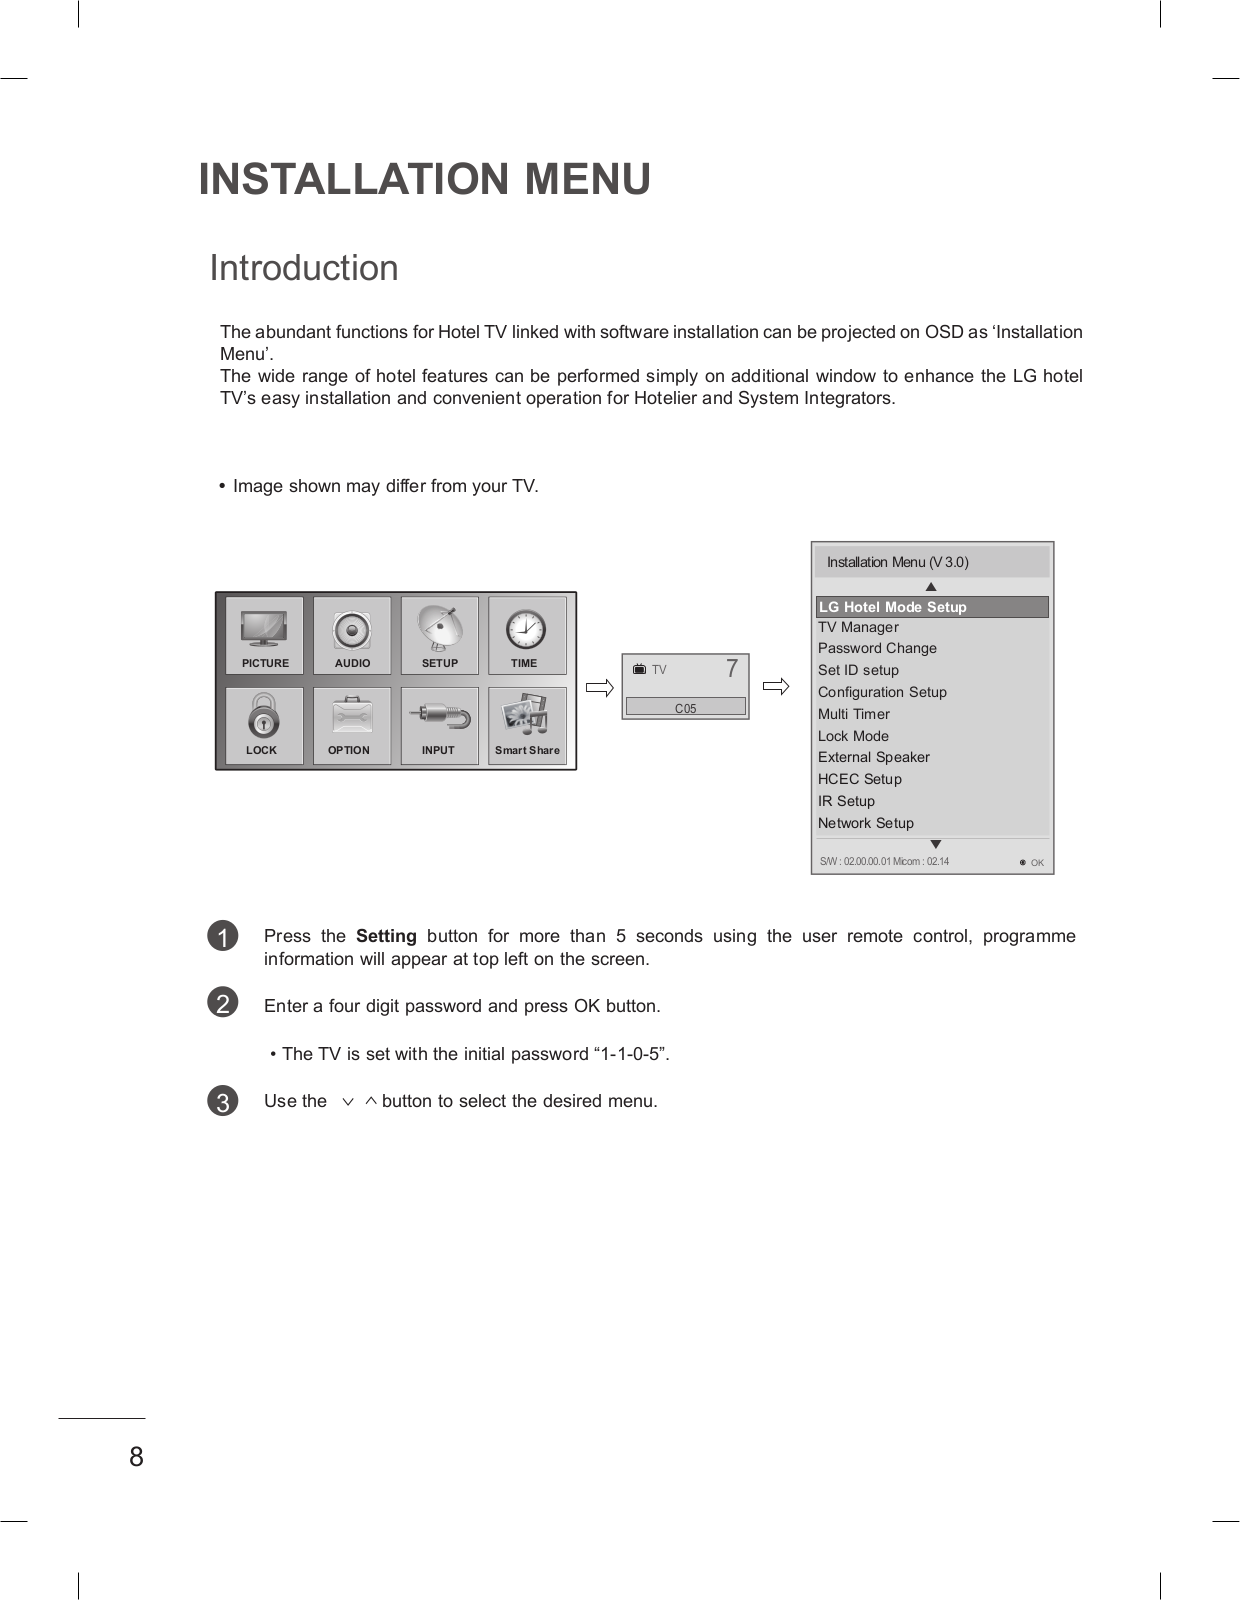
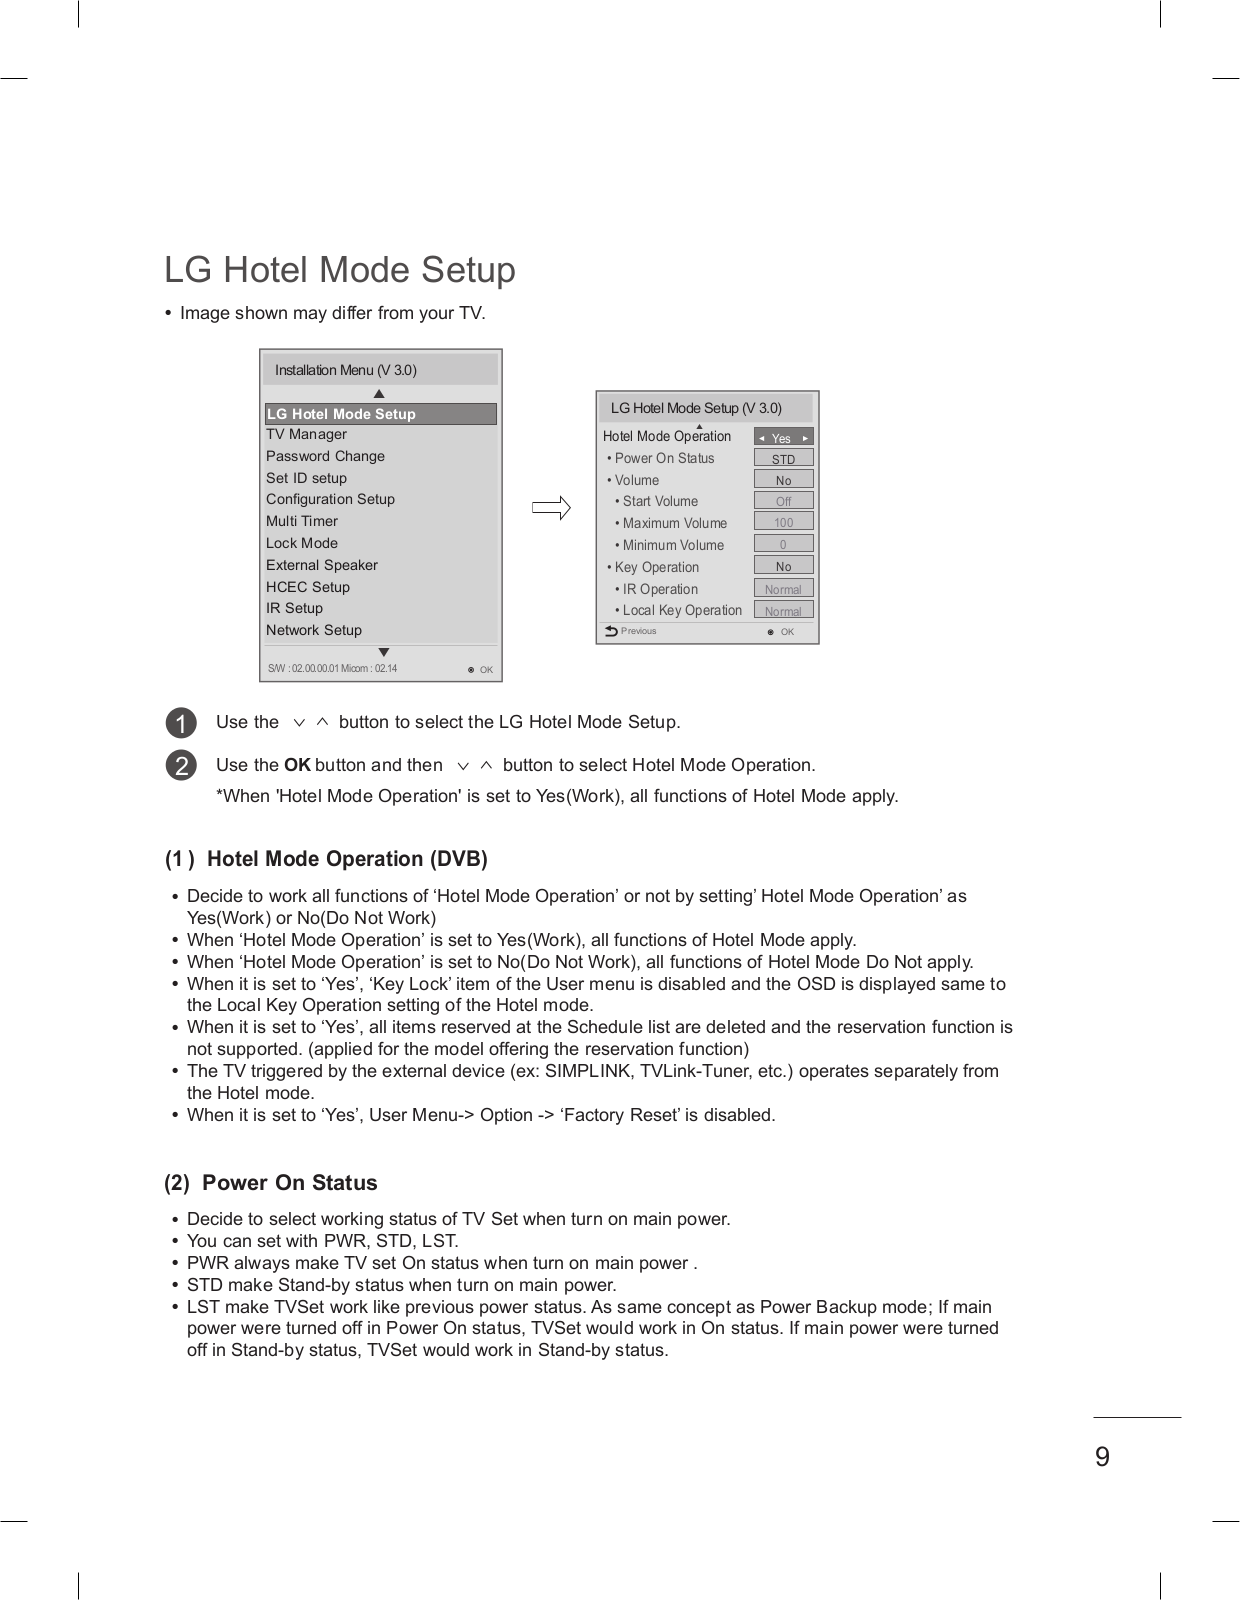
LG 39LY540H, 42LY541H INSTALLATION INSTRUCTIONS
...
LG INSTALLATION INSTRUCTIONS
Download
Specifications and Main Features
Frequently Asked Questions
User Manual
Download
Loading...
+
32
hidden pages
Unhide
You need points to download manuals.
1 point = 1 manual.
You can buy points or you can get point for every manual you upload.
Buy points
Upload your manuals