

Page 1

OWNER’S MANUAL
LED TV
* LG LED TV applies LCD screen with LED backlights.
Please read this manual carefully before operating
your set and retain it for future reference.
LA62**
LA64**
LA66**
LA69**
LA74**
P/NO : MFL67658602(1303-REV01)
Printed in Korea
LN57**
www.lg.com
Page 2

TABLE OF CONTENTS
A-2
TABLE OF CONTENTS
A-3 SETTING UP THE TV
A-3 Attaching the stand
A-6 Tidying cables
LANGUAGE LIST
English
Deutsch
Français
Italiano
Español
Português
Nederlands
Ελληνικά
Slovenščina
B-1 MAKING CONNECTIONS
B-1 Antenna connection
B-3 Satellite dish connection
B-4 HDMI connection
B-6 - ARC (Audio Return Channel)
B-7 DVI to HDMI connection
B-9 Component connection
B-11 Composite connection
B-12 MHL connection
B-14 Audio connection
B-14 - Digital optical audio connection
B-17 USB connection
B-19 CI module connection
B-21 Headphone connection
B-24 Euro Scart connection
COMMON
LANGUAGE
B-33 SPECIFICATIONS
COMMON
Page 3
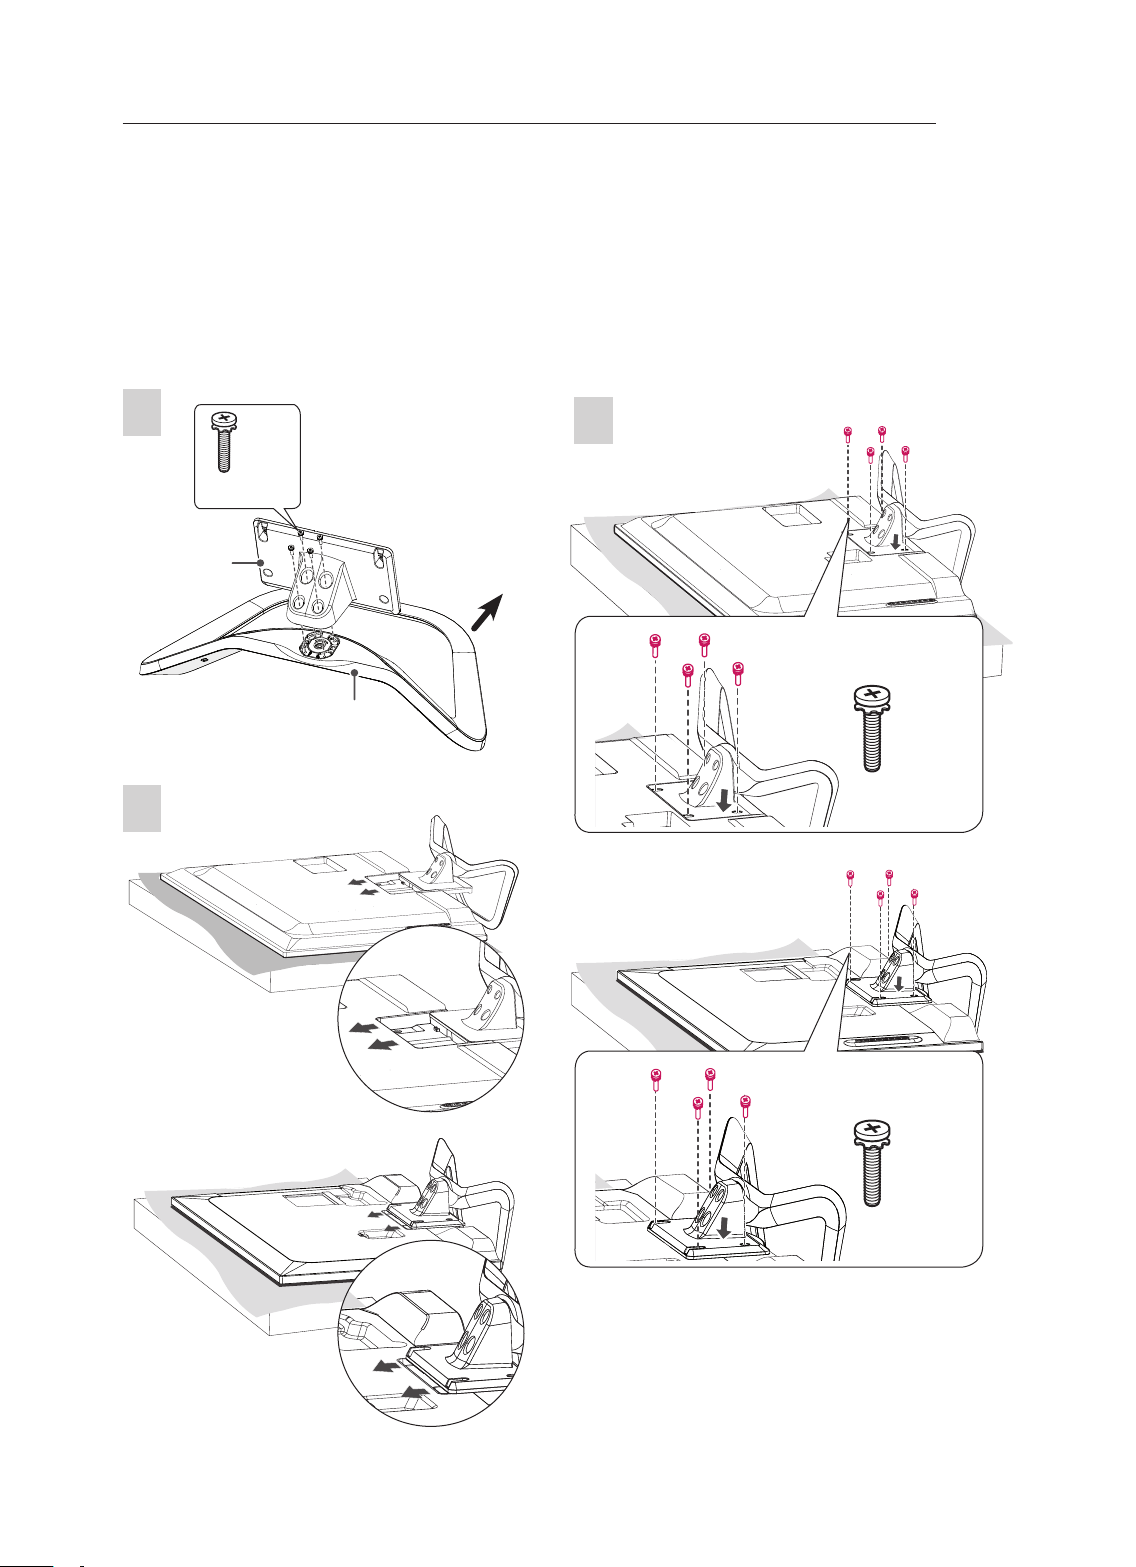
Setting up the TV
Image shown may differ from your TV.
Attaching the stand
LA62**, LA64**, LA66**, LN57**-ZE/ZK
SETTING UP THE TV
A-3
1
4 EA
M4 x 14
Stand Body
Stand Base
2
(Only LA62**, LN57**-ZE/ZK)
Front
(Only LA62**, LN57**-ZE/ZK)
3
(Only LA64**, LA66**)
M4 x 14
4 EA
(Only LA64**, LA66**)
M4 x 14
4 EA
Page 4
SETTING UP THE TV
A-4
LA69**, LA74**
1
2
3
Stand Base
M4 x 20
4EA
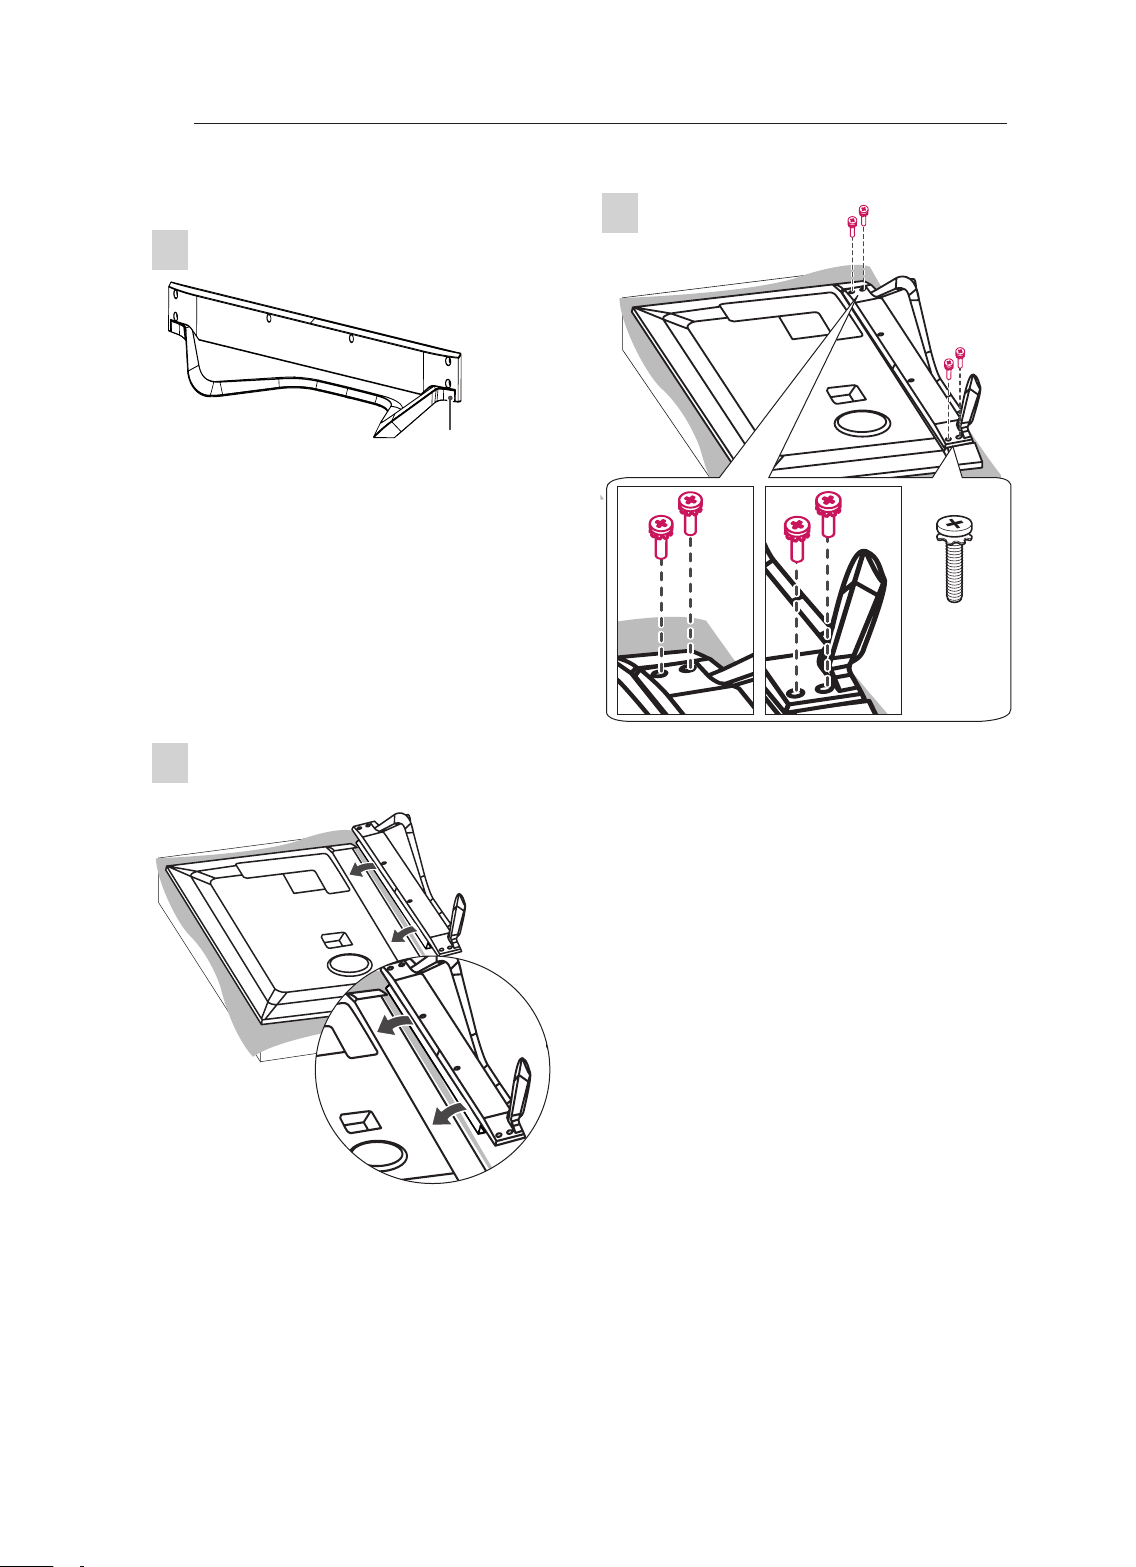
Page 5

LN57**-ZA
1
2
Stand Base
Stand Body
3EA
P5 x 25
SETTING UP THE TV
CAUTION
When attaching the stand to the TV
y
set, place the screen facing down on a
cushioned table or flat surface to protect the
screen from scratches.
Make sure that the screws are inserted
y
correctly and fastened securely. (If they are
not fastened securely enough, the TV may
tilt forward after being installed.)
Do not use too much force and over tighten
the screws; otherwise screw may be
damaged and not tighten correctly.
NOTE
Remove the stand before installing the TV
y
on a wall mount by performing the stand
attachment in reverse.
A-5
3
M4 x 14
4EA
Page 6
SETTING UP THE TV
⨲㘶ᖂ2
㏪ⱞ⋾#Ɐᴏ
A-6
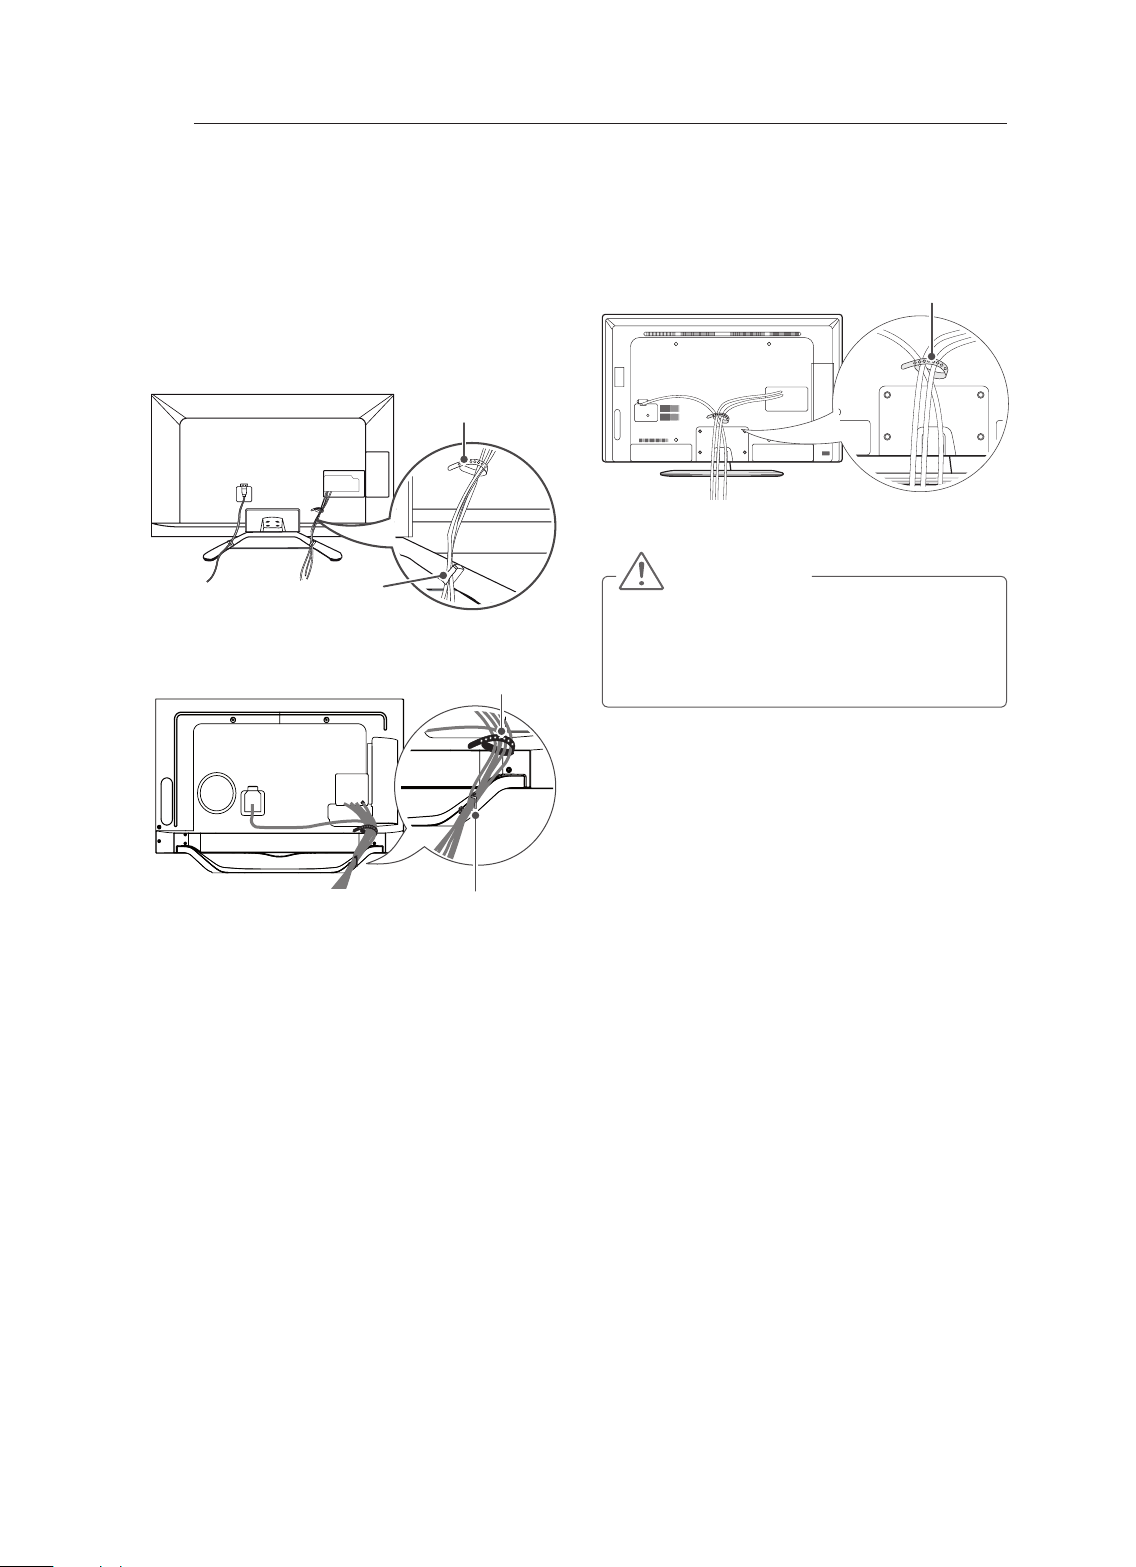
Tidying cables
1 Gather and bind the cables with the Cable
Holder and the Cable Management.
2 FixtheCableManagementrmlytotheTV.
(Only LA62**, LA64**, LA66**, LN57**-ZE/ZK)
Cable Holder
Cable Management
(Only LA69**, LA74**)
Cable Holder
(Only LN57**-ZA)
1 Gather and bind the cables with the Cable
Holder.
Cable Holder
CAUTION
Do not move the TV by holding the cable
y
holders, as the cable holders may break,
and injuries and damage to the TV may
occur.
Cable Management
Page 7

OWNER’S MANUAL
LED TV
* LG LED TV applies LCD screen with LED backlights.
Please read this manual carefully before operating
your set and retain it for future reference.
www.lg.com
Page 8
TABLE OF CONTENTS
2
ENGLISH
ENG
TABLE OF CONTENTS
3 LICENSES
3 OPEN SOURCE SOFTWARE NOTICE
4 SAFETY INSTRUCTIONS
10 - Viewing 3D Imaging (Only 3D models)
12 INSTALLATION PROCEDURE
12 ASSEMBLING AND PREPARING
12 Unpacking
15 Separate purchase
16 Parts and buttons
17 Lifting and moving the TV
18 Mounting on a table
20 Mounting on a wall
22 REMOTE CONTROL
24 MAGIC REMOTE CONTROL
FUNCTIONS
25 Registering Magic Remote Control
25 How to use Magic Remote Control
25 Precautions to Take when Using the Magic
Remote Control
26 USING THE USER GUIDE
27 MAINTENANCE
27 Cleaning your TV
27 - Screen, frame, cabinet and stand
27 - Power cord
27 TROUBLESHOOTING
28 EXTERNAL CONTROL DEVICE
SETUP
28 SPECIFICATIONS
WARNING
yIf you ignore the warning message, you may
be seriously injured or there is a possibility
of accident or death.
CAUTION
yIf you ignore the caution message, you may
be slightly injured or the product may be
damaged.
NOTE
yThe note helps you understand and use
the product safely. Please read the note
carefully before using the product.
Page 9

LICENSES / OPEN SOURCE SOFTWARE NOTICE
3
LICENSES
Supported licenses may differ by model. For more information about licenses, visit www.lg.com.
Manufactured under license from Dolby Laboratories. “Dolby” and the double-D
symbol are trademarks of Dolby Laboratories.
The terms HDMI and HDMI High-Definition Multimedia interface, and the HDMI logo
are trademarks or registered trademarks of HDMI Licensing LLC in the United States
and other countries.
ABOUT DIVX VIDEO: DivX® is a digital video format created by DivX, LLC, a
subsidiary of Rovi Corporation. This is an ofcial DivX Certied® device that plays
DivX video. Visit divx.com for more information and software tools to convert your
les into DivX video.
ABOUT DIVX VIDEO-ON-DEMAND: This DivX Certied® device must be registered
in order to play purchased DivX Video-on-Demand (VOD) movies. To obtain your
registration code, locate the DivX VOD section in your device setup menu. Go to vod.
divx.com for more information on how to complete your registration.
ENGENGLISH
“DivX Certied® to play DivX® video up to HD 1080p, including premium content.”
“DivX®, DivX Certied® and associated logos are trademarks of Rovi Corporation or
its subsidiaries and are used under license.”
“Covered by one or more of the following U.S. patents :
7,295,673; 7,460,668; 7,515,710; 7,519,274”
Manufactured under license under U.S. Patent Nos: 5,956,674; 5,974,380; 6,487,535
& other U.S. and worldwide patents issued & pending. DTS, the Symbol & DTS and
the Symbol together are registered trademarks & DTS 2.0+Digital Out is a trademark
of DTS, Inc. Product includes software. © DTS, Inc. All Rights Reserved.
OPEN SOURCE SOFTWARE NOTICE
To obtain the source code under GPL, LGPL, MPL and other open source licenses, that is contained in this
product, please visit http://opensource.lge.com .
In addition to the source code, all referred license terms, warranty disclaimers and copyright notices are
available for download.
LG Electronics will also provide open source code to you on CD-ROM for a charge covering the cost of
performing such distribution (such as the cost of media, shipping and handling) upon email request to
opensource@lge.com. This offer is valid for three (3) years from the date on which you purchased the
product.
Page 10
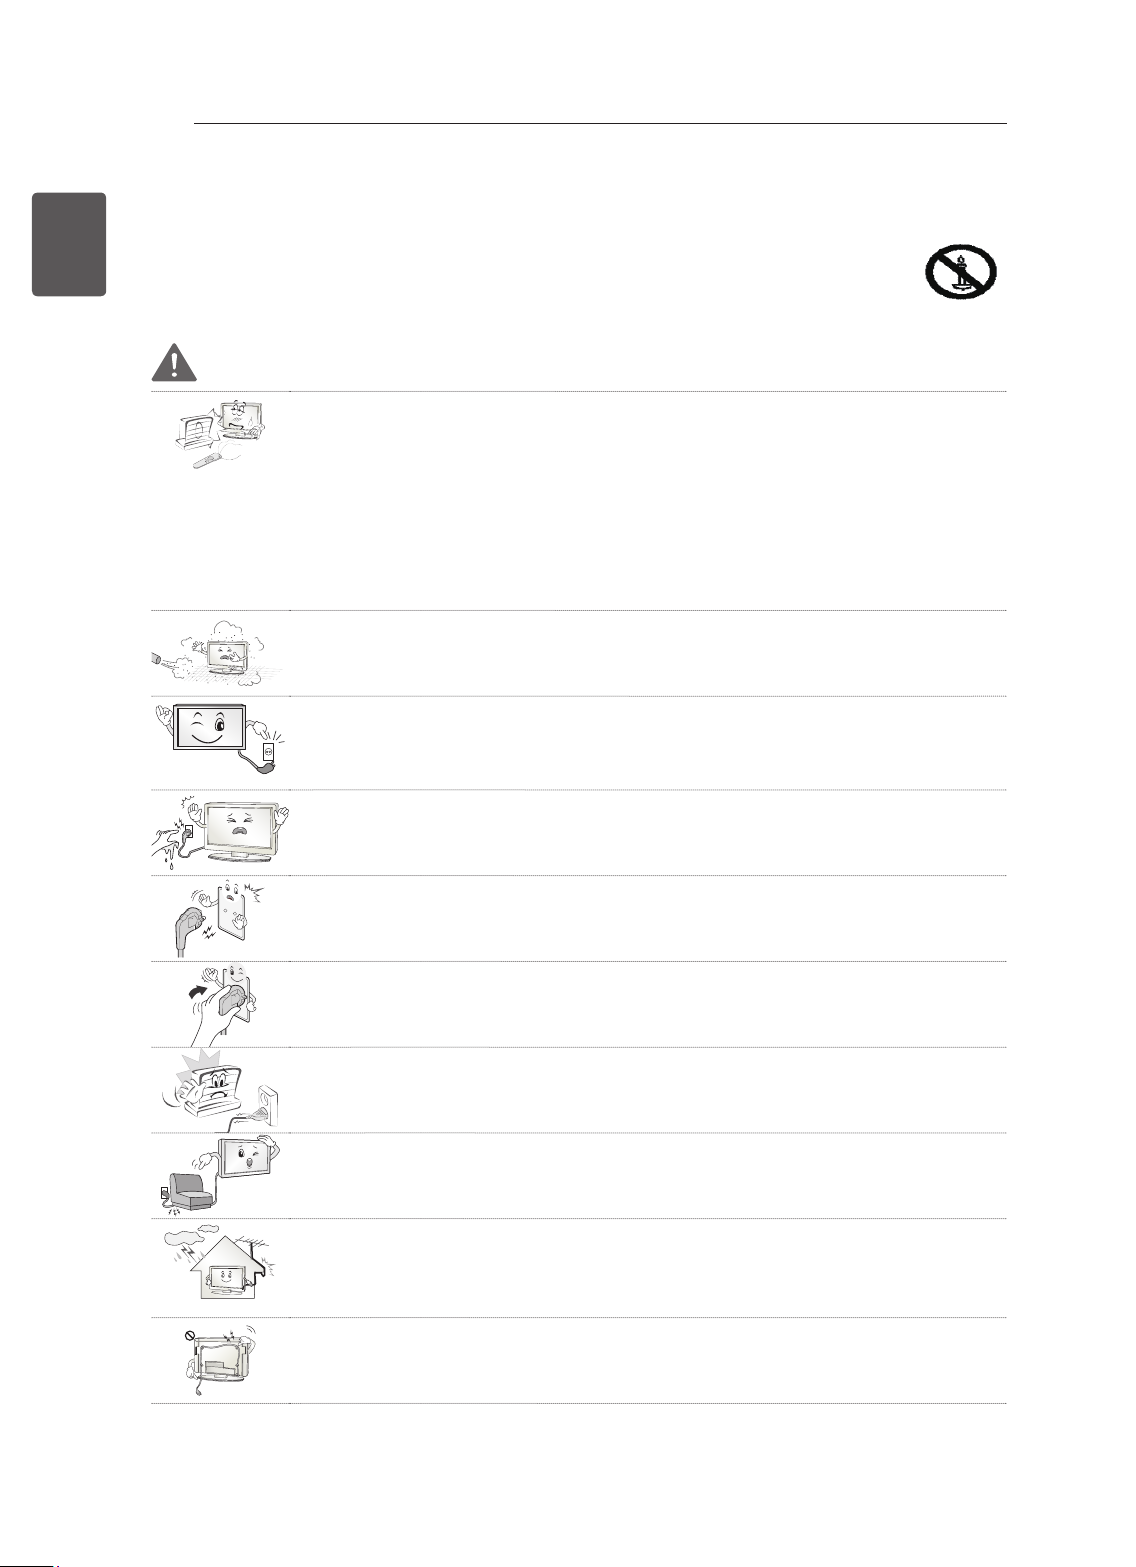
SAFETY INSTRUCTIONS
4
ENGLISH
ENG
SAFETY INSTRUCTIONS
Please read these safety precautions carefully before using the product.
WARNING
Do not place the TV and/or remote control in the following environments:
y
- A location exposed to direct sunlight
- An area with high humidity such as a bathroom
- Near any heat source such as stoves and other devices that produce heat
- Near kitchen counters or humidifiers where they can easily be exposed to steam
or oil
- An area exposed to rain or wind
- Near containers of water such as vases
Otherwise, this may result in fire, electric shock, malfunction or product deformation.
Do not place the product where it might be exposed to dust.
y
This may cause a fire hazard.
Mains Plug is the TV connecting/disconnecting device to AC mains electric supply.
y
This plug must remain readily attached and operable when TV is in use.
Do not touch the power plug with wet hands. Additionally, if the cord pin is wet or
y
covered with dust, dry the power plug completely or wipe dust off.
You may be electrocuted due to excess moisture.
Make sure to connect Mains cable to compliant AC mains socket with Grounded
y
earth pin. (Except for devices which are not grounded on earth.) Otherwise
possibility you may be electrocuted or injured.
Insert power cable plug completely into wall socket otherwise if not secured
y
completely into socket, fire ignition may break out.
Ensure the power cord does not come into contact with hot objects such as a
y
heater.
This may cause a fire or an electric shock hazard.
Do not place a heavy object, or the product itself, on power cables.
y
Otherwise, this may result in fire or electric shock.
Bend antenna cable between inside and outside building to prevent rain from
y
flowing in.
This may cause water damaged inside the Product and could give an electric
shock.
When mounting TV onto wall make sure to neatly install and isolate cabling from
y
rear of TV as to not create possibility of electric shock /fire hazard.
Page 11
Desiccant
SAFETY INSTRUCTIONS
Do not plug too many electrical devices into a single multiple electrical outlet.
y
Otherwise, this may result in fire due to over-heating.
Do not drop the product or let it fall over when connecting external devices.
y
Otherwise, this may result in injury or damage to the product.
Keep the anti-moisture packing material or vinyl packing out of the reach of
y
children.
Anti-moisture material is harmful if swallowed. If swallowed by mistake, force the
patient to vomit and visit the nearest hospital. Additionally, vinyl packing can cause
suffocation. Keep it out of the reach of children.
Do not let your children climb or cling onto the TV.
y
Otherwise, the TV may fall over, which may cause serious injury.
Dispose of used batteries carefully to ensure that a small child does not consume
y
them.
Please seek Doctor- Medical Attention immediately if child consumes batteries.
Do not insert any metal objects/conductors (like a metal chopstick/cutlery/
y
screwdriver) between power cable plug and input Wall Socket while it is connected
to the input terminal on the wall. Additionally, do not touch the power cable right
after plugging into the wall input terminal. You may be electrocuted.
(Depending on model)
Do not put or store inflammable substances near the product.
y
There is a danger of combustion/explosion or fire due to careless handling of the
inflammable substances.
5
ENGENGLISH
Do not drop metallic objects such as coins, hair pins, chopsticks or wire into the
y
product, or inflammable objects such as paper and matches. Children must pay
particular attention.
Electrical shock, fire or injury can occur. If a foreign object is dropped into the
product, unplug the power cord and contact the service centre.
Do not spray water on the product or scrub with an inflammable substance (thinner
y
or benzene). Fire or electric shock accident can occur.
Do not allow any impact, shock or any objects to fall into the unit, and do not drop
y
anything onto the screen.
You may be injured or the product can be damaged.
Never touch this product or antenna during a thunder or lighting storm.
y
You may be electrocuted.
Never touch the wall outlet when there is leakage of gas, open the windows and
y
ventilate.
It may cause a fire or a burn by a spark.
Page 12

SAFETY INSTRUCTIONS
6
ENGLISH
ENG
Do not disassemble, repair or modify the product at your own discretion.
y
Fire or electric shock accident can occur.
Contact the service centre for check, calibration or repair.
If any of the following occur, unplug the product immediately and contact your local
y
service centre.
- The product has been impacted by shock
- The product has been damaged
- Foreign objects have entered the product
- The product produced smoke or a strange smell
This may result in fire or electric shock.
Unplug the TV from AC mains wall socket if you do not intend to use the TV for a
y
long period of time.
Accumulated dust can cause fire hazard and insulation deterioration can cause
electric leakage/shock/fire.
Apparatus shall not be exposed to dripping or splashing and no objects filled with
y
liquids, such as vases, shall be placed on the apparatus.
Page 13
SAFETY INSTRUCTIONS
7
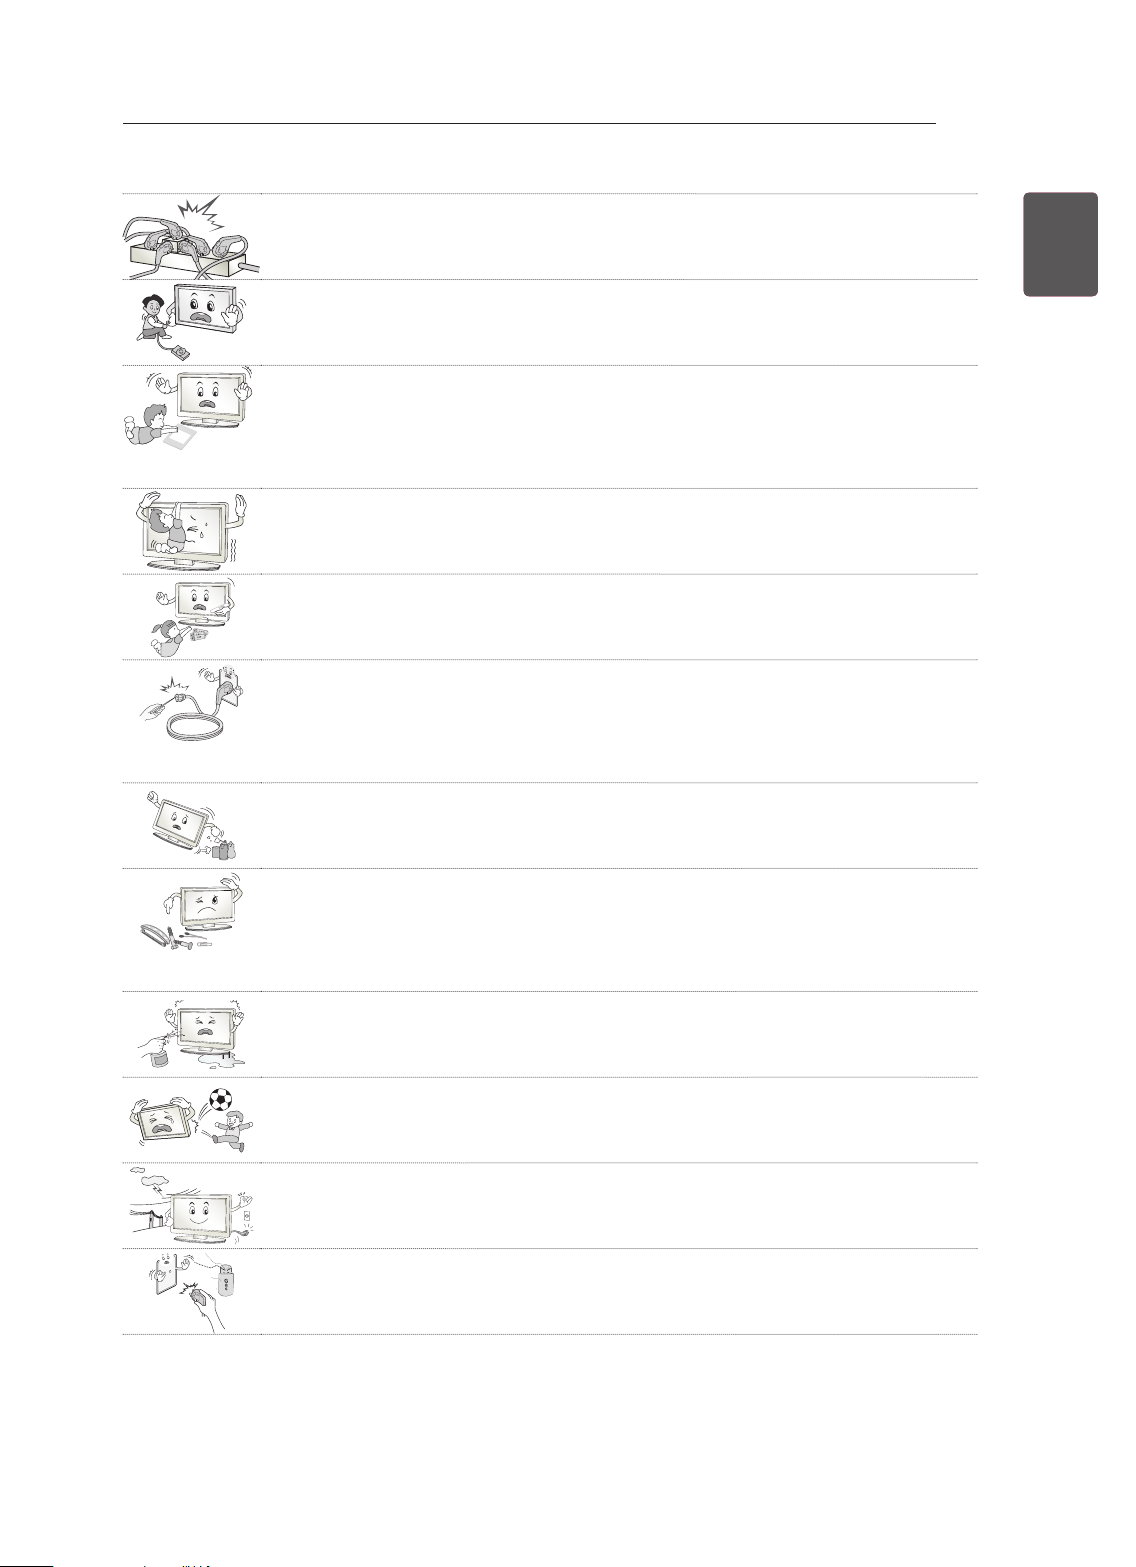
CAUTION
Install the product where no radio wave occurs.
y
There should be enough distance between an outside antenna and power lines to
y
keep the former from touching the latter even when the antenna falls.
This may cause an electric shock.
Do not install the product on places such as unstable shelves or inclined surfaces.
y
Also avoid places where there is vibration or where the product cannot be fully
supported.
Otherwise, the product may fall or flip over, which may cause injury or damage to
the product.
If you install the TV on a stand, you need to take actions to prevent the product
y
from overturning. Otherwise, the product may fall over, which may cause injury.
If you intend to mount the product to a wall, attach VESA standard mounting interface (optional
y
parts) to the back of the product. When you install the set to use the wall mounting bracket (optional
parts), fix it carefully so as not to drop.
Only use the attachments / accessories specified by the manufacturer.
y
When installing the antenna, consult with a qualified service technician. If not
y
installed by a qualified technician, this may create a fire hazard or an electric shock
hazard.
ENGENGLISH
We recommend that you maintain a distance of at least 2 to 7 times the diagonal
y
screen size when watching TV.
If you watch TV for a long period of time, this may cause blurred vision.
Only use the specified type of battery.
y
This could cause damage to the remote control.
Do not mix new batteries with old batteries.
y
This may cause the batteries to overheat and leak.
Batteries should not be exposed to excessive heat.eg keep away from direct Sunlight , open
y
fireplace and electric heaters .
Do not place non-rechargeable batteries in charging device.
y
Make sure there are no objects between the remote control and its sensor.
y
Signal from Remote Control can be interrupted due to external/internal lighting eg
y
Sunlight, fluorescent lighting.
If this occurs turn off lighting or darken viewing area.
When connecting external devices such as video game consoles, make sure the
y
connecting cables are long enough.
Otherwise, the product may fall over, which may cause injury or damage the
product.
Page 14
SAFETY INSTRUCTIONS
8
ENGLISH
ENG
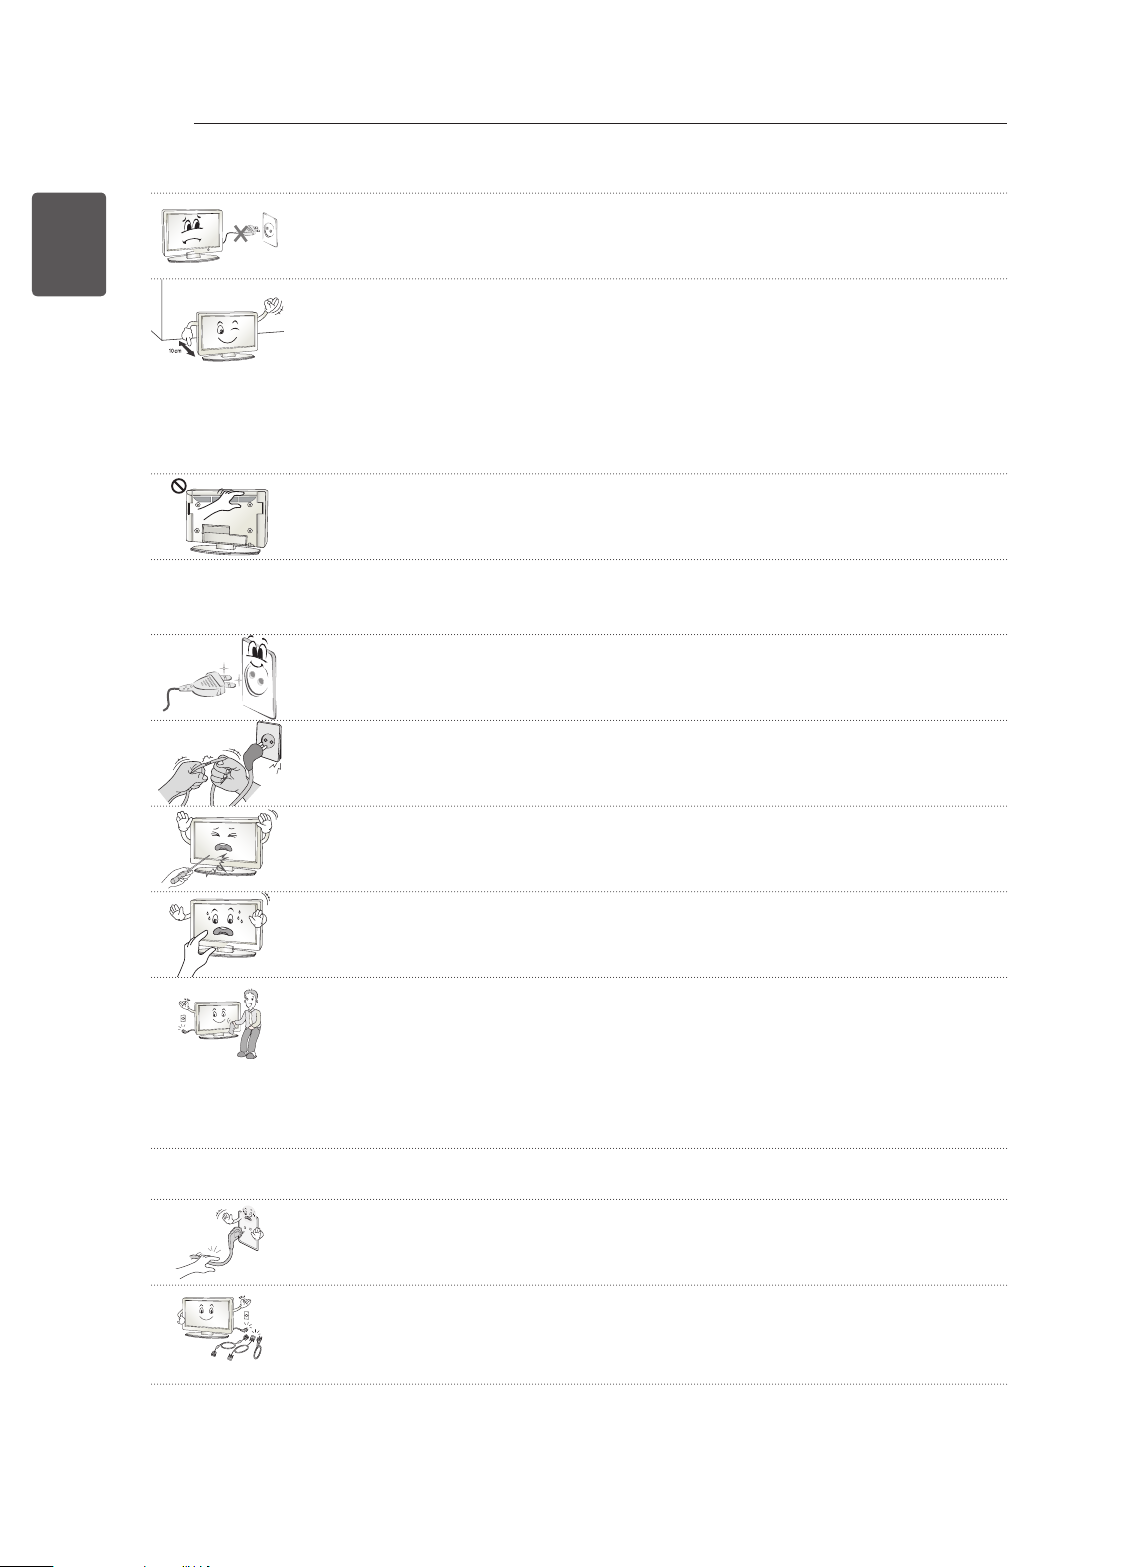
Do not turn the product On/Off by plugging-in or unplugging the power plug to the
y
wall outlet. (Do not use the power plug for switch.)
It may cause mechanical failure or could give an electric shock.
Please follow the installation instructions below to prevent the product from
y
overheating.
- The distance between the product and the wall should be more than 10 cm.
- Do not install the product in a place with no ventilation (e.g., on a bookshelf or in
a cupboard).
- Do not install the product on a carpet or cushion.
- Make sure the air vent is not blocked by a tablecloth or curtain.
Otherwise, this may result in fire.
Take care not to touch the ventilation openings when watching the TV for long
y
periods as the ventilation openings may become hot. This does not affect the
operation or performance of the product.
Periodically examine the cord of your appliance, and if its appearance indicates damage or
y
deterioration, unplug it, discontinue use of the appliance, and have the cord replaced with an exact
replacement part by an authorized servicer.
Prevent dust collecting on the power plug pins or outlet.
y
This may cause a fire hazard.
Protect the power cord from physical or mechanical abuse, such as being twisted,
y
kinked, pinched, closed in a door, or walked upon. Pay particular attention to plugs,
wall outlets, and the point where the cord exits the appliance.
Do not press strongly upon the panel with a hand or sharp object such as nail,
y
pencil or pen, or make a scratch on it, as it may cause damage to screen.
Avoid touching the screen or holding your finger(s) against it for long periods of
y
time. Doing so may produce some temporary or permanent distortion/damage to
screen.
When cleaning the product and its components, unplug the power first and wipe it
y
with a soft cloth. Applying excessive force may cause scratches or discolouration.
Do not spray with water or wipe with a wet cloth. Never use glass cleaner, car or
industrial shiner, abrasives or wax, benzene, alcohol etc., which can damage the
product and its panel.
Otherwise, this may result in fire, electric shock or product damage (deformation,
corrosion or breakage).
As long as this unit is connected to the AC wall outlet, it is not disconnected from the AC power
y
source even if you turn off this unit by SWITCH.
When unplugging the cable, grab the plug and unplug it, by pulling at the plug.
y
Don’t pull at the cord to unplug the power cord from the power board, as this could
be hazardous.
When moving the product, make sure you turn the power off first. Then, unplug the
y
power cables, antenna cables and all connecting cables.
The TV set or power cord may be damaged, which may create a fire hazard or
cause electric shock.
Page 15
SAFETY INSTRUCTIONS
When moving or unpacking the product, work in pairs because the product is
y
heavy.
Otherwise, this may result in injury.
Contact the service centre once a year to clean the internal parts of the product.
y
Accumulated dust can cause mechanical failure.
Refer all servicing to qualified service personnel. Servicing is required when the
y
apparatus has been damaged in any way, such as power supply cord or plug is
damaged, liquid has been spilled or objects have fallen into the apparatus, the
apparatus has been exposed to rain or moisture, does not operate normally, or has
been dropped.
If the product feels cold to the touch, there may be a small “flicker” when it is turned
y
on. This is normal, there is nothing wrong with product.
The panel is a high technology display product with resolution of two million to six
y
million pixels. You may see tiny black dots and/or brightly coloured dots (red, blue
or green) at a size of 1 ppm on the panel. This does not indicate a malfunction and
does not affect the performance and reliability of the product.
This phenomenon also occurs in third-party products and is not subject to
exchange or refund.
You may find different brightness and color of the panel depending on your viewing
y
position(left/right/top/down).
This phenomenon occurs due to the characteristic of the panel. It is not related with
the product performance, and it is not malfunction.
9
ENGENGLISH
Displaying a still image (e.g., broadcasting channel logo, on-screen menu, scene from a video
y
game) for a prolonged time may cause damage to the screen, resulting in retention of the image,
which is known as image sticking. The warranty does not cover the product for image sticking.
Avoid displaying a fixed image on your television’s screen for a prolonged period (2 or more hours
for LCD, 1 or more hours for Plasma).
Also, if you watch the TV at a ratio of 4:3 for a long time, image sticking may occur on the borders of
the panel.
This phenomenon also occurs in third-party products and is not subject to exchange or refund.
Generated Sound
y
“Cracking” noise: A cracking noise that occurs when watching or turning off the TV is generated by
plastic thermal contraction due to tempera-ture and humidity. This noise is common for products
where thermal deformation is required. Electrical circuit humming/panel buzzing: A low level noise is
generated from a high-speed switching circuit, which supplies a large amount of current to operate a
product. It varies depending on the product.
This generated sound does not affect the performance and reliability of the product.
Page 16

SAFETY INSTRUCTIONS
10
ENGLISH
ENG
Viewing 3D Imaging (Only 3D models)
WARNING
Viewing Environment
yViewing Time
- When watching 3D contents, take 5 - 15 minute breaks every hour. Viewing 3D contents for a long
period of time may cause headache, dizziness, fatigue or eye strain.
Those that have a photosensitive seizure or chronic illness
ySome users may experience a seizure or other abnormal symptoms when they are exposed to a
ashing light or particular pattern from 3D contents.
yDo not watch 3D videos if you feel nausea, are pregnant and/ or have a chronic illness such as epilepsy,
cardiac disorder, or blood pressure disease, etc.
y3D Contents are not recommended to those who suffer from stereo blindness or stereo anomaly. Double
images or discomfort in viewing may be experienced.
yIf you have strabismus (cross-eyed), amblyopia (weak eyesight) or astigmatism, you may have trouble
sensing depth and easily feel fatigue due to double images. It is advised to take frequent breaks than
the average adult.
yIf your eyesight varies between your right and left eye, revise your eyesight prior to watching 3D
contents.
Symptoms which require discontinuation or refraining from watching 3D contents
yDo not watch 3D contents when you feel fatigue from lack of sleep, overwork or drinking.
yWhen these symptoms are experienced, stop using/watching 3D contents and get enough rest until the
symptom subsides.
- Consult your doctor when the symptoms persist. Symptoms may include headache, eyeball pain,
dizziness, nausea, palpitation, blurriness, discomfort, double image, visual inconvenience or fatigue.
Page 17

SAFETY INSTRUCTIONS
11
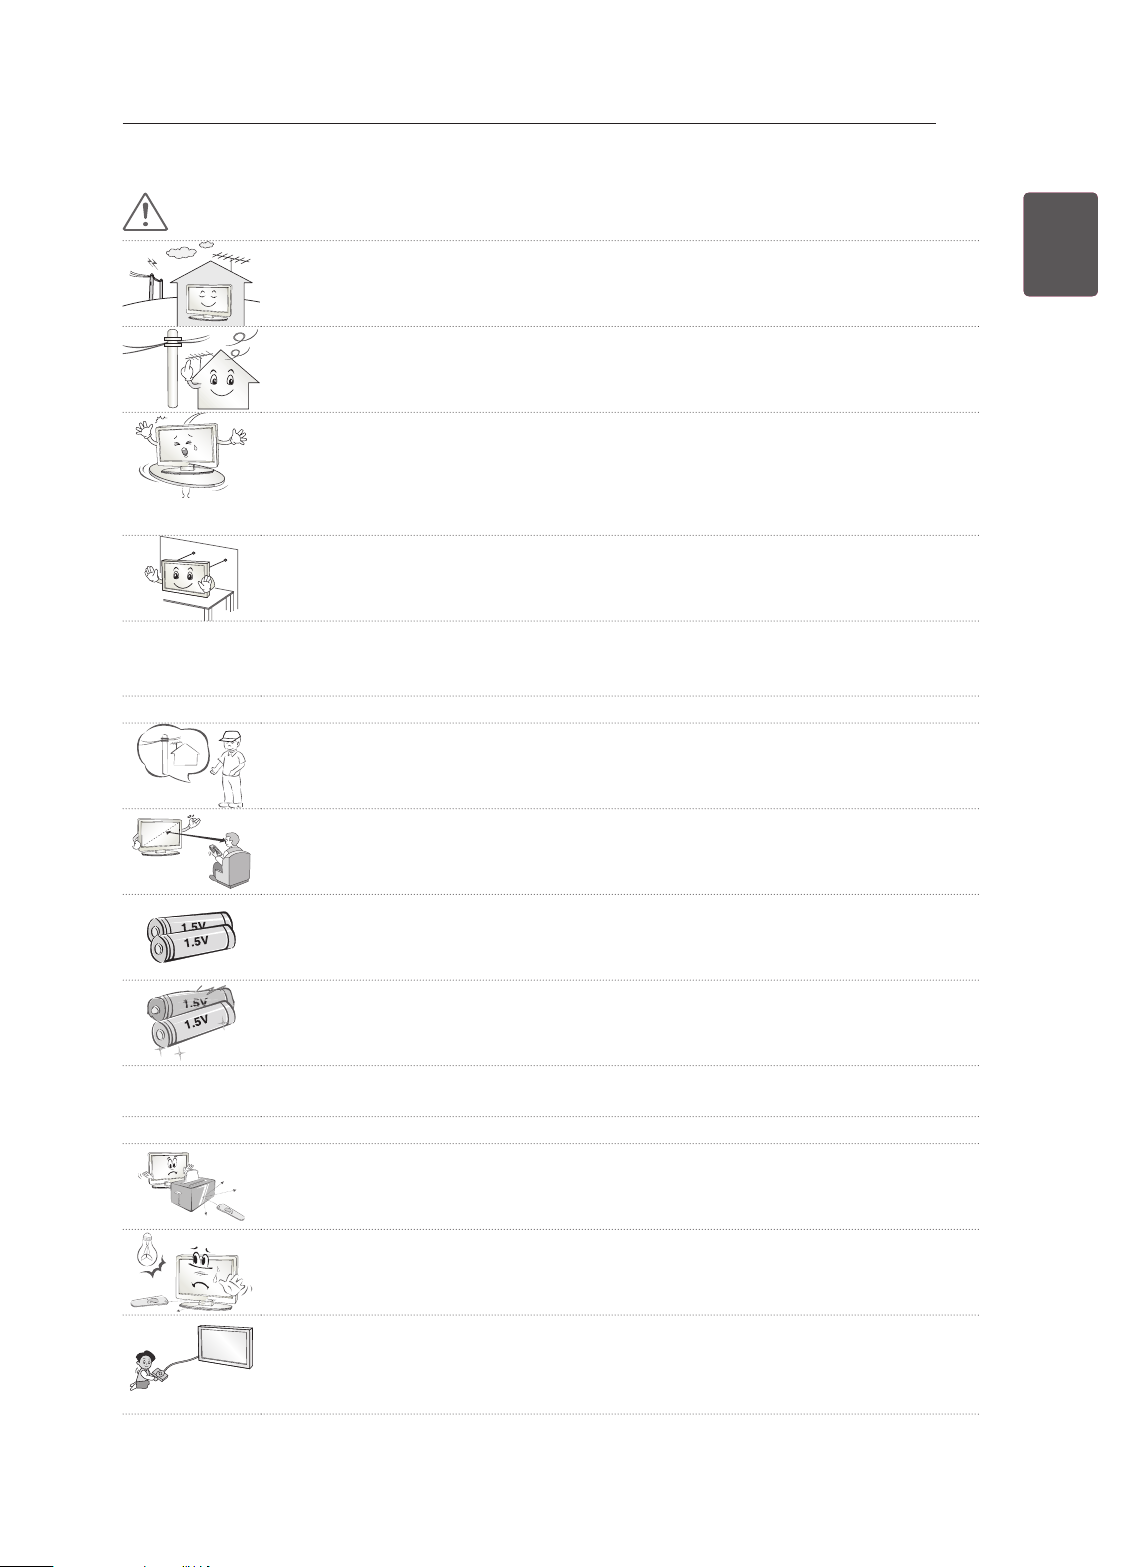
CAUTION
Viewing Environment
y Viewing Distance
- Maintain a distance of at least twice the screen diagonal length when watching 3D contents. If you
feel discomfort in viewing 3D contents, move further away from the TV.
Viewing Age
yInfants/Children
- Usage/ Viewing 3D contents for children under the age of 5 are prohibited.
- Children under the age of 10 may overreact and become overly excited because their vision is in
development (for example: trying to touch the screen or trying to jump into it. Special monitoring
and extra attention is required for children watching 3D contents.
- Children have greater binocular disparity of 3D presentations than adults because the distance
between the eyes is shorter than that of adults. Therefore they will perceive more stereoscopic
depth compared to adults for the same 3D image.
yTeenagers
- Teenagers under the age of 19 may react with sensitivity due to stimulation from light in 3D
contents. Advise them to refrain from watching 3D contens for a long time when they are tired.
yElderly
- The elderly may perceive less 3D effect compared to the young. Do not sit closer to the TV than the
recommended distance.
ENGENGLISH
Cautions when using the 3D glasses
y Make sure to use LG 3D glasses. Otherwise, you may not be able to view 3D videos properly.
y Do not use 3D glasses instead of your normal glasses, sunglasses or protective goggles.
y Using modied 3D glasses may cause eye strain or image distortion.
y Do not keep your 3D glasses in extremely high or low temperatures. It will cause deformation.
y The 3D glasses are fragile and are easily scratched. Always use a soft, clean piece of cloth when wiping
the lenses. Do not scratch the lenses of the 3D glasses with sharp objects or clean/wipe them with
chemicals.
Page 18

ENGLISH
<
<
ENG
INSTALLATION PROCEDURE / ASSEMBLING AND PREPARING
12
NOTE
Image shown may differ from your TV.
y
Your TV’s OSD (On Screen Display) may differ slightly from that shown in this manual.
y
The available menus and options may differ from the input source or product model that you are
y
using.
New features may be added to this TV in the future.
y
The TV can be placed in standby mode in order to reduce the power consumption. And the TV should
y
be turned off if it will not be watched for some time, as this will reduce energy consumption.
The energy consumed during use can be significantly reduced if the level of brightness of the picture
y
is reduced, and this will reduce the overall running cost.
INSTALLATION PROCEDURE
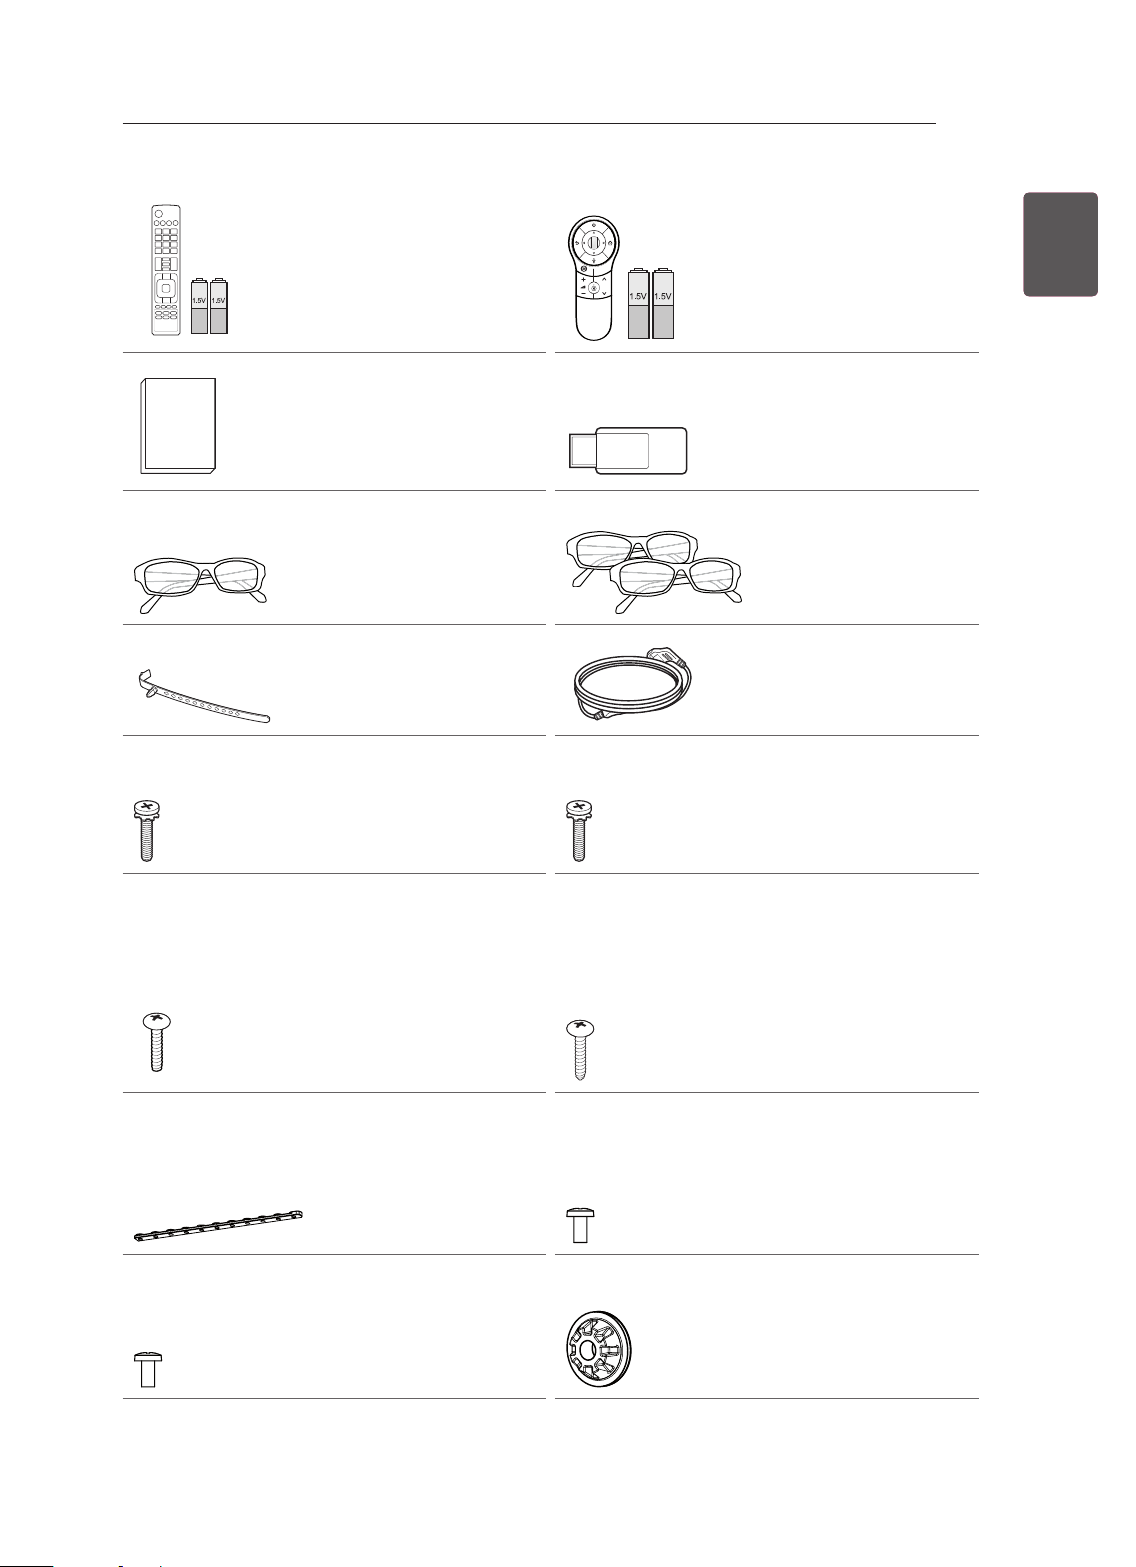
1 Open the package and make sure all the accessories are included.
2 Attach the stand to the TV set.
3 Connect an external device to the TV set.
4 Make sure the network connection is available.
You can use the TV network functions only when the network connection is made.
ASSEMBLING AND PREPARING
Unpacking
Check your product box for the following items. If there are any missing accessories, contact the local
dealer where you purchased your product. The illustrations in this manual may differ from the actual
product and item.
CAUTION
Do not use any unapproved items to ensure the safety and product life span.
y
Any damage or injuries caused by using unapproved items are not covered by the warranty.
y
Some models have a thin film attached on to the screen and this must not be removed.
y
NOTE
The items supplied with your product may vary depending on the model.
y
Product specifications or contents of this manual may be changed without prior notice due to upgrade
y
of product functions.
For an optimal connection, HDMI cables and USB devices should have bezels less than 10 mm thick
y
and 18 mm width. Use an extension cable that supports USB 2.0 if the USB cable or USB memory
stick does not fit into your TV’s USB port.
B
A
B
*A
10 mm
=
18 mm
*B
A
=
Page 19
ENERGY
P
123
SAVING
1 2 3
4 5 6
7 809
LIST
MENU
BACK
ASSEMBLING AND PREPARING
AV MODE
INPUT
TV
FLASHBK
MARK
FAV
P
A
G
3D
CHVOL
E
MUTE
INFO
Q.MENU
ENTER
EXIT
L/R SELECT
FREEZE
RATIO
Remote control and
batteries (AAA)
(Only LA62**, LA64**,
LN570*, LN575*, LN577*)
(See p. 22, 23)
Magic Remote Control,
Batteries (AA)
(Only LA66**, LA69**,
LA74**, LN578*)
(See p. 24)
13
ENGENGLISH
Wi-Fi Dongle
Owner’s manual
(Depending on model)
Cinema 3D Glasses
The number of 3D glasses
may differ depending on
the model or country.
(Depending on model)
Dual play glasses
(Depending on model)
Cable Holder
(Depending on model)
(See p. A-6)
Power Cord
(Depending on model)
Stand Screws
M4 x 14
(8 EA: Only LN57**-ZE/ZK,
LA62**, LA64**, LA66**)
(4 EA: Only LN57**-ZA)
(See p. A-3,A-5)
Stand Screws
3 EA, P5 x 25
(Only LN57**-ZA)
(See p.A-5)
Desk-mount Cable
2 EA (Only
32/39/42/47/50LN57**-ZE/
ZK, 32/39/42/47/50LA62**,
32/42/47/50LA64**,
32/42/47/50LA66**)
(See p. 18)
Bracket Screw
2 EA, M4 x 8
(Only 32/39/42LN57**ZE/ZK, 32/39/42LA62**,
32/42LA64**,32/42LA66**)
(See p. 18)
Stand Screws
M4 x 20
(4 EA: Only LA69**,
LA74**)
(See p. A-4)
Desk-mount Screw
(1 EA : Only
32/39/42/47/50/60LN57**ZA)
(2 EA :Only
32/39/42/47/50LN57**-ZE/
ZK, 32/39/42/47/50LA62**,
32/42/47/50LA64**,
32/42/47/50LA66**)
(See p. 18)
Bracket Screw
2 EA, P4 x 8
(Only 47/50LN57**ZE/ZK,47/50LA62**,
47/50LA64**,47/50LA66**)
(See p. 18)
Wall mount inner spacers
4 EA
(Only LA64**)
(See p. 21)
Page 20
ENGLISH
ENG
ASSEMBLING AND PREPARING
14
Tag On
Tag On
(Depending on model)
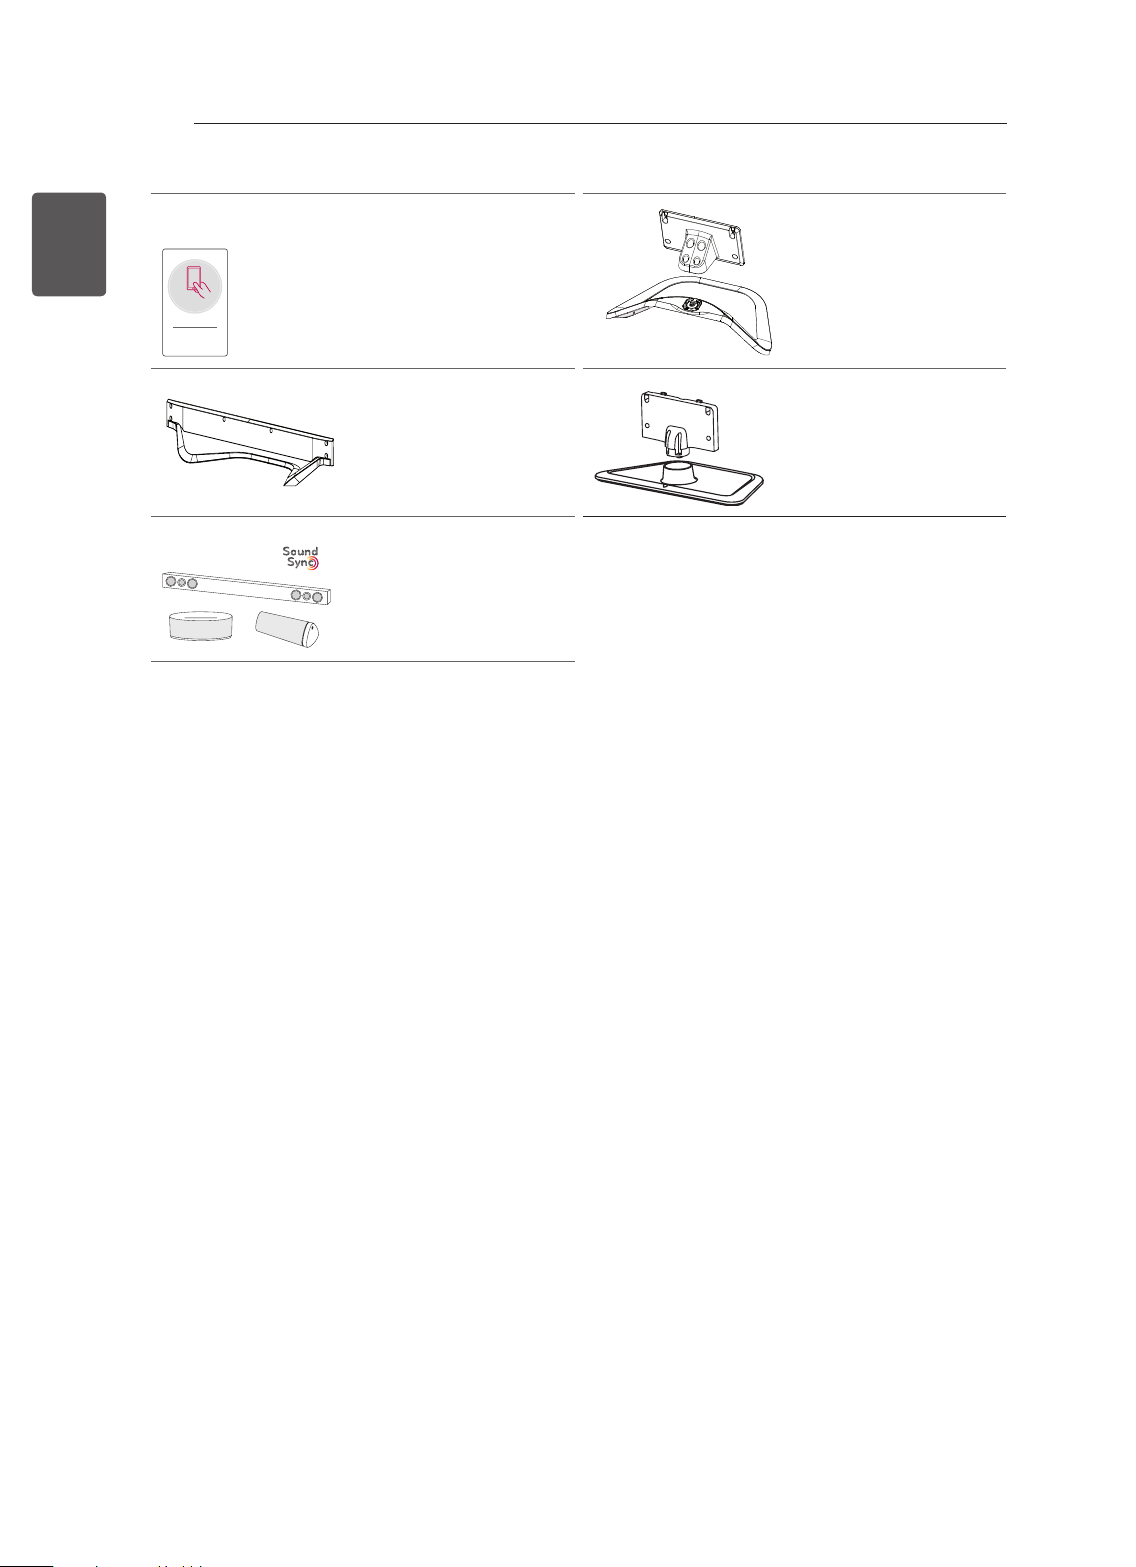
Stand Base
(Only LA69**, LA74** )
(See p.A-4)
LG Audio device
(Depending on model)
Stand Body / Stand Base
(Only LN57**-ZE/ZK,
LA62**, LA64** , LA66**)
(See p.A-3)
Stand Body / Stand Base
(Only LN57**-ZA)
(See p.A-5)
Page 21
ASSEMBLING AND PREPARING
P
123
15
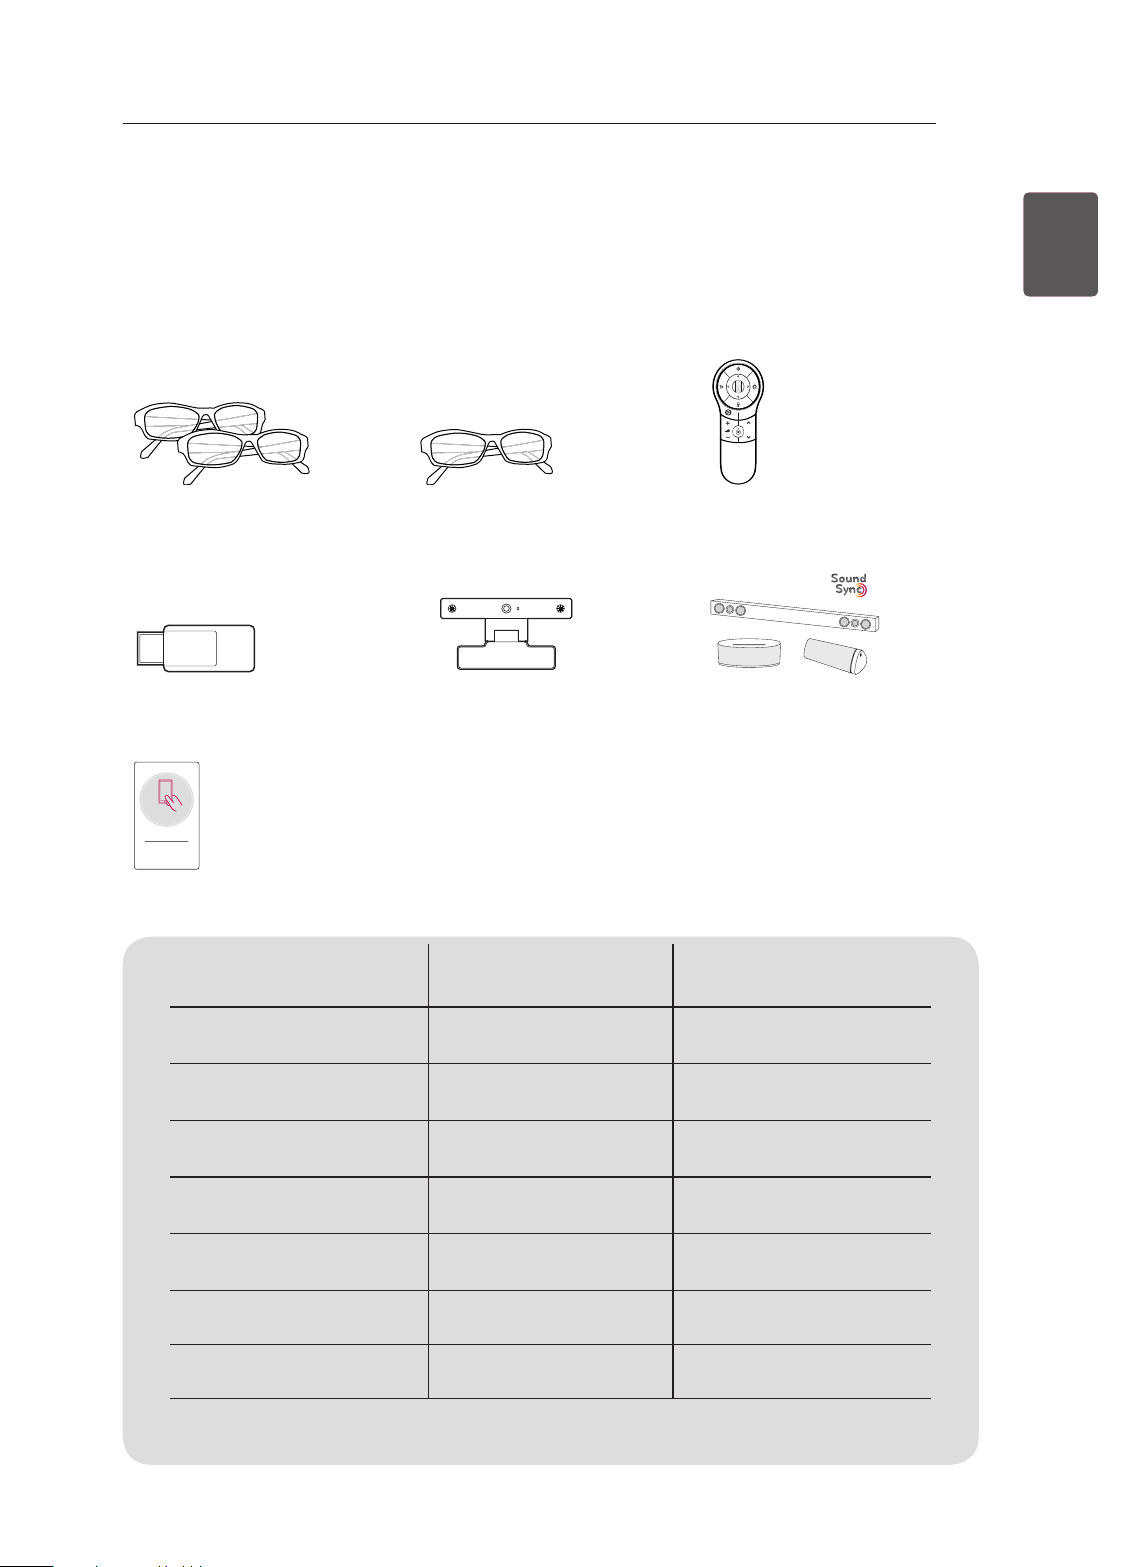
Separate purchase
(Depending on model)
Separate purchase items can be changed or modied for quality improvement without any notication.
Contact your dealer to buy these items.
These devices only work with certain models.
AG-F***DP
Dual play glasses
AN-WF100
Wi-Fi Dongle
AG-F***
Cinema 3D Glasses
AN-VC4**
Video call camera
AN-MR400
Magic Remote
LG Audio device
ENGENGLISH
Tag On
Tag on
Compatibility
AG-F***DP
Dual play glasses
AG-F***
Cinema 3D Glasses
AN-MR400
Magic Remote
AN-WF100
Wi-Fi Dongle
AN-VC4**
Video call camera
LG Audio device
Tag On
LN57**
• •
•
(Depending on model)
• •
•
(Depending on model)
•
(Depending on model)
LA62**, LA64**,
LA66**, LA69**, LA74**
•
(Depending on model)
•
•
•
The model name or design may be changed depending on the upgrade of product functions,
manufacturer’s circumstances or policies.
Page 22
ASSEMBLING AND PREPARING
H
H
H
SETTINGS
INPUT
OK
SETTINGS
INPUT
OK
SETTINGS
INPUT
OK
16
ENGLISH
ENG
Speakers
Parts and buttons
A type : LA62**, LA64**, LA66**,
LN57**-ZE/ZK
Screen
Remote control sensor
LG Logo Light (Only LA64**, LA66**)
Power Indicator (Only LA62**, LN57**-ZE/ZK)
C type : 60LA74**
Screen
Buttons
OK
SETTINGS
INPUT
Buttons
B type : LA69**, 42/47/55LA74**
Screen
Remote control sensor
LG Logo Light
D type : LN57**-ZA
Screen
Buttons
Speakers
Buttons
Speakers
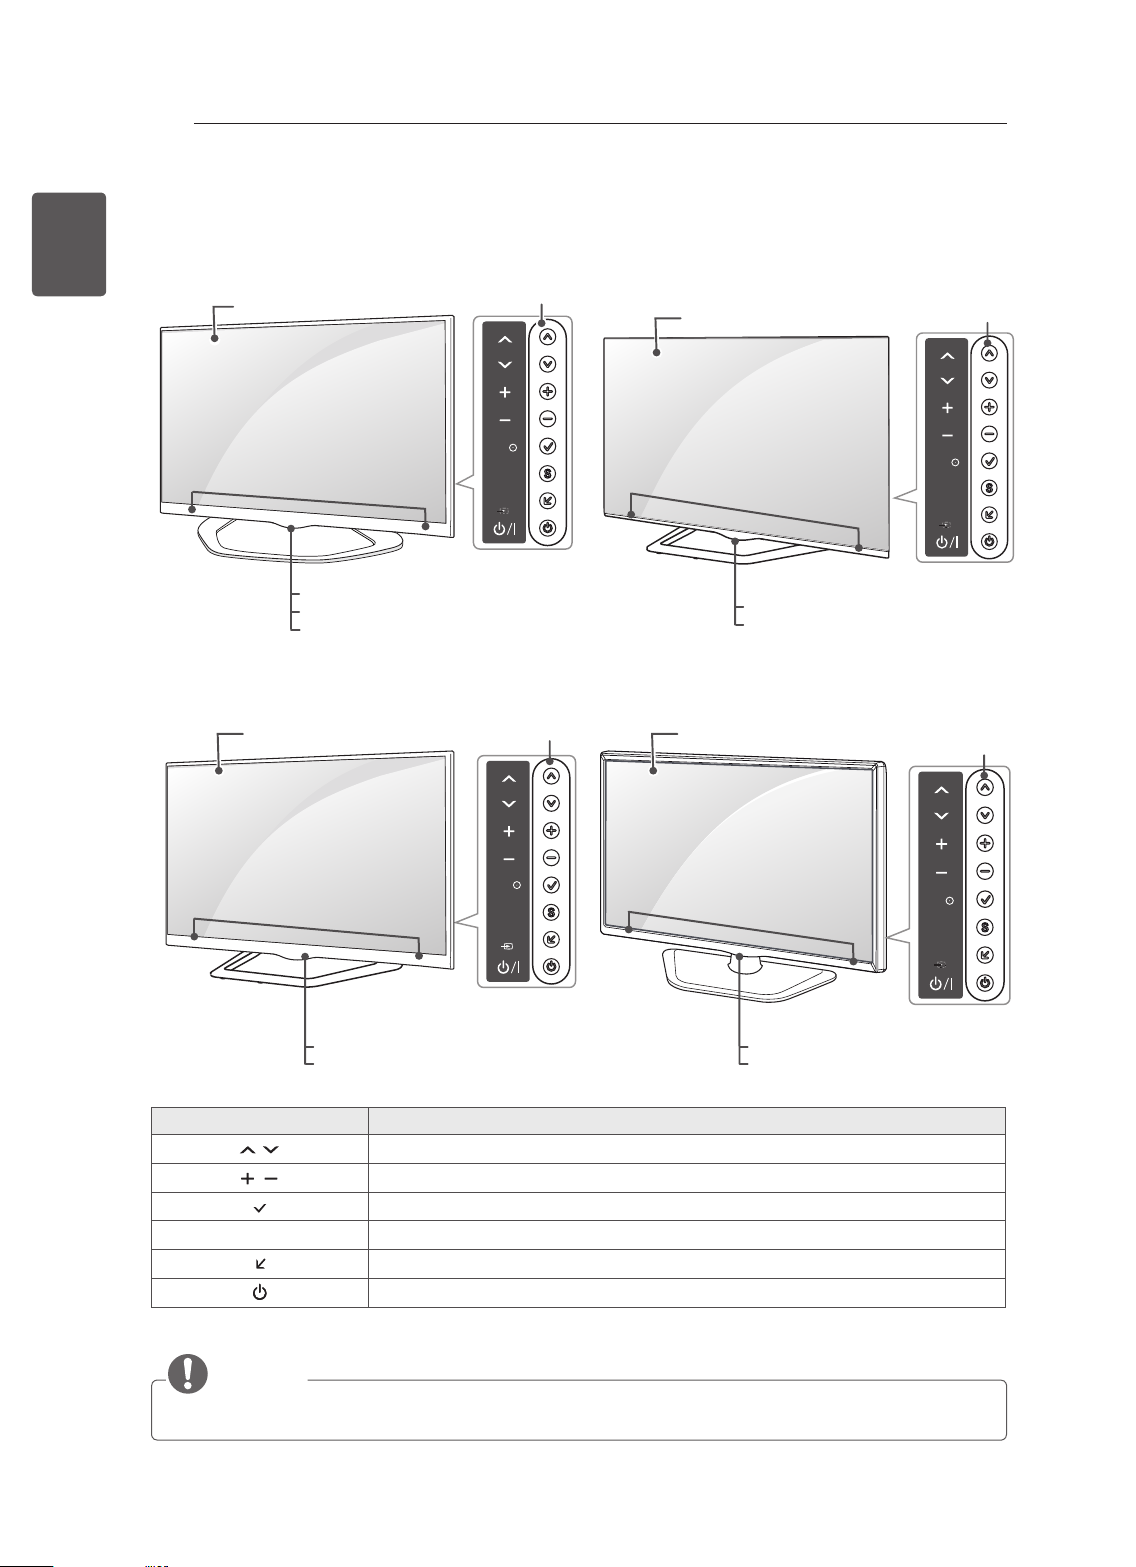
Button Description
NOTE
yYou can set the
S
Remote control sensor
LG Logo Light
Scrolls through the saved programmes.
Adjusts the volume level.
Selects the highlighted menu option or confirms an input.
Accesses the main menu, or saves your input and exits the menus.
Changes the input source.
Turns the power on or off.
LG Logo Light
to on or off by selecting OPTION in the main menus.(Depending on model)
Speakers
Remote control sensor
Power Indicator
Page 23
ASSEMBLING AND PREPARING
17
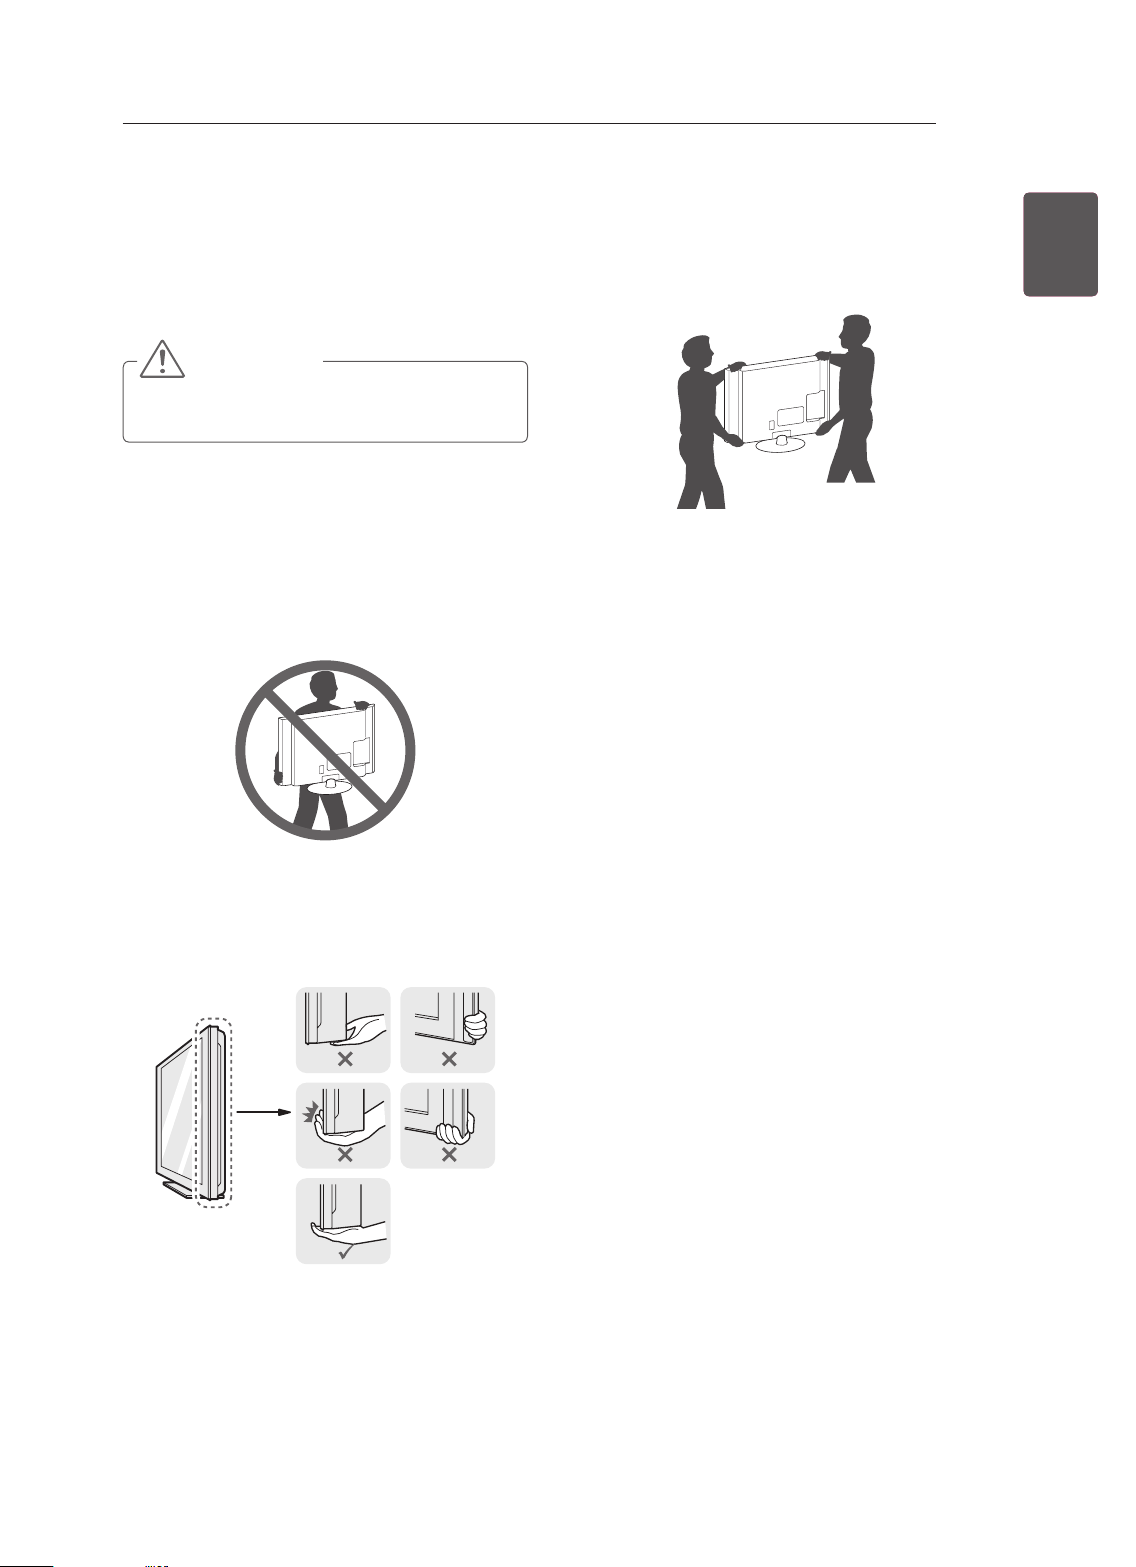
Lifting and moving the TV
Please note the following advice to prevent the
TV from being scratched or damaged and for safe
transportation regardless of its type and size.
CAUTION
yAvoid touching the screen at all times, as
this may result in damage to the screen.
yIt is recommended to move the TV in the box
or packing material that the TV originally came
in.
yBefore moving or lifting the TV, disconnect the
power cord and all cables.
yWhen holding the TV, the screen should face
away from you to avoid damage.
yWhen transporting a large TV, there should be
at least 2 people.
yWhen transporting the TV by hand, hold the TV
as shown in the following illustration.
yWhen transporting the TV, do not expose the
TV to jolts or excessive vibration.
yWhen transporting the TV, keep the TV upright,
never turn the TV on its side or tilt towards the
left or right.
yDo not apply excessive pressure to cause
exing /bending of frame chassis as it may
damage screen.
ENGENGLISH
yHold the top and bottom of the TV frame rmly.
Make sure not to hold the transparent part,
speaker, or speaker grill area.
Page 24
ASSEMBLING AND PREPARING
18
ENGLISH
ENG
Mounting on a table
1 Lift and tilt the TV into its upright position on a
table.
- Leave a 10 cm (minimum) space from the
wall for proper ventilation.
10 cm
10 cm
10 cm
2 Connect the power cord to a wall outlet.
CAUTION
yDo not place the TV near or on sources
of heat, as this may result in fire or other
damage.
10 cm
10 cm
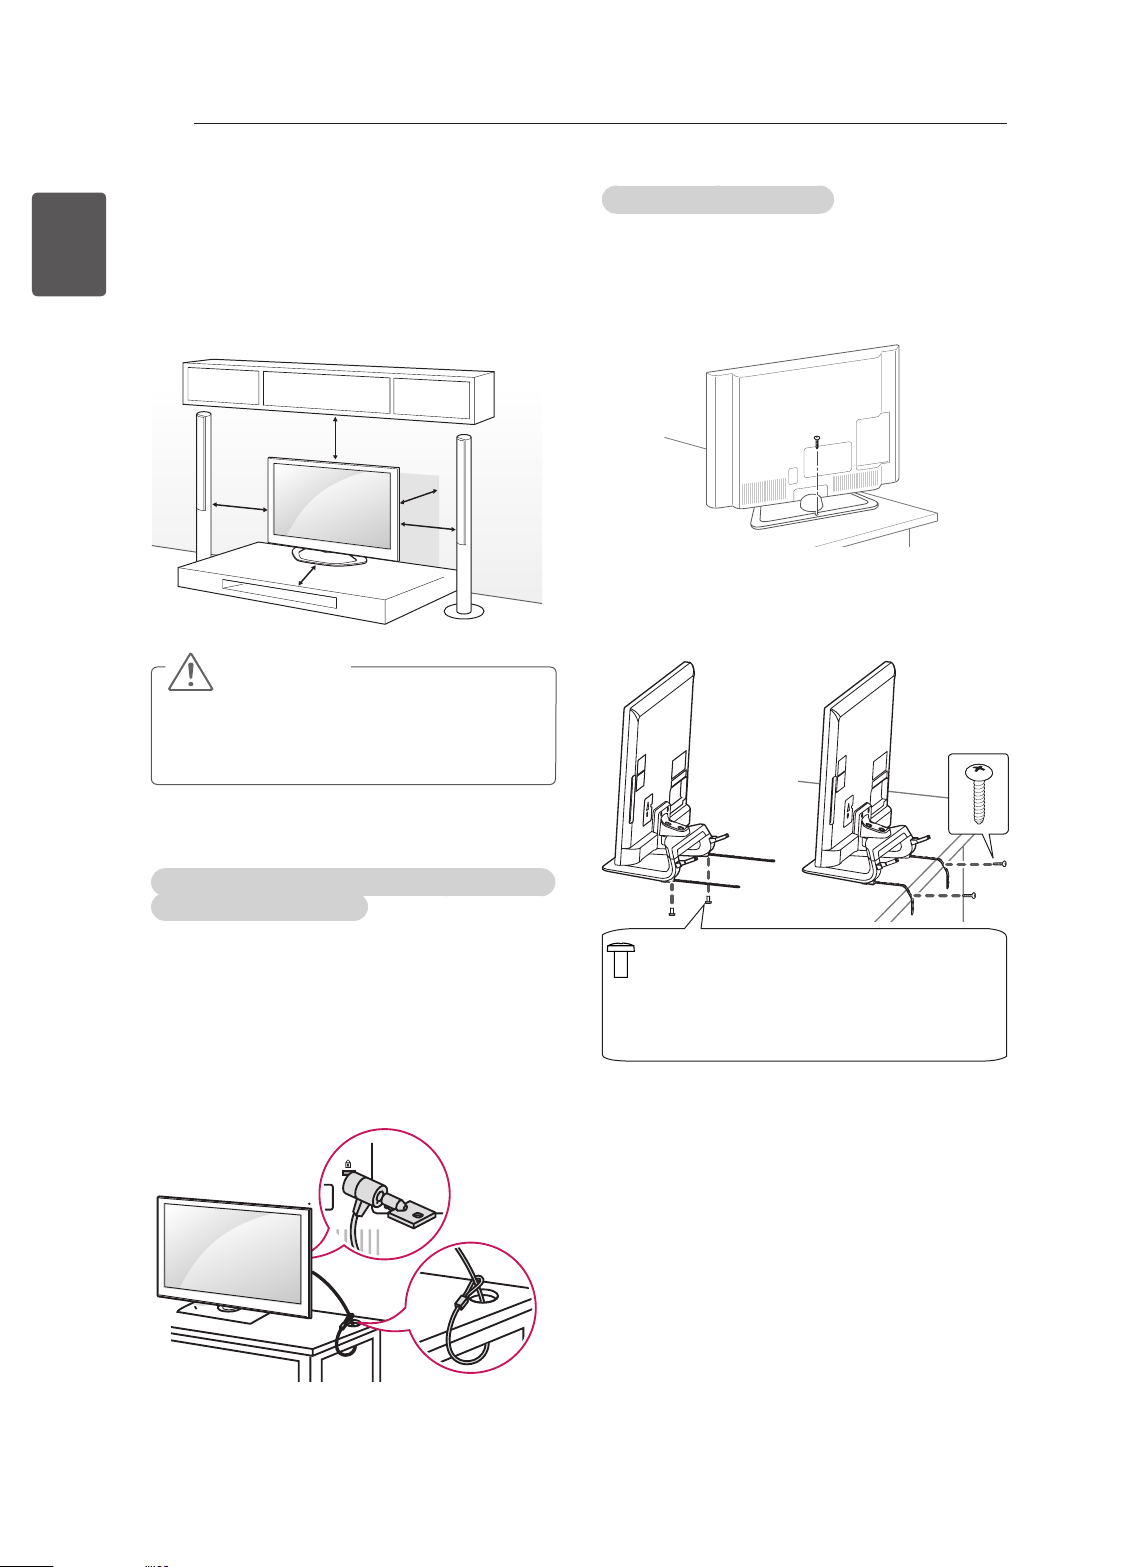
Securing the TV to a table
Fix the TV to a table to prevent from tilting forward,
damage, and potential injury.
To secure the TV to a table, insert and tighten the
supplied screw on the rear of the stand.
(Only 32/39/42/47/50/60LN57**-ZA)
(Only 32/39/42/47/50LN57**-ZE/ZK,
32/39/42/47/50LA62**, 32/42/47/50LA64**,
32/42/47/50LA66**)
Using the Kensington security system (This feature is
not available for all models.)
Image shown may differ from your TV.
y
The Kensington security system connector is
located at the rear of the TV. For more information
of installation and using, refer to the manual
provided with the Kensington security system or
visit
http://www.kensington.com.
Connect the Kensington security system cable
between the TV and a table.
2 EA, P4 x 8
(Only 47/50LN57**-ZE/ZK, 47/50LA62**,
47/50LA64**,47/50LA66**)
2 EA, M4 x 8
(Only 32/39/42LN57**-ZE/ZK, 32/39/42LA62**,
32/42LA64**, 32/42LA66**)
Page 25

ASSEMBLING AND PREPARING
19
NOTE
(Only 32/39/42/47/50LN57**-ZE/ZK,
32/39/42/47/50LA62**, 32/42/47/50LA64**,
32/42/47/50LA66**)
How to fix the TV to a table
1. Connect the Desk-mount Cables to the
Stand Base using the Bracket Screws.
2. Fix the Desk-mount Cables to a table using
the Desk-mount Screws.
3. Once the TV is fixed, move the table close to
the wall. Children may go in, causing injuries.
WARNING
yTo prevent TV from falling over, the TV
should be securely attached to the floor/
wall per installation instructions. Tipping,
shaking, or rocking the TV may cause injury.
Adjusting the angle of the TV to suit view
ENGENGLISH
(This feature is not available for all models.)
Swivel 15 degrees to the left or right and adjust the
angle of the TV to suit your view.
(Only LA62**, LA64**, LA66**, LN57**-ZE/ZK)
1515
Swivel 10 degrees to the left or right and adjust the
angle of the TV to suit your view.
(Only 42/47LA69**, 42/47LA74**)
1010
Swivel 8 degrees to the left or right and adjust the
angle of the TV to suit your view.
(Only 55LA69**, 55/60LA74**)
88
Page 26

ASSEMBLING AND PREPARING
20
ENGLISH
ENG
CAUTION
yWhen adjusting the angle adof the product,
watch out for your fingers.
»
Personal injury may occur if hands or fingers
are pinched. If the product is tilted too much, it
may fall, causing damage or injury.
<Rear> <Front>
Securing the TV to a wall
(This feature is not available for all models.)
CAUTION
yMake sure that children do not climb on or
hang on the TV.
NOTE
yUse a platform or cabinet that is strong and
large enough to support the TV securely.
yBrackets, bolts and ropes are not provided.
You can obtain additional accessories from
your local dealer.
Mounting on a wall
Attach an optional wall mount bracket at the rear of
the TV carefully and install the wall mount bracket
on a solid wall perpendicular to the floor. When you
attach the TV to other building materials, please
contact qualified personnel.
LG recommends that wall mounting be performed
by a qualified professional installer.
1 Insert and tighten the eye-bolts, or TV brackets
and bolts on the back of the TV.
- If there are bolts inserted at the eye-bolts
position, remove the bolts first.
2 Mount the wall brackets with the bolts to the
wall.
Match the location of the wall bracket and the
eye-bolts on the rear of the TV.
3 Connect the eye-bolts and wall brackets tightly
with a sturdy rope.
Make sure to keep the rope horizontal with the
at surface.
10 cm
10 cm
10 cm
10 cm
Page 27

Make sure to use screws and wall mount
bracket that meet the VESA standard. Standard
dimensions for the wall mount kits are described in
the following table.
Separate purchase(Wall Mounting Bracket)
Model 32LA62**
VESA (A x B) 200 x 100 200 x 200
Standard screw M4 M6
Number of screws 4 4
Wall mount
bracket
32LN57**
LSW130B LSW230B
39/42LA62**
32LA64**
32LA66**
39/42LN57**
ASSEMBLING AND PREPARING
CAUTION
yDisconnect the power first, and then move
or install the TV. Otherwise electric shock
may occur.
yIf you install the TV on a ceiling or slanted
wall, it may fall and result in severe injury.
Use an authorised LG wall mount and
contact the local dealer or qualified
personnel.
yDo not over tighten the screws as this may
cause damage to the TV and void your
warranty.
yUse the screws and wall mounts that meet
the VESA standard. Any damages or injuries
by misuse or using an improper accessory
are not covered by the warranty.
21
ENGENGLISH
Model 47/50/55/60LA62**
VESA (A x B)
Standard screw M6
Number of screws 4
Wall mount
bracket
42/47/50/55/60LA64**
42/47/50/55LA66**
42/47/55LA69**
42/47/55/60LA74**
47/50/55/60LN57**
400 x 400
LSW430B
A
B
NOTE
yUse the screws that are listed on the VESA
standard screw specifications.
yThe wall mount kit includes an installation
manual and necessary parts.
yThe wall mount bracket is not provided. You
can obtain additional accessories from your
local dealer.
yThe length of screws may differ depending
on the wall mount. Make sure to use the
proper length.
yFor more information, refer to the manual
supplied with the wall mount.
yWhen attaching a third-party wall mounting
bracket to the TV, insert the wall mount
inner spacers into the TV wall mount holes
to move your TV in vertical angle. Please
make sure not to use the spacers for LG
wall mounting bracket. (Only LA64**)
Wall Mount Inner Spacer
Page 28

REMOTE CONTROL
APP/*
MUTE
FAV
P
GUIDE
SMART
MY APPS
REC
LIVE TV
22
ENGLISH
ENG
REMOTE CONTROL
The descriptions in this manual are based on the buttons on the remote control.
Please read this manual carefully and use the TV correctly.
To replace batteries, open the battery cover, replace batteries (1.5 V AAA) matching
the
and ends to the label inside the compartment, and close the battery cover.
To remove the batteries, perform the installation actions in reverse.
CAUTION
yDo not mix old and new batteries, as this may damage the remote control.
Make sure to point the remote control toward the remote control sensor on the TV.
(Only LN570*, LN575*, LN577*)
TV/RAD Selects Radio, TV and DTV programme.
SUBTITLE Recalls your preferred subtitle in digital mode.
Q. MENU Accesses the quick menus.
GUIDE Shows programme guide.
RATIO Resizes an image.
INPUT Changes the input source.
LIST Accesses the saved programme list.
Q.VIEW Returns to the previously viewed programme.
FAV Accesses your favourite programme list.
APP/* Select the MHP TV menu source. (Only Italy.) (Depending on model)
PAGE Moves to the previous or next screen.
1
TELETEXT BUTTONS These buttons are used for teletext.
Views the information of the current programme and screen.
INFO
SMART Accesses the Smart Home menus.
MY APPS Shows the list of Apps.
1
2
1
Navigation buttons (up/down/left/right) Scrolls through menus or options.
Selects menus or options and confirms your input.
OK
BACK Returns to the previous level.
EXIT Clears on-screen displays and return to TV viewing.
SETTINGS Accesses the main menus.
REC Start to record and display record menu.
LIVE TV Return to LIVE TV.
Control buttons (
) Controls the Premium contents, Time
Machine or Smart Share menus or the SIMPLINK compatible devices (USB
or SIMPLINK or Time Machine).
2
Colour buttons These access special functions in some menus.
( : Red, : Green, : Yellow, : Blue)
or
Page 29

REMOTE CONTROL
P
A
G
E
TV/
RAD
RATIO INPUT
FAV
MUTE
EXIT
OK
GUIDE
MY APPS
LIVE TV
REC
TEXT
T.OPT
SUBTITLE
Q.MENU
AD
BACK
SETTINGS
INFO
1
.,;@
2
abc
3
def
4
ghi
5
jkl
6
mno
7
pqrs
8
tuv
0
9
wxyz
LIST
Q.VIEW
SMART
APP/*
23
(Only LA62**, LA64**)
1
2
ENGENGLISH
(User Guide) Sees user-guide.
RATIO Resizes an image.
INPUT Changes the input source.
TV/RAD Selects Radio, TV and DTV programme.
LIST Accesses the saved programme list.
(Space) Opens an empty space on the screen keyboard.
Q.VIEW Returns to the previously viewed programme.
FAV Accesses your favourite programme list.
3D Used for viewing 3D video.
PAGE Moves to the previous or next screen.
INFO Views the information of the current programme and screen.
SMART Accesses the Smart Home menus.
MY APPS Shows the list of Apps.
Navigation buttons (up/down/left/right) Scrolls through menus or options.
OK Selects menus or options and confirms your input.
BACK Returns to the previous level.
GUIDE Shows programme guide.
EXIT Clears on-screen displays and return to TV viewing.
1
Colour buttons These access special functions in some menus.
( : Red, : Green, : Yellow, : Blue)
2
TELETEXT BUTTONS These buttons are used for teletext.
SUBTITLE Recalls your preferred subtitle in digital mode.
Q. MENU Accesses the quick menus.
LIVE TV Return to LIVE TV.
Control buttons ( ) Controls the Premium contents, Time
Machine or Smart Share menus or the SIMPLINK compatible devices (USB
or SIMPLINK or Time Machine).
REC Start to record and display record menu.
SETTINGS Accesses the main menus.
AD Switches the Audio Description On or Off.
APP/* Select the MHP TV menu source. (Only Italy.) (Depending on model)
Page 30

ENGLISH
ENG
MAGIC REMOTE CONTROL FUNCTIONS
24
MAGIC REMOTE CONTROL FUNCTIONS
This item is not included for all models.
When the message “Magic Remote Control battery is low. Change the battery.” is
displayed, replace the battery.
To replace batteries, open the battery cover, replace batteries (1.5 V AA) matching
and ends to the label inside the compartment, and close the battery cover. Be
sure to point the remote control toward the remote control sensor on the TV.
To remove the batteries, perform the installation actions in reverse.
CAUTION
yDo not mix old and new batteries, as this may damage the remote control.
(Only LA66**, LA69**, LA74**, LN578*)
(POWER)
Turns the TV on or off.
BACK
Returns to the previous level.
Wheel(OK)
Selects menus or options and
confirms your input.
Scrolls through the saved
programmes.
If you press the navigation
button while moving the pointer
on the screen, the pointer
disappears, and the Magic
Remote Control works as a
regular remote control.
To display the pointer again,
shake the Magic Remote
Control from side to side.
3D
Used for viewing 3D video.
(Depending on model)
BACK SMART
/Q.MENU
P
Pointer (RF transmitter)
Navigation buttons (up/down/
left/right)
Scrolls through menus or options.
SMART
Accesses the Smart Home
menus.
Voice recognition
(Depending on model)
/Q.MENU
Accesses the quick menus.
Accesses the Universal Control.
+ -
Adjusts the volume level.
ꕌPꕍ
Scrolls through the saved
programmes or channels.
MUTE
Mutes all sounds.
Voice recognition(Depending on model)
Network connection is required to use the voice recognition function.
The recognition rate may vary depending on the user’s characteristics (voice, pronunciation, intonation
and speed) and the environment (noise and TV volume).
1. Press the Voice recognition button.
2. Speak when the voice display window appears on the left of the TV screen.
• The voice recognition may fail when you speak too fast or too slow.
• Use the Magic remote control no further than 10 cm from your face.
Page 31

MAGIC REMOTE CONTROL FUNCTIONS
HOME
25
Registering Magic Remote
Control
It is necessary to ‘pair’ (register) the magic remote
control to your TV before it will work.
How to register the Magic Remote Control
1 To register automatically,
turn the TV on and press the
Wheel(OK) button. When
registration is completed, the
completion message appears
on the screen.
2 If registration fails, turn the TV
off and back on, then press
the Wheel(OK) button to
complete registration.
How to re-register the Magic Remote Control
1 Press and hold the BACK
BACK
SMART
and SMART buttons
together for 5 seconds to
reset, then register it by
following “How to register the
Magic Remote Control” above.
2 To re-register the Magic
Remote Control, press and
hold the BACK button for 5
seconds toward the TV. When
registration is completed, the
completion message appears
on the screen.
How to use Magic Remote
Control
1 If the pointer disappears, move
the Magic Remote Control
slightly to left or right. Then, it
will automatically appear on
the screen.
»
If the pointer has not been
used for a certain period of
time, it will disappear.
2 You can move the pointer by
aiming the Pointer Receiver of
the Magic Remote Control at
your TV then move it left, right,
up or down.
»
If the pointer does not work
properly, leave the Magic
Remote Control for 10
seconds then use it again.
11-1 Brief Info Title Test...
More
If you press Wheel(OK) on the Magic
Remote Control, the following screen
appears.
1
Shows information about the current
programme and screen.
You can select More Menu.
2
Info.
Precautions to Take when
Using the Magic Remote
Control
Use the Magic Remote Control within the
y
maximum communication distance (10 m).
Using the Magic Remote Control beyond this
distance, or with an object obstructing it, may
cause a communication failure.
A communication failure may occur due to
y
nearby devices. Electrical devices such as
a microwave oven or wireless LAN product
may cause interference, as these use the
same bandwidth (2.4 GHz) as the Magic
Remote Control.
The Magic Remote Control may be damaged
y
or may malfunction if it is dropped or receives
a heavy impact.
Take care not to bump into nearby furniture
y
or other people when using the Magic
Remote Control.
Manufacturer and installer cannot provide
y
service related to human safety as the
applicable wireless device has possibility of
electric wave interference.
It is recommended that an Access Point (AP)
y
be located more than 1 m away from the
TV. If the AP is installed closer than 1 m, the
Magic Remote Control may not perform as
expected due to frequency interference.
ENGENGLISH
Page 32

USING THE USER GUIDE
26
ENGLISH
ENG
USING THE USER GUIDE
User Guide allows you to more easily access the detailed TV information.
1 Press the SMART button to access the
Smart Home menu.
2 Select User Guide and press Wheel(OK).
more
More
User Guide
User Guide
NOTE
yYou can also access the User Guide by
pressing (User Guide) in the remote
control.(Only LA62**, LA64**)
OPTION > To set language
SMART Settings OPTION Language
Selects Menu Language and Audio Language displayed on the screen.
Menu Language
Selects a language for the display text.
[In Digital Mode Only]
Audio Language
When watching a digital broadcast containing several audio
languages, you can select the language you want.
[In Digital mode Only]
Use the Subtitle function when two or more subtitle
Subtitle
languages are broadcast.
Language
✎ If subtitle data in a selected language is not broadcast,
the default language subtitle will be displayed.
Shows the description of the selected menu.
1
You can use ꕌ/ꕍto move between pages.
Moves to the selected menu directly from the
2
User Guide.
1
2
Try Now
Close
Index Online User Guide
User Guide
1
PROGRAMME Setting
PICTURE, SOUND Setting
OPTION
LG SMART Function
Advanced Function
Information
Shows the current watching programme or
1
3
To use input device
To set time options
To set TV lock options
To set language
To set country
Disabled Assisstance
2
To set Magic remote control
Index
4 5
Online User Guide
input source screen.
Allows to select the category you want.
2
Allows to select the item you want.
3
You can use ꕌ/ꕍto move between pages.
Allows to browse the description of the
4
function you want from the index.
Provides the detailed information on the
5
functions of LG Smart TV when the Internet
is connected.
(It may not be available depending on the
country/language.)
Page 33

MAINTENANCE / TROUBLESHOOTING
27
MAINTENANCE
Cleaning your TV
Clean your TV regularly to keep the best performance and to extend the product lifespan.
CAUTION
yMake sure to turn the power off and disconnect the power cord and all other cables first.
yWhen the TV is left unattended and unused for a long time, disconnect the power cord from the wall
outlet to prevent possible damage from lightning or power surges.
Screen, frame, cabinet and stand
yTo remove dust or light dirt, wipe the surface with a dry, clean, and soft cloth.
yTo remove major dirt, wipe the surface with a soft cloth dampened in clean water or a diluted mild
detergent. Then wipe immediately with a dry cloth.
CAUTION
yAvoid touching the screen at all times, as this may result in damage to the screen.
yDo not push, rub, or hit the screen surface with your fingernail or a sharp object, as this may result in
scratches and image distortions.
yDo not use any chemicals as this may damage the product.
yDo not spray liquid onto the surface. If water enters the TV, it may result in fire, electric shock, or
malfunction.
ENGENGLISH
Power cord
Remove the accumulated dust or dirt on the power cord regularly.
TROUBLESHOOTING
Problem Solution
Cannot control
the TV with the
remote control.
No image display
and no sound is
produced.
The TV turns off
suddenly.
When connecting
to the PC (HDMI
DVI), ‘No signal’
or ‘Invalid Format’
is displayed.
yCheck the remote control sensor on the product and try again.
yCheck if there is any obstacle between the product and the remote control.
yCheck if the batteries are still working and properly installed ( to , to ).
yCheck if the product is turned on.
yCheck if the power cord is connected to a wall outlet.
yCheck if there is a problem in the wall outlet by connecting other products.
yCheck the power control settings. The power supply may be interrupted.
yCheck if the Auto sleep feature is activated in the Time settings.
yIf there is no signal while the TV is on, the TV will turn off automatically after
15 minutes of inactivity.
yTurn the TV off/on using the remote control.
yReconnect the HDMI cable.
yRestart the PC with the TV on.
Page 34

EXTERNAL CONTROL DEVICE SETUP / SPECIFICATIONS
0197
28
ENGLISH
ENG
EXTERNAL CONTROL DEVICE SETUP
To obtain the external control device setup information, please visit www.lg.com
SPECIFICATIONS
(Only LA66**, LA69**, LA74**, LN578*)
Wireless LAN module (TWFM-B006D) specification
Standard IEEE802.11a/b/g/n
2400 to 2483.5 MHz
Frequency Range
Output Power
(Max.)
Bluetooth module (BM-LDS401) specification
5150 to 5250 MHz
5725 to 5850 MHz (for Non EU)
802.11a: 11 dBm
802.11b: 14 dBm
802.11g: 10.5 dBm
802.11n - 2.4GHz: 11 dBm
802.11n - 5GHz: 12.5 dBm
Standard Bluetooth Version 3.0
Frequency Range 2400 ~ 2483.5 MHz
Output Power (Max.) 10 dBm or lower
Because band channel used by the country could be different, the user can not change or adjust the
y
operating frequency and this product is set for the regional frequency table.
Page 35

SPECIFICATIONS
0197
29
(Only LN575*, LN577*, LA62**, LA64**)
Wireless LAN module(TWFM-B006D) specification
Standard IEEE802.11a/b/g/n
2400 to 2483.5 MHz
Frequency Range
Output Power
(Max.)
Because band channel used by the country could be different, the user can not change or adjust the
y
operating frequency and this product is set for the regional frequency table.
5150 to 5250 MHz
5725 to 5850 MHz (for Non EU)
802.11a: 11 dBm
802.11b: 14 dBm
802.11g: 10.5 dBm
802.11n - 2.4GHz: 11 dBm
802.11n - 5GHz: 12.5 dBm
ENGENGLISH
Page 36

Page 37

MAKING CONNECTIONS
B-1
MAKING
CONNECTIONS
This section on MAKING CONNECTIONS mainly
uses diagrams for the LA66** models.
Antenna connection
ANTENNA/
CABLE IN
English
Connect the TV to a wall antenna socket with an
RF cable (75 Ω).
NOTE
yUse a signal splitter to use more than 2 TVs.
yIf the image quality is poor, install a signal
amplifier properly to improve the image quality.
yIf the image quality is poor with an antenna
connected, try to realign the antenna in the
correct direction.
yAn antenna cable and converter are not
supplied.
ySupported DTV Audio: MPEG, Dolby Digital,
Dolby Digital Plus, HE-AAC
Deutsch
Schließen Sie das TV-Gerät mit einem RF-Kabel
(75 Ω) an eine Wandantennenbuchse an.
HINWEIS
yBei Verwendung von mehr als 2 TV-Geräten
verwenden Sie einen Signalsplitter.
yIst das Bild schlecht, installieren Sie einen
Signalverstärker, um die Bildqualität zu
verbessern.
yWenn die Bildqualität bei angeschlossener
Antenne schlecht ist, richten Sie die Antenne
richtig aus.
yAntennenkabel und Wandler sind nicht im
Lieferumfang enthalten.
yUnterstützter DTV-Ton: MPEG, Dolby
Digital, Dolby Digital Plus, HE-AAC
Français
Connectez la TV à une prise d’antenne murale
avec un câble RF (75 Ω).
REMARQUE
yUtilisez un séparateur de signaux pour
utiliser plus de deux téléviseurs.
ySi la qualité d’image est mauvaise, installez
correctement un amplificateur de signaux
pour l’améliorer.
ySi vous utilisez une antenne et que la qualité
d’image est mauvaise, essayez de réaligner
l’antenne dans la bonne direction.
yLe câble et le convertisseur d’antenne ne
sont pas fournis.
yTechnologies audio TNT prises en charge :
MPEG, Dolby Digital, Dolby Digital Plus,
HE-AAC
Italiano
Collegare il televisore all’antenna centralizzata con
un cavo RF (75 Ω).
NOTA
yUtilizzare uno sdoppiatore del segnale per
usare più di 2 televisori.
ySe la qualità dell’immagine è scarsa,
installare correttamente un amplificatore del
segnale per migliorarla.
ySe la qualità dell’immagine è scarsa con
un’antenna collegata, provare a riallineare
l’antenna nella direzione corretta.
yIl cavo e il convertitore dell’antenna non
sono in dotazione.
yAudio DTV supportato: MPEG, Dolby Digital,
Dolby Digital Plus, HE-AAC
Español
Conecte la TV a una toma de pared de antena con
un cable RF (75 Ω).
NOTA
yEmplee un divisor de señal cuando desee
utilizar más de dos TV.
ySi la imagen es de poca calidad, instale un
amplificador de señal correctamente para
mejorar la calidad de imagen.
ySi la imagen es de poca calidad con una
antena conectada, intente volver a orientar
la antena en la dirección adecuada.
yNo se suministran el cable de antena ni el
conversor.
yAudio DTV admitido: MPEG, Dolby Digital,
Dolby Digital Plus, HE-AAC
Page 38

MAKING CONNECTIONS
B-2
Português
Ligue a TV a uma tomada de antena de parede
com um cabo RF (75 Ω).
NOTA
yUtilize um separador de sinal se quiser
utilizar mais de 2 TVs.
ySe a qualidade de imagem for fraca, instale
um amplificador de sinal para melhorar a
qualidade de imagem.
ySe a qualidade de imagem for fraca mesmo
que tenha uma antena ligada, tente orientar
a antena para a direcção correcta.
yO cabo da antena e o conversor não são
fornecidos.
yÁudio DTV suportado: MPEG, Dolby Digital,
Dolby Digital Plus, HE-AAC
Nederlands
Sluit de TV met behulp van een RF-kabel (75 Ω)
aan op een antenneaansluiting op de muur.
OPMERKING
yGebruik een signaalsplitter om meer dan
twee TV’s te gebruiken.
yAls de beeldkwaliteit slecht is, installeert u
een signaalversterker om de beeldkwaliteit
te verbeteren.
yAls de beeldkwaliteit slecht is terwijl een
antenne is aangesloten, probeert u de
antenne in de juiste richting te draaien.
yAntennekabel en converter worden niet
meegeleverd.
yOndersteunde DTV-audio: MPEG, Dolby
Digital, Dolby Digital Plus, HE-AAC
Ελληνικά
Συνδέστε την τηλεόραση σε μια υποδοχή κεραίας
στον τοίχο με ένα καλώδιο RF (75 Ω).
ΣΗΜΕΙΩΣΗ
yΧρησιμοποιήστε ένα διαχωριστή σήματος για
τη χρήση περισσότερων από 2 τηλεοράσεων.
yΑν η ποιότητα της εικόνας δεν είναι καλή,
εγκαταστήστε έναν ενισχυτή σήματος για τη
βελτίωση της ποιότητας εικόνας.
yΑν η ποιότητα της εικόνας δεν είναι καλή
μετά τη σύνδεση της κεραίας, δοκιμάστε να
αλλάξετε τον προσανατολισμό της κεραίας
στη σωστή κατεύθυνση.
yΔεν παρέχεται καλώδιο κεραίας και
μετατροπέας.
yΥποστηριζόμενος ήχος DTV: MPEG, Dolby
Digital, Dolby Digital Plus, HE-AAC
Slovenščina
Televizor priključite v stensko antensko vtičnico s
kablom RF (75 Ω).
OPOMBA
yČe želite uporabljati več kot 2 televizorja,
uporabite razcepnik za signal.
yČe je kakovost slike slaba, jo izboljšajte
tako, da ustrezno namestite ojačevalnik
signala.
yČe je kakovost slike slaba in uporabljate
anteno, usmerite anteno v ustrezno smer.
yKabel antene in pretvornik nista priložena.
yPodprte oblike zvoka za DTV: MPEG, Dolby
Digital, Dolby Digital Plus, HE-AAC
Page 39

MAKING CONNECTIONS
B-3
Satellite dish connection
(Only satellite models)
13/18 V
700 mA Max
LNB
Satellite IN
English
Connect the TV to a satellite dish to a satellite
socket with a satellite RF cable (75 Ω).
Nederlands
Sluit de TV met behulp van een RF-satellietkabel
(75 Ω) aan op een satellietschotel.
Ελληνικά
Συνδέστε την τηλεόραση σε μια δορυφορική κεραία, μέσω μιας δορυφορικής υποδοχής με δορυφορικό καλώδιο (75 Ω).
Slovenščina
S kablom RF za satelit povežite televizor s satelitskim krožnikom prek vtičnice za satelit (75 Ω).
Deutsch
Schließen Sie das TV-Gerät mit einem SatellitenHF-Kabel (75 Ω) an eine Satellitenschüssel und an
eine Satellitenbuchse an.
Français
Connectez la TV à une parabole satellite ou à une
prise satellite à l’aide d’un câble satellite RF (75 Ω).
Italiano
Collegare la TV a un’antenna satellitare e a una
presa satellitare con un cavo RF satellitare (75 Ω).
Español
Para conectar la TV a una antena parabólica,
enchufe un cable de RF de satélite a una toma de
satélite (75 Ω).
Português
Ligue a TV a uma antena parabólica a uma tomada de satélite com um cabo RF para satélite (75 Ω).
Page 40

MAKING CONNECTIONS
B-4
HDMI connection
DVD/ Blu-Ray / HD Cable
Box / HD STB / PC
(*Not Provided)
(MHL)
3
/DVI IN
2
(ARC)
1
Deutsch
Überträgt digitale Video- und Audiosignale von
einem externen Gerät an das TV-Gerät. Verbinden
Sie das externe Gerät, wie in der folgenden
Abbildung gezeigt, mithilfe des HDMI-Kabels mit
dem TV-Gerät.
Wählen Sie zum Anschließen einen beliebigen
HDMI-Eingang. Es ist egal, welchen Port Sie
wählen.
HINWEIS
yFür optimale Bildqualität wird empfohlen,
den HDMI-Anschluss des TV-Gerätes zu
verwenden.
yVerwenden Sie das neueste
Hochgeschwindigkeits-HDMI™-Kabel
mit CEC-Funktion (Customer Electronics
Control).
yHigh-Speed-HDMI™-Kabel sind für die
Übertragung von HD-Signalen bis zu 1080p
und höher getestet.
yUnterstütztes HDMI-Audioformat:
Dolby Digital, DTS, PCM (bis
zu 192 KHz, 32 KHz/44,1 KHz/
/48 KHz/88 KHz/96 KHz/176 KHz/192 KHz)
HDMI
English
Transmits the digital video and audio signals from
an external device to the TV. Connect the external
device and the TV with the HDMI cable as shown.
Choose any HDMI input port to connect. It does
not matter which port you use.
NOTE
yIt is recommended to use the TV with the
HDMI connection for the best image quality.
yUse the latest High Speed HDMI™ Cable
with CEC (Customer Electronics Control)
function.
yHigh Speed HDMI™ Cables are tested to
carry an HD signal up to 1080p and higher.
ySupported HDMI Audio format : Dolby
Digital, DTS, PCM (Up to 192 KHz, 32k/44.1
k/48k/88k/96k/176k/192k)
Français
Permet de transmettre les signaux vidéo et audio
numériques d’un périphérique externe vers la TV.
Connectez le périphérique externe et la TV avec
le câble HDMI comme indiqué sur l’illustration
suivante.
Choisissez un port d’entrée HDMI pour établir la
connexion. Peu importe le port que vous utilisez.
REMARQUE
yPour obtenir une meilleure qualité d’image,
il est recommandé d’utiliser la TV avec une
connexion HDMI.
yUtilisez le tout nouveau câble haut débit
HDMI™ avec la fonction CEC (contrôles
électroniques client).
yLes câbles HDMI™ haut débit sont testés
pour transporter un signal HD de 1080p ou
supérieur.
yFormats audio HDMI pris en charge : Dolby
Digital, DTS, PCM (jusqu’à 192 KHz, 32k/44
,1k/48k/88k/96k/176k/192k)
Page 41

MAKING CONNECTIONS
B-5
Italiano
Il segnale digitale audio e video viene trasmesso
da un dispositivo esterno al televisore. Collegare il
dispositivo esterno e il televisore mediante il cavo
HDMI come mostrato nell’illustrazione di seguito.
Scegliere una porta di ingresso HDMI per il
collegamento. La scelta della porta è libera.
NOTA
ySi consiglia di utilizzare il televisore con il
collegamento HDMI per ottenere la migliore
qualità delle immagini.
yUtilizzare un cavo HDMI™ ad alta velocità
dotato dei requisiti più recenti con funzione
CEC (Customer Electronics Control).
yI cavi HDMI™ ad alta velocità sono testati
per trasmettere un segnale HD fino a 1080p
e superiore.
yFormato audio HDMI supportato: Dolby
Digital, DTS, PCM (fino a 192 KHz, 32
k/44,1 k/48 k/88 k/96 k/176 k/192 k)
Español
Transmite las señales de audio y vídeo digital de
un dispositivo externo a la TV. Use el cable HDMI
para conectar el dispositivo externo a la TV, tal y
como se muestra en la siguiente ilustración.
Seleccione un puerto de entrada HDMI. El puerto
utilizado es irrelevante.
NOTA
ySe recomienda usar la conexión HDMI de la
TV para obtener la mejor calidad de imagen.
yUtilice el cable HDMI™ de alta velocidad
más reciente con la función CEC (control de
electrónica de consumo).
yLos cables HDMI™ de alta velocidad están
preparados para transportar una señal HD
de 1080p o superior.
yFormato de audio HDMI admitido: Dolby
Digital, DTS, PCM (hasta 192 KHz, 32k/44,1
k/48k/88k/96k/176k/192k)
Português
Transmite os sinais digitais de vídeo e áudio
de um dispositivo externo para a TV. Ligue o
dispositivo externo à TV com o cabo HDMI,
conforme demonstrado na seguinte ilustração.
Escolha qualquer porta de entrada HDMI para
ligar. Pode utilizar qualquer porta.
NOTA
yRecomenda-se a utilização da TV com a
ligação HDMI para uma melhor qualidade
de imagem.
yUtilize o mais recente cabo HDMI™ de alta
velocidade com função CEC (Customer
Electronics Control).
yOs cabos HDMI™ de alta velocidade foram
testados para executar um sinal HD até
1080p e superior.
yFormato de áudio HDMI suportado: Dolby
Digital, DTS, PCM (até 192 KHz, 32k/44.1k/
48k/88k/96k/176k/192k.)
Nederlands
U kunt de digitale video- en audiosignalen vanaf
een extern apparaat naar de TV zenden. Sluit
het externe apparaat en de TV op elkaar aan met
behulp van de HDMI-kabel, zoals aangegeven in
de volgende afbeelding.
Kies op welke HDMI-ingangspoort u wilt
aansluiten. Het maakt niet uit welke poort u
gebruikt.
OPMERKING
yWij raden u aan de TV aan te sluiten door
middel van een HDMI-verbinding voor de
hoogste beeldkwaliteit.
yGebruik de nieuwste High Speed HDMI™-
kabel met CEC-functie (Customer
Electronics Control).
yHDMI™-kabels van het type High Speed zijn
getest op het verzenden van HD-signalen
tot 1080p en hoger.
yOndersteunde HDMI-audio-indeling: Dolby
Digital, DTS, PCM (maximaal 192 KHz, 32k/
44.1k/48k/88k/96k/176k/192k)
Page 42

MAKING CONNECTIONS
B-6
Ελληνικά
Μεταδίδει τα ψηφιακά σήματα εικόνας και ήχου
από μια εξωτερική συσκευή στην τηλεόραση.
Συνδέστε την εξωτερική συσκευή και την
τηλεόραση με το καλώδιο HDMI, όπως φαίνεται
στην παρακάτω εικόνα.
Επιλέξτε οποιαδήποτε θύρα εισόδου HDMI για
τη σύνδεση. Δεν έχει σημασία ποια θύρα θα
χρησιμοποιήσετε.
ΣΗΜΕΙΩΣΗ
yΓια τη βέλτιστη ποιότητα εικόνας,
χρησιμοποιήστε την τηλεόραση με σύνδεση
HDMI.
yΧρησιμοποιήστε το καλώδιο HDMI™ υψηλής
ταχύτητας με λειτουργία CEC (Customer
Electronics Control).
yΤα καλώδια HDMI™ υψηλής ταχύτητας
έχουν ελεγχθεί για τη μετάδοση σήματος HD
ανάλυσης έως 1080p ή υψηλότερης.
yΥποστηριζόμενη μορφή ήχου HDMI: Dolby
Digital, DTS, PCM (έως 192 KHz, 32k/44.1k
/48k/88k/96k/176k/192k)
ARC (Audio Return Channel)
English
An external audio device that supports
y
SIMPLINK and ARC must be connected
using HDMI/DVI IN 1 (ARC) port.
When connected with a high-speed HDMI
y
cable, the external audio device that
supports ARC outputs optical SPDIF without
additional optical audio cable and supports
the SIMPLINK function.
Deutsch
Ein externes Audiogerät, das SIMPLINK und
y
ARC unterstützt, muss über den HDMI/DVI
IN 1 (ARC) angeschlossen werden.
Wenn der Anschluss mit einem High-Speed-
y
HDMI-Kabel erfolgt, gibt das externe Audiogerät, das ARC unterstützt, SPDIF ohne
zusätzliches optisches Audiokabel aus und
unterstützt die SIMPLINK-Funktion.
Slovenščina
Prenaša digitalne video in zvočne signale iz
zunanje naprave na televizor. Povežite zunanjo
napravo in televizor s HDMI-kablom, kot je
prikazano na naslednji sliki.
Izberite vhodna vrata HDMI za povezavo. Ni
pomembno, katera vrata uporabite.
OPOMBA
yZa najboljšo kakovost slike priporočamo
uporabo televizorja s HDMI-povezavo.
yUporabite najnovejši kabel HDMI™ za
hitri prenos s funkcijo CEC (Customer
Electronics Control).
yKabli HDMI™ za hitri prenos so preizkušeni,
tako da lahko prenašajo signal visoke
ločljivosti do 1080p in več.
yPodprte oblike zvoka za HDMI: Dolby
Digital, DTS, PCM (do 192 KHz,
32 k/44,1 k/48 k/88 k/96 k/176 k/192 k)
Français
Un périphérique audio externe qui prend en
y
charge les technologies SIMPLINK et ARC
doit être connecté au port HDMI/DVI IN 1
(ARC).
Si vous reliez un câble HDMI haut débit,
y
le périphérique audio externe qui prend en
charge les sorties ARC, prend également en
charge la sortie optique SPDIF sans câble
audio optique supplémentaire, ainsi que la
fonction SIMPLINK.
Italiano
Per il collegamento di un dispositivo
y
audio esterno che supporta le funzionalità
SIMPLINK e ARC, usare la porta HDMI/DVI
IN 1 (ARC).
Se si effettua il collegamento con un cavo
y
HDMI ad alta velocità, il dispositivo audio
esterno che supporta ARC trasmette
il segnale SPDIF senza il cavo ottico
aggiuntivo e supporta la funzione SIMPLINK.
Page 43

MAKING CONNECTIONS
B-7
Español
Hay que conectar un dispositivo de audio
y
externo que admita SIMPLINK y ARC
utilizando el puerto HDMI/DVI IN 1 (ARC).
Cuando esté conectado mediante un cable
y
HDMI de alta velocidad, el dispositivo de
audio externo que admite ARC emite el
SPDIF óptico sin necesidad de un cable
óptico de audio adicional y admite la función
SIMPLINK.
Português
É necessário ligar um dispositivo de áudio
y
externo que suporte SIMPLINK e ARC utilizando a porta HDMI/DVI IN 1 (ARC).
Quando ligado a um cabo HDMI de alta
y
velocidade, o aparelho de áudio externo que
suporta ARC transmite SPDIF óptica sem
um cabo de áudio óptico adicional e suporta
a função SIMPLINK.
Nederlands
Een extern audioapparaat dat ondersteuning
y
biedt voor SIMPLINK en ARC, moet op de
HDMI/DVI IN 1 (ARC) worden aangesloten.
Bij aansluiting met een High Speed HDMI-
y
kabel zorgt het externe audioapparaat met
ARC-ondersteuning ervoor dat optische
SPDIF wordt uitgevoerd zonder extra
optische audiokabel, en ondersteunt dit
apparaat de SIMPLINK-functie.
Ελληνικά
Μια εξωτερική συσκευή ήχου η οποία υπο-
y
στηρίζει SIMPLINK και ARC πρέπει να συνδεθεί με τη χρήση της θύρας εισόδου HDMI/
DVI IN 1 (ARC).
Κατά τη σύνδεση με καλώδιο HDMI υψηλής
y
ταχύτητας, η εξωτερική συσκευή ήχου που
υποστηρίζει το ARC παρέχει οπτικό σήμα
SPDIF χωρίς πρόσθετο οπτικό καλώδιο ήχου
και υποστηρίζει τη λειτουργία SIMPLINK.
Slovenščina
Zunanja zvočna naprava, ki podpira funkciji
y
SIMPLINK in ARC, mora biti povezana z vhodnimi vrati HDMI/DVI IN 1 (ARC).
Če jo povežete s kablom HDMI za hitri
y
prenos, zunanja zvočna naprava, ki podpira
funkcijo ARC, oddaja optični zapis SPDIF
brez dodatnega optičnega zvočnega kabla in
podpira funkcijo SIMPLINK.
DVI to HDMI connection
(MHL)
3
/DVI IN
2
WHITE
RED
AUDIO OUT
DVD/ Blu-Ray / HD Cable Box / PC
English
Transmits the digital video signal from an external
device to the TV. Connect the external device and
the TV with the DVI-HDMI cable as shown. To
transmit an audio signal, connect an audio cable.
Choose any HDMI input port to connect. It does
not matter which port you use.
NOTE
yDepending on the graphics card, DOS mode
may not work if a HDMI to DVI Cable is in use.
yWhen using the HDMI/DVI cable, only Single
link is supported.
L
L/MONO
(ARC)
1
(*Not Provided)
DVI OUT
Page 44

MAKING CONNECTIONS
B-8
Deutsch
Überträgt digitale Videosignale von einem externen
Gerät an das TV-Gerät. Verbinden Sie das externe
Gerät, wie in der folgenden Abbildung gezeigt,
mithilfe des DVI-HDMI-Kabels mit dem TV-Gerät.
Schließen Sie ein Audiokabel an, um ein Audiosignal
zu übertragen.
Wählen Sie zum Anschließen einen beliebigen HDMIEingang. Es ist egal, welchen Port Sie wählen.
HINWEIS
yAbhängig von der Grafikkarte funktioniert
der DOS-Modus bei Einsatz eines HDMI-zuDVI-Kabels möglicherweise nicht.
yBei Verwendung des HDMI/DVI-Kabels wird
nur eine einfache Verbindung unterstützt.
Français
Permet de transmettre les signaux vidéo d’un
périphérique externe vers la TV. Connectez le
périphérique externe et la TV avec le câble DVIHDMI comme indiqué sur l’illustration suivante. Pour
émettre un signal audio, raccordez un câble audio.
Choisissez un port d’entrée HDMI pour établir la
connexion. Peu importe le port que vous utilisez.
REMARQUE
ySelon la carte graphique, le mode DOS peut
ne pas fonctionner si vous utilisez un câble
pour établir la connexion HDMI-DVI.
yLors de l’utilisation du câble HDMI/DVI, seule
une liaison unique peut être prise en charge.
Español
Transmite la señal de vídeo digital de un dispositivo
externo a la TV. Use el cable DVI-HDMI para
conectar el dispositivo externo a la TV, tal y como se
muestra en la siguiente ilustración. Para transmitir
una señal de audio, conecte un cable de audio.
Seleccione un puerto de entrada HDMI. El puerto
utilizado es irrelevante.
NOTA
yEn función de la tarjeta gráfica, puede
que no funcione el modo DOS si se está
utilizando un cable de HDMI a DVI.
ySi se utiliza un cable HDMI/DVI, solo se admite
un enlace.
Português
Transmite o sinal digital de vídeo de um dispositivo
externo para a TV. Ligue o dispositivo externo à
TV com o cabo DVI-HDMI, conforme demonstrado
na seguinte ilustração. Para transmitir um sinal de
áudio, ligue um cabo de áudio.
Escolha qualquer porta de entrada HDMI para
ligar. Pode utilizar qualquer porta.
NOTA
yDependendo da placa gráfica, o modo DOS
poderá não funcionar se utilizar um cabo
HDMI para DVI.
yAo utilizar o cabo HDMI/DVI, apenas a Ligação
única é suportada.
Italiano
Il segnale digitale video viene trasmesso da
un dispositivo esterno al televisore. Collegare
il dispositivo esterno e il televisore mediante il
cavo DVI-HDMI come mostrato nell’illustrazione
di seguito. Per trasmettere un segnale audio,
collegare un cavo audio.
Scegliere una porta di ingresso HDMI per il
collegamento. La scelta della porta è libera.
NOTA
yA seconda della scheda grafica in uso, la
modalità DOS potrebbe non funzionare se si
utilizza un cavo da HDMI a DVI.
yQuando si utilizza il cavo HDMI/DVI, è
supportata solo l’interfaccia Single link.
Nederlands
U kunt het digitale videosignaal vanaf een extern
apparaat naar de TV zenden. Sluit het externe
apparaat en de TV op elkaar aan met behulp
van de DVI-HDMI-kabel, zoals aangegeven in de
volgende afbeelding. Om het audiosignaal van het
externe apparaat naar de TV te zenden, moet u een
audiokabel aansluiten.
Kies op welke HDMI-ingangspoort u wilt aansluiten.
Het maakt niet uit welke poort u gebruikt.
OPMERKING
yAfhankelijk van de grafische kaart werkt de
DOS-modus mogelijk niet bij het gebruik van
een HDMI/DVI-kabel.
yBij gebruik van de HDMI/DVI-kabel wordt
alleen single link ondersteund.
Page 45

MAKING CONNECTIONS
VIDEO
AUDIO
VIDEO
AUDIO
COMPONENT IN
L
O
O
/M
2
B-9
Ελληνικά
Μεταδίδει το ψηφιακό σήμα εικόνας από μια
εξωτερική συσκευή στην τηλεόραση. Συνδέστε
την εξωτερική συσκευή και την τηλεόραση με
το καλώδιο DVI-HDMI, όπως φαίνεται στην
παρακάτω εικόνα. Για τη μετάδοση σήματος ήχου,
συνδέστε ένα καλώδιο ήχου.
Επιλέξτε οποιαδήποτε θύρα εισόδου HDMI για
τη σύνδεση. Δεν έχει σημασία ποια θύρα θα
χρησιμοποιήσετε.
ΣΗΜΕΙΩΣΗ
yΑνάλογα με την κάρτα γραφικών, η
λειτουργία DOS ενδέχεται να μην λειτουργεί,
εάν χρησιμοποιείται καλώδιο HDMI σε DVI.
yΌταν χρησιμοποιείτε το καλώδιο HDMI/DVI,
υποστηρίζεται αποκλειστικά η Μονή σύνδεση.
Slovenščina
Prenaša digitalni video signal iz zunanje naprave
na televizor. Povežite zunanjo napravo in televizor s
kablom DVI-HDMI, kot je prikazano na naslednji sliki.
Za prenos avdio signala priključite avdio kabel.
Izberite vhodna vrata HDMI za povezavo. Ni
pomembno, katera vrata uporabite.
Component connection
(*Not
Provided)
RED
WHITE
RED
BLUE
GREEN
OPOMBA
yOdvisno od grafične kartice način DOS
morda ne bo deloval, če uporabljate kabel
HDMI-DVI.
yKo uporabljate kabel HDMI/DVI, je podprta le
ena povezava.
DVD / Blu-Ray / HD Cable Box
English
Transmits analog video and audio signals from an
external device to the TV. Connect the external
device and the TV with a component cable as
shown.
NOTE
yIf cables are not installed correctly, it could
cause this image to display in black and
white or with distorted colours.
Page 46

MAKING CONNECTIONS
B-10
Deutsch
Überträgt analoge Video- und Audiosignale von
einem externen Gerät an das TV-Gerät. Verbinden
Sie das externe Gerät, wie in der folgenden
Abbildung gezeigt, mithilfe eines KomponentenKabels mit dem TV-Gerät.
HINWEIS
yWenn Kabel falsch angeschlossen werden,
kann dies dazu führen, dass ein Bild in
Schwarz-Weiß oder in verzerrten Farben
erscheint.
Français
Permet de transmettre les signaux audio et vidéo
analogiques d’un périphérique externe vers la
TV. Connectez le périphérique externe et la TV
avec un câble composante comme indiqué sur
l’illustration suivante.
REMARQUE
ySi les câbles sont mal installés, l’image
peut s’afficher en noir et blanc ou avec des
couleurs de mauvaise qualité.
Português
Transmite sinais analógicos de vídeo e áudio
de um dispositivo externo para a TV. Ligue
o dispositivo externo à TV com um cabo de
componente, conforme demonstrado na seguinte
ilustração.
NOTA
ySe os cabos não forem devidamente
instalados, poderão causar uma exibição
de imagem a preto e branco ou com cor
distorcida.
Nederlands
U kunt analoge video- en audiosignalen vanaf
een extern apparaat naar de TV zenden. Sluit
het externe apparaat en de TV op elkaar aan
met behulp van een componentkabel, zoals
aangegeven in de volgende afbeelding.
OPMERKING
yAls kabels onjuist zijn geïnstalleerd, kan het
beeld worden weergegeven in zwart-wit of
met vervormde kleuren.
Italiano
Il segnale audio e video analogico viene
trasmesso da un dispositivo esterno al televisore.
Collegare il dispositivo esterno al televisore
usando un cavo component come mostrato nella
gura di seguito.
NOTA
yL’errato collegamento dei cavi può far sì che
le immagini vengano visualizzate in bianco
e nero o con colori distorti.
Español
Transmite las señales de audio y vídeo analógico
de un dispositivo externo a la TV. Use el cable de
componentes para conectar el dispositivo externo
a la TV, tal como se muestra en la siguiente
ilustración.
NOTA
ySi los cables no se instalan correctamente,
puede que la imagen se visualice en blanco
y negro o con los colores distorsionados.
Ελληνικά
Μεταδίδει τα αναλογικά σήματα εικόνας και ήχου
από μια εξωτερική συσκευή στην τηλεόραση.
Συνδέστε την εξωτερική συσκευή και την
τηλεόραση με το καλώδιο Component, όπως
φαίνεται στην παρακάτω εικόνα.
ΣΗΜΕΙΩΣΗ
yΑν τα καλώδια δεν έχουν συνδεθεί
σωστά, η εικόνα ενδέχεται να εμφανίζεται
ασπρόμαυρη ή με αλλοιωμένα χρώματα.
Slovenščina
Prenaša analogne video in zvočne signale iz
zunanje naprave na televizor. Povežite zunanjo
napravo in televizor s komponentnim kablom, kot
je prikazano na naslednji sliki.
OPOMBA
yČe so kabli nepravilno nameščeni, se lahko
slika prikaže kot črnobela ali s popačeno
barvo.
Page 47

MAKING CONNECTIONS
B-11
Composite connection
L
L/MONO
RED
(*Not Provided)
RED
AUDIOL R L
WHITE
( )
MONO
AV 2 IN
WHITE
VIDEO
YELLOW
COMPONENT IN
YELLOW
Français
Permet de transmettre les signaux audio et vidéo
analogiques d’un périphérique externe vers la TV.
Connectez le périphérique externe et la TV avec
le câble composite comme indiqué sur l’illustration
suivante.
Italiano
Il segnale audio e video analogico viene
trasmesso da un dispositivo esterno al televisore.
Collegare il dispositivo esterno e il televisore
mediante il cavo composite come mostrato
nell’illustrazione di seguito.
Español
Transmite las señales de audio y vídeo analógico
de un dispositivo externo a la TV. Use el cable
compuesto para conectar el dispositivo externo
a la TV, tal como se muestra en la siguiente
ilustración.
Português
Transmite sinais analógicos de vídeo e áudio
de um dispositivo externo para a TV. Ligue o
dispositivo externo à TV com o cabo composto,
conforme demonstrado na seguinte ilustração.
Nederlands
DVD/ Blu-Ray / HD Cable Box / VCR
English
Transmits analog video and audio signals from
an external device o the TV. Connect the external
device and the TV with the composite cable as
shown.
Deutsch
Überträgt analoge Video- und Audiosignale von
einem externen Gerät an das TV-Gerät. Verbinden
Sie das externe Gerät, wie in der folgenden
Abbildung gezeigt, mithilfe des Composite-Kabels
mit dem TV-Gerät.
U kunt analoge video- en audiosignalen vanaf
een extern apparaat naar de TV zenden. Sluit
het externe apparaat en de TV op elkaar aan met
behulp van de composietkabel, zoals aangegeven
in de volgende afbeelding.
Ελληνικά
Μεταδίδει τα αναλογικά σήματα εικόνας και ήχου
από μια εξωτερική συσκευή στην τηλεόραση.
Συνδέστε την εξωτερική συσκευή και την
τηλεόραση με το καλώδιο Composite, όπως
φαίνεται στην παρακάτω εικόνα.
Slovenščina
Prenaša analogne video in zvočne signale iz
zunanje naprave na televizor. Povežite zunanjo
napravo in televizor s kompozitnim kablom, kot je
prikazano na naslednji sliki.
Page 48

MAKING CONNECTIONS
B-12
MHL connection
MHL passive cable
(*Not Provided)
(MHL)
3
/DVI IN
Deutsch
Mobile High-denition Link (MHL) ist eine digitale
Schnittstelle, welche audiovisuelle Signale vom
Mobiltelefon an ein TV-Gerät überträgt.
HINWEIS
Verbinden Sie das Mobiltelefon mit dem
y
HDMI/DVI IN 3 (M HL)-Anschlu s s , um
den Bildschirm des Telefons auf dem
Fernsehgerät anzuzeigen.
Das passive MHL-Kabel dient dazu, das TV-
y
Gerät mit einem Mobiltelefon zu verbinden.
Dies ist nur bei MHL-fähigen Telefonen
y
möglich.
Eini g e A n w endungen k ö nnen über di e
y
Fernbedienung gesteuert werden.
Einige MHL-fähige Mobiltelefone können mit
y
der Magic-Fernbedienung bedient werden.
Entfernen Sie das passive MHL-Kabel vom TV-
y
Gerät, wenn:
- die MHL-Funktion deaktiviert ist
- Ihr Mobilfunkgerät im Standby-Modus
vollständig geladen ist
Français
Mobile phone
English
Mobile High-denition Link (MHL) is an interface
for transmitting digital audiovisual signals from
mobile phones to television sets.
NOTE
Connect the mobile phone to the HDMI/DVI
y
IN 3 (MHL) port to view the phone screen on
the TV.
The MHL passive cable is needed to connect
y
the TV and a mobile phone.
This only works for the MHL-enabled phone.
y
Some applications can be operated by the
y
remote control.
For some mobile phones supporting MHL,
y
yo u can control with the magic remote
control.
Remove the MHL passive cable from the TV
y
when:
- the MHL function is disabled
- your mobile device is fully charged in
standby mode
Mobile High-denition Link (MHL) est une
interface qui permet de transmettre des signaux
audiovisuels numériques depuis des téléphones
portables vers des téléviseurs.
REMARQUE
Connectez le téléphone portable au port
y
d’entrée HDMI/DVI IN 3 (MHL) pour afficher
l’écran du téléphone sur le téléviseur.
Le câble passif MHL sert à connecter la TV à
y
un téléphone portable.
Ce t te fon c ti o nn a l it é es t uniq u em e nt
y
disponibles sur les téléphones prenant en
charge la connexion MHL.
Certaines applications peuvent être utilisées
y
depuis la télécommande.
Vous pouvez utiliser la télécommande Magic
y
sur certains téléphones portables prenant en
charge la connexion MHL.
Retirez le câble passif MHL du téléviseur
y
uniquement si :
- la fonction MHL est désactivée,
- votre périphérique mobile est
complètement chargé et en mode veille ou
Page 49

MAKING CONNECTIONS
B-13
Italiano
Mobile High-denition Link (MHL) è un’interfaccia
per la trasmissione di segnali audiovisivi digitali dai
cellulari ai TV.
NOTA
Collegare il cellulare alla porta HDMI/DVI
y
IN 3 (MHL) per visualizzare lo schermo del
telefono sul TV.
È necessario un cavo passivo MHL per
y
collegare il TV a un cellulare.
Questa funzione è disponibile soltanto sui
y
telefoni che supportano l’interfaccia MHL.
È possibile utilizzare alcune applicazioni
y
tramite il telecomando.
Per al c uni cellular i che supporta n o la
y
tecnologia MHL, è possibile utilizzare il
telecomando magico.
Rimuovere il cavo passivo MHL dal TV quando:
y
- La funzione MHL è disattivata
- Il dispositivo mobile è completamente carico
in modalità standby
Español
El enlace de alta denición móvil o MHL (del inglés
“Mobile High-denition Link”) es una interfaz que
se utiliza para transmitir señales audiovisuales
digitales de teléfonos móviles a equipos de
televisión.
NOTA
Conecte el teléfono móvil al puerto HDMI/DVI IN
y
3 (MHL) para ver la pantalla del teléfono en la TV.
Se necesita un cable pasivo MHL para conectar
y
el televisor y el teléfono móvil.
Esta función solo está disponible en teléfonos
y
compatibles con MHL.
Algunas aplicaciones se pueden utilizar a través
y
del mando a distancia.
Desde algunos teléfonos móviles compatibles
y
con MHL, se puede controlar el dispositivo por
medio del mando a distancia Mágico.
Extraiga el cable pasivo MHL de la TV cuando:
y
- la función MHL esté deshabilitada
- su dispositivo móvil esté completamente
cargado y en modo de espera
Português
A Ligação de Alta Denição Móvel (MHL) é uma
interface para transmissão de sinais audiovisuais
digitais do telemóvel para a televisão.
NOTA
Ligue o telemóvel à porta HDMI/DVI IN 3 (MHL)
y
para visualizar o ecrã do telemóvel na TV.
O cabo passivo MHL é necessário para ligar a
y
TV a um telemóvel.
Funciona apenas no telemóvel compatível com
y
MHL.
É possível utilizar algumas aplicações através
y
do controlo remoto.
Em alguns telemóveis que suportam MHL, é
y
possível controlar com o Comando Magic.
Remova o cabo passivo MHL da TV quando:
y
- a função MHL está desactivada
- o seu dispositivo móvel está totalmente
carregado no modo de espera
Nederlands
MHL (Mobile High-denition Link) is een interface
voor het verzenden van digitale audiovisuele
signalen van mobiele telefoons naar televisies.
OPMERKING
Sluit de mobiele telefoon aan op de HDMI/
y
DVI IN 3 (MHL)-poort om het scherm van de
telefoon op de TV weer te geven.
De MHL passieve kabel is nodig om de
y
TV en een mobiele telefoon met elkaar te
verbinden.
Dit kan alleen met een MHL-telefoon.
y
Sommige to epas singen kunnen met de
y
afstandsbediening worden bediend.
Bij sommige mobiele telefoons met MHL kunt
y
u de Magic-afstandsbediening gebruiken.
Koppel de MHL-passieve kabel los van de TV
y
wanneer:
- de MHL-functie is uitgeschakeld
- uw mobiele apparaat volledig is opgeladen in
standby-modus
Page 50

MAKING CONNECTIONS
B-14
Ελληνικά
Το MHL (Mobile High-denition Link) είναι
μια διασύνδεση για τη μετάδοση ψηφιακών
οπτικοακουστικών σημάτων από κινητά τηλέφωνα
προς τηλεοράσεις.
ΣΗΜΕΙΩΣΗ
Συνδέστε το κινητό τηλέφωνο στη θύρα
y
HDMI/DVI IN 3 (MHL) για προβολή της
οθόνης του τηλεφώνου στην τηλεόραση.
Το παθητικό καλώδιο MHL είναι απαραίτητο
y
για τη σύνδεση της τηλεόρασης με κινητό
τηλέφωνο.
Η λειτουργία αυτή υποστηρίζεται μόνο για
y
τηλέφωνα με δυνατότητα MHL.
Ορισμένες εφαρμογές μπορούν να
y
χρησιμοποιηθούν μέσω του τηλεχειριστηρίου.
Για ορισμένα κινητά τηλέφωνα που
y
υποστηρίζουν MHL, ο χειρισμός είναι
δυνατός μέσω του Magic Remote Control
(μαγικού τηλεχειριστηρίου).
Πρέπει να αφαιρείτε το παθητικό καλώδιο MHL
y
από την τηλεόραση όταν:
- η λειτουργία MHL είναι απενεργοποιημένη
- η κινητή συσκευή είναι πλήρως φορτισμένη
και βρίσκεται σε κατάσταση αναμονής
Audio connection
OPTICAL DIGITAL AUDIO
(*Not Provided)
OPTICAL
AUDIO IN
Digital Audio System / Sound Bar(Only
42/47LA669*)
OUT
Slovenščina
Povezava MHL (Mobile High-denition Link)
je vmesnik za oddajanje digitalnih zvočnih
in vizualnih signalov iz mobilnih telefonov v
televizorje.
OPOMBA
Če želite zaslon telefona gledati na televizorju,
y
priklopite mobilni telefon v vrata HDMI/DVI IN 3
(MHL).
Pasivni kabel MHL potreb ujete za pov ezavo
y
televizorja in mobilnega telefona.
To deluje samo pri telefonih s podporo za MHL.
y
Nekatere aplikacije lahko upravljate z daljinskim
y
upravljalnikom.
Pri nekaterih telefonih, ki podpirajo MHL, lahko
y
predvajanje upravljate z daljinskim upravljalnikom
Magic.
Pasivni kabel MHL odstranite s televizorja, ko:
y
- je funkcija MHL onemogočena
- je mobilna naprava popolnoma napolnjena
v načinu pripravljenosti
English
You may use an optional external audio system
instead of the built-in speaker.
Digital optical audio connection
Transmits a digital audio signal from the TV to an
external device. Connect the external device and
the TV with the optical audio cable as shown.
NOTE
yDo not look into the optical output port.
Looking at the laser beam may damage
your vision.
yAudio with ACP (Audio Copy Protection)
function may block digital audio output.
Page 51

MAKING CONNECTIONS
B-15
Deutsch
Sie können anstelle der integrierten Lautsprecher
ein optionales externes Audiosystem verwenden.
Anschluss über ein digitales
optisches Audiokabel
Überträgt ein digitales Audiosignal vom TV-Gerät
an ein externes Gerät. Verbinden Sie das externe
Gerät, wie in der folgenden Abbildung gezeigt,
mithilfe des optischen Audiokabels mit dem TV-
Gerät.
HINWEIS
yBlicken Sie nicht in den optischen
Ausgangsanschluss. Der Laserstrahl könnte
Ihren Augen schaden.
yDie Funktion Audio mit ACP (Audio-
Kopierschutz) blockiert möglicherweise den
digitalen Audioausgang.
Français
Vous pouvez utiliser un système audio externe en
option à la place d’un haut-parleur intégré.
Connexion audio optique
numérique
Permet de transmettre un signal audio numérique
de la TV au périphérique externe. Connectez le
périphérique externe et la TV avec le câble audio
optique comme indiqué sur l’illustration suivante.
REMARQUE
yNe regardez pas dans le port de sortie
optique. Le rayon laser risquerait de vous
abîmer la vue.
yLa fonction Audio avec ACP (protection
copie audio) peut bloquer la sortie audio
numérique.
Italiano
È possibile utilizzare un sistema audio esterno
opzionale al posto dell’altoparlante integrato.
Collegamento audio ottico
digitale
Il segnale audio digitale viene trasmesso dal
televisore su un dispositivo esterno. Collegare il
dispositivo esterno e il televisore con il cavo audio
ottico come mostrato nell’illustrazione di seguito.
NOTA
yNon guardare nella porta dell’uscita ottica.
Guardare il raggio laser potrebbe provocare
danni alla vista.
yContenuti audio con funzione anticopia
(ACP, Audio Copy Protection) possono
bloccare l’uscita audio digitale.
Español
Puede emplear un sistema de audio externo
opcional en vez de los altavoces integrados.
Conexión óptica de audio digital
Transmite una señal de audio digital de la TV a un
dispositivo externo. Use el cable de audio óptico
para conectar el dispositivo externo a la TV, tal y
como se muestra en la siguiente ilustración.
NOTA
yNo mire directamente el puerto de salida
óptica. El haz de luz del láser puede dañar
la vista.
yEl audio con función ACP (protección de
copia de audio) puede bloquear la salida de
audio digital.
Page 52

MAKING CONNECTIONS
B-16
Português
Pode utilizar um sistema de áudio externo opcional
em vez das colunas incorporadas.
Ligação de áudio óptica digital
Transmite um sinal áudio digital da TV para um
dispositivo externo. Ligue o dispositivo externo
à TV com o cabo de áudio óptico, conforme
demonstrado na seguinte ilustração.
NOTA
yNão olhe para a porta de saída óptica. Se
olhar para o feixe laser, poderá prejudicar a
visão.
yO áudio com a função ACP (protecção áudio
anti-cópia) poderá bloquear a saída áudio
digital.
Nederlands
U kunt een optioneel extern audiosysteem
gebruiken in plaats van de ingebouwde speaker.
Digitale, optische audioverbinding
U kunt een digitaal audiosignaal vanaf de TV naar
een extern apparaat zenden. Sluit het externe
apparaat en de TV op elkaar aan met behulp van
de optische audiokabel, zoals aangegeven in de
volgende afbeelding.
Ελληνικά
Αντί για το ενσωματωμένο ηχείο, μπορείτε να
χρησιμοποιήσετε ένα προαιρετικό εξωτερικό
ηχοσύστημα.
Ψηφιακή οπτική σύνδεση ήχου
Μεταδίδει ένα ψηφιακό σήμα ήχου από την
τηλεόραση σε μια εξωτερική συσκευή. Συνδέστε
την εξωτερική συσκευή και την τηλεόραση με
το οπτικό καλώδιο ήχου, όπως φαίνεται στην
παρακάτω εικόνα.
ΣΗΜΕΙΩΣΗ
yΜην κοιτάτε μέσα στην οπτική έξοδο. Αν
κοιτάξετε τη δέσμη λέιζερ, υπάρχει κίνδυνος
βλάβης στην όρασή σας.
yΗ λειτουργία Audio with ACP (Audio Copy
Protection) ενδέχεται να εμποδίζει την
ψηφιακή έξοδο ήχου.
Slovenščina
Namesto vgrajenih zvočnikov uporabite izbirni
zunanji zvočni sistem.
Digitalni optični avdio priključek
Prenaša digitalni zvočni signal iz televizorja na
zunanjo napravo. Povežite zunanjo napravo
in televizor z optičnim zvočnim kablom, kot je
prikazano na naslednji sliki.
OPMERKING
yKijk niet in de optische uitgangspoort. De
laserstraal kan schadelijk zijn voor uw ogen.
yAudio met de ACP-functie (analoge
kopieerbeveiliging) kan digitale audio-uitvoer
blokkeren.
OPOMBA
yNe glejte v optična izhodna vrata. Če
pogledate v laserski žarek, si lahko
poškodujete vid.
yZvok s funkcijo ACP (zaščita zvočne kopije)
lahko blokira izhodni digitalni zvok.
Page 53

MAKING CONNECTIONS
B-17
USB connection
3
2
USB INHDD IN
1
HDD
English
Connect a USB storage device such as a USB
ash memory, external hard drive, or a USB
memory card reader to the TV and access the
Smart Share menu to use various multimedia les.
HUB
USB
(*Not Provided)
Deutsch
Verbinden Sie ein USB-Speichergerät, z. B.
USB-Flash-Speicher, eine externe Festplatte oder
einen USB-Kartenleser für Speicherkarten mit dem
TV-Gerät, und greifen Sie auf das Menü „Smart
Share“ zu, um verschiedene Multimediadateien zu
verwenden.
HINWEIS
yEinige USB-Hubs funktionieren vielleicht
nicht. Falls ein über einen USB-Hub
verbundenes USB-Gerät nicht gefunden
wird, verbinden Sie es direkt mit dem USBAnschluss am TV-Gerät.
ySchließen Sie eine externe Stromquelle an,
wenn eine USB-Verbindung erforderlich ist.
Français
Connectez un périphérique de stockage USB
comme une clé USB, un disque dur externe ou
une carte mémoire USB à la TV et accédez au
menu Smart Share pour utiliser divers chiers
multimédia.
NOTE
ySome USB Hubs may not work. If a USB
device connected using a USB Hub is not
detected, connect it to the USB port on the
TV directly.
yConnect the external power source if your
USB is needed.
REMARQUE
yCertains ports USB peuvent ne pas
fonctionner. Si un appareil USB branché
sur un port USB n’est pas détecté alors
connectez-le directement au téléviseur.
yConnectez la source d’alimentation externe
si une connexion USB est nécessaire.
Page 54

MAKING CONNECTIONS
B-18
Italiano
Collegare una periferica di archiviazione USB, ad
esempio una memoria ash USB, un hard disk
esterno, o un lettore di schede di memoria USB
al televisore e accedere al menu Smart Share per
utilizzare diversi le multimediali.
NOTA
yAlcuni hub USB potrebbero non funzionare.
Se una periferica USB collegata tramite
un hub USB non viene rilevata, collegarla
direttamente alla porta USB della TV.
yCollegarsi all’alimentazione esterna se il
dispositivo USB lo richiede.
Español
Conecte un dispositivo de almacenamiento USB,
como una memoria ash USB, un disco duro
externo o un lector de tarjetas de memoria USB a
la TV y acceda al menú Smart Share para manejar
diversos archivos multimedia.
NOTA
yEs posible que algunos concentradores
USB no funcionen. Si no se detecta un
dispositivo USB conectado mediante un
concentrador USB, conéctelo directamente
al puerto USB de la TV.
yConecte la fuente de alimentación externa
si necesita el USB.
Português
Ligue um dispositivo de armazenamento USB,
como por exemplo uma memória ash USB, uma
unidade de disco rígido externa ou um leitor de
cartões de memória USB, à TV e aceda ao menu
Smart Share para utilizar vários tipos de cheiros
multimédia.
NOTA
yAlguns hubs USB poderão não funcionar.
Se não for detectado um dispositivo USB
ligado através de um hub USB, ligue o
dispositivo directamente à porta USB na TV.
yLigue a fonte de alimentação externa se o
seu USB for necessário.
Nederlands
Sluit een USB-opslagapparaat, zoals een
USB-ashgeheugen, externe harde schijf of
een USB-geheugenkaartlezer, aan op de TV
en open het menu Smart Share om diverse
multimediabestanden te kunnen gebruiken.
OPMERKING
ySommige USB-hubs werken mogelijk niet.
Als een USB-apparaat dat via een USB-hub
is aangesloten niet wordt gedetecteerd, sluit
u het apparaat direct aan op de USB-poort
van de TV.
ySluit het USB-apparaat, indien van
toepassing, op een stopcontact aan.
Page 55

MAKING CONNECTIONS
B-19
Ελληνικά
Συνδέστε μια συσκευή αποθήκευσης USB, όπως
μια μνήμη ash USB, έναν εξωτερικό σκληρό
δίσκο ή μια συσκευή ανάγνωσης καρτών μνήμης
USB, στην τηλεόραση και μεταβείτε στο μενού
Smart Share για τη χρήση διάφορων αρχείων
πολυμέσων.
ΣΗΜΕΙΩΣΗ
yΟρισμένοι διανομείς USB ενδέχεται να
μην λειτουργούν. Εάν δεν είναι δυνατή η
ανίχνευση μιας συσκευής USB που έχει
συνδεθεί μέσω διανομέα USB, συνδέστε
την απευθείας στην υποδοχή USB της
τηλεόρασης.
yΣυνδέστε την εξωτερική πηγή τροφοδοσίας
αν η εξωτερική συσκευή διαθέτει δικό της
καλώδιο.
Slovenščina
Na televizor priključite pomnilniško napravo
USB, kot je pomnilnik USB Flash, zunanji
trdi disk ali bralnik pomnilniških kartic USB in
odprite meni Smart Share, da uporabite različne
večpredstavnostne datoteke.
CI module connection
▼PCMCIA CARD SLOT▼
(*Not Provided)
OPOMBA
yNekatera zvezdišča USB morda ne bodo
delovala. Če naprava USB, povezana prek
zvezdišča USB, ni zaznana, jo priključite
neposredno na vrata USB na televizorju.
yPriklopite vir zunanjega napajanja, če ga
naprava USB zahteva.
English
View the encrypted (pay) services in digital TV
mode. This feature is not available in all countries.
NOTE
yCheck if the CI module is inserted into the
PCMCIA card slot in the right direction. If the
module is not inserted properly, this can cause
damage to the TV and the PCMCIA card slot.
yIf the TV does not display any video and
audio when CI+ CAM is connected, please
contact to the Terrestrial/Cable/Satellite
Service Operator.
Page 56

MAKING CONNECTIONS
B-20
Deutsch
Zeigen Sie verschlüsselte Dienste (Bezahldienste)
im digitalen TV-Modus an. Diese Funktion ist in
einigen Ländern nicht verfügbar.
HINWEIS
yÜberprüfen Sie, ob das CI-Modul richtig
herum in den PCMCIA-Kartensteckplatz
gesteckt wurde. Falls das Modul nicht korrekt
eingesetzt wurde, können TV-Gerät und
PCMCIA-Kartensteckplatz beschädigt werden.
yWenn das Fernsehgerät keine Videos oder
Audio-Dateien abspielt, während es mit der CI+
CAM verbunden ist, wenden Sie sich an den
Serviceanbieter für Terrestrisch / Kabel / Satellit.
Français
Afchez les services cryptés (payants) en mode
TV numérique. Cette fonction n’est pas disponible
dans tous les pays.
REMARQUE
yVérifiez si le module CI est inséré dans le
bon sens dans la fente de la carte PCMCIA.
Si le module est mal inséré, la TV pourrait
subir des dommages ainsi que la fente de la
carte PCMCIA.
ySi le téléviseur n’affiche aucune vidéo et
n’émet aucun son lorsque l’entrée CI+ CAM
est connectée, contactez votre opérateur de
service terrestre/satellite/câble.
Español
Puede visualizar los servicios de abono (de
pago) en el modo de DTV. Esta función no está
disponible en todos los países.
NOTA
yCompruebe si el módulo CI se ha insertado
en la ranura para tarjeta PCMCIA en la
dirección correcta. Si el módulo no se ha
insertado correctamente, podría causar
daños en la TV y en la ranura para tarjeta
PCMCIA.
ySi la TV no reproduce vídeo ni audio cuando
se conecta CI+ CAM, póngase en contracto
con el operador del servicio por satélite/
cable/digital terrestre.
Português
Visualizar os serviços encriptados (pagos)
no modo de TV digital. Esta função não está
disponível em todos os países.
NOTA
yVerifique se o módulo CI está inserido na
ranhura de cartão PCMCIA no sentido
correcto. Se o módulo não estiver inserido
correctamente, pode danificar a TV e a
ranhura de cartões PCMCIA.
ySe a TV não exibir qualquer vídeo e áudio
com o CAM CI+ ligado, contacte o Operador
de Serviços de satélite/por cabo/ terrestres.
Italiano
Consente la visione dei servizi codicati (a
pagamento) in modalità TV digitale. Questa
funzione non è disponibile in tutti i paesi.
NOTA
yVerificare che il modulo CI sia inserito
nello slot della scheda PCMCIA nel verso
corretto. Se il modulo non è inserito nel
modo corretto, possono verificarsi danni alla
TV e allo slot stesso.
ySe il TV non visualizza o riproduce alcun
contenuto video e audio quando è collegata
la funzione CAM (modulo di accesso
condizionale) con CI+ (Interfaccia comune
plus), contattare l’operatore del servizio
terrestre/via cavo/satellitare.
Nederlands
Bekijk gescrambelde services (betaalservices) in
de digitale TV-modus. Deze functie is niet in alle
landen beschikbaar.
OPMERKING
yControleer of de CI-module in de juiste
richting is geplaatst in de PCMCIAkaartsleuf. Indien de module niet goed is
geplaatst, kan dit schade veroorzaken aan
de TV en de PCMCIA-kaartsleuf.
yAls de TV geen audio en video afspeelt
terwijl CI+ CAM is aangesloten, neem
dan contact op met de ethernet-/kabel-/
satellietexploitant.
Page 57

MAKING CONNECTIONS
B-21
Ελληνικά
Παρακολουθήστε κρυπτογραφημένες
(συνδρομητικές) υπηρεσίες στη λειτουργία
ψηφιακής τηλεόρασης. Αυτή η
λειτουργία δεν είναι διαθέσιμη σε όλες τις χώρες.
ΣΗΜΕΙΩΣΗ
yΕλέγξτε αν η μονάδα CI έχει τοποθετηθεί
στην εσοχή κάρτας PCMCIA με τη σωστή
κατεύθυνση. Αν δεν έχει τοποθετηθεί σωστά,
μπορεί να προκαλέσει ζημιά στην τηλεόραση
και στην υποδοχή κάρτας PCMCIA.
yΑν η τηλεόραση δεν υποστηρίζει εικόνα
και ήχο κατά τη σύνδεση CI+ CAM,
επικοινωνήστε με τον πάροχο επίγειων/
καλωδιακών/δορυφορικών υπηρεσιών.
Slovenščina
Za ogled kodiranih (plačljivih) storitev v digitalnem
televizijskem načinu.
OPOMBA
yPrepričajte se, da je CI modul pravilno
vstavljen v režo za PCMCIA kartice. Če
modul ni obrnjen pravilno, lahko pride do
poškodbe TV aparata in PCMCIA reže.
yČe se na televizorju ne predvaja video ali
zvok, ko je priklopljen modul CI+ CAM, se
obrnite na ponudnika zemeljskih/kabelskih/
satelitskih storitev.
Headphone connection
H/P OUT
English
Transmits the headphone signal from the TV to
an external device. Connect the external device
and the TV with the headphone as shown.
NOTE
AUDIO menu items are disabled when
y
connecting a headphone.
When changing AV MODE with a headphone
y
connected, the change is applied to video
but not to audio.(Depending on model)
Optical Digital Audio Out is not available
y
when connecting a headphone.
Headphone impedance: 16 Ω
y
Max audio output of headphone: 9 mW to 15
y
mW
Headphone jack size: 0.35 cm
y
(*Not Provided)
Page 58

MAKING CONNECTIONS
B-22
Deutsch
Überträgt das Kopfhörersignal vom TV-Gerät an
ein externes Gerät. Verbinden Sie die Kopfhörer,
wie in der folgenden Abbildung gezeigt, mit dem
TV-Gerät.
HINWEIS
Bei angeschlossenem Kopfhörer sind die
y
AUDIO-Menüpunkte deaktiviert.
Wenn Sie bei angeschlossenem Kopfhörer
y
den AV-MODUS ändern, wird die Änderung
für das Videosignal übernommen, nicht
jedoch für das Audiosignal.(Abhängig vom
Modell)
Der optische digitale Audioausgang ist nicht
y
verfügbar, solange Kopfhörer angeschlossen
sind.
Kopfhörerimpedanz: 16 Ω
y
Max. Ausgangsleistung am Kopfhöreran-
y
schluss: 9 mW bis 15 mW
Kopfhörerbuchsen: 0,35 cm
y
Français
Transmet le signal du casque de la TV au
périphérique externe. Connectez le périphérique
externe et la TV avec le casque comme indiqué
sur l’illustration suivante.
REMARQUE
Les éléments du menu SON sont désactivés
y
lorsque vous branchez un casque.
Si vous modifiez le MODE AV avec un
y
casque connecté, la modification est
appliquée à la vidéo mais pas au son.(selon
le modèle)
La sortie audio numérique optique n’est pas
y
disponible lorsque vous branchez un casque.
Impédance du casque : 16 Ω
y
Sortie audio max. du casque : 9 mW à
y
15 mW
Taille de la prise casque : 0,35 cm
y
Italiano
Consente la trasmissione del segnale delle cufe
dalla TV a un dispositivo esterno. Collegare il
dispositivo esterno e la TV con le cufe come
mostrato nell’illustrazione di seguito.
NOTA
Le voci del menu AUDIO sono disabilitate se
y
sono collegate le cuffie.
Quando si cambia la MODALITÀ AV con le
y
cuffie collegate, la modifica viene applicata al
video ma non all’audio.(in base al modello)
L’uscita audio ottica digitale non è disponibile
y
se sono collegate le cuffie.
Impedenza cuffie: 16 Ω
y
Uscita audio max delle cufe: da 9 mW a 15
y
mW
Dimensioni jack per cufa: 0,35 cm
y
Español
Transmite la señal de auriculares de la TV a un
dispositivo externo. Use el cable de los auriculares
para conectar el dispositivo externo a la TV, tal y
como se muestra en la siguiente ilustración.
NOTA
Al conectar los auriculares se desactivarán
y
las opciones del menú AUDIO.
Al cambiar a MODO AV con unos auriculares
y
conectados, el cambio se aplica al vídeo,
pero no al audio.(En función del modelo)
La salida óptica de audio digital no estará
y
disponible al conectar unos auriculares.
Impedancia del auricular: 16 Ω
y
Salida de audio máxima de los auriculares:
y
de 9 mW a 15 mW.
Tamaño de la clavija de los auriculares: 0,35
y
cm.
Page 59

MAKING CONNECTIONS
B-23
Português
Transmite o sinal dos auscultadores da TV
para um dispositivo externo. Ligue o dispositivo
externo à TV com os auscultadores, conforme
demonstrado na seguinte ilustração.
NOTA
Os itens do menu ÁUDIO ficam inactivos
y
quando liga os auscultadores.
Quando altera o MODO AV com auscultado-
y
res ligados, a alteração é aplicada ao vídeo,
mas não ao áudio.(Dependendo do modelo)
A saída digital áudio óptico não está disponí-
y
vel quando liga auscultadores.
Impedância dos auscultadores: 16 Ω
y
Saída de áudio máx. dos auscultadores: 9 a
y
15 mW
Tamanho da tomada para auscultadores:
y
0,35 cm
Nederlands
U kunt het hoofdtelefoonsignaal vanaf de TV naar
een extern apparaat zenden. Sluit het externe
apparaat en de TV aan op de hoofdtelefoon, zoals
aangegeven in de volgende afbeelding.
Ελληνικά
Μεταδίδει το σήμα ακουστικών από την τηλεόραση
σε μια εξωτερική συσκευή. Συνδέστε την εξωτερική
συσκευή και την τηλεόραση με τα ακουστικά, όπως
φαίνεται στην παρακάτω εικόνα.
ΣΗΜΕΙΩΣΗ
Τα στοιχεία του μενού ΗΧΟΣ απενεργοποι-
y
ούνται, όταν συνδέετε ακουστικά.
Όταν αλλάζετε τη λειτουργία AV MODE, ενώ
y
έχετε συνδέσει ακουστικά, η αλλαγή εφαρμόζεται στην εικόνα, όχι όμως στον ήχο.
(Ανάλογα με το μοντέλο)
Η οπτική ψηφιακή έξοδος ήχου δεν είναι δια-
y
θέσιμη, όταν συνδέετε ακουστικά.
Σύνθετη αντίσταση ακουστικών: 16 Ω
y
Μέγιστη έξοδος ήχου ακουστικών: 9 mW έως
y
15 mW
Μέγεθος υποδοχής ακουστικών: 0,35 cm
y
Slovenščina
Prenaša signal za slušalke iz televizorja na
zunanjo napravo. Povežite zunanjo napravo in
televizor s kablom za slušalke, kot je prikazano na
naslednji sliki.
OPMERKING
Onderdelen in het menu GELUID worden
y
uitgeschakeld wanneer u een hoofdtelefoon
aansluit.
Als u de AV-modus wijzigt terwijl een
y
hoofdtelefoon aangesloten is, wordt de
wijziging op de video maar niet op de audio
toegepast.(afhankelijk van het model)
Optische Digitale Audio Uit is niet
y
beschikbaar bij het aansluiten van een
hoofdtelefoon.
Impedantie van hoofdtelefoon: 16 Ω
y
Maximale audio-uitvoer van hoofdtelefoon: 9
y
mW tot 15 mW
Grootte van hoofdtelefoonaansluiting: 0,35
y
cm
OPOMBA
Ko so priključene slušalke, ni mogoče upora-
y
bljati možnosti iz AVDIO menija.
Če spreminjate NAČIN AV ob priključenih
y
slušalkah, vnesene spremembe veljajo za video, ne pa tudi za avdio.(odvisno od modela)
Ob priključenih slušalkah optični digitalni
y
avdio izhod ni na razpolago.
Impedanca slušalk: 16 Ω
y
Največji avdio izhod slušalke: 9–15 mW
y
Velikost vtiča slušalk: 0,35 cm
y
Page 60

MAKING CONNECTIONS
AV1
IN/OUT
B-24
Euro Scart connection
(*Not Provided)
English
Transmits the video and audio signals from an
external device to the TV set. Connect the external
device and the TV set with the euro scart cable as
shown.
Output
Type
Current
input mode
Digital TV Digital TV
Analogue TV, AV
HDMI
1 TV Out : Outputs Analogue TV or Digital TV
signals.
AV1
(TV Out
Analogue TVComponent
1
)
Deutsch
Überträgt Video- und Audiosignale von einem
externen Gerät an das TV-Gerät. Verbinden Sie
das externe Gerät, wie in der folgenden Abbildung
gezeigt, mithilfe des Euro-Scart-Kabels mit dem
TV-Gerät.
Ausgangstyp
AV1
Aktueller
Eingangsmodus
Digital-TV Digital-TV
Analog-TV, AV
HDMI
1 TV-Ausgang: Ausgang für analoge und digitale
Fernsehsignale.
(TV-Ausgang
Analog-TVComponent
1
)
HINWEIS
yDas Euro-Scart-Kabel muss signaltechnisch
abgeschirmt sein.
yBei digitalem Fernsehen im 3D-Modus
können nur 2D-Ausgangssignale über ein
SCART-Kabel ausgegeben werden. (Nur
3D-Modelle)
NOTE
yAny Euro scart cable used must be signal
shielded.
yWhen watching digital TV in 3D imaging
mode, only 2D out signals can be output
through the SCART cable. (Only 3D models)
Page 61

MAKING CONNECTIONS
B-25
Français
Transmet les signaux audio et vidéo d’un appareil
externe au téléviseur. Raccordez l’appareil externe
et le téléviseur à l’aide d’un câble péritel comme
illustré ci-dessous.
Type de sortie
AV1
Mode
d'entrée actuel
TV numérique TV numérique
TV analogique, AV
HDMI
1 Sortie TV : sortie de signaux en mode TV
analogique ou en mode TV numérique.
(sortie TV
TV analogiqueComposant
1
)
REMARQUE
yTous les câbles Euro scart utilisés doivent
être des câbles de signal blindés.
yQuand le mode 3D est sélectionné sur la
TV numérique, seuls les signaux de sortie
2D peuvent être émis via le câble péritel.
(modèles 3D uniquement)
Italiano
Consente la trasmissione dei segnali audio e video
da un dispositivo esterno al televisore. Collegare il
dispositivo esterno e il televisore con il cavo Euro
Scart come mostrato nell’illustrazione di seguito.
Tipo di uscita
Modalità
di ingresso
corrente
TV digitale TV digitale
TV analogica, AV
HDMI
1 Uscita TV: uscite segnali TV analogica o TV
digitale.
AV1
(Uscita TV
TV analogicaComponent
1
)
NOTA
yI cavi Euro Scart devono essere schermati.
yQuando si guarda il TV digitale in modalità
immagini 3D, solo i segnali di uscita 2D
possono passare attraverso il cavo SCART.
(Solo modelli 3D)
Page 62

MAKING CONNECTIONS
B-26
Español
Transmite las señales de audio y vídeo de un
dipositivo externo a la TV. Use el cable euroconector para conectar el dispositivo externo a la TV, tal
y como se muestra en la siguiente ilustración.
Tipo de salida
AV1
Modo de
entrada
TV digital TV digital
TV analógica, AV
HDMI
1 Salida de TV: salida de señales de TV
analógica o digital.
(Salida de TV
TV analógicaComponent
1
)
NOTA
yTodo cable euroconector que se emplee
deberá estar blindado.
yCuando visualice la TV digital en modo de
imagen 3D, sólo podrá utilizar el euroconector
para las señales de salida 2D. (Solo para los
modelos 3D)
Português
Transmite os sinais de vídeo e áudio de um
dispositivo externo para a TV. Ligue o dispositivo
externo à TV com o cabo Euro Scart, conforme
demonstrado na ilustração seguinte.
Tipo de saída
AV1
Modo de
entrada actual
TV Digital TV Digital
TV Analógica, AV
HDMI
1 Saída TV: Sinais de Saída de TV Analógica ou
Digital.
(Saída TV
TV AnalógicaComponentes
1
)
NOTA
yQualquer cabo Euro scart utilizado terá de
ser blindado.
yQuando estiver a ver TV digital no modo de
imagem em 3D, apenas os sinais de saída
2D poderão ser emitidos através do cabo
SCART. (Apenas em modelos com 3D)
Page 63

MAKING CONNECTIONS
B-27
Nederlands
U kunt de video- en audiosignalen vanaf een etern
apparaat naar de TV zenden. Sluit het externe
apparaat en de TV op elkaar aan met behulp van
de Scart-kabel, zoals aangegeven in de volgende
afbeelding.
Uitvoertype
AV1
1
Huidige
invoermodus
Digitale TV Digitale TV
Analoge TV, AV
HDMI
1 TV Uit: voert analoge TV-signalen of Digitale
TV-signalen uit.
(TV Uit
Analoge TVComponent
)
OPMERKING
yVoor elke Scart-kabel moet het signaal zijn
afgeschermd.
yTijdens het kijken naar digitale TV in de
modus voor 3D-beelden kunnen alleen
2D-uitsignalen worden uitgevoerd via de
SCART-kabel. (Alleen 3D-modellen)
Ελληνικά
Μεταδίδει τα σήματα εικόνας και ήχου από μια
εξωτερική συσκευή στην τηλεόραση. Συνδέστε την
εξωτερική συσκευή και την τηλεόραση με το καλώδιο Euro Scart, όπως φαίνεται στην παρακάτω
ει- κόνα.
Τύπος εξόδου
Τρέχουσα
λειτουργία
εισόδου
Ψηφιακή τηλεόραση Ψηφιακή
Αναλογική τηλεόραση, AV
Component
HDMI
1 TV Out : Έξοδοι αναλογικού σήματος
τηλεόρασης ή ψηφιακού σήματος τηλεόρασης.
AV1
(Έξοδος TV
τηλεόραση
Αναλογική
τηλεόραση
1
)
ΣΗΜΕΙΩΣΗ
yΚάθε καλώδιο Euro scart που
χρησιμοποιείται πρέπει να διαθέτει θωράκιση
σήματος.
yΌταν παρακολουθείτε ψηφιακή τηλεόραση
στη λειτουργία απεικόνισης 3D, μόνο τα
σήματα εξόδου 2D μεταδίδονται μέσω του
καλωδίου SCART. (Μόνο σε μοντέλα 3D)
Page 64

MAKING CONNECTIONS
B-28
Slovenščina
Prenaša video in avdio signale iz zunanje naprave
na televizor. Povežite zunanjo napravo in televizor
z evro scart kablom, kot je prikazano na naslednji
sliki.
Vrsta izhoda
AV1
Trenutni
način vhoda
Digitalna TV Digitalna TV
Analogna TV, AV
HDMI
1 TV Out: Izhod za analogne in digitalne
televizijske signale.
(TV-izhod
Analogna TVKomponentni
1
)
OPOMBA
yKabel Euro Scart mora biti signalno zaščiten.
yPri gledanju digitalne televizije v 3D-načinu
je mogoče po kablu SCART oddajati le
2D-izhodne signale. (samo 3D-modeli)
English
Connect various external devices to the TV
and switch input modes to select an external
device. For more information of external device’s
connection, refer to the manual provided with each
device.
Available external devices are: HD receivers,
DVD players, VCRs, audio systems, USB storage
devices, PC, gaming devices, and other external
devices.
NOTE
yThe external device connection may differ
from the model.
yConnect external devices to the TV
regardless of the order of the TV port.
yIf you record a TV program on a DVD
recorder or VCR, make sure to connect the
TV signal input cable to the TV through a
DVD recorder or VCR. For more information
of recording, refer to the manual provided
with the connected device.
yRefer to the external equipment’s manual for
operating instructions.
yIf you connect a gaming device to the TV,
use the cable supplied with the gaming
device.
yIn PC mode, there may be noise associated
with the resolution, vertical pattern, contrast
or brightness. If noise is present, change
the PC output to another resolution, change
the refresh rate to another rate or adjust the
brightness and contrast on the PICTURE
menu until the picture is clear.
yIn PC mode, some resolution settings may
not work properly depending on the graphics
card.
Page 65

MAKING CONNECTIONS
B-29
Deutsch
Verbinden Sie mehrere externe Geräte mit dem
TV-Gerät, und wechseln Sie die Eingangsmodi,
um ein externes Gerät auszuwählen. Weitere
Informationen zum Anschluss von externen
Geräten entnehmen Sie bitte dem Handbuch des
jeweiligen Gerätes.
Verfügbare externe Geräte sind: HD-Receiver,
DVD-Player, Videorekorder, Audiosysteme, USBSpeichergeräte, PCs, Spielkonsolen und weitere
externe Geräte.
HINWEIS
yDer Anschluss für externe Geräte kann von
Modell zu Modell unterschiedlich sein.
yVerbinden Sie externe Geräte unabhängig
von der Reihenfolge der Anschlüsse mit
dem TV-Gerät.
yWenn Sie eine Fernsehsendung über DVD-
Player oder Videorekorder aufnehmen,
vergewissern Sie sich, dass das TV-Gerät
über das Eingangskabel für das TV-Signal
mit dem DVD-Player oder Videorekorder
verbunden ist. Weitere Informationen zu
Aufnahmen entnehmen Sie bitte dem
Handbuch des verbundenen Gerätes.
yAnweisungen zum Betrieb finden Sie im
Handbuch des externen Gerätes.
yWenn Sie eine Spielekonsole mit dem TV-
Gerät verbinden, verwenden Sie das mit der
Konsole mitgelieferte Kabel.
yIm PC-Modus kann es hinsichtlich
Auflösung, vertikalem Muster, Kontrast oder
Helligkeit zu Rauschen kommen. Wenn
Rauschen auftritt, stellen Sie den PC auf
eine andere Auflösung ein, ändern Sie die
Bildwiederholrate, oder passen Sie Helligkeit
und Kontrast im Menü „BILD“ an, bis das
Bild optimal ist.
yAbhängig von der Grafikkarte
funktionieren im PC-Modus einige
Auflösungseinstellungen möglicherweise
nicht ordnungsgemäß.
Français
Connectez divers périphériques externes à la
TV et changez de mode de source d’entrée pour
sélectionner un périphérique externe. Pour en
savoir plus sur le raccordement d’un périphérique
externe, reportez-vous au manuel fourni avec ce
dernier.
Les périphériques externes disponibles sont les
suivants : récepteurs HD, lecteurs DVD, VCR,
systèmes audio, périphériques de stockage USB,
PC, consoles de jeu et autres périphériques
externes.
REMARQUE
yLe raccordement du périphérique externe
peut différer du modèle.
yConnectez des périphériques externes à la
TV sans tenir compte de l’ordre du port TV.
ySi vous enregistrez un programme TV sur un
enregistreur de DVD ou un magnétoscope,
veillez à raccorder le câble de source
d’entrée du signal de la TV à la TV via un
enregistreur de DVD ou un magnétoscope.
Pour en savoir plus sur l’enregistrement,
reportez-vous au manuel fourni avec le
périphérique connecté.
yVeuillez consulter le manuel de l’équipement
externe contenant les instructions
d’utilisation.
ySi vous connectez une console de jeu à la
TV, utilisez le câble fourni avec la console
de jeu.
yEn mode PC, un bruit peut être associé
à la résolution, au modèle vertical, au
contraste ou à la luminosité. En présence
de bruit, changez la résolution de la
sortie PC, changez le niveau du taux de
rafraîchissement ou réglez la luminosité et
le contraste dans le menu IMAGE jusqu’à ce
que l’image soit nette.
yEn mode PC, certains réglages de la
résolution peuvent ne pas fonctionner
correctement en fonction de la carte
graphique utilisée.
Page 66

MAKING CONNECTIONS
B-30
Italiano
Collegare diversi dispositivi esterni al televisore e
modicare la modalità di ingresso per selezionare
un dispositivo esterno. Per ulteriori informazioni
sul collegamento di un dispositivo esterno,
consultare il manuale fornito in dotazione con
ciascun dispositivo.
È possibile collegare i seguenti dispositivi esterni:
ricevitori HD, lettori DVD, VCR, sistemi audio,
periferiche di archiviazione USB, PC, console per
videogiochi e altri dispositivi esterni.
NOTA
yIl collegamento del dispositivo esterno può
variare in base al modello.
yCollegare i dispositivi esterni al televisore
a prescindere dall’ordine della porta del
televisore.
ySe si registra un programma TV su un
registratore DVD o VCR, accertarsi di
collegare il cavo di ingresso del segnale al
televisore attraverso un registratore DVD
o VCR. Per ulteriori informazioni sulla
registrazione, consultare il manuale fornito
in dotazione con il dispositivo collegato.
yConsultare il manuale dell’apparecchiatura
esterna per le istruzioni operative.
ySe si collega una console per videogiochi
alla TV, utilizzare il cavo fornito con il
dispositivo.
yIn modalità PC, possono essere presenti
interferenze relative alla risoluzione, schemi
verticali, contrasto o luminosità. In caso
di interferenze, modificare la modalità
PC impostando un’altra risoluzione o
modificando la frequenza di aggiornamento
oppure regolare luminosità e contrasto
sul menu IMMAGINE finché non si ottiene
un’immagine nitida.
yA seconda della scheda grafica utilizzata,
alcune impostazioni di risoluzione
potrebbero non essere adatte alla modalità
PC.
Español
Puede conectar varios dispositivos externos a la
TV y cambiar entre los modos de entrada para
seleccionar un dispositivo externo. Para obtener
más información sobre la conexión de dispositivos
externos, consulte el manual que se incluye con
cada dispositivo.
Los dispositivos externos disponibles son:
receptores HD, reproductores de DVD,
vídeos, sistemas de audio, dispositivos de
almacenamiento USB, PC, consolas de juegos,
etc.
NOTA
yLa conexión de dispositivos externos puede
variar entre distintos modelos.
yConecte los dispositivos externos a la
TV independientemente del orden de los
puertos de la TV.
ySi graba un programa de TV en un grabador
de DVD o un vídeo, asegúrese de conectar
el cable de entrada de señal de TV a la
TV a través del grabador de DVD o del
vídeo. Para obtener más información sobre
la grabación, consulte el manual que se
incluye con el dispositivo que se conecte.
yConsulte el manual del equipo externo para
obtener las instrucciones de funcionamiento.
ySi conecta una consola de juegos a la
TV, emplee el cable proporcionado con el
dispositivo en cuestión.
yEn el modo PC, puede que se genere
ruido asociado a la resolución, al patrón
vertical, al contraste o a la luminosidad.
Si se produce ruido, cambie la salida PC
a otra resolución, cambie la frecuencia de
actualización o ajuste la luminosidad y el
contraste del menú IMAGEN hasta que la
imagen se muestre más clara.
yEn el modo PC, puede que algunos ajustes
de la resolución no funcionen correctamente
en función de la tarjeta gráfica.
Page 67

MAKING CONNECTIONS
B-31
Português
Ligue vários dispositivos externos à TV e mude os
modos de entrada para seleccionar um dispositivo
externo. Para mais informações sobre a ligação
de dispositivos externos, consulte o manual
fornecido com cada dispositivo.
Os dispositivos externos disponíveis são:
receptores HD, leitores de DVD, videogravadores,
sistemas de áudio, dispositivos de
armazenamento USB, PC, dispositivos de jogos e
outros dispositivos externos.
NOTA
yA ligação do dispositivo externo pode ser
diferente da do modelo.
yLigue dispositivos externos à TV
independentemente da ordem da porta da
TV.
ySe gravar um programa de televisão num
gravador de DVD ou num videogravador,
não se esqueça de ligar o cabo do de
entrada do sinal de TV à TV através do
gravador de DVD ou do videogravador.
Para mais informações sobre a gravação,
consulte o manual fornecido com o
dispositivo ligado.
yConsulte o manual do equipamento externo
sobre instruções de funcionamento.
ySe ligar um dispositivo de jogos à TV, utilize
o cabo fornecido com o dispositivo de jogos.
yNo modo PC, poderá ser produzido um
ruído associado à resolução, padrão
vertical, contraste ou luminosidade. Se se
verificar ruído, altere a saída do PC para
outra resolução, altere a frequência de
actualização para outra frequência ou ajuste
a luminosidade e o contraste no menu
IMAGEM até a imagem ficar nítida.
yNo modo PC, algumas definições
de resolução podem não funcionar
correctamente, dependendo da placa
gráfica.
Nederlands
U kunt diverse externe apparaten aansluiten op
de TV en de invoerbron wijzigen om het externe
apparaat te kiezen. Zie voor meer informatie
over het aansluiten van externe apparaten de
handleiding die bij elk extern apparaat is geleverd.
De mogelijke externe apparaten zijn: HDontvangers, DVD-spelers, videorecorders,
audiosystemen, USB-opslagapparaten, PC‘s,
game-apparaten en andere externe apparaten.
OPMERKING
yDe aansluiting van externe apparaten kan
per model verschillen.
ySluit externe apparaten aan op de TV,
ongeacht de volgorde van de TV-poort.
yAls u een TV-programma opneemt op een
DVD-recorder of videorecorder, moet u
ervoor zorgen dat de TV-signaalinvoerkabel
via de DVD-recorder of videorecorder op de
TV is aangesloten. Zie voor meer informatie
over het opnemen de handleiding die bij het
aangesloten apparaat is geleverd.
yRaadpleeg de handleiding bij het externe
apparaat voor bedieningsinstructies.
yAls u een game-apparaat aansluit op de
TV, gebruik dan de kabel die bij het gameapparaat is geleverd.
yHet is mogelijk dat in de PC-modus
ruis aan de resolutie, het verticale
patroon, het contrast of de helderheid
is gekoppeld. Wijzig in dat geval de PCuitvoer in een andere resolutie, verander
de vernieuwingsfrequentie in een andere
frequentie of pas de helderheid en het
contrast in het menu BEELD aan tot het
beeld duidelijk is.
yAfhankelijk van de grafische kaart werken
bepaalde resolutie-instellingen in de PCmodus mogelijk niet juist.
Page 68

MAKING CONNECTIONS
B-32
Ελληνικά
Για να επιλέξετε μια εξωτερική συσκευή, συνδέστε
διάφορες εξωτερικές συσκευές στην τηλεόραση
και αλλάξτε λειτουργίες εισόδου. Για περισσότερες
πληροφορίες σχετικά με τη σύνδεση εξωτερικών
συσκευών, ανατρέξτε στο εγχειρίδιο που
παρέχεται με κάθε συσκευή.
Οι διαθέσιμες εξωτερικές συσκευές περιλαμβάνουν
δέκτες HD, συσκευές αναπαραγωγής DVD,
VCR, ηχοσυστήματα, συσκευές αποθήκευσης
USB, υπολογιστές, παιχνιδομηχανές και άλλες
εξωτερικές συσκευές.
ΣΗΜΕΙΩΣΗ
yΗ σύνδεση εξωτερικών συσκευών ενδέχεται
να διαφέρει ανάλογα με το μοντέλο.
yΜπορείτε να συνδέσετε εξωτερικές συσκευές
στην τηλεόραση, ανεξάρτητα από τη σειρά
της θύρας της τηλεόρασης.
yΓια να εγγράψετε ένα τηλεοπτικό πρόγραμμα
σε μια συσκευή εγγραφής DVD ή VCR,
βεβαιωθείτε ότι έχετε συνδέσει το καλώδιο
εισόδου τηλεοπτικού σήματος στη συσκευή
εγγραφής DVD ή VCR. Για περισσότερες
πληροφορίες σχετικά με την εγγραφή,
ανατρέξτε στο εγχειρίδιο που παρέχεται με
τη συνδεδεμένη συσκευή.
yΓια οδηγίες λειτουργίας, ανατρέξτε στο
εγχειρίδιο του εξωτερικού εξοπλισμού.
yΓια να συνδέσετε μια παιχνιδομηχανή στην
τηλεόραση, χρησιμοποιήστε το καλώδιο που
παρέχεται με την παιχνιδομηχανή.
yΣτη λειτουργία PC, ενδέχεται να υπάρχει
θόρυβος λόγω της ανάλυσης, του
κάθετου πλέγματος, της αντίθεσης ή της
φωτεινότητας. Εάν υπάρχει θόρυβος,
αλλάξτε την ανάλυση στη λειτουργία PC
ή το ρυθμό ανανέωσης ή ρυθμίστε τη
φωτεινότητα και την αντίθεση στο μενού
ΕΙΚΟΝΑ, μέχρι να είναι καθαρή η εικόνα.
yΣε λειτουργία PC, ορισμένες ρυθμίσεις
ανάλυσης ενδεχομένως να μην λειτουργούν
σωστά, ανάλογα με την κάρτα γραφικών.
Slovenščina
Priključite različne zunanje naprave na televizor
in vklopite vhodne načine, da izberete zunanjo
napravo. Za dodatne informacije o priključitvi
zunanje naprave glejte navodila za uporabo, ki so
priložena posamezni napravi.
Zunanje naprave, ki so na voljo, so: HDsprejemniki, DVD-predvajalniki, videorekorderji,
zvočni sistemi, pomnilniki USB, računalniki, igralne
konzole in druge zunanje naprave.
OPOMBA
yPovezava z zunanjo napravo je lahko
odvisna od modela.
yZunanje naprave priključite na priključke
televizorja v poljubnem zaporedju.
yČe televizijski program snemate na DVD-
snemalnik ali videorekorder, morate DVD-
snemalnik ali videorekorder priključiti na
televizor s signalnim vhodnim kablom za
televizor. Za dodatne informacije o snemanju
glejte navodila za uporabo, ki so priložena
priključeni napravi.
yNavodila za uporabo si oglejte v priročniku
zunanje opreme.
yČe želite na televizor priključiti igralno
konzolo, uporabite kabel, ki je bil priložen
igralni konzoli.
yV načinu računalnika se lahko pojavi šum, ki
je povezan z ločljivostjo, navpičnim vzorcem,
kontrastom ali svetlostjo. Če se pojavi šum,
spremenite izhodno ločljivost računalnika,
spremenite hitrost osveževanje ali v meniju
SLIKA prilagodite svetlost in kontrast, dokler
slika ni jasna.
yV načinu računalnika nekatere nastavitve
ločljivosti morda ne bodo delovale pravilno
(odvisno od grafične kartice).
Page 69

SPECIFICATIONS
SPECIFICATIONS
Product specifications may be changed without prior notice due to upgrade of product functions.
For the power supply and power consumption, refer to the label attached to the product.
32LA62** 39LA62** 42LA62**
32LA6208-ZA
MODELS
Dimensions
(W x H x D)
Weight With stand (kg)
Power requirement
Power consumption
MODELS
Dimensions
(W x H x D)
Weight With stand (kg)
Power requirement
Power consumption
MODELS
Dimensions
(W x H x D)
Weight With stand (kg)
Power requirement
Power consumption 180 W
With stand (mm)
Without stand(
Without stand (kg)
With stand (
Without stand(
Without stand (kg)
With stand (mm)
Without stand(
Without stand (kg)
mm
32LA620S-ZA
32LA620V-ZA
32LA6218-ZD
32LA621S-ZD
32LA621V-ZD
733 x 499 x 242
733 x 444 x 78 963 x 562 x 78 964 x 573 x 78
mm)
7.6 11.8 11.8
6.4 10.0 10.0
AC 100-240 V~ 50 / 60 Hz AC 100-240 V~ 50 / 60 Hz AC 100-240 V~ 50 / 60 Hz
80 W 90 W 110 W
47LA62** 50LA62** 55LA62**
47LA6208-ZA
47LA620S-ZA
47LA620V-ZA
47LA6218-ZD
47LA621S-ZD
47LA621V-ZD
1076 x 695x 327 1131 x 725 x 327 1246 x 803 x 343
)
1076 x 637 x 79.4 1131
mm)
15.0 17.0 21.5
12.8 14.5 18.7
AC 100-240 V~ 50 / 60 Hz AC 100-240 V~ 50 / 60 Hz AC 100-240 V~ 50 / 60 Hz
130 W 140 W 160 W
60LA62**
60LA6208-ZA
60LA620S-ZA
60LA620V-ZA
60LA6218-ZD
60LA621S-ZD
60LA621V-ZD
1355 x 865 x 343
mm) 1355
25.9
23.1
AC 100-240 V~ 50 / 60 Hz
x
793
x
65.3
39LA6208-ZA
39LA620S-ZA
39LA620V-ZA
39LA6218-ZD
39LA621S-ZD
39LA621V-ZD
963 x 631 x 296 964 x 631 x 294
50LA6208-ZA
50LA620S-ZA
50LA620V-ZA
50LA6218-ZD
50LA621S-ZD
50LA621V-ZD
x
667
x
80.9 1246 x 732 x 77.2
42LA6208-ZA
42LA620S-ZA
42LA620V-ZA
42LA6218-ZD
42LA621S-ZD
42LA621V-ZD
55LA6208-ZA
55LA620S-ZA
55LA620V-ZA
55LA6218-ZD
55LA621S-ZD
55LA621V-ZD
B-33
Page 70

SPECIFICATIONS
B-34
MODELS
Dimensions
(W x H x D)
Weight With stand (kg)
Power requirement
Power consumption
MODELS
Dimensions
(W x H x D)
Weight With stand (kg)
Power requirement
Power consumption
With stand (mm)
Without stand(
Without stand (kg)
With stand (mm)
Without stand(
Without stand (kg)
32LA64** 42LA64** 47LA64**
32LA6400-ZA
32LA6408-ZA
32LA640S-ZA
32LA640V-ZA
32LA6418-ZB
32LA641S-ZB
32LA641V-ZB
32LA6418-ZC
32LA641S-ZC
32LA641V-ZC
32LA6448-ZA
32LA644S-ZA
32LA644V-ZA
32LA6458-ZC
32LA645S-ZC
32LA645V-ZC
743 x 518 x 241 973 x 652 x 294 1086 x 711 x 327
743 x 461 x 36.4 973 x 591 x 36.3 1086
mm)
9.2 14.2 17.5
8.0 12.4 15.0
AC 100-240 V~ 50 / 60 Hz AC 100-240 V~ 50 / 60 Hz AC 100-240 V~ 50 / 60 Hz
90 W 110 W 120 W
50LA64** 55LA64** 60LA64**
50LA6400-ZA
50LA6408-ZA
50LA640S-ZA
50LA640V-ZA
50LA6418-ZB
50LA641S-ZB
50LA641V-ZB
50LA6418-ZC
50LA641S-ZC
50LA641V-ZC
50LA6448-ZA
50LA644S-ZA
50LA644V-ZA
50LA6458-ZC
50LA645S-ZC
50LA645V-ZC
1137 x 732 x 327 1260 x 821 x 343
x
677
x
1137
mm)
19.2 24.2
16.7 21.5
AC 100-240 V~ 50 / 60 Hz AC 100-240 V~ 50 / 60 Hz AC 100-240 V~ 50 / 60 Hz
130 W 140 W
37.2 1260 x 753 x 36.3
42LA6400-ZA
42LA6408-ZA
42LA640S-ZA
42LA640V-ZA
42LA6418-ZB
42LA641S-ZB
42LA641V-ZB
42LA6418-ZC
42LA641S-ZC
42LA641V-ZC
42LA6448-ZA
42LA644S-ZA
42LA644V-ZA
42LA6458-ZC
42LA645S-ZC
42LA645V-ZC
55LA6400-ZA
55LA6408-ZA
55LA640S-ZA
55LA640V-ZA
55LA6418-ZB
55LA641S-ZB
55LA641V-ZB
55LA6418-ZC
55LA641S-ZC
55LA641V-ZC
55LA6448-ZA
55LA644S-ZA
55LA644V-ZA
55LA6458-ZC
55LA645S-ZC
55LA645V-ZC
47LA6400-ZA
47LA6408-ZA
47LA640S-ZA
47LA640V-ZA
47LA6418-ZB
47LA641S-ZB
47LA641V-ZB
47LA6418-ZC
47LA641S-ZC
47LA641V-ZC
47LA6448-ZA
47LA644S-ZA
47LA644V-ZA
47LA6458-ZC
47LA645S-ZC
47LA645V-ZC
x
654
x
60LA6400-ZA
60LA6408-ZA
60LA640S-ZA
60LA640V-ZA
60LA6418-ZB
60LA641S-ZB
60LA641V-ZB
60LA6418-ZC
60LA641S-ZC
60LA641V-ZC
60LA6448-ZA
60LA644S-ZA
60LA644V-ZA
60LA6458-ZC
60LA645S-ZC
60LA645V-ZC
1393 x 888 x 343
1393 x 834 x 41.4
29.7
27.0
180 W
36.3
Page 71

MODELS
Dimensions
(W x H x D)
Weight With stand (kg)
Power requirement
Power consumption
MODELS
Dimensions
(W x H x D)
Weight With stand (kg)
Power requirement
Power consumption
With stand (mm)
Without stand(
Without stand (kg)
With stand (mm)
Without stand(
Without stand (kg)
SPECIFICATIONS
32LA66** 42LA66** 47LA66**
32LA6608-ZA
32LA660S-ZA
32LA660V-ZA
32LA6628-ZC
32LA662S-ZC
32LA662V-ZC
32LA6678-ZB
32LA667S-ZB
32LA667V-ZB
32LA6698-ZE
32LA669S-ZE
32LA669V-ZE
725 x 501 x 241 957 x 635 x 294 1069 x 695 x 327
725 x 443 x 37.1 957 x 574 x 35 1069 x 637 x 35
mm)
8.7 14.3 17.2
7.5 12.4 14.7
AC 100-240 V~ 50 / 60 Hz AC 100-240 V~ 50 / 60 Hz AC 100-240 V~ 50 / 60 Hz
90 W 110 W 120 W
50LA66** 55LA66** 42LA69**
50LA6608-ZA
50LA660S-ZA
50LA660V-ZA
50LA6628-ZC
50LA662S-ZC
50LA662V-ZC
50LA6678-ZB
50LA667S-ZB
50LA667V-ZB
50LA6698-ZE
50LA669S-ZE
50LA669V-ZE
1129 x 730 x 326 1238 x 802 x 343 951 x 634 x 269
x
672
x
1129
mm)
19.8 22.7 14.3
17.3 20.0 12.2
AC 100-240 V~ 50 / 60 Hz AC 100-240 V~ 50 / 60 Hz AC 100-240 V~ 50 / 60 Hz
130 W 140 W 110 W
37.2 1238
42LA6608-ZA
42LA660S-ZA
42LA660V-ZA
42LA6628-ZC
42LA662S-ZC
42LA662V-ZC
42LA6678-ZB
42LA667S-ZB
42LA667V-ZB
42LA6698-ZE
42LA669S-ZE
42LA669V-ZE
55LA6608-ZA
55LA660S-ZA
55LA660V-ZA
55LA6628-ZC
55LA662S-ZC
55LA662V-ZC
55LA6678-ZB
55LA667S-ZB
55LA667V-ZB
55LA6698-ZE
55LA669S-ZE
55LA669V-ZE
x
733
x
47LA6608-ZA
47LA660S-ZA
47LA660V-ZA
47LA6628-ZC
47LA662S-ZC
47LA662V-ZC
47LA6678-ZB
47LA667S-ZB
47LA667V-ZB
47LA6698-ZE
47LA669S-ZE
47LA669V-ZE
42LA6908-ZA
42LA690S-ZA
42LA690V-ZA
42LA6908-ZB
42LA690S-ZB
42LA690V-ZB
42LA6918-ZA
42LA691S-ZA
42LA691V-ZA
42LA6928-ZC
42LA692S-ZC
42LA692V-ZC
35.2 951
x
564
x
B-35
34.5
Page 72

SPECIFICATIONS
B-36
47LA69** 55LA69** 42LA74**
47LA6908-ZA
47LA690S-ZA
47LA690V-ZA
47LA6908-ZB
MODELS
Dimensions
(W x H x D)
Weight With stand (kg)
Power requirement
Power consumption
MODELS
Dimensions
(W x H x D)
Weight With stand (kg)
Power requirement
Power consumption
MODELS
Dimensions
(W x H x D)
Weight With stand (kg)
Power requirement
Power consumption 140 W 180 W
With stand (mm)
Without stand(
Without stand (kg)
With stand (mm)
Without stand(
Without stand (kg)
With stand (mm)
Without stand(
Without stand (kg)
47LA690S-ZB
47LA690V-ZB
47LA6918-ZA
47LA691S-ZA
47LA691V-ZA
47LA6928-ZC
47LA692S-ZC
47LA692V-ZC
1063 x 697 x 269
x
627
x
1063
mm)
16.7
14.6
AC 100-240 V~ 50 / 60 Hz AC 100-240 V~ 50 / 60 Hz AC 100-240 V~ 50 / 60 Hz
120 W
47LA71** 55LA71** 47LA74**
47LA7108-ZA
47LA710S-ZA
47LA710V-ZA
1069 x 695 x 327 1238 x 802 x 343 1063 x 697 x 269
1069 x 637 x 35 1238
mm)
17.2 22.7
14.7 20.0
AC 100-240 V~ 50 / 60 Hz AC 100-240 V~ 50 / 60 Hz AC 100-240 V~ 50 / 60 Hz
120 W 140 W 120 W
55LA74** 60LA74** 32LN57**
55LA7408-ZA
55LA740S-ZA
55LA740V-ZA
55LA7408-ZB
55LA740S-ZB
55LA740V-ZB
55LA7418-ZA
55LA741S-ZA
55LA741V-ZA
1233 x 793 x 316
mm) 1233
x
22.8 27.6
20.0 24.8
AC 100-240 V~ 50 / 60 Hz AC 100-240 V~ 50 / 60 Hz AC 100-240 V~ 50 / 60 Hz
34.5
723
x
34.7 1352 x 794 x 59.9
55LA6908-ZA
55LA690S-ZA
55LA690V-ZA
55LA6908-ZB
55LA690S-ZB
55LA690V-ZB
55LA6918-ZA
55LA691S-ZA
55LA691V-ZA
55LA6928-ZC
55LA692S-ZC
55LA692V-ZC
1233 x 793 x 316
1233 x 723 x 34.7
22.8
20.0
140 W
55LA7108-ZA
55LA710S-ZA
55LA710V-ZA
60LA7408-ZA
60LA740S-ZA
60LA740V-ZA
60LA7408-ZB
60LA740S-ZB
60LA740V-ZB
60LA7418-ZA
60LA741S-ZA
60LA741V-ZA
1352 x 848 x 316
x
733
x
35.2 1063
42LA7408-ZA
42LA740S-ZA
42LA740V-ZA
42LA7408-ZB
42LA740S-ZB
42LA740V-ZB
42LA7418-ZA
42LA741S-ZA
42LA741V-ZA
951 x 634 x 269
951
x
564
x
34.5
14.3
12.2
110 W
47LA7408-ZA
47LA740S-ZA
47LA740V-ZA
47LA7408-ZB
47LA740S-ZB
47LA740V-ZB
47LA7418-ZA
47LA741S-ZA
47LA741V-ZA
x
627
x
34.5
16.7
14.6
32LN5707-ZA
32LN5708-ZA
32LN570R-ZA
32LN570S-ZA
32LN570U-ZA
32LN570V-ZA
738 x 497 x 207
738 x 449 x 79
7.0
6.4
80 W
Page 73

MODELS
Dimensions
(W x H x D)
Weight With stand (kg)
Power requirement
Power consumption
MODELS
Dimensions
(W x H x D)
Weight With stand (kg)
Power requirement
With stand (mm)
Without stand(
Without stand (kg)
With stand (mm)
Without stand(
Without stand (kg)
SPECIFICATIONS
39LN57** 42LN57** 47LN57**
39LN5707-ZA
39LN5708-ZA
39LN570R-ZA
39LN570S-ZA
39LN570U-ZA
39LN570V-ZA
894 x 587 x 236 968 x 629 x 236 1080 x 694 x 264
894 x 537 x 79 968 x 579 x 79 1080 x 642 x 80.5
mm)
9.7 10.7 14.7
8.6 9.6 13.4
AC 100-240 V~ 50 / 60 Hz AC 100-240 V~ 50 / 60 Hz
100 W
50LN57** 55LN57** 60LN57**
50LN5707-ZA
50LN5708-ZA
50LN570R-ZA
50LN570S-ZA
50LN570U-ZA
50LN570V-ZA
1136 x 727 x 264 1250 x 790 x 297 1359 x 852 x 297
1136 x 673 x 82.1 1250 x 737 x 79.1 1359 x 799 x 67.2
mm)
15.6 21.2 26.3
14.2 19.1 24.2
AC 100-240 V~ 50 / 60 HzAC 100-240 V~ 50 / 60 HzAC 100-240 V~ 50 / 60 Hz
42LN5707-ZA
42LN5708-ZA
42LN570R-ZA
42LN570S-ZA
42LN570U-ZA
42LN570V-ZA
110 W
55LN5707-ZA
55LN5708-ZA
55LN570R-ZA
55LN570S-ZA
55LN570U-ZA
55LN570V-ZA
47LN5707-ZA
47LN5708-ZA
47LN570R-ZA
47LN570S-ZA
47LN570U-ZA
47LN570V-ZA
AC 100-240 V~ 50 / 60
Hz
130 W
60LN5707-ZA
60LN5708-ZA
60LN570R-ZA
60LN570S-ZA
60LN570U-ZA
60LN570V-ZA
B-37
Power consumption
MODELS
Dimensions
(W x H x D)
Weight With stand (kg)
Power requirement
Power consumption
With stand (mm)
Without stand(
Without stand (kg)
140 W 160 W 200 W
32LN57** 39LN57** 42LN57**
32LN5708-ZE
32LN570S-ZE
32LN570V-ZE
32LN5758-ZE
32LN575S-ZE
32LN575V-ZE
32LN5778-ZK
32LN577S-ZK
32LN577V-ZK
32LN5788-ZE
32LN578S-ZE
32LN578V-ZE
738 x 502 x 242 894 x 595 x 294 968 x 637 x 294
738 x 449 x 79 894 x 537 x 79 968 x 579 x 79
mm)
7.6 10.4 11.4
7.0 8.6 9.6
AC 100-240 V~ 50 / 60 Hz AC 100-240 V~ 50 / 60 Hz AC 100-240 V~ 50 / 60 Hz
80 W
39LN5708-ZE
39LN570S-ZE
39LN570V-ZE
39LN5758-ZE
39LN575S-ZE
39LN575V-ZE
39LN5778-ZK
39LN577S-ZK
39LN577V-ZK
39LN5788-ZE
39LN578S-ZE
39LN578V-ZE
100 W
42LN5708-ZE
42LN570S-ZE
42LN570V-ZE
42LN5758-ZE
42LN575S-ZE
42LN575V-ZE
42LN5778-ZK
42LN577S-ZK
42LN577V-ZK
42LN5788-ZE
42LN578S-ZE
42LN578V-ZE
110 W
Page 74

SPECIFICATIONS
B-38
MODELS
Dimensions
(W x H x D)
Weight With stand (kg)
Power requirement
Power consumption
MODELS
Dimensions
(W x H x D)
Weight With stand (kg)
Power requirement
Power consumption
MODELS
Dimensions
(W x H x D)
Weight With stand (kg)
Power requirement
Power consumption
With stand (mm)
Without stand(
Without stand (kg)
With stand (
Without stand(
Without stand (kg)
With stand (
Without stand(
Without stand (kg)
mm
mm
47LN57** 50LN57** 55LN57**
47LN5708-ZE
47LN570S-ZE
47LN570V-ZE
47LN5758-ZE
47LN575S-ZE
47LN575V-ZE
47LN5778-ZK
47LN577S-ZK
47LN577V-ZK
47LN5788-ZE
47LN578S-ZE
47LN578V-ZE
1080 x 701 x 327 1136 x 732 x 327 1250 x 804 x 343
1080 x 642 x 80.5 1136 x 673 x 82.1 1250 x 737 x 79.1
mm)
15.9 16.8 21.9
13.4 14.2 19.1
AC 100-240 V~ 50 / 60 Hz AC 100-240 V~ 50 / 60 Hz AC 100-240 V~ 50 / 60 Hz
130 W 140 W 160 W
60LN57** 32LN61** 42LN61**
60LN5708-ZE
60LN570S-ZE
60LN570V-ZE
60LN5758-ZE
60LN575S-ZE
60LN575V-ZE
60LN5778-ZK
60LN577S-ZK
60LN577V-ZK
60LN5788-ZE
60LN578S-ZE
60LN578V-ZE
1359 x 867 x 343 733 x 499 x 242
)
1359 x 799 x 67.2 733 x 444 x 78 964 x 573 x 78
mm)
27.0 7.6 11.8
24.2 6.4 10.0
AC 100-240 V~ 50 / 60 Hz AC 100-240 V~ 50 / 60 Hz AC 100-240 V~ 50 / 60 Hz
200 W 80 W 110 W
47LN61**
47LN6108-ZB
47LN610S-ZB
47LN610V-ZB
47LN6138-ZB
47LN613S-ZB
47LN613V-ZB
1076 x 695x 327
)
1076 x 637 x 79.4
mm)
15.0
12.8
AC 100-240 V~ 50 / 60 Hz
130 W
50LN5708-ZE
50LN570S-ZE
50LN570V-ZE
50LN5758-ZE
50LN575S-ZE
50LN575V-ZE
50LN5778-ZK
50LN577S-ZK
50LN577V-ZK
50LN5788-ZE
50LN578S-ZE
50LN578V-ZE
32LN6108-ZB
32LN610S-ZB
32LN610V-ZB
32LN6138-ZB
32LN613S-ZB
32LN613V-ZB
55LN5708-ZE
55LN570S-ZE
55LN570V-ZE
55LN5758-ZE
55LN575S-ZE
55LN575V-ZE
55LN5778-ZK
55LN577S-ZK
55LN577V-ZK
55LN5788-ZE
55LN578S-ZE
55LN578V-ZE
42LN6108-ZB
42LN610S-ZB
42LN610V-ZB
42LN6138-ZB
42LN613S-ZB
42LN613V-ZB
964 x 631 x 294
Page 75

SPECIFICATIONS
B-39
CI Module Size (W x H x D)
Operating
Environment
condition
Television system
Programme coverage
Maximum number of
storable programmes
External antenna impedance 75 Ω
* : Only DVB-T2 support models
Temperature
Operating Humidity Less than 80 %
Storage Temperature -20 °C to 60 °C
Storage Humidity Less than 85 %
DVB-T(*DVB-T/T2)
DVB-C
DVB-S/S2
VHF, UHF
C-Band, Ku-Band
DVB-S/S2 : 6,000
DVB-T/T2/C & Analogue TV : 1,500
100.0 mm x 55.0 mm x 5.0 mm
0 °C to 40 °C
Digital TV Analogue TV
PAL/SECAM B/G/I/D/K
SECAM L/L’
VHF: E2 to E12, UHF : E21 to
E69, CATV: S1 to S20, HYPER:
S21 to S47
Page 76

SPECIFICATIONS
B-40
HDMI/DVI-DTV supported mode
Vertical
Frequency
(Hz)
Resolution
Horizontal
Frequency (kHz)
640X480 31.469 / 31.5 59.94 / 60
720X480 31.469 / 31.5 59.94 / 60
720X576
1280X720
1920X1080
31.25
15.625
37.500
44.96 / 45
33.72 / 33.75
28.125
26.97 / 27
33.716 / 33.75
56.250
67.43 / 67.5
50
50
50
59.94 / 60
59.94 / 60
25 / 50.00
23.97 / 24
29.976 / 30.00
50
59.94 / 60
Component port connecting information
HDMI/DVI-PC supported mode
Horizontal
Resolution
Frequency
(kHz)
640 x 350 31.468 70.09
720 x 400 31.469 70.08
640 x 480 31.469 59.94
800 x 600 37.879 60.31
1024 x 768 48.363 60.00
1152 x 864 54.348 60.053
1360 x 768 47.712 60.015
1280 x 1024 63.981 60.020
1920 x 1080 67.5 60.00
Except for 32LN57*U/ 32LN57*R/ 32LN57*7
Vertical
Frequency
(Hz)
Component ports on
the TV
Y P
Y P
Video output ports
on DVD player
Y B-Y R-Y
Y Cb Cr
Y Pb Pr
Signal Component
480i/576i O
480p/576p O
720p/1080i O
1080p
(50 Hz / 60 Hz only)
P
B
B
R
P
R
O
Page 77

SPECIFICATIONS
3D supported mode
Video, which is input as below media contents is switched into the 3D screen automatically.
y
The method for 3D digital broadcast may differ depending on the signal environment. If video is not
y
switched automatically into 3D, manually convert the settings to view 3D images.
3D supported mode automatically
B-41
Input Signal
640 X 480
480p
576p
720p
HDMI
1080i
1080p
USB 1080p 33.75 30
DLNA 1080p 33.75 30
DTV Frame Compatible Side by Side(Half), Top & Bottom
Horizontal
Frequency (kHz)
31.469 / 31.5
62.938 / 63 Frame Packing, Line Alternative
31.469 / 31.5
62.938 / 63 Frame Packing, Line Alternative
31.25
62.5 Frame Packing, Line Alternative
37.50 50
44.96 / 45 59.94 / 60
75 50
89.91 / 90 59.94 / 60
28.125 50
33.72 / 33.75 59.94 / 60
56.25 50
67.432 / 67.5 59.94 / 60
26.97 / 27 23.97 / 24
28.125 25
33.72 / 33.75 29.976 / 30
43.94 / 54 23.97 / 24
67.432 / 67.5 29.976 / 30
56.25 50
67.432 / 67.5 59.94 / 60
Signal Playable 3D video format
Vertical
Frequency (Hz)
59.94 / 60
50
Playable 3D video format
Top & Bottom,
Side by Side(Half), Side by Side(Full)
Top & Bottom,
Side by Side(Half), Side by Side(Full)
Top & Bottom,
Side by Side(Half), Side by Side(Full)
Top & Bottom,
Side by Side(Half), Side by Side(Full)
Frame Packing, Line Alternative
Top & Bottom,
Side by Side(Half), Side by Side(Full)
Frame Packing, Field Alternative
Top & Bottom,
Side by Side(Half), Side by Side(Full)
Frame Packing, Line Alternative56.25 25
Top & Bottom, Side by Side(Half)
Side by Side(Half), Top & Bottom,
Checker Board, MPO(Photo), JPS(Photo)
Page 78

SPECIFICATIONS
B-42
3D supported mode manually
Signal
Input
DTV HD / SD - -
ATV(CVBS/SCART) SD - -
Component HD / SD - -
HDMI-PC
HDMI-DTV
USB ,DLNA
(Movie)
USB, DLNA
(Photo)
Miracast/Widi
Resolution
1024X768 48.36
1360X768 47.71
1920X1080 67.5
Others - -
480P 31.5 60
576P 31.25 50
720p
1080i
1080p
Under 704x480 - - 2D to 3D
Over 704x480
interlaced
Over 704x480
progressive
Over 704x480
progressive
Under 320x240 - - 2D to 3D
Over 320x240 - -
1024X768p - 30 / 60
1280x720p - 30 / 60
1920X1080p - 30 / 60
Others - - 2D to 3D
Horizontal
Frequency
(kHz)
37.5 50
45 60
28.12 50
33.75 60
27 24
28.12 25
33.75 30
56.25 50
67.5 60
- -
- 50 / 60
- others
Verticla
Frequency
(Hz)
60
Playable 3D video format
2D to 3D, Side by Side(Half),
Top & Bottom
2D to 3D, Side by Side(Half),
Top & Bottom,
Checker Board, Frame
Sequential, Row Interleaving,
Column Interleaving
2D to 3D, Side by Side(Half),
Top & Bottom
2D to 3D, Side by Side(Half),
Top & Bottom, Checker Board,
Frame Sequential, Row
Interleaving, Column
Interleaving
2D to 3D, Side by Sied(Half),
Top & Bottom
2D to 3D, Side by Side(Half),
Top & Bottom,Checker Board,
Row Interleaving, Column
Interleaving
2D to 3D, Side by Side(Half),
Top & Bottom, Checker Board,
Frame Sequential, Row
Interleaving, Column
Interleaving
2D to 3D, Side by Side(Half),
Top & Bottom
2D to 3D, Side by Side(Half),
Top & Bottom,Checker Board,
Row Interleaving, Column
Interleaving, Frame Sequential
2D to 3D, Side by Side(Half),
Top & Bottom,Checker Board,
Row Interleaving, Column
Interleaving
2D to 3D, Side by Side(Half),
Top & Bottom
2D to 3D, Side by Side(Half),
Top & Bottom
Page 79

Page 80

Record the model number and serial number of
the TV.
Refer to the label on the back cover and quote
this information to your dealer when requiring any
service.
MODEL
SERIAL
Please contact LG First.
If you have any inquiries or comments,
please contact LG customer information centre.
Customer Information Centre
Country
Latvija
Service
0 810 144 131 0900 543 5454
015 200 255 800 187 40
0032 15 200 255 801 54 54 54
07001 54 54 808 78 54 54
810 555 810 031 228 3542
8088 5758 0850 111 154
0800 0 54 54 902 500 234
3220 54
01803 11 54 11 0848 543 543
801 11 200 900,
210 4800 564
06 40 54 54 54 800 9990
0818 27 6955 0 800 303 000
199600099
8 820 0071 1111
80200201
880008081 8 0000 710 005
Country
Service
0770 54 54 54
0844 847 5454
8 800 200 7676
8 8000 805 805,
2255(GSM)
8 800 120 2222
 Loading...