How it Works
Log In / Sign Up
Buy Points
How it Works
FAQ
Contact Us
Questions and Suggestions
Users
LG
Loading...
#
28LB45
28LB450B
2
28LB450U
6
28LB457B
2
28LB457U
5
28LB474A
28LB4900-ZA
5
28LB490B-ZG
5
28LB490B-ZH
5
28LB490U
6
28LB490U-ZA
5
28LB490U-ZG
5
28LB490U-ZH
5
28LB490V-ZA
5
28LB491B-JA
28LB491U
3
28LB491U-ZB
5
28LB498U
3
28LB498U-ZG
5
28LB515A
2
28LB600B-PC
28LB600B-PS
28LB700B-SC
28LF450A
28LF450B
2
28LF450U
6
28LF4520
28LF452A
2
28LF491U
6
28LF498U
2
28LF710B-P
28LH450U
2
28LH451U
2
28LH4530
28LH4530-PU
28LH454A
2
28LH491U
4
28LJ400B
28LJ400B-PD
28LJ430BPU
28LJ4540
28LJ720B-PS
28LK430B-PD
28LK430V-PD
28LK451V-PZ
28LK480U
28LK480U-PZ
28LM400B-PU
2
28LM430B-PU
28LM520S
28LN4100
2
28LN4105
28LN4110
2
28LN4130
2
28LN4130-TD
2
28LN4500
28LN4503-ZB
28LN4505-ZB
28LN450B-ZB
28LN450R-ZB
28LN450U
2
28LN450U-ZB
28LN4573-ZI
28LN4575-ZI
28LN457B-ZI
28LN457R-ZI
28LN457U
2
28LN457U-ZI
28LN500B-P
28LN500B-PC
28LN500B-PS
2
28LN500B-PX
2
28LN515S-PZ
2
28LN525V-PZ
2
28LN549M
2
28LT340CBZA
28LT661HBZA
4
28LV760M
28LV761H
2
28LW341C
2
28LW750H
2
28LW760V
3
28LX320C
28LX530H
2
28LX752V
2
28LY310C-ZA
28LY330C
2
28LY330C-ZA
28LY340C-ZA
28LY540H
2
28LY540H-ZA
28LY540M
2
28LY540M-ZA
28LY560M
2
28LY750H
28MN30A-PT
28MN30D-PR
7
28MN30D-PT
28MN30D-PTP
28MN30D-PU
Loading...
Loading...
Nothing found
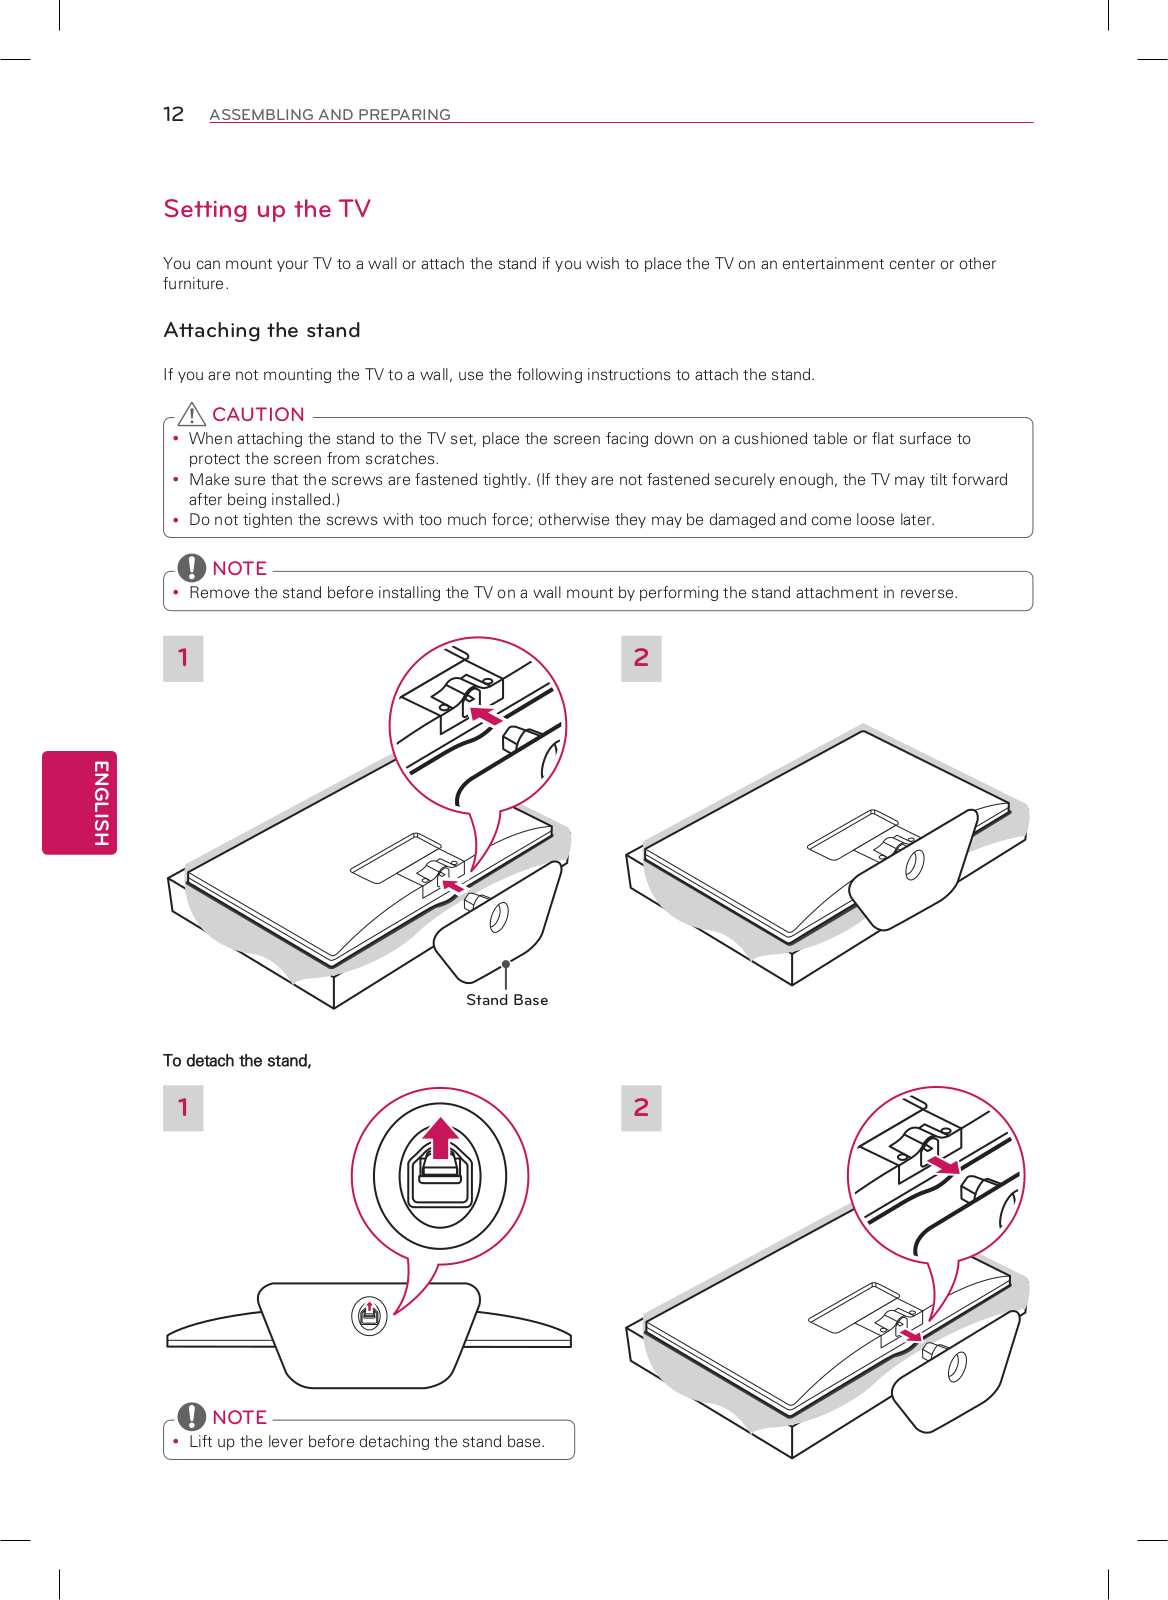
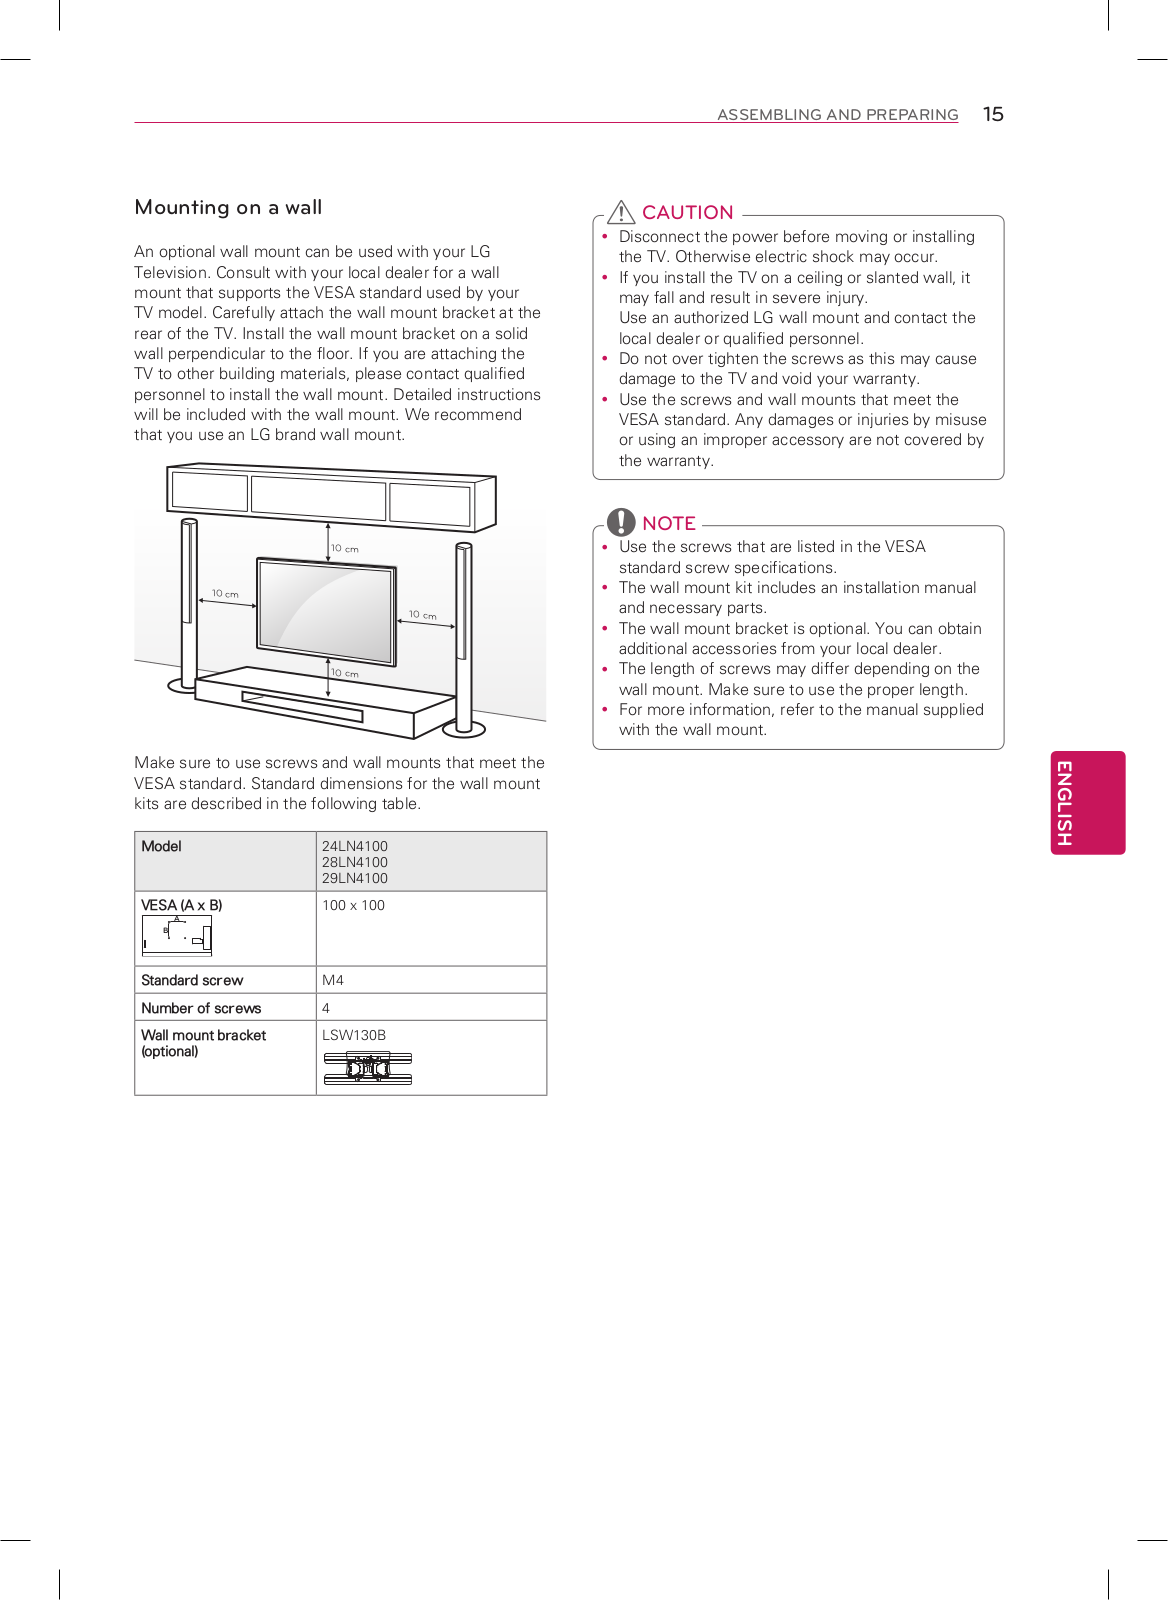
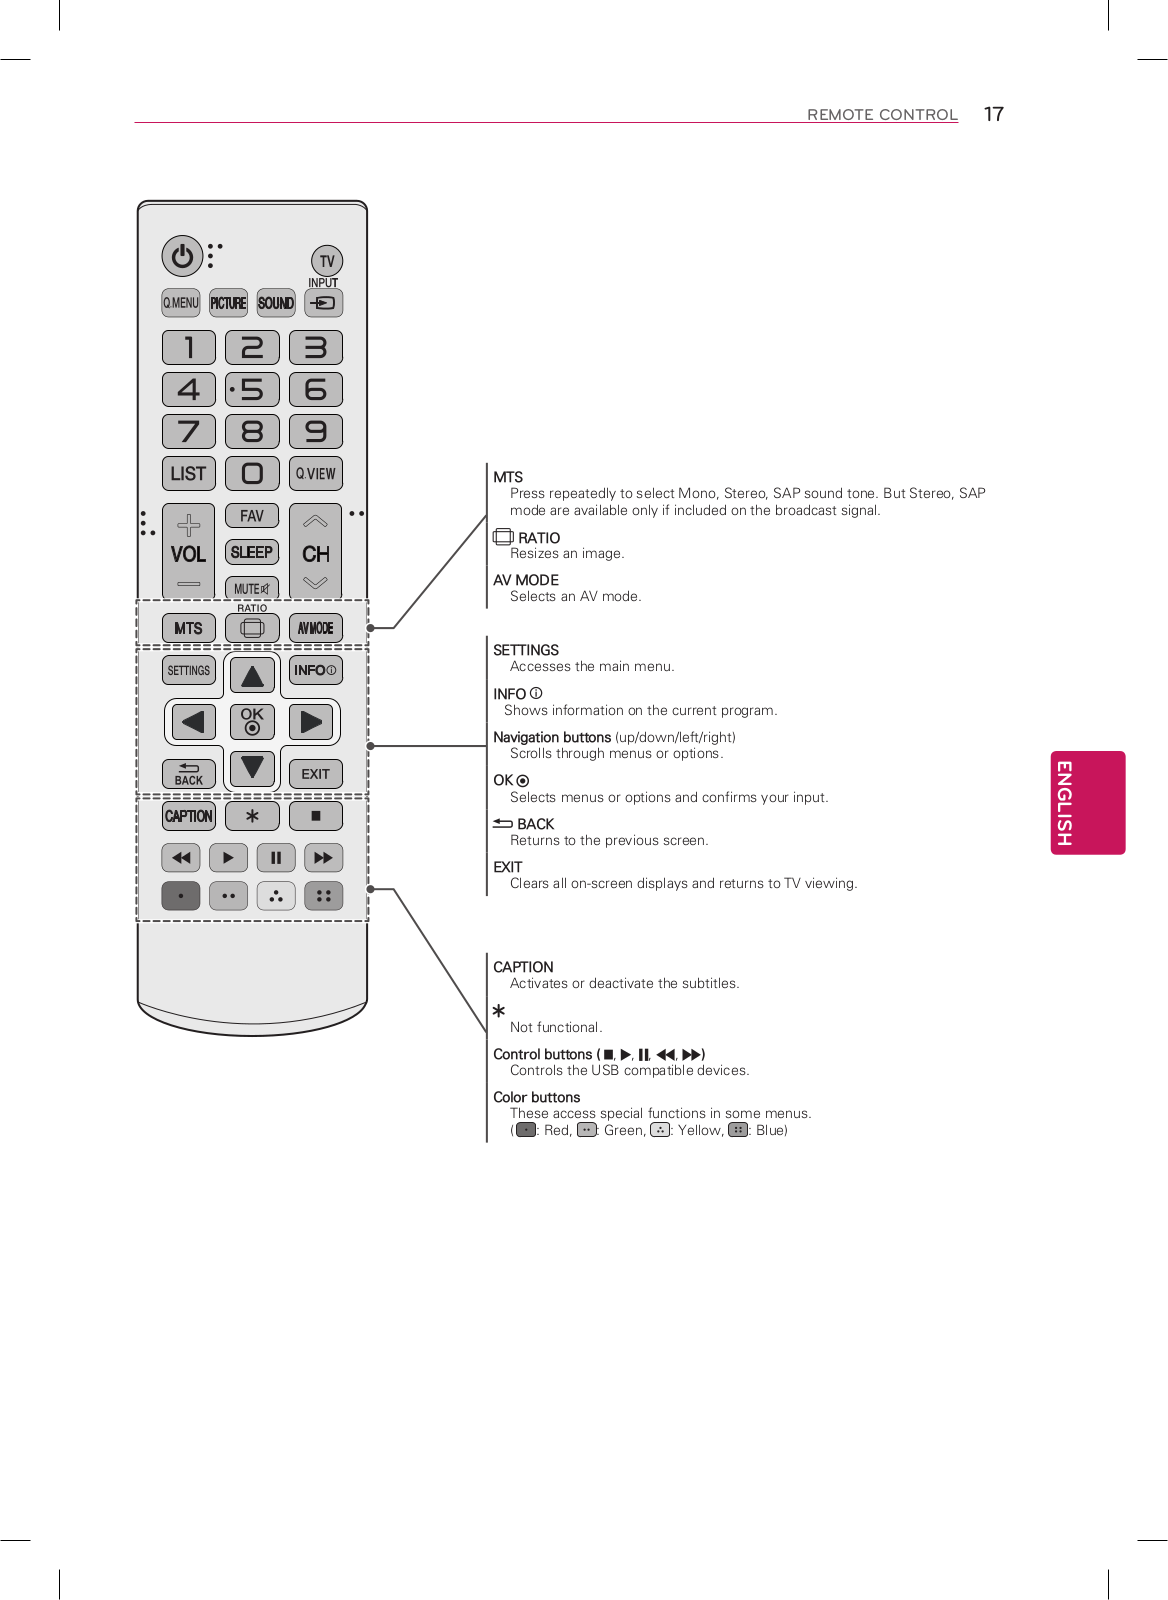
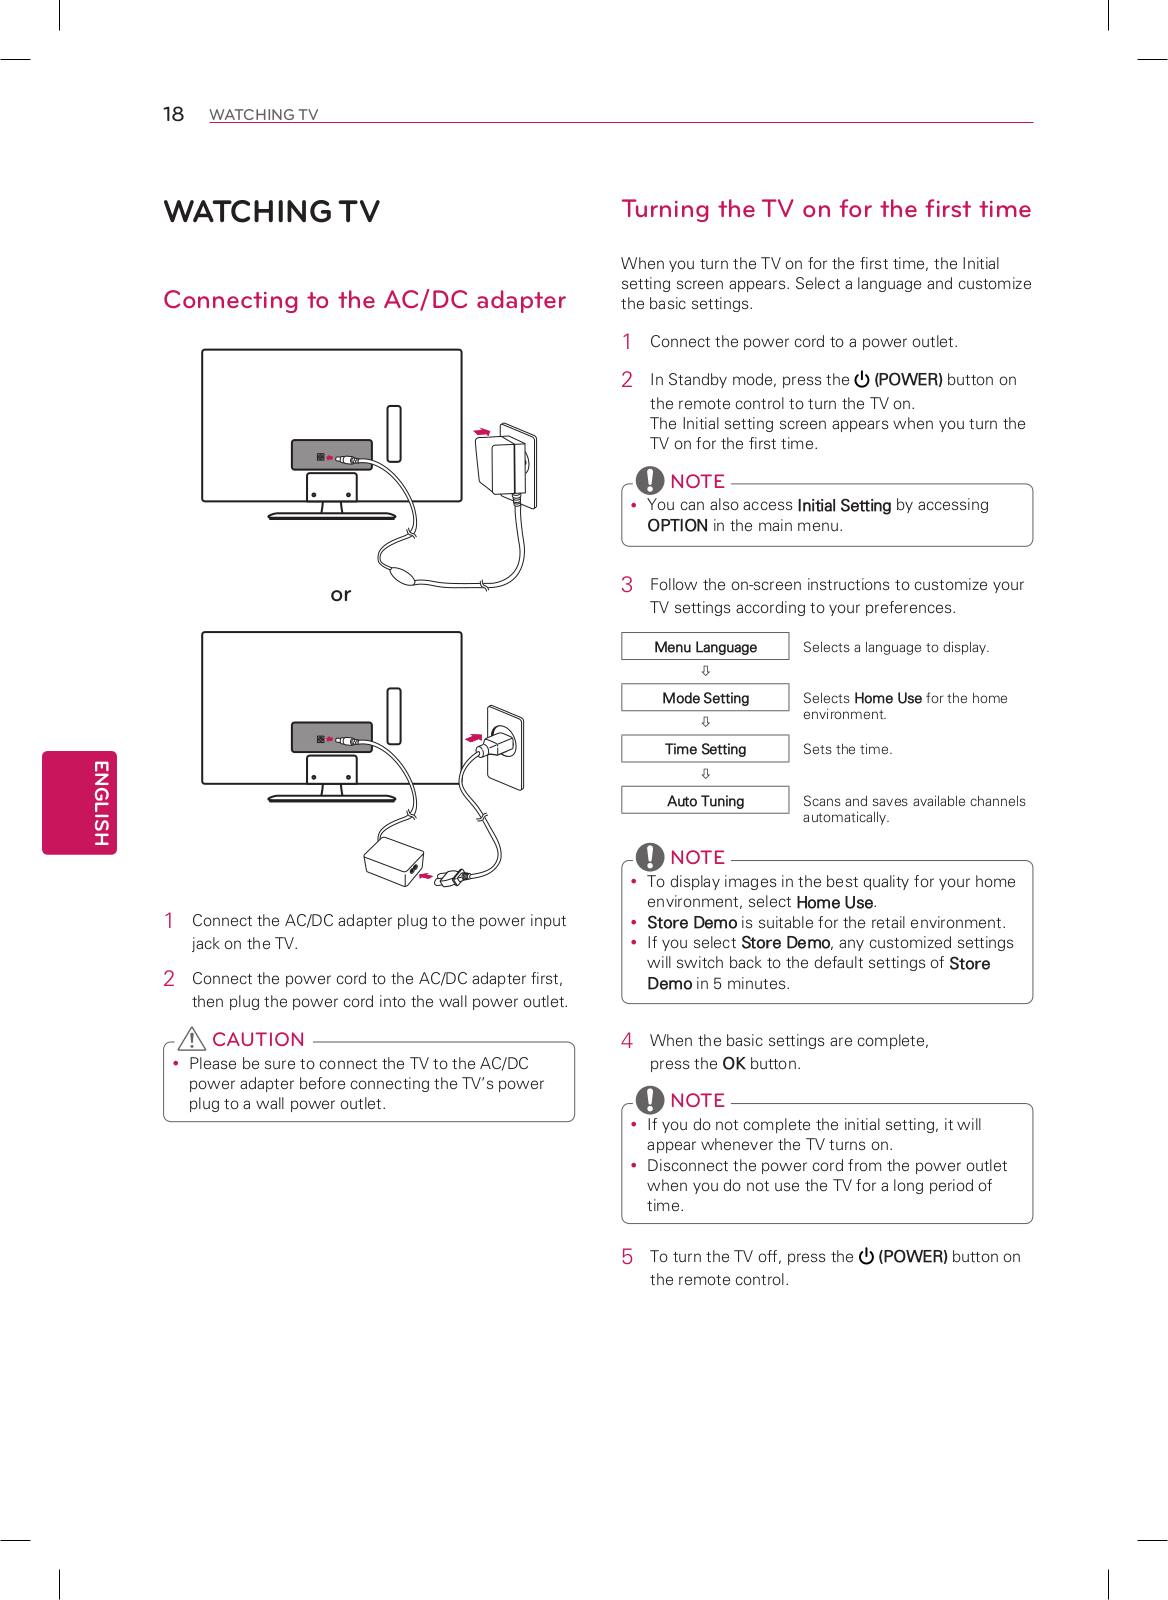
28LN4100
Owner's Manual [es]
104 pgs
19.34 Mb
0
Manual book [id]
52 pgs
13.23 Mb
0
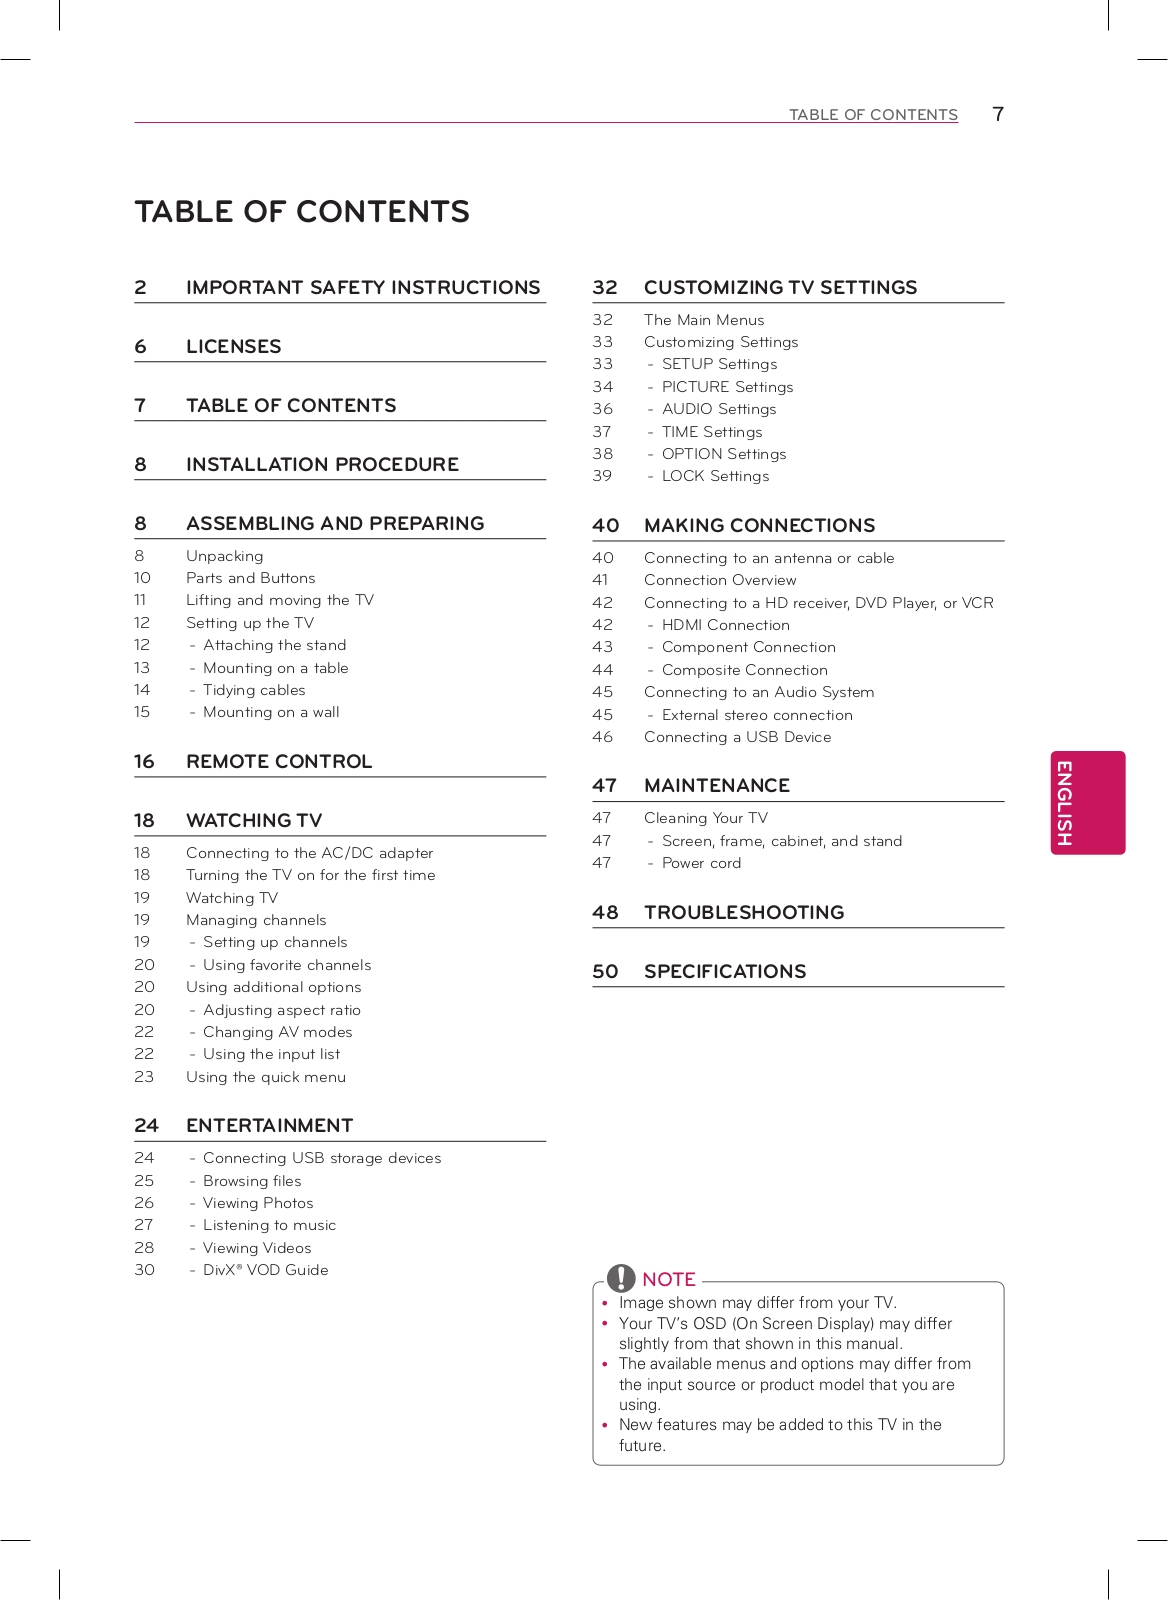
Table of contents
Loading...
LG 28LN4100 Owner's Manual [es]
...
LG Owner's Manual [es]
Download
Specifications and Main Features
Frequently Asked Questions
User Manual
Download
Loading...
+
74
hidden pages
Unhide
You need points to download manuals.
1 point = 1 manual.
You can buy points or you can get point for every manual you upload.
Buy points
Upload your manuals
 Loading...