

Page 1

PerfectLum
USER’S MANUAL
Page 2

TABLE OF CONTENTS
I. GETTING STARTED
1.1 Introduction
1.2. Minimum system requirements
1.2.1. PerfectLum client is supported on the following operating systems:
1.2.2. PerfectLum Remote server is supported on the following operating systems:
1.2.3. Your web browser should be one of the following:
1.3. Hardware requirements
1.3.1. Displays and Graphic boards
1.4. Installation Procedure Overview
1.4.1. Pre-installation conditions
1.4.2. Installation
1.4.3. Measurement Device Installation
1.5. The Main Window
1.5.1. Calibration and QA Tab
1.5.2. Scheduler Tab
1.5.3. History Tab
1.6. Do my first calibration
1.7. Do my first QA Acceptance test
II. PREFERENCES
2.1. Application Settings:
2.1.1. Language:
2.1.2. Software Update:
2.1.3. Password Protection:
2.1.4. Export/Import Common Settings:
2.1.5. Backup/Recover:
2.2. Workstation Settings:
2.2.1. Workstation name:
2.2.2. Ambient light:
Page 3

2.2.3. Task Delay:
2.2.4. Sleep Mode:
2.3. Calibration Settings:
2.3.1. Calibration Type:
2.3.2. Color Temperature:
2.3.3. Gamut:
2.3.4. White Level:
2.3.5. Black Level:
2.3.6. ICC/ICM Profile
2.4. QA Settings:
2.4.1. Regulation:
2.4.2. Import Acceptance Values
2.4.3. Workstation Location:
2.4.4. Person Responsible:
2.5. Remote and Network Settings:
2.5.1. Enable Remote:
2.5.2. Remote Database Synchronization:
2.5.3. Proxy Server:
III. LICENSE AND LICENSING
3.1. Remote License:
3.2. PerfectLum Suite License:
IV. DISPLAY SETTINGS
4.1. Ignore Display:
4.2. LUT Upload:
4.3. Used Sensor:
4.4. Sensor Correlation:
4.5. Display Model:
4.6. Display Serial Number:
4.7. Display Manufacturer:
4.8. Inventory number:
Page 4

4.9. Type of Display:
4.10. Display Technology:
4.11. Screen Size:
4.12. Resolution (h/v):
4.13. Backlight Stabilization:
4.14. Installation Date:
V. REGISTRATION
5.1. Free and Additional Features
5.2. Licenses Functionality
5.3. License Activation
VI. PERFECTLUM SUITE MENU ITEMS
6.1. Software Update
6.2. About us
6.3. Measure Color
6.4. Display Test-Pattern
6.5. 3D Gamut Viewer
6.6. Notification
6.7. Report
VII. OTHER
7.1.Matching Multiple Displays
7.2. Mass Installation of PerfectLum Suite version 3
7.3. PerfectLum Remote: System Administrator Guide
7.4. Acronyms
7.5. Qubyx Software License Agreement
Page 5

I. GETTING STARTED
1.1. Introduction
When it comes to medical imaging, the ability to see the whole image is important. With a standard workstation configuration using
an uncalibrated display, the user runs the risk of missing fine details. Missing fine details can represent a health risk to the patient, which
may lead to a misdiagnosis or an expensive lawsuit. The problem is not the image or the practitioner’s eye; it is the ability of the display
to represent all information accurately.
PerfectLum Suite is a software solution which enables the user to modify display output to meet DICOM part 14 GSDF and other
key industry standards. After calibration your workstation will allow you to see the finest details of every image displayed. With
PerfectLum Suite medical display calibration software installed on all of your computers, you are assured that no matter which image you
are looking at, it will be the same on every display.
PerfectLum Suite is not only a DICOM calibration tool, but also a medical monitor QA application, that verifies the display’s
conformance to medical standards AAPM TG18, DIN 6868-57, DIN 6868-157, JESRA X-0093, IEC 62563-1, the New York state Primary
Diagnostic Monitor (PDM) Quality Assurance Program and performs acceptance and conformance tests for these standards.
This document provides details on installation and use of the PerfectLum Suite application.
About PerfectLum Suite
PerfectLum Suite is a medical monitor quality assurance suite based on the medical standards NEMA DICOM part 14 GSDF, AAPM
TG18, DIN 6868-57, DIN 6868-157, JESRA X-0093, IEC 62563-1 and NY PDM. The medical monitor QA tool performs calibration,
acceptance test, conformance test and maintains consistency to all medical workstations. The use of this software enables healthcare
professionals to maintain international standards of quality in terms of their displays performance.
Page 6

PerfectLum Suite Features
● Calibration of all displays to DICOM part 14 GSDF, CIE L*, BT.709 and BT.1886 standard
● Update of video card LUT or display LUT for displays that comply with the DDC/CI standard
● Calibration of multi-head display systems
● White level and black level calibration
● Version 4 ICC profile generation
● Calibration to a certain color temperature and XY coordinates
● Verification of conformance to the major regulations: AAPM TG18, DIN 6868-57, DIN 6868-157, JESRA X-0093, IEC
62563-1 and the New York state Primary Diagnostic Monitor (PDM) Quality Assurance Program
● Automated QA - performing acceptance and conformance tests
● Scheduling conformance test automatically and reminders to perform tests
● Remote quality control
● Convenient and user-friendly calibration and QA reports
● Color measurement capability
● Diversified auto backup
● History log for comparing and checking results of calibrations
● Briggs, SMPTE, AAPM test patterns to visually check calibration results
● Wide OS compatibility, including Windows 10 and Mac OS X 10.9.4
● Many brands of photometer support
● License supports all users on the installed workstation
Page 7

1.2. Minimum system requirements
1.2.1.PerfectLum client is supported on the following operating systems:
● Windows:
○ Vista (32-bit and 64-bit)
○ Win 7 (32-bit and 64-bit)
○ Win 8 (32-bit and 64-bit)
○ Win 10 (32-bit and 64-bit)
Processor: Pentium or AMD K7
Minimum RAM: 512MB.
Minimum free space on hard disk: 150 MB.
● Mac OS X
○ 10.7+
Processor: Intel only. No PowerPC support.
Minimum RAM: 512MB.
Minimum free space on hard disk: 150 MB.
1.2.2. PerfectLum Remote server is supported on the following operating systems:
● Windows hosts:
○ Windows XP, all service packs (32-bit)
Page 8

○ Windows Server 2003 (32-bit)
○ Windows Vista (32-bit and 64-bit).
○ Windows Server 2008 (32-bit and 64-bit)
○ Windows Server 2012
○ Windows 7 (32-bit and 64-bit)
○ Windows 8 (32-bit and 64-bit)
○ Windows 8.1 (32-bit and 64-bit)
● Mac OS X hosts:
○ 10.6 Snow Leopard (Intel 32-bit and Intel 64-bit)
○ 10.7 Lion
○ 10.8 Mountain Lion
○ 10.9 Mavericks
○ 10.10 Yosemite
● Linux hosts (32-bit and 64-bit). Among others, this includes:
○ Ubuntu 6.06 ("Dapper Drake"), 6.10 ("Edgy Eft"), 7.04 ("Feisty Fawn"), 7.10 ("Gutsy Gibbon"), 8.04 ("Hardy Heron"), 8.10
("Intrepid Ibex"), 9.04 ("Jaunty Jackalope"), 9.10 ("Karmic Koala"), 10.04 ("Lucid Lynx"), 10.10 ("Maverick Meerkat), 11.04
("Natty Narwhal"), 11.10 ("Oneiric Ocelot"), 12.04 ("Precise Pangolin"), 12.10 ("Quantal Quetzal"), 13.04 ("Raring Ringtail"),
13.10 ("Saucy Salamander"), 14.04 ("Trusty Tahr")
○ Debian GNU/Linux 3.1 ("sarge"), 4.0 ("etch"), 5.0 ("lenny"), 6.0 ("squeeze"), 7.0 (“Wheezy”)
○ Oracle Enterprise Linux 4 and 5, Oracle Linux 6
○ Red Hat Enterprise Linux 4, 5 and 6
○ Fedora Core 4 to 20
○ Gentoo Linux
○ SUSE Linux 9, 10 and 11, openSUSE 10.3, 11.0, 11.1, 11.2, 11.3, 11.4, 12.1, 12.2, 12.3, 13.1
○ Mandriva 2007.1, 2008.0, 2009.1, 2010.0 and 2010.1
1.2.3. Your web browser should be one of the following:
• Mozilla Firefox, version 3.5 or higher
• Safari, version 4 or higher
• Google Chrome, version 3 or higher
• Internet Explorer 8 or higher
Page 9

1.3. Hardware requirements
1.3.1. Displays and Graphic boards:
- All LCD, CRT Displays and Projectors
- All currently commercially available graphic boards
1.4. Installation Procedure Overview
1.4.1. Pre-installation conditions:
In order to install PerfectLum Suite client you must have Administrator privileges or Administrator’s password if required when
installing to the user profile.
Before installing PerfectLum Suite software in your system:
Power on the workstation with all display(s) attached that you intend to use.
Check if the screen settings are correctly configured:
Vista - Go to Settings -> Control panel and click on “Adjust screen resolution” under the
Appearance and Personalisation Icon.
Windows 7, 8, 10 – Go to Control panel -> Display -> Adjust resolution.
Mac OS X - System Preferences -> Displays and choose resolution radio box “Best for display”.
Ensure that the screen resolution is set to the native resolution of the display with color quality of 32 bit “True color” or higher.
Ensure that the correct graphics card display driver is installed.
Repeat these checks for each display attached to your system.
Your system is now ready to start the installation process.
Page 10
IMPORTANT: Before starting the installation process, please make sure that the USB measurement device is NOT connected. The
measurement device will be added later, after PerfectLum Suite is successfully installed.
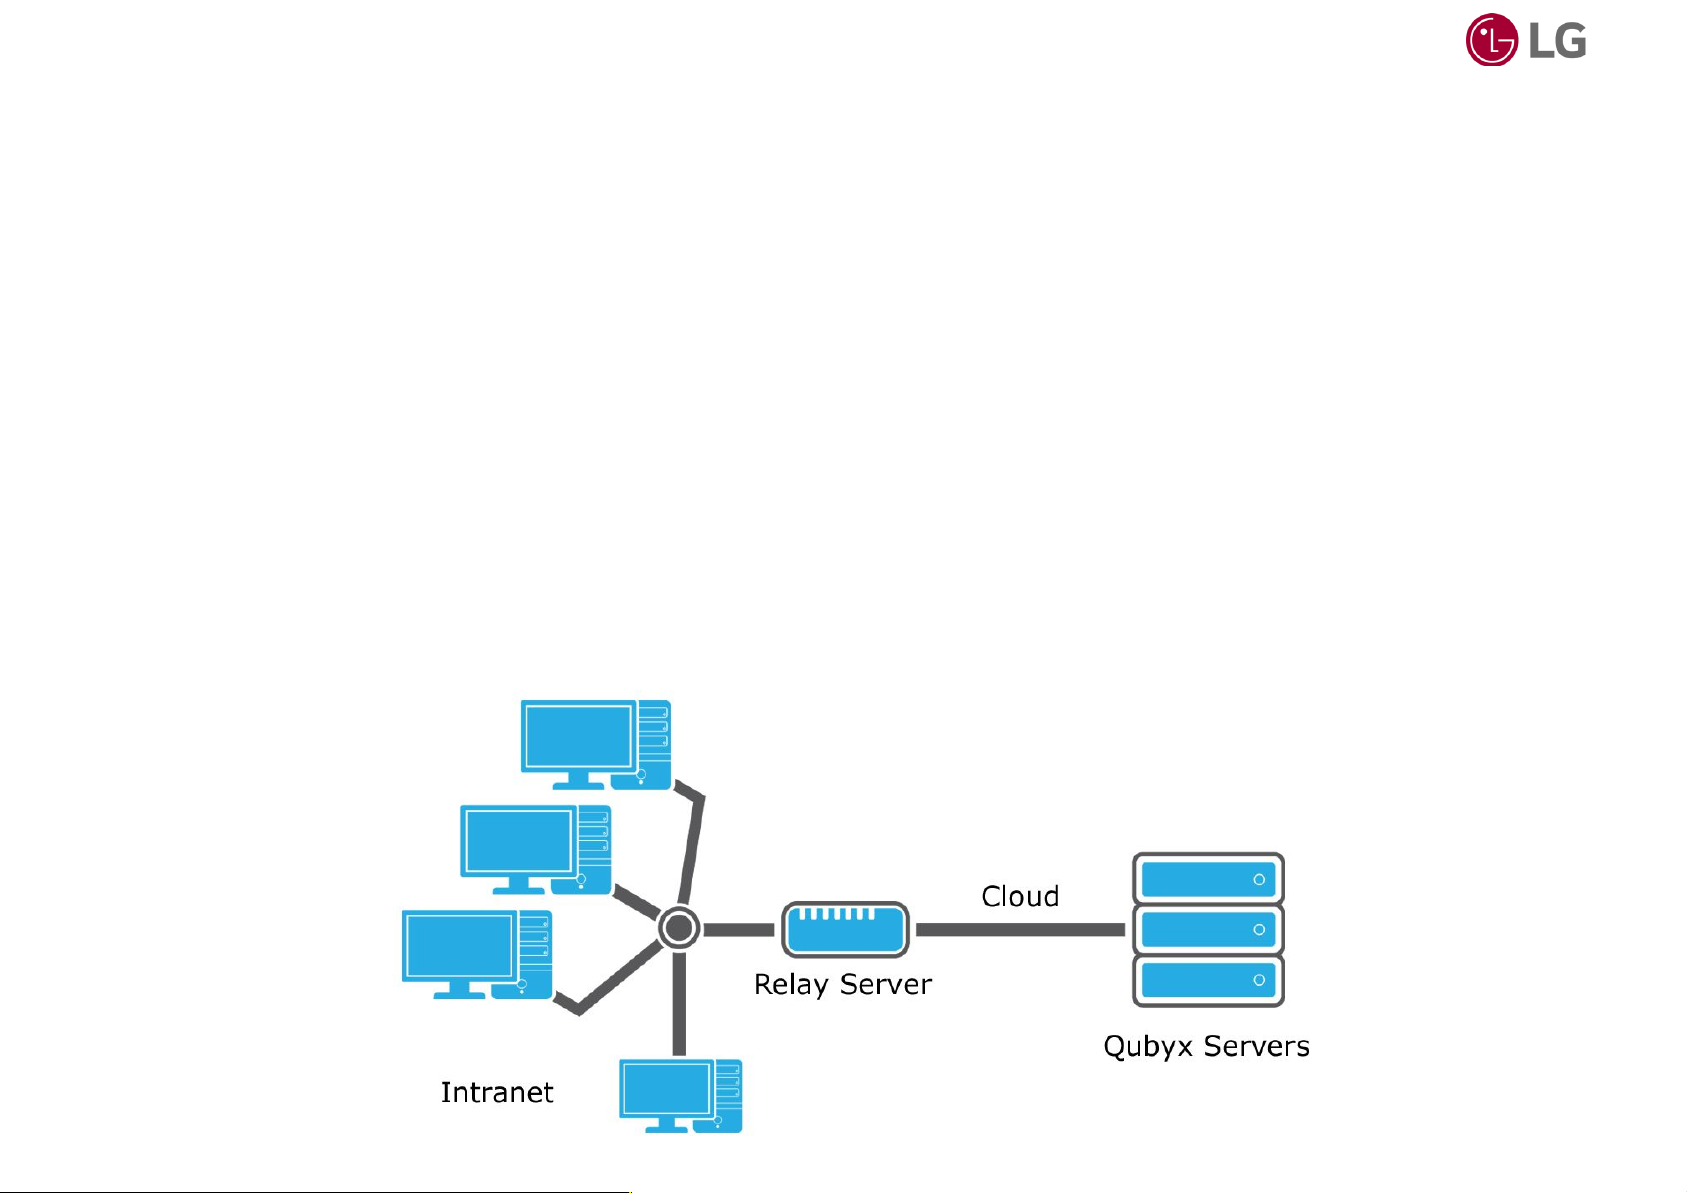
PerfectLum Suite can be operated as a client only or as a client-server combination.
Complete installation consists of several components.
PerfectLum Suite Client
PerfectLum Suite Client is the client application that runs on each of the workstations. It provides a number of actions that can be
performed locally on the workstations, including calibrating the displays, viewing test patterns or performing full QA (Quality Assurance)
and acceptance tests (QA tests available only in PerfectLum Suite). Even when PerfectLum Suite Client is not connected to PerfectLum
Remote Server it can still run all QA tasks on the workstation.
PerfectLum Remote Server
All PerfectLum Suite clients can be connected to PerfectLum Remote Server. No special license is required. QA managers can connect to
PerfectLum Remote Server via internet/intranet connection and take full control over the performance of connected workstations from any
location at any given time.
Page 11

1.4.2. Installation
Windows Vista/7/8/10:
Double click on the installer:
Page 12
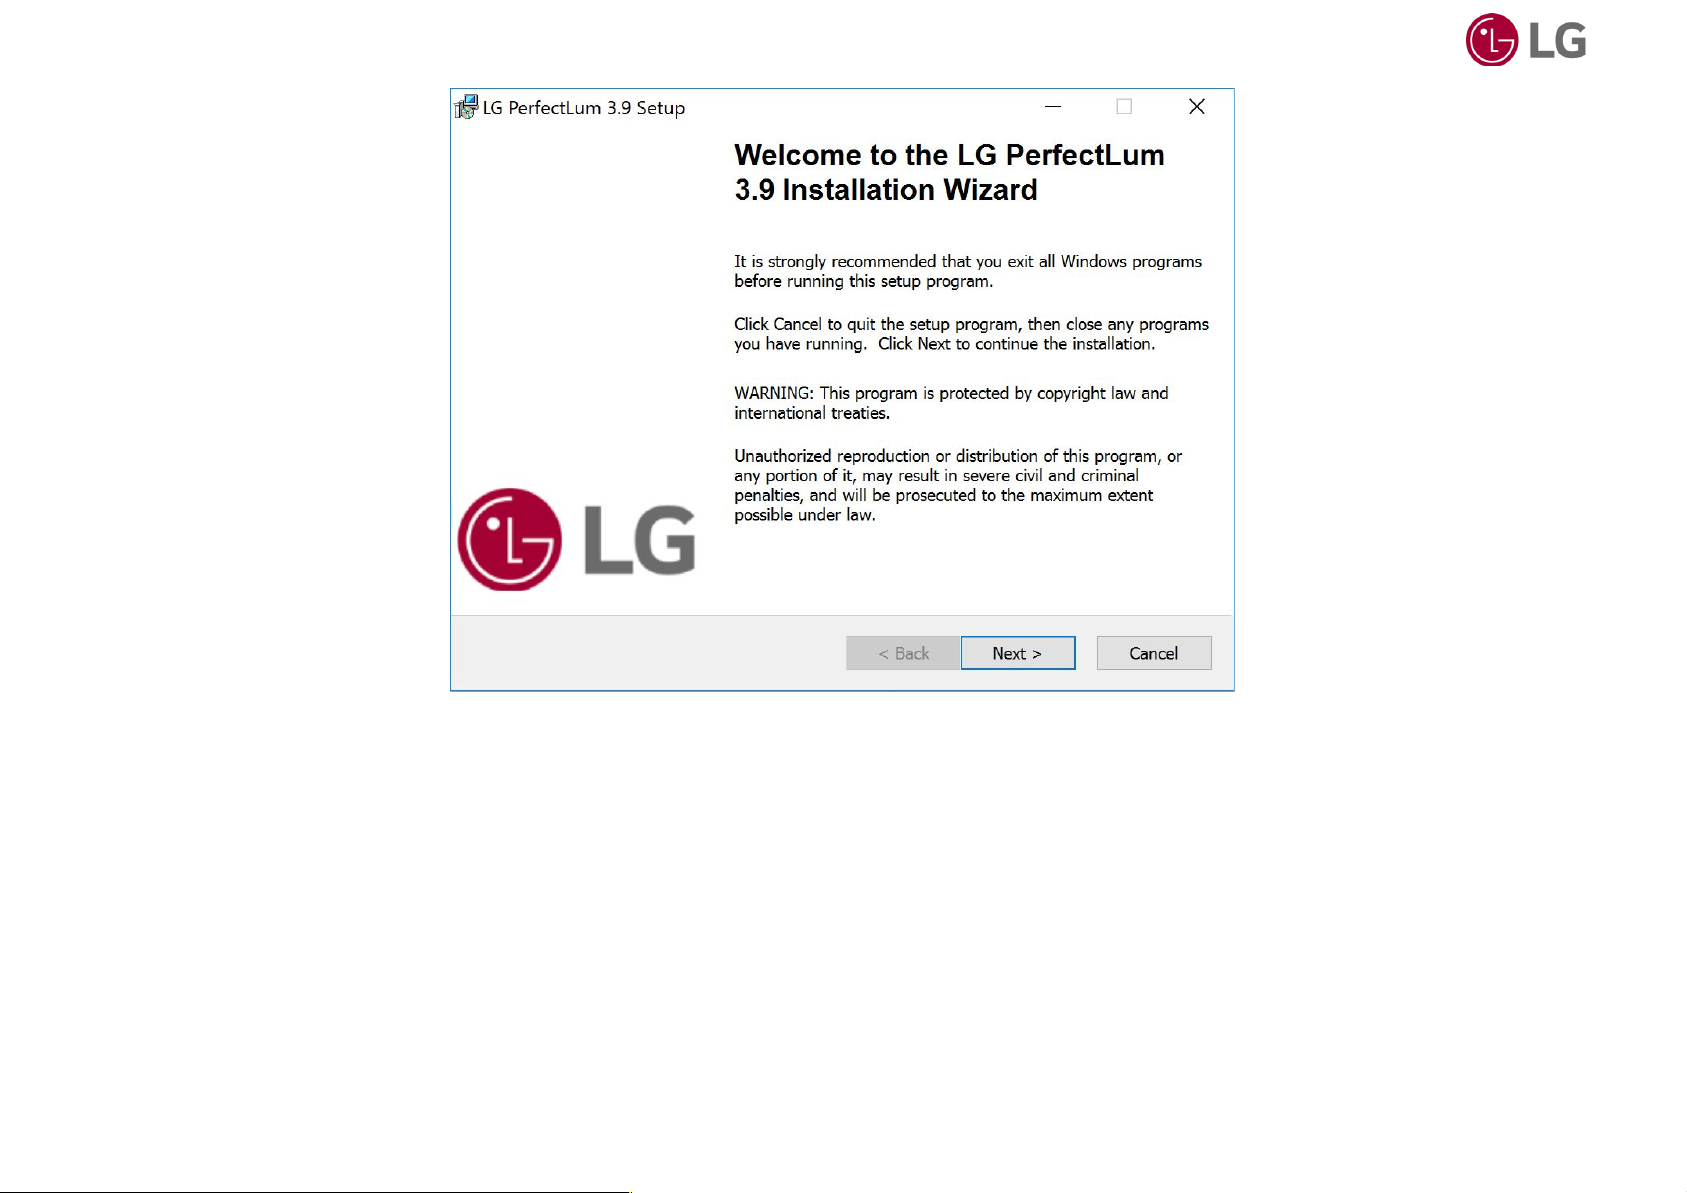
Follow the instructions presented in the installer and click on the QUBYX software license agreement after reading it carefully.
Page 13
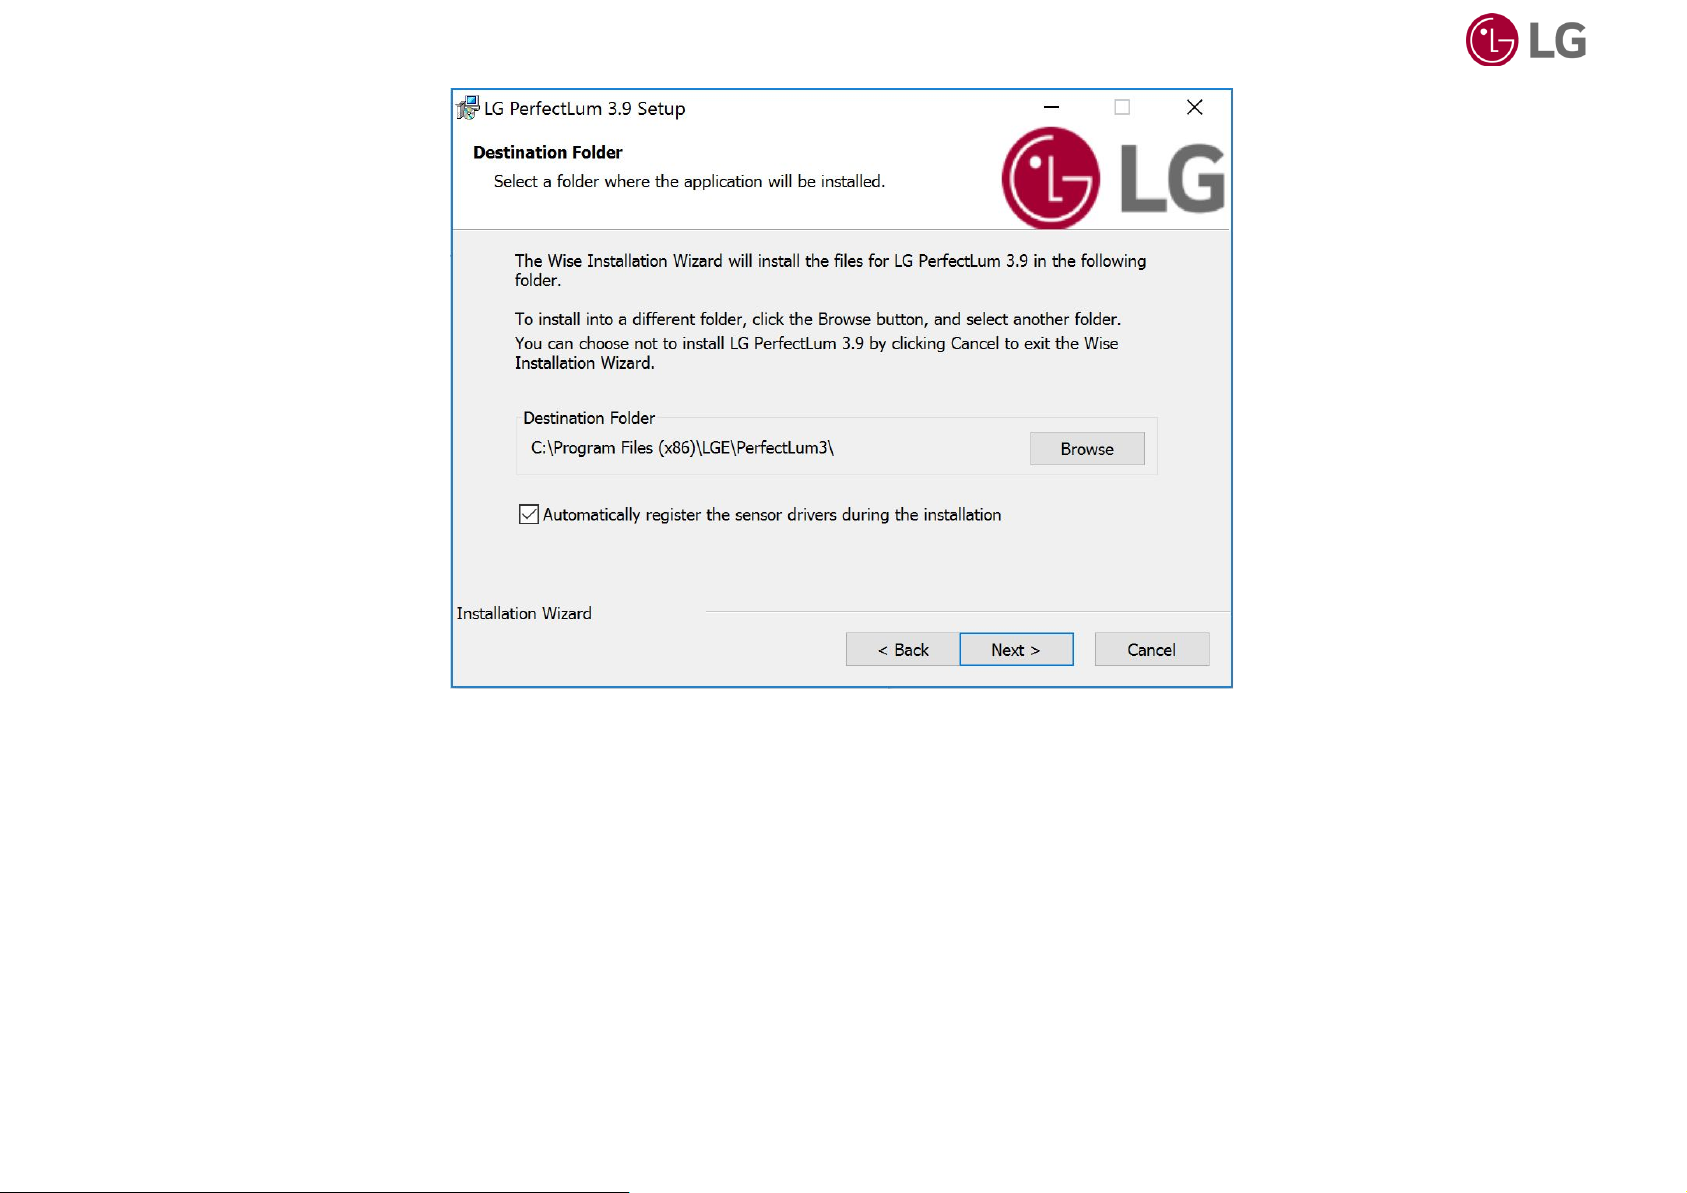
If you don’t want to install PerfectLum Suite into the default directory, browse your computer and choose another one.
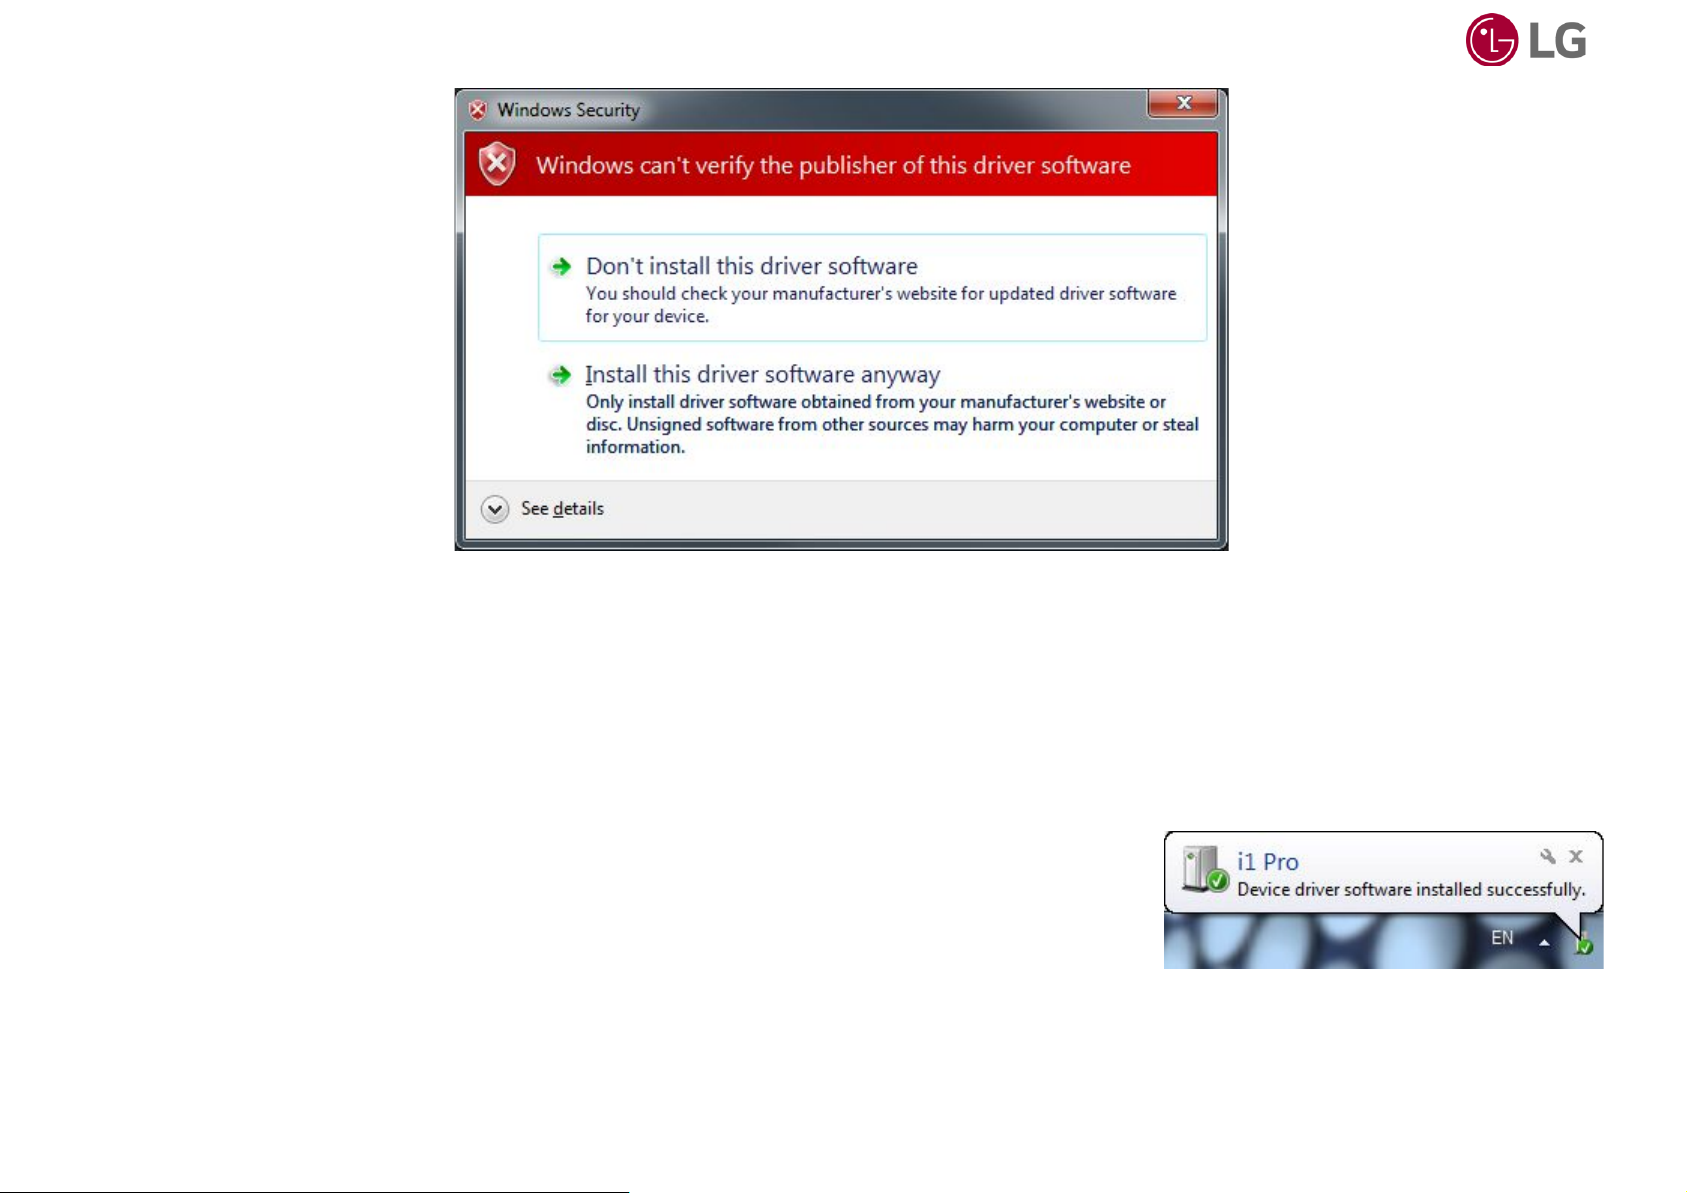
Windows will present a driver message for a few times during PerfectLum Suite installation. This is normal behavior as drivers to support
measurement devices are loaded. Please click the „Install this driver software anyway‟ button when prompted.
Page 14
1.4.3. Measurement Device Installation
Now that you have the software installed, it is time to install the measurement device. Plug the device into an unused USB port and refer
to the following depending on which OS you have installed the software:
Vista to Windows 10
Vista and Windows 7 will automatically install your device driver. Wait until you receive
the “Device driver software installed successfully‟ message, and jump ahead to the end
of this section.
Page 15

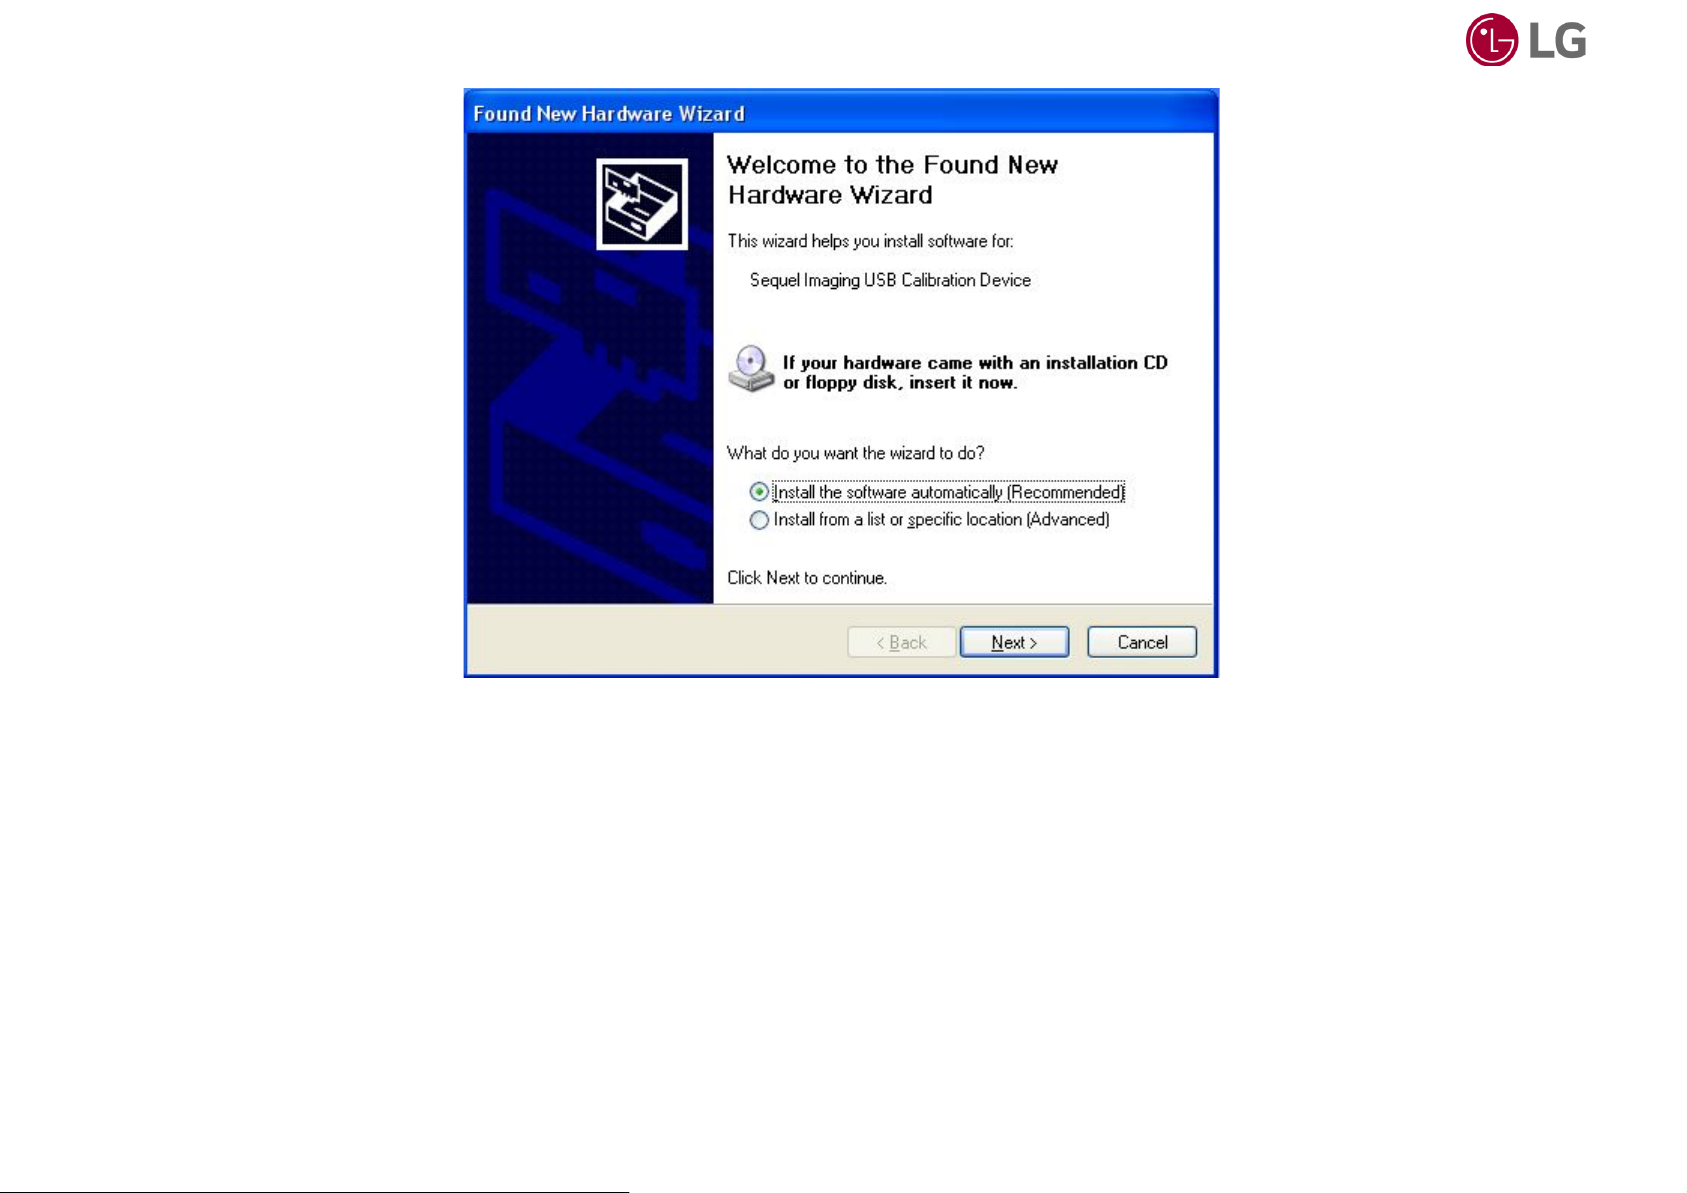
Windows XP:
The “Found new Hardware Wizard” will start. Click the “Yes, this time only” radio button followed by “Next”.
Check the “Install the Software Automatically (Recommended)” radio button and click “Next”.
Page 16
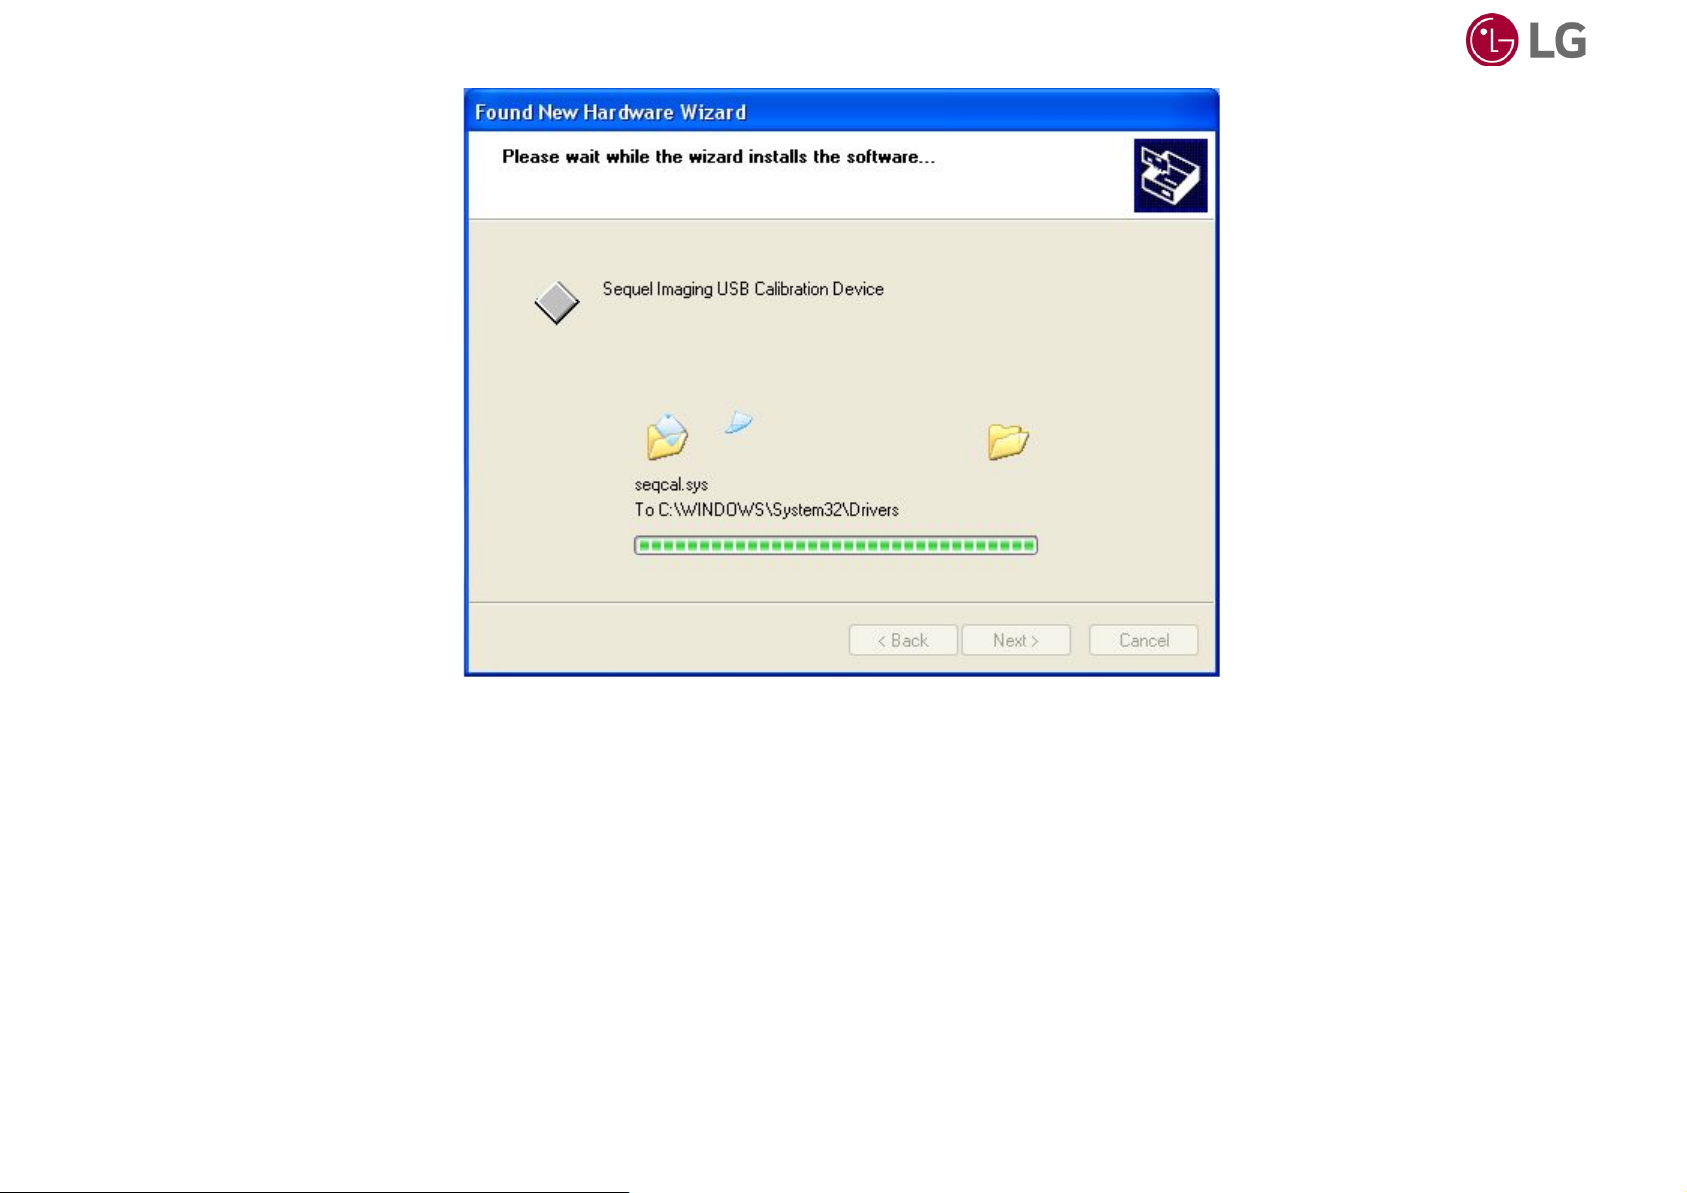
The software is installed automatically.
Page 17
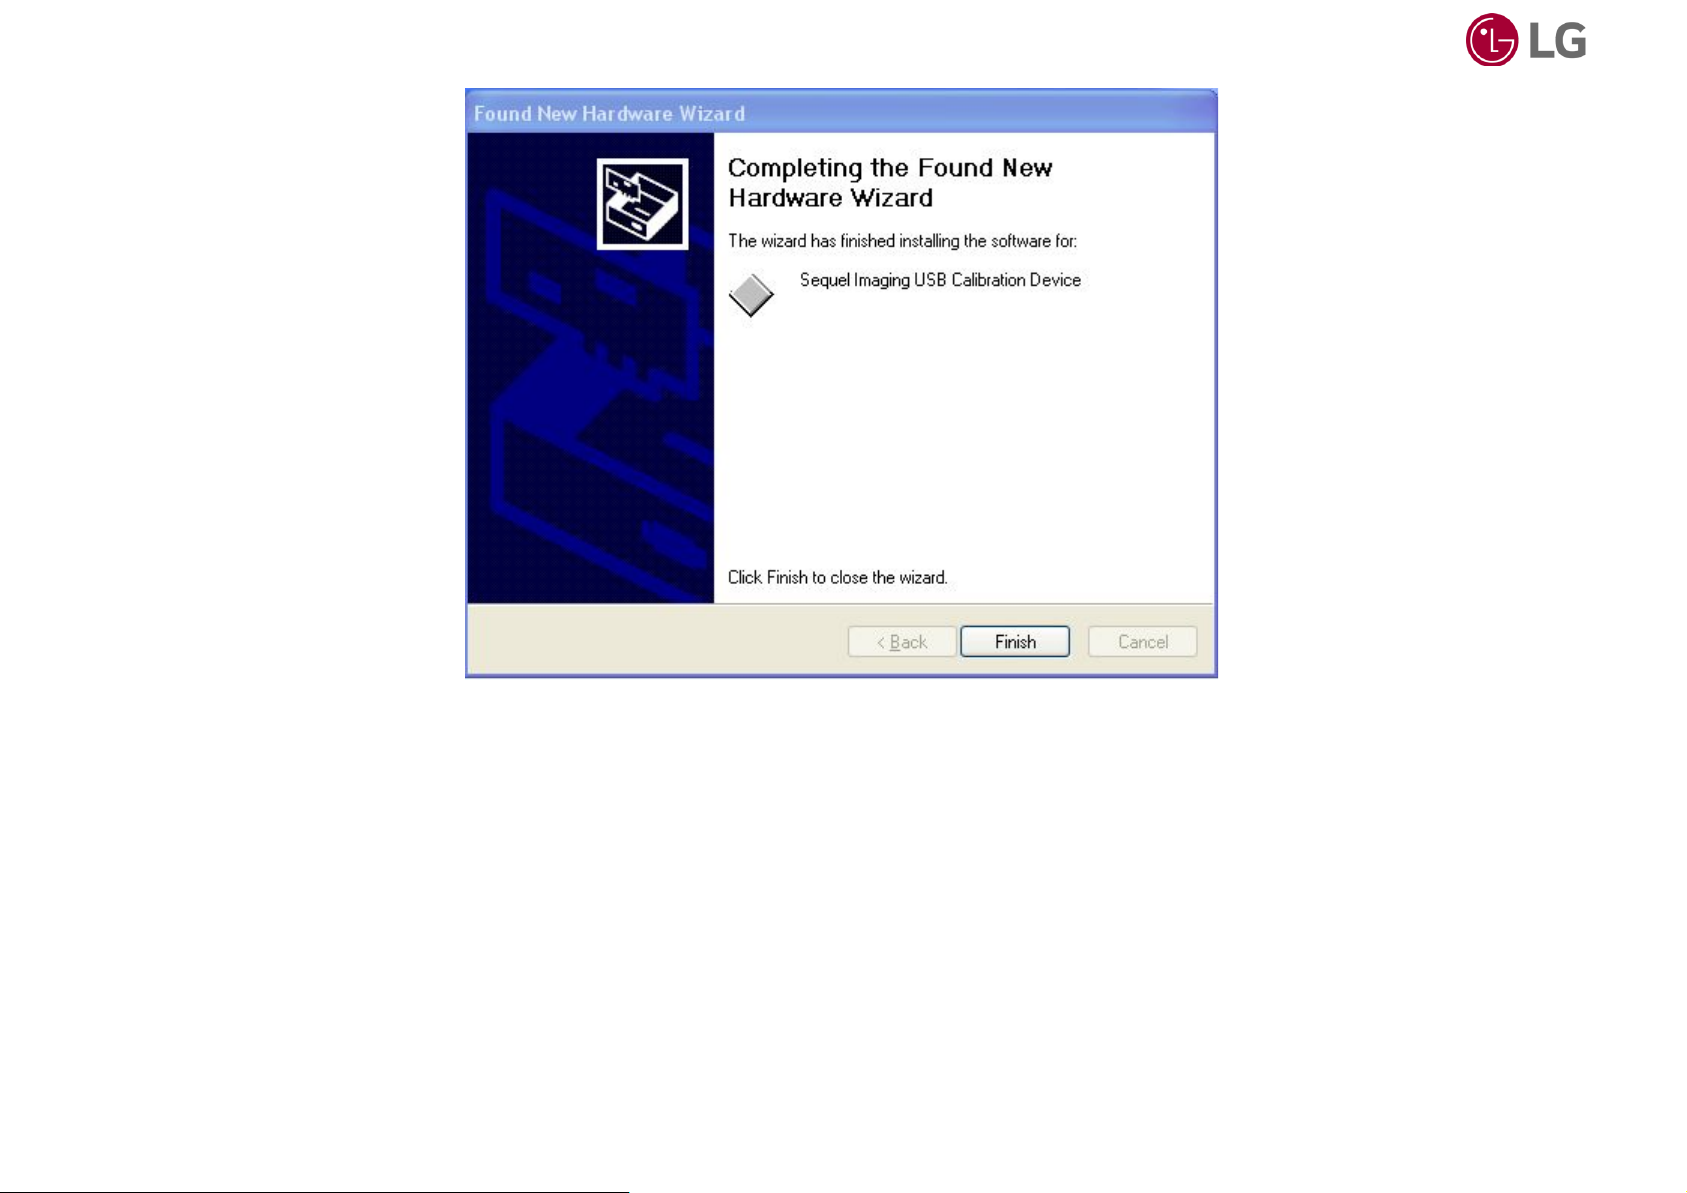
When all drivers have been loaded and configured, the wizard will prompt you to click on the “Finish” button.
Page 18
Windows will notify you when the measurement device is ready to use, by momentarily displaying the “Found New Hardware” message
balloon in the lower right corner of the screen.
Page 19

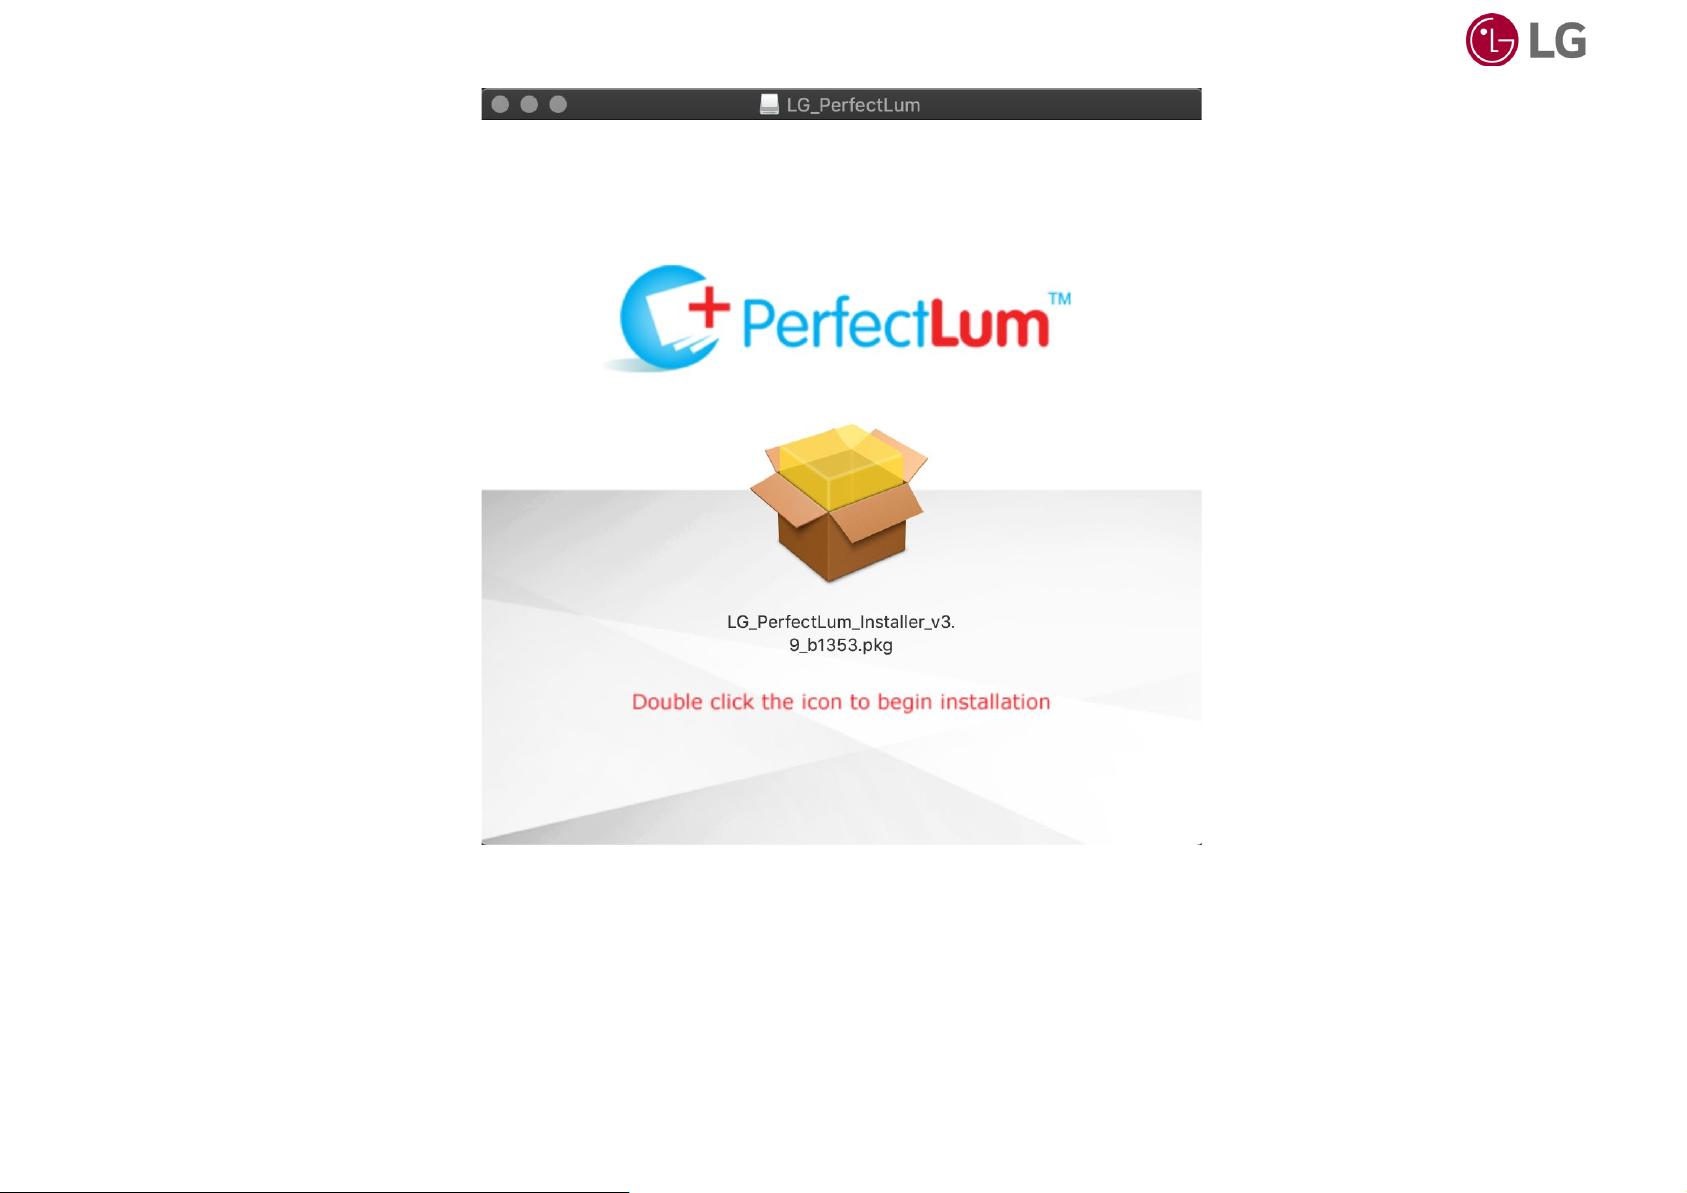
Mac OS:
Double click on the installer
Proceed by double clicking on the “box”.
Page 20
Page 21

Follow the instructions presented in the installer and click on the QUBYX software license agreement after reading it carefully.
Page 22

Click “Install” to begin the installation.
Page 23

1.5. The Main Window
Preliminary Conditions:
Before using the software, make sure the following conditions are observed:
- ambient light should be constant;
- ambient light should be as low as possible;
- no direct light should reach the display.
The tasks included in the Main Window:
On the left you can notice a list of displays linked to the PC. PerfectLum Suite provides visual feedback to help identify your display
in a multiple head situation. Double clicking on the selected display icon will identify the selected screen.
PerfectLum Suite Main window has 3 Tabs:
- Calibration and QA Tab. Here you can initiate calibrations and QA tasks.
- Scheduler Tab. Here you can manage your scheduled tasks.
- History Tab. Here you can view history data.
In the center of each tab there are buttons or lists of tasks to access all of the functionalities of the software.
Page 24

1.5.1. Calibration and QA Tab
Calibration: this function allows you to calibrate your display. The software will adjust your monitor based on your selected preferences.
First select the display you want to calibrate from the left menu and then click the “Calibration” button.
IMPORTANT: Calibration should always be started on a warmed-up display. Warm-up time is specified by the display manufacturer
(minimum 30 minutes).
White Level Calibration: adjusts the white level of your display to the target luminance in candelas.
Page 25

Create ICC Profile: creates a LUT - based ICC v4 profile of the display with the selected settings of the chromatic adaptation.
Acceptance Test: this task allows you to perform an acceptance test according to one of the following regulations: AAPM TG18, JESRA X,
DIN 6868-57, DIN 6868-157, IEC 62563-1 and NY PDM. The function automatically generates schedules for the corresponding
conformance tests. You can view the threshold values for each regulation by clicking the “Show Thresholds” button in QA Settings.
If you have already performed the acceptance test(s), you can import it into PerfectLum with the help of the “Import Acceptance Values”
Feature (see section 2.4.2).
Calibration Conformance: The function checks and validates the quality of the calibration and of the display ICC profile according to the
preferences you have selected as Calibration targets.
White Level Conformance: verifies the display’s luminance level.
All listed above functions (except Create ICC Profile) can also be performed in the demo version, which will be available during 15 days.
Page 26

1.5.2. Scheduler Tab
In the Scheduler Tab you can see automatically scheduled QA Constancy tasks (depending on the regulation you have selected). It is
possible to postpone the scheduled tasks, add, edit and delete locally created tasks.
Constancy test schedules that were created automatically by PerfectLum Suite software can not be deleted. Also, schedules that were
created from the system admin panel on the remote server can be edited and deleted only by the system admin.
Page 27

In order to create a new task click the “Add New Task” button and select the
following options: type of task (Calibration, Create ICC Profile, Calibration Conformance,
White Level Calibration, White Level Conformance, Display Test Pattern), the display you
want to perform
the task on, schedule type (Start-up, Once, Daily, Weekly, Monthly,
Quarterly, Semiannually, Annually) and the scheduled date and time.
You can also disable tasks - in this case you will not be notified about them
by the task notificator. Just check the ‘Disable Task’ box.
To edit a task, select the task, click the “Edit Task” button or double-click on the task.
To delete a task, select the task and click on the “Delete Task” button.
To launch a new task instantly, select the task and click on “Perform Selected Task Now”.
In the search field you can filter task types, displays, dates and frequency.
Page 28

1.5.3. History Tab
In the History Tab you can view tasks that were performed in the past. Simply double-click on a task to see the detailed report.
Select a task from the list and click “Perform Selected Task Again” to restart the task.
The search field enables you to filter task types, displays, dates and results.
Page 29

The ‘Show Display Consistency’ function indicates white and black levels of a selected display over time on a graph. The graph is shown
when enough data is collected (e.g. 2 or more tasks were performed on a display). Note that the data are shown only for connected
displays.
“Display Report” shows the option where you can select a time interval and a display for which you want to see a report of all QA tasks
performed.
1.6 Do my first calibration:
First select the display you want to calibrate from the menu on the left. After that, click the “Calibration” button. A Wizard will pop up and
will guide you in order to customize the calibration process.
Please note that the Wizard will not pop up if you have opened the preferences before.
IMPORTANT: Calibration should always be started on a warmed-up display. Warm-up time is specified by the display manufacturer
(minimum 30 minutes).
Select the calibration type by choosing between DICOM, Gamma, CIE L*, BT.709 and BT.1886.
If you want to calibrate the color of the display, check “Adjust Color Temperature” box, select the predefined target value or enter your
own value by choosing a “custom” option.
If you want to adjust the white level, check “Set White Level” box and enter the target white level luminance in candelas.
After you customized the calibration settings, place the sensor on the display and start the calibration process. Make sure no ambient light
reaches the sensor. After calibration is finished a report will pop up on the screen with the calibration results.
1.7. Do my first QA Acceptance test:
When you perform the first acceptance test a Wizard will pop up. The Wizard will prompt you to select the regulation and the display
category. In addition, you have to fill in some information about the location of your workstation and the responsible person. Please note
that the Wizard will not pop up if you have opened the preferences before.
Page 30

The acceptance test consists of two parts: a measurement part and a set of visual tests. The exact tests are determined by the selected
regulation. For measurement tests an on-screen or a handheld measurement device can be used. Please refer to the list of supported
measurement devices for detailed information.
After the acceptance test was performed, associated Consistency QA Tasks are automatically scheduled.
II. PREFERENCES:
2.1. Application Settings:
2.1.1. Language:
Set the language of the application. Supported languages: English, German, Japanese, Chinese, Korean, French.
2.1.2. Software Update:
Check the “Update Software Automatically” box if you want the software to notify you about new software updates.
2.1.3. Password Protection:
When you check the “Protect Settings by Password” box two fields will appear. Enter a password in the first field and repeat it in the
second field.
IMPORTANT: Make sure you note down the password in a secured location for future use, since you can not recover it from the system.
Once the preferences are protected by a password, they can be changed only when the correct password is entered. If the wrong
password is entered, the settings are visible, but can not be changed.
2.1.4. Export/Import Common Settings:
Settings of the application can be exported into one file as backup or as “golden” settings. The same settings can be imported into the
Page 31

application from other machines to work with the same settings and to save time during installations.
To export the settings, click on the “Export” button and browse the directory to select the folder where you want to save the settings.
To import the settings, click on the “Import” button, browse for the .qbxs settings file and click OK.
Please note that the “Display Settings” and the “Remote and Network Settings” will not be recovered. Display settings and serial numbers
can differ from each other and the different remote and network settings can be set on different workstations.
2.1.5. Backup/Recover:
This function will backup the entire database with all history data, settings and schedules. Click on the “Backup” button and browse the
directory where you want to save the database. Click “Recover” and browse the .qbx database backup file to recover the database.
Please note that the “Display Settings” and the “Remote and Network Settings” will not be recovered. Display settings and serial numbers
can differ from each other and the different remote and network settings can be set on different workstations.
Check the “Activate auto backup” box to have the software run an automatic backup every day, week or month. Select the directory
where you want the database to be saved.
Note: If the path you’ve chosen for auto backup is changed (renamed or deleted folder) the path line will become selected with a red
frame - choose a correct path for auto backup and save preferences.
2.2. Workstation Settings:
2.2.1. Workstation Name:
The workstation name is read automatically from the system. It can be overwritten to be personalized.
The workstation name can be changed and is used on the remote management server to identify your workstation among the others.
2.2.2. Ambient light:
Ambient Light is the reflection of ambient light on the switched off display panel. Enter a value for ambient light in candelas if you know it,
or click the “Measure Ambient Light” button to measure the reflection. During this process the software will switch off the backlight of the
Page 32

panel. You must place the sensor 15 cm away from the display facing the switched off panel. The software will measure the reflection of
an ambient light on the display panel.
During the measurement process don’t move the mouse and don’t hit any keys as it will switch the display back on. Once the
measurement is finished the display will be automatically switched back on.
2.2.3. Task Delay:
Check the “Use Scheduler to remind me when Tasks are due” box to program the application to automatically remind you when a task is
due. This function can also schedule start tasks automatically. Set the time between 5 and 60 minutes for the display to warm up after
the system boot before starting any scheduled tasks.
2.2.4. Sleep Mode:
Check the“Put display to Energy Saving Mode” box to put the display into an energy save mode for a set time period. In the energy save
mode the backlight of the display is switched off to save energy and to extend backlight lifetime.
2.3. Calibration Settings:
2.3.1. Calibration Type:
DICOM
Calibrates to NEMA DICOM Part 14 GSDF (Grayscale Display Function)
Gamma
Calibrates towards the gamma function. Enter a value for gamma. Typically Gamma 2.2 is used.
CIE L*
Calibrates to the Color Space Lab of the CIE (Commission Internationale d'Eclairage)
BT.709
Defines the image format parameters and values for HDTV, specifies the opto-electronic transfer
characteristics at the source.
BT.1886
Specifies the reference electro-optical transfer function that the displays used in HDTV programme
production should follow in order to facilitate consistent picture presentation.
Page 33

2.3.2. Color Temperature:
Check the “Adjust Color Temperature” box to calibrate the color of the display and to adjust the display to reach target color temperature.
You can enter the target color temperature in 3 different ways:
CIE Standard light source color
presets
Standard lights between D50 and P93. D65 is the mostly used value and represents daylight.
Color Temperature
Enter a value for color temperature. Color temperature is less precise and doesn’t represent a
standard like CIE standards.
Advanced settings x and y value
Enter the x and y coordinates of the CIE xyY color space. The values are generally used to
match any other device or film.
2.3.3. Gamut:
Check the “Adjust Gamut” box to include a Gamut calibration into the calibration process. Select the predefined color space or enter your
own by clicking the “Advanced” button.
2.3.4. White Level:
Check the “Set White Level” box to adjust the white level luminance of the display to a certain value. Enter the target value in candelas
into the field.
2.3.5. Black Level:
Check the “Set Black Level” box to adjust the black level luminance of the display to a certain value. Enter the target value in candelas
into the field.
Page 34

2.3.6. ICC/ICM Profile:
If you want to include an ICC Profile creation into the calibration process, check the “Create ICC/ICM Profile” box and select the necessary
chromatic adaptation.
2.4. QA Settings:
All information related to the Quality Assurance Regulations is entered in this section.
2.4.1. Regulation:
Select the Regulation you want to use and the Application Category.
Regulation
Category
Application
DIN 6868-57
Mammography
Mammography
A Diagnostic
B Reviewing
Dental
Dental
DIN 6868-157
Projection Radiology
Projection Radiology
Fluoroscopy
Fluoroscopy
Computer Tomography
Computer Tomography
Dental
Dental
Mammography
Mammography
Operation Room
Operation Room
Page 35

AAPM TG18
Primary
Diagnostic
Secondary
Reviewing
JESRA X-0093
Category 1
Diagnostic
Category 2
Reviewing
IEC 62563-1
Diagnostic
Diagnostic
Reviewing Monochrome
Reviewing
Reviewing Color
Reviewing
NY PDM
Mammography
Mammography
No Mammography
Diagnostic
Click the “Show Tests” button to see QA tests that are part of this regulation.
Click the “Show Thresholds” button to see the thresholds that will be applied during QA tests for this regulation and category.
2.4.2. Import Acceptance Values
Easily import all your previously performed QA tests into PerfectLum with the “Import Acceptance Values” feature. In order to
use this function, please go to Preferences -> QA Settings, select the desired regulation and click the “Import Acceptance
Values” button.
Page 36

Then select a display, date of the test and a name of a tester who performed the test. If the constancy tests have been
passed, please set the dates they were performed and check the appropriate boxes. After you have entered the values
measured in the imported test(s), click “OK” and wait until the confirmation message appears.
Page 37

In order to view a display report, you need to complete the following steps:
1. Open the “History tab” in the main window of PerfectLum
2. Click the “Display Report” button
3. Select the display for which you want to get a report
4. Set the time interval and click “OK”.
Page 38

Now you have a report with clear pass/fail indication of test results
Page 39

Note:
If you want to exclude the specific QA or Constancy tests data from the display report, you can click the right button on them
in the “History tab” and select the “Disable” option.
2.4.3. Workstation Location:
The workstation location contains the information about the workstation used to perform the tasks (e.g. Display Calibration, QA). Please
enter the information regarding your facility, department and room.
Note: this information will be displayed in reports.
2.4.4. Person Responsible:
The person responsible is the person who should be notified if something is wrong with the workstation. Please enter the information into
the corresponding fields.
2.5. Remote and Network Settings:
Activate Remote Control for the workstation and connect it to the PerfectLum Remote Control server.
2.5.1. Enable Remote:
Enter the IP address or the server address like https://remote.qubyx.com into the field “Server Address”. Enter the username and the
password of the PerfectLum Remote user account and click the “Enable Remote Management” button. When connection is established, a
dialog will pop up, asking you to select the workgroup for this workstation. Select the workgroup and click ‘Save’ - then all the data
(schedules, history and preferences) will be immediately synchronized with the remote server.
Note: Remote Admin account needs to be created first on PerfectLum Remote. In addition to this, you have to create a workgroup, a
facility and user accounts on Remote Server in advance.
Page 40

2.5.2. Remote Database Synchronization:
Select the time interval within which you want to synchronize the databases between the client and the server.
2.5.3. Your Proxy Server:
Check the “Use Proxy” box if you use a proxy server to access the internet. This action is required in order to access PerfectLum Remote
Management server if you do not use it on the intranet and for activating software license automatically via internet.
Note: If the “Use Proxy” box is checked, the license activation will be performed using the given settings.
III. LICENSE AND LICENSING:
3.1. Remote License:
Remote license is included for FREE. You can connect and manage your displays with QUBYX PerfectLum Remote server. The following
features are also free: Calibration Conformance, White Level Conformance, Display Test Pattern, Measure color.
3.2. PerfectLum Suite License:
PerfectLum Suite license is required to perform Calibration and White Level Calibration, QA Acceptance and Constancy tests for AAPM
TG18, JESRA X, DIN 6868-57, DIN 6868-157, IEC 62563-1 and NY PDM regulations. In order to activate the license, click the “Add
License” button, enter the license code and your email address into the selected fields and click “Activate”. The license will be activated if
your workstation is connected to the internet. If it is not connected, go to http://software-registration.org/ from any other machine and
enter the license code and the ID number from the workstation (visible in the license activation window). You will receive an unlock code.
Enter this code into the activation window to activate and unlock the software.
Page 41

IV. DISPLAY SETTINGS:
The displays connected to the workstation are visible in separate tabs. Select a display to adjust the settings for that specific display.
4.1. Ignore Display:
Check the “Exclude Display from Testing/Calibration” box if you do not want to perform any Quality Assurance tests or calibration on a
specified display.
4.2. Calibration Upload:
Calibration upload will select the location where LUT (Look Up Table) will be saved and the exact communication channel that will be used
to perform the action.
Note: Calibration upload is detected automatically for each display.
Calibration Upload
Look Up Table is saved in
Used communication channel
Graphics card
Graphics card
Graphics card
DDC/CI
Display
DDC/CI i2c channel
Serial
Display
Serial RS232
USB
Display
USB
4.3. Used Sensor:
Check the “Use Internal Sensor If Possible” box if your display has an internal Front Sensor and you want to use that sensor during
calibrations.
Note: The sensor is detected automatically for each display. If this option is missing, that means your display has no Front Sensor
available.
Page 42

4.4. Sensor Correlation:
The software can create a correlation table between an external measurement device and the embedded front sensor. The correlation
reduces the deviation between the measurements of an external sensor and the front sensor. To perform the correlation, you need first to
connect the external measurement device. Then click “correlation” in the Display Preferences, place the external sensor in the center of
the display panel and follow the dialog.
Page 43

Page 44

4.5. Display Model:
The software will read the model name of the display from its EDID. You can change the model name. The model name will be visible in
calibration and QA reports.
4.6. Display Serial Number:
The software will read the serial number of the display from its EDID. You can change the serial number. The serial number will be visible
in calibration and QA reports.
4.7. Display Manufacturer:
The software will read the name of the display manufacturer from its EDID. You can change the name. The manufacturer’s name will be
visible in calibration and QA reports.
4.8. Inventory Number:
You can set an inventory number for the display.
4.9. Type of Display:
Select the type of the display (Color or Gray). Depending on your choice, a different calibration algorithm and a different set of QA tests
will be used for this display.
4.10. Display Technology:
Select if the display is a Flat screen, LCD or a CRT screen. Depending on your selection different thresholds in QA regulations will be
applied.
Page 45

4.11. Screen Size:
The software will read the diagonal size of the display automatically.
4.12. Resolution (h/v):
The software will read the horizontal and vertical resolution of the display automatically. The resolution will be documented in QA reports.
4.13. Backlight Stabilization:
Select if the display has integrated backlight stabilization that maintains the white level of the display constant over time. If the display
has backlight stabilization the intervals for QA test will be longer.
4.14. Installation Date:
Enter the date when the display was installed.
Page 46

V. REGISTRATION
5.1. Free and Additional Features:
PerfectLum has free and additional features. Free features are available as soon as you install PerfectLum. Additional features can be
unlocked by buying the display calibration and QA license.
Free features
Additional features
Calibration Conformance
Display Calibration
White Level Conformance
White Level Calibration
Display Test Pattern
QA Acceptance Tests
Measure Color
QA Constancy Tests
Sync with remote
Create ICC Profiles
3D Gamut Viewer
History and Reporting
Task Scheduling
There are two possibilities to access the licensing part: over Preferences or License section from the main window.
Page 47

5.2. Licenses Functionality
Function
PerfectLum Suite
PerfectLum Suite
Demo Period
PerfectLum Suite
Expired Demo Period
Calibrate Display
+ + -
Hardware calibration and DDC/CI / USB / Serial
usage
+ - -
Adjust White Level
+ + -
Verify calibration
+ + +
Verify White Level
+ + +
Generate Display ICC Profile
+ - -
Adjust Gamut
+ - -
Perform Acceptance Test
+ + -
Perform Constancy Tests
+ - -
Schedule QA Tasks
+ + +
Edit Settings
+ + +
Edit Calibration Settings
+ + +
Edit QA Settings
+ + +
Measure Color
+ + +
Display Test Pattern
+ + +
Remote Control
+ + +
Note: Quick access to preferences is Ctrl+P for Windows or Command+P for Mac OS X.
Page 48

5.3. License Activation
To activate the Calibration and QA license,
click the “License” option in the main
window, and select “Registration/Activation”.
When the Registration/Activation window
opens, enter the serial number you
obtained when you purchased a license,
and choose an activation type.
For automatic online activation, just enter and repeat your
e-mail address, and click the “Activate” button.
For manual activation, follow the link and fill out the form
that you will find on the website. Enter the generated
workstation ID that you see below into the corresponding
field of the form. When you submit the form, an activation
code will be sent to your e-mail. Enter this code into the
field below and click “Activate”.
Page 49

When you finish the license activation, all licenses in the Preferences > License and Licensing section will be marked as active.
Page 50

Page 51

VI. PERFECTLUM SUITE MENU ITEMS:
6.1. Software Update
This function checks the server for a new PerfectLum Suite version. You will get a link to download a new version if there exists one.
6.2. About Us...
The window where you can see our contact information, license agreement, license information and version installed.
Tools:
Page 52

Tools are accessible in PerfectLum Suite from the Main Window > Tools
Note: Tools are included for free use.
6.3. Measure Color:
This function will open two windows. In the first window you can start measurement. Mix color and gray levels will be displayed in the
second window where measurements are actually performed. First select the RGB color patch with sliders or by entering a number for
RGB values. Then place the measurement device on the patch and start measuring. You can perform two measurements, the software will
compare them and will display color difference in Delta E with or without L (Luminance).
Note: Quick access to this tool is Ctrl+M (Command+M on MAC OS)
6.4. Display Test-Pattern:
Select the display where you want the test pattern to be displayed and select the test pattern you want to display. Click “View and
Check”. For displaying a test image that is not in the list, but is available on the system, select “User Image” click View and Check,
navigate to your image file and open it. Click on the test pattern or press “Escape” button on your keyboard to close it.
Note: Quick access to this tool is Ctrl+T (Command+T on MAC OS)
6.5. 3-D Gamut Viewer:
This function graphically displays the 3D gamuts of different profiles using the selected color spaces and rendering intents. It is possible to
calculate the percentage of Gamut intersection of two profiles.
6.6. Notification:
After a task is created, PerfectLum Suite Task Notification will pop up at the scheduled time provided that the warm up time has expired
(see “Use Scheduler to remind me when Tasks are due”). Click the “Perform Scheduled Tasks”’ button to carry out a scheduled task or
“Remind Me In” button to remind the user about the task later. You can also choose the time interval of getting a reminder in the combo
box placed near. Closing this window means “Remind Me In” + value that is set in the combo box.
Page 53

Note: For displays that have Front Sensors, measurement tasks that require no manual interruption (Display Calibration, Display
Conformance, White Level Calibration, White Level Conformance and Create ICC Profile) will be started automatically and report will not
be shown for the next task to start successfully.
6.7. Report:
After each measurement and QA task you will get a report where you can check your result with more details and graphs, and a summary
result (OK or Failed). Reports can also be exported as a .PDF file or printed. Use these two icons:
VII. OTHER
7.1. Matching Multiple Displays
To achieve identical image reproduction on two or more displays connected to one workstation side by side, or several displays connected
to different workstations, you will need to adjust such characteristics of the displays as color temperature, white level, and luminance
response to the same level.
To match image reproduction on two or more displays, follow this procedure:
1. Make sure all displays are set to the same values over the display OSD. Especially important are the color pre-settings, brightness,
and the contrast settings. Doing a factory reset on all displays can be helpful to make sure all of them start from a similar level.
2. Use only one measurement device. Measurement devices, unfortunately, still have considerable deviations when measuring color.
So it is recommended to use the same device on all displays.
3. Identify the weakest display. If you want all displays to have the same white level, you need to know which of them has the lowest
one and measure it. This white level will become the target value for all displays. It is important to have the same white level on
displays that are connected to one workstation and installed side by side.
4. Set your target values for white level, color temperature and luminance response in PerfectLum Preferences.
5. Perform a display calibration with those same settings on each of your displays.
Page 54

7.2. Read Me - mass installation of PerfectLum Suite version 3
Create your “master” settings file
Before performing a mass auto-installation you need to prepare your “master” settings file.
To do this just make ONE usual installation and set all needed configurations in preferences. (Important: Do not forget eventual proxy
settings if they are used in your network).
Then go again to Preferences > Application and click “Export”. The software will create the needed file for auto-configuration. The file
extension is .qbxs - save the file in your preferred location.
Installation
On every workstation you will need to:
1. Сopy the PerfectLum Suite installer msi file and the “master” settings file (.qbxs file)
2. In console run installation in silent mode (you MUST have administrative rights):
msiexec /i [PATH to installer]PerfectLum_Installer.msi /quiet
or if you need specific installation path:
msiexec /i PerfectLum_Installer_v3.0.436.msi /qn INSTALLDIR=D:\Apps\LGE\PerfectLum3
Page 55

Warning: the installation will not be completely silent - import of PerfectLum 2 database will appear for a few seconds. Also the user
might be asked to apply drivers installation.
run auto configuration:
[PATH]perfectlum.exe configure <PATH-to-Settings> [<PATH-to-Log>]
Examples:
“C:\Program Files\LGE\PerfectLum3\perfectlum.exe” configure default.qbxs
“C:\Program Files (x86)\LGE\PerfectLum3\perfectlum.exe” configure default.qbxs d:\logs\p3log.log
“D:\Apps\LGE\PerfectLum3\perfectlum.exe” configure d:\tmp\default.qbxs d:\logs\p3log.log
run auto registration:
[PATH]perfectlum.exe registration <SERIAL> <MAIL> [<PATH-to-Log>]
Example:
“C:\Program Files\LGE\PerfectLum3\perfectlum.exe” registration 012XERT2ASDF admin@hospital.co.uk d:\logs\p3log.log
run auto remote enabling:
[PATH]perfectlum.exe remote <SERVER> <LOGIN> <PASSWORD> <GROUP_NAME> [<PATH-to-Log>]
Example:
“C:\Program Files\LGE\PerfectLum3\perfectlum.exe” remote “http://remote.perfectlum.com” testuser testpassword “our group”
d:\logs\p3log.log
Notes:
<PATH-to-Log> - is an optional parameter in all commands
Page 56

<GROUP_NAME> - is the name of a workgroup you want to connect your machine to. Case insensitive, but sensitive to the whitespaces
7.3. PerfectLum Remote: System Administrator Guide
System Requirements
Virtual Machine (VM) is provided as an OVA package. So, you need virtualization software, which supports OVF (Open Virtualization
Format) and .vmdk disk images. Oracle VirtualBox is the preferred choice for running this VM. However, you can also use VMware
products.
About 550 Mb of free space is needed for an OVA package and minimum 2 GB needed for VM production use (1.5 GB base system and
500 Mb for database and backups). Note that database and backup images are constantly growing, so you may consider having more free
space in advance.
1. Installing and configuring VM
You should use the “Import Appliance” option from the “File” menu of Oracle VirtualBox Manager in order to install VM. All required
settings are predefined. However, you may tune some settings, such as amount of memory, to better fit your requirements. We
recommend to select the correct network card in virtual machine settings (network tab) before the first start.
After successful installation you may safely start VM. You may log into console when the login prompt appears. You need to do this in
order to check or set up an IP address for VM.
It takes IP address via DHCP by default, but you may want to set a static one.
2. TCP/IP Settings
In order to find VMs current IP address you need to complete following steps:
1. Log in as root (find passwords in “Default Settings” document).
2. Run “ifconfig” command and find “inet addr” for eth0 interface in its output.
Now, when you know the IP address of VM, you may use it to login via SSH or Webmin. Note, that “root” user is not allowed to log in via
SSH, so you should log in as “perfectlum” and then use “su” command with a root password.
Page 57

In order to set a static IP address or change other network configuration settings you should modify “/etc/network/interfaces” file. You
can find a full description of “interfaces” file in “Network Configuration” article from Debian
(http://wiki.debian.org/NetworkConfiguration#Setting_up_an_Ethernet_Interface).
The alternative way recommended by us is to change system and network settings is Webmin (check Default Settings document for
Webmin URL). You may change boot-time network settings by selecting “eth0” interface at “Network Interfaces’”section of “Networking
-> Network Configuration” menu.
Both “console way” and “Webmin way” are described for next tasks.
3. Configuring firewall
VM comes up with small set of predefined rules, which are stored at “/etc/iptables/rules” file and executed at boot-time. In order to
modify these rules you should edit firewall initialization script “/home/perfectlum/bin/perfectlum-firewall” and then execute it. However,
you may edit “/etc/iptables/rules” directly or via Webmin, but “perfectlum-firewall” script is the recommended way to update firewall
rules.
Console
# nano /home/perfectlum/bin/perfectlum-firewall
Modify firewall rules and save changes
# /home/perfectlum/bin/perfectlum-firewall
Webmin
Use “Linux Firewall” option of “Networking” menu.
Page 58

4. Mail delivery settings
You may want to provide an SMTP server address if you want to receive email notifications from PerfectLum Remote Management. The
only way to do this is updating the Exim configuration. Exim is the MTA (Mail Transport Agent) software, which is responsible for mail
delivery.
Open “/etc/exim4/update-exim4.conf.conf” file in a text editor and set “dc_smarthost” directive value to your SMTP server IP-address or
hostname. If your SMTP server uses a non-default port you may define it using “::” (two colons). Example:
dc_smarthost=’smtp.googlemail.com::587’
If your SMTP server requires authentication, you should define credentials in the “/etc/exim4/passwd.client” file. To do this just open
“/etc/exim4/passwd.client” in a text editor and add a new line with your credentials using the following format:
smtp_server:login:password. Example:
smtp.googlemail.com:perfectlum@example.com:examplepassword
When all changes are done you should run the “update-exim4.conf” script to generate new configuration files and then restart Exim.
Console
# nano /etc/exim4/update-exim4.conf.conf
Modify configuration files according to your needs
# nano /etc/exim4/passwd.client
Write credentials here if your SMTP server requires authentication
# update-exim4.conf
# /etc/init.d/exim4 restart
Page 59

Webmin
There is no possibility to do this in Webmin
5. Managing backups
VM is doing automatic database backups every night. Backup starts right after the midnight. Backups older than 7 days from the current
date are removed automatically.
Backups are stored at “/home/perfectlum/backups” in a separate disk image. So, you can even attach a physical partition or hard drive, if
you need more space for backups.
You may use “perfectlum-restore” script to restore database backup for particular date. Be careful, because “perfectlum-restore”
overwrites your current database.
To restore database backup just run “perfectlum-restore” with full path to backup the file you want to restore.
Example:
/home/perfectlum/bin/perfectlum-restore /home/perfectlum/backups/2011-01-01-perfectlum-mysql-backup
Don’t forget to restart MySQL when restore is finished. Simply run the following command:
/etc/init.d/mysql restart
Default Settings
Default System Accounts
System Administrator account
Login: root
Password: vb903lejfMPk1
Page 60

Default unprivileged account
Login: perfectlum
Password: plumadmin2912
MySQL Accounts
MySQL Administrator account
Login: root
Password: bemy349R00t
PerfectLum Database account
Login: perfectlum
Password: elj390g#$J@ld0289
Use “perfectlum” MySQL database while installing Remote Management.
Firewall Settings
New incoming connections are accepted for the following TCP ports:
20, 21, 22, 80, 443, 11001
New incoming connections are accepted for the following UDP ports:
68
All other new incoming connections which do not satisfy the stated rules are rejected.
All new incoming connections from localhost are accepted.
All outgoing connections are accepted.
Page 61

Webmin
Webmin is a web-based interface for system administration for Unix. Using any modern web browser, you can setup user accounts,
Apache, DNS, file sharing and much more.
Webmin is listening 11001 TCP port. Point your browser to “http:// VM_IP_ADDRESS:11001” and log in using one of default accounts to
use it.
Page 62

PerfectLum Remote site configuration
Enter the IP address (static IP or DHCP) in your browser.
A setup screen, where you can set the name, password and email
of "Super Admin", will appear.
Then click "Install". If the installation was successful,
a congratulation screen will show up.
Before you can connect workstations to Qubyx Remote, some preparations are necessary:
1. In Qubyx Remote, go to the "Setup" tab and then to:
Facilities - create a new facility (e.g. NYU Medical Center)
Workgroups - create at least one workgroup (e.g. CT, Radiology, etc.)
Page 63

Users - create an admin user
2. Now you can connect from client application Perfectlum Suite to Qubyx Remote New:
- open preferences and go to "Remote and Network Settings"
- enter Qubyx Remote IP as "Server Address"
- enter the admin user you have created and the password for this admin user
- click on the "Enable Remote Management" button.
That's it. Now your workstation is connected to Qubyx Remote and will synchronize its data at certain intervals, which are set in the same
dialog.
7.4. Acronyms
DICOM Digital Imaging and Communications in Medicine
GSDF Grayscale Display Function
CIE Commission Internationale d'Eclairage
BT Broadcasting service (television)
NEMA National Electrical Manufacturers Association
AAPM American Association of Physicists in Medicine
DIN Deutsches Institut für Normung
IEC International Electrotechnical Commission
NY PDM the New York state Primary Diagnostic Monitor (PDM) Quality Assurance Program
JESRA Japanese Engineering Standards of Radiological Apparatus
LUT Look Up Table
DDL Digital Driving Levels
JND Just-Noticeable Difference
OSD On Screen Display
Page 64

7.5. QUBYX SOFTWARE LICENSE AGREEMENT
IMPORTANT - READ CAREFULLY:
This License Agreement ("Agreement") is a legal contract between You, a user ("You"), and QUBYX ("QUBYX") for the QUBYX software
identified above, which encompasses all material and software accompanying this Agreement, including computer software, associated
printed material, readme file, online help, and any other accompanying information and documentation (collectively "Software").
By clicking the acceptance button, installing, or otherwise using the Software, You are consenting to be bound by the terms of this
Agreement. If You do not agree to all of the terms of this Agreement, QUBYX is not willing to license the Software to You. If You do not
agree to be bound by the terms of this Agreement, click the button that indicates that You do not accept its terms, do not install, copy, or
otherwise use the Software, and contact QUBYX for instructions on how to return the unused Software.
1. Software License
a) Grant of License
QUBYX hereby licenses to the extent described below the use of the software but does not sell the Software to You. You acknowledge that
You do not acquire any rights of ownership or title in the Software. You own the media and the dongle, if any, on which the Software
resides and is copy-protected, respectively, but QUBYX retains all right, title and interest in and to the Software, which is the subject of
copyright, trade secret, trademark and patent rights, among other intellectual property and proprietary rights ("Proprietary Rights").
b) Restricted use
QUBYX hereby grants You under all its Proprietary Rights the personal, non-exclusive right to install and use the Software for its intended
purpose in connection with ICC-profiles and LUTs (Look Up Tables), in particular the creation thereof on a single personal computer or
workstation and to make one copy of the Software in machine-readable form for backup purposes only. You must reproduce the copyright
notices and any other proprietary legends that were on the original copy of the Software on any such copy. QUBYX grants no rights or
license of any kind for the Software to You other than those expressly granted above.
c) Additional Specified Restrictions
To avoid any doubt, the limited license to use the Software granted above, places the following limitations and restrictions on Your use of
the Software.
i) Reverse Engineering and Decompilation
Page 65

You understand and acknowledge that the codes, structures, methods and other elements comprising the software are confidential to and
trade secrets of QUBYX. Accordingly, You may not disassemble, decompile, reverse engineer or otherwise attempt to create or derive
source codes for the computer program comprising the Software or reduce such programs of any of their component structures,
algorithms or other elements to a human-perceivable form. You may not modify or translate any part of the Software.
ii) No other Use
Except as expressly permitted in Section 1(a) above, You may not disclose, distribute, modify, make or have made any copies of the
Software, in whole or in part, nor sell, rent, lease, license or lend the Software without prior written authorization of QUBYX.
iii) Multiple installation / Single Use at the time
The Software may be used by You on one single personal computer or workstation at the time. Specifically, You may install the Software
on more than one computer at Your premises or at Your home at a time, however, the use of the Software must always be connected with
the use of the dongle provided by QUBYX. You are not permitted to circumvent the protection given by the dongle. Furthermore, it is not
allowed to use the Software or to network the Software to multiple computers or terminals without first obtaining an expanded license
from QUBYX to cover such additional users and computers. QUBYX may replace the dongle by any other means of protection without
previous announcement.
2. Use of LUT (Look Up Table) and profiles
a) The Software is licensed for use only as follows:
(i) to create LUTs and profiles on a specific input or output device that You own or otherwise possess and for which they were created
("Your Device"). You may make these LUTs and profiles available to third parties only under circumstances in which the third party will be
optimizing images that have been created on or will be output on Your Device, provided that Your Device continues to be owned by You or
in Your possession at such time that a profile is made available to such third party; or
(ii) to create LUTs and profiles by using reference characteristic data which are publicly and without consideration provided by professional
or trade associations like standardization institutes to be used for their intended purpose.
b) No Distribution of generic LUTs and profiles
Page 66

This Agreement does not grant You the right to distribute or embed created LUTs and profiles, also not under Your private label, into any
software, devices or consumables like Computer Displays, Digital cameras, Printers, Projectors, paper that You manufacture, market or
distribute to third parties. If You wish to create LUTs and profiles for this purpose, You will need a separate license for each device. With
regard to generic LUTs and profiles created by non-profit organizations like the ECI, QUBYX is however prepared to permit to embed such
LUTs and profiles into any software, devices or consumables to be distributed commercially by an agreement on a case by case basis. For
information on a separate license You may contact support@qubyx.com.
3. Copyrights, Trademarks and Patents
The marks "PerfectLum", "PressProof", "Display4Proof", "QUBYX", "ChromaView", as well as QUBYX’s logo are registered trademarks of
QUBYX or its affiliated companies. The technology in this product is covered by European patents, with additional U.S. and international
patents pending. The Software including, without limitation, any images and text incorporated therein, as well as the ICC-profiles and
LUTs created by You, are the subject to international copyright protection. This Agreement grants You no other rights, licenses, or
interests of any kind in or to such copyright, trademarks and patents, other than granted herein. You agree that You will assert no other
rights, licenses or interests other than those granted herein or otherwise challenge QUBYX or QUBYX’s affiliated Companies exclusive
ownership of such copyrights, trademarks and patents.
4. Duty to Inform
You agree to make reasonable efforts to notify and inform everyone having access to the Software or the computer on which it is installed
of all applicable restrictions limiting use of the Software, as well as Your other duties and obligations under this Agreement. You agree to
provide notice to QUBYX immediately after learning of or having reason to suspect a breach of any of the restrictions set forth in this
Agreement.
5. Termination
This Agreement is effective until terminated. You may terminate this Agreement at any time by returning to QUBYX any disks, CDs and
any associated dongles as well as associated documentation or other copies of the Software under Your control, together with written
notice of Your intent to terminate this Agreement. If You fail to comply with any provision of this Agreement, this Agreement will
automatically and immediately terminate without notice from QUBYX or the requirement of any other action by QUBYX. Upon termination
by QUBYX, You must destroy or return to QUBYX all copies of the Software in Your control.
Page 67

6. Improvements
You agree that QUBYX may, on a non-exclusive basis, use for any purpose, in any media now known or hereafter devised, all suggestions,
improvements, and any other information, ideas, concepts, know-how, works of authorship, and inventions (including corrections to
problems with the Software, whether written or oral) (collectively, "Improvements") developed by You during the term of this Agreement.
You will promptly notify QUBYX of all such Improvements without any duty of accounting or other compensation by QUBYX.
7. Government Licensee
If You are acquiring the Software on behalf of any unit or agency of the United States Government, the following provisions apply. The
Government acknowledges QUBYX’s representations that a) the Software was developed at private expense, contains information that is
confidential and proprietary to QUBYX, is a trade secret and is copyrighted; and b) the Software is "Restricted Computer Software" as that
term is defined in Clause 52.227-19 of the Federal Acquisition Regulations ("FAR") and is "Commercial Computer Software" as that term is
defined in the Department of Defense Federal Acquisition Regulation Supplement ("DFARS"). The Government agrees that if the Software
is supplied to the Department of Defense ("DoD"), the Software is classified as "Commercial Computer Software" and the Government is
acquiring only "limited rights" on the Software as that term is defined in Clause 252.227-7013(a)(13) of the DFARS. If the Software is
supplied to any unit or agency of the United States Government other than DoD, the Government agrees that the Software is classified as
"Restricted Computer Software" and the Government’s rights on the Software will be as defined in Clause 52.227-19(c)(2) of the FAR.
8. No Warranties
THE SOFTWARE IS PROVIDED "AS IS", WITHOUT ANY WARRANTY OF ANY KIND. QUBYX EXPRESSLY DISCLAIMS ALL WARRANTIES,
WHETHER EXPRESSED OR IMPLIED, INCLUDING BUT NOT LIMITED TO THE IMPLIED WARRANTY OF MERCHANTABILITY AND FITNESS
FOR A PARTICULAR PURPOSE; ANY WARRANTIES ARISING FROM A COURSE OF DEALING, USAGE OR TRADE PRACTICE; AND ANY
WARRANTIES OF NON-INFRINGEMENT OF ANY THIRD PARTY'S PATENT(S), TRADE SECRET(S), TRADEMARK(S), COPYRIGHT(S) OR
OTHER INTELLECTUAL PROPERTY RIGHTS. QUBYX DOES NOT WARRANT THAT THE FUNCTIONS CONTAINED IN THE SOFTWARE WILL
MEET YOUR REQUIREMENTS, THAT THE OPERATION OF THE SOFTWARE WILL BE UNINTERRUPTED OR ERROR-FREE, THAT DEFECTS IN
THE SOFTWARE WILL OR CAN BE CORRECTED. FURTHERMORE, QUBYX DOES NOT WARRANT OR MAKE ANY REPRESENTATIONS
REGARDING THE USE OR THE RESULTS OF THE USE OF THE SOFTWARE IN TERMS OF THEIR CORRECTNESS, ACCURACY, RELIABILITY,
OR OTHERWISE. NO ORAL OR WRITTEN INFORMATION OR ADVICE GIVEN BY QUBYX OR QUBYX'S AUTHORIZED REPRESENTATIVE OR
ANY REPRESENTATION MADE BY QUBYX OR ITS AUTHORIZED REPRESENTATIVE SHALL CREATE ANY WARRANTY.
Page 68

9. Limitation of Liability
UNDER NO CIRCUMSTANCES SHALL QUBYX BE LIABLE FOR ANY LOST REVENUE OR PROFITS OR ANY INCIDENTAL, INDIRECT, SPECIAL,
PUNITIVE OR CONSEQUENTIAL DAMAGES THAT RESULT FROM THE USE OR INABILITY TO USE THE SOFTWARE, EVEN IF QUBYX OR ITS
AUTHORIZED REPRESENTATIVE HAS BEEN ADVISED OF THE POSSIBILITY OF SUCH DAMAGES IN ADVANCE OR SUCH DAMAGES WERE
CAUSED BY QUBYX'S NEGLIGENCE. IN NO EVENT SHALL QUBYX'S TOTAL LIABILITY TO YOU FOR ALL DAMAGES, LOSSES AND CAUSES
OF ACTION, WHETHER IN CONTRACT, TORT (INCLUDING NEGLIGENCE) OR OTHERWISE, EXCEED THE AMOUNT PAID BY YOU FOR THE
SOFTWARE.
10. General
a) The material laws of France shall govern the interpretation and enforcement of this Agreement. If You are in North America, the
material laws of the State of New York shall govern the interpretation and enforcement of this Agreement.
b) If any term or provision of this Agreement or application thereof to any person or circumstances shall to any extent be invalid or
unenforceable, the remainder of this Agreement, or the application of such term or provision to persons or circumstances other than that
which is held to be unenforceable or invalid, shall not be affected thereby, and each such term and provision shall be valid and be
enforced to the full extent permitted by law.
c) This Agreement constitutes the entire understanding of the parties with respect to the Software and supersedes all prior and
contemporaneous agreements, understandings, representations, warranties, promises and other communications of any kind, whether
written or oral, between the parties with respect to the Software. No alteration, modification, variation or waiver of this Agreement, or
any of the provisions hereof shall be effective unless executed by both parties in writing.
 Loading...