

LF Illumination VF100 Series Installation Instructions Manual
VF100 Series
DUAL TRIM INSERT
Warnings:
* Risk of fire or electric shock.
* Disconnect all power before installing or servicing.
* Installation Instructions for qualified electricians only.
* Install per National Electrical Code and local regulations.
* Read Installation Instructions completely before installation.
* Failure to follow Installation Instructions may void warranties.
C US
®
Pre-Installation Note: The trim insert and housing are packaged and shipped in separate cartons. Set the trim unit aside in a
clean and undamaging environment. The trim unit will be put in place after housing / ceiling installation. For joist installations or where
wiring access to housing is limited, it is advised to pre-wire the housing with leads before installation.
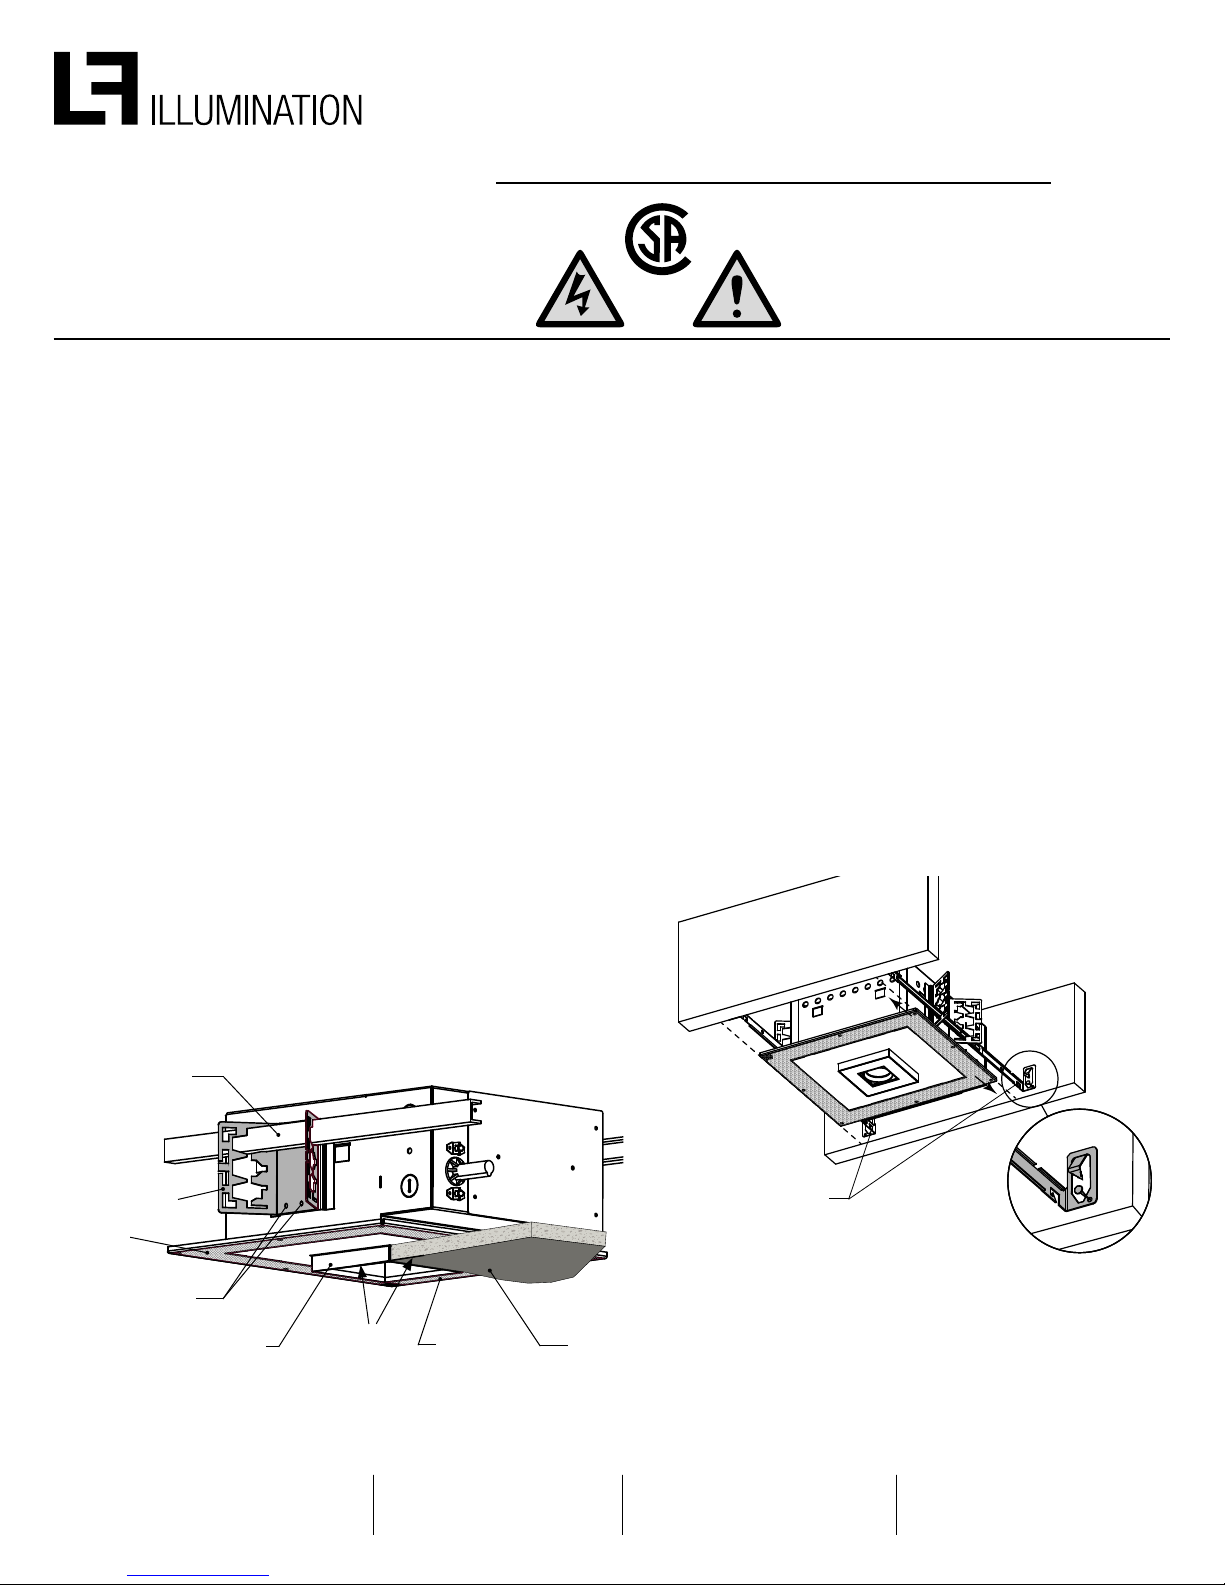
Butterfly Mounting (Commercial):
Step 1. Fixture comes equipped with Universal BUTTERFLY
MOUNTING BRACKETS and take common 1” or 1-1/2” Black
Iron or Galvanized MOUNTING CHANNELS (Supplied By Others).
Step 2. POSITION FIXTURE so the MOUNTING CHANNELS lie on
top of ceiling runners.
Step 3. Fasten MOUNTING CHANNELS securely to the ceiling
runners with wire tie downs.
Step 4. Secure MOUNTING CHANNELS to the UNIVERSAL
BUTTERFLY MOUNTING BRACKETS with wire tie downs.
Step 5. ADJUST ELEVATION OF FIXTURE so that the surface of
the PERFORATED HOUSING PLATE SITS FLUSH with the top of
the finished ceiling surface AND THE TRIM COLLAR EXTENDS
FLUSH WITH THE FINISHED CEILING AND MUD PLATE.
Joist Installation:
HANGER BARS required for installation. (Supplied)
Step 1. Extend HANGER BARS to fit between joist and
attach to joist or frame member using appropriate hardware for
material. See Fig 2, Detail 2A.
Step 2. ADJUST ELEVATION OF FIXTURE so that the surface of
the PERFORATED HOUSING PLATE SITS FLUSH with the top of
the finished ceiling surface AND THE TRIM COLLAR EXTENDS
FLUSH WITH THE FINISHED CEILING AND MUD PLATE.
See Fig 1. Step 6.
Step 3. Position housing horizontally by sliding on hanger bars.
Secure housing in position using wire tie downs.
THIS PRODUCT MUST BE INSTALLED IN
ACCORDANCE WITH THE APPLICABLE
INSTALLATION CODE BY A PERSON
FAMILIAR WITH THE CONSTRUCTION AND
OPERATION OF THE PRODUCT AND THE
HAZARDS INVOLVED.
Page 1 of 2
INSTALLATION INSTRUCTIONS
Step 6. The perforated housing plate is adjustable from 1/2” to
1” ceiling thickness. Fine adjustments can be made by loosening the two (2) 1/4” HEX SCREWS on both UNIVERSAL
BUTTERFLY MOUNTING BRACKETS and set collar depth
accordingly Fig 1 / Fig 5 Detail.
Mounting Channel
(By Others)
Universal Butterfly
Mounting Bracket
Perforated
Housing Plate
(2) 1/4” Hex Screws
Trim Collar
Align Collar
to Ceiling
Perforated
Housing Plate
FIGURE 1
©2014 LF ILLUMINATION LLC
We reserve the right to change or
withdraw specifications without prior notice.
HEADQUARTERS
9200 Deering Avenue
Chatsworth CA 91311
Finished
Ceiling Material
Hanger Bars
(Supplied)
Telephone: 818-885-1335
Toll Free: 855-885-1335
Fax: 818-576-1335
FIGURE 2
Detail 2A
www.lfillumination.com
VF1002LT 07.19.14
VF100 Series
Trim Collar
DUAL TRIM INSERT
INSTALLATION INSTRUCTIONS
Page 2 of 2
ELECTRICAL CONNECTION:
The housing features an easy access junction box for
simplified field wiring installation.
DO NOT modify the factory wiring settings as it may cause
the luminaire to malfunction and void warranty.
Notes: The junction box will accept 3/4˝ trade size fittings.
Review fixture labeling to make sure it is rated for the voltage
installation being used. Make sure no bare wires are
exposed outside wire connectors.
Step 1. Provide electrical service according to the “National
Electrical Code” or your local electrical regulations from a
suitable junction box. Supply wire insulation must be rated for
at least 90°C.
Step 2. Remove junction box cover Fig 3.
Step 3. Remove appropriate round knockout and connect
conduit to junction box with proper connector (not included).
Step 4.
Non-Dimmable or Phase Dimmable:
120V or 277V AC Supply: Connect white to white, black to
black and green (from electrical service) to the green copper
wire located in the junction box.
0-10V Dimmable:
Connect PURPLE wire to D+ and GREY wire to D-. If not
dimmed, these wires should be capped. For other dimming
please contact factory.
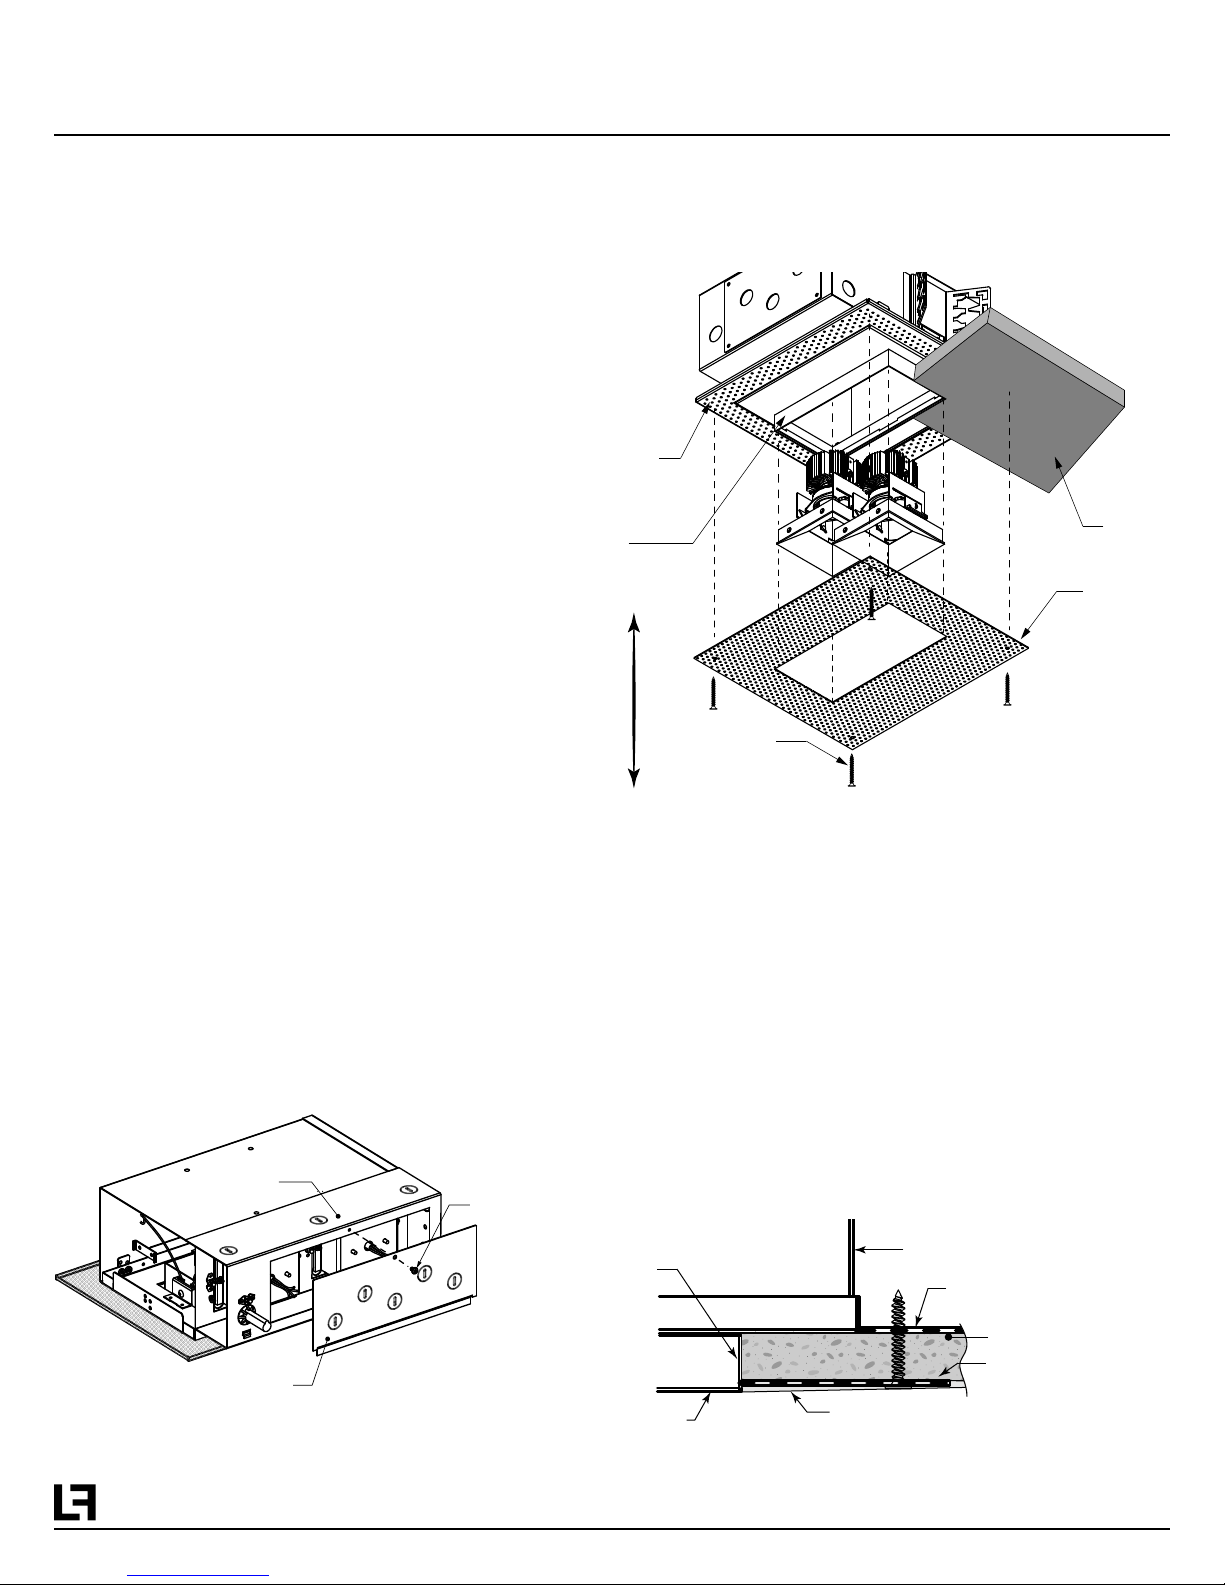
TRIMLESS INSTALLATION ASSEMBLY
Perforated
Housing Plate
Adjustable
Trim
Collar
Drywall
Screws
Finished
Ceiling
Perforated
Mud Plate
FIGURE 4
CEILING INSTALLATION:
Step 1. CUT A CLEAN SQUARE OPENING in the CEILING MATERIAL to fit
the trim collar. Install the ceiling material below housing as shown in
Fig 1. Ceiling Cut-Out - 4.13” x 8.13”
Step 5. Place all connections and excess wiring into the
junction box and replace cover Fig 3.
Junction Box
Junction Box Cover
FIGURE 3
Cover
Screw
Step 2.
capturing ceiling between the perforated housing plate and perforated
mud plate. Secure using drywall screws (4) places as shown in
PLACE the PERFORATED MUD PLATE around collar opening,
Fig 4.
Step 3. SPREAD MUDDING COMPOUND from trim collar opening and
mud plate onto the finished ceiling. Feather back at least 12” on to the
finished ceiling. See detail Fig 5.
Aperture
Wall
Mud Finish to Aperture
Housing
Perforated
Housing Plate
Drywall Ceiling
Perf. Mud Plate
TRIMLESS DETAIL
FIGURE 5
www.lfillumination.com
VF1002LT 07.19.14
 Loading...