

Page 1
Installation Instructions for LED Medicine Cabinet
Installation Instructions:
Note: To ensure general use of this product please follow the installation
instructions carefully. Must be installed indoors and on a suitable load bearing
wall.Installation should be done by a licensed contractor and/or electrician.
Only a clean soft cloth should be used to clean this product.
Installation Tools Needed
Measu rin g Tape
①
Lev el
E
F
F
②
E
Drill Screwdriver
AB
③
E
AB
Hammer
F
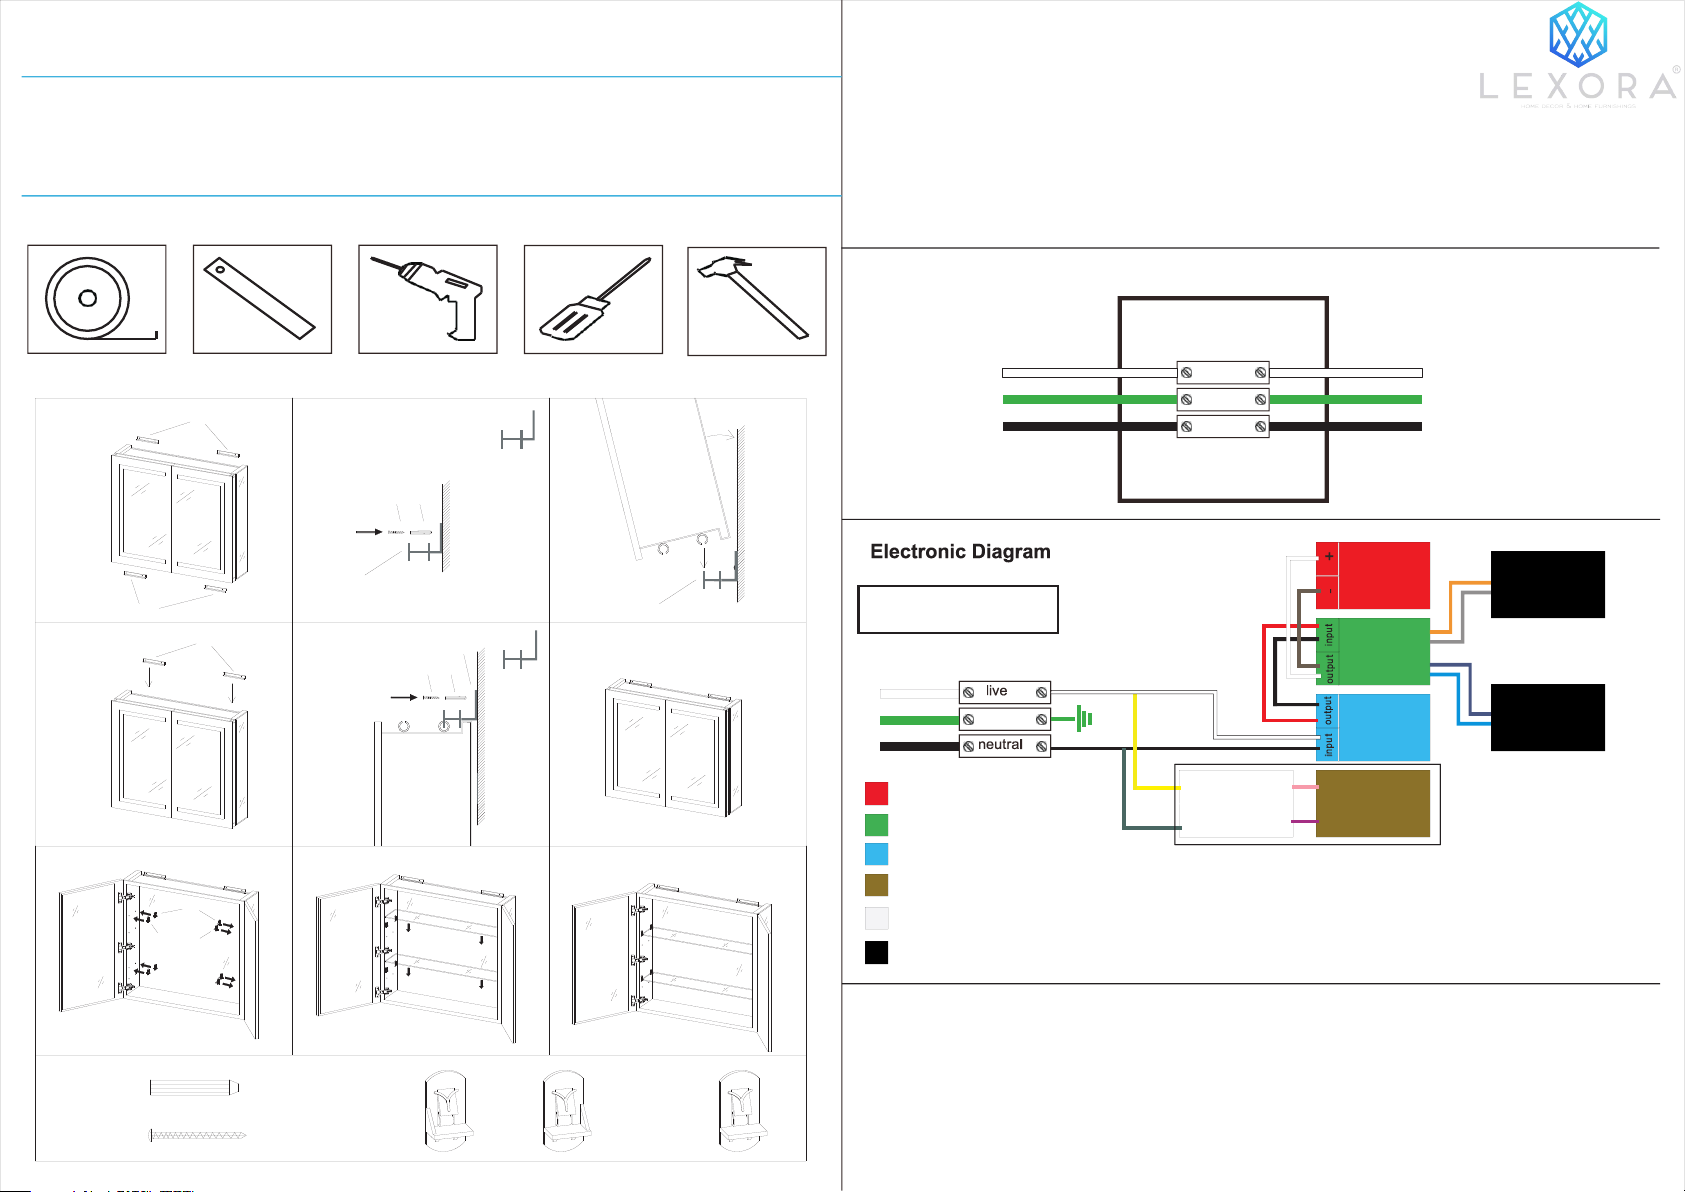
Fig①: Unpack the "E" and "F" mounting brackets.
Fig②: Install the "F" bracket using the "A" anchor and "B”. Make sure the "F" bracket is in the horizontal position.
Fig③: Lift the medicine cabinet and securely place in the "F" bracket as shown in the illustration.
Fig④: Hold the cabinet in the upright position and securely fasten the "E” bracket in the grove on top of the cabinet.
Fig⑤: Use "A" anchor and "B" screw through the mounting hole to secure the "E" bracket to the wall.
Fig⑦: Insert the provided shelf clips (C1/C2/D) into the round holes on both sides of the cabinet.
Fig⑧: After installing the shelf clips, insert the glass shelve(s).
W irin g d ia g ra m fo r in p u t te rm in a l
White
Green
Black
MAIN SUPPLY
live
ground
neutral
White
Green
Black
MAIN SUPPLY
ground
LED Strip
④
D
C1
C2
⑦
⑤
⑧
⑥
⑨
A
B
C1
DC2
Bluetooth (optional function)
Constant-voltage power
Defogger (optional function)
Transfer relay for Defogger
Bluetooth speaker (optional function)
CAUTION:
During operation of this product, never use hard or sharp objects directly against the mirror
surface, as it may result in damage and/or personal injury. Clean the product with a soft
cloth and mild detergent only. Do not use abrasives, chemical cleaners, or leave any
solutions on the surface such as soup, shampoo, etc. as they may damage the mirror.
 Loading...