

Page 1

Z700 Series Color Jetprinter™
P700 Series Photo Jetprinter™
User’s Guide for Mac OS X
• Setup troubleshooting
A checklist to find solutions to common setup problems.
• Printer overvie w
Learn about t he printer parts and the printer software.
• Printing ideas
How to print several projects on various types of paper.
• Maintenance
Caring for your cartridges and ordering supplies.
• General troubleshooting
Error messages, print quality problems, paper jams, and
much more.
January 2003
www.lexmark.com
Page 2

Edition: January 2003
The following paragraph does not apply to any country where such provisions are inconsistent with local law: LEXMARK
INTERNATIONAL, INC., PROVIDES THIS PUBLICATION “AS IS” WITHOUT WARRANTY OF ANY KIND, EITHER EXPRESS OR
IMPLIED, INCLUDING, BUT NOT LIMITED TO, THE IMPLIED WARRANTIES OF MERCHANTABILITY OR FITNESS FOR A
PARTICULAR PURPOSE. Some states do not allow disclaimer of express or implied warranties in certain transactions; therefore, this
statement may not apply to you.
This publication could include technical inaccuracies or typographical errors. Changes are periodically made to the information herein;
these changes will be incorporated in later editions. Improvements or changes in the products or the programs described may be made
at any time.
Comments about this publication may be addressed to Lexmark International, Inc., Department F95/032-2, 740 West New Circle Road,
Lexington, Kentucky 40550, U.S.A. In the United Kingdom and Eire, send to Lexmark International Ltd., Marketing and Services
Department, Westhorpe House, Westhorpe, Marlow Bucks SL7 3RQ. Lexmark may use or distribute any of the information you supply in
any way it believes appropriate without incurring any obligation to you. You can purchase additional copies of publications related to this
product by calling 1-800-553-9727. In the United Kingdom and Eire, call +44 (0)8704 440 044. In other countries, contact your point of
purchase.
References in this publication to products, programs, or services do not imply that the manufacturer intends to make these available in
all countries in which it operates. Any reference to a product, program, or service is not intended to state or imply that only that product,
program, or service may be used. Any functionally equivalent product, program, or service that does not infringe any existing intellectual
property right may be used instead. Evaluation and verification of operation in conjunction with other products, programs, or services,
except those expressly designated by the manufacturer, are the user’s responsibility.
Lexmark and Lexmark with diamond design are trademarks of Lexmark International, Inc., registered in the United States and/or other
countries. Color Jetprinter and Photo Jetprinter are trademarks of Lexmark International, Inc. Other trademarks are the property of their
respective owners.
© 2003 Lexmark International, Inc.
All rights reserved.
UNITED STATES GOVERNMENT RIGHTS
This software and any accompanying documentation provided under this agreement are commercial computer software and
documentation developed exclusively at private expense.
2
Page 3

Content s
Chapter 1: Printer overview .......................................................... 5
Understanding the printer parts..................................................... ................. 5
Using memory ca r ds (L e x m a rk P7 00 S e ries only)............ ............. .. .. ............ 7
Using the printer software .............................................................................. 9
Using the paper type sensor.......................... .................. ................... ......... 14
Chapter 2: Printing ideas............................................................. 15
Printing on plain p a pe r . .. .............................................................................. 15
Printing phot o s .... .. .. ................................................................................ .. .. . 16
Printing on premium paper........................................................................... 18
Printing card s .... .. .......................... ... .. .......................................................... 20
Printing envelopes........................................................................................ 23
Printing color images in black and white............................ ...................... .... 25
Printing labels............................................................................................... 26
Printing handouts ........................................................................................ 29
Printing iron-on transfers.............................................................................. 31
Printing trans p a re n c ie s.......... ....................................... .. ... .......................... . 33
Printing your document in reverse order ...................................................... 35
Chapter 3: Maintenance............................................................... 37
Replacing the print cartridges... .. .................... .................... .................... .. .... 37
Specifying cartridge setti ngs in the printer software..................................... 40
Aligning the prin t cartridges... .. ..................................................................... 41
Improving print quality.................................................................................. 42
Preserving the print cartridges..................................................................... 44
Ordering supplies..... ............................... ............................... ...................... 44
Chapter 4: Setup troubleshooting.............................................. 45
Contents
3
Page 4

Troubleshooting checklist............................................................................. 45
When I insert the printer software CD, nothing happens.............................. 46
Solving printer software installation problems.............................................. 47
Chapter 5: General troubleshooting........................................... 49
Solving network printing problems ............................................................... 49
Understanding error messages and flashing l ight s...................................... 49
Resolving unsuccessful or slow printing....................................................... 51
Clearing paper misfeeds or jams......... ......................................................... 53
Solving print quality problems ...................................................................... 55
Solving specialty media problems................................................................ 57
Notices........................................................................................... 59
Glossary......................................................................................... 61
Index............................................................................................... 64
Contents
4
Page 5

1
Printer overview
Understanding the printer parts
Lexmark™ Z700 Series Color Jetprinter™
Paper support
Paper guide and
release tab
Front cover
USB cable connector
Power supply connector
Paper Feed button
Power button
Paper exit tray
Printer overview
5
Page 6

Lexmark P700 Series Photo Jetprinter™
Paper guide
and release tab
Front cover
USB cable connector
Paper support
Power supply connector
Paper Feed button
Power button
Memory card slots
USB card reader
Paper exit tray
Use this: When you want to:
Front cover • Install or change print cartridges.
• Clear a paper jam.
Memory card slots Access your photos.
Paper exit tray Stack paper after printing.
Understanding the printer parts
6
Page 7
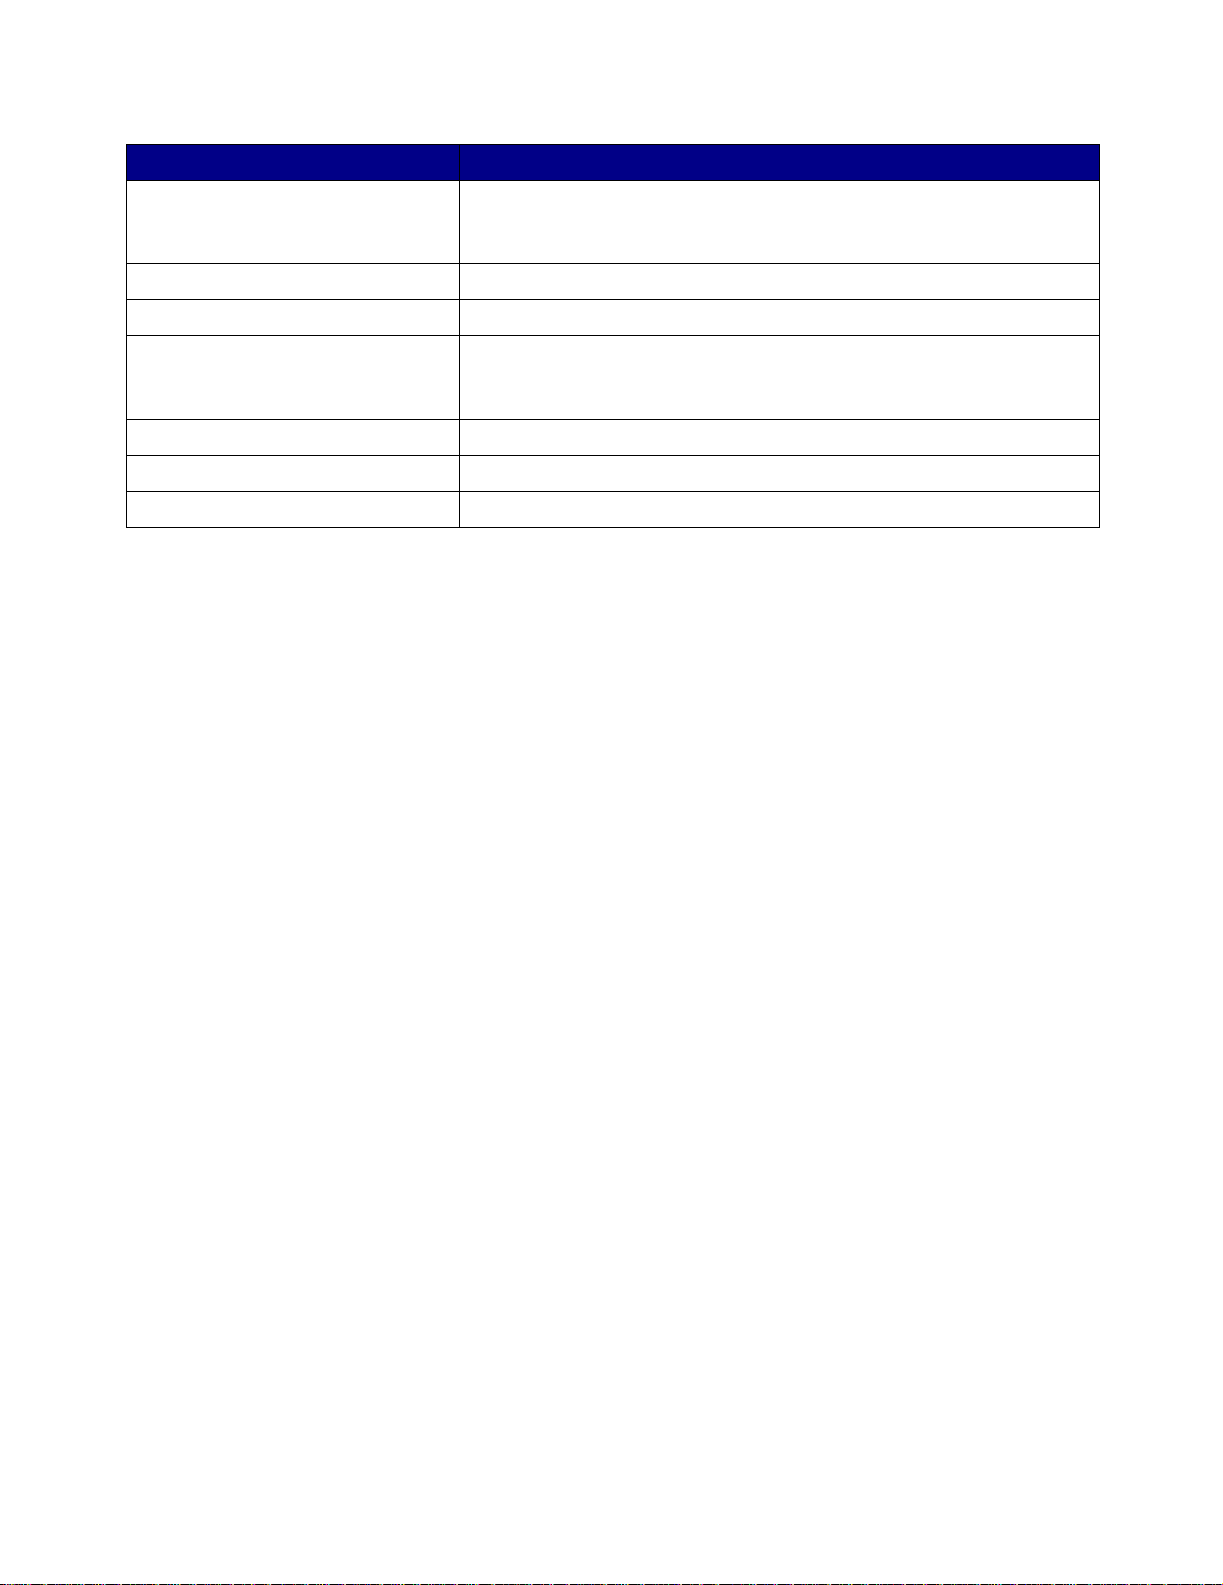
Use this: When you want to:
Paper Feed button • Eject paper from the printer.
• Check the printer status. For more information, see “Understanding
error messages and flashing lights” on page 49.
Paper guide and release tab Make sure paper feeds correctl y into the printer.
Paper support Keep paper straight in the printer.
Power button • Turn the printer on or off.
• Check the printer status. For more information, see “Understanding
error messages and flashing lights” on page 49.
Power supply connector Supply power to the printer.
USB cable connector Connect the printer to the computer.
USB card reader Transfer data from a memory card to your computer.
Using memory cards (Lexmark P700 Series only)
Most digital cameras use a memory card to store photos. You can insert the memory card into your
printer and print your photos or save them on your computer.
Inserting a memory card
Your printer supports the following digital media:
• CompactFlash I and II
• IBM Microdrive
• Secure Digital
• MultiMedia Card
• Memory Stick
• SmartMedia
Using memory cards (Lexmark P700 Series only)
7
Page 8

The USB card reader on your printer has four slot s to accommodate these media. This illustration
shows you where to insert each of the supported memory cards.
CompactFlash I and II,
IBM Microdrive
Secure Digital,
MultiMedia Card
Memory Stick
SmartMedia
Before you insert your memory card, consider the following information:
• Your printer recognizes one source for photos at a time. Insert only one memory card at a
time.
• A small button on top of the card reader light s up o nce the card is properly installed.
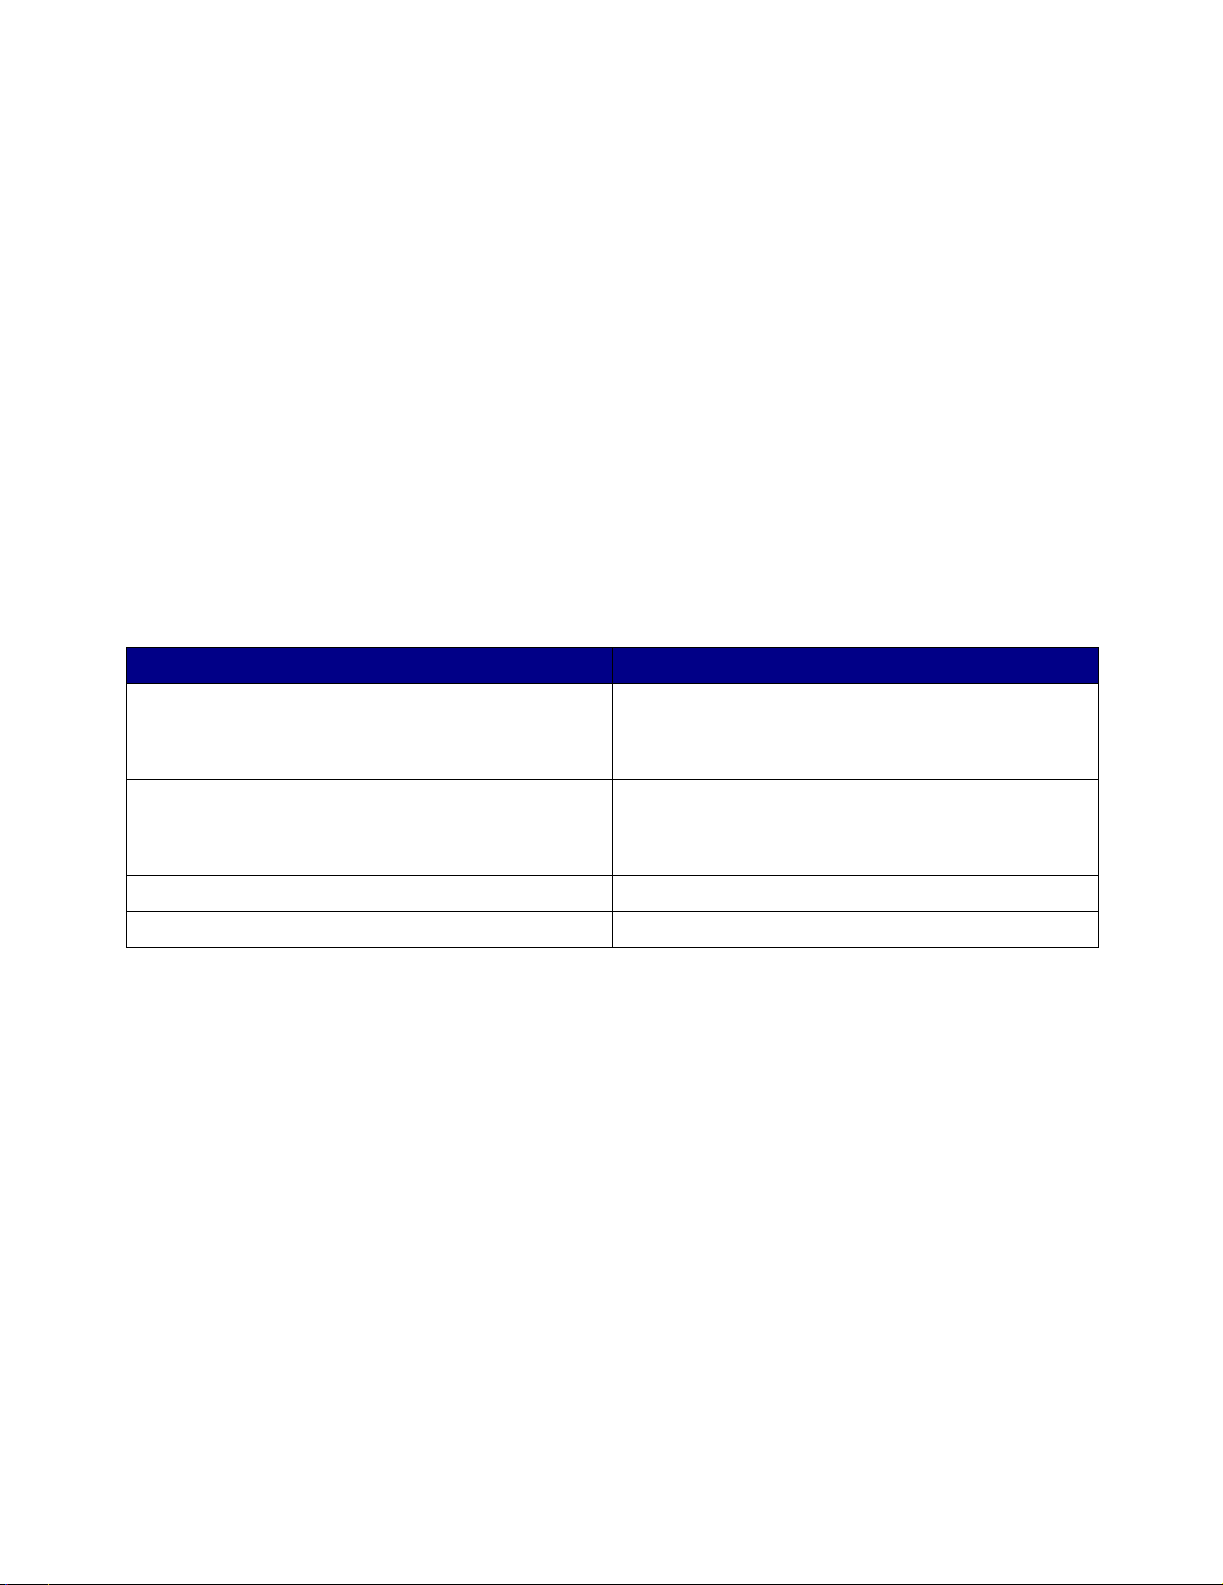
If you are inserting a memory card of this type: Make sure:
• CompactFlash I and II
• IBM Microdrive
•Memory Stick
• Secure Digital
• MultiMedia Card
• SmartMedia The gold contact area faces toward the printer.
The name label faces toward the printer.
The gold contact area faces away from the printer.
When you insert your memory card into the card reader, an icon representing a new drive appears
on your desktop. Once that new drive appears, you can work with the file s in the same way as you
would with any removable media like a floppy disk. When you are done with the memory card, drag
the icon to the trash can. You can then remove the memory card.
Using memory cards (Lexmark P700 Series only)
8
Page 9

Using the printer software
Your printer integrates with the Page Setup dialog and Print dialog that come with Mac OS X. The
CD that comes with your printer also includes the Z700-P700 Series Utility.
To customize the settings for your document, refer to the “Page Setup dialog” on page 9 and the
“Print dialog” on page 10. For more information on which settings to select for your document, see
“Printing ideas” on page 15. When you install the print e r software, the Page Setup and Print dialogs
are set to these default settings:
Print Quality: Normal Paper Type: Automatic
Paper Size: A4 or U.S. Letter Orientation: Portrait
Note: Your printer has a paper type sensing capability that automatically detects most
paper types. For more informati on, see “Usi ng the p aper type sensor ” on pa ge 14.
Page Setup dialog
While the document you want to print is open, use the Page Setup dialog to select settings such as
paper size. To customize the settings in the Page Setup dialog:
1 From the software program, choose File Page Setup.
A screen similar to the following appears .
Using the printer softwar e
9
Page 10

2
Change the settings as needed.
From: Select: When you want to:
Settings Page Attributes Choose a paper size, orientation, or scaling value for your
Summary View a summary of the current page settings.
Format for Z700-P700 Series Format your page for printing with your Z700-P700 Series
Paper Size Choose a paper size.
Orientation Choose between portrait, landscape, or reverse landscape
Scale Change the scaling value of your document. Valid values are
For more information about these settings, click ? to view the Mac OS X Help.
3
document.
printer.
orientation.
from 1 - 100,000. Recommended values are between 25% and
400% of the original document size.
4 Click OK to apply the settings and close the Page Setup dialog.
Print dialog
While your document is open, you can use the Print dialog to select settings that affect the
appearance of your document. To customize the settings in the Print dialog:
1 From the software program, choose File Print.
A screen similar to the following appears .
Using the printer softwar e
10
Page 11

2
From the Printer pop-up menu, choose Z700-P700 Series.
3 Change the settings as needed.
From the popup menu,
choose:
Select: When you want to:
Copies &
Pages
Layout Pages per Sheet Print multiple pages of your document on a single sheet of
Output Options Save as File Print your document to a PDF format.
Color Options Document Color Choose a color setting.
Advanced
Layout
Quality &
Media
Copies Specify the number of copies you want to print (1-999).
Collated Sort multiple copy jobs.
Pages Print all of the pages in a document or print a range of pages.
paper.
Layout Direction Print the pages of your document in a specified order.
Border Print a border around each page of your document.
Print Last Page First Print your document in reverse page order.
Mirror Print your document as a mirror image.
Paper Type Choose the paper type for your document.
Print Quality Choose a print quality. You can choose from Quick Print,
Normal, Better, or Best.
Note: Normal print quality is recommended for most documents.
Higher print quality settings result in better quality documents for
some paper types, but take longer to print. For more information
about the appropriate print quality for your document, see
“Printing ideas” on page 15.
Printer
Services
Summary View a summary of the current print settings.
Save Custom Setting Save the current print settings for future use.
Z700-P700 Series Utility Get a direct link to the printer utility.
Troubleshooting Get a direct link to the Help Center.
Order Supplies Get a direct link to the Lexmark Web site.
Software Version View software version on installed files.
4 If you want more information about the settings in the Print dialog, click ? to view Help on
these items. When you are finished, click the red close button.
5 Click Print to apply your settings and print your document .
Using the printer softwar e
11
Page 12

Z700-P700 Series Utility
Use the Z700-P700 Series Utility to monitor your pri nter and printer supplies. You can:
• Install cartridges • Print a test page
• Align cartridges • Obtain information on ordering supplies
• Clean print nozzles • Obtain software version information
• Select a printer • Configure a network printer
• Calibrate the paper type sensor • Check for offers (United States and Canada only)
Using the Z700-P700 Series Utility
1 From your desktop, double-click the Z700-P700 Series Printer folder. If the folder is not on
your desktop, relaunch the printer software CD.
The Z700-P700 Series Printer dialog appears.
Using the printer softwar e
12
Page 13

2
Double-click Z700-P700 Series Utility.
Note: Y ou can als o access the Z700-P700 Series Uti lity from Printer Ser vices in the Print
dialog menu.
The Z700-P700 Series Utility appears.
Click the: Select: When you want to:
Cartridges tab Install/Change
Cartridge
Align Cartridges Align the cartridges. For more information, see “Aligning the print
Clean Print
Nozzles
Print Test Page Verify if your printer is functioning properly.
Order Supplies Order supplies, such as print cartridges, from the Lexmark Web site.
Offers Access the Lexmark Web site for offers.
About tab Obtain printer software version information.
Specify cartridge settings in the printer software when installing or
changing a cartridge. For more information, see “Replacing the print
cartridges” on page 37.
cartridges” on page 41.
Improve print quality by cleaning clogged print nozzles. For more
information, see “Improving print quality” on page 42.
For more information, see “Ordering supplies” on page 44.
Note: United States and Canada only.
Using the printer softwar e
13
Page 14

Click the: Select: When you want to:
Advanced menu Select Printer • Select a printer and make it the default printer.
• Find the IP address for the selected printer.
• Add a printer located on a remote subnet. You can add a single
printer or search the subnet for all available printers.
• View a list of all USB, USB print sharing, and network printers.
Network Printer
Configuration
Calibrate Paper
Type Sensor
• Configure a network printer.
• View a list of network printers.
Ensure that the paper type sensor is working correctly.
3 To learn more about what you can do with your printer, click ? to view the printer software
Help.
4 Click the red button in the upper left corner to close the Z700-P700 Series Utility.
Using the paper type sensor
Your printer has a paper type sensor that detects the following paper types loaded in your printer,
and automatically adjusts the Paper Type setting in the Print dialog accordingly:
• Plain
• Coated
• Glossy/Photo
• Transparency
When you install your printer, the paper type sensor is set on Automatic (default).
If you want to turn off the paper type sens or and manu ally choose your paper type:
1 From the software program, choose File Print.
2 From the Printer pop-up menu, choose Z700-P700 Series.
3 From the pop-up menu in the upper left corner, choose Quality & Media.
4 From the Paper Type pop-up menu, choose your preferred paper type.
5 Click Print.
Note: Although the printer c an detect the t ype of paper you are using, it cannot det ect the
paper size. Make sure you select the appropriate paper size in the Page Setup
dialog.
Using the paper type sensor
14
Page 15

2
Printing ideas
Printing on plain paper
You can print up to 100 sheets of paper at a time, depending on the thickness of the paper.
Step 1: Load the paper
• Load the paper vertically against the right side of the paper support.
• Do not force the paper into the printer.
• Squeeze and slide the paper guide to the left edge of the p aper.
Note: If you are using Letter size paper, adjusting the paper guide may not be necessary.
Printing ideas
15
Page 16

Step 2: Customize the print settings
If you are using A4 or Letter size paper and you want to print with Normal print quality, you do not
need to adjust the settings.
If you are using specialty media, customize the settings by fol lowing the steps for your paper type.
Step 3: Print your document
1 From the software program, choose File Print.
2 Click Print.
Note: The paper exit tray holds up to 50 sheets of paper. To print more than 50 pages,
remove the first 50 sheets, and then continue printing.
Printing photos
You can load up to 50 sheets of photo or glossy p aper, depending on the thickness of the paper. You
may want to print your photos on pl ain p aper before l oading photo p aper and ch anging your settings.
This ensures that you do not waste photo paper perfecting the im age you want to print.
To print on photo cards, see “Printing cards” on page 20.
Step 1: Load the photo paper
• For best results, use photo paper designed for inkjet printers.
• If your photo paper includes instructions, read them carefully.
• Load the paper against the right side of the paper support.
Printing photos
16
Page 17

• Make sure your paper is not used or damaged.
• Make sure the glossy side is facing you.
• Do not force the paper into the printer.
• Squeeze and slide the paper guide to the left edge of the p aper.
Note: If you are using Letter size photo paper, adjusting the paper guide may not be
necessary.
Step 2: Customize the print settings
1 Choose a paper size and orientation:
a From the software program, choose File Page Setup.
b From the Format for pop-up menu, choose Z700-P700 Series.
c From the Settings pop-up menu, choose Page Attributes.
d From the Paper Size pop-up menu, choose a paper size. To print borderless photos,
choose one of the following paper sizes for borderless printing:
• U.S. Letter (Borderless)
• A4 (Borderless)
• U.S. 4 x 6 Photo (Borderless)
e From Orientation, clic k the portrait, landscape, or reverse landscape icon.
f Click OK.
2 Choose a paper type and print quality:
a From the software program, choose File Print.
b From the Printer pop-up menu, choose Z700-P700 Series.
Printing photos
17
Page 18

c From the pop-up menu in the upper left corner, choose Quality & Media.
Note: If Automatic is not chosen in the Paper T ype pop-up menu, choose Glossy/Photo.
For more information, see “Using the pape r type sensor” on page 14.
d From Print Quality, click Better or Best.
Note: Higher print quality sett ings resul t in better quality doc uments, but may tak e longer
to print.
3 To print borderless photos:
a Make sure you choose one of the supported paper sizes for borderless printing from
Paper Size in the Page Setup dialog.
b From the software program, set the margins to zero.
Note: Disregard this step if your program does not support margin setting.
c On the screen, make sure that the image covers the entire page.
Step 3: Print your photos
1 From the software program, choose File Print.
2 Click Print.
Note: To prevent smearing, remove each photo as it exits the printer, and then let it dry
before stacking.
Printing on premium paper
You can load up to 100 pages of premium or coated paper, depending on the thickness of the paper.
Step 1: Load the premium paper
• If your paper includes instructions, read them carefully.
Printing on premium paper
18
Page 19

• Load the paper vertically against the right side of the paper support.
• Make sure your paper is not used or damaged.
• Make sure the print side is facing you.
• Do not force the paper into the printer.
• Squeeze and slide the paper guide to the left edge of the p aper.
Note: If you are using Letter size paper, adjusting the paper guide may not be necessary.
Step 2: Customize the print settings
1 Choose a paper size and orientation:
a From the software program, choose File Page Setup.
b From the Format for pop-up menu, choose Z700-P700 Series.
c From the Settings pop-up menu, choose Page Attributes.
Printing on premium paper
19
Page 20

d From the Paper Size pop-up menu, choose a paper size.
e From Orientation, clic k the portrait, landscape, or reverse landscape icon.
f Click OK.
2 Choose a paper type and print quality:
a From the software program, choose File Print.
b From the Printer pop-up menu, choose Z700-P700 Series.
c From the pop-up menu in the upper left corner, choose Quality & Media.
Note: If Automatic is not chosen in the Paper T ype pop-up menu, choose Coated. For
more information, see “Using the paper type sensor” on page 14.
d From Print Quality, select your preferred print quality. Normal is the default.
Note: Higher print quality sett ings resul t in better quality doc uments, but may tak e longer
to print.
Step 3: Print your document
Click Print.
Note: The paper exit tray holds up to 50 sheets of paper. To print more than 50 pages,
remove the first 50 sheets, and then continue printing.
Printing cards
You can load up to 25 greeting cards, index cards, photo cards, or postcards into the paper support,
depending on the thickness of the cards.
Step 1: Load the cards
• If your cards include instructions, read them carefully.
Printing cards
20
Page 21

• Load the cards vertically against the right si de of the paper support.
• Make sure your cards are not used or damaged.
• Make sure the print side is facing you.
• Do not force the cards into the printer.
• Squeeze and slide the paper guide to the left edge of the cards .
Step 2: Customize the print settings
1 Choose a paper size and orientation:
a From the software program, choose File Page Setup.
b From the Format for pop-up menu, choose Z700-P700 Series.
c From the Settings pop-up menu, choose Page Attributes.
Printing cards
21
Page 22

d From the Paper Size pop-up menu, choose a card size. To print borderless photos on
cards, choose one of the following card sizes f o r borderless printing:
• A6 Card (Borderless)
• U.S. 4 x 6 Card (Borderless)
• Hagaki Postcard (Borderless)
e From Orientation, clic k the portrait, landscape, or reverse landscape icon.
f Click OK.
2 Choose a print quality and paper type:
a From the software program, choose File Print.
b From the Printer pop-up menu, choose Z700-P700 Series.
c From the pop-up menu in the upper left corner, choose Quality & Media.
Note: If Automatic is not chosen in the Paper T ype po p-up menu, choose Glossy/Photo
for photo cards and Plain for other types of cards. For more information, see “Using
the paper type sensor” on page 14.
d From Print Quality , click Better or Best for photo and gr eeting cards and Normal for other
types of cards.
Note: Higher print quality sett ings resul t in better quality doc uments, but may tak e longer
to print.
3 To print borderless photos on your photo cards:
a Make sure you choose one of the support ed card sizes for borderl ess printing f rom Paper
Size in the Page Setup dialog.
b From the software program, set the margins to zero.
Note: Disregard this step if your program does not support margin setting.
c On the screen, make sure that the image covers the entire page.
Step 3: Print your cards
1 From the software program, choose File Print.
2 Click Print.
Note: To prevent smearing, remove each card as it exits the prin ter, and then let it dry
before stacking.
Printing cards
22
Page 23

Printing envelopes
You can load up to 10 envelopes, depending on the thickness of the envelopes.
Step 1: Load the envelopes
Note: Do not use envelopes with holes, windows, deep embossing, metal clasps, string
ties, or metal folding bars.
• Load the envelopes vertically against the right side of the paper support.
• Make sure your envelopes are not used or damaged.
• Make sure the print side is facing you.
• Make sure the stamp location is in the upper left corner.
• Do not force the envelopes into the printer.
Printing envelop es
23
Page 24

• Squeeze and slide the paper guide to the left edge of the envelopes.
Step 2: Customize the print settings
1 Choose an envelope size and orientation:
a From the software program, choose File Page Setup.
b From the Format for pop-up menu, choose Z700-P700 Series.
c From the Settings pop-up menu, choose Page Attributes.
d From the Paper Size pop-up menu, choose an envelope size.
e From Orientation, make sure to click the landscape icon.
Note: Many software programs are designed to override the envelope settings in Page
Setup. Make sure landscape orient ation is al so selected in your soft ware program.
f Click OK.
2 Choose a paper type and print quality:
a From the software program, choose File Print.
b From the Printer pop-up menu, choose Z700-P700 Series.
c From the pop-up menu in the upper left corner, choose Quality & Media.
Note: If Automatic is not chosen in the Paper T ype pop-up menu, choose Plain. For more
information, see “Using the paper type sensor” on page 14.
d From Print Quality, select your preferred print quality. Normal is the default.
Note: Higher print quality sett ings resul t in better quality doc uments, but may tak e longer
to print.
Printing envelop es
24
Page 25

Step 3: Print your envelopes
Click Print.
Note: The paper exit tray holds up to 10 envelopes. To print more than 10 envelopes,
remove the first 10 envelopes, and then continue printing.
Printing color images in black and white
You can print color images in black and white.
Note: This setting is only available if there is a black print cartridge installed.
Load the paper
• Load the paper vertically against the right side of the paper support.
• Make sure your paper is not used or damaged.
• Make sure the print side is facing you.
• Do not force the paper into the printer.
Printing color images in black and white
25
Page 26

• Squeeze and slide the paper guide to the left edge of the p aper.
Note: If you are using Letter size paper, adjusting the paper guide may not be necessary.
Step 2: Customize the print settings
1 Choose your color options:
a From the software program, choose File Print.
b From the Printer pop-up menu, choose Z700-P700 Series.
c From the pop-up menu in upper left corner, choose Color Options.
d From the Document Color pop-up menu, choose Black Only.
2 Continue customizing your document following the steps for your paper type.
Step 3: Print your document
Click Print.
Note: The paper exit tray holds up to 50 sheet s of paper. To print more than 50 sheets of
paper, remove the first 50 sheets, and then continue printing.
Printing labels
You can load up to 25 sheets of labels, depending on the thickness of the sheets.
Step 1: Load the labels
• Use only labels designed for inkjet prin ters.
Printing labels
26
Page 27

• If your labels include instructions, read them carefully.
• Load the labels vertically against the right side of the paper support.
• Make sure your labels are not used or damaged.
• Do not print within 1 mm (0.04 in.) of the edge of a label.
• Make sure there are no missing or curled labels.
• Make sure the print side is facing you.
• Do not force the label sheets into the printer.
• Squeeze and slide the paper guide to the left edge of the sheet of label s.
Note: If you are using Letter size label paper, adjusting the paper guide may not be
necessary.
Printing labels
27
Page 28

Step 2: Customize the print settings
1 Choose a paper size and orientation:
a From the software program, choose File Page Setup.
b From the Format for pop-up menu, choose Z700-P700 Series.
c From the Settings pop-up menu, choose Page Attributes.
d From the Paper Size pop-up menu, choose a paper size.
e From Orientation, make sure to click the portrait icon.
f Click OK.
2 Choose a paper type and print quality:
a From the software program, choose File Print.
b From the Printer pop-up menu, choose Z700-P700 Series.
c From the pop-up menu in the upper left corner, choose Quality & Media.
Note: If Automatic is not chosen in the Paper T ype pop-up menu, choose Plain. For more
information, see “Using the paper type sensor” on page 14.
d From Print Quality, select your preferred print quality. Normal is the default.
Note: Higher print quality sett ings resul t in better quality doc uments, but may tak e longer
to print.
Step 3: Print your labels
Click Print.
Note: The paper exit tray holds up to 10 sheets of labels. To print more than 10 sheets,
remove the first 10 sheets, and then continue printing.
Printing labels
28
Page 29

Printing handouts
You can conserve paper by printing handout s. Handout s are multiple p ages of a doc ument printed on
a single sheet of paper. You can load up to 100 sheets of paper, depending on the thickness of the
paper.
Step 1: Load the paper
• If your paper includes instructions, read them carefully.
• Load the paper vertically against the right side of the paper support.
• Make sure your paper is not used or damaged.
• Make sure the print side is facing you.
• Do not force the paper into the printer.
Printing handouts
29
Page 30

• Squeeze and slide the paper guide to the left edge of the p aper.
Note: If you are using Letter size paper, adjusting the paper guide may not be necessary.
Step 2: Customize the print settings
You can print your handouts on one side or on both sides of the paper.
1 Choose a paper size and orientation:
a From the software program, choose File Page Setup.
b From the Format for pop-up menu, choose Z700-P700 Series.
c From the Settings pop-up menu, choose Page Attributes.
d From the Paper Size pop-up menu, choose a paper size.
e From Orientation, clic k the portrait, landscape, or reverse landscape icon.
f Click OK.
2 Choose a print quality, paper type, and layout:
a From the software program, choose File Print.
b From the Printer pop-up menu, choose Z700-P700 Series.
c From the pop-up menu in the upper left corner, choose Quality & Media.
Note: If Automatic is not chosen in the Paper Type pop-up menu, choose a paper type
for your document. For more information, see “Using the paper type sensor” on
page 14.
Printing handouts
30
Page 31

d From Print Quality, select your preferred print quality. Normal is the default.
Note: Higher print quality sett ings resul t in better quality doc uments, but may tak e longer
to print.
e From the pop-up menu in the upper left corner, choose Layout.
f From the Pages per Sheet pop-up menu, choose the number of pages you want to print
on one sheet.
g From Layout Direction, click the graphic that shows the order you want the pages to print
on the sheet.
h If you want to print a border around each image, choose an option from the Border pop-
up menu.
Step 3: Print your handouts
Click Print.
Printing iron-on transfers
You can load up to 100 iron-on tr ansfers, depending on the thickness of the iron-on transfers. You
may want to print your image on plain paper before printing it on an iron-on transfer. This ensures
you do not waste iron-on transfers perfecting the image you want to print. When the image prints to
your satisfaction, load the iron- on trans fers.
Note: For best results, load iron-on transfers one at a time.
Step 1: Load the iron-on transfers
• If your iron-on transfers include i n structions, read them carefully.
Printing iron-on tran sfer s
31
Page 32

• Load the iron-on transfers vertically against the right side of the paper support.
• Make sure your iron-on transfers are not used or damaged.
• Make sure the print (blank) side is facing you.
• Do not force the iron-on transfers into the printer.
• Squeeze and slide the paper guide to the left edge of the iron-on transfers.
Note: If you are using Letter size iron-on transfers, adjusting the p aper guide may not be
necessary.
Step 2: Customize the print settings
1 Choose a paper size and orientation:
a From the software program, choose File Page Setup.
b From the Format for pop-up menu, choose Z700-P700 Series.
c From the Settings pop-up menu, choose Page Attributes.
Printing iron-on tran sfer s
32
Page 33

d From the Paper Size menu, choose a paper size.
e From Orientation, clic k the portrait, landscape, or reverse landscape icon.
f Click OK.
2 Choose a paper type and print quality:
a From the software program, choose File Print.
b From the Printer pop-up menu, choose Z700-P700 Series.
c From the pop-up menu in the upper left corner, choose Quality & Media.
d From the Paper Type pop-up menu, choose Iron-On Transfer.
Note: Choosing Iron-On T ransfer automatically mirrors the image you want to print. Ma ke
sure you do not select an option from your software program that will mirror your
image.
e From Print Quality, select your preferred print quality. Normal is the default.
Note: Higher print quality sett ings resul t in better quality doc uments, but may tak e longer
to print.
f If your software program also mirrors the image, follow these steps:
• From the pop-up menu in the upper left corner, choose Advanced Layout.
• Make sure Mirror is not selected.
Step 3: Print your iron-on transfers
Click Print.
Note: To prevent smudging, remove each iron-on transfer as it exits the pr inter, and then
let it dry before stacking.
Printing transparencies
You can load up to 50 transparencies, depending on the thickness of the transparencies.
Step 1: Load the transparencies
• Use transparencies designed for inkjet printers.
• If the transparenci es have paper backing sheets, make sure you separ ate the p aper from t he
transparencies before you load them.
• If your transparencies include instructions, read them carefully.
Printing transparencies
33
Page 34

• Load the transparencies vertically against the right side of the paper support.
• Make sure your transparencies are not used or damaged.
• Make sure the rough (print) side of the transparencies is facing you. If the transparencies
have a removable strip, make sure each strip is facing away and down toward the printer.
• Do not force the transparencies into the printer.
• Squeeze and slide the paper guide to the left edge of the transparencies.
Note: If you are using Letter size tr ansp arency p aper, adjusting the paper guide may not
be necessary.
Step 2: Customize the print settings
1 Choose a paper size and orientation:
a From the software program, choose File Page Setup.
b From the Format for pop-up menu, choose Z700-P700 Series.
c From the Settings pop-up menu, choose Page Attributes.
Printing transparencies
34
Page 35

d From the Paper Size pop-up menu, choose a paper size.
e From Orientation, clic k the portrait, landscape, or reverse landscape icon.
f Click OK.
2 Choose a paper type and print quality:
a From the software program, choose File Print.
b From the Printer pop-up menu, choose Z700-P700 Series.
c From the pop-up menu in the upper left corner, choose Quality & Media.
Note: If Automatic is not chosen in the Paper T ype pop-up menu, choose Transparency.
For more information, see “Using the pape r type sensor” on page 14.
d From Print Quality, select your preferred print quality. Normal is the default.
Note: Higher print quality sett ings resul t in better quality doc uments, but may tak e longer
to print.
Step 3: Print your transparencies
Click Print.
Note: T o preve nt smudging, remove each transp arency as it exit s the printer , and then le t
it dry before stacking. Transparencies may require up to 15 minutes to dry.
Printing your document in reverse order
Step 1: Load the paper
• Load the paper vertically against the right side of the paper support.
Printing your document in reverse order
35
Page 36

• Make sure the print side is facing you.
• Do not force the paper into the printer.
• Squeeze and slide the paper guide to the left edge of the paper.
Note: If you are using Letter size paper, adjusting the paper guide may not be necessary.
Step 2: Customize the print settings
1 Choose a paper size and orientation:
a From the software program, choose File Page Setup.
b From the Paper Size pop-up menu, choose a paper size.
c From Orientation, clic k the portrait, landscape, or reverse landscape icon.
d Click OK.
2 Choose a layout for your document:
a From the software program, choose File Print.
b From the Printer pop-up menu, choose Z700-P700 Series.
c From the pop-up menu in the upper left corner, choose Advanced Layout.
d Click the Print Last Page First check box.
Step 3: Print your document
Click Print.
Note: The paper exit tray holds up to 50 sheets of paper. If you want to print more than
50 sheets, remove the first 50 sheets, and then continue printing.
Printing your document in reverse order
36
Page 37

3
Maintenance
Replacing the print cartridges
The Z700-P700 Series uses the following cartridges:
Left cartridge carrier:
Color cartridges only
19
20
25
Note: Y ou can use the printer with just a color cart ridge or just a black cartridge. Y ou must
have a color cartridge installed when you print with a photo cartridge.
For information about ordering supplies, see page 44.
Remove the used cartridges
1 Make sure the power light is on.
2 Raise the front cover.
Right cartridge carrier:
Black or Photo cartridges
48
50
55
90 (Photo)
The cartridge carrier moves to the loadi ng po sition, unless the printer is busy.
Maintenance
37
Page 38

3
Pull the cartridges towards you until you hear a snap.
4 Remove the used cartridges. Store them in an airtight container or dispose of them properly.
When removing the photo cartridge to exchange it with a black cart ridge, store the photo
cartridge in the storage unit provided.
Replacing the print cartridges
38
Page 39

Install the cartridges
1 If you are installing new cartridges, remove the sticker and transparent tape from the back
and bottom of each print cartridge.
Warning: Do not touc h or remove the gold contact area on the back and bottom of each print
cartridge.
2 Insert the color cartridge in the left carrier. Insert the black or photo cartridge in the right
carrier.
P/N 19, 20, 25
Note: T o extend the li fe of your col or cartridge and improve print ing speed, inst all a black
or photo cartridge along with the color cartridge.
P/N 48, 50, 55, 90 (Photo)
Replacing the print cartridges
39
Page 40

3
Snap the cartridges into place.
4 Close the front cover.
Note: The front cover must be closed to start a print job.
Specifying cartridge settings in the printer software
Before you specify the print cartridge settings in the printer software, install the cartridges. For help,
see “Install the cartridges” on page 39.
1 After installing the cart ridges , open the printe r utili ty by doub le-clic king the Z700-P700 Series
Printer folder on your desktop, and then double-clicking Z700-P700 Series Utility. You can
also access the Z700-P700 Series Utility from Printer Services in the Print dialog menu.
2 From the Cartridges t ab, click Inst all/Change Cart ridge. Follow the i nstruction on the screen
to install the cartridges.
Specifying cartridge settings in the printer software
40
Page 41

3
Click Continue.
The Cartridge Verification dialog appears.
4 Select the part numbers of the cartridges you are installing.
5 Select Yes, it is old if the cartridge has been used before, or No, it is new if t he cartridge has
not been used before.
Note: If an old cartridge is incorrectly identif ied as new cart ridge, ink level s i n the print er
utility may be incorrect.
6 Click OK.
Aligning the print cartridges
Typically, you only align print cartridges after installing or replacing a cartridge. However, you may
also need to align cartridges when:
• Characters are improperly formed or are misaligned at the left margin.
• Vert ical, straight lines are wavy.
To align the cartridges:
1 Load paper.
2 Open the printer utility by double-clicking the Z700-P700 Series Printer folder on your
desktop, and then double-clicking Z700-P700 Series Utility. You can also access the Z700-
P700 Series Utility from Printer Services in the Print dialog menu.
3 From the Cartridges tab, click Align Cartridges.
The Cartridge Alignment dialog appears.
4 Click Continue to print the alignment page.
5 On the Alignment S tatus dialog, click OK if automatic alignment is successful.
If automatic alignment is not successful , click Yes to print a manual alignment page.
6 Find the number under the darkest arrow for each alignment group on the print ed ali gnment
page.
7 On the screen, use the arrows in the Align Cartridges dialog to select the number that
matches the darkest arrow on the printed page fo r each alignment group.
8 Click OK.
If the alignment page does not print, see “Alignment page does not print” on page 52.
Aligning the print cartridges
41
Page 42

Improving print quality
If you are not satisfied with the print quality of your document, first make sure you:
• Use the appropriate paper for the document . For example, use photo paper if you are printing
a photo.
• Use paper that is heavier, bright white, or coated.
• Select a higher print quality:
1 From the software program, choose File Print.
2 From the pop-up menu in the upper left corner, choose Quality & Media.
3 Select Better or Best.
If your document still does not have the print quality you want, follow these steps:
1 Reinsert the print cartridges.
a Remove the print cartridges. For help, see “Remov e the used cartridges” on page 37.
b Insert the print cartridges. For help, see “Instal l the cartridges” on page 39.
c Align the print cartridges. For help, see “Aligning the print cartridges” on page 41.
d Print your document again.
e If the print quality has not improved, clean the print cartridge nozzles.
2 Clean the print cartridge nozzles.
a Load paper.
b Open the printer utility by double-clicking the Z700-P700 Series Printer folder on your
desktop, and then double-clicking Z700-P700 Series Utility. You can also access the
Z700-P700 Series Utility from Printer Services in the Print dialog menu.
c From the Cartridges tab, click Clean Print Nozzles.
A nozzle page prints, forcing ink through the nozzles to clean any that are clogged.
d Print your document again to verify that your print quality has improved.
e To further improve print quality, continue with step 3.
3 Wiping the print cartridge nozzles and contacts.
If the print quality has not improved af ter cleaning the print cartridge nozzles, there may be
dried ink on the nozzles or contacts.
a Remove the print cartridges. For help, see “Remov e the used cartridges” on page 37.
b Dampen a clean, lint-free cloth with water.
Improving print quality
42
Page 43

c Gently hold the cloth against the nozzles for about three seconds, and then wipe in the
direction shown.
Nozzles
d Gently hold a clean section of the cloth against t he con tac t s fo r abo ut t hre e seconds, and
then wipe in the direction shown.
Contacts
e Allow the nozzles and contacts to dry completely.
f Reinstall the print cartridges, and then print your document again.
If the print quality has not improved, clean the print cartridge nozzles up to two more times.
If print quality is still unsatisfactory, replace your print cartridges. For help, see “Replacing the print
cartridges” on page 37.
Improving print quality
43
Page 44
Preserving the print cartridges
To ensure the longest life from your print cartridges and opti m um performance from your printer:
• Keep a new print cartridge in its packaging until you are ready to install it.
• Do not remove a print cartridge from the printer except to replace, clean, or store it in an
airtight container. The print cartridges do not print correctly if left exposed for an extended
period.
• Keep the photo cartridge in its own storage unit when not in use.
Lexmark’s printer warranty does not cover rep air of f ailures or damage caus ed by a ref illed c artridge.
We do not recommend the use of refilled cartridges. Refilling cartridges can affect print quality and
cause damage to the printer. For best results, use Lexmark supplies.
Ordering supplies
To order supplies or locate a dealer near you, contact the Lexmark Web site at www.lexmark.com.
Item: Part number:
Color cartridge 19
20
25
Black cartridge 48
50
55
Photo cartridge 90
USB cable 12A2405
Preserving the print cartridg es
44
Page 45

4
Setup troubleshooting
Troubleshooting checklist
Is the power supply firmly atta ched to your printe r and a properly grounded el ectrical outl et?
Are both your printer and computer on? If you are using your printer on a network, make
sure your computer is connected to the network, your Lexmark adapter is on, and all
indicator lights are on. For more inf o rmation, refer to the adapter documentation.
Is your USB cable securely attached to your pri nter and to your computer or Lexmark
adapter?
Are the printer lights blinking? If they are, see “Understanding error messages and flashing
lights” on page 49.
Did you remove the sticker and transparent tape from the back and bottom of each print
cartridge?
Did you install the print cartridges correctly? For help, see “Install the cartridges” on
page 39.
Is the paper loaded correctly? Make sure you do not push the paper too far into the printer.
If the Paper Feed light is blinking, see “Understanding error messages and flashing lights”
on page 49.
Did you install the printer software correctly?
Open the printer utility by double-clicking the Z700-P700 Series Printer folder on
your desktop, and then double-clicking Z700-P700 Series Utility. You can also
access the Z700-P700 Series Utility from Printer Services in the Print dialog menu.
If the printer fold er and the pri nter utility ar e not found, relaun ch the print er softwar e.
For help, see “Installing the printer software” on page 47.
Setup troubleshooting
45
Page 46

Is the printer set as the default or current printer?
To make sure that your printer is set as the default printer:
1 From the Dock, click the Print Center icon.
The Printer List dialog appears.
Note: If the Print Center icon is not on the Dock, from the Finder window choose
Go Applications Utilities Print Center.
2 Make sure that the Z700-P700 Series is highlighted in the list.
To make sure that your printer is set as the current printer:
1 With your document open, choose File Page Setup.
2 From the Format for pop-up menu, choose Z700-P700 Series.
3 Click OK.
4 Choose File Print.
5 From the Printer pop-up menu, choose Z700-P700 Series.
Is your printer directly connected to your computer? If it is connected through an external
device such as a USB hub, switch box, scanner, or fax machine, follow these corrective
steps:
1 Disconnect your printer from any external devices.
2 Connect your printer directly to your computer with a USB cable.
3 Print a test page.
a Open the printer utility by double-clicking the Z700-P700 Series Printer folder
on your desktop, and then double-clicking Z700-P700 Seri es Utility. Y ou can
also access the Z700-P700 Series Utility from Printer Services in the Print dialog
menu.
b From the Cartridges tab, click Print Test Page.
• If the test page prints, the printer is working properly. The initial problem may
be due to your external devices, not your printer. Check the documentation
that comes with your external devices for hel p.
• If the test page does not print, refer to the printer software Help for further
troubleshooting information. See also “Test page does not print” on page 52.
When I insert the printer software CD, nothing happens
1 Close all open software programs.
2 Remove the printer software CD.
When I insert the printer software CD, nothing happens
46
Page 47

3
Restart your computer.
4 When your desktop appears, reinsert the printer softwar e CD.
The Lexmark Z700-P700 Series CD icon is created on your desktop.
5 Follow the instructions in “Installing the printer software” on page 47 to complete the printer
software install a tion.
Solving printer software installation pro blems
If the printer software does not install properly, a communications error message appears when you
try to print. You may need to remove the printer software, and then reinst all it.
Removing the printer software
There are two ways to remove the printer software. One way to remove it is as fol lows:
1 From your desktop, double-click the Lexmark Z700-P700 Series CD icon. If the CD icon is
not on your desktop, insert the printer software CD to relaunch it.
The Lexmark Installer screen appears.
2 Double-click Install.
The Lexmark Z700-P700 Series Installation menu appears.
3 Click Uninstall.
Complete the user authentication notice if it appears, and then click OK.
4 Follow the steps on your screen to complete printer software removal.
Another way to remove the printer software is as follows:
1 From your desktop, double-click the Z700-P700 Series Printer folder.
The Z700-P700 Series Printer menu appears.
2 Double-click the Z700-P700 Series Uninstaller.
Complete the user authentication notice if it appears, and then click OK.
3 Click Uninstall.
4 Follow the steps on your screen to complete printer software removal.
Installing the printer software
Restart your computer before installing or reinstalling the printer software.
You can install the printer softwar e using t he CD that c omes wi th your pri nter, or you can download it
from the Lexmark Web site at www.lexmark.com.
Solving printer s oftware installation problems
47
Page 48

To connect your printer to a network with a Lexmark adapter, refer to the documentation that comes
with your adapter.
Using the CD that comes with your printer
1 Close all open software programs.
2 When your desktop appears, insert the printer software CD.
The Lexmark Z700-P700 Series CD icon appears on your desktop.
3 Double-click the Lexmark Z700-P700 Series CD icon.
4 Double-click Install.
5 Click Install and Agree.
6 Choose the country or region closest to you, and then click Continue.
Note: If the Printer Selecti on or the New Network Prin ter Found dialog appears, f ollow the
instructions displayed. Cl ick ? on the screen or cont act your networ k administrato r
for help.
7 Follow the instructions on the screen to complete printer software installation.
8 When printer software installation is complete, you can:
• Register your printer on the Internet.
• Print a test page to observe your printer in action.
• Check the Lexmark Web site for offers (United States and Canada only).
9 Click Finished when you are done.
10 The Z700-P700 Series Printer folder is automaticall y created on your desktop. You are now
ready to start using your Lexmark Z700-P700 Series printer.
Using the World Wide Web
Installing the printer software from the Web is as easy as:
1 Make sure Stuffit Expander is loaded on your system.
2 Access the Lexmark Web site, www.lexmark.com.
3 On the home page, navigate through the menu selection and click Drivers & Downloads.
4 Select the printer and the printer driver for your operating system.
5 Follow the instructions on the screen to download the driver and install the print er software.
Solving printer s oftware installation problems
48
Page 49

5
General troubleshooting
For information about: See page:
Solving net work printing problems 49
Understanding error messages and flashing lights 49
Resolving unsuccessful or slow printing 51
Clearing paper misfeeds or jams 53
Solving print quality problems 55
Solving specialty media problems 57
Solving network printing problems
If you are connected to a network with a Lexmark adapter, see the adapter documentation for
troubleshooting informa tion.
Understanding error messages and flashing lights
Use this section to understand printer software error messages on your computer screen and
blinking lights on your print er. For information about lights on a Lexmark adapter, refer to the adapter
documentation.
Paper Jam message
For help clearing a paper jam, see “Printer has a paper jam” on page 54.
Ink Low message
A print cartridge is running out of ink. To order a new cartridg e or locat e a dealer near you, see
“Ordering supplies” on page 44, or contact the Lexmark Web site at www.lexmark.com. For help in
replacing the cartridges, see “Replacing the print cartridges” on page 37.
General troubleshooting
49
Page 50

Paper Feed light is blinking
If the printer is out of paper:
1 Load paper.
2 Press the Paper Feed button.
If the printer has a paper jam, see “Printer has a paper jam” on page 54.
Power light is flashing
The print cartridge carrier is stalled.
1 Check your computer screen for error messages.
2 Turn the printer off.
3 Wait a few seconds, and then turn the printer back on.
If the cartridge carrier is stalled due to a paper jam, see “Printer has a paper jam” on page 54.
Understandi ng error messa ges and flashing lights
50
Page 51

Resolving unsuccessful or slow printing
The following topics can help you correct unsuccessful or slow printing.
Printer is plugged in, but does not print
Make sure:
• The printer is on and the printer cable is securely attached at both ends. If your printer is
connected to a network, make sure the Lexmark adapter is on and all indicator lights are on.
For help, refer to the adapter documentation.
• The paper is loaded correctly and no t pushed too far into the printer. If the paper is jammed,
see “Clearing paper misfeeds or jams” on page 53.
• The printer is not held or paused. To check the printer status:
1 From the Dock, click the Print Center icon.
The Printer List dialog appears.
Note: If the Print Center icon is not on the Dock, from the Finder window choose Go
Applications Utilities Print Center.
2 Highlight the Z700-P700 Series in the list.
3 From the Queue drop-down menu, choose Start Queue.
4 From the Printers drop-down menu, choose Show Queue or Show Jobs.
5 Select your job from the list.
6 Click Resume.
• The printer is set as the default printe r. To set the printer as the default:
1 From the Dock, click the Print Center icon.
The Printer List dialog appears.
Note: If the Print Center icon is not on the Dock, from the Finder window choose Go
Applications Utilities Print Center.
2 Make sure that the Z700-P700 Series is highlighted in the list.
After you check these items, print a test page.
Resolving unsuccessful or slow printin g
51
Page 52

Printing a test page
1 Access the printer utility by double-clicking the Z700-P700 Series Printer folder on your
desktop, and then double-clicking Z700-P700 Series Utility. You can also access the
Z700-P700 Series Utility from Printer Services in the Print dialog menu.
2 From the Cartridges tab, click Print Test Page.
• If the test page prints, the printer is working properly.
• If the test page does not print , continue with the fol lowing section or re fer to the print er
software Help for further tr oubleshooting information.
Test page does not print
For help, first see “Troubleshooting checklist” on page 45, and then:
• If the paper is jammed, see “Clearing p aper misfeeds or jams” on page 53.
• Make sure the printer is not held or paused. To check the printer status:
1 From the Dock, click the Print Center icon.
The Printer List dialog appears.
Note: If the Print Center icon is not on the Dock, from the Finder window choose Go
Applications Utilities Print Center.
2 Highlight the Z700-P700 Series in the list.
3 From the Queue drop-down menu, choose Start Queue.
4 From the Printers drop-down menu, choose Show Queue or Show Jobs.
5 Select your job from the list.
6 Click Resume.
7 Print your test page again. If it stil l does not print, see “Solving prin ter software inst allatio n
problems” on page 47.
Alignment page does not print
Make sure:
• You completely removed the transparent tape and sticker from the back and bottom of each
print cartridge.
• You installed the cartridges correctly. For help, see “Install the cartridges” on page 39.
• You loaded the paper correctly and did not force the paper into the printer.
• If you are connected to a network with a Lexmark adapter, the indicator lights are on. For
more information, see the adapter documentation.
Resolving unsuccessful or slow printin g
52
Page 53

Printer ejects a blank page after appearing to print
Make sure:
• You remove the sticker and transparent tape from the back and bottom of each pri nt
cartridge. For help, see “Replacing the print cartridges” on page 37.
• Your cartridges do not have clogged nozzles. Clean the print cartridge nozzles. Follow the
steps in “Improving print quali ty” on page 42.
Printer prints very slowly
• If you are using a Mac OS X version prior to 10.1, consider upgrading to enhance pri nt
system performance.
• Close any software programs not in use.
• Check the document you are printing. Photos and graphics may take longer to print than
regular text. Documents that are large or that contain background images may also take
longer to print.
• Check the printer to see if another document is being printed. Print jobs are print ed in the
order the printer receives them.
• Decrease the print quality setting to Normal or Quick Print.
Note: Higher print quality sett ings resul t in better quality doc uments, but may tak e longer
to print.
Clearing paper misfeeds or jams
The following topics can help you correct paper misfeeds or jams.
Paper misfeeds or multiple sheets feed
Make sure:
• The edges of your paper are not curled.
• Your paper is designed for inkjet printers.
• A piece of paper from a previous print job is not jammed.
• You do not load too much paper. Depending on the weight of the paper, you can load up to
100 sheets of paper.
• You do not force the paper into the printer.
• The paper guide is against the left edge of the paper.
• The paper guide does not cause the paper to bow.
Clearing paper misfeed s or jams
53
Page 54

• The printer is on a flat, level surface.
• The printer settings you have chosen are correct for the type of docume nt you are printing.
For help, see “Printing ideas” on page 15.
Printer does not feed specialty media
Make sure:
• Your printer feeds paper without problems. Load the specialty media vertically against the
right side of the paper support. Squeeze and sli de the paper guide to the left edge of the
specialty media. For help, see “Print ing ideas” on page 15.
• You select the appropriate media or specialty me dia size. See “Page Setup di alog” on p age 9
and “Print dialog” on page 10.
• You are using a specialty media size supported by your printer.
• Your software program is designed to print your specialty media. For help, check your
software program documentation.
• The specialty media is not jammed. For help, see “Printer has a paper jam” on page 54.
• Your printer is not held or paused. To check the printer st atus:
1 From the Dock, click the Print Center icon.
The Printer List dialog appears.
Note: If the Print Center icon is not on the Dock, from the Finder window choose Go
Applications Utilities Print Center.
2 Make sure that the Z700-P700 Series is highlighted in the list.
3 From the Queue drop-down menu, choose Start Queue, if available.
4 From the Printers drop-down menu, choose Show Queue or Show Jobs.
5 Select your print job from the list.
6 Click Resume or Retry.
Printer has a paper jam
If the paper is lodged too far into the printer and cannot be removed:
1 Turn the printer off.
2 Turn the printer back on.
Clearing paper misfeed s or jams
54
Page 55

3
If the printer does not automatically eject the page:
a Turn the printer off.
b Pull firmly on the paper to remove it.
If you cannot reach the paper, raise the front cover , pull the paper out, and then close the
front cover.
c Turn the printer on.
Solving print quality problems
If print quality is unsatisfactory, you may need to adjust the margin settings, choose a higher print
quality, align the print cartridges, or clean the nozzles.
The following topics can help you improve print quality:
Print is too dark or smudged
• Make sure the paper is straight and not wrinkled.
• Let the ink dry completely before handlin g the paper.
• Make sure the paper type and paper size sett ings in the printer software match the pap e r
loaded in the printer. For help, see “Using the printer software” on page 9.
• Change the print quality setting to Quick Print.
• Clean the print cartridge nozzles. Follow the steps in “Improving print quality” on page 42.
Vertical straight lines are not smooth
To improve the print quality of vertical straight lines in tables, borders, and graphs:
• Select a higher print quality.
• Align the print cart ridge nozzles. For help, see “Aligning the print cartridges” on page 41.
• Clean the print cartridge nozzles. Follow the steps in “Improving print quality” on page 42.
Print smears on the page
• The next page exiting the printer may be smearing the ink. Remove each page as it exits the
printer, and then let it dry completely before stacking.
• Clean the print cartridge nozzles. Follow the steps in “Improving print quality” on page 42.
Solving print quality problems
55
Page 56

Printed pages have alternating bands of light and dark print (intermittent
printing)
• Change the print quality to Better or Best.
• If your printer is connected to your computer through a hub or peripheral device, such as a
scanner or fax machine, connect the printer directly to your computer with a USB cable.
• If your printer is connected to your network, connect the pri nter direct ly to your computer wit h
a USB cable.
Print quality is poor at the edges
• Make sure that the Lexmark printer is the default prin ter.
• Clean the print cartridge nozzles and cont act s. Follow the step s in “Improving pr int quality” on
page 42.
• Print your document without borders.
If you print your document with borders, make sure your margins are set wi thin the following margin
settings.
Margin: Minimum setting:
Left and right • 6.35 mm (0.25 in.) for U.S. Letter, U.S. Legal, Banner Letter, and custom paper
sizes
• 3.175 mm (0.125 in.) for envelopes
• 3.37 mm (0.13 in.) for most paper sizes
Top • 1.7 mm (0.067 in.)
Bottom • 12.7 mm (0.5 in.) for black print jobs
• 19 mm (0.75 in.) recommended for color print jobs
Printed characters are improperly formed or misaligned
• Cancel all print jobs and print your job again. To cancel all print jobs:
1 From the Dock, click the Print Center icon.
The Printer List dialog appears.
Note: If the Print Center icon is not on the Dock, from the Finder window choose Go
Applications Utilities Print Center.
2 Make sure that the Z700-P700 Series is highlighted in the list.
3 From the Queue drop-down menu, choose Start Queue.
4 From the Printers drop-down menu, choose Show Queue or Show Jobs.
Solving print quality problems
56
Page 57

5 Select the job you want to delete.
6 Click Delete.
7 Repeat steps 5 through 6 until all jobs are deleted.
• Align the print cart ridges. For help, see “Aligning the print cartridges” on page 41.
• Clean the print cartridge nozzles. Follow the steps in “Improving print quality” on page 42.
Colors on the printout differ from the colors on the screen
• A cartridge may be low on ink. For help, see “Replacing the print cart ridges” on page 37.
• Use a different pap er brand. Each paper brand accepts ink differently and print s with color
variations.
• Select Natural Color as the document color:
1 From the software program, choose File Print.
2 From the Printer pop-up menu, choose Z700-P700 Series.
3 From the pop-up menu in the upper left corner, choose Color Options.
4 From the Document Color pop-up menu, choose Natural Color.
Colors on the printout are faded
Try the suggestions listed in the section “Colors on the printout differ from the colors on the screen”
on page 57. If the colors still seem faded, clean the print cartridge nozzles. Follow the steps in
“Improving print quality” on page 42.
Characters are missing or unexpected
Clean the print cartridge nozzles. Follow the steps in “Improving print quality” on page 42.
Photos do not print as expected
• Select a higher print quality.
• Choose photo paper as the paper type.
Solving specialty media problems
The following topics can help you solve problems with specialty media.
Solving specialty media pr ob le m s
57
Page 58

Glossy/photo papers or transparencies stick together
• Use glossy/photo paper or transparency designed for inkjet printers.
• Make sure you loaded the paper correctly (with print side facing you) and selected the
appropriate settings in the printer software. For help, see “Printing photos” on page 16 or
“Printing transparencies” on page 33.
• Remove each page as it exits the printer, and then let it dry completely before stacking.
Transparencies or photos contain white lines
• Make sure you loaded the paper correctly (with print side facing you) and selected the
appropriate settings in the printer software. For help, see “Printing transparencies” on
page 33 or “Printing photos” on page 16.
• Select a higher print quality, such as Better or Best. For help, see “Printing ideas” on
page 15.
• Clean the print cartridge nozzles. Follow the steps in “Improving print quality” on page 42.
Solving specialty media pr ob le m s
58
Page 59

Notices
Electronic emission notices
Federal Communications Commission (FCC) compliance information statement
The Lexmark Z700 Series Color Jetprinter, type 4136-001, and Lexmark P700 Series Photo Jetprinter, type 4136-0P1, has been tested and
found to comply with the limits for a Class B digital device, pursuant to Part 15 of the FCC Rules. Operation is subject to the following two
conditions: (1) this device may not cause harmful interference, and (2) this device must accept any interference received, including
interference that may cause undesired operation.
The FCC Class B limits are designed to provide reasonable protection against harmful interference in a residential installation. This
equipment generates, uses and can radiate radio frequency energy and, if not installed and used in accordance with the instructions, may
cause harmful interference to radio communications. However, there is no guarantee that interference will not occur in a particular
installation. If this equipment does cause harmful interference to radio or television reception, which can be determined by turning the
equipment off and on, the user is encouraged to try to correct the interference by one or more of the following measures:
• Reorient or relocate the receiving antenna.
• Increase the separation between the equipment and receiver.
• Connect the equipment into an outlet on a circuit different from that to which the receiver is connected.
• Consult your point of purchase or service representative for additional suggestions.
The manufacturer is not responsible for any radio or television interference caused by using other than recommended cables or by
unauthorized changes or modifications to this equipment. Unauthorized changes or modifications could void the user's authority to operate
this equipment.
Note: To assure compliance with FCC regulations on electromagnetic interference for a Class B computing device, use a properly shielded
and grounded cable such as Lexmark part number 1329605 for parallel attach or 12A2405 for USB attach. Use of a substitute cable not
properly shielded and grounded may result in a violation of FCC regulations.
Any questions regarding this compliance information statement should be directed to:
Director of Lexmark Technology & Services
Lexmark International, Inc.
740 West New Circle Road
Lexington, KY 40550
(859) 232-3000
Industry Canada compliance statement
This Class B digital apparatus meets all requirements of the Canadian Interference-Causing Equipment Regulations.
Avis de conformité aux normes de l’industrie du Canada
Cet appareil numérique de la classe B respecte toutes les exigences du Règlement sur le matériel brouilleur du Canada.
European Community (EC) directives conformity
This product is in conformity with the protection requirements of EC Council directives 89/336/EEC and 73/23/EEC on the approximation
and harmonization of the laws of the Member States relating to electromagnetic compatibility and safety of electrical equipment designed
for use within certain voltage limits.
A declaration of conformity with the requirements of the directives has been signed by the Director of Manufacturing and T echnical Support,
Lexmark International, S.A., Boigny, France.
This product satisfies the Class B limits of EN 55022 and safety requirements of EN 60950.
The United Kingdom Telecommunications Act 1984
This apparatus is approved under the approval number NS/G/1234/J/100003 for the indirect connections to the public telecommunications
systems in the United Kingdom.
Notices
59
Page 60

Japanese VCCI notice
Notices
60
Page 61

Glossary
alignment page. A page with printed alignment patterns that eject s from your printer dur ing cartridge
alignment.
alignment values. Numbers corresponding to patterns on the alignment page.
application. See program.
automatic alignment. A feature that automatically aligns the print cartridges.
cartridge contact. The gold area on your print cartridge that t ouches th e carrier co nta cts i nside your
printer.
coated paper. Treated paper designed for high-quality printed images.
collate. A printer software option that lets you automati cally print one complete copy of a multiple-
page document before the next copy begins, and so on.
configured printer. A printer connected to a network that has been assi gned an IP address and
printer name. You must configure a network-capable printer to access it over a network.
custom size paper. A non-standard paper size.
default printer. The printer automatically used when you send jo bs to print.
default printer settings. Printer software settings defined when the printer is manufactured.
driver. See printer software.
glossy paper. Paper with one glossy side designed for photographs.
handouts. Multiple-page images pri nted on a single sheet of paper. See N-up.
hub. A device used to connect several computers or peripheral devices.
IP (Internet Protocol) address. A 32-bit binary number that identifies the location of a specific
computer on the Internet. Any computer direct ly connected to the Internet must have an IP address.
label. Self-adhesive paper.
Glossary
61
Page 62

landscape orientation. Page orientation in which text runs parallel with the long edge of the paper.
Lexmark adapter. An external device that connects your network-capable printer to a network.
manual alignment. A printer software feature that let s you select print cartridge alignment values.
margin. The blank area between printed text or graphics and the edges of a page.
mirror. A printer software option that lets you reverse an image before printing.
N-up. A printer software option that lets you print multiple pages of a document on a single sheet of
paper. For example, select 4-up to print reduced images of pages 1 through 4 on the first sheet of
paper, images of pages 5 through 8 on the second sheet, and so on.
natural color. A printer software option used for printing photographs and highly detailed graphic
images.
network. A group of computers, printers, or other periphe ral devi ces connected to each other fo r the
purpose of sharing information.
network adapter. See Lexmark adapter.
network printer. A printer made available on a network, not connected directly to your computer.
operating system. The software that provides the basic functions needed for operating your
computer. For example, Windows 98 or Macintosh OS X.
paper type sensor. A feature that automatically detects some types of paper loaded in the paper
tray.
peripheral device. Any external device connected to and controlled by a computer.
photo paper. Treated paper designed for photographs.
plain paper. Paper designed for printing text documents.
portrait orientation. Page orientation in which text run s parallel with the short edge of the paper.
premium paper. Coated paper designed for reports or documents with graphics.
print cartridge. The replaceable unit inside your printer that contains the ink.
print cartridge nozzles. The gold area of the print cartridge that ink flows thr ough before it is
applied to your paper during printing.
print queue. The location on the server where print jobs are stored for pri n ting in the order in which
they are sent.
Glossary
62
Page 63

printer driver. See printer software.
printer software. (1) The program that lets you select settings to customize your print job. (2) Th e
program that lets your computer communicate with your printer.
program. Any software loaded on your computer that lets you perform a specific task, such as word
processing or photo editing.
remote subnet. A separate network that is connected to your loc al area network.
reverse order printing. A printer software option that lets you print the last page of your document
first so your pages are in sequential order on the exit tray.
subnet. A segment of a network that is connected to a larger network. A local area network is
sometimes referred to as a local subnet.
transparency. A see-through sheet of print media that can be displayed on an overhead projector.
USB cable. A lightweight, flexible cable that lets your pr inter communicate with your computer. USB
cables transmit data at much higher speeds than parallel cables.
Glossary
63
Page 64

Index
A
aligning print cartridges 41
automatic cartridge alignment
41
B
banding 56
black cartridge part number
39, 44
blinking lights 50
border 11, 31
borderless cards 22
borderless photos 18
button
paper feed 7, 50
power 7, 50
C
cable, part number
USB 44
card reader, USB 7
cards
borderless 22
printing 20
cards, memory 7
cartridges, print
aligning 41
cleaning 42
installing 39
ordering 44
part number 44
preserving 44
removing 37
replacing 37
troubleshooting 45
wiping 42
CD, software
installing 48
troubleshooting 46
characters, misformed 56
coated paper 18
color cartridge part number
39, 44
connector
power supply 7
USB cable 7
contacts, wiping 42
customizing settings
cards 21
coated paper 17
envelopes 24
glossy paper 17
greeting cards 21
handouts 30
index cards 21
iron-on transfers 32
labels 28
n-up
See handouts
photo cards 21
photo paper 17
plain paper 15
postcards 21
premium paper 19
printer software 9
printing color images in black
and white 26
printing in reverse order 36
printing last page first
See printing in reverse
order
transparencies 34
T-shirt transfers
See iron-on transfers
D
dark or smudged print 55
default settings 9
dialog
Page Setup 9
Print 10
digital media, photo 7
downloaded printer driver,
installing 48
E
edge-to-edge printing
See borderless cards
See borderless photos
electronic emission notices 59
envelopes 23
error messages
Ink Low 49
Paper Jam 49
F
FCC notice 59
flashing lights 49
G
glossy paper 16
greeting cards 20
H
handouts 29
I
improving print quality 55
index cards 20
Ink Low message 49
installing
print cartridges 39
Index
64
Page 65

printer software 47
intermittent printing 56
iron-on transfers 31
L
labels 26
last page first, printing 35
layout 11, 31
layout, advanced 11, 33, 36
Lexmark Utility 12
light
paper feed 50
power 50
loading
cards 20
coated paper
See premium paper
envelopes 23
glossy paper 16
greeting cards 20
handouts 29
index cards 20
iron-on transfers 31
labels 26
photo cards 20
photo paper 16
plain paper 15
postcards 20
premium paper 18
transparencies 33
T-shirt transfers
See iron-on transfers
M
margins, setting
borderless cards 22
borderless photos 18
minimum settings 56
memory cards 7
messages, error
Ink Low 49
Paper Jam 49
mirror 11, 33
N
network printer
configure 14
troubleshooting 49
nozzles, print
wiping 42
n-up printing
See handouts
O
ordering supplies 44
orientation 10
P
page settings, changing 9
Page Setup dialog 9
paper exit tray 6
paper feed button 7
paper guide 7
Paper Jam message 49
paper jam, clearing 54
paper misfeeds 53
paper support 7
Paper Type 11
paper type sensor 14
part number
black cartridge 39, 44
color cartridge 39, 44
photo cartridge 39, 44
USB cable 44
photo cards 20
photo cartridge part number
39, 44
photo memory cards 7
photo paper 16
pop-up menu
Color Options 11
Copies & Pages 11
Document Color 11
Format for 10
Layout 11
Output Options 11
Paper Size 10
Printer Services 11
Quality & Media 11
Settings 10
postcards 20
power button 7
power supply
connector 7
premium paper 18
print cartridge
aligning 41
cleaning 42
installing 39
ordering 44
part number 44
preserving 44
removing 37
replacing 37
wiping 42
Print dialog 10
print in reverse order 35
print last page first
See print in reverse order
print nozzles, wiping 42
print quality, improving 42
print quality, troubleshooti ng
55
printer cable, troubleshooting
45
printer driver
installing 48
removing 47
printer parts 5
printer settings, customizing 9
printer software
CD, troubleshooting 46
installing 47
Lexmark Utility 12
overview 9
Page Setup dialog 9
Print dialog 10
removing 47
using 9
printer status 51
printing
alignment page 41
borderless cards
borderless photos
cards 20
color images in black and
white 25
envelopes 23
greeting cards 20
handouts 29
index cards 20
iron-on transfers 31
labels 26
Index
65
Page 66

last page first
See reverse order
multiple pages per sheet 29
n-up
See handouts
on premium paper 18
photo cards 20
photos 16
plain paper 15
reverse order 35
transparencies 33
T-shirt transfers
See iron-on transfers
printing problems
blank pages 53
error messages 49
flashing lights 49
general 49
network 49
paper feeding 53
paper jams 54
print quality 55
software 47
specialty paper 57
unsuccessful or slow print ing
51
R
release tab, paper guide 7
removing print cartridges 37
removing printer software 47
replacing print cartridges 37
S
scale 10
sensor, paper type 14
setting margin
borderless cards 22
borderless photos 18
minimum settings 56
settings, customizing
cards 21
coated paper 17
envelopes 24
glossy paper 17
greeting cards 22
handouts 30
index cards 22
iron-on transfers 32
labels 28
last page first
See reverse order printi ng
n-up
See handouts
photo cards 21
photo paper 17
plain paper 15
postcards 21
premium paper 19
printing color images in black
and white 26
reverse order printing 36
transparencies 34
T-shirt transfers
See iron-on transfers
settings, default 9
software, printer
CD 46, 48
installing 47
Lexmark Utility 12
removing 47
using 9
specialty paper
solving problems with 57
supplies, ordering 44
T
test page
does not print 52
printing 52
transfers, iron-on 31
transparencies 33
troubleshooting
alignment page 52
blank pages 53
cartridges 45
error messages 49
flashing lights 49
general printing problems
49
margins 56
network printing 49
paper feeding 53
paper jams 54
paper misfeeds 53
print quality 55
printer cable 45
printer not printing 51
printer software installation
47
software 47
specialty media 57
unsuccessful or slow printing
51
troubleshooting checklist 45
U
USB cable
connector 7
ordering 44
USB card reader 7
Utility, Lexmark 12
W
Web site, Lexmark
offers 13, 48
order supplies 11, 13, 44
printer software download
47
printer software installation
48
Index
66
Page 67

Lexmark and Lexmark with diamond design are trademarks of Lexmark International, Inc.,
registered in the United States and/or other countries. Color Jetprinter and Photo Jetprinter are trademarks of Lexmark
International, Inc.
© 2003 Lexmark International, Inc.
740 West New Circle Road
Lexington, Kentucky 40550
www.lexmark.com
 Loading...