

Lexmark Optra T620, T622, 20T4450 - T 622n B/W Laser Printer, T Series Quick Reference
Quick Reference
Lexmark T Family Laser Printer
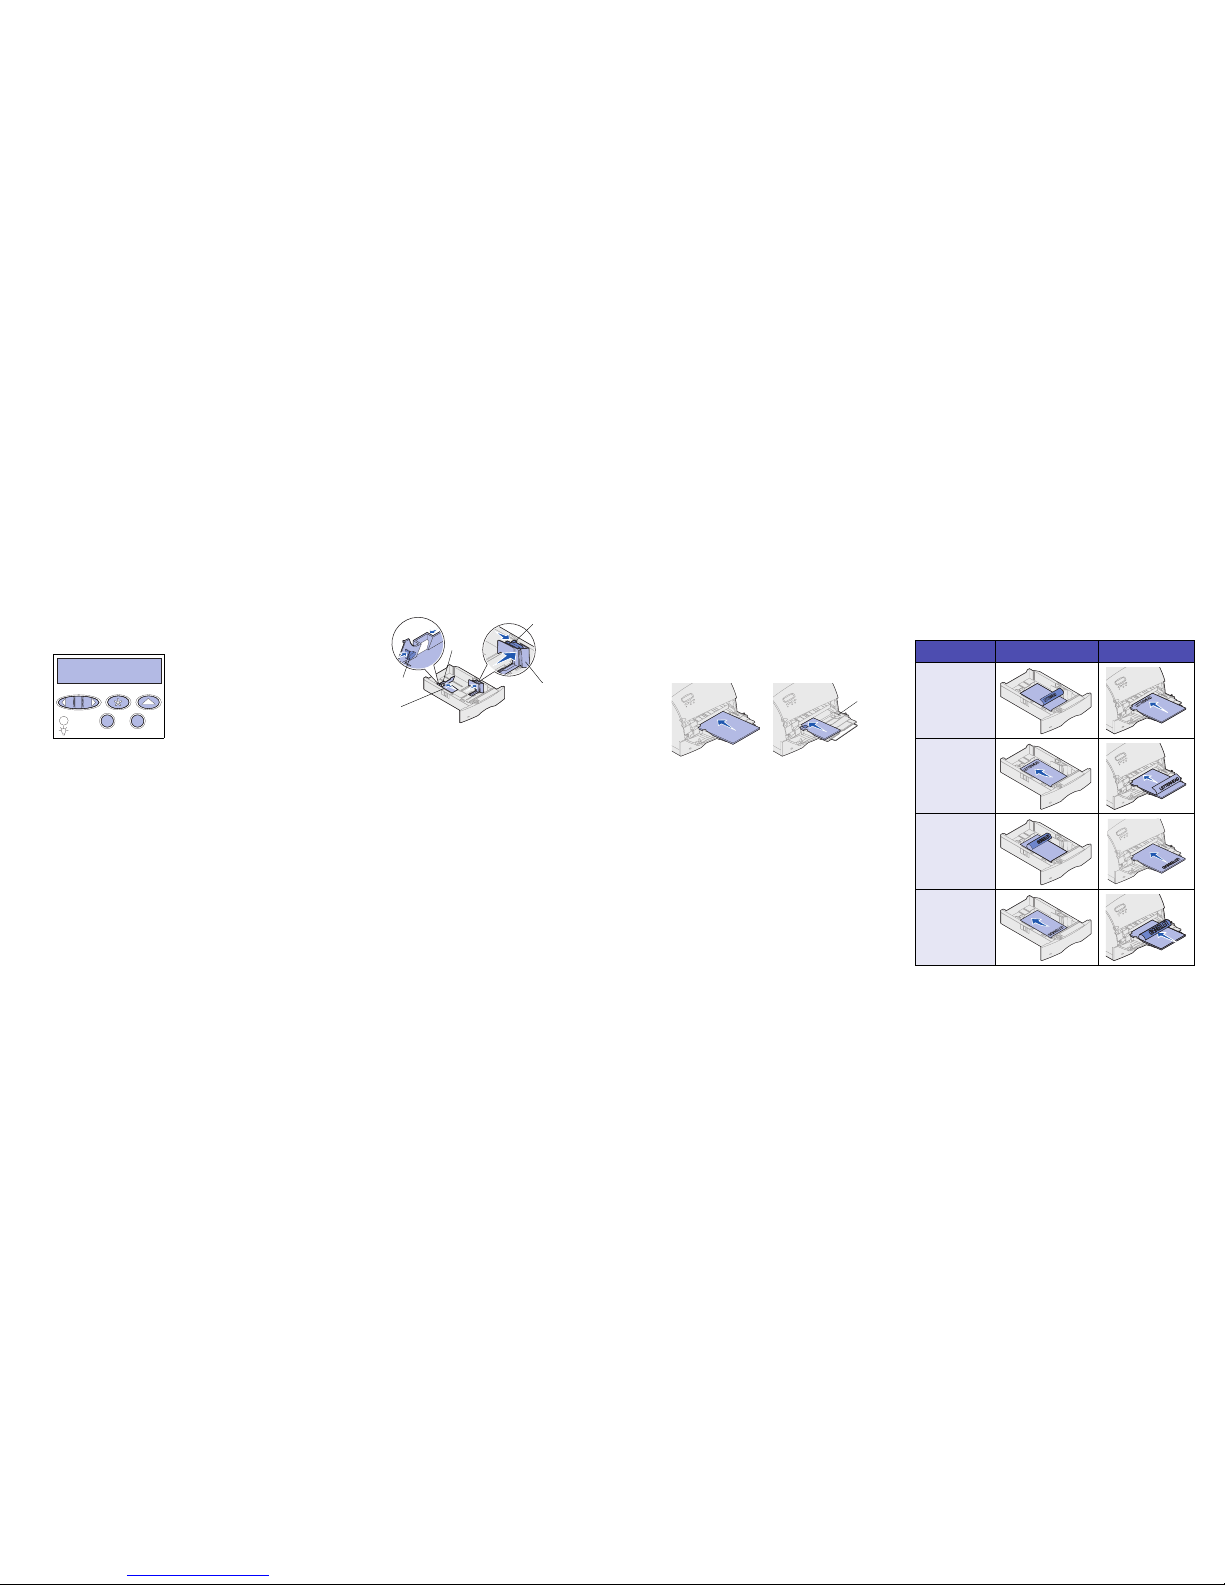
Operator panel
Press Menu to:
• Enter the menus from the ready state
• Scroll through menus or values
• Increase or decrease a numerical value
• Display the Job Menu or the Supplies Menu while
the printer is busy
Press Select to:
• Select the item on the second line of the display
• Save the selection as a new default setting
Press Return to:
• Return to the previous menu level
Press Go to:
• Exit printer menus and return to the Ready state
• Clear messages
Press Stop to:
• Temporarily stop all print activity without losing
data
Loading a paper tray
Complete these instructions to load print materials into any of the standard or
optional trays. All paper trays are loaded the same way.
1 Remove the paper tray.
2 Pull the width guide tab and slide the width guide to the far right side of
the tray.
3 Squeeze the length guide lever and slide the length guide to the correct
position for the size paper you are loading.
4 Place the paper into the paper tray with the recommended print side face
down for single-sided printing and face up for double-sided printing. Do
not fill paper above the paper capacity mark (fill line).
Pull the width guide tab and slide the width guide to the left until it lightly rests
against the edge of the paper stack.
Loading the multipurpose feeder
1 Push the lower release latch.
2 Pull the metal bar out far enough to support your paper size.
3 Slide the paper width guide to the far right.
Supported print material sizes and types
Types
Sizes
:
Loading letterhead
Letterhead must be loaded differently depending on what options you have
installed on your printer.
Ready
1
Menu 2Select 3Return
4
Go 5Stop
6
Pull here
Length
guide
Paper size
indicators
Width
guide
Length guide
lever
Paper and transparencies Envelopes
Plain Paper Labels Preprinted Envelope
Card Stock Bond Colored Paper
Transparency Lette rhead Custom
Type <x>
Letter A4 B4 Folio* 9 Envelope
Legal A5 JIS-B5 Statement* DL Envelope
Executive B5 Envelope
C5 Envelope
7 3/4 Envelope
10 Envelope
Other Envelope
*This size is not available until Size Sensing is turned off. For more information, refer to
the online information.
In a paper tray
In the multipurpose
feeder
Without finisher,
single-sided printing
Without finisher,
double-sided
printing
With finisher,
single-sided printing
With finisher,
double-sided
printing
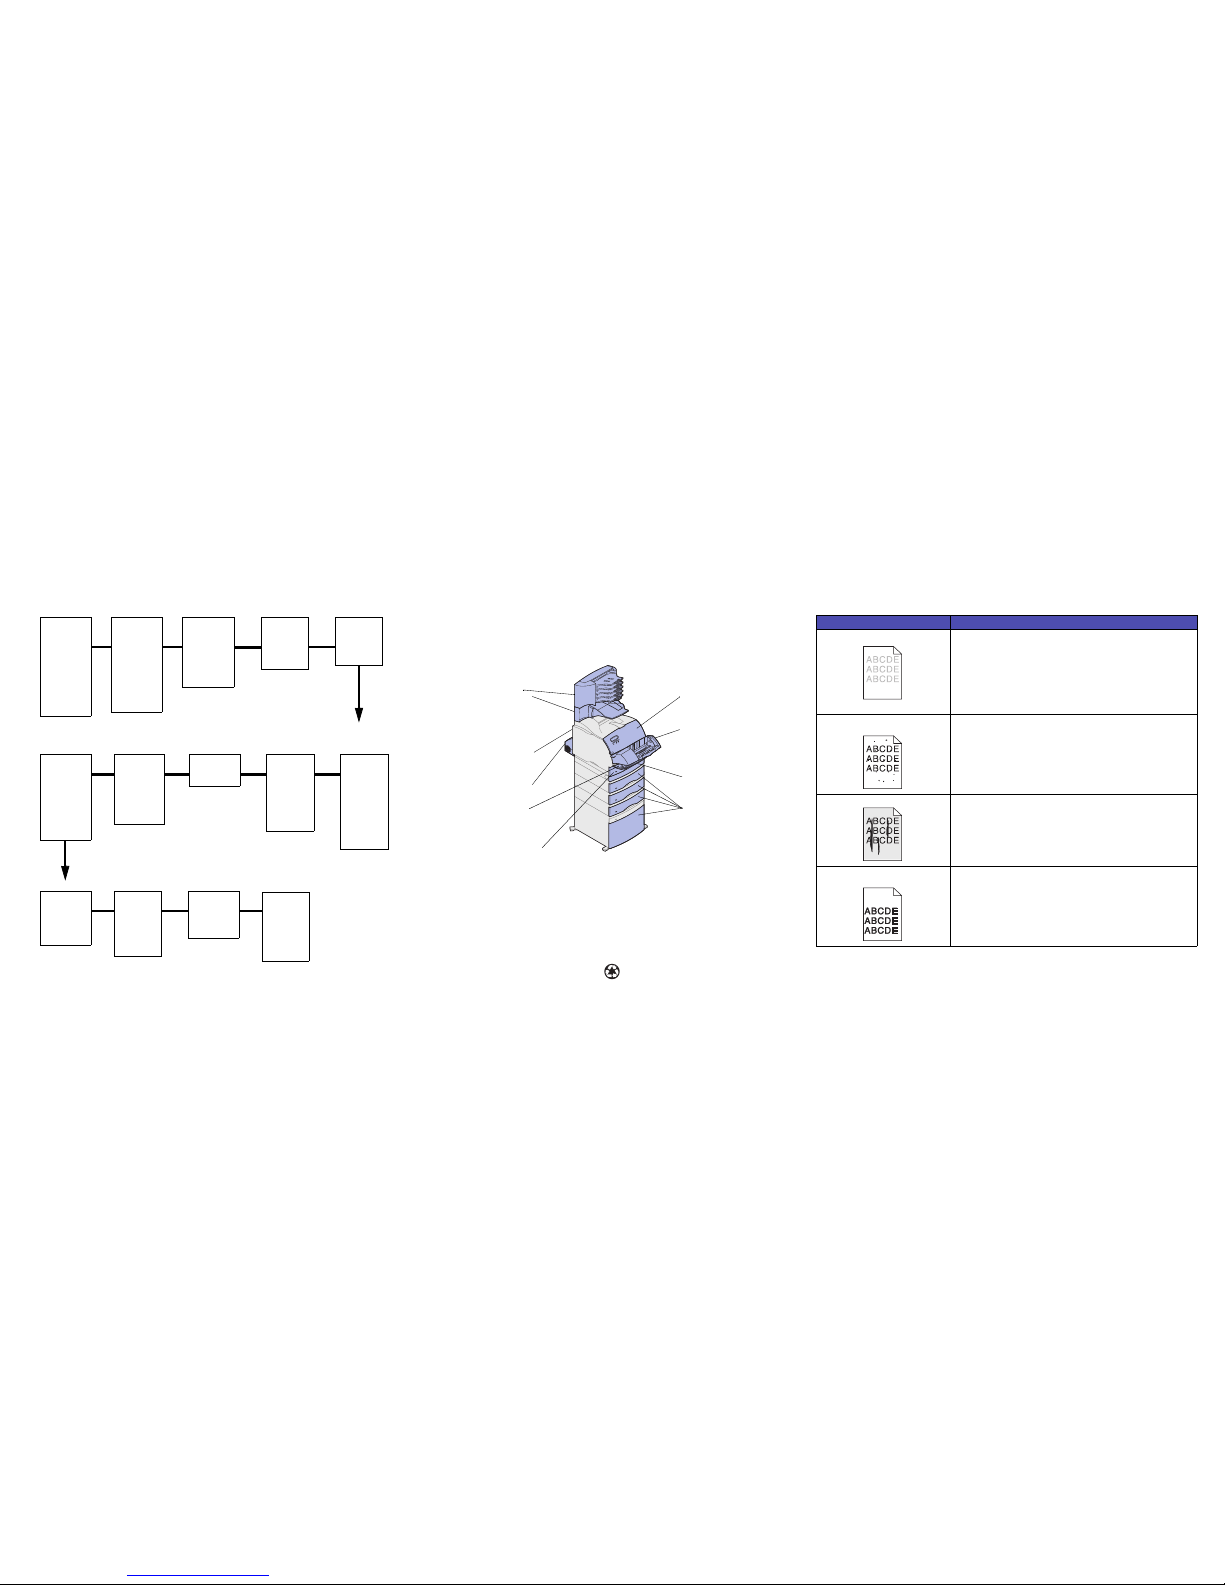
Operator panel menus Accessing paper jam areas
You open doors and covers, remove paper trays, and remove options to access paper jam areas. If your
printer has a multipurpose feeder, it is visible when the lower front door is opened. The illustration shows the
location of paper sources and possible paper jam areas.
Warnin g: Do not attempt to clear any paper jam using tools or instruments. This may permanently
damage the printer.
Print quality problems
PCL Emul Menu
Font Source
Font Name
Point Si ze
Pitch
Symbol Set
Orientation
Lines per Page
A4 Width
Tray Renumber
Auto CR after LF
Auto LF after CR
Paper Menu
Paper So urce
Paper Si ze
Paper Type
Custom Types
Universal Setup
Output Bin
Configure Bins
Overflow Bin
Assign Type/Bin
Substitute Size
Configure MP
Envelope Enhance
Paper Texture
Paper Weight
Paper Loading
Finishing Menu
Duplex
Duplex Bind
Copies
Blank Pages
Collation
Separator Sheets
Separator Source
Multipage Print
Multipage Order
Multipage View
Multipage Border
Staple Job
Staple Prime Src
Offset Pages
Quality Menu
Print Resolution
Toner Darkness
PQET
PictureGrade
Job Menu
Confidential Job
Held Jobs
Cancel Job
Reset Printer
Print Buffer
Prime Stapler
Reset Active Bin
Utilities Menu
Print Menus
Print Net <x> Setup
Print Fonts
Print Directory
Factory Defaults
Format Flash
Defragment Flash
Format Disk
Job Acct Stat
Hex Trace
Setup Menu
Printer Language
Power Save r
Resource Save
Download Target
Print Timeout
Wait Tim eout
Auto Continue
Jam Recovery
Page Protect
Display Language
Alarm Control
Toner Alarm
Staple Alarm
Job Accounting
PostScript Menu
Print PS Error
Font Pri ority
Serial Menu
PCL SmartSwitch
PS SmartSwitch
NPA Mode
Serial Buffer
Job Buffering
RS-232/RS-422
RS-422 Polarity
Serial Protocol
Robust XON
Baud
Data Bits
Parity
Honor DSR
Network Menu
PCL SmartSwitch
PS SmartSwitch
NPA Mode
Network Buffer
Job Buffering
Network <x> Setup
Mac Binary PS
LocalTalk Menu
LocalTalk Port
PCL SmartSwitch
PS SmartSwitch
NPA Mode
LocalTalk Buffer
Job Buffering
NPA Hosts
LocalTalk Name
LocalTalk Addr
LocalTalk Zone
USB Menu
PCL SmartSwitch
PS SmartSwitch
NPA Mode
USB Buffer
Job Buffering
Mac Binary PS
Parallel Menu
PCL SmartSwitch
PS SmartSwitch
NPA Mode
Parallel Buffer
Job Buffering
Advanced Status
Protocol
Honor Init
Parallel Mode 1
Parallel Mode 2
Infrared Menu
Infrared Port
PCL SmartSwitch
PS SmartSwitch
NPA Mode
Infrared Buffer
Job Buffering
Window Size
Transmit Delay
Max Baud Rate
27x Paper Jam
28x Paper Jam
Rear door of:
5-bin mailbox
Output expander
(High-capacity
output stacker
and StapleSmart
not shown)
202 Paper Jam
Printer rear door
230 Paper Jam
Duplex rear door
200 Paper Jam
201 Paper Jam
Upper front door
250 Paper Jam
Lower front door
(down when envelope
feeder is installed)
24x Paper Jam
Integrated input tray
230 Paper Jam
Duplex front
access cover
24x Paper Jam
Paper tr ays
260 Paper Jam
Envelope feeder
Problem Action
Print is too light. • The toner may be low. To utilize the remaining toner, remove the
cartridge by gripping the handles with bot h hands. With the cartridge
arrows pointing downward, shake the print cartrid ge back and forth.
Reinstall the cartridge and then press Go.
• Change the Toner Darkness setting in the Quality Menu.
• If you are printing on an uneven print surface, change the Paper
Weight and Paper Texture settings in the Paper Menu.
Verify that the correct print material is being used.
Toner fog or background shading
appears on the page.
• Check the print cartridge to make sure it is installed c orrectly.
• Change the print cartridge.
• If the problem continues, change the charge roll.
Streaks appear on the page. • The toner may be low. To utilize the remaining toner, remove the
cartridge by gripping the handles with both hands, and then shake the
print cartridge vigorously. Reinstall the same print car tridge.
• If you are using preprinted forms, make sure the ink can withstand
temperatures of 212°C (414°F).
The job prints, but the top and side
margins are incorrect.
• Make sure the Paper Size setting in the Paper Menu is correct.
• Make sure the margins are set correctly in your software application.
Copyright © 2001 Lexmark International, Inc. All ri ghts reserved.
Printed in U.S.A.
This document is printed on recycled paper. 1/01
E.C. 1K0911 P/N 11K3143
 Loading...