

Lexmark X646e, 644e - X MFP B/W Laser, 646dte - X MFP B/W Laser, 646e - X MFP B/W Laser, 646ef - X MFP B/W Laser Menus And Messages Manual
www.lexmark.com
Menus and Messages Guide
X
644e and
X
646e
January 2006
Lexmark and Lexmark with diamond design are trademarks of Lexmark International, Inc.,
registered in the United States and/or other countries.
© 2006 Lexmark International, Inc.
All rights reserved.
740 West New Circle Road
Lexington, Kentucky 40550

2
Edition: January 2006
The following paragraph does not apply to any country where such provisions are inconsistent with local law: LEXMARK
INTERNATIONAL, INC., PROVIDES THIS PUBLICATION “AS IS” WITHOUT WARRANTY OF ANY KIND, EITHER EXPRESS OR
IMPLIED, INCLUDING, BUT NOT LIMITED T O, THE IMPLIED W ARRANTIES OF MERCHANT ABILITY OR FITNESS FOR A P AR TICULAR
PURPOSE. Some states do not allow disclaimer of express or implied warranties in certain transactions; therefore, this statement may not
apply to you.
This publication could include technical inaccuracies or typographical errors. Changes are periodically made to the information herein; these
changes will be incorporated in later editions. Improvements or changes in the products or the programs described may be made at any time.
Comments about this publication may be addressed to Lexmark International, Inc., Department F95/032-2, 740 West New Circle Road,
Lexington, Kentucky 40550, U.S.A. In the United Kingdom and Eire, send to Lexmark International Ltd., Marketing and Services
Department, Westhorpe House, Westhorpe, Marlow Bucks SL7 3RQ. Lexmark may use or distribute any of the information you supply in
any way it believes appropriate without incurring any obligation to you. You can purchase additional copies of publications related to this
product by calling 1-800-553-9727. In the United Kingdom and Eire, call +44 (0)8704 440 044. In other countries, contact your point of
purchase.
References in this publication to products, programs, or services do not imply that the manufacturer intends to make these available in all
countries in which it operates. Any reference to a product, program, or service is not intended to state or imply that only that product,
program, or service may be used. Any functionally equivalent product, program, or service that does not infringe any existing intellectual
property right may be used instead. Evaluation and verification of operation in conjunction with other products, programs, or services, except
those expressly designated by the manufacturer, are the user’s responsibility.
Lexmark and Lexmark with diamond design, MarkNet, MarkTrac k, and MarkVision are trademarks of Lexmark International, Inc., registered
in the United States and/or other countries.
PCL
®
is a registered trademark of the Hewlett-Packard Company. PostScript® is a registered trademark of Adobe Systems Incorporated.
The following terms are trademarks or registered trademarks of these companies:
Albertus The Monotype Corporation plc ITC Lubalin Graph International Typeface Corporation
Antique Olive Monsieur Marcel OLIVE ITC Mona Lisa International Typeface Corporation
Apple-Chancery Apple Computer, Inc. ITC Zapf Chancery International Typeface Corporation
Arial The Monotype Corporation plc Joanna The Monotype Corporation plc
CG Times
Based on Times New Roman under license from The
Monotype Corporation plc, is a product of Agfa
Corporation Marigold Arthur Baker
Chicago Apple Computer, Inc. Monaco Apple Computer, Inc.
Clarendon Linotype-Hell AG and/or its subsidiaries New York Apple Computer, Inc.
Eurostile Nebiolo Oxford Arthur Baker
Geneva Apple Computer, Inc. Palatino Linotype-Hell AG and/or its subsidiaries
GillSans The Monotype Corporation plc Stempel Garamond Linotype-Hell AG and/or its subsidiaries
Helvetica Linotype-Hell AG and/or its subsidiaries Taffy Agfa Corporation
Hoefler Jonathan Hoefler Type Foundry Times New Roman The Monotype Corporation plc
ITC Avant Garde
Gothic International Typeface Corporation Univers Linotype-Hell AG and/or its subsidiaries
ITC Bookman International Typeface Corporation
© 2006 Lexmark International, Inc.
All rights reserved.
UNITED STATES GOVERNMENT RIGHTS
This software and any accompanying documentation provided under this
agreement are commercial computer software and documentation
developed exclusively at private expense.

3
Contents
Chapter 1: Using MFP menus ................................................ ........................... ................. 5
Understanding the multifunction printer (MFP) control panel ...........................................................................5
Home screen ................................. ..... ...... ...... ..... ........................................ ..... ........................................7
Using the LCD touch-screen buttons .............................................................................................................10
Sample screen one .................................................................................................................................11
Information on LCD touch-screen buttons .............................................................................................. 11
Sample screen two .................................................................................................................................13
Information on LCD touch-screen buttons .............................................................................................. 13
Other LCD touch-screen buttons ............................................................................................................15
Features .................................................................................................................................................16
Menus ............................................................................................................................................................17
Menu map ...............................................................................................................................................17
Paper Menu ............................... ..... ...... ..... ...... ...... ....................................... ...... ........................................... 18
Default Source ........................................................................................................................................18
Paper Size/Type .............................................................. ..... ....................................... ...........................18
Configure MP ..........................................................................................................................................21
Envelope Enhance .................................................................................................................................21
Substitute Size ........................................................................................................................................22
Paper Weight ................................. ..... ...... ...... ....................................... ...... ..... ......................................23
Paper Loading ............................... ....................................... ...... ............................................................24
Custom Types ........................................................................................................................................24
Custom Names .......................................................................................................................................24
Universal Setup ......................................................................................................................................25
Reports ..........................................................................................................................................................25
Network/Ports ................................................................................................................................................27
TCP/IP ....................................................................................................................................................27
IPv6 ........................................................................................................................................................29
E-mail Server Setup ...............................................................................................................................30
Wireless ..................................................................................................................................................32
Standard Network or Network <x> .........................................................................................................32
Standard USB or USB <x> .....................................................................................................................33
Standard Parallel or Parallel <x> ............................................................................................................35
Serial <x> ...............................................................................................................................................37
NetWare .................................................................................................................................................39
AppleTalk ................................................................................................................................................40
LexLink ...................................................................................................................................................41
Settings ..........................................................................................................................................................41
General Settings .....................................................................................................................................41
Copy Settings ................................ ..... ...... ...... ..... ........................................ ..... ......................................47
Fax Settings .............................................. ....................................... ...... .................................................51
E-mail Settings ......................................................................................................................................60
FTP Settings ...........................................................................................................................................64
Print Settings ..........................................................................................................................................67
Security ...................................................................................................................................................81
Set Date and Time ..................................................................................................................................88

4
Help Pages ....................................................................................................................................................89
Manage Shortcuts ..........................................................................................................................................90
Chapter 2: Understanding MFP messages ..................................................................... 92
Status messages ...........................................................................................................................................92
Fax status messages .............................................................. ..... ....................................... . ..........................95
Cancel jobs messages ...................................................................................................................................95
Password and PIN messages ........................................................................................................................95
Copy, e-mail, fax, FTP, and scan button messages ......................................................................................96
Attendance messages ...................................................................................................................................96
Functions disabled transitional messages ...................................................................................................110
Index .................................................................................................................................. 111
Using MFP menus
5
1
Using MFP menus
Understanding the multifunction printer (MFP) control panel
Most print settings can be changed from the application in use or the print driver. Settings changed from the application or
print driver apply only to the job being sent to the MFP.
Changes made to print settings from an application override changes made from the control panel.
If a setting cannot be changed from the application, use the MFP control panel, MarkVision™ Professional, or the
Embedded Web Server (EWS) pages. Changing a setting from any of these makes that setting the user default.
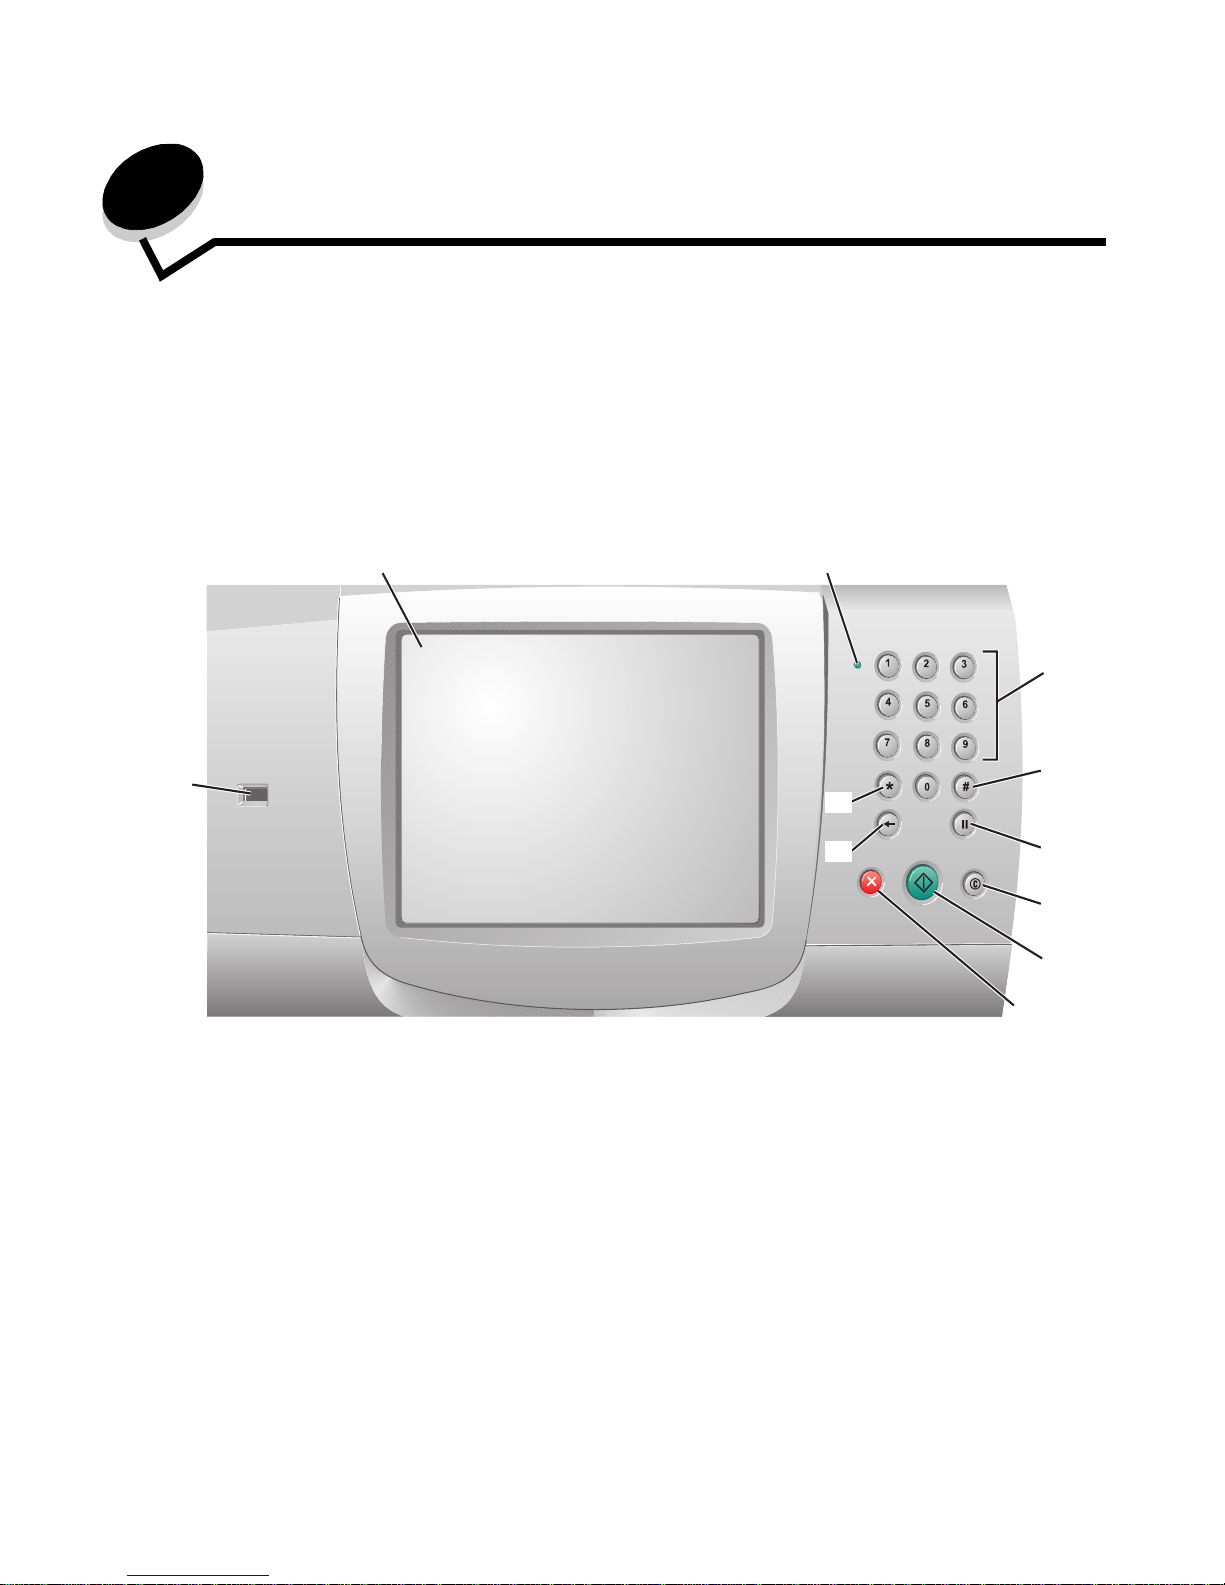
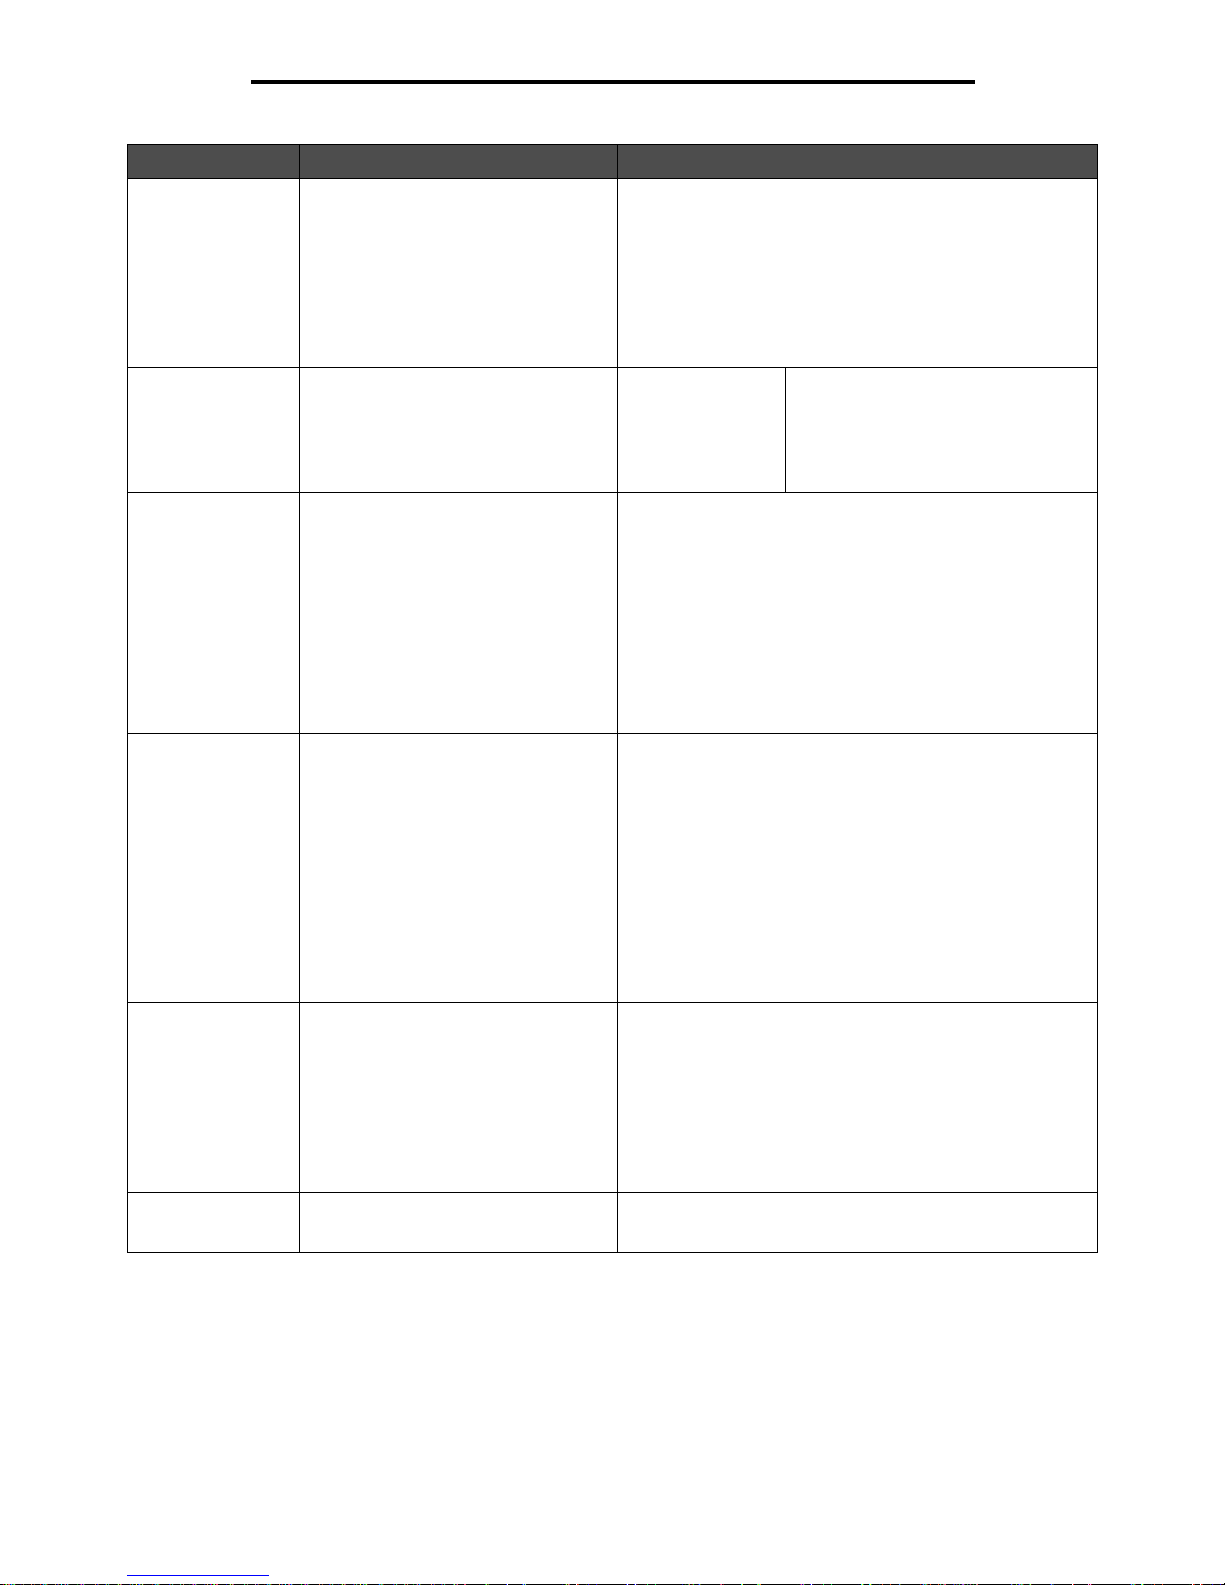
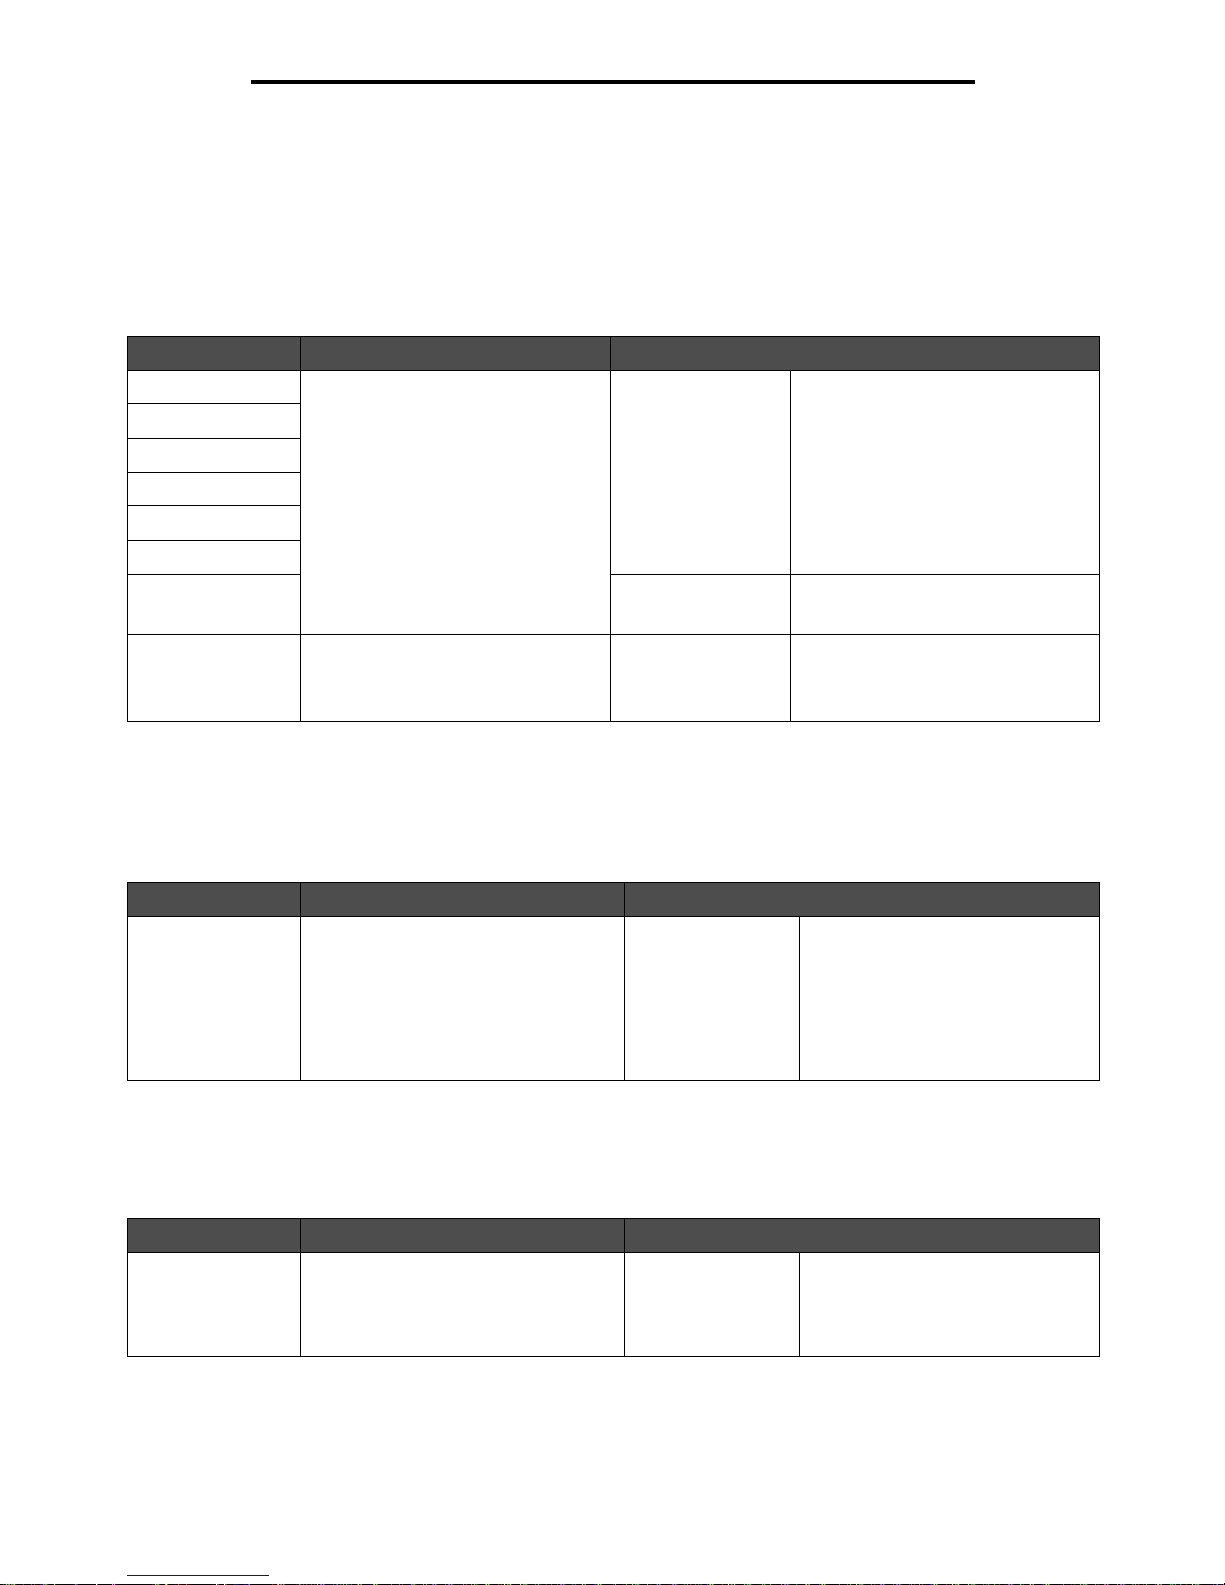
The MFP control panel consists of:
1
11
2
3
4
5
6
7
8
9
10
ABC
DEF
GHI
JKL
MNO
PQRS
TUV
WXYZ
Understanding the multifunction printer (MFP) control panel
6
Using MFP menus
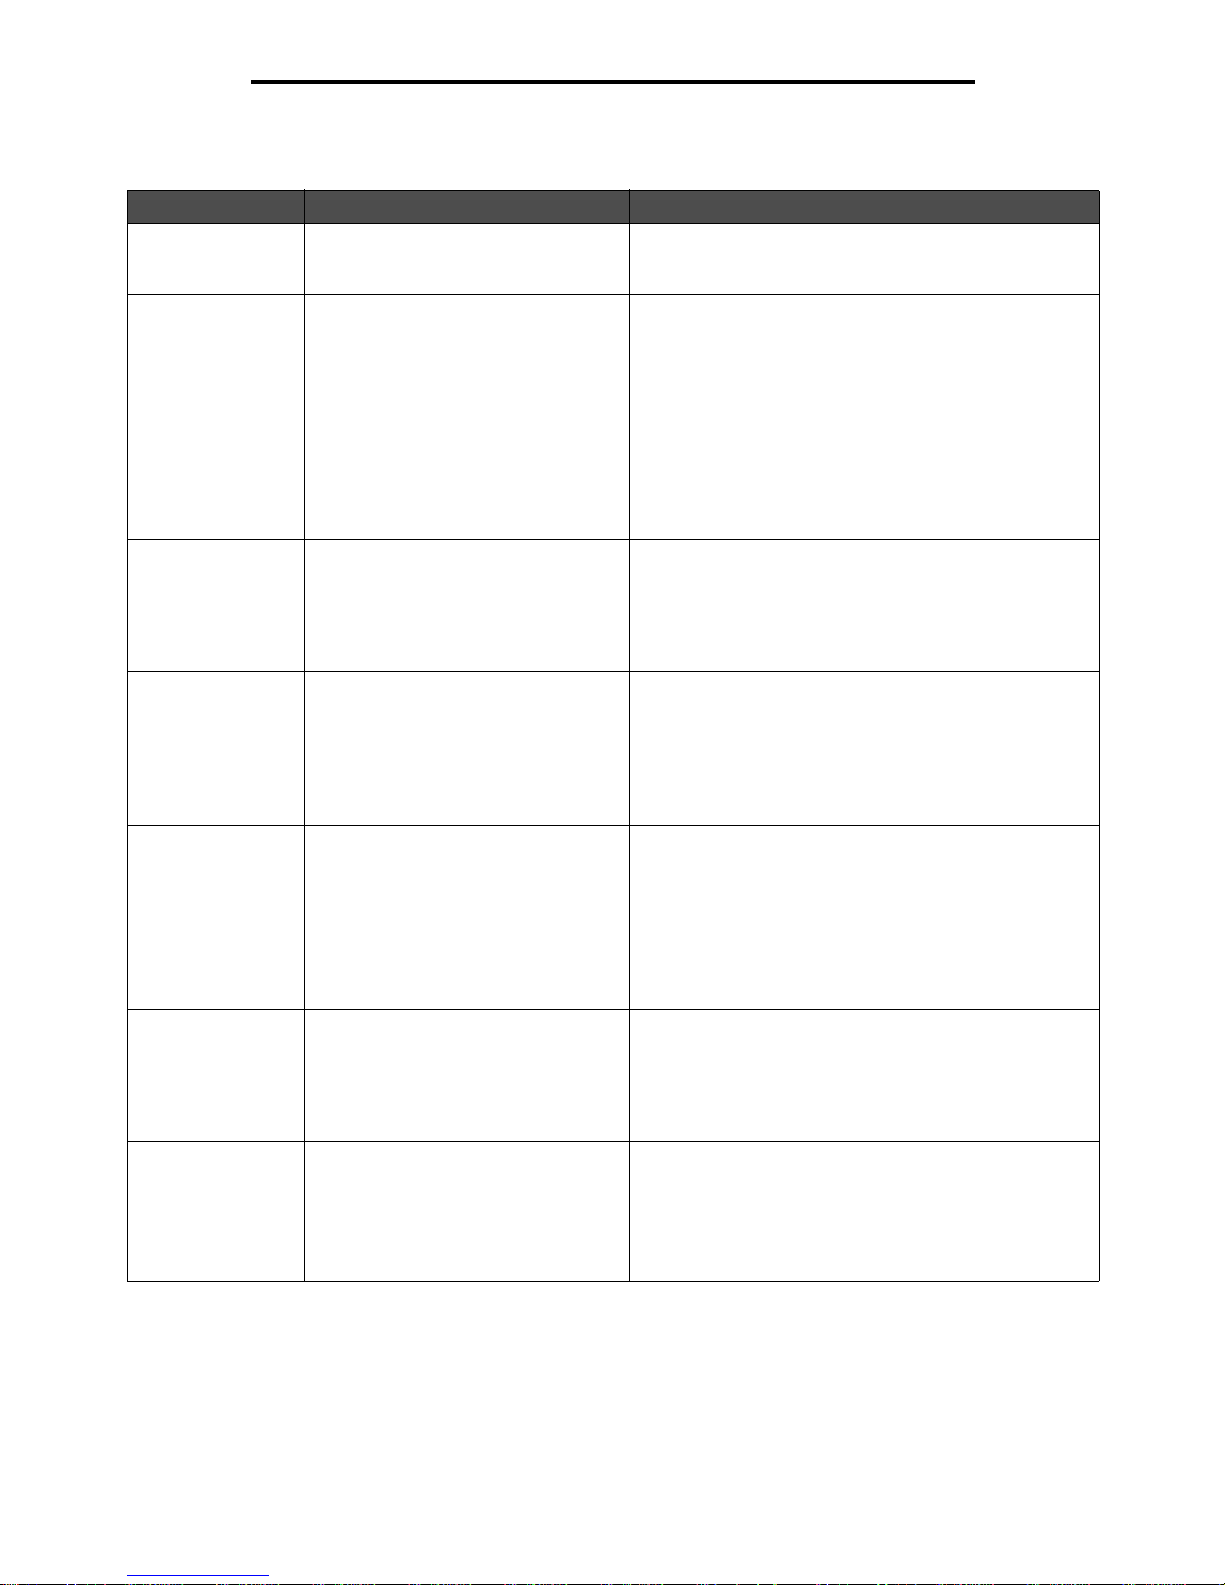
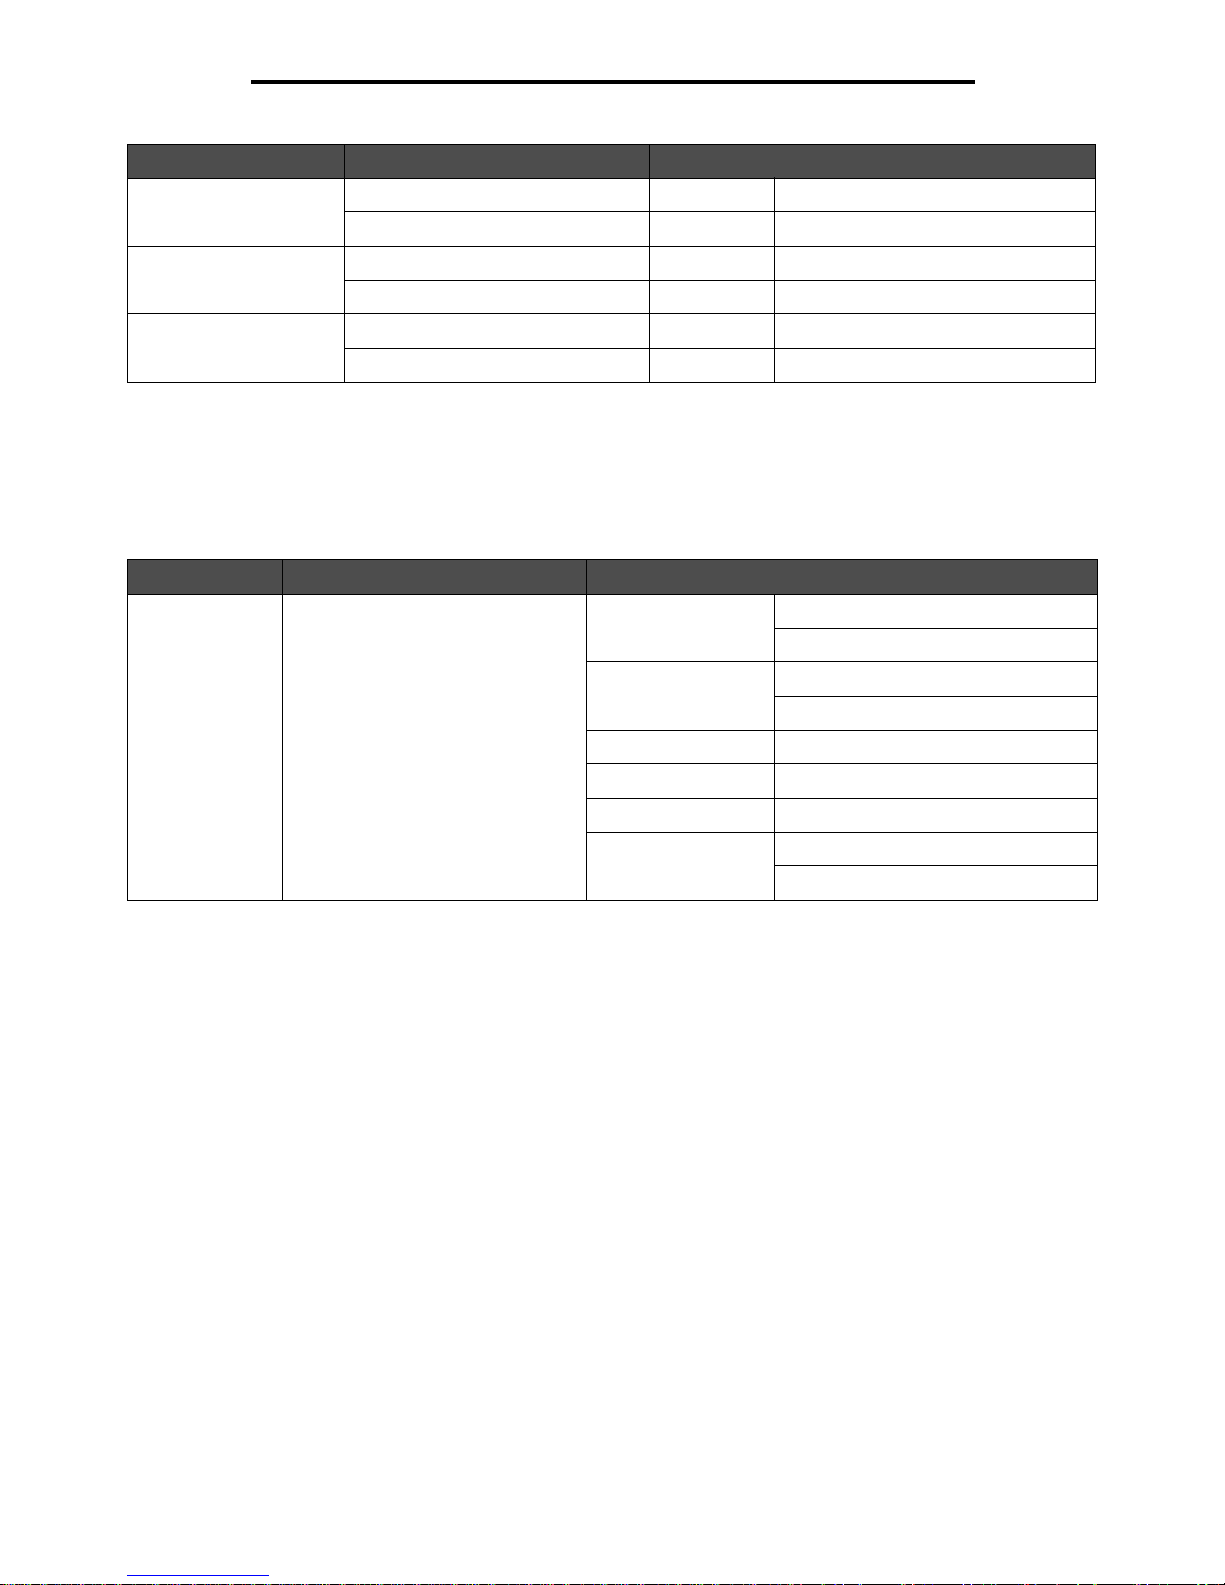
Callout Control panel item Function
1 LCD A liquid crystal display (LCD) which shows home screen
buttons, menus, menu items, and values. Allows for
making selections within Copy, Fax, and so on.
2 Indicator light Gives information about the status of the MFP using the
colors red and green.
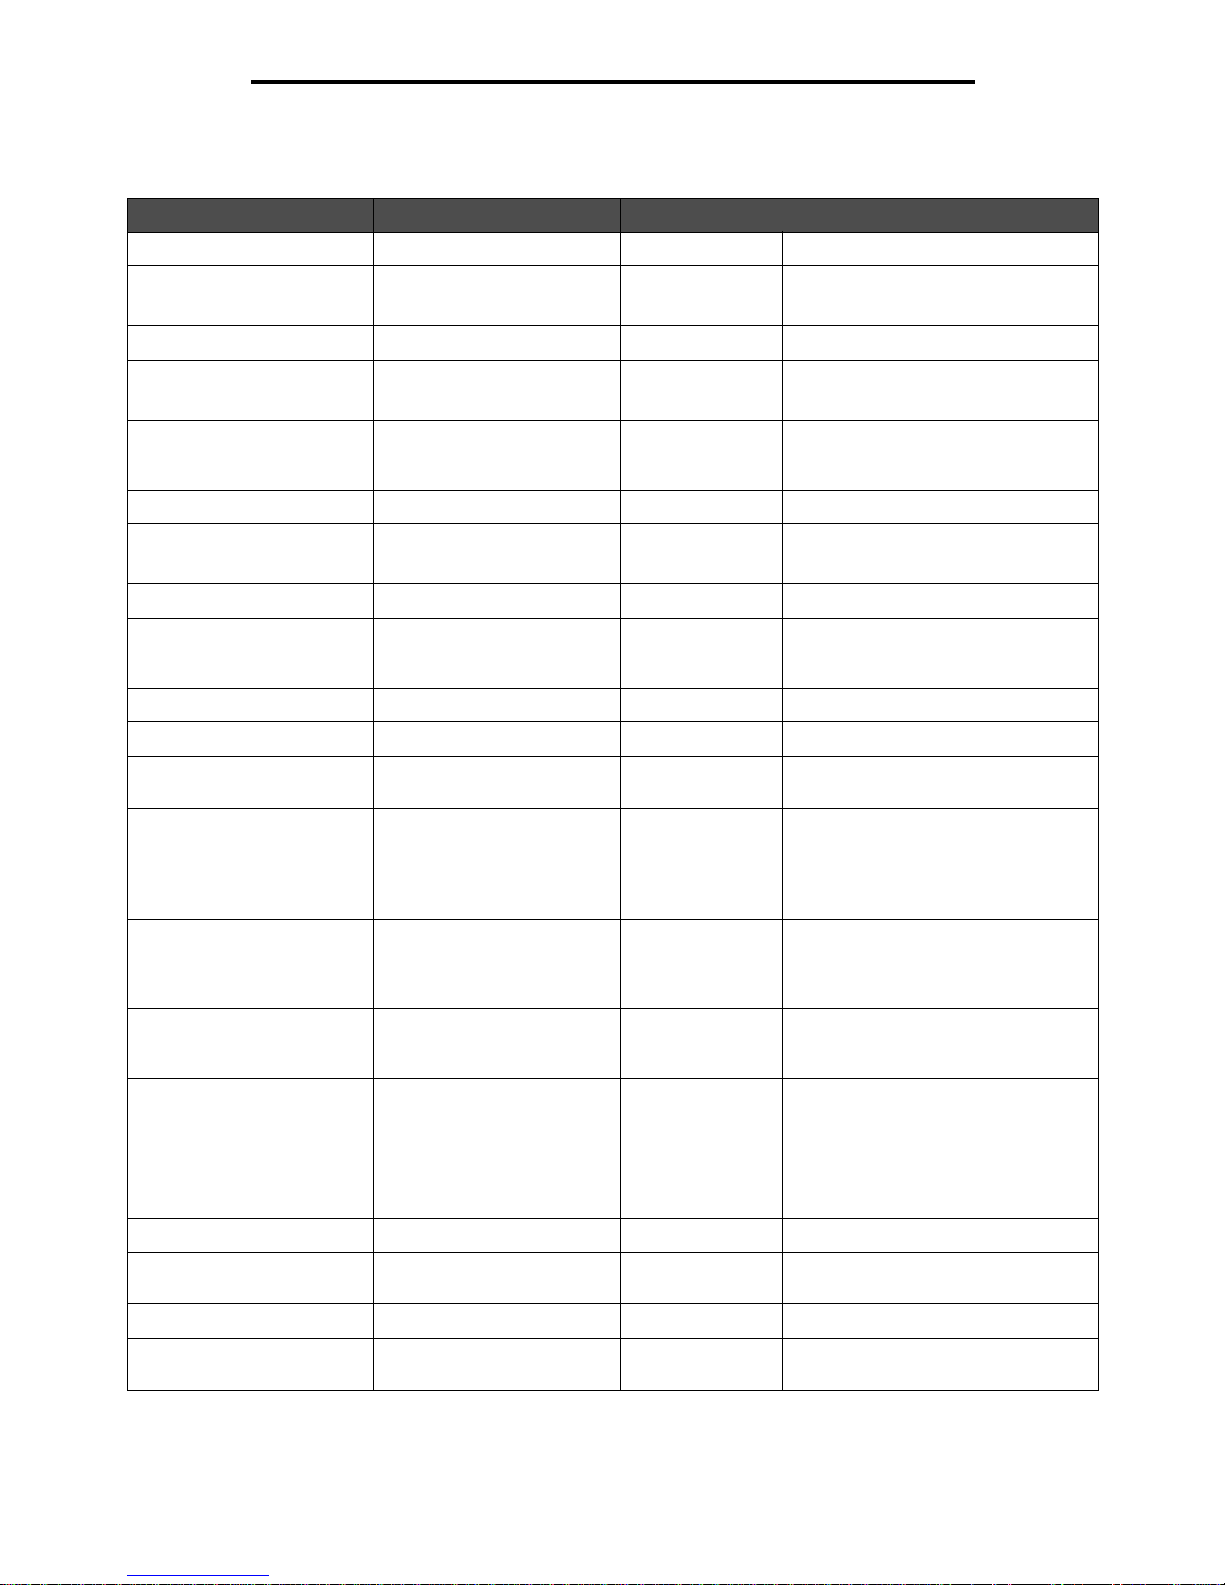
3 0–9
Note: Referred to as the numeric
keypad.
Press these buttons to enter numbers when the LCD
screen has a field that accepts the entry of numbers.
Also, use these buttons to dial phone numbers for faxes.
Note: If a number is pressed while on the home screen
without pressing the # button first, the Copy menu opens
and changes the Copy Quantity.
4 # (Pound or number character) Press this button:
• For a shortcut identifier.
• Within phone numbers. For a Fax number with a #,
enter it twice — ##.
• From the home screen, the Fax Destination List menu
item, E-mail Destination List menu item, or Profile List
menu item to access shortcuts.
5 Dial Pause Press to cause a two- or three-sec ond dial pause in a f ax
number. The button only functions within the Fax menu or
with fax functions.
Press from the home screen to redial a fax number.
When outside of the Fax menu, fax function, or home
screen, pressing Dial Pause causes an error beep.
When sending a fax, in the Fax To: field, a Dial Pause
press is represented by a comma (,).
6 Clear All When in the function menus, such as Copy, Fax, E-mail,
and FTP, it returns all settings to their def aul t values, and
then returns the MFP to the home screen.
When in any other menu while the MFP is Ready , it
cancels all changes that have not been submitted and
returns the MFP to the home screen.
7 Start Press to initiate the current job indicated on the control
panel.
From the home screen, press it to start a copy job with
the default setting s .
If pressed while a job runs through the scanner, the
button has no effect.
Status Indicates
Off MFP power is off.
Blinking green MFP is warming up, proces sing data,
or printing a job.
Solid green MFP is on, but idle.
Solid red Operator intervention is required.
Understanding the multifunction printer (MFP) control panel
7
Using MFP menus
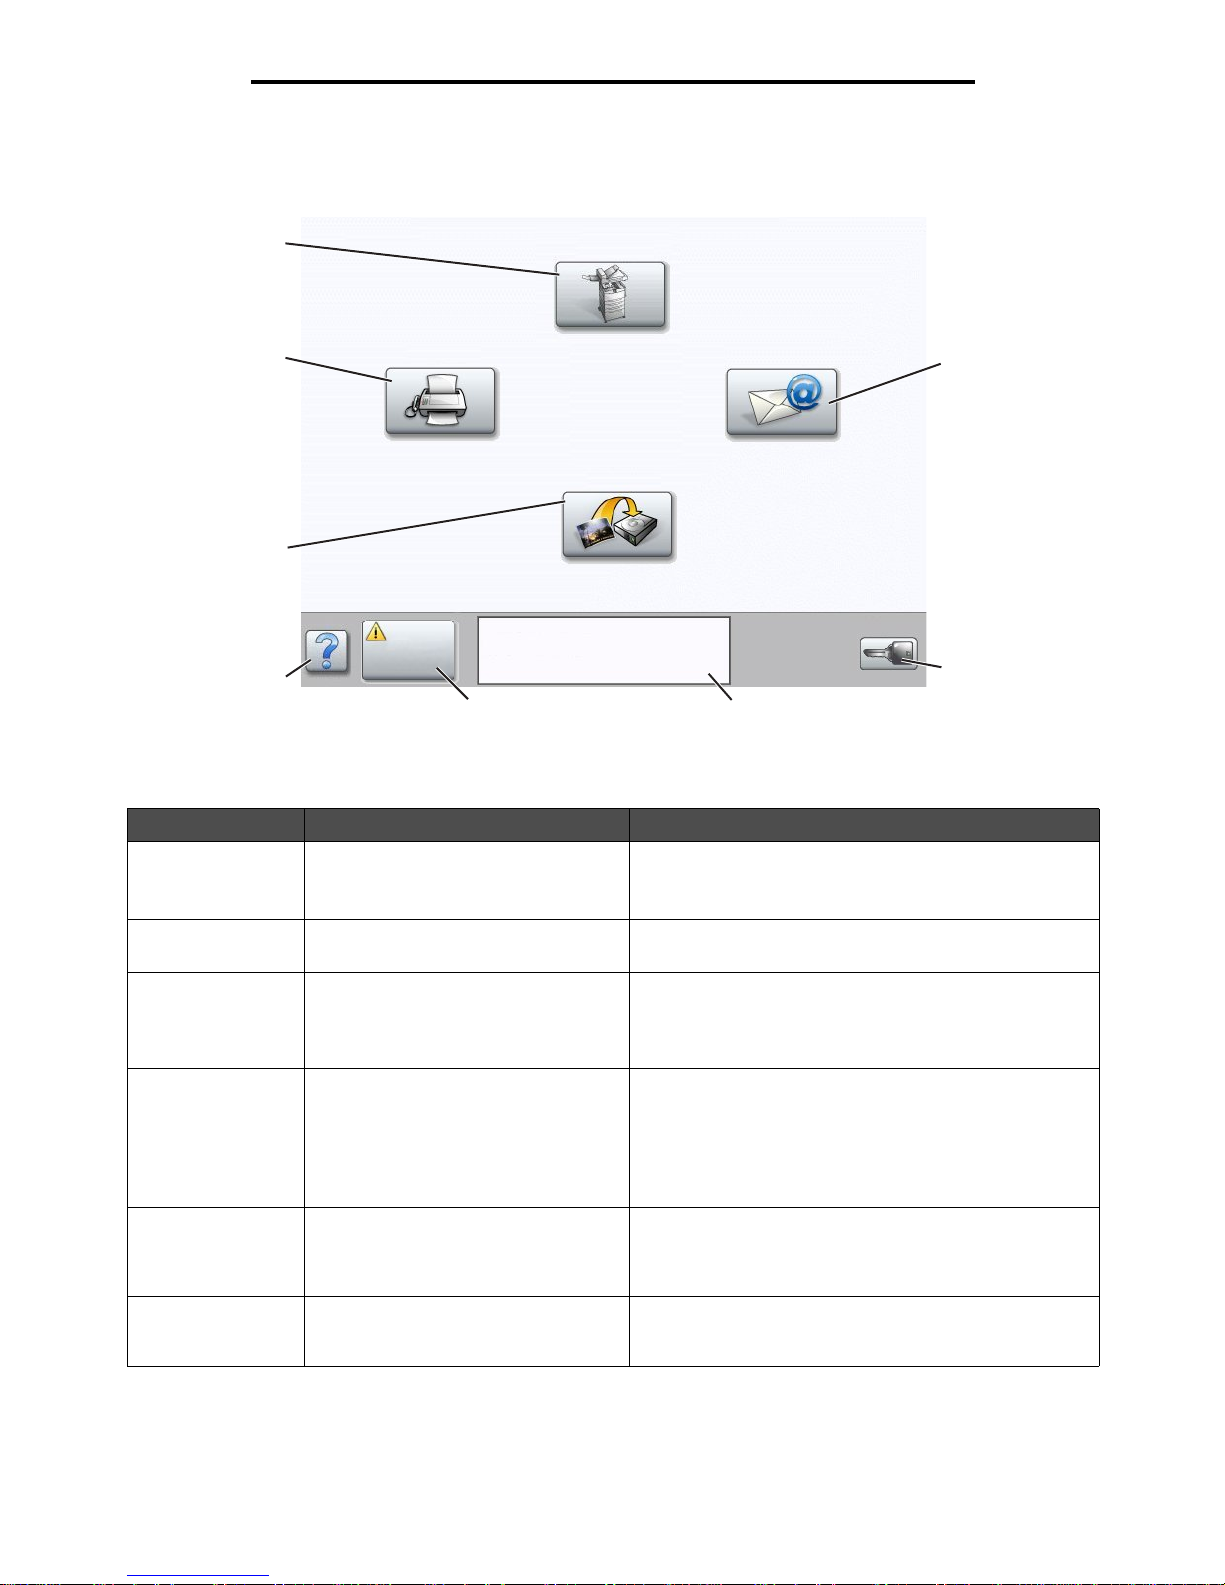
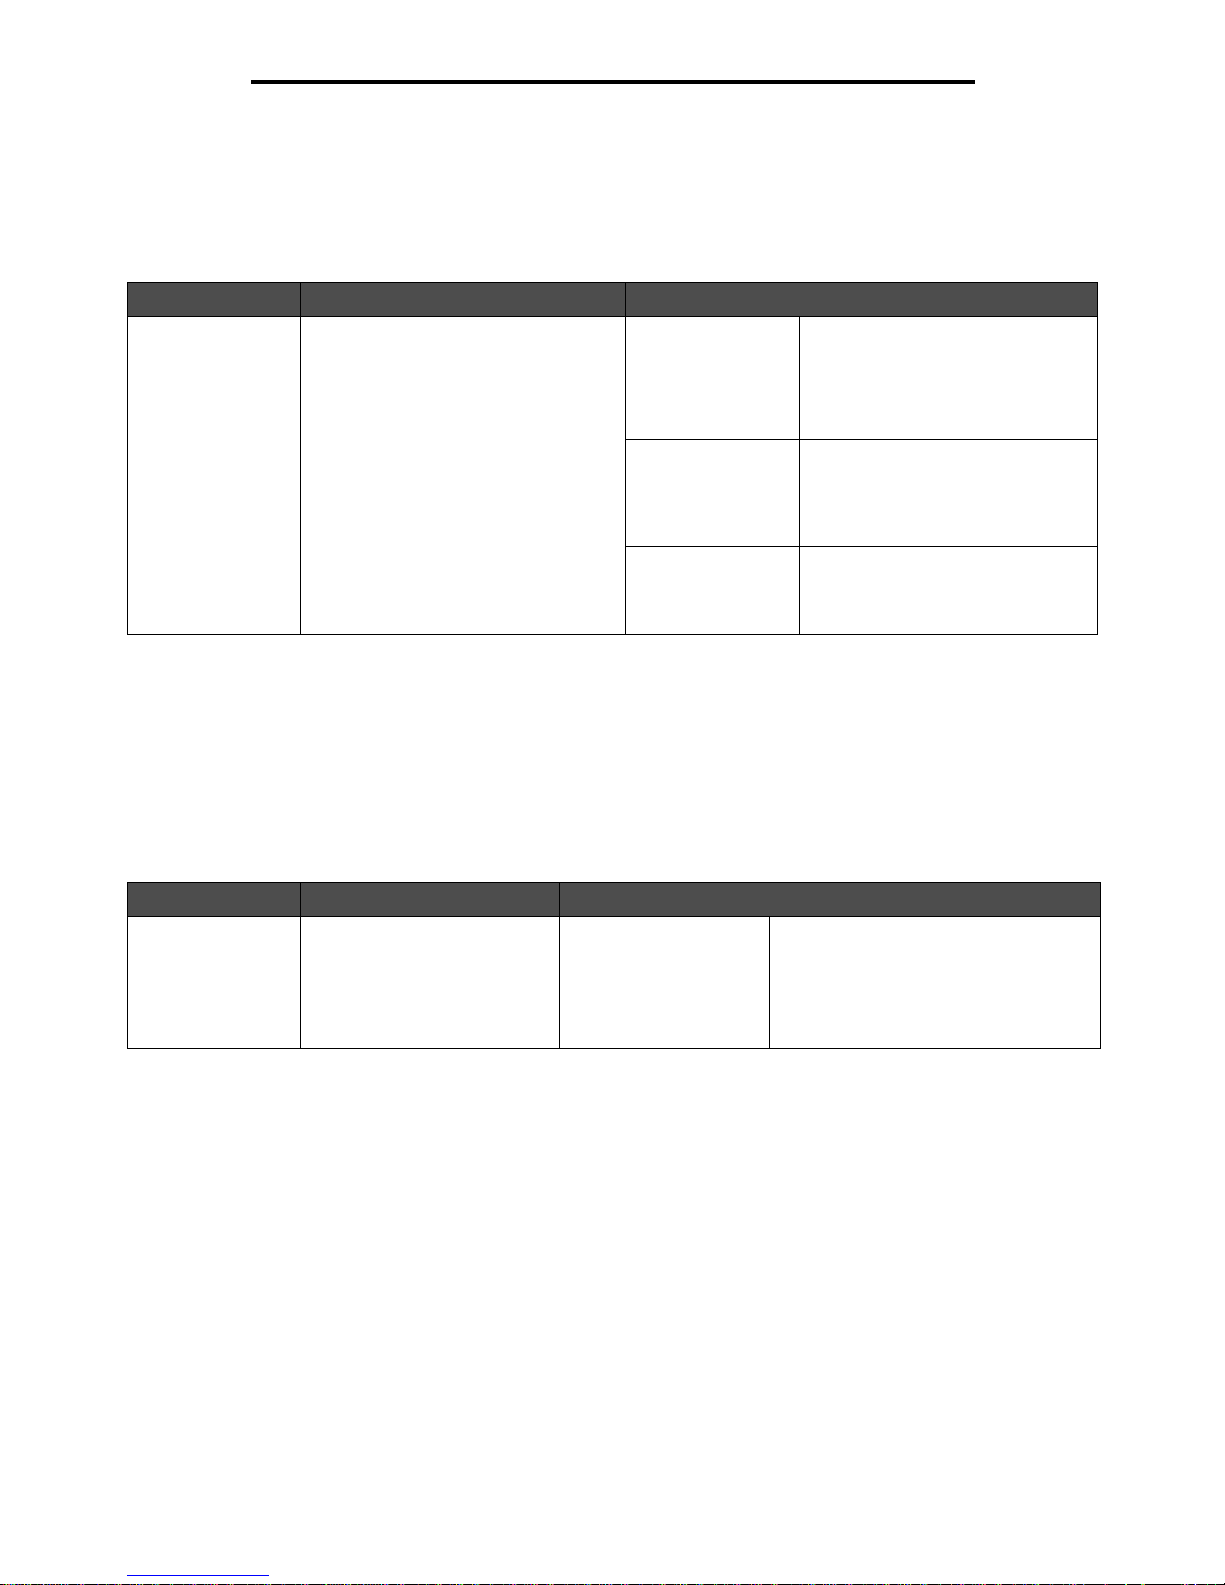
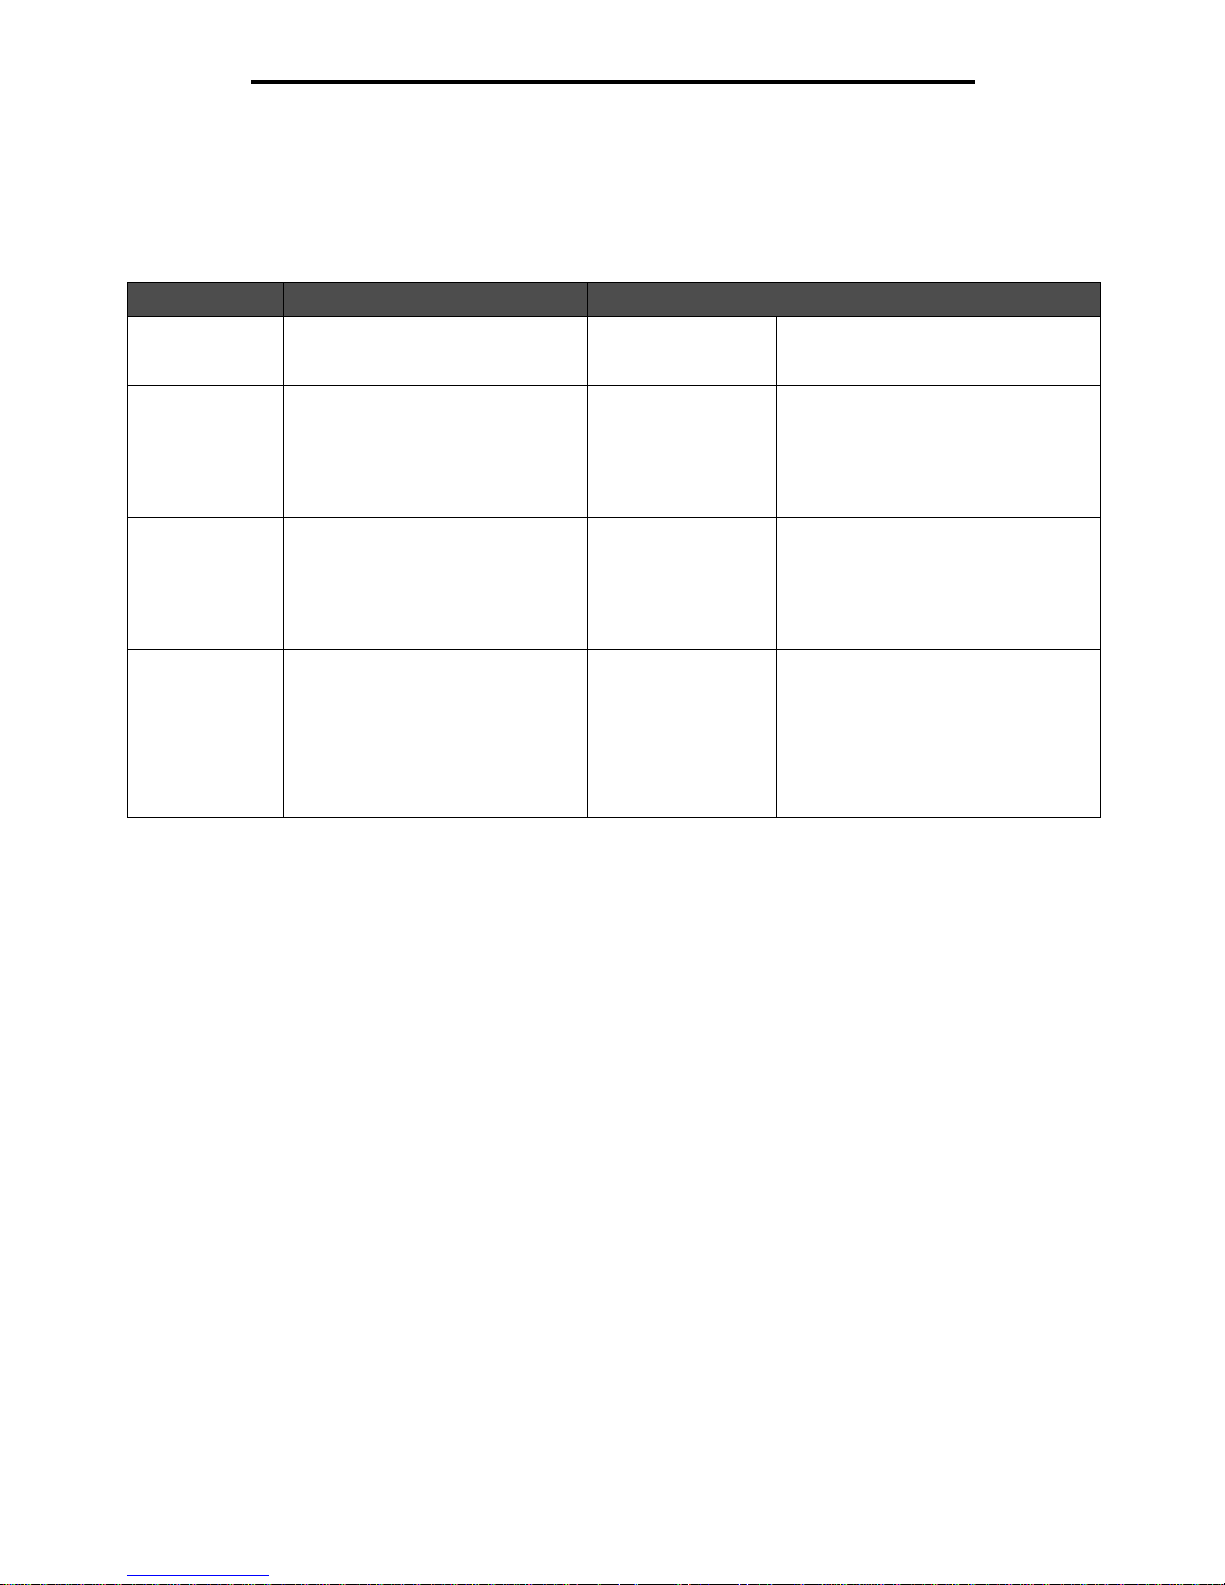
Home screen
After the MFP is turned on and a s ho rt warm-up period occurs, the LCD show s the following basic s cre en wh ic h is referred
to as the home screen. Use the LCD touch-screen home screen buttons to open a menu. Once in a menu, use other
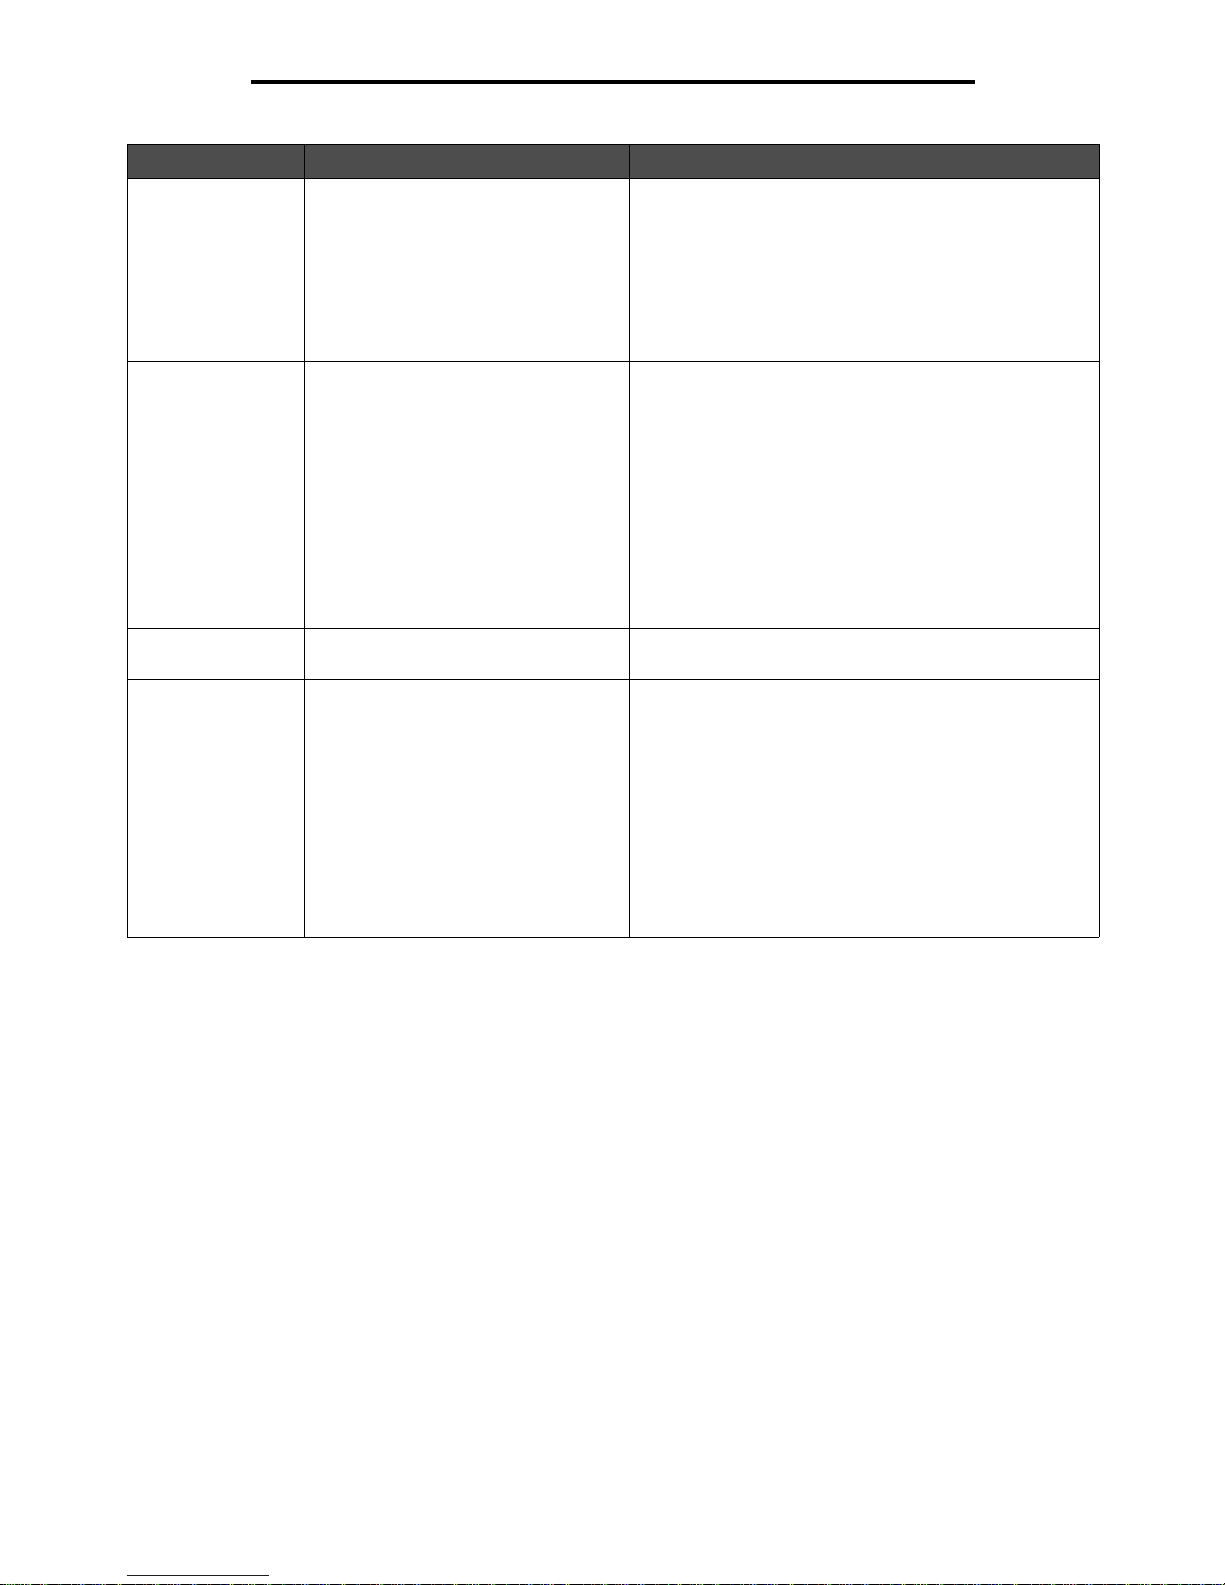
8 Stop Press to cause the printing or scanning to stop.
During a scan job, the scanner finishes scanning the
current page and then stops, which means paper may
remain in the automatic document feeder (ADF).
During a print job, the print media path is cleared before
the printing stops.
Stopping appears on the control panel during this
process.
9 Backspace Within the Copy menu, which is accessed by touching the
Copy button, press Backspace to delete the right-most
digit of the value in the Copy Count. The default value of
1 appears if the entire number is deleted by pressing
Backspace numerous t imes.
Within the Fax Destination List, press Backspace to
delete the right-most digit of a number entered manually.
It also deletes an entire shortcut entry. Once an entire
line is deleted, anot her press of Backspace causes the
cursor to move up one line.
Within the E-mail Destination List, press Backspace to
delete the charac ter to the lef t of the cu rsor. If the ent ry is
in a shortcut, the entire entry is deleted.
10 Asterisk (*) * is used as part of a fax number or as an alphanumeric
character.
11 USB direct interface device The host Universal Serial Bus (USB) direct interface
device on the control panel is used to plug in a USB flash
memory device a nd prin t a n y Portable Doc um ent Format
(PDF) [.pdf file], Joint Photographic Experts Group
(JPEG) [.jpeg or .jpg file], Tagged Image File Format
(TIFF) [.tiff or .tif file], Gr aphic s Interchan ge Format (GIF)
[.gif file], Basic Multilingual Plane (BMP) [.bmp file],
Portable Network Graphics (PNG) [.png file], PiCture
eXchange (PCX) [.pcx file], and PC Paintbrush File
Format [.dcx file] files.
The USB direct interface can also be used to scan a
document to a USB flash memory device using the PDF,
TIFF, or JPEG formats.
Callout Control panel item Function
Understanding the multifunction printer (MFP) control panel
8
Using MFP menus
buttons to scroll through a list of menu items or values, select a value to change the user default setting, and respond to
messages.
Callout number Button or screen item Function
1 Copy Touch to access the Copy menus.
If the home screen is shown, press a number to access
the Copy menus, too.
2 E-mail Touch to access the E-mail menus. It is possible to scan
a document directly to an e-mail address.
3 Menus (A key is shown on the button.) Touch to access the menus. These menus are only
available when the MFP is in the Ready state.
The Menus button is on a gray bar called the navigati on
bar. The bar contains other buttons described as follows.
4 Status message bar Shows the current MFP status such as Ready or Busy.
Shows MFP condit ions such as Toner Low.
Shows intervention messages to give instructions on
what the user should do so the MFP can continue
processing, such as Close door or insert print
cartridge.
5 Status/Supplies Appears on the LCD whene v er the MFP st atus inclu des a
message requiring intervention. Touch it to access the
messages screen for more information on the message
including how to clear it.
6 ? (Tips) All menus have a Tips button. Tips is the
context-sensitive Help feature within the LCD touch
screens.
1
2
3
4
5
6
7
8
Copy
Fax
E-mail
FTP
Status/
Supplies
Ready. Toner low.
Touch any button to begin.
Menus
Understanding the multifunction printer (MFP) control panel
9
Using MFP menus
Other LCD touch-screen buttons may appear on the home screen. They are:
7 FTP Touch to access the File Transfer Protocol (FTP) menus.
A document can be scanned directly to an FTP site.
8 Fax Touch to access the Fax menus.
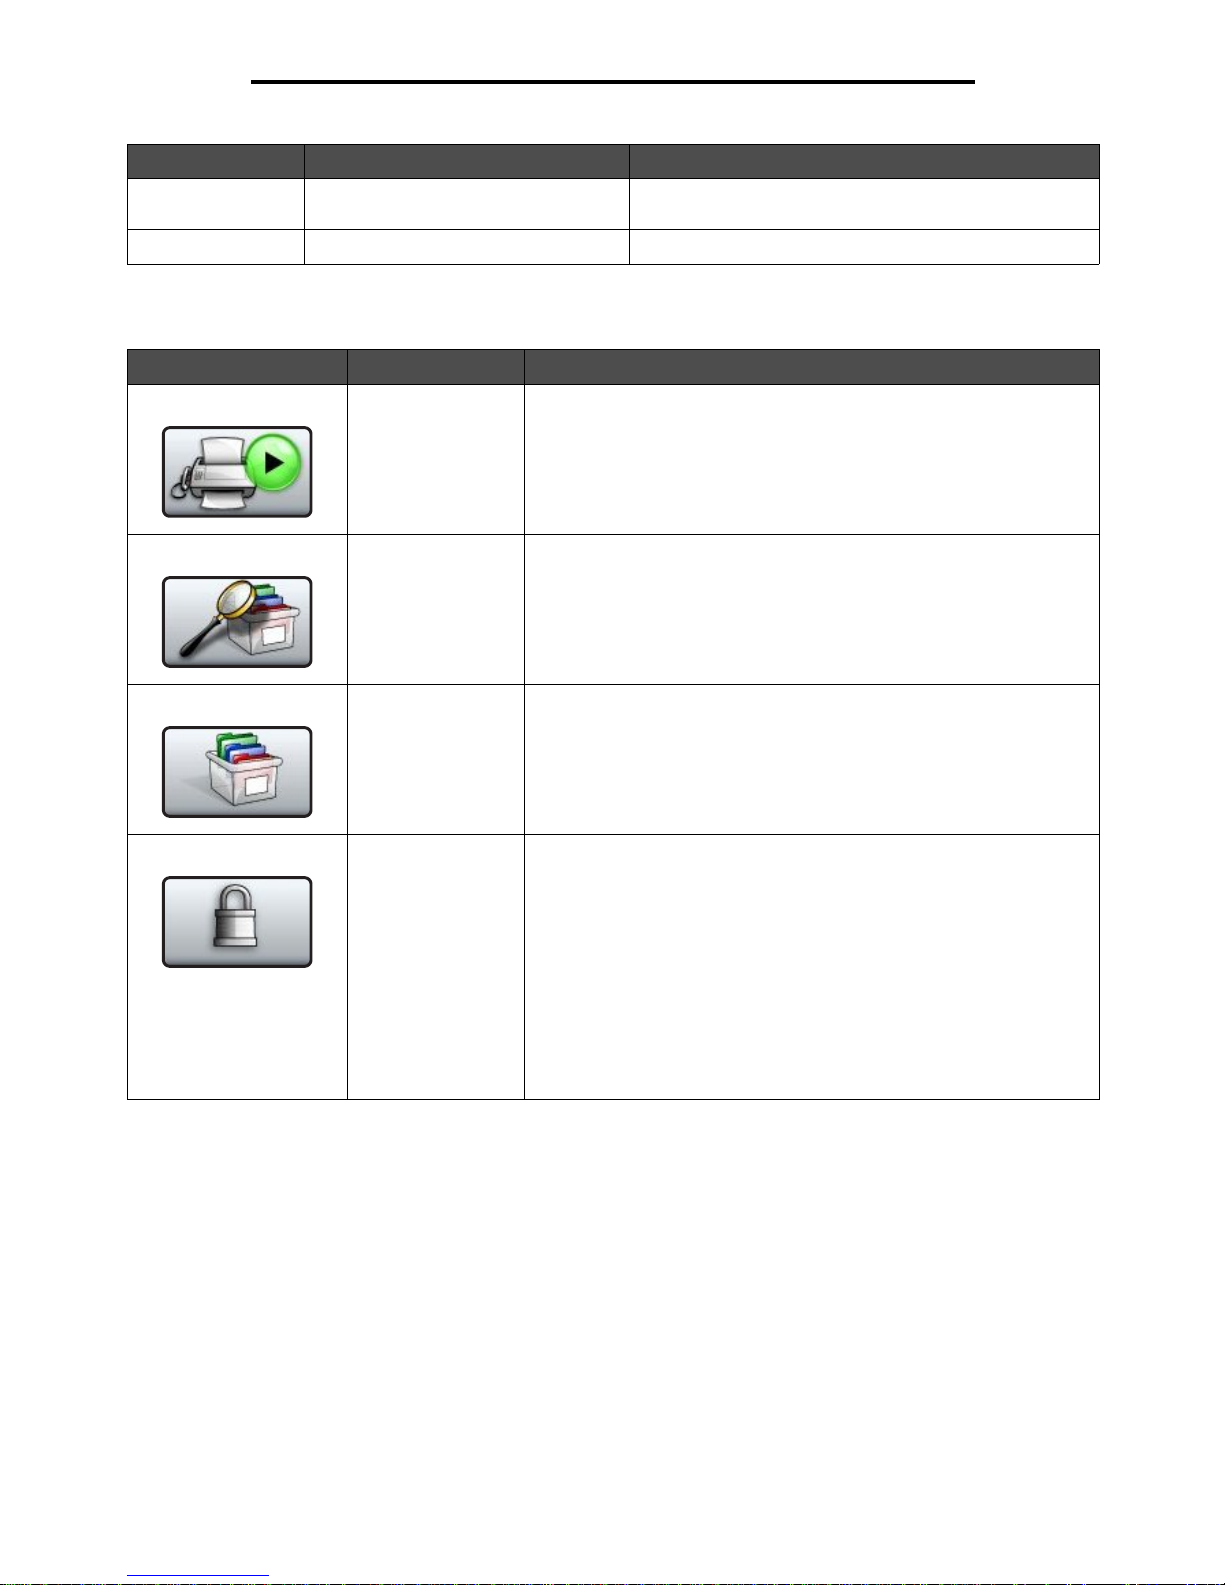
Button Button name Function
Release Held Faxes
(or Held Faxes if in
Manual Mode)
There are held faxes with a scheduled hold time previously set. To
access the list of held faxes, touch this button.
Search Held Jobs To search on any of the following items and return any matches:
• User names for held or confidential print jobs
• Job names for held jobs, excluding confidential print jobs
• Profile names
• Bookmark container or job names
• USB container or job names for supported extensions only
Held Jobs To open a screen containing all the held jobs containers.
Lock Device This button appears on the screen when the MFP is unlocked and
Device Lockout Personal Identification Number (PIN) is not null or
empty.
To lock the MFP:
1 Touch Lock Device to open a PIN entry screen.
2 Enter the correct PIN to lock the control panel which locks both the
control panel buttons and the touch-screen buttons.
Once the control panel is locked, the PIN entry screen clears, and
the Lock Device button is replaced with the Unlock Device button.
Note: If an invalid PIN is entered, Invalid PIN. appears. A pop-up
screen appears with the Continue button. Touch Continue. The home
screen returns with the Lock Device button.
Callout number Button or screen item Function
Using the LCD touch-screen buttons
10
Using MFP menus
Using the LCD touch-screen buttons
The following section provides information on navigating through several screens. Only a few are chosen to demonstrate
the use of the touch-screen buttons.
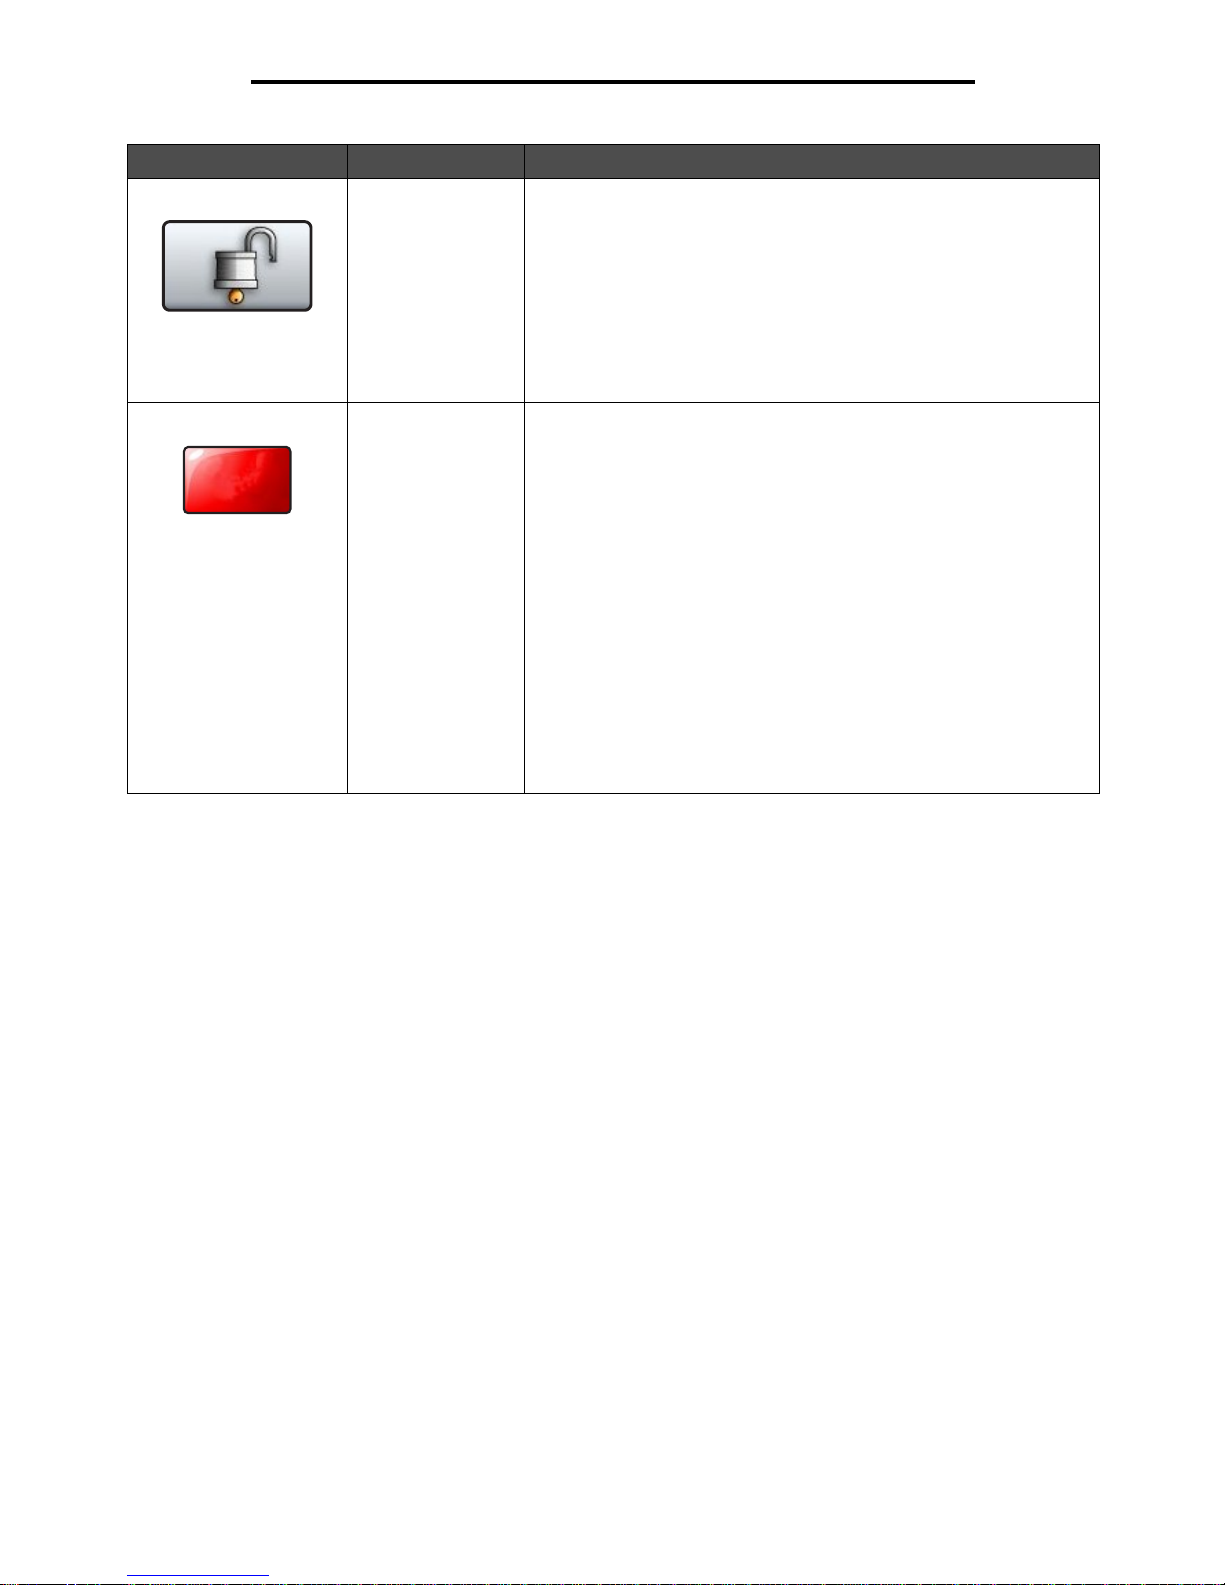
Unlock Device This button appears on the screen when the MFP is locked. The
control panel buttons and shortcuts cannot be used while it appears
and no default copy starts may occur.
To unlock the MFP:
1 Touch Unlock Device to open a PIN entry screen.
2 Enter the correct PIN to unlock the numeric keypad (0–9) and the
Backspace button on the control panel.
Note: If an invalid PIN is entered, Invalid PIN. appears. A pop-up
screen appears with the Continue button. Touch Continue. The home
screen returns with the Unlock Device button.
Cancel Jobs To open the Cancel Jobs screen. The Cancel Jobs screen shows any
of the following items under three headings on the screen which are
Print, Fax, and Network:
•print job
•copy job
•fax
•profile
• FTP
• e-mail send
Each heading has its own list of jobs shown in a column under the
heading. Each column can only show three jobs per screen. The job
appears as a button. If mo re than three jobs e xist in a co lumn, then the
down arrow appears at the bottom of the column. Each touch of the
down arrow accesses one job in the list. When more than three jobs
exist, once the fourth job in the list is reached, then an up arrow
appears at the top of the column. For illustrations of the up and down
arrow buttons, see Information on LCD touch-screen buttons on
page 13.
To cancel a job, see the User’s Guide for instructions.
Button Button name Function
Cancel
Jobs
Using the LCD touch-screen buttons
11
Using MFP menus
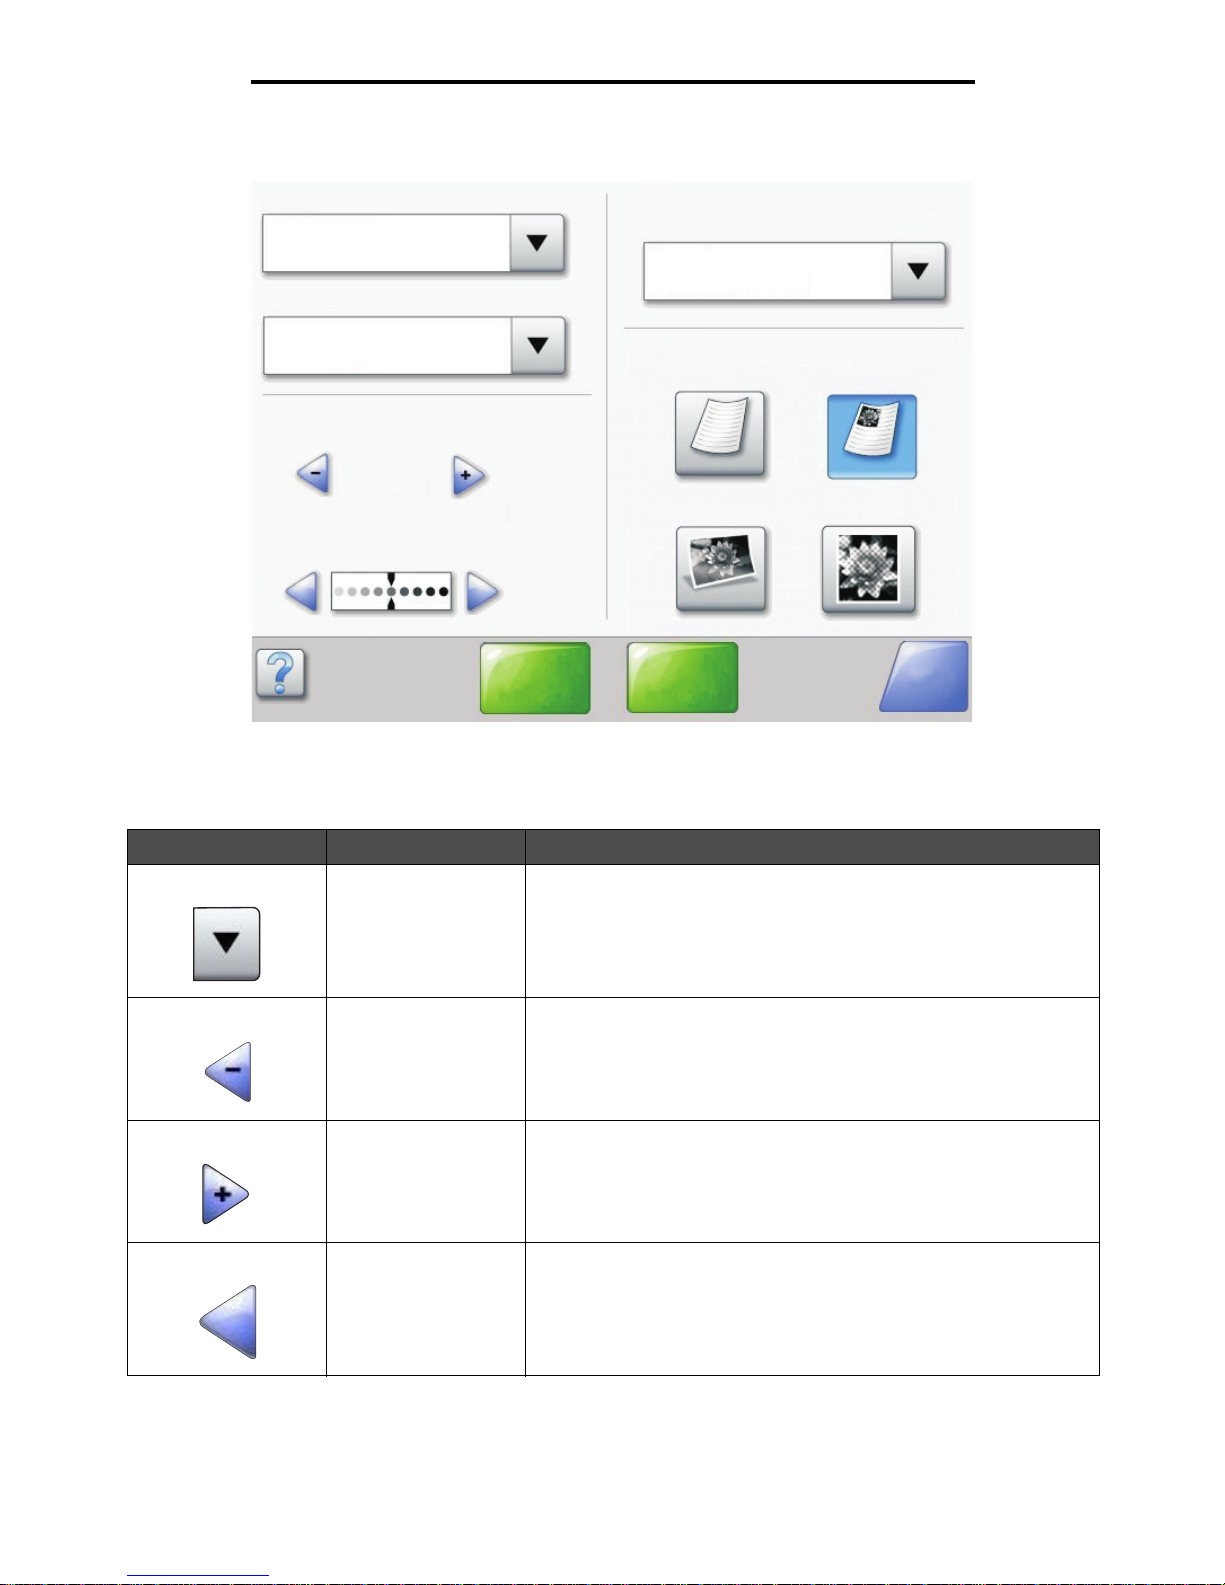
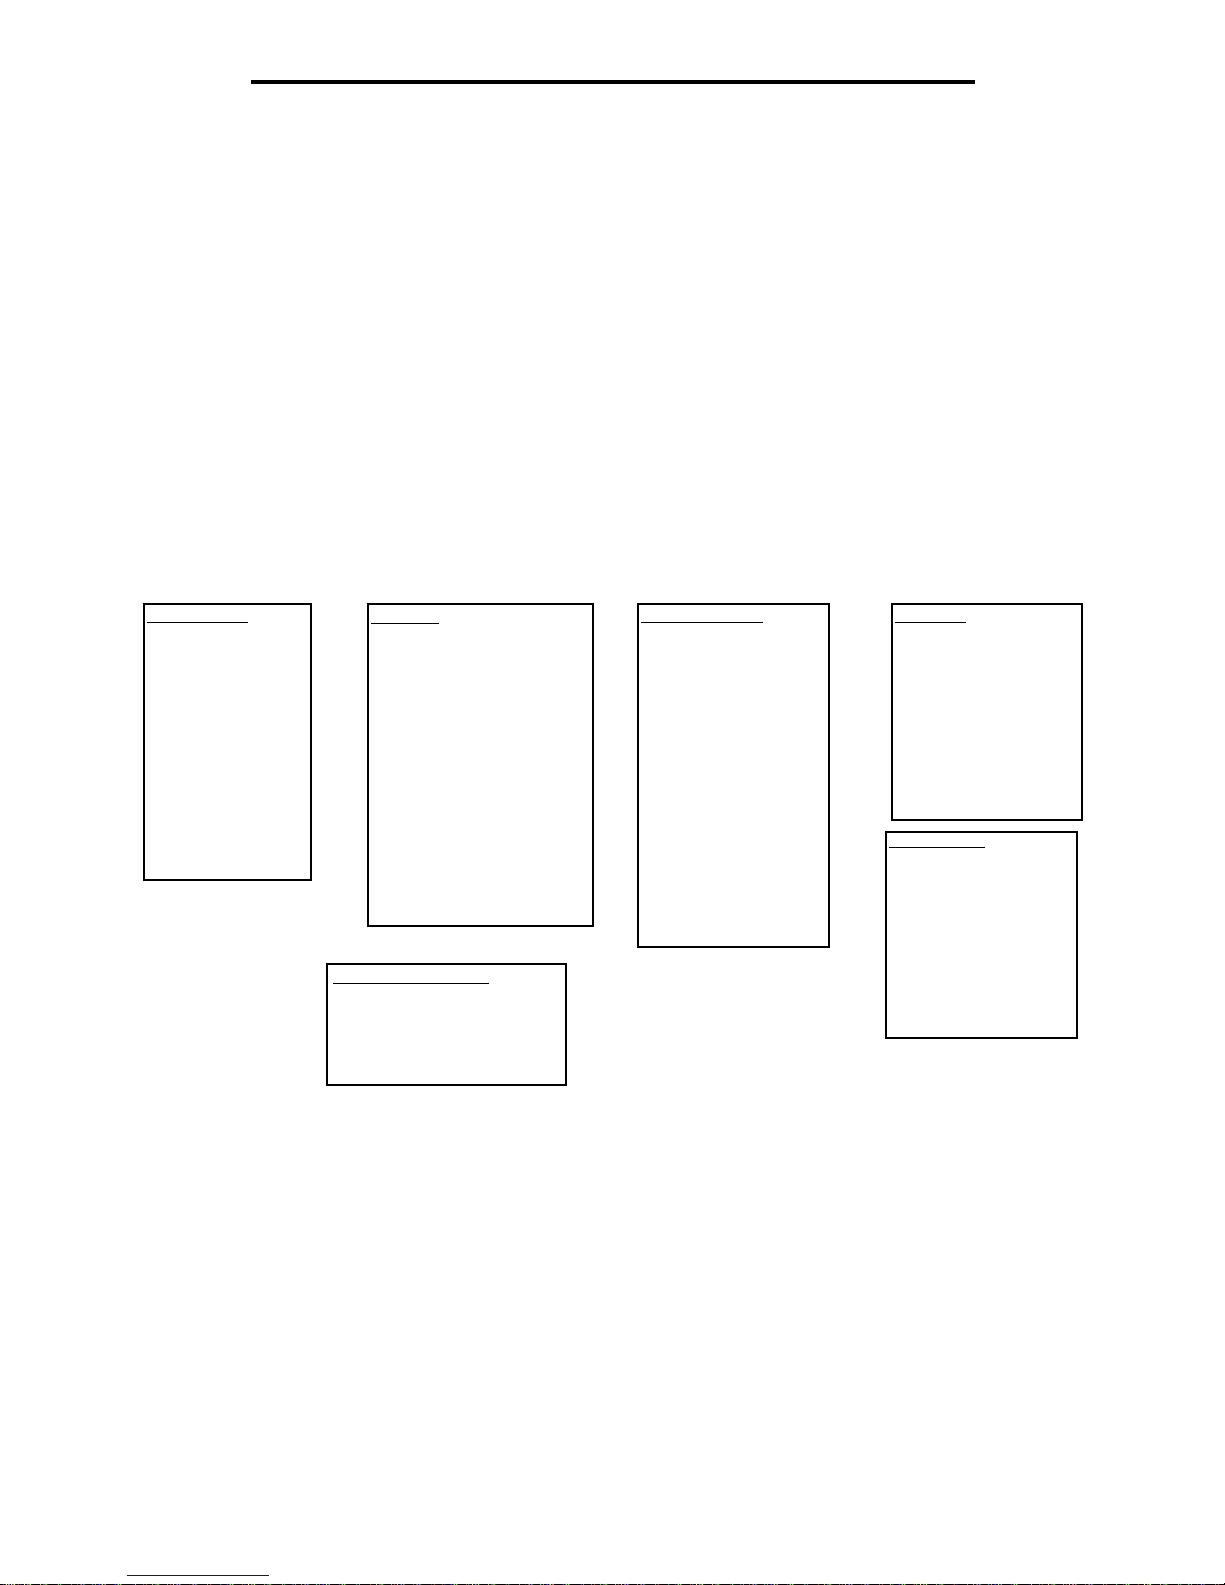
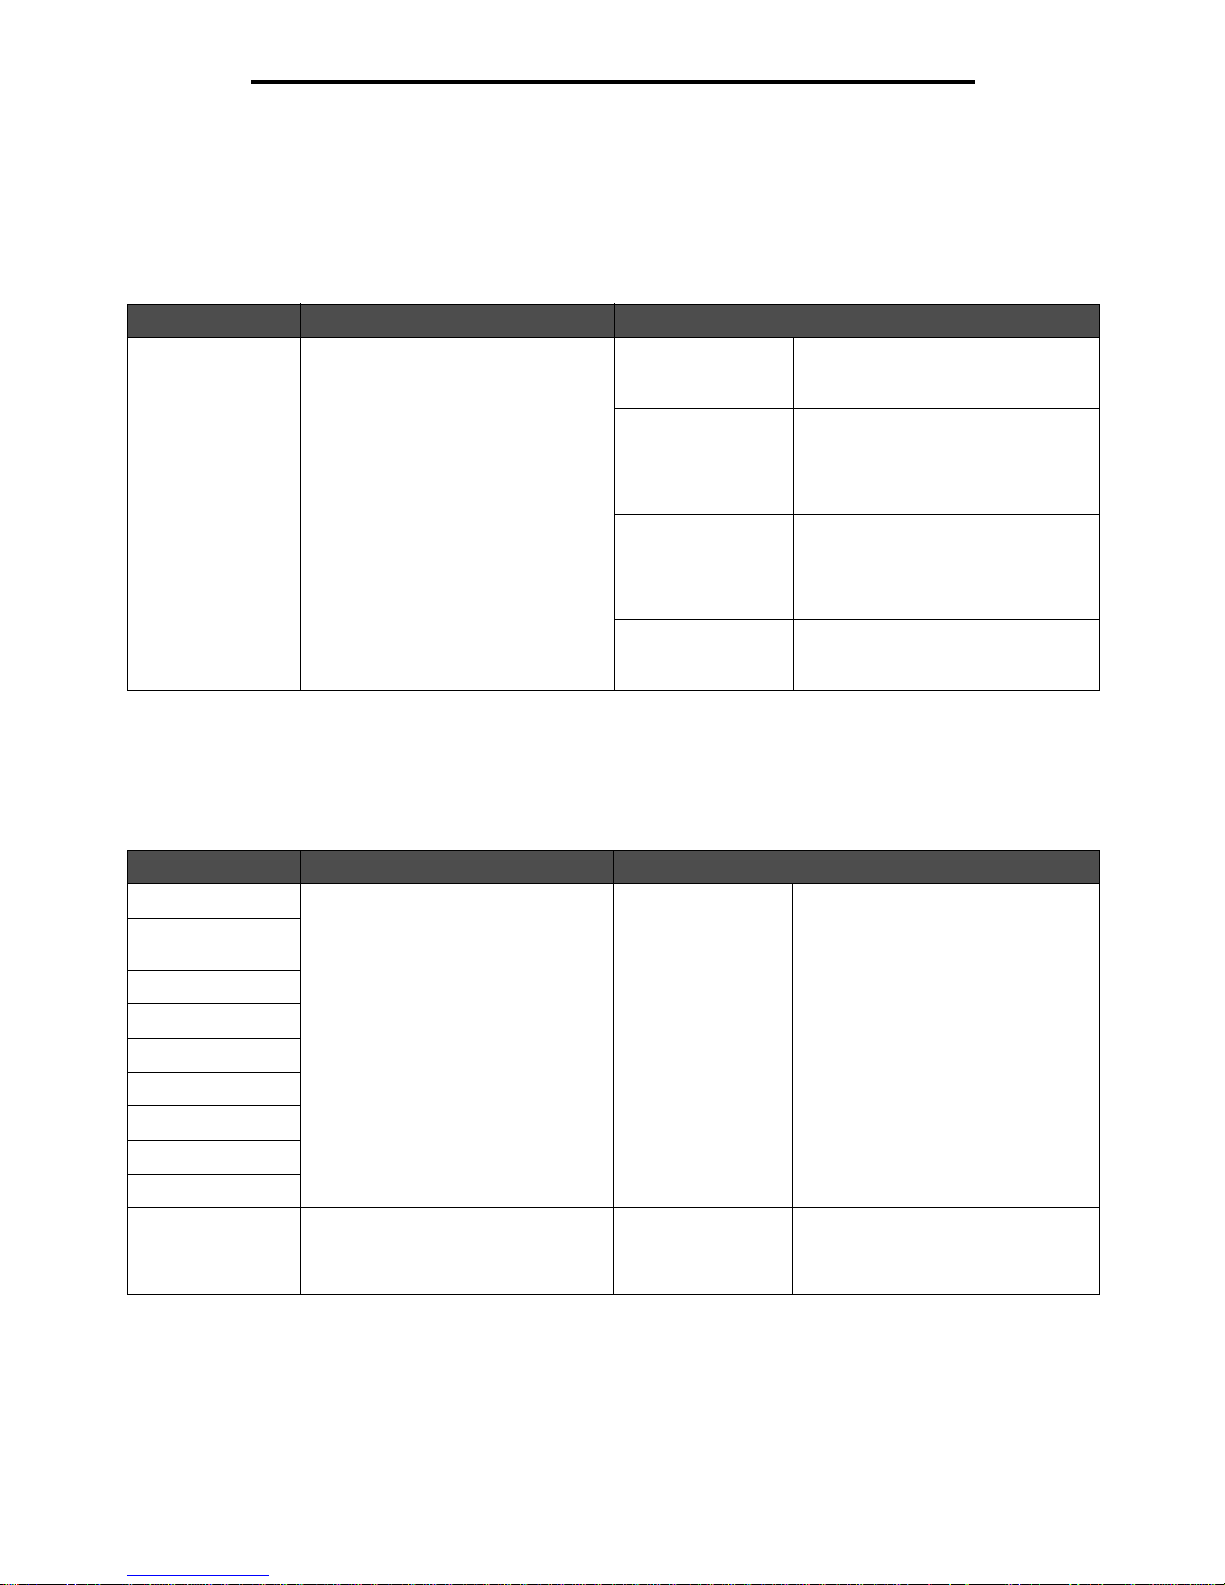
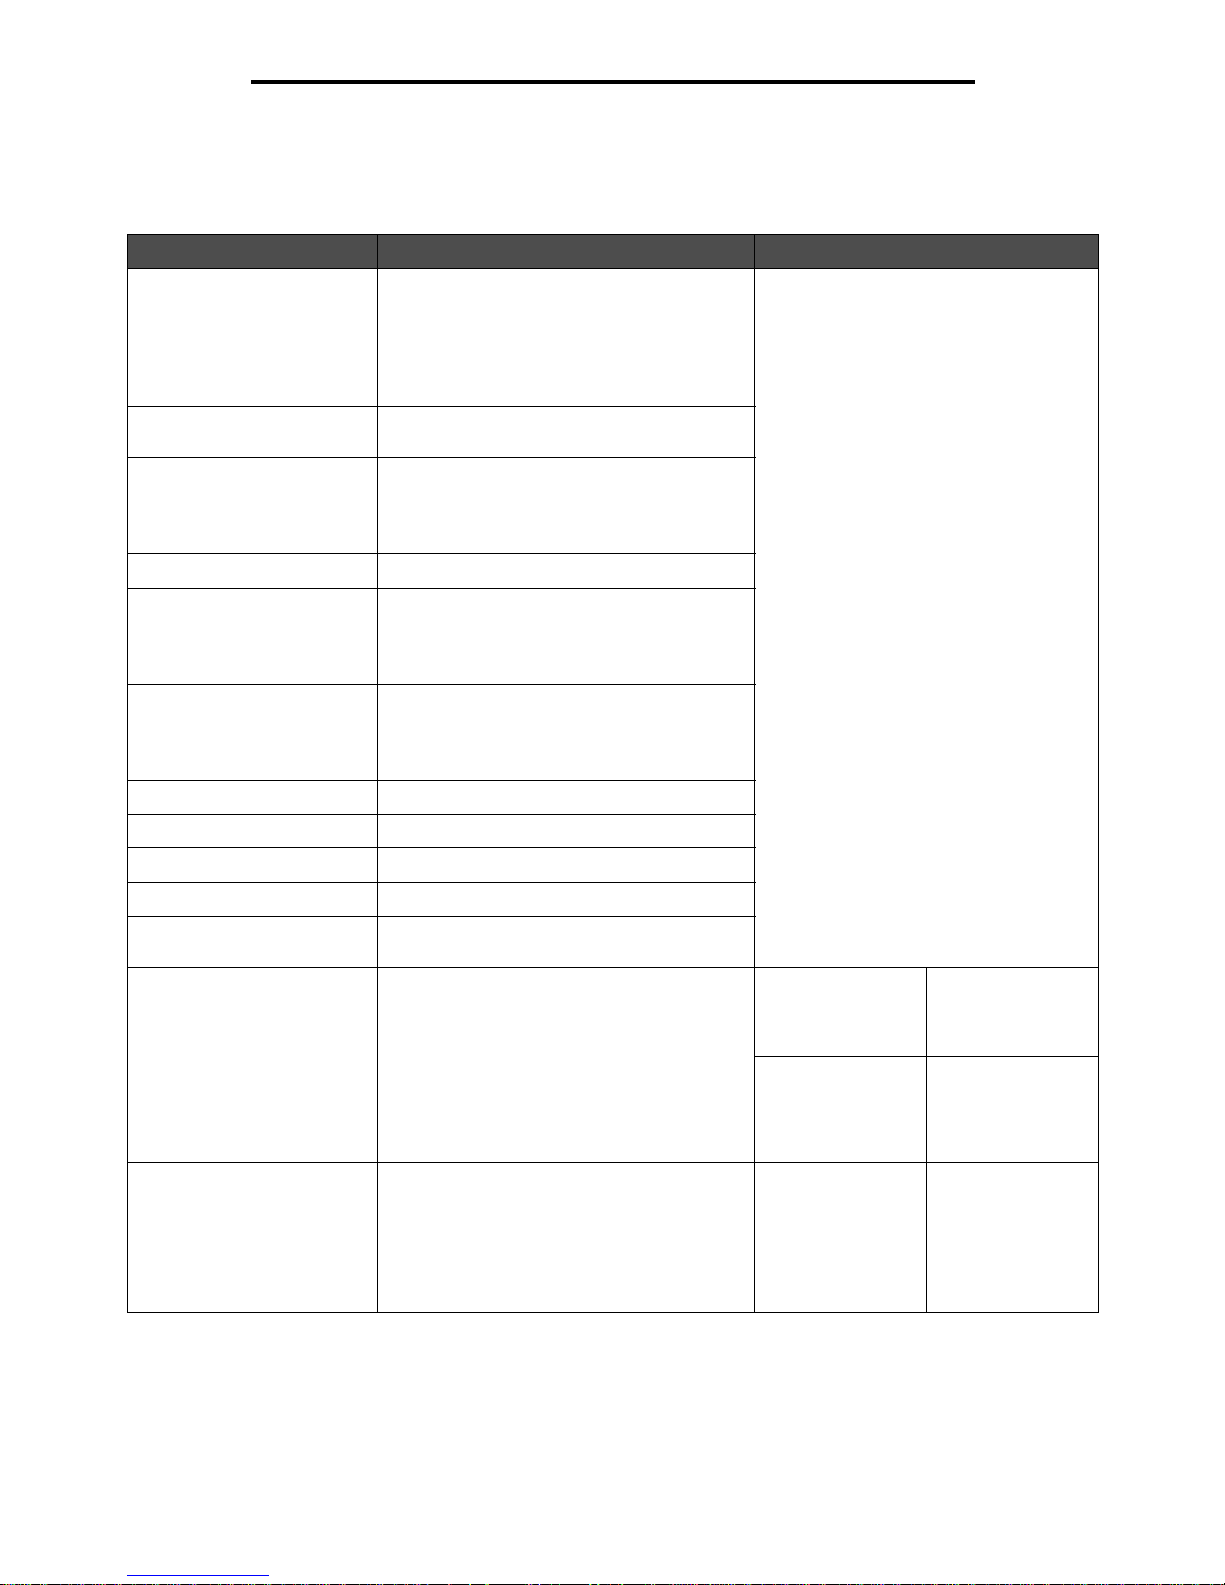
Sample screen one
Information on LCD touch-screen buttons
Button Button name Function or descript ion
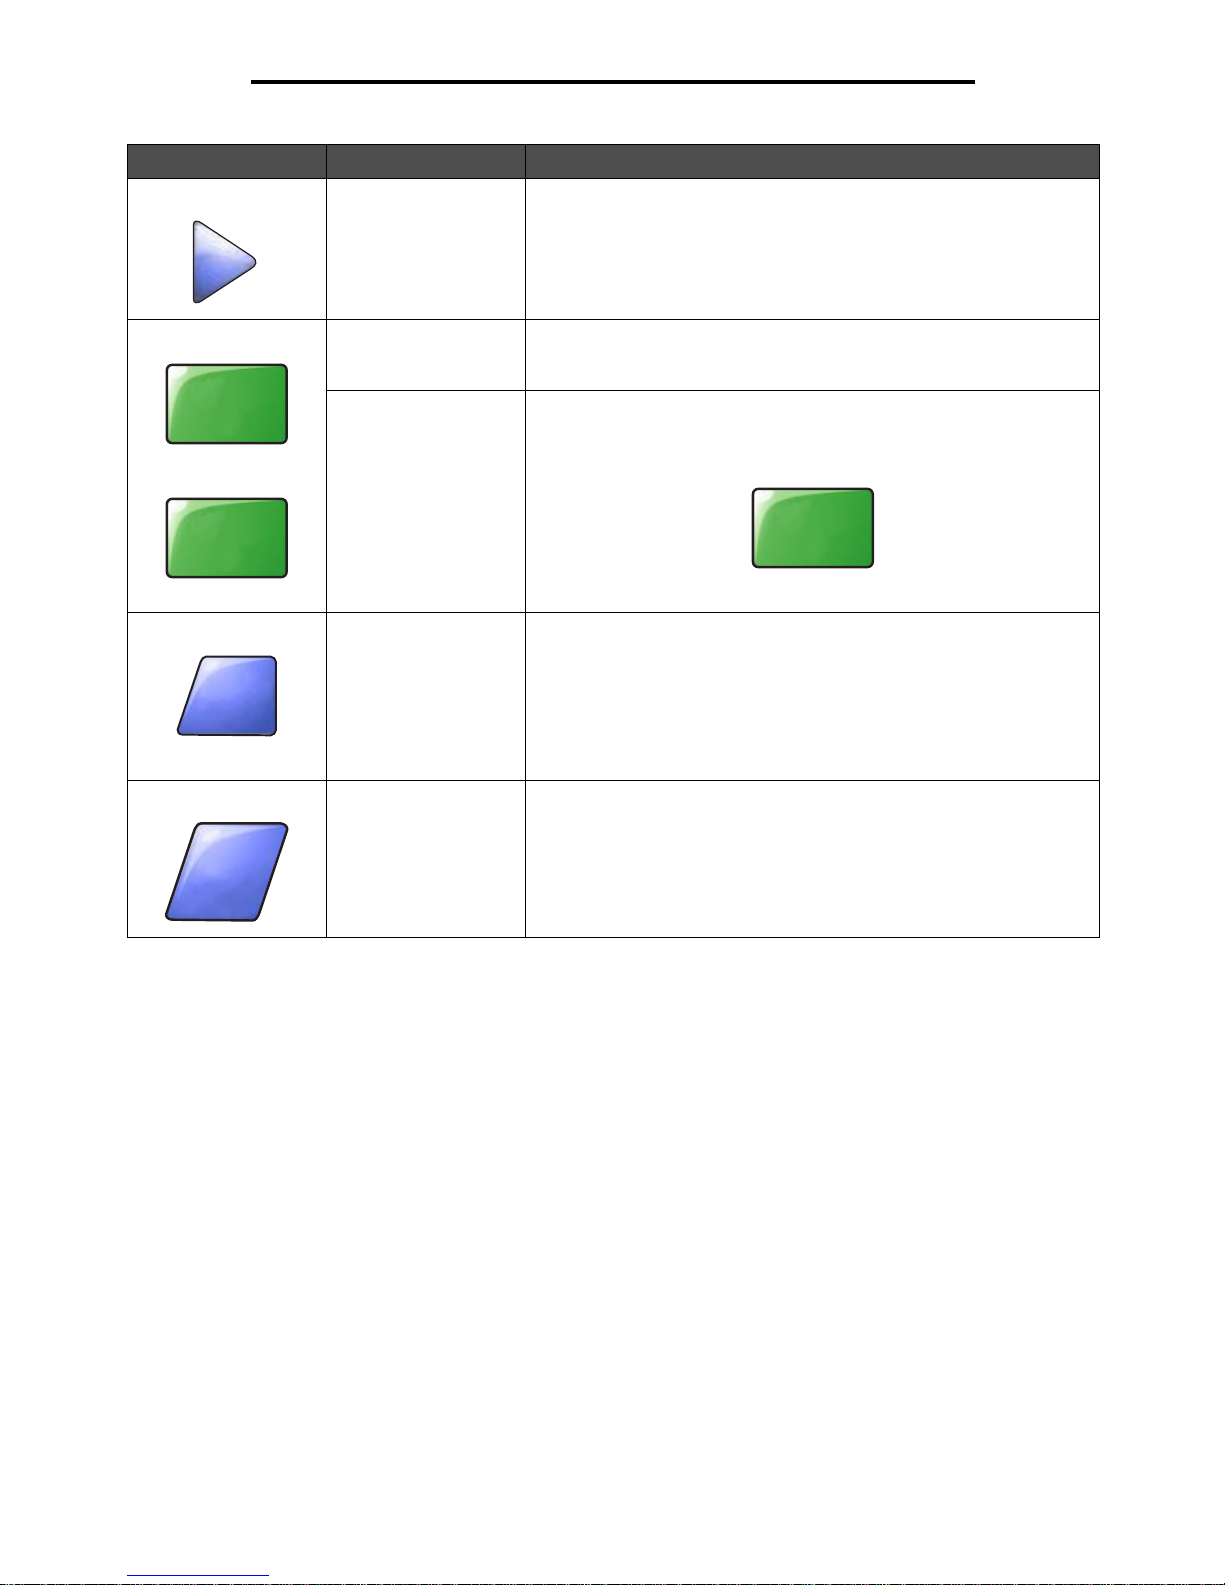
Select button Touch the select button to hav e ano ther screen appear with additio nal
items. On the first screen, the user default setting is shown. Once the
select button is touched, and the next screen appears, touching
another item shown on the screen changes the user default setting.
Left scroll decrease
button
Touch the left scroll decrease button to scroll to another value in
decreasing order.
Right scroll increase
button
Touch the right scroll increase button to scroll to another val ue in
increasing order.
Left arrow button Touch the left arr o w button to scroll left to:
• Reach a decreased value shown by an illustration.
• See a full text field on the left.
Copy from
Letter (8.5 x 11 in.)
Copy to
Letter (8.5 x 11 in.)
Plain Paper
Sides (Duplex)
Portrait
1-sided to 1-sided
Content
Scale
Auto
(100%)
Darkness
Scan the
ADF
Scan the
flatbed
Back
Text Text/Photo
Photograph Printed Image
Using the LCD touch-screen buttons
12
Using MFP menus
Right arrow button Touch the right arrow button to scroll right to:
• Reach an increased value shown by an illustration.
• See a full text field on the right.
Scan the ADF
Scan the flatbed
On the gray navigation bar, these two choices indicate that two types
of scanning are possible. One may choose to scan from the ADF or
the flatbed.
Submit A green button indicates a choice. If a different value within a menu
item is touched, it needs to be saved to become the current user
default setti ng. To save the value a s the ne w user default setting, touch
Submit.
For information on user default settings, see page 17.
Back When the Back button is shaped like this, no other navigation is
possible from this screen except to go back. If any other choice is
made on the navigation bar, the screen closes.
For example, in Sample screen one all the selections for scanning
have been made. One of the preceding green buttons should be
touched. The only other b utto n a v aila bl e is Bac k. Touch Back to return
to the previous screen, and all the settings for the scan job made on
Sample screen one are lost.
Back When the Back button is shaped like this, both forward and backward
navigation is possible from this screen, so there are other options
available on the screen besides selecting Back.
Button Button name Function or descript ion
Scan the
ADF
Scan the
flatbed
Submit
Back
Back
Using the LCD touch-screen buttons
13
Using MFP menus
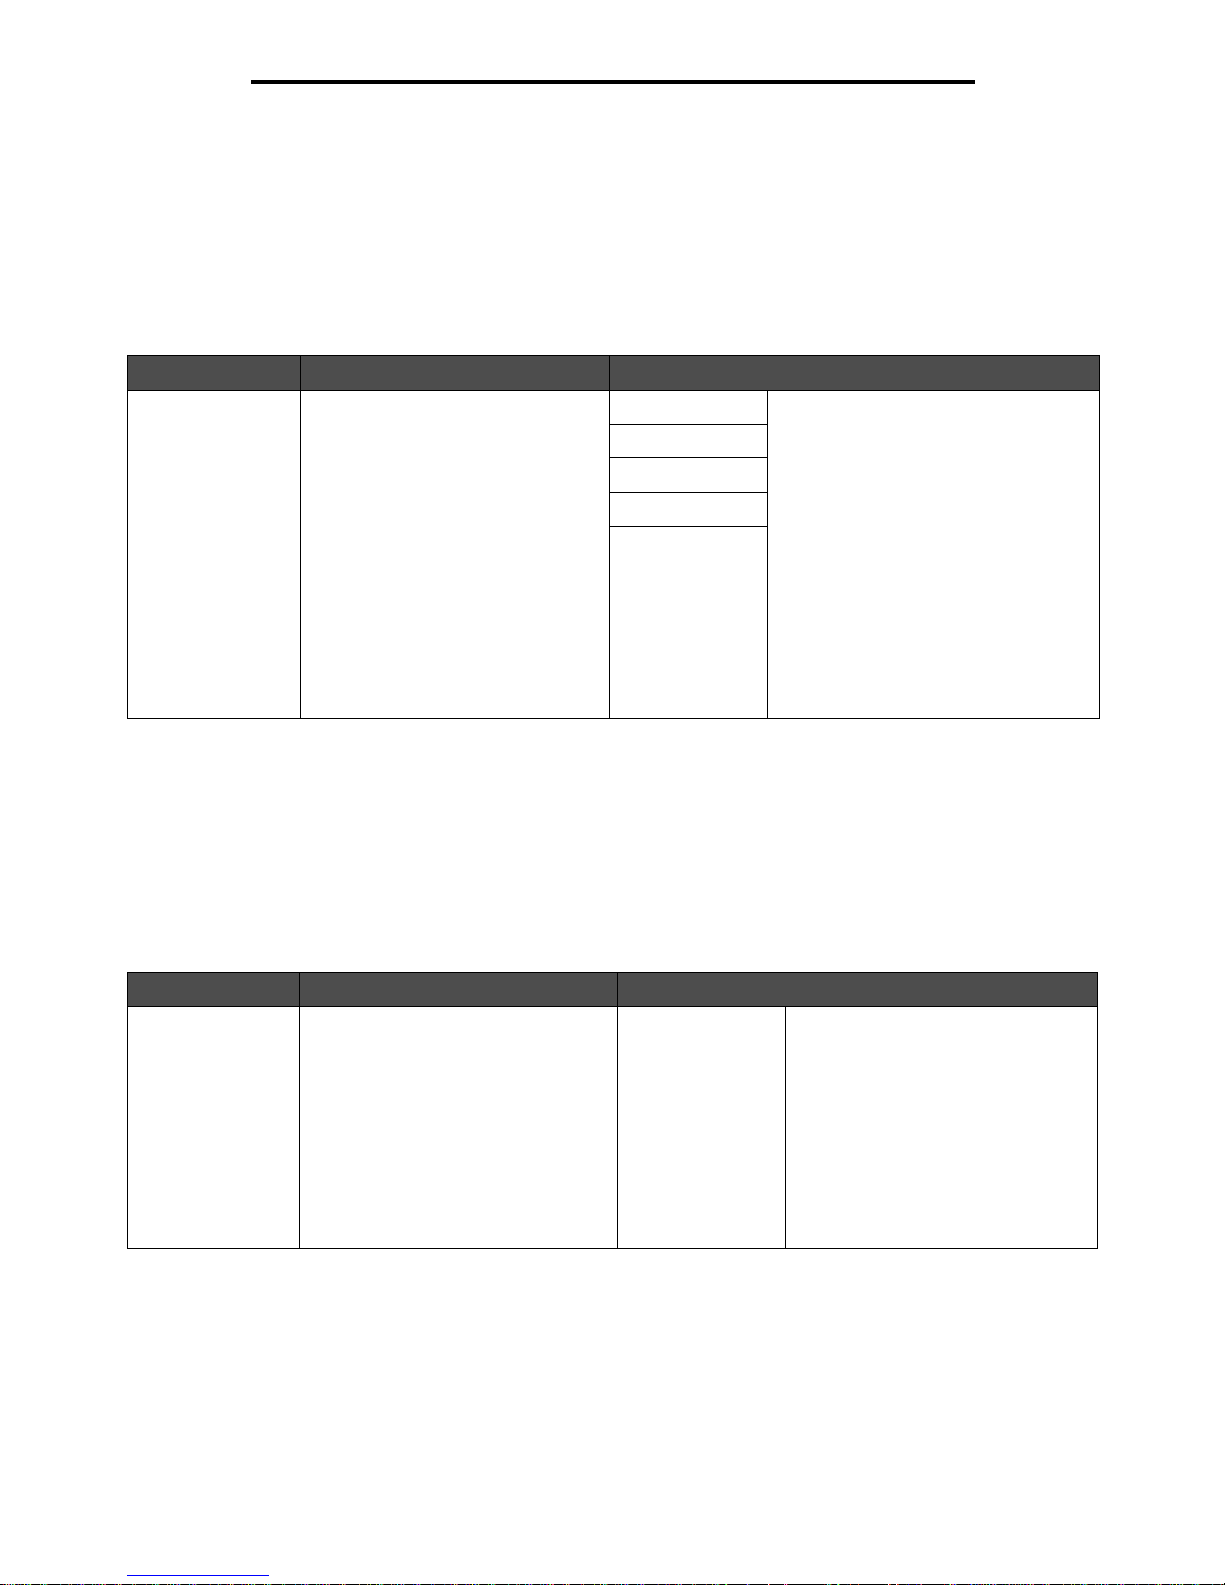
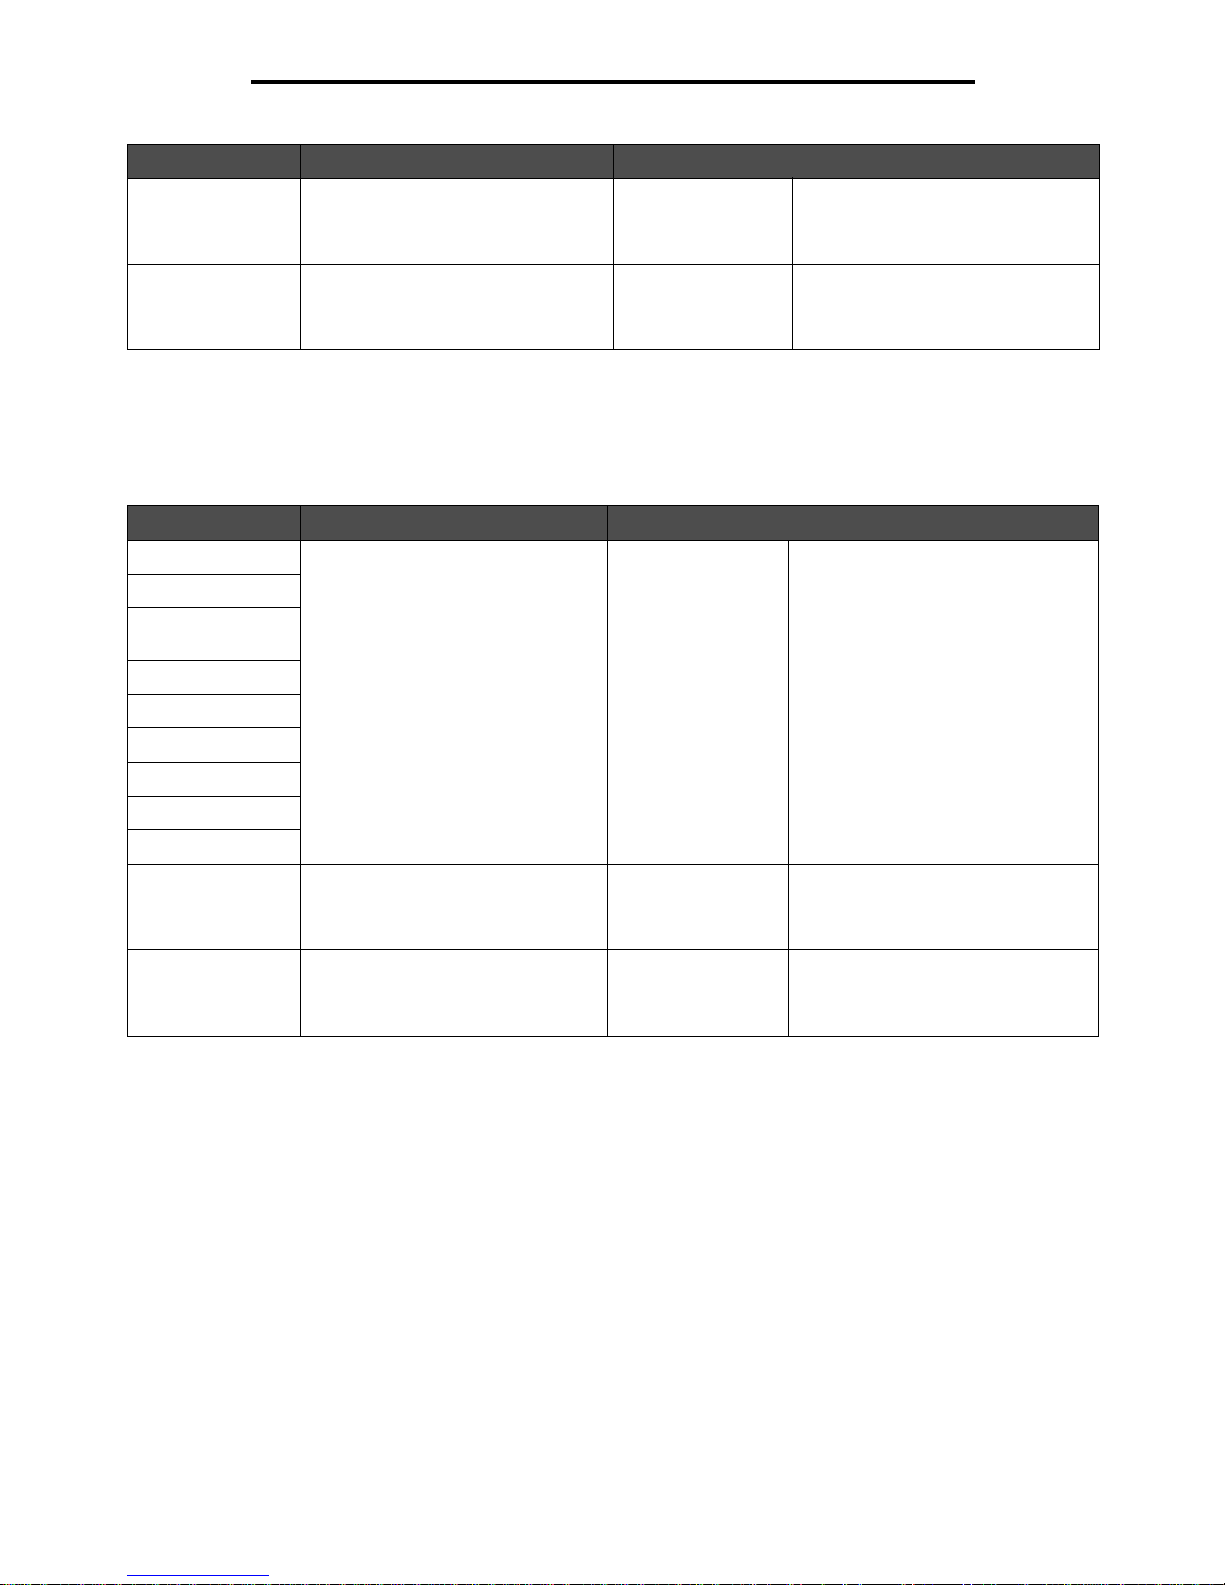
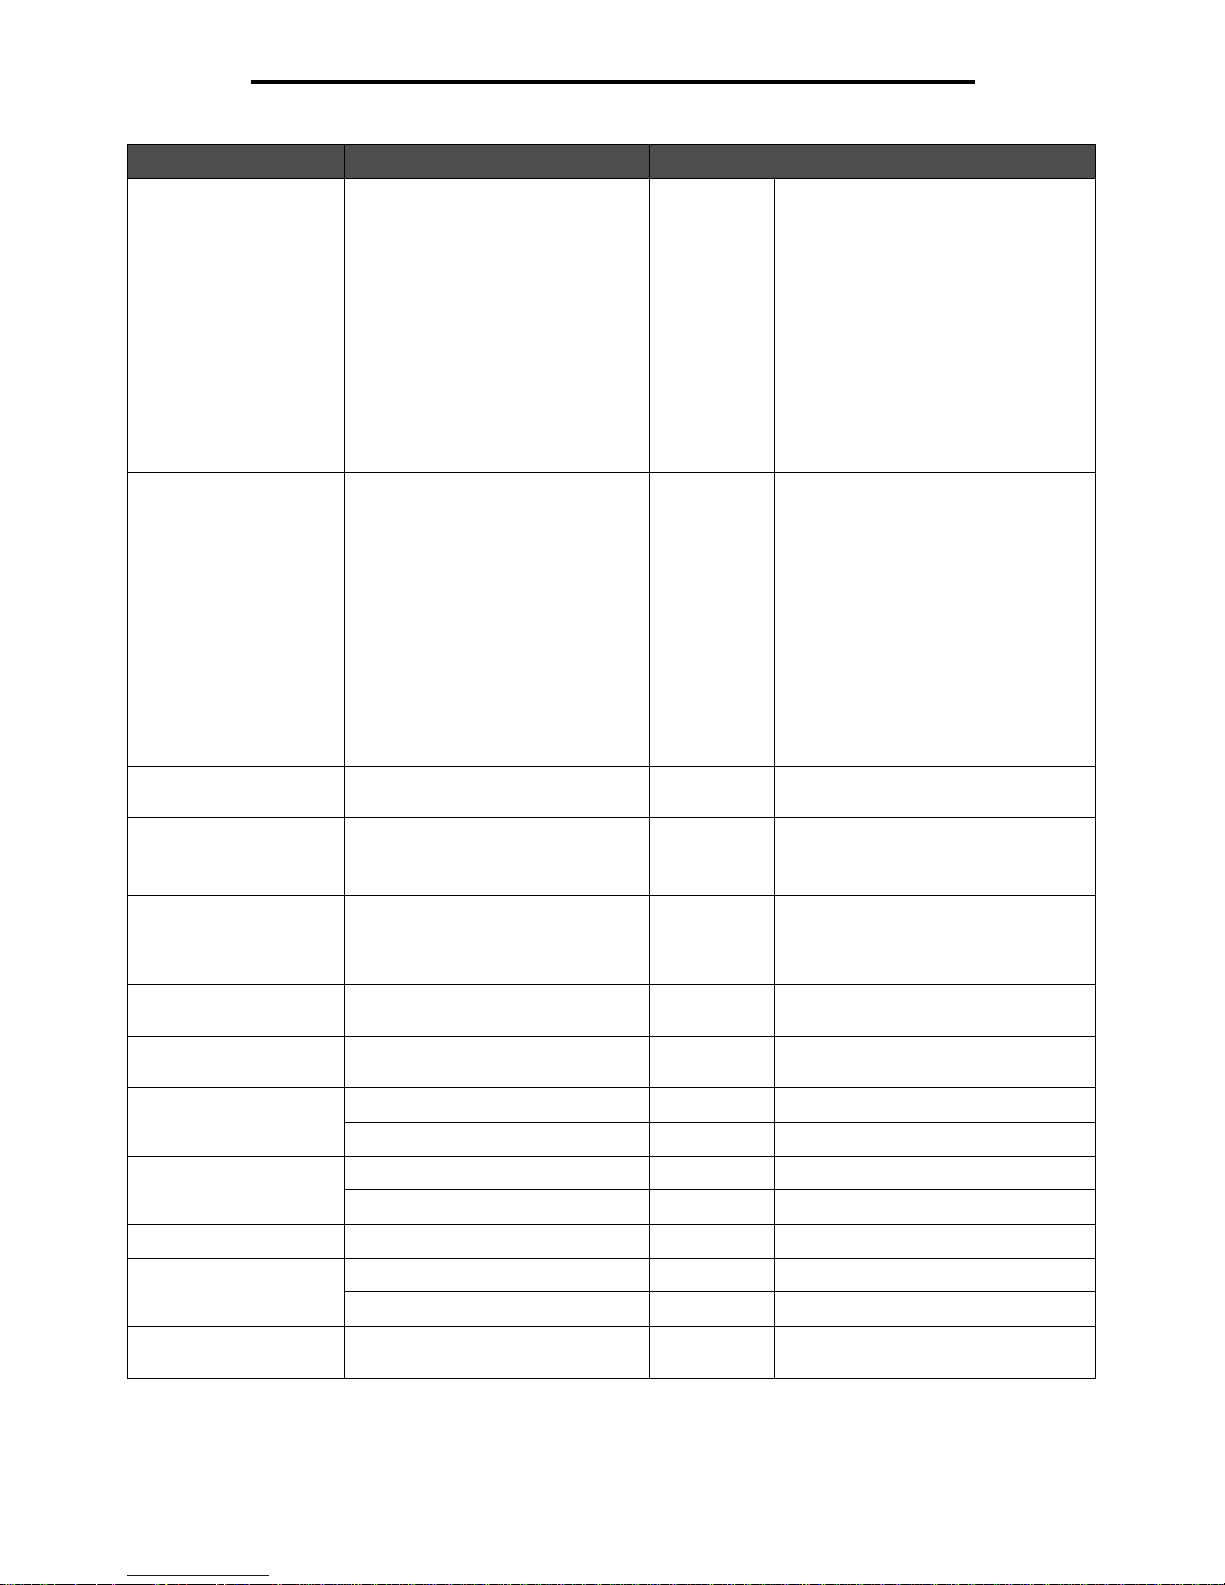
Sample screen two
Information on LCD touch-screen buttons
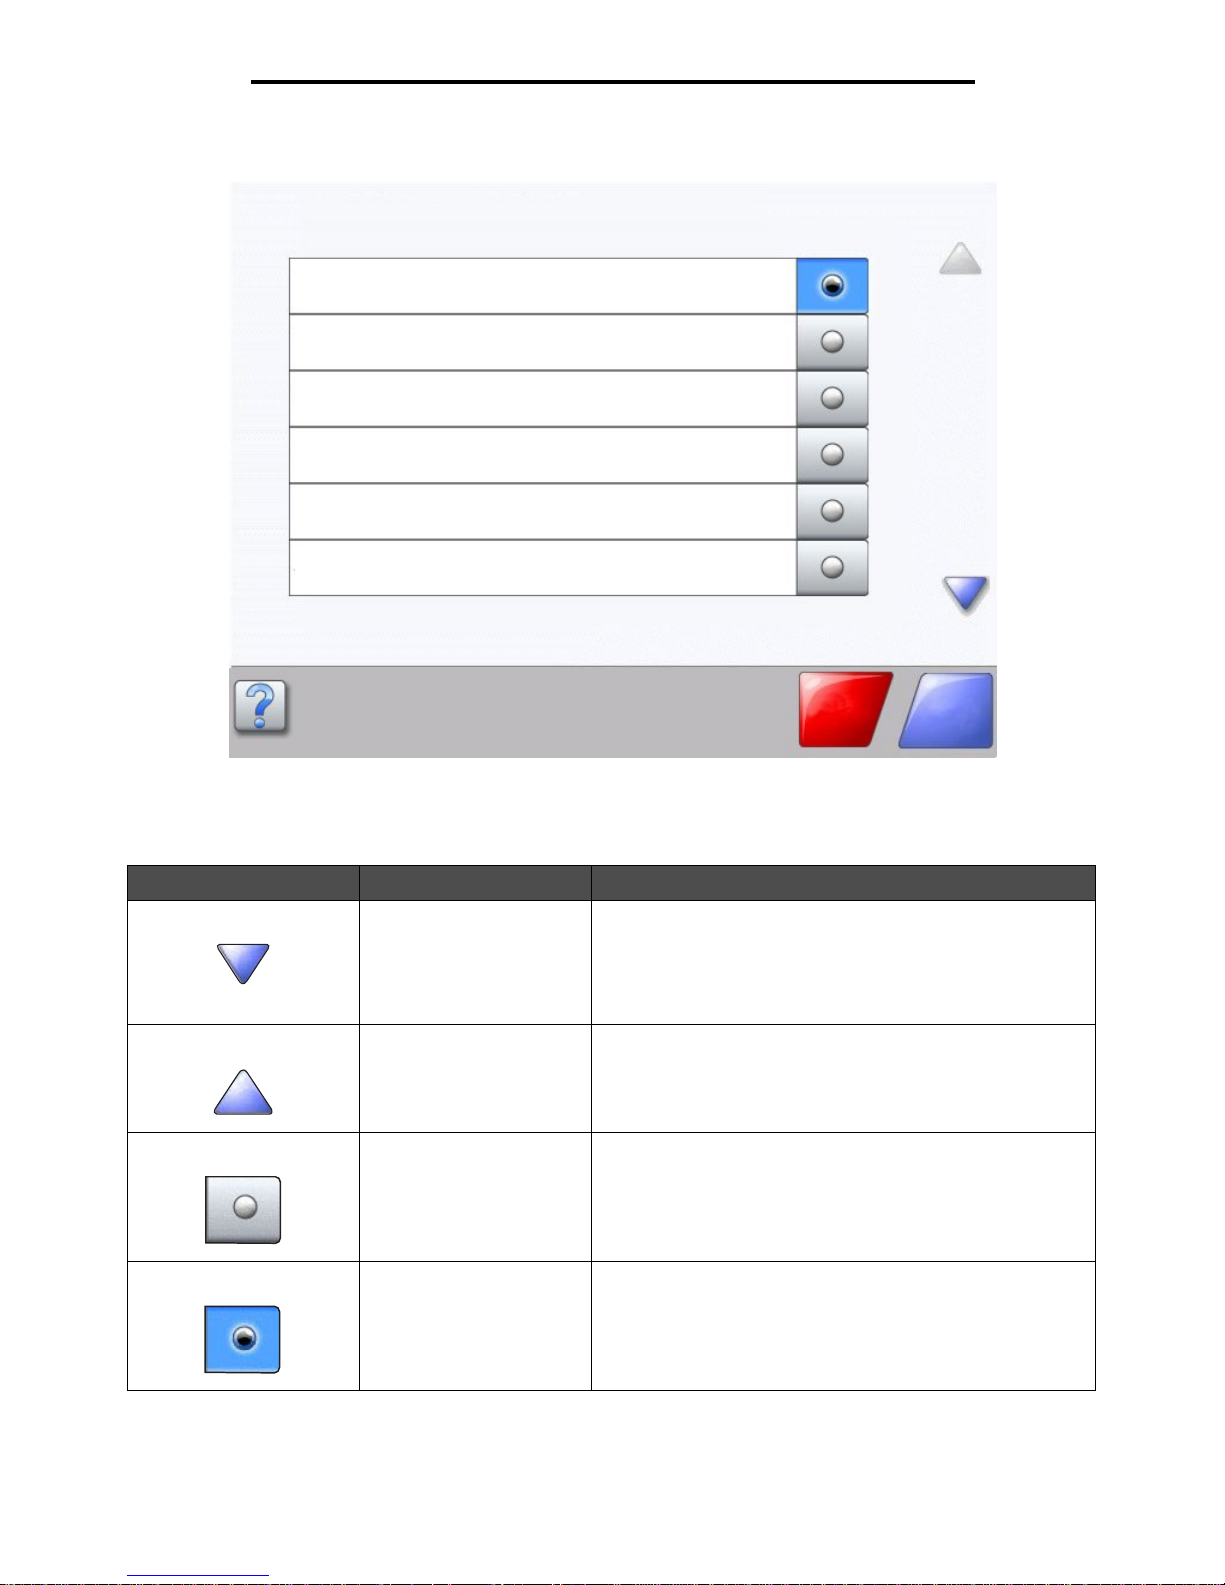
Button Button name Function or description
Down arrow Touch the do wn arrow to move down to the next item in a list,
such as a list of menu items or values. The down arrow does
not appear on a screen with a short listing. It only appears if
the entire listing cannot be seen on one screen. On the last
screen of the listing, the down arrow is gray to indicate that it
is not active since the end of the list appears on this screen.
Up arrow Touch the up arrow to move up to the next item in a list, such
as a list of menu items or values. When on the first screen
presented with a l ong l ist , th e up arrow is g ray to indi ca te that
it is not active . On the sec ond scree n needed to s how the rest
of the listed item, the up arrow is blue to show that it is active.
Unselected radio button This is an unselected radio button.
Selected radio bu tton This is a selected ra dio button. Touc h a ra di o button to select
it. The radio button changes color to show it is selected. In
Sample screen two, the only paper size selected is Letter.
Unknown paper size. Copy from:
Letter (8.5 x 11 in.)
Legal (8.5 x 14 in.)
Executive (7.25 x 10.5 in.)
Continue
Cancel
Job
A4 (210 x 297 mm)
Folio (8. 5 x 13 in.)
Statement (5.5 x 8.5 in.)
Using the LCD touch-screen buttons
14
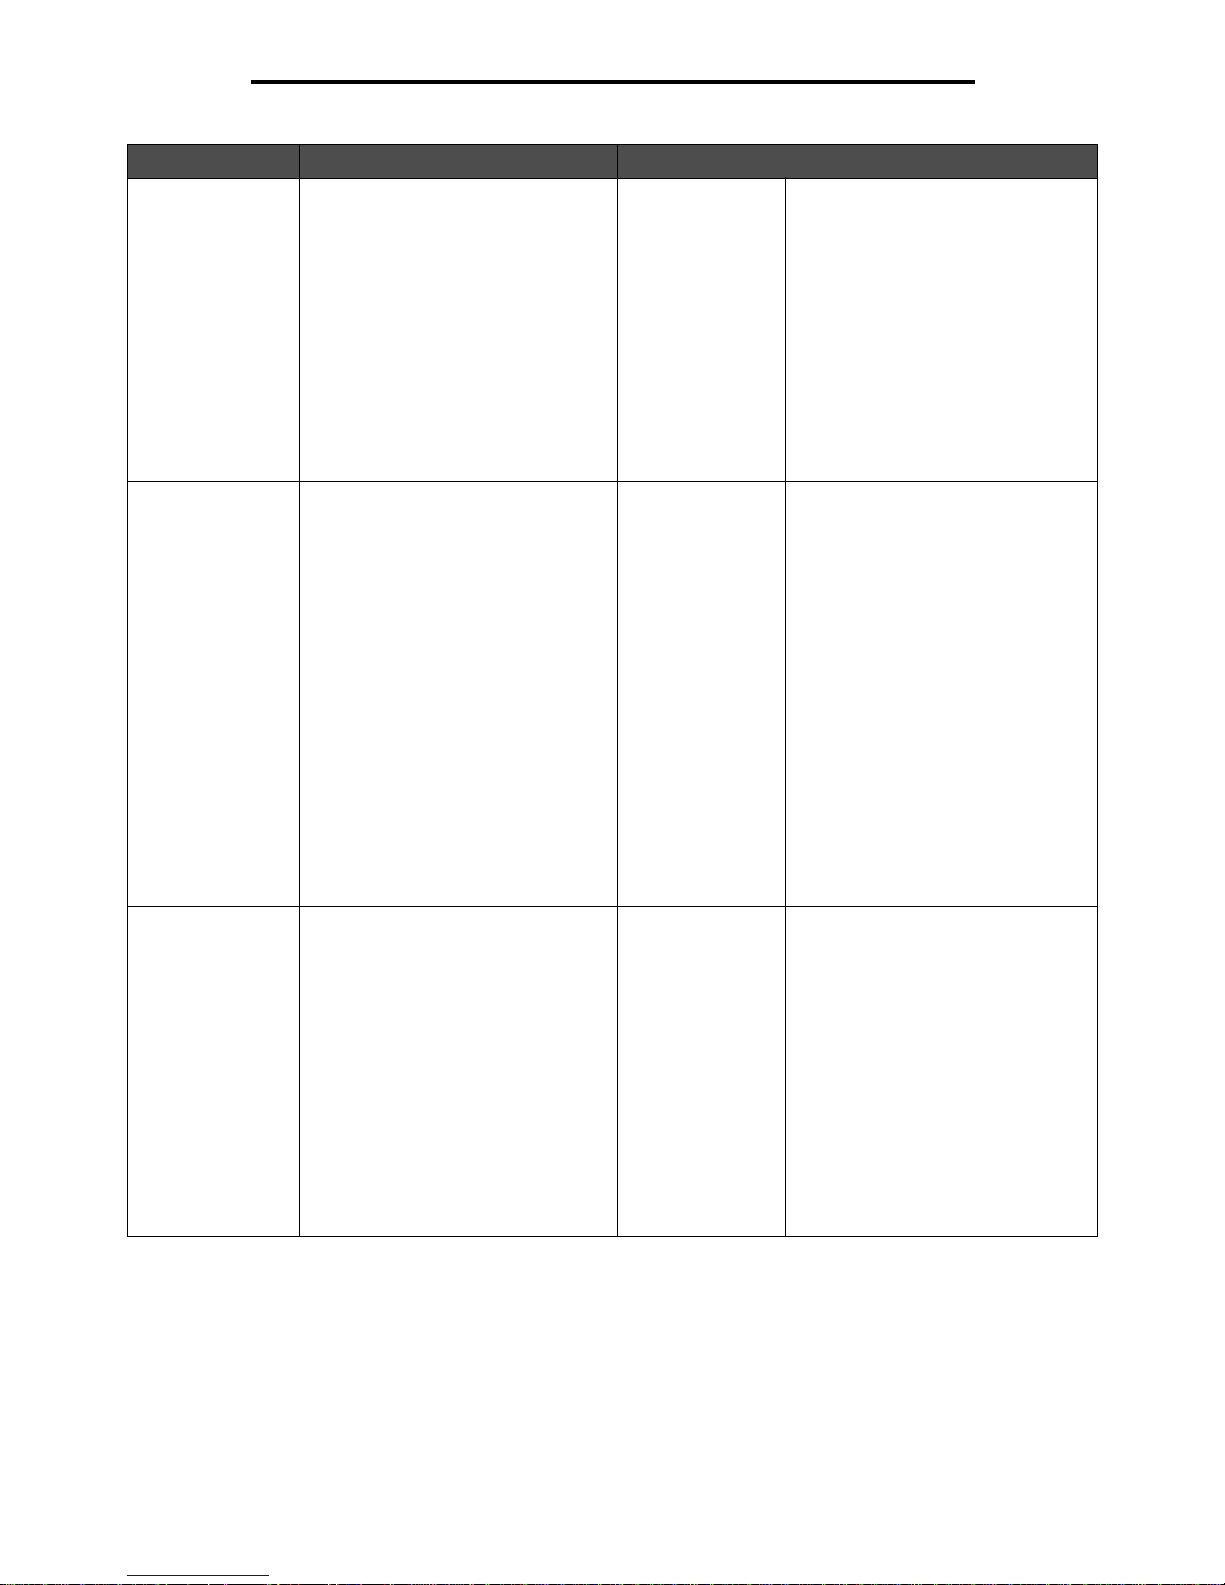
Using MFP menus
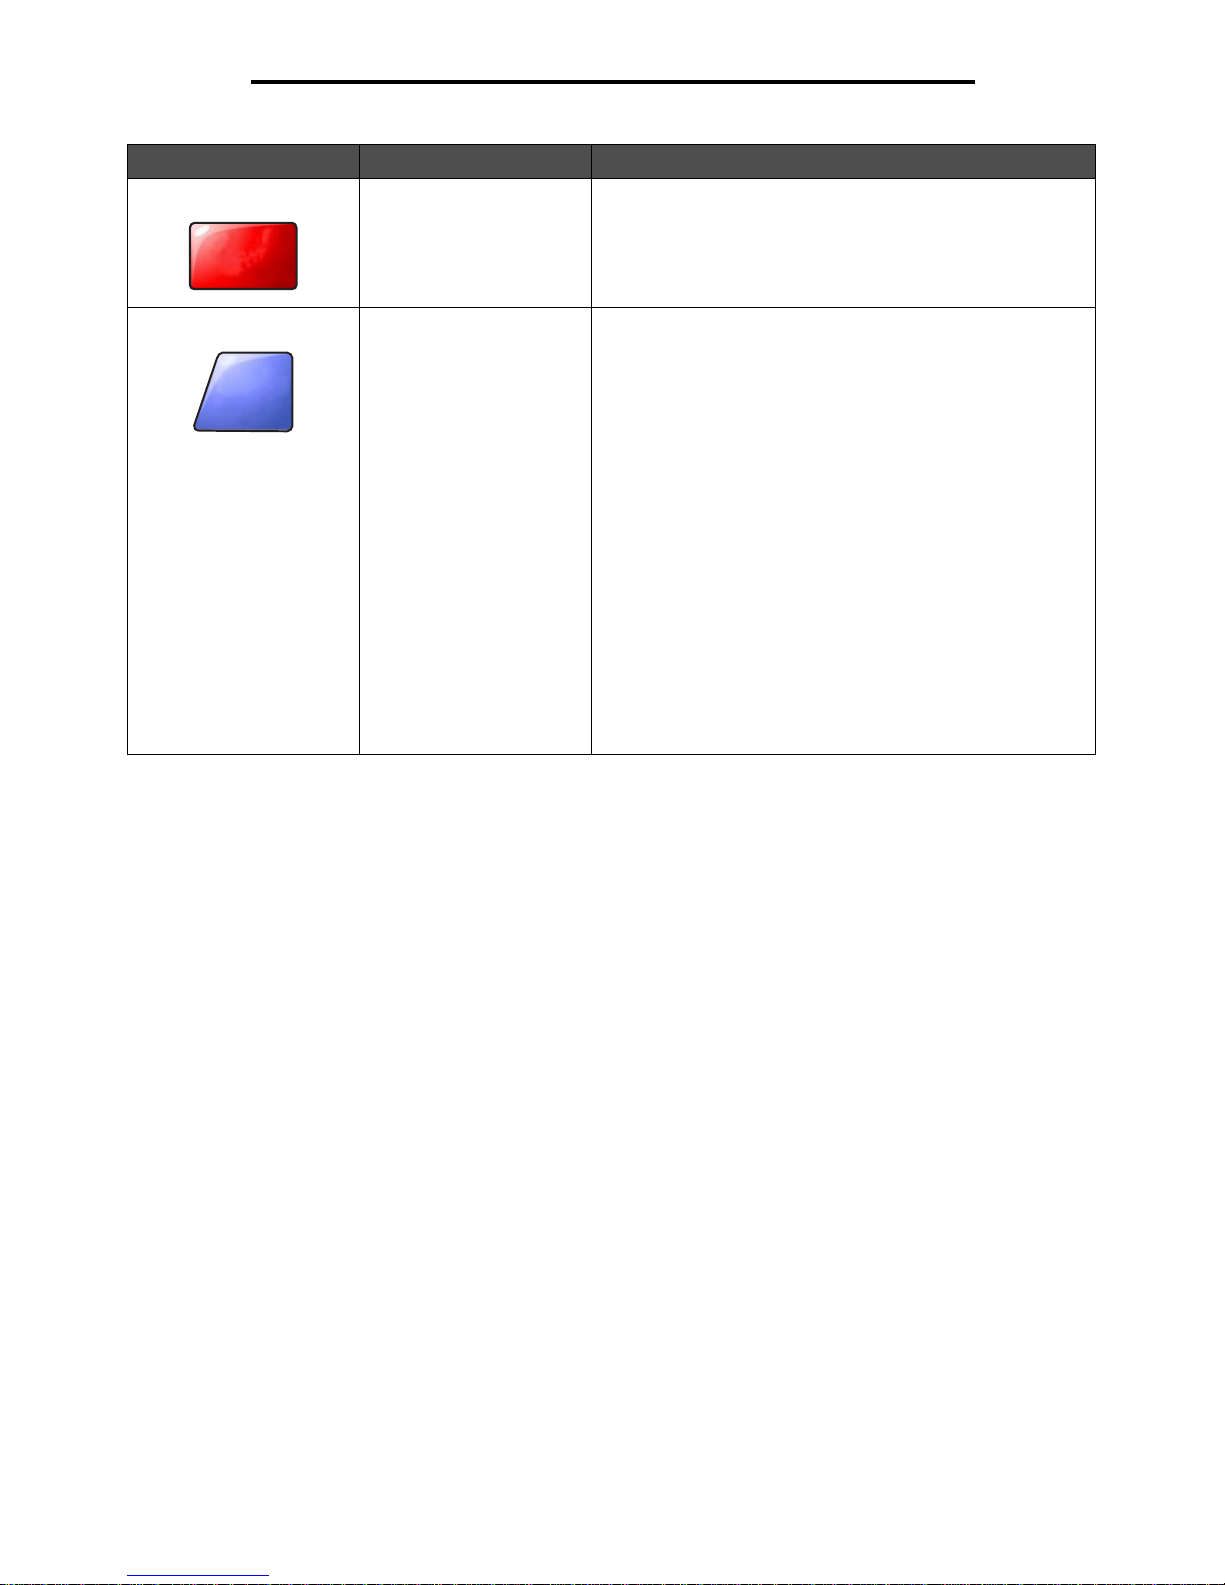
Cancel Job See Cancel Jobs on page 10.
Continue Touch Continue after a menu item or value on a screen is
selected and more changes need to be made for a job from
the original screen. Once Continue is touched, the original
screen appears.
For example, if one touched Copy on the home screen, the
Copy screen appears like Sample screen one on page 11.
The following example shows how the Continue button
reacts.
1 Touch the select button by the Copy to box, and a new
screen appears.
2 Touch MP Feeder, and a new screen appears.
3 Touch Legal, and a new screen appears.
4 Touch Next, and a new screen appears.
5 Touch Plain Paper for the type of print media needed.
6 Touch Continue. The Copy screen returns to allow other
selections besides Cop y to . Th e other se ttings on the Cop y
screen available are Duplex, Scale, Darkness, Collate, and
Copies.
Touch Continue to return to the original screen and make
other setting changes for a copy job before the Copy i t
button is touched to start the job.
Button Button name Function or description
Cancel
Job
Continue
Using the LCD touch-screen buttons
15
Using MFP menus
Other LCD touch-screen buttons
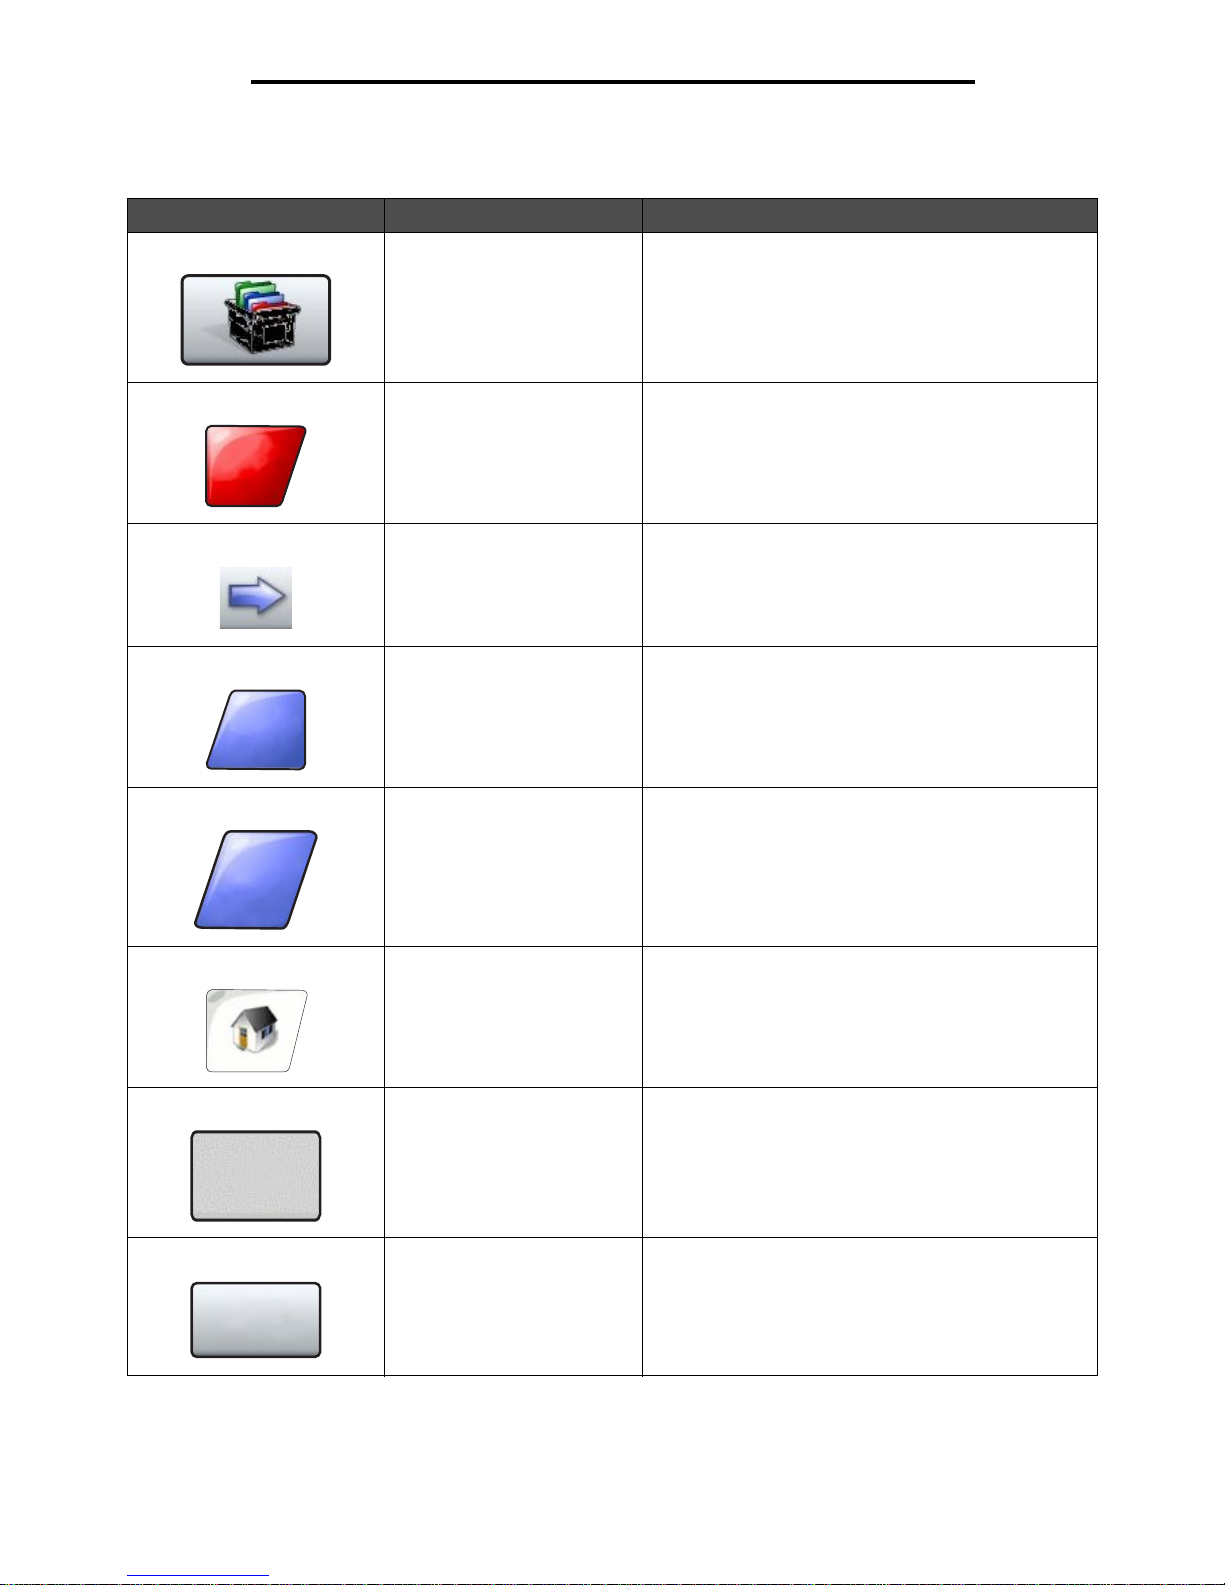
Button Button name Function or description
Custom Allows for creating a custom button based on the
user’s needs.
Cancel Touch Cancel to cancel an action or a selection.
Touch to cancel out of a screen and return to the
previous screen.
Select Touch to select a menu. The next screen appears
showing menu items.
Touch to select a menu item. The next screen appears
showing val ues.
Done Allows specifying that a job is finished. For example,
when scanning an original document, one can indicate
that the last page is scanned, and then the print job
begins.
Back Touch the Back button to return to the previous screen
and no settings are saved on the screen where it was
touched. The Back button appears on each menu
screen except for the home screen.
Home Touch the Home button to return to the home screen.
The Home button appears on every screen except the
home screen. See the Home screen on page 7 for
more information.
Grayed out button When this button appears, it looks faded with a faded
word on it. It means the button is not active or is
unavailable on this screen. It was probably active on
the previous screen, but the selections made on the
previous screen caused it to be unavailable on the
current screen.
For an example, see page 90.
Gray button Touch this button to select the action appearing on the
button.
For an example, see page 91.
Cancel
Done
Back
Using the LCD touch-screen buttons
16
Using MFP menus
Features
Feature Feature name Description
Menus
Æ Settings
Æ Copy Settings
Æ Number of
Copies
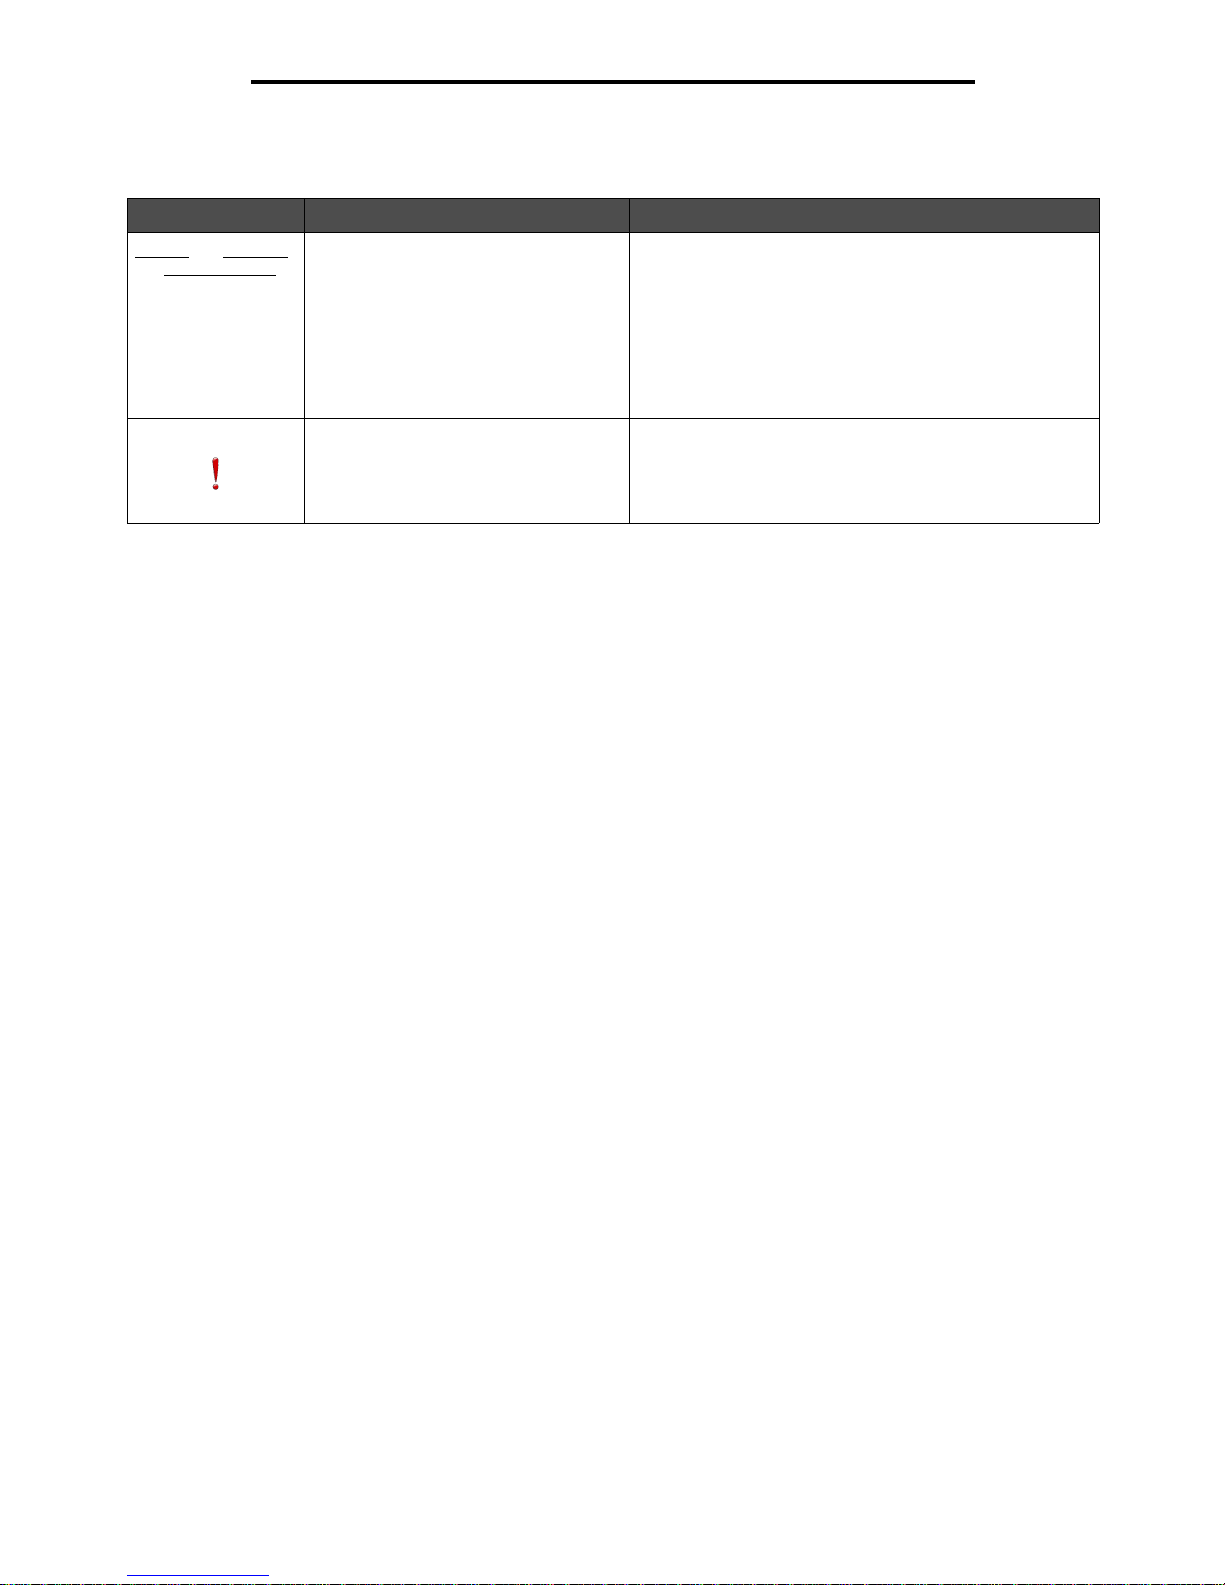
Menu trail line A line is located at the top of each menu screen. This
feature acts as a tr ail. It giv es the e xact location within the
menus. Touch any of the underlined words to return to
that menu or menu item. The Number of Copies is not
underlined since this is the current screen.
If this feature is used on the Number of Copies screen
before the Number of Copies is set and saved, then the
selection is not saved, and it does not become the user
default setting.
Attendance message alert If an attendance message occurs which closes a
function, such as copy or fax, then a blinking red
exclamation po int appears o ver the func tion butto n on the
home screen. This feature indicates an attendance
message exists.
Menus
17
Using MFP menus
Menus
Factory defaults are the function settings in effect the first time the MFP is turned on. These remain in effect until they are
changed. F a cto ry def a ult s are resto r ed if the Restore value for the Factory Default s menu item is selec ted .
When a value or setting is selected and saved for MFP functions, it is stored in MFP memory. Once stored, these settings
remain active until new ones are stored or the factory defaults are restored. These settings are called user default settings
since the user selects and saves them.
Note: Settings chosen for faxing, scanning, e-mailing, and copying, and settings for printing from the
application may override the user default settings.
Menu map
The following menu map provides an overview of the menus and menu items available from the control panel. Select a
menu or menu item for more details. For values or settings for each menu item, see the individual descriptions of menu
items fol lowing the menu map. There can be an extra level in th e m en u hierarchy s o that the r e are me n u, menu item, menu
item (which can be several more menu items under a menu item), and values.
Click any of the following menus or menu items listed for more information:
Paper Menu
Default Source
Paper Siz e/Type
Configure MP
Envelope Enhance
Substitute Size
Paper Texture
Paper W ei gh t
Paper Loadin g
Custom Types
Custom Names
Universal Setup
Network/Ports
TCP/IP
IPv6
E-mail Server Setup
Wireless
Standard Network
Network <x>
Standard USB
USB <x>
Standard Parallel
Parallel <x>
Serial <x>
NetWare
AppleTalk
LexLink
Settings
General Settings
Copy Settings
Fax Settings
E-mail Settings
FTP Settings
Print Settings
Security
Set Date and Time
Reports
Menu Settings Page
Device Statistics
Network Setup Page
Shortcut List
Fax Job Log
Fax Call Log
E-mail Shortcuts
Fax Shortcuts
FTP Shortcuts
Profiles List
NetWare Setup Page
Print Fonts
Print Directory
Note: The factory default is indicated by an asterisk (*) by the value in the following tables.
Help Pages
Print All
Information Guide
Copying
E-mail
Faxing
FTP
Print Defects
Supplies Guide
Manage Shortcuts
Manage Fax Shortcuts
Manage E-mai l Shortcuts
Manage FTP Shortcuts
Manage Profile Shortcuts
Paper Menu
18
Using MFP menus
Paper Menu
Use the Paper Menu to define settings relating to print media.
Default Source
Use this menu item to define the default print media source.
Paper Size/Type
Note: Only installed print media sources ap pear for this menu it em.
These menu items are used to set the size and type of print media loaded into a source, such as a tray, the multipurpose
feeder, or the manual feed slot. Setting the s ize and type is a two-step process. In the firs t me n u i tem , Size appears in bold
letters. After selecting the print media size, the screen changes, and Type appears in bold letters. Select the print media
type.
Menu item Purpose Values and descriptions
Default Source Identifies the default print media
source.
Tra y <x> If the same size and type of print media
are in two sources (and the Paper Size
and Paper Type menu items are
correctly set), the sources are
automatica lly linked. When one source
is empty, print media automatically
feeds from the next linked source.
Tray 1 is the factory default setting.
x represents the tray number, such as
Tray 1 for the standard tray and Tray 2
for an optional tray.
Note: The MP Feeder value, which
stands for the multipurpose feeder, is
shown only when Co nfigure MP is set to
Cassette. See Configure MP for more
information.
MP Feeder
Envelope Feeder
Manual Paper
Manual Env
Menu item Purpose Values and descriptions
Tray <x>
Size
Identifies the default size for each
source.
Only installed sourc es app ear.
Note: For trays with automatic size
sensing, only the value detected by
the hardware appears.
A4* (non-US)
A5
JIS B5
Letter* (US)
Legal
Executive
Folio
Statement
Universal
If the same size and type of print
media is in two sources (and the
Paper Size and Paper Type menu
items are correctly set), the sources
are automatically linked. When one
source is empty, print media
automatically feeds from the next
linked source.
See Tray <x> Type for more
information.
Paper Menu
19
Using MFP menus
Tray <x>
Type
Identifies the type of print media
loaded in each source.
Note: If a user-defined name is
available, it appears instead of
Custom Type <x>. If two or more
custom types share the same name,
the name only appears once in the
Pap er Typ e list.
Plain Paper
Card Stock
Transparency
Labels
Vinyl Labels
Bond
Letterhead
Preprinted
Colored Paper
Custom Type<x>
(where x
represents 1–6)
Use this menu item to:
• Optimize print quality for the
specified print media.
• Select sources through the
software application by selecting
type.
• Automatically link sources.
Any sources containing the same
type and size of print media are
automatically lin ked b y the MFP if the
Paper Size and the Paper Type are
set to the correct values.
MP Feeder
Size
Identifies the size of print media
inserted in the multipurpose feeder.
A4 (non-US)*
A5
JIS B5
Letter (US)*
Legal
Executive
Folio
Statement
Universal
7 3/4 Envelope
9 Envelope
10 Envelope
DL Envelope
B5 Envelope
C5 Envelope
Other Envelope
The multipurpose feeder only
appears on the control panel when
Configure MP is set to Cassette .
Note: See Configure MP for more
information.
MP Feeder
Type
Identifies the type of print media
inserted in the multipurpose feeder.
Note: If a user-defined name is
available, it appears instead of
Custom Type <x>. If two or more
custom types share the same name,
the name only appears once in the
Paper Type value list.
Plain Paper*
Card Stock
Transparency
Labels
Vinyl Labels
Bond
Envelope
Letterhead
Preprinted
Colored Paper
Custom Type <x>
(where x
represents 1–6)
The multipurpose feeder only
appears on the control panel when
Configure MP is set to Cassette .
Custom Type 6 is the factory default
for Cu stom Type s.
Note: See Configure MP for more
information.
Menu item Purpose Values and descriptions
Paper Menu
20
Using MFP menus
Envelope Feeder
Size
Identifies the size of envelope
inserted in the envelope feeder.
This menu item appears only if the
optional envelope feeder is insta lle d.
7 3/4 Envelope
9 Envelope
10 Envelope* (US)
DL Envelope* (non-US)
C5 Envelope
B5 Envelope
Other Envelope
Envelope Feeder
Type
Identifies the type of envelope
inserted in the envelope feeder.
This menu item appears only if the
optional envelope feeder is insta lle d.
Envelope
Custom Type <x>
(where x
represents 1–6)
Note: If a user-defined name is
available, it appears instead of
Custom Type <x>. If two or more
custom types share the same name,
the name only appears once in the
Envelope Feeder Type value list.
Manual Paper
Size
Identifies the print media size being
manually loaded.
A4* (non-US)
A5
JIS B5
Letter* (US)
Legal
Executive
Folio
Statement
Universal
Manual Paper
Type
Identifies the print media type being
manually loaded.
Plain Paper*
Card Stock
Transparency
Labels
Vinyl Labels
Bond
Letterhead
Preprinted
Colored Paper
Custom Ty pe <x> (where x represents 1–6)
Manual Envelope
Size
Identifies the envelope size being
manually loaded.
7 3/4 Envelope
9 Envelope
10 Envelope (US) *
DL Envelope (non-US)*
B5 Envelope
C5 Envelope
Other Envelope
Manual Envelope
Type
Identifies the envelope type being
manually loaded.
Envelope*
Custom Ty pe <x> (where x represents 1–6)
Menu item Purpose Values and descriptions
Paper Menu
21
Using MFP menus
Configure MP
This menu item is use d to configure the multi purpose feed er as another source or m anual f eede r . If the m ultipurpose f eeder
is linked with another tray, the MFP can select print media from the multipurpose feeder before selecting print media from
another tray.
Envelope Enhance
Use this setting to di sable the option al envelope con di tion er hardware when printing envelopes . This hardware si gni fic an tly
lessens the wrinkling or creasing of some envelopes.
Note: When printing env elopes a bubb le ma y f orm between the en v elope la y ers . When the b ubb le reaches
the end of the env elope during the fusin g process, a wrinkle or creas e forms. To prevent this situation,
pressure on a roller in the fuser is released periodically. This is envelope conditioning.
Menu item Purpose Valu es and des criptio ns
Configure MP Determines when the MFP selects
print media loaded in the multipurpose
feeder.
Cassette* MFP treats the multipu rpose feeder
like any other tray. If a print job
requests a size or type that is only
loaded in the multipurpose feeder,
the MFP pulls print media from the
multipurpose feeder for the job.
Manual MFP treats the multipurpose feeder
like a man ual feed tra y, and
Load
Manual
appears when a single
sheet of print media needs to be
inserted in the feeder.
First MFP pulls print media from the
multipurpose feeder until it is
empty, regardless of the source or
size requested for the job.
Menu item Purpose Values and descriptions
Envelop e Enhance Disab les the optional en velope
conditione r hardware.
On*
Off
This menu item is shown if op tional
envelope conditioner hardware is
installed.
Turning Envelope Enhance to Off does
not allow the fuser to release pressure
during fusing.
Paper Menu
22
Using MFP menus
Substitute Size
This menu item is used to determine whether the MFP can substitute another print media size if the requested size is not
currently installed in any of the MFP sources. If, for example, Substitute Size is set to Letter/A4, and only letter size paper
is installed in the MFP when a request is received to print on A4 paper, the MFP substitutes letter for A4 and prints the job
instead of showing a change paper request.
Paper Texture
These menu items are u se d to se t the prin t me di a texture f or ea ch of th e d efined print media types . Th is all o w s the MFP to
optimize the print quality for the specified print media.
Menu item Purpose Values and descriptions
Substitute Size The MFP substitutes the specified
print med ia size if the requested size
is not loaded.
Off MFP prompts the user to load the
requested paper siz e . No size
substitutions are allowed.
Statement/A5 Prints A5 size jobs on statement
size paper if only statement size
paper is loaded, and prints
statement size jobs on A5 paper if
only A5 paper is loaded.
Letter/A4 Prints A4 size jobs on letter size
paper if onl y letter size paper is
loaded, and prints letter size jobs on
A4 size paper if only A4 size paper is
loaded.
All listed* Substitutes both Letter/A4 and
Statement/A5 which means all
available substitutions are allowed.
Menu item Purpose Values and descriptions
Plain Texture Identifies the texture of th e print
media loaded in a specific source.
Smooth
Normal*
Rough
Note: The default for Bond Texture
is Rough.
Transparency
Texture
Glossy Texture
Labels Texture
Bond Texture
Envelope Texture
Letterhead Texture
Preprinted Texture
Colored Texture
Vinyl Labels
Texture
Identifies the texture of the vinyl
labels loaded in a specific source.
Smooth
Normal*
Rough
Shown if vinyl labels are supported
in the specified source.
Paper Menu
23
Using MFP menus
Paper Weight
These menu items are used to set the paper weight for each of the defined print media types. This allows the MFP to
optimize the print quality for the print media weight.
Card Stock Te xture Identifies the textu re of the card stock
loaded in a specific source.
Smooth
Normal*
Rough
Shown if Card Stock is supported in
the specified source.
Custom <x>
Texture
Identifies the texture of the custom
print media loaded in a specific
source. (x repr esents 1–6.)
Smooth
Normal*
Rough
Shown if the custom type is
supported in the specified source.
Menu item Purpose Values and descriptions
Plain Weight Identifies the relative weight of the
print media loaded in a specific
source, and ensures the toner
adheres properly to the printed
page.
Light
Normal*
Heavy
Note: Card Stock is shown on the
control panel only if it is su pported in
a specified source.
Card Stock Weight
Transparency
Weight
Labels Weight
Bond Weight
Envelope Weight
Letterhead Weight
Preprinted Weight
Colored Weight
Vinyl Labels Weight Identifies the relative weight of the
vinyl labels loaded in a specific
source.
Light
Normal*
Heavy
Shown if v in yl labe ls are a supp orted
type.
Custom <x> Weight Identifies the relative weight of the
custom paper loaded in a specific
source. (x repr esents 1–6.)
Light
Normal*
Heavy
Shown if the custom type is
supported in the specified source .
Menu item Purpose Values and descriptions
Paper Menu
24
Using MFP menus
Paper Loading
These menu items are us ed to s et the l oadin g orientatio n for each print media t ype . A sou rce is loade d with pre printed print
media, and then the MFP can be notified that the print media is loaded for duplex (two-sided) printing. Use the application
software to indicate simplex (one-sided) printing. When simplex printing is selected, the MFP automatically inserts blank
pages to print the simplex job correctly.
Paper Loading is only shown on the control panel if a duplex unit is installed.
Custom Types
This menu item is used to define a name for each custom paper type. Assign names using a utility such as MarkVision or
from the control panel.
Custom Names
This menu item is used to define a custom name for each print media.
Menu item Purpose Values and descriptions
Card Stock Load Properly handles the specific
preprinted print media whether the
job is a duplex job (two-sided) or a
simplex job (single-sided).
Duplex
Off*
Duplex is for two-sided printing on
the print media, and off indicat es that
duplex printing is turned off.
Labels Loading
Bond Loading
Letterhead Loading
Preprinted Loading
Colored Loading
Vinyl Labels
Loading
Duplex
Off*
Shown if vinyl labels are supported
in the specified source.
Custom <x>
Loading
Properly handles preprinted custom
paper whether the j ob is a dup lex job
(two-sided) or a simplex job
(single-sided). x represents 1–6.
Duplex
Off*
Shown if the custom type is
supported in the specified source.
Menu item Purpose Values and descriptions
Custom Type<x> Specifies the type of print media
associated with each Custo m Type
available in the Paper Type menu.
Paper*
Card Stock
Transparency
Labels
Vinyl Labels
Envelope
The custom type print media must
be supported in the designated
source in order to assign a userdefined na me.
Once the name is assigned, the
name appears instead of Custom
Type <x>.
Menu item Purpose Values and descriptions
<user-defined
Custom Name>
Specifies the name of print media
associated with each Custo m Nam e
<x> available in the Paper Type menu
where x is 1–6.
[user-defined
name], such as:
Stephen’ s lab els
Mary’s card stock
The custom print media must be
supported in the designate d sou rce
to assign a user-defined name.
Reports
25
Using MFP menus
Universal Setup
These menu items ar e us ed to specify the height an d wid t h o f th e Universal Paper Size. By s pec ify in g th e h eig ht a nd width
for Unive r sa l Paper Size, the MFP uses the U niversal setting lik e othe r paper si z e s , inc lu din g sup port for duplex and n-up.
For more information on n-up, see Multipage Print.
Reports
Note: After a report prints, the MFP returns to the home screen.
Menu item Purpose Valu es and desc riptio ns
Units of Measure Determines the unit of measure
used to enter the Universal Heig ht
and Width.
Inches
Millimeters
Inches is the US default, and
Millimeters is the international default.
Portrait Width Sets the portrait width of the
universal media.
Note: If the value set exceeds the
maximum width, the MFP uses the
maximum value allowed in inches or
millimeters.
3 inches to
14.17 inches in 0.01
inch increments
76 mm to 360 mm in
1 mm increments
Shows either inches or millimeters
from Units of Measure setting;
8.5 inches is the US default, and
216 mm is the international default.
Portrait Height Sets the portrait height of the
universal media.
Note: If the value set exceeds the
maximum height, the MFP uses the
maximum value allowed in inches or
millimeters.
3 inches to
14.17 inches in 0.01
inch increments
76 mm to 360 in
1 mm increments
Shows either inches or millimeters
from Units of Measure setting;
14 inches is the US default, and
356 millimeters is the international
default.
Feed Direction Specifies the feed direction of the
Universal Paper Size.
Short Edge*
Long Edge
Feed Direction is only shown i f the
Long Edge value is available. Long
Edge exists if the longest edge is
shorter than the maximum physical
width that the tray can accommodate.
See Duplex Bind on page 68 for
more information about short and long
edges.
Reports
26
Using MFP menus
Each report prints using some sta ndard p rint v alues , s uch as on e cop y, 600 dots per inch (dpi) print resoluti on, normal print
area, no separat or sheets, duple x printin g is off , mul tiple page p rinting is off , toner da rkness set to ei ght, portrait orientation,
and the media source is the user default.
Menu item Purpose Valu es and des criptio ns
Menu Settings Page Prints information relating to:
• Current settings for each of the menu
items for all men us
• Cartridge information
• A list of installed options and features
• Available MFP memory
After selecting this item, the page prints
and the MFP returns to Ready.
Device Statistics Prints information relating to the MFP
statistics.
Network Setup Page
Network <x> Setup Page
appears if additional network
options are installed.
Prints information relatin g to net work setti ngs
and verifies the network connection.
Note: This page also provides information
that aids in configuring for network printing.
Shortcut List Prints a list of previously defined shortcuts.
Fax Job Log Prints a list of pe ndi ng fax jobs al ong w i th the
most recent 200 fax tasks complete d.
Note: The menu item only appears when
Enable Job Log is on.
Fax Call Log Prints a list of the of the last 100 fax calls
made or answered by the MFP.
Note: The menu item only appears when
Enable Call Log is on.
E-mail Shortcuts Prints a list of the e-mail shortcuts.
Fax Shortcuts Prints a list of the fax shortcuts.
FTP Shortcuts Prints a list of the FTP shortcuts.
Profiles List Prints a list of profiles stored in the MFP.
NetWare Setup Page Prints a page listing the NetWare protocol
settings.
Print Fonts Prints a sample of all the fonts available for
the selected emulation.
PCL Fonts Prints a sample of
all MFP fonts
available for
PCL emulation.
PostScript Fonts Prints a sample of
all MFP fonts
available for
PostScript
emulation.
Print Directory Prints a list of the resources that are stored
on the optional flash memory card or the
internal hard disk.
Note: Print Directory is available on the
control panel if either an optional
nondefective flash memory or standard hard
disk is installed and formatted.
After selecting this
item, the page
prints and the MFP
returns to Ready .

Network/Ports
27
Using MFP menus
Network/Ports
TCP/IP
This menu item is used to view and change the Transmission Control Protocol/Internet Protocol settings. Internet Protocol
(IP) specifies the format of packets, also called datagrams, and the addressing scheme. Most networks combine IP with a
higher-level protocol called Transmission Control Protocol (TCP). TCP enables two hosts to establish a connection and
exchange streams of data. TCP guarantees delivery of data and also guarantees that packets are delivered in the same
order in which they were sent.
Menu item Purpose Values and descriptions
Set Hostname
Address Defines a specific address on the
network which defines the device.
IP address 4 field IP address
Display only
Netmask De fines inf ormation that the network
uses to decide how to search for the
specific IP address.
netmask 4 field mask
Display only
Gateway Provides the address of the
machine that controls the
communication for the sub-network.
gateway 4 field IP address
Display only
Set static IP address link Link to the page to set a static IP
address. Changing the IP address
sets DHCP, BOOTP, and RARP to Off.
Enable DHCP DHCP is Dynamic Host
Configuration Proto col. The n etwork
automatica lly assigns a number for
the networ k informatio n.
On*
Off
Enable RARP RARP is Reverse Address
Resolution Protocol.
On*
Off
Enable BOOTP BOOTP is Bootstrap Protocol. On*
Off
AutoIP Provides automatic IP. On*
Off
Enable FTP/TFTP Allows files to be transferred to the
device.
File Transfer Protocol (FTP) is the
protocol used on the Internet for
exchanging fil es. FTP uses the
Internet TCP/IP protocols to enable
data transfe r.
TFTP is Trivial File Transfer
Protocol, which is a simple form of
FTP.
On*
Off
HTTP Server Enabled Specifies if Web pages can b e s een .
HyperT e xt T r ansfer Protoco l (HTTP),
the underlying protocol used by the
World Wide Web (W WW). HTTP
defines how messages are
formatted and transm itted, and what
actions Web servers and browsers
should take in response to various
commands.
On* The function is enabled. Web pages
can be seen.
Off The function is disabled.
Network/Ports
28
Using MFP menus
WINS Server Address A server handles host names by
assigning host names to IP
addresses. Devices have a host
name registered with the WINS
server.
Windows Internet Nami ng Servi c e
(WINS) is a system that determines
the IP address associated with a
particular network computer. This is
called name resolution. WINS
supports network client and server
computers running Windows and
can provide name resolution for
other computers with special
arrangements.
4 field IP
address
DNS Server Address Registers the host name with the
DNS server. Enables nam e
resolution f or t he e-m ail serv er, FTP,
and other host name entries.
Domain Name System (or Domain
Name Service) [DNS] is an Internet
service that translates domain
names into IP addresses. Domain
names are alphabetic; ther efore,
they are easier to remember. The
Internet is really based on IP
addresses. Each time a domain
name is used, a DNS service must
translate the name into the
corresponding IP address.
4 field IP
address
Backup DNS Server
Address
This is used if the DNS Server
Address is not available.
4 field IP
address
Domain Search Order Defines the search order of the
domains.
text entry
field
The search order is given in a comma
delimited list, such as:
myserver.com, myprinter.com
Restricted Server List Defines a limited number of IP
addresses.
text entry This is a comma delimited list of up to
10 IP addresses allo wed to mak e TCP
connections. A zero (0) can be used
as a wildcard in the list.
MTU Defines the range of the
communication type.
numeric
entry
This is range, such as 256–1500
Ethernet, 256–4096 Token-Ring
Default TTL* numeric
entry
Gives the range in seconds, such as
Range: 5–254 seconds
DDNS On*
Off
mDNS On*
Off
Zero Configuration Name text entry Example: John’s office printer.
SLP Broadcast On*
Off
LPD Timeout numeric
entry
The range is 0–65535 seconds.
Menu item Purpose Values and descriptions
Network/Ports
29
Using MFP menus
IPv6
Use this menu item to view or change Internet Protocol Version 6 (IPv6) settings.
Note: This menu item does not appear for non-network models.
LPD Banner Page On
Off*
LPD Trailer Page On
Off*
LPD Carriage Return
Conversion
On
Off*
Menu item Purpose Values and descriptions
IPv6 Sets the network to IPv6 (Internet
Protocol Version 6).
Enable IPv6 Yes*
No
Auto Configur a tio n On*
Off
Hostname text entry field
Address text entry field
Router Address text entry field
Enable DHCPv6 Yes*
No
Menu item Purpose Values and descriptions
Network/Ports
30
Using MFP menus
E-mail Server Setup
Menu item Purpose Values and descriptions
Primary SMTP Gateway IP address field
Primary SMTP Gateway Port numeric entry
(25*)
Secondary SMTP Gateway IP address field
Secondary SMTP Gateway
Port
numeric ent ry
(25*)
SMTP Timeout numeric entry
5–30 (30*)
The timeout numeric entry is a range
of 5 to 30 seconds with 30 seconds
as the default.
Authentication header
Server Requires
Authentication
Yes
No*
Userid text entry
Password text entry, plain
text? if not need
confirm
Reply Address text entry This is a required item.
Subject text entry
Message text entry The text entry field has a limitation of
512 characters.
Send me a copy Sends a copy of the e-mail
back to the creator of the
e-mail.
Never appears*
On by default
Off by default
Always on
The user must be authenticated.
Max e-mail size Specifies the maximum
e-mail size in kilobytes.
E-mail above the spe ci fie d
size is not sent.
numeric entry Specify 0 (zero) for no limit.
Size error message Sends a message when an
e-mail is greater than the
configured size limit.
text entry
Limit destinations Sends an e-mail only when
the address contains the
domain name, such as a
company domain name.
E-mail can only be sent to
the specified domain.
@text entry The limit is one domain. The @ is
permanent before the text field.
Example: @ companydomain.com
For the example, e-mails are only
sent when the address ends with
@companydomain.com.
Web Link Setup header
Server Specifies the name of the
server.
text entry For example:
server.mine.com
Login text entry
Password password text
entry
 Loading...