

Lexmark E460dtn, E460dtw, 34S0606 - E 460dw B/W Laser Printer, 460dn - E B/W Laser Printer, E460 Installation Manual

Wireless Setup Guide
© 2008 Lexmark International, Inc.
All rights reserved.
740 West New Circle Road
Lexington, Kentucky 40550

Edition notice
August 2008
The following paragraph does not apply to any country where such provisions are inconsistent with local law: LEXMARK INTERNATIONAL,
INC., PROVIDES THIS PUBLICATION “AS IS” WITHOUT WARRANTY OF ANY KIND, EITHER EXPRESS OR IMPLIED, INCLUDING, BUT NOT LIMITED TO,
THE IMPLIED WARRANTIES OF MERCHANTABILITY OR FITNESS FOR A PARTICULAR PURPOSE. Some states do not allow disclaimer of express or
implied warranties in certain transactions; therefore, this statement may not apply to you.
This publication could include technical inaccuracies or typographical errors. Changes are periodically made to the information herein; these
changes will be incorporated in later editions. Improvements or changes in the products or the programs described may be made at any time.
© 2008 Lexmark International, Inc.
All rights reserved.
UNITED STATES GOVERNMENT RIGHTS
This software and any accompanying documentation provided under this agreement are commercial computer software and documentation
developed exclusively at private expense.

Contents
Edition notice......................................................................................2
Setting up the printer........................................................................5
Follow these steps to set up your printer......................................................................................................................5
Setting up the printer hardware.......................................................................................................................................5
Choosing a connection method......................................................9
Preparing to connect wirelessly...................................................10
Information you will need to set up the printer on a wireless network..........................................................10
Adding the printer to a network using MAC address filtering............................................................................10
Connecting to a wireless network using Windows...................12
Installing the printer on a wireless network (Windows)........................................................................................12
Connecting to a wireless network using Macintosh.................14
Installing the printer on a wireless network (Macintosh)......................................................................................14
Troubleshooting wireless setup....................................................17
Connecting using a USB cable........................................................28
USB setup and connection...............................................................................................................................................28
Connecting using an Ethernet network......................................29
Wired setup and connection...........................................................................................................................................29
Networking glossary.......................................................................30
Index...................................................................................................32
Contents
3

4

Setting up the printer
Follow these steps to set up your printer
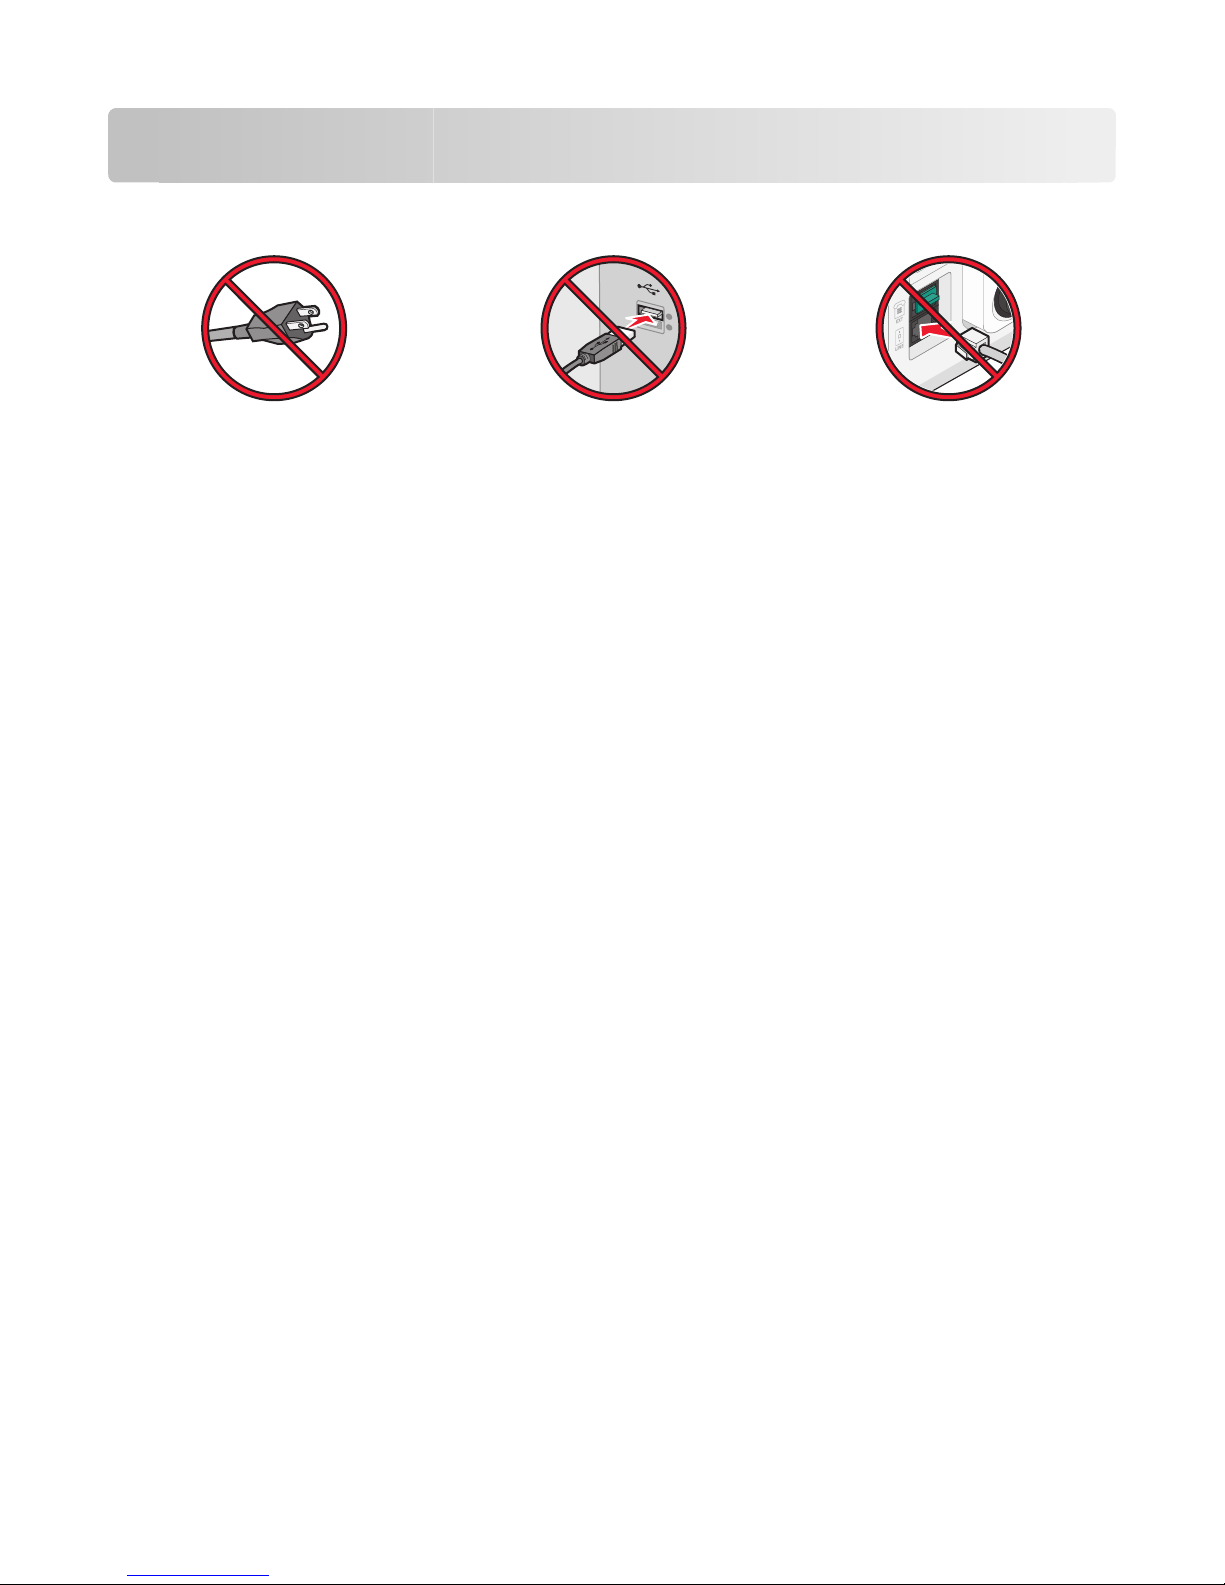
Note: Do not connect cables until instructed.
1 Set up the printer hardware.
2 Decide how you want to connect the printer.
This guide includes three methods:
• Wireless
• Wired (Ethernet)
• Local (USB)
Setting up the printer hardware
Unpack the printer, cables, and CD.
Press the door release button and lower the front
door.
2
1
Setting up the printer
5
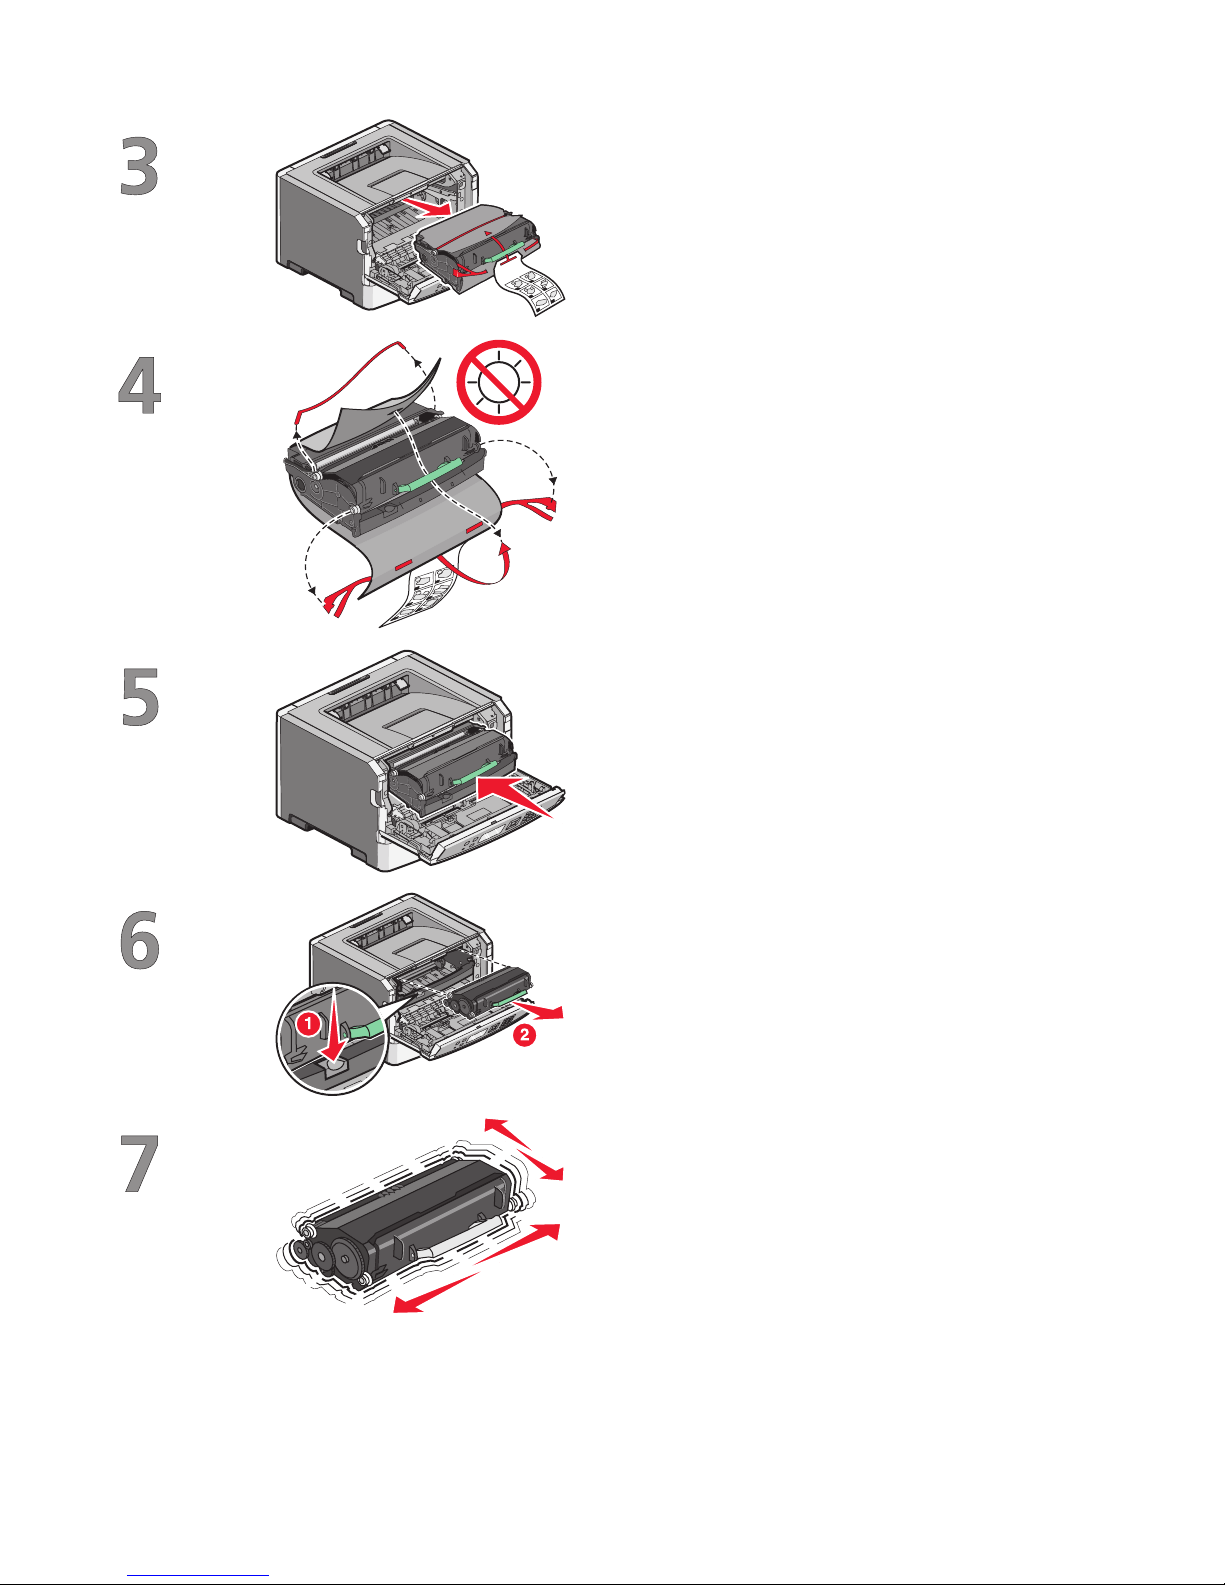
Remove the unit consisting of the photoconductor
kit and the toner cartridge from the printer.
Remove the tape and packaging material from the
unit.
Reinsert the unit into the printer.
Press the button on the base of the photoconductor
kit. Pull the toner cartridge up and out using the
handle.
Firmly shake the cartridge side-to-side and front-toback several times to distribute toner.
Setting up the printer
6
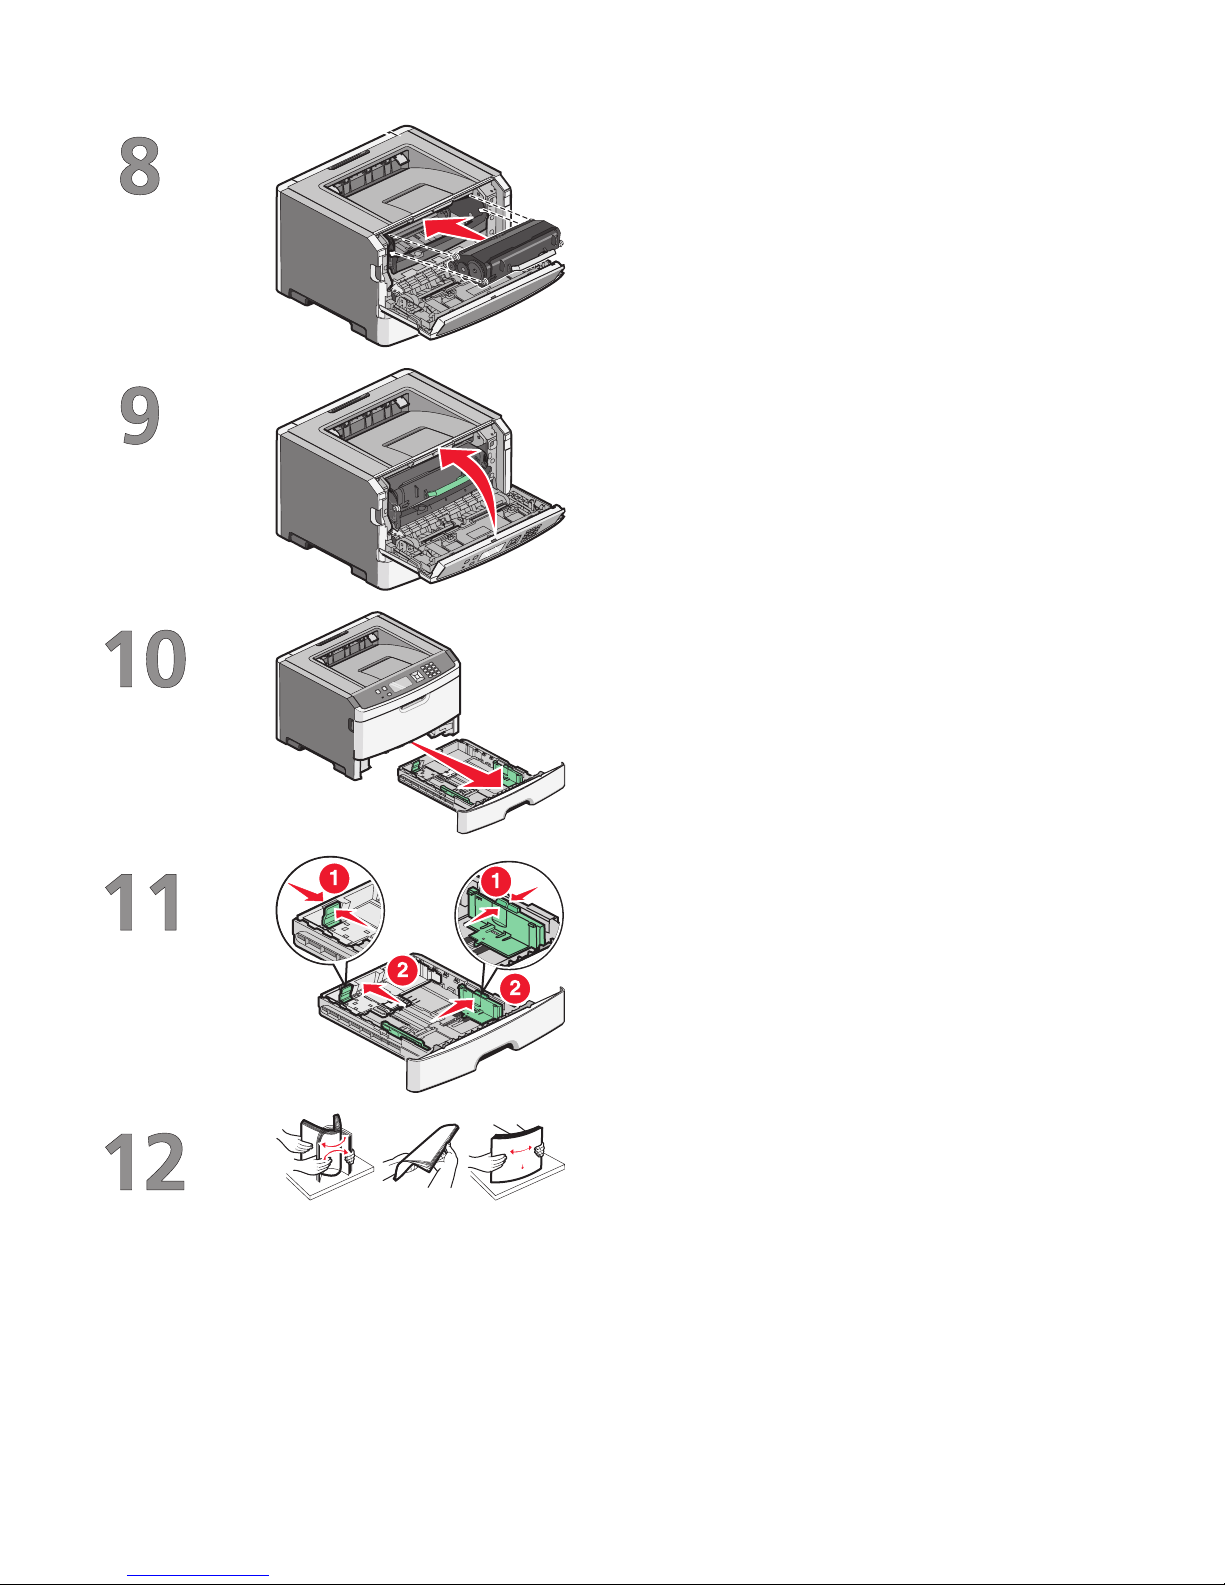
Insert the toner cartridge into the photoconductor
kit by aligning the rollers on the toner cartridge with
the tracks. Push the toner cartridge until it clicks into
place.
Close the front door.
Pull the tray completely out.
Squeeze the width guide tabs on the right guide as
shown, and then slide the width guides to the sides
of the tray. Notice that the two width guides move
in unison when you move just the right width guide.
Squeeze the length guide tabs together as shown,
and then slide the length guide to the correct
position for the paper size being loaded.
Flex the sheets back and forth to loosen them, and
then fan them. Do not fold or crease the paper.
Straighten the edges on a level surface.
Setting up the printer
7
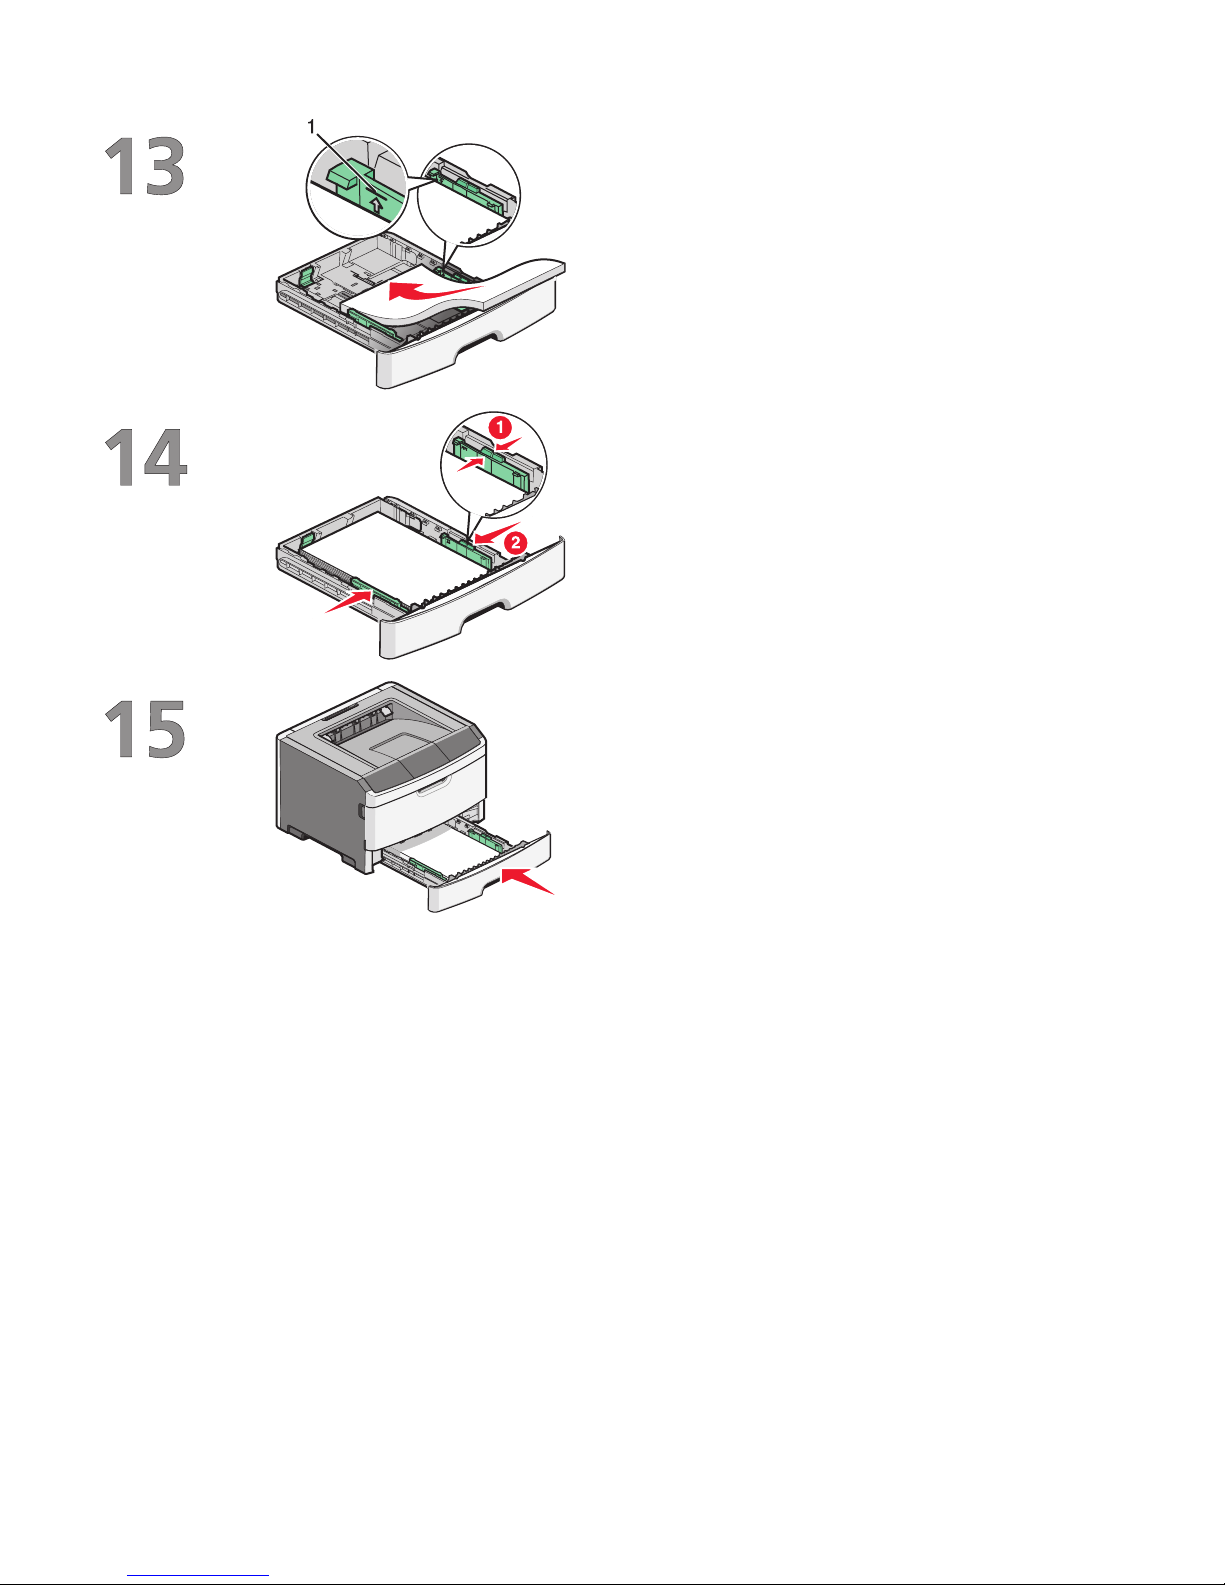
Load the paper stack toward the back on the tray as
shown with the recommended print side facedown.
Note: Notice the maximum fill line on the side of the
width guide which indicates the maximum height
for loading paper. Do not try to overload the tray.
Squeeze the width guide tabs on the right guide, and
then slide the width guides to lightly touch the side
of the stack.
Insert the tray back into the printer.
Setting up the printer
8
Choosing a connection method
Note: Do not connect cables until instructed.
Connect to a wireless network using Windows
For detailed steps, see “Information you will need to set up the printer on a wireless network” on page 10 and
“Installing the printer on a wireless network (Windows)” on page 12.
Connect to a wireless network using Macintosh
For detailed steps, see “Information you will need to set up the printer on a wireless network” on page 10 and
“Installing the printer on a wireless network (Macintosh)” on page 14.
Connect directly to a computer using a USB cable
For detailed steps, see “Connecting using a USB cable” on page 28.
Connect to a wired network using an Ethernet cable
For detailed steps, see “Connecting using an Ethernet network” on page 29.
Choosing a connection method
9

Preparing to connect wirelessly
Information you will need to set up the printer on a
wireless network
Note: Do not connect the installation or network cables until prompted to do so by the setup software.
• SSID—The SSID is also referred to as the network name.
• Wireless Mode (or Network Mode)—The mode will be either infrastructure or ad hoc.
• Channel (for ad hoc networks)—The channel defaults to auto for infrastructure networks.
Some ad hoc networks will also require the auto setting. Check with your system support person if you are not
sure which channel to select.
• Security Method—There are three basic options for Security Method:
– WEP key
If your network uses more than one WEP key, enter up to four in the provided spaces. Select the key currently
in use on the network by selecting the Default WEP Transmit Key.
or
– WPA or WPA2 passphrase
WPA includes encryption as an additional layer of security. The choices are AES or TKIP. Encryption must be
set for the same type on the router and on the printer or the printer will not be able to communicate on the
network.
– No security
If your wireless network does not use any type of security, you will not have any security information.
Note: Using an unsecured wireless network is not recommended.
If you are installing the printer on an 802.1X network using the Advanced method, then you may need the following:
• Authentication type
• Inner authentication type
• 802.1X username and password
• Certificates
Note: For more information on configuring 802.1X security, see the Networking Guide on the Software and
Documentation CD.
Adding the printer to a network using MAC address
filtering
Every network device has a unique hardware identification number to distinguish it from other network devices. This
identification number is called the Media Access Control (MAC) address.
A list of MAC addresses can be set on a wireless router so that only those devices with matching MAC addresses can
join the network. This is called MAC address filtering. When installing the printer on a network that uses MAC address
filtering, be sure to add the printer MAC address to the list of addresses allowed by the wireless router. If this address
is not specifically allowed on the wireless network, the printer will not work wirelessly.
Preparing to connect wirelessly
10
 Loading...