

Page 1
Appuyez sur les touches
Appuyez sur MENU une fois pour changer le sous-canal.
Appuyez sur les touches
Appuyez sur la touche PTT pour confirmer le réglage.
L’affichage passe de l’un à l’autre des deux canaux sélectionnés.
Si l’appareil détecte un signal sur l’un des canaux, il s’arrêtera et le recevra. Tant que
l’appareil est en mode Dual Watch, DCM restera affiché à l’écran.
Pour arrêter le mode Dual Watch
Appuyez 7 fois sur la touche MENU.
Appuyez sur les touches
à l’écran.
Appuyez sur la touche PTT pour confirmer le réglage.
ou pour sélectionner un second canal.
ou pour sélectionner le sous-canal.
ou jusqu’à ce que s'affiche ‘OFF’
Défilement des canaux
Quand la fonction SCAN est en service, l’appareil interrogera les huit canaux et les 38
sous-canaux, jusqu’à en trouver un sur lequel un autre utilisateur est en train de
transmettre.
Appuyez sur les touches MENU et
l’écran et l’appareil débute le scan.
Quand l’appareil détecte un canal actif, il s’arrête sur ce canal.
Appuyez sur
Appuyez sur
Appuyez sur la touche PTT pour terminer le scan et communiquer.
pour continuer à interroger les canaux 1 à 8.
pour interroger les sous-canaux.
simultanément. SCAN apparaît à
Verrouillage des touches
Avec les touches verrouillées, vous pouvez transmettre (TALK), recevoir ou surveiller
(MON) le canal actif, mais vous ne pouvez ni changer le volume (
touche MENU.
Pour verrouiller les touches :
Appuyez sur la touche MENU et maintenez-la enfoncée, jusqu’à ce que
apparaisse à l’écran .
Pour déverrouiller les touches :
Appuyez sur la touche MENU et maintenez-la enfoncée, jusqu’à ce que
disparaisse de l’écran .
), ni utiliser la
3. Nettoyage et entretien
Pour nettoyer votre TW40, utilisez un chiffon doux humidifié avec de l’eau.
N’utilisez pas de détergents ou de solvants, qui peuvent provoquer un dommage
non couvert par la garantie.
4. Caractéristiques techniques
Fréquence de service 446,00625 à 446,09375 MHz (huit canaux)
Intervalle de canal 12,5 KHz
Canal
Codes des sous-canaux CTCSS
(Élimination de toute interférence)
Fréquence (Mhz)
Code
Canal
CodeFréquence (Hz)
Fréquence (Mhz)
Fréquence (Hz)
5. Déclaration de Conformité
Nous, Lexibook S.A
2, avenue de Scandinavie, 91953 Courtaboeuf Cedex, France
déclarons sous notre seule responsabilité que le produit
Désignation : Talkie-Walkie
Référence/type : TW40
est conforme aux normes suivantes :
ETSI EN300 296-2 : 2001
EN301489 : 2002
EN60065 : 1998
Par la présente, nous déclarons que le produit mentionné ci-dessus est conforme aux
exigences essentielles de la directive 1999/5/CE.
Yiu Wai Man
Responsable recherche et développement produit
6. Guide de dépannage
Problème Cause probable — solution
Pas d’énergie Vérifiez les batteries, remplacez les si nécessaire.
Réception faible/
Pas de réception/
Réception bruyante
Impossible de
changer de canaux
En mode VOX,
l’appareil transmet
tout le temps.
En mode VOX,
l’appareil ne
transmet pas.
L’appareil n’est pas branché — Vérifiez.
Les batteries sont presque épuisées ou mal mises —
Pas d’autre utilisateur à portée — Vérifiez.
Appareils non réglés sur même canal — Vérifiez.
Volume trop faible — Augmentez le volume.
Parlez avec une voix normale, à 5–8 cm
(2–3 pouces) du microphone.
Les conditions locales gênent la réception — Allez
dans un autre endroit, en évitant les obstacles et
aussi haut que possible.
Vous tenez l’appareil trop près de votre corps —
Déplacez l’appareil.
L’autre utilisateur ne transmet pas — Vérifiez.
L’autre utilisateur est trop près — Vérifiez.
Il y a une interférence avec d’autres utilisateurs sur le même
canal — Convenez d’un autre canal.
L’appareil est verrouillé — Vérifiez.
Les batteries sont épuisées ou mal mises.
Le bruit de fond est important — Allez dans un endroit
plus tranquille.
La sensibilité VOX est trop élevée — Réglez à un niveau
inférieur.
La sensibilité VOX est trop faible — Réglez à un niveau
supérieur.
Parlez plus fort, plus près du microphone.
7. Garantie et service après-vente
Ce produit est couvert par notre garantie d'un an.
Celle-ci n'inclut pas la détérioration de l'écran LCD.
Pour toute mise en oeuvre de la garantie ou de service après vente, vous devez vous
adresser à votre revendeur muni de votre preuve d'achat. Notre garantie couvre les
vices de matériel ou de montage imputables au constructeur à l'exclusion de
toute détérioration provenant du non respect de la notice d'utilisation ou de toute
intervention intempestive sur l'article (telle que démontage, exposition à la chaleur ou
à l'humidité…).
Si votre TW40 présente un défaut, vérifiez tout d’abord les points ci-dessus.
Si vous ne pouvez corriger le problème, retournez l’ensemble du système là où vous
l’avez acheté.
®
Lexibook
améliore continuellement ses produits et se réserve donc le droit de
procéder à des modifications du produit et des fonctions sans avis préalable.
Ce produit est destiné pour utilisation dans les pays suivants :
Autriche Finlande Lettonie Espagne
Belgique France Liechtenstein Suède
Bulgarie Allemagne Luxembourg Suisse
Croatie Grèce Hollande Turquie
Chypre Hongrie Norvège Royaume-Uni
Rép. Tchèque Islande Pologne Roumanie
Danemark Irlande Portugal
Estonie Italie Slovénie
Référence : TW40
© 2010 LEXIBOOK®
Conçu et développé en Europe – Fabriqué en Chine
Lexibook S.A
2, avenue de Scandinavie
91953 Courtaboeuf Cedex
France
Service consommateurs à votre écoute :
0892 23 27 26 (0.34€ TTC/min)
www.lexibook.com
Informations sur la protection de l'environnement
Tout appareil électrique usé est une matière recyclable et ne devrait pas
faire partie des ordures ménagères! Nous vous demandons de bien
vouloir nous soutenir en contribuant activement au ménagement des
ressources et à la protection de l'environnement en déposant cet appareil
dans des sites de collecte (si existants).
Ce produit n'est
pas un jouet.
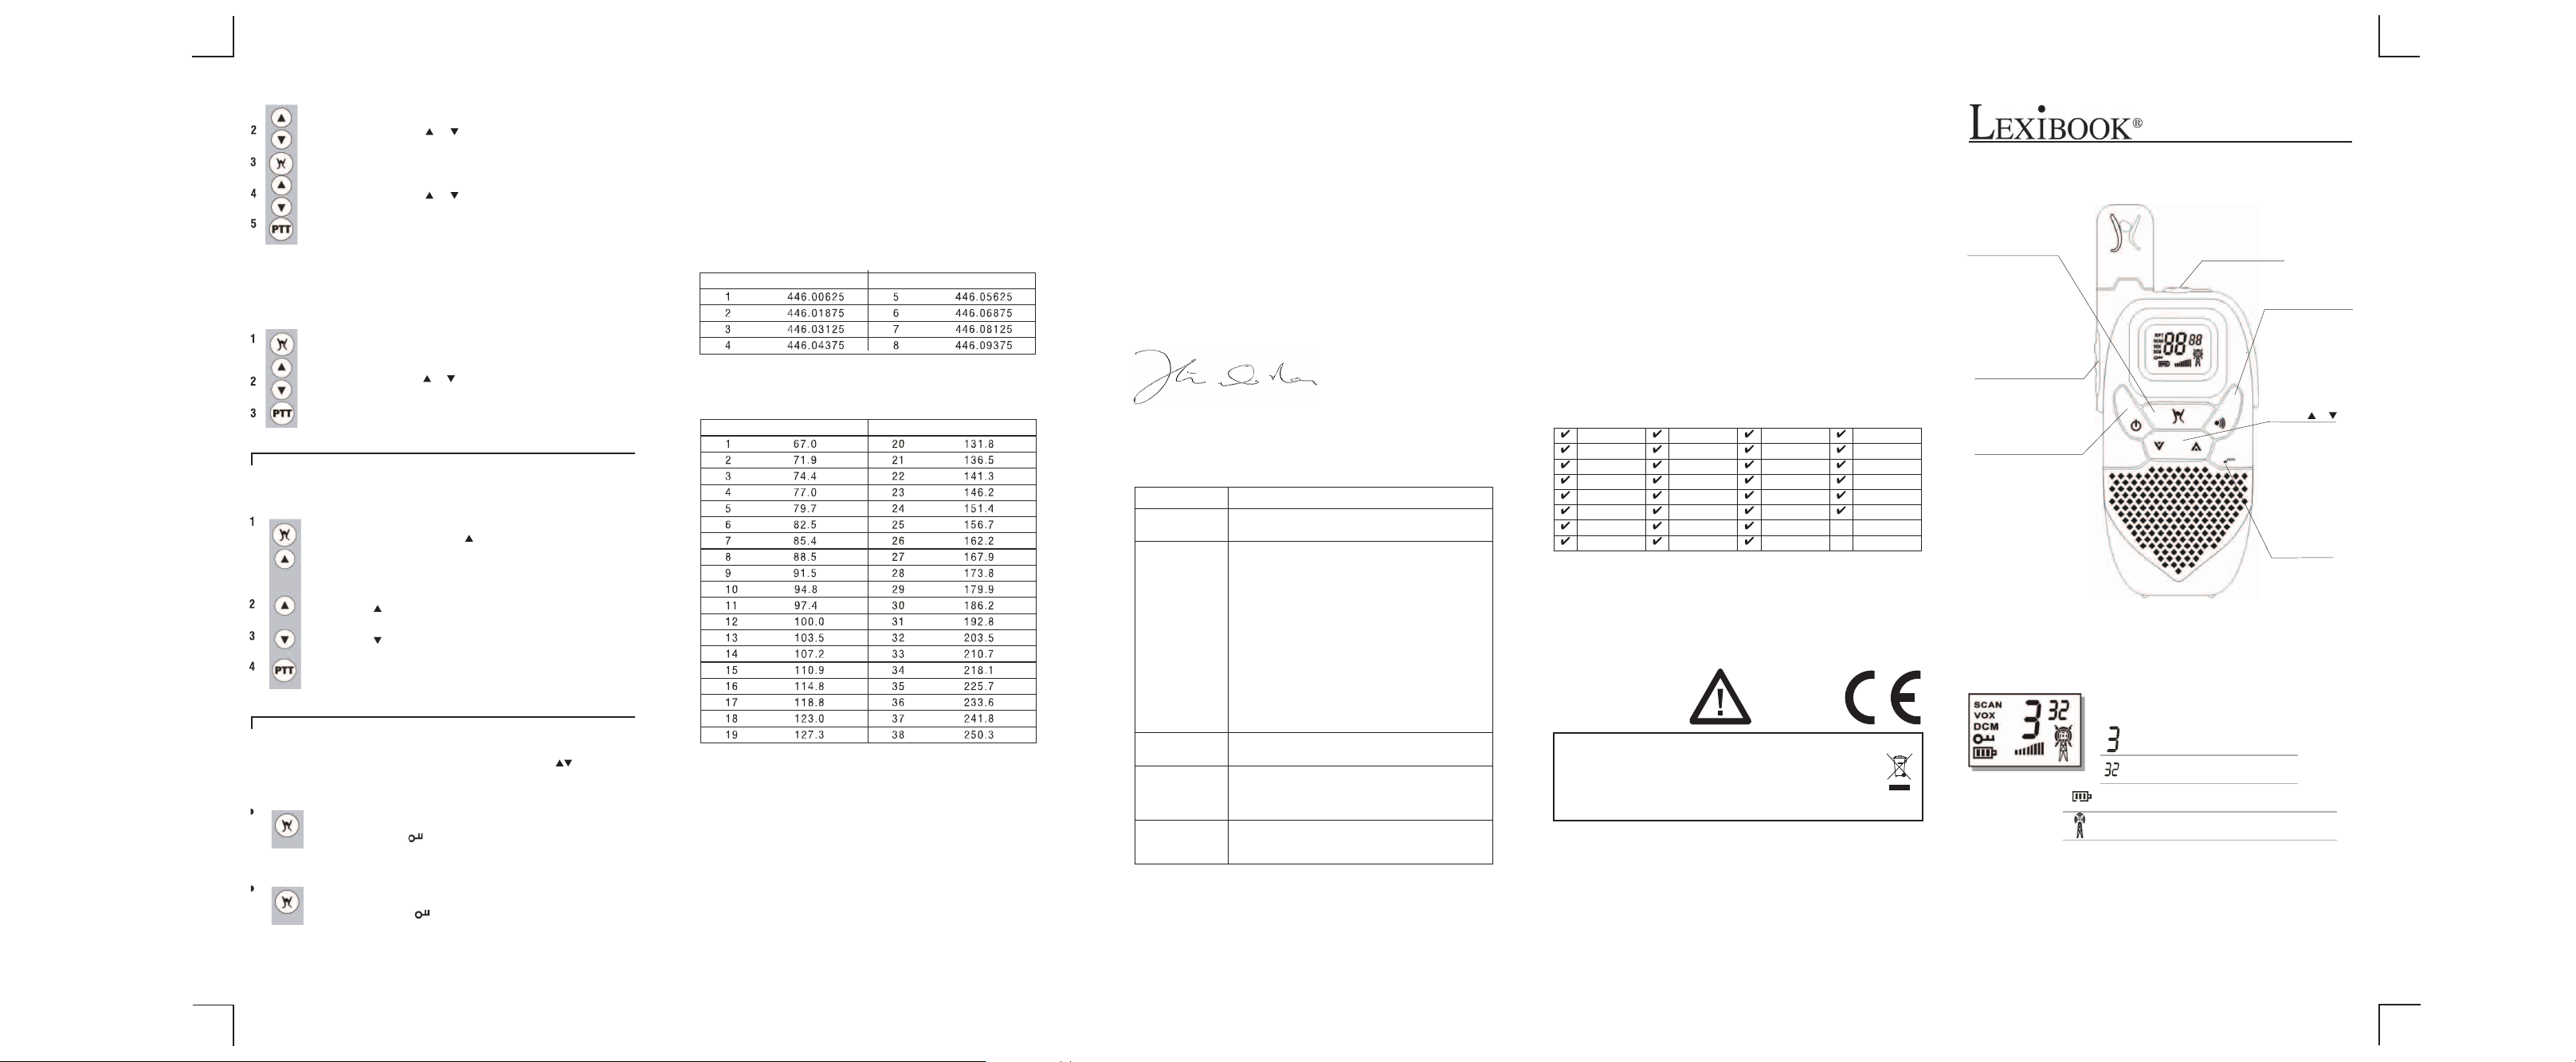
TALKIE-WALKIE
Touche MENU
Appuyer pour changer de
canaux, de sous-canaux
et de modes.
PTT TALK (parler)
Appuyer et maintenir
pendant la transmission.
Touche Marche/Arrêt
Affichage de l'écran
TW40
Manuel de l’utilisateur
Prise pour kit mains-libres
Sous le cache.
Touche CALL
Appuyer pour envoyer la
tonalité d’appel à d’autres
Touches
Appuyer pour
changer le volume
du haut parleur.
Appuyer ensuite sur
la touche MENU
pour changer de
Microphone
Si l’unité est en marche
Numéro de canal (1 à 8)
Numéro de sous-canal (0 à 38)
Niveau de charge de la pile — quand le nombre de
barres diminue, veuillez remplacer les piles.
Apparaît lors de la transmission du signal
utilisateurs.
et
canaux.
Page 2
Apparaît lors de la réception du signal
Dual Watch (Double surveillance) — indique que
vous surveillez deux canaux à la fois.
VOX Indique que l’appareil est en mode VOX (voix).
Indique que l’appareil scanne tous les canaux.
Affiché quand les touches sont verrouillées.
Niveau du volume.
Glissez votre
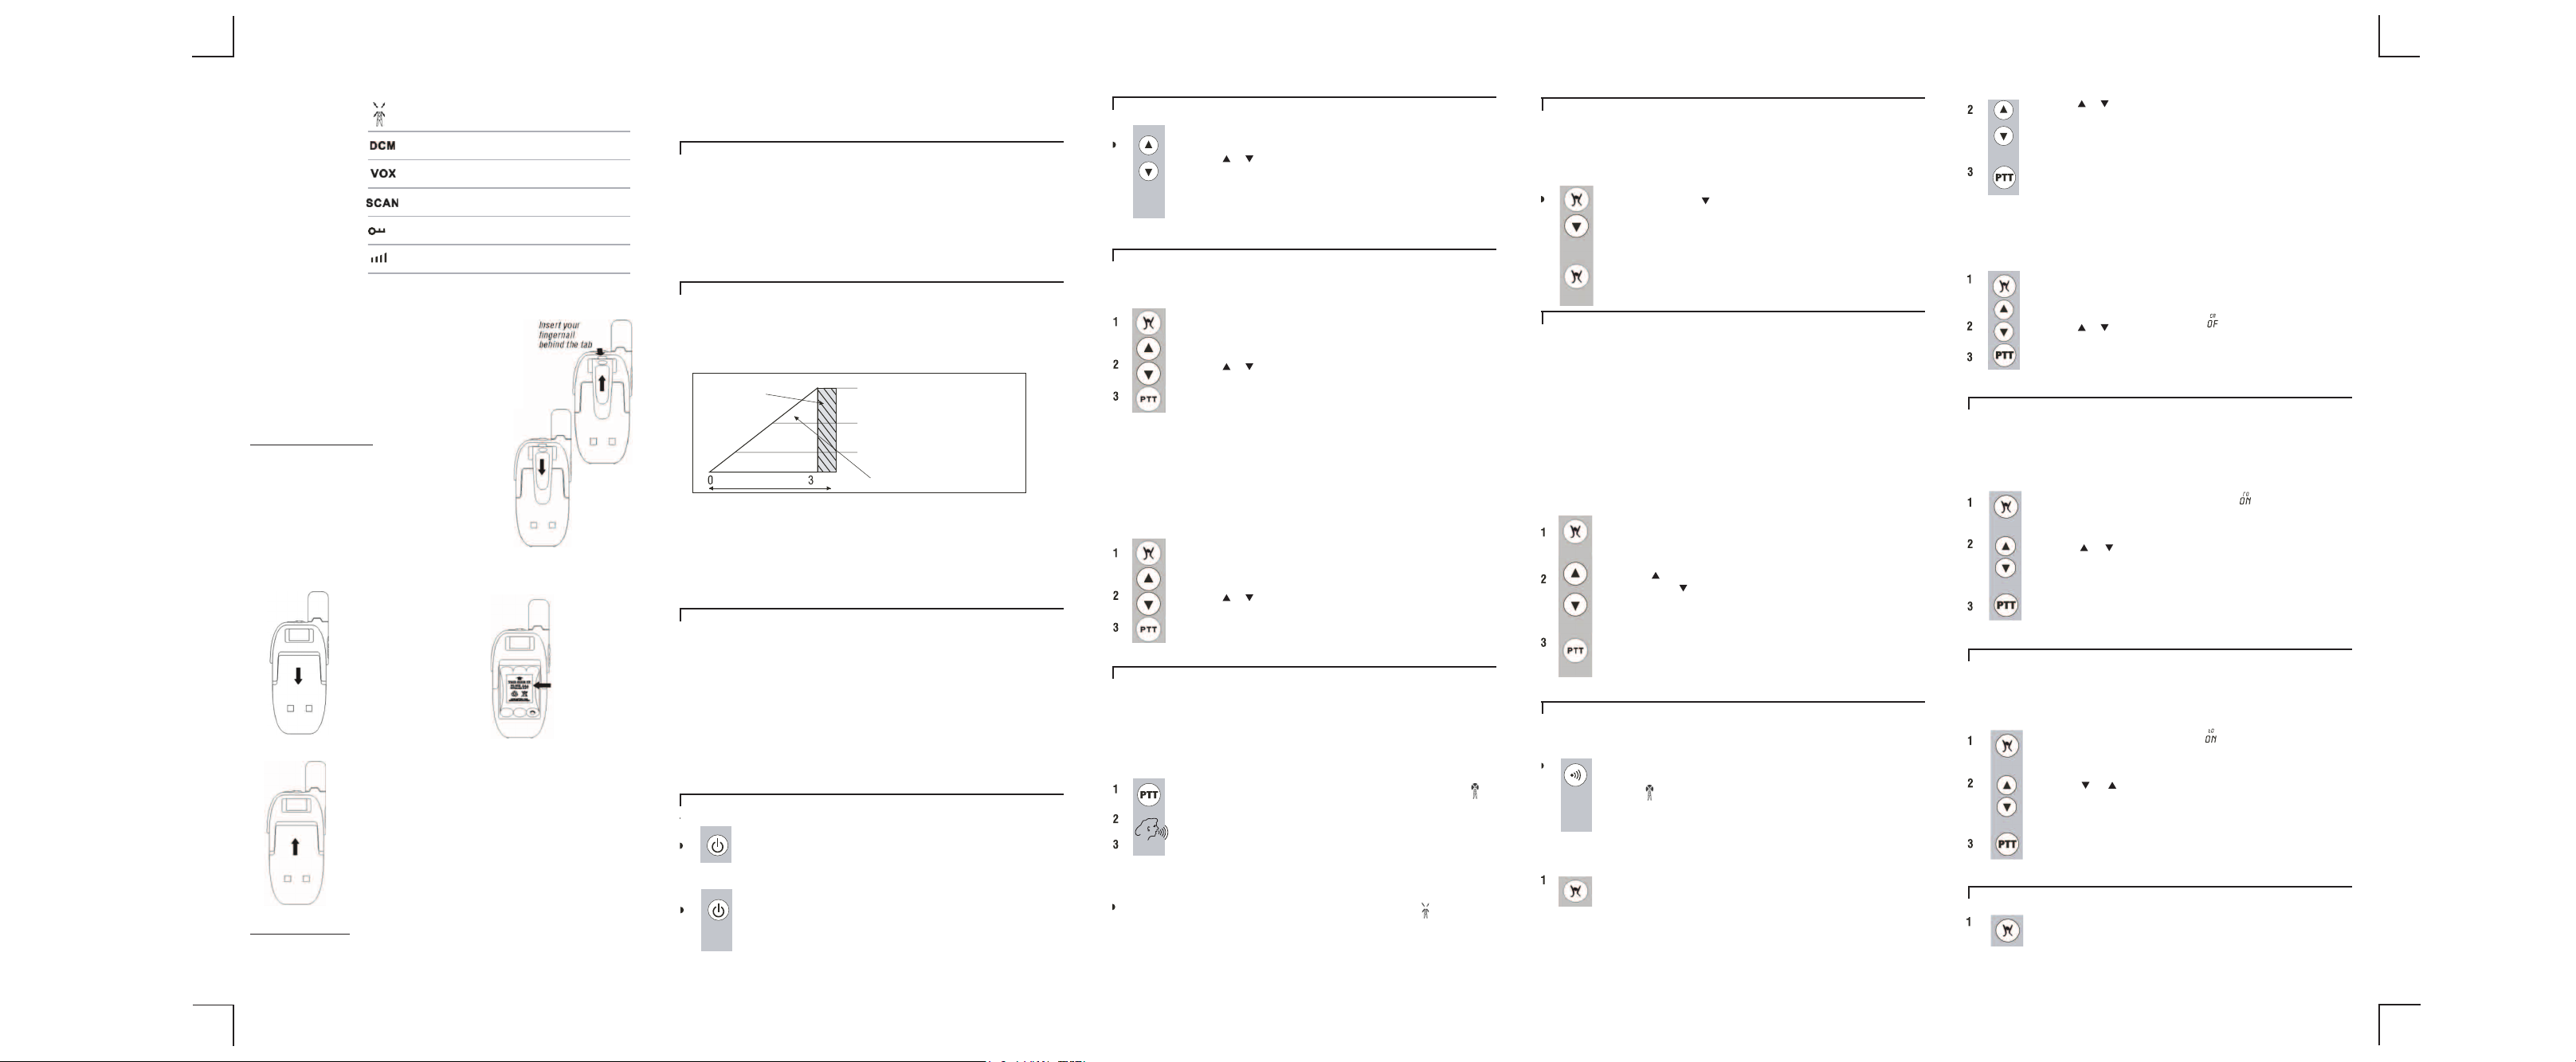
1. Installer les piles
Votre TW40 fonctionne avec 3 piles LR03/AAA
pour chaque talkie walkie (non fournies).
ongle derriere
la languette
Pour enlever l’attache ceinture
Il est plus facile d’installer le bloc pile sans l’attache.
Tirez la languette vers l’avant (en éloignant
l’appareil) pour détacher l’attache ceinture. Retirez
alors l’attache ceinture.
Pour insérer la batterie
1. Faites glisser le couvercle
du compartiment des piles.
3. Replacez le couvercle.
2. Insérez les 3 piles LR03/AAA
selon la polarité (signes +/-).
Pour remettre l’attache ceinture
Faites glisser l’attache dans la fente en cliquant.
ATTENTION : D’importantes interférences électromagnétiques ou des décharges électrostatiques
peuvent provoquer un dysfonctionnement ou une perte de données. Si l’appareil ne fonctionne pas
correctement, réinitialisez l’unité ou enlevez puis remettez les piles.
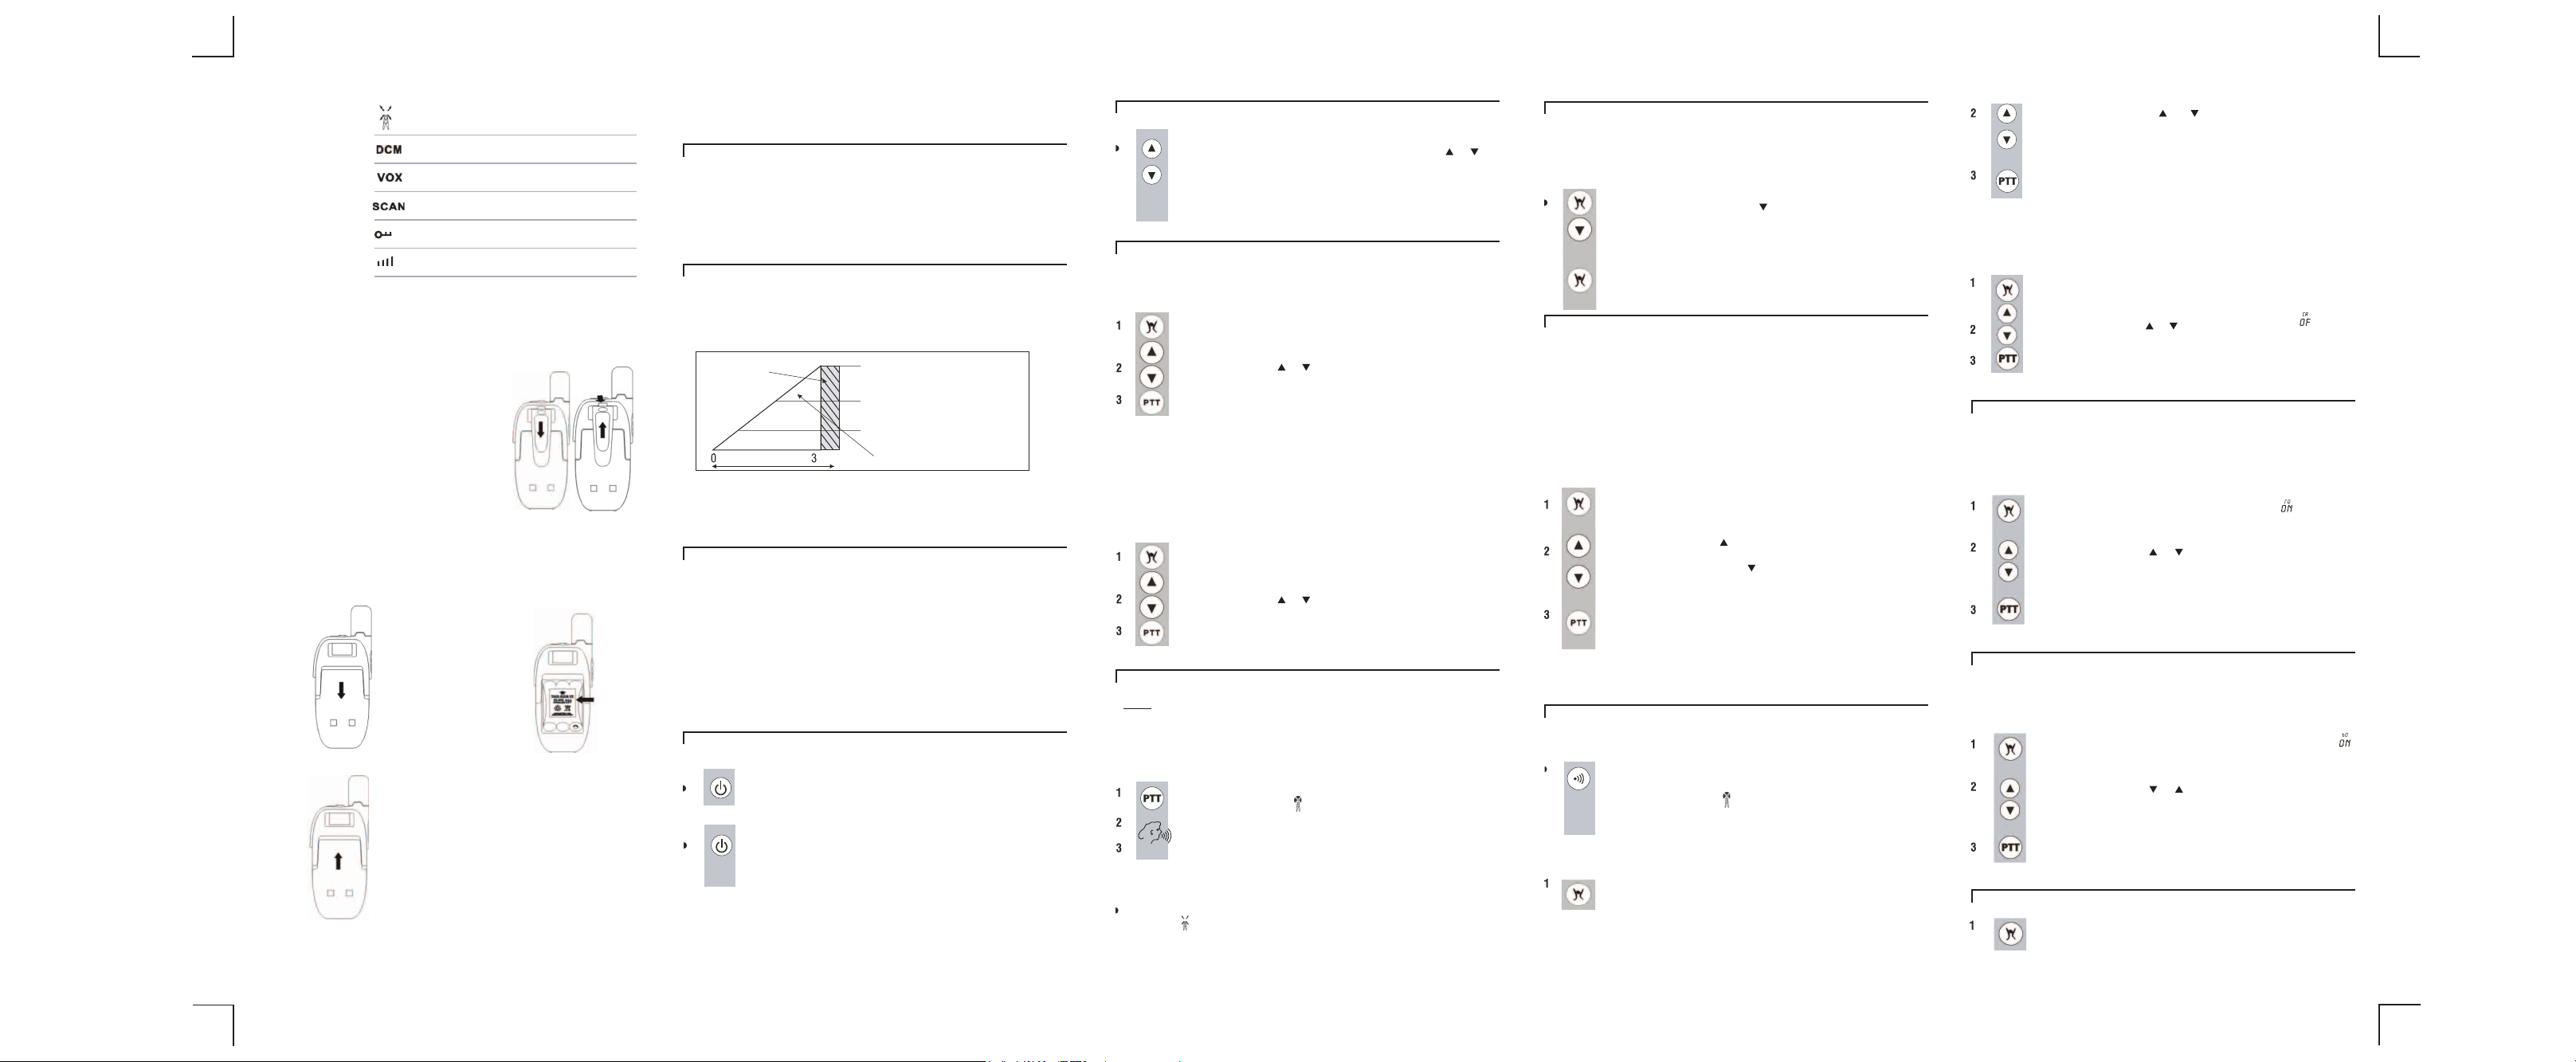
2. Utilisation du talkie-walkie "Personal Mobile Radio" (PMR)
Domaine de transmission
La portée de communication dépend de l’environnement et du terrain. Elle sera
maximum (jusqu’à 3 km environ) dans des grands espaces ouverts, sans obstacles, tels
que collines ou bâtiments. N’essayez pas d’utiliser deux talkies-walkies PMR à moins de
1,5 m de distance. Si vous le faites, vous pourrez avoir des interférences.
Domaine réel
La portée de transmission de ce produit dépend entièrement de l’environnement et du
terrain où il est utilisé. Le diagramme ci-dessous tente
performance à laquelle s’attendre lors de l’utilisation quotidienne du produit.
Force du Signal
Portée (Km)
! Le PRM446 est une bande radio libre (à licence ouverte au public). Identifiez vous
toujours quand vous transmettez, car d’autres personnes peuvent être en train de
communiquer sur le même canal.
Optimale (aire ouverte) (1)
Médium, obstruction du sol (2)
Aire très urbaine (3)
La pente de la portée
(Range Slope)
Règles de sécurité - IMPORTANT
• Si vous utilisez un casque d’écoute, ne réglez pas le volume au plus haut niveau afin
de protéger votre ouïe.
• Pour limiter l’exposition aux fréquences radio quand vous utilisez votre TW40,
tenez votre appareil au moins à 5 cm (2 pouces) de votre visage.
• N’utilisez jamais votre TW40 à l’extérieur pendant un orage.
• N’utilisez jamais votre TW40 sous la pluie.
• Si votre TW40 est très mouillé, éteignez–le et enlevez le bloc-pile. Séchez le
compartiment à piles et laissez ouvert quelques heures. N’utilisez pas le
talkie-walkie avant qu’il soit parfaitement sec.
• Ne pas laissez le TW40 à la portée de jeunes enfants.
Mettre en marche et arrêt le talkie-walkie (on/off)
Pour mettre en marche votre TW40 , appuyez et maintenez enfoncée la
touche Marche/Arrêt jusqu’à ce que le numéro du canal s’affiche et que
vous entendiez un ‘bip’.
Pour
éteindre le talkie-walkie (ou le mettre en veille), appuyez et maintenez
enfoncée la touche Marche/Arrêt jusqu’à ce que le numéro du canal
disparaisse de l’affichage.
Vous entendrez une tonalité musicale à chaque fois pour confirmer.
de guider l’utilisateur sur la
Contrôle du volume
Pour régler le volume du haut-parleur : appuyez sur la touche
Le niveau du volume est indiqué par les barres sur l’affichage.
Vous pouvez régler le volume pendant que vous utilisez votre TW40 ou
pendant que l’appareil est en veille (allumé, mais non utilisé).
ou .
Changement de canaux et sous-canaux
Le TW40 a huit canaux, numérotés de 1 à 8. Pour communiquer avec d’autres
utilisateurs PMR à portée, vos talkies-walkies doivent être toujours réglés sur un même
canal.
Appuyez une fois sur la touche MENU.
Le numéro de canal actuel clignote sur l’affichage.
Appuyez sur la touche
Appuyez sur la touche PTT pour confirmer.
Chaque canal a aussi 38 sous-canaux (parfois appelés codes CTCSS) vous permettant
d’organiser des groupes d’utilisateurs sous un même canal pour une communication
plus privée. Si vous avez réglé un sous-canal, vous pouvez seulement communiquer
avec les utilisateurs étant sur le même canal et sous-canal.
Pour désactiver la fonction du sous-canal, veuillez régler le sous-canal sur 0 (zéro).
Vous pourrez alors communiquer avec tout utilisateur étant sur le même canal et ayant
aussi désactivé la fonction sous-canal (ou avec les utilisateurs n’ayant pas cette
fonction sur leur talkie-walkie).
Appuyez deux fois sur la touche MENU.
Le numéro de sous-canal actuel clignote sur l’affichage.
Appuyez sur la touche
Appuyez sur la touche PTT pour confirmer.
ou pour accéder au canal que vous souhaitez.
ou pour accéder au canal que vous souhaitez.
Transmettre et recevoir
Note : La transmission PMR est ‘un-sens-à-la-fois’. Pendant que vous parlez, vous ne
pouvez pas recevoir de transmission.
La transmission PMR est sur fréquence ouverte. Identifiez-vous toujours avant de
parler comme d’autres utilisateurs pourraient être sur le même canal.
Pour parler à un autre utilisateur de talkie-walkie :
Appuyez sur la touche PTT et maintenez-là enfoncée, pour que le
symbole de transmission ( ) s’allume sur l’affichage.
Parlez clairement dans le microphone, d’une voix normale. Ne criez pas.
Quand vous avez fini de parler, relâchez la touche PTT (parler).
Pour écouter un autre utilisateur de talkie-walkie :
Assurez vous que vous n’appuyez pas sur la touche PTT (parler). Le symbole de
réception ( ) est indiqué sur l’affichage, quand l’autre personne parle. N’essayez
pas de transmettre avant qu’elle ait fini.
Surveillance du canal actuel
Normalement, le TW40 ne capte pas de signaux très faibles. Vous pouvez toutefois
surveiller tous les bruits sur le canal actuel.
Pour activer la surveillance du canal actuel
Appuyez sur les touches MENU et
Votre appareil captera tous les signaux sur le canal actuel, y compris les
bruits de fond.
Appuyez sur la touche MENU pour terminer la surveillance.
simultanément.
Mode VOX (transmission main-libre)
Dans le mode VOX, votre talkie-walkie fera une transmission, chaque fois qu’il
détecte votre voix (ou une autre voix), sans avoir appuyé sur la touche PTT (parler).
Il transmettra pendant 2 secondes au moins, même si vous avez cessé de parler.
Le niveau de sensibilité VOX est représenté par des barres sur l’affichage. Au niveau
le plus haut (3), l’appareil captera des bruits faibles (y compris bruit de fond) ; au
niveau le plus bas, il ne captera que des sons forts. Pour plus de discrétion, vous
pouvez utiliser un kit main-libres (non inclus). Pour ce faire, branchez la prise du
casque dans la prise jack.
Pour couper et sélectionner le mode VOX :
Appuyez 3 fois sur la touche MENU.
VOX est affiché et
Appuyez sur la touche pour régler le niveau de sensibilité VOX
(maximum 3).
Si vous appuyez sur la touche
disparaisse de l’affichage, le mode VOX sera coupé.
Appuyez sur la touche PTT pour confirmer le réglage.
Tant que l’appareil est en mode VOX, VOX est affiché de façon fixe sur
l’affichage.
OF clignote sur l’affichage.
de façon répétée, jusqu’à ce que OF
Tonalité d’appel
Vous pouvez envoyer la tonalité d’appel vers d’autres appareils à portée et réglés sur le même
canal (ou sous-canal si applicable) pour les avertir que vous voulez communiquer avec eux.
Appuyez sur la touche CALL (appel) et relâchez-la.
Vous entendrez une tonalité durant environ deux secondes alors que le
symbole de transmission ( ) apparaît sur le panneau LCD.
Tout autre appareil à portée et réglé sur le même canal entendra la
tonalité d’appel et pourra décider de communiquer avec vous.
Choisir une tonalité d’appel
Appuyez 4 fois sur la touche MENU.
L’unité entrera en mode de réglage d’appel.
que 1 clignotera.
CR s’affichera à l’écran tandis
Appuyez sur les touches ou pour changer la tonalité d’appel
(5 différentes tonalité offertes), les tonalités peuvent être entendues
durant ce réglage.
Appuyez sur la touche PTT pour confirmer le réglage.
Désactiver la tonalité d’appel
Lorsque vous envoyez une tonalité d’appel, vous l’entendrez aussi sur votre
talkie-walkie. Si vous ne voulez pas l’entendre, suivez les instructions ci-dessous :
Appuyez 4 fois sur la touche MENU jusqu’à ce que l’unité entre en mode
de réglage de la tonalité d’appel.
Appuyez sur les touches
à l’écran.
Appuyez sur la touche PTT pour confirmer le réglage.
ou jusqu’à ce que vous voyiez s’afficher
Allumer/Eteindre le bip ‘Roger’
Le bip ‘Roger’ est une tonalité qui est transmise automatiquement lorsque la touche
PTT est relâchée. Elle permet d’indiquer à votre interlocuteur que vous avez terminé
de parler et que vous êtes désormais en mode de réception.
Pour activer/désactiver le bip ‘Roger ’
Appuyez 5 fois sur la touche MENU jusqu’à ce que
s'affiche à l’écran.
Appuyez sur les touches
désactiver (
Appuyez sur la touche PTT pour confirmer le réglage
‘OFF ’ apparaît à l’écran) la tonalité Roger.
ou pour activer (‘ON’ apparaît à l’écran) ou
Pour activer/désactiver le bip des touches
Cette fonction vous permet d’entendre un son ‘bip’ à chaque fois qu’une touche est
qu'une touche est pressée.
Pour allumer/éteindre le bip des touches
Appuyez 6 fois sur la touche MENU jusqu’à ce que vous voyiez
s’afficher à l’écran.
Appuyez sur les touches
désactiver (
Appuyez sur la touche PTT pour confirmer le réglage.
‘OFF ’ apparaît à l’écran) la tonalité des touches.
ou pour activer (‘ON ’ apparaît à l’écran) ou
Surveiller deux canaux à la fois (Dual Watch)
Appuyez 7 fois sur la touche MENU.
DCM apparaît sur l’affichage tandis que
‘OFF’ clignote.
Page 3

Select the desired 2nd channel by pressing or button.
Press the MENU button once to change the CTCSS code.
Press the
Press the PTT button to confirm the setting.
The display switches backwards and forwards between the two channels. If the handset
detects a signal on either channel, it will stop and receive it. As long as the unit is in Dual
watch mode, DCM is shown steadily on the display.
To end the Dual Watch mode
Press the MENU button seven times.
The channel number flashes on the display.
Press the
Press the PTT button to exit from the Dual Watch mode.
or buttons to select the desired CTCSS code.
or buttons until ‘OFF‘ is shown on the display.
Scanning Channels
When the Scan function is turned on, the handset will continuously scan through all eight
channels and all 38 sub-channels until it finds one on which another user is transmitting.
Press the MENU and the button at the same time.
SCAN appears on the display, and the handset begins to scan.
When a signal is detected, the unit will pause.
Press the
Press the
Press the PTT button to stop the scan and communicate.
button to continue scanning channels 1 to 8.
button to scan the Sub-channels.
Locking the buttons
With the buttons locked you can transmit (Talk), receive or monitor (MON) the current
channel. But you can't change the volume (
To lock the buttons:
Press and hold the MENU button until " " appears on the display.
To unlock the buttons:
Press and hold the MENU button until " " disappears from the display.
) or use the MENU button.
3. Cleaning and care
To clean your PMR, use a soft cloth dampened with water. Do not use cleaners or
solvent, which may cause damage not covered by the guarantee.
4. Technical specification
Operating frequency 446.00625 to 446.09375 MHz (eight channels)
Channel spacing 12.5 KHz
Channel
Interference Elimination Codes
(CTCSS - Continuous Tone Coded Squelch System)
Code
Frequency (Mhz)
Channel
CodeFrequency (Hz)
Frequency (Mhz)
Frequency (Hz)
5. Declaration of conformity
We, Lexibook S.A
2, avenue de Scandinavie, 91953 Courtaboeuf Cedex, France
declare under our sole responsibility that the product
Kind of product: Walkie-Talkie
Type number: TW40
to which this declaration relates, is in conformity with the following standards and/or
other normative documents.
ETSI EN300 296-2: 2001
EN301489: 2002
EN60065: 1998
We hereby declare that the above named product is in conformity to all the essential
requirements of Directive 1999/5/EC.
Yiu Wai Man
Responsible for Research and Development
6. Troubleshooting
Problem Possible cause — solution
No power.
Weak reception/
no reception/
noisy reception.
Cannot change
channels.
In VOX mode, the
handset transmits
ali the time.
In VOX mode, the
handset doesn't
transmit.
• Battery is low or not fitted correctly → check
• PMR is not switched on
• Battery is low or not fitted correctly
• Other user is not within range
• PMR are not tuned to the same channel
• Noisy reception is more likely when using high numbered
sub-channels
channel, agreeing it with the rest of your group first
• Volume level is too low
•
→
Speak in a normal voice, 5-8cm (2-3 inches ) away
from the microphone
• Local conditions are impairing reception
different location away from obstructions and as high
as possible
• Other user is not transmit ting → check
• Other user is too close
• There's interference from other users on the same
channel
→
agree to use a different channel
• PMR is locked → check
• Battery is low or not fitted correctly
• Background noise is high → move to a quieter place
• VOX sensitivity is too high
• VOX sensitivity is too low → set it to a higher level
•
→
Speak in a louder voice, nearer to the microphone
→
check
→
check
→
check
→
try using a lower-numbered sub-
→
increase the volume
→
→
check
→
set it to a lower level
move to a
7. Guarantee and service
The Lexibook®TW40 is fully guaranteed for 1 year from the date of purchase.
The guarantee does not cover damage by misuse or negligence, or by excessive
voltages.
When you first unpack your Lexibook
any damage, don’t use the handsets — return the whole system to where you
bought it.
If your Lexibook
solve the problem, return the whole system to where you bought it.
Lexibook®operates a policy of continuous product improvement, and so
reserves the right to make changes to the product and functions without notice.
The equipments is intended for used in:
Reference: TW40
©2010 LEXIBOOK®
Designed and developed in Europe - Made in China
United Kingdom & Ireland
For any further information, please call Helpline: 0808 1003015
www.lexibook.com
Environmental Protection
Unwanted electrical appliances can be recycled and should not be
discarded along with regular household waste! Please actively support
the conservation of resources and help protect the environment by
returning this appliance to a collection centre (if available).
®
TW40 develops a fault, first check the points above. If you cannot
Austria Finland Latvia Spain
Belgium France Liechtenstein Sweden
Bulgaria Germany Luxembourg Switzerland
Croatia Greece
Cyprus Hungary Norway UK
Czech Iceland Poland Romania
Denmark Ireland Portugal
Estonia ltaly Slovenia
®
TW40, check for visible damage. If you see
The Netherlands
This product is
not a toy.
Turkey
Walkie-Talkie
MENU button
Press to change
channels and
sub-channels and
to switch between
modes
PTT button
Press and hold while
you are transmitting.
ON/OFF button
What's on the display
TW40
User Guide
Socket for hands-free kit (Socket)
Under the hinged
cover.
CALL button
Press to send Ring
tones to other handsets.
and buttons
Press to change
the speaker
volume. Press
after menu
button to change
the channels.
Microphone
If the unit power ON
Channel number (1 to 8)
Sub-channel number (0 to 38)
Battery charge level. When the bars reduce, the battery
needs charging.
Shown when you are transmitting the signal.
Page 4
Shown when you are receiving the signal
Dual watch - shown when you are monitoring two
channels at once
Shown when the unit is in VOX (voice activated
mode)
Shown when the unit is scanning all channels
Shown when the buttons are locked
Volume level
1. Fitting the batteries
Your TW40 works with 3 x LR03/AAA batteries for each
walkie-talkie (not included).
To remove the belt clip
It is easier to fit the batteries without the belt clip in place.
Pull the tab forward (away from the handset) to
release the belt clip. Then lift the belt clip off.
To fit the batteries
1. Slide down the battery
compartment cover.
3. Replace the cover.
To fit the belt clip
Slide the belt clip down into the slot until it clicks into place.
WARNING: Mal-function or loss of memory may be caused by strong frequency interference or
electrostatic discharge. Should any abnormal function occur, reset the unit or remove the
batteries and insert them again.
2. Insert the 3 x LR03/AAA
batteries according to the
polarity (+/- signs).
2. Using the Personal Mobile Radio (PMR)
Transmitting range
The talk range depends on environmental and terrain. It will be greatest (up to about 3km
or 1 3/4 miles) in wide open spaces, without obstructions such as hills or buildings. Don't
try to use two PMR handsets which are less than 1.5m (5 feet) apart. lf you do, you may
get interference.
! PMR446 is an open-license band - always identify yourself when transmitting, as other
people may be communicating on the same channel.
Effective Range
The Transmission range of the product is wholly dependent on the environment or
terrain in which it is being used, the following diagram attempts to guide the user on the
sort of performance to expect in everyday use.
Signal Strength
Range (Km)
Range Check
The transmission range will be affected as shown in the diagram above. The transmit
ting range typical values for different environment conditions will be (1) 3km (2)
1.5km (3) 750m. It should be remembered that these are only guide values as actual
achieved distances will be dependent on the environment and terrain.
Important safety warning
• If you are using a head set, to protect your hearing, do not turn the volume to the
highest level .
• To reduce radio frequency exposure when you're using your TW40, hold the
handset at least 5cm (2inches) from your face.
• Never use your PMR outdoors in a thunderstorm.
• Don't use your PMR in the rain.
If your PMR becomes wet, turn it off and remove the battery pack. Dry the battery
compartment and leave the battery cover off for a few hours.
Don't use the PMR until it is completely dry.
• Keep the PMR out of the reach of babies and young children.
To switch your PMR ON & OFF
To switch the PMR ON, press & hold the ON/OFF button until the Channel
number is displayed & you hear a beep.
To switch the PMR OFF
Press and hold the ON/OFF but ton until the channel display goes off.
You hear a musical tone each time to confirm.
Optimum (open area) (1)
Medium ground based obstruction (2)
Heavily built up area (3)
Range Slope
Volume control
To adjust the loudspeaker volume.
Press the
The volume level is shown by the bars on the display. You can change the
volume either While you're using your PMR handset, or while the handset
is idle (switched on but not in Use).
or button.
Changing the channels and sub-channels
Your PMR has eight channels, numbered 1 to 8. To communicate with other PMR users
within range, you must ali have your PMR tuned to the same channel.
Press the MENU button once.
The current channel number flashes on the display.
Press the
Press the PTT button to confirm the channel setting.
Each channel also has 38 sub-channels (Sometimes called CTCSS Codes) let ting you
set up groups of users within the same channels, for more private communication. If you
have set sub-channel, you can communicate only with other users tuned to the same
channel and sub-channel.
To turn the sub-channel function off, simply set the sub-channel to 0 (zero).Then you
can communicate with any PMR user on the same channel who also turned off
sub-channel operation(or whose PMR does not have the feature).
Press the MENU button twice
The current sub-channel number flashes on the display.
Press the
Press the PTT button to confirm the sub-channel setting.
or buttons to go to the channel you want.
or button to go to the sub-channel you want.
Transmitting and Receiving
! PMR transmission is 'one way-at-a-time' - while you are speaking, you cannot
receive a transmission.
! PMR is an open-license band - always identify yourself when transmitting, as other
people may be communicating on the same channel.
To speak to another PMR user:
Press and hold the PTT button so that the Transmitting symbol ( )
appear on the LCD panel.
Speak clearly into the microphone, in a normal tone - don't shout.
When you're finished speaking, release the PTT button.
To listen to another PMR user:
Make sure you are not pressing the PTT button Receiving symbol ( ) is shown on
the display when the other person is speaking. Don’t try to transmit until they have
finished.
Monitoring the current channel
Normally Your PMR will not pick up very weak signais. But you can monitor the
current channel for ali sounds.
To activate the monitoring feature
Press the MENU and
Your handset will pick up any signals on the current channel, including
background noise.
Press the MENU button to stop monitoring.
buttons at the same time.
VOX (voice activated transmission) mode
In VOX mode your PMR will transmit whenever it detects your Voice (or other noise)
without the PTT button having to be pressed. It will transmit for 2 seconds even if you
stop talking.
The level of VOX sensitivity is shown by numbers on the display. At the highest level
(level 3) , the handset will pickup softer noise (including background noise); at the
lowest level, it will pick up only quite loud noise.
For more discretion, you may use a handsfree kit (not included). Plug the
handsfree kit's socket into Mic/Spk jack.
To turn VOX mode ON and OFF:
Press MENU button three times.
The VOX icon is displayed and
Press the button to set the level of sensitivity (3 maximum).
If you press the
off.
Press the PTT button to confirm the set ting.
As long as the handset is in VOX mode, VOX is shown steadily on the
display.
button until OF appears on the display, VOX is turned
OF flashes on the LCD panel.
Ring tone
You can send ring tone to other handsets within range and tuned to the same channel,
(and sub-channel if applicable), to alert them you want to communicate with them.
Press and release the CALL button.
You can hear ring tone for about two seconds, while the transmitting
symbol ( ) appears on the LCD panel.
Any other PMR handset within the range and tuned to the same channel
will hear Ring tone, and may decide to transmit to you.
Setting Call-Ring tones
Press the Menu button 4 times.
The unit will enter Call-Ring set ting mode. The LCD will display CA while 1
is flashing.
Press the or button to change the Call-Ring tone.
(5 different tones), the different Call-Ring tone can be heard during
changing.
Press the PTT button to confirm your setting after you select your
desired Call-Tone.
Setting Call-Ring off
When you send a Cali Ring you also hear it on your handset. If you do not want to
hear it, follow the procedure below.
Press the MENU button 4 times, the unit enters Call-Ring setting mode.
Press the
Press the PTT button to confirm your setting.
or buttons until you see on the display.
Roger Beep ON/OFF setting
The Roger Beep is a tone which is automatically transmitted whenever the PTT button
is released. It lets the other person know that you have finished talking and you are now
in receiver mode.
To enable or disable the Roger Beep tone
Press the MENU button Five times until the flashing on the LCD
screen.
Press the
disable (
Press the PTT button to confirm the set ting.
or buttons to enable (‘ON’ will appear on the display) or
‘OFF‘ will appear on the display) the roger tone.
Key tone ON/OFF setting
This feature allows the PMR unit to sound a confirmation tone whenever keys are
pressed.
To turn the Key-Tone ON or OFF
Press the MENU button Six times. The icon flashes on the display.
Press the
disable (
Press PTT button to confirm your setting.
or buttons to enable (‘ON’ will appear on the LCD) or
‘OFF’ will appear on the LCD) the key tone feature.
DuaI Watch - Monitor the current channel plus one other at the same time
Press the MENU button 7 times.
DCM appears on the display while
‘OFF ’ is flashing.
Page 5
Seleccione el segundo canal utilizando las teclas
Pulse la tecla Menú una vez para cambiar el código CTCSS.
Utilice las teclas
Pulse la tecla PTT para confirmar el ajuste.
En la pantalla, el número de canal cambiará continuamente entre el canal actual y el
canal seleccionado para monitorizar. Si el terminal detecta señal en alguno de los dos
canales, quedará fijo en la pantalla ese número de canal y la unidad recibirá por ese
canal. Mientras la unidad esté en modo de escucha dual, el texto DCM permanecerá fijo
en la pantalla.
Para desactivar la escucha dual
Pulse siete veces la tecla Menú.
En la pantalla parpadeará el número de canal.
Pulse la tecla
Pulse la tecla PTT para salir del modo de escucha dual.
o para seleccionar el código CTCSS deseado.
o hasta que aparezca el símbolo
o .
‘OFF ‘ en la pantalla.
Rastreo de canales
Cuando está activada la función de rastreo de canales, la unidad estará continuamente
rastreando los 8 canales y los 38 subcanales hasta que encuentre uno por el cual esté
transmitiendo algún usuario.
Pulse las teclas Menú y
En la pantalla se mostrará SCAN y el terminal comenzará a rastrear los
canales. Cuando se encuentre señal, el rastreo se detendrá.
Pulse la tecla
Pulse la tecla
Pulse la tecla PTT para detener el rastreo y comunicar.
al mismo tiempo.
para continuar rastreando los demás canales.
para rastrear los subcanales.
Bloqueo del teclado
Con el teclado bloqueado se puede transmitir (PTT), recibir o monitorizar (MON) en el
canal actual. Pero no puede cambiar el volumen (
Para bloquear el teclado
Mantenga pulsada la tecla Menú hasta que aparezca el símbolo en
la pantalla.
) ni utilizar la tecla Menú.
3. Mantenimiento y cuidado de la unidad
Para limpiar la unidad utilice un paño suave humedecido solo con agua. No utilice
detergentes ni disolventes ya que podrían producir daños en la unidad no cubiertos
por la garantía.
4. Especificaciones técnicas
Frecuencia de operación 446,00625 a 446,09375 MHz (8 canales).
Separación entre canales 12,5 kHz.
Canal
Códigos de supresión de interferencias
(CTCSS – Continuos Tone Coded Squelch System)
Código
Frecuencia (MHz)
Canal
CódigoFrecuencia (Hz)
Frecuencia (MHz)
Frecuencia (Hz)
5. Declaración de conformidad
Nosotros, Lexibook S.A
2, avenue de Scandinavie, 91953 Courtaboeuf Cedex, Francia
declaramos bajo nuestra
Tipo de producto : Walkie Talkie
Referencia de producto : TW40
al cual esta declaración hace referencia,está en conformidad con los siguientes
estándares y/o otros documentos normativos:
ETSI EN300 296-2 : 2001
EN301489 : 2002
EN60065 : 1998
Declaramos que el producto arriba citado está en conformidad a todos los
requerimientos esenciales de la Directiva 1999/5/EC.
El producto arriba citado tiene restricciones de uso en los siguientes países :
Croacia, República de Yugoslavia y República de Macedonia.
Yiu Wai Man
Responsable Investigación y Desarrollo produit
6. Resolución de problemas
Problema Posible causa — Resolución
No se enciende
Recepción débil /
No hay recepción /
Recepción con ruido
No se puede
cambiar de canal
En modo VOX, el
terminal transmite
continuamente
En modo VOX
el terminal no
transmite
• La batería está baja o no esta colocada correctamente → comprobar
• No ha encendido la unidad → comprobar
• La batería está baja o no esta colocada correctamente → comprobar
• El interlocutor está fuera del rango de transmisión → comprobar
• El PMR no está sintonizado al mismo canal → comprobar
• La recepción con ruido es más probable con subcanales de número alto →
intente utilizar subcanales más bajos después de acordarlo con el resto
de componentes del grupo
• El nivel de volumen está muy bajo → pruebe a subir el nivel de volumen
• → Hable en un tono normal a una distancia de 5 a 8 cm (2 a 3
pulgadas) del micrófono
• Las condiciones locales dificultan la recepción → sitúese en otro lugar,
más apartado de edificios y más alto a ser posible
• El interlocutor no está transmitiendo → comprobar
• El interlocutor está demasiado cerca → comprobar
• Se están produciendo interferencias debidas a otros usuarios que se
comunican por el mismo canal → acuerden utilizar un canal diferente
• Hay mucho ruido de fondo → colóquese en un lugar mas silencioso
• La sensibilidad del modo VOX está ajustada a un nivel demasiado alto →
ajústela a un nivel mas bajo
• La sensibilidad del modo VOX está ajustada a un nivel demasiado bajo →
ajústela a un nivel mas alto
• → hable más alto y más cerca del micrófono
• La sensibilidad del modo VOX está ajustada a un nivel demasiado bajo →
ajústela a un nivel mas alto
• → hable más alto y más cerca del micrófono
7. Garantía
NOTA: Conserve este manual de instrucciones ya que contiene informaciones de
importancia.
Este producto está cubierto por nuestra garantía de un año. Para hacer uso de
esta garantía o del servicio post-venta, debe de dirigirse al lugar de compra provisto
con la prueba de haber realizado la misma. Nuestra garantía cubre los vicios de
material o del montaje imputable al fabricante con la exclusión de cualquier deterioro proveniente del no respeto del modo de uso o de la intervención inadecuada sobre
el artículo (tales como desmontaje, exposición al calor o a la humedad…).
En nuestro constante afán de superación, podemos proceder a la modificación de los
colores y detalles del producto mostrado en el embalaje.
• El contenido de este manual está sujeto a cambios sin previo aviso.
• No podrá reproducirse ninguna parte de este manual, en ninguna forma, sin la
previa autorización por escrito del fabricante.
Este equipo está destinado para su uso en:
Austria Finlandia Latvia España
Bélgica Francia Liechtenstein Suecia
Bulgaria Alemania Luxemburgo Suiza
Croacia Grecia Países Bajos Turquía
Chipre Hungría Noruega Reino Unido
República Checa
Dinamarca Irlanda Portugal
Estonia Italia Eslovenia
Referencia: TW40
©2010 LEXIBOOK®
Diseñado y desarrollado en Europa – Fabricado en China
España
Servicio atención al cliente: 902367933
www.lexibook.com
Protección medioambiental
¡Los aparatos eléctricos pueden ser reciclados y no deben ser
desechados junto con la basura doméstica habitual! Apoye activamente el
aprovechamiento racional de los recursos y ayude a proteger el medio
ambiente enviando este producto a un centro de recolección para reciclaje
(en caso de estar disponible).
Islandia Polonia Rumanía
Este producto no
es un juguete.
Radio portátil personal (PMR)
Tecla Menú
Pulse para cambiar
canales y subcanales, y
para cambiar de modo.
Botón PTT
Manténgalo pulsado para
hablar.
Tecla On/Off
Información en la pantalla
Si la unidad está encendida
Nivel de carga de la batería. Deberá recargar la batería
cuando el número de barras disminuya.
Se muestra cuando la unidad está transmitiendo señal.
Manual de uso
Conectores para manos libres
Bajo cubierta abatible.
Número de canal (1 a 8)
Número de subcanal (0 a 38)
TW40
Tecla Llamar
Pulse para enviar
tonos de llamada a
otros terminales.
Teclas Arriba
volumen del altavoz. Pulse
después de la tecla Menú
para cambiar los canales.
y Abajo
Pulse para cambiar el
Micrófono
Para desbloquear el teclado
Mantenga pulsada la tecla Menú hasta que desaparezca el símbolo
en la pantalla.
Page 6

Se muestra cuando la unidad está recibiendo señal.
Escucha dual – Se muestra cuando está
monitorizando dos canales a la vez.
Se muestra cuando la unidad está en modo VOX
(activación por voz)
Se muestra cuando la unidad está rastreando los
canales.
Se muestra cuando las teclas están bloqueadas.
Nivel de volumen.
1. Instalación de las baterías
El TW40 funciona con 3 pilas AAA/LR03 para cada
walkie-talkie.
Inserte la uña
debajo de la
pestaña
Para remover el pasador para el cinturón
Es más fácil instalar la batería con el pasador para el
cinturón quitado.
Tire hacia delante de la pestaña (hacia fuera del
terminal) para liberar el pasador. Extraiga entonces
el pasador.
Suelte el
pasador
Para colocar la batería
1. Deslice hacia abajo la
cubierta del compartimento
de la batería.
3. Vuelva a colocar la tapa.
2. Coloque las 3 pilas de tipo
LR03/AAA respetando la
polaridad (símbolos +/-)
indicada en el compartimento.
Para colocar el pasador para el cinturón
Desplace el pasador hacia abajo hasta que encaje en su posición.
ADVERTENCIA: Interferencias fuertes de señales de radio o descargas electrostáticas pueden
provocar un mal funcionamiento de la unidad o que se pierda el contenido de la memoria. En caso de
que se produzca un funcionamiento anormal, reinicie la unidad o retire y vuelva a colocar las pilas.
2. Utilización de la radio móvil personal (PMR)
Rango de transmisión
El rango de transmisión depende de las circunstancias ambientales y del terreno. Será
mayor (hasta 3 km o 1 3/4 millas) en espacios abiertos, sin obstáculos como edificios o
montes. No intente usar dos terminales que estén más cerca que 1,5 m (5 pies).
Pueden producirse interferencias.
Rango efectivo
El rango de transmisión de este producto depende completamente de las condiciones
ambientales y del terreno en que se esté utilizando. El siguiente diagrama pretende dar
una indicación del alcance de la emisión en el uso cotidiano.
Fuerza de la señal
Rango (km)
Estimación de la cobertura
El rango de transmisión se verá afectado como se muestra en el diagrama anterior.
Los rangos de transmisión típicos varían son, para diferentes condiciones ambientales,
(1) 3 km, (2) 1,5 km, (3) 750 m. Debe tenerse en cuenta que estos valores son
únicamente ilustrativos, y que los valores reales dependerán en cada situación de las
condiciones mencionadas.
Advertencias importantes de seguridad
• Si utiliza auriculares, no ponga el volumen al máximo ya que puede ser peligroso
para sus oídos.
• Para reducir la exposición a radiofrecuencias cuando utilice el TW40, coloque el
terminal por lo menos a 5 cm (2 pulgadas) de su cara.
• Nunca utilice el PMR en exteriores en condiciones de tormenta.
• No use el PMR bajo la lluvia.
• Si el PMR se mojase, apáguelo y retire la batería. Seque el compartimento de
la batería y deje la puerta del compartimento sin poner durante unas pocas
horas. No utilice el PMR hasta que esté completamente seco.
• Mantenga el PMR fuera del alcance de bebés y niños pequeños.
Para encender y apagar el PMR
Para encender el PMR mantenga pulsada la tecla ON/OFF hasta que se
muestre el número de canal y se oiga un pitido.
Óptima (espacios abiertos) (1)
Obstáculos terrestres medios (2)
Areas con muchos edificios (3)
Curva de rango
Para apagar el PMR mantenga pulsada la tecla ON/OFF hasta que
desaparezca de la pantalla el número de canal.
Oirá una tono musical de confirmación.
Control de volumen
Para ajustar el volumen del altavoz pulse las teclas y .
El nivel de volumen se muestra mediante barras en la pantalla.
Puede cambiar el volumen bien cuando está utilizando el PMR o bien
cuando está inactivo (encendido pero sin uso).
Cambio de canales y subcanales
El PMR tiene 8 canales, numerados de 1 a 8. Para comunicarse con otros usuarios de
PMR situados dentro del rango de emisión, todos los PMR deben estar sintonizados en
el mismo canal.
Pulse la tecla Menú una vez.
El numero de canal actual parpadeará en la pantalla.
Utilice las teclas
Pulse la tecla PTT para confirmar el ajuste de canal.
Cada canal tiene 38 subcanales (a veces llamados códigos CTCSS), que le permiten
formar grupos de usuarios dentro de un mismo canal para tener una mayor privacidad.
Si configura la comunicación para utilizar subcanales, podrá comunicarse únicamente
con usuarios que utilicen el mismo canal y subcanal.
Para desactivar la función de subcanal simplemente ajuste el subcanal a 0.
Entonces podrá comunicarse con cualquier usuario de PMR que esté en el mismo
canal y que también tenga desactivada la función de subcanal (o bien, con
aquellos que no tengan esa función).
Pulse la tecla Menú dos veces.
En la pantalla parpadeará el número del actual subcanal.
Utilice las teclas
Pulse la tecla PTT para confirmar la selección de subcanal.
o para seleccionar el canal deseado.
o para seleccionar el número de subcanal deseado.
Transmitir y recibir
! La transmisión PMR es una transmisión de un único sentido en cada momento – no
puede recibir al mismo tiempo que está transmitiendo.
! PMR es una banda de licencia abierta – identifíquese siempre cuando transmita, ya
que otras personas pueden estar comunicándose por el mismo canal.
Para hablar a otro usuario de PMR
Mantenga pulsada la tecla PTT de manera que aparezca en la
pantalla el símbolo de transmisión ( ).
Hable con claridad al micrófono, en un tono normal – no grite.
Cuando haya terminado de hablar suelte la tecla PTT .
Para escuchar a otro usuario de PMR
Asegúrese de que no está pulsando la tecla PTT .
Mientras la otra persona esté hablando, en la pantalla LCD se mostrará el símbolo
. No intente transmitir hasta que el interlocutor haya terminado de hablar.
Monitorización del canal actual
Normalmente, el PMR no captará señales muy débiles. Pero usted puede monitorizar
todas las señales que se reciben en el canal actual.
Para activar la función de monitorización
Pulse al mismo tiempo las teclas Menú y
El terminal captará cualquier señal que se reciba por el canal actual,
incluyendo ruido de fondo.
Pulse la tecla PTT para detener la función de monitorización.
.
Modo VOX (transmisión activada por voz)
En modo VOX el PMR transmitirá automáticamente en cualquier momento que
detecte su voz (u otro sonido) sin que pulse la tecla Talk. La transmisión será de 2
segundos, incluso si deja de hablar antes.
El nivel de sensibilidad del modo VOX se muestra en la pantalla mediante números.
En el nivel más alto, el 3, el terminal reaccionará ante sonidos débiles, incluyendo
ruido de fondo. En el nivel más bajo, reaccionará únicamente ante sonidos más bien
fuertes. Para mayor discreción, puede utilizar un kit de manos libres (no incluido).
kit se conecta en la clavija Mic/Altavoz.
El
Para activar y desactivar el modo VOX
Pulse 3 veces la tecla Menú.
En la pantalla se mostrará el icono VOX el símbolo
Pulse la tecla para seleccionar la sensibilidad (máximo 3).
Si pulsa la tecla
se desactiva.
Pulse la tecla PTT para confirmar el ajuste.
Mientras el modo VOX este activado, el símbolo VOX aparecerá fijo en la
pantalla.
hasta que OF desaparezca de la pantalla, el modo VOX
OF parpadeando.
Tono de llamada
Puede enviar tonos de llamada a otros terminales que estén sintonizados en el mismo canal
(y subcanal si es el caso), para hacer saber a otros usuarios que quiere comunicar con ellos.
Pulse y suelte la tecla Call.
Oirá un tono de llamada durante dos segundos aproximadamente,
mientras el símbolo de transmisión ( ) se muestra en la pantalla LCD.
Cualquier otro PMR que esté dentro del alcance de transmisión y
sintonizado en el mismo canal, oirá la señal de llamada y podrá contestar.
Ajuste de tonos de llamada
Pulse la tecla Menú 4 veces.
La unidad entrará en el modo de “ajuste de tono de llamada”. La pantalla
LCD mostrará el símbolo
CR y el número 1 parpadeando.
Pulse la tecla o para cambiar el tono de llamada (hay 5 tonos
diferentes). Al pasar de un tono a otro se oirá el tono nuevo.
Una vez seleccionado el tono deseado, pulse la tecla PTT para confirmar
el ajuste.
Para desactivar el sonido del tono de llamada
Normalmente, cuando emite el tono de llamada, en la propia unidad oirá también el
sonido de la llamada. Si prefiere que no se oiga, siga este procedimiento:
Pulse la tecla Menú 4 veces. La unidad entrará en el modo de “ajuste de
tono de llamada”.
Pulse la tecla
Pulse la tecla PTT para confirmar el ajuste.
o hasta que aparezca el símbolo en la pantalla.
Activación y desactivación del tono roger
El tono roger es un pitido que se transmite automáticamente cuando se suelta la tecla
PTT, para indicar que hemos terminado de hablar y que hemos pasado al modo de
recepción.
Para activar o desactivar el tono roger:
Pulse la tecla Menú 5 veces hasta que el símbolo se muestre
parpadeando en la pantalla.
Pulse las teclas
desactivar el tono roger (se mostrará
Pulse PTT para confirmar el ajuste.
o para activar (se mostrará ‘ON’ en la pantalla) o para
‘OFF‘ en la pantalla).
Activar y desactivar sonido de las teclas
Puede seleccionar que el PMR emita un tono cada vez que se pulsa una tecla.
Para activar o desactivar esta función:
Pulse seis veces la tecla Menú. En la pantalla se mostrará el icono
parpadeando.
Pulse las teclas Arriba o Abajo para activar (se mostrará ‘ON’ en la
pantalla) o para desactivar el tono del teclado (se mostrará
pantalla).
Pulse PTT para confirmar el ajuste.
‘OFF’ en la
Escucha dual – Monitorización de otro canal además del actual
Pulse siete veces la tecla Menú.
En la pantalla aparecerá DCM y el símbolo
‘OFF’ parpadeando.
Page 7

Escolha o segundo canal desejado premindo o botão
Prima uma vez o botão MENU para alterar o código CTCSS.
Prima os botões
Prima o botão PTT para confirmar a configuração.
O ecrã alterna entre os dois canais. Se a unidade detectar um sinal nalgum dos canais,
irá parar e recebê-lo. Enquanto a unidade estiver no modo de dupla sintonização, é
apresentada constantemente a mensagem DCM.
Para terminar o modo de Dupla Sintonização
Prima o botão MENU sete vezes. O número do canal pisca no ecrã.
Prima os botões
Prima o botão PTT para sair do modo de Dupla Sintonização.
ou para escolher o código CTCSS desejado.
ou até que seja apresentado [OFF ] no ecrã.
ou .
Sintonizar Canais
Quando a função de sintonização estiver ligada, a unidade irá procurar continuamente
pelos oito canais e 38 sub-canais até que encontre um que outro utilizador esteja a
utilizar.
Prima o botão MENU e o botão
SCAN no ecrã e a unidade começa a sintonizar.
Quando for encontrado um sinal, a unidade pára.
Prima o botão
Prima o botão
Prima o botão PTT para parar a sintonização e comunicar.
para continuar a busca entre os canais 1 a 8.
para fazer a busca entre os sub-canais.
em simultâneo. Aparece a mensagem
Bloquear os botões
Com os botões bloqueados, pode transmitir (falar), receber ou monitorizar (MON) o
actual canal, mas não pode mudar o volume [
Para bloquear os botões
Prima e mantenha premido o botão MENU
ecrã.
Para desbloquear os botões
Prima e mantenha premido o botão MENU
ecrã.
] ou usar o botão MENU.
até que [ ] apareça no
até que [ ] desapareça no
3. Limpeza e cuidados
Para limpar o seu TW40, use um pano suave ligeiramente embebido em água.
Não use detergentes ou solventes , que podem causar danos que não estão
cobertos pela garantia.
4. Características técnicas
Frequência de funcionamento: 446.00625 a 446.09375 MHz (oito canais)
Espaçamento do canal: 12.5 KHz
Canal
Códigos de Eliminação de Interferências
(CTCSS – Sistema Silenciador Codificado por Tom Contínuo)
Código
Frequência (Mhz)
Canal
CódigoFrequência (Hz)
Frequência (Mhz)
Frequência (Hz)
5. Declaração de conformidade
Nós, Lexibook S.A
2, avenue de Scandinavie, 91953 Courtaboeuf Cedex, França
declaramos sob nossa única responsabilidade que o produto
Tipo de Produto: Walkie-Talkie
Número: TW40
com o qual esta declaração se relaciona,está em conformidade com os seguintes
padrões e/ou outros documentos normativos:
ETSI EN300 296-2 : 2001
EN301489 : 2002
EN60065 : 1998
Nós declaramos,por este meio,que o produto acima referido está em conformidade
com todos os requerimentos essenciais da Directiva 1999/5/EC.
Yiu Wai Man
Chefe de investigação e desenvolvimento de produtos
6. Resolução de Problemas
Problema Possível causa — Solução
Não há energia
Recepção fraca/
Sem recepção/
Recepção com
ruídos.
Não consigo
mudar de canais.
No modo VOX,
a unidade está
sempre a
transmitir.
No modo VOX,
a unidade não
transmite.
Não consigo
carregar as pilhas.
A bateria está fraca ou não foi colocada correctamente — Verifique.
O PMR não está ligado — Verifique.
A bateria está fraca ou não foi colocada correctamente —
Verifique.
O outro utilizador não se encontra dentro do limite —
Verifique.
O PMR não está sintonizado no mesmo canal — Tente
usar um número inferior de sub-canais, combinando
isto primeiro com o resto do grupo.
A recepção com ruídos é mais provável quando se usa um
elevado número de sub-canais — Aumente o volume.
O volume está muito baixo — Fale com uma voz normal
de 5 a 8 cm afastado do microfone.
As condições locais estão a afectar a recepção — Vá para
um local diferente.
O outro utilizador não está a transmitir — Verifique.
O outro utilizador está demasiado próximo — Verifique.
Existe a interferência de outros utilizadores no mesmo
canal — Concorde em usar um canal diferente.
Os botões do PMR estão bloqueados — Verifique.
A bateria está fraca ou não foi colocada correctamente.
O ruído de fundo é elevado — Vá para um local mais
calmo.
A sensibilidade VOX é demasiado elevada — Configure
para um nível mais baixo.
A sensibilidade VOX é demasiado baixa — Configure-a
para um nível superior.
Fale mais alto, perto do microfone.
Certifique-se que a ficha da energia está bem ligada na
entrada do carregador.
Certifique-se que a ficha do adaptador está bem ligada e
que a energia está ligada na tomada.
7. Garantia
NOTA: Por favor guarde este manual, pois contém informações importantes.
Este produto está coberto pela nossa garantia de um ano. Para qualquer
reclamação de garantia ou serviço após venda, é favor contactar o seu fornecedor
local com a sua prova de compra. A nossa garantia cobre todos os defeitos de
fabrico ou de montagem imputáveis ao fabricante mas não cobre a deterioração pelo
não respeito do Manual de Instruções ou mau manuseamento do produto (tal como
exposição ao calor ou humidade ou desmantelamento do produto).
Na procura de uma constante melhoria, poderemos modificar as cores ou
características do produto apresentadas na caixa.
• O conteúdo deste manual está sujeito a alterações sem aviso.
• Nenhuma parte deste manual pode ser reproduzida
maneira sem o consentimento expresso por escrito do fabricante.
Recomenda-se que conserve a embalagem para futura referência.
Este jogo não é aconselhado a crianças com menos de 36 meses pois contém peças
pequenas que podem ser engolidas.
Este equipamento foi criado para ser usado em:
Áustria Finlândia Letónia Espanha
Bélgica França Liechtenstein Suécia
Bulgária Alemanha Luxemburgo Suíça
Croácia Grécia Holanda Turquia
Chipre Hungria Noruega Reino Unido
Rep. Checa Islândia Polónia Roménia
Dinamarca Irlanda Portugal
Estónia Itália Eslovénia
Referência: TW40
©2010 LEXIBOOK®
Criado e desenvolvido na Europa - Fabricado na China
Portugal
AJ AGUIAR
Atendimento a clientes á sua disposição: 227455403
www.lexibook.com
Este produto não é
um brinquedo.
Protecção ambiental
Os aparelhos eléctricos indesejados podem ser reciclados e não deverão
ser deitados fora juntamente com o lixo convencional! Por favor, apoie
activamente a conservação de recursos e ajude a proteger o ambiente,
devolvendo esta unidade a um centro de recolha (se disponível).
de nenhuma
Transmissor/Receptor Pessoal Móvel (PMR)
Manual do Utilizador
Botão MENU
Prima para mudar o
canal e sub-canal e para
alternar entre os modos.
Botão PTT
Prima e mantenha
premido enquanto
estiver a transmitir.
Botão de ligar e desligar
O que se encontra no ecrã
Se a unidade estiver ligada (ON)
Número do canal (1 a 8)
Número do sub-canal (0 a 38)
Nível da bateria. Quando as barras desaparecem, isso
significa que a bateria tem de ser recarregada
Aparece quando estiver a transmitir o sinal
TW40
Entrada para o kit mãos livres
Atrás da tampa.
Botão CALL
Prima para mandar um
toque a outras unidades.
Botões de
Prima para mudar o
volume do
altifalante. Prima
após o botão do
PPT para mudar os
canais.
Microfone
e
Page 8
Aparece quando estiver a receber o sinal.
Dupla sintonização, apresentado quando estiver a
monitorizar dois canais em simultâneo.
Aparece quando a unidade estiver em VOX (modo
activado por voz).
Aparece quando a unidade estiver a analisar todos os
canais.
Aparece quando os botões estiverem bloqueados.
Volume.
1. Colocação da Bateria
O seu TW40 funciona com três pilhas LR03/AAA em cada
walkie-talkie (não incluídas).
Para retirar o clipe para o cinto
É fácil colocar as pilhas sem que o clipe para o cinto
esteja no lugar.
Puxe a aba para a frente (afastar da unidade) para
soltar o clipe para o cinto. De seguida retire-o.
Para colocar as pilhas
1. Faça deslizar a tampa do
compartimento das pilhas.
3. Volte a colocar a tampa.
Para voltar a colocar o clipe
Faça deslizar o clipe para o cinto para dentro da ranhura,
até ouvir um clique, o que significa que já está no devido
lugar.
AVISO: Uma descarga electrostática ou frequências fortes podem dar origem a um mau
funcionamento ou perda de memória. Caso ocorra algum funcionamento anormal, reinicie a
unidade ou retire e volte a colocar as pilhas.
Insira a unha
por detrás da
aba
Retire o
clipe para
o cinto
2. Coloque as três pilhas
LR03/AAA de acordo com a
polaridade (sinais +/-).
2. Usar o Transmissor/Receptor Pessoal Móvel (PMR)
Raio de Transmissão
O raio de conversação depende do ambiente e do terreno. Será maior (até cerca de 3
km) em áreas abertas, sem obstruções, como montanhas ou edifícios. Não tente usar
duas unidades PMR que estejam a uma distância inferior a 1,5 m. Se o fizer, pode obter
interferências.
Raio Efectivo
O raio de transmissão do produto depende apenas do ambiente e do terreno onde está
a ser usado. A imagem seguinte mostra ao utilizador o tipo de desempenho a esperar
no uso do dia-a-dia.
Força do sinal
Alcance em km
Verificação do Alcance
O raio de transmissão é afectado conforme apresentado na imagem acima. Os
valores típicos do raio de transmissão para as diferentes condições ambientais é de
(1) 3 km (2) 1,5 km (3) 750 m. É de lembrar que estes são apenas valores para se
orientar. As distâncias obtidas dependem do ambiente e do terreno.
Avisos importantes de segurança
• Se estiver a usar auricular, não aumente ao máximo o volume, para proteger a sua
audição.
• Para reduzir a exposição à frequência de rádio quando estiver a usar o seu TW40,
segure a unidade pelo menos a 5 cm da cara.
• Nunca use o seu PMR no exterior em dias de tempestade.
• Não use o seu PMR à chuva.
• Se o seu PMR ficar molhado, desligue-o e retire a bateria. Seque o compartimento
da bateria e não coloque a tampa do compartimento durante algumas horas. Não
use o PMR enquanto não estiver completamente seco.
• Mantenha o PMR fora do alcance de bebés e de crianças.
Para LIGAR e DESLIGAR o seu PMR
Para ligar o PMR, prima e mantenha premido o botão de ligar e desligar
(ON/OFF) até que o número do canal seja apresentado e oiça um sinal
sonoro.
Óptimo (em áreas abertas) (1)
Médio, com base na obstrução (2)
Área com muitos edifícios (3)
Inclinação do Alcance
Para desligar o PMR. Prima e mantenha premido o botão de ligar e
desligar (ON/OFF) até que a apresentação do canal desapareça.
Ouvirá sempre um som musical para confirmar.
Controlo do volume
Para ajustar o volume do altifalante. Prima os botões ou .
O nível do volume é apresentado pelas barras no ecrã.
Pode mudar o volume ou enquanto estiver a usar o seu TW40 ou
enquanto a unidade estiver em standby (ligada, mas sem ser utilizada).
Mudar de canal e de sub-canal
O seu TW50 tem oito canais, numerados de 1 a 8. Para comunicar com outros
utilizadores que se encontrem dentro do alcance da sua unidade, todas as unidades
deverão estar sintonizadas no mesmo canal.
Prima uma vez o botão MENU.
O actual número do canal pisca no ecrã
Prima os botões
Prima o botão PTT para confirmar o canal.
Cada canal também tem 38 sub-canais (muitas vezes chamados de códigos CTCSS),
que o deixa criar grupos de utilizadores dentro do mesmo canal, para uma
comunicação mais privada. Se escolher um sub-canal, pode comunicar apenas com
outros utilizadores que tenham sintonizado o mesmo canal e sub-canal.
Para desligar a função do sub-canal, simplesmente coloque o sub-canal e, [
Nesse caso pode comunicar com qualquer utilizador de um PMR que esteja no mesmo
canal e que também tenha a função do sub-canal desligada (ou para PMRs que não
tenham sub-canais).
Prima duas vezes o botão MENU.
O actual número do sub-canal começa a piscar no ecrã.
Prima os botões
Prima o botão PTT para confirmar o sub-canal escolhido.
ou para escolher o canal desejado.
0] (zero).
ou para ir para o sub-canal desejado.
Transmitir e Receber
Nota: A transmissão por PMR é só de uma via: enquanto estiver a falar, não pode
receber uma transmissão.
O PMR tem uma banda de licença aberta. Identifique-se sempre quando estiver a
transmitir, pois podem haver outras pessoas a comunicar no mesmo canal.
Para falar com outro utilizador de um PMR
Prima e mantenha premido o botão PTT de modo a que o símbolo de
Transmissão ( ) apareça no ecrã LCD.
Fale claramente para o microfone, com um tom normal. Não grite.
Quando terminar de falar, deixe de premir o botão PTT.
Para escutar outro utilizador de um PMR
Certifique-se que não está a premir o botão PTT.
Aparece o símbolo [ ] no ecrã quando outra pessoa estiver a falar. Não tente
transmitir até que essa pessoa tenha terminado de falar.
Monitorizar o canal actual
Habitualmente, o seu TW40 não recebe sinais muito fracos, mas pode monitorizar o
canal actual para todos os sons.
Para activar a característica de monitorização
Prima os botões MENU e
A sua unidade irá receber quaisquer sinais do canal actual, incluindo ruído
de fundo.
Prima o botão TMENU para parar de monitorizar.
em simultâneo.
Modo VOX (Transmissão Activada por Voz)
No modo VOX, o seu PMR transmite sempre que detectar a sua Voz (ou outro ruído
qualquer) sem que o botão TALK tenha de ser premido. Irá transmitir durante 2
segundos, mesmo que pare de falar.
O nível de sensibilidade VOX é apresentado por números no ecrã. No mais elevado
(nível 3), a unidade recebe ruídos mais suaves (não incluindo ruídos de fundo).
mais baixo, só recebe sons bastante elevados.
No nível
Para ligar e desligar o modo VOX:
Prima o botão MENU três vezes.
O ícone VOX é apresentado e aparece a piscar no ecrã LCD a mensagem
Prima o botão , para configurar o nível de sensibilidade (máximo 3).
Se premir o botão
desligada.
Prima o botão PTT para confirmar as configurações feitas.
Enquanto a unidade estiver no modo VOX, a mensagem VOX é
apresentada constantemente no ecrã.
Para uma maior privacidade, pode usar o kit mãos livres (incluído). Ligue a ficha do
kit mãos livres na entrada para o microfone/auscultador.
até que [OF] apareça no ecrã, a opção VOX é
OF
]
[
.
Toques
Pode enviar toques para outras unidades que se encontrem dentro do limite e sintonizados no
mesmo canal (e sub-canal, se tal se aplicar), para alertar essas unidades que quer comunicar
com elas.
Prima e deixe de premir o botão CALL.
Ouvirá um toque durante dois segundos enquanto o símbolo de
transmissão ( ) aparece no ecrã LCD.
Qualquer outra unidade PMR dentro do limite e que se encontre
sincronizada no mesmo canal irá ouvir um toque e pode decidir entrar em
transmissão consigo.
Configurar os toquesl
Prima o botão MENU 4 vezes.
A unidade irá entrar no modo de configuração do Toque de Chamada. O
ecrã LCD irá apresentar a mensagem [
CR] enquanto 1 está a piscar.
Prima o botão ou para alterar o toque de chamada. Existem 5
toques diferentes. Os diferentes toques de chamada podem ser ouvidos
enquanto os altera.
Prima o botão PTT para confirmar a sua configuração após ter seleccionado
o toque desejado.
Desligar o toque de chamada
Quando enviar um toque de chamada, também o ouve na sua unidade. Se não o
quiser ouvir, siga os passos apresentados abaixo.
Prima o botão MENU 4 vezes, até que a unidade entre no modo de
configuração do Toque de Chamada.
Prima os botões
Prima o botão PTT para confirmar a sua configuração.
ou até ver o sinal [ ] no ecrã.
Toque de Confirmação (Roger) Ligado/Desligado
O toque de confirmação é um toque que é transmitido automaticamente sempre que
deixa de premir o botão PTT . Isso indica à outra pessoa que terminou de falar e que
agora se encontra no modo de recepção.
Para ligar ou desligar o toque de confirmação
Prima o botão MENU 5 vezes até que a mensagem [ ] apareça a
piscar no ecrã LCD.
Prima os botões
desligar (aparece a mensagem [
Prima o botão PTT para confirmar a configuração.
ou para ligar (aparece a mensagem (‘ON’ no ecrã) ou
‘OFF’] no ecrã) o toque de confirmação.
Som dos botões ligado/desligado
Esta característica permite à unidade PMR fazer um som de confirmação sempre que
premir um botão.
Para ligar ou desligar o som dos botões
Prima o botão MENU seis vezes. O ícone [ ] começa a piscar no ecrã.
Prima os botões
ou desligar (aparece a mensagem [
botões.
Prima o botão PTT para confirmar a sua configuração.
ou para ligar (aparece a mensagem [ON] no ecrã)
OFF] no ecrã) o som do toque dos
Dupla sintonização – Monitorize dois canais em simultâneo
Prima o botão MENU 7 vezes.
Aparece a mensagem "DCM” no ecrã enquanto [
OFF ] está a piscar.
Page 9

Selezionare il secondo canale desiderato premendo i tasti SU e GIÙ.
Guida all’Uso
Premere il pulsante MENU per cambiare il codice CTCSS.
Premere i pulsanti SU e GIÙ per selezionare il codice CTCSS desiderato.
Premere il pulsante PTT per confermare l’impostazione.
Il display passa da uno all’altro dei due canali. Se il microtelefono rileva un segnale su
uno dei due canali, si ferma e lo riceve. Fintanto che l’unità è in modalità dual watch,
DCM rimane visualizzato sul display.
Per uscire dalla modalità Dual Watch
Premere il pulsante MENU 7 volte.
Il numero del canale lampeggia sul display.
Premere i pulsanti SU e GIÙ fino a che "OF" compare sul display.
Premere il pulsante PTT per uscire dalla modalità Dual Watch.
Scansione dei canali
Quando la funzione di Scansione è attiva, il microtelefono continua a scansire tutti gli
otto canali e tutti i 38 sottocanali fino a che ne trova uno in cui un altro utente sta
trasmettendo.
Premere i pulsanti MENU e SU contemporaneamente.
SCAN compare sul display, e il numero del canale cambia. Quando viene
rilevato un segnale, l’unità entra in pausa.
Premere il pulsante SU per continuare la scansione dei canali da 1 a 8.
Premere il pulsante GIÙ per scansire i sottocanali.
Premere il pulsante PTT per interrompere la scansione e comunicare o il
pulsante GIÙ per continuare la scansione.
Blocco della tastiera
Con i tasti bloccati è possibile trasmettere (Parlare), ricevere o chiamare il canale attuale.
Ma non potete cambiare il volume ( ) o usare il pulsante MENU.
Per bloccare la tastiera
Tenere premuto il pulsante MENU fino a che compare " " sul display.
Per sbloccare la tastiera
Tenere premuto il pulsante MENU fino a che scompare " " dal display.
3. Pulizia e manutenzione
Per pulire il TW40, utilizzare un panno morbido inumidito con acqua.
Non utilizzare detergenti o solventi, in quanto potrebbero causare
danni non coperti da garanzia.
4. Specifiche tecniche
Frequenza di funzionamento: da 446.00625 a 446.09375 MHz (otto canale).
Spazio del canale: 12.5 KHz
Canale
Codici di eliminazione interferenze (CTCSS – Sistema di azzeramento
codificato tono continuo)
Canale
Frequenza (Hz)
Canale
CanaleFrequenza (Hz)
Frequenza (Hz)
Frequenza (Hz)
5. Dichiarazione di conformità
Noi, Lexibook S.A
2, avenue de Scandinavie, 91953 Courtaboeuf Cedex, França
dichiara sotto la propria responsabilità che il prodotto
Tipo di prodotto: Walkie-Talkie
Codice: TW40
cui si riferisce la dichiarazione, è conforme e alle seguenti norme e/o altri documenti
normativi.
ETSI EN300 296-2: 2001
EN301489: 2002
EN60065: 1998
Con la presente dichiariamo che il suddetto prodotto è conforme ai principali requisiti
della Direttiva 1999/5/EC.
Yiu Wai Man
Responsabile ricerca e sviluppo prodotto
6. Ricerca Guasti
Problema Possibile causa –soluzione
Non c’è potenza
Ricezione debole/
nessuna ricezione /
ricezione rumorosa
Non si possono
cambiare i canali
In modalità VOX, il
microtelefono
trasmette
continuamente
In modalità VOX, il
microtelefono non
trasmette
• Le batterie sono scariche o non inserite correttamente →
verificare;
→
• Il microtelefono non è acceso
• Le batterie sono scariche o non inserite correttamente
• L’altro utilizzatore è fuori portata
• I microtelefoni non sono sintonizzati sullo stesso canale
verificare
• La ricezione rumorosa è più probabile quanto si utilizzano
molti sottocanali
sottocanali, d’accordo con il resto del gruppo.
• Il livello del volume è troppo basso
• Parlare a voce normale, a 5-8 cm dal microfono
• Le condizioni locali impediscono la ricezione
in un luogo diverso lontano da ostacoli e il più alto possibile
• Si tiene il microtelefono troppo vicino al corpo
il microtelefono
• L’altro utente non sta trasmettendo
• L’altro utente è troppo vicino
• C’è interferenza da parte di altri utenti sullo stesso canale
→
concordate di usare un altro canale
• La tastiera è bloccata
• Le batterie sono scariche o non inserite correttamente
• Il rumore di sottofondo è alto
tranquillo
• La sensibilità VOX è troppo alta
più basso
• La sensibilità VOX è troppo bassa
livello più alto
•
→
Parlate a voce più alta, più vicino al microfono
→
cercate di usare un numero minore di
verificare
→
verificare
→
→
→
verificare
→
verificare
→
spostarsi in un luogo più
→
impostarla ad un livello
→
aumentare il volume
→
verificare
impostarla ad un
spostarsi
→
spostare
7. Garanzia e servizio
Il prodotto Lexibook® TW40 è garantito completamente per un anno dalla data
dell’acquisto.
La garanzia non copre i danni per errato uso o negligenza, o per tensione eccessiva.
Nello sballare il Lexibook
utilizzate i microtelefoni — restituite l’intero sistema al negozio in cui lo avete
acquistato.
Se il Lexibook
non si riesce a risolvere il problema, restituite l’intero sistema al negozio in cui lo
avete acquistato.
®
mette in atto una politica di continuo miglioramento del prodotto e si
Lexibook
riserva il diritto di eseguire modifiche al prodotto e alle funzionalità senza preavviso.
Questo prodotto è predisposto per l’utilizzo in:
Austria Finland Latvia Spain
Belgium France Liechtenstein Sweden
Bulgaria Germany Luxembourg Switzerland
Croatia Greece
Cyprus Hungary Norway UK
Czech Iceland Poland Romania
Denmark Ireland Portugal
Estonia Italy Slovenia
Codice: TW40
©2010 LEXIBOOK®
Progettato e sviluppato in Europa – Fabbricato in Cina
www.lexibook.com
→
Protezione ambientale
Le apparecchiature elettriche non volute possono essere riciclate e non
devono essere smaltire con i rifiuti domestici! Si prega di contribuire
attivamente alla conservazione delle risorse e di aiutare a proteggere
l’ambiente portando questa apparecchiatura presso un centro di raccolta
(se disponibile).
®
TW40, verificare danni visibili. Se vedete danni, non
®
TW40 ha un problema, verificare prima i punti sopra elencati. Se
The Netherlands
Questo non è un
giocattolo.
Turkey
Personal Mobile Radio (PMR)
Pulsante MENU
Premere per cambiare
canali e sottocanali e
per passare da una
modalità all’altra
Pulsante PTT
Tenere premuto mentre si
trasmette
Pulsante ON/OFF
Cosa compare sullo schermo
Livello batteria.
Compare quando si trasmette il segnale.
Attacco per kit mani libere
(Attacco)* sotto la linguetta
numero del canale (da 1 a 8).
numero sotto canale (da 0 a 38).
TW40
Pulsante Chiamata
Premere per inviare toni
di chiamata ad altri
microtelefoni
Pulsanti Su e Giù
Premere per cambiare il
volume dell’altoparlante.
Premere dopo il
pulsante MENU per
cambiare i canali
Microfono
Page 10
Compare quando si riceve il segnale.
Dual Watch – Compare quando si controllano due
canali alla
Compare quando il microtelefono è in VOX (modalità
attivazione vocale).
Compare quando l’unità sta scansionando tutti i canali.
Compare quando la tastiera è bloccata.
Livello Volume.
Inserire
l’unghia
dietro alla
linguetta.
1. Le baterie
Il TW40 funziona con 3 batterie tipo LR03/AAA per
ciascun walkie-talkie (non in dotazione).
Togliere la
clip per
attacco alla
cintura.
Togliere la clip per attacco alla cintura
È più semplice inserire la batteria senza la clip.
Tirare in avanti la linguetta (staccarla dal
microtelefono) per sganciare la clip. Quindi togliere
la clip.
Per inserire le batterie
1. Far scivolare giù il
coperchio del vano batterie.
3. Riposizionare il coperchio.
2. Inserire le 3 batterie tipo
LR03/AAA secondo la
polarità (segni +/-) indicata.
Per inserire la clip
Far scivolare la clip nella scanalatura fino a sentire un “click” di aggancio.
Importante – leggere le Avvertenze per la Sicurezza prima di caricare le batterie
• Eliminare le batterie usate in modo sicuro – non tentare di bruciarle o di gettarle via,
potrebbero aprirsi o essere bruciate.
• Quando non si utilizza TW40 per alcune settimane, togliere le batterie in modo che non perdano.
AVVERTENZA: Una forte interferenza di frequenza o scariche elettrostatiche possono causare
malfunzionamenti o perdite di memoria. Se si dovessero verificare funzionamenti anormali,
resettare l’unità o togliere e reinserire le batterie, oppure staccare l’adattatore CA/CC dalla presa
di corrente e reinserirlo.
2. Utilizzare la Personal Mobile Radio (PMR)
Portata della Trasmissione
La portata dipende dall’ambiente e dal terreno. Sarà maggiore (fino a circa 3 km) in ampi
spazi aperti, senza ostacoli come colline o edifici. Non tentare di utilizzare due microtelefoni
PMR a meno di 1.5 m di distanza. Se lo fate, potreste avere interferenze.
! PMR446 è una banda di utilizzo senza licenza – identificatevi sempre durante la
trasmissione, in quanto altre persone potrebbero comunicare sullo stesso canale.
Portata Effettiva
La portata della trasmissione del prodotto dipende completamente dall’ambiente o dal
terreno in cui si utilizza, il diagramma seguente tenta di guidare l’utente su quale tipo di
prestazione aspettarsi nell’utilizzo quotidiano.
Potenza del Segnale
Portata (Km)
Importante avvertenza sulla sicurezza
• Per ridurre l’esposizione alle frequenze radio quando si utilizza il TW40, tenere il
microtelefono ad almeno 5 cm dal viso.
• Non utilizzare mai il TW40 all’aperto durante un temporale.
• Non utilizzare il TW40 sotto la pioggia.
• Se il TW40 si bagna, spegnerlo e togliere le batterie Asciugare il vano batterie e
lasciare il coperchio aperto per alcuni giorni. Non utilizzare il microtelefono finché non
è completamente asciutto.
• Tenere il TW40Z fuori dalla portata dei bambini.
Accensione e spegnimento
Accendere il microtelefono.
Tenere premuto il pulsante ON/OFF fino a quando compare il numero del
canale e si sente un beep.
Spegnere il microtelefono
Tenere premuto il pulsante ON/OFF fino a quando il display si azzera.
Ogni volta sentirete un tono musicale a conferma.
Potenza Ottima del Segnale
(area aperta) (1)
Ostacolo medio sul terreno (2)
Zona pesantemente edificata (3)
Curva della portata
Controllo del Volume
Per regolare il volume dell’altoparlante:
Premere il pulsante SU o GIÙ.
Il livello del volume è illustrato dalle barre sul display. Si può cambiare il
volume mentre si utilizza il microtelefono TW40 oppure mentre il
microtelefono non è utilizzato (acceso ma non utilizzato).
Cambiare canali e sottocanali
TW40 ha otto canali, numerati da 1 a 8. Per comunicare con altri utilizzatori di PMR
nella portata, dovete avere tutti il PMR sintonizzato sullo stesso canale.
Premere il pulsante MENU una volta.
Il numero del canale attuale lampeggia sul display
Premere il pulsante SU o GIÙ per andare al canale desiderato
Premere il pulsante PTT per confermare l’impostazione del canale.
Ogni canale ha anche 38 sottocanali (talvolta chiamati codici CTCSS) che permettono
di impostare gruppi di utenti nell’ambito degli stessi canali, per comunicazioni più riservate.
Se avete impostato sottocanali, potete comunicare con altri utenti soltanto sintonizzati
sullo stesso canale e sottocanale.
Per annullare la funzione sottocanale, impostare semplicemente il sottocanale a 0 (zero).
In quel modo potete comunicare con qualsiasi utilizzatore PMR sullo stesso canale che
abbia disattivato la funzione sottocanale (o il cui microtelefono PMR non abbia quella
opzione).
Premere il pulsante MENU due volte
Il numero del sottocanale attuale lampeggia sul display.
Premere il pulsante SU o GIÙ per passare al sottocanale che si desidera
Premere il pulsante PTT per confermare l’impostazione del sottocanale.
Trasmissione e Ricezione
! Nota: La trasmissione PMR è 'a senso unico' - mentre si parla, non si può ricevere.
! TW40 è una banda di utilizzo senza licenza - identificatevi sempre durante la
trasmissione, in quanto altre persone potrebbero comunicare sullo stesso canale.
Per parlare con un altro utilizzatore di microtelefono
Tenere premuto il pulsante PTT in modo che il simbolo della trasmissione
( ) compaia sullo schermo LCD.
Parlare chiaramente al microfono, con un tono normale – non gridare
Quando avete finito di parlare, lasciate il pulsante PTT.
Per ascoltare un altro utilizzatore di microtelefono
Fare attenzione a non premere il pulsante PTT. Il simbolo della ricezione ( )
compare sul display quando l’altra persona sta parlando. Non tentare di trasmettere f
inché non ha finito.
Monitorare il canale attuale
Normalmente il TW40 non capta segnali molto deboli. Tuttavia, potete monitorare il
canale corrente per tutti i suoni.
Per attivare la funzione di monitoraggio
Premere i pulsanti MENU e GIÙ allo stesso tempo.
Il simbolo della ricezione ( ) compare sul display.
Il microtelefono riceverà qualsiasi segnale sul canale attuale, inclusi i
rumori di fondo.
Premere il pulsante MENU per interrompere il monitoraggio.
Modalità VOX (trasmissione ad attivazione vocale)
In modalità VOX il microtelefono trasmetterà ogni volta che rileverà la vostra voce
(o un altro rumore) senza dovere premere il pulsante PTT. Trasmetterà per 2 secondi
anche se smettete di parlare.
Il livello di sensibilità VOX è indicato dai Numeri sul display. Al livello massimo, il
microtelefono capterà anche i rumori più deboli (non inclusi i rumori di fondo); al livello
minimo, capterà solo rumori piuttosto forti.
Per attivare/ disattivare la modalità VOX:
Premere il pulsante MENU 3 volte.
Compare l’icona VOX e OFF lampeggia sullo schermo LCD.
Premere il pulsante SU per impostare il livello di sensibilità (massimo 3).
Se si preme il pulsante GIÙ fino a che compare OFF sul display, VOX è
disattivato.
Premere il pulsante PTT per confermare l’impostazione.
Mentre il microtelefono è in modalità VOX, VOX compare in modo
permanente sul display.
Tono di chiamata
È possibile inviare uno squillo ad altri microtelefoni nella portata e
sintonizzati sullo stesso canale (e sottocanale se applicabile) per avvertirli
che si desidera comunicare con loro..
Premere e lasciare il pulsante CHIAMATA
Si sentirà un tono di chiamata per circa due secondo, mentre il simbolo
della trasmissione ( ) compare sullo schermo LCD. Qualsiasi altro
microtelefono nella portata e sintonizzato sullo stesso canale sentirà il
tono di chiamata e potrà decidere di chiamarvi.
Selezionare i toni di Chiamata
Premere il pulsante MENU quattro volte, l’unità entrerà in modalità
impostazione Chiamata. Sul display LCD comparirà 1 CA con 1
lampeggiante.
Premere il pulsante SU o GIÙ per cambiare il tono di chiamata
(5 toni diversi). I toni diversi si possono ascoltare mentre si cambia.
Premere il pulsante PTT per confermare le impostazioni dopo aver
selezionato il tono di chiamata desiderato.
Disattivare il tono di chiamata
Se non si desidera sentire il tono di chiamata, potete impostare il tono di chiamata su
OFF. In questo modo, potete inviare il tono di chiamata (tono di chiamata predefinito
numero 1) ad altri, ma non sentirete il tono di chiamata.
Premere il pulsante MENU quattro volte, l’unità entrerà in modalità
impostazione tono di chiamata.
Premere i pulsanti SU e GIÙ fino a che compare sullo schermo OF CA.
Premere il pulsante PTT per confermare l’impostazione.
Impostazione Beep Roger ON/OFF
Il beep Roger è un tono trasmesso automaticamente ogni qual volta si rilascia il pulsante
PARLA. Fa sapere all’altra persona che avete finito di parlare e che siete in modalità
ricezione
Per abilitare e disabilitare il tono Beep Roger
Premere il pulsante MENU 5 volte fino a che On lampeggia sullo
schermo LCD.
Premere i pulsanti SU e GIÙ per abilitare (" " comparirà sul display) o
disabilitare ("OF" comparirà sul display) la funzionalità beep Roger.
Premere il pulsante PTT per confermare l’impostazione.
Impostazione tono tasti ON/OFF
Questa caratteristica consente al microtelefono di emettere un tono di conferma ogni
volta che viene premuto un tasto.
Per abilitare/ disabilitare il tono tasti
Premere il pulsante MENU sei volte. L’icona " " lampeggia sul display.
Premere i pulsanti SU e GIÙ per abilitare ("ON" comparirà sul display) o
disabilitare ("OF" comparirà sul display) la funzionalità tono tasti.
Premere il pulsante PTT per confermare l’impostazione.
Monitorare due canali per volta (Dual Watch)
Premere il pulsante MENU 7 volte.
DCM compare sul display mentre "OF" lampeggia.
Page 11

Wählen Sie den gewünschten 2. Kanal mit den Tasten / aus.
Drücken Sie einmal die MENU Taste, um in den CTCSS Code zu wechseln.
Wählen Sie den gewünschten CTCSS Code mit den Tasten
Bestätigen Sie die Einstellung mit der Gesprächstaste (PTT).
Das Display schaltet zwischen beiden Kanälen hin und her. Wenn das Handgerät einen
Signalton von einem der beiden Kanäle empfängt, startet es den Empfang. Solange das
Geräte im doppelten Beobachtungsmodus ist, bleibt am Display DCM eingeblendet.
Den doppelten Beobachtungsmodus abschalten
Drücken Sie 7 Mal die MENU Taste.
Halten Sie die Tasten
wird.
Mit der Gesprächstaste (PTT) verlassen Sie diesen Modus.
/ gedrückt, bis am Display "OFF" eingeblendet
/ aus.
Kanäle durchsuchen (Scanning)
Wenn die Scan-Funktion aktiviert ist, durchsucht das Handgerät permanent alle 8
Kanäle und die 38 Unterkanäle nach einem Sendesignal.
Drücken Sie gleichzeitig die MENU und die Taste. Am Display wird SCAN
eingeblendet. Das Handgerät startet die Suche. Sobald ein Signal erkannt
wird, stoppt die Suche.
Mit der Taste
Mit der Taste
Mit der Gesprächstaste (PTT) stoppen Sie die Suche und nehmen das
Gespräch auf.
setzten Sie die Suche durch die Kanäle 1-8 fort.
werden die Unterkanäle durchsucht.
Tastensperre
Auch wenn die Tasten gesperrt sind, können Sie senden, empfangen und den
aktuellen Kanal überwachen. Sie können jedoch nicht die Lautstärke einstellen ( ).
Die Tasten sperren
Halten sie die Taste MENU gedrückt, bis " " eingeblendet wird.
3. Reinigung und Pflege
Reinigen Sie Ihr PMF mit einem mit Wasser angefeuchteten Tuch. Verwenden Sie
weder Reinigungs- noch Lösungsmittel, da diese Vorgehensweise nicht durch die
Garantiervereinbarung abgedeckt ist.
4. Technische Daten
Betriebsfrequenz: 445,00625 bis 446,09375 MHz (8 Kanäle)
Kanalleistung: 12,5 KHz
Kanal
Entstörungscode
(CTCSS - Permanentes Störungsunterdrückungssystem)
Code
Frequenz (Mhz)
Kanal
CodeFrequenz (Hz)
Frequenz (Mhz)
Frequenz (Hz)
5. KONFORMITÄTSERKLÄRUNG
Wir, Lexibook S.A
2, avenue de Scandinavie, 91953 Courtaboeuf Cedex, Frankreich
erklären es unter unserer alleinigen Verantwortung, daß das Produkt
Art des Produktes: Walkie-Talkie
Typ Nummer: TW40
welches diese Erklärung betrifft, konform ist mit folgenden Standards und/oder
anderen normativen Dokumenten.
ETSI EN300 296-2 : 2001
EN301489 : 2002
EN60065 : 1998
Wir erklären hiermit, daß das oben genannte Produkt konform ist
mit allen wichtigsten Anforderungen der 1999/5/EC Richtlinie.
Yiu Wai Man
Verantwortlicher für Forschung und Entwicklung
6. Fehlerbehebung
Problem Mögliche Ursache — Lösung
Kein Strom
Schwacher
Empfang/ kein
Empfang /
störende
Geräusche
Kein Kanalwechsel
möglich
Handgerät sendet
permanent im VOX
Modus
Akkus lassen sich
nicht aufladen
• Schwacher Akku bzw. nicht richtig eingelegt→ überprüfen
• PMF nicht eingeschaltet
• Schwacher Akku bzw. nicht richtig eingelegt
• Kein anderer Benutzer in Reichweite
• PMF nicht auf den gleichen Kanal eingestellt
überprüfen
• Störgeräusche sind in Kanälen mit höheren Frequenzen
wahrscheinlicher
Kanal mit der Gruppe absprechen
• Lautstärke zu geringe
→
Sprechen Sie in normaler Lautstärke, 5-8 cm vom
•
Mikrofon entfernt
• PMF gesperrt→überprüfen
• Schwacher Akku bzw. nicht richtig eingelegt
• Zu starke Hintergrundgeräusche→Wechsel an einen
ruhigeren Ort
• VOX Sensibilität zu hoch
Stufe ein
• Verbinden Sie das Stromkabel richtig mit der Ladebuchse
• Vergewissern Sie sich, dass das Stromkabel eingesteckt
ist und der Stromschalter eingeschaltet
→
überprüfen
→
überprüfen
→
Den Wechsel zu einem niedrigen
→
Die Lautstärke erhöhen
→
stellen Sie eine geringere
7. Garantie
Anmerkung: Bitte bewahren Sie diese Bedienungsanleitung auf, da sie wichtige
Hinweise enthält.
Dieses Produkt hat 1 Jahr Garantie.
Für jede Inanspruchnahme der Garantie oder des Kundendienstes, kontaktieren Sie
bitte Ihren Einzelhändler unter Vorlage der Einkaufsquittung. Unsere Garantie deckt
Materialschäden oder Installationsfehler, die auf den Hersteller zurückzuführen sind.
Nicht eingeschlossen sind Schäden, die durch Missachtung der Bedienungsanleitung
oder auf unsachgemäße Behandlung (wie z. B. unbefugtes Öffnen, Aussetzen von
Hitze oder Feuchtigkeit, usw.) zurückzuführen sind. Wir empfehlen, die Verpackung
für spätere Konsultationen aufzubewahren.
Bedingt durch unser ständiges Bemühen nach Verbesserung, kann das Produkt
möglicherweise in Farben und Details von der Verpackungsabbildung abweichen.
Nicht für Kinder unter 36 Monaten geeignet, da es kleine, abnehmbare Einzelteile
enthält, die verschluckt werden könnten.
Für jede spätere Bezugnahme bitte die Verpackung aufheben.
Das Gerät ist für den Einsatz in folgenden Ländern bestimmt:
Österreich Finnland Litauen Spanien
Belgien Frankreich Liechtenstein Schweden
Bulgarien Deutschland Luxemburg Schweiz
Kroatien Griechenland Niederlande Türkei
Zypern Ungarn Norwegen Großbritannien
Tschechien Island Polen Rumänen
Dänemark Irland Portugal
England Italien Slowenien
→
Referenz: TW40
©2010 LEXIBOOK®
Designed und entwickelt in Europa - Hergestellt in China
Deutschland & Österreich
Service-Hotline: 01805 010931 (0.14€ TTC/Minute)
E-Mail: savcomfr@lexibook.com
Dieses Produkt ist
kein Spielzeug.
Umweltschutz
Elektronische Geräte können aufbereitet werden und dürfen nicht im
Haushaltsmüll entsorgt werden. Bitte unterstützen Sie die
Wiederaufbereitung und schützen Sie die Umwelt, indem Sie Altgeräte
entsprechend der Umweltschutzbestimmungen entsorgen bzw. abgeben.
Walkie Talkie
MENÜ TASTE
Kanal und Sub-Kanal
auswählen.
PTT TASTE
Drücken und gedrückt halten
wenn Signal gesendet wird
EIN- UND AUSSCHALTEN
TASTE
Benutzerhandbuch
Buchse für Freisprecheinrichtung
Das Gerät ist eingeschaltet
Kanal (1 bis 8)
Sub-Kanal (0 bis 38)
Anzeige des Batterieladestands
Funkgerät übermittelt Signal
TW40
CALL-FUNKTION
AKTIVIEREN
(GEZIELTES SENDEN)
LAUTSTÄRKE
EINSTELLEN,
KANAL
AUSWÄHLEN
MIKROFON
Die Tasten entsperren
Halten sie die Taste MENU gedrückt, bis " " ausgeblendet wird.
Page 12
Einblendung bei Signalempfang
Einblendung der Doppelüberwachung wenn Sie
gleichzeitig zwei Kanäle beobachten
Einblendung im VOX-Modus (Sprache aktiviert)
Einblendung bei Überprüfung aller Kanäle
Einblendung bei Tastensperre
Lautstärkepegel
1. Einsetzen der Batterien
Jedes Walkie-Talkie benötigt 3 x LR03/AAA
Batterien (nicht beiliegend).
NEHMEN SIE DEN GURTCLIP AB.
Die Batterien lassen sich ohne Gurtclip leichter einlegen.
Ziehen Sie die Abdeckung nach vorne (vom
Gerät weg), um den Gurtclip zu entfernen.
Ziehen Sie den Gurtclip dann ab.
Einlegen der Batterien
1. Schieben Sie den Deckel
des Batteriegehäuses nach
unten.
3. Schließen Sie das
Batteriegehäuse.
Gurtclipbefestigung
Schieben Sie den Gurtclip in den Schlitz, bis er einrastet.
WARNUNG: Funktionsstörungen oder Speicherverlust können möglicherweise durch starke
Frequenzstörungen oder elektrostatische Entladung verursacht werden. Sollte es zu
unnormalen Funktionen kommen, setzen Sie das Gerät zurück oder entfernen Sie die Batterien
und legen Sie die Batterien wieder ein.
2. Legen Sie 3 LR03/AAA-Batterien
entsprechender
Polaritätsmarkierungen
(+/- Zeichen) ein.
2. Die Verwendung des persönlichen Mobilfunks (PMF)
Übertragungsreichweite
Die Gesprächsreichweite hängt von der Umgebung und dem Gelände ab. Im freien
Gelände oder bei Hindernissen, wie Hügel oder Gebäude, ist die Übertragungsreichweite am längsten (bis cirka 3 km oder 1 3/4 Meilen). Versuchen Sie nicht zwei PMF
Handgeräte gleichzeitig in einer Reichweite zu verwenden, die unter 1,5 m liegt. Dies
könnte Störungen verursachen.
Effektive Reichweite
Die Übertragungsreichweite des Geräts hängt vollkommen von dem Gelände oder der
Umgebung ab, in der es verwendet wird. Das folgende Diagramm soll dem Benutzer
verständlich machen, wie die Reichweiten beeinflusst werden könnten:
Signalstärke
Reichweite (Km)
Überprüfung der Reichweite
Die Übertragungsreichweite wird, wie in der o.a. Abbildung dargestellt, beeinflusst.
Unter normalen Umständen liegen die Reichweiten von (1) bei 3 Km, (2) bei 1,5 km
(3) bei 750 m. Bedenken Sie bitte, dass es sich dabei nur um Richtwerte handelt und
dass die tatsächlichen Reichweiten von den Gegebenheiten vor Ort beeinflusst
werden.
Wichtige Sicherheitshinweise
• Stellen Sie die Lautstärke nicht zu hoch ein, um Gehörschäden zu vermeiden, wenn
Sie das Handgerät verwenden.
• Ihr TW40 setzt Strahlen frei, halten Sie das Gerät daher mindestens 5 cm von Ihrem
Gesicht entfernt.
• Verwenden Sie Ihr PMF niemals während eines Gewitters im Freien.
• Verwenden Sie Ihr PMF nicht im Regen.
• Wenn der Akku nass werden sollten, nehmen Sie diese bitte aus dem Akkufach
heraus. Trocknen Sie das Batteriefach und lassen Sie es einige Tage offen.
Verwenden Sie das PMF erst wieder, wenn es vollständig trocken ist.
• Bewahren Sie Ihr PMF außerhalb der Reichweite von Kindern auf.
Das PMF ein- und ausschalten
Halten Sie die Taste ON/OFF gedrückt, um Ihr PMF ein- und
auszuschalten. Die Kanalnummer wird eingeblendet und Sie hören einen
Signalton.
Maximal (freies Gelände) (1)
Bodenerhebung mittlerer Höhe (2)
Stark bebautes Gelände (3)
Abfall
PMF ausschalten (OFF).
Halten Sie die Taste ON/OFF gedrückt, bis der Kanal am Display
ausgeblendet wird.
Sie hören jedes Mal zur Bestätigung einen Klang.
Lautstärkeregelung
Die Lautstärke einstellen. Drücken Sie die Taste / .
Die Lautstärke wird durch Balken an der Anzeige anzeigt.
Sie können die Lautstärke einstellen, während Sie das PMF benutzen oder
während das Gerät im Ruhezustand ist (eingeschaltet aber nicht benutzt).
Die Kanäle und Unterkanäle verändern
Ihr PMF verfügt über 8 Kanäle, die von 1 bis 8 nummeriert sind. Damit Sie mit anderen
Funkgerätebenutzern in Ihrem Empfangs-/Sendebereich sprechen können, müssen alle
Teilnehmer den gleichen Kanal verwenden.
Drücken Sie einmal die MENU Taste.
Die aktuelle Kanalnummer blinkt am Display.
Wählen Sie die Kanäle mit den Tasten
Bestätigen Sie Ihre Einstellung mit der Gesprächstaste (PTT).
Jeder Kanal verfügt über 38 Unterkanäle (CTCSS Code), über die Sie Benutzergruppen
innerhalb der gleichen Kanäle für die bessere private Kommunikation einstellen können.
Wenn Sie die Unterkanäle einstellen, können Sie nur mit Personen auf dem gleichen
Kanal und Unterkanal kommunizieren.
Abschalten des Unterkanals: Schalten Sie den Unterkanal einfach auf 0 (null). Sie
können nun mit Anderen kommunizieren, die den Unterkanal ebenfalls abgeschaltet
haben (bzw. mit Funkgerätebenutzern, die nicht über diese Funktion verfügen).
Drücken Sie zweimal die MENU Taste.
Die aktuelle Unterkanalnummer blinkt am Display.
Wählen Sie die Unterkanäle mit den Tasten
Bestätigen die Unterkanalauswahl mit der Gesprächstaste (PTT).
/ aus.
/ aus
Senden und empfangen
! Die PMF-Übertragung ist eine Einwegeübertragung - während Sie sprechen können
Sie nicht empfangen.
! PMF ist eine offene Übertragungsart - geben Sie sich stets zu erkennen, wenn Sie
senden, da auch Andere auf dem gleichen Kanal kommunizieren könnten
Das Gespräch mit einem anderen PMF-Teilnehmer
Halten Sie die Gesprächstaste gedrückt. Am Display wird das Sendesymbol ( ) eingeblendet.
Sprechen Sie laut und deutlich in normalem Ton in das Mikrofon - schreien
Sie nicht.
Wenn Sie zu Ende gesprochen haben, drücken Sie die Gesprächstaste.
Einem Gesprächspartner zuhören
Drücken Sie die Gesprächstaste. Am Display wird das Empfangssymbole ( )
eingeblendet, wenn der Gesprächspartner spricht. Senden Sie erst, wenn der Partner
zu Ende gesprochen hat.
Den aktuellen Kanal beobachten
Normalerweise empfängt Ihr PMF keine schwachen Signale. Sie können den
aktuellen Kanal jedoch auf beliebige Geräusch hin beobachten.
Die Aktivierung der Überwachungsfunktion
Drücken Sie gleichzeitig die Tasten MENU und
Ihr Handgeräte nimmt Signale des aktuellen Kanals auf, darunter auch
Hintergrundgeräusche.
Mit die Tasten ( MENU ) unterbrechen Sie die Überwachung.
.
VOX (Sprachaktivierte Übertragung)
Im VOX Modus startet Ihr PMF die Übertragung, sobald es Ihre Stimme (oder andere
Geräusche) erkennt. Dazu muss die Gesprächstaste nicht gedrückt sein. Die Übertragung
startet 2 Sekunden, nachdem Sie aufgehört haben zu sprechen.
Für diskretere Gespräche können Sie ein Freihandset verwenden (nicht beiliegend). Verbinden
Sie den Stecker des Freihandgeräts mit der Mik./Gespr. Buchse.
Die Sensibilität von VOX wird durch Zahlen auf dem Display angezeigt. Auf der höchsten Stufe
(Stufe 3) nimmt das Handgerät leisere Geräusche (einschließlich Hintergrundgeräusche) auf.
Auf der niedrigsten Stufe, nimmt es nur laute Geräusche auf.
VOX ein- und ausschalten
Drücken Sie die MENU Taste dreimal.
An der LCD-Anzeige blinken das VOX Symbol und OF.
Mit der Taste wählen Sie die Sensibilität aus (max. 3 Stufen).
Mit der Taste
Bestätigen Sie Ihre Einstellung mit der Gesprächstaste (PTT).
So lange sich das Gerät im VOX Modus befindet, wird am Display des
Handgeräts VOX eingeblendet.
schalten Sie VOX aus. Es wird OF eingeblendet.
Klingelton
Sie können Klingeltöne an Handgeräte auf dem gleichen Kanal (und ggfs. Unterkanal)
und innerhalb Ihrer Reichweite senden, um diese darauf aufmerksam zu machen, dass
Sie kommunizieren möchten.
Tippen Sie die Taste Senden an.
Sie werden ungefähr zwei Sekunden lange einen Klingelton hören, während
das Symbol für Übertragen ( ) am LCD Display erscheint. Andere
Teilnehmer innerhalb der Reichweite und auf dem selben Kanal hören das
Klingelzeichen und können die Kommunikation mit Ihnen aufnehmen.
Einstellen der Klingeltöne
Drücken Sie die MENU Taste viermal.
Das Gerät schaltet in den Einstellmodus Klingeltöne. Am Display wird
eingeblendet. Die Zahl 1 blinkt.
Verändern Sie den Klingelton mit den Tasten / (5 verschiedene Töne).
Während der Einstellung hören Sie die unterschiedlichen Töne.
Bestätigen Sie Ihre Einstellung mit der Gesprächstaste (PTT).
Den Klingelton ausschalten
Wenn Sie einen Klingelton senden, hören Sie diesen an Ihrem Handgerät. Sie
können diesen Ton wie folgt abschalten.
Drücken Sie viermal die MENU Taste, um auf den Einstellmodus für den
Klingelton zuzugreifen.
Drücken Sie die Tasten
Bestätigen Sie Ihre Einstellung mit der Gesprächstaste (PTT).
/ , bis am Display eingeblendet wird.
Roger-Ton EIN/AUS
Der Signalton "Roger" ist ein Ton, der automatisch übertragen wird, sobald die
Gesprächstaste (PTT) gedrückt wird. Der Gesprächsteilnehmer weiß, dass Sie das
Gespräch beendet haben und auf Empfang sind.
Den Ton "Roger" ein- und ausschalten
Drücken Sie fünfmal die MENU Taste. Am Display wird eingeblendet.
Mit den Tasten
(
‘OFF ’ wird eingeblendet) Sie den Signalton.
Bestätigen Sie Ihre Einstellung mit der Gesprächstaste (PTT).
/ aktivieren (‘ON’ wird eingeblendet) oder deaktivieren
Den Tastenton ein- und ausschalten
Mit dieser Funktion ertönt ein Bestätigungston, sobald Sie eine Taste am Gerät drücken.
Den Tastenton ein- und ausschalten
Drücken Sie sechsmal die MENU Taste. Am Display wird
eingeblendet.
Mit den Tasten / aktivieren (‘ON’ wird eingeblendet) oder deaktivieren
(
‘OFF‘ wird eingeblendet) Sie den Tastenton.
Bestätigen Sie Ihre Einstellung mit der Gesprächstaste (PTT).
DOPPELBEOBACHTUNG - GLEICHZEITIGES BEOBACHTEN VON 2 KANÄLEN
CR
Drücken Sie 7 Mal die MENU Taste.
Am Display wird DCM eingeblendet.
‘OFF’ blinkt.
Page 13
Selecteer het gewenste 2de kanaal door op de of toets te drukken.
Druk op de MENU toets om de CTCSS-code te veranderen.
Druk op de of toets om de gewenste CTCSS-code te selecteren.
Druk op de PTT toets om de instelling te bevestigen.
Het scherm verspringt tussen de twee kanalen. Indien de handset een signaal op één
van de kanalen ontdekt, zal het stoppen en het ontvangen. Zolang het toestel in de
dubbele afluistermodus staat, zal DCM op het display constant afgebeeld worden.
Om de Dubbele afluistermodus te beëindigen
Druk 7 maal op de MENU toets.
Het kanaalnummer zal op het display flikkeren.
Druk op de of toets tot "OF" op het display verschijnt.
Druk op de PTT toets om de Dubbele Afluistermodus te verlaten.
Kanalen scannen
Wanneer de scanfunctie ingeschakeld is, zal de handset continu alle acht kanalen en
38 subkanalen scannen tot het het kanaal vindt waarop een andere gebruiker een
transmissie doorstuurt.
Druk tegelijkertijd op de MENU en de toetsen.
SCAN verschijnt op het display en het kanaalnummer verandert.
Wanneer een signaal wordt ontdekt, zal het toestel pauzeren.
Druk op de toets om verder te gaan met het scannen van kanalen 1 tot 8.
Druk op de toets om de subkanalen te scannen.
Druk op de PTT-toets om het scannen te stoppen en te communiceren of
druk op de DOWN-toets om verder te gaan met scannen.
De toetsen vergrendelen
Als de toetsen vergrendeld zijn, kan je verzenden (Spreken), ontvangen of een huidig
kanaal oproepen. Maar je kan niet het volume veranderen ( ) of de MENU-toets
gebruiken.
Om de toetsen te vergrendelen
Hou de MENU-toets ingedrukt tot " " op het scherm verschijnt.
Om de toetsen te ontgrendelen
Hou de MENU-toets ingedrukt tot " " van het scherm verdwijnt.
3. Reiniging en Onderhoud
Om jouw TW40 te reinigen, gebruik je een zacht doekje, lichtjes
bevochtigd met water. Gebruik geen reinigingsmiddelen of
oplosmiddelen, daar deze schade kunnen veroorzaken die niet door
de garantie wordt gedekt.
4. Technische gegevens
Werkingsfrequentie: 446.00625 tot 446.09375 MHz (8 kanalen).
Kanaalafstand: 12.5 KHz
Channel
Storingseliminatiecodes (CTCSS - Continuous Tone Coded Squelch System)
Code
Frequency (Mhz)
Channel
CodeFrequentie(Hz)
Frequency (Mhz)
Frequentie(Hz)
5. Conformiteitsverklaring
Wij, Lexibook S.A
2, avenue de Scandinavie, 91953 Courtaboeuf Cedex, Frankrijk
verklaren onder onze enige verantwoordelijkheid, dat het product
Type van het product: Walkie-Talkie
Modelnummer: TW40
Waarbij deze verklaring van toepassing is, volledig conform is met de onderstaande
normen en/of andere normatieve documenten.
ETSI EN300 296-2: 2001
EN301489: 2002
EN60065: 1998
Wij verklaren hierbij dat het bovenvermelde product conform is aan alle essentiële
vereisten van de Richtlijnen 1999/5/EC.
Yiu Wai Man
Hoofd van het onderzoek en productontwikkeling
6. Probleemoplossen
Probleem Mogelijke oorzaak - oplossing
Geen stroom
Zwakke ontvangst /
geen ontvangst/
Luidruchtige
ontvangst
Je kan de kanalen
niet veranderen
De handset verzendt
continu een bericht in
de VOX-functie
De handset verzendt
geen bericht in de
VOX-functie
• Batterijen zijn bijna leeg of zijn niet correct ingestoken
controleer;
→
• Handset is niet ingeschakeld
• Batterijen zijn bijna leeg of zijn niet correct ingestoken
• De andere gebruiker bevindt zich niet binnen het bereik
controleer
• De handsets zijn niet op hetzelfde kanaal afgestemd
Controleer
• Luidruchtige ontvangst komt meer voor bij het gebruiken
van hoger genummerde subkanalen
genummerde subkanalen, ga eerst akkoord met de
rest van jouw groep.
• Het volume is te laag
→
Sp re ek met ee n no rmale ste m, 5 -8cm (2 -3
•
du im ) verwijd er d van de mi cr of oon
• De plaatselijke omgeving verzwakt de ontvangst
naar een andere locatie, uit de buurt van hindernissen
en eveneens zo hoog mogelijk
• Je draagt de handset te dicht tegen jouw lichaam
verplaats de handset
• De andere gebruiker verzendt niets
• De andere gebruiker staat te dicht bij jou
• Er zijn storingen van andere gebruikers op hetzelfde
→
ga akkoord om een ander kanaal te
kanaal
gebruiken
• De handset is vergrendeld
• De batterijen zijn bijna leeg of zijn niet correct ingestoken
• Het achtergrondgeluid is te hoog
waar het stiller is
• VOX-sensitiviteit is te hoog
niveau
• De VOX-sensitiviteit is te laag
niveau
•
→
Spreek met een luidere stem en dichter bij de
microfoon
controleer
→
probeer lager
→
verhoog het volume
→
→
controleer
→
ga naar een plaats
→
stel het in op een lager
→
stel het in op een hoger
controleer
→
controleer
7. Garantie en Onderhoudsdienst
De Lexibook® TW40 heeft een volledige garantie gedurende 1 jaar, vanaf de dag van
de aankoop.
De garantie dekt geen schade die is veroorzaakt door misbruik of verwaarlozing of
excessieve elektrische spanningen.
Wanneer je jouw Lexibook
controleren voor zichtbare schade. Indien je enige schade ontdekt, mag je de
handsets niet gebruiken — breng het volledige systeem terug naar de plaats waar je
het hebt gekocht.
Indien jouw Lexibook
punten voor probleemoplossing controleren. Als je het probleem niet kan verhelpen,
moet je het volledige systeem terugbrengen naar de plaats waar je het hebt gekocht.
®
Lexibook
onderhoudt een principe om continu haar producten te verbeteren en
heeft daarbij het recht om veranderingen aan het product en de functies ervan aan te
brengen, zonder voorafgaande schriftelijke verwittiging.
Dit product is bestemd voor gebruik in:
Oostenrijk Finland Letland Spanje
België Frankrijk Lichtenstein Zweden
Bulgarije Duitsland Luxemburg Zwitserland
Croatië Griekenland
Cyprus Hongarije Noorwegen Groot-Brittanië
Tsjechië Ijsland Polen Roemenië
Denemarken Ierland Portugal
Estland Italië Slovenië
→
Referentie: TW40
©2010 LEXIBOOK®
Ontworpen en ontwikkeld in Europe – Gefabriceerd in China
→
→
→
ga
→
www.lexibook.com
Milieubescherming
Ongewenste electrische apparaten moeten gerecycleerd worden en
mogen niet worden weggegooid met het dagelijkse huisvuil! Gelieve
actief deel te nemen aan het behoud van natuurlijke bronnen en help het
milieu beschermen door dit apparaat terug te sturen naar een
collectiecentrum (indien voorradig).
®
TW40 voor de eerste keer uitpakt, moet je het
®
TW40 incorrect werkt, moet je eerst de bovenvermelde
Nederland
Dit product is geen
speelgoed.
IM code: TW40seriesIM1240
Turkije
Persoonlijke mobiele radio (PMR)
MENU-toets
Druk hierop om de
kanalen en subkanalen
te veranderen en om te
verspringen tussen de
verschillende functies
PTT-toets
Hou ingedrukt tijdens het
verzenden
ON/OFF-toets
(Aan/Uit)
Wat staat er op het display
Kanaalnummer (1 tot 8).
Subkanaalnummer (0 tot 38).
Batterijniveau.
Afgebeeld wanneer je een signaal verzendt.
Gebruikshandleiding
Contact voor handvrije set
(Contact)* onder het deksel
TW40
met scharniertje
Call-toets (oproep)
Druk hierop om beltonen
naar de andere handsets
volume van de speakers
kanalen te veranderen
Kanaalnummer (1 tot 8).
te zenden
en toetsen
Druk hierop om het
aan de passen. Druk
nadien op de
MENU-toets om de
Microfoon
Page 14

Afgebeeld wanneer je een signaal ontvangt.
Dual Watch (dubbel afluisteren) – Afgebeeld wanneer
je twee kanalen terzelfdertijd beluistert.
Afgebeeld wanneer de handset in VOX staat
(voice activated mode) (stem geactiveerd).
Afgebeeld wanneer het toestel alle kanalen scant.
Afgebeeld wanneer de toetsen vergrendeld zijn.
Volumeniveau.
1. De handsets startklaar maken
Jouw TW40 werkt met 3 x LR03/AAA batterijen voor elke
walkie-talkie (niet bijgeleverd).
Om de riemclip te verwijderen
Het is makkelijker om de batterijen in te steken zonder de
riemclip.
Trek het klepje naar voor (weg van de handset) om
de riemclip vrij te maken. Trek nadien de riemclip weg.
Om de batterijen in te steken
1. Schuif het batterijdeksel
naar beneden.
3. Plaats het deksel terug.
Om de riemclip te bevestigen
Schuif de riemclip naar beneden in het gleufje tot het vastklikt.
Belangrijk – lees deze veiligheidsmaatregelen alvorens je de batterijen
oplaadt
• Gooi gebruikte batterijen veilig weg – probeer nooit om deze te verbranden
of ergens weg te gooien, ze zouden kunnen verbranden of doorboord worden.
• Wanneer je jouw TW40 voor enkele weken niet zal gebruiken, moet je de
batterijen eruit nemen om het lekken van bijtende stoffen te vermijden.
WAARSCHUWING: Een storing of geheugenverlies kan veroorzaakt
worden door een sterke frequentie-interferentie of een elektrostatische
ontlading. Indien er zich een abnormale functie voordoet, stel het
toestel opnieuw in of verwijder en verbind opnieuw de batterijen.
2. Steek de 3 x LR03/AAA
batterijen volgens de
polariteit (+/- symbolen).
2. De Persoonlijke Mobiele Radio (PMR) gebruiken
Zendbereik
Het spreekbereik hangt af van de omgeving en het terrein. Het is het grootst ( tot
ongeveer 3 km of 1,75 mijl) in wijde, open ruimtes zonder hindernissen, zoals heuvels of
gebouwen. Probeer niet om twee PMR handsets te gebruiken minder dan 1,5m ( 5 voet)
van elkaar verwijderd. Indien je dit wel doet, kunnen er storingen optreden.
! PMR446 is een een frequentieband met vrije licentie – je moet jezelf altijd bekendmaken
tijdens het verzenden, daar er ook andere mensen op ditzelfde kanaal kunnen
communiceren.
Effectief bereik
Het zendbereik van het product is totaal afhankelijk van de omgeving en het terrein waar
het wordt gebruikt. Het onderstaande diagram geeft de gebruiker een idee over de
mogelijke werking bij het dagelijks gebruik.
Signaalsterkte
Bereik (Km)
Belangrijke veiligheidsmaatregelen
• Om blootstelling aan radiofrequentie te verlagen tijdens het gebruik van jouw
TW40, moet je de handset tenminste 5cm (2 duim) van je gelaat verwijderd houden.
• Gebruik jouw TW40 nooit buitenshuis tijdens een onweer.
• Gebruik de TW40 niet in de regen.
• Indien jouw TW40 ooit nat wordt, moet je het uitzetten en de batterijen verwijderen.
Droog het batterijvak en laat het deksel gedurende enkele uren open. Gebruik enkel
de handset wanneer het opnieuw droog is.
• Hou de TW40 buiten het bereik van peuters en jonge kinderen.
Aan en uit zetten
Om de handset AAN te zetten.
Hou de ON/OFF toets (AAN/UIT) ingedrukt tot het kanaalnummer op het
display verschijnt en je een biep hoort. Om de handset UIT te zetten.
Hou de ON/OFF toets (AAN/UIT) ingedrukt tot je een blanco display
krijgt. Je zal telkens een muziektoon horen ter bevestiging.
Optimale signaalsterkte
(open ruimte) (1)
Gemiddelde hindernis op de grond (2)
Dichtbebouwde ruimte (3)
Bereik bij hellingsoppervlak
Volumecontrole
Om het volume van de luidspreker aan te passen:
Druk op de of toets.
Het volumeniveau wordt op het display weergegeven in de vorm van
balkjes. Je kan het volume aanpassen terwijl je jouw TW40Z handset
gebruikt, of wanneer de handset inactief is (staat aan maar wordt niet
gebruikt).
De kanalen en subkanalen veranderen
De TW40Z heeft 8 kanalen, genummerd van 1 tot 8. Om met andere PMR-gebruikers
binnen dit bereik te communiceren, moet iederen zijn PMR op hetzelfde kanaal
afstemmen.
Druk eenmaal op de MENU toets
Het huidige kanaalnummer zal op het display flikkeren
Druk op de of toets om naar het gewenste kanaal over te springen
Druk op de PTT toets om de kanaalinstelling te bevestigen.
Elk kanaal beschikt eveneens over 38 subkanalen (soms CTCSS-codes genoemd),
hetgeen je toelaat om groepen gebruikers op te stellen binnenin dezelfde kanalen,
voor een meer privaat gesprek. Indien je subkanalen hebt ingesteld, kan je enkel
communiceren met andere gebruikers die op hetzelfde kanaal en subkanaal zijn
afgestemd.
Om de subkanaalfunctie uit te zetten, moet je het subkanaal gewoon op 0 (nul) zetten.
Nu kan je op hetzelfde kanaal communiceren met elke PMR-gebruiker die eveneens de
subkanaalfunctie heeft uitgeschakeld (of die een PMR-handset heeft die niet over deze
functie beschikt).
Druk tweemaal op de MENU toets
Het huidig subkanaalnummer zal op het display flikkeren.
Druk op de of toets om naar het gewenste subkanaal te verspringen
Druk op de PTT toets om de instelling van het subkanaal te bevestigen.
Zenden en ontvangen
! Opmerking: PMR-transmissie is een “éénrichtingsverkeer” – wanneer je spreekt, kan
je geen transmissie ontvangen.
! TW40Z is een frequentieband met vrije licentie – je moet jezelf altijd bekendmaken
tijdens het verzenden, daar er mogelijk andere mensen op hetzelfde kanaal
communiceren.
Om met een andere handsetgebruiker te spreken
Hou de PTT-toets ingedrukt tot het zendsymbool ( ) op het LCDscherm verschijnt.
Spreek klaar en duidelijk door de microfoon, met een normale stem –
schreeuw niet
Wanneer je klaar bent met spreken, laat je de PTT toets los.
Om naar een andere handsetgebruiker te luisteren:
Zorg ervoor dat je niet op de PTT toets drukt. Het ontvangstsymbool ( ) wordt op
het display afgebeeld wanneer de andere persoon spreekt. Wacht om te verzenden
tot de andere persoon klaar is.
Afluisteren van het huidig kanaal
Normaal gezien zal de TW40 geen zwakke signalen oppikken. Toch kan je het
huidig kanaal afluisteren voor alle geluiden.
Om de afluisterfunctie te activeren
Druk terzelfdertijd op de MENU en toetsen.
Het ontvangstsymbool ( ) verschijnt op het display.
Jouw handset zal alle signalen op het huidig kanaal oppikken, inclusief de
achtergrondgeluiden.
Druk op de MENU toets om het afluisteren te stoppen.
VOX (voice activated transmission) functie
(stemgeactiveerde transmissie)
Met de VOX-functie zal jouw handset berichten versturen van zodra het jouw stem
hoort (of een ander geluid) zonder op de PTT-toets te moeten drukken. Het zal
gedurende 2 seconden verzenden, zelfs al stop je met spreken.
Het niveau van de VOX sensibiliteit wordt op het display aangeduid met cijfers.
Op het hoogste niveau zal de handset zachtere geluiden oppikken (niet inclusief
achtergrondgeluiden); op het laagste niveau zal het enkel zeer luide geluiden
oppikken.
Om de VOX-functie AAN en UIT te zetten:
Druk driemaal op de MENU toets.
Het VOX-symbool zal worden afgebeeld en OFF (UIT) zal op het LCD-
scherm flikkeren.
Druk op de toets om het niveau voor sensibiliteit in te stellen
(maximum 3). Indien je op de toets drukt tot OFF (Uit) op het
scherm verschijnt, zal de VOX-functie worden uitgeschakeld.
Druk op de PTT toets om de instelling te bevestigen.
Zolang de handset in de VOX-functie staat, zal VOX constant op het
display worden afgebeeld.
Beltoon
Binnen het zendbereik en afgestemd op hetzelfde kanaal (en subkanaal, indien
aanwezig), kan je een beltoon naar andere handsets sturen om hen te verwittigen
dat je met hen wil communiceren.
Druk op de CALL-toets en laat los.
Je zal ongeveer twee seconden een beltoon horen terwijl het zendsymbool
( ) op het LCD-scherm verschijnt. Elke handset die zich binnen het bereik
bevindt en is afgestemd op hetzelfde kanaal, zal een beltoon horen en kan
dan kiezen om een bericht naar jou te sturen.
Selecteren van beltonen
Druk viermaal op de MENU toets, het toestel zal de instellingsmodus voor
Call-Ring (gespreksbeltoon) openen. 1 CA zal op het scherm flikkeren.
Druk op de of toets om de Gespreksbeltoon
(5 verschillende tonen) te veranderen. Je zal de verschillende
gespreksbeltonen horen tijdens het veranderen ervan.
Druk op de PTT toets om jouw instellingen te bevestigen nadat je de
gewenste gespreksbeltoon hebt geselecteerd.
De gespreksbeltoon uitschakelen
Indien je verkiest geen gespreksbeltoon te horen, kan je de functie voor
gespreksbeltoon op UIT zetten. In dit geval kan de Gespreksbeltoon (default is cijfer 1),
naar een andere partij verzenden, maar zal jijzelf geen beltoon horen.
Druk viermaal op de MENU toets; het toestel zal de instellingsmodus voor
gespreksbeltoon openen.
Druk op de of toetsen tot op het scherm verschijnt.
Druk op de PTT toets om jouw instellingen te bevestigen.
Instelling van Roger-Biep AAN/UIT
De Roger-biep is een geluid dat automatisch wordt verzonden telkens wanneer de
TALK-toets (spreektoets) wordt losgelaten. Hiermee weet de andere persoon dat je
klaar bent met spreken en dat je je nu in de ontvangstmodus bevindt.
Om de Roger-biep in en uit te schakelen
Druk vijfmaal op de MENU-toets tot On ( ) op het LCD-scherm flikkert.
Druk op de of toets om de Roger-biep functie in te schakelen
(“ON” zal op het scherm verschijnen) of uit te schakelen (“OF” zal op het
scherm verschijnen.
Druk op de PTT toets om de instelling te bevestigen.
AAN/UIT instelling van de toetstoon
Met deze eigenschap geeft de handset een bevestigingstoon weer telkens er een toets
wordt ingedrukt.
Om de toetstoon AAN of UIT te zetten
Druk zesmaal op de MENU toets. Het " "-symbool zal op het
scherm flikkeren.
Druk op de of toets om de toetstoonfunctie in te schakelen ('On ' zal
op het scherm verschijnen) of uit te schakelen ( 'OF ' zal op het scherm
verschijnen).
Druk op de PTT toets om jouw instelling te bevestigen.
Twee kanalen tegelijkertijd afluisteren (Dubbel afluisteren)
Druk 7 maal op de MENU toets.
DCM verschijnt op het scherm terwijl "OF" flikkert.
 Loading...