

Page 1
Disney Elements © Disney 2009. All rights reserved.
User’s Guide
Portable DVD Player
Manual de usuario
Reproductor DVD Portátil
Guide de l’utilisateur
Lecteur DVD portable
P7100PDE
P7100PDE Zoran Eng 20AB.indd 2 2009/8/18 4:23:23 PM
Page 2
GB - 1
IMPORTANT SAFETY INSTRUCTIONS
CAUTION : TO REDUCE THE RISK OF ELECTRIC SHOCK,
DO NOT REMOVE COVE R (OR BACK ). N O USE RSERVICEABLE PARTS INSIDE, REFER SERVICING TO
QUALIFIED SERVICE PERSONNEL.
WARNING
To prevent re or shock hazard, do not expose this
appliance to rain or moisture.
The apparatus should not be exposed to dripping or
splashing and no objects lled with liquids, such as
vases, shall be placed on the apparatus.
The ventilation should not be impeded by covering the
ventilation openings with items, such as newspapers,
table-cloths, curtains, etc.
No naked ame sources, such as lighted candles, should
be placed on the apparatus.
The mains plug is used as the disconnect device, the
disconnect device should remain readily operable.
In order to disconnect the apparatus from the mains
completely, the mains plug should be disconnected from
the mains socket outlet completely.
The external exible cord of this AC/DC adaptor cannot
be replaced; if the cord is damaged, the AC/DC adaptor
is irreparable and should be discarded.
Excess sound pressure from earphones and headphones
can cause hearing loss.
Manufactured under license from Dolby Laboratories.
“Dolby”, “Pro Logic” and the double-D symbol are
tra demar ks of Dolby Labora torie s. C onfident ial
unpublished works. ©1992-1997 Dolby Laboratories,
Inc. All rights reserved.
CAUTION:
THIS DIGITAL VIDEO DISC PLAYER EMPLOYS A
LASER SYSTEM.
TO ENSURE PROPER USE OF THIS PRODUCT,
PLEASE READ THIS OWNER’S MANUAL CAREFULLY
AND RETAIN FOR FUTURE REFERENCE. SHOULD
THE UNIT REQUIRE MAINTENANCE, CONTACT AN
AUTHORIZED SERVICE LOCATION-SEE SERVICE
PROCEDURE.
USE OF CONTROLS , ADJU STMEN TS OR THE
PERFORMANCE OF PROCEDURES OTHER THAN
TH OS E SP ECIFIED HER EI N MAY RES ULT IN
HAZARDOUS RADIATION EXPOSURE.
TO PREVENT DIRECT EXPOSURE TO LASER BEAM,
DO NOT TRY TO OPEN THE ENCLOSURE. VISIBLE
LASER RADIATION MAY BE PRESENT WHEN THE
ENCLOSURE IS OPENED. DO NOT STARE INTO
BEAM.
WARNING:
TO REDUCE THE RISK OF FIRE OR ELECTRIC SHOCK, DO
NOT EXPOSE THIS PRODUCT TO RAIN OR MOISTURE.
WARNING:
TO REDUCE THIS RISK OF FIRE OR ELECTRIC
SHOCK, AND ANNOYING INTERFERENCE, USE THE
RECOMMENDED ACCESSORIES ONLY.
DANGER
INVISIBLE LASER RADIATION WHEN
OPEN AND INTERLOCK FAILED OR
DEFEATED. AVOID DIRECT EXPOSURE
TO LASER BEAM.
LASER SAFETY
This unit employs an optical laser beam system in the
CD mechanism, designed with built -in safeguards. Do
not attempt to disassemble, refer to qualied service
personnel. Exposure to this invisible laser light beam
may be harmful to the human eye.
THIS IS A CLASS-1 LASER PRODUCT. USE OF
CONTROLS, OR ADJUSTMENTS OR PROCEDURES
OTHER THAN THOSE SPECIFIED HEREIN, MAY
RES ULT IN HAZARDOU S LAS ER LIGHT BEAM
EXPOSURE.
The lighting ash with arrowhead symbol, within an
equilateral triangle, is intended to alert the user to the
presence of uninsulated “dangerous voltage” within the
product’s enclosure that may be of sufcient magnitude
to constitute a risk of electric shock to persons.
The exclamation point within an equilateral triangle
is intended to alert the user to presence of important
operating and maintenance (servicing) instructions in
the literature accompanying the appliance.
RISK OF ELECTRIC SHOCK
DO NOT OPEN
Disposal:
Please dispose of this product
responsibly at approved waste or
recycling facilities. Do not dispose of
in household waste.
P7100PDE Zoran Eng 20AB.indd 1 2009/8/18 4:23:26 PM
Page 3
GB - 2
IMPORTANT SAFETY INSTRUCTIONS (CONTINUED)
PLEASE READ THE INSTRUCTION CAREFULLY BEFORE OPERATING THIS UNIT.
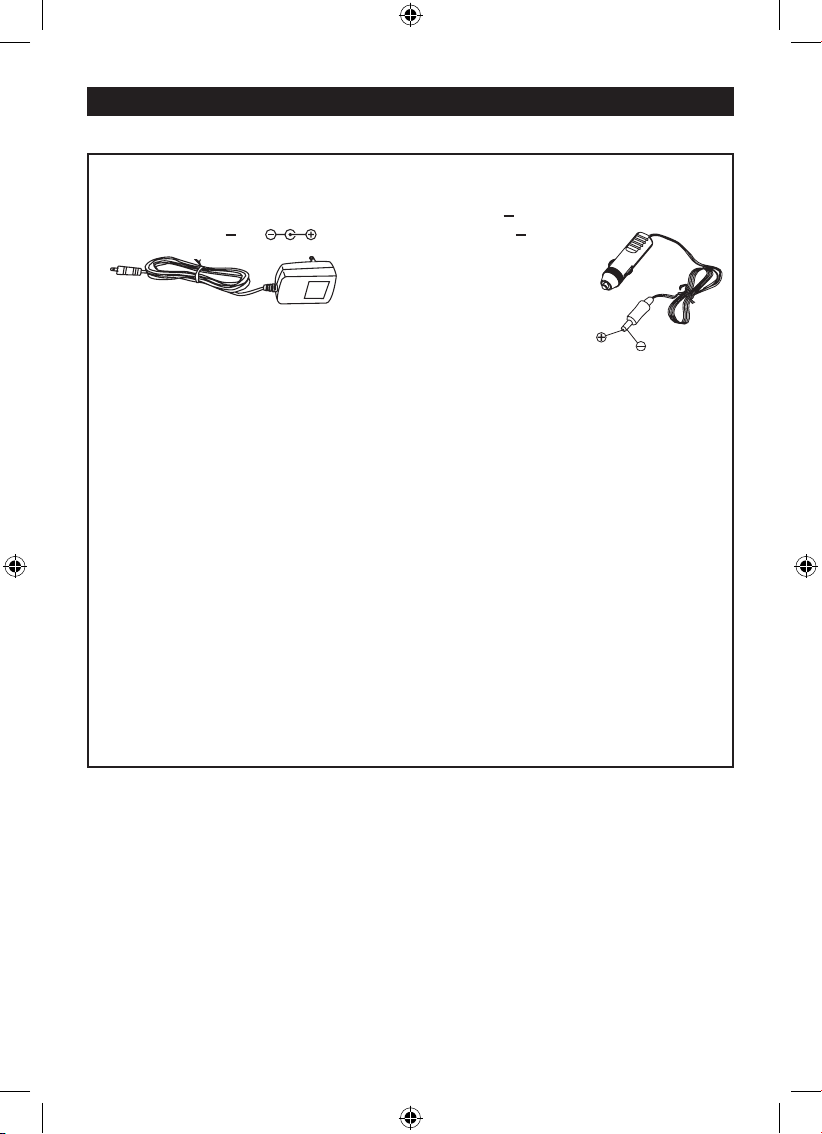
THIS PRODUCT IS SOLD WITH AN ADAPTOR AND CAR ADAPTOR
AC Adaptor Car Adaptor
1. Input : AC220V-240V~ 0.4A (max) 50Hz 1. Input : DC ... 12V 2A (max)
2. Output: DC 9V ... 1A 2. Output : DC ... 12V 2A (max)
WARNING
To prevent re or shock hazard, do not expose this appliance to rain or moisture. The
apparatus should not be exposed to dripping or splashing and no objects lled with liquids,
such as vases, should be placed on the apparatus. Ventillation should not be impeded by
covering the ventilation openings with items, such as newspapers, table-cloths, curtains,
etc.
To prevent electronic shock, match wide blade of plug to wide slot and fully insert.
No naked ame sources, such as lighted candles, should be placed on the apparatus.
In order to disconnect the apparatus from the mains completely, the mains plug should be
disconnected from the mains socket outlet completely.
Excess sound pressure from earphones and headphones can cause hearing loss.
Car Adapter Fuse Replacement
Should the player fail to operate with the DC car adapter/cord, check the fuse (2A). If brown,
check all connections and inspect the adapter cord for any damage. Always replace the
fuse with the same type and rating. If the fuse blows again after replacement, a potential
problem is indicated. DO NOT replace fuse with a higer rating, as doing so may cause
damage to the player.
CAUTION
Since the CD circuitry may cause interference to other radio tuners nearby, switch this unit
off when not in use or move it away from the affected radio tuner.
P7100PDE Zoran Eng 20AB.indd 2 2009/8/18 4:23:27 PM
Page 4
GB - 3
PRECAUTIONS
NOTES ON HANDLING:
•
When shipping the DVD player, always use the
original shipping carton and packing materials.
For maximum protection, repack the unit as it was
originally packed at the factory.
•
Do not use volatile liquids, such as insect spray,
near the DVD player. Do not leave rubber or plastic
products in contact with the DVD player for a long
time. They will leave marks on the nish.
•
The top and rear panels of the DVD player may
become warm after a long period of use. This is
normal and not a malfunction.
•
When the DVD player is not in use, be sure to
remove the disc and turn off the power.
•
If you do not use the DVD player for a long period,
the unit may not function properly in the future.
Turn on and use the DVD player occasionally.
NOTES ON LOCATING THE DVD PLAYER:
•
When you place this DVD player near a TV, radio
or VCR, the playback picture may become poor
and the sound may be distorted. In this case, move
the DVD player away from the TV, radio or VCR.
NOTES ON CLEANING:
Use a soft, dry cloth for cleaning.
• For stubborn dirt, soak the cloth in a weak
detergent solution, wringing well and wipe.
Use a dry cloth to wipe it dry. Do not use any
type of solvent, such as thinner and benzene,
as they may damage the surface of the DVD
player.
• If you use a chemical-saturated cloth to clean
the unit, follow that product’s instructions.
Warning: Cleaning and adjustment of lenses
and/or other components of playback mechanism
should be performed by a qualified service
technician.
TO OBTAIN A CLEAR PICTURE:
The DVD player is a high technology, precision
device. If the optical pick-up lens and disc drive parts
are dirty or worn down, the picture quality becomes
poor. To obtain a clear picture, we recommend
regular inspection and maintenance (cleaning or parts
replacement) every 1,000 hours of use depending on
the operating environment. For details, contact your
nearest dealer.
NOTES ON MOISTURE CONDENSATION:
Moisture condensation damages the DVD
player. Please read the following carefully.
•
Moisture condensation occurs, for example, when
you pour a cold drink into a glass on a warm day.
Drops of water form on the outside of the glass.
In the same way, moisture may condense on the
optical pick-up lens inside this unit, one of the most
crucial internal parts of the DVD player.
Moisture condensation occurs during the
following cases:
•
When you bring the DVD player directly from a
cold place to a warm place.
•
When you use the DVD player in a room where
you just turned on the heater, or a place where the
cold wind from the air conditioner directly hits the
unit.
•
In summer, when you use the DVD player in a hot
and humid place just after you moved the unit from
an air conditioned room.
•
When you use the DVD player in a humid place.
Do not use the DVD player when moisture
condensation may occur.
•
If you use the DVD player in such a situation, it
may damage discs and internal parts. Remove
the disc, connect the power cord of the DVD
player to the wall outlet, turn on the DVD player
and leave it “ON” for two or three hours. After two
or three hours, the DVD player will have warmed
up and evaporated any moisture. Keep the DVD
player connected to the wall outlet and moisture
condensation will seldom occur.
P7100PDE Zoran Eng 20AB.indd 3 2009/8/18 4:23:28 PM
Page 5

GB - 4
LOCATION OF CONTROLS
1. LCD Display
2. Speakers
3. Remote Sensor
4. Power Indicator
5. Power on/off Switch
6. DVD Door
7. ENTER Button
8. Navigation ( , , , )
9. DVD Door Open Button
10. SETUP Button
11. LCD on/off
12. PLAY / PAUSE Button
13. Skip Backward Button ( )
14. Skip Forward Button ( )
15. DVD Menu Button
16. Charge Indicator
- Red LED light is being charged
- Green LED light is full charged
Note: The battery charge must be in
power switch OFF condition.
17. DC In Jack 9V-12V
18. Coaxial Jack
19. Source Switch (DVD AV IN)
Note: To make sure the switch is set to
“DVD” position when DVD is playing.
20. AV Input Jack
Note: To make sure the switch is set to
“AV IN” position when AV IN is playing.
21. AV Output Jack
Note:
The AV output function is available in
DVD mode only.
For energy saving purpose, the LCD
panel will be automatically powered OFF
when connecting to external TV.
22. Earphones Jack*
23. Volume Control
* EARPHONES JACK
For private listening, connect a 32 ohm stereo headphones set (3.5mm plug) into the
headphone jack. Adjust volume controls to your level preference.
Note the speakers are disconnected automatically.
CAUTION
HEARING EXPERTS ADVISE AGAINST EXPOSURE TO CONTINUOUS EXTENDED PLAY
AT LOUD/HIGH VOLUME LEVELS WHILE USING HEADPHONES OR EARPHONES.
POSSIBLE HEARING LOSS MAY RESULT. IF YOU EXPERIENCE A RINGING IN THE
EARS. REDUCE VOLUME OR DISCONTINUE USE.
1
2
2
3 4 5
6
7
11
98 10
12
13
14
15
16
17
18
19
20
21
22
23
P7100PDE Zoran Eng 20AB.indd 4 2009/8/18 4:23:31 PM
Page 6
GB - 5
LOCATION OF CONTROLS (CONTINUED)
BATTERY INSTALLATION
1. Unscrew the battery compartment cover out.
2. Install two (2) “AAA” batteries into the remote,
paying attention to the polarity diagram in the battery
compartment
3. Replace the battery compartment cover.
BATTERY PRECAUTIONS
Follow these precautions when using batteries in this device:
1. The batteries (battery pack or batteries installed) shall not be exposed excessive heat
such as sunshine, re or the like.
2. Do not attempt to recharge, short-circuit, disassemble, heat or throw the batteries into a
re.
3. Do not mix old and new batteries.
4. Do not mix alkaline, standard (carbon-zinc), or rechargeable (nickel cadmium)
batteries.
5. If the device is not to be used for a long period of time, remove the batteries to prevent
damage or injury from possible battery leakage.
6. Do not try to recharge batteries not intended to be recharged; they can overheat and
rupture. (Follow battery maufacturer’s directions.)
7. Dispose of batteries properly in accordance with local laws.
BATTERY INSTALLATION (REMOTE CONTROL)
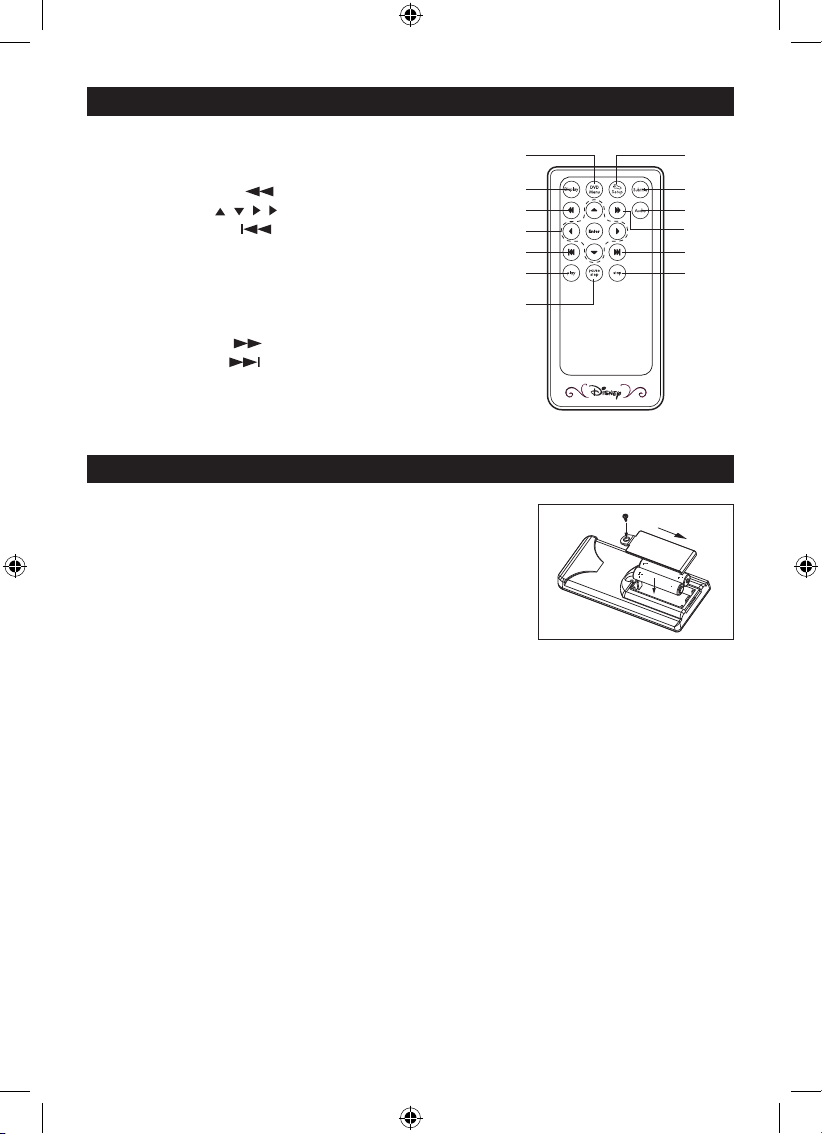
REMOTE CONTROL
1. DVD Menu Button
2. Display Button
3. Fast Backward ( ) Button
4. Navigation ( , , , ) / Enter Button
5. Skip Backward ( ) Button
6. Play Button
7. Pause / Step Button
8. Set Up Button
9. Subtitle Button
10. Audio Button
11. Fast Forward ( ) Button
12. Skip Forward ( ) Button
13. Stop Button
1
2
3
4
6
5
7
8
9
10
11
12
13
P7100PDE Zoran Eng 20AB.indd 5 2009/8/18 4:23:34 PM
Page 7
GB - 6
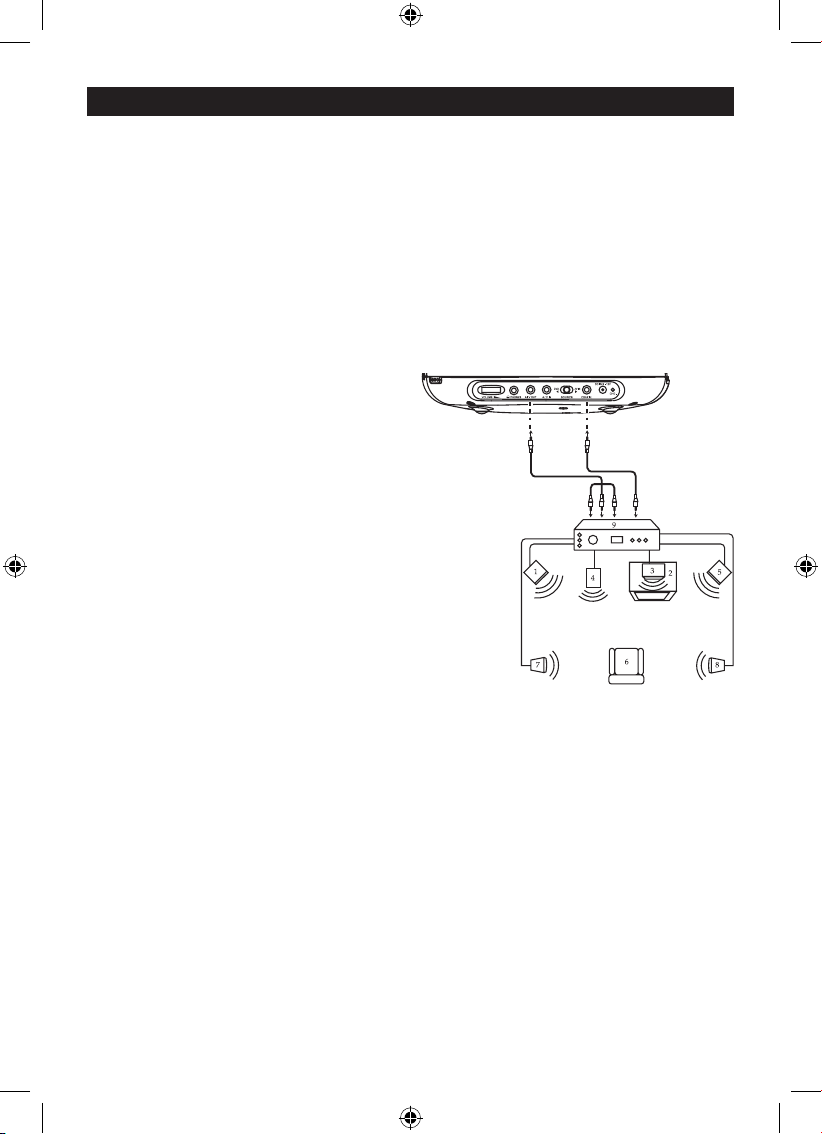
CONNECTING THE DVD TO A HOME THEATER SYSTEM
1. Front Left Speaker
2. Television
3. Center Speaker- can be located
on top or below the Television.
4. Sub-woofer- can be located on
anywhere in the room.
5. Front Right Speaker
6. Viewing/Listening Position-
The best listening position is obtained
by positioning the chair, sofa, etc. in the
middle of all the speakers.
7. Rear Left Speaker
8. Rear Right Speaker
9. AV Amplier w/Dolby Digital Decoder/DTS Decoder
Place the subwoofer, front, rear and center speakers in locations as shown / described here.
After correctly positioning the speakers, perform the Tone Test on the AV Amplifer and adjust
the volume controls until the desired sound is achieved. For best results, sit in the viewing
position and have someone adjust the volumes for you; this will enable you to set the optimal
levels.
NOTE: the rear speakers can also be located on the side wall facing the viewing position and
each other. Make sure the viewing position is located between the 2 speakers in this case.
Experiment to nd optimal position.
CONNECTION
NOTES FOR CONNECTING TO A TV:
•
Connect the DVD player with the AV cable into the TV AV in.
• Set the TV’s TV/VIDEO button or switch to the VIDEO setting.
• When connecting the DVD, refer to the owner’s manual of the TV, as well as this manual.
• When connecting the DVD to the TV, make sure the power is off and both units are unplugged before
making any connections.
• If your TV only has one audio input, the use of a “Y” connector may be necessary. Visit your local
electronics supply store.
• Connect the DVD player to your TV directly. If you connect the DVD player through a VCR, the
playback picture will be distorted because DVD video discs are copy protected.
AV Cable
From
Digital Out
To Digital
Audio Input
Coaxial Cable
P7100PDE Zoran Eng 20AB.indd 6 2009/8/18 4:23:35 PM
Page 8
GB - 7
ABOUT DISCS
The region number for this DVD Player is :
See the following page for information regarding region numbers.
PLAYABLE DISCS:
The following discs can be played back on this DVD player:
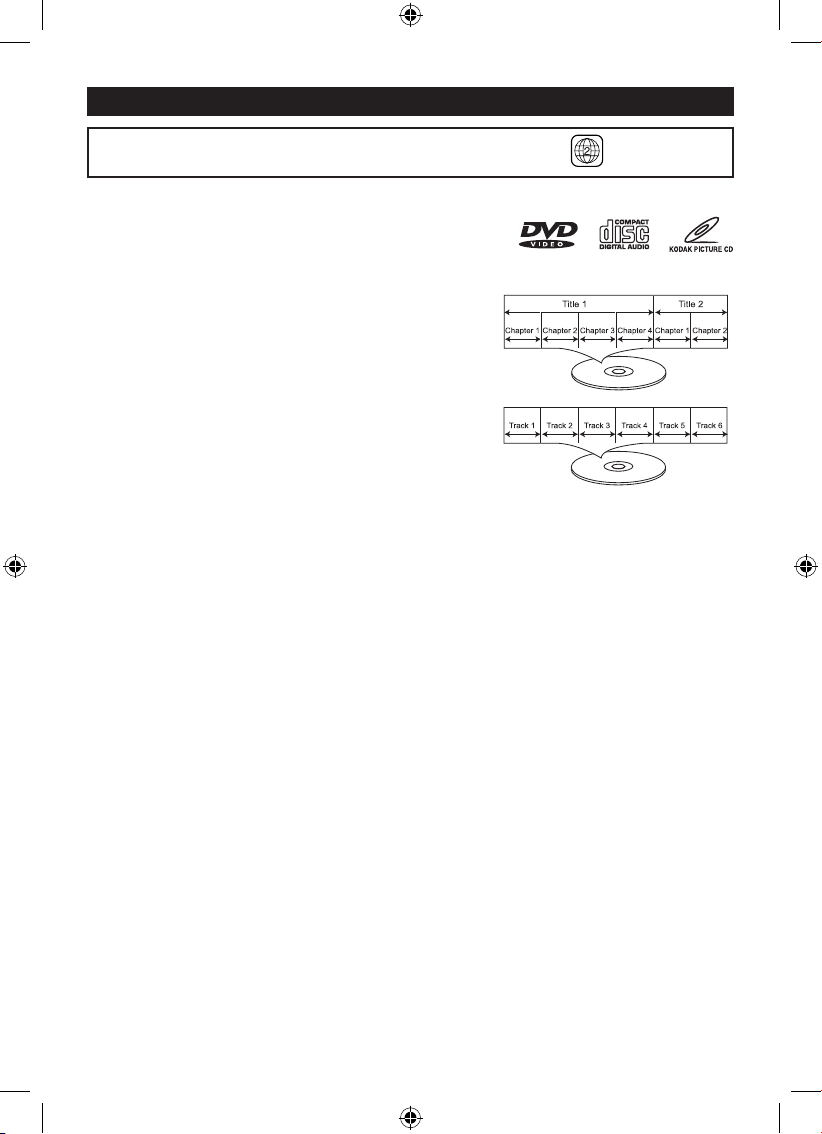
DISC TYPES:
DVD
Data on most DVDs is divided into sections called “titles”
and then into subsections called “chapters”, each of
which is given a title or chapter number. Some features
of this DVD player will not operate with some DVD discs
as they are preset. If a function you selected does not
run as desired, refer to the manual accompanying the
DVD disc.
AUDIO CD
Data on an audio CD is divided into sections called
“tracks”, each of which is given a track number.
IMPORTANT:
It is important that you read the manual that accompanies the DVD discs, as there are features
that are on the DVD player that cannot be used with certain DVDs. There are also extra
features on the DVD disc that are different for each DVD disc, so they are not explained in
this owner’s manual.
Notes on Copyright:
It is forbidden by law to copy, broadcast, show, broadcast on cable, play in public and rent
copyrighted material without permission. DVD video discs are copy protected, and any
recordings made from these discs will be distorted. This product incorporates copyright
protection technology that is protected by method claims of certain U.S. patents and other
intellectual property rights owners. Use of this copyright protection technology must be
authorized by Macrovision Corporation, and is intended for home and other limited viewing
uses only unless otherwise authorized by Macrovision Corporation. Reverse engineering or
disassembly is prohibited.
Region Management Information:
This DVD Player is designed and manufactured to respond to the Region Management
Information that is recorded on a DVD disc. If the Region number described on the DVD
disc does not correspond to the Region number of this DVD player, this DVD player cannot
play that disc. You may not be able to play back some DVD video on this player if they are
purchased from outside your geographic area or made for business purposes.
When you try to playback an unauthorized disc, “REGION ERROR” appears on the screen.
P7100PDE Zoran Eng 20AB.indd 7 2009/8/18 4:23:37 PM
Page 9
GB - 8
SETUP MENU
DVD Setup Mode
• While in DVD stop mode, press the SETUP button on the remote control, the setup menu
will appear on the screen.
• Setup Mode provides the menu for the conguration of LANGUAGE SETUP, VIDEO SETUP,
and AUDIO SETUP.
• Item selection in the Setup Menu is done by using the direction buttons and the ENTER
button.
• To exit the Setup Menu, press the SETUP button again.
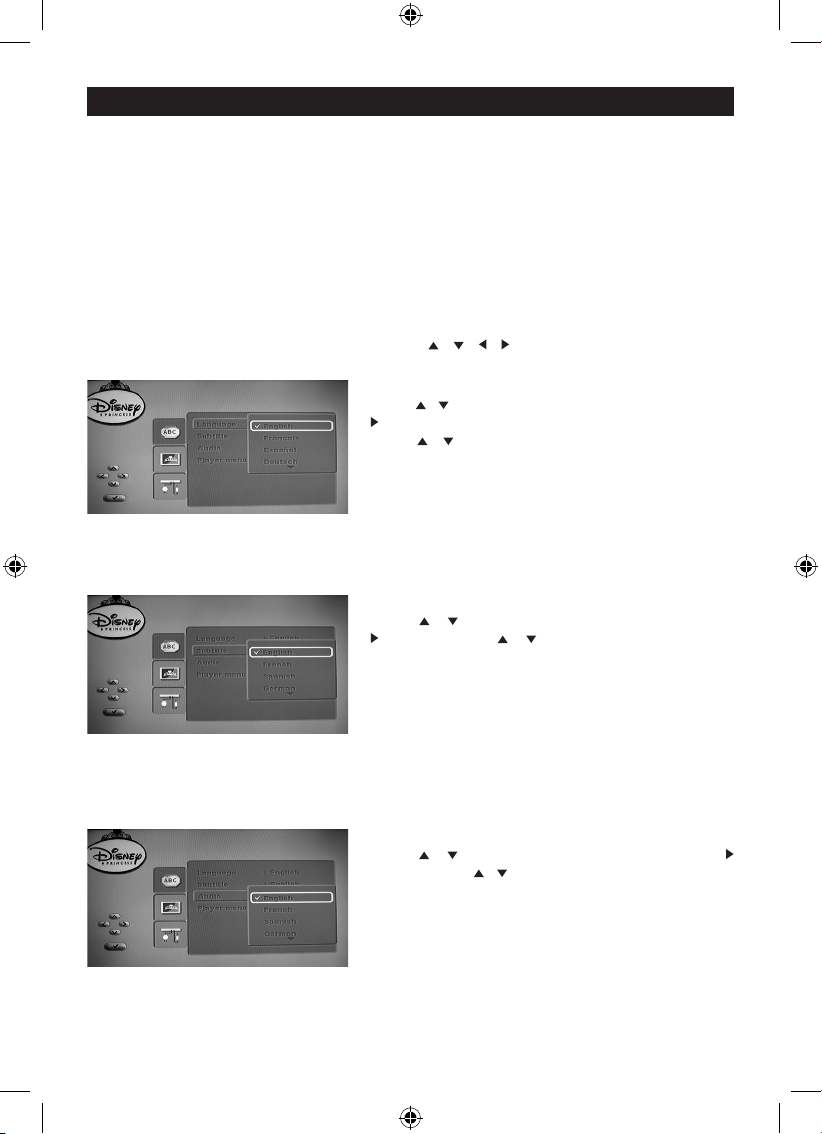
LANGUAGE SETUP
In STOP mode, press the SETUP button and highlight LANGUAGE with remote control. To
select the desired item, use Direction buttons ( / / / ), then press ENTER button to
conrm the selection.
Language (on-screen display language)
Press / button to select “Language”, then press
button to move the cursor to the column of choices.
Using / button to select a language and press
ENTER:
- English
- Français
- Español
- Deutsch
- Italiano
- Portuguese
Subtitle Language
Press / button to select “Subtitle” and press
button. Using / button to select a subtitle
language (or Off to select none) and press ENTER:
- English
- French
- Spanish
- German
- Italian
- Portuguese
- Auto
- Off
Audio Language
Press / button to select “Audio” and press
button. Using / button to select a desired audio
language and press ENTER:
- English
- French
- Spanish
- German
- Italian
- Portuguese
P7100PDE Zoran Eng 20AB.indd 8 2009/8/18 4:23:38 PM
Page 10
GB - 9
SETUP MENU (CONTINUED)
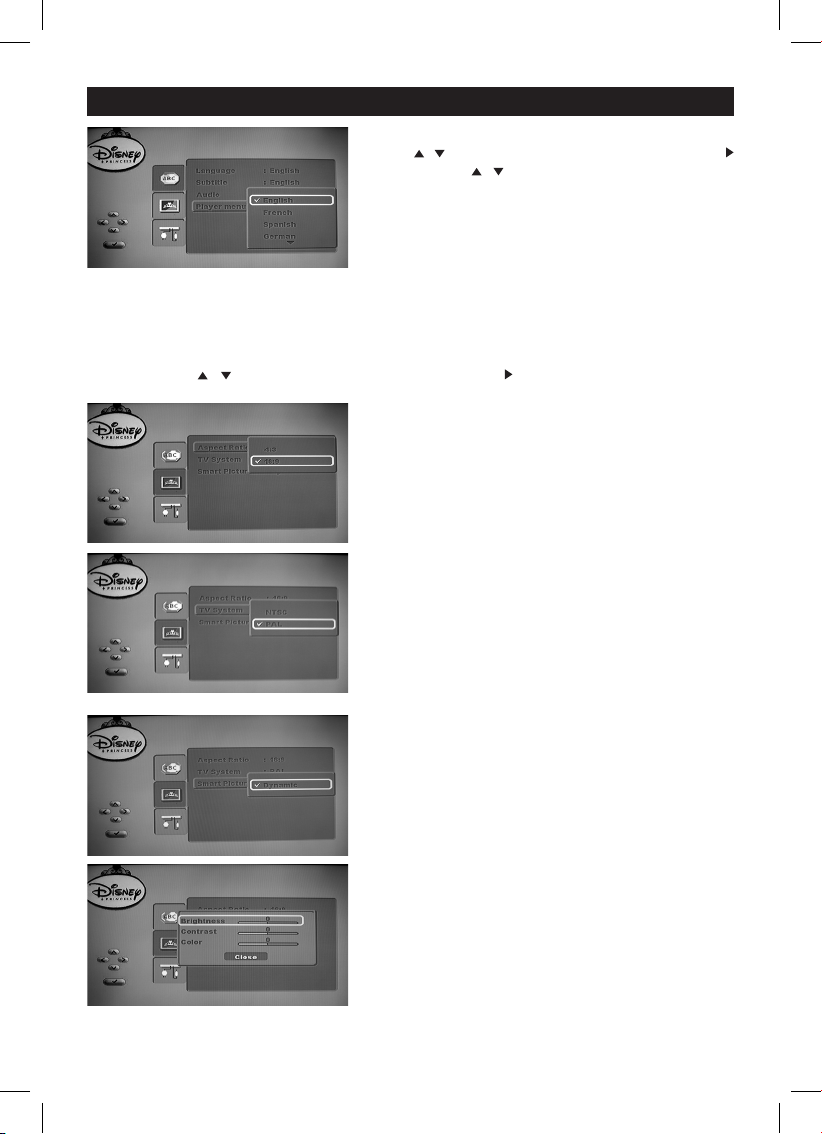
Player Menu Language
Press / button to select “Player menu” and press
button. Using / button to select the desired DVD
menu and press ENTER:
- English
- French
- Spanish
- German
- Italian
- Portuguese
VIDEO SETUP
In STOP mode, press the SETUP button on remote control. The SYSTEM SETUP MENU
appears, press / buttons to select “VIDEO”, then press button to conrm.
Aspect Ratio
(4:3) - Select this if you have a normal TV. A “Wide-
screen” display with black bats on the top and
bottom will be displayed on the TV screen.
(16:9) - Select this for wide-screen TV (frame ratio
16:9).
TV System
(NTSC) - Select this if the connected TV has the
NTSC colour system. It will change the video
signal of a PAL disc and output to NTSC
format.
(PAL) - Select this if the connected TV has the PAL
colour system. It will change the video signal of
an NTSC disc and output it to PAL format.
Smart picture
Select “Dynamic”, then press ENTER button to
conrm.
(Brightness) - This option will adjust the brightness
of the whole screen.
It is ranged from -20 to 20.
(Contrast) - This option will adjust the contrast of the
whole screen.
It is ranged from -16 to 16.
(Color) - This option will adjust the color of the whole
screen.
It is ranged from -20 to 20.
P7100PDE Zoran Eng 20AB.indd 9 2010/2/26 5:34:11 PM
Page 11

GB - 10
SETUP MENU (CONTINUED)
AUDIO SETUP
In STOP mode, press the SETUP button on remote control. The SYSTEM SETUP MENU
appears, press / buttons to select “AUDIO”, then press button to conrm.
DIGITAL OUTPUT
Selecting the Digital Output setting allows the user
to adjust the audio output on S/PDIF ports to work
in harmony with the audio equipment connected to
the player, the following options are available.
• In “Audio”, press to select “DIGITAL OUTPUT”,
then press button.
(off) - To deactivate the digital audio output. For
example, if you use the FRONT (L/R) AUDIO
OUT sockets to connect to a TV or stereo
system.
(PCM) - Select this if the connected device is not
capable of decoding multichannel audio. The
DVD player will convert the Dolby Digital and
MPEG-2 multichannel signals to PCM (Pulse
Code Modulation).
(RAW) - Select this if the connected device has a
built-in multichannel decoder that supports one
of the multichannel audio format (Dolby Digital,
MPEG-2).
DRC MODE
Select “ON” to turn the DRC (Dynamic Range
Compress) on, or “OFF” to turn DCR off.
Dynamic Range Compression will compress the
dynamic range of the DVD’s audio track.
DOWN SAMPLING
When using the coaxial digital output, select “ON”
turn the Down Sampling on, or “OFF” to turn Down
Sampling off.
When Down Sampling is on, the digital output will be
sampling at 48k even if the original audio is encoding
in 96k for DVD.
P7100PDE Zoran Eng 20AB.indd 10 2009/8/18 4:23:42 PM
Page 12

GB - 11
IMPORTANT NOTES:
• A symbol will appear at the upper right corner on the TV screen during operation if you
try to access a function that is not available on the disc.
• Some discs may take a few seconds to load.
• Always hold the disc without touching either of its surfaces. When inserting a disc, position
it with the printed title side facing up, align it with the guides and place it in its proper
position.
• It is important that you read the manual that accompanies the DVD disc as there are
features that are on this DVD player that cannot be used with certain DVDs. There are
also extra features that are different for each DVD disc, so they are not explained in this
owner’s manual.
TV SELECTION
Turn on the TV, the DVD player and the Audio Amplier System (if any).
1. Press the “TV/VIDEO” button on the TV.
2. Select the Video Mode (TV).
Note: If there is more than 1 AV channel for the TV, select the channel you have connected
to the DVD player.
3. Select the correct audio output on the AV amplifer (if any).
PLAYBACK OF A DVD
1. Press the POWER switch to turn on the unit; the orange LED is light.
2. Press the Door Open Switch to open the disc tray. Insert a disc with the label side facing
up on the disc tray.
3. Close the disc tray. After loading, the menu screen of the DVD should appear. Use the
Navigation ( , , , ) buttons to select the desired option and the ENTER button to
select it; playback will start immediately.
4. To stop playback, press the STOP button. Because the unit will remember where you
stopped, simply press the PLAY button to resume playback where you left off. If the STOP
button is pressed twice, the unit will stop completely.
NOTES:
• If a MENU appears on the TV screen, press the Navigation ( , , , ) buttons to select
the desired option/item, then press the ENTER button. Please make sure to refer to the
disc’s jacket or case for additional information.
• Resuming playback may not work on all discs.
DVD MENU
Press the MENU button, and the Main Menu of the disc will appear. Use the Navigation ( ,
, , ) buttons to select the desired option, and then press the ENTER button. This is not
available on all discs.
SKIP
Press the SKIP FORWARD button (less than 1 sec) on main unit or press ( ) button on
remote control to advance the DVD to the beginning of the next chapter.
Press the SKIP BACK button (less than 1 sec) on main unit or press ( ) button on remote
control to move the DVD to the beginning of the previous chapters.
DVD BASIC OPERATION
P7100PDE Zoran Eng 20AB.indd 11 2009/8/18 4:23:42 PM
Page 13

GB - 12
DVD BASIC OPERATION (CONTINUED)
SEARCH
During playback, press ( ) button or ( ) button on remote control to move the DVD
forward or backward at double (x2) speed to locate a specic section. Repeatedly press these
buttons and the speed will increase to x4, x8, x16 and resume normal playback.
The DVD will move forward or backward at high speed until the PLAY/PAUSE button is pressed
again; normal playback will resume at that point.
DISPLAY
While playing a DVD, press the DISPLAY button on remote control once to view the elapsed
title time and remaining title time. Press a second time to view current Title and chapter.
Press a third time to view the audio and subtitle setting. Press a fourth time to view angle and
repeat setting. Press a fth time to turn the display off.
Note: There is no ANGLE and REPEAT button in the machines although press DISPLAY button
that showing the angle and repeat, it needs used in conjuction with corresponding buttons.
PLAY/PAUSE
Press the PLAY/PAUSE button once to pause the picture. Press the PLAY/PAUSE button
again to resume normal playback.
SUBTITLE
This function is only applicable for DVD disc. It can change the subtitle language by press
the SUBTITLE button on remote control.
Note: Number of subtitle available depends on the DVD disc.
AUDIO
This function is applicable for DVD and CD audio but with different effects.
- Pressing the AUDIO button on remote control will change the audio channel.
Note: When AV is input, this key has no function.
P7100PDE Zoran Eng 20AB.indd 12 2009/8/18 4:23:42 PM
Page 14
GB - 13
PICTURE CD OPERATION
PLAYBACK OF A PICTURE CD
1. Press the POWER switch to turn on the unit; the orange LED is light.
2. Press the Door Open Switch to open the disc tray. Insert a picture CD with the label side
facing up on the disc tray.
3. Close the disc tray. After loading, the FOLDER/PICTURE menu will appear on the TV
screen. Press the Navigation ( , ) buttons to select the desired folder/track.
4. Press the ENTER button to conrm. Press the Navigation ( , ) buttons to select the
desired picture; the image preview of the picture will appear in the image preview area.
Press the ENTER button to play the picture. Press the STOP button on remote control to
stop playback.
5. To select other folders, press Navigation ( , ) button to select “- -” followed by press
the ENTER button to go back to select the folders and use the Navigation ( , ) button
to select the desired folder again.
CD BASIC OPERATION
PLAYBACK OF A CD
1. Press the POWER switch to turn on the unit; the orange LED is light.
2. Press the Door Open Switch to open the disc tray. Insert a disc with the label side facing
up on the disc tray.
3. Close the disc tray. After loading, playback will start automatically.
4. Press the STOP button on remote control to stop playback.
SELECTING TRACKS USING THE SKIP BUTTONS
During playback, press the SKIP ( ) or ( ) button on remote control to select a track
to be played.
P7100PDE Zoran Eng 20AB.indd 13 2009/8/18 4:23:43 PM
Page 15
GB - 14
CARE AND MAINTENANCE
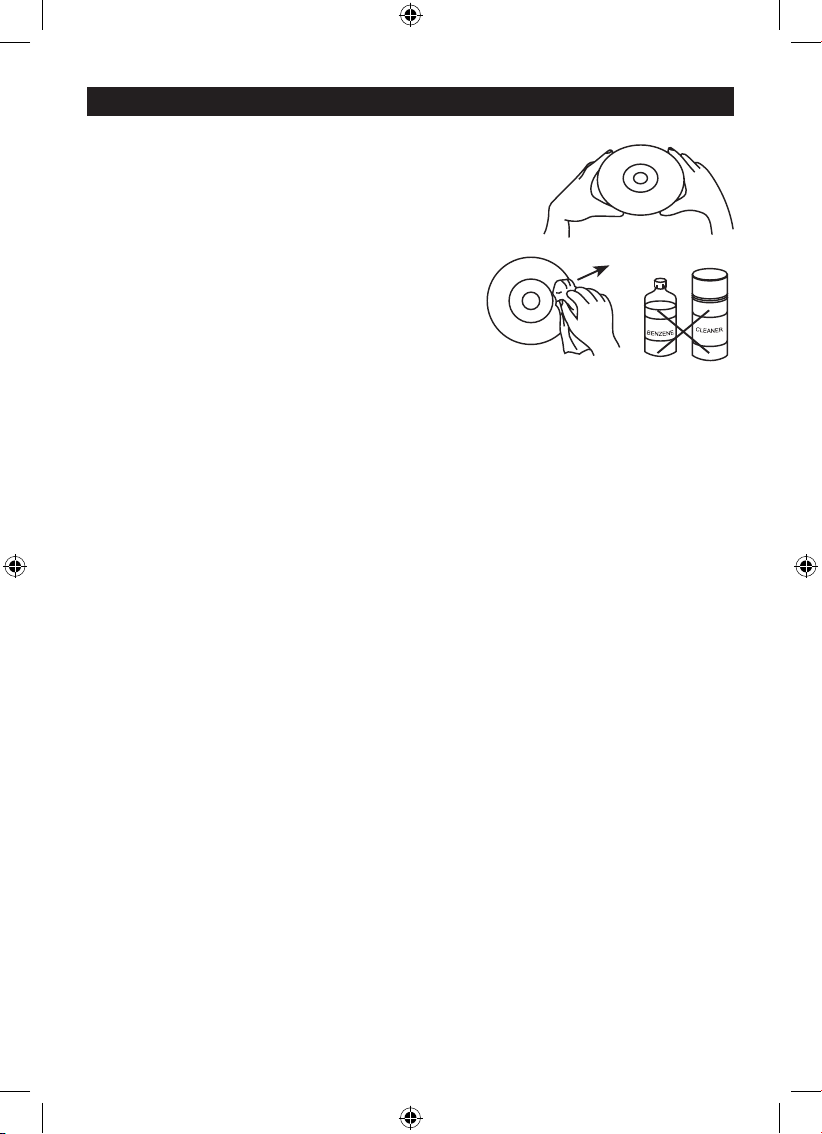
Caring for Discs
• Treat the disc carefully. Handle the disc only
by its edges. Never allow your ngers to come
in contact with the shiny, unprinted side of the
disc.
• Do not attach adhesive tape, stickers, etc. to the
disc label.
• Clean the disc periodically with a soft, lint-free,
dry cloth. Never use detergents or abrasive
cleaners to clean the disc. If necessary, use a
CD cleaning kit.
• If a disc skips or gets stuck on a section
of the disc, it is probably dirty or damaged
(scratched).
• When cleaning the disc, wipe in straight lines from the center of the disc to the outer edge
of the disc. Never wipe in circular motions.
• Discs should be stored in their cases after each use to avoid damage.
• Do not expose discs to direct sunlight, high humidity, high temperatures or dust, etc.
Prolonged exposure or extreme temperatures can warp the disc.
• Do not stick or write anything on either side of the disc. Sharp writing instruments, or the
ink, may damage the surface.
Cleaning the Unit
• To prevent re or shock hazard, disconnect your unit from the AC power source when
cleaning.
• The nish on your unit may be cleaned with a dust cloth and cared for as other furniture.
Use caution when cleaning and wiping the plastic parts.
• Mild soap and a damp cloth may be used on the front panel.
P7100PDE Zoran Eng 20AB.indd 14 2009/8/18 4:23:44 PM
Page 16

GB - 15
Correction
• Insert the CAR Adapter into the car
DC outlet having 12V.
• Set the Power switch to On.
• Insert a disc.
• Set the “SOURCE” switch
appropriately, for either an external
video source (AV IN) or (DVD) for
internal disc playing.
• Check the unit for the proper
external connections.
• Turn on the externally connected
equipment.
• Clean the disc by following the
procedure on page 14.
• Insert a disc.
• Insert a playable disc. (Check the
disc type, the TV System menu, and
the Regional Code).
• Place the disc on the disc tray with
the proper orientation.
• Clean the disc.
• Press the SETUP button on the unit
or remote control to close the menu
screen.
• Point remote at unit’s sensor.
• Operate with 23 feet (7m).
• Remove the obstacle.
• Replace the batteries.
• Plug the AC adaptor securely into
the wall outlet and securely into the
unit as well.
• Set the Power switch to OFF
position.
TROUBLESHOOTING GUIDE
Symptom
The unit is receiving
no power
The power is ON,
but the unit does not
operate.
There is no picture
(and/or sound), and
the Power LED is lit
in ORANGE.
Poor picture and/or
audio quality.
The DVD player does
not start playback.
The remote control
does not work
properly
The battery cannot
charge
Cause
• The CAR adaptor is
disconnected.
• The Power switch set to Off.
• No disc is inserted.
•
The “SOURCE” switch is set to
AV IN, but there is no external
video input available.
• The “SOURCE” switch is set to
AV IN position, but playing DVD,
CD or JPEG disc.
• The external video/audio cable(s)
are not connected securely.
• The external video/audio
equipment is powered off.
• A dirty or scratched disc is being
played.
• No disc is inserted.
• An unplayable disc is inserted.
• The disc is placed in the unit
upside down or misaligned with
the guides.
• The disc is dirty.
• A menu is still on the screen.
• Not pointed at the unit.
• Operated too far away.
• Obstacle in remote’s path.
• Batteries in remote are low.
• The AC adaptor is disconnected
from the wall outlet or is not
connected to the unit.
• Power switch is set to ON
position.
Check the following guide for the possible cause of a problem before contacting service.
P7100PDE Zoran Eng 20AB.indd 15 2009/8/18 4:23:44 PM
Page 17

GB - 16
SPECIFICATIONS
GENERAL
Power source DC 9V-12V ... 1A
Power consumption 10W
External dimensions (LxWxH) 228 x 185 x 56 mm
Weight 0.96kg
Operating conditions Temperature: 5°C to 35°C
Operation status Horizontal
Operating humidity 5% to 90%
SYSTEM
Laser Semiconductor laser wave length 650nm
Signal system PAL/NTSC
S/N more than 90db
Dynamic Range more than 90db
INPUT
Composite video 1.0V P-P 75ohm negative sync.
Audio 0.5Vrms 47Kohm
OUTPUT
Composite video 1.0V P-P 75ohm negative sync.
Audio output (Digital) 0.5V P-P 75ohm
Audio output (Analog) 0.5Vrms 600ohm
AC/DC ADAPTOR
Input AC 220V-240V~ 0.4A 50Hz
Output DC 9V ... 1A
ACCESSORIES:
1 x AV cable
1 x Headphone
1 x AC/DC Adaptor
1 x Car Cigarette Adaptor
1 x Remote Control
2 x “AAA” batteries (for remote control)
* Design and specication are subject to change without notice.
P7100PDE Zoran Eng 20AB.indd 16 2009/8/18 4:23:44 PM
Page 18

ES - 1
ADVERTENCIA: PARA REDUCIR EL RIESGO DE ELECTROCUCIÓN,
NO QUITE LA CUBIERTA (O LA PARTE TRASERA). NO CONTIENE
COMPON EN TE S ÚT IL ES PARA EL USU SA RIO, ACUDA A
PERSONAL DE SERVICIO TÉCNICO CUALIFICADO.
ADVERTENCIA
Para prevenir el riesgo de incendio o choque peligroso, no exponga la
unidad a la lluvia o humedad.
La unidad no debe exponerse a supercies que goteen, salpiquen,
tampoco se deben emplazar sobre la unidad cualquier otro objeto que
contenga líquido, como por ejemplo jarrones.
No se deberá tapar las aperturas de ventilación de la unidad con objetos
como periódicos, gamuzas, cortinas, etc.
No deberá exponer la unidad a fuentes inamables, como velas
encendidas.
El enchufe principal se utiliza como mecanismo de desconexión,
el mecanismo de desconexión debería permanecer fácilmente en
funcionamiento. Para desconectar la unidad de la red de suministro, el
enchufe de la red de suministro deberá desconectarse por completo de
la base del enchufe. No deberá exponer la unidad a fuentes inamables,
como velas encendidas.
El exterior de este cable exible de AC / DC adaptador no puede ser
sustituido, si el cable está dañado, el AC / DC adaptador es irreparable
y debe ser desechada.
El enchufe principal se utiliza como mecanismo de desconexión,
el mecanismo de desconexión debería permanecer fácilmente en
funcionamiento. Para desconectar la unidad de la red de suministro,
el enchufe de la red de suministro deberá desconectarse por completo
de la base del enchufe.
Fabricado bajo la licencia de Dolby Laboratories. “Dolby”,
“Pro Logic” y el doble símbolo D son marcas registradas
de Dolby Laboratories. Obras Condenciales sin publicar.
©1992-1997 Dolby Laboratories, Inc. Todos los derechos
reservados.
ADVERTENCIA:
EL REPRODUCTOR DE DISCO VIDEO DIGITAL UTILIZA
UN SISTEMA LÁSER.
PARA ASEGURAR UN USO APROPIADO DE ESTE
PRODUCTO, LEA CUIDADOSAMENTE EL MANUAL
DE USUA RIO Y GU ÁRD ELO C OMO FUTU RA
RE FE RENCI A. EN CASO DE QUE LA UNIDA D
NECESITE MANTENIMIENTO, CONTACTE CON EL
SERVICIO AUTORIZADO- LEA LOS PROCEDIMIENTOS
DE SERVICIO.
EL USO DE CONTROLES, AJUSTES O DESARROLLO
DE PRO CEDI MIEN TOS DIF EREN TES A LOS
ESP EC I FICAD OS P OD RÍAN P R OVOCA R LA
EXPOSICIÓN DE RADACIONES PELIGROSAS.
PARA PREVENIR LA EXPOSICIÓN DIRECTA A LOS
RAYOS LÁSER, NO INTENTE ABRIR EL CHASIS.
CUANDO SE ABRE LA CUBIERTA PODRÍAN APARECER
RADIACIONES LÁSER VISIBLES.NO MIRE FIJAMENTE
LOS RAYOS LÁSER.
ADVERTENCIA:
PAR A REDUC IR EL RI ESGO DE INC END IO O
ELECTROCUCIÓN, NO EXPONGA LA UNIDAD A LA
LLUVIA O HUMEDAD.
ADVERTENCIA:
PARA REDUCIR EL RIESGO DE ELECTROCUCIÓN
O I NCE NDI O O C UAL QUI ER O TRO TIP O DE
INTERFERENCIA, UTILICE SÓLO LOS ACCESORIOS
RECOMENDADOS.
PELIGRO
RA D I AC IÓ N LÁ S E R V ISIB L E E
INVISIBLE CUANDO ESTÉ ABIERTO
CON LOS CIERRES FORZADOS. EVITE
LA EXPOSICIÓN DIRECTA AL RAYO
LÁSER.
SEGURIDAD LÁSER
Esta unidad usa un rayo láser óptico en el mecanismo
CD, diseñado con protecciones integradas. No intente
desmontarlo; diríjalo a personal de servicio cualicado.
La exposición a este rayo láser de luz invisible puede ser
perjudicial para el ojo humano.
PR ODU CTO LÁSE R DE C LAS E 1. E l us o de
controles,ajustes o realización de procedimientos distintos
a los aquí especicados puederesultar en una exposición
peligrosa a LUZ LÁSER.
INSTRUCCIONES IMPORTANTES DE SEGURIDAD
El símbolo de un rayo parpadeante, dentro de un triángulo
equilatero, pretende alertar al usuario sobre la presencia de
un “voltaje peligroso” no aislado dentro de la unidad que
podría ser lo sucientemente serio como para constituir un
riesgo de electrocución para las personas.
El punto de exclamación dentro de un triángulo equilatero
pretende alertar al usuario sobre la importancia de utilizar
y mantener esta unidad de acuerdo con estas instrucciones
de uso.
ADVERTENCIA
RIESCO DE ELECTROCUCIÓN
NO ABRIR
Eliminación:
Deseche este producto responsablemente
en centros de residuos o reciclaje
aprobados. No lo deseche con sus
residuos domésticos.
P7100PDE Zoran Spa 20AB.indd 1 2009/8/18 4:27:54 PM
Page 19

ES - 2
INSTRUCCIONES IMPORTANTES DE SEGURIDAD (CONTINUACIÓN)
LEA CUIDADOSAMENTE LAS INSTRUCCIONES ANTES DE UTILIZAR ESTA UNIDAD
ESTE PRODUCTO SE VENDE CON UN ADAPTADOR Y UN ADAPTADOR PARA COCHE
Adaptador CA Adaptador para Coche
1. Entrada: CA220V-240V~ 0.4A (máx) 50Hz 1. Entrada : CC ... 12V 2A (máx)
2. Salida: DC 9V ... 1A 2. Salida : CC ... 12V 2A (máx)
ADVERTENCIA
Para prevenir incendio o un choque peligroso, no exponga la unidad a la lluvia o humedad.
El aparato no debe ser expuesto a supercies que goteen, salpiquen, tampoco se deben
emplazar sobre la unidad cualquier otro objeto que contenga líquido, como por ejemplo
jarrones.No se deberán tapar las aperturas de ventilación de la unidad con objetos como
periódicos, gamuzas, cortinas, etc.
Para evitar electrocución, elija un enchufe con una base bastante amplia de manera que
el enchufe
se pueda insertar por completo en la base.
No deberá exponer la unidad a fuentes inamables, como velas encendidas.
Un volumen de sonido excesivo en los auriculares puede provocar pérdida auditiva.
Substitución del fusible del Adaptador para Coche
En caso de que el reproductor no funcione con el cable/adaptador CC para el coche,
compruebe el fusible (2A). Si está de color marrón, compruebe todas las conexiones
y asegúrese de que el cable del adaptador no está dañado. Siempre debe reemplazar
el fusible por otro del mismo tipo y clasicación. Si el fusible se funde otra vez trás su
subtitución, entonces esto indica un problema más serio. NO REEMPLACE el fusible por
uno de diferente clasicación, ya que podría provocar daños en el reproductor.
ADVERTENCIA
Ya que el circuito del CD puede provocar interferencias con otros sintonizadores de
radio cercanos, apague la unidad cuando no vaya a utilizarla o aléjela del sintonizador
de radio.
P7100PDE Zoran Spa 20AB.indd 2 2009/8/18 4:27:56 PM
Page 20

ES - 3
PRECAUCIONES
NOTAS SOBRE EL MANEJO:
• Cuando embale el reproductor de DVD, utilice
siempre el cartón y los materiales de embalaje
proporcionados. Para una máxima protección,
embale el DVD como fue originalmente
empaquetado en la fábrica.
• No utilice líquidos volátiles, como aerosol
contra insectos, cerca del DVD. No deje
durante un largo período basura o productos
plásticos en contacto con el reproductor de
DVD. Podría dejar marcas en el acabado.
• L os paneles superiores y trasero s del
reproductor del DVD pueden calentarse tras
un largo período de uso. Esto es normal y no
se se trata de un malfuncionamiento.
• Cuando el reproductor DVD no se está
utilizando, asegúrese de que ha quitado el
discodel DVD y que este está apagado.
• Si no utiliza el reproductor de DVD durante
un largo período, puede que la unidad no
funcione correctamente en el futuro.
Encienda el reproductor de DVD y utilícelo
ocasionalmente.
NOTAS SOBRE EL EMPLAZAMIENTO DEL DVD:
• Si emplaza el DVD cerca de una TV, radio o
VCR, la imagen del reproductor puede perder
calidad y el sonido puede distorsionarse. En
este caso, aleje el reproductor de DVD de la
TV, radio o VCR.
NOTAS SOBRE LA LIMPIEZA:
Utilice un tejido sua ve y seco para la
limpieza.
• Para la suciedad dicil de limpiar, empape
la gamuza en detergente, escúrrala bien y
limpie.
Utilice una gamuza seca para secarla. No
utilice ningún tipo de disolvente o benceno,
ya que estos podrían dañar la supercie del
DVD.
• Si utiliza una gamuza con productos químicos
saturados para limpiar la unidad, siga las
instrucciones del producto.
Advertencia: la limpieza y el ajuste de las
lentes o de otros componentes del dispositivo
de reproducción deberían llevarse a cabo por
un técnico cualicado.
CÓMO OBTENER UNA IMAGEN LIMPIA:
El reproductor de DVD es un dispositivo de gran
tecnología y calidad.
Si la lente óptica o alguna parte del disco está sucia
o gastada, la imagen perderá calidad. Se recomienda
una in specc ión y man tenimie nto (li mpiez a o
comp onentes de re puesto) cad a 1000 horas
dependiendo del entorno de utilización. Para más
detalles, contacte con el distribuidor más cercano.
NOTAS SOBRE LA CONDENSACIÓN DE
HUMEDAD
La condesación de humedad puede dañar el
reproductor de DVD.
Sig a d e tallad amente la s s i guient es
instrucciones.
• La condensación de humedad aparece cuando,
por ejemplo, vierte una bebida fría en un vaso
en un día caluroso. La parte externa del vaso de
agua transpira gotas de agua. De la misma forma,
la humedad puede condensarse en la lente óptica
dentro de la unidad, que es una de las partes más
importantes del reproductor de DVD.
La condensación de humedad aprece en los
siguientes casos:
• Cuando el reproductor de DVD estaba en un lugar
frío y lo emplaza en una zona más caliente.
• Cuando utiliza el reproductor de DVD en una
habitación en la que acaba de conectar la
calefacción, o un lugar en el que el aire frío del
aire acondicionado da directamente a la unidad.
• En verano, cuando acaba de mover el reproductor
de DVD de una habitación con aire acondicionado
a un lugar húmedo y caluroso.
• Cuando utiliza el reproductor de DVD en un lugar
húmedo.
No utilice el reproductor de DVD cuando puede
aparecer condensación de humedad.
• Si utiliza el reproductor de DVD en dicha situación,
puede dañar componentes internos del reproductor
de DVD. Quite el disco, conecte el cable de
corriente del reproductor de DVD a la salida de la
pared, encienda el reproductor de DVD y déjelo
encendido durante dos o tres horas. Transcurrido
dicho período, el reproductor de DVD se habrá
calentado y evaporado la humedad.
Es poco frecuente que la condensación aparezca si
manteniene conectado el reproductor de DVD a la
salida de la pared.
P7100PDE Zoran Spa 20AB.indd 3 2009/8/18 4:27:56 PM
Page 21

ES - 4
POSICIÓN DE LOS CONTROLES
1. Pantalla LCD
2. Altavoz
3. Sensor remoto
4. Indicador de conectado
5. Interruptor de encendido/apagado
6. Tapa DVD
7. Entrar Button
8. Botón de navegación ( , , , )
9. Botón apertura de puerta de DVD
10. Botón de conguración
11. LCD Encendido/Apagado
12. Botón reproducir / pausa
13. Botón de salto atrás ( )
14. Botón de salto adelante ( )
15. Botón Menú DVD
16. Indicador de carga
- LED rojo encendido durante la carga.
- LED verde encendido completamente
cargada.
Nota: La carga de la batería debe estar
con el interruptor APAGADO
17. Toma de entrada CD 9V-12V
18. Toma coaxial
19. Interruptor de fuente (DVD AV IN)
Nota: a: Asegurarse de que el interruptor
está en la posición de “DVD” cuando se
está reproduciendo el DVD.
20. Toma entrada AV
Nota: Asegurarse de que el interruptor
está en la posición de “AV IN” cuando se
está reproduciendo el AV.
21. Toma salida AV
Nota:
La función de salida de AV está disponible
solamente en el modo DVD.
Para el propósito ahorro de energía,
el panel del LCD se rá accionado
automáticamente APAGADO.
22. Toma de auriculares
23. Control de volumen
* ENCHUFE AURICULARES
Para escuchar individualmente, conecte el juego de auriculares estéreo de 32 ohm (clavija de
3,5 mm) en el enchufe de los auriculares. Ajuste los controles del volumen a su gusto.
Observe que los altavoces se desconectan automáticamente.
ADVERTENCIA
LOS EXPERTOS EN AUDICIÓN ADVIERTEN DE LA POSIBLE PÉRDIDA DE AUDICIÓN
DERIVADA DE LA EXPOSICIÓN A UNA REPRODUCCIÓN PROLONGADA CONTINUA CON
NIVELES DE VOLUMEN ALTO/MUY ALTO AL USAR LOS AURICULARES. SI EXPERIMENTA
UN ZUMBIDO EN LOS OÍDOS, REDUZCA EL VOLUMEN O NO LO UTILICE DE MANERA
CONTINUA.
1
2
2
3 4 5
6
7
11
98 10
12
13
14
15
16
17
18
19
20
21
22
23
P7100PDE Zoran Spa 20AB.indd 4 2009/8/18 4:27:59 PM
Page 22

ES - 5
POSICIÓN DE LOS CONTROLES (CONTINUACIÓN)
INSTALACIÓN DE LAS BATERÍAS
1. Deslice hacia afuera el compartimento para las
baterías.
2. Inserte en el mando a distancia dos (2) baterías “AAA”,
preste especial atención al diagrama de polaridad del
compartimento para las baterías.
3. Vuelva a colocar la tapa del compartimento para las
baterías.
PRECAUCIÓN
Siga las siguiente precauciones cuando vaya a utilizar las baterías en este dispositivo:
1. Las pilas (paquete de pilas o pilas incorporadas) no deben ser expuestas a calor excesivo
como luz del sol, fuego o condiciones similares.
2. No intente recargar, provocar un cortocicuito, desmontar, calentar o arrojar las baterías
al fuego.
3. No mezcle las baterías ya usadas con las nuevas.
4. No mezcle baterías alcalinas, estándar (carbono-zinc) o recargables (níquel cadmio).
5. Si este dispositivo no se utiliza durante un largo período, quite las baterías para prevenir
daños debido a posibles perdidas en las baterías.
6. No intente recargar las baterías que no son recargarbles; se pueden sobrecalentar y
romperse (siga las directrices del fabricante de las baterías.)
7. Deseche apropiadamente las baterías de acuerdo con las leyes locales.
INSTALACIÓN DE LAS BATERÍAS (MANDO A DISTANCIA)
MANDO A DISTANCIA
1. Botón Menú DVD
2. Botón de pantalla
3. Botón de retroceso rápido ( )
4. Botón de navegación ( , , , ) / entrar
5. Botón de salto atrás ( )
6. Botón de Reproducir
7. Botón de pausa/fotograma
8. Botón de conguración
9. Botón de subtítulos
10. Botón de audio
11. Botón de avance rápido ( )
12. Botón de salto adelante ( )
13. Botón de detención
1
2
3
4
6
5
7
8
9
10
11
12
13
P7100PDE Zoran Spa 20AB.indd 5 2009/8/18 4:28:02 PM
Page 23

ES - 6
CONEXIÓN
NOTAS PARA LA CONEXIÓN A UNA TV:
• Conecte el reproductor de DVD con el cable de Antena a la entrada de Antena de la TV.
• Presione en la TV el botón de TV/VIDEO o cambie a conguración de VIDEO.
• Cuando conecte el DVD, diríjase al manual del usuario de la TV, así como a este
manual.
• Cuando conecte el DVD a la TV, asegúrese de que el botón de corriente esté apagado y que
ambas unidades están desenchufadas antes de llevar a cabo ningún tipo de conexión.
• Si la TV sólo tiene una entrada de audio, necesitará utilizar un conector de “Y”. Acuda a
su tienda local de consumibles eléctronicos.
• Conecte directamente el reproductor de DVD a la TV. Si conecta el reproductor de DVD a
través del VCR, la imagen de la reproducción estará distorsionada debido a que los
discos
de video DVD son copias protegidas.
CONEXIÓN DEL DVD A UN SISTEMA HOME CINEMA
1. Altavoz frontal izquierdo
2. Television
3. Altavoz central- se puede emplazar en la
parte superior de la televisión.
4. Sub-woofer- se puede emplazar en
cualquier parte de la habitación.
5. Altavoz frontal derecho
6. Posición Escucha/Visionado-
Para una mejor calidad del audio se
recomienda poner el sofa, silla, etc entre
los altavoces.
7. Altavoz trasero izquierdo
8. Altavoz trasero derecho
9. Amplicador AV /Decodicador Dolby
Digital / Decodicador DTS
Ponga los altavoces centrales, traseros, frontales y subwoofer como se indica en el
diagrama.
Trás el correcto posicionamiento de los altavoces, lleve a cabo el test de sonido en el
amplicador y ajuste los controles de volumen hasta que se obtenga el sonido deseado.
Para un mejor resultado, siéntese en la posición de visionado y que otra persona ajuste el
volumen para usted; esto le permitirá establecer un nivel óptimo.
NOTA: los altavoces traseros también se pueden poner en la pared entre la posición de
visionado. Asegúrese de que la posición de visionado está entre los dos altavoces.
Pruebe diferentes emplazamientos hasta alcanzar la posición óptima.
Cable AV
De Salida Digital
A la Entrada
Audio de Digital
Cable Coaxial
P7100PDE Zoran Spa 20AB.indd 6 2009/8/18 4:28:03 PM
Page 24

ES - 7
SOBRE LOS DISCOS
El número de región de este reproductor DVD es:
Consulte la página siguiente para información sobre los números de región.
DISCOS REPRODUCIBLES:
Los siguientes discos se pueden reproducir en este
reproductor de DVD:
TIPOS DE DISCOS:
DVD
Los datos en la mayoría de los DVDs están divididos
en secciones llamadas “títulos” y luego en subsecciones
llamadas “capítulos”, a cada uno se le ha dado un número
de título o capítulo. Algunas características de este DVD
no funcionan con algunos discos DVD. Si ha seleccionado
una función y ésta no funciona correctamente, acuda al
manual que acompaña al disco DVD.
CD AUDIO
Los datos en un CD de audio se dividen en secciones
denominadas “pistas”, cada una de ellas tiene un número
de pista.
IMPORTANTE:
Es importante que lea el manual que acompaña a los discos DVD, ya que hay funciones que
hay en el reproductor de DVD que no se pueden utilizar con determinados DVDs.
También hay otras funciones en el disco DVD que son diferentes para cada tipo de disco
DVD, por lo que no se explica en este manual de usuario.
Notas sobre el Copyright:
Está prohibido copiar, emitir, mostrar, reproducir en público y alquilar material con coyright
sin permiso. Los discos de video DVD son copias protegidas y cualquier tipo de grabación
realizada a través de estos discos aparecerán distorsionadas. Este producto incorpora una
tecnología de protección de copyright que está protegida por patentes de EE.UU y otros
propietarios de los derechos de la propiedad intelectual. Si desea utilizar esta tecnología de
protección del copyright, debe ser autorizado por Macrovision Corporation, y está reservado al
uso doméstico y otros visionados limitados, a menos que haya sido autorizado por Macrovision
Corporation. Está prohibida la ingeniería inversa o el desmontaje.
Información sobre la Organización de la Región:
El reproductor de DVD ha sido diseñado y fabricado para responder a la Información de la
Organización de la Región que se ha grabado en el disco DVD. Si el número de la region
descrito en el disco DVD no corresponde con el número de la región del reproductor de DVD,
este reproductor DVD no podrá reproducir algunos videos DVD con este reproductor si se
han comprado fuera de su zona geográca o fabricado con propósitos empresariales.
Cuando intente reproducir un disco no autorizado, aparecerá «Error de región» en la
pantalla.
P7100PDE Zoran Spa 20AB.indd 7 2009/8/18 4:28:05 PM
Page 25

ES - 8
MENÚ DE CONFIGURACIÓN
Modo de conguración DVD
• En modo detención DVD, pulse el botón CONFIGURACIÓN del mando a distancia,
aparecerá el menú de conguración en pantalla.
• El modo conguración ofrece el menú para congurar la CONFIGURACIÓN DE IDIOMA,
CONFIGURACIÓN VÍDEO y CONFIGURACIÓN AUDIO.
• La selección de elementos en el Menú de Conguración se realiza usando los botones
de dirección y el botón ENTER.
• Para salir del Menú de Conguración, pulse el botón CONFIGURACIÓN de nuevo.
CONFIGURACIÓN DE IDIOMA
En modo detención, pulse el botón CONFIGURACIÓN y marque IDIOMA con el mando a
distancia. Para seleccionar el elemento deseado, use los botones de dirección ( / / / )
y pulse ENTER para conrmar la selección.
Idioma (idioma de menú de pantalla)
Pulse el botón / para seleccionar “Idioma”
y pulse para mover el cursor a la columna de
elecciones. Use el botón / para seleccionar un
idioma y pulse ENTER:
- Inglés
- Francés
- Español
- Alemán
- Italiano
- Portugués
Idioma de subtítulos
Pulse el botón / para seleccionar “Subtítulos”
y pulse . Use el botón / para seleccionar
un idioma de subtítulos (o Desactivado para no
seleccionar ninguno) y pulse ENTER:
- Inglés
- Francés
- Español
- Alemán
- Italiano
- Portugués
- Auto
- Desactivado
Idioma audio
Pulse el botón / para seleccionar “Audio” y pulse
. Use el botón / para seleccionar el idioma de
audio deseado y pulse ENTER:
- Inglés
- Francés
- Español
- Alemán
- Italiano
- Portugués
P7100PDE Zoran Spa 20AB.indd 8 2010/2/26 5:45:24 PM
Page 26

ES - 9
MENÚ DE CONFIGURACIÓN (CONTINUACIÓN)
Idioma del menú del reproductor
Pulse el botón / para seleccionar “Menú del
reproductor” y pulse . Use el botón / para
seleccionar el idioma de menú DVD deseado y
pulse ENTER:
- Inglés
- Francés
- Español
- Alemán
- Italiano
- Portugués
CONFIGURACIÓN VÍDEO
En modo detención, pulse el botón CONFIGURACIÓN con el mando a distancia. Aparecerá
el MENÚ DE CONFIGURACIÓN DE SISTEMA; pulse los botones / para seleccionar
“VÍDEO” y pulse para conrmar.
Relación de aspecto
(4:3) – Seleccione esta opción si tiene una TV
normal. Se mostrará una imagen “widescreen”
con bandas negras encima y debajo en la
pantalla de TV.
(16:9) – Seleccione esta opción para una TV
widescreen (relación de pantalla 16:9)
Sistema TV
(NTSC) – Seleccione esta opción si la TV conectada
tiene el sistema de color NTSC. Cambiará la
señal de vídeo de un disco PAL y lo emitirá en
formato NTSC.
(PAL) – Seleccione esta opción si la TV conectada
tiene el sistema de color PAL. Cambiará la
señal de vídeo de un disco NTSC y lo emitirá en
formato PAL.
Imagen inteligente
Seleccione “Dinámico” y pulse ENTER para
conrmar.
(Brillo) – Esta opción ajustará el brillo de toda la
pantalla.
Tiene un rango de -20 a 20.
(Contraste) – Esta opción ajustará el contraste de
toda la pantalla.
Tiene un rango de -16 a 16.
(Color) – Esta opción ajustará el color de toda la
pantalla.
Tiene un rango de -20 a 20.
P7100PDE Zoran Spa 20AB.indd 9 2010/2/26 5:42:52 PM
Page 27

ES - 10
MENÚ DE CONFIGURACIÓN (CONTINUACIÓN)
CONFIGURACIÓN AUDIO
En modo detención, pulse el botón CONFIGURACIÓN con el mando a distancia. Aparecerá
el MENÚ DE CONFIGURACIÓN DE SISTEMA; pulse los botones / para seleccionar
“AUDIO” y pulse para conrmar.
SALIDA DIGITAL
Seleccionando la conguración Salida Digital
permite al usuario ajustar la salida audio de los
puertos S/PDIF para que funcionen harmonizadas
con el equipo audio conectado al reproductor. Tiene
las siguientes opciones disponibles.
• En “Audio”, pulse para seleccionar “SALIDA
DIGITAL” y pulse el botón .
(desactivado) – Desactiva la salida audio digital.
Por ejemplo, si utiliza las tomas de SALIDA
AUDIO ANTERIOR (I/D) para conectar a una TV
o sistema estéreo.
(PCM) – Seleccione esta opción si el dispositivo
conectado no puede descodicar audio
multicanal. El reproductor DVD convertirá las
señales multicanal Dolby Digital y MPEG-2 en
PCM (Modulación de Código por Pulsos).
(RAW) – Seleccione esta opción si el dispositivo
conectado tiene un descodicador multicanal
integrado que soporte uno de los formatos de
audio multicanal (Dolby Digital, MPEG-2).
MODO DRC
Seleccione “ACTIVADO” para activar el
DRC (Compresión de Rango Dinámica) o
“DESACTIVADO” para desactivar el DRC.
La Compresión de Rango Dinámica comprimirá el
rango dinámico de la pista audio del DVD.
DOWN SAMPLING
Cuando use una salida digital coaxial, seleccione
“ACTIVADO” para activar el Downsampling, o
“DESACTIVADO” para desactivarlo.
Cuando el Down Sampling esté activado, la salida
digital se muestreará a 48k aunque el audio original
esté codicado en 96k para el DVD.
P7100PDE Zoran Spa 20AB.indd 10 2009/8/18 4:28:10 PM
Page 28

ES - 11
FUNCIONAMIENTO BÁSICO DEL DVD
NOTAS IMPORTANTES:
• Si intenta acceder a una función que no está disponible en el disco, aparecerá un símbolo
en la parte superior derecha del la TV cuando esté en funcionamiento.
• Algunos discos pueden tardar algunos segundos en cargarse.
• Coja siempre el disco sin tocar ninguna de las dos supercies. Cuando inserte un disco,
introdúzcalo con la cara de la supercie impresa hacia arriba, a continuación deberá
alinearlo con las guías y emplazarlo en la posición adecuada.
• Es importante que lea el manual que acompaña el disco del DVD, ya que hay
características que hay en este reproductor de DVD que no se pueden utilizar con algunos
DVDs. También hay algunas otras características que son diferentes en cada disco, por
lo que estas no aparecen en este manual del usuario.
SELECCIÓN DE LA TV
Encienda la TV , el reproductor de DVD y el Sistema de Amplicación de Audio (Si hay).
1. Presione el botón de “TV/VIDEO” que hay en la TV.
2. Seleccione el Modo Video (TV).
Nota: si hay más de un canal de Antena para la TV, seleccione el canal al que ha conectado
el reproductor de DVD.
3. Seleccione la salida de audio apropiada en el amplicador de Antena (si hay).
REPRODUCCIÓN DE UN DVD
1. Presione el interruptor para girar la unidad; el LED anaranjado es luz.
2. Presione el interruptor de Abrir Tapa para abrir la tapa. Inserte un disco con la cara impresa
en la parte superior de la bandeja del disco.
3. Cierre la tapa del disco. Una vez que se haya cargado, aparecerá la pantalla del menú del
DVD. Utilice los botones de Navegación ( , , , ) para seleccionar la opción deseada
y el botón de INTRO para seleccionarla; la reproducción empezará inmediatamente.
4. Para parar la reproducción, presione el botón de STOP. Debido a que la unidad memorizará
donde paró la reproducción, presione simplemente el botón de REPRODUCIR para
continuar con la reproducción. Si pulsa dos veces el botón de STOP, la unidad se parará
por completo.
NOTAS:
• Si aparece un MENÚ en la pantalla de la TV, presione los botones de Navegación
( , , , ) para seleccionar la opción/punto deseado, a continuación presione el botón
de INTRO. Asegúrese de consultar la cubierta del disco para más información.
• La opción de reanudar reproducción puede que no funcione en todos los discos.
MENÚ DEL DVD
Presione el botón de MENÚ y aparecerá el Menú Principal del Disco. Utilice los botones de
Navegación ( , , , ) para seleccionar la opción deseada, a continuación presione el
botón de INTRO. Esta opción no está disponible en todos los discos.
P7100PDE Zoran Spa 20AB.indd 11 2009/8/18 4:28:11 PM
Page 29

ES - 12
FUNCIONAMIENTO BÁSICO DEL DVD (CONTINUACIÓN)
SALTO
Presione (menos de un segundo) el botón de SALTO ADELANTE sobre la unidad principal
o presione el botón de ( ) sobre el mando a distancia para avanzar el DVD al comienzo
del siguiente capítulo.
Presione (menos de un segundo) el botón de SALTO ATRÁS sobre la unidad principal o
presione el botón de ( ) en el mando a distancia para mover el DVD al comienzo del
capítulo anterior.
BÚSQUEDA
Durante la reproducción, presione el botón ( ) o ( ) en el mando a distancia para ir
hacia delante o atrás al doble (2x) de velocidad para ir a una sección especíca. Presione
repetidamente estos botones y la velocidad aumentará a I 4x, 8x, 16x y volver a reproducción
normal.
El DVD se moverá hacia delante o atrás a gran velocidad hasta que presione de Nuevo el
botón de REPRODUCCIÓN/PAUSA, la reproducción normal se reiniciará en este punto.
PANTALLA
Cuando reproduzca un DVD, pulse el botón PANTALLA en el mando a distancia una vez
para ver el tiempo transcurrido del título y el tiempo restante del título. Púlselo por segunda
vez para ver el título y capítulo actual. Púlselo por tercera vez para ver la conguración de
audio y subtítulos. Púlselo por cuarta vez para ver la conguración de ángulo y repetición.
Púlselo por quinta vez para desactivar la información.
Nota: No hay ANGLE Botón REPEAT y en las máquinas, aunque pulse DISPLAY botón
que muestra el ángulo y la repetición, debe utilizarse en conjunción con los botones correspondientes.
REPRODUCIR / PAUSA
Presione una vez el botón de REPRODUCIR/PAUSA para detener la imagen. Presione de
nuevo el botón de REPRODUCIR/PAUSA para volver a la reproducción normal.
SUBTÍTULOS
Esta función sólo es aplicable para discos DVD. Puede cambiar el idioma de los subtítulos
pulsando el botón SUBTÍTULOS del mando a distancia.
Nota: El número de subtítulos depende del disco DVD.
AUDIO
Esta función es aplicable para el audio de DVD y CD pero con efectos diferentes.
- Si pulsa el botón de AUDIO en el mando a distancia, cambiará el canal de audio.
Nota: Cuando AV es entrada, esta tecla no tiene función.
P7100PDE Zoran Spa 20AB.indd 12 2009/8/18 4:28:11 PM
Page 30

ES - 13
FUNCIONAMIENTO BÁSICO DEL CD
REPRODUCCIÓN DEL CD
1. Presione el interruptor para girar la unidad; el LED anaranjado es luz.
2. Presione el interruptor de Apertura del Compartimento del CD para abrir la bandeja del CD.
Inserte un disco en la bandeja del disco. Introduzca el disco con la cara de la supercie
impresa en la parte de arriba.
3. Cierre la bandeja del disco. Tras cargarse, la reproducción se iniciará de forma
automática.
4. Presione el botón de Stop en el mando a distancia para detener la reproducción.
SELECCIÓN DE PISTAS UTILIZANDO LOS BOTONES DE SALTO
Durante la reproducción, presione el botón de SALTO ( ) o ( ) en el mando a distancia
para seleccionar la pista que desee reproducir.
FUNCIONAMIENTO DE CD DE IMÁGENES
REPRODUCCIÓN DE UN CD DE IMÁGENES
1. Presione el interruptor para girar la unidad; el LED anaranjado es luz.
2. Presione el Interruptor de Abrir Compartimento de CD para abrir la bandeja del disco.
Inserte el CD de imágenes con la cara de la supercie impresa en la parte de arriba.
3. Cierre la bandeja del disco. Tras cargarse, el menú de CARPETA/ARCHIVO aparecerá
en la pantalla de la TV. Presione los botones de Navegación ( , ) para seleccionar la
carpeta/pista deseada.
4. Presione el botón de INTRO para conrmar. Presione los botones de Navigación ( , )
para seleccionar las imagen deseada, la vista de la imagen de la foto aparecerá en el área
de vista previa. Presione el botón de REPRODUCCIÓN/INTRO para reproducir la imagen.
Presione el botón de STOP en el mando a distancia para detener la reproducción.
5. Para seleccionar otras carpetas, presione los botones de Navegación ( , ) para
seleccionar “- -” a continuación presione el botón de INTRO para volver para seleccionar
las carpetas y utilice los botones de Navegación ( , ) para seleccionar de nuevo la
carpeta deseada.
P7100PDE Zoran Spa 20AB.indd 13 2009/8/18 4:28:11 PM
Page 31

ES - 14
CUIDADO Y MANTENIMIENTO
Cuidado de los Discos
• Trate el disco cuidadosamente. Coja el disco por los
extremos.Nunca ponga los dedos en contacto con la
supercie del disco no impresa.
• No pegue en el disco cinta adhesiva, pegatinas,
etc.
• Limpie el disco de forma periódica, con una gamuza
suave, seca y limpia. Nunca utilice detergentes o
limpiadores abrasivos para limpiar le disco. Si es
necesario, utilice el kit de limpieza para CD.
• Si un disco salta o se bloquea en una sección
del disco, es probable que esté sucio o dañado
(rayado)
• Cuando limpie el disco, límpielo del centro a la parte exterior de forma lineal, nunca en
movimientos circulares.
• Para evitar daños, los discos deberán de almacenarse en sus cubiertas despues de su
uso.
• No exponga los discos a rayos directos solares, alto nivel de humedad, altas temperatures
o polvo, etc. La exposición prolongada o las temperatures extremas pueden dañar el
disco.
• No pegue o escriba nada en ninguna de las caras del disco, no utilice instrumentos de
escritura alados, o tinta, esto podría dañar la supercie.
Limpieza de la unidad
• Para prevenir incendio o choque peligroso, desconecte la unidad de la fuente de
alimentación CA cuando vaya a limpiarlo.
• El acabado de la unidad se puede limpiar con una gamuza para el polvo como para cualquier
otro mobiliario. Preste especial atención cuando limpie los componentes de plástico.
• Deberá utilizar jabón neutro o gamuza húmedas para el panel frontal.
P7100PDE Zoran Spa 20AB.indd 14 2009/8/18 4:28:12 PM
Page 32

ES - 15
Corrección
• Inserte el Apdatador del Coche en la
salida cc de 12V.
• Conecte el interruptor de
Encendido.
• Inserte un disco.
• Ajuste el interruptor “FUENTE”
correctamente, bien para una fuente
de vídeo externa (AV IN) o (DVD)
para jugar a disco interno.
• Compruebe adecuadamente
la unidad para las conexiones
externas.
• Encienda el equipo conectado
externo.
• Limpie el disco siguiendo el
procedimiento de la página 16.
• Inserte un disco.
•
Inserte un disco que se pueda reproducir
(compruebe el tipo de disco, el menú del
sistema de la TV y el código regional).
• Ponga el disco en la bandeja dle
disco con la orientación adecuada.
• Limpie el disco.
•
Presione el botón de CONFIGURACIÓN
en la unidad o el mando a distancia para
cerrar el menú en la pantalla.
• Apunte con el mando al sensor de
la unidad.
•
Tiene un área de funcionamiento de 7m.
• Quite le obstáculo.
• Subtituya las baterías
• Enchufe el adaptador CA
rmemente en la toma de corriente
de la pared y en la unidad también.
• Ajuste el interruptor de conexión a
la posición de APAGADO.
GUÍA SOLUCIONADOR DE PROBLEMAS
Síntoma
La unidad no está
recibiendo corriente.
El interruptor de corriente
está conectado, pero la
unidad no funciona.
No hay imagen (y /o
sonido) y el
indicador
LED está de color
NARANJA.
Calidad pobre de la
imagen o del audio.
El reproductor de
DVD no reproduce.
El mando a distancia
no funciona
correctamente.
No se puede cambiar
la batería
Cause
• El adapatador para el Coche
está desconectado.
• El interruptor de Encendido está
desconectado.
• No se ha insertado un disco.
•
El interruptor “FUENTE” se ajusta
en la posición AV IN, pero no existe
entrada de vídeo externa disponible.
•
El interruptor “FUENTE” se ajusta en
la posición AV IN, pero se reproducen
DVD, CD o disco de JPEG.
• El cable (s) de audio/video
externo no está conectado de
forma adecuada.
• El equipo de audio/video externo
está apagado.
• Se está reproduciendo un disco
rayado o sucio.
• No se ha insertado un disco.
• Se ha insertado un disco que no
se puede reproducir.
• El disco se ha insertado
incorrectamente.
• El disco está sucio.
• Todavía hay un menú en la
pantalla.
• No se está apuntando a la
unidad.
• Se está utilizando muy lejos.
• Hay un obstáculo entre el sensor
del mando y el de la unidad.
•
Las baterías en el mando a distancia
no tienen se están agotando.
•
El adaptador de batería CA está
desconectado de la toma de
corriente de la pared o no está
conectado a la unidad.
• El interruptor está en la posición de
ENCENDIDO.
Compruebe la siguiente guía para las posibles causas de un problema antes de contactar
con el servicio técnico.
P7100PDE Zoran Spa 20AB.indd 15 2009/8/18 4:28:13 PM
Page 33

ES - 16
ESPECIFICACIONES
GENERAL
Alimentación CD 9V-12V ... 1A
Consumo 10W
Dimensiones externas (LxPXA) 228 X185 X56 mm
Peso 0.96kg
Condiciones de funcionamiento Temperatura: 5°C a 35°C
Estado de funcionamiento Horizontal
Humedad de funcionamiento 5% a 90%
SISTEMA
Láser Láser semiconductor ancho de onda 650nm
Sistema de señal PAL/NTSC
S/R más de 90dB
Rango dinámico más de 90dB
ENTRADA
Vídeo compuesto 1,0V P-P 75 ohm, sinc. negativa
Audio 0.5Vrms 47Kohm
SALIDA
Vídeo compuesto 1,0V P-P 75 ohm, sinc. negativa
Salida audio (digital) 0.5V P-P 75ohm
Salida audio (analógica) 0.5Vrms 600ohm
ADAPTADOR CA/CD
Entrada CA 220-240V~ 0.4A 50Hz
Salida CD 9V ... 1A
ACCESORIOS:
1 cable AV
1 auriculares
1 adaptador CA/CC
1 adaptador para encendedor del coche
1 mando a distancia
2 baterías “AAA” (para el mando a distancia)
* El diseño y las especicaciones están sujetos a cambio sin previo aviso.
P7100PDE Zoran Spa 20AB.indd 16 2009/8/18 4:28:13 PM
Page 34

FR - 1
AT TE NT IO N : A F I N D E R E DU IR E L ES R IS QU ES
D’ÉLECTROCUTION, NE PAS RETIRER LE COFFRAGE (NI LE
FONDS). ELEMENTS NON REPARABLES PAR L’UTILISATEUR,
CONFIER TOUTE REPARATION A DU PERSONNEL QUALIFIE.
AVERTISSEMENT
An d’éviter les incendies ou électrocution, ne pas exposer
cet appareil à la pluie ni à l’humidité.
Cet appareil ne doit pas être exposés aux liquides ni aux
éclaboussures et aucun objet rempli de liquide, vases ou
autres, ne doit être placé dessus.
La ventilation ne doit pas être gênée par des objets couvrant
les ouvertures de ventilation, tels que journaux, nappes,
tapis, etc.
Aucune source de amme nue, telle que bougie allumée, ne
doit être placée sur l’appareil.
La prise principale sert de déconnecteur, lequel doit rester
constamment opérationnel.
L’extérieur de ce cordon exible adaptateur AC / DC ne peut
pas être remplacé, si le cordon est endommagé, l’adaptateur
AC / DC sont irréparables et doivent être jetés.
Pour déconnecter complètement l’appareil, la prise principale
doit être débranchée de l’arrivée locale de courant.
Fabriqué sous licence par les Laboratoires Dolby. “Dolby”,
“Pro Logic” et le symbole double-D sont des marques de
commerce de Dolby Laboratories. Travaux condentiels
non publiés. ©1992-1997 Dolby Laboratories, Inc. Tous
droits réservés
ATTENTION:
CE LECTEUR VIDEO NUMERIQUE UTILISE UN SYSTEME
LASER.
POUR UNE BONNE UTILISATION DE CE PRODUIT,
LIRE ATTENTIVEMENT CE MANUEL ET CONSERVER
PO UR CON SULTAT ION FUT UR E. P OU R TOUT E
REPARATION, CONTACTER UN SERVICE AUTORISE
- VOIR PROCEDURE REPARATION.
L’UTILISATION DE COMMANDES, REGLAGES ou TOUTE
MANIPULATION AUTRES QUE CEUX SPECIFIES ICI
PEUT EXPOSER A DES RADIATIONS DANGEREUSES.
AFIN D’EVITER L’EXPOSION DIRECTE AUX RAYONS
LASER, NE PAS ESSAYER D’OUVRIR LE COFFRAGE.
DES RADIATIONS LASER VISIBLES PEUVENT ETRE
PRESENTES LORSQUE LE COFFRAGE EST OUVERT.
NE PAS REGARDER LES RAYONS.
AVERTISSEMENT:
AFI N DE REDUIR E LES RISQUES D’INC ENDIE ou
D’ÉLECTROCUTION, NE PAS EXPOSER CE PRODUIT A
LA PLUIE ou A L’HUMIDITE.
AVERTISSEMENT:
AFIN DE REDUIRE LES RISQUES D’INCENDIE OU
D’ÉLECTROCUTION, ET TOUTE INTERFERENCE
GENANTE, N’UT IL IS ER QUE LES ACCESSOIRES
RECOMMANDES.
DANGER
RADIATION LASER INVISIBLE SI OUVERT
ET SI DISPOSITIF DE SECURITE DEJOUE.
EVITEZ L’EXPOSITION DIRECTE AU
RAYON LASER.
SECURITE LASER
Cette unité utilise un système de rayon laser optique situé
dans le mécanisme du lecteur CD conçu avec des dispositifs
de sécurité intégrés. Ne tentez pas de démonter cette unité,
consultez du personnel qualié. Une exposition à ce laser
invisible est dangereux pour l’œil.
PR OD UI T LASER DE CLA SS E -1 L’ UT ILISATIO N
DE S C OMM ANDE S, DES RE GLAG ES OU DES
PERFORMANCES DES PROCEDURES AUTRES QUE
CE LL ES SP ECIFI EES DANS DUDI T DOC UM ENT
PEUT RESULTER EN UN RISQUE D’EXPOSITION AUX
RADIATIONS.
INSTRUCTIONS IMPORTANTES DE SECURITE
Le ash lumineux avec un symbole de èche dans un
triangle équilatéral, alerte l’utilisateur de la présence de
“tension dangereuse non isolée” à l’intérieur du coffrage
de l’appareil pouvant être d’une force sufsante pour
constituer un risque d’électrocution.
Le point d’exclamation dans un triangle équilatéral,
alerte l’utilisateur de la présence de d’instructions
importante de fonctionnement et entretien (réparation)
dans les textes accompagnant l’appareil.
ATTENTION
RISQUES D’ÉLECTROCUTION
NE PAS OUVRIR
Ordure
Veuillez jeter ce produit de façon responsable
dans un centre agrée ou dans une déchetterie
prenant en charge le recyclage de ce type
de déchet. Ne le jetez pas avec les ordures
ménagères.
P7100PDE Zoran Fre 20AB.indd 1 2009/8/18 4:25:49 PM
Page 35

FR - 2
INSTRUCTIONS IMPORTANTES DE SECURITE (SUITE)
LIRE CES INSTRUCTION ATTENTIVEMENT AVANT DE METTRE CET APPAREIL EN MARCHE.
CE PRODUIT EST VENDU AVEC UN ADAPTAUER ET UN ADAPTATEUR DE VOITURE
Adaptateur AC Adaptateur de voiture
1. Entrée : AC220V-240V~ 0.4A (max.) 50Hz 1. Entrée : DC ... 12V 2A (max.)
2. Sortie DC 9V ... 1A 2. Sortie : DC ... 12V 2A (max.)
AVERTISSEMENT
An d’éviter les incendies ou électrocution, ne pas exposer cet appareil à la pluie ni à
l’humidité. Cet appareil ne doit pas être exposés aux liquides ni aux éclaboussures et
aucun objet rempli de liquide, vases ou autres, ne doit être placé dessus.
La ventilation ne doit pas être gênée par des objets couvrant les ouvertures de ventilation,
tels que journaux, nappes, tapis, etc.
Aucune source de flamme nue, telle que bougie allumée, ne doit être placée sur
l’appareil.
Une pression de son excessive des écouteurs et du casque peut causer une perte de l’ouïe.
Remplacement du fusible de l’adaptateur de voiture
Si e lecteur ne fonctionne pas avec l’adaptateur/cordon de voiture DC, vérier le fusible (2A).
S’il est brûlé, vérier toutes les connexions et inspecter le cordon de l’adaptateur. Toujours
remplacer le fusible avec un autre de même type et puissance. Si le fusible brûle à nouveau
après remplacement, cela indique un problème potentiel. NE PAS remplacer un fusible
avec un autre d’une puissance supérieure, cela risquant d’endommager le lecteur.
ATTENTION
Comme le circuit des CD peut être cause d’interférence avec d’autres postes de radio à
proximité, il est préférable d’éteindre cet appareil lorsqu’il n’est pas utilisé ou de l’éloigner
de la radio affectée.
Pg 2, add (max) / Pg 5, chnage remote (delete VOL+ / VOL-) / Pg 9 +20 to -20 change to -16 to 16
Pg 13 delete “twice” from point 4
Pg 13 delete “DISPLAY” from CD OPERATION
P7100PDE Zoran Fre 20AB.indd 2 2009/8/18 4:25:51 PM
Page 36

FR - 3
PRECAUTIONS
NOTES SUR LE TRANSPORT:
• Lors du transport du lecteur DVD, toujours
utiliser le carton et l’emballage originaux de
transport. Pour un maximum de protection,
emballer l’appareil comme il a été empaqueté
à l’origine à l’usine.
• Ne pas utiliser de liquides volatiles, tels que
insecticide, à proximité du lecteur DVD. Ne pas
laisser de produits en gomme ou en plastique
au contact du lecteur DVD pendant longtemps.
Cela peut laisser des marques sur la nition.
• Les panneaux supérieur et arrière du lecteur
DVD peuvent chauffer après une longue
utilisation. C’est normal et n’indique pas un
dysfonctionnement.
• Lorsque le lecteur DVD n’est pas utilisé,
vérier que le disque est enlevé et éteindre
l’appareil.
• Si le lecteur DVD n’est pas utilisé pendant
longtemps, cet appareil peut, par la suite, ne
pas fonctionner correctement. Allumer et utiliser
le lecteur DVD de temps en temps.
NOTES SUR LE POS ITION NEMENT DU
LECTEUR DVD:
• Lorsque ce lecteur DVD est placé à proximité
d’une TV, radio ou magnétoscope, l’image
peut être appauvrie et le son brouillé. Dans ce
cas, éloigner le lecteur DVD de la TV, radio ou
magnétoscope.
NOTES SUR LE NETTOYAGE:
Ut i lis er u n chi ffo n dou x et s ec po ur le
nettoyage.
• Si la saleté attache, tremper le chiffon dans
une solution détergente, frotter bien et essuyer.
Utiliser un chiffon sec pour sécher. Ne pas
utiliser de solvant, tel que diluant et benzène,
car ils peuvent endommager la surface du
lecteur DVD.
• En cas d’utilisation d’un chiffon imbibé de
produit nettoyant, suivre les instructions
données avec ce chiffon.
AVERTISSEMENT: Le nettoyage et le réglage
de la lentille et/ou des autres composants du
mécanisme de lecture doivent être effectués par
un technicien qualié.
OBTENTION D’UNE IMAGE CLAIRE :
Le lecteur DVD est un app ar ei l de haute
technologie et de précision. Si la lentille du
capteur optique et les parties de commande des
disques sont sales ou usées, la qualité de l’image
s’appauvrit. Pour obtenir une image claire, nous
recommandons une inspection et un entretien
(nettoyage ou remplacement des éléments)
réguliers tous les 1000 heures d’utilisation selon
l’environnement d’utilisation. Pour plus de détails,
contacter votre vendeur le plus proche.
OTES SUR LA CONDENSATION D’HUMIDITE:
La condensation d’h um idité endommage le
lecteur DVD. Lire attentivement les indications
suivantes.
• La condensa tion d’humidité sur vient par
exemple lorsqu’on verse une boisson froide
dans un verre par temps chaud. Des gouttes
d’eau se forment à l’extérieur du verre. De
même, l’humidité peut se condenser sur la
lentille du capteur optique dans l’appareil, l’une
des parties les plus importantes du lecteur
DVD.
La condensation d’humidité survient dans
les cas suivants:
• Lorsqu e le lec teu r DVD es t tra nsp orté
directement d’un endroit froid dans un endroit
chaud.
• Lorsque le lecteur DVD est utilisé dans une
pièce où le chauffage vient d’être allumé, ou
dans un endroit où l’air froid d’un climatiseur
arrive directement sur l’appareil.
• En été, lorsque le lecteur DVD est utilisé dans
un endroit chaud et humide juste après avoir
été transporté depuis une pièce climatisée.
• Lorsque le lecteur DVD est utilisé dans une
pièce humide.
Ne pas utiliser le lecteur DVD lorsqu’il peut y
avoir de la condensation d’humidité
• Si le lecteur DVD est utilisé dans ce type
de si tua tio n, les disques peuvent êtr e
endommagés ainsi que les parties internes.
Retirer les disques, brancher le lecteur DVD,
activer le lecteur DVD et le laisser sur “ON”
pendant deux ou trois heures. Après deux
ou trois heures, le lecteur DVD aura chauffé
et évaporé toute humidité. Garder le lecteur
DVD branché pour diminuer les risques de
condensation d’humidité.
P7100PDE Zoran Fre 20AB.indd 3 2009/8/18 4:25:51 PM
Page 37

FR - 4
SITUATION DES COMMANDES
1. Ecran LCD
2. Haut-parleur
3. Capteur de distance
4. Indicateur de marche
5. Interrupteur alimentation on/off
6. Porte du DVD
7. Bouton Entrée
8. Bouton Navigation ( , , , )
9. Bouton d’ouverture de la porte du
DVD
10. Bouton Installation
11. Marche/arrêt du LCD
12. Bouton Lecture / Pause
13. Bouton Saut en Arrière ( )
14. Bouton Saut Avant ( )
15. Bouton Menu DVD
16. Indicateur de charge -
- Le témoin LED rouge est chargé.
- Le témoin LED est vert si la batterie
est complètement chargée
Remarque : La mise en charge doit être
en mode OFF
17. DC In Jack 9V-12V
18. Prise Coaxiale
19. Commutateur de source
(DVD Entrée AV)
Remarque : Pour vous assurer que le
commutateur est sur la position “DVD”
lorsque le DVD est en lecture.
20. Prise d’entrée AV
Remarque : Pour vous assurer que
le commutateur est sur la position
“Entrée AV” lorsque le “Entrée AV” est
en lecture.
21. Prise sortie AV
Remarque :
Fonction de sortie AV disponible en
mode DVD uniquement.
Pour le but économiseur d’énergie,
le panneau d’affichage à cristaux
liquides sera automatiquement mis hors
tension.
22. Prise Casque
23. Contrôle du Volume
* JACK ÉCOUTEURS
Pour une écoute privée, insérez des écouteurs stéréo 32 Ohms dans la prise casque. Ajustez
le contrôle du volume au niveau que vous désirez.
Veuillez noter que els écouteurs sont déconnectés automatiquement.
ATTENTION
LES SPÉCIALISTES DE L’AUDITION RECOMMANDENT LA VIGILANCE LORS DE
L’ÉCOUTE PROLONGÉE À UN NIVEAU DE VOLUME FORT/ÉLEVÉ LORSQUE VOUS
UTILISEZ UN CASQUE OU DES ÉCOUTEURS. RISQUE DE PERTE D’AUDITION SI
VOUS ENTENDEZ UN SIFFLEMENT DANS LES OREILLES. RÉDUISEZ LE VOLUME OU
ARRÊTEZ L’ÉCOUTE.
1
2
2
3 4 5
6
7
11
98 10
12
13
14
15
16
17
18
19
20
21
22
23
P7100PDE Zoran Fre 20AB.indd 4 2009/8/18 4:25:54 PM
Page 38

FR - 5
SITUATION DES COMMANDES (SUITE)
INSTALLATION DES PILES
1. Faire glisser le couvercle du compartiment pour piles.
2. Installer deux (2) piles “AAA” dans la télécommande,
en faisant attention au dessin de polarité dans le
compartiment.
3. Replacer le couvercle du compartiment.
PRECAUTIONS CONCERNANT LES PILES
Prendre les précautions suivantes lors de l’utilisation de piles pour cet appareil:
1. Les piles (le bloc-pile ou les piles installées) ne devraient pas être exposées à une
chaleur excessive telle que la lumière directe du soleil, un incendie ou quelque chose de
similaire.
2. Ne pas tenter de recharger, court-circuiter, démonter, chauffer ni jeter au feu des piles.
3. Ne pas mélanger des piles anciennes et nouvelles.
4. Ne pas mélanger des piles alcaline, standard (carbone zinc), ou rechargeables (nickel
cadmium).
5. Si l’appareil n’est pas utilisé pendant longtemps, retirer les piles pour éviter les dommages
ou accidents qui pourraient arriver si les piles coulent.
6. Ne pas essayer de recharger des piles qui ne sont pas conçues pour être rechargées;
elles peuvent surchauffer et éclater. (Suivre les indications du fabricant de piles.)
7. Jeter les piles selon les règlements locaux.
INSTALLATION DES PILES (TELECOMMANDE)
TÉLÉCOMMANDE
1. Bouton Menu DVD
2. Bouton Afchage
3. Bouton retour rapide ( )
4. Bouton Navigation ( , , , ) / Entrée
5. Bouton Saut en Arrière ( )
6. Bouton Lecture
7. Bouton Pause / Etape
8. Bouton Installation
9. Bouton Sous-titre
10. Bouton Audio
11. Bouton Avance Rapide ( )
12. Bouton Saut Avant ( )
13. Bouton Stop
1
2
3
4
6
5
7
8
9
10
11
12
13
P7100PDE Zoran Fre 20AB.indd 5 2009/8/18 4:25:57 PM
Page 39

FR - 6
CONNEXION
NOTES POUR LA CONNEXION A UN TELEVISEUR :
• Connecter le lecteur DVD avec un câble AV à l’entrée AV du téléviseur.
• Régler la touche TV/VIDEO du téléviseur ou passer en conguration VIDEO.
• Lors de la connexion du DVD, voir le manuel de l’utilisateur du téléviseur, ainsi que ce
manuel.
• Lors de la connexion du DVD à une TV, vérier que les appareils sont éteints et débranchés
avant d’effectuer toute connexion.
• Si le téléviseur ne comprend qu’une entrée audio, l’utilisation d’un connecteur “Y” peut
être nécessaire. Voir dans un magasin de matériel électronique.
• Connecter le lecteur DVD directement au téléviseur. Si le lecteur DVD est connecté par un
magnétoscope, l’image sera trouble car les disques DVD sont protégés contre la copie.
CONNEXION DU DVD A UN SYSTEME HOME CINEMA
1. Haut-parleur avant gauche
2. Téléviseur
3. Haut-parleur central – peut être situé sur
ou sous une télévision.
4. Caisson de basses – peut être situé
Partout dans la pièce.
5. Haut-parleur avant droit
6. Position Vue/écoute
La meilleure position d’écoute est obtenue
en positionnant las chaises, canapés etc.
au milieu de tous les haut-parleurs.
7. Haut-parleur arrière gauche
8. Haut-parleur arrière droit
9. Ampli AV w/Décodeur Dolby Digital /
Décodeur DTS
Placer le caisson de basses et les haut-parleurs avant, arrière et central selon les positions
montrée / décrites ici.
Une fois les haut-parleurs correctement positionnés, faire un test de tonalité sur l’ampli AV et
régler le volume jusqu’à obtention su son souhaité. Pour de meilleurs résultats, s’asseoir en
position de spectateur et faire régler le son par quelqu’un d’autre ; ceci permet d’optimiser
les réglages.
NOTE: les haut-parleurs arrière peuvent également être situés sur le mur latéral en face du
spectateur. Vérier alors que le spectateur est entre les 2 haut-parleurs.
Tester pour trouver la meilleure position.
Câble AV
Depuis la sortie numérique
Câble Coaxial
Vers entrée
audio numérique
P7100PDE Zoran Fre 20AB.indd 6 2009/8/18 4:25:58 PM
Page 40

FR - 7
SUR LES DISQUES
Le code zone de ce lecteur DVD est:
Consultez la page suivante pour les informations concernant le code zone.
DISQUES LISIBLES :
Les disques suivant peuvent être lus sur ce lecteur DVD :
TYPES DE DISQUES
DVD
Les données sur la plupart des DVD sont divisées en
sections appelées ‘’titres’’ et en sous-sections appelées
‘’chapitres’’, chacune ayant un numéro de titre ou de
chapitre. Certaines fonctions de ce lecteur ne fonctionnent
pas sur certains DVD comme elles ont été programmées.
Si une fonction sélectionnée ne fonctionne pas comme
souhaité, consulter la plaquette accompagnant le CD.
CD AUDIO
Les données sur un CD audio sont divisées en sections
appelées ‘’pistes’’, chacune ayant un numéro de piste
AUDIO
IMMPORTANT
Il est important de lire le manuel accompagnant les DVD, car certaines fonctions du lecteur DVD
ne peuvent pas être utilisées sur certains DVD. Il y a également certaines fonctions optionnelles
différentes pour chaque DVD, qui ne sont donc pas présentées dans ce manuel.
Notes sur le droit de copie :
Il est interdit par la loi de copier, diffuer, montrer, diffuser sur câble, représenter en public ou
louer sans permission du matériel protégé contre la copie. Les disques DVD sont protégés
contre la copie, et tout enregistrement de ces DVD sera brouillé. Ce produit contient une
technologie de protection copyright protégée par la méthode de plainte de certains brevets
américains et détenteurs de propriété intellectuelle. L’utilisation de cette technologie doit
être autorisée par Macrovision Corporation, et est conçu pour l’utilisation familiale ou en
cercle restreint uniquement à moins d’autorisation contraire de Macrovision Corporation. Le
changement des technologies ou le démontage sont interdits.
Informations sur la gestion des zones
Ce lecteur DVD est conçu et fabriqué pour répondre aux informations de gestion de zone
inscrites sur les DVD. Si le numéro de zone inscrit sur le DVD ne correspond pas à celui
du lecteur, le lecteur ne peut pas lire le DVD. Certains DVD peuvent ne pas être lisibles sur
ce lecteur s’ils ont été achetés dans une autre zone géographique ou fabriqués dans un
but commercial. Si vous essayez de lire un disque non autorisé, le message ‘’Erreur zone’’
s’afche sur l’écran du téléviseur.
Lorsque vous essayez de lire un disque non autorisé “ERREUR REGION’’ apparaît à
l’écran.
P7100PDE Zoran Fre 20AB.indd 7 2009/8/18 4:26:00 PM
Page 41

FR - 8
MENU CONFIGURATION
Mode réglages DVD
• En mode arrêt DVD, appuyer sur le bouton REGLAGES sur la télécommande, le menu
des réglages apparaît sur l’écran.
• Le mode Réglages donne le menu pour la conguration de REGLAGE LANGUE,
REGLAGE VIDEO et REGLAGE AUDIO.
• La sélection d’options dans le menu Réglages se fait avec les boutons directionnels et le
bouton ENTRER.
• Pour quitter le menu Réglages, appuyer sur le bouton REGLAGES à nouveau.
REGLAGE LANGUE
En mode ARRET, appuyer sur REGLAGES et choisir LANGUE avec la télécommande. Pour
sélectionner une option, utiliser les boutons directionnels ( / / / ), puis appuyer sur
ENTRER pour conrmer la sélection.
Langue (langue d’afchage à l’écran)
Appuyer sur / pour sélectionner “Langue”,
puis appuyer sur pour bouger le curseur sur la
colonne des choix. Sélectionner une langue avec
les boutons / et appuyer sur ENTRER:
- Anglais
- Français
- Espagnol
- Allemand
- Italien
- Portugais
Langue de sous-titre
Appuyer sur / pour sélectionner “Sous-titre” et
appuyer sur . Sélectionner une langue de soustitre avec les boutons / (ou Off pour aucun
sous-titre) et appuyer sur ENTRER:
- Anglais
- Français
- Espagnol
- Allemand
- Italien
- Portugais
- Aautomatique
- Off
Langue audio
Appuyer sur / pour sélectionner “Audio” et
appuyer sur . Sélectionner une langue audio avec
les boutons / et appuyer sur ENTRER:
- Anglais
- Français
- Espagnol
- Allemand
- Italien
- Portugais
P7100PDE Zoran Fre 20AB.indd 8 2009/8/18 4:26:02 PM
Page 42

FR - 9
MENU CONFIGURATION (SUITE)
Langue menu lecteur
Appuyer sur / pour sélectionner “Menu lecteur”
et appuyer sur . Sélectionner une langue de
menu DVD avec les boutons / et appuyer sur
ENTRER:
- Anglais
- Français
- Espagnol
- Allemand
- Italien
- Portugais
REGLAGE VIDEO
En mode ARRET, appuyer sur REGLAGES sur la télécommande, le MENU REGLAGE
SYSTEME apparaît. Apuyer sur / pour sélectionner “VIDEO”, puis appuyer sur pour
conrmer.
Aspect Ratio
(4:3) – Sélectionner cette option pour un écran TV
normal. Le téléviseur afchera un “Ecran large”
avec des bandes noires en haut et en bas.
(16:9) - Sélectionner cette option pour un écran
large (rapport 16:9)
Système TV
(NTSC) - Sélectionner cette option si le téléviseur
raccordé est doté d’un système couleur NTSC.
Le signal vidéo d’un disque PAL sortira en format
NTSC.
(PAL) – Sélectionner cette option si le téléviseur
raccordé est doté d’un système couleur PAL. Le
signal vidéo d’un disque NTSC sortira en format
PAL.
Qualité d’image
Sélectionner “Dynamique”, puis appuyer sur
ENTRER pour conrmer.
(Luminosité) – Cette option permet d’ajuster la
luminosité de l’écran.
Portée de -20 à 20.
(Contraste) - Cette option permet d’ajuster le
contraste sur l’écran.
Portée de -16 à 16.
(Couleur) - Cette option permet d’ajuster la couleur
sur l’écran.
Portée de -20 à 20.
P7100PDE Zoran Fre 20AB.indd 9 2010/2/26 5:36:37 PM
Page 43

FR - 10
MENU CONFIGURATION (SUITE)
REGLAGE AUDIO
En mode ARRET, appuyer sur REGLAGES sur la télécommande, le MENU REGLAGE
SYSTEME apparaît. Apuyer sur / pour sélectionner “AUDIO”, puis appuyer sur pour
conrmer.
SORTIE NUMERIQUE
Sélectionner le réglage Sortie numérique pour
pouvoir régler la sortie audio du port S/PDIF pour
fonctionner en harmonie avec l’équipement audio
raccordé au lecteur, les options suivantes sont
disponibles.
• Sous “Audio”, appuyer sur pour sélectionner
“SORTIE NUMERIQUE”, puis appuyer sur .
(off) – pour désactiver la sortie audio numérique.
Par exemple, pour utiliser les ches de SORTIE
AUDIO AVANT (G/D) pour brancher un téléviseur
ou un système stéréo.
(PCM) – sélectionner si l’appareil raccordé ne peut
pas décoder une sortie audio multicanaux. Le
lecteur DVD convertit les signaux multicanaux
Dolby Digital et MPEG-2 en PCM (Modulation
d’impulsion codée).
(RAW) - sélectionner si l’appareil raccordé est doté
d’un décodeur multicanaux intégré supportant
l’un des formats audio multicanaux (Dolby
Digital, MPEG-2).
MODE DRC
Sélectionner “ON” pour activer le DRC
(Compression de portée dynamique), ou “OFF”
pour le désactiver.
La compression de portée dynamique compresse la
portée dynamique de la piste audio du DVD.
DOWN SAMPLING
Avec une sortie numérique coaxiale, sélectionner
“ON” pour activer le Down Sampling, ou “OFF” pour
désactiver le Down Sampling.
Lorsque le Down Sampling est activé, la sortie
numérique sera échantillonnée à 48k même si
l’audio original est codé en 96k pour les DVD.
P7100PDE Zoran Fre 20AB.indd 10 2009/8/18 4:26:05 PM
Page 44

FR - 11
OPERATIONS DVD DE BASE
NOTES IMPORTANTES:
• Un symbole apparaît dans l’angle en haut à droite de l’écran de TV en cours d’opération
si vous essayez d’accéder à une fonction non disponible sur le disque.
• Certains disques peuvent mettre quelques secondes à charger.
• Toujours tenir le disque de façon à ne pas toucher la surface. Lors de l’insertion du disque,
le positionner avec la face imprimée vers le haut, l’aligner dans l’encastrement et le placer
en position correcte.
• Il est important de lire le manuel qui accompagne les DVD car certaines fonctions de
ce lecteur DVD ne peuvent pas être utilisées sur tous les DVD. Certaines fonctions
optionnelles sont différentes pour chaque DVD, et ne sont donc pas expliquées dans ce
manuel.
SELECTION TV
Allumer la TV, le lecteur DVD et le système d’ampli Audio (s’il y en a).
1. Appuyer sur “TV/VIDEO” sur la TV.
2. Sélectionner le mode Vidéo (TV).
Note: s’il y a plus d’un canal AV pour la TV, sélectionner le canal connecté au lecteur
DVD.
3. Sélectionner la sortie audio qui convient sur l’ampli AV (s’il y en a).
LECTURE D’UN DVD
1. Appuyez sur l’interrupteur pour allumer l’unité; la DEL orange est lumière.
2. Appuyer sur le bouton d’ouverture de la porte pour ouvrir le plateau de disques. Insérer
un disque avec le côté labellisé vers le haut.
3. Fermer le plateau. Une fois le disque chargé, l’écran de menu du DVD doit apparaître.
Utiliser les touches de Navigation ( , , , ) pour sélectionner l’option souhaitée et la
touche ENTRER pour sélectionner ; la lecture commence immédiatement.
4. Pour arrêter la lecture, appuyer sur la touche STOP. L’appareil mémorise l’endroit où il
a été arrêté, appuyer simplement sur la touche LECTURE pour reprendre la lecture où
elle s’était arrêtée. Une double pression sur STOP arrête complètement la lecture.
Remarque:
• Si un MENU apparaît sur l’écran TV, appuyer sur les touches de Navigation ( , ,
, ) pour sélectionner l’option/élément souhaité, puis appuyer sur la touche ENTRER.
Consulter le livret ou le boîtier du disque pour plus d’informations.
• Le retour à la lecture peut ne pas fonctionner sur tous les disques.
MENU DVD
Appuyer sur la touche MENU, et le Menu principal du disque apparaît. Avec les touches de
Navigation ( , , , ) sélectionner l’option souhaitée, puis appuyer sur la touche ENTRER.
Cette fonction n’est pas valide sur tous les disques.
P7100PDE Zoran Fre 20AB.indd 11 2009/8/18 4:26:05 PM
Page 45

FR - 12
OPERATIONS DVD DE BASE (SUITE)
SAUT
Appuyer sur la touche SAUT AVANT (moins de 1 sec) sur l’appareil principal ou appuyer sur
la touche ( ) sur la télécommande pour avancer le DVD au début du chapitre suivant.
Appuyer sur la touche SAUT EN ARRIÈRE (moins de 1 sec) sur l’appareil principal ou appuyer
sur la touche ( ) sur la télécommande pour revenir au début du chapitre précédent.
RECHERCHE
En cours de lecture, appuyer sur les touches ( ) ou ( ) sur la télécommande pour
faire avancer ou revenir en arrière le DVD en vitesse double (x2) pour trouver une section
particulière. Appuyer à plusieurs reprises sur ces boutons et la vitesse augmente de x4, x8,
x16 puis revient à la normale.
Le DVD avance ou retourne en vitesse rapide jusqu’à ce que soit pressée la touche LECTURE/
PAUSE ; la lecture normale revient à ce moment.
AFFICHAGE
En cours de lecture de DVD, appuyer une fois sur AFFICHAGE sur la télécommande pour
voir le temps écoulé et le temps restant du titre. Appuyer une deuxième fois pour voir le
titre et chapitre en cours. Appuyer une troisième fois pour voir le réglage audio et de soustitre. Appuyer une quatrième fois pour voir le réglage d’angle et de répétition. Appuyer une
cinquième fois pour désactiver l’afchage.
Note: Il n’ya pas de touche REPEAT ANGLE et dans les machines mais sur la touche
DISPLAY de presse indiquant que l’angle et le répète, il faut utiliser en conjonction avec les
boutons correspondants.
LECTURE / PAUSE
Appuyer sur la touche LECTURE/PAUSE une fois pour mettre en pause l’image. Appuyer sur
la touche LECTURE/PAUSE pour revenir à la lecture normale.
SOUS-TITRES
Cette fonction ne s’applique qu’aux disques DVD. Il est possible de modier la langue de
sous-titrage en appuyant sur le bouton SOUS-TITRES de la télécommande.
Remarque: Le nombre de sous-titres dépend du disque DVD.
AUDIO
Cette fonction s’applique aux DVD et CD audio avec différents effets.
- En appuyant sur la touche AUDIO de la télécommande, vous modierez le canal audio.
Remarque : Lorsque AV est l’entrée, cette touche n’a aucune fonction.
P7100PDE Zoran Fre 20AB.indd 12 2009/8/18 4:26:06 PM
Page 46

FR - 13
OPERATION CD DE BASE
LECTURE DE CD
1. Appuyez sur l’interrupteur pour allumer l’unité; la DEL orange est lumière.
2. Appuyer sur le bouton d’ouverture de la porte pour ouvrir le plateau de disques. Insérer
un disque avec le côté labellisé vers le haut.
3. Fermer le plateau. Une fois le disque chargé, la lecture démarre automatiquement.
4. Appuyer sur STOP sur la télécommande pour arrêter la lecture.
SELECTION DES PISTES AVEC LA TOUCHE SAUT
En cours de lecture, appuyer sur les touches SAUT ( ) ou ( ) sur la télécommande
pour sélectionner une piste à lire.
OPERATIONS SUR CD D’IMAGE
LECTURE D’UN CD D’IMAGE
1. Appuyez sur l’interrupteur pour allumer l’unité; la DEL orange est lumière.
2. Appuyer sur le bouton d’ouverture de la porte pour ouvrir le plateau de disques. Insérer
un disque avec le côté labellisé vers le haut.
3. Fermer le plateau. Une fois le disque chargé, le menu DOSSIER/IMAGE apparaît sur
l’écran TV. Appuyer sur les touches de Navigation ( , ) pour sélectionner le dossier/
piste.
4. Appuyer sur la touche ENTRER pour conrmer. Appuyer sur les touches de Navigation
( , ) pour sélectionner l’image souhaitée; l’aperçu de l’image apparaît dans la zone
d’aperçu de l’image. Appuyer sur la touche ENTRER pour voir l’image. Appuyer sur STOP
sur la télécommande pour arrêter la lecture.
5. Pour sélectionner d’autres dossiers, appuyer sur Navigation ( , ) pour sélectionner «- -»
puis appuyer sur la touche ENTRER pour revenir sélectionner les dossiers et utilise les
touche de Navigation ( , ) pour sélectionner le dossier souhaité.
P7100PDE Zoran Fre 20AB.indd 13 2009/8/18 4:26:06 PM
Page 47

FR - 14
ENTRETIEN ET MAINTENANCE
Entretien des disques
• Traiter les disques avec précaution. Les tenir
uniquement par les bords. Ne jamais laisser les
doigts entrer en contact avec la surface brillante
non imprimée du disque.
• Ne pas coller de scotch, autocollant, etc. sur la
face imprimée du disque.
• Nettoyer les disques de temps en temps avec
un chiffon sec, propre et sans produit. Ne jamais
utiliser de détergent ou nettoyant abrasif pour
nettoyer les disques. Si nécessaire, utiliser un
kit de nettoyage de CD.
• Si un disque saute ou s’arrête sur une section, il
est probablement sale ou endommagé (rayé).
• Pour le nettoyage du disque, essuyer en lignes droits depuis le centre vers les bord. Ne
jamais essuyer en mouvements circulaires.
• Les disques doivent être stockés dans leur boîtier après chaque utilisation pour éviter les
dommages.
• Ne pas exposer les disques à la lumière directe du soleil, à une forte humidité, de hautes
températures, à la poussière, etc. Une exposition prolongée à des températures extrêmes
peut déformer les disques.
• Ne pas coller ni écrire sur aucune face des disques. Les stylos ou l’encre peuvent
endommager les surfaces.
Nettoyage de l’appareil
• Pour éviter les incendies et électrocution, débrancher l’appareil de l’alimentation AC lors
du nettoyage.
• La nition de l’appareil peut être nettoyée avec un chiffon à poussière et entretenue
comme un meuble. Nettoyer et essuyer les parties en plastique avec précaution.
• Un savon doux et un chiffon humide peuvent être utilisés pour le panneau avant.
P7100PDE Zoran Fre 20AB.indd 14 2009/8/18 4:26:07 PM
Page 48

FR - 15
Correction
• Insérer l’adaptateur VOITURE dans
le DC voiture de sortie 12V.
• Activer l’interrupteur.
• Insérer un disque.
• Réglez le commutateur ‘SOURCE’
de manière appropriée soit pour une
source vidéo externe (Entrée AV) ou
(DVD) pour la lecture interne d’un
disque.
• Verier les connexions de l’appareil.
• Activer l’équipement externe.
• Nettoyer le disque selon les
procédures décrites page 16.
• Insérer un disque.
• Insérer un disque lisible. (vérier le
type de disque, le menu système
TV, et le Code zone).
• Placer le disque à l’endroit et bien
orienté.
• Nettoyer le disque
•
Appuyer sur la touche CONFIGURATION
sur l’appareil ou la télécommande pour
fermer le menu à l’écran.
• Pointer la télécommande sur le
capteur.
• Faire fonctionner à moins de 23
pieds (7mètres)
• Retirer l’obstacle.
• Remplacer les piles.
• Connectez l’adaptateur AC
correctement à la prise murale ainsi
qu’à l’appareil.
• Réglez le commutateur de courant
sur la position OFF.
GUIDE DE DEPANNAGE
Symptom
L’appareil ne
reconnaît aucun
bouton.
Le bouton est sur
ON mais l’appareil
ne fonctionne pas.
Il n’y a pas d’image
(et/ou de son), et le
LED est ORANGE.
Qualité d’image vidéo
et/ou audio pauvre.
Le Lecteur DVD ne
démarre pas la
lecture.
La télécommande ne
fonctionne pas
correctement
La batterie ne se
charge pas
Cause
• L’adaptateur VOITURE est
déconnecté.
• L’interrupteur de marche est sur
Off.
• Aucun disque n’est inséré.
•
Le commutateur ‘SOURCE’ est
réglé sur AV IN mais aucune
entrée vidéo externe n’est
disponible.
• Le commutateur ‘SOURCE’ est
réglé sur AV IN mais un disque
DVD, CD ou JPEG est en lecture.
• Les câbles externes vidéo/audio
ne sont pas bien connectés.
• L’équipement vidéo/audio
externe est éteint.
• Le disque est sale ou rayé.
• Pas de disque inséré.
• Le disque inséré n’est pas lisible.
• Le disque est mis à l’envers ou
mal encastré.
• Le disque est sale.
• Un menu est toujours sur l’écran.
• N’est pas pointée sur l’appareil.
• Est trop éloignée.
• Un obstacle se trouve devant le
capteur .
• Les piles sont mortes.
• L’adaptateur AC est déconnecté
de la prise de courant murale ou
n’est pas connecté à l’appareil.
• Le commutateur de courant est
placé sur ON.
En cas de problème, vérier le guide suivant avant de contacter notre service.
P7100PDE Zoran Fre 20AB.indd 15 2009/8/18 4:26:07 PM
Page 49

FR - 16
SPECIFICATIONS
GENERALES
Alimentation DC 9V-12V ... 1A
Consommation d’énergie 10W
Dimensions externes (LxWxH) 228 x 185 x 56 mm
Poids 0.96kg
Température des conditions d’opération Temperatura: 5°C à 35°C
Etat de fonctionnement Horizontal
Taux d’humidité pour le fonctionnement 5% à 90%
SISTEME
Laser Longueur de l’onde laser du
Semiconducteur 650nm.
Sistème de signal NTSC/PAL
Signal / Bruit plus de 90db
Gamme dynamique plus de 90db
ENTREE
Vidéo composite 1,0V P-P 75 ohm, synchronisation négative
Audio 0.5Vrms 47Kohm
SORTIE
Vidéo composite 1,0V P-P 75 ohm, synchronisation négative
Sortie Audio (Digitale) 0.5V P-P 75ohm
Sortie Audio (Analogue) 0.5Vrms 600ohm
ADAPTEUR AC/DC
Entrée AC 220V-240V~ 0.4A 50Hz
Sortie DC 9V ... 1A
ACCESSOIRES :
1 câble AV
1 casque
1 adaptateur AC /DC
1 adaptateur allume-cigare
1 télécommande
2 piles AAA (pour la télécommande)
* La conception et les spécications sont sujettes à modication sans avis préalable.
P7100PDE Zoran Fre 20AB.indd 16 2009/8/18 4:26:08 PM
Page 50

THIS INSTRUCTION BOOK MAY CONTAIN ERRORS AND OMISSIONS.
DESIGN AND SPECIFCATION ARE SUBJECT TO CHANGE WITHOUT NOTICE
ESTE LIBRO DE INSTRUCCIONES PUEDE CONTENER ERRORES Y OMISIONES.
EL DISNO Y LAS ESPECIFICACIONES ESTÁN SUJETAS A CAMBIOS SIN NOTIFICAIÓN PREVIA
CE LIVRET D’INSTRUCTIONS PEUT CONTENIR DES ERREURS ET DES OMISSIONS.
LE CONCEPT ET LES CARACTERISTIQUES SONT SUJETS A CHANGEMENTSANS PRAVIS
P7100PDE Zoran Eng 20AB.indd 17 2009/8/18 4:23:44 PM
 Loading...