

Instruction Manual
NTL460
NTL460IM0036.indd 1 20/02/2006 15:01:08

2 3
English
INTRODUCTION
GETTING STARTED
RESET
SYSTEM SETTING
CHANGING CAPITALS AND LOWER CASE
CHANGING CHARACTERS AND NUMBER INPUT
SETTING HOME TIME
SEARCHING WORLD TIME
TRANSLATOR MODE
PHRASES
TELEPHONE MODE
SCHEDULE MODE
MEMO MODE
ALARM FUNCTION
SECRET MEMORY
CALCULATOR MODE
CONVERSION MODE
GAME MODE
APPENDIX
CHANGING BATTERIES
PRECAUTIONS
WARRANTY
4
4
4
4
5
5
6
6
7
8
9
11
11
12
13
14
15
17
19
19
20
20
SUMMARY
NTL460IM0036.indd 2-3 20/02/2006 15:01:08

4
English
5
English
Press SHIFT + (MENU) to enter the system settings mode. Use and or press
the corresponding number to scroll through the following settings:
1. KEY TONE: Press ENTER for key tone settings. The default key tone status is on,
press or to turn it on and off.
INTRODUCTION
Thank you for purchasing this NTL460 4-language translator. This product has been
designed to help you translate words in English, French, Spanish and German.
The database includes 30,000 words for each language, as well as 150 conversational
phrases per language, which have been grouped into 10 different categories for easy
access and use. Under normal use the NTL460 is designed to give many years of
service. Please follow these instructions carefully to ensure your product operates correctly.
GETTING STARTED
Removing the battery tab
Before you start using the unit, carefully remove the battery tab located at the rear of the unit:
1. Unscrew and remove the battery compartment lid on the back of the unit.
2. Take note of the correct polarity (+/- signs), and remove the battery.
3. Remove the battery tab, and replace the battery according to the polarity.
Reset
Reset the unit before using it for the first time:
- Press reset button on the back of the unit with a small thin object i.e. the end of a
paper clip. “RESET?” will be displayed onscreen.
- Press ENTER to confirm.
Notes:
- If a function key is pressed, reset will cancelled, and the function will be activated.
- Press any other key to exit the reset mode, and enter Home Time mode.
Opening and closing the unit
To open the unit, press the front centre button to release the catch.
To close it, gently push the lid down.
Before switching the unit on, make sure you remove the clear film label from the LCD
screen by pulling the tab.
SYSTEM SETTING
2. AUTO OFF: Press ENTER for auto off time settings. The default auto off time is
5 minutes, press or to scroll through the following selection:
3 MINUTES, 5 MINUTES, and 7 MINUTES.
3. PASSWORD: Press ENTER to access this function. For more details, please refer
to the section SECRET MEMORY).
4. CONTRAST: Press ENTER for contrast settings. The default contrast is 6.
Press or to scroll from 1 to 8.
5. LANGUAGE: Press ENTER to select the language of the prompts. The default
language is ENGLISH. Press or to scroll as follows:
ENGLISH, FRANÇAIS, DEUTSCH, ESPAÑOL.
6. CHIME: Press ENTER for the hourly chime settings. The default chime status
is OFF, press or to turn it on and off. When the chime is set
on, the chime icon is displayed, and an alarm will sound every hour.
7. SCHD ALARM: Press ENTER for scheduled alarms settings. Press or to turn
it on and off.
8. HOME CITY: Press ENTER for home city name settings. You can input your city’s
name to edit the city displayed on the home time screen.
9. MEMORY: Press ENTER to display the available memory.
Press SHIFT + (CAPS) to switch the keyboard between capital and lower case
letters.
In TELEPHONE, MEMO and SCHEDULE modes, press the NUM key once to switch to
number input. Press again to return to character input.
SWITCHING BETWEEN CAPITALS AND LOWER CASE
CHANGING CHARACTERS AND NUMBER INPUT
NTL460IM0036.indd 4-5 20/02/2006 15:01:10
6
English
7
English
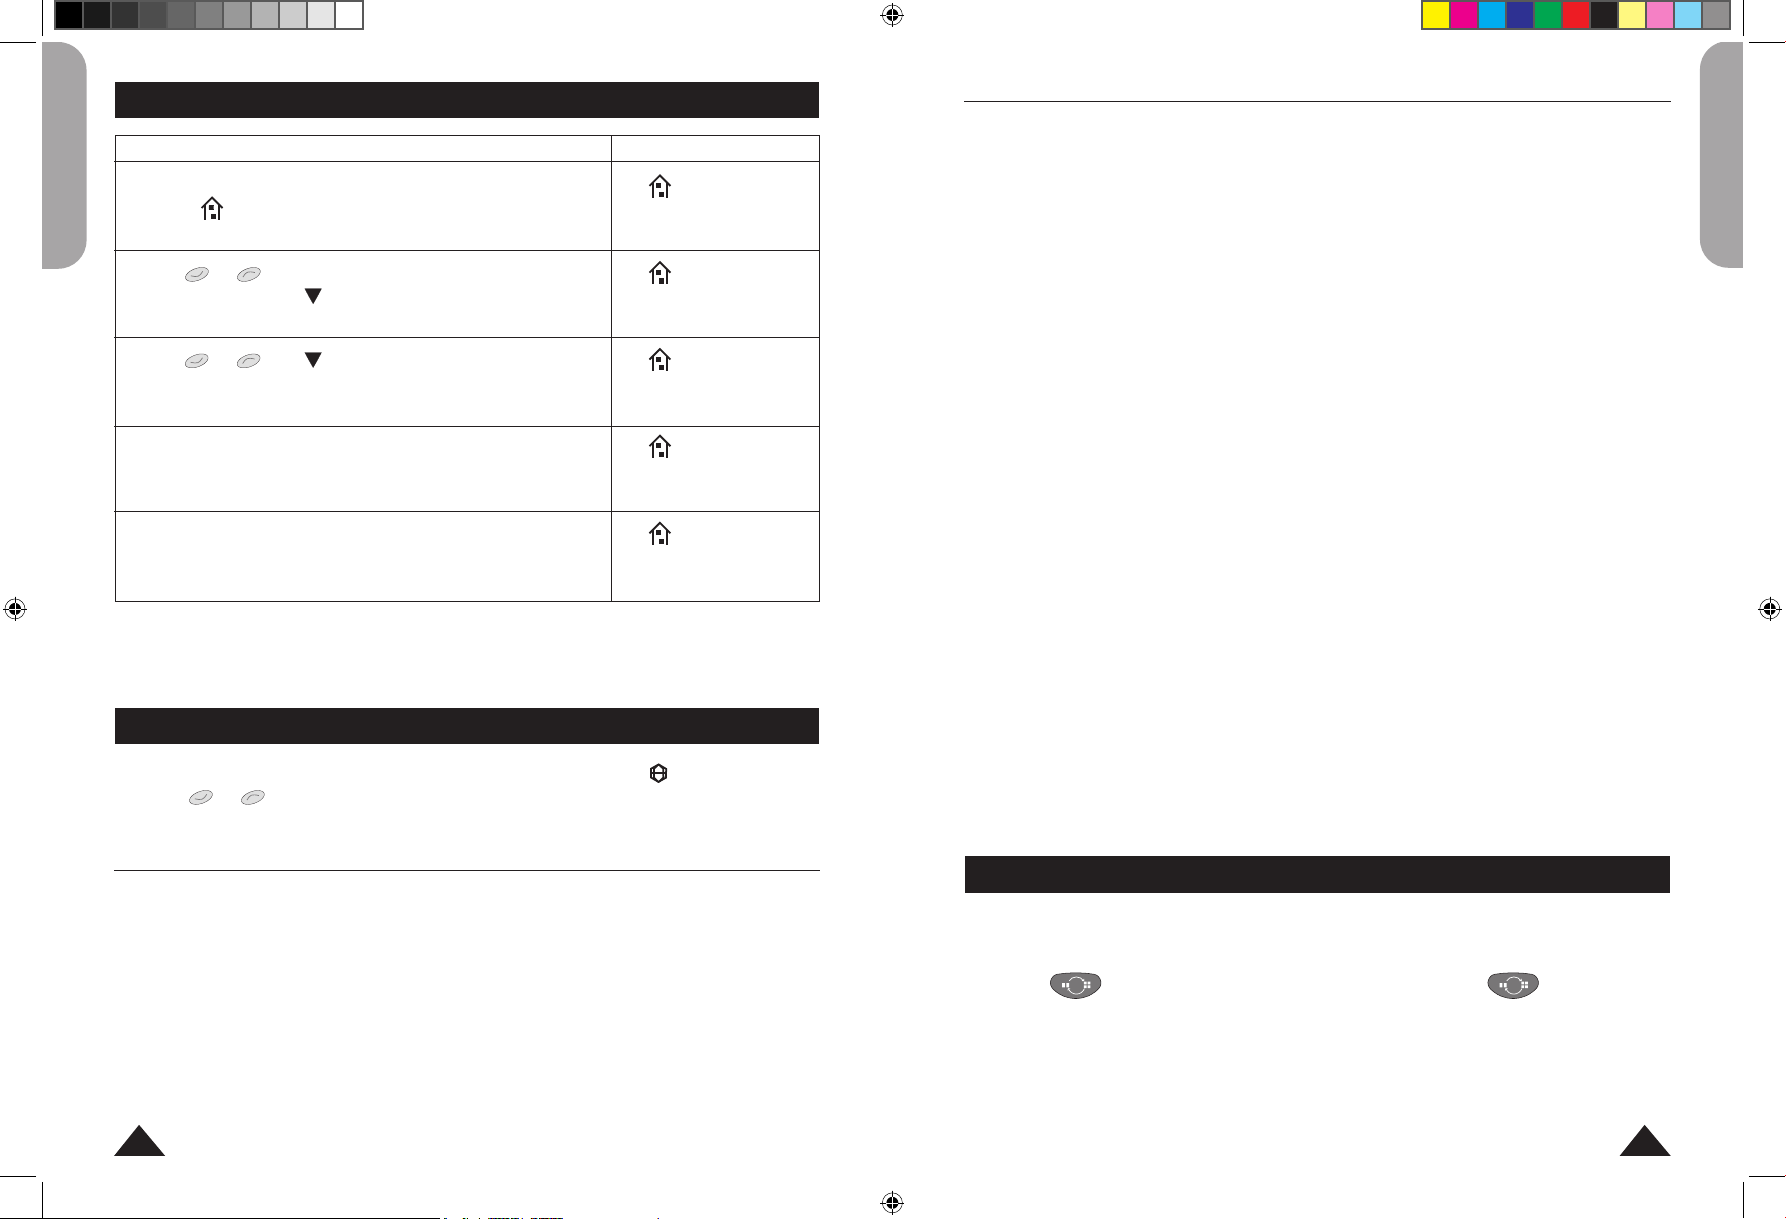
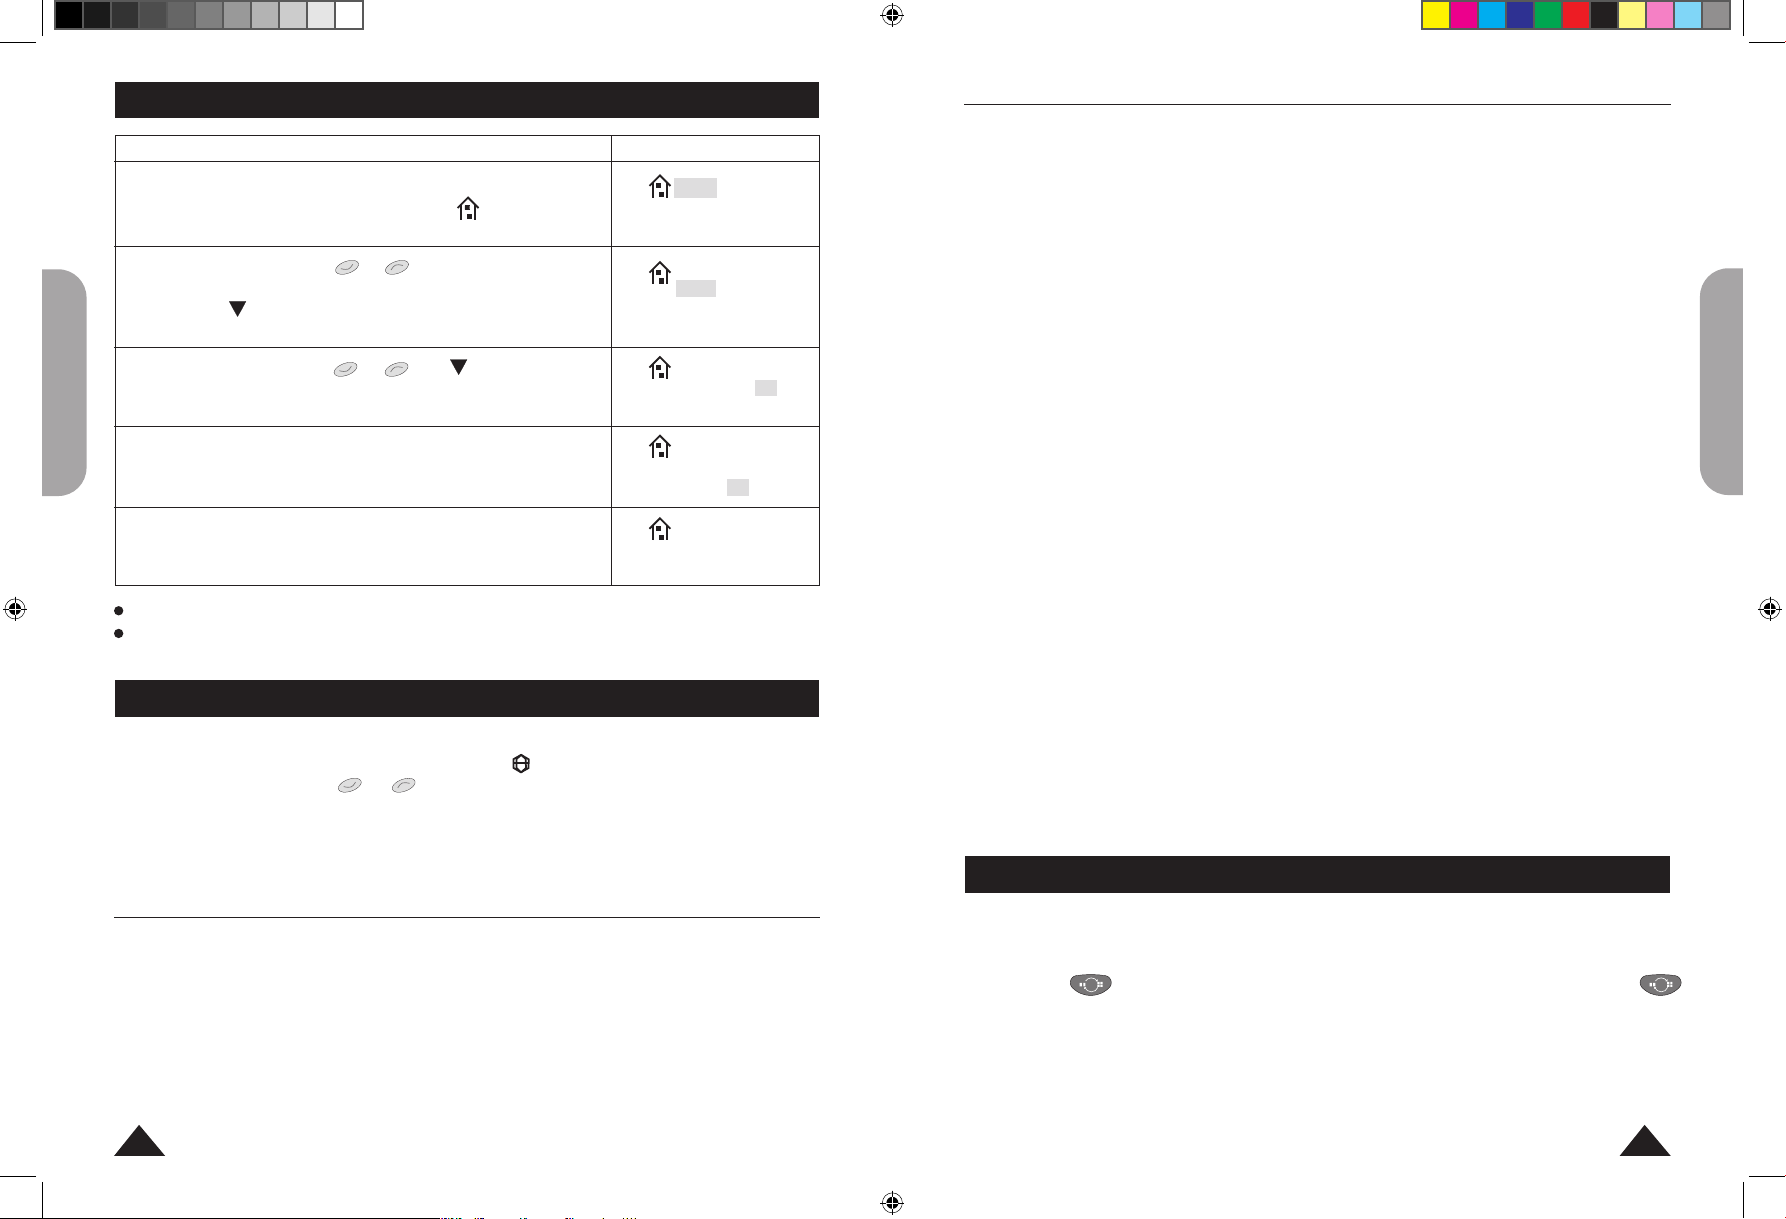
SETTING THE HOME TIME
OPERATION DISPLAY
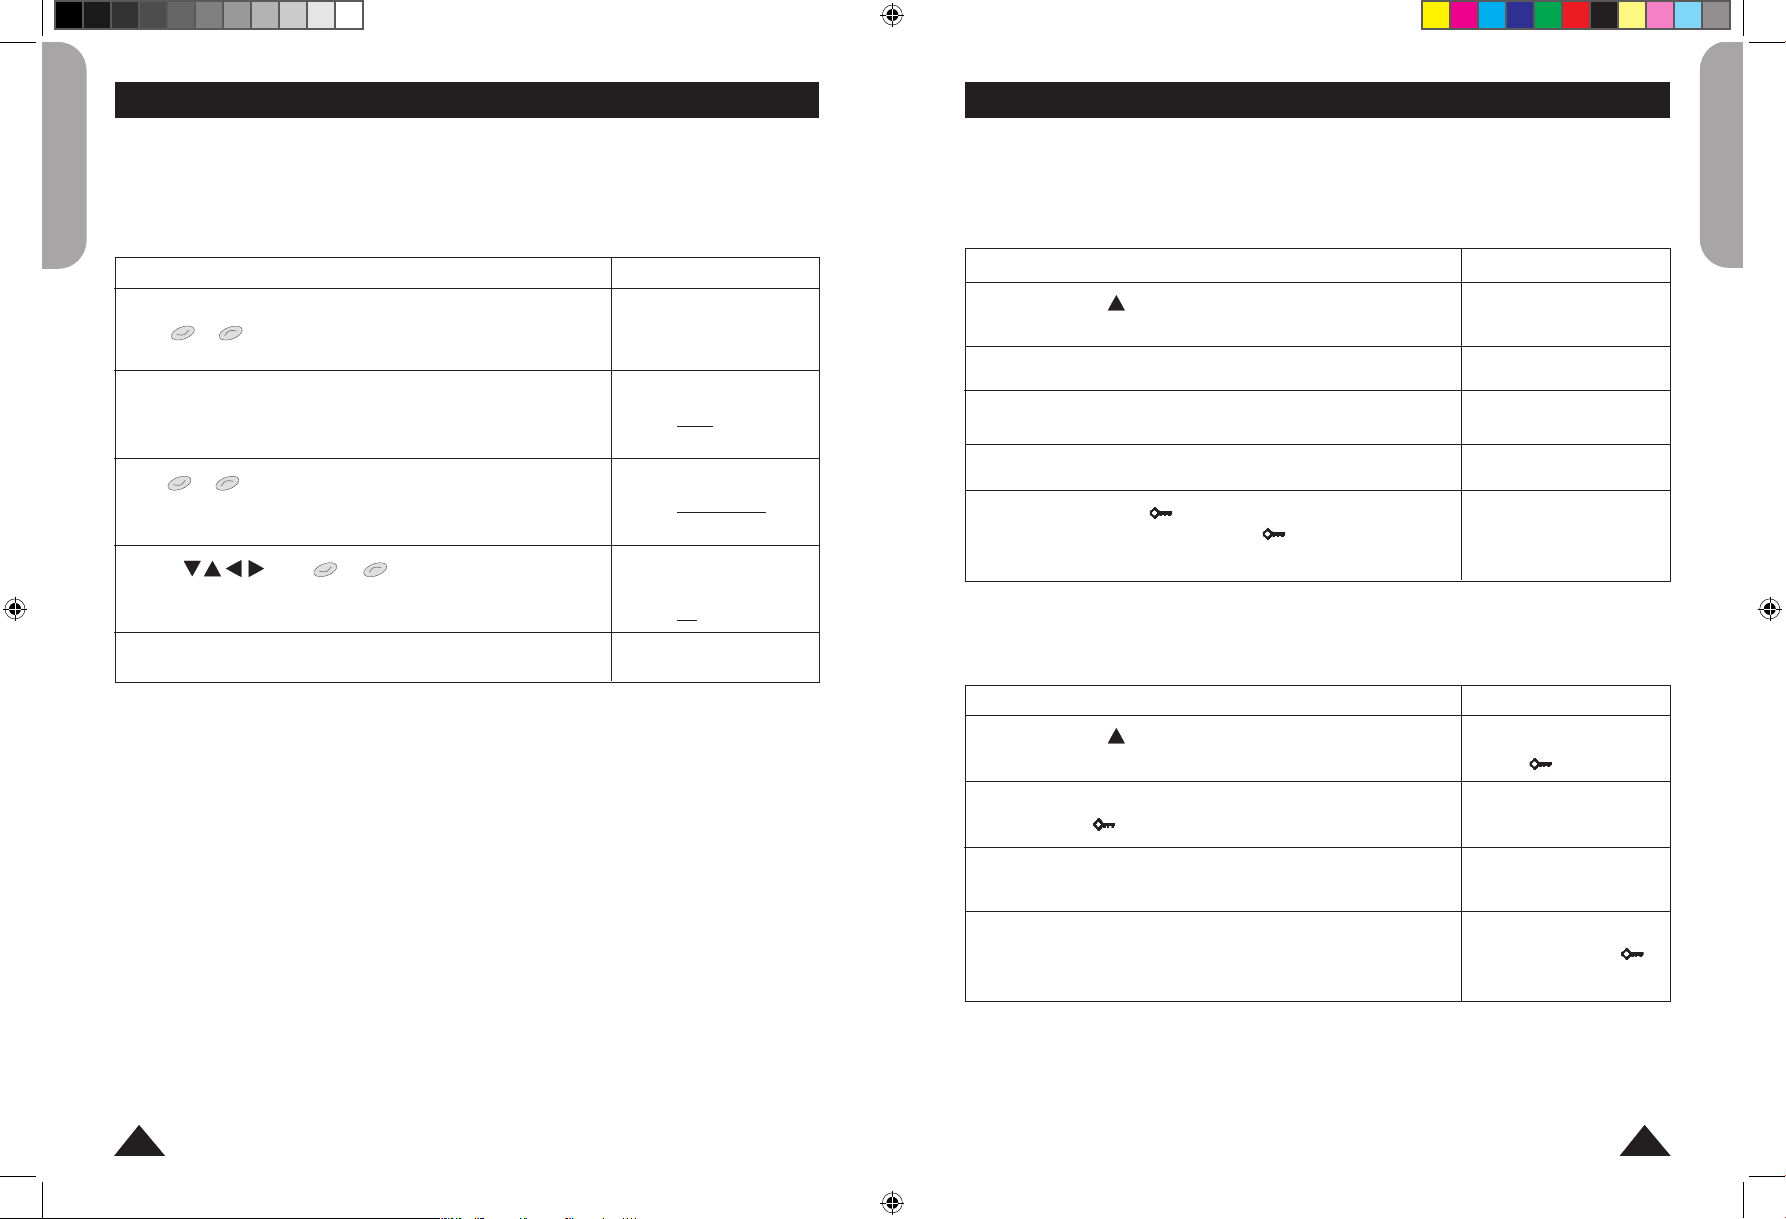
Press SHIFT + CAL/CONV (HT) to select HOME TIME
(symbol displayed), then press EDIT.
Press or until the city of your time zone
appears. Then press to move the cursor to the 2
nd
line
Press or then to select the desired year,
month and day.
Use same procedure as above to set the hour.
Press ENTER to save your settings.
NYC # WED
2006-01-01
00:00:08
ROM # WED
2006-01-01
00:01:02
ROM # TUE
2006-12- 12
00:01:48
ROM #TUE
2006 -12-12
16:30:00
ROM #TUE
2006 -12-12
16:30:12
Press the key B (DST) to switch the daylight saving time on and off.
Note: the Home Time format is 24-hour, and the date format is YYYY/MM/DD.
1. Press SHIFT + ALARM (WT) to enter world time mode (symbol displayed).
2. Press or to browse the time in 43 major world cities. The world time adjusts
the time you set in home time relatively to the time difference in each world city.
SEARCHING WORLD TIME
TIME ZONE CITY NAME ABBREVIATION TIME DIFFERENCE
01
02
03
04
05
06
07
08
09
10
LONDON
LISBON
PARIS
BERLIN
ROME
AMSTERDAM
MADRID
HELSINKI
CAIRO
MOSCOW
LON
LIS
PAR
BER
ROM
AMS
MAD
HEL
CAI
MOW
+0
+0
+1
+1
+1
+1
+1
+2
+2
+3
TIME ZONE CITY NAME ABBREVIATION TIME DIFFERENCE
11
12
13
14
15
16
17
18
19
20
21
22
23
24
25
26
27
28
29
30
31
32
33
34
35
36
37
38
39
40
41
42
43
RIYADH
TEHRAN
DURAI
KABUL
KARACHI
DELHI
DHAKA
YANGON
BANGKOK
BEIJING
HONG KONG
SINGAPORE
TOKYO
ADELAIDE
SYDNEY
GUAM
NOUMEA
WELLINGTON
AUCKLAND
TONGA
MIDWAY ISLANDS
HONOLULU
ANCHORAGE
LOS ANGELES
DENVER
CHICAGO
NEW YORK
TORONTO
CARACAS
RIO DE JANEIRO
---MID ATLANTIC
AZORES
RUH
THR
DXB
KBL
KHI
DEL
DAC
RGN
BKK
BEI
HKG
SIN
TYO
ADL
SYD
GUM
NOU
WLG
AKL
TNG
MID
HNL
ANC
LAX
DEN
CHI
NYC
YYZ
CCS
RIO
-2H
MAT
AZO
+3
+3.5
+4
+4.5
+5
+5.5
+6
+6.5
+7
+8
+8
+8
+9
+9.5
+10
+10
+11
+12
+12
+13
-11
-10
-9
-8
-7
-6
-5
-5
-4
-3
-2
-2
-1
TRANSLATOR MODE
The NTL460 is a 4-Language translator with English, Spanish, French, and German.
For each language, 30,000 words are available.
Press the key to enter translator mode. When you press , the prompt
display language will be displayed as source language. To select another source language, press one of the 4 language function keys :
ENG for English
FRA for French
DEU for German
ESP for Spanish
NTL460IM0036.indd 6-7 20/02/2006 15:01:13
8
English
9
English
Once the source language is selected, input a word to translate. Index words will be
displayed simultaneously. You can continue to key in letters or use the keys to
select an index word. A word is selected when it is underlined in black. Then, press
ENTER to perform the translation.
If the word is found, its translation will be displayed in French (if the source language is
not English, the translation will first be displayed in English). To translate the word into
another language, press the corresponding language key (DEU or ESP). Press to
view the translation of previous/next word or input another word to translate.
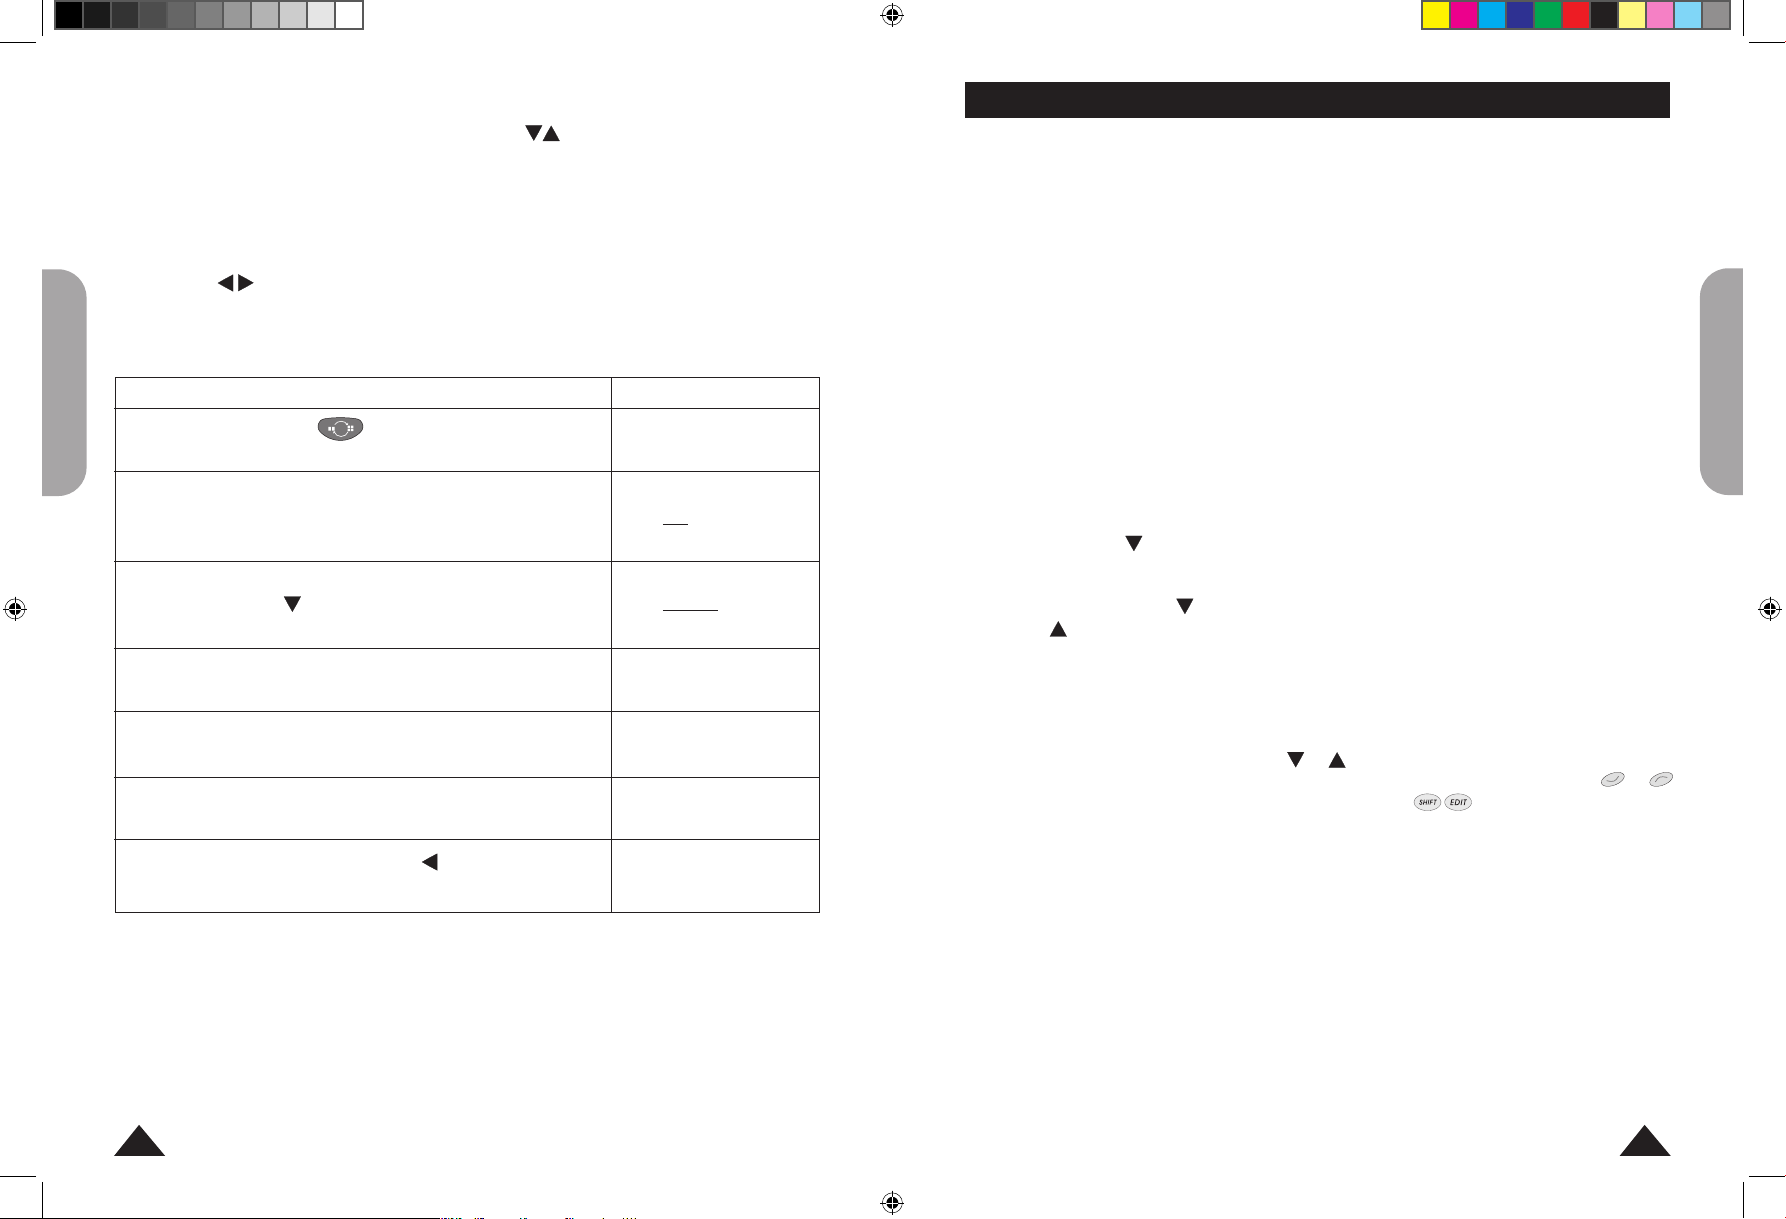
Example 1: Perform a translation (source language = English)
OPERATION DISPLAY
Press the key to enter translator mode.
Input “beg”. As soon as you start typing letters, the
system finds matches..
The index words are displayed simultaneously
Continue to type the word, and then choose the desired
word using the key. For example, begin, and press
ENTER.
The translation in French is displayed.
For the translation in Spanish, press ESP.
Or press DEU for German.
Press to see the previous word.
English:
beg_
beg
beget
begi_
begin
beginner
E: begin
F: commencer
F: entonner
E: begin
S: comenzar
E: begin
G: anfangen
E: beggary
G: Betteln
PHRASES
There are 600 phrases and expressions classified into 10 categories:
1. BUSINESS
2. RESTAURANT
3. HOTEL
4. IN TOWN
5. TRAVELLING AROUND
6. EMERGENCIES
7. RECREATION
8. BANK/MAIL/TELEPHONE
9. AIRPORT
10. GENERAL PHRASES
It is possible to translate a phrase in any of the 4 languages available.
Using the Phrase mode
1. Press PHRA key to select the PHRASE mode.
2. The screen briefly shows the ‘language’ previously set in system settings.
e.g. English (default) and then displays the first option of the PHRASE mode.
3. The first category BUSINESS is displayed. Press ENTER to access this category.
4. Or press to view the next category. When the desired category is
displayed, press ENTER to confirm. The first phrase of the category will be shown.
5. Press to see the next phrase in the list. Press to see the previous phrase in
the list.
6. Press a language key to view the translation in the target language.
7. Press another language key to see the translation in another language.
8. If a phrase is long, you can scroll down using and .
9. To scroll through the phrases within one category, press or .
10. To return to the phrase list, press repeatedly .
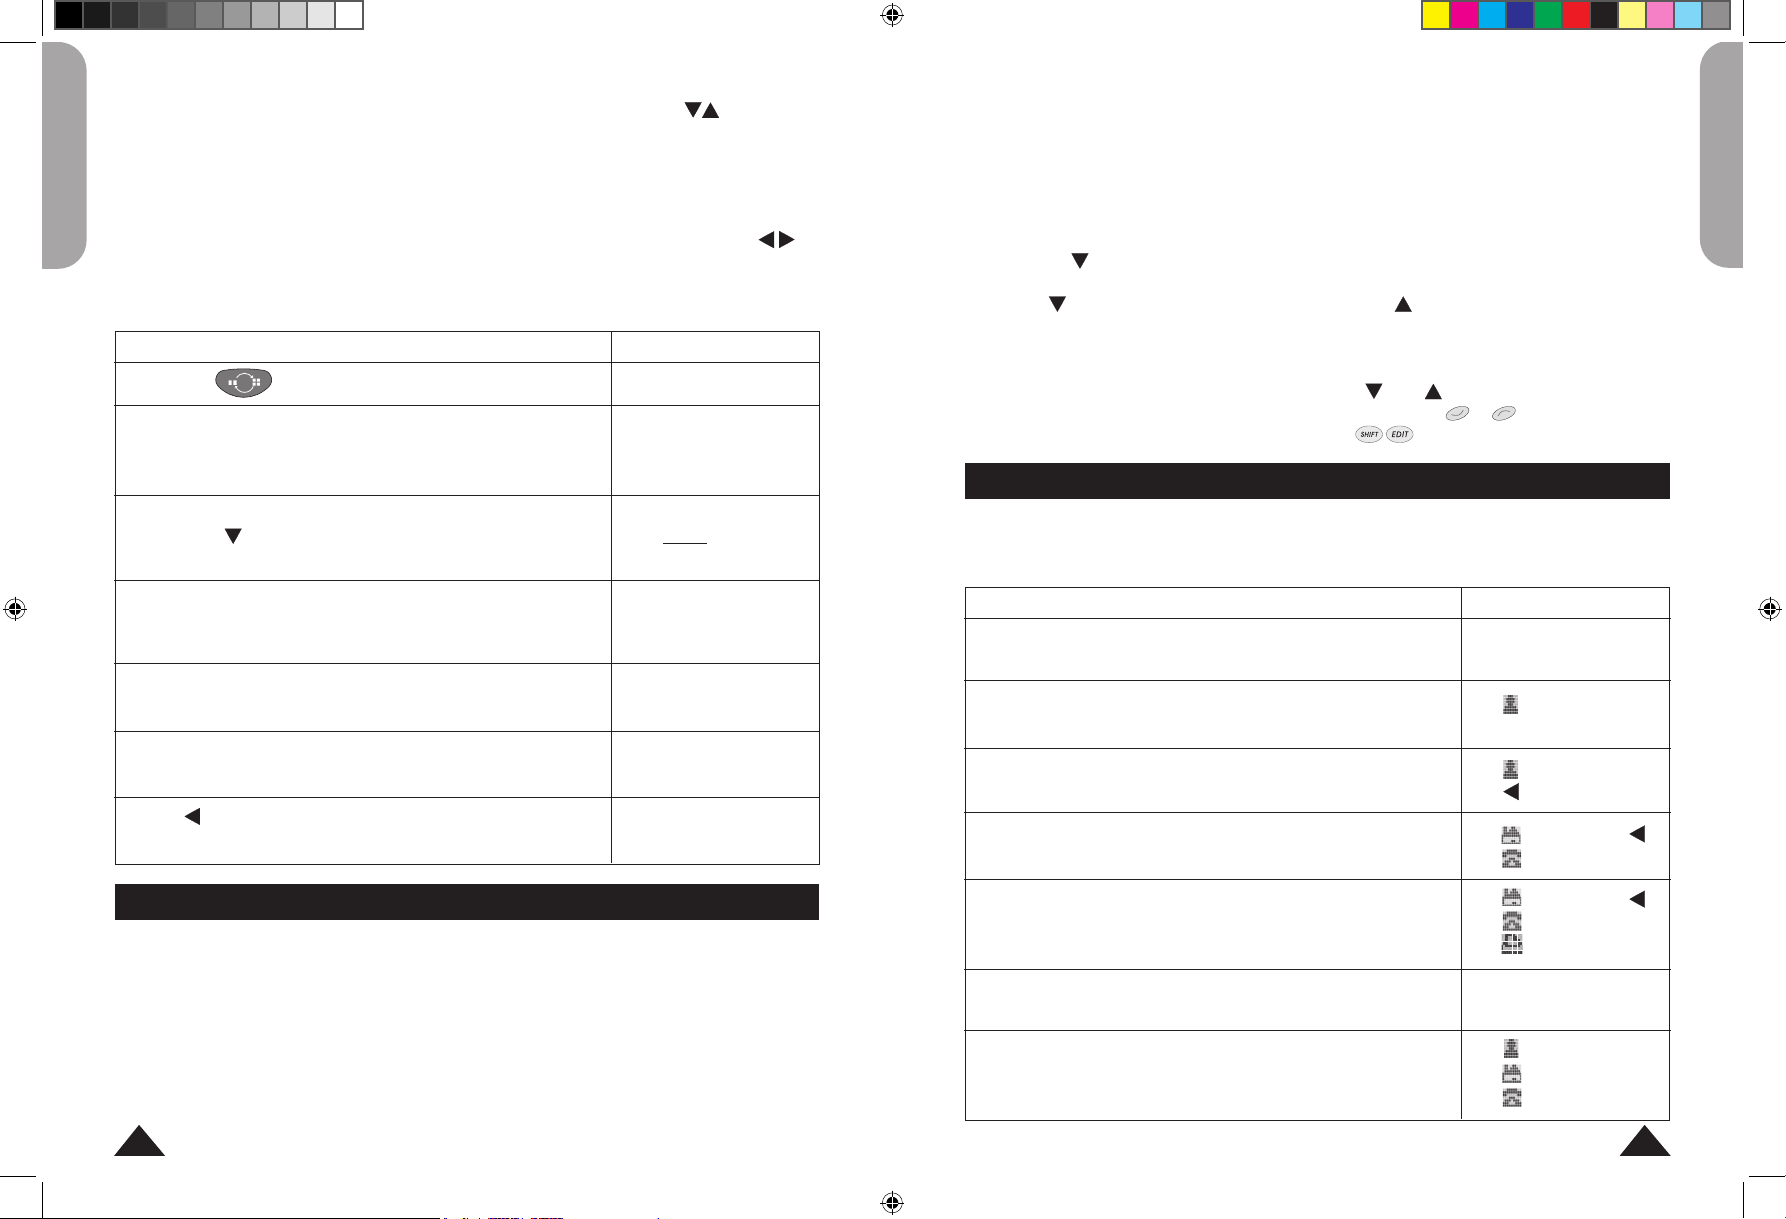
TELEPHONE MODE
There are two kinds of telephone directory - BUSINESS & PERSONAL.
Press SHIFT + ENG (TEL) once for PERSONAL and twice for BUSINESS mode.
A maximum of Max. 11 lines can be input per field.
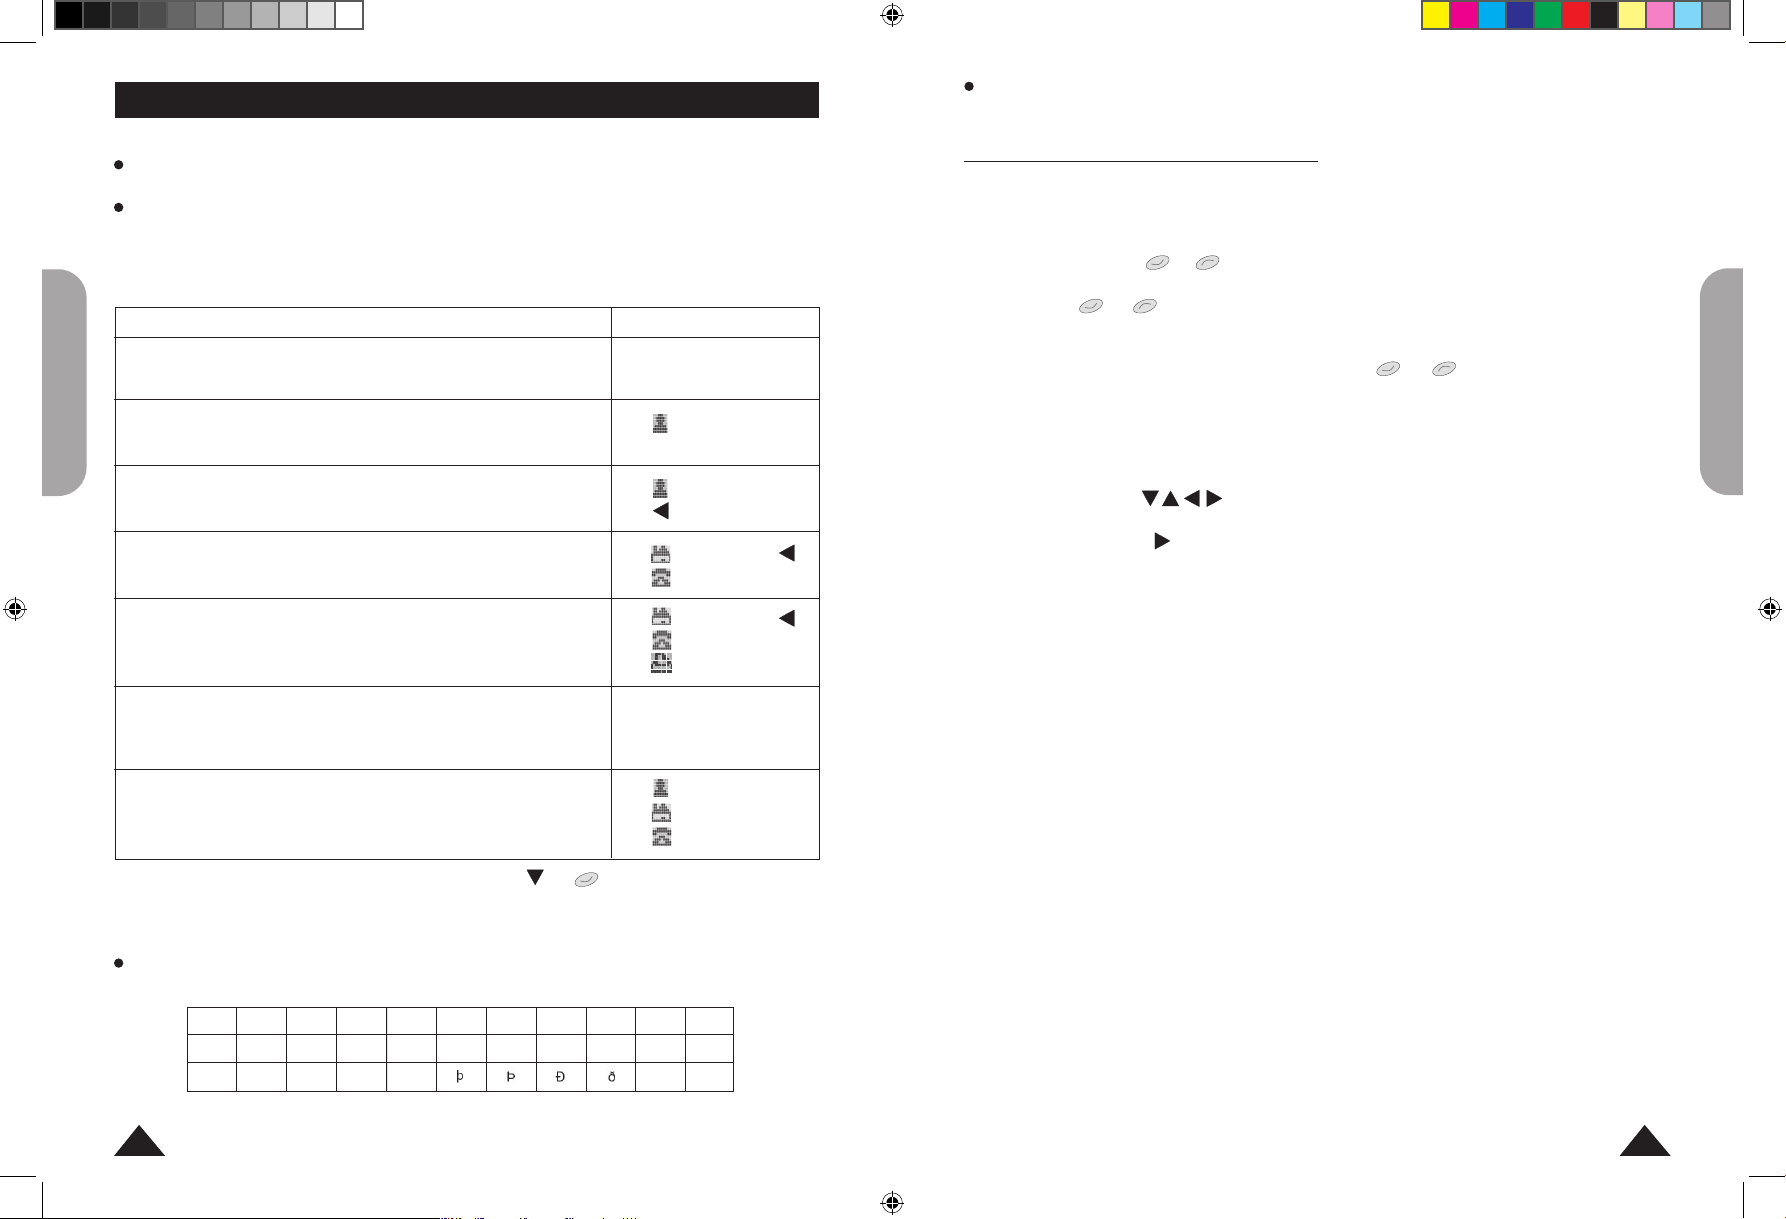
OPERATION DISPLAY
Press SHIFT + ENG (TEL) twice to select BUSINESS
mode.
Enter JOHN SMITH and press ENTER.
Enter NEW YORK and press ENTER.
Press NUM to input numbers. Then key in a phone
numberand press ENTER.
On the FAX# line, input a number and press ENTER.
Press NUM to enter characters.
Input “FRIEND” then press ENTER to validate the entry
2 seconds later, screen returns to the view display.
<BUSINESS>
NAME:
JOHN SMITH
ADDRESS:
JOHN SMITH
TEL#:
NEW YORK
111123211
NEW YORK
111123211
345456125
STORED!
JOHN SMITH
TAIPEI
111123211
NTL460IM0036.indd 8-9 20/02/2006 15:01:18
10
English
11
English
It is possible to skip a field entry by pressing or and ENTER (for example if your
contact does not have a FAX number).
Note: the following symbols can be obtained by pressing SHIFT + SPACE repeatedly:
To type an accented letter, first press the letter. Then, move the cursor under that letter
and press EURO repeatedly until the correct accent is displayed.
PRIVATE MODE AND BUSINESS MODE
A. SEARCHING DATA
1. Press SHIFT + ENG (TEL) to enter the PRIVATE (PERSONAL) or BUSINESS mode
2. Use or key to search alphabetically. You can also input the first letters of the
contact’s name, and press or to find the desired data.
B. VIEWING DATA
Once you found the data you were looking for, press and to scroll through the
information of the selected data.
C. EDITING DATA
1. Retrieve the data to be edited. Press EDIT.
2. Use key to move the cursor to the desired position.
3. Press BS (DEL) to delete one character or number, and press SHIFT + RIGHT (INS)
to toggle between insert/overwrite status.
4. Input the new data.
5. Press ENTER.
6. Or press SHIFT + EDIT to quit the edit mode.
D. DELETING DATA
1. Find the data to be deleted.
2. Press SHIFT + BS (DEL). ”DELETE?” appears on the display..
3. Press ENTER, “DELETED!” is displayed and the data is deleted
Note: if SHIFT + BS (DEL) has been pressed by mistake; simply press any other key
except ENTER to avoid deletion.
SCHEDULE MODE
1. An appointment’s date (the default date is same as the Home Time date), time and
description can be saved. Max. of 11 lines can be inputted.
2. If you want to activate the schedule alarm, you must set SCHD ALARM on in System
Setting mode.
OPERATION DISPLAY
Press SHIFT + FRA (SCHD) to select the schedule mode.
Input a description and press several times to move
cursor 2006/01/01 to the date line.
Input the date (year, month, day) and time (hour, minute).
Press ENTER to validate the entry.
2006/01/01
PLAN:
2006/01/01
00:00
NEW MEETING
NEW MEETING
STORED!
Note:
You may only input the description of an appointment. Press ENTER to store it: there
will be no schedule alarm.
As schedule reminder alarm is set on (the icon (((/))) is displayed onscreen). The
alarm will ring for one minute. The screen will display the scheduled record. Press
any key to stop the alarm. The alarm will also ring if the unit is off.
A. DATA SEARCH
1. SEQUENTIAL SEARCH – by pressing or .
2. DIRECT SEARCH – input the initial characters of the data, then press or key
to search directly.
B. EDITING/DELETING DATA
Same procedure as in the telephone mode. Refer to page 10.
MEMO MODE
Example: save your passport number: HK32145
1. Press SHIFT + DEU (MEMO) to enter the memo mode.
2. Input the memo description: PASSPORT HK32145
3. Press ENTER key to validate the entry.
A. DATA SEARCH
1. SEQUENTIAL SEARCH – by pressing or key.
2. DIRECT SEARCH – – input the initial characters of the data, then press or key
to search directly.
B. EDITING/DELETING DATA
Same procedure as in the telephone mode. Refer to page 10.
NTL460IM0036.indd 10-11 20/02/2006 15:01:21
12
English
13
English
ALARM FUNCTION
It is possible to activate several types of alarms: daily alarm, workday alarm, weekend
alarm, and an alarm for each day of the week. 5 kinds of alarm melody are available.
When an alarm has been set, the alarm symbol (((.))) will be displayed.
Example: setting the daily alarm at 6:25, melody type 2:
OPERATION DISPLAY
Press ALARM to select the alarm mode.
Use or to select ALARM 1, 2, 3.
Press EDIT to select the desired alarm type.
Use or : 10 types of alarms can be selected.
Press then or to select the desired hour
and melody.
When the alarm rings, press any key to stop it.
<ALARM 1>
OFF
--:-- -
<ALARM>
OFF
--:-- -
<ALARM 1>
SMTWTFS
00:00 1
<ALARM 1>
SMTWTFS
00:00 1
SECRET MEMORY
A separate list of data can be secured by using the secret mode, which is available in
telephone, schedule, and memo modes. The password can only be characters (capital
or lower case) and 6 max.
Example: Set up a password of “ABCD”
OPERATION DISPLAY
Press SHIFT + (MENU) to enter the system setting
mode. Select PASSWORD and press ENTER.
Input “ABCD “then press ENTER.
Re-enter the password.
NEW PSSWD?
RE-ENTER?
RE-ENTER?
****-
Press ENTER to validate the password.
2 seconds later, the icon is displayed and the screen
returns to the original display. The icon will not disappear until the password is input again.
STORED!
1. KEY TONE
2. AUTO OFF
3. PASSWORD
EDITING THE PASSWORD
The existing password can be changed or disabled.
Example: Change password to “CDEF”
OPERATION DISPLAY
Press SHIFT + (MENU) to enter the system setting
mode. Select PASSWORD and press ENTER.
Input “ABCD” (password previously entered) then press
ENTER. The icon disappears.
Execute the same procedure as setting new password
and enter “CDEF”. Then ENTER to validate the password.
2 seconds later, the screen returns to the original
display and the password has changed.
PASSWORD?
_
NEW PSSWD?
_
STORED!
1. KEY TONE
2. AUTO OFF
3. PASSWORD
Note: To disable the password, do not input any characters and press ENTER in the
“NEW PSSWD?” and “RE-ENTER?” columns, now the password has been disabled.
You can press SHIFT + EDIT to exit the edition mode.
NTL460IM0036.indd 12-13 20/02/2006 15:01:24
14
English
15
English
CALCULATOR MODE
Tip/Discount calculation:
The default tip value is 10% and the default discount value is 5%.
Use for discount calculator and for tip calculator.
Example: execute a tip calculation
OPERATION DISPLAY
Press the CAL/CONV key to select CAL mode.
Input 100, for example.
Press for Tip.
Press for Total.
Press to ENTER to record the result of calculation.
Press to calculate the tip to be paid.
<CALCULATOR>
0.
<CALCULATOR>
100.
<CALCULATOR>
TIP
10.
<CALCULATOR>
TOTAL
110.
<CALCULATOR>
110.
<CALCULATOR>
TIP
11.
Note: Same thing for discount but use instead.
Set Tip/Discount Value:
OPERATION DISPLAY
Press the CAL/CONV key to select CAL mode.
Press for Tip. (Press for Discount).
Press EDIT: the amount of the tip is displayed on the
screen. The cursor flashes.
<CALCULATOR>
0.
<CALCULATOR>
TIP
0.
<CALCULATOR>
PERCENTAGE
10.
Input “20” for example if you want to change the amount
of tip.
Then press ENTER: tip is set. (Or Discount is set)
<CALCULATOR>
PERCENTAGE
20.
<CALCULATOR>
CONVERSION MODE
Press the CAL/CONV key twice, one after the other, for currency conversion, three
times for EURO conversion and four times for metric conversion.
1. How to set the new currency rate and how to convert it.
Example: 1 HKD = 4, 2 NTD? HKD = 508, 2 NTD
OPERATION DISPLAY
Press the CAL/CONV key twice to select the currency
conversion mode.
Press or to select the desired currency conversion.
EX: JPY USD
Press EDIT to enter the setting mode; the 1st character
will flash and the RATE becomes “0”.
Input HKD, press and enter NTD.
Press . Input the rate amount 4.2 and press ENTER
key to store the setting.
Press (CAPS), the rate is displayed.
For example, input 508.2, to obtain the conversion.
Press SHIFT + EDIT to return to the previous screen.
CAD USD
RATE=
1.
JPY USD
RATE=
1.
JPY USD
RATE=
0.
HKD NTD_
RATE=
0.
HKD NTD
RATE=
4.2
HKD NTD
RATE=
0.238095238
HKD NTD
508.2
120.9999999
HKD NTD
RATE=
0.238095238
NTL460IM0036.indd 14-15 20/02/2006 15:01:27
16
English
17
English
2. EURO Converter
Example: 500 EURO = ? ATS
3. Metric conversion
Example: 100 Meters = ? Feet
OPERATION DISPLAY
Press CAL/CONV key thrice to select the
EURO conversion.
Press or key to select the desired EURO
conversion.
Input 500, for example, to obtain a conversion.
EURO ATS
RATE=
13.7603
EURO ATS
RATE=
13.7603
EURO ATS
RATE=
6880.15
OPERATION DISPLAY
Press the CAL/CONV key 4 times to select the metric
conversion.
Press or key to search the desired conversion set.
Use “ /CAPS” and to change the direction of the
conversion.
Input “100”, for example, to obtain a conversion.
inch cm
RATE=
2.54
feet m
RATE=
0.3048
feet m
RATE=
3.280839895
feet m
RATE=
328.0839895
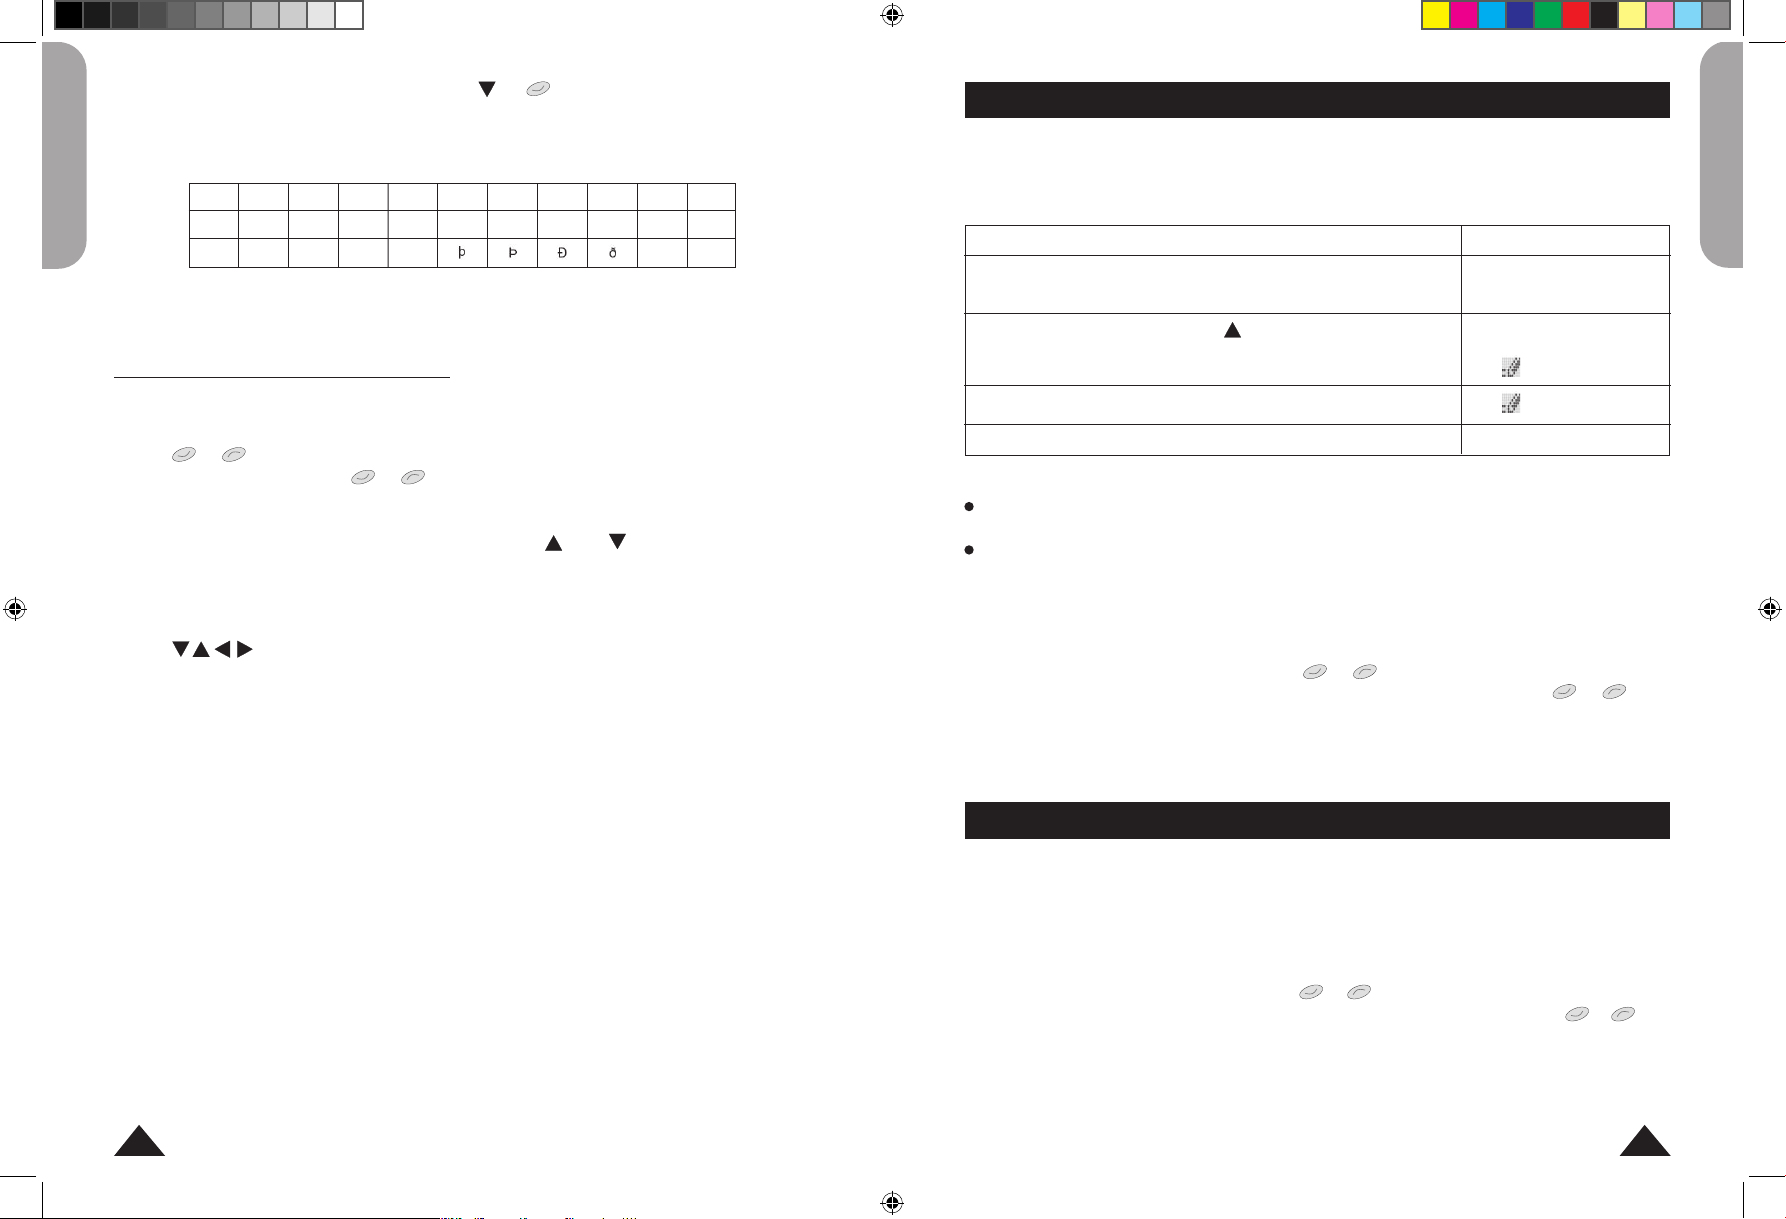
GAME MODE
There are three games available: 777 Game, Snake Game and Hangman Game.
1. 777 Game
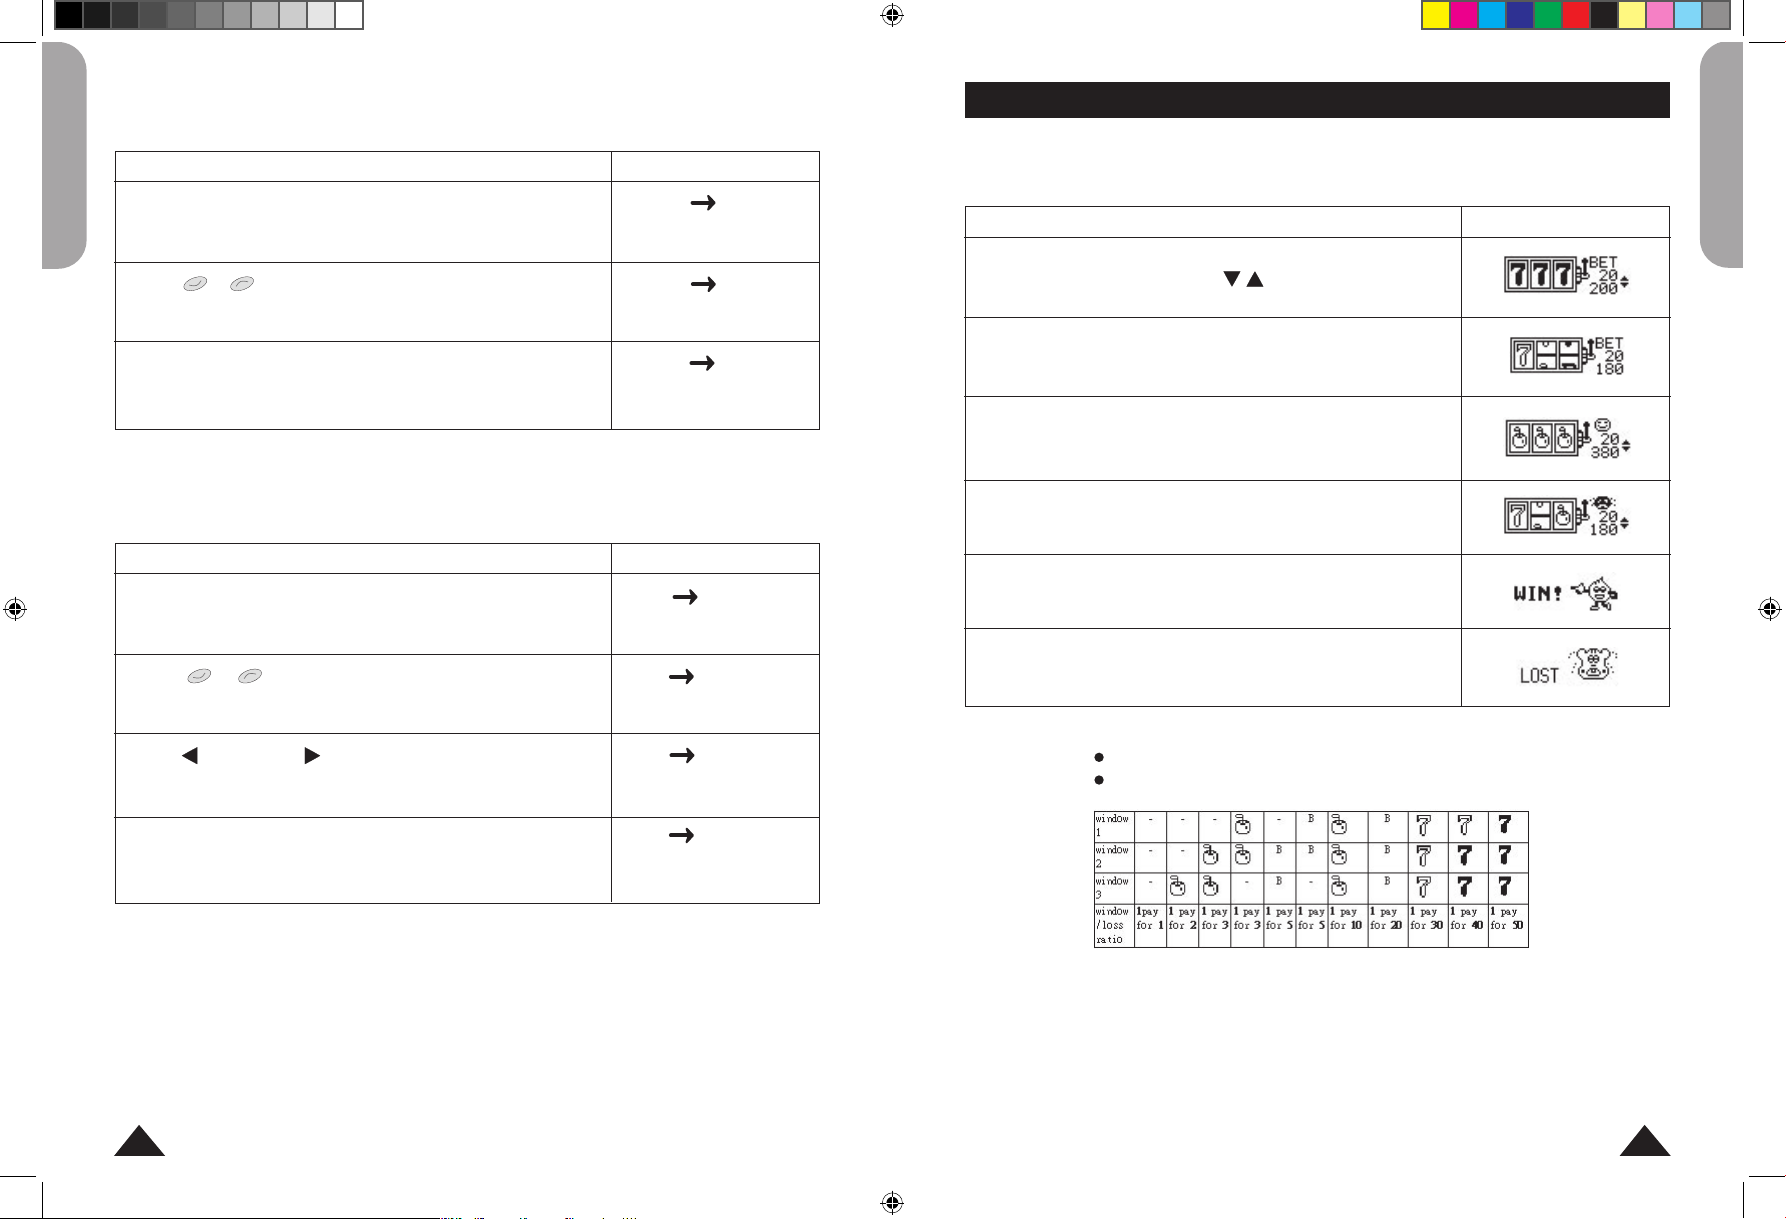
OPERATION DISPLAY
Press SHIFT + ESP (GAME) once to select 777 Game.
“20” is the default BET; press key to select one of
the following bets “5/10/15/20”.
Press ENTER to start the game
The 3 display boxes will spin for a while, and then show
the result.
If the user gets one the combinations as below, this indicates
that he has won the bet. Money is paid according to the
relevant loss ratio and is added to the total money.
If you lose, the amount of the bet will be removed from
your total money.
If your amount of money reaches 990, the screen will
display:
Otherwise, if you have lost all your money, the screen will
display:
Notes:
Press SHIFT + EDIT to exit the game.
Combinations and their corresponding ratio:
NTL460IM0036.indd 16-17 20/02/2006 15:01:30
18
English
19
English
2. Snake Game
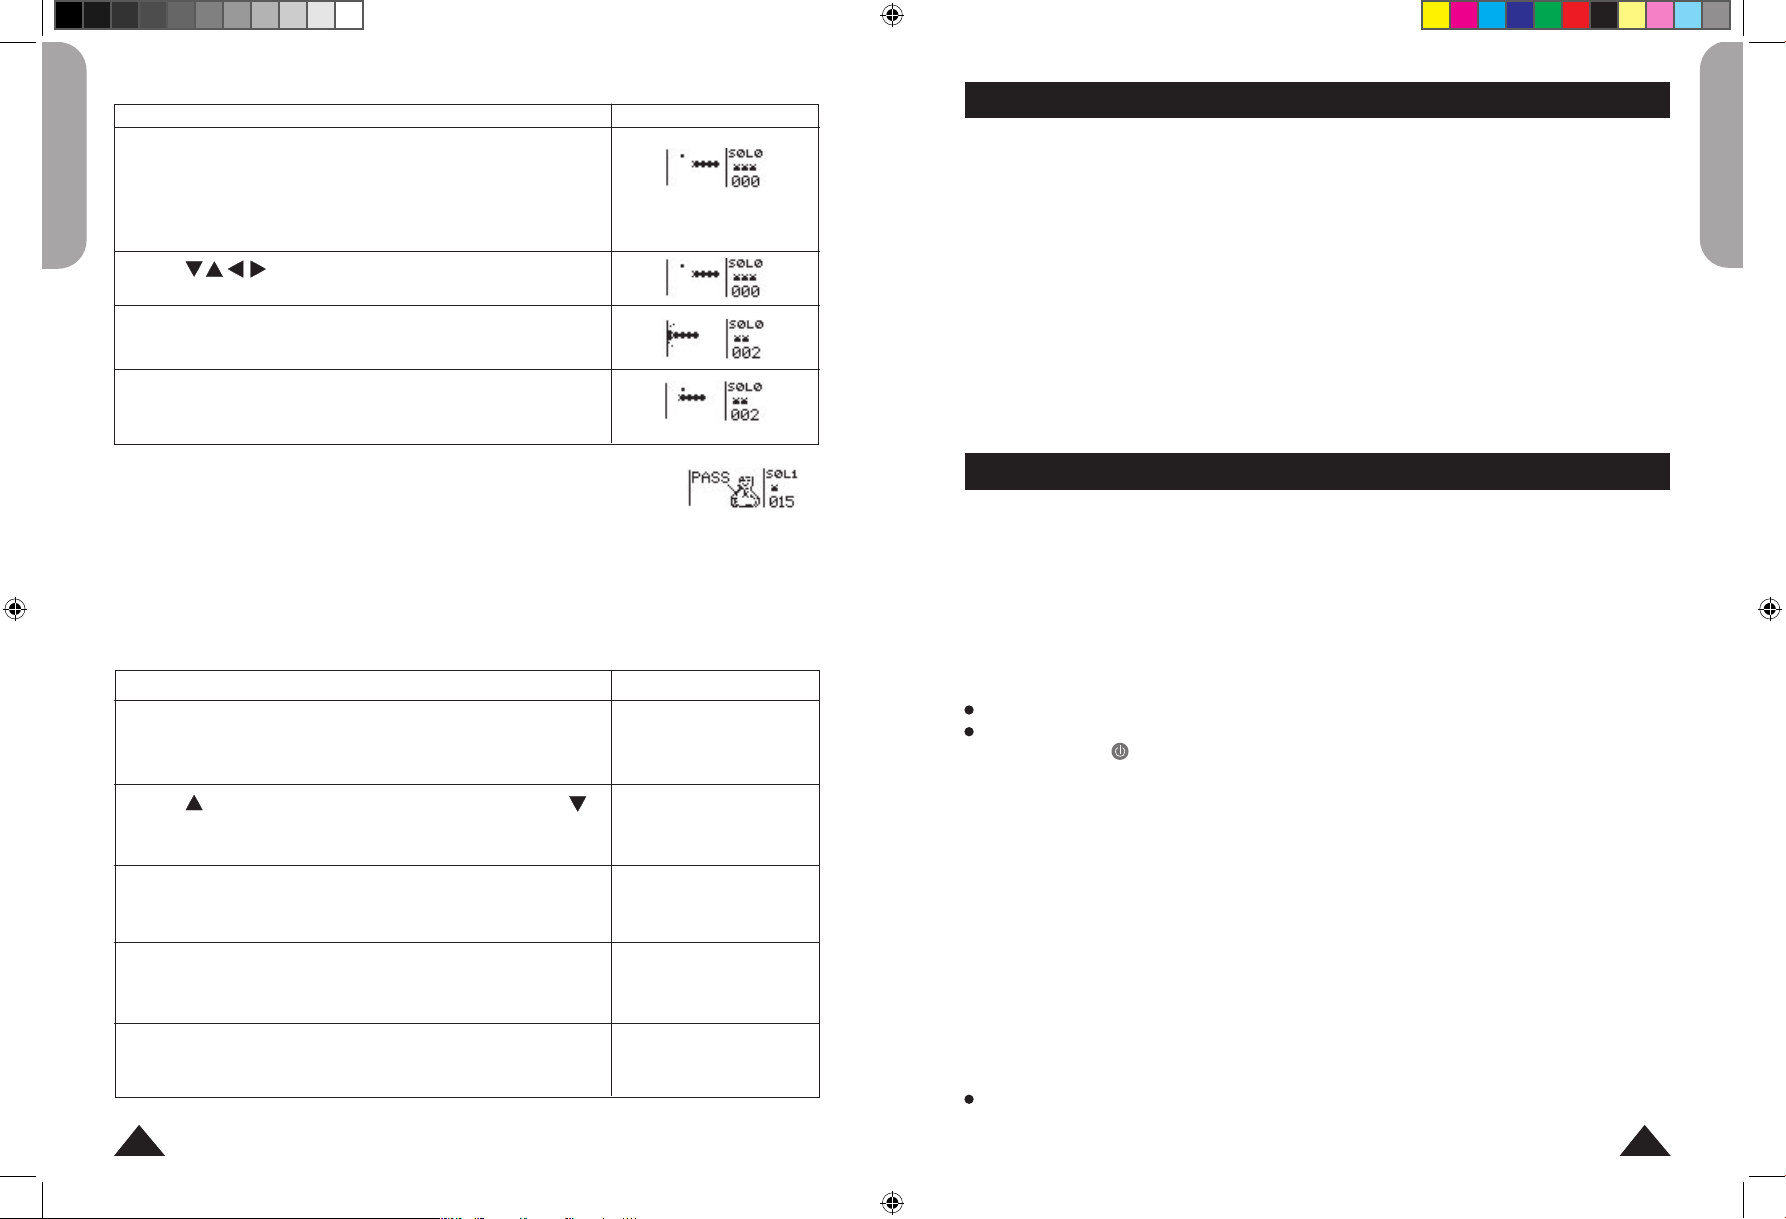
OPERATION DISPLAY
Press SHIFT + ESP (GAME) twice to select Snake Game.
1. “S0L0” indicates the initial speed and level:
S0= Speed 0, L0= Level 0
2. The second line indicates the chances (or lives).
3. The third line indicates the score.
Press to move the snake.
If the snake hits a wall or itself, one life is lost.
The snake has to collect as many ‘apples’ as possible to
get to the next level.
When all of the apples in one level are collected, “PASS” will be
displayed onscreen. Press any key to begin the next level; the number
of apples will increase. After going through several levels, the snake’s
speed will increase.
If you lose all your lives, the screen will display “GAME OVER”. Press any key to start
a new game.
Note: press SHIFT + EDIT to exit the game.
3. Hangman Game
Note: press SHIFT + EDIT to exit the game.
OPERATION DISPLAY
Press ESP (GAME) three times to select the hangman
game. The default number of tries is 5; it can be selected
from 4 to 9.
Press key to increase the number of tries, or press
key to decrease it. Then, press ENTER.
Guess the hidden word by keying in letters.
Repeating a letter does not reduce the number of tries.
If you correctly guess the word within the designated
number of tries. (e.g. input “g”).
Otherwise:
HANGMAN
Tries: 5
HANGMAN
Tries: 7
_ _ _ _ _ _
HANGMAN
Tries: 3
_ olden
HANGMAN
YOU WIN !
golden
HANGMAN
YOU LOST !
golden
APPENDIX
Appendix 1 - Euro fixed rates
Currency Code Currency Description Country Euro rate
FRF French Franc France 1 Euro = 6.55957 FRF
DEM Mark Germany 1 Euro = 1.95583 DEM
IEP Punt Ireland 1 Euro = 0.787564 IEP
ESP Peseta Spain 1 Euro = 166.386 ESP
ITL Lira Italy 1 Euro = 1936.27 ITL
ATS Shilling Austria 1 Euro = 13.7603 ATS
BEF Belgium Franc Belgium 1 Euro = 40.3399 BEF
FIM Finish Mark Finland 1 Euro = 5.94573 FIM
LUF Luxembourg Franc Luxembourg 1 Euro = 40.3399 LUF
NLG Gilder Holland 1 Euro = 2.20371 NLG
PTE Escudos Portugal 1 Euro = 200.482 PTE
POWER SUPPLY
The NTL460 works with 1 x CR2032 battery (included). To replace the battery:
1. Turn off the unit.
2. Unscrew and remove the battery cover at the back of the unit.
3. Remove the battery and insert a new one.
4. Replace the battery door.
5. Press any key except ENTER to skip the RESET for preventing loss of previously
stored data.
Be sure to complete the replacement of battery within one minute.
If no key is pressed, auto power off will be activated when the set auto off time is
reached. Press key again to turn on the unit.
Replace batteries as per the instructions above; failure to do so may lead to the loss
of information stored in the unit’s memory. Non-rechargeable batteries should not to
be recharged. Do not use rechargeable batteries. Batteries should be inserted with
the correct polarity. Exhausted batteries should be removed from the unit. The supply
terminals should not be short-circuited. Do not mix old and new batteries. Do not mix
alkaline, standard (carbon-zinc) or rechargeable (nickel-cadmium) batteries. Do not
bury or burn used batteries. Use alkaline batteries for best performance and longer life.
Only use batteries of the same or equivalent types as recommended.
WARNING: If the unit malfunctions or receives an electrostatic shock, switch the
unit off and on again. If this proves to be ineffective, remove the batteries. This
will reset the product and should clear any malfunction.
When the sound weakens or the unit does not respond anymore, you may need to
change the batteries.
Reset will clear the memory of all data and settings.
NTL460IM0036.indd 18-19 20/02/2006 15:01:32
20
English
21
Français
PRECAUTIONS
Avoid extreme temperatures, direct exposure to sunlight, water, moisture and dust.
Do not drop the unit. Do not use detergents, cleaning products or solvents to clean the unit. Wipe
with a soft, dry cloth only. Do not use the unit near a powerful magnetic field (ex: loudspeakers), or
a static source of electricity. Do not try and disassemble the unit – this will invalidate your warranty.
We highly recommend you keep a hard copy of your important data. By principle, any system with
an electronic memory can lose its data in certain circumstances. We cannot accept any responsibility
for the loss of data caused by misuse, repair, error, battery replacement, the use of batteries after
their use-by date or any other circumstance.
We cannot accept any direct or indirect responsibility for financial loss or third party complaints,
which could result from the use of this product and its functions, like the loss of credit card numbers
or modification of data.
WARRANTY
This product is covered by our 2-year warranty.
To make use of the warranty or after-sales service, please contact your retailer and supply proof of
purchase, or return the unit the address given below complete with proof of purchase.
Note: Warranty does not cover broken LCD displays.
It is the nature of products utilising electronic memory that on rare occasions the information stored
in the memory of the unit may be lost. Lexibook cannot accept any responsibility for the loss of data
caused by misuse, attempts to repair the unit, an error, replacement of batteries, use of batteries after
their use-by-date has expired, or any other circumstance. Similarly we cannot accept any direct or
indirect responsibility for financial losses or complaints of third parties, which could result from the
use of this product. Our warranty covers material or installation-related defects attributable to the
manufacturer; with the exception of wear caused by failure to respect the instructions for use or any
unauthorised work on the equipment (such as dismantling, exposure to heat or damp etc).
Note: It is recommended that all packaging be kept for future reference. Keep this instruction
manual in a safe place as it contains important information.
Disclaimer
In our constant concern for improvement, the colours and details of the product may differ slightly
from those shown on the packaging.
Reference: NTL460
2-year warranty
©2006 LEXIBOOK®
Designed and developed in Europe – Made in China
Customer Service
LEXIBOOK UK ltd
Unit 10 Petersfield Industrial Estate
Bedford Road, Petersfield
Hampshire, GU32 3QA,
United Kingdom
Freephone helpline: 0808 100 3015
http://www.lexibook.com
Environmental Protection
Unwanted electrical appliances can be recycled and should not be discarded along with
regular household waste! Please actively support the conservation of resources and help
protect the environment by returning this appliance to a collection centre (if available)
INTRODUCTION
BIEN DEMARRER
REINITIALISATION
CONFIGURATION DU SYSTEME
CHOIX DU TEXTE MAJUSCULES/ MINUSCULES
CHOIX DU MODE DE SAISIE : DE LETTRES A CHIFFRES
CONFIGURATION DE L’HEURE LOCALE
RECHERCHE DES FUSEAUX HORAIRES
MODE TRADUCTEUR
PHRASES
MODE TELEPHONE
MODE AGENDA
MODE MEMO
FONCTION ALARME
MODE CONFIDENTIEL
MODE CALCULATRICE
MODE CONVERSION
MODE JEUX
REMPLACEMENT DES PILES
PRECAUTIONS D’EMPLOI
GARANTIE
ANNEXE
22
22
22
22
23
23
24
24
25
27
28
29
29
30
32
33
34
36
38
39
39
40
SOMMAIRE
NTL460IM0036.indd 20-21 20/02/2006 15:01:33

22
Français
23
Français
INTRODUCTION
Félicitations ! Nous sommes heureux de vous compter aujourd’hui parmi les très nombreux
utilisateurs des produits Lexibook®.
Vous venez d’acheter le nouveau traducteur 4 langues NTL460. Ce produit a été conçu
pour vous aider à traduire entre l’Anglais, le Français, l’Espagnol, l’Allemand. Il contient
plus de 30,000 mots ou expressions par langue en plus de 150 phrases par langue
réparties en 10 thèmes pour vous permettre de traduire les principales situations vécues
lors d’un voyage à l’étranger.
Nous vous invitons à lire attentivement ce mode d’emploi pour utiliser au mieux votre
traducteur.
BIEN DEMARRER
A la première utilisation du NTL460, il vous faut retirer la languette plastique de protection
des piles :
1. Retournez l’appareil et dévissez la vis du compartiment des piles.
2. Retirez la trappe et soulevez les piles protégées par la languette plastique.
3. Retirez la languette plastique et replacez les piles en respectant leur polarité.
4. Faire un reset de l’appareil (voir paragraphe suivant).
5. Ouvrir et fermer l’appareil :
pour ouvrir l’unité, appuyez sur le bouton d’ouverture afin d’ouvrir la protection.
pour fermer, refermer la protection jusqu’à entendre le ‘clic’.
6. Avant d’allumer l’unité, assurer vous d’avoir enlevé la protection plastique de l’écran
d’affichage.
Insérez une pointe fine et appuyez doucement. « RESET ? » s’affiche à l’écran.
Appuyez sur ENTER pour confirmer. L’opération peut prendre plusieurs secondes.
Appuyez sur n’importe quelle autre touche pour annuler la réinitialisation.
NB : la réinitialisation supprime toutes les informations stockées dans la machine et
le code secret si l’appareil a déjà été utilisé.
Appuyez sur SHIFT+ MENU pour entrer dans le mode de configuration du système ;
utilisez les touches et ou appuyez sur le numéro correspondant pour parcourir
les rubriques suivantes :
1. BIP TOUCHE : appuyer sur ENTER pour sélectionner le mode de configuration sonore.
La tonalité des touches est activée par défaut; appuyez sur les touches ou
pour désactiver la tonalité.
Appuyez sur ENTER pour confirmer.
REINITIALISATION (RESET)
2. ARRÊT AUTO : appuyez sur ENTER pour sélectionner le mode de configuration
d’arrêt automatique. Le délai d’arrêt automatique est programmé par défaut sur
5 minutes ; appuyez sur les touches ou pour parcourir la sélection suivante :
3 MINUTES, 5 MINUTES, et 7 MINUTES.
3. MOT DE PASSE : appuyez sur ENTER pour sélectionner le mode confidentiel et
entrez votre mot de passe.
NB : Pour plus de détails consulter la section : Mode Confidentiel.
4. CONTRASTE : appuyer sur ENTER pour sélectionner le mode de configuration du
contraste. Le contraste est défini par défaut sur 06 ; appuyer sur les touches ou
pour parcourir les valeurs de 01 à 08.
5. LANGUE : appuyez sur ENTER pour activer le mode de sélection de la langue. La
langue configurée par défaut est l’Anglais ; appuyez sur les touches ou pour
parcourir les sélections suivantes : ENGLISH, FRANÇAIS, ALLEMAND, ESPAÑOL.
6. SONNERIE : appuyez sur ENTER pour sélectionner le mode d’Activation/Désactivation
du carillon. Le carillon est positionné par défaut en mode Désactivation ; appuyez
sur les touches ou pour sélectionner la position ON/OFF. Lorsque le carillon
est activé, l’icône du carillon s’affiche, un signal « Bip Bip » sera émis chaque heure.
7. ALARME: appuyez sur ENTER pour sélectionner le mode de programmation de
l’alarme ; appuyez sur les touches ou pour sélectionner la position ON/OFF.
8. VILLE LOC. : appuyez sur ENTER pour configurer le nom de la ville, Vous pouvez
entrer le nom de votre ville pour éditer la ville affichée à l’écran.
9. MÉMOIRE : appuyez sur ENTER pour afficher la mémoire disponible.
Appuyez sur SHIFT+ (CAPS) pour changer le format du texte en majuscule ou en
minuscule.
Dans les modes TELEPHONE, MEMO, et AGENDA, appuyez une fois sur la touche
NUM pour basculer en mode de saisie numérique et appuyez encore une fois pour
revenir au mode de saisie de texte.
CHOIX DU TEXTE MAJUSCULES/ MINUSCULES
CHOIX DU MODE DE SAISIE : DE LETTRES A CHIFFRES
CONFIGURATION DU SYSTEME
NTL460IM0036.indd 22-23 20/02/2006 15:01:35
24
Français
25
Français
CONFIGURATION DE L’HEURE LOCALE
OPERATION AFFICHAGE
Appuyez sur SHIFT+ CAL/CONV pour sélectionner
l’heure locale (indiquée par le symbole ( ) et appuyez
sur EDIT.
Appuyez sur les touches ou jusqu’à ce que la
ville correspondant à votre fuseau apparaisse. Appuyez
ensuite sur pour positionner le curseur sur la deuxième
ligne.
Appuyez sur les touches ou puis pour sélectionner
l’année, le mois et le jour.
Appliquez la même procédure que celle décrite ci-dessus
pour définir l’heure.
Appuyez sur ENTER pour valider la configuration
NYC # MER
2006-01-01
00:00:08
ROM # MER
2006-01-01
00:01:02
ROM # MER
2006 -12-12
00:01:48
ROM # MER
2006 -12-12
00:12:30
ROM # MER
2006 -12-12
00:12:30
Avant de configurer l’heure, appuyez sur la touche B (DST) pour passer à l’heure d’été.
Le format de l’heure locale correspond au mode 24 heures et le format de la date
correspond au mode AAAA/MM/JJ.
1. Appuyez sur SHIFT + ALARME (WT) pour sélectionner le mode de configuration de
l’heure internationale (indiquée par le symbole ).
2. Appuyez sur les touches ou pour rechercher l’heure dans les 43 plus
importantes villes. L’heure internationale ajuste l’heure que vous avez entré par
rapport à la différence d’heure de chaque ville.
On dénombre 43 grandes villes dont l’heure est communiquée :
RECHERCHE DES FUSEAUX HORAIRES
FUSEAU HORAIRE NOM DE LA VILLE ABBRÉVIATION HEURE DE DIFFÉRENCE
01
02
03
04
05
06
07
08
09
LONDRES
LISBONNE
PARIS
BERLIN
ROME
AMSTERDAM
MADIRD
HELSINKI
LE CAIRE
LON
LIS
PAR
BER
ROM
AMS
MAD
HEL
CAI
+0
+0
+1
+1
+1
+1
+1
+2
+2
FUSEAU HORAIRE NOM DE LA VILLE ABBRÉVIATION HEURE DE DIFFÉRENCE
10
11
12
13
14
15
16
17
18
19
20
21
22
23
24
25
26
27
28
29
30
31
32
33
34
35
36
37
38
39
40
41
42
43
MOSCOU
RIYAD
TEHERAN
DOUBAI
KABOUL
KARACHI
DELHI
DACCA
YANGON
BANGKOK
BEIJING
HONG KONG
SINGAPOUR
TOKYO
ADELAIDE
SYDNEY
GUAM
NOUMEA
WELLINGTON
AUCKLAND
TONGA
ILES MIDWAY
HONOLULU
ANCHORAGE
LOS ANGELES
DENVER
CHICAGO
NEW YORK
TORONTO
CARACAS
RIO DE JANEIRO
-----MID ATLANTIQUE
ILES AÇORES
MOW
RUH
THR
DXB
KBL
KHI
DEL
DAC
RNG
BKK
BEI
HKG
SIN
TYO
ADL
SYD
GUM
NOU
WLG
AKL
TNG
MID
HNL
ANC
LAX
DEN
CHI
NYC
YYZ
CCS
RIO
-2H
MAT
AZO
+3
+3
+3.5
+4
+4.5
+5
+5.5
+6
+6.5
+7
+8
+8
+8
+9
+9.5
+10
+10
+11
+12
+12
+13
-11
-10
-9
-8
-7
-6
-5
-5
-4
-3
-2
-2
-1
MODE TRADUCTEUR
Le NTL460 est un traducteur 4 langues : Anglais, Espagnol, Français et Allemand.
30,000 mots sont disponibles par langue.
Appuyez sur pour entrer dans le mode traducteur. Lorsque vous appuyez sur
la langue configurée est affichée comme langue source. Pour sélectionner une autre
langue source, appuyez sur l’un des 4 boutons de langues :
ENG pour Anglais
FRA pour Français
DEU pour Allemand
ESP pour Espagnol
NTL460IM0036.indd 24-25 20/02/2006 15:01:38
26
Français
27
Français
Une fois la langue sélectionnée, entrez le mot à traduire, les mots contenus dans
l’index seront affichés simultanément. Vous pouvez continuer à entrer les lettres du
mot recherché ou vous pouvez utiliser les touches pour sélectionner le mot dans
l’index. Un mot est sélectionné lorsqu’il est souligné en noir. Appuyez sur ENTER pour
exécuter la traduction.
Si le mot est trouvé, la traduction sera affichée en Français (si la langue source n’est
pas l’Anglais le mot sera d’abord traduit en Anglais). Pour traduire le mot dans une
autre langue, appuyez sur la touche de la langue correspondante (DEU ou ESP).
Appuyez sur pour visualiser la traduction du mot précédent/ suivant ou entrer un
nouveau mot à traduire.
Exemple 1 : Lancer une traduction (LANGUE SOURCE : Français)
OPERATION AFFICHAGE
Appuyez sur la touche pour entrer dans le mode
traducteur.
Entrez « ma ». Dès que vous commencez à taper les
lettres, le système trouve des suggestions. Les mots
contenus dans l’index sont affichés simultanément.
Continuez à écrire le mot et choisissez le mot désiré à
l’aide de la touche , par exemple, maison et appuyez
sur ENTER.
La traduction en Anglais est affichée
Pour la traduction en Espagnol, appuyez sur ESP
Ou appuyez sur DEU pour Allemand.
Vous pouvez appuyer sur la touche pour voir le mot
précédent.
Français :
ma_
ma
macabre
mai_
maigre
maigreur
F: maison
A: house
F: maison
E: casa
F: maison
A: haus
F : maïs
A : mais
PHRASES
On dénombre 600 phrases et expressions classées en 10 catégories:
1. AFFAIRES
2. RESTAURANT
3. HÔTELS
4. EN VILLE
5. VOYAGER
6. URGENCES
7. LOISIRS
8. BANQUE /POSTE /TELEPHONE
9. AÉROPORT
10. GÉNÉRALITES
Vous pouvez traduire chaque phrase du NTL460 dans 4 langues : Anglais, Espagnol,
Français et Allemand.
Utiliser le mode Phrase :
1. Appuyer sur la touche PHRA pour sélectionner le mode PHRASE.
2. L’écran montre brièvement la langue précédemment choisie dans le mode de
configuration (Anglais par défaut et Français dans cet exemple) et ensuite montre la
première option du mode phrase.
3. La première catégorie AFFAIRES est affichée. Appuyez sur ENTER pour confirmer.
4. Ou appuyez sur pour voir les catégories suivantes. Lorsque la catégorie désirée
est affichée, appuyez sur ENTER pour confirmer. La première phrase de cette
catégorie sera affichée sur l’écran.
5. Appuyez sur la touche pour voir la phrase suivante de la liste. Appuyez sur la
touche pour voir la phrase précédente.
6. Lorsque la phrase désirée est affichée, appuyez sur le bouton correspondant à la
langue désirée pour la traduction.
7. Appuyez sur un autre bouton de traduction pour voir la phrase dans une autre
langue.
8. Si la phrase est affichée sur plus qu’un écran, vous pouvez parcourir l’expression
choisie en appuyant sur les touches et .
9. Pour parcourir les expressions dans une catégorie, appuyez sur les touches ou
10. A la fin d’utilisation du mode PHRASE, appuyez sur .
NTL460IM0036.indd 26-27 20/02/2006 15:01:41
28
Français
29
Français
MODE TELEPHONE
Deux catégories de répertoires sont disponibles : PERSONNEL et AFFAIRES.
Appuyez une fois sur SHIFT+ENG (TEL) pour sélectionner le mode PERSONNEL et
deux fois pour sélectionner le mode AFFAIRES.
Une entrée peut accueillir un maximum de 11 lignes pour l’ensemble des informations.
Exemple : AFFAIRES : (NOM) JOHN SMITH, (ADRESSE) NEW YORK,
(TEL) 111-123-1243, (FAX) 345-456-1256.
Il est possible de sauter une ligne en appuyant sur ou puis ENTER (par exemple
si votre contact n’a pas de numéro de fax).
Remarque :
Appuyez sur les touches SHIFT+SPACE plusieurs fois pour obtenir les symboles
suivants :
OPERATION AFFICHAGE
Appuyez sur SHIFT+ENG (TEL) deux fois pour sélectionner
le mode AFFAIRES.
Entrez JOHN SMITH et appuyez sur ENTER.
Entrez NEW YORK et appuyez sur ENTER.
Appuyez sur NUM pour entrer des numéros. Entrez
ensuite le numéro de téléphone et appuyez sur ENTER.
A la ligne FAX #, entrez le numéro et appuyez sur ENTER
Appuyez sur NUM une nouvelle fois pour revenir au mode
saisie de texte. Entrez « AMI » et appuyez ensuite sur
ENTER pour valider l’entrée.
2 secondes plus tard l’écran repasse en mode affichage.
AFFAIRES
NOM :
JOHN SMITH
ADDRESS:
JOHN SMITH
TEL#:
NEW YORK
111123211
NEW YORK
111123211
345456125
JOHN SMITH
NEW YORK
111123211
ENREGISTRÉ !
Pour entrer une lettre accentuée, tapez la lettre à accentuer puis appuyez sur la
touche EURO plusieurs fois jusqu’à ce que l’accent désiré apparaisse.
MODE PERSONNEL ET MODE AFFAIRES
A. RECHERCHE DE DONNÉES
1. Appuyez sur SHIFT+ ENG (TEL) pour entrer dans le mode PERSONNEL ou
AFFAIRES.
2. Utilisez les touches ou pour lancer une recherche dans l’ordre alphabétique.
Vous pouvez aussi entrez les premières lettres du contact recherché et appuyez
ensuite sur ou pour trouver les données souhaitées.
B. AFFICHAGE DE L’ENSEMBLE DES DONNÉES
Une fois le contact recherché trouvé, appuyez sur ou pour faire défiler les
données de ce contact.
C. MODIFICATION DE DONNÉES
1. Sélectionnez l’entrée à modifier. Appuyez sur EDIT pour entrer dans le mode
édition.
2. Utilisez les touches pour déplacer le curseur vers la position désirée.
3. Appuyez sur la touche SHIFT+BS (DEL) pour supprimer 1 caractère ou 1 nombre et
appuyez sur SHIFT+ (INS) pour basculer entre les modes insérer/ remplacer.
4. Entrez les nouvelles données.
5. Appuyez sur ENTER.
6. Ou appuyez sur SHIFT+EDIT pour quitter le mode édition.
D. SUPPRESSION DE DONNÉES
1. Sélectionnez l’entrée à supprimer.
2. Appuyer sur SHIFT+BS (DEL), la mention « ANNULER? » apparaît à l’écran.
3. Appuyez sur ENTER, la mention « ANNULÉ ! » est affichée et toutes les données de
cette entrée sont effacées.
Remarque : si vous avez appuyé par erreur sur la séquence de touches SHIFT+BS
(DEL), il vous suffit d’appuyer sur n’importe quelle touche à l’exception de la touche
ENTER afin d’éviter la suppression des données.
NTL460IM0036.indd 28-29 20/02/2006 15:01:45

30
Français
31
Français
MODE AGENDA
1. Ce mode permet d’enregistrer une date de rendez-vous (celle-ci correspond par
défaut à la date du mode Heure Locale), une heure et une description. Au maximum,
11 lignes peuvent être entrées.
2. Si vous souhaitez programmer l’alarme, vous devez définir le paramètre ALARME
dans le mode de configuration du système.
3. Exemple : NOUVELLE RÉUNION
2006/12/31 12 :30 (la programmation est activée)
OPERATION AFFICHAGE
Appuyez sur SHIFT+FRA (SCHD) pour sélectionner le
mode de Agenda.
Entrez une description puis appuyez plusieurs fois sur
pour déplacer le curseur vers la colonne Date.
Entrez la date (Année, Mois, jour) et l’heure (Heure,
Minute).
Appuyez sur ENTER pour valider.
2006/01/01
PROJET :
2006/01/01
00 :00
NOUVELLE REUNION
NOUVELLE REUNION
ENREGITRÉ !
Remarque :
Vous pouvez choisir de n’entrer que la description, appuyez sur ENTER pour valider
l’enregistrement. Aucune alarme ne sera programmée.
• Lorsque l’alarme de rappel est programmée (l’icône (((/))) est affichée á l’écran) :
l’alarme sonnera environ une minute et le message enregistré s’affichera sur
l’écran. Appuyez sur n’importe quelle touche pour désactiver le signal. L’alarme se
déclenchera aussi si l’appareil est éteint
A. RECHERCHE DE DONNÉES
1. RECHERCHE SEQUENTIELLE : appuyez sur les touches ou .
2. RECHERCHE DIRECTE - tapez la première lettre de la donnée et appuyez
sur ou pour rechercher directement.
B. MODIFICATION/ SUPPRESSIONS DE DONNÉES
Procédure identique au mode téléphone.
MODE MEMO
Exemple : Enregistrer votre numéro de passeport : HK32145
1. Appuyez sur les touches SHIFT + DEU (MEMO) pour sélectionner le mode mémo.
2. Entrez la description du mémo : PASSEPORT HK32145
3. Appuyez sur la touche ENTRER pour valider.
A. RECHERCHE DE DONNÉES
1. RECHERCHE SEQUENTIELLE : appuyez sur les touches ou .
2. RECHERCHE DIRECTE : tapez la première lettre de la donnée et appuyez
sur ou pour rechercher directement.
B. MODIFICATION/ SUPPRESSION DE DONNÉES
Procédure identique au mode téléphone.
FONCTION ALARME
Il est possible d’activer plusieurs types d’alarmes : Alarme quotidienne, Alarme « Jour
de travail », Alarme week-end, Alarme lundi, Alarme mardi, Alarme mercredi, Alarme
jeudi, Alarme vendredi, Alarme samedi, Alarme dimanche. 5 types de mélodies sont
disponibles. Lorsque l’alarme est activée le symbole (((/))) est affiché sur l’écran.
Configuration de l’alarme quotidienne à 6h25, type de mélodie 2 :
Remarque :
Lorsque l’alarme sonnera, appuyez sur n’importe quelle touche pour l’éteindre.
OPERATION AFFICHAGE
Appuyez sur la touche ALARM pour sélectionner le mode
alarme. Utilisez les touches ou pour sélectionner
le type d’alarme : ALARME 1, 2, 3.
Appuyez sur EDIT pour sélectionner le type d’alarme
désiré.
A l’aide des touches ou : 10 catégories d’alarmes
peuvent être sélectionnées.
Appuyez sur les touches puis ou pour
sélectionner l’heure et la mélodie souhaitée.
<ALARME 1>
OFF
--:-- -
<ALARME 1>
OFF
--:-- -
<ALARME 1>
LMMJVSD
00:00 1
<ALARME 1>
LMMJVSD
00:00 1
NTL460IM0036.indd 30-31 20/02/2006 15:01:48

32
Français
33
Français
MODE CONFIDENTIEL
Certaines données sauvegardées en mémoire peuvent être protégées par le biais du
mode confidentiel (valable pour les modes TEL, PROGRAMMATION et MEMO). Le mot
de passe ne peut se composer que de 6 lettres (majuscules ou minuscules).
Exemple : entrez le mot de passe « ABCD »
OPERATION AFFICHAGE
Appuyez sur SHIFT+ MENU pour sélectionner le mode
de configuration du système. Sélectionnez MOT DE
PASSE et appuyez sur ENTER.
Entrez « ABCD » et appuyez sur ENTER.
Entrez le même mot de passe et appuyez sur ENTER.
Puis appuyez sur ENTER pour valider la saisie.
Apres 2 secondes, l’icône s’affiche et l’écran revient à
l’affichage initial. L’icône ne disparaîtra pas tant que le
mot de passe n’a pas été réintroduit.
NOUVEAU ?
NOUVEAU ?
****
CONFIRMEZ ?
****
ENREGISTRÉ !
1. BIP TOUCHE
2. ARRÊT AUTO
3. MOT DE PASSE
MODIFICATION DU MOT DE PASSE
Il est possible de modifier et de désactiver le mot de passe existant.
Exemple : modification du mot de passe en « CDEF »
Appuyez sur SHIFT+ MENU pour sélectionner le mode
de configuration du système, Sélectionnez MOT DE
PASSE et appuyez sur ENTER.
Entrez «ABCD» et appuyez sur ENTER. L’icône disparaît.
Appliquez la même procédure que dans le cas de la
configuration d’un nouveau mot de passe. Appuyez ensuite sur ENTER pour valider la saisie.
Apres 2 secondes, l’écran revient à l’affichage initial et le
mot de passe est modifié.
MOT DE PASSE ?
_
NOUVEAU ?
_
CONFIRMEZ ?
****
1. BIP TOUCHE
2. ARRÊT AUTO
3. MOT DE PASSE
Remarque :
Si vous souhaitez désactiver le mot de passe, il vous suffit de n’entrer aucun
caractère et d’appuyer directement sur ENTER dans les colonnes « NOUVEAU » et
« CONFIRMEZ ? » ; le mot de passe est à présent désactivé.
Vous pouvez appuyer sur SHIFT+EDIT pour quitter le mode édition.
OPERATION AFFICHAGE
MODE CALCULATRICE
CALCUL D’UN POURBOIRE/ D’UNE RISTOURNE :
Par défaut le montant du pourboire est de 10% et le montant de la ristourne est de 5%.
Utilisez la touche pour sélectionner le mode calcul de pourboire et la touche
pour sélectionner le mode de calcul de la ristourne.
Exemple : pour effectuer le calcul du pourboire.
Appuyez sur la touche CAL/CONV pour sélectionner le
mode calculatrice.
Entrez 100 par exemple.
Appuyer sur pour afficher le pourboire.
Appuyez sur à nouveau pour afficher le total.
Appuyez sur ENTER pour enregistrer le résultat du calcul.
Appuyez sur pour calculer le pourboire à payer.
CALCULATRICE
0.
CALCULATRICE
100.
CALCULATRICE
INDICE
10.
CALCULATRICE
TOTAL
110.
CALCULATRICE
110.
CALCULATRICE
INDICE
11.
Remarque :
Même procédure pour le calcul de la ristourne mais en utilisant la touche .
Définir le montant du pourboire/ de la ristourne :
Appuyez sur la touche CAL/CONV pour sélectionner le
mode calculatrice.
Appuyer sur pour afficher le pourboire.
Appuyez sur EDIT: le montant du pourboire par défaut
s’affiche à l’écran et le curseur clignote.
CALCULATRICE
0.
CALCULATRICE
INDICE
0.
CALCULATRICE
POURCENTAGE
10.
OPERATION AFFICHAGE
OPERATION AFFICHAGE
NTL460IM0036.indd 32-33 20/02/2006 15:01:51

34
Français
35
Français
Entrez « 20 » par exemple si vous voulez changer le
montant du pourboire.
Puis appuyez sur ENTER, le pourboire est défini.
CALCULATRICE
POURCENTAGE
20.
CALCULATRICE
Remarque : même procédure pour le calcul de la ristourne mais en utilisant la touche .
MODE CONVERSION
Appuyez deux fois sur la touche CAL/CONV pour passer au mode de conversion des
devises, trois fois pour la conversion de l’euro, et quatre fois pour passer au mode de
conversion du système métrique.
1. Comment configurer le nouveau taux de change des devises et comment le convertir ?
Exemple : 1 HKD = 4.2 NTD ? = 508.2 NTD
Appuyez deux fois sur la touche CAL/CONV pour
sélectionner le mode conversion des devises.
Appuyez sur les touches ou pour sélectionner la
conversion des devises souhaitées.
EX : JPY USD
Appuyez sur le touche EDIT pour sélectionner le mode de
configuration : le 1er caractère clignote et le TAUX affiche
« 0 »
Entrez HKD, appuyez sur et entrez NTD.
Appuyez sur , entrez le taux de 4.2 et appuyez sur la
touche ENTER pour mémoriser la configuration.
Appuyez sur (CAPS), pour changer le sens de la conversion.
Entrez 508.2, par exemple, pour avoir la conversion.
Appuyez sur SHIFT+EDIT pour revenir à l’écran initial.
CAD USD
TAUX =
1.
JPY USD
TAUX =
1.
JPY USD
TAUX =
0.
HKD NTD
TAUX =
0.
HKD NTD
TAUX =
4.2
HKD NTD
TAUX =
0.2380955238
HKD NTD
508.2
120.999999
HKD NTD
TAUX =
0.238095238
OPERATION AFFICHAGE
2. Conversion de l’euro.
Exemple : 500 EURO = ? ATS
3. Utilisation de la fonction de conversion du système métrique.
Exemple : 100 mètres = ? Pieds
Appuyez 3 fois sur la touche CAL/CONV pour
sélectionner le mode conversion de l’euro.
Appuyez sur les touches ou pour sélectionner la
conversion EURO désirée.
Entrez « 500 » par exemple pour obtenir la conversion.
EURO ATS
TAUX =
13.7603
EURO ATS
TAUX =
13.7603
EURO ATS
500
6880.15
Appuyez sur la touche CAL/CONV pour sélectionner le
mode de conversion du système métrique.
Appuyez sur les touches ou pour sélectionner la
conversion désirée.
Appuyez sur (CAPS) pour changer le sens de
la conversion.
Entrez « 100 » par exemple pour obtenir la conversion.
inch (pouces) cm
TAUX =
2.54
feet (pieds) m
TAUX =
0.3048
feet m
TAUX =
3.280839895
feet m
100
328.0839895
OPERATION AFFICHAGE
OPERATION AFFICHAGE
NTL460IM0036.indd 34-35 20/02/2006 15:01:54

36
Français
37
Français
MODE JEUX
Trois jeux vous sont proposés : 777, le serpent et le pendu.
1. Jeu 777
Appuyez une fois sur la touche SHIFT + ESP (GAME)
pour sélectionner le jeu 777.
« 20 » est la MISE (BET) par défaut ; appuyez sur les
touches ou pour sélectionner une des mises suivantes : « 5, 10, 15, 20 »
Appuyez sur ENTER pour démarrer le jeu. L’écran
défilera sans arrêt avant de montrer le résultat.
Si l’utilisateur réalise l’une des combinaisons reproduites
ci-dessous, ce qui indique qu’il a gagné la mise, la
somme gagnée conformément au coefficient sera ajoutée
à la somme totale.
Dans le cas contraire, le montant de la mise sera retiré de
la somme totale.
Si votre somme totale atteint 990, l’écran affichera le
message suivant :
Si vous avez perdu tout votre argent, l’écran affichera le
message suivant :
Remarque :
Appuyez sur les touches SHIFT+EDIT pour sortir du jeu.
Combinaisons et leurs ratios de gains correspondants :
OPERATION AFFICHAGE
2. Le jeu du serpent.
Appuyer DEUX fois sur la touche SHIFT+ESP (GAME)
pour sélectionner le jeu du serpent.
1. La mention « SOLO » signale la vitesse et le niveau
de départ.
2. La deuxième ligne indique le nombre de vies
restantes.
3. La troisième ligne indique le score.
Appuyez sur les touches pour déplacer le serpent.
Si le serpent se heurte à la paroi ou à lui-même, il perdra
une vie.
Autrement, le serpent doit collecter le plus de « pommes »
possibles pour passer au niveau supérieur.
Lorsque toutes les « pommes » d’un niveau sont collectées,
« PASS » s’affichera à l’écran, vous pourrez alors passer
au niveau supérieur en appuyant sur n’importe quelle touche.
Dans ce cas là, le nombre de « pommes » à collecter
et/ou la vitesse du serpent augmenteront.
Lorsque vos 4 vies sont écoulées. L’écran affichera le
message « GAME OVER ». Appuyez sur n’importe quelle
touche pour commencer une nouvelle partie.
Appuyer TROIS fois sur la touche SHIFT+ESP (GAME)
pour sélectionner le jeu HANGMAN.
Le nombre d’essais par défaut est fixé à 5 ; il peut être
sélectionné de 4 à 9.
Appuyez sur les touches pour augmenter ou réduire
le nombre d’essais.
Devinez le mot caché en tapant des lettres.
La répétition de lettres ne diminue pas le nombre
d’essais.
Si vous devinez le mot avec le nombre d’essais stipulés
(par exemple ici tapez « g »), le message suivant apparaîtra.
Dans le cas contraire :
PENDU
Essais : 5
PENDU
Essais : 7
--------
PENDU
Essais : 3
-olden
PENDU
GAGNÉ !
golden
PENDU
PERDU !
golden
OPERATION AFFICHAGE
GAME OVER!
Remarque :
Appuyez sur les touches SHIFT+EDIT pour sortir du jeu.
3. Le pendu
OPERATION AFFICHAGE
Remarque :
Appuyez sur les touches SHIFT+EDIT pour sortir du jeu.
NTL460IM0036.indd 36-37 20/02/2006 15:01:56

38
Français
39
Français
REMPLACEMENT DES PILES
PRECAUTIONS D’EMPLOI
Ne pas exposer l’appareil au soleil direct, à des températures extrêmes, à l’humidité et
à la poussière. Ne pas laisser tomber l’appareil. Ne pas utiliser de détergent, de produit
nettoyant ou de solvant pour nettoyer l’appareil. Essuyez simplement l’appareil avec
un chiffon doux, sec et propre. Ne pas tordre l’appareil. Ne pas tenter d’ouvrir le boîtier.
AVERTISSEMENT: Si cet appareil subit des décharges électrostatiques, vous pouvez
le réinitialiser à l’aide de la touche reset ou en enlevant puis en réinstallant les piles.
Ce produit est couvert par notre garantie de deux ans. Pour toute mise en oeuvre de la
garantie ou de service après vente, vous devez vous adresser à votre revendeur muni
de votre preuve d’achat. Notre garantie couvre les vices de matériel ou de montage imputables au constructeur à l’exclusion de toute détérioration provenant du non respect
de la notice d’utilisation ou de toute intervention intempestive sur l’article (telle que
démontage, exposition à la chaleur ou à l’humidité…).
Note : la garantie ne couvre pas le bris de l’écran LCD.
NOTE : veuillez garder ce mode d’emploi, il contient d’importantes informations.
Dans un souci constant d’amélioration, nous pouvons être amenés à modifier les couleurs et les détails du produit présenté sur l’emballage.
La référence de la pile utilisée dans votre Traducteur Lexibook est CR2032.
Si le contraste écran faiblit fortement même après l’avoir réglé au plus fort, nous vous
conseillons de changer la pile sans tarder.
1. Dévissez la vis au dos de l’appareil qui maintient la trappe du compartiment
de la pile.
2. Retirez la trappe puis la pile usagée.
3. Insérez la pile neuve en respectant la polarité (côté + au dessus).
4. Appuyez sur la touche ON/OFF pour mettre en marche l’appareil.
Ne pas utiliser de piles rechargeables. Les piles ne doivent pas être rechargées. Retirer
les accumulateurs du jeu avant de les recharger. Ne charger les accumulateurs que sous
la surveillance d’un adulte. Ne pas mélanger différents types de piles ou accumulateurs,
ou des piles et accumulateurs neufs et usagés. Les piles et accumulateurs doivent être
mis en place en respectant la polarité. Les piles et accumulateurs usagés doivent être
enlevés du jouet. Les bornes d’une pile ou d’un accumulateur ne doivent pas être mis en
court-circuit. Ne pas jeter les piles au feu Les piles non rechargeables ne doivent pas être
rechargées. N’utilisez que des piles du (des) type(s) recommandé(s).
Si l’appareil ne démarre pas, procédez à un Reset comme indiqué dans le paragraphe
précédent.
GARANTIE
Référence : NTL 460
Garantie 2 ans
©2006 LEXIBOOK®
Conçu en Europe – Fabriqué en Chine
LEXIBOOK S.A
2, avenue de Scandinavie
91953 Courtaboeuf Cedex France
Assistante technique : 0892 23 27 26 (0,34 € TTC/Min)
Site Internet : www.lexibook.com
Informations sur la protection de l’environnement
Tout appareil électrique usé est une matière recyclable et ne devrait pas faire partie des
ordures ménagères! Nous vous demandons de bien vouloir nous soutenir en contribuant
activement au ménagement des ressources et à la protection de l’environnement en
déposant cet appareil dans des sites de collecte (si existants).
ANNEXE
Taux de l’EURO
FRF Franc Français France 1 Euro = 6.55957 FRF
DEM Mark allemand Allemagne 1 Euro = 1.95583 DEM
IEP Livre Irlandaise Irlande 1 Euro = 0.787564 IEP
ESP Peseta Espagnole Espagne 1 Euro = 166.386 ESP
ITL Lire Italienne Italie 1 Euro = 1936.27 ITL
ATS Shilling Autrichien Autriche 1 Euro = 13.7603 ATS
BEF Franc Belge Belgique 1 Euro = 40.3399 BEF
FIM Mark Finlandais Finlande 1 Euro = 5.94573 FIM
LUF Franc Luxembourgeois Luxembourg 1 Euro = 40.3399 LUF
NLG Florin Hollande 1 Euro = 2.20371 NLG
PTE Escudos portugais Portugal 1 Euro = 200.482 PTE
Code Monnaie Pays Taux Euro
NTL460IM0036.indd 38-39 20/02/2006 15:01:57

40
Español
41
Español
INTRODUCCIÓN
ANTES DE COMENZAR
REINICIALIZACIÓN (RESET)
AJUSTE DEL SISTEMA
CAMBIAR MAYÚSCULAS Y MINÚSCULAS
CAMBIAR ENTRE CARÁCTERES Y NUMEROS
AJUSTE DE LA HORA LOCAL
BUSQUEDA DE LOS HUSOS HORARIOS
MODO TRADUCTOR
PALABRAS
MODO TELÉFONO
MODO PROGRAMACIÓN
MODO MEMO
FUNCION ALARMA
MODO CONFIDENCIAL
MODO CALCULADORA
MODO CONVERSIÓN
MODO JUEGO
CAMBIAR LAS PILAS
PRECAUCIONES
GARANTÍA
41
41
41
41
42
42
43
43
44
46
46
48
49
50
51
52
53
55
57
58
58
INDICE
INTRODUCCIÓN
¡Felicidades! Bienvenido al mundo de Lexibook®.
Acaba de adquirir la nueva traductora de idiomas NTL460. Este producto ha sido diseñado
para ayudarle a traducir palabras en Inglés, Francés, Español y Alemán.
Por favor, antes de utilizar la traductora lea cuidadosamente éstas instrucciones y así asegurarse de que obtiene el mejor rendimiento de su producto.
ANTES DE COMENZAR
Antes de utilizar la traductora por primera vez, quite la lengüeta de protección de pilas.
1. Desatornille y abra la tapa del compartimiento de pilas, situada en la parte posterior de
la unidad.
2. Extraiga las pilas protegidas por la lengüeta de plástico.
3. Quite la lengüeta y vuelva a colocar las pilas, asegurándose que son insertadas
correctamente.
4. Antes de utilizar, reajuste la unidad - ver el procedimiento de Reajuste mas adelante.
Localice el agujero RESET situado en la parte de atrás del aparato.
Inserte una punta fina y apriete suavemente. ¿RESET? aparecerá en pantalla.
Pulse ENTER para confirmar. La operación puede tardar varios segundos.
N.B.: la reinicialización suprime todas las informaciones almacenadas en la traductora y
el código secreto si lo tuviese.
Abriendo y cerrando la unidad
Para abrir la unidad, presionar el botón central al frente para desabrochar.
Para cerrarla, presione la cubierta suavemente hacia abajo.
Antes de encender la unidad, asegúrese de retirar la etiqueta protectora transparente de
la pantalla LCD tirando de ella por la lengüeta.
Pulse SHIFT /MENU para entrar en el modo de Ajuste del sistema utilice los botones
o pulse el número correspondiente para desplazarse entre los siguientes puntos:
1. TONO TECLA: Pulse ENTER para entrar al ajuste de tono de teclado. El estado de
tono de teclado por defecto es activado, pulse el botón o para seleccionar
Apagado/Encendido.
2. AUTO APAG.: Pulse ENTER para entrar en ajuste de horario de apagado automático.
El horario de apagado automático por defecto es 5 minutos, pulse el botón o
para desplazarse entre la siguiente selección: 3 MINUTOS, 5 MINUTOS, 7 MINUTOS.
REINICIALIZACIÓN (RESET)
AJUSTE DEL SISTEMA
NTL460IM0036.indd 40-41 20/02/2006 15:01:58

42
Español
43
Español
3. CONTRASEÑA: Pulse ENTER para entrar en el modo secreto. (Para detalles ver a
continuación MODO CONFIDENCIAL).
4. CONTRASTE: Pulse ENTER para entrar en el ajuste de contraste. El contraste por
defecto es 06. Pulse el botón o para ver del 01 al 08.
5. IDIOMA: Pulse ENTER para entrar en el apartado de selección de idioma. El
idioma por defecto es INGLES. Pulse el botón o para ver como sigue:
ENGLISH, DEUTSCH, FRANÇAIS, ESPAÑOL.
6. CAMPANA: Pulse para entrar en el apartado de ajuste del timbre Apagado/Encendido.
Por defecto, el estado del timbre es Encendido, pulse el botón o para activar /
desactivar el timbre. Cuando el timbre está activado, el icono será mostrado y cada
hora se escuchará un sonido “Bip, Bip”.
7. ALARMA CAL: Pulse ENTER para entrar en el apartado de ajuste de alarma
Apagado/Encendido. Pulse el botón o para activar / desactivar la alarma.
8. CD. LOCAL: Pulse ENTER para entrar en el modo de edición del nombre de la ciudad.
Escriba el nombre de la ciudad para editar el modo de Horario Local de la ciudad.
Después de editar, esta columna quedará en blanco.
9. MEMORIA: Pulse ENTER. La memoria disponible será mostrada durante 2 segundos.
Pulse SHIFT + CAPS para cambiar el alfabeto a mayúsculas o minúsculas.
En eI modo de entrada de TELEFONO, NOTAS, AGENDA, pulse una vez, para
cambiar a entrada de números, y pulse otra vez para volver a caracteres.
CAMBIAR MAYÚSCULAS Y MINÚSCULAS
CAMBIAR ENTRE CARÁCTERES Y NUMEROS
AJUSTE DE LA HORA LOCAL
PROCEDIMIENTO VISUALIZACIÓN
Pulse SHIFT + CAL/CONV (HT) para seleccionar la hora
local (aparece el símbolo ), luego pulse EDIT.
Pulse o hasta que aparezca la ciudad de su zona
horario. Luego pulse para mover el cursor a la 2ª línea.
Pulse o seguido de para seleccionar el año, mes
y día deseado.
Utilice el mismo procedimiento para ajustar el horario.
Pulse ENTER para validar la configuración.
NYC # DOM
2006-01-01
00:00:08
ROM # DOM
2006-01-01
00:01:02
ROM # MAR
2006-12-12
00:01:48
ROM # MAR
2006-12-12
16:30:00
ROM # MAR
2006-12-12
16:30:12
Pulse la tecla B (DST) para cambiar al horario de ahorro de luz.
Nota: El formato del Horario Local es de 24-horas y el formato de fecha es
YYYY/MM/DD (AÑO/MES/DIA).
1. Pulse SHIFT + ALARM (WT) para seleccionar el modo de configuración de la hora
(aparece el símbolo ).
2. Pulse o para buscar el tiempo en 43 ciudades mundiales.
BUSQUEDA DE LOS HUSOS HORARIOS
HUSO HORAEIO NOMBRE DE LA CIUDAD ABREVIACION DIFERENCIA DE TIEMPO
01
02
03
04
05
06
07
08
09
10
11
12
LONDRES
LISBOA
PARIS
BERLIN
ROMA
AMSTERDAM
MADRID
HELSINKI
CAIRO
MOSCU
RIYADH
TEHERAN
LON
LIS
PAR
BER
ROM
AMS
MAD
HEL
CAI
MOW
RUH
THR
+0
+0
+1
+1
+1
+1
+1
+2
+2
+3
+3
+3.5
NTL460IM0036.indd 42-43 20/02/2006 15:02:02

44
Español
45
Español
13
14
15
16
17
18
19
20
21
22
23
24
25
26
27
28
29
30
31
32
33
34
35
36
37
38
39
40
41
42
43
DUBAI
KABUL
KARACHI
DELHI
DHAKA
RANGOON
BANGKOK
PEKIN
HONG KONG
SINGAPUR
TOKYO
ADELAIDA
SYDNEY
GUAM
NOUMEA
WELLINGTON
AUCKLAND
TONGA
ISLAS MIDWAY
HONOLULU
ANCHORAGE
LOS ANGELES
DENVER
CHICAGO
NUEVA YORK
TORONTO
CARACAS
RIO DE JANEIRO
----ATLANTICO MEDIO
AZORES
DXB
KBL
KHI
DEL
DAC
RNG
BKK
BEI
HKG
SIN
TYO
ADL
SYD
GUM
NOU
WLG
AKL
TNG
MID
HNL
ANC
LAX
DEN
CHI
NYC
YYZ
CCS
RIO
-2H
MAT
AZO
+4
+4.5
+5
+5.5
+6
+6.5
+7
+8
+8
+8
+9
+9.5
+10
+10
+11
+12
+12
+13
-11
-10
-9
-8
-7
-6
-5
-5
-4
-3
-2
-2
-1
MODO TRADUCTOR
Es una traductora de 4 idiomas: Ingles, Español, Francés y Alemán.
Por cada idioma, hay disponibles 30 000 palabras.
Pulse para entrar en el modo traductor. Cuando pulse la lengua configurada
esta mostrada como lengua de origen. Para seleccionar una otra lengua de origen,
pulse sobre una de las teclas de lengua:
ENG para Ingles
FRA para Francés
DEU para Alemán
ESP para Español
Una vez la lengua de origen seleccionada, las palabras índice se mostrarán
simultáneamente. . Podrá escribir directamente la palabra deseada o utilizar los
botones para seleccionar la palabra índice, seguidamente pulse para efectuar la
traducción.
Si la palabra está disponible, la pantalla mostrará la traducción. Ahora puede pulsar
las funciones de 4 idiomas para traducir continuamente, y pulse para visualizar la
traducción de la palabra anterior / siguiente o escribir otra palabra para traducir. Si la
palabra no estuviese disponible entrará en el modo SPELLING CHECK (Ortografía y
Gramática).
Ejemplo 1: Hacer una traducción (LENGUA DE ORIGEN: ESPAÑOL)
PROCEDIMIENTO VISUALIZACIÓN
Cuando se encuentre en otro modo que no sea el modo
traductor, pulse para seleccionarlo.
Ponga “ co ”. Las palabras contenidas en el índice aparecen
simultáneamente.
Continua escribiendo la palabra y elija la palabra
deseada con la ayuda de la tecla , por ejemplo, coche
y pulse sobre ENTER.
Pulse la tecla del idioma deseado, por ejemplo,
Ingles: pulse ENG.
O pulse sobre FRA para el Francés.
O pulse sobre DEU para el Alemán
Se puede pulsar la tecla para ver la palabra precedente.
ESPANOL
co_
coaccion
coagulo
Coch_
coche
E: coche
I: car
E : coche
F : automobile
E : coche
A: auto
E : cocer demasiado
A : verkochen
HUSO HORAEIO NOMBRE DE LA CIUDAD ABREVIACION DIFERENCIA DE TIEMPO
NTL460IM0036.indd 44-45 20/02/2006 15:02:04

46
Español
47
Español
PALABRAS
Hay 600 palabras y expresiones clasificadas en 10 categorías.
1. NEGOCIOS
2. RESTAURANTE
3. HOTELES
4. EN CIUDAD
5. VIAJAR
6. URGENCIAS
7. OCIO
8. BANCO/CORREO/TELEFONO
9. AEROPUERTO
10. MISCELANEOS
Es posible traducir una palabra en las 4 lenguas disponibles.
Utilización del modo Palabras
1. Pulse la tecla PHRA para seleccionar el modo Palabra
2. La pantalla muestra brevemente el idioma antes puesto en Ajustes del sistema
Ingles por defecto y después muestra la primera opción del modo palabra.
3. La primera categoría NEGOCIOS esta mostrada, pulse ENTER para entrar en esta
categoría.
4. O pulse para ver la categoría siguiente. cuando la categoría deseada esta
mostrada, pulse ENTER para confirmar. La primera palabra de la categoría será
mostrada.
5. Pulse para ver le palabra siguiente de la lista. Pulse para ver la palabra precedente.
6. Pulse una tecla de idioma para ver la traducción en el idioma deseado.
7. Pulse otra tecla de idioma para la traducción en otro idioma.
8. Si una palabra esta larga, puedes enrollar usando y .
9. Para enrollar las palabras dentro de una categoría, pulse o .
10. para volver a la lista de palabras, pulse repetidamente .
MODO TELEPHONO
Hay incorporados dos tipos de directorio de teléfono -NEGOCIOS Y PERSONAL.
Pulse SHIFT + ENG (TEL) una vez para entrar al modo PERSONAL y dos veces
para NEGOCIOS.
Capacidad máxima de 11 líneas por campo
Ejemplo: BUSINESS: (NAME) JOHN SMITH, (ADDRESS) NUEVA YORK,
(TEL. NO.) 111-123-2143,(FAX NO.) 345-456-1256, (NOTE) FRIEND.
PROCEDIMIENTO VISUALIZACION
Pulse SHIFT+ENG(TEL) dos veces, una después de otra
para seleccionar el modo de NEGOCIOS.
Escriba JOHN SMITH y pulse ENTER.
Escriba NUEVA YORK y pulse ENTER
Pulse NUM para cambiar a escritura de números.
Escriba entonces 111-123-2143 y pulse ENTER.
Escriba 345-456-1256 y pulse ENTER.
Pulse otra vez NUM para volver a la escritura de
caracteres. Escriba “AMIGO” y pulse para ENTER validar
la entrada.
2 segundos mas tardes la pantalla mostrará la
visualización.
<NEGOCIOS>
NOMBRE
JOHN SMITH
DIRRECCION :
JOHN SMITH
TEL#:
NUEVA YORK
111123211
NUEVA YORK
111123211
345456125
¡ GRABADO !
JOHN SMITH
NUEVA YORK
111123211
Recuerde:
Los símbolos siguientes podrán obtenerse pulsando SHIFT+SPACE seguidamente
y repetidamente:
NTL460IM0036.indd 46-47 20/02/2006 15:02:07

48
Español
49
Español
MODO NEGOCIOS/PERSONAL
A. BUSQUEDA DE INFORMACIÓN
1. Pulse los botones SHIFT+ ENG (TEL) para entrar en el modo NEGOCIOS o PERSONAL.
2. Utilice los botones o para buscar alfabéticamente o para escribir los primeros
caracteres y luego pulse o o para localizar la información deseada.
B. VISIALIZAR TODA LA INFORMACIÓN
Pulse o para visualizar toda la información.
C. EDITAR LA INFORMACIÓN
1. Recupere la información que va a ser editada. Pulse EDIT para entrar en el modo de
edición.
2. El estado de edición por defecto es insertar. Utilice los botones para
mover el cursor a la posición deseada.
3. Pulse para borrar 1 carácter o número y pulse SHIFT + ”DERECHA/ INS” para
cambiar entre los estados insertar / sobrescribir.
4. Escriba la nueva información.
5. Pulse ENTER.
6. O pulse SHIFT+EDIT para salir del modo de edición.
D. BORRAR INFORMACIÓN
1. Busque la información que va a borrar.
2. Pulse SHIFT+BS(DEL), la pantalla mostrará ”¿ELIMINAR?”.
3. Pulse ENTER, la pantalla muestra “¡ELIMINADO!” y la información es borrada.
Nota: Si por error ha pulsado el botón SHIFT+BS (DEL), simplemente pulse cualquier
otro botón menos para evitar la eliminación salvo ENTER.
1. Este modo de registro de la fecha de programación (es la fecha que corresponde
por defecto a la fecha en modo Home Time), la hora y la descripción. Tiene un
máximo de 10 líneas.
2. Si desea programar la alarma, deberá de ajustar los parámetros SCHD ALARM ON
en el modo de Ajuste del Sistema.
3. Ejemplo: NUEVA ENTREVISTA 2006/01/01 12:30 (Alarma de agenda es activada).
MODO PROGAMACION
PROCEDIMIENTO VISUALIZACIÓN
Pulse SHIFT+FRA(SCHD) para seleccionar el modo de
agenda.
Escriba una descripción seguidamente pulse varias
veces para mover el cursor a la columna de Fecha.
Escriba: 2006, 01, 01(Año, Mes, Día) 12,30
(Horas, Minutos).
Pulse ENTER para validar la entrada.
2006/01/01
PLAN:
2006/01/01
00 :00
NUEVA ENTREVISTA
NUEVA ENTREVISA
¡ GRABADO !
Recuerde:
Escriba tan solo la descripción y pulse ENTER para guardar. No habrá alarma de
agenda.
Cuando se activa a alarma de recordatorio de agenda, el icono (((/))) es mostrado
en la pantalla. Si el aparato está activado, y sin importar el modo, cuando el horario
local alcance el horario de la alarma programada, esta sonará durante 1 minuto y la
pantalla mostrará la visualización de la anotación de la agenda – pulse cualquier botón
para parar el sonido. Si el aparato está desactivado, cuando el horario local alcance el
horario de la alarma programada, la agenda se activará y actuará de la misma manera
que cuando el aparato está activado. Cuando el sonido de la alarma se para el aparto
se desactivará.
A. BÚSQUEDA DE INFORMACIÓN
1. BÚSQUEDA SECUENCIAL – pulsando o .
2. BÚSQUEDA DIRECTA – escriba los caracteres iniciales de la información, luego
pulse o para buscar directamente.
B. EDICIÓN / ELIMINACIÓN DE INFORMACIÓN
Igual que en el modo de teléfono.
Ejemplo: PASAPORTE 321456796129
1. Pulse los botones SHIFT + DEU(MEMO) para entrar en el modo memo.
2. Escriba PASAPORTE 321456796129.
3. Pulse el botón ENTER para validar la entrada.
A. BÚSQUEDA DE DATOS
1. BÚSQUEDA SECUENCIAL – pulsado el botón o .
2. BÚSQUEDA DIRECTA – igual que el modo de agenda.
B. MODIFICACIÓN/SUPRESIÓN DE DATOS
El mismo procedimiento que en modo teléfono/memo.
MODO MEMO
NTL460IM0036.indd 48-49 20/02/2006 15:02:10

50
Español
51
Español
FUNCION ALARMA
Es posible seleccionar 3 alarmas. El tipo de alarma puede ser seleccionado de la
siguiente manera: Alarma diaria, Alarma de día laboral, Alarma de fin de semana,
Alarma de Lunes, Martes, Miércoles, Jueves, Viernes y Sábado.
Hay disponibles 5 melodías de alarma.
Cuando la alarma ha sido programada, el símbolo (((.))) se visualizará.
Ajuste de la alarma diaria a las 6:25, tipo de melodía 2:
PROCEDIMIENTO VISUALIZACIÓN
Pulse el botón ALARM para seleccionar el modo de
alarma.
Utilice el botón o para seleccionar: ALARM 1, 2, 3.
Pulse EDIT para seleccionar el tipo de alarma deseada.
Con la ayuda de las teclas y , las 10 categorías de
alarmas pueden ser seleccionadas.
Pulse sobre después sobre las teclas o
para seleccionar la hora y la melodía deseadas.
<ALARMA 1>
APAGADO
--:--
<ALARMA 1>
APAGADO
--:--
<ALARMA 2>
DLMMJVS
--:--
<ALARMA 2>
DLMMJVS
--:--
MODO CONFIDENCIAL
Puede proteger una lista adicional de información utilizando el modo secreto, que está
disponible en los modos TEL, SCHD y MEMO. La contraseña tan solo puede ser de
caracteres (mayúsculas y minúsculas) y máximo de 6.
Ejemplo: Instalar una contraseña “ABCD”
PROCEDIMIENTO VISUALIZACIÓN
Pulse SHIFT+ MENU para entrar al modo de ajuste
del sistema, seleccione el modo de contraseña y pulse
sobre ENTER.
Escriba “ABCD” luego pulse sobre ENTER.
Vuelva a escribir la misma contraseña.
Pulse sobre ENTER para validar la elección.
2 segundos mas tarde, el icono es mostrado en la pantalla
y la visualización volverá a la original. El icono no
desaparecerá hasta que vuelva a escribir la contraseña.
NVO. PASSWD:
_
¿RE – INTRO ?
¿RE – INTRO ?
****
¡ GRABADO !
1. TONO TECLA
2. AUTO-APAG
3. CONTRASEÑA
EDITAR LA CONTRASEÑA
La contraseña actual puede cambiarse o desactivarse.
Ejemplo: Cambiar la contraseña a “CDEF”.
Pulse SHIFT+ MENU para entrar al modo de
ajuste del sistema, seleccione el modo de contraseña y
pulse sobre ENTER.
Escriba “ABCD” luego pulse ENTER.
El icono desaparecerá.
Ejecute el mismo procedimiento que para instalar una
contraseña.
Luego pulse sobre ENTER para validar la elección.
2 segundos más tarde, la pantalla vuelve a la visualización original y la contraseña ha cambiado.
PASSWORD?
_
NVO. PASSWD:
_
¡ GRABADO !
1. TONO TECLA
2. AUTO-APAG
3. CONTRASEÑA
Recuerde:
Para desactivar la contraseña, no escriba ningún carácter y pulse en las columnas
“NVO. PASSWD” y “¿RE – INTRO?” ahora la contraseña ha sido desactivada.
O pulse SHIFT + EDIT para salir del modo de edición.
PROCEDIMIENTO VISUALIZACIÓN
NTL460IM0036.indd 50-51 20/02/2006 15:02:13

52
Español
53
Español
MODO CALCULADORA
Cálculo de Propinas / Descuento:
Por defecto, el valor de propinas es de 10% y el valor de descuento es 5%.
Utilice para la calculadora de descuentos y para la calculadora de propinas.
Ejemplo: Ejecutar una calculación de propinas
Pulse CAL/CONV para seleccionar el modo CAL.
Escriba 100 por ejemplo.
Pulse para propinas.
Pulse para el total.
Pulse ENTER para guardar el resultado del cálculo.
CALCULADORA
0.
CALCULADORA
100
CALCULADORA
TIP
10
CALCULADORA
TOTAL
110
CALCULADORA
110
Recuerde :
Mismo procedimiento para el descuento pero con la tecla .
Ajuste del valor de Propinas / Descuento:
Pulse CAL/CONV para seleccionar el modo CAL.
Pulse para propinas.
Pulse EDIT el importe de la propina se visualiza por
defecto y parpadea.
Escriba “ 20 “ por ejemplo si desea cambiar la cantidad
de la propina.
Pulse ENTER: la propina está ajustada.
CALCULADORA
0.
CALCULADORA
TIP
0
CALCULADORA
PORCENTAJE
10
CALCULADORA
PORCENTAJE
20
CALCULADORA
PORCENTAJE
0
PROCEDIMIENTO VISUALIZACIÓN
PROCEDIMIENTO VISUALIZACIÓN
Recuerde:
Mismo procedimiento para el descuento pero con la tecla .
MODO CONVERSIÓN
Pulse dos veces una después de otra para la conversión de divisas, tres veces para
conversión de EURO y cuatro veces para la conversión métrica.
1. Como ajustar el valor de cambio de una moneda y como convertirla.
Ejemplo: 1 HKD = 4.2 NTD? HKD = 508.2 NTD
Pulse CAL/CONV dos veces para seleccionar el
modo de conversión de divisa.
Pulses o para seleccionar la conversión
de divisas deseada.
EX: JPY USD
Pulse el botón EDIT para entrar en el modo de
ajuste , el 1º carácter parpadeará y el RATE
(VALOR) será “0”.
Escriba HKD, pulse y ponga NTD.
Pulse y escriba la cantidad de valor 4.2 y pulse el
botón ENTER para guardar el ajuste.
Pulse (CAPS) la tasa se visualiza.
Escriba 508.2 por ejemplo para obtener la conversión.
Pulse SHIFT+EDIT para que la pantalla vuelva a su
posición Inicial.
CAD USD
CAMBIO =
1.
JPY USD
CAMBIO =
1.
JPY USD
TAUX =
0.
HKD NTD
CAMBIO =
1.
HKD NTD
CAMBIO =
4.2
HKD NTD
CAMBIO =
0.238095238
HKD NTD
508.2
120.99999999
HKD NTD
CAMBIO =
4.2
PROCEDIMIENTO VISUALIZACIÓN
NTL460IM0036.indd 52-53 20/02/2006 15:02:15

54
Español
55
Español
2. Conversión de EURO
Ejemplo: 500 EURO =? ATS
3. Utilizar la función de conversión métrica
Ejemplo: 100 Metros = ? Pies
Pulse CAL/CONV tres veces seguidas para seleccionar la
conversión de EURO.
Pulse el botón o para seleccionar la conversión
deseada de EURO.
Escriba 500 como ejemplo para obtener la conversión.
EURO ATS
CAMBIO =
13.7603
EURO ATS
CAMBIO =
13.7603
EURO ATS
500
6880.15
Pulse CAL/CONV cuatro veces seguidas para seleccionar
la conversión métrica.
Pulse el botón o para localizar la conversión
deseada.
Pulse (CAPS)
Escriba “100” como ejemplo para obtener la conversión.
inch cm
CAMBIO =
2.4
feet m
CAMBIO =
0.3048
feet m
CAMBIO =
3.280839895
feet m
100
3.280839895
PROCEDIMIENTO VISUALIZACIÓN
PROCEDIMIENTO VISUALIZACIÓN
MODO JUEGO
Hay tres juegos disponibles para su selección: El juego del 777, La Serpiente y el juego
del Ahorcado.
1. Juego del 777
Pulse los botones SHIFT + ESP(GAME) una vez para
seleccionar el juego del 777. Se escucha música cuando
la visualización del juego aparece. La apuesta BET por
defecto es “20” ; pulse el botón o para seleccionar
entre las siguientes APUESTAS “ 5,10,15,20”.
Pulse ENTER para comenzar el juego. La pantalla parpadeará constantemente.
Si se obtiene una de las combinaciones, mostradas en el
apartado inferior, esto indicará que ha ganado el juego.
En la pantalla parpadeará una cara sonriente y el dinero
será acreditado según el valor de pérdida relevante y
añadido al total del dinero.
Si pierde, en la pantalla parpadeará una cara triste y el
dinero de la apuesta será deducido de la cantidad total.
Cuando el valor total alcance 999 la pantalla mostrará:
Por otro lado, si pierde todo el dinero y puntúa 000, la
pantalla mostrará:
Recuerde:
Pulse los botones SHIFT+EDIT para salir del juego.
Combinaciones de ventanas y sus valores de pérdida
correspondientes:
PROCEDIMIENTO VISUALIZACIÓN
NTL460IM0036.indd 54-55 20/02/2006 15:02:17

56
Español
57
Español
2. Juego de la serpiente
Pulse los botones SHIFT+ESP(GAME) dos veces
seguidas para seleccionar el juego de la serpiente.
1. Se escucha música cuando la visualización inicial del
juego aparece.
2. “S0L0” indica la velocidad y nivel inicial.
3. La segunda línea indica las oportunidades o vidas.
4. La tercera línea indica la puntuación.
Pulse para mover la serpiente.
Si la serpiente choca contra la pared o toca su propio
cuerpo, se perderá una oportunidad o una vida.
De no ser así, la serpiente pasará una puerta de peaje.
Cuando se pasan toas las puertas de peaje d un nivel,
la pantalla mostrará “PASS” . Pulse cualquier botón para
comenzar el siguiente nivel de velocidad. En este, la
velocidad de movimiento de la serpiente aumentará.
Cuando se pierdan todas las vidas, la pantalla mostrará
“GAME OVER”. Pulse cualquier botón para comenzar un
nuevo juego.
Pulse los botones SHIFT+ESP(GAME) tres veces
seguidas para seleccionar el juego del ahorcado. El
número por defecto de oportunidades es 5, pueden
seleccionarse de 4 a 9.
Pulse sobre la tecla para aumentar el número de
posibilidades o puede pulsar sobre la tecla para reducir
este número, después pulsar .
Escriba las letras que piensa forman la palabra.
(e.g. a d e s t l n o). El repetir las letras no reduce el
número de oportunidades.
Si adivina la palabra, dentro del número designado de
oportunidades. (e.g. input “g”):
De no ser así:
Usted vuelve a la primera pantalla.
EL HORCADO
Intentos : 5
EL HORCADO
Intentos : 5
-----
EL HORCADO
Intentos 2:
-enos
EL HORCADO
¡GANASTE!
menos
EL HORCADO
¡PERDISTE!
menos
EL HORCADO
Intentos : 5
PROCEDIMIENTO VISUALIZACIÓN
GAME OVER!
Recuerde:
Pulse los botones SHIFT+EDIT para salir del juego.
3. Juego del Horcado
PROCEDIMIENTO VISUALIZACIÓN
Recuerde:
Pulse los botones SHIFT+EDIT para salir del juego.
ANEXO
Anexo 1 - Euro tarifas fijas
FRF Franco francés Francia 1 Euro = 6,55957 FRF
DEM Marco alemán Alemania 1 Euro = 1,95583 DEM
IEP Libra irlandesa Irlanda 1 Euro = 0,787564 IEP
ESP Peseta española España 1 Euro = 166,386 ESP
ITL Lira italiana Italia 1 Euro = 1936,27 ITL
ATS Chelín austriaco Austria 1 Euro = 13,7603 ATS
BEF Franco belga Bélgica 1 Euro = 40,3399 BEF
FIM Marco finlandés Finlandia 1 Euro = 5,94573 FIM
LUF Franco Luxemburgués Luxemburgo 1 Euro = 40,3399 LUF
NLG Florín de Países Bajos Países Bajos 1 Euro = 2,20371 NLG
PTE Escudo portugués Portugal 1 Euro = 200,482 PTE
Código Moneda País Cambio
PILAS
La unidad NTL460 funciona con 1 pila alcalina de tipo CR2032. Si la pantalla se ve
demasiado tenue como para poder leerse correctamente, es señal de que la pila está
gastada y debe ser sustituida tan pronto como sea posible.
Para sustituir la pila siga este procedimiento:
1. Apague la unidad. Quite el tornillo de la puerta del compartimento de la pila, en la
parte trasera de la unidad, y retírela.
2. Saque la pila, observando cómo están colocados los polos, y sustitúyala con una
nueva colocando los polos en la misma posición.
3. Vuelva a colocar la puerta del compartimento de la pila y atorníllela.
4. Presionar cualquier tecla excepto ENTER para pasar el RESETEAR para prevenir
pérdida de datos previamente almacenados.
Sustituya la pila siguiendo las instrucciones anteriores; de no hacerlo así, puede que se
pierda la información almacenada en la memoria de la unidad. No intente nunca recargar baterías no recargables. No utilices pilas recargables. Cuide siempre de colocar las
pilas en la posición correcta, de acuerdo con la polaridad indicada en el compartimento. Retire de la unidad las pilas gastadas. No permita que entren en contacto eléctrico
los terminales de la alimentación. No mezcle pilas nuevas con pilas usadas. No mezcle
pilas alcalinas con pilas estándar (carbón-zinc) o recargables (níquel-cadmio). No
entierre ni queme las pilas usadas. Para un mejor rendimiento y mayor duración aconsejamos utilizar pilas alcalinas. Utilice únicamente pilas del mismo tipo o equivalente al
recomendado.
Precaución: Si la unidad recibe una descarga electrostática y deja de funcionar, reiníciela retirando la pila y esperando 30 segundos antes de volver a colocarla.
¡IMPORTANTE! Solo dispone de un minuto para cambiar la pila – si tarda más de un
minuto en hacerlo se perderán todos los datos.
NTL460IM0036.indd 56-57 20/02/2006 15:02:19

58
Español
59
Deutsch
PRECAUCIONES
GARANTÍA
Evite temperaturas extremas, luz solar directa, agua, humedad y polvo.
No deje caer el aparato.
No utilice detergentes, productos de limpieza o disolventes para limpiar el aparato. Límpielo con
un paño suave y seco.
No utilice el aparato cerca de un campo magnético potente (ex. Altavoces), o de una fuente de
electricidad estática.
NO trate de desmontar el aparato – Esto invalidará su garantía.
Recomendamos encarecidamente que guarde una copia de toda la información. Por principio,
cualquier sistema con una memoria electrónica podrá perder su información bajo ciertas
circunstancias. No podemos aceptar ninguna responsabilidad por la pérdida de información
causada por el uso inapropiado, reparación, error, cambio de pila, el uso de pilas después de
su fecha de caducidad o cualquier otra circunstancia.
No podemos aceptar ninguna responsabilidad directa o indirecta por perdidas financieras, o
por reclamaciones de terceras partes, que puedan resultar por el uso de este producto y sus
funciones, como la pérdida de números de tarjeta de crédito, o modificación de información.
Este producto tiene una garantía de 2 años.
Para hacer uso de la garantía o del servicio posventa, contacte con el vendedor y suministre el
comprobante de la compra, o devuelva la unidad a la dirección que se proporciona más abajo,
completa y con comprobante de compra.
Nota: La garantía no cubre la rotura de la pantalla LCD.
Es natural en los productos con memoria electrónica que, en raras ocasiones, se pierda la
información almacenada en la unidad. Lexibook no puede aceptar ninguna responsabilidad por
la perdida de datos causada por mal uso, intento de reparar la unidad, un error, sustitución de
la pila, uso de pilas caducadas o cualquier otra circunstancia. De manera similar, no podemos
aceptar ninguna responsabilidad directa ni indirecta por pérdidas económicas o quejas de terceras
partes que pudieran resultar de la utilización de este producto. Nuestra garantía cubre defectos
relativos al material o al montaje atribuibles al fabricante; con excepción del desgaste causado
por no seguir las instrucciones de uso o cualquier manipulación no autorizada del equipo (como
desensamblado, exposición al calor o a la humedad, etc.).
Nota: Se recomienda guardar todo el embalaje para futuras consultas. Guarde este manual de
instrucciones en un lugar seguro, ya que contiene información importante.
Descargo de responsabilidad
Como resultado de nuestro empeño constante para mejorar nuestros productos, puede suceder
que los colores y detalles del producto varíen respecto a las imágenes mostradas en el embalaje.
Referencia: NTL460
Garantía de 2 años
©2006 LEXIBOOK®
Diseñado y desarrollado en Europa – Fabricado en China
Servicio al cliente
Lexibook Ibérica S.L
C/ de las Hileras 4, 4° dpcho 15
28013 Madrid
España
Servicio consumidores: 91 548 89 32.
http://www.lexibook.com
Protección medioambiental
¡Los aparatos eléctricos pueden ser reciclados y no deben ser desechados junto con
la basura doméstica habitual! Apoye activamente el aprovechamiento racional de los
recursos y ayude a proteger el medio ambiente enviando este producto a un centro de
recolección para reciclaje (en caso de estar disponible).
EINLEITUNG
VOR DEM START
RÜCKSETZUNG (RESET)
SYSTEMEINSTELLUNG
ZWISCHEN GROSS- UND KLEINSCHREIBUNG WECHSELN
ZWISCHEN ZEICHEN- UND NUMMERNEINGABE WECHSELN
EINSTELLEN DER LOKALEN ZEIT
SUCHEN DER WELTZEIT
ÜBERSETZUNGSMODUS
SATZ
TELEFONBUCH MODUS
TERMINPLANER MODUS
MEMO-MODUS
ALARMFUNKTION
GEHEIMMODUS - VERBORGENER SPEICHER
TASCHENRECHNER MODUS
UMRECHNUNGSMODUS
SPIELEMODUS
BATTERIEN WECHSELN
SCHUTZMASSNAHMEN
GARANTIE
60
60
60
60
61
61
62
62
63
65
66
67
68
69
70
71
72
74
76
77
77
INHALTSVERZEICHNIS
NTL460IM0036.indd 58-59 20/02/2006 15:02:20

60
Deutsch
61
Deutsch
EINLEITUNG
Danke, dass Sie sich für diesen 4-Sprachen-Übersetzer NTL460 entschieden haben.
Dieses Produkt wurde entwickelt, um Sie bei der Übersetzung von Worten in englisch,
französisch, spanisch und deutsch zu unterstützen.
Die Datenbank umfasst für jede Sprache 30.000 Worte sowie 150 Redewendungen je
Sprache, die aus Gründen der Benutzerfreundlichkeit in 10 verschiedene Kategorien
unterteilt worden sind. Bei normaler Verwendung werden Sie viele Jahre Freude an
Ihrem NTL460 haben. Bitte befolgen Sie diese Anweisungen, damit Ihr Produkt fehlerfrei
arbeitet.
Entfernen Sie den Plastikstreifen zum Batterieschutz, bevor Sie den Übersetzer zum ersten
Mal benutzen:
1. Schrauben Sie den Deckel vom Batteriefach auf der Rückseite des Geräts ab.
2. Entnehmen Sie die, durch den Plastikstreifen geschützten, Batterien.
3. Entfernen Sie den Plastikstreifen und legen Sie die Batterien wieder ein. Achten Sie auf die
richtige Lage.
4. Starten Sie das Gerät neu, bevor Sie es benutzen – vgl. Sie die Beschreibung zum
Neustart weiter unten.
Das RESET-Loch auf der Rückseite des Geräts ausfindig machen.
Führen Sie einen feinen Stift ein und drücken Sie vorsichtig. RESET? Wird angezeigt.
Zur ENTER Bestätigung drücken. Der Vorgang kann mehrere Sekunden dauern.
N.B.: Wenn das Gerät vorher schon benutzt wurde, löscht die Rücksetzung den Geheimcode
und alle im Gerät gespeicherten Informationen.
Hinweise:
Wenn eine Funktionstaste gedrückt wird, wird die Zurücksetzung aufgehoben und die
Funktion aktiviert.
Drücken Sie eine weitere Taste, um den Zurücksetzmodus zu verlassen und auf den
Modus aktuelle Zeitzone zuzugreifen.
So öffnen und schließen Sie das Gerät
Um das Gerät zu öffnen, drücken Sie den zentral auf der Vorderseite angebrachten Knopf,
um die Lasche zu lösen.
Um das Gerät zu schließen, drücken Sie den Deckel leicht nach unten.
Ziehen Sie bitte den transparenten Film von der LCD-Anzeige ab, bevor Sie das Gerät öffnen.
Drücken Sie SHIFT+ (MENU), um in das Menü für die Systemeinstellung zu gelangen,
benutzen Sie die oder Tasten oder drücken Sie die entsprechenden Nummern, um zu
den folgenden Menüpunkten zu gelangen.
VOR DEM START
RUCKSETZUNG (RESET)
SYSTEMEINSTELLUNG
1. TAST. AN : Drücken Sie ENTER, um zum Klingelton-Menü zu gelangen. Der Klin
gelton ist eingeschaltet, drücken Sie oder für ON/OFF.
2. AUTO AUS : Drücken Sie ENTER, um zum Menü für automatisches Ausschalten zu
gelangen. Die Zeitspanne bis zum. Ausschalten bei Nichtbenutzung beträgt
5 Minuten, drücken Sie die oder Tasten, um unter diesen Möglichkeiten zu
wählen: 3 MINUTES, 5 MINUTES, 7 MINUTES.
3. PASSWT : Drücken Sie ENTER für den Geheimmodus. (Sehen Sie für Details die
Passage GEHEIMMODUS).
4. KONTR : Drücken Sie um zum Kontrast-Menü zu gelangen. Der gesetzte Kontrast
ist 05. Drücken Sie die oder Tasten, um zwischen 01 und 08 zu wählen.
5. SPRACHE : Drücken Sie ENTER, um zum Sprachauswahl-Menü zu gelangen. Die
gesetzte Sprache ist Englisch. Drücken Sie die oder , um aus der folgenden
Liste auszuwählen: ENGLISH, DEUTSCH, FRANÇAIS, ESPAÑOL.
6. ALARM TON : Drücken Sie , um zu den Läuten ON/OFF Einstellungen zu gelangen.
Eingestellt ist OFF, drücken Sie die oder Tasten, um zwischen ON/OFF
zu wählen. Wenn das Läuten eingeschaltet ist, wird das Symbol erscheinen und ein
“Beep, Beep” Alarm jede Stunde erklingen.
7. TER. ALARM : Drücken Sie ENTER, um zur Einstellung ON/OFF für den
Terminkalender-Alarm zu gelangen. Drücken Sie die oder Tasten, um
zwischen ON/OFF zu wählen.
8. HEIMATORT : Drücken Sie ENTER, um zum Menü zur Einstellung des Namens
Ihrer Heimatstadt zu gelangen. Sie können einen Städtenamen eingeben, um den
Namen der Stadt für den Lokalzeitmodus zu bearbeiten. Zum Editieren wird die
Spalte automatisch leer.
9. SPEICHER : Drücken Sie ENTER. Der verfügbare Speicher wird für zwei Sekunden
angezeigt werden.
Drücken Sie SHIFT + (CAPS), um zwischen Groß- und Kleinschreibung zu wählen.
Drücken Sie in den Eingabemenüs TELEPHONE, MEMO und SCHEDULE die NUM
Taste einmal, um zwischen Zeichen- und Nummerneingabe zu wechseln.
ZWISCHEN GROSS-UND KLEINSCHREIBUNG WECHSELN
ZWISCHEN ZEICHEN-UND NUMMERNEINGABE WECHSELN
NTL460IM0036.indd 60-61 20/02/2006 15:02:22

62
Deutsch
63
Deutsch
ENSTELLEN DER LOKALEN ZEIT
OPERATION ANZEIGE
Drücken Sie SHIFT + CAL/CONV (HT) um zum HOME
TIME-Modus zu gelangen (Das Symbol wird angezeigt),
drücken Sie dann EDIT.
Drücken Sie oder bis die Stadt aus Ihrer Zeitzone
erscheint. Drücken Sie dann , um den Zeiger zur
zweiten Zeile zu bewegen.
Drücken Sie oder und dann , um das gewünschte
Jahr, den Monat und den Tag auszuwählen
Stellen Sie die Uhrzeit mit der gleichen Vorgehensweise
ein.
Drücken Sie zur Bestätigung ENTER.
NYC # WED
2006-01-01
00 :00 :08
ROM # WED
2006-01-01
00 :01 :02
ROM # TUE
2006-12-12
00 :01 :48
ROM #TUE
2006-12-12
16 :30 : 00
ROM #TUE
2006-12-12
16 :30 :12
Das Format für die lokale Zeit sind 24 Stunden und für das Datum JJJJ/MM/TT.
Drücken Sie B (DST) vor dem Einstellen der Zeit, um zur Sommerzeit zu wechseln.
1. Drücken Sie SHIFT + ALARM (WT), um zum Weltzeit-Menü zu gelangen (Das
Symbol wird angezeigt).
2. Drücken Sie oder , um nach der gewünschten Stadt zu suchen und drücken
Sie zur Bestätigung ENTER.
Es gibt 43 für die Weltzeit wichtige Städte:
SUCHEN DER WELTZEIT
ZEITZONEN NAME DER STADT ABKURZUNG STUNDE VON UNTERSCHIED
01
02
03
04
05
06
07
08
09
10
LONDON
LISSABON
PARIS
BERLIN
ROM
AMSTERDAM
MADRID
HELSINKI
KAIRO
MOSKAU
LON
LIS
PAR
BER
ROM
AMS
MAD
HEL
CAI
MOW
+0
+0
+1
+1
+1
+1
+1
+2
+2
+3
11
12
13
14
15
16
17
18
19
20
21
22
23
24
25
26
27
28
29
30
31
32
33
34
35
36
37
38
39
40
41
42
43
RIYADH
TEHERAN
DOUBAI
KABUL
KARACHI
DELHI
DHAKA
YANGON
BANGKOK
BEIJING
HONG KONG
SINGAPUR
TOKIO
ADELAIDE
SYDNEY
GUAM
NOUMEA
WELLINGTON
AUCKLAND
TONGA
MIDWAY ISLANDS
HONOLULU
ANCHORAGE
LOS ANGELES
DENVER
CHICAGO
NEW YORK
TORONTO
CARACAS
RIO DE JANEIRO
-----MID ATLANTIC
AZOREN
RUH
THR
DXB
KBL
KHI
DEL
DAC
RNG
BKK
BEI
HKG
SIN
TYO
ADL
SYD
GUM
NOU
WLG
AKL
TNG
MID
HNL
ANC
LAX
DEN
CHI
NYC
YYZ
CCS
RIO
-2H
MAT
AZO
+3
+3.5
+4
+4.5
+5
+5.5
+6
+6.5
+7
+8
+8
+8
+9
+9.5
+10
+10
+11
+12
+12
+13
-11
-10
-9
-8
-7
-6
-5
-5
-4
-3
-2
-2
-1
ZEITZONEN NAME DER STADT ABKURZUNG STUNDE VON UNTERSCHIED
UBERSETZUNGSMODUS
Es gibt 4 Sprachübersetzer für Englisch, Spanisch, Französisch, Deutsch.
Für jede Sprache sind 30 000 Wörter abrufbar.
Drücken Sie auf eine der 4 Sprachfunktionstasten, um zum Übersetzungsmodus zu
gelangen. Sie wählen so die Herkunftssprache aus. Die Herkunftssprache kann nur
ausgewählt werden, wenn Sie von einem anderen Modus zum Übersetzungsmodus
wechseln.
Drücken Sie beispielsweise , um zum Übersetzungsmodus zu gelangen, dann
wird der Bildschirm “ENGLISH:” anzeigen. (Wenn eine andere Sprachtaste gedrückt
NTL460IM0036.indd 62-63 20/02/2006 15:02:25

64
Deutsch
65
Deutsch
wurde, wird die entsprechende Sprache erscheinen), geben Sie ein Wort zum Übersetzen
ein. Die Stichwörter werden zugleich angezeigt. Sie können das gewünschte Wort direkt
eingeben oder die Tasten benutzen, um ein Stichwort auszuwählen. Drücken Sie
dann , um die Übersetzung durchzuführen.
Wenn das Wort verfügbar ist, wird der Bildschirm die Übersetzung anzeigen. Nun
können Sie die 4 Sprachtasten drücken, um die Übersetzung in den anderen Sprachen
weiterzuführen; Drücken Sie um die Übersetzung des vorherigen/nächsten
Wortes anzuzeigen oder geben Sie ein anderes Wort zur Übersetzung ein. Wenn das
Wort nicht verfügbar ist, wird zum SPELLING CHECK Modus gewechselt.
Beispiel 1: Eine Übersetzung durchführen
OPERATION ANZEIGE
Wenn Sie sich in einem anderen, als dem
Übersetzungsmodus befinden, drücken Sie um
zum Übersetzungsmodus zu gelangen.
Eingabe “au”. Die Stichwörter werden zugleich
angezeigt.
Fahren Sie mit der Worteingabe fort und wählen
Sie das gewünschte Wort mit der Taste aus,
z.B. „”auto” und drücken Sie ENTER.
Drücken Sie die der gewünschten Sprache
entsprechende Taste z.B ESP.
Oder drücken Sie FRA
Wenn Sie die Taste drücken, können Sie das
vorhergehende Wort sehen.
DEUTSCH :
au_
au
aubergine
aut_
autarkie
authentish
D: auto
E: automobile
D: auto
F: automobile
D: autismus
F: autisme
Sie können einen Satz in jede der 4 Sprachen übersetzen.
So nutzen Sie den Satz-Modus
1. Drücken Sie die Taste PHRA, um auf den SATZ-Modus zuzugreifen.
2. Am Bildschirm wird kurz die ‘Sprache’ eingeblendet, die Sie zuvor in den
Systemeinstellungen eingerichtet haben. Z. B. Englisch (Standard) und danach
wird die erste Option des Modus SATZ eingeblendet.
3. Die erste Kategorie BUSINESS wird eingeblendet. Drücken Sie ENTER, um auf
diese Kategorie zuzugreifen.
4. Oder drücken Sie , um auf die nächste Kategorie zuzugreifen. Wenn die
gewünschte Kategorie eingeblendet wird bestätigen Sie mit ENTER. Der erste Satz
dieser Kategorie wird eingeblendet.
5. Drücken Sie , um den nächsten Satz der Liste einzublenden. Drücken Sie , um
den vorhergehenden Satz der Liste einzublenden.
6. Drücken Sie die Sprach-Taste, um die Übersetzung in der Zielsprache zu sehen.
7. Drücken Sie eine weitere Sprach-Taste, um die Übersetzung in einer anderen
Sprache aufzurufen.
8. Bei langen Sätzen können Sie mit oder blättern.
9. Um die Sätze einer Kategorie zu durchblättern, drücken Sie oder .
10. Um zur Satzübersicht zurückzukehren, halten Sie gedrückt.
SÄTZE
600 Sätze und Ausdrücke wurden in 10 Kategorien unterteilt:
1. GESCHAFTL
2. RESTAURANT
3. IM HOTEL
4. EINKAUFEN
5. UNTERWEGS
6. NOTFäLLE
7. FREIZEIT
8. BANK/POST/TELEFON
9. FLUGHAFEN
10. ALLGEMEINES
NTL460IM0036.indd 64-65 20/02/2006 15:02:28

66
Deutsch
67
Deutsch
Anmerkung:
Die folgenden Symbole können Sie erhalten, indem Sie SHIFT drücken und dann
wiederholt SPACE:
Drücken Sie auf einen der folgenden Buchstaben und dann wiederholt auf EURO um
einen der gewünschten Buchstaben mit Akzentzeichen zu erhalten.
TELEFONBUCH MODUS
Es gibt zwei Arten von Telefonbüchern - GESCHäFIL & PERSöNLICH.
Drücken sie SHIFT + ENG (TEL) einmal für den PERSONAL und zweimal für den
GESCHäFIL Modus.
Max. 11 Zeilen können in einem Feld eingegeben werden.
Beispiel: GESCHäFIL: (NAME) JOHN SMITH, (ADDRESS) NEW YORK
(TEL. NO.) 111-123-2143, (FAX NO.) 345-456-1256, (NOTE) FREUND.
OPERATION ANZEIGE
Drücken Sie zweimal hintereinander SHIFT+ENG (TEL)
und um den GESCHäFIL Modus auszuwählen.
Geben Sie JOHN SMITH ein und
drücken Sie ENTER.
Geben sie NEW YORK ein und drücken Sie ENTER.
Drücken Sie NUM um zur Zahleneingabe zu wechseln. Geben Sie dann 111-123-2143 ein und drücken Sie ENTER.
Geben Sie 345-456-1256 ein und drücken
Sie ENTER.
Drücken Sie wieder NUM um zur Buchstabeneingabe
zurückzukehren. Geben Sie “FREUND” ein und drücken
Sie zur Bestätigung ENTER.
2 Sekunden später kehrt der Bildschirm zur
Eintragsanzeige zurück.
<BUSINESS>
NAME
JOHN SMITH
ADDRESS:
JOHN SMITH
_
TEL#:
NEW YORK_
111_123_21
FAX#:
43_
345_456_12
NOTE
GEISPECHERT !
JOHN SMITH
NEW YORK
111_123_21
PRIVATMODUSE
A. DATEN SUCHEN
1. Drücken Sie die SHIFT+ ENG (TEL) Tasten, um zum PRIVAT-Modus zu gelangen.
2. Drücken Sie die oder Tasten, um alphabetisch zu suchen oder geben Sie die
Anfangsbuchstaben ein und drücken Sie dann oder , um die gewünschten
Daten zu finden.
B. ALLE DATEN EINSEHEN
Drücken Sie um alle Daten einzusehen.
C. DATEN EDITIEREN
1. Rufen Sie die Daten zum Editieren ab. Drücken Sie EDIT, um zum EDITModus zu
gelangen.
2. Der eingestellte Status ist Einfügen der Eingabe. Benutzen Sie die Tasten,
um den Cursor zu der gewünschten Stelle zu bewegen.
3. Drücken Sie BS (DEL), um ein Zeichen oder eine Nummer zu löschen und drücken
Sie SHIFT + (INS), um zwischen Einfügen/Überschreiben zu wechseln.
4. Geben Sie die neuen Daten ein.
5. Drücken Sie ENTER.
6. Oder drücken Sie SHIFT + EDIT, um den EDIT Modus zu beenden.
D. DATEN LÖSCHEN
1. Suchen Sie die Daten, die Sie löschen möchten.
2. Drücken Sie SHIFT + BS (DEL), ”DELETE?” erscheint auf dem Bildschirm.
3. Drücken Sie ENTER, “DELETED!” wird angezeigt, und die Daten sind gelöscht.
Bemerkung: Wenn die SHIFT + BS (DEL)Tasten versehentlich gedrückt wurden,
drücken Sie einfach irgendeine andere Taste außer ENTER, um das Löschen zu
vermeiden.
BUSINESSMODUS
Funktioniert wie der PRIVAT-Modus.
1. Kann Termine speichern (Das gesetzte Datum entspricht der lokalen Zeit), Zeit und
Beschreibung: Max. 10 Zeilen können eingegeben werden.
2. Wenn Sie den Alarm für den Terminplaner anstellen wollen, müssen Sie SCHD
ALARM ON im Systemeinstellungsmodus einstellen.
3. Beispiel:
NEW MEETING
2000/12/31 12:30 (Alarm ist angestellt).
TERMINPLANER MODUS
NTL460IM0036.indd 66-67 20/02/2006 15:02:31

68
Deutsch
69
Deutsch
OPERATION ANZEIGE
Drücken Sie SHIFT + FRA (SCHD), um den Terminplaner Modus anzuwählen
Geben Sie NEW MEETING ein, und drücken Sie
dann mehrmals um zur Zeile für das Datum zu
gelangen.
Geben Sie 2000, 12, 31(Jahr, Monat, Tag) 12,30
(Stunde, Minute).
Drücken Sie zur Bestätigung ENTER.
2003/01/01
PLANUNG:
2003/01/01
:
NEW MEETING
NEW MEETING
GEISPECHERT !
Anmerkung
Sie können auch nur die Beschreibung eingeben und dann ENTER zum Speichern
drücken. Dann gibt es kein Alarmsignal.
Wenn der Terminplaner Alarm eingeschaltet ist, wird (((/))) auf dem Bildschirm angezeigt.
Wenn das Gerät eingeschaltet ist, wird der Alarm, unabhängig vom Modus, für eine Minute
erklingen und der Bildschirm den gespeicherten Eintrag anzeigen, sobald die gesetzte Zeit
für den Termin und die lokale Zeit zusammenfallen – drücken Sie eine beliebige Taste, um
den Alarm zu stoppen. Wenn das Gerät ausgeschaltet ist, und die beiden Zeiten
zusammenfallen, schaltet sich das Gerät automatisch ein und wird sich genauso verhalten,
als wenn es schon angeschaltet gewesen wäre. Wenn der Alarm endet, schaltet sich das
Gerät wieder aus.
A. DATEN SUCHEN
1. SEQUENTIELLE SUCHE – durch drücken von oder .
2. DIREKTE SUCHE – geben Sie die Anfangszeichen des Eintrags ein, drücken Sie
dann die oder Tasten, um direkt zu suchen.
B. EDITING/DELETIN DATEN EDITIEREN/LÖSCHEN
Funktioniert wie im Telefonbuch Modus.
Beispiel: PASSPORT 321456796129
1. Drücken Sie die Tasten SHIFT + DEU (MEMO), um den Memomodus auszuwählen.
2. Geben Sie PASSPORT 321456796129 ein.
3. Drücken Sie zur Bestätigung die Taste ENTER.
A. EINTRÄGE SUCHEN
1. SEQUENTIELLE SUCHE (SEQUENTIAL SEARCH): Drücken Sie die Taste oder
2. DIREKTE SUCHE (DIRECT SEARCH): Funktioniert wie im Terminplaner-Modus.
B. ÄNDERUNG / LÖSCHEN DER EINTRAGUNGEN
Funktioniert wie im Telefonbuch Modus.
MEMO-MODUS
ALARMFUNKTION
Es ist möglich, drei verschiedene Alarmtypen auszuwählen. Der Typ des Alarms kann
auf die folgende Weise ausgewählt werden: Täglicher Alarm; Wochentag-Alarm,
Wochenend-Alarm; Sonntag-Alarm, Montag-Alarm, Dienstag-Alarm, Mittwoch-Alarm,
Donnerstag-Alarm, Freitag-Alarm, Samstag-Alarm.
5 Arten von Alarmmelodien sind vorhanden.
Wenn der Alarm eingestellt wurde, erscheint das Alarmsymbol (((.))).
Den täglichen Alarm auf 6:25 setzen, Melodietyp 2
Wenn die lokale Zeit die eingestellte Alarmzeit erreicht, wird der Alarm in Form der
eingestellten Melodie ertönen.
OPERATION ANZEIGE
Drücken Sie ALARM die Taste, um den Alarm Modus
anzuwählen. Verwenden Sie die oder Tasten, um
ALARM 1, 2, 3 auszuwählen.
Drücken Sie EDIT, um den gewünschten Alarmtyp
auszuwählen.
Mit Hilfe der Tasten oder können 10 verschiedene
Alarmtypen ausgewählt werden.
Drücken Sie und dann die Tasten oder
um die gewünschte Zeit und Melodie auszuwählen.
<ALARM 1>
AUS
--: -- -
<ALARM 1>
AUS
--: -- -
<ALARM 1>
SMDMDFS
00:00 1
<ALARM 1>
SMDMDFS
00:00 1
NTL460IM0036.indd 68-69 20/02/2006 15:02:34

70
Deutsch
71
Deutsch
GEHEIMMODUS – VERBORGENER SPEICHER
Eine gesonderte Liste von Daten kann durch den Geheimmodus gesichert werden.
Dieser steht in den TEL, SCHD und MEMO Modi zur Verfügung. Das Passwort kann
nur aus max. 6 Buchstaben (Groß- oder Kleinschreibung) bestehen.
Beispiel: Das Passwort “ABCD” eingeben
OPERATION ANZEIGE
Drücken Sie SHIFT + (MENU) um zum
Systemeinstellungsmodus zu gelangen, drücken Sie dann
zweimal oder direkt die Taste “3”, um den Passwort
Modus auszuwählen. Drücken Sie ENTER.
Geben Sie “ ABCD “ ein und drücken Sie dann ENTER.
Geben Sie dasselbe Passwort noch einmal ein.
Drücken Sie dann zur Bestätigung ENTER.
Zwei Sekunden später wird das Symbol angezeigt
und der Bildschirm kehrt zur eigentlichen Anzeige zurück.
Das wird nicht verschwinden, bis das Passwort wieder
eingegeben wurde.
PASSWT NU ?
_
WIEDER EINGE ?
_
WIEDER EINGE?
****-
GEISPECHERT !
1. TAST. TON
2. AUTO. AUS
3. PASSWT
Drücken Sie SHIFT + (MENU), um zum
Systemeinstellung smodus zu gelangen, drücken Sie
dann zweimal oder direkt die Taste “3”, umden Passwort Modus anzuwählen. Drücken
Sie ENTER.
Geben Sie “ABCD” ein und drücken Sie
dann ENTER. Das Symbol verschwindet.
Führen Sie dieselbe Prozedur, wie beim Einstellen eines
neuen Passworts durch. Dann zur Bestätigung ENTER
drücken.
2 Sekunden später kehrt der Bildschirm zur ursprünglichen
Anzeige zurück und das Passwort wurde geändert
PASSWT ?
_
PASSWT NU?
_
GEISPECHERT !
1. TAST. TON
2. AUTO. AUS
3. PASSWT
Anmerkung:
Um das Passwort zu löschen, geben Sie einfach keine Buchstaben ein und drücken
sofort ENTER in den “PASSWT NU?” und “WIEDER EINGE?” Spalten wurde das
Passwort nun gelöscht.
Oder drücken Sie SHIFT + EDIT, um den Editionsmodus zu verlassen.
OPERATION ANZEIGE
DAS PASSWORT EDITIEREN
Das vorhandene Passwort kann editiert oder gelöscht werden.
Beispiel: Passwort ändern in “CDEF”
TASCHENRECHNER MODUS
Trinkgelder/Rabatte berechnen:
Die gesetzte Höhe für Trinkgelder beträgt 10% und für Rabatte 5%.
Benutzen Sie für die Rabattberechnung und für die Trinkgeldberechnung.
Beispiel: Trinkgeldberechnung durchführen
Drücken Sie CAL/CONV um den CAL Modusanzuwählen.
Geben Sie z.B. 100 ein
für Trinkgelder
für Summe.
Drücken Sie ENTER, um das Berechnungsergebnis
zu speichern.
Drücken Sie , um die Höhe des Trinkgeldes
zu berechnen.
<RECHNER>
0.
< RECHNER >
100.
< RECHNER >
TIP
10.
< RECHNER >
TOTAL
110.
< RECHNER >
110.
< RECHNER >
TIP
11.
Drücken Sie CAL/CONV, um den CAL Modus anzuwählen.
für Trinkgelder.
Drücken Sie EDIT : Die vorgegebene Höhe des
Trinkgeldes erscheint und der Cursor blinkt.
Geben Sie z.B. “20” ein, wenn Sie den Betrag des
Trinkgelds ändern wollen.
Drücken Sie ENTER, der Betrag des Trinkgeldes
ist berechnet.
< RECHNER >
0.
< RECHNER >
TIP
0.
<CALCULATOR>
PROZENTSATZ
10.
< RECHNER >
PERCENTAGE
20.
< RECHNER >
0.
OPERATION ANZEIGE
OPERATION ANZEIGE
Einstellen der Höhe des Trinkgeldes/Rabattes
NTL460IM0036.indd 70-71 20/02/2006 15:02:37

72
Deutsch
73
Deutsch
UMRECHNUNGSMODUS
Drücken Sie CAL/CONV zweimal nacheinander für Währungsumrechnung, dreimal
für EURO Umrechnung und viermal für metrische Umrechnung.
1. Wie der neue Wert der Währung und der Wechselkurs gesetzt wird.
Beispiel: 1 HKD = 4,2 NTD ? HKD = 508,2 NTD
Drücken Sie die CAL/CONV Tasten zweimal, um zum
Währungsumrechnungs-Modus zu gelangen.
Drücken Sie oder um die gewünschten
Wechselwährungen auszuwählen.
Bsp.: JPY USD
Drücken Sie die EDIT Taste, um zum Einstellungsmodus
zu gelangen. Der 1. Buchstabe wird blinken und die RATE
wird auf “0” zurückgesetzt.
Geben Sie HKD ein, drücken Sie und geben
Sie NTD ein.
Drücken Sie , geben Sie den Kurs 4,2 ein und
drücken Sie die Taste um die Eingabe zuspeichern.
Drücken Sie (CAPS), der Kurs wird angezeigt
Geben Sie z.B. 508.2 ein um die Umrechnung zu erhalten.
Drücken Sie SHIF + EDIT, um zur anfänglichen Anzeige
zurückzukehren.
CAD USD
RATE=
1.
JPY USD
RATE=
1.
JPY USD
RATE=
0
HKD NTD_
RATE=
0.
HKD NTD
RATE=
4.2
HKD NTD
RATE=
0.238095238
HKD NTD
508.2
120.9999999
HKD NTD
RATE=
4.2
OPERATION ANZEIGE
2. EURO umrechnen
Beispiel: 500 EURO =? ATS
3. Das Benutzen der metrischen Umrechnung
Beispiel: 100 Meter = ? Fuß
Drücken Sie CAL/CONV dreimal hintereinander die
Tasten, um die EURO Umrechnung auszuwählen.
Drücken Sie die oder Tasten, um die gewünschte
EURO Umrechnung auszuwählen.
Geben Sie z.B. 500 ein, um die Umrechnung
auszuführen.
EURO ATS
RATE=
13.7603
EURO ATS
RATE=
13.7603
EURO ATS
500
6880.15
Drücken Sie viermal hintereinander die CAL/CONV Taste
um die metrische Umrechnung anzuwählen.
Drücken Sie die oder Taste, um nach
dem gewünschten Umrechnungspaar zu suchen.
Drücken Sie “ /CAPS.
Geben Sie z.B. “100” ein um die Umrechnung
auszuführen
inch cm
RATE=
2.54
feet m
RATE=
0.3048
feet m
RATE=
3.280839895
feet m
100
328.0839895
OPERATION ANZEIGE
OPERATION ANZEIGE
NTL460IM0036.indd 72-73 20/02/2006 15:02:39

74
Deutsch
75
Deutsch
SPIELEMODUS
Es gibt drei Spiele zur Auswahl: 777 Spiel, Snake Spiel and Hangman Spiel.
1. 777 Spiel
Drücken Sie die SHIFT+ESP (GAME) Tasten einmal, um
das 777 Spiel auszuwählen. Die Musik erklingt, wenn das
777 auf dem Bildschirm erscheint. “20” ist der eingestellte
Wetteinsatz (BET); Drücken Sie oder , um einen der
folgenden Wetteinsätze auszuwählen “5,10,15,20”.
Drücken Sie ENTER, um das Spiel zu starten.
Der Bildschirm wird ununterbrochen blinken.
Wenn der Spieler eine der unteren Kombinationen erhält,
bedeutet das, dass die Runde gewonnen wurde. Das
lachende Gesicht wird auf dem Bildschirm blinken und
das Geld wird im Verhältnis zur entsprechenden Gewinn/Verlustquote ausgezahlt und zum Gesamtgewinn addiert.
Wenn Sie verlieren, blinkt das Icon eines weinenden
Gesichts auf dem Schirm und das verlorene Geld
aus der Wette wird von Ihrem Gewinn abgezogen.
Wenn Ihr Gewinn 990 erreicht, wird der Bildschirm
anzeigen:
Oder wenn Sie Ihr ganzes Geld verloren haben und bei
000 angelangt sind, wird der Bildschirm anzeigen:
Anmerkung:
Drücken Sie SHIFT + EDIT Tasten, um das Spiel zu verlassen.
Fensterkombinationen und die entsprechende Gewinn-/Verlustrate:
OPERATION ANZEIGE
2. Snake Spiel
Drücken Sie die Taste , um die Schlange
zubewegen.
Wenn die Schlange auf Wände trifft oder ihren eigenen
Körper berührt, geht ein Versuch, bzw. Leben verloren.
Ansonsten wird die Schlange eine Zollstelle passieren.
Wenn alle Zollstellen einer Geschwindigkeitsstufe
passiert wurden, wird “PASS” auf dem Bildschirm
erscheinen. Drücken Sie eine beliebige Taste, um die
nächste Geschwindigkeitsstufe zu starten. Die
Geschwindigkeit mit der sich die Schlange bewegt ist hier
höher.
Wenn alle Leben verloren sind, wird der Bildschirm
“GAME OVER” anzeigen. Drücken Sie eine beliebige
Taste, um ein neues Spiel zu starten.
Drücken Sie dreimal hintereinander die SHIFT+ESP(GAME)
Tasten, um das Hangman Spiel auszuwählen.
Die eingestellte Anzahl für Versuche ist 5, es kann zwischen
4 und 9 ausgewählt werden.
Drücken Sie die Taste, um die Zahl der Versuche zu
erhöhen oder die Taste, um sie zu reduzieren und drücken
Sie dann ENTER.
Geben Sie die Buchstaben ein, die Sie raten, um das Wort zu
finden. (Bsp. a d e s t l m n o).
(Das Wiederholen eines Buchstabens verringert
nicht die Anzahl der Versuche).
Wenn Sie das Wort innerhalb der gewählten Zahl von
Versuchen richtig geraten haben. (Bsp. Eingabe “g”).
Oder:
Dann erscheint wieder der Anfangsschirm.
HANGMAN
Versuche : 5
HANGMAN
Versuche : 7
_ _ _ _ _ _
HANGMAN
Versuche : 3
_ olden
HANGMAN
GEWONNEN!
golden
HANGMAN
VERLOREN !
golden
HANGMAN
Versuche : 5
OPERATION ANZEIGE
GAME OVER!
OPERATION ANZEIGE
Achtung: Die zu erratenen Wörter werden nur auf Englisch angezeigt.
Anmerkung:
Drücken Sie die SHIFT EDIT Tasten, um das Spiel zu verlassen.
Anmerkung:
Drücken Sie die SHIFT+EDIT Tasten, um das Spiel zu verlassen.
3. Hangman Spiel
Drücken Sie zweimal hintereinander die SHIFT+ ESP
(GAME) Taste, um das Snake Spiel auszuwählen.
1. Die Musik erschallt, sobald das Startbild erscheint.
2. “S0L0” zeigt Anfangsgeschwindigkeit und Level an.
3. Die zweite Zeile zeigt die Versuche, bzw. Leben an.
4. Die dritte Zeile zeigt die Punktzahl an.
OPERATION ANZEIGE
NTL460IM0036.indd 74-75 20/02/2006 15:02:42

76
Deutsch
77
Deutsch
Anhang
Anhang 1
FRF Französischer Franc Frankreich 1 Euro = 6,55957 FRF
DEM Deutsche Mark Deutschland 1 Euro = 1,95583 FRF
IEP Irisches Pfund Irland 1 Euro = 0,787564 IEP
ESP Spanische Peseta Spanien 1 Euro = 166,386 ESP
ITL Italienische Lira Italien 1 Euro = 1936,27 ITL
ATS Österreichischer Schilling Österreich 1 Euro = 13,7603 ATS
BEF Belgischer Franc Belgien 1 Euro = 40,3399 BEF
FIM Finnmark Finnland 1 Euro = 5,94573 FIM
LUF Luxemburger Franc Luxemburg 1 Euro = 40,3399 LUF
NLG Niederländischer Gulden Niederlande 1 Euro = 2,20371 NLG
PTE Portugiesischer Escudo Portugal 1 Euro = 200,482 PTE
Code Währung Land Kurs
BATTERIEN WECHSLEN
Dieses Produkt funktioniert mit 1 x CR2032 Batterie.
1. Schalten Sie das Gerät ab.
2. Lösen und entfernen Sie den Batteriedeckel auf der Rückseite des Gerätes.
3. Entfernen Sie die Batterien und legen Sie die neuen Batterien ein.
4. Schließen Sie das Batteriefach.
5. Drücken Sie eine beliebige Taste außer ENTER , um RESET zu überspringen und
den Verlust von vorher gespeicherten Daten zu vermeiden.
Achten Sie darauf, dass Sie die Batterien innerhalb einer Minute gewechselt haben.
Wenn keine Taste gedrückt wird, aktiviert sich „automatisches Ausschalten“ sobald
die gesetzte Zeit für automatisches Ausschalten erreicht ist. Drücken Sie wieder die
Taste, um den Organisator neu zu starten.
Benutzen Sie keine wiederaufladbaren Batterien. Laden Sie die Batterien, die Sie benutzen, nicht wieder auf. Entfernen Sie leere Batterien umgehend, um das Risiko von
Auslauf/Korrosion zu vermeiden. Wenn Batterieflüssigkeit ausläuft und in Kontakt mit Ihren
Augen oder Ihrer Haut kommt, waschen Sie die Stellen sofort mit sehr viel Wasser. Stellen
Sie sicher, dass die Batterien richtig eingelegt wurden, indem Sie die + und – Zeichen der
Batterie beachten.
Wechseln Sie alle Batterien auf einmal aus. Nur Batterien des gleichen oder ähnlichen
Typs, wie der empfohlene, dürfen verwendet werden. Verwenden Sie nicht alte und neue
Batterien oder Batterien unterschiedlichen Typs gleichzeitig.
Entfernen Sie die Batterien, wenn das Gerät für längere Zeit nicht benutzt wird. Wiederaufladbare Batterien müssen aus dem Gerät genommen werden, bevor Sie wieder aufgeladen werden. Wiederaufladbare Batterien dürfen nur unter Aufsicht von Erwachsenen
aufgeladen werden. Nicht-wiederaufladbare Batterien dürfen nicht wieder aufgeladen
werden. Die Stromanschlüsse dürfen nicht kurzgeschlossen werden.
WARNUNG: Wenn das Gerät nur fehlerhaft arbeitet oder einen elektrostatischen
Schock erfährt, schalten Sie das Gerät aus und wieder ein. Wenn sich das als
nicht ausreichend erweisen sollte, entfernen Sie die Batterien. Das wird das
Produkt zurücksetzen (reset) und sollte ale Fehlfunktionen beheben.
Wenn der Ton schwächer wird oder das Gerät nicht mehr reagiert, müssen Sie die Batterien
wechseln.
SCHUTZMASSNAHMEN
GARANTIE
Setzen Sie das Gerät weder direkter Sonneneinstrahlung, noch hohen oder niedrigen
Temperaturen, Wasser, Feuchtigkeit oder Staub aus.
Lassen Sie das Gerät nicht fallen. Es könnte irreparabel beschädigt werden.
Verwenden Sie keine Waschmittel, Reinigungs- oder Lösungsmittel, um das Gerät zu reinigen.
Halten Sie das Gerät nicht an starke Magnetquellen (z. B.: Lautsprecher) oder statisch
aufgeladene Quellen.
Bauen Sie das Gerät nicht auseinander. Ihr Garantieanspruch wird hinfällig.
Verbiegen oder verdrehen Sie das Gerät nicht.
Wir empfehlen dringend, dass Sie einen Ausdruck Ihrer Daten anlegen. Grundsätzlich besteht
bei jedem elektronischen Speicher die Gefahr von Datenverlusten. Wir übernehmen keine
Verantwortung für den Verlust von Daten aufgrund von fehlerhafter Verwendung, fehlerhafter
Reparatur, Batterieaustausch oder leeren Batterien.
Die Garantiezeit für dieses Gerät beläuft sich auf 2 Jahre.
Um die Garantie oder den Kundendienst in Anspruch zu nehmen, setzen Sie sich bitte mit
Ihrem Händler oder Lieferanten in Verbindung oder senden Sie das Gerät an die unten
angegebene Adresse ein. Fügen Sie Ihren Kaufbeleg bei.
Hinweis: Die Garantie gilt nicht für defekte LCD-Bildschirme.
Es liegt in der Natur von Geräten mit elektronischer Speicherfunktion, dass die Daten im
Speicher in sehr seltenen Fällen verloren gehen können. Lexibook übernimmt keine Haftung
für Datenverluste aufgrund von Missbrauch, Reparaturversuchen, Fehlern, Batterieaustausch,
Verwendung von abgelaufenen Batterien oder unter anderen Umständen. Darüber hinaus
übernehmen wir keine direkte oder indirekte Haftung für finanzielle Verluste oder Ansprüche
Dritter, die auf der Benutzung dieses Produkts beruhen. Unsere Garantie bezieht sich auf
Material- und Verarbeitungsfehler des Herstellers, nicht jedoch auf Verschleiß,
Nichteinhaltung der Anleitungen, unautorisierte Arbeiten am Gerät und dessen Bestandteilen
(Demontage, Hitze, Dampf usw.).
Hinweis: Wir empfehlen, dass Sie die Originalverpackung für spätere Zwecke aufbewahren.
Bewahren Sie diese Bedienungsanleitung an einem sicheren Ort auf, da sie wichtige
Informationen enthält.
Haftungsausschluss
Wir verbessern unsere Produkte, deren Farben und Produktdetails ständig, daher kann Ihr
Produkt leicht von der Abbildung auf der Verpackung abweichen.
Referenz: NTL460
Garantie: 2 Jahre
©2006 LEXIBOOK®
Design und Entwicklung in Europa - Made in China
Kundendienst
LEXIBOOK S.A
2, avenue de Scandinavie
91953 Courtaboeuf Cedex France
Tel. Technischer Service : 0892 23 27 26 (0,34 € TTC/Min)
Site Internet : www.lexibook.com
Umweltschutz
Elektronische Geräte können aufbereitet werden und dürfen nicht im Haushaltsmüll
entsorgt werden. Bitte unterstützen Sie die Wiederaufbereitung und schützen Sie die
Umwelt, indem Sie Altgeräte entsprechend der Umweltschutzbestimmungen entsorgen
bzw. abgeben.
NTL460IM0036.indd 76-77 20/02/2006 15:02:42

78
Nederlands
79
Nederlands
INTRODUCTIE
ALVORENS TE BEGINNEN
HET SYSTEEM INSTELLEN
HOOFDLETTERS EN KLEINE LETTERS OMZETTEN
WISSELEN TUSSEN KARAKTER- EN NUMMER-INVOER
EIGEN TIJD INSTELLEN
WERELDTIJD ZOEKEN
TOEPASSING VERTALER
ZIN MODUS
TOEPASSING TELEFOON
TOEPASSING AGENDA
TOEPASSING MEMO
ALARM FUNCTIE
GEHEIM GEHEUGEN
TOEPASSING REKENMACHINE
TOEPASSING CONVERSIE
SPELLETJE
BATTERIJEN VERVANGEN
UIT VOORZORG
WAARBORG
79
79
79
80
80
80
81
82
83
84
85
86
87
87
89
90
92
94
95
95
INHOUDSOPGAVE
INTRODUCTIE
Wij danken u voor uw aankoop van deze NTL460 vertaler in 4 talen. Dit product is
ontworpen om u te assisteren bij het vertalen van woorden in het Engels, Frans,
Spaans en Duits.
De gegevensbank bevat 30.000 woorden in elke taal, alsook 150 gesprekzinnen
per taal en die in 10 verschillende categorieën zijn onverdeeld om een gemakkelijke
toegang en gebruik te waarborgen. De NTL460 is ontworpen u bij een normaal gebruik
vele jaren van dienst te zijn. Volg deze instructies zorgvuldig om een correcte werking
te waarborgen.
Verwijder de plastic batterij beschermingsstrip voordat u de Vertaler voor het eerst
gebruikt.
Schroef het klepje van het batterijvakje aan de achterkant van het apparaat los en
verwijder deze.
Verwijder de batterijen die in plastic verpakt zijn.
Verwijder het plastic van de batterijen en plaats ze terug op de juiste wijze.
Zet het apparaat op reset alvorens te gebruiken – zie de reset- procedure verderop.
- De RESET-knop vindt u aan de achterkant van de calculator.
- Druk zachtjes met een een dun, puntig voorwerp op het knopje. RESET verschijnt op
het display.
- Toets ENTER om te bevestigen. Deze werking kan een paar seconden duren.
N.B. : RESET wist alle informatie die is opgeslagen en wist de geheime code wanneer
het apparaat al is gebruikt.
Opmerkingen:
- indien een functietoets wordt ingedrukt, wordt de reset geannuleerd en zal de functie
worden opgestart.
- Druk een andere toets om de reset modus te verlaten en activeer de Home Time
modus.
Openen en sluiten van de eenheid
Druk op de centrale knop vooraan. De sluithaak komt los en de eenheid kan worden
geopend.
Om dit opnieuw te sluiten, druk het lid zacht naar beneden.
Vooraleer de eenheid op te starten, moet het etiket uit doorschijnende folie van het LCD
scherm worden verwijderd door aan het treklipje te trekken.
Toets SHIFT + (MENU) voor de ‘system setting mode’, gebruik de toetsen of
toets het corresponderende nummer om door de volgende onderwerpen te scrollen:
1. KEY TONE : Toets ENTER voor instellen van toetsgeluid. Binnen de standaard
instelling staat het geluid aan, toets om ON/OFF te selecteren.
2. AUTO OFF : Toets ENTER voor instellen automatische uitschakeling. De standaard
instelling is 5 minuten, toets of om te kiezen uit de volgende mogelijkheden:
3 MINUTEN, 5 MINUTEN, 7 MINUTEN.
ALVORENS TE BEGINNEN
HET SYSTEEM INSTELLEN
NTL460IM0036.indd 78-79 20/02/2006 15:02:43

80
Nederlands
81
Nederlands
3. PASSWORD : Toets ENTER voor instellen geheime code.
(Kijk voor details bij SECRET MODE).
4. CONTRAST: Toets ENTER voor instellen contrast. Het standard ingestelde contrast
is 05. Toets om te scrollen van 01 naar 08.
5. LANGUAGE : Toets ENTER om een taal te selecteren. De standard ingestelde
taal is ENGELS. Toets om in de volgende volgorde te scrollen: ENGLISH,
DEUTSCH, FRANÇAIS, ESPAÑOL.
6. CHIME : Toets ENTER om het alarm ON/OFF te zetten. Het alarm staat in eerste
instantie uit, toets om ON/OFF te selecteren. Als het alarm aan staat
verschijnt het ikoon op de display en een “Beep, Beep” alarm gaat elk uur af.
7. SCHD ALARM : Toets ENTER om agenda-alarm aan of uit te zetten. Toets
om ON/OFF te selecteren.
8. HOME CITY: Toets ENTER om woonplaats te kiezen. U kunt de plaatsnaam
invoeren om de plaatsnaam in de Home Time mode te wijzigen. Na aanpassing
wordt deze kolom automatisch weer blanco.
9. MEMORY: Toets ENTER. Het beschikbare geheugen wordt zichtbaar gedurende 2
seconden.
Toets SHIFT + (CAPS) om het alfabet in hoofdletters of kleine letters om te zetten.
M.b.t. TELEPHONE, MEMO en SCHEDULE invoer, toets NUM één keer om naar
nummerinvoer te gaan en nog eens om terug te keren naar karakterinvoer.
HOOFDLETTERS EN KLEINE LETTERS OMZETTEN
WISSELEN TUSSEN KARAKTER- EN NUMMER – INVOER
EIGEN TIJD INSTELLEN
WERKING FUNCTIES DISPLAY
Toets SHIFT + CAL/CONV (HT) om HOME TIME te
selecteren (symbool op display), toets dan EDIT .
Toets totdat de stad binnen uw tijdzone verschijnt.
Toets dan om de cursor naar de 2e regel te verplaatsen.
Toets dan om gewenst jaar, maand
en dag te selecteren
Volg dezelfde bovenstaande procedure voor het
instellen van de tijd.
Toets ENTER om de invoer te bevestigen.
NYC # DOM
2006-01-01
00:00:08
ROM # DOM
2006-01-01
00:01:02
ROM # MAR
2006-12-12
00:01:48
ROM # MAR
2006-12-12
16:30:00
ROM # MAR
2006 -12-12
16:30:12
1. Toets SHIFT + ALARM (WT) voor instellen wereldtijd (symbool op display).
2. Toets om gewenste stad te zoeken, toets ENTER om de invoer te
bevestigen. Er zijn 43 hoofd wereldtijd-steden.
WERELDTIJD ZOEKEN
ZONE PLAATSNAAM AFKORTING ONDERSCHEID
01
02
03
04
05
06
07
08
09
10
11
12
13
14
15
16
17
18
19
20
21
22
23
24
25
26
27
28
29
30
31
32
33
34
35
36
37
38
39
40
41
42
43
LONDEN
LISSABON
PARIJS
BERLIJN
ROME
AMSTERDAM
MADRID
HELSINKI
CAIRO
MOSKOU
RIIAD
TEHERAN
DUBAI
KABUL
KARACHI
DELHI
DHAKA
YANGON
BANGKOK
PEKING
HONG KONG
SINGAPORE
TOKIO
ADELAIDA
SYDNEY
GUAM
NOUMEA
WELLINGTON
AUCKLAND
TONGA
MIDWAY
HONOLULU
ANCHORAGE
LOS ANGELES
DENVER
CHICAGO
NEW YORK
TORONTO
CARACAS
RIO DE JANEIRO
----MID ATLANTIC
AZOREN
LON
LIS
PAR
BER
ROM
AMS
MAD
HEL
CAI
MOW
RUH
THR
DXB
KBL
KHI
DEL
DAC
RNG
BKK
BEI
HKG
SIN
TYO
ADL
SYD
GUM
NOU
WLG
AKL
TNG
MID
HNL
ANC
LAX
DEN
CHI
NYC
YYZ
CCS
RIO
-2H
MAT
AZO
+0
+0
+1
+1
+1
+1
+1
+2
+2
+3
+3
+3.5
+4
+4.5
+5
+5.5
+6
+6.5
+7
+8
+8
+8
+9
+9.5
+10
+10
+11
+12
+12
+13
-11
-10
-9
-8
-7
-6
-5
-5
-4
-3
-2
-2
-1
De Home Time samenstelling is een 24-uurs samenstelling en de datum-samenstelling
is JJJJ/MM/DD.
Toets alvorens de tijd in te stellen DST voor het verkrijgen van de zomertijd.
NTL460IM0036.indd 80-81 20/02/2006 15:02:47

82
Nederlands
83
Nederlands
TOEPASSING VERTALER
Er zijn 4-Vertalers met Engels, Spaans, Frans, Duits.
Voor elke taal zijn er 10 000 woorden beschikbaar.
Toets d.m.v. de functietoetsen één van de 4 talen in voor toepassing van de Vertaler. De
taal die u selecteert is de brontekst. De brontekst kan alleen veranderd worden wanneer u
van een andere toepassing (mode) naar de Vertaler toepassing (mode) gaat.
Bijvoorbeeld, toets voor de toepassing van de Vertaler, op het display verschijnt
“ENGLISH:” (Als er een andere taal functietoets is ingetoetst, verschijnt de overeenkomstige
taal), voer een te vertalen woord in, de woorden uit de index verschijnen gelijktijdig op het
display. U kunt het gewenste word direct invoeren of u gebruikt om het woord uit de
index te selecteren, toets dan ENTER om de vertaling te voltooien.
Als het woord beschikbaar is verschijnt de vertaling op het scherm. U kunt nu de
8 taalfuncties intoetsen om door te gaan met vertalen, toets dan om de vertaling
van het vorige/volgende woord te bekijken of voer een ander woord ter vertaling in.
Indien het woord niet beschikbaar is, gaat het naar SPELLING CHECK toepassing.
Voorbeeld 1: Maak een vertaling
WERKING FUNCTIES DISPLAY
Druk op toets om de vertalingmodus op te starten.
Voer “be” in. De woorden van de index verschijnen
gelijktijdig.
Vervolg invoer van het woord en kies het.
gewenste woord op het display. Bijvoorbeeld,
begin (to) en toets ENTER.
Druk op de toets voor de gewenste taal,
Bijvoorbeeld spaans : ESP
Of Toets FRA.
U kunt toetsen om terug te keren naar het voorgaande
woord.
ENGLISH :
be_
beach
beachwear
Beg_
Beginner_
beginning
E: begin (to)
S: empezar
E : begin (to)
F : commencer
E : beginning
F : commencement
Een zin kan in de vier beschikbare zinnen worden vertaald.
Gebruik van de Zin modus
1. Druk op de PHRA toets en selecteer de ZIN modus.
2. Het scherm toont heel kort de ‘taal’, die in het systeem werd ingesteld, Bijv. Engels
(standaard) en toont dan de eerste optie in de ZIN modus.
3. De eerste categorie BUSINESS wordt afgebeeld. Druk op ENTER om tot deze
categorie toegang te krijgen.
4. Of druk op om een nieuwe categorie te bekijken. Wanneer de gewenste
categorie wordt afgebeeld, druk dan op ENTER om te bevestigen. De eerste zin van
de categorie wordt afgebeeld.
5. Druk op om de volgende zin op de lijst te bekijken. Druk op om de vorige zin op
de lijst te bekijken.
6. Druk op een taaltoets om de vertaling in de doeltaal te bekijken.
7. Druk op een andere taaltoets, en bekijk de vertaling in een andere taal.
8. Is de zin te lang, kunt u aan de hand van en op- en afrollen.
9. Om doorheen de zinnen binnen een categorie te rollen, druk op of .
10. Om terug naar de zinnenlijst te keren, druk herhaaldelijk op .
ZIN MODUS
Er zijn 600 zinnen en uitdrukkingen, onderverdeeld in 10 categorieën:
1. BUSINESS
2. RESTAURANT
3. HOTEL
4. IN DE STAD
5. RONDREIZEN
6. NOODSITUATIES
7. ONTSPANNING
8. BANK/POST/TELEFOON
9. VLIEGHAVEN
10. ALGEMENE ZINNEN
NTL460IM0036.indd 82-83 20/02/2006 15:02:50

84
Nederlands
85
Nederlands
Opmerking :
De volgende symbolen kunnen worden verkregen door SHIFT + SPACE te toetsen
en dan herhaaldelijk te toetsen:
Toets één van de volgende karakters en toets dan herhaaldelijk EURO om de gewenste
letters met leestekens te verkrijgen.
TOEPASSING TELEFOON
Er zijn twee soorten telefoonbestanden – ZAKELIJK & PRIVÉ.
Toets SHIFT + ENG (TEL) één keer voor PRIVÉ toepassing en twee keer voor
toepassing ZAKELIJK.
Max. 10 regels kunnen worden ingevoerd op één veld. Voorbeeld: ZAKELIJK:
(NAAM) JOHN SMITH, (ADRES) NEW YORK (TEL. NO.) 111-123-2143,(FAX NO.)
345-456-1256, (NOTITIE) VRIENDEN.
WERKING FUNCTIES DISPLAY
Toets SHIFT + ENG (TEL) en toets dan om ZAKELIJK te
selecteren
Voer in JOHN SMITH en toets ENTER
Voer in NEW YORK en toets ENTER.
Toets om naar nummer invoer te gaan.
Voer dan in 111-123-2143 en toets ENTER.
Voer in 345-456-1256 en toets ENTER .
Toets weer NUM om terug te keren naar karakter invoer.
Voer in “VRIEND” toets dan ENTER om uw invoer te
bevestigen.
2 seconden later verschijnen de gegevens op uw scherm.
<BUSINESS>
NAME
JOHN SMITH
ADDRESS :
JOHN SMITH
TEL#:
NEW YORK
111123211
NEW YORK
111123211
345456125
STORED !
JOHN SMITH
NEW YORK
111123211
PERSOONLIJKE GEGEVENS
A. GEGEVENS ZOEKEN
1. Toets SHIFT + ENG (TEL) voor PERSOONLIJKE gegevens.
2. Gebruik om op alfabetische volgorde te zoeken of voer
initialen in en toets of om de gewenste gegevens te vinden.
B. ALLE GEGEVENS BEKIJKEN
Toets om alle gegevens te bekijken.
C. GEGEVENS AANPASSEN
1. Roep de aan te passen gegevens op. Toets om gegevens aan te kunnen passen.
2. De standaard instelling is ‘nieuwe invoer toevoegen’. Gebruik om de
cursor naar de gewenste positie te brengen.
3. Toets om 1 karakter of cijfer te wissen en toets SHIFT + (INS) om te wisselen
tussen invoeg- en overschrijf-instelling.
4. Voer nieuwe gegevens in.
5. Toets ENTER.
6. Of toets SHIFT + EDIT voor beëindigen aanpassen gegevens.
D. GEGEVENS WISSEN
1. Zoek de te wissen gegevens.
2. Toets SHIFT + BS (DEL),”DELETE?” verschijnt op het display.
3. Toets ENTER, “DELETED!” verschijnt op het display en de gegevens zijn gewist.
NB: Als SHIFT + BS (DEL) per ongeluk is ingetoetst, druk dan eenvoudig op een
willekeurig andere toets, behalve ENTER om wissen te voorkomen.
ZAKELIJKE GEGEVENS
Gelijk aan de toepassing voor persoonlijke gegevens.
1. Kan data met afspraken opslaan (de standaard datum is dezelfde als de Home Time
datum), Tijd en Omschrijving. Max. 10 regels kunnen worden ingevoerd.
TOEPASSING AGENDA
WERKING FUNCTIES DISPLAY
Toets SHIFT + FRA (SCHD) voor werking agenda
Voer in MEETING toets dan enkele keren om de
cursor naar de datum kolom te verplaatsen.
Voer in 2000, 12, 31(Jaar, maand, Dag) 12,30
(Uur, Minuten).
Toets ENTER om de invoer te bevestigen
2006/01/01
PLAN:
2006/01/01
00 :00
NEW MEETING
NEW MEETING
STORED!
NTL460IM0036.indd 84-85 20/02/2006 15:02:53

86
Nederlands
87
Nederlands
2. Indien u er een afspraakalarm aan wilt koppelen, moet u SCHD ALARM ON instellen
in System Setting mode.
3. Voorbeeld: NIEUWE AFSPRAAK 2000/12/31 12:30 (Afspraak alarm staat aan).
Remark :
U kunt ook slechts een omschrijving invoeren en dan ENTER toetsen om op te slaan.
Er is dan geen afspraak alarm.
Als het afspraak-alarm is ingeschakeld (verschijnt (((/))) ikoon op het display).
Als de power aan staat,ongeacht binnen welke toepassing, en de eigen ingestelde
tijd bereikt de tijd van de afspraak in de agenda mèt ingeschakeld alarm, dan gaat
het alarm af gedurende 1 minuut en op het scherm verschijnt de geplande afspraak
druk op een willekeurige toets om het geluid te stoppen. Als de power uit staat, en
de eigen ingestelde tijd bereikt de tijd van de afspraak in de agenda met ingeschakeld
alarm, dan schakelt de organizer aan en wordt dezelfde procedure gevolgd als met
power aan. Als het alarmgeluid stopt, schakelt de power weer uit.
A. GEGEVENS ZOEKEN
1. OPEENVOLGEND ZOEKEN – door te toetsen.
2. DIRECT ZOEKEN – voer de eerste letters van het gegeven in, toets dan of voor
direct zoeken.
B. AANPASSEN/WISSEN GEGEVENS
Gelijk aan toepassing binnen telefoon.
Voorbeeld: PASPOORT 321456796129
1. Toets SHIFT + DEU (MEMO) voor toepassing memo.
2. Voer in PASPOORT 321456796129.
3. Toets ENTER om de invoer te bevestigen
A. GEGEVENS ZOEKEN
1. OPEENVOLGEND ZOEKEN – door of te toetsen.
2. DIRECT ZOEKEN –gelijk aan toepassing binnen agenda.
B. AANPASSEN/WISSEN GEGEVENS
Gelijk aan toepassing binnen telefoon.
TOEPASSING MEMO
ALARM GEHEUGEN
Het is mogelijk om 3 alarmen te selecteren. Het type alarm kan als volgt geselecteerd
worden: Dagelijks alarm, Werkdag alarm, Weekend alarm, Zondag alarm, Maandag
alarm, Dinsdag alarm, Woensdag alarm, Donderdag alarm, Vrijdag alarm, Zaterdag
alarm.
WERKING FUNCTIES DISPLAY
Toets ALARM voor toepassing alarm.
Gebruik om ALARM 1, 2, 3 te
selecteren
Toets EDIT om het gewenste alarmtype te
selecteren
Met de of toetsen zijn 10 soorten alarmen
beschikbaar voor selectie.
Toets dan of om de tijd en de
gewenste melodie te selecteren.
<ALARM 1>
OFF
--: -- -
<ALARM 1>
OFF
--: -- -
<ALARMA 2>
DLMMJVS
--:-- 1
<ALARM 1>
SMTWTFS
00:00 1
Er zijn 5 verschillende alarm melodieën beschikbaar.
Als het alarm is ingesteld, verschijnt het (((.))) symbool op het display. Instellen
dagelijks alarm om 6:25, melodie type 2:
GEHEIM GEHEUGEN
Een aparte lijst met gegevens kan worden verborgen middels het geheime geheugen, dat
beschikbaar is in de TEL, SCHD en MEMO toepassingen.
Het wachtwoord mag alleen bestaan uit karakters (hoofdletters of kleine letters) en max. 6.
Voorbeeld: Voer het wachtwoord “ABCD” in
WERKING FUNCTIES DISPLAY
Toets SHIFT + (MENU) voor system setting mode,
toets dan twee keer of toets meteen “3” om
wachtwoord te selecteren. Toets ENTER .
Voer in “ABCD” dan ENTER.
Voer hetzelfde wachtwoord nogmaals in.
Toets dan ENTER om de invoer te bevestigen.
2 seconden later, verschijnt ikoon op het
display en keert het scherm terug naar het
originele display. Het ikoon verschijnt niet
meer tot het wachtwoord opnieuw wordt ingevoerd.
NEW PSSWD?
_
RE-ENTER?
RE-ENTER?
****-
STORED!
1. KEY TONE
2. AUTO OFF
3. PASSWORD
NTL460IM0036.indd 86-87 20/02/2006 15:02:56

88
Nederlands
89
Nederlands
Toets SHIFT + UP(MENU) voor system setting
mode, toets dan twee keer of toets meteen “3” om
wachtwoord te selecteren. Toets ENTER.
Voer in “ABCD” toets dan ENTER
Het ikoon verschijnt.
Volg dezelfde procedure als bij het instellen van een
nieuw wachtwoord. Toets ENTER dan om de invoer te
bevestigen.
2 seconden later keert het scherm terug naar het
originele display en het wachtwoord is gewijzigd.
PASSWORD ?
_
NEW PSSWD ?
_
STORED!
1. KEY TONE
2. AUTO OFF
3. PASSWORD
Om wachtwoord buiten werking te stellen voert u geen karakters in en toetst u
ENTER in de “NEW PSSWD?” en in de “RE-ENTER?” kolommen, het wachtwoord is
nu buiten werking gesteld.
U kunt SHIFT + EDIT toetsen om de aanpasmogelijkheid te onderbreken.
WERKING FUNCTIES DISPLAY
AANPASSEN WACHTWOORD
Het bestaande wachtwoord kan worden veranderd of buiten werking worden gesteld.
Voorbeeld: Verander wachtwoord naar “CDEF”. Opmerking :
TOEPASSING REKENMACHINE
Fooi/korting berekening:
De standaard fooiwaarde is 10% en de standaard kortingwaarde is 5%.
Gebruik voor kortingberekeningen en voor de fooiberekeningen.
Bijvoorbeeld: Voer een fooiberekening uit
Toets om CAL/CONV mode te selecteren.
Voer bijvoorbeeld 100 in.
Toets voor weergave fooien.
Toets voor weergave totaal.
Toets ENTER om op te slaan in resultaat berekening.
<CALCULATOR>
0.
<CALCULATOR>
100.
<CALCULATOR>
TIP
10.
<CALCULATOR>
TOTAL
110.
<CALCULATOR>
110.
Toets om CAL/CONV mode te selecteren.
Toets voor fooien.
Toets EDIT : Ingestelde waarde verschijnt op display en
de cursor knippert.
Voer in bijvoorbeeld “20” indien u het fooibedrag wilt
veranderen.
Toets dan ENTER: Fooi is ingesteld.
<CALCULATOR>
0.
<CALCULATOR>
TIP
0.
<CALCULATOR>
PERCENTAGE
10.
<CALCULATOR>
PERCENTAGE
20.
<CALCULATOR>
0.
WERKING FUNCTIES DISPLAY
WERKING FUNCTIES DISPLAY
Opmerking: Hetzelfde dient worden uitgevoerd bij een kortingberekening maar gebruik .
Kortingswaarde is 5%
Gebruik voor kortingsberekeningen en voor fooiberekeningen
Voorbeeld: Fooiberekening uitvoeren
NTL460IM0036.indd 88-89 20/02/2006 15:02:58

90
Nederlands
91
Nederlands
TOEPASSING CONVERSE
Druk tweemaal op de toets CAL/CONV, de een na de andere, voor een valutaconversie,
drie maal voor een euro conversie en vier maal voor een metrische conversie.
1. Hoe de nieuwe valutakoers instellen en hoe omzetten?
Bijvoorbeeld: 1 HKD = 4, 2 NTD? 1 HKD = 508, 2 NTD
Toets CAL/CONV twee keer voor toepassing valuta
conversie.
Toets of om de gewenste valuta conversie
te selecteren.
BV: JPY USD
Toets EDIT om in te kunnen stellen, het eerste
karakter knippert en de koers wordt “0”.
Voer in HKD, toets en toets dan NTD.
Toets en voer dan de koerswaarde van 4.2 in
en toets ENTER om op te slaan.
Toets (CAPS) de koers verschijnt op het display.
Voer in bijvoorbeeld 508.2 voor het verkrijgen van de
conversie.
Toets SHIFT + EDIT om terug te keren naar het
oorspronkelijke scherm.
CAD USD
RATE=
1.
JPY USD
RATE=
1.
JPY USD
RATE=
0
HKD NTD_
RATE=
0.
HKD NTD
RATE=
4.2
HKD NTD
RATE=
0.238095238
HKD NTD
508.2
120.99999999
HKD NTD
RATE =
4.2
WERKING FUNCTIES DISPLAY
2. EURO omzetter
Bijvoorbeeld: 500 EURO =? ATS
3. Metrische conversie
Bijvoorbeeld: 100 meter =? Feet
Toets 3 keer achter elkaar CAL/CONV om EURO
conversie te selecteren.
Toets of om de gewenste EURO conversie te
selecteren.
Voer bijvoorbeeld 500 in voor het verkrijgen van de conversie
EURO ATS
RATE=
13.7603
EURO ATS
RATE=
13.7603
EURO ATS
500
6880.15
Toets 4 keer achter elkaar CAL/CONV om de metriek
conversie te selecteren
Toets of om de gewenste conversie set te
selecteren.
Toets /CAPS.
Voer bijvoorbeeld “100” in voor het verkrijgen van de
conversie.
inch cm
RATE=
2.54
feet m
RATE=
0.3048
feet m
RATE=
3.280839895
feet m
100
328.0839895
WERKING FUNCTIES DISPLAY
WERKING FUNCTIES DISPLAY
NTL460IM0036.indd 90-91 20/02/2006 15:03:00

92
Nederlands
93
Nederlands
SPELLETJES
Er zijn drie spelletjes waaruit u kan kiezen: 777 Game, Snake Game and Hangman
Game (galgje).
Toets SHIFT + ESP (GAME) één keer om 777 Game te
selecteren.
Muziekje speelt wanneer 777 game scherm verschijnt.
“20” is de standaard ingestelde BET; toet voor
het volgende BET “5,10,15,20”.
Toets ENTER om het spel te beginnen. Het scherm knippert
continu.
Als de speler één van onderstaande combinaties
krijgt he eft hij de ronde gewonnen. Het lachebekje knippert
op het scherm en het geld wordt uitgekeerd
overeenkomstig de ratio en opgeteld bij het totale bedrag
Als u verliest verschijnt het huilebalkje op het scherm en
wordt het bedrag van de laatste gok afgetrokken van het
totaalbedrag
Als het totaal een bedrag van 990 bereikt, verschijnt op
het display:
Anders: u heeft al uw geld verloren en de score is
000, op het display verschijnt:
Opmerkingen:
Druk SHIFT + EDIT om het spel te verlaten.
Combinaties en hun corresponderende ratio:
WERKING FUNCTIES DISPLAY
2. Snake game
Toets SHIFT + ESP (GAME) twee keer om Snake Game
te selecteren.
1. Muziek klinkt wanneer het beginscherm op het
display verschijnt.
2. “S0L0” geeft de begin-snelheid en beginlevel aan.
3. De tweede regel geeft de kansen/levens aan.
4. De derde regel geeft de score aan.
WERKING FUNCTIES DISPLAY
Druk op de toetsen om de slang te bewegen.
Als de slang de muur of zijn eigen lijf raakt, verliest
u één leven of kans.
Zo niet, dan passeert de slang een tolpoort.
Wanneer alle tolpoorten binnen één snelheid zijn
gepasseerd, verschijnt er een “PASS” scherm.
Druk op een willekeurige toets om naar de
volgende snelheid te gaan. Hier zal de snelheid
waarmee de slang beweegt toenemen.
Wanneer alle levens zijn verloren, verschijnt
op het scherm “GAME OVER”. Druk op een
willekeurige toets om aan een nieuw spel te beginnen.
Toets 3 keer achter elkaar SHIFT + ESP (GAME) om galgje
te selecteren. Het standaard ingestelde aantal pogingen is 5,
u kunt selecteren tussen 4 tot 9.
Toets om het aantal pogingen te vermeerderen,dan.
Of u toetst nom ze te verminderen.Toets dan ENTER.
Type de letters in waarvan u denkt dat het woord
uit bestaat (bv: a d e s t l m n o). Herhaling van een letter
doet het aantal pogingen niet afnemen.
Als u het woord raadt binnen het vastgestelde
aantal pogingen (bv. “g” invoeren).
Anders:
Keer je terug naar het eerste display
HANGMAN
Tries : 5
HANGMAN
Tries : 7
_ _ _ _ _ _
HANGMAN
Tries : 3
_ olden
HANGMAN
YOU WIN!
golden
HANGMAN
YOU LOST!
golden
HANGMAN
Tries : 5
WERKING FUNCTIES DISPLAY
GAME OVER!
WERKING FUNCTIES DISPLAY
WAARSCHUWING : De te raden woorden zijn alleen beschikbaar in het engels.
Opmerkingen:
Druk SHIFT + EDIT om het spel te verlaten.
3. Hangman game
NTL460IM0036.indd 92-93 20/02/2006 15:03:03

94
Nederlands
95
Nederlands
Annex
Annex
FRF Franse Frank Frankrijk 1 Euro = 6,55957 FRF
DEM Duitse Mark Duitsland 1 Euro = 1,95583 DEM
IEP Ierse Pond Ierland 1 Euro = 0,787564 IEP
ESP Spaanse Peseta Spanje 1 Euro = 166,386 ESP
ITL Italiaanse Lire Italie 1 Euro = 1936,27 ITL
ATS Oostenrijkse Shilling Oostenrijk 1 Euro = 13,7603 ATS
BEF Belgische Frank Belgie 1 Euro = 40,3399 BEF
FIM Finse Mark Finland 1 Euro = 5,94573 FIM
LUF Luxemburgse Frank Luxemburg 1 Euro = 40,3399 LUF
NLG Nederlandse Gulden Nederland 1 Euro = 2,20371 NLG
PTE Portugese Escudo Portugal 1 Euro = 200,482 PTE
Code Valuta Land Koers
BATTERIJEN VERVANGEN
Dit product werkt op 1x CR2032 batterij.
1. Schakel de power uit.
2. Schroef het klepje van het batterijvakje aan de achterkant van het apparaat los en
verwijder deze.
3. Verwijder de batterij en plaats de nieuwe batterij.
4. Plaats het klepje van het batterijvakje terug.
5. Druk op een willekeurige toets behalve om RESET over te slaan ter vermijding van
verlies van eerder opgeslagen gegevens.
Zorg ervoor dat u de vervanging van de batterij binnen een minuut voltooid heeft.
Indien er geen toets is ingedrukt, schakelt het apparaat automatisch uit na het
verstrijken van de tijd die binnen ‘auto off time’ is ingesteld. Toets om de organizer
opnieuw op te starten.
Gebruik geen oplaadbare batterijen. Laad de batterijen niet opnieuw op. Verwijder
batterijen met een verstreken levensduur meteen om het risico op lekkage/corrosie
te voorkomen. Verwijder dode batterijen voorzichtig. Als een batterij lekt en in contact
komt met uw ogen of huid, was deze dan onmiddellijk met een grote hoeveelheid water.
Zorg ervoor dat de batterijen op de juiste wijze geplaatst zijn door naar de + and
tekens op de batterij te kijken. Vervang alle batterijen tegelijkertijd als een set. Alleen
batterijen van hetzelfde of gelijksoortig type als aanbevolen, dienen te worden gebruikt.
Gebruik geen oude en nieuwe batterijen of verschillende type batterijen door elkaar.
Verwijder de batterijen indien u het apparaat gedurende langere tijd niet gebruikt.
Oplaadbare batterijen dienen uit het apparaat te worden verwijderd alvorens ze op te
laden. Oplaadbare batterijen dienen utsluitend onder toezicht van een volwassene te
worden opgeladen. Niet oplaadbare batterijen mogen niet worden opgeladen. Maak
geen kortsluiting met de voedings-contactpunten.
WAARSCHUWING: Als het apparaat niet goed functioneert of electrostatische
schokken ontvangt, schakel het apparaat dan uit en weer aan. Indien dit niet blijkt
te helpen, verwijder dan de batterijen. Hiermee wordt het apparaat op reset gezet
en moet het defect verholpen zijn.
Wanneer het geluid zwakker wordt of wanneer het apparaat niet meer goed functioneert, kan het tijd zijn om de batterijen te vervangen.
UIT VOORZORG
Garantie
Hou het toestel uit de buurt van direct zonlicht, hoge of lage temperaturen, water, vochtigheid en stof.
Laat het toestel niet vallen daar dit kan leiden tot onherstelbare schade.
Gebruik geen detergenten, reinigingsprodukten of oplosmiddelen om het toestel te reinigen.
Hou het toestel niet in de nabijheid van een sterk magnetisch veld (bv. luidsprekers), of een
statische bron van electriciteit.
Haal het toestel niet uit elkaar. Elke poging ervan zal je garantie te niet doen.
Verkrom of buig het toestel niet.
Wij raden ten zeerste aan een harde kopij van jouw data te bewaren. In principe kan elk systeem
met een electronisch geheugen, data verliezen onder bepaalde omstandigheden. Wij zijn niet
aansprakelijk voor het verlies van je data dat werd veroorzaakt door verkeerd gebruik, verkeerde
reparatie, misbruik door de gebruiker, vervangen van de batterij of gebruik van verouderde
batterijen.
Dit product heeft een garantie van 2 jaar.
Om de garantie of naverkoopdienst te gebruiken, gelieve contact op te nemen met je verkoper met
een aankoopbewijs of zend het toestel terug naar ondervermeld adres met een aankoopbewijs.
Opmerking: Gebroken LCD-schermen zijn niet gedekt door de garantie.
Bij het gebruik van electronische geheugens is het volledig normaal dat onder zeer zeldzame
omstandigheden alle opgeslagen informatie in het geheugen, verloren gaat. Lexibook is niet
verantwoordelijk voor verlies van data veroorzaakt door misbruik, poging tot herstellen van het
toestel, een fout, vervangen van batterijen, gebruik van batterijen na hun vervaldatum, of enig andere
omstandigheden. Evenzo, kunnen we niet aansprakelijk gesteld worden voor rechtstreeks of
onrechtstreeks financieel verlies of klachten door derde partijen, die kunnen ontstaan bij het gebruik
van dit product. Onze garantie dekt schade aan materialen of installatie-betreffende schade met
betrekking tot de fabrikant, met uitzondering van slijtage veroorzaakt door het niet navolgen van de
richtlijnen voor het gebruik van dit toestel of door niet-geautoriseerde herstellingen aan het toestel
(zoals demontage, blootstelling aan hitte of vochtigheid, enz.).
Opmerking: Het is aangeraden alle verpakkingsmaterialen te bewaren als referentiemateriaal voor
later. Bewaar deze gebruikshandleiding op een veilige plaats daar het belangrijke informatie bevat.
Disclaimer
Omwille van ons voortdurend streven naar verbetering, is het mogelijk dat kleuren en details van
het product lichtjes verschillen van deze die op de verpakking zijn afgebeeld.
Referentie: NTL460
2-jaar garantie
©2006 LEXIBOOK®
Ontworpen en ontwikkeld in Europa – Gefabriceerd in China
Klantendienst
LEXIBOOK S.A
2, avenue de Scandinavie
91953 Courtaboeuf Cedex France
Telefoon technische bijstand : 0892 23 27 26 (0,34 € TTC/Min)
Site Internet : www.lexibook.com
Milieubescherming
Niet langer bruikbare electrische apparaten kunnen gerecycleerd worden en mogen
niet weggegooid worden met het gewone huisvuil! Gelieve actief de bescherming van
bronnen te ondersteunen en deel te nemen in de bescherming van het milieu door dit
toestel terug te zenden naar een verzamelcentrum (indien aanwezig).
NTL460IM0066
NTL460IM0036.indd 94-95 20/02/2006 15:03:03
 Loading...