

Page 1
TV SPORTS PLUG & PLAY
I
N
S
T
R
U
C
T
I
O
N
M
A
N
U
A
L
w
w
w
.
l
e
x
i
b
o
o
k
j
u
n
i
o
r
.
c
o
m
JG7000
M
O
D
E
D
’
E
M
P
L
O
I
w
w
w
.
l
e
x
i
b
o
o
k
.
c
o
m
®
Page 2
2
Page 3
3
Guide de prise en main
Cette section explique comment jouer avec la console de jeu sans l TV Sports Plug and Play. Il est
recommandé de lire ce mode d’emploi en entier pour les instructions détaillées et les conseils de
sécurité.
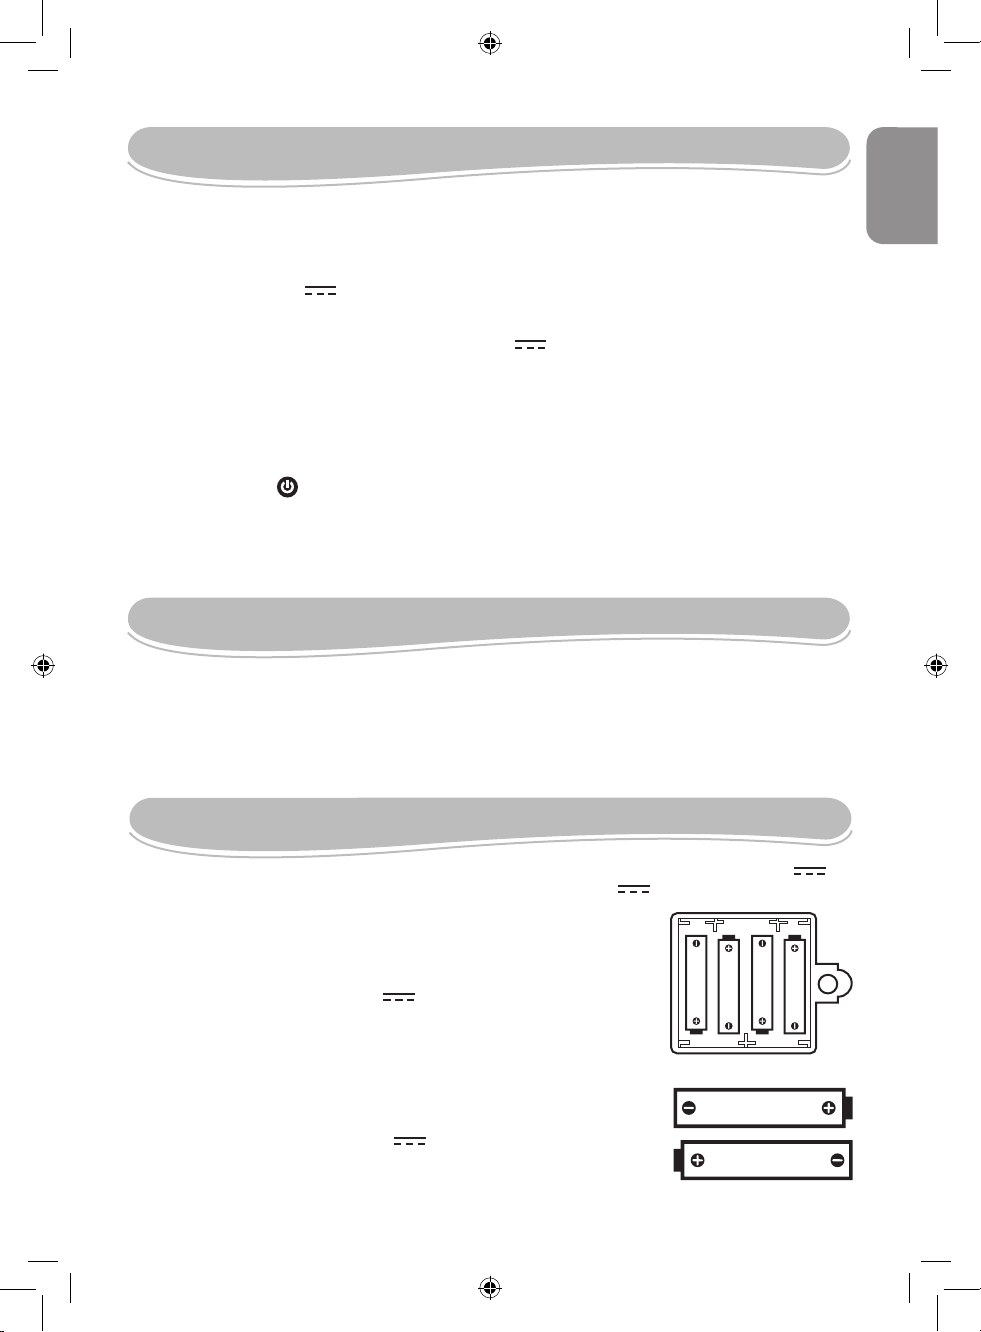
1. A l’aide d’un tournevis, ouvrez le couvercle du compartiment à piles situé sous la console. Insérez 4
piles AA/LR6 de 1,5 V (non fournies), refermez le compartiment à piles et resserrez la vis.
2. A l’aide d’un tournevis, ouvrez le couvercle des compartiments à piles situé sur le côté droit des
manettes sans l. Insérez 2 piles AAA/LR3 de 1,5 V (non fournies) dans chaque manette,
refermez les compartiments à piles et resserrez la vis.
3. Branchez les câbles de la console dans les prises A/V du téléviseur en associant les couleurs des
câbles avec celles des prises A/V.
ATTENTION : éteignez le téléviseur et la console avant d’effectuer les branchements.
4. Allumez le téléviseur et mettez la chaîne AV. Puis allumez la console en appuyant sur le bouton
MARCHE/ARRET .
5. Après l’écran de démarrage, vous accéderez à l’écran de sélection des jeux. Pour sélectionner un
jeu, appuyez plusieurs fois sur le bouton SELECT situé sur la gauche du tapis. Appuyez sur la
touche START pour conrmer votre choix et lancer le jeu. Pour plus de détails sur le fonctionnement
des activités, merci de vous référer à la section « Liste des jeux » p.5.
Français
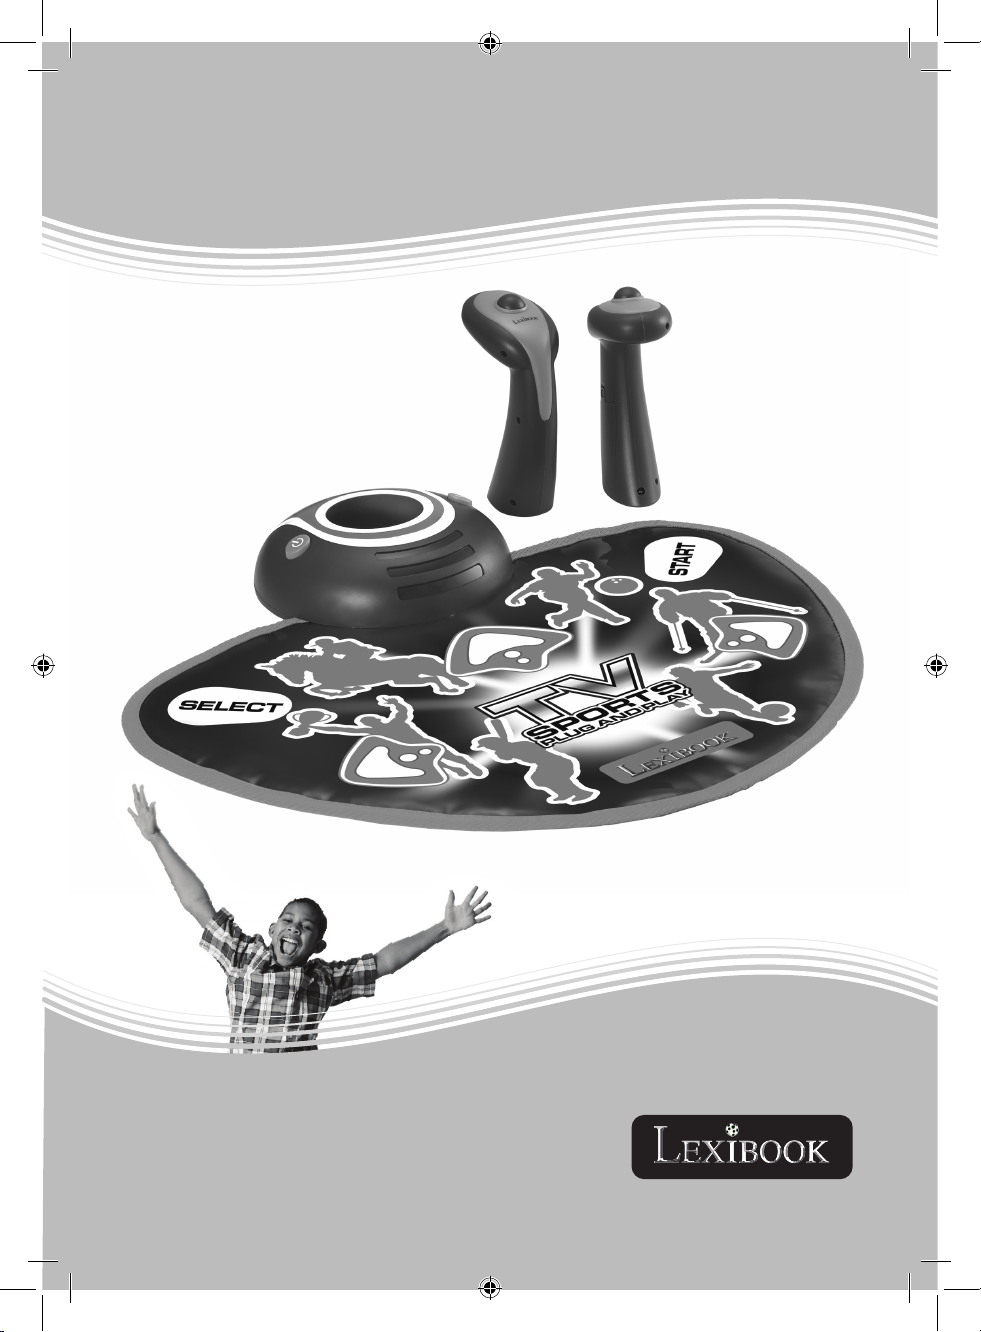
Contenu de la boîte
1 console de jeu TV Sports Plug and Play avec tapis interactif
2 manettes sans l
1 mode d’emploi
ATTENTION : Les éléments d’emballage tels que lms plastiques, rubans adhésifs, étiquettes et rubans de xation
métalliques ne font pas partie de ce jouet et doivent être enlevés pour raison de sécurité avant toute utilisation par un
enfant.
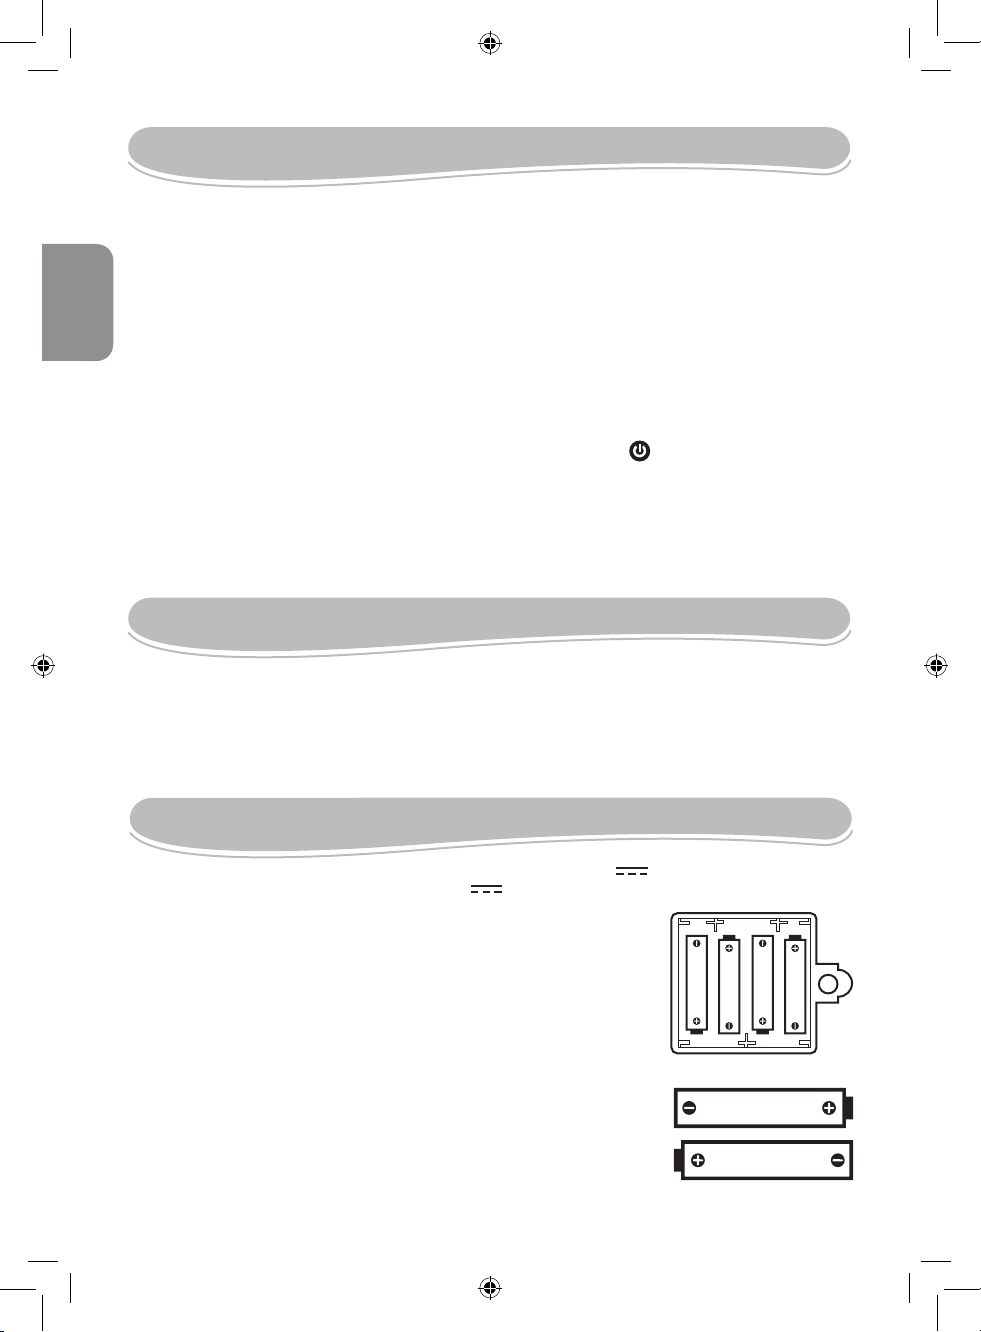
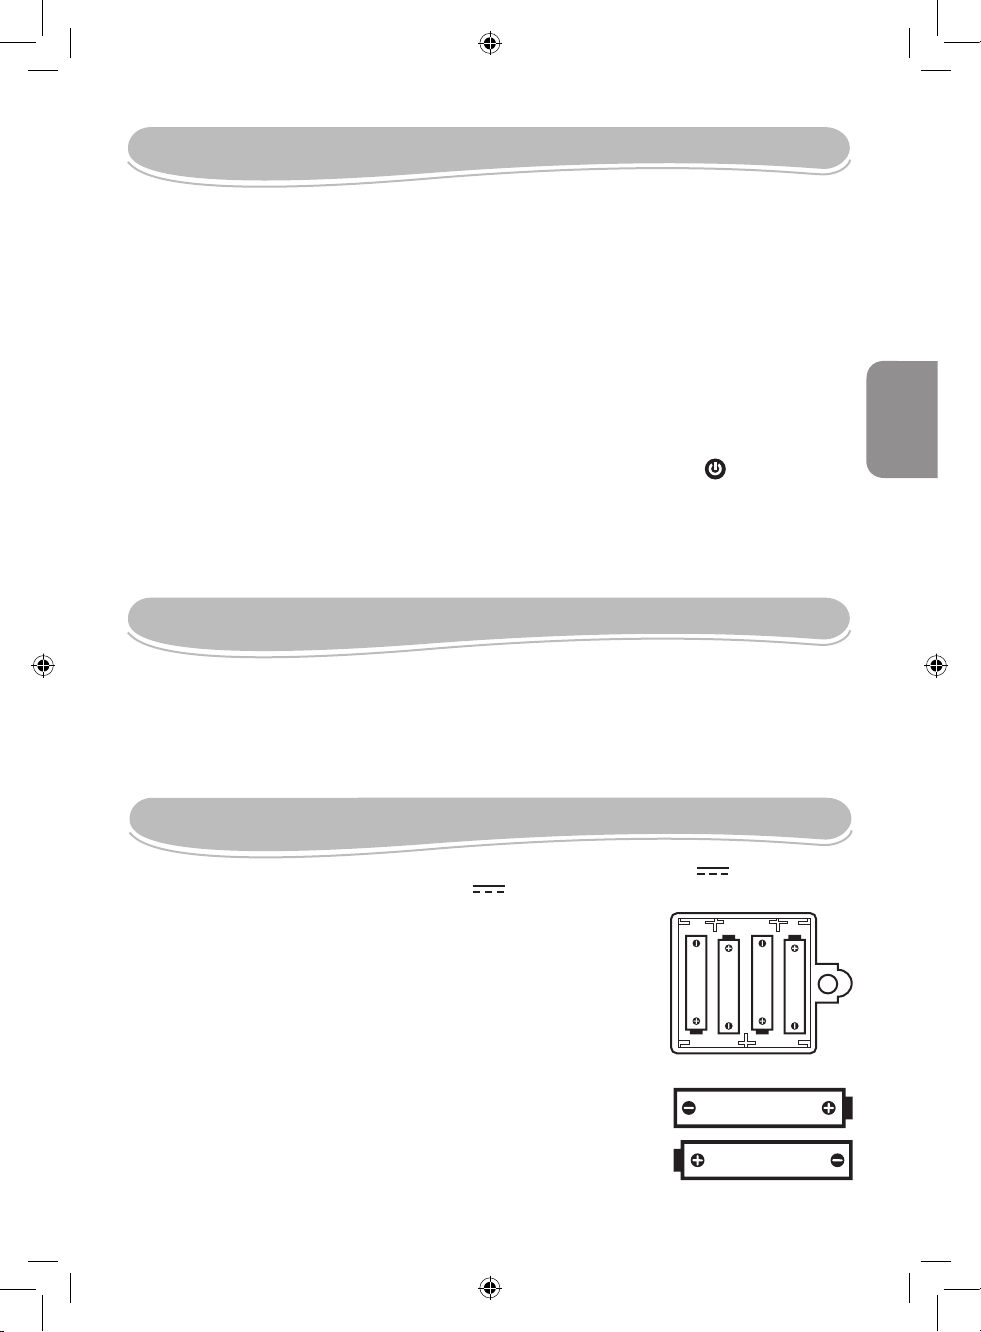
Information sur les piles
La console de jeu TV Sports Plug and Play fonctionne avec 4 piles alcalines AA/LR6 de 1.5 V
(non fournies) pour la console et 2 piles alcalines AAA/LR3 de 1,5 V (non fournies) pour
chacune des manettes sans l.
Console:
1. Ouvrez le couvercle du compartiment à piles situé sous la console à
l’aide d’un tournevis.
2. Installez 4 piles AA/LR6 de 1,5 V (non fournies) en respectant le
sens des polarités indiqué au fond du compartiment et selon le schéma
ci-contre.
3. Refermez le compartiment à piles et resserrez la vis.
Manettes de jeu sans l :
1. Ouvrez le couvercle du compartiment à piles situé sur le côté des
manettes à l’aide d’un tournevis.
2. Installez 2 piles AAA/LR3 de 1,5 V (non fournies) dans chaque
manette en respectant le sens des polarités indiqué au fond du
compartiment et selon le schéma ci-contre.
3. Refermez le compartiment à piles et resserrez la vis.
1.5V AA ORLR6
1.5V AA ORLR6
1.5V AA ORLR6
1.5V AA ORLR6
1.5V SIZE AAA
LR 03
1.5V SIZE AAA
LR 03
Page 4
4
Français
Ne pas recharger les piles non rechargeables. Retirer les accumulateurs du jeu avant de les
recharger. Ne charger les accumulateurs que sous la surveillance d’un adulte. Ne pas mélanger
différents types de piles ou accumulateurs, ou des piles et accumulateurs neufs et usagés. Les
piles et accumulateurs doivent être mis en place en respectant la polarité. Les piles et
accumulateurs usagés doivent être enlevés du jouet. Les bornes d’une pile ou d’un accumulateur
ne doivent pas être mises en court-circuit. Ne pas jeter les piles au feu. Retirer les piles en cas de
non utilisation prolongée.
ATTENTION : Si le produit présente un mauvais fonctionnement ou subit des décharges
électrostatiques, appuyez sur la touche RESET. Si le produit ne fonctionne toujours pas correctement,
enlever puis remettre les piles.
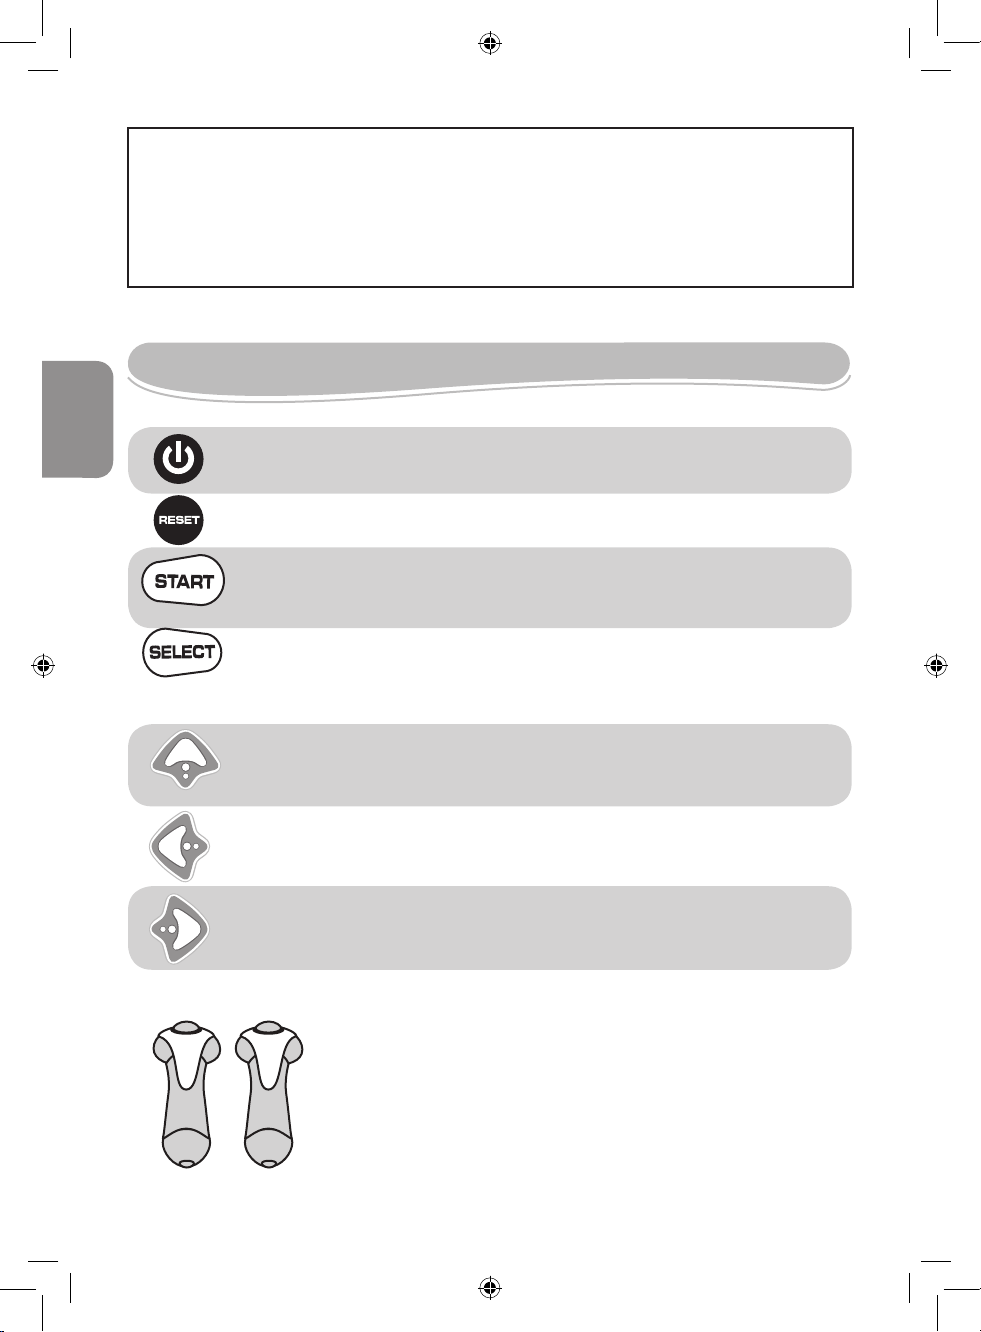
Console :
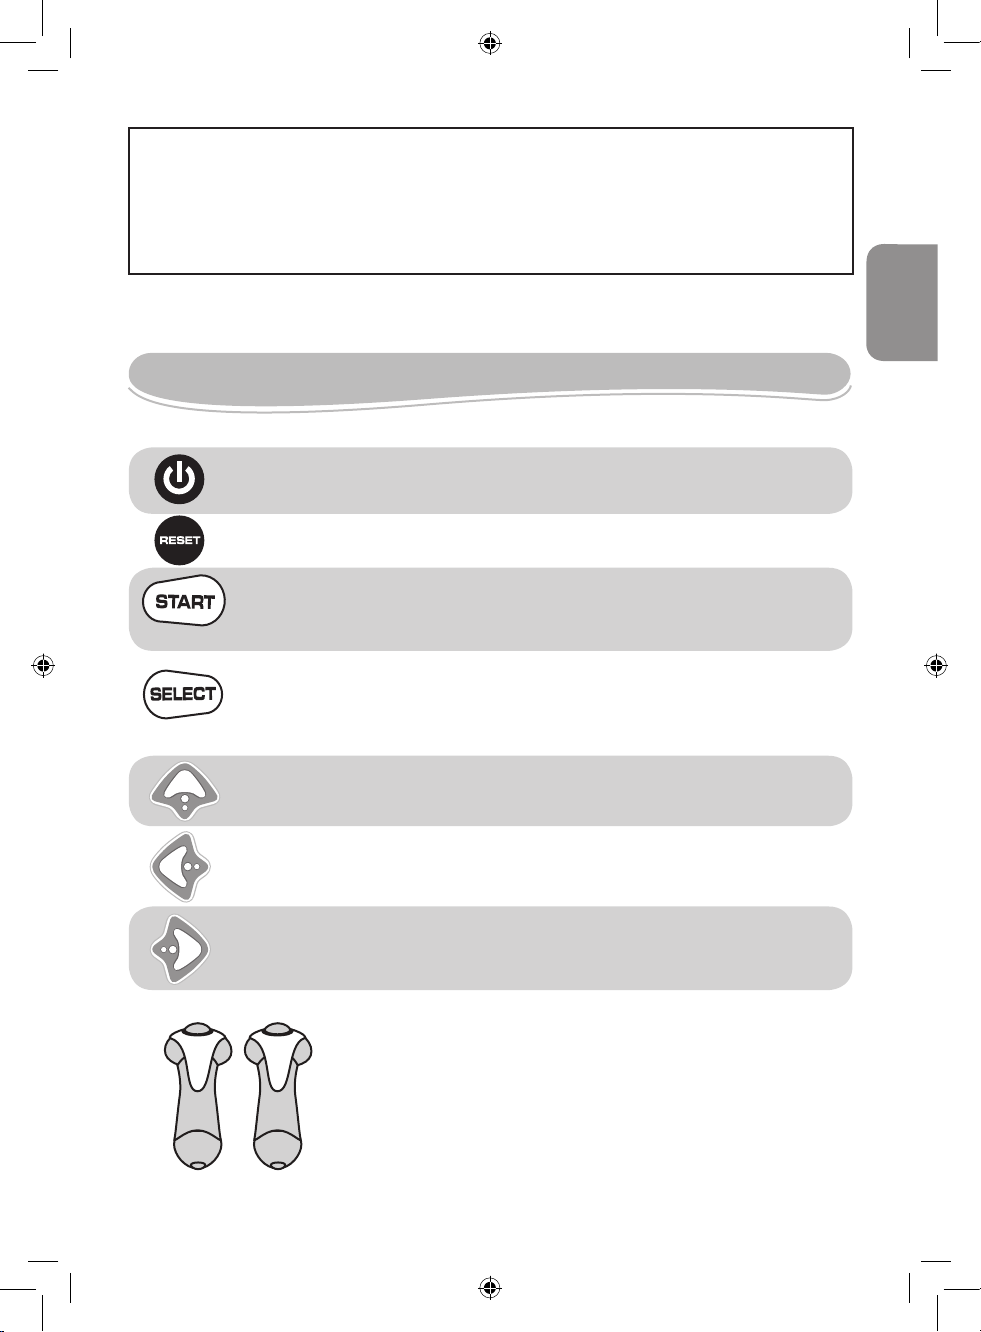
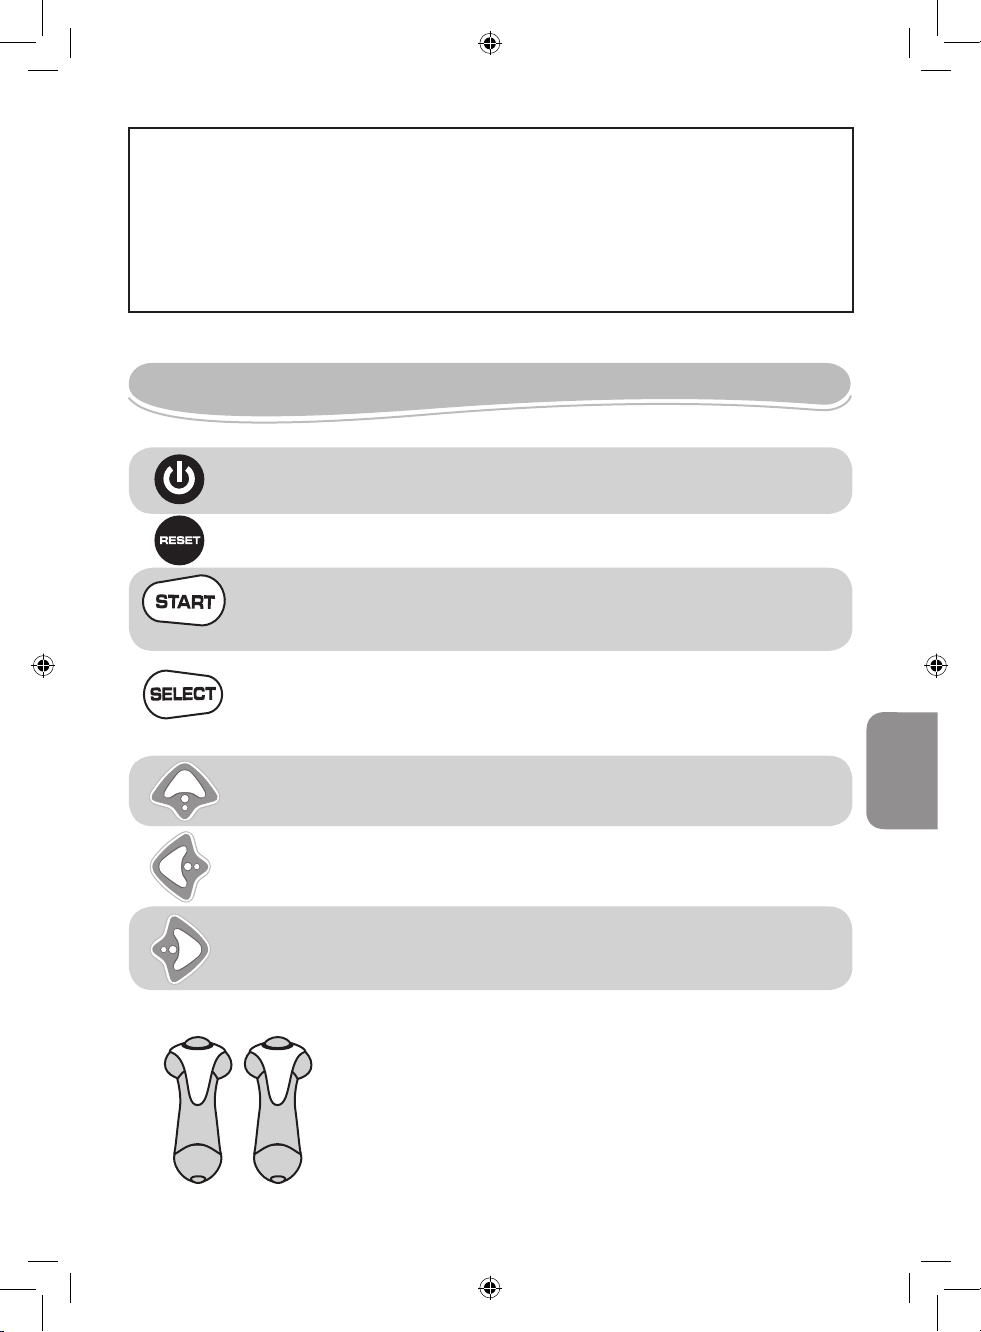
Touche
MARCHE/
ARRET
Pour allumer ou éteindre ta console.
Touche
RESET
Pour terminer une partie et revenir à l’écran de sélection
des jeux.
Touche
START
Pour accéder à un jeu, jouer une partie, ou mettre le jeu
sur pause. A tout moment, appuie une fois sur la touche
pour mettre le jeu sur pause, et appuie à nouveau sur la
même touche pour le relancer.
Touche
SELECT
Pour sélectionner un jeu, un personnage ou différents
modes et options de jeux. Permet aussi d’afficher des
détails concernant un personnage (dépend du jeu
sélectionné).
Touche
FLECHE
DU HAUT
Pour effectuer un saut (dépend du jeu sélectionné).
Touche
FLECHE DE
GAUCHE
Pour effectuer un déplacement vers la gauche ou, en
combinaison avec la touche FLECHE DE DROITE, pour
courir (dépend du jeu sélectionné).
Touche
FLECHE
DE
DROITE
Pour effectuer un déplacement vers la droite ou, en
combinaison avec la touche FLECHE DE GAUCHE, pour
courir (dépend du jeu sélectionné).
Pour contrôler le personnage sélectionné, effectuer des
mouvements avec les manettes ou appuyer sur les
boutons d’action situés sur le dessus.
Note : Les deux boutons d’action ont la même fonction et peuvent être utilisées indifféremment.
Description des commandes
Manettes de jeu sans l:
Page 5
5
Français
Liste des jeux
1. A l’écran de sélection des jeux, utilise la touche SELECT pour choisir l’activité
Equitation et appuie sur la touche START pour confirmer.
2. Utilise la touche SELECT pour choisir un cheval parmi les 4 chevaux proposés,
puis appuie sur la touche START pour confirmer.
3. Utilise la touche SELECT pour choisir l’emplacement de la course (forêt ou désert),
puis appuie sur la touche START pour confirmer.
4. Utilise la touche SELECT pour choisir la météo (ensoleillée, neigeuse ou
pluvieuse), puis appuie sur la touche START pour confirmer et commencer la
course.
5. Appuie répétitivement sur les boutons d’action ou agite les manettes pour faire
galoper ton cheval.
6. Utilise les touches ou pour déplacer le cheval vers la gauche ou vers la
droite. Appuie sur la touche pour le faire sauter et éviter les obstacles.
1. A l’écran de sélection des jeux, utilise la touche SELECT pour choisir l’activité Ski
et appuie sur la touche START pour confirmer.
2. Utilise la touche SELECT pour choisir un des 4 skieurs, puis appuie sur la touche
START pour confirmer et commencer la partie.
3. Appuie répétitivement sur les boutons d’action ou agite les manettes pour accélérer.
4. Utilise les touches ou pour déplacer ton skieur vers la gauche ou vers la
droite. Appuie sur la touche pour le faire sauter et éviter les obstacles.
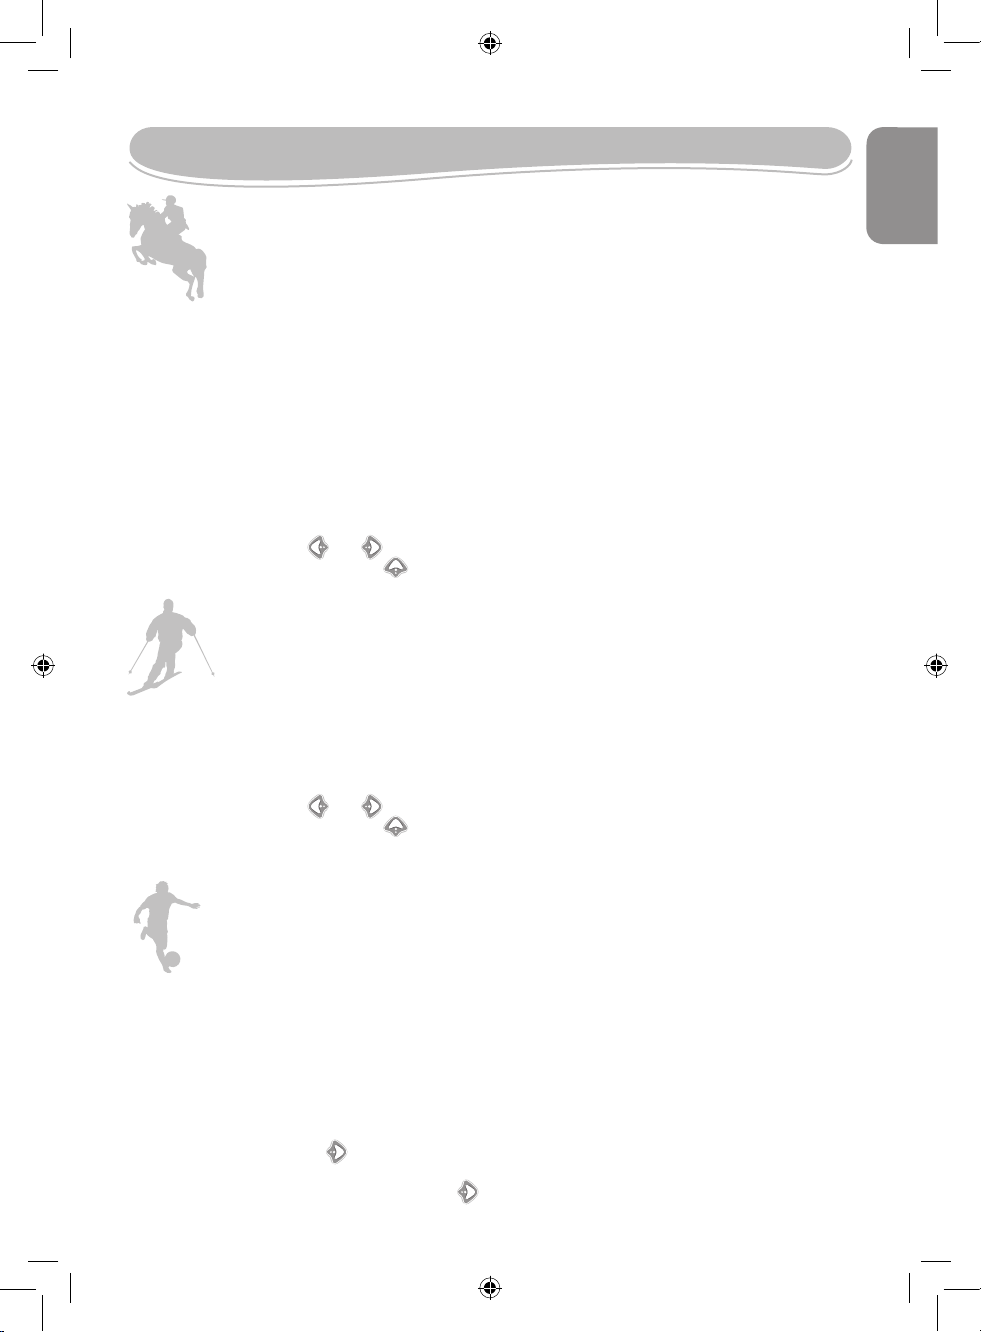
EQUITATION (HORSE RIDING)
Grimpe sur ton cheval et galope à toute allure pour dépasser tous les autres
cavaliers et gagner la course ! Evite les obstacles en sautant et n’oublie pas de
récupérer des fruits et du grain pour augmenter ta vitesse ! Attention : tu as 6
minutes pour finir la course.
SKI (SKIING)
Dévale la piste de ski et deviens le roi de la glisse ! Tu as 4 minutes pour atteindre
la ligne d’arrivée. Récupère les boissons et le pain pour augmenter ta vitesse et ta
puissance. Mais attention : tu perds du temps si tu heurtes les obstacles.
1. A l’écran de sélection des jeux, utilise la touche SELECT pour choisir l’activité Goal
Keeper et appuie sur la touche START pour confirmer.
2. Utilise la touche SELECT pour choisir un mode de jeu : Entraînement (practice) ou
Tournoi (tournament), puis appuie sur la touche START pour confirmer.
Note : en mode Tournoi, tu ne peux pas choisir ton adversai re.
3. Si tu as choisi le mode Entraînement, utilise la touche SELECT pour choisir un
adversaire parmi les 4 joueurs proposés. Appuie sur la touche START pour
confirmer et commencer la séance de tirs au but.
4. Appuie sur la touche pour déplacer les gants vers la droite de la cage de but.
Pour diriger les gants vers le coin supérieur droit de la cage, appuie simultanément
sur les touches d’action et la touche .
GOAL (GOAL KEEPER)
Prêt pour une séance de tirs au but pleine de suspense ? Utilise les manettes et le
tapis interactif pour diriger les gants et arrêter tous les ballons !
Page 6
6
Français
1. A l’écran de sélection des jeux, utilise la touche SELECT pour choisir l’activité
Bowling et appuie sur la touche START pour confirmer.
2. Appuie sur la touche START ou sur un des boutons d’action pour commencer une
partie.
3. Utilise les touches et pour déplacer ton joueur sur la ligne vers la droite ou
vers la gauche, puis appuie sur un bouton d’action pour confirmer.
4. L’indicateur sur la barre de contrôle de la trajectoire en haut à droite de l’écran se
met à bouger. Appuie sur un bouton d’action pour l’arrêter quand il atteint la
position désirée et déterminer une trajectoire pour la balle.
5. L’indicateur sur la barre de puissance se met à bouger. Appuie sur les boutons
d’action pour l’arrêter quand il atteint la position désirée et déterminer un niveau de
puissance pour le lancer de balle.
6. Utilise la manette pour effectuer un mouvement de lancer de balle et déclencher le
tir.
Note : po ur plus de précision et de con fort de jeu, il est recommandé d’utiliser une seule manette pour jouer à
cette act ivité.
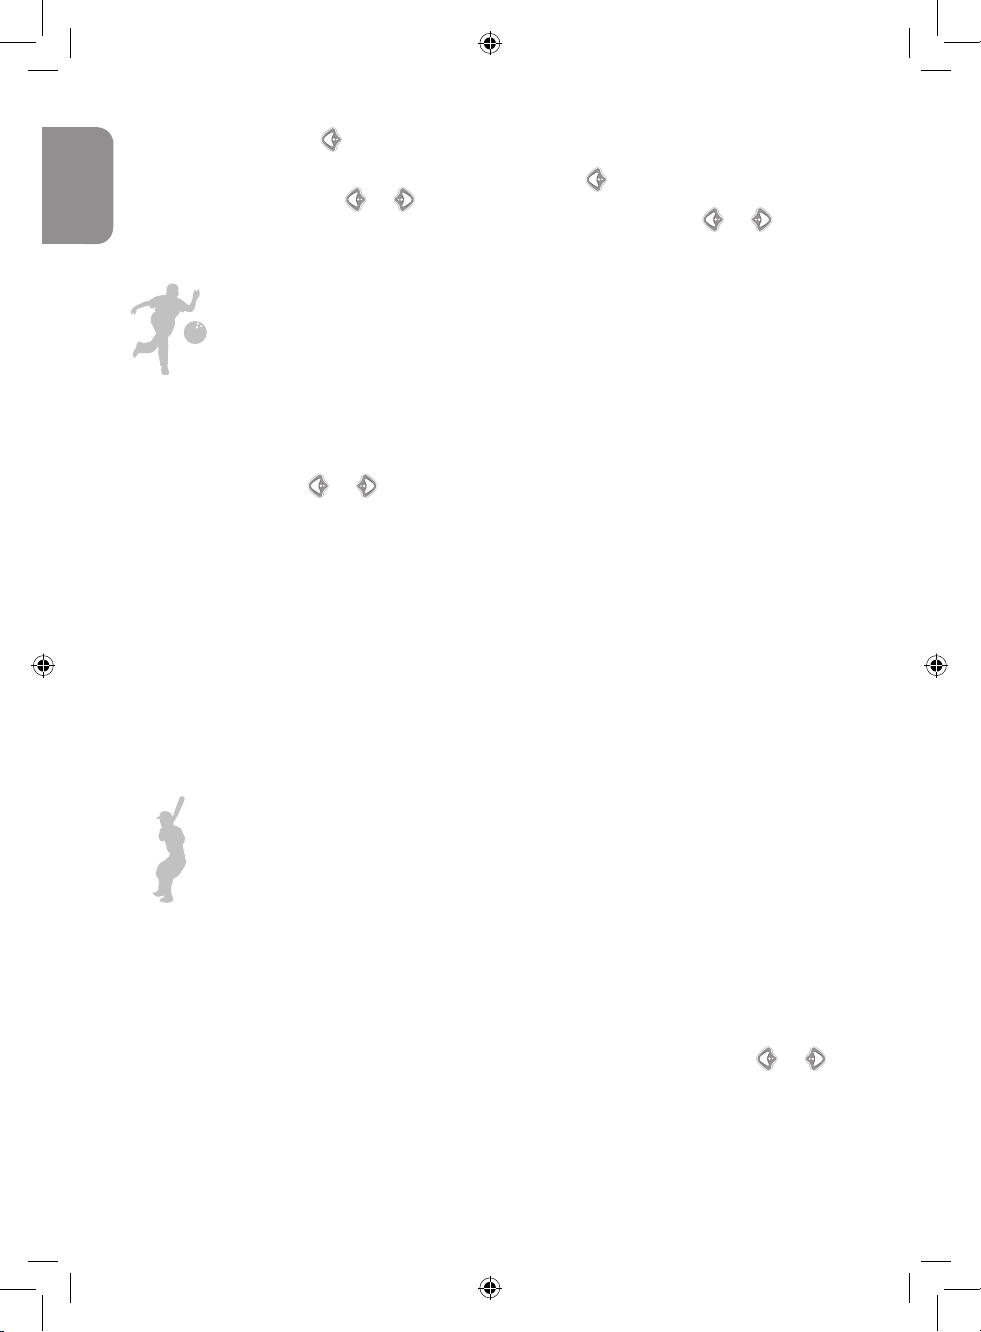
BOWLING
Multiplie les « strike » grâce aux manettes et deviens un vrai pro du bowling !
1. A l’écran de sélection des jeux, utilise la touche SELECT pour choisir l’activité
Baseball et appuie sur la touche START pour confirmer.
2. Utilise la touche SELECT pour choisir un mode de jeu : Entraînement (practice) ou
Tournoi (tournament), puis appuie sur la touche START pour confirmer.
3. Une fois que la balle a été lancée par ton adversaire, utilise les manettes pour faire
un mouvement de swing et frapper la balle au bon moment. Tu peux aussi utiliser
les boutons d’actions.
4. Quand tu as réussi à frapper la balle, appuie rapidement sur les touches et
l’une après l’autre pour courir jusqu’à la base la plus proche.
Note : La partie se termine si 3 de tes joueurs ont été éliminés par le lanceur adverse ou quand le s 11 joueurs
de ton éq uipe ont tous fini leur tour.
BASEBALL
Mène ton équipe de baseball à la victoire : utilise les manettes de jeu et le tapis
interactif pour frapper la balle au bon moment et courir jusqu’à la base suivante !
5. Appuie sur la touche pour déplacer les gants vers la gauche de la cage de but.
Pour diriger les gants vers le coin supérieur gauche de la cage, appuie
simultanément sur les touches d’action et la touche .
6. Appuie sur les touches et simultanément pour garder les gants au centre de
la cage de but. Appuie sur les boutons d’action et sur les touches et
simultanément pour déplacer les gants vers le haut de la cage de but.
©200 8 Le xibook®
Page 7
7
Français
Informations sur la protection de l’environnement :
Tout appareil électrique usé est une matière recyclable et ne devrait pas faire partie des ordures
ménagères! Nous vous demandons de bien vouloir nous soutenir en contribuant activement au
ménagement des ressources et à la protection de l’environnement en déposant cet appareil dans
sites de collecte (si existants).
Avertissement sur l’épilepsie
A lire avant toute utilisation d’un jeu vidéo par vous-même ou votre enfant.
Certaines personnes sont susceptibles de faire des crises d’épilepsie ou d’avoir des pertes de conscience à la vue
de certains types de lumières clignotantes ou d’éléments fréquents dans notre environnement quotidien. Ces
personnes s’exposent à des crises lorsqu’elles regardent certaines images télévisées ou lorsqu’elles jouent à
certains jeux vidéo. Ces phénomènes peuvent apparaître alors même que le sujet n’a pas d’antécédent médical ou
n’a jamais été confronté à une crise d’épilepsie. Si vous-même ou un membre de votre famille avez déjà présenté
des symptômes liés à l’épilepsie (crise ou perte de conscience) en présence de stimulations « lumineuses », veuillez
consulter votre médecin avant toute utilisation de jeux vidéo. Nous conseillons aux parents d’être attentifs à leurs
enfants lorsqu’ils jouent avec des jeux vidéo. Si vous-même ou votre enfant présentez les symptômes suivants :
vertige, trouble de la vision, contraction des yeux ou des muscles, perte de conscience, trouble de l’orientation,
mouvement involontaire ou convulsion, veuillez immédiatement cesser de jouer et consulter un médecin.
Précautions à prendre dans tous les cas pour l’utilisation d’un jeu vidéo
Ne vous tenez pas trop près de l’écran. Jouez à bonne distance de l’écran de télévision et aussi loin que le permet
le cordon de raccordement. Utilisez de préférence les jeux vidéo sur un écran de petite taille. Évitez de jouer si vous
êtes fatigué ou si vous manquez de sommeil. Assurez-vous que vous jouez dans une pièce bien éclairée. En cours
d’utilisation, faites des pauses de dix à quinze minutes toutes les heures.
Entretien et garantie
Protéger le jouet de l’humidité. S’il est mouillé, l’essuyer immédiatement. Ne pas le laisser en plein soleil, ne pas
l’exposer à une source de chaleur. Ne pas le laisser tomber. Ne pas tenter de le démonter. Pour le nettoyer, utiliser
un chiffon légèrement imbibé d’eau à l’exclusion de tout produit détergent.
NOTE : Veuillez garder ce mode d’emploi, il contient d’importantes informations. Ce produit est couvert par notre
garantie de deux ans. Pour toute mise en œuvre de la garantie ou de service après-vente, vous devez vous
adresser à votre revendeur muni d’une preuve d’achat. Notre garantie couvre les vices de matériel ou de montage
imputables au constructeur à l’exclusion de toute détérioration provenant du non respect de la notice d’utilisation ou
toute intervention intempestive sur l’article (telle que le démontage, exposition à la chaleur ou à l’humidité …). Il est
recommandé de conserver l’emballage pour toute référence ultérieure. Dans un souci constant d’amélioration, nous
pouvons être amenés à modier les couleurs et les détails du produit présenté sur l’emballage. Ne convient pas à un
enfant de moins de 36 mois car contient de petits éléments détachables susceptibles d’être avalés.
Référence : JG7000
Conçu en Europe – Fabriqué en Chine
LEXIBOOK S.A, 2, avenue de Scandinavie, 91953 Courtaboeuf Cedex France
Service consommateurs à votre écoute : 08 92 23 27 26 (0.34€ TTC/min)
www.lexibookjunior.com,
www.lexibook.com
©200 8 Le xibook®
Page 8
8
English
Start-up guide
This section explains how to use the TV Sports Plug & Play wireless game. It is recommended to read
the complete instruction manual for detailed instructions on the activities and safety warnings.
1. Using a screwdriver, open the battery compartment under the console. Install the 4 x LR6/AA type
batteries (not included). Close back the battery compartment and tighten the screw.
2. Using a screwdriver, open the battery compartments located on the right side of the wireless
controllers. Install the 2 x LR3/AAA type batteries (not included), close back the battery
compartments and tighten the screw.
3. Connect the console cables into the A/V outlets of your television by matching the corresponding
colours of the cables and the A/V outlets.
WARNING: Switch off the TV and the console before making all connections.
4. Switch on the TV and select the AV channel. Press the ON/OFF key to switch on the console.
5. After the startup screen, the game selection screen will be displayed. To select the desired game,
use the SELECT key on the left side of the interactive mat. Press the START key to conrm and
start playing. For more details on the games, please go to the « Game list» section (p.10).
Contents of the packaging
1 TV Sports Plug & Play console with an interactive mat
2 wireless controllers
1 instruction manual
WARNING: All packaging materials, such as tape, plastic sheets, wire ties and tags are not part of this toy and
should be discarded for your child’s safety.
Battery information
The TV Sports Plug & Play console operates with 4 X 1.5 V AA/LR6 type batteries (not included) for the console and 2 X 1.5 V AAA/LR3 type batteries (not included) for each wireless
controllers.
Console:
1. Use a screwdriver to open the battery compartment located under the
console.
2. Install the 4 x LR6/AA type batteries (not included) observing carefully
the polarity indicated at the bottom of the battery compartment and as
per the diagram shown opposite.
3. Close back the battery compartment and tighten the screw.
Wireless controllers:
1. Use a screwdriver to open the battery compartments located on the
right side of the controllers.
2. Install the 2 x LR3/AAA type batteries (not included) observing carefully
the polarity indicated at the bottom of the battery compartments and as
per the diagram shown opposite.
3. Close back the battery compartments and tighten the screws.
1.5V AA ORLR6
1.5V AA
ORLR
6
1.5V AA ORLR6
1.5V AA
ORLR
6
1.5V SIZE AAA
LR 03
1.5V SIZE AAA
LR 03
Page 9
9
English
Non rechargeable batteries are not to be recharged. Rechargeable batteries are to be removed
from the toy before being charged. Rechargeable batteries are only to be charged under adult
supervision. Different types of batteries or new and used batteries are not to be mixed. Only
batteries of the same or equivalent type as recommended are to be used. Batteries are to be
inserted with the correct polarity. Exhausted batteries are to be removed from the toy. The supply
terminals are not to be short circuited. Do not throw batteries into a re. Remove the batteries if
you are not going to use the game for a long period of time.
WARNING: If the unit malfunctions or receives an electrostatic shock, press the RESET key. If this proves to be ineffective, remove the batteries and insert them again.
Console :
ON/OFF
key
Used to switch on or switch off your console.
RESET
key
Used to end a game or to go back to the game selection
menu.
START
key
Used to start a game, to play a game round or to pause a
game. Press the START key once to suspend the game in
progress and press it again to resume playing.
SELECT
key
Used to select a game, a game character or browse
through game modes and options. Press the same key to
display additional information on a game character (the
keys functions may change according to the selected
game).
UP
ARROW
key
Used to make a jump (the keys functions may change according to the selected game).
LEFT
ARROW
key
Used to move game character left. Or, combines with the
RIGHT ARROW key, to make the character run (the keys
functions may change according to the selected game).
RIGHT
ARROW
key
Used to move game character right. Or, combines with the
LEFT ARROW key, to make the character run (the keys
functions may change according to the selected game).
Move the controllers or press on the action buttons located
on the top to control the game characters.
Note: The two action buttons have the same function and can be used independently.
Product features
Wireless controllers:
Page 10

10
English
Game list
1. On the game selection screen, use the SELECT key to select the Horse Riding
activity and press the START key to confirm.
2. Use the SELECT key to choose a horse (there are 4 horses available), then press
the START key to confirm.
3. Use the SELECT key to choose a place for the race (forest or desert), then press
the START key to confirm.
4. Use the SELECT key to choose the weather (sunny, snowy or rainy), then press the
START key to confirm.
5. Press repeatedly on the action buttons or shake the wireless controllers to
accelerate.
6. Use the or keys to move the horse left or right. Press the key to jump
and avoid the obstacles.
1. On the game selection screen, use the SELECT key to select the Ski activity and
press the START key to confirm.
2. Use the SELECT key to choose a skier (there are 4 skiers available), then press
the START key to confirm.
3. Press repeatedly on the action buttons or shake the wireless controllers to
accelerate.
4. Use the or keys to move the skier left or right. Press the key to jump and
avoid the obstacles.
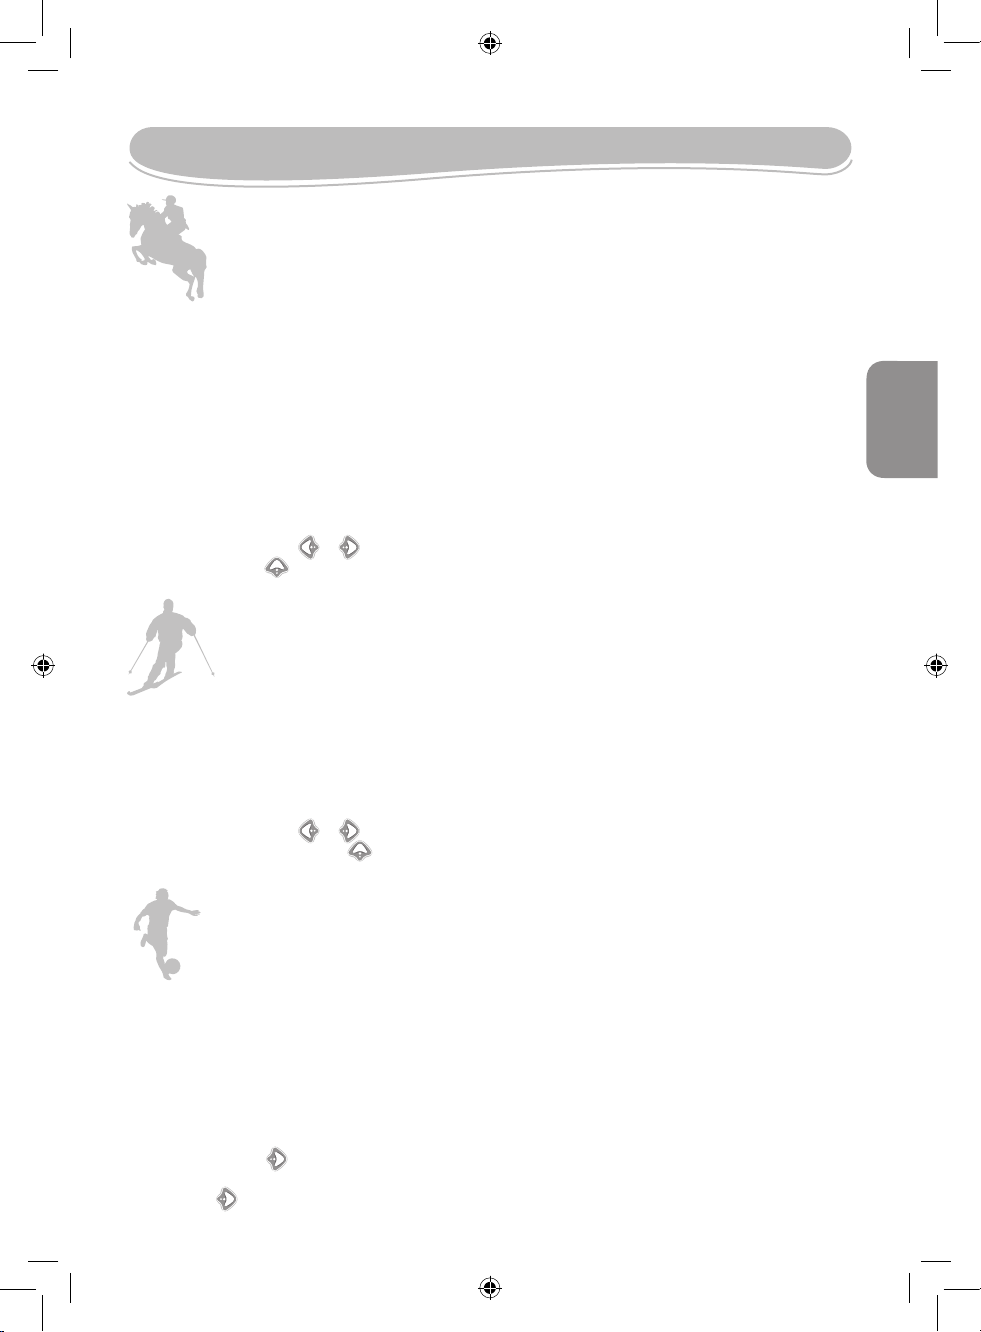
HORSE RIDING
Hop on your horse and ride as fast as you can to overtake the other horse riders! To
win the race, jump over the road obstacles and don’t forget to pick up the carrots and
grain to increase your speed. Be careful! You only have 6 minutes to finish the race!
SKIING
You have 4 minutes to ski all the way down to the nish line. Collect as much elements as
you can to increase your speed and your power and jump over the obstacles in the snow!
1. On the game selection screen, use the SELECT key to select the Goalkeeper
activity and press the START key to confirm.
2. Use the SELECT key to choose a game mode: Practice or Tournament, then press
the START key to confirm.
Note: if you choose the Tournament mode, y ou won’t be able to choose you r opponent.
3. If you chose the Practice mode, use the SELECT key to choose an opponent
between the 4 players available. Press the START key to confirm and start the
penalty shootout.
4. Press the key to guard the right corner of the goal. To guard the upper right
corner of the goal, press simultaneously the action buttons and the key.
GOAL KEEPER
Get ready for a fun thrilling penalty shootout! Use the controllers and the interactive
mat to control the goalkeeper gloves and stop all the penalties!
Page 11

11
English
1. On the game selection screen, use the SELECT key to select the Baseball activity
and press the START key to confirm.
2. Use the SELECT key to choose a game mode: Practice or Tournament, then press
the START key to confirm.
3. Once the pitcher has thrown the ball, swing the wireless controllers as if you were
swinging a bat and try to hit the ball. You can also use the action buttons.
4. When you hit the ball, press quickly the and the keys one after another to
make your player run and reach the next base.
Note: The game will end if the opposing pitcher retires 3 of your pla yers or if all your 11 players ha ve completed th eir round.
BASEBALL
Lead your baseball team to the victory! You must hit the ball and run to reach the
next base. Try to hit a home run!
1. On the game selection screen, use the SELECT key to select the Bowling activity
and press the START key to confirm.
2. Press the START key or one of the action buttons to start the game.
3. Use the and the keys to move your player right or left on the throwing line.
Press an action button to confirm the position.
4. The indicator on the Control bar (on the upper right corner of the screen) will start
moving. Press an action button when it reaches the desired position to confirm the
ball direction.
5. The indicator on the Power bar will started moving. Press an action button when it
reaches the desired position to select a power level for the ball throw.
6. Use the wireless controller to make a throwing move and throw the ball.
Note: to make accurate moves, it is rec ommended to use one wireless c ontroller when playing this ga me.
BOWLING
Bowling won’t have any more secrets for you! Get ready, aim and throw the ball for
the strike.
5. Press the key to guard the left corner of the goal. To guard the upper left corner
of the goal, press simultaneously the action buttons and the key.
6. Press simultaneously the and the keys to guard the centre of the goal. Press
simultaneously the action buttons and the and the keys to guard the upper
centre of the goal.
Page 12

12
English
Environmental Protection:
Unwanted electrical appliances can be recycled and should not be discarded along with regular
household waste! Please actively support the conservation of resources and help protect the
environment by returning this appliance to a collection centre (if available).
Epilepsy warning
To be read before attempting to use a video game, either by you or your child.
Some people are susceptible to suffer epileptic seizures or to loose consciousness when looking at certain types of
ashing lights or elements commonly present in our everyday environment. These people are exposed to seizures
when watching certain images on television or when they play some video games. This phenomenon can become
apparent even if the person has no previous medical history of such, or has never suffered an epileptic t. If you or a
member of your family has shown in the past any symptom linked to epilepsy (either a seizure or loss of
consciousness) when exposed to “luminous” stimulation, please consult with your doctor prior to any attempt to use
this game. We warn parents to be vigilant with their children while they play with video games. If you or your child
experience any of the following symptoms: dizziness, altered vision, eye or muscle twitches, loss of awareness,
disorientation or involuntary movement or convulsions, stop immediately playing the game and consult a doctor.
Precautions to take in any case while using a video game
When you use a video game which can be connected to a TV screen, stand or sit relatively far from the TV screen
and as far as the connection cable allows it. Use preferably video games which have a small screen. Avoid playing
video games if you are tired or lack some sleep. Make sure to play in room which is well lit. While playing video
games, take 10 to 15 minute breaks every hour.
Maintenance and warranty
Only use a soft, slightly damp cloth to clean the unit. Do not use detergent. Do not to expose the unit to direct
sunlight or any other heat source. Do not immerse the unit in water. Do not dismantle or drop the unit. Do not try to
twist or bend the unit. If the unit malfunctions, try to change the batteries rst. If this proves to be ineffective, read the
instruction manual again.
NOTE: please keep this instruction manual, it contains important information. This product is covered by our 2-year
warranty. For any claim under the warranty or after sale service, please contact your distributor and present a valid
proof of purchase. Our warranty covers any manufacturing material and workmanship defect, with the exception of
any deterioration arising from the non-observance of the instruction manual or from any careless action implemented
on this item (such as dismantling, exposition to heat and humidity, etc.). It is recommended to keep the packaging for
any further reference. Not suitable for children under 36 months old, as it contains small detachable elements which
could be swallowed. In a bid to keep improving our services, we could implement modication on the colours and the
details of the product shown on the packaging.
Reference: JG7000
Designed and developed in Europe – Made in China
Lexibook UK Ltd, Unit 10 Peterseld Industrial Estate, Bedford Road, Peterseld,
Hampshire, GU32 3QA, United Kingdom.
Helpline: 0808 1003015,
www.lexibookjunior.com,
www.lexibook.com
©200 8 Le xibook®
Page 13
13
Español
Guía de puesta en marcha
Esta sección explica cómo utilizar el juego inalámbrico Plug & Play de deportes para televisor. Se
recomienda leer completamente el manual de uso para conocer las instrucciones detalladas de las
actividades y las advertencias de seguridad.
1. Abre el compartimento de las pilas situado bajo la consola, utilizando un destornillador. Coloca 4
pilas de tipo LR6/AA (no incluidas). Vuelve a cerrar el compartimento y aprieta el tornillo.
2. Abre el compartimento de las pilas situado en el lateral derecho de los controladores inalámbricos,
utilizando un destornillador. Coloca 2 pilas de tipo LR3/AAA (no incluidas), vuelve a cerrar el
compartimento de las pilas y aprieta el tornillo.
3. Conecta los cables de la consola a los conectores A/V del televisor haciendo coincidir los colores
de cada conector y de cada clavija de cable.
ADVERTENCIA: Apaga el televisor y la consola antes de realizar las conexiones.
4. Enciende el televisor y selecciona el canal AV (Vídeo). Pulsa el botón ON/OFF para encender la
consola.
5. Después de la pantalla de inicio, se mostrará la pantalla de selección de juego. Para seleccionar el
juego deseado, utiliza el botón SELECT situado en el lado izquierdo de la alfombrilla interactiva.
Pulsa el botón START para conrmar y comenzar el juego. Consulta la sección “Lista de juegos”
(pág. 15), para conocer más detalles sobre los juegos.
Contenido del embalaje
1 consola Plug & Play de deportes para televisor con una alfombrilla interactiva
2 controladores inalámbricos
1 manual de instrucciones
¡ADVERTENCIA! Los elementos utilizados para el embalaje, tales como recubrimientos de plástico, cintas
adhesivas, etiquetas y ataduras metálicas, no forman parte de este juguete y deberán retirarse del mismo por
razones de seguridad antes de que se permita al niño utilizar el juguete.
Información sobre las pilas
La consola Plug & Play de deportes para televisor funciona con 4 pilas de 1,5 V de tipo AA/LR6
(no incluidas) para la consola, y 2 pilas de 1,5 V de tipo AAA/LR3 (no incluidas) para cada uno
de los controladores inalámbricos.
Consola:
1. Abre el compartimento de las pilas, situado bajo la consola, con ayuda
de un destornillador.
2. Coloca las 4 pilas de tipo LR6/AA (no incluidas), respetando la
polaridad que se indica en el fondo del compartimento de las pilas,
como se muestra en la gura.
3. Vuelve a cerrar el compartimento y aprieta el tornillo.
Controladores inalámbricos:
1. Abre el compartimento de las pilas situado en el lateral derecho de los
controladores, utilizando un destornillador.
2. Coloca las 2 pilas de tipo LR3/AAA (no incluidas), respetando la
polaridad que se indica en el fondo del compartimento de las pilas,
como se muestra en la gura de enfrente.
3. Vuelve a cerrar el compartimento de las pilas y aprieta el tornillo.
1.5V AA ORLR6
1.5V AA ORLR6
1.5V AA ORLR6
1.5V AA ORLR6
1.5V SIZE AAA
LR 03
1.5V SIZE AAA
LR 03
Page 14
14
Español
No intente nunca recargar pilas no recargables. Para cargar las pilas recargables, antes retírelas
del juguete. Las pilas recargables deben recargarse siempre bajo la supervisión de un adulto.
No mezcle pilas de distinto tipo, o pilas nuevas con pilas usadas. Utilice únicamente pilas del tipo
recomendado o equivalentes. Colocar siempre las pilas en la posición correcta, de acuerdo con
la polaridad indicada en el compartimento. Retire del juguete las pilas gastadas. No permita que
entren en contacto eléctrico los terminales de la alimentación. Si prevé que el juguete no va a
utilizarse durante un periodo largo de tiempo, retire las pilas. Cuando el sonido se hace débil o el
juego no responde adecuadamente es señal de que debe sustituir las pilas.
ADVERTENCIA: Si la unidad no funcionase bien o recibiese una descarga electrostática, pulsa el
botón RESET. Si esto no diese resultado, retira las pilas y vuelve a colocarlas.
Consola:
Botón
ON/OFF
Se utiliza para encender y apagar la consola.
Botón
RESET
Se utiliza para terminar un juego o para volver al menú de
selección de juego.
Botón
START
Se utiliza para empezar un juego, empezar una ronda de
juego o hacer una pausa en un juego. Pulsa una vez el botón
START para hacer una pausa en el juego actual, y vuelve a
pulsarlo para continuar el juego.
Botón
SELECT
Se utiliza para seleccionar un juego o un personaje de juego, o
para desplazarse por los distintos modos y opciones de juego.
Pulsa este botón para que se visualice información adicional
sobre un personaje de juego (las funciones del botón pueden
cambiar dependiendo del juego seleccionado).
Botón de
FLECHA
HACIA
ARRIBA
Se utiliza para hacer un salto (las funciones del botón pueden
cambiar dependiendo del juego seleccionado).
Botón de
FLECHA
HACIA LA
IZQUIERDA
Se utiliza para mover al personaje hacia la izquierda. O bien,
combinado con el botón FLECHA HACIA LA DERECHA, para
hacer correr a un personaje (las funciones del botón pueden
cambiar dependiendo del juego seleccionado).
Botón
FLECHA
HACIA LA
DERECHA
Se utiliza para mover al personaje hacia la derecha. O bien,
combinado con el botón FLECHA HACIA LA IZQUIERDA,
para hacer correr a un personaje (las funciones del botón
pueden cambiar dependiendo del juego seleccionado).
Mueve los controladores o pulsa los botones de acción
situados en la parte superior, para controlar a los personajes
del juego.
Nota: Los dos botones de acción tienen la misma funcionalidad y pueden utilizarse
independientemente.
Características del producto
Controladores
inalámbricos:
Page 15
15
Español
Lista de juegos
1. En la pantalla de selección de juego, utiliza el botón SELECT para seleccionar la
actividad Horse Riding (Montando a caballo), y pulsa luego el botón START para
conrmar.
2. Utiliza el botón SELECT para elegir un caballo (hay 4 caballos disponibles), y pulsa
luego el botón START para conrmar.
3. Utiliza el botón SELECT para elegir un lugar para la carrera (bosque o desierto), y
pulsa luego el botón START para conrmar.
4. Utiliza el botón SELECT para elegir el clima (con sol, con nieve o con lluvia), y pulsa
luego el botón START para conrmar.
5. Pulsa repetidamente los botones de acción o agita los controladores inalámbricos para
acelerar.
6. Utiliza los botones y para mover el caballo hacia la derecha o hacia la izquierda.
Pulsa el botón para saltar y evitar los obstáculos.
1. En la pantalla de selección de juego, utiliza el botón SELECT para seleccionar la
actividad Ski (Esquiando), y pulsa luego el botón START para conrmar.
2. Utiliza el botón SELECT para elegir un esquiador (hay 4 esquiadores disponibles), y
pulsa luego el botón START para conrmar.
3. Pulsa repetidamente los botones de acción o agita los controladores inalámbricos para
acelerar.
4. Utiliza los botones y para mover al esquiador hacia la derecha o hacia la
izquierda. Pulsa el botón para saltar y evitar los obstáculos.
MONTANDO A CABALLO (HORSE RIDING)
¡Monta en tu caballo y cabalga lo más rápido que puedas para adelantar a los otros
jinetes! Para ganar la carrera, salta sobre los obstáculos del camino, y no olvides
atrapar las frutas que aparezcan para aumentar tu velocidad. ¡Ten cuidado! ¡Solo
tienes 6 minutos para terminar la carrera!
ESQUIANDO (SKIING)
Tienes 4 minutos para descender esquiando toda la pendiente hasta la línea de meta.
¡Recoge tantas bebidas como puedas para aumentar tu velocidad y salta sobre los
obstáculos en la nieve!
1. En la pantalla de selección de juego, utiliza el botón SELECT para seleccionar la
actividad Goalkeeper (Portero), y pulsa luego el botón START para conrmar.
2. Utiliza el botón SELECT para seleccionar un modo de juego: Practice (Práctica ) o
Tournament (Campeonato), y pulsa luego el botón START para conrmar.
Nota: si eliges el modo campeonato, no podrás seleccionar a tu contrincante.
3. Si eliges el modo de práctica, utiliza el botón SELECT para seleccionar una contrincante
entre los 4 jugadores disponibles. Pulsa el botón START para conrmar y comenzar la
ronda de penaltis.
4. Pulsa el botón para defender la esquina derecha de la portería. Para defender la
esquina superior derecha de la portería, pulsa simultáneamente los botones de acción y
el botón .
PORTERO DE FÚTBOL (GOAL KEEPER)
¡Prepárate para una emocionante ronda de penaltis! ¡Utiliza los controladores y la
alfombrilla interactiva para controlar los guantes del portero y parar todos los penaltis!
Page 16
16
Español
1. En la pantalla de selección de juego, utiliza el botón SELECT para seleccionar la
actividad Bowling (Bolos), y pulsa luego el botón START para conrmar.
2. Pulsa el botón START o uno de los botones de acción para comenzar el juego.
3. Utiliza los botones y para mover al jugador a la izquierda o a la derecha sobre la
línea de lanzamiento. Pulsa luego un botón de acción para conrmar la posición.
4. El indicador en la barra de control (en la esquina superior derecha de la pantalla)
comenzará a moverse. Pulsa un botón de acción cuando alcance la posición deseada
para conrmar la dirección de lanzamiento de la bola.
5. El indicador en la barra de energía comenzará a moverse. Pulsa un botón de acción
cuando alcance la posición deseada para conrmar la fuerza de lanzamiento de la bola.
6. Utiliza el controlador inalámbrico para hacer un gesto de lanzar y lanzar la bola.
Nota: para hacer movimientos precisos, es recomendable utilizar uno de los controles inalámbricos para este juego.
BOLOS (BOWLING)
¡El juego de bolos ya no tendrá misterios para ti! Prepárate, apunta y tira la bola contra
los bolos.
1. En la pantalla de selección de juego, utiliza el botón SELECT para seleccionar la
actividad Baseball (Béisbol), y pulsa luego el botón START para conrmar.
2. Utiliza el botón SELECT para seleccionar un modo de juego: Practice (Práctica) o
Tournament (Campeonato), y pulsa luego el botón START para conrmar.
3. Una vez que el pitcher haya lanzado la bola, balancea los controladores inalámbricos
como si estuvieses utilizando un bate e intenta golpear la bola. Puedes también utilizar
los botones de acción.
4. Cuando golpees la bola, pulsa rápidamente los botones y , uno tras otro, para
hacer que tu corredor corra y alcance la siguiente base.
Nota: Perderás el juego si el pitcher del equipo contrario elimina a 3 de tus jugadores o si tus 11 jugadores comple-
tan su ronda.
BÉISBOL (BASEBALL)
¡Conduce a tu equipo de béisbol a la victoria! Debes golpear la bola y correr para
alcanzar la siguiente base. ¡Intenta hacer un jonrón!
5. Pulsa el botón para defender la esquina izquierda de la portería. Para defender la
esquina superior izquierda de la portería, pulsa simultáneamente los botones de acción
y el botón .
6. Pulsa simultáneamente los botones y para defender el centro de la portería.
Pulsa simultáneamente los botones de acción y los botones y para defender la
parte superior central de la portería.
©200 8 Le xibook®
Page 17
17
Español
Advertencia para la protección del medio ambiente
¡Los aparatos eléctricos desechados son reciclables y no deben ser eliminados en la basura
doméstica! Por ello pedimos que nos ayude a contribuir activamente en el ahorro de recursos
y en la protección del medio ambiente entregando este aparato en los centros de colección (si
existen).
Aviso relacionado con la epilepsia
Léase antes de utilizar cualquier videojuego, ya sea por usted o por sus hijos.
Algunas personas son susceptibles de padecer ataques epilépticos o desmayos al contemplar ciertos tipos de luces
parpadeantes o elementos encontrados frecuentemente en nuestro entorno cotidiano. Estas personas están
expuestas a ataques epilépticos cuando contemplan ciertas imágenes de televisión o al jugar con ciertos
videojuegos. Estos fenómenos pueden aparecer incluso si el individuo no tiene antecedentes médicos que puedan
denotar la enfermedad o aunque nunca haya sufrido un ataque epiléptico con anterioridad. Si usted o algún
miembro de su familia ya ha experimentado síntomas relacionados con la epilepsia (ataques o desmayos) ante
estímulos “luminosos”, consulte a su médico antes de proceder a utilizar este aparato. Aconsejamos a los padres
que vigilen a sus hijos mientras que estos juegan con videojuegos. Si usted o alguno de sus hijos experimenta
algunos de los siguientes síntomas: mareos, alteración de la visión, contracciones oculares o musculares, pérdida
de conocimiento, desorientación, movimientos involuntarios o convulsiones, interrumpa inmediatamente el juego y
consulte a su médico.
Precauciones a tomar siempre que se esté usando un vídeo juego
Cuando esté usando un video juego que se conecta al aparato de TV, permanezca de pie o siéntese relativamente
alejado de la pantalla de TV y tan lejos como el cable le permita. Use, de preferencia, vídeo juegos que posean
pantallas pequeñas. Evite jugar a vídeo juegos si se encuentra cansado o ha dormido poco. Asegúrese de que juega
en una habitación bien iluminada. Cuando juegue a vídeo juegos tómese de 10 a 15 minutos de descanso por cada
hora de juego.
Mantenimiento y garantía
Para limpiar el juguete, utilice únicamente un paño suave humedecido en agua. No utilice ningún producto
detergente. No exponga el juguete a la acción directa de los rayos del sol ni a ninguna otra fuente de calor. No mojar
el juguete. No desmonte o deje caer el juguete. Retire las pilas del juguete si no va utilizarlo durante largos periodos
de tiempo.
NOTA: Conserve este manual de instrucciones ya que contiene informaciones de importancia. Este producto está
cubierto por nuestra garantía de 2 años. Para cualquier reclamación bajo la garantía o petición de servicio post
venta deberá dirigirse a su revendedor y presentar su comprobante de compra. Nuestra garantía cubre los defectos
de material o montaje que sean imputables al fabricante, con la excepción de todo aquel deterioro que sea
consecuencia de la no observación de las indicaciones indicadas en el manual de instrucciones o de toda
intervención improcedente sobre este aparato (como por ejemplo el desmontaje, exposición al calor o a la
humedad…). Se recomienda conservar el embalaje para cualquier referencia futura. En nuestro constante afán de
superación, podemos proceder a la modicación de los colores y detalles del producto mostrado en el embalaje.
Referencia: JG7000
Diseñado y desarrollado en Europa – Fabricado en China
Lexibook Ibérica S.L,
C/ de las Hileras 4, 4° dpcho 14,
28013 Madrid, España.
Servicio consumidores: 91 548 89 32.
www.lexibook.com
www.lexibookjunior.com
©200 8 Le xibook®
Page 18
18
Guia de início rápido
Esta secção explica como usar o jogo sem os TV Sports Plug & Play. Recomendamos que leia por
completo o manual de instruções para obter instruções detalhadas acerca das actividades e avisos de
segurança.
1. Com uma chave de fendas, abra a tampa do compartimento das pilhas, que se encontra na parte
inferior da consola. Coloque 4 pilhas LR6/AA (não incluídas). Volte a fechar o compartimento das
pilhas e aperte o parafuso.
2. Com uma chave de fendas, abra a tampa dos compartimentos das pilhas, que se encontram do
lado direito de cada um dos controlos sem os. Coloque 2 pilhas LR3/AAA (não incluídas), volte a
fechar os compartimentos das pilhas e aperte o parafuso.
3. Ligue os cabos da consola às entradas A/V da sua televisão, colocando as devidas chas de cor
nas entradas A/V.
AVISO: Desligue a televisão e a consola antes de fazer todas as ligações.
4. Ligue a televisão e escolha o canal AV. Prima o botão ON/OFF para ligar a consola.
5. Após aparecer o ecrã inicial, será apresentado o ecrã de escolha do jogo. Para escolher o jogo
desejado, use o botão SELECT do lado esquerdo do tapete interactivo. Prima o botão START para
conrmar e começar a jogar. Para mais informações acerca dos jogos, consulte a secção “Lista de
jogos” (página 20).
Conteúdo da caixa
1 Consola TV Sports Plug & Play com tapete interactivo
2 Comandos sem os
1 Manual de instruções
ATENÇÃO: As peças da embalagem, como os revestimentos de plástico, elásticos, etiquetas e os de xação
de metal não fazem parte do brinquedo e devem ser deitados fora, por razões de segurança, antes de entregar o
brinquedo a uma criança.
Informação acerca das pilhas
A consola TV Sports Plug & Play funciona com 4 pilhas AA/LR6 de 1,5V (não incluídas) para a
consola e 2 pilhas AAA/LR3 de 1,5V (não incluídas) para cada um dos comandos sem os.
Consola:
1. Use uma chave de fendas para abrir a tampa do compartimento das
pilhas, que se encontra na parte inferior da consola.
2. Coloque as 4 pilhas LR6/AA (não incluídas), tendo em conta a
polaridade indicada na parte inferior do compartimento das pilhas, e
de acordo com a imagem apresentada ao lado.
3. Volte a fechar a tampa do compartimento das pilhas e aperte o
parafuso.
Comandos sem os:
1. Use uma chave de fendas para abrir os compartimentos das pilhas,
que se encontram do lado direito de cada um dos comandos.
2. Coloque as 2 pilhas LR3/AAA (não incluídas), tendo em conta a
polaridade indicada na parte inferior do compartimento das pilhas e de
acordo com a imagem apresentada ao lado.
3. Volte a fechar os compartimentos das pilhas e aperte os parafusos.
1.5V AA ORLR6
1.5V AA
ORLR
6
1.5V AA ORLR6
1.5V AA
ORLR
6
1.5V SIZE AAA
LR 03
1.5V SIZE AAA
LR 03
Português
Page 19

19
Português
As pilhas não recarregáveis não deverão ser recarregadas. As pilhas recarregáveis deverão ser
retiradas do brinquedo antes de serem recarregadas e só deverão ser recarregadas sob a supervisão de um adulto. Não misture diferentes tipos de pilhas ou pilhas novas com pilhas usadas.
Só deverá utilizar pilhas do mesmo tipo ou de um tipo equivalente às recomendadas. As pilhas
deverão ser colocadas com a polaridade correcta. Deverá retirar as pilhas gastas do brinquedo.
Não coloque os terminais em curto-circuito. Não atire as pilhas para o fogo. Retire as pilhas caso
não utilize a unidade durante um longo período de tempo. Quando o som car fraco ou o jogo não
responder, pense em substituir as pilhas.
AVISO: Se a unidade funcionar mal ou receber um choque electrostático, prima o botão RESET. Se isso não funcionar, retire as pilhas e volte a colocá-las.
Consola:
Botão
ON/OFF
Usado para ligar e desligar a consola.
Botão
RESET
Usado para terminar o jogo ou para voltar ao menu de
selecção do jogo.
Botão
START
Usado para começar um jogo, para jogar uma ronda de um
jogo ou para fazer uma pausa. Prima uma vez o botão START
para suspender o jogo em progresso e volte a premir para
continuar o jogo.
Botão
SELECT
Usado para escolher um jogo, uma personagem do jogo, ou
para correr os modos de jogo e as opções. Prima o mesmo
botão para ver a informação adicional acerca de uma personagem do jogo (as funções dos botões podem mudar, de
acordo com o jogo seleccionado).
Botão da
SETA PARA
CIMA
Usado para saltar (as funções dos botões podem mudar, de
acordo com o jogo seleccionado).
Botão da
SETA
PARA A
ESQUERDA
Usado para mover a personagem do jogo para a esquerda,
ou combinado com o botão da SETA PARA A DIREITA, serve
para fazer a personagem correr (as funções dos botões
podem mudar, de acordo com o jogo seleccionado).
Botão
da SETA
PARA A
DIREITA
Usado para mover a personagem do jogo para a direita, ou
combinado com o botão da SETA PARA A ESQUERDA, serve
para fazer a personagem correr (as funções dos botões podem mudar, de acordo com o jogo seleccionado).
Mova os comandos, ou prima os botões de acção, que se
encontram no topo, para mover as personagens do jogo.
Nota: Os dois botões de acção têm a mesma função e podem ser usados de modo independente.
Características do produto
Comandos sem os:
Português
Page 20
20
Português
Lista de jogos
1. No ecrã de selecção do jogo, usa o botão SELECT para escolheres a Corrida de
Cavalos e prime o botão START para conrmar.
2. Usa o botão SELECT para escolheres um cavalo (existem 4 cavalos disponíveis). De
seguida, prime o botão START para conrmar.
3. Usa o botão SELECT para escolheres um local de corrida (oresta ou deserto). De
seguida, prime o botão START para conrmar.
4. Usa o botão SELECT para escolheres o tempo (sol, neve ou chuva). De seguida, prime
o botão START para conrmar.
5. Prime repetidamente os botões de acção ou abana os comandos sem os para
acelerares.
6. Usa os botões ou para moveres o cavalo para a direita ou para a esquerda.
Prime o botão para saltares e para evitares os obstáculos.
1. No ecrã de selecção do jogo, usa o botão SELECT para escolheres o Esqui. De
seguida, prime o botão START para conrmar.
2. Usa o botão SELECT para escolheres um esquiador (existem 4 esquiadores
disponíveis). De seguida, prime o botão START para conrmar.
3. Prime repetidamente os botões de acção ou abana os comandos sem os para
acelerares.
4. Usa os botões ou para moveres o esquiador para a esquerda ou para a direita.
Prime o botão para saltares e para evitares os obstáculos.
CORRIDA DE CAVALOS (HORSE RIDING)
Salta para o teu cavalo e corre o mais rápido que conseguires para ultrapassares os
outros cavalos! Para ganhares a corrida, salta por cima dos obstáculos e não te
esqueças de recolher as frutas para aumentar a tua velocidade. Tem cuidado! Só tens 6
minutos para terminares a corrida!
ESQUI (SKIING)
Tens 4 minutos para esquiares até à linha de chegada. Recolhe o máximo de bebidas
que conseguires para aumentares a tua velocidade e salta por cima dos obstáculos
existentes na neve!
1. No ecrã de selecção do jogo, usa o botão SELECT para escolheres a actividade do
Guarda-redes. De seguida, prime o botão START para conrmar.
2. Usa o botão SELECT para escolheres um modo de jogo: Praticar ou Torneio. De
seguida, prime o botão START para conrmar.
Nota: Se escolheres o modo de Torneio, não poderás escolher o teu adversário.
3. Se escolheres o modo de Praticar, usa o botão SELECT para escolheres um
adversário entre os 4 jogadores disponíveis. Prime o botão START para conrmares e
para começares a sessão de grandes penalidades.
4. Prime o botão para defenderes para o canto direito da baliza. Para defenderes para
o canto superior da baliza, prime em simultâneo os botões de acção e o botão .
GUARDA-REDES (GOAL KEEPER)
Prepara-te para uma sessão emocionante de grandes penalidades! Usa os comandos
e o tapete interactivo para controlares as luvas do guarda-redes e para defenderes as
grandes penalidades!
Page 21
21
Português
1. No ecrã de selecção do jogo, usa o botão SELECT para escolheres a actividade
Basebol e prime o botão START para conrmar.
2. Usa o botão SELECT para escolheres um modo de jogo: Praticar ou Torneio. De
seguida, prime o botão START para conrmar.
3. Quando o lançador lançar a bola, baloiça os comandos sem os, como se estivesses a
baloiçar um taco e tenta acertar na bola. Também podes usar os botões de acção.
4. Quando acertares na bola, prime rapidamente os botões e um a seguir ao outro
para fazeres o teu jogador correr e chegar à base seguinte.
Nota: Perdes o jogo se o lançador adversário conseguir retirar 3 dos teus jogadores, ou todos os teus 11 jogadores
tiverem completado a sua ronda.
BASEBOL (BASEBALL)
Leva a tua equipa de basebol à vitória! Tens de acertar na bola e correr para chegares à
base seguinte. Tenta acertar na bola de modo a fazeres um home run!
1. No ecrã de selecção do jogo, usa o botão SELECT para escolheres a actividade do
Bowling. De seguida, prime o botão START para conrmar.
2. Prime o botão START ou um dos botões de acção para começares o jogo.
3. Usa os botões e para moveres o teu jogador para a esquerda ou para a direita na
linha de lançamento. Prime um botão de acção para conrmares a posição.
4. O indicador na barra de controlo (no canto superior direito do ecrã) começa a mover-se.
Prime um botão de acção quando chegar à posição desejada para conrmar a direcção
da bola.
5. O indicador na barra da potência começa a mover-se. Prime um botão de acção quando
chegar à posição desejada, para escolheres um nível de potência para lançares a bola.
6. Usa os comandos sem os para fazeres um movimento de lançamento e para lançares
a bola.
Nota: Para fazeres movimentos precisos, recomendamos que uses um comando sem os quando jogares este jogo.
BOWLING
O bowling vai deixar de ter segredos para ti! Prepara-te, aponta e atira a bola para
deitares os pinos abaixo.
5. Prime o botão para defenderes para o canto esquerdo da baliza. Para defenderes
para o canto superior esquerdo da baliza, prime em simultâneo os botões de acção e o
botão .
6. Prime em simultâneo os botões e para defenderes no centro da baliza. Prime em
simultâneo os botões de acção e os botões e para defenderes a parte superior
do centro da baliza.
Page 22

22
Português
Indicações para a protecção do meio ambiente
Aparelhos eléctricos antigos são materiais que não pertencem ao lixo doméstico! Por isso
pedimos para que nos apoie, contribuindo activamente na poupança de recursos e na
protecção do ambiente ao entregar este aparelho nos pontos de recolha, caso existam.
Advertência sobre a epilepsia
Ler antes de qualquer utilização de um jogo de vídeo por si próprio ou pelo seu lho.
Certas pessoas estão susceptíveis de ter crises de epilepsia ou de ter perdas de consciência quando expostas a
certo tipo de luzes que piscam ou de elementos frequentes no nosso ambiente quotidiano. Essas pessoas
expõem-se a crises quando vêem certas imagens televisivas ou quando jogam a certos jogos de vídeo. Estes
fenómenos podem aparecer mesmo que o sujeito não tenha antecedentes médicos ou que nunca tenha sido
confrontado com uma crise de epilepsia. Se você ou algum membro da sua família já apresentou alguma vez alguns
sintomas ligados à epilepsia (crise ou perda de consciência) em presença de estímulos “ luminosos “, deve consultar
o seu médico antes de qualquer utilização. Nós aconselhamos os pais a estarem atentos aos seus lhos quando
eles jogam com jogos de vídeo. Se você ou o seu lho apresentar os sintomas seguintes : vertigens, problemas de
visão, contracção dos olhos ou dos músculos, perda de consciência, problemas de orientação, movimento
involuntário ou convulsões, pare imediatamente de jogar e consulte um médico.
Precauções a ter em conta sempre que estiver a utilizar um videojogo
Quando estiver a utilizar um videojogo que pode ser conectado ao aparelho de TV, que em pé ou sente
relativamente longe do ecrã da TV, e tão longe quanto o o lhe permitir. Utilize de preferência videojogos com um
ecrã pequeno. Evite jogar videojogos se estiver cansado ou com falta de sono. Jogue sempre em um quarto bem
iluminado. Quando estiver a jogar videojogos descanse 10 ou 15 minutos por cada hora de jogo.
Manutenção e garantia
Para limpar o jogo, utilize apenas um pano suave ligeiramente humedecido e sem qualquer tipo de detergente. Não
exponha o jogo à luz directa do sol nem a qualquer outra fonte de calor. Não molhe a unidade. Não desmonte nem
deixe cair a unidade. Retire as pilhas caso o produto não seja utilizado durante um longo período de tempo.
NOTA: Por favor guarde este manual, pois contém informações importantes. Este produto está coberto pela nossa
garantia de 2 anos. Para a utilização da garantia ou do serviço pós-venda, deverá dirigir-se ao seu revendedor,
levando consigo o talão da compra. A nossa garantia cobre defeitos de material ou de montagem da
responsabilidade do fabricante, excluindo qualquer deterioração proveniente do não cumprimento do modo de
utilização ou de qualquer intervenção inoportuna sobre a unidade (como a desmontagem, exposição ao calor ou à
humidade…). Recomenda-se que guarde a caixa para uma futura referência. Na procura de uma constante
melhoria, poderemos modicar as cores ou características do produto apresentadas na caixa. Não aconselhado
a crianças com menos de 36 meses de idade, devido às pequenas peças desmontáveis, susceptíveis de serem
engolidas.
Referência: JG7000
Criado e desenvolvido na Europa – Fabricado na China
Lexibook Electrónica Lda,
Quinta dos loios,
Praceta José Domingos dos Santos, 6B-8A,
2835-343 Lavradio-Barreiro, Portugal.
Apoio técnico: 21 206 13 48
www.lexibook.com
www.lexibookjunior.com
©200 8 Le xibook®
Page 23

23
Guida di avvio
Questa sezione spiega come usare il gioco wireless TV Sports Plug & Play. Si consiglia di leggere il
manuale di istruzioni no alla ne per istruzioni dettagliate sulle attività e avvertenze sulla sicurezza.
1. Con un cacciavite, aprire il vano batterie sotto la console. Inserire 4 batterie tipo LR6/AA (non in
dotazione). Chiudere il vano batterie e serrare la vite.
2. Con un cacciavite, aprire i vani batterie posizionati sul lato destro dei comandi wireless. Inserire 2
batterie tipo LR3/AAA (non in dotazione), richiudere i vani batterie e serrare la vite.
3. Collegare i cavi della console nelle uscite A/V del televisore abbinando i colori corrispondenti dei
cavi e delle prese A/V.
AVVERTENZA: Spegnere la TV e la console prima di eseguire tutte le connessioni.
4. Accendere la TV e selezionare il canale AV. Premere il tasto ON/OFF per accendere la console.
5. Dopo la schermata di avvio, compare la schermata di selezione gioco. Per selezionare il gioco
desiderato, utilizzare il tasto SELECT sul lato sinistro del tappetino interattivo. Premere il tasto
START per confermare e iniziare a giocare. Per ulteriori dettagli sui giochi, andare alla sezione
«Elenco giochi» (p.25).
Contenuto della confezione
1 Console TV Sports Plug & Play con tappetino interattivo
2 comandi wireless
1 manuale di istruzioni
ATTENZIONE : I componenti dell’imballo, quali pellicole in plastica, nastro adesivo, nastri di ssaggio metallici non
fanno parte del giocattolo e devono essere eliminati per motivi di sicurezza prima dell’utilizzo dei bambini.
Informazioni sulle batterie
La console TV Sports Plug & Play funziona con 4 batterie tipo 1.5 V AA/LR6 (non in dotazione)
per la console e 2 batterie tipo 1.5 V AAA/LR3 (non in dotazione) per ogni comando wireless.
Console:
1. Usare un cacciavite per aprire il vano batterie posizionato sotto la
console.
2. Inserire 4 batterie tipo LR6/AA (non in dotazione) osservando
attentamente la polarità indicata sul fondo del vano batterie e come da
diagramma a lato.
3. Chiudere il vano batterie e serrare la vite.
Comandi wireless:
1. Usare un cacciavite per aprire i vani batterie collocati sul lato destro
dei comandi.
2. Inserire 2 batterie tipo LR3/AAA (non in dotazione) osservando
attentamente la polarità indicata sul fondo dei vani batterie e come da
diagramma illustrato a lato.
3. Chiudere i vani batterie e serrare le viti.
1.5V AA ORLR6
1.5V AA ORLR6
1.5V AA ORLR6
1.5V AA ORLR6
1.5V SIZE AAA
LR 03
1.5V SIZE AAA
LR 03
Italiano
Page 24

24
Le batterie non ricaricabili non devono essere ricaricate; le batterie ricaricabili devono essere tolte
dal giocattolo prima di essere ricaricate; le batterie ricaricabili devono essere caricate unicamente
con la supervisione di un adulto; non mischiare differenti tipi di batterie o batterie nuove e usate;
utilizzare unicamente batterie del tipo raccomandato o equivalenti; inserire le batterie rispettando
le polarità; rimuovere le batterie esaurite dal giocattolo; non cortocircuitare i terminali di
alimentazione. Non buttare le batterie nel fuoco. Rimuovere le batterie se non si usa il gioco per
molto tempo. Sostituire le batterie quando il suono diventa debole o il gioco non funziona.
AVVERTENZA: Se l’unità non funziona correttamente o subisce uno shock elettrostatico, premere il
tasto RESET. Se questo non ha effetti, togliere le batterie e inserirle nuovamente.
Console:
Tasto
ON/OFF
Utilizzato per accendere e spegnere la console.
Tasto
RESET
Utilizzato per terminare una partita o per tornare al menu
selezione gioco.
Tasto
START
utilizzato per iniziare un gioco, giocare una partita o
mettere in pausa in gioco. Premere il tasto START una volta
per sospendere il gioco in svolgimento e premerlo di nuovo
per iniziare a giocare.
Tasto
SELECT
Utilizzato per selezionare un gioco, una caratteristica del
gioco o per scorrere le modalità di gioco e le opzioni. Premere
lo stesso tasto per visualizzare informazioni aggiuntive su una
caratteristica del gioco (le funzioni dei tasti possono cambiare
secondo il gioco selezionato).
Tasto
UP
ARROW
Utilizzato per fare un salto (le funzioni dei tasti possono cambiare secondo il gioco selezionato).
Tasto
LEFT
ARROW
Utilizzato per spostare un personaggio del gioco a sinistra.
Oppure in combinazione con il tasto RIGHT ARROW, per far
correre il personaggio (le funzioni dei tasti possono cambiare
secondo il gioco selezionato).
Tasto
RIGHT
ARROW
Utilizzato per spostare un personaggio del gioco a destra.
Oppure in combinazione con il tasto LEFT ARROW, per far
correre il personaggio (le funzioni dei tasti possono cambiare
secondo il gioco selezionato).
Muovere i comandi o premere i tasti azione sulla parte alta
per controllare i personaggi del gioco.
Nota: I due tasti azione hanno la stessa funzione e possono essere usati in modo indipendente.
Caratteristiche del prodotto
Comandi wireless:
Italiano
Page 25

25
Elenco giochi
1. Sulla schermata di selezione gioco, usare il tasto SELECT per selezionare l’attività
Corsa di Cavalli e premere il tasto START per confermare.
2. Usare il tasto SELECT per scegliere un cavallo (ci sono 4 cavalli a disposizione), poi
premere il tasto START per confermare.
3. Usare il tasto SELECT per scegliere un luogo per la gara (foresta o deserto), poi
premere il tasto START per confermare.
4. Usare il tasto SELECT per scegliere il tempo (sole, neve o pioggia), poi premere il tasto
START per confermare.
5. Premere ripetutamente i pulsanti azioni o scuotere i comandi wireless per accelerare.
6. Usare i tasti o per spostare il cavallo a destra o a sinistra. Premere il tasto
per saltare ed evitare gli ostacoli.
1. Sulla schermata di selezione gioco, usare il tasto SELECT per selezionare l’attività Sci e
premere il tasto START per confermare.
2. Usare il tasto SELECT per scegliere uno sciatore (ci sono 4 sciatori a disposizione), poi
premere il tasto START per confermare.
3. Premere ripetutamente i pulsanti azioni o scuotere i comandi wireless per accelerare.
4. Usare i tasti o per spostare lo sciatore a destra o a sinistra. Premere il tasto
per saltare ed evitare gli ostacoli.
CORSA DI CAVALLI (HORSE RIDING)
Salta sul tuo cavallo e galoppa più veloce che puoi per superare gli altri fantini! Per
vincere la corsa, salta gli ostacoli sulla strada e non dimenticarti di raccogliere la frutta per
aumentare la velocità. Attenzione! Hai solo 6 minuti per nire la corsa!
SCI (SKIING)
Hai 4 minuti per sciare su tutta la pista no al traguardo. Raccogli quante più bibite puoi
per aumentare la velocità e saltare gli ostacoli sulla neve!
1. Sulla schermata di selezione gioco, usare il tasto SELECT per selezionare l’attività
Portiere e premere il tasto START per confermare.
2. Usare il tasto SELECT per scegliere una modalità di gioco: Allenamento o Torneo, poi
premere il tasto START per confermare.
Nota: se si sceglie la modalità Torneo, non si può scegliere l’avversario.
3. Se si sceglie la modalità Allenamento, usare il tasto SELECT per scegliere un avversario
tra i 4 giocatori disponibili. Premere il tasto START per confermare e iniziare a tirare i
rigori.
4. Premere il tasto per presidiare l’angolo a destra della rete. Per presidiare l’angolo in
alto a destra della rete, premere simultaneamente i tasti azione e il tasto .
PORTIERE (GOAL KEEPER)
Preparati a divertirti con una entusiasmante gara ai rigori! Usare i comandi e il tappetino
interattivo per controllare i guantoni del portiere e parare tutti i rigori!
Italiano
Page 26

26
1. Sulla schermata di selezione gioco, usare il tasto SELECT per selezionare
l’attività Bowling e premere il tasto START per confermare.
2. Premere il tasto START o uno dei tasti azione per iniziare il gioco.
3. Usare i tasti e per muovere il giocatore a destra o a sinistra sulla
linea di tiro. Premere un tasto azione per confermare la posizione.
4. L’indicatore sulla barra di Comando (nell’angolo in alto a destra dello
schermo) inizia a muoversi. Premere un tasto azione quando raggiunge la
posizione desiderata per confermare la direzione della palla.
5. L’indicatore sulla barra di Potenza inizia a muoversi. Premere un pulsante
azione quando raggiunge la posizione desiderata per selezionare un livello
di potenza per tirare la palla.
6. Usare il comando wireless per fare la mossa di tiro e gettare la palla.
Nota: per fare mosse accurate, si consi glia di utilizzare un comando wireless quando si gioca.
BOWLING
Il bowling non avrà più segreti per voi! Preparatevi, prendete la mira e tirate la palla
per fare strike.
1. Sulla schermata di selezione gioco, usare il tasto SELECT per selezionare
l’attività Baseball e premere il tasto START per confermare.
2. Usare il tasto SELECT per scegliere una modalità di gioco: Allenamento o
Torneo, poi premere il tasto START per confermare.
3. Quando il pitcher ha gettato la palla, ruotare i comandi wireless come si
stesse roteando una mazza per cercare di colpire la palla. Si possono
usare anche i pulsanti azione.
4. Quando si colpisce la palla, premere velocemente i tasti e uno dopo
l’altro per far correre i giocatori e raggiungere la base successiva.
Nota: Si perde la partita se il pitcher avversario elimina 3 dei vost ri giocatori o se tutti i vost ri 11 giocatori
hanno com pletato il turno.
BASEBALL
Portate la vostra squadra di baseball alla vittoria! Dovete colpire la palla e correre
per raggiungere la base successiva. Provate a fare un home run!
5. Premere il tasto per presidiare l’angolo a sinistra della rete. Per presidiare
l’angolo in alto a sinistra della rete, premere simultaneamente i tasti azione e il
tasto .
6. Premere simultaneamente i tasti e per presidiare il centro della rete. Premere
simultaneamente i tasti azione e i tasti e per presidiare la parte centrale in
alto della rete.
Italiano
©200 8 Le xibook®
Page 27
27
Avvertenze per la tutela dell’ambiente
Gli apparecchi elettrici vecchi sono materiali pregiati, non rientrano nei normali rifiuti domestici!
Preghiamo quindi i gentili clienti di contribuire alla salvaguardia dell’ambiente e delle risorse e di
consegnare il presente apparecchio ai centri di raccolta competenti, qualora siano presenti sul
territorio.
Avvertenze sull’epilessia
Leggere prima di un qualsiasi utilizzo di un videogioco da parte vostra o del vostro bambino. Determinate persone
possono essere soggette a crisi epilettiche o a perdite di coscienza alla vista di determinati tipi di luci lampeggianti o
di elementi frequenti presenti nell’ambiente quotidiano. Queste persone sono soggette a crisi guardando determinate
immagini televisive o durante l’uso di videogiochi. Questi fenomeni possono apparire nonostante il soggetto non
abbia dei precedenti o non sia mai stato colpito da crisi epilettiche. Nel caso in cui voi o un qualsiasi membro della
vostra famiglia abbia presentato in passato sintomi legati all’epilessia (crisi o perdita di coscienza) in presenza di
stimoli “luminosi” consultare un medico prima di utilizzare il giocattolo. Consigliamo ai genitori di prestare la massima
attenzione durante l’uso dei videogiochi da parte dei bambini. Nel caso in cui voi o i vostri bambini presentiate i
seguenti sintomi: vertigini, turbe della vista, contrazioni oculari o muscolari, perdita di coscienza, turbe
dell’orientamento, movimento involontario o convulsioni, interrompere immediatamente il gioco e consultare un
medico.
Precauzioni da rispettare quando si utilizzano videogiochi
Quando si usa un videogioco che può essere collegato ad uno schermo TV, restare, in piedi o seduti, ad una certa
distanza dallo schermo, almeno per quanto consentito dal cavo di collegamento. Usare preferibilmente videogiochi
che hanno uno schermo piccolo. Evitare di giocare se si è stanchi o si è dormito poco. Assicurarsi che la stanza in
cui si gioca sia ben illuminata. Quando si gioca, fare degli intervalli di 10-15 minuti ogni ora.
Manutenzione e garanzia
Per pulire il giocattolo, servirsi unicamente di un panno morbido leggermente inumidito con acqua, evitando qualsiasi
prodotto detergente. Non esporre il giocattolo alla luce diretta del sole né ad altre sorgenti di calore. Non bagnare.
Non smontare il giocattolo e non lasciarlo cadere. Estrarre le batterie in caso di mancato utilizzo per un lungo periodo
di tempo.
NOTA: conservare il presente libretto d’istruzioni in quanto contiene informazioni importanti. Questo prodotto è
coperto dalla nostra garanzia di 2 anni. Per servirsi della garanzia o del servizio di assistenza post vendita, rivolgersi
al negoziante muniti di prova d’acquisto. La nostra garanzia copre i vizi di materiale o di montaggio imputabili al
costruttore a esclusione di qualsiasi deterioramento causato dal mancato rispetto delle istruzioni d’uso o di qualsiasi
intervento inadeguato sul prodotto (smontaggio, esposizione al calore o all’umidità…). Si raccomanda di conservare
la confezione per qualsiasi riferimento futuro. Nel nostro impegno costante volto al miglioramento dei nostri prodotti,
è possibile che i colori e i dettagli dei prodotti illustrati sulla confezione differiscano dal prodotto effettivo. Non adatto
a bambini di età inferiore a 36 mesi in quanto contiene piccole parti mobili che potrebbero essere ingoiate.
Riferimento: JG7000
Progettato e sviluppato in Europa – Fabbricato in China
Lexibook Italia S.r.l,
Via Eustachi, 45,
20129 Milano, Italia.
Servizio consumatori : 022040 4959 (Prezzo di una chiamata locale).
www.lexibook.com
www.lexibookjunior.com
Italiano
©200 8 Le xibook®
Page 28

28
Inbetriebnahme
Dieser Abschnitt erklärt, wie das kabellose TV Sports Plug & Play Spiel benutzt wird. Es wird
empfohlen, die komplette Bedienungsanleitung für genaue Anleitungen bezüglich der Aktivitäten und
Sicherheitshinweise durchzulesen.
1. Öffne mit Hilfe eines Schraubendrehers das Batteriefach unter der Konsole. Lege 4 x Batterien des
Typs LR6/AA (nicht mitgeliefert) ein. Verschließe das Batteriefach wieder und ziehe die Schraube
fest.
2. Öffne mit Hilfe eines Schraubendrehers das Batteriefach auf der rechten Seite der kabellosen
Fernsteuerung. Lege 2 x Batterien des Typs LR3/AAA (nicht mitgeliefert) ein, verschließe das
Batteriefach wieder und ziehe die Schraube fest.
3. Verbinde die Kabel der Konsole mit den A/V-Ausgangsbuchsen an deinem Fernseher, indem du die
Kabel passend zu den Farben der Ausgänge anschließt.
WARNUNG: Schalte den Fernseher und die Konsole aus, bevor du alle Verbindungen herstellst.
4. Schalte den Fernseher ein und wähle den AV-Kanal. Drücke die EIN-/AUS-Taste , um die
Konsole einzuschalten.
5. Nach dem Startup-Bildschirm, erscheint der Spielauswahl-Bildschirm. Wähle mit der
SELECT(Auswahl)-Taste auf der linken Seite der interaktiven Matte das gewünschte Spiel aus.
Drücke die START-Taste, um deine Wahl zu bestätigen und das Spiel zu starten. Für weitere
Informationen zu den Spielen, sieh bitte den Abschnitt “Spieleliste” (S.30).
Verpackungsinhalt
1 TV Sports Plug & Play Konsole mit interaktiver Matte
2 kabellose Fernsteuerungen
1 Bedienungsanleitung
WARNUNG: Entfernen Sie das Verpackungsmaterial, wie Plastikfolien, Klebebänder, Etiketten und Befestigungsbänder aus Metall. Diese sind nicht Bestandteil des Spiels und müssen aus Sicherheitsgründen entfernt werden, bevor
Ihr Kind das Spiel benutzt.
Batterie-Information
Die TV Sports Plug & Play Konsole benötigt zum Betrieb 4 X 1,5V Batterien des Typs AA/LR6
(nicht mitgeliefert) für die Konsole und 2 X 1,5V Batterien des Typs AAA/LR3 (nicht
mitgeliefert) für jede der Fernsteuerungen.
Konsole:
1. Öffne mit einem Schraubendreher das Batteriefach unter der Konsole.
2. Lege 4 x Batterien des Typs LR6/AA (nicht mitgeliefert) unter
Beachtung der Polarität, die am Boden des Batteriefachs und im
Schaubild gegenüber angezeigt wird, ein.
3. Schließe das Batteriefach und ziehe die Schraube fest.
Kabellose Fernsteuerungen:
1. Öffne mit einem Schraubendreher die Batteriefächer auf der rechten
Seite der Fernsteuerungen.
2. Lege 2 x Batterien des Typs LR3/AAA (nicht mitgeliefert) unter
Beachtung der Polarität, die am Boden des Batteriefachs und im
Schaubild gegenüber angezeigt wird, ein.
3. Schließe die Batteriefächer und ziehe die Schrauben fest.
1.5V AA ORLR6
1.5V AA
ORLR
6
1.5V AA ORLR6
1.5V AA
ORLR
6
1.5V SIZE AAA
LR 03
1.5V SIZE AAA
LR 03
Deutsch
Page 29
29
Nicht wieder auadbare Batterien können nicht aufgeladen werden. Auadbare Batterien müssen
vor der Auadung aus dem Spielzeug genommen werden. Batterien dürfen nur unter Aufsicht
eines Erwachsenen aufgeladen werden. Unterschiedliche Batterietypen bzw. alte und neue
Batterien dürfen nicht gemischt werden. Es dürfen nur solche Batterien verwendet werden, die
gleichwertig zum empfohlenen Batterietyp sind. Die Batterien müssen korrekt entsprechend der
Polaritätsmarkierungen eingelegt werden. Leere Batterien müssen aus dem Spielzeug genommen
werden. Die Anschlüsse dürfen nicht kurz geschlossen werden. Batterien niemals ins Feuer
werfen. Entfernen Sie die Batterien, wenn Sie das Spielzeug für längere Zeit nicht benutzen.
Wenn der Sound schwächer wird oder das Spielzeug anfängt, nicht mehr direkt zu reagieren,
deutet dieses ebenfalls darauf hin, dass es Zeit wird, neue Batterien einzusetzen.
WARNUNG: Sollte das Gerät nicht korrekt funktionieren oder einen elektrostatischen Schock erhalten, drücke die
RESET-Taste. Sollte dies ergebnislos bleiben, entferne bitte die Batterien und legen sie wieder ein.
Konsole:
EIN-/
AUS-Taste
Deine Konsole ein- und ausschalten.
RESETTaste
Eine Spiel beenden oder zum Spielauswahl-Menü
zurückkehren.
STARTTaste
Ein Spiel starten, eine Spielrunde spielen oder ein Spiel
unterbrechen. Drücke die START-Taste einmal, um das
aktuelle Spiel zu unterbrechen und drücke die Taste noch
einmal, um das Spiel fortzusetzen.
SELECT
(Auswahl)Taste
Ein Spiel oder eine Spielgur auswählen oder Spielmodi
und Spieloptionen durchsuchen. Drücke dieselbe Taste, um
zusätzliche Informationen über eine Spielgur aufzurufen (Die
Funktionen der Tasten können sich gemäß der gewählten
Spiele ändern).
ABWÄRTS
PFEILTaste
Einen Sprung ausführen (Die Funktionen der Tasten können
sich gemäß der gewählten Spiele ändern).
LINKS
PFEILTaste
Spielgur nach links bewegen oder, kombiniert mit der
RECHTS PFEIL-Taste, die Figur laufen lassen (Die Funktionen der Tasten können sich gemäß der gewählten Spiele
ändern).
RECHTS
PFEILTaste
Spielgur nach rechts bewegen oder, kombiniert mit der
LINKS PFEIL-Taste, die Figur laufen lassen (Die Funktionen
der Tasten können sich gemäß der gewählten Spiele ändern).
Bewege die Fernsteuerungen oder drücke die Action-Tasten
oben auf den Fernsteuerungen, um die Spielguren zu
steuern.
Hinweis: Die zwei Action-Tasten haben dieselbe Funktion und können unabhängig voneinander
benutzt werden.
Produkteigenschaften
KABELLOSE
FERNSTEUERUNGEN:
Deutsch
Page 30

30
Spieleliste
1. Wähle mit der SELECT-Taste auf dem Spielauswahl-Bildschirm die Aktivität “Reiten”
und drücke die START-Taste, um zu bestätigen.
2. Wähle mit der SELECT-Taste ein Pferd (es stehen 4 Pferde zur Verfügung), drücke
dann zur Bestätigung die START-Taste.
3. Wähle mit der SELECT-Taste einen Ort für das Rennen (Wald oder Wüste), drücke dann
zur Bestätigung die START-Taste.
4. Wähle mit der SELECT-Taste das Wetter (Sonne, Schnee oder Regen), drücke dann zur
Bestätigung die START-Taste.
5. Drücke mehrmals auf die Action-Tasten oder schüttle die Fernsteuerunngen, um zu
beschleunigen.
6. Bewege das Pferd mit der oder Taste nach links oder rechts. Drücke die
Taste, um zu springen und Hindernissen auszuweichen.
1. Wähle mit der SELECT-Taste die Aktivität “Ski fahren” auf dem Spielauswahl-Bildschirm
und drücke dann zur Bestätigung die START-Taste.
2. Wähle mit der SELECT-Taste ein Paar Skier (es stehen 4 Paar Skier zur Verfügung),
drücke dann zur Bestätigung die START-Taste.
3. Drücke mehrmals die Action-Tasten oder schüttle die Fernbedienungen, um zu
beschleunigen.
4. Bewege mit der oder Taste die Skier nach rechts oder links. Drücke die Taste,
um zu springen und Hindernissen auszuweichen.
REITEN (HORSE RIDING)
Springe auf dein Pferd und reite so schnell du kannst, um die anderen Reiter zu
überholen! Um das Rennen zu gewinnen, springe über die Hindernisse und vergiss nicht,
die Früchte aufzusammeln, um deine Geschwindigkeit zu erhöhen. Pass auf! Du hast nur
6 Minuten Zeit, um das Rennen zu beenden!
SKI FAHREN (SKIING)
Du hast 4 Minuten Zeit, um die gesamte Piste bis zur Ziellinie mit deinen Skiern
herunterzusausen. Sammle so viele Getränke wie möglich, um deine Geschwindigkeit zu
erhöhen und springe über die Hindernisse im Schnee!
1. Wähle mit der SELECT-Taste die Aktivität “Torwart” auf dem Spielauswahl-Bildschirm
und drücke dann zur Bestätigung die START-Taste.
2. Wähle mit der SELECT-Taste einen Spielmodus: Training oder Meisterschaft, drücke
dann zur Bestätigung die START-Taste.
Hinweis: Wenn du den Meisterschaftsmodus wählst, kannst du dir deinen Gegner nicht aussuchen.
3. Wenn du den Trainingsmodus gewählt hast, wähle mit der SELECT-Taste aus 4 zur
Verfügung stehenden Spielern einen Gegner aus. Drücke die START-Taste zur
Bestätigung und starte das Elfmeterschießen.
TORWART (GOAL KEEPER)
Mache dich für ein spannendes Elfmeterschießen bereit! Steuere mit den
Fernsteuerungen und der interaktiven Matte die Handschuhe des Torwarts und halte alle
Elfmeter!
Deutsch
Page 31
31
1. Wähle mit der SELECT- Taste die Aktivität “Baseball” auf dem Spielauswahl-Bildschirm
und drücke zur Bestätigung die START-Taste.
2. Wähle mit der SELECT-Taste einen Spielmodus: Training oder Meisterschaft, drücke
dann zur Bestätigung die START-Taste.
3. Wenn der Pitcher den Ball geworfen hat, schwinge die kabellosen Fernsteuerungen,
als würdest du einen Baseballschläger schwingen, und versuche den Ball zu treffen. Du
kannst auch die Action-Tasten benutzen.
4. Wenn du den Ball triffst, drücke schnell nacheinander die und die Tasten, um
deinen Spieler losrennen und die nächste Base erreichen zu lassen.
Hinweis: Das Spiel ist zu Ende, wenn der gegnerische Pitcher drei deiner Spieler aus dem Spiel geworfen hat oder
alle deine 11 Spieler ihre Runde beendet haben.
BASEBALL
Führe dein Baseball-Team zum Sieg! Du musst den Ball treffen und zur nächsten Base
rennen. Versuche einen Homerun - das heißt, versuche alle vier Base abzulaufen und die
Home Base zu erreichen – zu machen!
1. Wähle mit der SELECT-Taste die Aktivität “Bowling” auf dem Spielauswahl-Bildschirm
und drücke zur Bestätigung die START-Taste.
2. Drücke die START-Taste oder eine der Action-Tasten, um das Spiel zu starten.
3. Bewege mit den und die Tasten deinen Spieler nach rechts oder links auf der
Abwurinie. Drücke eine Action-Taste, um die Position zu bestätigen.
4. Der Indikator auf dem Kontrollbalken (in der oberen rechten Bildschirmecke) beginnt
sich zu bewegen. Drücke eine Action-Taste, wenn er die gewünschte Position erreicht
hat, um die Richtung der Bowling-Kugel zu bestätigen.
5. Der Indikator auf dem Kraftbalken beginnt sich zu bewegen. Drücke eine Action-Taste,
wenn er die gewünschte Position erreicht hat, um die Kraftstufe des Kugelwurfs
auszuwählen.
6. Mache mit der kabellosen Fernsteuerung eine Wurfbewegung und wirf die Kugel.
Hinweis: Um genaue Bewegungen zu machen, wird empfohlen nur eine kabellose Fernsteuerung in diesem Spiel zu
benutzen.
BOWLING
Bowling wird für dich keine Geheimnisse mehr bergen! Mache dich bereit, ziele und wirf
die Kugel, um alle Kegel umzuwerfen.
4. Schütze mit der Taste die rechte Torecke. Um die obere rechte Ecke zu bewachen,
drücke gleichzeitig die Action-Tasten und die Taste.
5. Drücke die Taste, um die linke Torecke zu bewachen. Um die obere linke Torecke zu
bewachen, drücke die Action-Tasten und die Taste gleichzeitig.
6. Drücke die und die Tasten gleichzeitig, um die Tormitte zu bewachen. Drücke
gleichzeitig die Action -Tasten und die und die Tasten, um die obere Tormitte zu
bewachen.
Deutsch
Page 32
32
Hinweise zum Umweltschutz
Alt-Elektrogeräte sind Wertstoffe, sie gehören daher nicht in den Hausmüll! Wir möchten Sie
daher bitten, uns mit Ihrem aktiven Beitrag bei der Ressourcenschonung und beim Umweltschutz
zu unterstützen und dieses Gerät bei den (falls vorhanden) eingerichteten Rücknahmestellen
abzugeben.
Epilepsie - Hinweis
Bitte sorgfältig lesen, bevor Sie oder Ihr Kind ein Videospiel beginnen. Bei einem kleinen Prozentsatz der
Bevölkerung können während des Betrachtens von blinkenden Lichtern oder Mustern, die in unserer Umgebung
täglich vorkommen, epileptische Erscheinungsformen auftreten. Diese Zustände können bei den betroffenen
Personen durch das Betrachten bestimmter Fernsehbilder oder beim Spielen bestimmter Videospiele hervorgerufen
werden. Auch bei Spielern, die bislang nicht mit epileptischen Symptomen auf Lichtreize reagiert haben, ist eine
bisher unentdeckte epileptische Veranlagung nicht ausgeschlossen. Befragen Sie daher einen Arzt, bevor Sie ein
Videospiel benutzen oder wenn bei einem Mitglied Ihrer Familie Epilepsie vorliegt. Wir empfehlen allen Eltern,
ihre Kinder beim Spielen von Videospielen zu beobachten. Sollten bei Ihnen oder Ihrem Kind folgende Symptome
auftreten, unterbrechen Sie augenblicklich das Spiel: verändertes Sehvermögen, Augen- und Muskelzuckungen,
unwillkürliche Bewegungen, Desorientierung, Wahrnehmungsverlust der Umgebung, geistige Verwirrung,
Schwindelgefühle und/oder Krämpfe. Befragen Sie Ihren Arzt.
Vorkehrungen, die bei Videospielen in jedem Fall zu treffen sind
Wenn Sie eine Spielkonsole benutzen, die an den Bildschirm Ihres Fernsehgerätes angeschlossen werden kann,
setzen oder stellen Sie sich bitte relativ weit vom Bildschirm entfernt, und zwar so weit, wie es die Länge des Kabels
erlaubt. Machen Sie vorrangig solche Videospiele, die an einem kleinen Bildschirm gespielt werden können.
Verzichten Sie auf Videospiele, wenn Sie müde sind oder Ihnen Schlaf fehlt. Stellen Sie bitte sicher, dass Sie in
einem Raum spielen, der hell oder gut ausgeleuchtet ist. Wenn Sie Videospiele machen, sollten Sie jede Stunde eine
Pause von 10 bis 15 Minuten einlegen.
Flege und Wartung / Garantie
Verwenden Sie zur Reinigung des Spielzeugs nur ein weiches, leicht angefeuchtetes Tuch und niemals
Reinigungsmittel. Setzen Sie das Spielzeug nicht direkter Sonnenbestrahlung oder anderen Hitzequellen aus.
Bringen Sie es auf keinen Fall mit Nässe in Berührung. Nehmen Sie es nicht auseinander und lassen Sie es nicht
fallen. Entnehmen Sie die Batterien, falls das Spielzeug über einen längeren Zeitraum hinweg nicht in Gebrauch ist.
Anmerkung: Bitte bewahren Sie diese Bedienungsanleitung auf, da sie wichtige Hinweise enthält. Dieses Produkt
hat 2 Jahre Garantie. Für jede Inanspruchnahme der Garantie oder des Kundendienstes, kontaktieren Sie bitte Ihren
Einzelhändler unter Vorlage der Einkaufsquittung. Unsere Garantie deckt Materialschäden oder
Installationsfehler, die auf den Hersteller zurückzuführen sind. Nicht eingeschlossen sind Schäden, die durch
Missachtung der Bedienungsanleitung oder auf unsachgemäße Behandlung (wie z. B. unbefugtes Öffnen, Aussetzen
von Hitze oder Feuchtigkeit, usw.) zurückzuführen sind. Wir empfehlen, die Verpackung für spätere Konsultationen
aufzubewahren. Bedingt durch unser ständiges Bemühen nach Verbesserung, kann das Produkt möglicherweise in
Farben und Details von der Verpackungsabbildung abweichen. Nicht für Kinder unter 36 Monaten geeignet, da es
kleine, abnehmbare Einzelteile enthält, die verschluckt werden könnten.
Referenznummer: JG7000
Design und Entwicklung in Europa - Made in China
Lexibook Deutschland - Service-Hotline/Kundendienst
Tel. 01805 010931(0,14 €/Minute)
E-Mail: savcomfr@lexibook.com
www.lexibook.com
www.lexibookjunior.com
Deutsch
©200 8 Le xibook®
Page 33

33
Opstartgids
Deze sectie legt uit hoe u het TV sporten Plug & Play draadloos spel moet gebruiken. Het is aanbevolen de volledige handleiding te lezen omwille van uitvoerige instructies over de functies en de
veiligheidswaarschuwingen.
1. Open het batterijvakje onderaan de console met behulp van een schroevendraaier. Plaats 4 LR6/AA
batterijen (niet inbegrepen). Sluit het batterijvakje opnieuw en draai de schroef vast.
2. Open de batterijvakjes aan de rechterzijde van de draadloze controllers. Plaats de 2 LR3/AAA
batterijen (niet inbegrepen), sluit het batterijvakje opnieuw en draai de schroef vast.
3. Sluit de kabels van de console aan op de A/V uitgangen op uw televisie door de overeenkomstige
kleuren van de kabels te doen passen bij de A/V uitgangen.
WAARSCHUWING: Schakel de tv en de console uit alvorens alles aan te sluiten.
4. Zet de tv aan en selecteer het AV kanaal. Druk op de ON/OFF (AAN/UIT) toets om de console in
te schakelen.
5. Na het opstartscherm, zal het scherm voor spelselectie weergegeven worden. Gebruik de
SELECTEREN toets aan de linkerkant van de interactieve mat om het gewenste spel te selecteren.
Druk op de START toets om te bevestigen en om te beginnen spelen. Gelieve de “Spellijst” te
raadplegen voor meer details over de spellen (p.35).
Inhoud van de verpakking
1 TV Sporten Plug & Play console met een interactieve mat
2 draadloze controllers
1 handleiding
WAARSCHUWING: De verpakkingsdelen, zoals plastic folie, plakband, etiketten en metalen hechtingsbanden,
maken geen deel uit van dit speelgoed en moeten voor alle veiligheid worden verwijderd vooraleer het speelgoed
door een kind kan en mag worden gebruikt.
Batterijinformatie
De TV Sporten Plug & Play console werkt op 4 X 1.5 V AA/LR6 batterijen (niet inbegrepen) voor
de console en 2 X 1.5 V AAA/LR3 batterijen (niet inbegrepen) voor elke draadloze controller.
Console:
1. Gebruik een schroevendraaier om het batterijvakje onderaan de
console te openen.
2. Plaats de 4 LR6/AA batterijen (niet inbegrepen) waarbij u de polariteit
in acht neemt die aangegeven is op de onderkant van het batterijvakje,
alsook tegenovergesteld zoals weergegeven op de schets.
3. Sluit het batterijvakje en draai de schroef vast.
Draadloze controllers:
1. Gebruik een schroevendraaier om de batterijcompartimenten aan de
rechterkant van de controllers te openen.
2. Plaats de 2 LR3/AAA batterijen (niet inbegrepen), waarbij u de
polariteit in acht houdt die weergegeven is op de onderkant van het
batterijvakje , alsook tegenovergesteld zoals weergegeven op de
schets.
3. Sluit het batterijvakje opnieuw en draai de schroeven vast.
1.5V AA ORLR6
1.5V AA ORLR6
1.5V AA ORLR6
1.5V AA ORLR6
1.5V SIZE AAA
LR 03
1.5V SIZE AAA
LR 03
Nederlands
Page 34
34
Niet-heroplaadbare batterijen kunnen niet worden heropgeladen; oplaadbare batterijen moeten
uit het speelgoed worden verwijderd alvorens deze op te laden; heroplaadbare batterijen mogen
alleen onder toezicht van een volwassene worden opgeladen; verschillende types batterijen of
nieuwe en oude batterijen mogen niet onderling gebruikt worden; gebruik alleen batterijen van
hetzelfde of equivalente type zoals aangeraden door de fabrikant; batterijen moeten volgens de
juiste polariteit worden ingestoken; lege batterijen moeten uit het speelgoed worden verwijderd; de
toevoerterminals mogen geen kortsluiting ondervinden. Gelieve de verpakking te bewaren als
referentie voor later daar het belangrijke informatie bevat. Gooi batterijen nooit in open vuur.
Indien je het spel voor langere tijd niet zal gebruiken, neem de batterijen uit het spel. Wanneer het
geluid verzwakt of het spel niet reageert, vervang dan de batterijen.
WAARSCHUWING: Als het toestel niet werkt of een elektrostatische schok krijgt, dient u op de
RESET (opnieuw opstarten) knop te drukken. Als dit ondoeltreffend blijkt te zijn, verwijder dan de
batterijen en steek ze er opnieuw in.
Console:
ON/OFF
(AAN/UIT)
toets
Gebruikt om uw console in of uit te schakelen.
RESET
(opnieuw
opstarten) toets
Gebruikt om een spel te beëindigen of terug te gaan naar het
menu van spelselectie.
START
toets
Gebruikt om een spel te starten, een spellenronde te spelen
of het spel te pauzeren. Druk eenmaal op de START toets om
het spel in uitvoering te onderbreken en druk er opnieuw op
om het spelen te hervatten.
SELECT
(SELECTEREN)
toets
Gebruikt om een spel of guur te selecteren of te bladeren
door de spellenmodi en opties. Druk op dezelfde toets om
bijkomende informatie over het guurtje weer te geven (de
toetsfuncties kunnen verschillen naargelang het geselecteerde
spel).
OPWAARTSE
PIJL toets
Gebruikt om een sprong te maken (de toetsfuncties kunnen
verschillen naargelang het geselecteerde spel).
LINKERPIJL
toets
Gebruikt om het guurtje naar links te bewegen. Kan in
combinatie met de RECHTERPIJL toets ook gebruikt worden
om het guurtje te doen lopen (de toetsfuncties kunnen
verschillen naargelang het geselecteerde spel).
RECHTERPIJL
toets
Gebruikt om het guurtje naar rechts te bewegen. Kan in
combinatie met de LINKERPIJL toets ook gebruikt worden om
het guurtje te doen lopen (de toetsfuncties kunnen
verschillen naargelang het geselecteerde spel).
Beweeg de controllers of druk op de actieknoppen die
bovenaan staan om de guurtjes te besturen.
Opmerking: De twee actieknoppen hebben dezelfde functie en kunnen afzonderlijk gebruikt worden.
Productkenmerken
Draadloze controllers:
Nederlands
Page 35
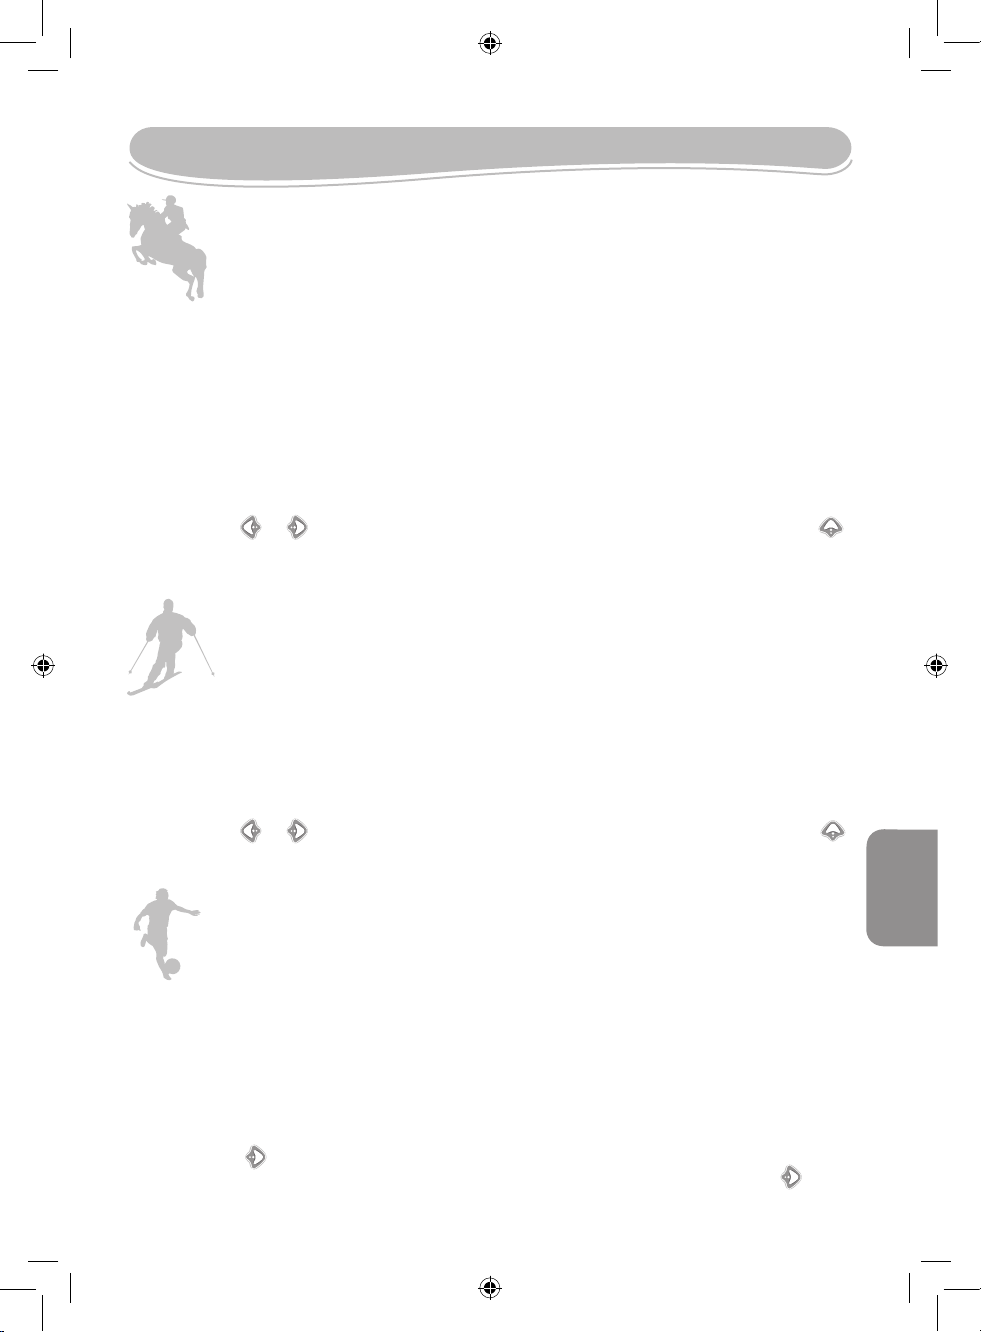
35
Spellijst
1. Gebruik de SELECTEREN toets op het scherm voor spelselectie om de activiteit van
Paardrijden te selecteren en druk dan op START om te bevestigen.
2. Gebruik de SELECTEREN toets om een paard te kiezen (er zijn 4 paarden
beschikbaar), druk vervolgens op START om te bevestigen.
3. Gebruik de SELECTEREN toets om een locatie te kiezen voor de race (bos of woestijn),
druk vervolgens op de START toets om te bevestigen.
4.Gebruik de SELECTEREN toets om het weer te kiezen (zonnig, sneeuwachtig of
regenachtig), druk vervolgens op de START toets om te bevestigen.
5. Druk herhaaldelijk op de actieknoppen of schud de draadloze controllers om te
versnellen.
6. Gebruik de of toets om het paard naar rechts of links te bewegen. Druk op de
toets om te springen en obstakels te vermijden.
1. Gebruik de SELECTEREN toets op het scherm voor spelselectie om de skiactiviteit te
selecteren en druk op de START toets om te bevestigen.
2. Gebruik de SELECTEREN toets om een skiër te kiezen (er zijn 4 skiërs beschikbaar),
druk vervolgens op de START toets om te bevestigen.
3. Druk herhaaldelijk op de actieknoppen of schud de draadloze controllers om te
versnellen.
4. Gebruik de of oetsen om de skiër naar rechts of links te bewegen. Druk op de
toets om te springen en obstakels te vermijden.
PAARDRIJDEN (HORSE RIDING)
Spring op uw paard en rijd zo snel als u kan om de andere paardrijders in te halen!
Om de race te winnen, springt u over de wegobstakels en vergeet niet om uw fruit op
te rapen om uw snelheid te verhogen. Wees voorzichtig! U heeft maar 6 minuten om
de eindstreep te bereiken!
SKIËN (SKIING)
U hebt vier minuten om naar beneden te skiën tot aan de eindmeet. Verzamel zoveel
mogelijk drank als u kan om uw snelheid te verhogen en spring over obstakels in de
sneeuw!
1. Gebruik de SELECTEREN toets op het scherm voor spelselectie om het keepen als
activiteit te selecteren en druk op de START toets om te bevestigen.
2. Gebruik de SELECTEREN toets om een spelmodus te kiezen: training of toernooi, druk
vervolgens op de START toets om te bevestigen.
Opmerking: als u de Toernooi modus kiest, zult u uw tegenstander niet kunnen kiezen.
3. Als u de Training modus kiest, gebruikt u de SELECTEREN toets om een tegenstander
te kiezen uit 4 beschikbare spelers. Druk op de START knop om te bevestigen en de
strafschoppen te starten.
4. Druk op de toets om de rechterhoek van het doel te beschermen. Om de
rechterbovenhoek te beschermen, drukt u gelijktijdig op de actieknoppen en de
toets.
KEEPER (GOAL KEEPER)
Maak u klaar voor een leuke, spannende penalty doelpuntenfestijn! Gebruik de
controllers en de interactieve mat om de keeperhandschoenen te bedienen en alle
penalty’s te stoppen!
Nederlands
Page 36

36
1. Gebruik de SELECTEREN toets om de Bowlingactiviteit te selecteren en druk op START
om te bevestigen.
2. Druk op de START toets of op één van de actieknoppen om het spel te starten.
3. Gebruik de en de toetsen om uw speler naar rechts of links te bewegen op de
werplijn. Druk op een actieknop om de positie te bevestigen.
4. De indicator op de controlebalk (in de rechterbovenhoek van het scherm) zal beginnen
bewegen. Druk op een actieknop als het de gewenste positie bereikt om de balrichting
te bevestigen.
5. De indicator op de krachtbalk zal beginnen bewegen. Druk op een actieknop als het de
gewenste positie bereikt om een krachtniveau te selecteren om de bal te werpen.
6. Gebruik de draadloze controller om een werpbeweging te maken en werp te bal.
Opmerking: om gepaste bewegingen te maken, is het aanbevolen één draadloze controller te gebruiken bij het
spelen van dit spel.
BOWLING
Bowling zal geen geheimen meer voor u kennen! Bereid u voor, mik en werp de bal voor
een strike.
1. Gebruik de SELECTEREN toets om een Baseballactiviteit te selecteren en druk op de
START toets om te bevestigen.
2. Gebruik de SELECTEREN toets om een spelmodus te kiezen: Training of Toernooi en
druk vervolgens op de START toets om te bevestigen.
3. Eens de pitcher de bal gegooid heeft, zwaait u de draadloze controllers alsof u met een
knuppel zou zwaaien en een bal probeert te raken. U kunt ook de actieknoppen
gebruiken.
4. Als u een bal raakt, druk dan vlug op de en de toets na elkaar om uw speler te
doen lopen en de volgende honk te bereiken.
Opmerking: U zult het spel verkiezen als de pitcher van de tegenpartij de innings afbreekt van 3 van uw spelers of
als uw 11 spelers hun ronde voltooid hebben.
BASEBALL
Leid uw baseball team naar de overwinning! U moet de bal raken en lopen om de
volgende honk te bereiken. Probeer een home run te slaan!
5. Druk op de toets om de linkerhoek van het doel te beschermen. Om de
linkerbovenhoek van het doel te beschermen, drukt u gelijktijdig op de actieknoppen en
de toets.
6. Druk gelijktijdig op de en de toetsen om het midden van het doel te beschermen.
Druk gelijktijdig op de actieknoppen en de en de toetsen om het dak (bovenaan
in het midden) van het doel te beschermen.
Nederlands
©200 8 Le xibook®
Page 37

37
Richtlijnen voor milieubescherming
Gebruikte elektronische apparaten horen niet thuis in het huisafval ! Wij vragen u daarom een
bijdrage aan de bescherming van ons milieu te leveren en dit apparaat op de voorziene
verzamelplaatsen af te geven.
Waarschuwing voor epilepsie
Moet door jou of jouw kind gelezen worden alvorens een videospel te gebruiken.
Sommige mensen kunnen aanvallen van epilepsie krijgen of het bewustzijn verliezen bij het zien van bepaalde
itsende lichten of frequente bewegingen in onze dagelijkse omgeving. Deze mensen stellen zich bloot aan
dergelijke aanvallen bij het bekijken van bepaalde televisiebeelden of bij het spelen van bepaalde videospelen. Dit
fenomeen kan ook plaatsvinden zonder voorafgaande medische verschijning of zonder enige voorafgaande aanval
van epilepsie. Indien jezelf of iemand van je familie reeds symptomen van epilepsie (aanval of bewustzijnsverlies)
heeft ervaren bij het zien van “licht”stimulaties, gelieve uw dokter te raadplegen alvorens dit spel te gebruiken.
Wij raden de ouders aan om aandachtig hun kinderen te observeren tijdens het spelen van een videospel. Indien
jijzelf of je kind de volgende symptomen vertonen: duiziligheid, problemen van het zicht, oog- of
spiersamentrekkingen, orientatieproblemen, ongecontroleerde bewegingen of stuiptrekkingen, gelieve onmiddellijk
het spel te stoppen en uw dokter te raadplegen.
Voorzorgsmaatregelen die je bij het gebruik van video games altijd in acht moet nemen
Wanneer je een video game speelt met een TV-scherm kan verbonden worden, ga altijd op een relatieve verre
afstand van het scherm zitten of staan en zo ver als de verbindingsdraad het toelaat. Gebruik het liefst video games
met een klein scherm. Speel geen video games wanneer je moe bent of niet lang hebt geslapen. Zorg ervoor dat
de ruimte waarin je speelt voldoende verlicht is. Wanneer je video games speelt, neem elke 10 tot 15 minuten een
onderbreking.
Onderhoud en garantie
Om het speelgoed te reinigen, gebruik je alleen een zachte, licht vochtige doek. Alle detergenten zijn verboden. Stel
het spel niet bloot aan direct zonlicht of eender welke hittebron. Maak het spel niet nat. Haal het niet uit elkaar en laat
het niet vallen. Indien je het spel voor langere tijd niet gebruikt, haal de batterijen eruit.
OPMERKING: gelieve deze handleiding te bewaren aangezien het belangrijke informatie bevat. Het product is
gedekt door onze 2 jaar garantie. Voor alle herstellingen tijdens de garantie of naverkoopsdienst, moet je je richten
tot de verkoper met een aankoopbewijs. Onze garantie geldt voor al het materiaal en de montage van de
fabrikant, exclusief alle schade veroorzaakt door het niet repsecteren van onze gebruiksaanwijzing ( zoals uit elkaar
halen, blootstellen aan hitte of vochtigheid….). Wij raden aan de verpakking te bewaren voor enige referentie in
de toekomst. In onze poging voor constante verbetering, is het mogelijk dat kleuren en details van dit product
lichtjes verschillen van deze op de verpakking. Niet geschikt voor kinderen onder 36 maanden daar er kleine losse
onderdeeltjes aanwezig zijn.
Referentie : JG7000
Ontworpen en ontwikkeld in Europa - Gemaakt in China
www.lexibook.com
www.lexibookjunior.com
Nederlands
©200 8 Le xibook®
Page 38

38
Οδηγίες για το ξεκίνημα
Εξηγούμε εδώ πώς να χρησιμοποιήσετε το ασύρματο παιχνίδι TV Sports Plug & Play. Συνιστούμε να διαβάσετε
ολόκληρο το εγχειρίδιο οδηγιών για να μάθετε λεπτομέρειες σχετικά με τις δραστηριότητες και τις προειδοποιήσεις
ασφάλειας.
1. Με ένα κατσαβίδι, ανοίξτε το καπάκι των μπαταριών που βρίσκεται κάτω από την κονσόλα. Βάλτε μέσα τις 4
μπαταρίες τύπου LR6/AA (δεν περιλαμβάνονται). Κλείστε πάλι το καπάκι των μπαταριών και σφίξτε τη βίδα.
2. Με ένα κατσαβίδι, ανοίξτε το καπάκι των μπαταριών που βρίσκεται στη δεξιά πλευρά των ασύρματων
χειριστηρίων. Βάλτε μέσα τις 2 μπαταρίες τύπου LR3/AAA (δεν περιλαμβάνονται), κλείστε πάλι το καπάκι των
μπαταριών και σφίξτε τη βίδα.
3. Συνδέστε τα καλώδια της κονσόλας στις εξόδους AV της τηλεόρασής σας αντιστοιχίζοντας τα χρώματα των
καλωδίων με τις εξόδους AV.
ΠΡΟΕΙΔΟΠΟΙΗΣΗ: Έχετε την τηλεόραση και την κονσόλα κλειστές μέχρι να κάνετε όλες τις συνδέσεις.
4. Ανάψτε την τηλεόραση και επιλέξτε το κανάλι AV. Πατήστε το πλήκτρο ON/OFF για να ανάψετε την κονσόλα.
5. Μετά την οθόνη εκκίνησης, εμφανίζεται το οθόνη επιλογής παιχνιδιών. Για να επιλέξετε το παιχνίδι που θέλετε,
χρησιμοποιήστε το πλήκτρο SELECT [Επιλογή] που βρίσκεται αριστερά στο διαδραστικό χαλάκι. Πατήστε το
πλήκτρο START [Ξεκίνημα] για επιβεβαίωση και αρχίστε να παίζετε. Για περισσότερες λεπτομέρειες σχετικά με τα
παιχνίδια, παρακαλούμε δείτε την ενότητα « Λίστα παιχνιδιών » (σελ. 40).
Περιεχόμενα της συσκευασίας
1 Κονσόλα TV Sports Plug & Play με διαδραστικό χαλάκι
2 Ασύρματα χειριστήρια
1 Εγχειρίδιο οδηγιών
ΠΡΟΣΟΧΗ: Τα αντικείμενα που περιέχονται στη συσκευασία, όπως πλαστικά φιλμ, κολλητικές ταινίες, ετικέτες και
στερεωτικές μεταλλικές ταινίες, δεν αποτελούν μέρος αυτού του παιχνιδιού και πρέπει να αφαιρούνται για λόγους
ασφαλείας κάθε φορά πριν χρησιμοποιηθεί το παιχνίδι από το παιδί.
Πληροφορίες για τις μπαταρίες
Η κονσόλα TV Sports Plug & Play λειτουργεί με 4 μπαταρίες 1.5V τύπου AA/LR6 (δεν
περιλαμβάνονται) για την κονσόλα και 2 μπαταρίες 1.5V τύπου AAA/LR3 (δεν περιλαμβάνονται) για
κάθε ασύρματο χειριστήριο.
Κονσόλα:
1. Με ένα κατσαβίδι, ανοίξτε το καπάκι των μπαταριών που βρίσκεται
κάτω από την κονσόλα.
2. Βάλτε μέσα τις 4 μπαταρίες τύπου LR6/AA (δεν περιλαμβάνονται),
δίνοντας προσοχή στην πολικότητα, όπως φαίνεται στο κάτω μέρος του
χώρου των μπαταριών, και σύμφωνα με το διπλανό σχέδιο.
3. Κλείστε πάλι το καπάκι των μπαταριών και σφίξτε τη βίδα.
Ασύρματα χειριστήρια:
1. Με ένα κατσαβίδι, ανοίξτε τα καπάκια των μπαταριών που βρίσκονται
στη δεξιά πλευρά των χειριστηρίων.
2. Βάλτε μέσα τις 2 μπαταρίες τύπου LR3/AAA (δεν περιλαμβάνονται),
δίνοντας προσοχή στην πολικότητα, όπως φαίνεται στο κάτω μέρος του
χώρου των μπαταριών, και σύμφωνα με το διπλανό σχέδιο.
3. Κλείστε πάλι τα καπάκια των μπαταριών και σφίξτε τις βίδες.
1.5V AA ORLR6
1.5V AA
ORLR
6
1.5V AA ORLR6
1.5V AA
ORLR
6
1.5V SIZE AAA
LR 03
1.5V SIZE AAA
LR 03
Ελληνικά
Page 39
39
Οι μη επαναφορτιζόμενες μπαταρίες δεν πρέπει να επαναφορτίζονται. Οι επαναφορτιζόμενες μπαταρίες πρέπει να
αφαιρούνται από το παιχνίδι πριν φορτιστούν. Οι επαναφορτιζόμενες μπαταρίες πρέπει να φορτίζονται μόνο κάτω από
την επίβλεψη ενήλικου ατόμου. Δεν πρέπει να αναμειγνύονται διαφορετικοί τύποι μπαταριών ή νέες μπαταρίες μαζί με
μεταχειρισμένες. Πρέπει να χρησιμοποιούνται μόνο οι μπαταρίες ίδιου ή ισοδύναμου τύπου με αυτόν που συνιστάται. Οι
μπαταρίες πρέπει να μπαίνουν με τη σωστή πολικότητα. Οι μπαταρίες που έχουν εξαντληθεί πρέπει να αφαιρούνται από το
παιχνίδι. Οι ακροδέκτες της τροφοδοσίας δεν πρέπει να βραχυκυκλώνονται. Όταν πέσει η ισχύς των μπαταριών, θα μειωθεί
η ένταση της κόκκινης φωτεινής ένδειξης στο μηχάνημα. Φροντίστε τότε να αντικαταστήσετε τις μπαταρίες. Παρόμοια, όταν
ο ήχος εξασθενίσει ή το παιχνίδι δεν αποκρίνεται, φροντίστε να αντικαταστήσετε τις μπαταρίες. Παρακαλούμε κρατήστε τη
συσκευασία για γιατί περιέχει σημαντικές πληροφορίες που μπορούν να χρειαστούν στο μέλλον.
ΠΡΟΕΙΔΟΠΟΙΗΣΗ: Αν η συσκευή πάθει βλάβη ή βραχυκύκλωμα, πατήστε το πλήκτρο RESET [Επανεκκίνηση]. Αν
αυτό δεν έχει αποτέλεσμα, βγάλτε τις μπαταρίες και βάλτε τις πάλι μέσα.
Κονσόλα:
Πλήκτρο
ON/OFF
Ανάβετε ή σβήνετε την κονσόλα σας.
Πλήκτρο
RESET
Τελειώνετε ένα παιχνίδι ή επιστρέφετε στο μενού επιλογής
παιχνιδιών.
Πλήκτρο
START
Ξεκινάτε ένα παιχνίδι, παίζετε έναν γύρο παιχνιδιού ή διακόπτετε
προσωρινά ένα παιχνίδι. Πατήστε το πλήκτρο START μία φορά
για να διακόψετε προσωρινά το παιχνίδι που είναι σε εξέλιξη, και
πατήστε το πάλι για να συνεχίσετε να παίζετε.
Πλήκτρο
SELECT
Επιλέγετε ένα παιχνίδι ή έναν ήρωα, ή εξετάζετε τους τρόπους
και τις επιλογές παιξίματος. Πατήστε το ίδιο πλήκτρο για να
εμφανιστούν πρόσθετες πληροφορίες για τον ήρωα ενός
παιχνιδιού. (Οι λειτουργίες των πλήκτρων μπορεί να διαφέρουν
ανάλογα με το επιλεγμένο παιχνίδι).
Πλήκτρο
ΑΝΩ
βέλους
Πραγματοποιείτε ένα πήδημα. (Οι λειτουργίες των πλήκτρων
μπορεί να διαφέρουν ανάλογα με το επιλεγμένο παιχνίδι).
Πλήκτρο
ΑΡΙΣΤΕΡΟΥ
βέλους
Μετακινείτε τον ήρωα του παιχνιδιού αριστερά. Ή,
συνδυάζοντάς το με το πλήκτρο ΔΕΞΙΟΥ βέλους, κάνετε τον
ήρωα να τρέχει. (Οι λειτουργίες των πλήκτρων μπορεί να
διαφέρουν ανάλογα με το επιλεγμένο παιχνίδι).
Πλήκτρο
ΔΕΞΙΟΥ
βέλους
Μετακινείτε τον ήρωα του παιχνιδιού δεξιά. Ή, συνδυάζοντάς
το με το πλήκτρο ΑΡΙΣΤΕΡΟΥ βέλους, κάνετε τον ήρωα να
τρέχει. (Οι λειτουργίες των πλήκτρων μπορεί να διαφέρουν
ανάλογα με το επιλεγμένο παιχνίδι).
Μετακινείτε τα χειριστήρια ή πατάτε στα κουμπιά δράσης που
βρίσκονται στο πάνω μέρος, για να ελέγχετε τους ήρωες των
παιχνιδιών.
Σημείωση: Τα δύο κουμπιά δράσης εκτελούν την ίδια λειτουργία και μπορούν να χρησιμοποιηθούν ανεξάρτητα.
Λειτουργίες του προϊόντος
Ασύρματα χειριστήρια:
Ελληνικά
Page 40

40
Λίστα παιχνιδιών
1. Στ οθόνη επιλογής παιχνιδιών, χρησιμοποιήστε το πλήκτρο SELECT για να επιλέξετε τη
δραστηριότητα “Ιππασία”, και πατήστε το πλήκτρο START για επιβεβαίωση.
2. Χρησιμοποιήστε το πλήκτρο SELECT για να διαλέξετε ένα άλογο (υπάρχουν 4 άλογα
διαθέσιμα), και μετά πατήστε το πλήκτρο START για επιβεβαίωση.
3. Χρησιμοποιήστε το πλήκτρο SELECT για να διαλέξετε το είδος τοποθεσίας για τον
αγώνα (δάσος ή έρημος), και μετά πατήστε το πλήκτρο START για επιβεβαίωση.
4. Χρησιμοποιήστε το πλήκτρο SELECT για να διαλέξετε το είδος καιρού (ηλιόλουστη,
συννεφιασμένη ή βροχερή μέρα), και μετά πατήστε το πλήκτρο START για επιβεβαίωση.
5. Πατήστε επανειλημμένα τα κουμπιά δράσης ή κουνήστε γρήγορα τα ασύρματα
χειριστήρια για να επιταχύνετε.
6. Χρησιμοποιήστε τα πλήκτρα ή για να μετακινήσετε το άλογο δεξιά ή αριστερά.
Πατήστε το πλήκτρο για να πηδήξετε και να αποφεύγετε τα εμπόδια.
1. Στην οθόνη επιλογής παιχνιδιών, χρησιμοποιήστε το πλήκτρο SELECT για να επιλέξετε
τη δραστηριότητα “Σκι”, και πατήστε το πλήκτρο START για επιβεβαίωση.
2. Χρησιμοποιήστε το πλήκτρο SELECT για να διαλέξετε ένα σκιέρ (υπάρχουν 4 σκιέρ
διαθέσιμοι), και μετά πατήστε το πλήκτρο START για επιβεβαίωση.
3. Πατήστε επανειλημμένα τα κουμπιά δράσης ή κουνήστε γρήγορα τα ασύρματα
χειριστήρια για να επιταχύνετε.
4. Χρησιμοποιήστε τα πλήκτρα ή για να μετακινήσετε το σκιέρ δεξιά ή αριστερά.
Πατήστε το πλήκτρο για να πηδήξετε και να αποφεύγετε τα εμπόδια.
ΙΠΠΑΣΙΑ (HORSE RIDING)
Καβαλήστε το άλογό σας και τρέξτε όσο πιο γρήγορα μπορείτε για να ξεπεράσετε τους
άλλους ιππείς! Για να κερδίσετε τον αγώνα, πηδήξτε τα εμπόδια που συναντάτε στον
δρόμο και μην ξεχνάτε να μαζεύετε τα φρούτα, για να αυξήσετε ταχύτητα. Προσέξτε!
Έχετε στη διάθεσή σας μόνο 6 λεπτά για να τερματίσετε στον αγώνα!
ΣΚΙ (SKIING)
Έχετε στη διάθεσή σας 4 λεπτά για να κατέβετε κάνοντας σκι μέχρι τη γραμμή
τερματισμού. Μαζέψτε όσα ποτά μπορείτε για να αυξήσετε ταχύτητα και να πηδήξετε τα
εμπόδια πάνω στο χιόνι!
1. Στην οθόνη επιλογής παιχνιδιών, χρησιμοποιήστε το πλήκτρο SELECT για να επιλέξετε
τη δραστηριότητα “Τερματοφύλακας” και πατήστε το πλήκτρο START για επιβεβαίωση.
2. Χρησιμοποιήστε το πλήκτρο SELECT για να διαλέξετε τρόπο παιξίματος: Εξάσκηση ή
Τουρνουά, και μετά πατήστε το πλήκτρο START για επιβεβαίωση.
Σημείωση: Αν διαλέξετε “Τουρνουά”, δεν μπορείτε να διαλέξετε τον αντίπαλό σας.
3. Αν διαλέξετε “Εξάσκηση”, χρησιμοποιήστε το πλήκτρο SELECT για να επιλέξετε
έναν αντίπαλο ανάμεσα στους 4 διαθέσιμους παίκτες. Πατήστε το πλήκτρο START για
επιβεβαίωση και ξεκινήστε τη διαδικασία των πέναλτι.
ΤΕΡΜΑΤΟΦΥΛΑΚΑΣ (GOAL KEEPER)
Ετοιμαστείτε για μια διασκεδαστική και συναρπαστική διαδικασία πέναλτι! Χρησιμοποιήστε
τα χειριστήρια και το διαδραστικό χαλάκι για να ελέγχετε τα γάντια του τερματοφύλακα και
να αποκρούετε τα πέναλτι!
Ελληνικά
Page 41
41
1. Στην οθόνη επιλογής παιχνιδιών, χρησιμοποιήστε το πλήκτρο SELECT για να επιλέξετε
τη δραστηριότητα “Μπέιζμπολ”, και πατήστε το πλήκτρο START για επιβεβαίωση.
2. Χρησιμοποιήστε το πλήκτρο SELECT για να διαλέξετε ένα τρόπο παιξίματος: Εξάσκηση
ή Τουρνουά, και μετά πατήστε το πλήκτρο START για επιβεβαίωση.
3. Μόλις ο πίτσερ ρίξει την μπάλα, κουνήστε τα ασύρματα χειριστήρια σαν να ήταν
ρόπαλο του μπέιζμπολ και προσπαθήστε να χτυπήσετε την μπάλα. Μπορείτε επίσης να
χρησιμοποιήσετε τα κουμπιά δράσης.
4. Όταν χτυπήσετε την μπάλα, πατήστε γρήγορα τα πλήκτρα και το ένα μετά το άλλο
για να κάνετε τον παίκτη σας να τρέξει και να φτάσει στην επόμενη βάση.
Σημείωση: Χάνετε το παιχνίδι αν ο αντίπαλος πίτσερ αποσύρει 3 παίκτες σας ή αν και οι 11 παίκτες σας έχουν
συμπληρώσει τον γύρο τους.
ΜΠΕΙΖΜΠΟΛ (BASEBALL)
Οδηγήστε την ομάδα σας μπέιζμπολ στη νίκη! Πρέπει να χτυπήσετε την μπάλα και να
τρέξετε για να φτάσετε στην επόμενη βάση. Προσπαθήστε να κάνετε home run!
1. Στην οθόνη επιλογής παιχνιδιών, χρησιμοποιήστε το πλήκτρο SELECT για να επιλέξετε
τη δραστηριότητα “Μπόουλινγκ”, και πατήστε το πλήκτρο START για επιβεβαίωση.
2. Πατήστε το πλήκτρο START ή ένα από τα κουμπιά δράσης για να ξεκινήσετε το
παιχνίδι.
3. Χρησιμοποιήστε τα πλήκτρα και για να μετακινήσετε τον παίκτη σας δεξιά ή αριστερά
πάνω στη γραμμή βολής. Πατήστε ένα κουμπί δράση για να επιβεβαιώσετε τη θέση.
4. Ένας δείκτης πάνω στη γραμμή Ελέγχου (στην πάνω δεξιά γωνία της οθόνης) θ’ αρχίσει
να κινείται. Πατήστε ένα κουμπί δράσης όταν ο δείκτης φτάσει στη θέση που θέλετε, για
να επιβεβαιώσετε την κατεύθυνση της μπάλας.
5. Ο δείκτης πάνω στη γραμμή Δύναμης θ’ αρχίσει να κινείται. Πατήστε ένα κουμπί δράσης
όταν ο δείκτης φτάσει στη θέση που θέλετε, για να επιλέξετε ένα επίπεδο δύναμης για τη
βολή της μπάλας.
6. Χρησιμοποιήστε το ασύρματο χειριστήριο για να κάνετε μια κίνηση βολής και να ρίξετε
την μπάλα.
Σημείωση: Για να κάνετε ακριβείς κινήσεις, συνιστάται να παίζετε αυτό το παιχνίδι χρησιμοποιώντας ένα μόνο
ΜΠΟΟΥΛΙΝΓΚ (BOWLING)
Το μπόουλινγκ δεν θα κρύβει πλέον μυστικά για εσάς! Ετοιμαστείτε, σημαδέψτε και ρίξτε
την μπάλα για να κάνετε στράικ.
4. Πατήστε το πλήκτρο για να προστατέψετε τη δεξιά γωνία του τέρματος. Για να
προστατέψετε την πάνω δεξιά γωνία του τέρματος, πατήστε ταυτόχρονα τα κουμπιά
δράσης και το πλήκτρο .
5. Πατήστε το πλήκτρο για να προστατέψετε την αριστερή γωνία του τέρματος. Για να
προστατέψετε την πάνω αριστερή γωνία του τέρματος, πατήστε ταυτόχρονα τα κουμπιά
δράσης και το πλήκτρο .
6. Πατήστε ταυτόχρονα τα πλήκτρα και για να προστατέψετε το κέντρο του τέρματος.
Πατήστε ταυτόχρονα τα κουμπιά δράσης και τα πλήκτρα και για να προστατέψετε
το πάνω κέντρο του τέρματος.
Ελληνικά
Page 42

42
Υποδείξεις για την προσ τασία του περιβάλλοντος
Οι παλιές ηλεκτρικές συσκευές είναι πολύτιμα υλικά και συνεπώς δεν έχουν θέση στα οικιακά
απορρίμματα! Θα θέλαμε λοιπόν να σας παρακαλέσουμε να μας υποστηρίξετε συμβάλλοντας
ενεργά στην προστασία των πρώτων υλών και του περιβάλλοντος παραδίδοντας τη συσκευή
αυτή στις υπηρεσίες ανακύκλωσης - εφόσον υπάρχουν.
ΠΡΟΕΙΔΟΠΟΙΗΣΗ ΣΧΕΤΙΚΑ ΜΕ την ΕΠΙΛΗΨΙΑ
Να διαβαστεί πριν τη χρήση παιχνιδιού βίντεο, είτε από εσάς είτε από το παιδί σας.
Ορισμένα άτομα είναι ευπαθή σε επιληπτικές κρίσεις ή στο να χάνουν τις αισθήσεις τους όταν κοιτάζουν ορισμένα
είδη φώτων που αναβοσβήνουν ή στοιχεία που βρίσκει συχνά κανείς στο καθημερινό περιβάλλον. Αυτά τα άτομα
παθαίνουν κρίσεις όταν παρακολουθούν ορισμένες εικόνες στην τηλεόραση ή παίζουν ορισμένα παιχνίδια βίντεο.
Αυτό το φαινόμενο μπορεί να εκδηλωθεί ακόμη και αν το άτομο δεν έχει κανένα ιατρικό ιστορικό παρόμοιας
περίπτωσης ή δεν έχει ποτέ υποφέρει από επιληπτική κρίση.
Αν εσείς οι ίδιοι ή κάποιο μέλος της οικογένειά σας έχει παρουσιάσει στο παρελθόν οποιοδήποτε σύμπτωμα που
σχετίζεται με επιληψία (είτε κρίση ή απώλεια αισθήσεων) όταν έχει εκτεθεί σε “φωτεινό” ερέθισμα, παρακαλούμε
συμβουλευτείτε τον γιατρό σας πριν επιχειρήσετε να χρησιμοποιήσετε αυτό το παιχνίδι.
Προειδοποιούμε τους γονείς να έχουν το νου τους στα παιδιά όταν αυτά παίζουν με παιχνίδια βίντεο. Αν εσείς οι
ίδιοι ή το παιδί σας έχει παρουσιάσει οποιοδήποτε από τα ακόλουθα συμπτώματα: ζαλάδα, αλλοίωση της όρασης,
σπασμούς ματιών ή μυών, απώλεια επίγνωσης, αίσθηση αποπροσανατολισμού ή ακούσιες κινήσεις ή μυϊκές
συσπάσεις, σταματήστε αμέσως το παιχνίδι και συμβουλευτείτε έναν γιατρό.
Προφυλάξεις που πρέπει να πάρετε σε οποιαδήποτε περίπτωση όταν
παίζετε ένα παιχνίδι βίντεο
Όταν παίζετε ένα παιχνίδι βίντεο που έχετε συνδέσει σε συσκευή τηλεόρασης, να στέκεστε ή να κάθεστε σχετικά
μακριά από την οθόνη της τηλεόρασης, όσο σας το επιτρέπει το μήκος του καλωδίου σύνδεσης. Παίζετε κατά
προτίμηση παιχνίδια βίντεο που οι διαστάσεις της εικόνας τους να είναι σχετικά μικρή. Αποφεύγετε να παίζετε
παιχνίδια αν είστε κουρασμένοι ή σας λείπει ύπνος. Παίζετε σε χώρο που είναι καλά φωτισμένος. Όταν παίζετε
παιχνίδια βίντεο, κάντε ένα διάλειμμα 10 με 15 λεπτά κάθε ώρα.
Συντήρηση και εγγύηση
Για να καθαρίσετε το παιχνίδι, χρησιμοποιήσετε μόνο ένα μαλακό πανί ελαφρά μουσκεμένο σε νερό. Μη
χρησιμοποιήσετε κανένα απορρυπαντικό. Μην εκθέτετε το παιχνίδι στο φως του ήλιου ή σε οποιαδήποτε άλλη πηγή
θερμότητας. Μην αφήσετε το το παιχνίδι να βραχεί. Μην αποσυναρμολογήσετε ή αφήσετε να πέσει κάτω το παιχνίδι.
Βγάζετε τις μπαταρίες αν το προϊόν δεν πρόκειται να χρησιμοποιηθεί για μεγάλο χρονικό διάστημα.
ΣΗΜΕΙΩΣΗ: Παρακαλούμε φυλάξτε αυτό το εγχειρίδιο οδηγιών γιατί περιέχει σημαντικές πληροφορίες. Αυτό το
προϊόν καλύπτεται με 2ετή εγγύηση. Για οποιαδήποτε απαίτηση που προβλέπεται στην εγγύηση ή στην τεχνική
υποστήριξη, παρακαλούμε επικοινωνήστε με τον διανομέα, παρουσιάζοντας μια έγκυρη απόδειξη αγοράς. Η εγγύησή
μας καλύπτει οποιοδήποτε ελάττωμα ως προς τα κατασκευαστικά υλικά και την τεχνική αρτιότητα, με εξαίρεση
οποιαδήποτε φθορά που προκύπτει από τη μη τήρηση των οδηγιών του εγχειριδίου ή οποιαδήποτε απρόσεκτη
ενέργεια απέναντι σε αυτό το προϊόν (όπως αποσυναρμολόγηση, έκθεση σε ζεστό ή υγρό μέρος, κλπ.). Συνιστάται
να φυλάξετε τη συσκευασία για οποιεσδήποτε περαιτέρω πληροφορίες. Στην προσπάθειά μας της συνεχούς
βελτίωσης των υπηρεσιών μας, πιθανώς να κάνουμε αλλαγές στα χρώματα και τις λεπτομέρειες του προϊόντος που
φαίνονται στη συσκευασία.
Το προϊόν αυτό δεν είναι κατάλληλο για παιδιά κάτω των 36 μηνών, επειδή περιέχει μικρά αφαιρούμενα κομμάτια που
τα μικρά παιδιά θα μπορούσαν να καταπιούν.
Κωδικός αναφοράς: JG7000
www.lexibook.com
www.lexibookjunior.com
©200 8 Le xibook® IM R ef. Code: JG70 00IM 0108
Ελληνικά
Page 43
YOUR OPINION MATTERS / VOTRE AVIS COMPTE
Help us make products better than ever! Please fill out the following form in English or in French, and return it to / Aidez-nous à rendre nos
produits encore meilleurs! Merci de bien vouloir remplir ce coupon en français ou en anglais et de nous le retourner à l’adresse suivante :
Name and reference of product purchased / Nom et référence du produit acheté :
Date of purchase / Date de l’achat : ____/_____/_____
Store / Enseigne :
Birth Date of the user / Date de naissance de l’utilisateur de ce produit : ____/_____/_____
What is your overall impression of the product? / Vous trouvez le produit globalement :
Very satisfactory/Très satisfaisant
Satisfactory/Satisfaisant
Please feel free to leave your comments here / Vous pouvez à présent utiliser l’espace suivant pour nous donner vos remarques :
Find all our new products / Retrouvez toute notre actualité: http://www.lexibook.com
First name/Prénom :
Last name/Nom de famille :
Address/Adresse :
Zip code/Code Postal :
Country/Pays :
Phone/Téléphone :
Email :
Average/Moyen
Disappointing/Décevant Very disappointing/Très décevant
LEXIBOOK S.A,
Mon avis compte
2, avenue de Scandinavie,
91953 Courtaboeuf Cedex
FRANCE
City/Ville :
Conformément aux articles 34 et suivants de la loi « Informatique et Libertés » du 6 janvier 1978, vous disposez d'un droit d'accès, de modification,
de rectification et de suppression des données qui vous concernent. Vous pouvez l'exercer sur simple demande à notre adresse. Si vous ne souhaitez
pas que ces données soient utilisées à des fins de prospection commerciale, veuillez cocher ici :
Page 44

LEXIBOOK S.A,
Mon avis compte,
2, avenue de Scandinavie,
91953 Courtaboeuf Cedex
FRANCE
Affranchir
ici
 Loading...