

Page 1

DMP84IM1232_7Jun_V05.indb 1 07/06/2012 2:31 PM
Multimedia player
MODE D’EMPLOI - INSTRUCTION MANUAL
DMP84series
Page 2

1
2 3 4
5
DMP84IM1232_7Jun_V05.indb 2 07/06/2012 2:31 PM
6
10
11
7
8 9
12
Page 3
• Déballage de l’appareil :
Lors du déballage, assurez-vous que les pièces suivantes soient incluses :
1 baladeur multimédia DMP84 / 1 paire d’écouteurs / 1 câble USB / 1 mode d’emploi
AVERTISSEMENT : Tous les matériaux d’emballage, comme le scotch, les feuilles en
plastique, les celles et les étiquettes ne font pas partie de ce produit et doivent être jetés.
• Connexion des écouteurs :
Branchez les écouteurs (fournis) dans la prise casque située sous l’appareil.
ATTENTION : Baissez toujours le niveau du volume avant de mettre vos écouteurs.
Autrement votre audition pourrait être endommagée.
• Chargement de la batterie :
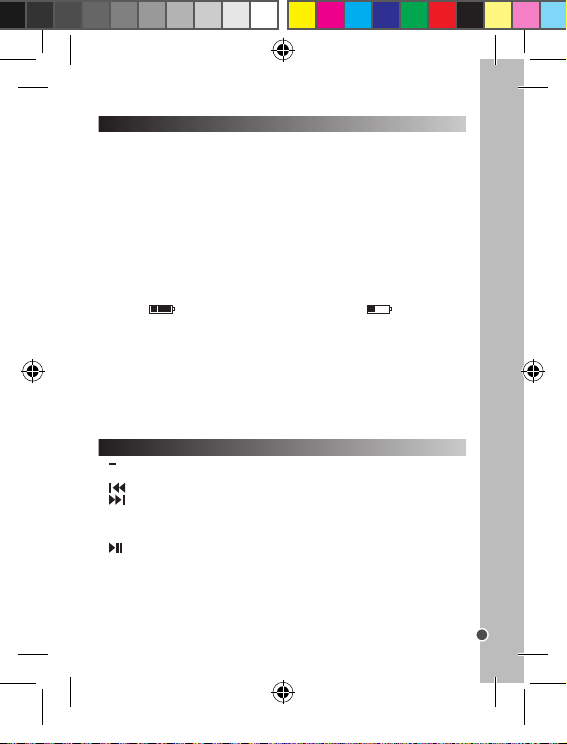
Note : L’indicateur de charge de la batterie se trouve en haut à droite de l’écran LCD.
Le symbole indique que la batterie est pleine. Le symbole indique que la
batterie est faible et que vous devez le recharger.
Votre baladeur multimédia est équipé d’une batterie intégrée rechargeable. Pour
charger l’appareil, éteignez-le en plaçant le sélecteur ON-OFF sur la position OFF puis
connectez-le à un ordinateur en utilisant le câble USB fourni.
AVERTISSEMENT : D’importantes interférences électromagnétiques ou des décharges
électrostatiques peuvent provoquer un dysfonctionnement ou une perte de données. Si
l’appareil ne fonctionne pas correctement, éteignez-le puis rallumez-le ou débranchez
le câble USB.
Guide des touches
1. Volume - Pour diminuer le volume sonore de l’appareil.
2. + Volume - Pour augmenter le volume sonore de l’appareil.
3. Prev. (Précédent) - Pour accéder à la piste ou à l’élément précédent.
4. Next (Suivant) - Pour accéder à la piste ou à l’élément suivant.
5. M Menu - Appuyer une fois pour valider ou accéder aux options d’une fonction.
Maintenir appuyé pour accéder aux écrans de sélection des fonctions.
6. Écran
7. Play/Pause - Pour lancer/suspendre/reprendre la lecture.
8. Prise casque 3,5 mm - Pour brancher des écouteurs à l’appareil.
9. Microphone
10. ON-OFF (Marche-Arrêt) - Pour mettre en marche ou éteindre l’appareil.
11. Haut-parleur
12. Port mini USB - Pour charger l’appareil ou transférer des données.
Guide de démarrage
FRANÇAIS
3
DMP84IM1232_7Jun_V05.indb 3 07/06/2012 2:31 PM
Page 4

FRANÇAIS
Votre baladeur multimédia est livré avec les six fonctions suivantes : Musique,
Enregistrements, Voix, Radio (en option) et Conguration.
• Fonction « Musique »
Note : Pour savoir comment transférer des chiers audio dans votre lecteur multimédia,
consultez la section « Téléchargement de chiers multimédia » à la page 4 de ce mode
d’emploi.
1. Sélectionnez la fonction Musique puis appuyez sur la touche Play/Pause pour
démarrer la lecture du chier audio
Note : C’est la dernière chanson écoutée qui s’afche, par défaut, lorsque vous ouvrez
la fonction Musique.
2. Appuyez sur la touche Play/Pause pour suspendre la lecture. Pressez une
nouvelle fois cette touche pour reprendre la lecture.
3. Appuyez sur les touches ou pour sélectionner le chier audio précédent
ou suivant.
4. Pour une avance rapide ou un retour rapide dans la piste en cours de lecture,
maintenez les touches ou appuyées.
Note : L’appareil est équipé d’un haut-parleur (écoute collective) et d’une prise casque
(écoute privée).
ATTENTION : Baissez toujours le niveau du volume avant de mettre vos écouteurs.
Autrement votre audition pourrait être endommagée.
Les options de la fonction Musique :
- Dans la fonction Musique, vous accédez aux options suivantes en appuyant, une fois,
sur le bouton M de l’appareil : « Dossier local », « Effacer le chier », « Tout effacer »
et « Fin ».
- En mode lecture, vous accédez aux options suivantes en appuyant, une fois, sur le
bouton M de l’appareil : « Équaliseur », « Répéter », « Relire » et « Fin ».
• Fonction « Enregistrements »
1. Sélectionnez la fonction Enregistrements puis appuyez sur le bouton Play/Pause
pour commencer l’enregistrement. L’icône apparaît en bas à gauche de l’écran et la
durée d’enregistrement déle en haut de l’écran.
2. Appuyez une nouvelle fois sur le bouton Play/Pause pour mettre l’enregistrement
sur pause puis encore fois pour reprendre l’enregistrement.
2. Utilisez les boutons et de l’appareil pour parcourir les différentes options
disponibles.
3. Lorsque l’option de votre choix apparaît en surbrillance, appuyez sur le bouton M
pour y accéder.
Revenir aux écrans de sélection des fonctions
Pour revenir aux écrans de sélection des fonctions, maintenez le bouton M de l’appareil
appuyé.
Mise en marche/Arrêt
1. Pour mettre en marche votre baladeur multimédia, glissez le sélecteur ON-OFF sur la
position ON de l’appareil.
2. Pour éteindre l’appareil, maintenez le bouton Play/Pause appuyé.
Note : Positionnez le sélecteur ON-OFF de l’appareil sur la position OFF en cas de
non-utilisation prolongée.
Remarque : L’appareil se met automatiquement en veille au bout de quelques minutes
d’inactivité. Appuyez sur le bouton Play/Pause pour le réactiver.
Téléchargement de chiers multimédia
Vous pouvez connecter votre baladeur multimédia à un ordinateur et y transférer des chiers.
1. Branchez la prise mini USB, du câble USB fourni, dans le port mini USB situé sur le
côté droit de l’appareil.
2. Connectez ensuite l’autre extrémité du câble USB à un port USB de votre ordinateur.
3. L’écran de votre baladeur s’allume et un schéma indiquant que l’appareil est connecté
à l’ordinateur apparaît.
4. Votre ordinateur détecte et installe automatiquement le baladeur sur votre ordinateur.
5. L’installation terminée, une fenêtre s’afche sur l’écran de votre ordinateur.
Sélectionnez le disque amovible et double-cliquez pour accéder à son contenu.
Note : Si aucune fenêtre ne s’ouvre à l’écran, vous pouvez accéder au disque amovible
via l’explorateur de votre ordinateur.
7. Vous pouvez maintenant transférer les chiers situés sur votre ordinateur vers votre
baladeur et vice versa.
8. Les transferts de chiers terminés, fermez tous les programme liés au baladeur et
cliquez sur l’icône « Retrait du périphérique en toute sécurité » situé en bas à droite dans
la barre des tâches de votre ordinateur.
9. Vous pouvez maintenant débrancher votre baladeur puis le câble USB.
Note : Ne déconnectez jamais le câble USB lorsque l’appareil transfère ou lit des
données. Vous risqueriez de perdre des données et/ou d’endommager l’appareil.
Navigation
Sélectionner une fonction
1. Mettez en marche le baladeur en positionnant le sélecteur ON-OFF de l’appareil sur
la position ON.
2. Utilisez les boutons et de l’appareil pour faire déler les différentes fonctions.
3. Lorsque la fonction de votre choix s’afche à l’écran, appuyez sur le bouton M pour
y accéder.
Accéder aux options d’une fonction
1. Dans la fonction, appuyez une fois sur le bouton M pour accéder aux options de la
fonction.
4
DMP84IM1232_7Jun_V05.indb 4 07/06/2012 2:31 PM
Page 5

2. Utilisez les boutons et de l’appareil pour parcourir les différentes options
disponibles.
3. Lorsque l’option de votre choix apparaît en surbrillance, appuyez sur le bouton M
pour y accéder.
Revenir aux écrans de sélection des fonctions
Pour revenir aux écrans de sélection des fonctions, maintenez le bouton M de l’appareil
appuyé.
FRANÇAIS
Présentation des fonctions
Votre baladeur multimédia est livré avec les six fonctions suivantes : Musique,
Enregistrements, Voix, Radio (en option) et Conguration.
• Fonction « Musique »
Note : Pour savoir comment transférer des chiers audio dans votre lecteur multimédia,
consultez la section « Téléchargement de chiers multimédia » à la page 4 de ce mode
d’emploi.
1. Sélectionnez la fonction Musique puis appuyez sur la touche Play/Pause pour
démarrer la lecture du chier audio
Note : C’est la dernière chanson écoutée qui s’afche, par défaut, lorsque vous ouvrez
la fonction Musique.
2. Appuyez sur la touche Play/Pause pour suspendre la lecture. Pressez une
nouvelle fois cette touche pour reprendre la lecture.
3. Appuyez sur les touches ou pour sélectionner le chier audio précédent
ou suivant.
4. Pour une avance rapide ou un retour rapide dans la piste en cours de lecture,
maintenez les touches ou appuyées.
Note : L’appareil est équipé d’un haut-parleur (écoute collective) et d’une prise casque
(écoute privée).
ATTENTION : Baissez toujours le niveau du volume avant de mettre vos écouteurs.
Autrement votre audition pourrait être endommagée.
Les options de la fonction Musique :
- Dans la fonction Musique, vous accédez aux options suivantes en appuyant, une fois,
sur le bouton M de l’appareil : « Dossier local », « Effacer le chier », « Tout effacer »
et « Fin ».
- En mode lecture, vous accédez aux options suivantes en appuyant, une fois, sur le
bouton M de l’appareil : « Équaliseur », « Répéter », « Relire » et « Fin ».
• Fonction « Enregistrements »
1. Sélectionnez la fonction Enregistrements puis appuyez sur le bouton Play/Pause
pour commencer l’enregistrement. L’icône apparaît en bas à gauche de l’écran et la
durée d’enregistrement déle en haut de l’écran.
2. Appuyez une nouvelle fois sur le bouton Play/Pause pour mettre l’enregistrement
sur pause puis encore fois pour reprendre l’enregistrement.
5
DMP84IM1232_7Jun_V05.indb 5 07/06/2012 2:31 PM
Page 6
FRANÇAIS
Assurez-vous d’éteindre l’appareil et de débrancher le câble d’alimentation avant de
le nettoyer. Essuyez cet appareil avec un chiffon sec et souple. Si les surfaces sont
extrêmement sales, nettoyez- les avec un chiffon qui a été trempé dans une solution
eau et savon puis essoré fermement. Essuyez une nouvelle fois avec un chiffon sec.
N’utilisez jamais d’alcool, d’essence, de dissolvant, liquides nettoyants ou autres produits
chimiques. Et n’utilisez pas d’air comprimé pour enlever la poussière.
Ce produit est couvert par notre garantie de 2 ans. Pour toute mise en œuvre de la
garantie ou du service après-vente, vous devez vous adresser à votre revendeur muni
de votre preuve d’achat. Notre garantie couvre les vices de matériel ou de montage
imputables au constructeur à l’exclusion de toute détérioration provenant du non-respect
de la notice d’utilisation ou de toute intervention intempestive sur l’article (telle que
démontage, exposition à la chaleur ou à l’humidité…).
Note : Veuillez garder ce mode d’emploi, il contient d’importantes informations. Le
contenu de ce mode d’emploi peut changer sans préavis. Aucune partie de ce mode
d’emploi ne doit être reproduite sans le consentement écrit du fabricant.
Référence : DMP84series
Conçu et développé en Europe – Fabriqué en Chine
© 2012 LEXIBOOK®
LEXIBOOK SA
2, avenue de Scandinavie
91953 Courtabœuf Cedex
France
Service consommateurs à votre écoute : 0 892 23 27 26 (0.34€ / min)
www.lexibook.com
3. Maintenez le bouton M appuyé pour terminer l’enregistrement et sauvegarder le
chier.
Note : Les enregistrements sont automatiquement sauvegardés dans la fonction Voix et
dans la fonction Musique (Dossier Local/Record).
Les options de la fonction Enregistrements :
- En appuyant, une fois, sur le bouton M de l’appareil, vous accédez aux options
d’enregistrement suivantes : « Rec. Type » (Type d’enregistrement) et « Fin ».
• Fonction « Voix »
La fonction Voix vous donne accès à tous les enregistrements effectués via la fonction
Enregistrements de votre baladeur.
1. Sélectionnez la fonction Voix puis utilisez les touches et pour faire déler les
enregistrements disponibles.
2. Appuyez sur le bouton Play/Pause pour démarrer la lecture de l’enregistrement
choisi.
Note : Les options disponibles dans la fonction Enregistrements sont identiques à celles
de la fonction Musique. Pour en savoir plus, référez-vous à la partie « Fonction Musique »
de
ce mode d’emploi.
• Fonction « Radio » (en option)
1. Sélectionnez la fonction Radio puis utilisez les touches et pour faire déler
les radios disponibles.
2. Appuyez sur le bouton M pour accéder au mode radio.
Les options de la fonction Enregistrements (disponibles lors de l’écoute)
- Recherche Auto : pour effectuer une recherche automatique des stations de radio.
- Sauvegarder : pour enregistrer une station de radio.
- Supprimer le chier : pour supprimer une station de radio.
- Supprimer tout : pour supprimer toutes les stations de radio.
- Enregistrer : pour enregistrer le programme radio à l’écoute.
- Sortir : pour revenir aux écrans de sélection des fonctions.
• Fonction « Conguration »
1. Dans la fonction Conguration, utilisez les touches et pour faire déler les
réglages disponibles.
2. Appuyez sur le bouton M pour accéder au réglage ou à l’information souhaité.
Les réglages disponibles :
- Écran : réglage de la luminosité et du rétro-éclairage de l’écran.
- Langue : choix de la langue d’afchage.
- Extinction : réglage du délai d’extinction automatique de l’écran.
- Version rmware : informations sur le programme installé.
- Info mémoire : informations sur l’espace disponible et l’espace occupé dans la mémoire
de l’appareil.
- Fin : retour aux écrans de sélection des fonctions.
6
DMP84IM1232_7Jun_V05.indb 6 07/06/2012 2:31 PM
Page 7
Assurez-vous d’éteindre l’appareil et de débrancher le câble d’alimentation avant de
Entretien et Garantie
le nettoyer. Essuyez cet appareil avec un chiffon sec et souple. Si les surfaces sont
extrêmement sales, nettoyez- les avec un chiffon qui a été trempé dans une solution
eau et savon puis essoré fermement. Essuyez une nouvelle fois avec un chiffon sec.
N’utilisez jamais d’alcool, d’essence, de dissolvant, liquides nettoyants ou autres produits
chimiques. Et n’utilisez pas d’air comprimé pour enlever la poussière.
Ce produit est couvert par notre garantie de 2 ans. Pour toute mise en œuvre de la
garantie ou du service après-vente, vous devez vous adresser à votre revendeur muni
de votre preuve d’achat. Notre garantie couvre les vices de matériel ou de montage
imputables au constructeur à l’exclusion de toute détérioration provenant du non-respect
de la notice d’utilisation ou de toute intervention intempestive sur l’article (telle que
démontage, exposition à la chaleur ou à l’humidité…).
Note : Veuillez garder ce mode d’emploi, il contient d’importantes informations. Le
contenu de ce mode d’emploi peut changer sans préavis. Aucune partie de ce mode
d’emploi ne doit être reproduite sans le consentement écrit du fabricant.
Référence : DMP84series
Conçu et développé en Europe – Fabriqué en Chine
© 2012 LEXIBOOK®
LEXIBOOK SA
2, avenue de Scandinavie
91953 Courtabœuf Cedex
France
Service consommateurs à votre écoute : 0 892 23 27 26 (0.34€ / min)
www.lexibook.com
Informations sur la protection de l’environnement :
Tout appareil électrique usé est une matière recyclable et ne devrait pas
faire partie des ordures ménagères ! Nous vous demandons de bien vouloir
nous soutenir en contribuant activement au ménagement des ressources et
à la protection de l’environnement en déposant cet appareil dans des sites
de collecte (si existants).
AVERTISSEMENT : A pleine puissance,
l’écoute prolongée du baladeur peut
endommager l’oreille de l’utilisateur.
Ce produit n’est pas un jouet.
FRANÇAIS
7
DMP84IM1232_7Jun_V05.indb 7 07/06/2012 2:31 PM
Page 8
• Unpacking the device:
1. To switch your multimedia player on, slide the ON-OFF switch to the ON position.
2. To switch the device off, press and hold the Play/Pause button.
Note: Move the ON-OFF switch to the OFF position when not using for prolonged
periods.
Note: The device automatically switches to standby after a few minutes of inactivity.
Press the Play/Pause button to reactivate it.
You can connect your multimedia player to a computer and transfer les onto it.
1. Plug the mini USB plug on the USB cable supplied into the mini USB port on the
right-hand-side of the device.
2. Then connect the other end of the USB cable to a USB port on your computer.
3. The multimedia player screen will turn on and an image will appear indicating that the
device is connected.
4. Your computer will detect and automatically install the driver for your multimedia player
on your computer.
5. Once the installation is complete, a window will appear on your computer screen.
Select the removable disk and double-click to access the contents.
Note: If no window opens on the screen, you can access the removable disk via your
computer’s explorer.
7. You can now transfer the les located on your computer onto your multimedia player
and vice versa.
8. Once the le transfers are complete, close all programmes linked to the multimedia
player and click on the icon “Safely Remove Hardware” located at the bottom-right-hand
task-bar of your computer screen.
9. You can now unplug your multimedia player followed by the USB cable.
Note: Never remove the USB cable while the device is transferring or playing data. You
risk losing the data and/or damaging the device.
Selecting an application
1. Switch the multimedia player on by moving the ON-OFF switch to the ON position.
2. Use the and buttons on the device to scroll through the different applications.
3. When your chosen application appears on the screen, press the M button to access it.
When unpacking the device, make sure all the following items are included:
ENGLISH
1 DMP84 multimedia player / 1 pair of earphones / 1 USB cable / 1 set of instructions
WARNING: All the packaging materials, such as the adhesive tape, plastic sheets, ties
and labels are not part of the product and must be discarded.
• Connecting the speakers:
Plug the speakers (supplied) into the headphone socket under the device.
CAUTION: Make sure the volume is low before plugging in your earphones. Otherwise
your hearing may be damaged.
• Charging the battery:
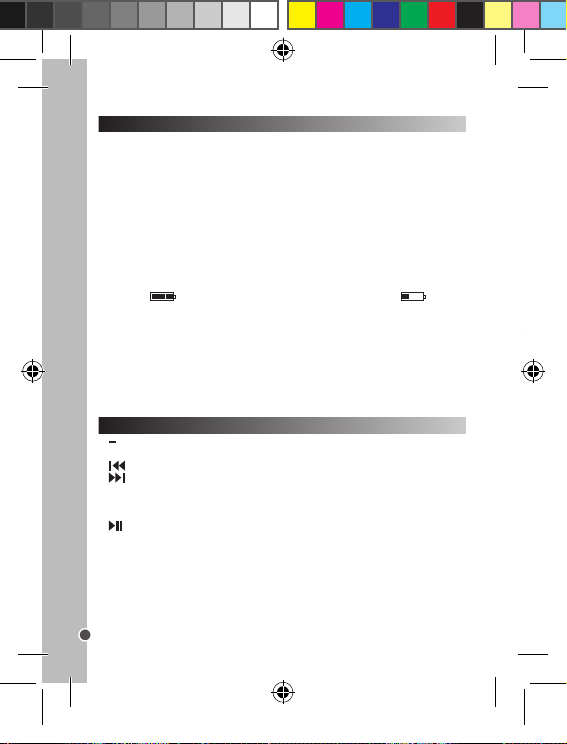
Note: The battery-charge indicator can be found in the top-right-hand corner of the LCD
screen. The symbol indicates that the battery is fully charged. The symbol
indicates that the battery is low and needs recharging.
Your multimedia player is equipped with a built-in rechargeable battery. To charge the
device, switch it off by moving the ON-OFF switch to the OFF position, and then connect
it to a computer using the USB cable supplied.
WARNING: Signicant electromagnetic interference or electrostatic discharges may
cause the device to malfunction or lose data. If the device is not functioning correctly,
switch it off and then on again, or unplug the USB cable.
Button guide
1. Volume - To reduce the sound volume on the device.
2. + Volume - To increase the sound volume on the device.
3. Prev. - To go to the previous track or item.
4. Next - To go to the next track or item.
5. M Menu - Press once to conrm an option or to access the menu for an application.
Press and hold to access the application selection screens.
6. Screen
7. Play/Pause - To play/pause/restart.
8. 3.5mm headphone socket - To plug headphones into the device.
9. Microphone
10. ON-OFF - To switch the device on or off.
11. Speaker
12. Mini USB port - To charge the device and transfer data.
8
Set-up guide
DMP84IM1232_7Jun_V05.indb 8 07/06/2012 2:31 PM
Page 9

1. To switch your multimedia player on, slide the ON-OFF switch to the ON position.
2. To switch the device off, press and hold the Play/Pause button.
Note: Move the ON-OFF switch to the OFF position when not using for prolonged
periods.
Note: The device automatically switches to standby after a few minutes of inactivity.
Press the Play/Pause button to reactivate it.
Downloading multimedia les
Switching on/off
You can connect your multimedia player to a computer and transfer les onto it.
1. Plug the mini USB plug on the USB cable supplied into the mini USB port on the
right-hand-side of the device.
2. Then connect the other end of the USB cable to a USB port on your computer.
3. The multimedia player screen will turn on and an image will appear indicating that the
device is connected.
4. Your computer will detect and automatically install the driver for your multimedia player
on your computer.
5. Once the installation is complete, a window will appear on your computer screen.
Select the removable disk and double-click to access the contents.
Note: If no window opens on the screen, you can access the removable disk via your
computer’s explorer.
7. You can now transfer the les located on your computer onto your multimedia player
and vice versa.
8. Once the le transfers are complete, close all programmes linked to the multimedia
player and click on the icon “Safely Remove Hardware” located at the bottom-right-hand
task-bar of your computer screen.
9. You can now unplug your multimedia player followed by the USB cable.
Note: Never remove the USB cable while the device is transferring or playing data. You
risk losing the data and/or damaging the device.
Navigation
Selecting an application
1. Switch the multimedia player on by moving the ON-OFF switch to the ON position.
2. Use the and buttons on the device to scroll through the different applications.
3. When your chosen application appears on the screen, press the M button to access it.
ENGLISH
9
DMP84IM1232_7Jun_V05.indb 9 07/06/2012 2:31 PM
Page 10

Accessing application options
2. Press again on the Play/Pause button to pause the recording and then once again
to start recording again.
3. Press and hold the M button to nish recording and save the le.
Note: Recordings are automatically saved in the Voice and Music applications (Local/
Record le).
The Recordings application options:
- By pressing once on the M button on the device, you can access the following
recordings options: “Rec. Type” (Type of recording) and “End”.
• “Voice” Application
The Voice application gives you access to all the recordings made using your multimedia
player’s recordings application.
1. Select the Voice application and then use the and buttons to scroll through
the available recordings.
2. Press the Play/Pause button to start playing the chosen recording.
Note: The available options in the Recordings application are identical to those in the
Music application. To nd out more, please refer to the “Music Application” section of
these instructions.
• “Radio” Application (optional)
1. Select the Radio application and then use the and buttons to scroll through
the available radio stations.
2. Press the M button to access the radio application.
The Recordings application options (available when listening)
- Auto-Search: to automatically search radio stations.
- Save: to save a radio station.
- Erase the le: to delete a radio station.
- Erase all: to delete all the radio stations
- Record: to record the radio station being listened to.
- Exit: to return to the application selection screens.
• “Conguration” Application
1. In the Conguration application, use the and buttons to scroll through the
available settings.
2. Press the M button to access the setting or the required information.
Available settings:
- Screen: brightness and back-lit screen setting.
- Language: selects the display language.
- Screen standby: sets the automatic screen standby time.
1. In the application, press once on the M button to access the application options.
2. Use the and buttons on the device to scroll through the different possible
ENGLISH
options.
3. When the option of your choice appears on the screen, press the M button to access
it.
Returning to the application selection screens
To return to the application selection screens, press and hold the M button on the device.
Introduction to applications
Your multimedia play comes with the ve following applications: Music, Recordings,
Voice, Radio (optional) and Conguration.
• “Music” Application
Note: To nd out how to transfer audio les to your multimedia player, consult the section
“Downloading multimedia les” on page 9 of these instructions.
1. Select the Music application and then press the Play/Pause button to start playing
the audio le.
Note: The last song played is displayed by default when you open the Music application.
2. Press the Play/Pause button to pause. Press this button again to start playing
again.
3. Press the or buttons to select the next or previous audio le.
4. To fast forward or rewind the track currently playing, press and hold the or
buttons.
Note: The device is equipped with a loudspeaker (collective listening) and an earphone
socket (personal listening).
CAUTION: Make sure the volume is low before plugging in your earphones. Otherwise
your hearing may be damaged.
The Music application options:
- In the Music application, you can access the following options by pressing the M button
once. “Local le”, “Erase le”, “Erase all” and “End”.
- In playing mode, you can access the following options by pressing the M button once.
“Equaliser”, “Repeat”, “Replay” and “End”.
• “Recordings” Application
1. Select the Recordings application and then press the Play/Pause button to start
recording. The icon will appear on the bottom-left-hand side of the screen and the
recording time is shown at the top of the screen.
10
DMP84IM1232_7Jun_V05.indb 10 07/06/2012 2:31 PM
Page 11
2. Press again on the Play/Pause button to pause the recording and then once again
to start recording again.
3. Press and hold the M button to nish recording and save the le.
Note: Recordings are automatically saved in the Voice and Music applications (Local/
Record le).
The Recordings application options:
- By pressing once on the M button on the device, you can access the following
recordings options: “Rec. Type” (Type of recording) and “End”.
• “Voice” Application
The Voice application gives you access to all the recordings made using your multimedia
player’s recordings application.
1. Select the Voice application and then use the and buttons to scroll through
the available recordings.
2. Press the Play/Pause button to start playing the chosen recording.
Note: The available options in the Recordings application are identical to those in the
Music application. To nd out more, please refer to the “Music Application” section of
these instructions.
• “Radio” Application (optional)
1. Select the Radio application and then use the and buttons to scroll through
the available radio stations.
2. Press the M button to access the radio application.
The Recordings application options (available when listening)
- Auto-Search: to automatically search radio stations.
- Save: to save a radio station.
- Erase the le: to delete a radio station.
- Erase all: to delete all the radio stations
- Record: to record the radio station being listened to.
- Exit: to return to the application selection screens.
• “Conguration” Application
1. In the Conguration application, use the and buttons to scroll through the
available settings.
2. Press the M button to access the setting or the required information.
Available settings:
- Screen: brightness and back-lit screen setting.
- Language: selects the display language.
- Screen standby: sets the automatic screen standby time.
ENGLISH
11
DMP84IM1232_7Jun_V05.indb 11 07/06/2012 2:31 PM
Page 12

- Firmware version: information on the installed programme.
- Memory info: Information on free and used space in the device memory.
- End: to return to the application selection screens.
ENGLISH
Ensure that you switch off the device and unplug the power cable before cleaning. Wipe
the device with a dry, soft cloth. If the surfaces are particularly dirty, clean them with a
cloth that has been soaked in soapy water and then wrung out thoroughly. Wipe again
with a dry cloth. Never use alcohol, petrol, solvents, cleaning products or other chemical
products. And do not used compressed air to remove dust.
This product is covered by our 2-year guarantee. To apply the guarantee or to use the
after-sales service, please contact the retailer with proof of purchase. Our guarantee
covers all material or manufacturing defects attributable to the manufacturer, excluding
any deterioration caused by not following the instructions or by any tampering with the
device (such as disassembling, exposure to heat or moisture etc.)
Note: Please keep these instructions for future reference as they contain important
information. The content of these instructions may change without prior notice. No part of
these instructions must be reproduced without the written consent of the manufacturer.
Maintenance and Guarantee
Reference: DMP84series
Designed and developed in Europe - made in China
© 2012 LEXIBOOK®
LEXIBOOK SA
2, avenue de Scandinavie
91953 Courtabœuf Cedex
France
The Customer Service team are available on: +33 (0) 8 92 23 27 26 (0.34€ / min)
WARNING! At full power, listening to a portable
music player for prolonged periods can damage
the user’s hearing.
www.lexibook.com
This product is not a toy.
Information on protecting the environment
All used electronic items are recyclable and must not be disposed of among
regular household waste. We kindly ask you to support us by contributing
actively to conserving resources and protecting the environment by
disposing of this device at a suitable sorting centre (if available).
12
DMP84IM1232_7Jun_V05.indb 12 07/06/2012 2:31 PM
Page 13

• Desembalaje del aparato:
Cuando desembale el producto, asegúrese de que se incluyen todos los elementos
siguientes: 1 reproductor multimedia DMP84 / 1 par de auriculares / 1 cable USB y 1
manual de utilización
¡ADVERTENCIA! Todos los materiales de embalaje tales como cintas, láminas de plástico,
cuerdas, y etiquetas no forman parte de este producto y, por lo tanto, deben desecharse.
• Conexión de auriculares al aparato:
Conecte los auriculares (incluidos) en la correspondiente salida situada en el lado
inferior del aparato.
¡ATENCIÓN! Disminuya siempre el nivel del volumen antes de colocarse los auriculares.
Si no lo hiciera, podría dañar su capacidad auditiva.
• Cómo recargar la pila:
Nota: El indicador de nivel de carga de la pila está situado en la esquina superior derecha
de la pantalla LCD. El símbolo indica que la pila está a su máximo nivel de carga.
El símbolo indica que la pila esta baja de carga y que hay que recargarla.
Su reproductor multimedia cuenta con una pila recargable integrada. Para recargar el
aparato, apáguelo primero desplazando el interruptor de encendido/apagado (ON/OFF)
hasta la posición “OFF” y, a continuación, conéctelo a un ordenador utilizando el cable
USB suministrado.
¡ADVERTENCIA! Cualquier interferencia electromagnética o descarga electrostática
importante podrá hacer que el aparato no funcione correctamente o se pierdan los datos
almacenados en su memoria. En caso de que el aparato no funcione correctamente,
apáguelo y vuelva a encenderlo, o bien desenchufe el cable USB.
ESPAÑOL
Descripción de los botones y conexiones del aparato
1. Volume - Se utiliza para disminuir el nivel de volumen del aparato.
2. + Volume - Se utiliza para aumentar el nivel de volumen del aparato.
3. Prev. (Anterior) - Se utiliza para acceder a la pista o archivo anterior.
4. Next (Siguiente) - Se utiliza para acceder a la pista o archivo siguiente.
5. M Menu - Pulse una sola vez esté botón para conrmar una selección o acceder a las
opciones de una función. Manténgalo pulsado para acceder a las pantallas de selección
de funciones.
6. Pantalla
7. Play/Pause (Reproducción/Pausa) - Se utiliza para iniciar/pausar/reanudar la
reproducción.
8. Conexión de 3,5 mm - Se utiliza para conectar los auriculares al aparato.
9. Micrófono
10. On/Off (encendido-apagado) - Se utiliza para encender o apagar el aparato.
11. Altavoz
Guía de inicio
12. Puerto mini USB - Se utiliza para recargar el aparato y transferir datos.
13
DMP84IM1232_7Jun_V05.indb 13 07/06/2012 2:31 PM
Page 14

1. Para encender su reproductor multimedia, desplace el interruptor de encendido/
Su reproductor multimedia portátil incluye las cinco funciones siguientes: Música,
Grabaciones, Voz, Radio (opcional) y Conguración.
• Función de “Música”
Nota: para informarse sobre cómo transferir archivos de audio a su reproductor
multimedia, consulte el apartado titulado “Descarga de archivos multimedia” que se
incluye en la página 14 de este manual de utilización.
1. Seleccione la función de “Música” y, a continuación, pulse el botón de Reproducción/
Pausa para iniciar la reproducción del archivo de audio que corresponda.
Nota: tras seleccionar la opción de “Música”, la pantalla del aparato mostrará por
defecto el último archivo musical que se haya escuchado.
2. Pulse el botón de Reproducción/Pausa para pone en causa la reproducción del
archivo musical. Vuelva a pulsar este botón para reanudar la reproducción.
3. Pulse los botones o para seleccionar el archivo de audio anterior o siguiente.
4. Si desea avanzar o retroceder rápidamente por el archivo que se está reproduciendo,
mantenga pulsado los botones o .
Nota: el aparato incorpora un altavoz (para escucha colectiva), así como una salida para
auriculares (para escucha en privado).
¡ATENCIÓN! Disminuya siempre el nivel del volumen antes de colocarse los auriculares.
Si no lo hiciera, podría dañar su capacidad auditiva.
Opciones de la función de “Música”:
- Desde la función de “Música”, podrá acceder a las siguientes opciones pulsando una
sola vez el botón “M” del aparato: “Carpeta local”, “Eliminar archivo”, “Eliminar todo” y
“Finalizar”.
- En modo de reproducción, podrá acceder a las siguientes opciones pulsando una sola
vez el botón “M” del aparato: “Ecualizador”, “Repetir“, “Reproducir sección” y “Finalizar”.
Cómo acceder a las opciones de una función determinada
1. Una vez que haya accedido a la función deseada, pulse una sola vez el botón “M”
para acceder a sus correspondientes opciones.
2. Utilice los botones y del aparato para recorrer las diferentes opciones
disponibles.
3. Una vez que la opción deseada se muestre en la pantalla, pulse el botón “M” para
acceder a esta.
Cómo regresar a las pantallas de selección de funciones
Para volver a las pantallas de selección de funciones, mantenga pulsado el botón “M”
del aparato.
apagado (ON/OFF) hasta la posición de encendido “ON”.
2. Para apagar el aparato, mantenga pulsado el botón de Reproducción/Pausa.
Nota: asegúrese de desplazar el interruptor de encendido/apagado (ON/OFF) hasta la
posición “OFF” si no va a utilizar el aparato durante períodos prolongados.
ESPAÑOL
Nota importante: el aparato pasa automáticamente a funcionar en modo de espera
al cabo de unos minutos de no detectar actividad alguna. Si esto sucede, bastará con
pulsar el botón de Reproducción/Pausa para reactivarlo.
Descarga de archivos multimedia
Encendido/apagado del aparato
Si lo desea, podrá conectar su reproductor multimedia a un ordenador y transferir
archivos entre ambos dispositivos.
1. Enchufe el conector mini USB del cable (incluido) en el mini puerto USB situado en el
lateral derecho del aparato.
2. A continuación, conecte el otro extremo del cable USB al puerto USB de su ordenador.
3. La pantalla de su reproductor portátil se encenderá y mostrará un diagrama indicando
que el aparato está conectado al ordenador.
4. Su ordenador detectará e instalará automáticamente el controlador de su reproductor portátil.
5. Una vez nalizada la instalación, se mostrará una ventana de dispositivos en la
pantalla de su ordenador. Seleccione el icono de unidad de disco extraíble y haga dos
veces clic sobre este para acceder a su contenido.
Nota: de no mostrarse ninguna ventana en la pantalla del ordenador, podrá acceder a la
unidad de disco extraíble utilizando el explorador de archivos de su ordenador.
7. Tras esto, podrá transferir los archivos almacenados en su ordenador hacia su
reproductor portátil y viceversa.
8. Una vez nalizada la transferencia de archivos, cierre todos los programas
relacionados con el reproductor portátil y, a continuación, haga clic en el icono “Quitar
hardware de forma segura” que aparece en la parte inferior derecha de la barra de
tareas de su ordenador.
9. Seguidamente, podrá desconectar su reproductor portátil y después el cable USB.
Nota: Nunca desenchufe el cable USB mientras se estén transriendo o reproduciendo
archivos. Dicha acción podría causar la pérdida de los archivos y/o dañar el aparato.
Navegación
Selección de funciones
1. Encienda el reproductor portátil desplazando el interruptor de encendido/apagado
(ON/OFF) del aparato hasta la posición “ON”.
2. Utilice los botones y del aparato para recorrer las diferentes funciones
disponibles.
3. Una vez que la función deseada se muestre en la pantalla, pulse el botón “M” para
acceder a esta.
14
DMP84IM1232_7Jun_V05.indb 14 07/06/2012 2:31 PM
Page 15

Cómo acceder a las opciones de una función determinada
1. Una vez que haya accedido a la función deseada, pulse una sola vez el botón “M”
para acceder a sus correspondientes opciones.
2. Utilice los botones y del aparato para recorrer las diferentes opciones
disponibles.
3. Una vez que la opción deseada se muestre en la pantalla, pulse el botón “M” para
acceder a esta.
Cómo regresar a las pantallas de selección de funciones
Para volver a las pantallas de selección de funciones, mantenga pulsado el botón “M”
del aparato.
Presentación de las funciones
Su reproductor multimedia portátil incluye las cinco funciones siguientes: Música,
Grabaciones, Voz, Radio (opcional) y Conguración.
• Función de “Música”
Nota: para informarse sobre cómo transferir archivos de audio a su reproductor
multimedia, consulte el apartado titulado “Descarga de archivos multimedia” que se
incluye en la página 14 de este manual de utilización.
1. Seleccione la función de “Música” y, a continuación, pulse el botón de Reproducción/
Pausa para iniciar la reproducción del archivo de audio que corresponda.
Nota: tras seleccionar la opción de “Música”, la pantalla del aparato mostrará por
defecto el último archivo musical que se haya escuchado.
2. Pulse el botón de Reproducción/Pausa para pone en causa la reproducción del
archivo musical. Vuelva a pulsar este botón para reanudar la reproducción.
3. Pulse los botones o para seleccionar el archivo de audio anterior o siguiente.
4. Si desea avanzar o retroceder rápidamente por el archivo que se está reproduciendo,
mantenga pulsado los botones o .
Nota: el aparato incorpora un altavoz (para escucha colectiva), así como una salida para
auriculares (para escucha en privado).
¡ATENCIÓN! Disminuya siempre el nivel del volumen antes de colocarse los auriculares.
Si no lo hiciera, podría dañar su capacidad auditiva.
Opciones de la función de “Música”:
- Desde la función de “Música”, podrá acceder a las siguientes opciones pulsando una
sola vez el botón “M” del aparato: “Carpeta local”, “Eliminar archivo”, “Eliminar todo” y
“Finalizar”.
- En modo de reproducción, podrá acceder a las siguientes opciones pulsando una sola
vez el botón “M” del aparato: “Ecualizador”, “Repetir“, “Reproducir sección” y “Finalizar”.
15
ESPAÑOL
DMP84IM1232_7Jun_V05.indb 15 07/06/2012 2:31 PM
Page 16

• Función de “Grabaciones”
• Función de “Conguración”
1. Seleccione la función de Conguración y, a continuación, utilice los botones y
para recorrer los parámetros de conguración disponibles.
2. Pulsando el botón “M” podrá acceder al parámetro o a la información deseada.
Parámetros de conguración disponibles:
- Pantalla: permite ajustar la intensidad luminosa y la retroiluminación de la pantalla.
- Idioma: permite seleccionar el idioma de visualización de los diferentes menús.
- Apagado: permite ajustar el intervalo de retardo de apagado automático de la pantalla.
- Versión de rmware: permite visualizar información acerca del sistema operativo
instalado.
- Datos de memoria: permite visualizar información acerca del espacio de memoria aún
disponible y ya utilizado en el aparato.
- Salir: esta opción permite volver a las pantallas de selección de funciones.
Asegúrese de apagar el aparato y desenchufar su cable de alimentación antes de
proceder a su limpieza. Limpie únicamente el aparato con un paño seco y suave.
Si las supercies están excesivamente sucias, límpielas con un paño, previamente
humedecido con una solución de agua y jabón. Aclare bien a continuación. Vuelva
a limpiarlo con un paño seco. Nunca utilice alcohol, gasolina, disolvente, líquidos
limpiadores ni ningún otro producto químico para limpiar al aparato. Utilice únicamente
aire comprimido para eliminar el polvo.
Este producto está cubierto por nuestra garantía de 2 años. Para cualquier reclamación
bajo la garantía o petición de servicio posventa, deberá dirigirse a su distribuidor
y presentar su comprobante de compra. Nuestra garantía cubre aquellos defectos
de material o montaje que sean atribuibles al fabricante, a excepción de todo aquel
deterioro que se produzca como consecuencia de la no observación de las indicaciones
señaladas en el manual de utilización o de toda intervención improcedente sobre el
aparato (como por ejemplo, su desmontaje, exposición al calor o a la humedad…).
Nota: conserve este manual de utilización, ya que contiene informaciones de
importancia. El contenido de este manual de utilización podrá modicarse sin previo
aviso. Queda prohibida cualquier reproducción parcial o total de este manual de
utilización sin la previa autorización por escrito del fabricante.
1. Seleccione la función de “Grabaciones” y, a continuación, pulse el botón de
Reproducción/Pausa para iniciar la grabación. El icono se mostrará en la esquina
inferior izquierda de la pantalla y la indicación del intervalo de grabación transcurrido
deslará por la parte superior de la pantalla.
2. Pulse de nuevo el botón de Reproducción/Pausa para pausar la grabación y
ESPAÑOL
vuelva a pulsarlo de nuevo para reanudarla.
3. Mantenga pulsado el botón “M” para nalizar la grabación y guardar el archivo
grabado.
Nota: los archivos grabados se guardarán automáticamente en la función de Voz y de
Música (Carpeta local/Grabación).
Opciones de la función de “Grabaciones”:
- Pulsando una sola vez el botón “M” del aparato, podrá acceder a las siguientes
opciones de grabación: “Rec. Type” (tipo de grabación) y “Finalizar”.
• Función de “Voz”
La función de Voz le permite acceder a todas las grabaciones efectuadas a través de la
función de Grabaciones de su reproductor portátil.
1. Seleccione la función de Voz y, a continuación, utilice los botones y para
recorrer las grabaciones disponibles.
2. Pulse el botón de Reproducción/Pausa para iniciar la reproducción del archivo de
grabación seleccionado.
Nota: las opciones disponibles en la función de Grabaciones son idénticas a las de la
función de Música. Si desea obtener información complementaria al respecto, consulte
el apartado titulado “Función de Música” que se incluye en este manual de utilización.”
• Función de “Radio” (opcional)
1. Seleccione la función de Radio y, a continuación, utilice los botones y para
recorrer las emisoras disponibles.
2. Pulse el botón “M” para acceder al modo de radio.
Opciones de la función de Grabaciones (disponibles durante la reproducción del
archivo grabado)
- Búsqueda automática: esta opción se utiliza para efectuar la búsqueda automática de
emisoras de radio.
- Guardar: esta opción se utiliza para memorizar una emisora de radio como presintonía.
- Eliminar archivo: esta opción se utiliza para eliminar una emisora de radio previamente
presintonizada.
- Eliminar todo: esta opción se utiliza para eliminar todas las emisoras de radio
previamente presintonizadas.
- Grabar: esta opción permite grabar el programa de radio que se esté escuchando.
- Salir: esta opción permite volver a las pantallas de selección de funciones.
16
DMP84IM1232_7Jun_V05.indb 16 07/06/2012 2:31 PM
Page 17

• Función de “Conguración”
1. Seleccione la función de Conguración y, a continuación, utilice los botones y
para recorrer los parámetros de conguración disponibles.
2. Pulsando el botón “M” podrá acceder al parámetro o a la información deseada.
Parámetros de conguración disponibles:
- Pantalla: permite ajustar la intensidad luminosa y la retroiluminación de la pantalla.
- Idioma: permite seleccionar el idioma de visualización de los diferentes menús.
- Apagado: permite ajustar el intervalo de retardo de apagado automático de la pantalla.
- Versión de rmware: permite visualizar información acerca del sistema operativo
instalado.
- Datos de memoria: permite visualizar información acerca del espacio de memoria aún
disponible y ya utilizado en el aparato.
- Salir: esta opción permite volver a las pantallas de selección de funciones.
Mantenimiento y garantía
Asegúrese de apagar el aparato y desenchufar su cable de alimentación antes de
proceder a su limpieza. Limpie únicamente el aparato con un paño seco y suave.
Si las supercies están excesivamente sucias, límpielas con un paño, previamente
humedecido con una solución de agua y jabón. Aclare bien a continuación. Vuelva
a limpiarlo con un paño seco. Nunca utilice alcohol, gasolina, disolvente, líquidos
limpiadores ni ningún otro producto químico para limpiar al aparato. Utilice únicamente
aire comprimido para eliminar el polvo.
Este producto está cubierto por nuestra garantía de 2 años. Para cualquier reclamación
bajo la garantía o petición de servicio posventa, deberá dirigirse a su distribuidor
y presentar su comprobante de compra. Nuestra garantía cubre aquellos defectos
de material o montaje que sean atribuibles al fabricante, a excepción de todo aquel
deterioro que se produzca como consecuencia de la no observación de las indicaciones
señaladas en el manual de utilización o de toda intervención improcedente sobre el
aparato (como por ejemplo, su desmontaje, exposición al calor o a la humedad…).
Nota: conserve este manual de utilización, ya que contiene informaciones de
importancia. El contenido de este manual de utilización podrá modicarse sin previo
aviso. Queda prohibida cualquier reproducción parcial o total de este manual de
utilización sin la previa autorización por escrito del fabricante.
ESPAÑOL
17
DMP84IM1232_7Jun_V05.indb 17 07/06/2012 2:31 PM
Page 18

Referencia: Serie DMP84
Diseñado y desarrollado en Europa – Fabricado en China
© 2012 LEXIBOOK®
LEXIBOOK SA
ESPAÑOL
2, avenue de Scandinavie
91953 Courtabœuf Cedex
Francia
Servicio de atención al consumidor a su disposición: 0 892 23 27 26 (la tarifa de la
llamada es de 0,34 €/min.)
www.lexibook.com
¡ADVERTENCIA! A pleno volumen, la escucha
prolongada del reproductor portátil puede dañar la
capacidad auditiva del usuario.
Este producto no es ningún juguete
Informaciones sobre protección del medio ambiente:
¡Los aparatos eléctricos usados se consideran productos reciclables y, por
lo tanto, no deben desecharse junto con los desperdicios domésticos! Le
rogamos que apoye nuestra política medioambiental y participe activamente
a la conservación de los recursos naturales existentes y a la protección del
medio ambiente, desechando este aparato en aquellos centros de reciclaje
previstos a tal efecto (si los hay).
18
DMP84IM1232_7Jun_V05.indb 18 07/06/2012 2:31 PM
Page 19

• Retirar o aparelho da caixa:
Ao desempacotar, certique-se de que as peças seguintes se encontram incluídas:
1 leitor multimédia DMP84 / 1 par de auscultadores / 1 cabo USB / 1 manual de
utilização
AVISO: Todos os materiais de empacotamento, como ta, folhas de plástico, os e
etiquetas não fazem parte do produto e devem ser eliminados.
• Ligação dos auscultadores:
Ligue os auscultadores (fornecidos) na entrada dos auscultadores na parte inferior do
aparelho.
ATENÇÃO: Baixe sempre o nível do volume antes de colocar os auscultadores. Caso
contrário, pode sofrer lesões auditivas.
• Carregamento da bateria.
Nota: O indicador de carregamento da bateria encontra-se na parte superior direita do
ecrã LCD. O símbolo indica que a bateria está cheia. O símbolo indica que
a bateria está fraca e que tem de ser recarregada.
O seu leitor multimédia vem equipado com uma bateria integrada recarregável. Para
recarregar o aparelho, desligue-o, colocando o interruptor ON-OFF na posição OFF,
depois ligue-o a um computador, utilizando o cabo USB fornecido.
AVISO: Grandes interferências electromagnéticas ou descargas electrostáticas podem
dar origem a um mau funcionamento ou perda de dados. Se o aparelho não funcionar
correctamente, desligue-o e volte a ligar, ou retire o cabo USB.
Guia dos botões
1. Volume - Para diminuir o volume sonoro do aparelho.
2. + Volume - Para aumentar o volume sonoro do aparelho.
3. Prev. (Anterior) - Para aceder à faixa ou elemento anterior.
4. Next (Seguinte) - Para aceder à faixa ou elemento seguinte.
5. M Menu - Prima uma vez para validar ou aceder às opções de uma função. Mantenha
premido para aceder aos ecrãs de selecção das funções.
6. Ecrã
7. Play/Pause - Para iniciar/suspender/continuar a reprodução.
8. Entrada para auscultadores de 3,5 mm - Para ligar auscultadores ao aparelho.
9. Microfone
10. ON-OFF (Ligar-Desligar) - Para ligar ou desligar o aparelho.
11. Altifalante
12. Porta mini USB - Para carregar o aparelho e transferir dados.
Guia de início rápido
PORTUGUÊS
19
DMP84IM1232_7Jun_V05.indb 19 07/06/2012 2:31 PM
Page 20

1. Para ligar o seu leitor multimédia, faça deslizar o interruptor ON-OFF para a posição
O seu leitor multimédia é entregue com as seguintes cinco funções: Música, Gravação,
Voz, Rádio (opcional) e Conguração.
• Função “Música”
Nota: Para saber como transferir cheiros de áudio para o seu leitor multimédia,
consulte a secção “Descarregar cheiros multimédia” na página 20 deste manual.
1. Seleccione a função Música, depois prima o botão Play/Pause para iniciar a
reprodução do cheiro de áudio.
Nota: A última música reproduzida aparece por defeito quando iniciar a função Música.
2. Prima o botão Play/Pause para suspender a reprodução. Prima novamente este
botão para continuar a reprodução.
3. Prima os botões ou para seleccionar o cheiro de áudio anterior ou
seguinte.
4. Para um avanço ou retrocesso rápido na faixa a ser reproduzida, mantenha premido
o botão ou .
Nota: O aparelho vem equipado com altifalante (escuta colectiva) e uma entrada para
auscultadores (escuta privada).
ATENÇÃO: Baixe sempre o nível do volume antes de colocar os auscultadores. Caso
contrário, pode sofrer lesões auditivas.
Opções da função Música:
- Na função Música, acede às seguintes opções, premindo uma vez o botão M do
aparelho: “Pasta local”, “Apagar o cheiro”, “Apagar tudo” e “Fim”.
- No modo de reprodução, acede às seguintes opções, premindo uma vez o botão M do
aparelho: “Equalizador”, Repetir”, “Reler” e “Fim”.
• Função “Gravação”
1. Seleccione a função Gravação e prima o botão Play/Pause para começar a
gravação. O ícone aparece no canto inferior esquerdo do ecrã e a duração da
gravação corre na parte superior do ecrã.
2. Prima novamente o botão Play/Pause para fazer uma pausa na gravação e depois
novamente para continuar a gravação.
3. Mantenha premido o botão M para terminar a gravação e guardar o cheiro.
Nota: As gravações são guardadas automaticamente na função Voz e na função Música
(Pasta Local/Record).
Voltar aos ecrãs de selecção das funções
Para voltar aos ecrãs de selecção das funções, mantenha premido o botão M do
aparelho.
ON do aparelho.
2. Para desligar o aparelho, mantenha premido o botão Play/Pause.
Nota: Coloque o interruptor ON-OFF do aparelho na posição OFF no caso de não
utilização prolongada.
Atenção: O aparelho desliga-se automaticamente passados alguns minutos de
inactividade. Prima o botão Play/Pause para o reactivar.
PORTUGUÊS
Pode ligar o seu leitor multimédia a um computador e transferir cheiros.
1. Ligue a cha mini USB do cabo USB fornecido à porta mini USB do lado direito do
aparelho.
2. A seguir, ligue a outra extremidade do cabo USB a uma porta USB do seu
computador.
3. O ecrã do seu leitor acende e um esquema a indicar que o aparelho está ligado ao
computador aparece.
4. O seu computador detecta e instala automaticamente o leitor no seu computador.
5. Quando a instalação terminar, aparece uma janela no ecrã do seu computador.
Seleccione o disco amovível e clique duas vezes para aceder ao seu conteúdo.
Nota: Se nenhuma janela se abrir no ecrã, pode aceder ao disco amovível através do
explorador do seu computador.
7. Agora, pode transferir os cheiros do seu computador para o seu leitor e vice-versa.
8. Quando terminar a transferência dos cheiros, feche todos os programas ligados
ao leitor e clique no ícone “Retirar periférico em segurança” na parte inferior direita, na
barra de tarefas do seu computador.
9. Agora, pode desligar o seu leitor e depois o cabo USB.
Nota: Nunca desligue o cabo USB quando o aparelho estiver a transferir ou a ler dados.
Corre o risco de perder dados e/ou danicar o aparelho.
Descarregar cheiros multimédia
Navegação
Seleccionar uma função
1. Ligue o leitor, colocando o interruptor ON-OFF do aparelho na posição ON.
2. Utilize os botões e do aparelho para correr as diferentes funções.
3. Quando a função desejada aparecer no ecrã, prima o botão M para lhe aceder.
Aceder às opções de uma função
1. Na função, prima uma vez o botão M para aceder às opções da função.
2. Utilize os botões e do aparelho para correr as diferentes opções disponíveis.
3. Quando a opção desejada aparecer realçada, prima o botão M para lhe aceder.
20
Ligar/desligar
DMP84IM1232_7Jun_V05.indb 20 07/06/2012 2:31 PM
Page 21

Voltar aos ecrãs de selecção das funções
Para voltar aos ecrãs de selecção das funções, mantenha premido o botão M do
aparelho.
Apresentação das funções
O seu leitor multimédia é entregue com as seguintes cinco funções: Música, Gravação,
Voz, Rádio (opcional) e Conguração.
• Função “Música”
Nota: Para saber como transferir cheiros de áudio para o seu leitor multimédia,
consulte a secção “Descarregar cheiros multimédia” na página 20 deste manual.
1. Seleccione a função Música, depois prima o botão Play/Pause para iniciar a
reprodução do cheiro de áudio.
Nota: A última música reproduzida aparece por defeito quando iniciar a função Música.
2. Prima o botão Play/Pause para suspender a reprodução. Prima novamente este
botão para continuar a reprodução.
3. Prima os botões ou para seleccionar o cheiro de áudio anterior ou
seguinte.
4. Para um avanço ou retrocesso rápido na faixa a ser reproduzida, mantenha premido
o botão ou .
Nota: O aparelho vem equipado com altifalante (escuta colectiva) e uma entrada para
auscultadores (escuta privada).
ATENÇÃO: Baixe sempre o nível do volume antes de colocar os auscultadores. Caso
contrário, pode sofrer lesões auditivas.
Opções da função Música:
- Na função Música, acede às seguintes opções, premindo uma vez o botão M do
aparelho: “Pasta local”, “Apagar o cheiro”, “Apagar tudo” e “Fim”.
- No modo de reprodução, acede às seguintes opções, premindo uma vez o botão M do
aparelho: “Equalizador”, Repetir”, “Reler” e “Fim”.
• Função “Gravação”
1. Seleccione a função Gravação e prima o botão Play/Pause para começar a
gravação. O ícone aparece no canto inferior esquerdo do ecrã e a duração da
gravação corre na parte superior do ecrã.
2. Prima novamente o botão Play/Pause para fazer uma pausa na gravação e depois
novamente para continuar a gravação.
3. Mantenha premido o botão M para terminar a gravação e guardar o cheiro.
Nota: As gravações são guardadas automaticamente na função Voz e na função Música
(Pasta Local/Record).
21
PORTUGUÊS
DMP84IM1232_7Jun_V05.indb 21 07/06/2012 2:31 PM
Page 22

Opções da função Gravação:
Certique-se de que desliga o aparelho e que retira o cabo da alimentação antes de
proceder à limpeza. Limpe este aparelho com um pano suave e seco. Se as superfícies
estiverem muito sujas, limpe-as com um pano ligeiramente embebido em água e
detergente, depois seque bem. Limpe novamente com um pano seco. Nunca utilize
álcool, gasolina, diluente, líquidos de limpeza ou outros produtos químicos. Não utilize ar
comprimido para limpar o pó.
Este produto está coberto pela nossa garantia de 2 anos. Para qualquer utilização da
garantia ou do serviço pós-venda, deve consultar o seu revendedor e apresentar-
lhe a sua prova de compra. A nossa garantia abrange danos de material ou de
montagem imputáveis ao fabricante, excepto qualquer deterioração devido ao não
respeito do manual de utilização ou qualquer intervenção intempestiva no artigo (como
desmontagem, exposição ao calor ou humidade…).
Nota: Guarde este manual de utilização. Ele contém informações importantes. O
conteúdo deste manual pode mudar sem aviso prévio. Nenhuma parte deste manual de
utilização pode ser reproduzida sem o consentimento por escrito do fabricante.
Referência: Série DMP84
Criado e desenvolvido na Europa - Fabricado na China
©2012 LEXIBOOK®
LEXIBOOK SA
2, avenue de Scandinavie
91953 Courtabœuf Cedex
France
Serviço de apoio ao cliente: 0 892 23 27 26 (0,34€ / min)
www.lexibook.com
- Premindo uma vez o botão M do aparelho, acede às seguintes opções de gravação:
“Rec. Type” (Tipo de gravação) e “Fim”.
• Função “Voz”
A função Voz dá-lhe acesso a todas as gravações efectuadas através da função
Gravação do seu leitor.
1. Seleccione a função Voz, depois utilize os botões e para correr as
gravações disponíveis.
PORTUGUÊS
2. Prima o botão Play/Pause para iniciar a reprodução da gravação escolhida.
Nota: As opções disponíveis na função Gravação são idênticas às da função Música.
Para saber mais, consulte a secção “Função Música” neste manual de utilização.
• Função “Rádio” (opcional)
1. Seleccione a função Rádio, depois utilize os botões e para correr os rádios
disponíveis.
2. Prima o botão M para aceder ao modo Rádio.
Opções da função Gravação (disponíveis durante a escuta)
- Procura automática: Para efectuar uma procura automática das estações de rádio.
- Guardar: Para guardar uma estação de rádio.
- Apagar o cheiro: Para apagar uma estação de rádio.
- Apagar tudo: Para apagar todas as estações de rádio.
- Guardar: Para guardar o programa de rádio que está a escutar.
- Sair: Voltar aos ecrãs de selecção das funções.
• Função “Conguração”
1. Na função Conguração, utilize os botões e para correr as regulações
disponíveis.
2. Prima o botão M para aceder à regulação ou informação desejada.
Regulações disponíveis:
- Ecrã: Regulação da luminosidade e da luz de fundo do ecrã.
- Língua: Escolha da língua de apresentação.
- Apagamento: Regulação do tempo de apagamento automático do ecrã.
- Versão do rmware: Informações sobre o programa instalado.
- Info memória: Informações sobre o espaço disponível e o espaço ocupado na memória
do aparelho.
- Fim: Voltar aos ecrãs de selecção das funções.
22
DMP84IM1232_7Jun_V05.indb 22 07/06/2012 2:31 PM
Page 23

Certique-se de que desliga o aparelho e que retira o cabo da alimentação antes de
Manutenção e Garantia
proceder à limpeza. Limpe este aparelho com um pano suave e seco. Se as superfícies
estiverem muito sujas, limpe-as com um pano ligeiramente embebido em água e
detergente, depois seque bem. Limpe novamente com um pano seco. Nunca utilize
álcool, gasolina, diluente, líquidos de limpeza ou outros produtos químicos. Não utilize ar
comprimido para limpar o pó.
Este produto está coberto pela nossa garantia de 2 anos. Para qualquer utilização da
garantia ou do serviço pós-venda, deve consultar o seu revendedor e apresentarlhe a sua prova de compra. A nossa garantia abrange danos de material ou de
montagem imputáveis ao fabricante, excepto qualquer deterioração devido ao não
respeito do manual de utilização ou qualquer intervenção intempestiva no artigo (como
desmontagem, exposição ao calor ou humidade…).
Nota: Guarde este manual de utilização. Ele contém informações importantes. O
conteúdo deste manual pode mudar sem aviso prévio. Nenhuma parte deste manual de
utilização pode ser reproduzida sem o consentimento por escrito do fabricante.
Referência: Série DMP84
Criado e desenvolvido na Europa - Fabricado na China
©2012 LEXIBOOK®
LEXIBOOK SA
2, avenue de Scandinavie
91953 Courtabœuf Cedex
France
Serviço de apoio ao cliente: 0 892 23 27 26 (0,34€ / min)
www.lexibook.com
AVISO: Com a potência no
Este produto não
é um brinquedo.
Informações sobre a protecção do ambiente:
Qualquer aparelho eléctrico usado é material reciclável e não deve ser
eliminado juntamente com o lixo doméstico comum! Pedimos que nos apoie,
contribuindo activamente para a gestão dos recursos e para a protecção do
ambiente, entregando este aparelho em instalações de recolha (se existirem).
máximo, a escuta prolongada do
leitor pode criar lesões auditivas
ao utilizador.
PORTUGUÊS
23
DMP84IM1232_7Jun_V05.indb 23 07/06/2012 2:31 PM
Page 24

• Apertura della confezione:
1 Per accendere il lettore multimediale, spostare l’interruttore ON-OFF su ON.
2 Per spegnere l’apparecchio, mantenere premuto il pulsante Play/Pause.
Nota : Posizionare il selettore ON-OFF dell’apparecchio su OFF in caso di mancato
utilizzo prolungato.
Nota: L’apparecchio si mette automaticamente in standby dopo qualche minuto di
inattività. Premere sul pulsante Play/Pause per riattivare.
Il lettore multimediale si può collegare a un computer e vi si possono trasferire i le.
1. Collegare la presa mini USB del cavo USB fornito nella porta mini USB situata sul lato
destro dell’apparecchio.
2. Collegare poi l’altra estremità del cavo USB a una porta USB del computer.
3. Lo schermo del lettore si illumina e appare uno schema che indica che l’apparecchio
è collegato al computer.
4. Il computer individua e installa automaticamente il lettore portatile sul computer.
5. A installazione conclusa, appare una nestra sullo schermo del computer. Selezionare
il disco amovibile e cliccare due volte per accedere al contenuto.
Nota: Se nessuna nestra si apre sullo schermo, si può accedere al disco amovibile
tramite explorer del computer.
7. Si possono ora trasferire i le dal computer al lettore portatile e viceversa.
8. Una volta terminato il trasferimento, chiudere tutti i programmi collegati al lettore e
cliccare sull’icona “Prelievo dalla periferica in tutta sicurezza” in basso a destra sulla
barra dei compiti del computer.
9. Si può ora staccare il lettore e poi il cavo USB.
Nota: Non scollegare mai il cavo USB quando l’apparecchio sta trasferendo o leggendo
dati. Si rischia di perdere i dati e/o di rovinare l’apparecchio.
Selezione di una funzione
1. Accendere il lettore posizionando il selettore ON-OFF dell’apparecchio su ON.
2. Usare i pulsanti e dell’apparecchio per far scorrere le varie funzioni.
3. Quando sullo schermo appare la funzione di propria scelta, premere sul pulsante M
per accedervi.
Accedere alle opzioni di una funzione
1. Nella funzione, premere una volta sul pulsante M per accedere alle opzioni della
funzione.
2. Usare i pulsanti e dell’apparecchio per far scorrere le diverse opzioni disponibili.
3. Quando appare evidenziata la funzione di vostra scelta, premere sul pulsante M per
accedervi.
Al momento dell’apertura della confezione, assicurarsi che siano inclusi i seguenti pezzi:
1 lettore portatile multimediale DMP84 / 1 paio di auricolari / 1 cavo USB / 1 manuale
d’istruzioni
AVVERTENZA: Tutti i materiali della confezione, come lo scotch, i fogli di plastica, i li e
le etichette non fanno parte di questo prodotto e devono essere eliminate.
• Collegamento degli auricolari:
Collegare gli auricolari (forniti) nell’apposita presa sull’apparecchio.
ATTENZIONE: Abbassare sempre il livello del volume prima di mettere gli auricolari. In
caso contrario l’udito si potrebbe rovinare.
• Caricamento della batteria:
ITALIANO
Nota: L’indicatore di carica della batteria si trova in alto a destra dello schermo LCD. Il
simbolo indica che la batteria è carica. Il simbolo indica che la batteria è
debole e che occorre ricaricarla.
Il lettore multimediale è dotato di una batteria integrata ricaricabile. Per caricare
l’apparecchio, spegnerlo mettendo il selettore ON-OFF sulla posizione OFF, poi
collegarlo al computer utilizzando il cavo USB fornito.
AVVERTENZE: Forti interferenze elettromagnetiche o scariche elettrostatiche possono
provocare un malfunzionamento o una perdita di dati. Se l’apparecchio non funziona
correttamente, spegnerlo poi riaccenderlo o scollegarle il cavo USB.
Guida dei pulsanti
1. Volume - Per diminuire il volume sonoro dell’apparecchio.
2. + Volume - Per aumentare il volume sonoro dell’apparecchio.
3. Prev. (Precedente) - Per accedere alla traccia o all’elemento precedente.
4. Next (Seguente) - Per accedere alla traccia o all’elemento seguente.
5. M Menu - Premere una volta per confermare o accedere alle opzioni di una funzione.
Continuare a premere per accedere agli schermi di selezione delle funzioni.
6. Schermo
7. Play/Pause - Per avviare/sospendere/riprendere la lettura.
8. Presa cufe 3,5 mm - Per collegare gli auricolari all’apparecchio.
9. Microfono
10. ON-OFF (Acceso-Spento) - Per accendere e spegnere l’apparecchio.
11. Altoparlante
12. Porta mini USB - Per caricare l’apparecchio o trasferire i dati.
24
Guida all’avvio
DMP84IM1232_7Jun_V05.indb 24 07/06/2012 2:31 PM
Page 25

1 Per accendere il lettore multimediale, spostare l’interruttore ON-OFF su ON.
2 Per spegnere l’apparecchio, mantenere premuto il pulsante Play/Pause.
Nota : Posizionare il selettore ON-OFF dell’apparecchio su OFF in caso di mancato
utilizzo prolungato.
Nota: L’apparecchio si mette automaticamente in standby dopo qualche minuto di
inattività. Premere sul pulsante Play/Pause per riattivare.
Scaricare i le multimediali
Accensione/Spegnimento
Il lettore multimediale si può collegare a un computer e vi si possono trasferire i le.
1. Collegare la presa mini USB del cavo USB fornito nella porta mini USB situata sul lato
destro dell’apparecchio.
2. Collegare poi l’altra estremità del cavo USB a una porta USB del computer.
3. Lo schermo del lettore si illumina e appare uno schema che indica che l’apparecchio
è collegato al computer.
4. Il computer individua e installa automaticamente il lettore portatile sul computer.
5. A installazione conclusa, appare una nestra sullo schermo del computer. Selezionare
il disco amovibile e cliccare due volte per accedere al contenuto.
Nota: Se nessuna nestra si apre sullo schermo, si può accedere al disco amovibile
tramite explorer del computer.
7. Si possono ora trasferire i le dal computer al lettore portatile e viceversa.
8. Una volta terminato il trasferimento, chiudere tutti i programmi collegati al lettore e
cliccare sull’icona “Prelievo dalla periferica in tutta sicurezza” in basso a destra sulla
barra dei compiti del computer.
9. Si può ora staccare il lettore e poi il cavo USB.
Nota: Non scollegare mai il cavo USB quando l’apparecchio sta trasferendo o leggendo
dati. Si rischia di perdere i dati e/o di rovinare l’apparecchio.
Navigazione
Selezione di una funzione
1. Accendere il lettore posizionando il selettore ON-OFF dell’apparecchio su ON.
2. Usare i pulsanti e dell’apparecchio per far scorrere le varie funzioni.
3. Quando sullo schermo appare la funzione di propria scelta, premere sul pulsante M
per accedervi.
Accedere alle opzioni di una funzione
1. Nella funzione, premere una volta sul pulsante M per accedere alle opzioni della
funzione.
2. Usare i pulsanti e dell’apparecchio per far scorrere le diverse opzioni disponibili.
3. Quando appare evidenziata la funzione di vostra scelta, premere sul pulsante M per
accedervi.
25
ITALIANO
DMP84IM1232_7Jun_V05.indb 25 07/06/2012 2:31 PM
Page 26

Ritorno alla schermata di selezione delle funzioni
Le opzioni della funzione Registrazione:
- Premendo una volta sul pulsante M dell’apparecchio, si accede alle opzioni di
registrazione seguenti: « Rec. Type » (Tipo di registrazione) e «Fine».
• Funzione «Voce»
La funzione Voce dà accesso a tutte le registrazioni effettuate tramite la funzione
Registrazione del lettore portatile.
1. Selezionare la funzione Voce, poi usare i tasti e per far scorrere le
registrazioni disponibili.
2. Premere il pulsante Play/Pausa per avviare la lettura della registrazione richiesta.
Nota: Le opzioni disponibili nella funzione Registrazione sono identiche a quelle della
funzione Musica. Per saperne di più, far riferimento alla parte «Funzione Musica» di
queste istruzioni.
• Funzione «Radio» (opzionale)
1. Selezionare la funzione Radio, poi usare i tasti e per far scorrere le radio
disponibili.
2. Premere il pulsante M per accedere al modo radio.
Le opzioni della funzione Registrazione (disponibili al momento dell’ascolto)
- Ricerca Auto: per effettuare una ricerca automatica delle stazioni radio.
- Salvaguardare: per registrare una stazione radio.
- Sopprimere il le: per sopprimere una stazione radio.
- Sopprimere tutto: per sopprimere tutte le stazioni radio.
- Registrazione: per registrare il programma radio all’ascolto.
- Uscire: per tornare alle schermate di selezione delle funzioni.
• Funzione «Congurazione»
1. Nella funzione Congurazione, usare i tasti e per far scorrere le impostazioni
disponibili.
2. Premere sul pulsante M per accedere alla regolazione o all’informazione richiesta.
Le impostazioni disponibili:
- Schermo: regolazione della luminosità e della retroilluminazione dello schermo.
- Lingua: scelta della lingua di visualizzazione.
- Spegnimento: impostazione dello spegnimento automatico dello schermo dopo un certo
intervallo di tempo.
- Versione rmware: informazioni sul programma installato.
- Informazioni memoria: informazioni sullo spazio disponibile e lo spazio occupato nella
memoria dell’apparecchio.
- Fine: per tornare alle schermate di selezione delle funzioni.
Per tornare alle schermate di selezione delle funzioni, tenere premuto il pulsante M
dell’apparecchio.
Presentazione delle funzioni
Il lettore multimediale viene consegnato con le cinque seguenti funzioni: Musica,
Registrazione, Voce, Radio (opzionale) e congurazione.
• Funzione «Musica»
Nota: Per sapere come trasferire i le audio sul lettore multimediale, consultare la
sezione “Scaricare i le multimediali” a pagina 25 del manuale di istruzioni.
1. Selezionare la funzione musica, poi premere il tasto Play/Pausa per avviare la
lettura del le audio.
ITALIANO
Nota : Quando si apre la funzione Musica, appare di default l’ultima canzone ascoltata.
2. Premere il tasto Play/Pausa per sospendere la lettura. Premere di nuovo questo
tasto per riprendere la lettura.
3. Premere sui tasti o per selezionare il le audio precedente o seguente.
4. Per avanzare rapidamente o tornare indietro rapidamente nella traccia in corso di
lettura, mantenere premuti i tasti o .
Nota: L’apparecchio è dotato di un altoparlante (ascolto collettivo) e di una presa cufa
(ascolto privato).
ATTENZIONE : Abbassare sempre il livello del volume prima di mettere le cufe. In caso
contrario l’udito si potrebbe rovinare.
Le opzioni della funzione Musica:
- Nella funzione Musica si accede alle opzioni seguenti premendo una volta sul pulsante
M dell’apparecchio: «Cartella locale», «Cancellare il le», «Cancellare tutto» e «Fine».
- In modo Lettura, si accede alle opzioni seguenti premendo una volta sul pulsante M
dell’apparecchio: « Equalizzatore», «Ripetere», «Rileggere» e «Fine».
• Funzione «Registrazione»
1. Selezionare la funzione Registrazione, poi premere il pulsante Play/Pause per
cominciare la registrazione. In basso a sinistra dello schermo appare l’icona e la
durata della registrazione scorre nella parte alta dello schermo.
2. Premere nuovamente sul pulsante Play/Pause per mettere in pausa la
registrazione, premere di nuovo per riprendere la registrazione.
3. Tenere premuto il pulsante M per terminare la registrazione e salvaguardare il le.
Nota: Le registrazioni sono salvate automaticamente nella funzione Voce e nella
funzione Musica (Cartella Locale/Registrazione)
26
DMP84IM1232_7Jun_V05.indb 26 07/06/2012 2:31 PM
Page 27

Le opzioni della funzione Registrazione:
- Premendo una volta sul pulsante M dell’apparecchio, si accede alle opzioni di
registrazione seguenti: « Rec. Type » (Tipo di registrazione) e «Fine».
• Funzione «Voce»
La funzione Voce dà accesso a tutte le registrazioni effettuate tramite la funzione
Registrazione del lettore portatile.
1. Selezionare la funzione Voce, poi usare i tasti e per far scorrere le
registrazioni disponibili.
2. Premere il pulsante Play/Pausa per avviare la lettura della registrazione richiesta.
Nota: Le opzioni disponibili nella funzione Registrazione sono identiche a quelle della
funzione Musica. Per saperne di più, far riferimento alla parte «Funzione Musica» di
queste istruzioni.
• Funzione «Radio» (opzionale)
1. Selezionare la funzione Radio, poi usare i tasti e per far scorrere le radio
disponibili.
2. Premere il pulsante M per accedere al modo radio.
Le opzioni della funzione Registrazione (disponibili al momento dell’ascolto)
- Ricerca Auto: per effettuare una ricerca automatica delle stazioni radio.
- Salvaguardare: per registrare una stazione radio.
- Sopprimere il le: per sopprimere una stazione radio.
- Sopprimere tutto: per sopprimere tutte le stazioni radio.
- Registrazione: per registrare il programma radio all’ascolto.
- Uscire: per tornare alle schermate di selezione delle funzioni.
• Funzione «Congurazione»
1. Nella funzione Congurazione, usare i tasti e per far scorrere le impostazioni
disponibili.
2. Premere sul pulsante M per accedere alla regolazione o all’informazione richiesta.
Le impostazioni disponibili:
- Schermo: regolazione della luminosità e della retroilluminazione dello schermo.
- Lingua: scelta della lingua di visualizzazione.
- Spegnimento: impostazione dello spegnimento automatico dello schermo dopo un certo
intervallo di tempo.
- Versione rmware: informazioni sul programma installato.
- Informazioni memoria: informazioni sullo spazio disponibile e lo spazio occupato nella
memoria dell’apparecchio.
- Fine: per tornare alle schermate di selezione delle funzioni.
27
ITALIANO
DMP84IM1232_7Jun_V05.indb 27 07/06/2012 2:31 PM
Page 28

Assicurarsi di spegnere l’apparecchio e scollegarlo il cavo di alimentazione dalla presa
Manutenzione e Garanzia
di corrente prima di pulirlo. Asciugare l’apparecchio con un panno morbido e asciutto. Se
le superci sono estremamente sporche, pulirle con un panno immerso in una soluzione
di acqua e sapone strizzato con forza. Asciugare poi nuovamente con un panno asciutto.
Non usare mai alcool, benzina, solventi, liquidi detergenti o altri prodotti chimici. Non
usare aria compressa per rimuovere la polvere.
Questo prodotto è coperto da una garanzia di due anni. Per qualsiasi applicazione della
garanzia o del servizio post-vendita occorre rivolgersi al proprio rivenditore muniti della
prova d’acquisto. La nostra garanzia copre i vizi materiali o di montaggio imputabili
al costruttore con esclusione di qualsiasi deterioramento dovuto al mancato rispetto
delle istruzioni o a qualsiasi intervento inadeguato sull’articolo (come lo smontaggio,
l’esposizione al calore o all’umidità….).
ITALIANO
Nota: Conservare queste istruzioni, contengono informazioni importanti. Il contenuto di
queste istruzioni può variare senza preavviso. Nessuna parte delle istruzioni deve essere
riprodotta senza il consenso scritto del produttore.
Riferimento: Serie DMP84
Progettato e sviluppato in Europa - Fabbricato in Cina
© 2012 LEXIBOOK®
LEXIBOOK SA
2, avenue de Scandinavie
91953 Courtabœuf Cedex
Francia
Servizio consumatori: 0 892 23 27 26 (0.34€ / min)
www.lexibook.com
28
DMP84IM1232_7Jun_V05.indb 28 07/06/2012 2:31 PM
Questo prodotto
non è un gioco
Informazioni sulla protezione dell’ambiente:
Qualsiasi apparecchio elettrico usato è un materiale riciclabile e non deve
essere smaltito insieme ai riuti domestici! Raccomandiamo ai nostri clienti
di sostenerci contribuendo attivamente alla gestione delle risorse e alla
protezione dell’ambiente deponendo questo apparecchio presso gli appositi
centri di raccolta (laddove esistenti).
AVVERTENZA: Al massimo volume
l’ascolto prolungato del lettore può
rovinare l’udito dell’utente.
Page 29

• Auspacken des Gerätes:
Versichern Sie sich beim Auspacken, dass die folgenden Teile enthalten sind:
1 Multimedia-Player DMP84 / 1 Kopfhörer / 1 USB-Kabel / 1 Bedienungsanleitung
WARNUNG: Das gesamte Verpackungsmaterial, wie Klebeband, Plastikfolie, Schnüre
und Etiketten, ist nicht Teil des Produktes und muss entsorgt werden.
• Anschluss des Kopfhörers:
Verbinden Sie den Kopfhörer (mitgeliefert) mit der Kopfhörerbuchse unter dem Gerät.
ACHTUNG: Stellen Sie das Gerät immer erst leise, bevor Sie Ihren Kopfhörer benutzen.
Andernfalls könnte Ihr Gehör geschädigt werden.
• Auaden des Akkus:
Anmerkung: Der Ladestand des Akkus wird oben rechts auf dem LC-Display angezeigt.
Das Symbol zeigt an, dass der Akku voll ist. Das Symbol zeigt an, dass der
Akku schwach ist und Sie ihn auaden müssen.
Ihr Multimedia-Player ist mit einem eingebauten Akku versehen. Um das Gerät
aufzuladen, schalten Sie es aus, indem Sie den ON-OFF-Schalter auf OFF stellen.
Verbinden Sie das Gerät mithilfe des mitgelieferten USB-Kabels mit einem Computer.
WARNUNG: Schwere elektromagnetische Interferenzen oder elektrostatische Entladungen
können zu Fehlfunktionen oder Datenverlust führen. Falls das Gerät nicht ordnungsgemäß
funktioniert, schalten Sie es aus und wieder ein oder ziehen Sie das USB-Kabel.
DEUTSCH
Erklärung der Bedienelemente
Inbetriebnahme
1. Volume - Um den Ton des Gerätes leiser zu stellen.
2. + Volume - Um den Ton des Gerätes lauter zu stellen.
3. Prev. (Zurück) - Um auf den vorherigen Track oder das vorherige Element
zuzugreifen.
4. Next (Weiter) - Um auf den nächsten Track oder das nächste Element zuzugreifen.
5. M Menu - Einmal drücken, um zu bestätigen oder auf die Optionen einer Funktion
zuzugreifen. Gedrückt halten, um das Auswahlmenü für die Funktionen zu öffnen.
6. Display
7. Play/Pause - Um die Wiedergabe zu starten/zu unterbrechen/fortzusetzen.
8. 3,5-mm-Kopfhörerbuchse Um Kopfhörer mit dem Gerät zu verbinden.
9. Mikrofon
10. ON-OFF (Ein-Aus) - Um das Gerät ein- oder auszuschalten.
11. Lautsprecher
12. Mini-USB-Port - Um das Gerät aufzuladen oder Daten zu übertragen.
Ein-/Ausschalten
1. Um Ihren Multimedia-Player einzuschalten, schieben Sie den ON-OFF-Schalter des
Gerätes auf ON.
2. Um das Gerät auszuschalten, halten Sie die Taste Play/Pause gedrückt.
29
DMP84IM1232_7Jun_V05.indb 29 07/06/2012 2:31 PM
Page 30

Ihr Multimedia-Player verfügt über die folgenden fünf Funktionen: Musik, Aufnehmen,
Stimme, Radio (wahlweise) und Konguration.
• Musik
Anmerkung: Um zu erfahren, wie Sie Audiodateien auf Ihren Multimedia-Player
übertragen, sehen Sie bitte den Abschnitt „Herunterladen von Multimedia-Dateien“ auf
Seite 30 dieser Bedienungsanleitung.
1. Wählen Sie die Funktion Musik, drücken Sie dann die Taste Play/Pause , um die
Wiedergabe der Audiodateien zu starten.
Anmerkung: Standardmäßig wird der zuletzt gehörte Song angezeigt, wenn Sie die
Funktion Musik öffnen.
2. Drücken Sie die Taste Play/Pause , um die Wiedergabe zu unterbrechen. Drücken
Sie diese Taste erneut, um die Wiedergabe fortzusetzen.
3. Drücken Sie die Taste oder , um die vorherige oder nächste Audiodatei zu
wählen.
4. Um einen Schnellvorlauf oder Rücklauf der aktuellen Wiedergabe durchzuführen,
halten Sie die Taste oder gedrückt.
Anmerkung: Das Gerät verfügt über einen Lautsprecher (gemeinsames Hören) und
eine Kopfhörerbuchse (alleiniges Hören).
ACHTUNG: Stellen Sie das Gerät immer erst leise, bevor Sie Ihren Kopfhörer benutzen.
Andernfalls könnte Gehör geschädigt werden.
Die Optionen der Funktion Musik:
- In der Funktion Musik können Sie die folgenden Optionen aufrufen, indem Sie einmal
die Taste M drücken: „Lokaler Ordner“, „Datei löschen“, „Alle löschen“ und „Beenden“.
- Im Wiedergabemodus können Sie auf die folgenden Optionen zugreifen, indem
Sie einmal auf die Taste M drücken: „Equalizer“, „Wiederholen“, „Erneut lesen“ und
„Beenden“.
• Aufnehmen
1. Wählen Sie die Funktion Aufnehmen und drücken Sie dann auf die Taste Play/
Pause ,
um die Aufnahme zu starten. Das Symbol erscheint unten links auf dem
Display und die Aufnahmedauer läuft am oberen Displayrand.
2. Drücken Sie erneut auf die Taste Play/Pause , um die Aufnahme zu unterbrechen.
Drücken Sie dieselbe Taste noch einmal, um die Aufnahme fortzusetzen.
3. Halten Sie die Taste M gedrückt, um die Aufnahme zu beenden und die Datei zu
speichern.
3. Wenn die Option Ihrer Wahl leuchtend hervorgehoben ist, drücken Sie die Taste M,
um auf sie zuzugreifen.
Rückkehr zum Auswahlmenü der Funktionen
Um zum Auswahlmenü der Funktionen zurückzukehren, halten Sie die Taste M gedrückt.
Anmerkung: Stellen Sie den ON-OFF-Schalter des Gerätes auf OFF, falls das Gerät für
längere Zeit nicht benutzt wird.
Anmerkung: Das Gerät schaltet sich nach einigen Minuten der Inaktivität automatisch in
den Stand-by-Modus. Drücken Sie die Taste Play/Pause, um es wieder zu aktivieren.
Herunterladen von Multimedia-Dateien
Sie können Ihren Multimedia-Player mit einem Computer verbinden und Dateien von
dort herunterladen.
1. Verbinden Sie den Mini-USB-Stecker des mitgelieferten USB-Kabels mit dem Mini-
USB-Port an der rechten Seite des Gerätes.
2. Verbinden Sie dann das andere Ende des USB-Kabels mit dem USB-Port Ihres Computers.
3. Das Display Ihres Players schaltet sich ein und es erscheint eine Abbildung, die
anzeigt, dass das Gerät mit dem Computer verbunden ist.
4. Ihr Computer wird automatisch den Player erkennen und auf Ihrem Computer
installieren.
5. Wenn die Installation abgeschlossen ist, wird ein Fenster auf dem Bildschirm Ihres
Computers angezeigt. Wählen Sie den Wechseldatenträger und doppelklicken Sie, um
auf seinen Inhalt zuzugreifen.
DEUTSCH
Anmerkung: Falls sich kein Fenster auf dem Bildschirm öffnet, können Sie über den
Explorer Ihres Computers auf den Wechseldatenträger zugreifen.
7. Sie können jetzt Dateien von Ihrem Computer auf Ihren Player übertragen und
umgekehrt.
8. Wenn die Übertragung der Dateien abgeschlossen ist, schließen Sie alle Programme,
die mit dem Player in Zusammenhang stehen, und klicken Sie auf das Symbol
„Hardware sicher entfernen“, das sich unten rechts auf der Taskleiste Ihres Computers
bendet.
9. Sie können jetzt Ihren Player entfernen und dann das USB-Kabel.
Anmerkung: Ziehen Sie niemals das USB-Kabel, wenn das Gerät Daten überträgt oder
liest. Sie riskieren, die Daten zu verlieren oder/und das Gerät zu beschädigen.
Navigation
Auswahl einer Funktion
1. Schalten Sie das Gerät ein, indem Sie den ON-OFF-Schalter des Gerätes auf ON
stehen.
2. Scrollen Sie mithilfe der und Tasten des Gerätes durch die verschiedenen
Funktionen.
3. Falls die gewünschte Funktion auf dem Display angezeigt wird, drücken Sie die Taste
M, um die Funktion zu öffnen.
Öffnen der Optionen einer Funktion
1. Wenn Sie die Funktion geöffnet haben, drücken Sie einmal auf die Taste M, um auf die
Optionen der Funktion zuzugreifen.
2. Scrollen Sie mithilfe der und Tasten des Gerätes durch die verschiedenen
30
verfügbaren Optionen.
DMP84IM1232_7Jun_V05.indb 30 07/06/2012 2:31 PM
Page 31

3. Wenn die Option Ihrer Wahl leuchtend hervorgehoben ist, drücken Sie die Taste M,
um auf sie zuzugreifen.
Rückkehr zum Auswahlmenü der Funktionen
Um zum Auswahlmenü der Funktionen zurückzukehren, halten Sie die Taste M gedrückt.
Beschreibung der Funktionen
Ihr Multimedia-Player verfügt über die folgenden fünf Funktionen: Musik, Aufnehmen,
Stimme, Radio (wahlweise) und Konguration.
• Musik
Anmerkung: Um zu erfahren, wie Sie Audiodateien auf Ihren Multimedia-Player
übertragen, sehen Sie bitte den Abschnitt „Herunterladen von Multimedia-Dateien“ auf
Seite 30 dieser Bedienungsanleitung.
1. Wählen Sie die Funktion Musik, drücken Sie dann die Taste Play/Pause , um die
Wiedergabe der Audiodateien zu starten.
Anmerkung: Standardmäßig wird der zuletzt gehörte Song angezeigt, wenn Sie die
Funktion Musik öffnen.
2. Drücken Sie die Taste Play/Pause , um die Wiedergabe zu unterbrechen. Drücken
Sie diese Taste erneut, um die Wiedergabe fortzusetzen.
3. Drücken Sie die Taste oder , um die vorherige oder nächste Audiodatei zu
wählen.
4. Um einen Schnellvorlauf oder Rücklauf der aktuellen Wiedergabe durchzuführen,
halten Sie die Taste oder gedrückt.
Anmerkung: Das Gerät verfügt über einen Lautsprecher (gemeinsames Hören) und
eine Kopfhörerbuchse (alleiniges Hören).
ACHTUNG: Stellen Sie das Gerät immer erst leise, bevor Sie Ihren Kopfhörer benutzen.
Andernfalls könnte Gehör geschädigt werden.
Die Optionen der Funktion Musik:
- In der Funktion Musik können Sie die folgenden Optionen aufrufen, indem Sie einmal
die Taste M drücken: „Lokaler Ordner“, „Datei löschen“, „Alle löschen“ und „Beenden“.
- Im Wiedergabemodus können Sie auf die folgenden Optionen zugreifen, indem
Sie einmal auf die Taste M drücken: „Equalizer“, „Wiederholen“, „Erneut lesen“ und
„Beenden“.
• Aufnehmen
1. Wählen Sie die Funktion Aufnehmen und drücken Sie dann auf die Taste Play/
Pause ,
um die Aufnahme zu starten. Das Symbol erscheint unten links auf dem
Display und die Aufnahmedauer läuft am oberen Displayrand.
2. Drücken Sie erneut auf die Taste Play/Pause , um die Aufnahme zu unterbrechen.
Drücken Sie dieselbe Taste noch einmal, um die Aufnahme fortzusetzen.
3. Halten Sie die Taste M gedrückt, um die Aufnahme zu beenden und die Datei zu
speichern.
31
DEUTSCH
DMP84IM1232_7Jun_V05.indb 31 07/06/2012 2:31 PM
Page 32

Anmerkung: Die Aufnahmen werden automatisch in der Funktion Stimme und der
Stellen Sie sicher, dass Sie das Gerät vor dem Reinigen ausschalten und das Netzkabel
ziehen. Wischen Sie dieses Gerät mit einem trockenen und weichen Tuch ab. Falls
die Oberächen sehr verschmutzt sind, reinigen Sie diese mit einem Tuch, das mit
Seifenwasser befeuchtet wurde. Trocknen Sie das Gerät anschließend gut ab. Wischen
Sie es erneut mit einem trockenen Tuch ab. Verwenden Sie niemals Alkohol, Benzin,
Lösungsmittel, üssige Reinigungsmittel oder andere chemische Produkte. Verwenden
Sie keine Druckluft, um Staub zu entfernen.
Dieses Produkt ist mit unserer Zwei-Jahres-Garantie versehen. Um die Garantie
oder den Kundendienst in Anspruch zu nehmen, müssen Sie sich an Ihren Händler
unter Vorlage Ihres Kaufbelegs wenden. Unsere Garantie deckt Mängel ab, die auf
Material- oder Fertigungsfehler seitens des Herstellers zurückzuführen sind. Davon
ausgeschlossen sind alle Abnutzungserscheinungen, die aus der Nichtbeachtung
der Bedienungsanleitung oder unsachgemäßen Behandlung des Produktes (wie zum
Beispiel, das Produkt auseinandernehmen, Hitze oder Feuchtigkeit aussetzen ...)
resultieren.
Anmerkung: Bitte bewahren Sie diese Bedienungsanleitung auf, sie enthält wichtige
Informationen. Der Inhalt dieser Bedienungsanleitung kann ohne Vorankündigung
geändert werden. Kein Teil dieser Bedienungsanleitung darf ohne die schriftliche
Genehmigung des Herstellers reproduziert werden.
Referenz: DMP84 Serie
Entworfen und entwickelt in Europa – Hergestellt in China
© 2012 LEXIBOOK®
LEXIBOOK SA
2, avenue de Scandinavie
91953 Courtabœuf Cedex
Frankreich
Der Kundendienst ist für Sie da unter: 0 892 23 27 26 (0,34 € / min)
www.lexibook.com
Funktion Musik gespeichert (Lokaler Ordner/Aufnahme).
Die Optionen der Funktion Aufnehmen:
- Indem Sie einmal die Taste M drücken, können Sie auf die folgenden
Aufnahmeoptionen zugreifen: „Rec. Type“ (Aufnahmeart) und „Beenden“.
• Stimme
Über die Funktion Stimme können Sie auf alle Aufnahmen zugreifen, die mit der Funktion
Aufnehmen des Players gemacht wurden.
1. Wählen Sie die Funktion Stimme, scrollen Sie dann mit den Tasten und durch
die verfügbaren Aufnahmen.
2. Drücken Sie die Taste Play/Pause , um die Wiedergabe der gewünschten
Aufnahme zu starten.
Anmerkung: Die verfügbaren Optionen der Funktion Aufnehmen sind die gleichen wie
für die Funktion Musik. Um mehr zu erfahren, sehen Sie bitte den Abschnitt „Musik“ in
dieser Bedienungsanleitung.
• Radio (wahlweise)
DEUTSCH
1. Wählen Sie die Funktion Radio, scrollen Sie dann mithilfe der Tasten und
durch die verfügbaren Radiosender.
2. Drücken Sie die Taste M, um den Radiomodus zu öffnen.
Die Optionen der Funktion Radio (verfügbar beim Hören)
- Automatische Suche: zum Ausführen einer automatischen Radiosendersuche.
- Speichern: zum Speichern eines Radiosenders.
- Löschen einer Datei: zum Löschen eines Radiosenders.
- Alle löschen: um alle Radiosender zu löschen.
- Aufnehmen: um das laufende Radioprogramm aufzunehmen.
- Beenden: um zum Auswahlmenü der Funktionen zurückzukehren.
• Konguration
1. In der Funktion Konguration scrollen Sie mithilfe der Tasten und durch die
verfügbaren Einstellungen.
2. Drücken Sie die Taste M, um die gewünschte Einstellung oder Information zu öffnen.
Die verfügbaren Einstellungen:
- Display: einstellen der Helligkeit und Hintergrundbeleuchtung des Displays.
- Sprache: Auswahl der Anzeigesprache
- Display ausschalten: Einstellen der Dauer für die automatische Ausschaltung des
Displays.
- Firmware-Version: Informationen über das installierte Programm.
- Speicherinformationen: Informationen über den verfügbaren Speicherplatz des Gerätes.
- Beenden: Rückkehr zum Auswahlmenü der Funktionen
32
DMP84IM1232_7Jun_V05.indb 32 07/06/2012 2:31 PM
Page 33

Stellen Sie sicher, dass Sie das Gerät vor dem Reinigen ausschalten und das Netzkabel
Pege und Garantie
ziehen. Wischen Sie dieses Gerät mit einem trockenen und weichen Tuch ab. Falls
die Oberächen sehr verschmutzt sind, reinigen Sie diese mit einem Tuch, das mit
Seifenwasser befeuchtet wurde. Trocknen Sie das Gerät anschließend gut ab. Wischen
Sie es erneut mit einem trockenen Tuch ab. Verwenden Sie niemals Alkohol, Benzin,
Lösungsmittel, üssige Reinigungsmittel oder andere chemische Produkte. Verwenden
Sie keine Druckluft, um Staub zu entfernen.
Dieses Produkt ist mit unserer Zwei-Jahres-Garantie versehen. Um die Garantie
oder den Kundendienst in Anspruch zu nehmen, müssen Sie sich an Ihren Händler
unter Vorlage Ihres Kaufbelegs wenden. Unsere Garantie deckt Mängel ab, die auf
Material- oder Fertigungsfehler seitens des Herstellers zurückzuführen sind. Davon
ausgeschlossen sind alle Abnutzungserscheinungen, die aus der Nichtbeachtung
der Bedienungsanleitung oder unsachgemäßen Behandlung des Produktes (wie zum
Beispiel, das Produkt auseinandernehmen, Hitze oder Feuchtigkeit aussetzen ...)
resultieren.
Anmerkung: Bitte bewahren Sie diese Bedienungsanleitung auf, sie enthält wichtige
Informationen. Der Inhalt dieser Bedienungsanleitung kann ohne Vorankündigung
geändert werden. Kein Teil dieser Bedienungsanleitung darf ohne die schriftliche
Genehmigung des Herstellers reproduziert werden.
Referenz: DMP84 Serie
Entworfen und entwickelt in Europa – Hergestellt in China
© 2012 LEXIBOOK®
LEXIBOOK SA
2, avenue de Scandinavie
91953 Courtabœuf Cedex
Frankreich
Der Kundendienst ist für Sie da unter: 0 892 23 27 26 (0,34 € / min)
www.lexibook.com
Dieses Produkt ist
kein Spielzeug.
Informationen zum Umweltschutz:
Alle elektrischen Altgeräte sind recycelbar und dürfen nicht mit dem
Hausmüll entsorgt werden! Wir bitten Sie, uns zu unterstützen und einen
aktiven Beitrag zur Konservierung der Ressourcen und zum Umweltschutz
leisten, indem Sie dieses Gerät bei einer Sammelstelle abgeben (sofern
vorhanden).
WARNUNG: Das Hören des
Players bei voller Lautstärke über
längere Zeit kann das Gehör des
Benutzers schädigen.
33
DEUTSCH
DMP84IM1232_7Jun_V05.indb 33 07/06/2012 2:31 PM
Page 34

• Het apparaat uitpakken:
1. Om uw multimediaspeler in te schakelen, schuif de ON/OFF-schakelaar naar de ON
positie op het apparaat
2. Om het apparaat uit te schakelen, houd de Play/Pause knop ingedrukt.
Opmerking: In geval u het apparaat gedurende een lange periode niet zult gebruiken,
stel de ON/OFF-schakelaar op de OFF positie in.
Opmerking: Het apparaat gaat na enkele minuten van inactiviteit automatisch in stand-
by. Druk op de Play/Pause knop om deze opnieuw in te schakelen.
U kunt uw mediaspeler op een computer aansluiten om bestanden over te dragen.
1. Steek de mini USB-stekker van de meegeleverde USB-kabel in de mini USB-poort op
de rechterzijde van het apparaat.
2. Sluit het ander uiteinde van de USB-kabel aan op een USB-poort van uw computer.
3. Het scherm van uw speler brandt en een afbeelding verschijnt om aan te geven dat de
speler op de computer is aangesloten.
4. Uw computer detecteert en installeert automatisch de speler op uw computer.
5. Eenmaal de installatie is voltooid verschijnt een venster op het scherm van uw
computer. Kies de afneembare schijf en klik tweemaal om de inhoud te bekijken.
Opmerking: Als er geen venster op het scherm verschijnt, open de afneembare schijf via
de verkenner van uw computer.
7. U kunt nu bestanden die zich op uw computer bevinden overdragen naar uw speler
en vice versa.
8. Eenmaal het overdragen van bestanden is voltooid, sluit alle programma’s die met de
speler zijn verbonden en klik op het pictogram “hardware veilig verwijderen” dat zich in
de rechterbenedenhoek van de takenbalk van uw computer bevindt.
9. U kunt vervolgens uw speler en de USB-kabel losmaken.
Opmerking: Koppel de USB-kabel nooit los terwijl het apparaat gegevens overdraagt en
leest. Dit kan verlies van gegevens en/of schade aan het apparaat veroorzaken.
Een functie kiezen
1. Schakel de speler in door de ON/OFF-schakelaar op de ON positie in te stellen.
2. Gebruik de en knoppen om de verschillende functies te doorlopen.
3. Eenmaal de gewenste functie op het scherm verschijnt, druk op de M knop om deze
te openen.
De opties binnen een functie openen
1. In de functie, druk eenmaal op de M knop om de opties van de functie te openen.
2. Gebruik de en knoppen om de verschillende mogelijke opties te doorlopen.
Tijdens het uitpakken, controleer of volgende onderdelen meegeleverd zijn:
1 DMP84 multimediaspeler / 1 koptelefoon / 1 USB-kabel / 1 gebruiksaanwijzing
WAARSCHUWING: Alle verpakkingsmaterialen, zoals het kleefband, plastic folie,
koorden en labels maken geen onderdeel van dit product uit en dienen weggegooid te
worden.
• Koptelefoonaansluiting:
Sluit de koptelefoon (meegeleverd) op de koptelefoonaansluiting onderaan het apparaat
aan.
OPGELET: Verlaag altijd het volume alvorens uw koptelefoon aan te sluiten. Zo niet kan
dit gehoorschade veroorzaken.
• De batterij opladen:
Opmerking: De oplaadindicator van de batterij bevindt zich in de rechterbovenhoek van
het LCD-scherm. Het symbool geeft aan dat de batterij vol is. Het symbool
geeft aan dat de batterij leeg is en opgeladen dient te worden.
Uw multimediaspeler is uitgerust met een ingebouwde, oplaadbare batterij. Om het
apparaat op te laden, schakel deze uit door de ON/OFF-schakelaar op de OFF positie
NEDERLANDS
in te stellen, en sluit uw apparaat vervolgens op een computer aan met behulp van de
meegeleverde USB-kabel.
WAARSCHUWING: Sterke elektromagnetische velden of elektrostatische ontlading
kunnen een storing of een verlies van de gegevens veroorzaken. Als het apparaat niet
naar behoren werkt, schakel het apparaat uit en vervolgens opnieuw in of koppel de
USB-kabel los.
Toetsengids
1. Volume - Om het volume van het apparaat te verlagen.
2. + Volume - Om het volume van het apparaat te verhogen.
3. Prev. (Vorige) - Om naar de vorige track of element te gaan.
4. Next (Volgende) - Om naar de volgende track of element te gaan.
5. M Menu - Druk eenmaal om te bevestigen of om opties van een functie te openen.
Houd ingedrukt om de functiekeuzeschermen te openen.
6. Scherm
7. Play/Pause - Om het afspelen te starten/pauzeren/hervatten.
8. 3,5 mm koptelefoonaansluiting - Om de koptelefoon op het apparaat aan te sluiten.
9. Microfoon
10. ON-OFF (Aan-Uit) - Om het apparaat in of uit te schakelen.
11. Luidspreker
34
12. Mini USB-poort - Om het apparaat op te laden of gegevens over te dragen.
Startgids
DMP84IM1232_7Jun_V05.indb 34 07/06/2012 2:31 PM
Page 35

1. Om uw multimediaspeler in te schakelen, schuif de ON/OFF-schakelaar naar de ON
positie op het apparaat
2. Om het apparaat uit te schakelen, houd de Play/Pause knop ingedrukt.
Opmerking: In geval u het apparaat gedurende een lange periode niet zult gebruiken,
stel de ON/OFF-schakelaar op de OFF positie in.
Opmerking: Het apparaat gaat na enkele minuten van inactiviteit automatisch in standby. Druk op de Play/Pause knop om deze opnieuw in te schakelen.
Multimediabestanden downloaden
In-/uitschakelen
U kunt uw mediaspeler op een computer aansluiten om bestanden over te dragen.
1. Steek de mini USB-stekker van de meegeleverde USB-kabel in de mini USB-poort op
de rechterzijde van het apparaat.
2. Sluit het ander uiteinde van de USB-kabel aan op een USB-poort van uw computer.
3. Het scherm van uw speler brandt en een afbeelding verschijnt om aan te geven dat de
speler op de computer is aangesloten.
4. Uw computer detecteert en installeert automatisch de speler op uw computer.
5. Eenmaal de installatie is voltooid verschijnt een venster op het scherm van uw
computer. Kies de afneembare schijf en klik tweemaal om de inhoud te bekijken.
Opmerking: Als er geen venster op het scherm verschijnt, open de afneembare schijf via
de verkenner van uw computer.
7. U kunt nu bestanden die zich op uw computer bevinden overdragen naar uw speler
en vice versa.
8. Eenmaal het overdragen van bestanden is voltooid, sluit alle programma’s die met de
speler zijn verbonden en klik op het pictogram “hardware veilig verwijderen” dat zich in
de rechterbenedenhoek van de takenbalk van uw computer bevindt.
9. U kunt vervolgens uw speler en de USB-kabel losmaken.
Opmerking: Koppel de USB-kabel nooit los terwijl het apparaat gegevens overdraagt en
leest. Dit kan verlies van gegevens en/of schade aan het apparaat veroorzaken.
Navigatie
Een functie kiezen
1. Schakel de speler in door de ON/OFF-schakelaar op de ON positie in te stellen.
2. Gebruik de en knoppen om de verschillende functies te doorlopen.
3. Eenmaal de gewenste functie op het scherm verschijnt, druk op de M knop om deze
te openen.
De opties binnen een functie openen
1. In de functie, druk eenmaal op de M knop om de opties van de functie te openen.
2. Gebruik de en knoppen om de verschillende mogelijke opties te doorlopen.
NEDERLANDS
35
DMP84IM1232_7Jun_V05.indb 35 07/06/2012 2:31 PM
Page 36

3. Eenmaal de optie van uw keuze is opgelicht, druk op de M knop om deze te openen.
Opmerking: De opnames worden automatisch in de Stem- en Muziekfunctie (Lokale
Map/Record) opgeslagen.
De opties van de Opnamefunctie:
- Druk eenmaal op de M knop om de volgende opname-opties te openen: ”Rec. Type”
(Opnametype) en ”Afsluiten”.
• “Stem” functie
De Stemfunctie geeft u toegang tot alle uitgevoerde opnames via de Opnamefunctie
van uw speler.
1. Kies de Stemfunctie, en gebruik vervolgens de en toetsen om de mogelijke
opnames te doorlopen.
2. Druk op Play/Pause knop om het afspelen van de gekozen opname te starten.
Opmerking: De mogelijke opties in de Opnamefunctie zijn dezelfde als deze van de
Muziekfunctie. Om meer te weten te komen, raadpleeg de rubriek “Muziekfunctie” van
deze gebruiksaanwijzing.
• “Radio” functie (facultatief)
1. Kies de Radiofunctie, en gebruik vervolgens de en toetsen om de
beschikbare radiozenders te doorlopen.
2. Druk op de M knop om de radiomodus te openen.
De opties van de Opnamefunctie (beschikbaar tijdens het luisteren)
- Automatisch zoeken: Om automatisch naar radiozenders te zoeken.
- Opslaan: Om een radiozender op te slaan.
- Het bestand wissen: Om een radiozender te wissen.
- Alles wissen: Om alle radiozenders te wissen.
- Opnemen: Om het programma waar u naar luistert op te nemen.
- Afsluiten: Om naar de functiekeuzeschermen terug te keren.
• “Conguratie” functie
1. In de Conguratiefunctie, gebruik de en toetsen om de mogelijke
instellingen te doorlopen.
2. Druk op de M knop om de gewenste instelling of informatie te openen.
Beschikbare instellingen:
- Scherm: Instellen van de helderheid en achtergrondverlichting van het scherm.
- Taal: Keuze van de weergavetaal.
- Uitschakeling: Instellen van de automatische uitschakeltijd van het scherm.
- Firmwareversie: Informatie over het geïnstalleerd programma.
- Geheugeninformatie: Informatie over de beschikbare en gebruikte geheugenruimte
van het apparaat.
- Afsluiten: Naar de functiekeuzeschermen terugkeren.
Naar de functiekeuzeschermen terugkeren
Om naar de functiekeuzeschermen terug te keren, houd de M knop ingedrukt.
Voorstelling van de functies
Uw multimediaspeler is voorzien van de volgende vijf functies: Muziek, Opname, Stem,
Radio (facultatief) en Conguratie.
• “Muziek” functie
Opmerking: Om te weten te komen hoe audiobestanden naar uw multimediaspeler over
te dragen, raadpleeg de rubriek “Mutimediabestanden downloaden” op pagina 35 van
deze gebruiksaanwijzing.
1. Kies de Muziekfunctie en druk vervolgens op de Play/Pause toets om het afspelen
van het audiobestand te starten.
Opmerking: Het laatste afgespeelde liedje wordt standaard weergegeven wanneer u de
Muziekfunctie opent.
2. Druk op de Play/Pause toets om het afspelen te pauzeren. Druk nogmaals op
deze toets om het afspelen te hervatten.
3. Druk op de of toetsen om het vorig of volgend audiobestand te selecteren.
NEDERLANDS
4. Om in de huidig afgespeelde track snel door of terug te spoelen, houd de of
toets ingedrukt.
Opmerking: Het apparaat is uitgerust met een luidspreker (gezamelijk luisteren) en een
koptelefoonaansluiting (persoonlijk luisteren).
OPGELET: Verlaag altijd het volume alvorens uw koptelefoon aan te sluiten. Zo niet kan
dit gehoorschade veroorzaken.
De opties van de Muziekfunctie:
- In de Muziekfunctie kunt u de volgende opties openen door eenmaal op de M knop te
drukken: “Lokale map”, “Het bestand wissen”, “Alles wissen” en “Afsluiten”.
- In de afspeelmodus kunt u de volgende opties openen door eenmaal op de M knop te
drukken: “Equaliser”, “Herhalen”, “Opnieuw afspelen” en “Afsluiten”.
• “Opname” functie
1. Kies de Opnamefunctie en druk vervolgens op de Play/Pause knop om de opname
te starten. Het pictogram verschijnt in de linkerbenedenhoek van het scherm en de
opnameduur wordt bovenaan het scherm weergegeven.
2. Druk nogmaals op de Play/Pause knop om de opname te pauzeren en druk nog
een keer om de opname te hervatten.
3. Houd de M knop ingedrukt om de opname te voltooien en het bestand op te slaan.
36
DMP84IM1232_7Jun_V05.indb 36 07/06/2012 2:31 PM
Page 37

Opmerking: De opnames worden automatisch in de Stem- en Muziekfunctie (Lokale
Map/Record) opgeslagen.
De opties van de Opnamefunctie:
- Druk eenmaal op de M knop om de volgende opname-opties te openen: ”Rec. Type”
(Opnametype) en ”Afsluiten”.
• “Stem” functie
De Stemfunctie geeft u toegang tot alle uitgevoerde opnames via de Opnamefunctie
van uw speler.
1. Kies de Stemfunctie, en gebruik vervolgens de en toetsen om de mogelijke
opnames te doorlopen.
2. Druk op Play/Pause knop om het afspelen van de gekozen opname te starten.
Opmerking: De mogelijke opties in de Opnamefunctie zijn dezelfde als deze van de
Muziekfunctie. Om meer te weten te komen, raadpleeg de rubriek “Muziekfunctie” van
deze gebruiksaanwijzing.
• “Radio” functie (facultatief)
1. Kies de Radiofunctie, en gebruik vervolgens de en toetsen om de
beschikbare radiozenders te doorlopen.
2. Druk op de M knop om de radiomodus te openen.
De opties van de Opnamefunctie (beschikbaar tijdens het luisteren)
- Automatisch zoeken: Om automatisch naar radiozenders te zoeken.
- Opslaan: Om een radiozender op te slaan.
- Het bestand wissen: Om een radiozender te wissen.
- Alles wissen: Om alle radiozenders te wissen.
- Opnemen: Om het programma waar u naar luistert op te nemen.
- Afsluiten: Om naar de functiekeuzeschermen terug te keren.
• “Conguratie” functie
1. In de Conguratiefunctie, gebruik de en toetsen om de mogelijke
instellingen te doorlopen.
2. Druk op de M knop om de gewenste instelling of informatie te openen.
Beschikbare instellingen:
- Scherm: Instellen van de helderheid en achtergrondverlichting van het scherm.
- Taal: Keuze van de weergavetaal.
- Uitschakeling: Instellen van de automatische uitschakeltijd van het scherm.
- Firmwareversie: Informatie over het geïnstalleerd programma.
- Geheugeninformatie: Informatie over de beschikbare en gebruikte geheugenruimte
van het apparaat.
- Afsluiten: Naar de functiekeuzeschermen terugkeren.
NEDERLANDS
37
DMP84IM1232_7Jun_V05.indb 37 07/06/2012 2:31 PM
Page 38

Alvorens het apparaat te reinigen, schakel het apparaat uit en haal de stekker uit
Onderhoud en garantie
het stopcontact. Maak dit apparaat met een zachte en droge doek schoon. Als het
oppervlak zeer vuil is, maak het apparaat schoon met een doek die in zeepwater is
ondergedompeld en wring de doek vervolgens goed uit. Veeg vervolgens nogmaals
met een droge doek over het oppervlak. Maak het apparaat nooit schoon met alcohol,
benzine, oplosmiddelen, vloeibare schoonmaakmiddelen of andere chemische
producten. Gebruik nooit perslucht om stof te verwijderen.
Dit product wordt gedekt door onze garantie van 2 jaar. Om gebruik te kunnen maken
van onze garantie of onze klantendienst, lever het product in op de plaats van aankoop
samen met uw betaalbewijs. Onze garantie dekt materiaaldefecten en montage- en
fabricagefouten, exclusief alle schade veroorzaakt door het niet in acht nemen van
de instructies of elke ongepaste aanpassing aan het product (zoals uit elkaar halen,
blootstelling aan hitte of vocht,...).
Opmerking: Bewaar deze gebruiksaanwijzing op een veilige plaats, deze bevat
belangrijke informatie. De inhoud van deze gebruikershandleiding kan wijzigen zonder
voorafgaande kennis. Geen enkel deel uit deze gebruikershandleiding mag zonder
geschreven goedkeuring van de fabrikant worden gereproduceerd.
Referentie: DMP84serie
NEDERLANDS
Ontworpen en ontwikkeld in Europa - Geproduceerd in China
© 2012 LEXIBOOK®
LEXIBOOK SA
2, avenue de Scandinavie
91953 Courtabœuf Cedex
Frankrijk
Klantendienst: 0 892 23 27 26 (0,34€ / min)
www.lexibook.com
Informatie over milieubescherming:
Afgedankte elektrische apparatuur kan worden gerecycled en mag niet
samen met het huishoudelijk afval worden weggegooid! Help ons met
het actief steunen van het behoud van de natuurlijke rijkdommen en het
beschermen van het milieu door dit apparaat bij een geschikt inzamelpunt in
te leveren (indien voorhanden).
38
WAARSCHUWING : Een langdurige
blootstelling aan een hoog volume met
gebruik van een kop- of oortelefoon, kan
het gehoor van de gebruiker beschadigen.
Dit product is
geen speelgoed.
IM code: DMP84IM1232
DMP84IM1232_7Jun_V05.indb 38 07/06/2012 2:31 PM
Page 39

DMP84IM1232_7Jun_V05.indb 39 07/06/2012 2:31 PM
Average/ Moyen
City/Vil le :
FRANCE
LEXIBOOK S.A,
Mon avis compte
91953 Co urtaboeuf C edex
2, avenu e de Scandi navie,
DMP84
YOUR OPINION MATTERS / VOTRE AVIS COMPTE
produits encore mei lleurs! Mer ci de bien v ouloir remp lir ce coup on en franç ais ou en a nglais et d e nous le r etourner à l’adresse su ivante :
Help us make produc ts better t han ever! Pl ease fill o ut the foll owing form in English or in Frenc h, and retu rn it to / Aidez-nous à rendre nos
Reference of product / Référence du produit
First na me/Prénom : Last name /Nom de fam ille :
Address/ Adresse :
Zip code/ Code Postal : Country/Pays :
Store / Enseigne :
Birth Dat e of the us er / Date de naissance de l’utilisa teur de ce produit : __ __/_____/__ ___
Name of p roduct / No m du produit :
Date of p urchase / D ate de l’ach at : ____/_ ____/_____
Phone/Té léphone : Email :
What is your overal l impressio n of the pro duct? / Vou s trouvez l e produit g lobalement :
Very satisfactory/Très satisfaisant Satisfac tory/Satisf aisant
Please feel free to leave your comments here / Vous pouvez à présent utiliser l’espace suivant pour nous donner vos remarques :
Disappoi nting/Décev ant Very dis appointing/ Très déceva nt
Conformément aux articles 34 et suivants de la loi « Informatique et Libertés » du 6 janvier 1978, vous disposez d'un droit d'accès, de modification,
de rectification et de suppression des données qui vous concernent. Vous pouvez l'exercer sur simple demande à notre adresse. Si vous ne souhaitez
pas que ces données soient utilisées à des fins de prospection commerciale, veuillez cocher ici :
Find all our new pro ducts / Retr ouvez toute notre actua lité: http: //www.lexibo ok.com
Page 40

DMP84IM1232_7Jun_V05.indb 40 07/06/2012 2:31 PM
2, avenue de Scandinavie,
91953 Courtaboeuf Cedex
Mon avis compte,
LEXIBOOK S.A,
FRANCE
Affranch ir
ici
 Loading...