

Page 1
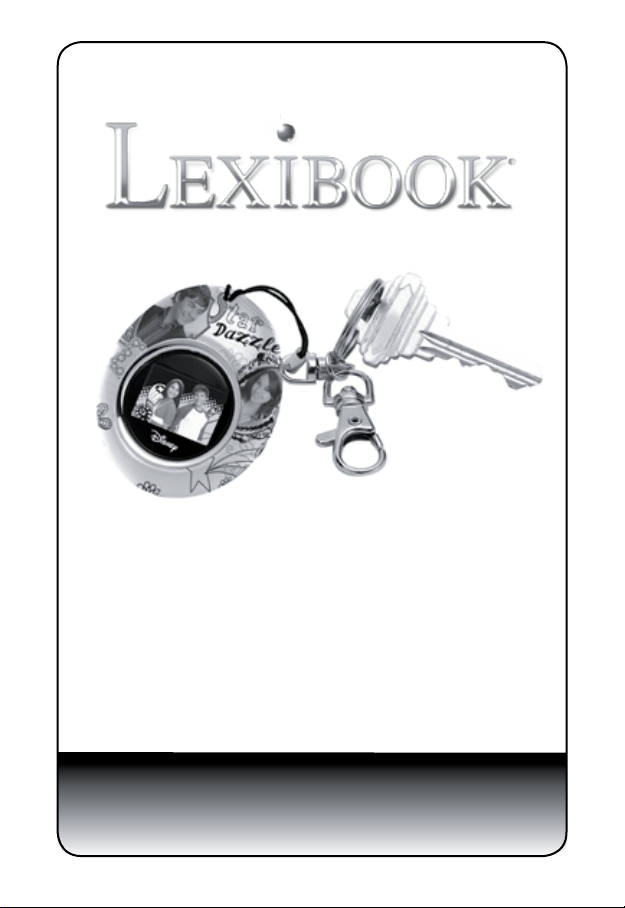
Porte clés Cadre Photo Numérique
Digital Photo Frame Keychain
Llavero con Marco de Fotografías Digital
Porta-chaves com moldura para fotos digitais
Portachiavi Portafoto Digitale
Schlüsselanhänger mit digitalem Fotorahmen
Digitale Fotoframe-sleutelhanger
Manuel d’utilisation /Instruction Manual
DKC01HSM_01
Page 2
FR
FR
FR
GB
----------
----------
FRANÇAIS
ENGLISH
ES
----------
PT
----------
----------
IT
----------
DE
----------
NL
2
ESPAÑOL
PORTUGUÊS
ITALIANO
DEUTSCH
NEDERLANDS
Copyright © Lexibook 2008
Page 3

TABLE DES MATIÈRES
INTRODUCTION .................................................................................. 4
REMARQUE IMPORTANTE ................................................................ 4
SI VOUS AVEZ BESOIN D’AIDE .......................................................... 4
DÉBALLER VOTRE DKC01HSM_01 ................................................... 4
PRÉSENTATION .................................................................................. 4
INSTALLATION .................................................................................... 5
UTILISATION DU LOGICIEL DE PHOTOS « IMAGEVIEWER »
LORSQUE LE CADRE EST CONNECTÉ À VOTRE PC ..................... 5
UTILISATION DU CADRE LORSQU’IL N’EST PAS CONNECTÉ À
VOTRE PC ........................................................................................... 6
CHARGEMENT DE LA BATTERIE ...................................................... 7
NETTOYAGE ET ENTRETIEN ............................................................. 7
SPÉCIFICATIONS TECHNIQUES ....................................................... 7
CONDITIONS DE VALIDITÉ DE LA GARANTIE .................................. 8
Français
Copyright © Lexibook 2008
3
Page 4
Français
INTRODUCTION
Félicitations ! Nous sommes heureux de vous compter aujourd’hui
parmi les très nombreux utilisateurs des produits LEXIBOOK®. Vous
venez d’acheter le porte clés cadre photo numérique DKC01HSM_01 de
LEXIBOOK®.
Ce porte clés cadre photo numérique convivial possède de nombreuses
fonctions et caractéristiques très utiles pour vous permettre d’apprécier
au mieux vos photos et les garder tout le temps près de vous. Nous vous
invitons à lire attentivement ce mode d’emploi pour proter pleinement de
toutes les fonctions offertes par votre appareil.
REMARQUE IMPORTANTE
Si vous avez besoin d’aide
La Ligne d’aide Lexibook® est à votre disposition de 9h00 à 12h30 et de
14h00 à 17h00, du lundi au vendredi, au numéro suivant : 0892 23 27 26
(0.34 € TTC par minute).
Déballer votre cadre photo numérique DKC01HSM_01
La boîte contient :
Un cadre photo numérique
Un cordon USB
Conservez les matériaux d’emballage en lieu sûr, vous pourriez en avoir
besoin pour transporter l’unité.
Conservez le ticket de caisse, qui sert également de garantie.
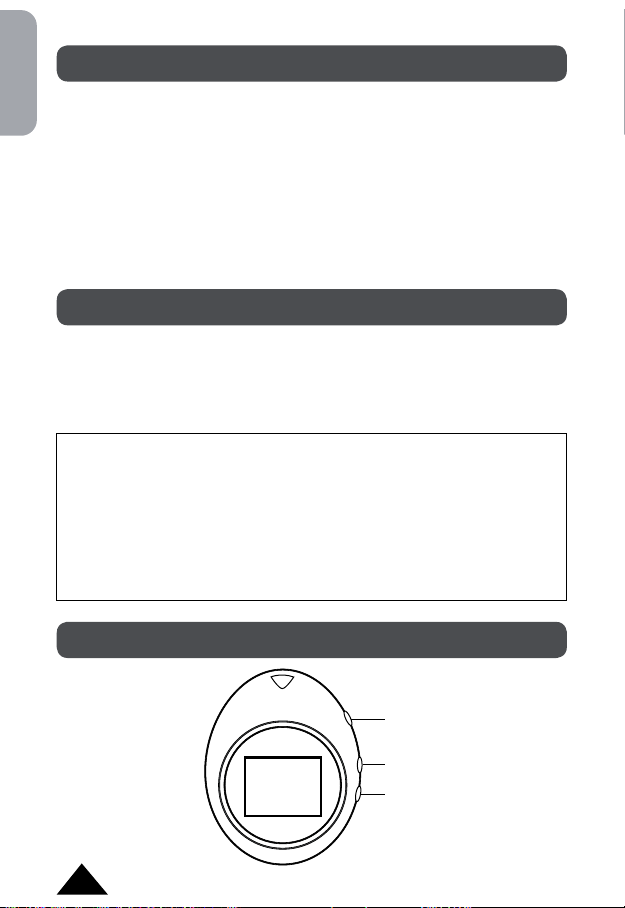
PRÉSENTATION
Up
Down
Mode
4
Copyright © Lexibook 2008
Page 5

INSTALLATION
1. Branchez le cordon USB à votre PC et au porte clés cadre photo
numérique. Le PC va détecter le nouveau périphérique et la fenêtre du
logiciel de photos doit apparaitre automatiquement. L’écran de l’appareil
afche « PC connecting ».
2. Si la connexion initiale échoue, débranchez le cordon USB de votre PC
et rebranchez-le. Ceci n’affectera en rien le fonctionnement de l’appareil
même si l’écran n’afche pas « PC connecting ».
3. Si vous désirez utiliser le programme pour éditer les photos, lancez
imageview.exe depuis votre PC.
UTILISATION DU LOGICIEL DE PHOTOS « IMAGEVIEWER »
LORSQUE LE CADRE EST CONNECTÉ À VOTRE PC
1. Le logiciel lmageViewer afche automatiquement toutes photos qui sont
déjà téléchargées dans le cadre.
2. Vous pouvez sélectionner une photo du cadre photo numérique en
cliquant sur une photo dans la fenêtre de gauche.
3. Après avoir cliqué sur une photo, vous pouvez changer sa position en
début ou n de liste. Ceci changera l’ordre dans lequel les photos seront
afchées lorsque vous utilisez la fonction « délement de photos »
(slideshow) du cadre.
4. Vous pouvez aussi effacer une photo en la sélectionnant et en cliquant
« Delete ». Ceci effacera dénitivement la photo de la liste.
5. Cliquez sur «
cadre photo.
6. Cliquez sur «
a) Placez le curseur sur le coin en bas à droite de la photo, puis cliquez
et maintenez. Bougez le curseur dans la photo pour redimensionner
la sélection.
Placez le curseur à l’intérieur de la sélection et cliquez pour déplacer
la sélection.
b) Cliquez sur «
cliquez sur « Smooth Edit » pour la rendre claire sur l’écran du cadre
photo.
7. Pour ajouter une photo au cadre photo, cliquez sur «
Sélectionnez ensuite le dossier dans lequel la photo est sauvegardée et
cliquez sur « Ouvrir ».
Clear » pour complètement effacer toute la mémoire du
Edit » pour retoucher une photo.
Auto Stretch » pour que la photo remplisse l’écran et
Add image as… ».
Français
Copyright © Lexibook 2008
5
Page 6

Français
a) La photo apparait dans la fenêtre de gauche.
b) La photo peut maintenant être manipulée comme toutes les autres.
8. Sauvegardez tous vos changements en cliquant sur «
Set logo image » permet de sélectionner la photo initiale qui apparaît
9. «
à chaque fois que le cadre est allumé. Vous pouvez sélectionner cette
photo de la même façon que vous choisissez les photos à ajouter au
cadre. Cette photo n’apparaîtra pas pendant la fonction « délement de
photos » (slideshow).
10. Cliquez sur «
Exit » pour quitter le programme.
UTILISATION DU CADRE LORSQU’IL N’EST PAS
CONNECTÉ À VOTRE PC
1. Appuyez sur la touche « Mode » pendant 2 secondes pour allumer
l’appareil.
2. Appuyez sur la touche «
Appuyez sur les touches « Up » (haut) et « Down » (bas) pour faire
déler les options et appuyez à nouveau sur la touche « Mode » pour
conrmer.
3. Appuyez sur la touche «
est synchronisée avec l’heure de votre PC. Vous ne pouvez pas régler
l’heure sur l’appareil lui-même.
4. Dans le sous-menu «
« Down » pour sélectionner « OSD ON » ou « OSD OFF » an d’afcher
ou de cacher la date et l’heure à l’écran du cadre photo lors du mode
afchage de photos
5. Appuyez sur la touche «
des photos lors de l’utilisation de la fonction « délement de photos »
entre 0 et 31 secondes. Vous pouvez aussi désactiver cette fonction en
choisissant 0 pour qu’une seule photo reste en permanence à l’écran.
6. Sélectionnez l’option «
tension automatique du cadre. Utilisez les touches « Up » et « Down »
pour changer le temps, de 0 à 31 minutes. Réglez le temps sur 0 pour
désactiver la fonction « Screen Save » .
7. Appuyez sur la touche «
8. Appuyez sur la touche «
photos.
Mode » pour afcher le menu des options.
Time » pour consulter la date et l’heure. L’heure
Time » appuyez sur les touches « Up » et
Slideshow » pour changer le temps d’afchage
Screen Save » pour régler le temps de mise hors
Brightness » pour régler la luminosité.
Mode» pour retourner au mode afchage de
Save ».
6
Copyright © Lexibook 2008
Page 7

CHARGEMENT DE LA BATTERIE
• Rechargez votre appareil en le branchant à votre PC à l’aide du cordon
USB fourni.
• L’écran du cadre photo afche le symbole de la batterie.
• Lorsque la pile de l’appareil est presque vide, la luminosité de l’écran
diminue et l’écran clignote avant de s’éteindre complètement.
NETTOYAGE ET ENTRETIEN
• Ne nettoyez aucune partie de votre porte clés cadre photo numérique
DKC01HSM_01 avec du benzène, du diluant ou d’autres solvants
chimiques. Cela peut entraîner un dommage permanent qui n’est pas
couvert par la garantie. Si nécessaire, nettoyer avec un chiffon humide.
• Tenez votre cadre photo numérique DKC01HSM_01 éloigné de la
chaleur, de l’humidité ou d’une lumière solaire forte et évitez de le
mouiller.
• Tout a été fait pour assurer une grande abilité de votre porte clés cadre
photo numérique DKC01HSM_01. Toutefois, en cas de problème, ne
tentez pas de le réparer vous-même, consultez votre fournisseur ou la
ligne d’aide LEXIBOOK®
SPÉCIFICATIONS TECHNIQUES
Formats supportés JPEG, BMP, GIF
Écran Écran couleur OLED 1.1 pouce
Capacité de mémoire 60 photos
Alimentation Batterie Lithium 3.7 V rechargeable par cordon
Système
d’exploitation
USB
Win SE / ME / XP / Vista
Français
Copyright © Lexibook 2008
7
Page 8

Français
CONDITIONS DE VALIDITÉ DE LA GARANTIE
Ce produit est couvert par notre garantie de deux ans*.
Pour toute mise en œuvre de la garantie ou de service après vente, vous
devez vous adresser à votre revendeur muni de cette carte et de votre
preuve d’achat. Pour qu’elle soit valable, cette carte de garantie doit porter
obligatoirement le cachet du vendeur avec la date d’acquisition et être
accompagnée de votre preuve d’achat.
Notre garantie couvre les vices de matériel ou de montage imputables au
constructeur à l’exclusion de toute détérioration provenant du non-respect de
la notice d’utilisation ou de toute intervention intempestive sur l’article (telle
que démontage, exposition à la chaleur ou à l’humidité…).
* N’inclut pas la détérioration de l’écran LCD.
Notes : Veuillez garder ce mode d’emploi, il contient d’importantes
informations.
Lexibook mène une politique d’amélioration continue de ses produits et,
en cela, se réserve le droit d’apporter des modications au produit et à ses
fonctions sans préavis.
Référence : DKC01HSM_01
Garantie 2 ans
©2008 LEXIBOOK®
Conçu en Europe – Fabriqué en Chine
Fabricant :
Lexibook SAV
2, av de Scandinavie
91953 Courtaboeuf cedex
Tél. Assistance technique : 0892 23 27 26 (0,34€ TTC/Min)
FAX : +33 (0)1 73 23 23 04
Site Internet : http://www.lexibook.com
Informations sur la protection de l’environnement
Tout appareil électrique usé est une matière recyclable et ne
devrait pas faire partie des ordures ménagères! Nous vous
demandons de bien vouloir nous soutenir en contribuant
activement au ménagement des ressources et à la protection
de l’environnement en déposant cet appareil dans des sites de
collecte (si existants).
8
Copyright © Lexibook 2008
Page 9

TABLE OF CONTENTS
INTRODUCTION ................................................................................ 10
UNPACKING YOUR DKC01HSM_01 ................................................ 10
PRESENTATION ................................................................................ 10
INSTALLATION ...................................................................................11
USING IMAGEVIEWER WHEN DKC01HSM_01 IS CONNECTED
TO YOUR PC .....................................................................................11
USING DKC01HSM_01 WHEN IT IS NOT CONNECTED
TO YOUR PC ..................................................................................... 12
CHARGING THE BATTERY ............................................................... 12
CLEANING AND CARE INSTRUCTIONS .......................................... 13
TECHNICAL SPECIFICATIONS ......................................................... 13
GUARANTEE ..................................................................................... 14
English
Copyright © Lexibook 2008
9
Page 10
INTRODUCTION
Congratulations on the purchase of your DKC01HSM_01 Digital Photo
Frame keychain from LEXIBOOK®!
This convivial digital photo frame keychain offers numerous features and
English
functions to allow you to enjoy your digital photos and keep them with you
wherever you go.
This document is a brief guide which illustrates the main features and
functions of DKC01HSM_01. We invite you to read this manual attentively as
it will help and guide you with the usage of your new product.
UNPACKING YOUR DKC01HSM_01
Inside the package:
- 1 DKC01HSM_01 digital photo frame keychain
- 1 USB cable
Please keep all packaging in a safe place for future reference.
Please keep your sales (till) receipt – this is your guarantee.
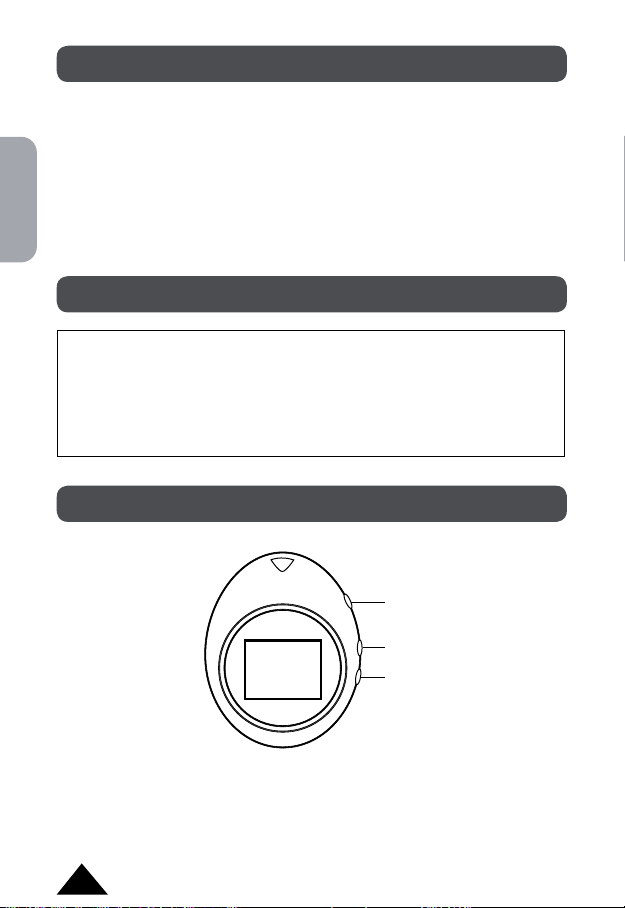
PRESENTATION
Up
Down
Mode
10
Copyright © Lexibook 2008
Page 11

INSTALLATION
1. Plug the USB cable into the computer and the digital photo frame.
The computer will detect the new hardware automatically and the
ImageViewer window should pop up on its own. The screen on the unit
will show “PC connecting.”
2. If this does not happen, unplug the USB cord from the computer and
plug it in again. This will not affect the functioning of the unit even if the
screen on the unit does not show “PC connecting.”
3. If you would like to go back into the program to edit your photos, please
launch the imageview.exe le from your computer.
USING IMAGEVIEWER WHEN DKC01HSM_01
IS CONNECTED TO YOUR PC
1. ImageViewer will automatically display all the pictures which are already
loaded into the frame.
2. You may select a photo in the digital photo frame by clicking the desired
photo in the left box.
3. Once you click on a photo, you can move it up or down the list. This
changes the order in which the photos are displayed when using the
digital photo frame slideshow function.
4. You may also delete a photo by selecting it and clicking “
permanently delete the photo from the list.
5. Click “
6. The “
7. To add an image to the digital photo frame, click “
Clear” to clear the entire contents of the digital photo frame.
Edit” button can be used to crop a photo.
a. In editing mode, place the cursor at the bottom right corner of the
picture, then click and hold. Move the cursor inside the picture to
resize the selection. Click and hold inside the selection area to move
the selection.
b. Click “
select the directory where the image was saved and click “Open.”
a. Once this is done, the image will appear in the left box.
b. At this point, the image can be manipulated like any others.
Auto Stretch” to ll up the entire screen with the photo and
click “Smooth Edit” so that the photo appears clear in the photo
frame.
Delete.” This will
Add Image as …” Then
English
Copyright © Lexibook 2008
11
Page 12

8. Click the “Save” button to save all changes.
9. Click “
10. Click “
Set Logo Image” to select a start-up photo for the unit, just as you
would select any other photo. It will show up every time when you turn
the unit on. This picture is not displayed during the slideshow.
Exit” to leave the program
English
USING DKC01HSM_01 WHEN IT IS NOT CONNECTED
TO YOUR PC
1. Press and hold the “Mode” button for 2 seconds to turn on your digital
photo frame.
2. Press “
3. Select “
4. In the time sub-menu, press the “
5. Select “
6. Select “
7. Select “
8. Press the “
Mode” again to display the Options Menu and press the “Up” and
“Down” keys to scroll and navigate inside the menu. Press “Mode” again
to conrm.
Time” to display the date and time. This time is synchronized with
your PC clock. You cannot set the time from the unit itself.
Up” and “Down” keys to set “OSD ON”
or “OSD OFF” to show or hide the time and date on the screen of the unit
in picture mode.
Slideshow” to change the time between photos from 0 to 31
seconds when using the slideshow function of the photo frame. Set it to
“0” to disable the slideshow function.
Screen Save” to set the amount of time before the digital photo
frame turns off automatically. Use the “Up” and “Down” keys to change
the time from 0 to 31 minutes. Set it to “0” to disable the screen save
function.
Brightness” to adjust the brightness.
Mode” button again to return to picture mode.
CHARGING THE BATTERY
• Charge the unit by plugging the USB cable to your PC.
• The screen of the unit will display the battery symbol.
• When the unit is low in battery, the display will dim and blink before it
nally turns off.
12
Copyright © Lexibook 2008
Page 13

CLEANING AND CARE
• Don’t clean any part of your DKC01HSM_01 with benzene, thinners or
other solvent chemicals—this may cause permanent damage which is
not covered by the guarantee. When necessary, clean it with a damp
cloth.
• Keep your DKC01HSM_01 away from
strong sunlight.
• Every effort has been made to ensure high standards of reliability for your
DKC01HSM_01. However, if something does go wrong, please do not
try to repair it yourself – consult your supplier or the LEXIBOOK® help
line
hot, humid conditions and
TECHNICAL SPECIFICATIONS
Supported Formats JPEG, BMP, GIF
Display 1.1 inch OLED Colour Display
Storage Capacity Stores 60 pictures
Power 3.7 V Lithium battery + USB cable charger
Operation System Win SE / ME / XP / Vista
English
Copyright © Lexibook 2008
13
Page 14
GUARANTEE
This product is covered by our two-year guarantee*.
For all matters relating to the guarantee or our after-sales service, please
contact your retailer and have your receipt on hand. Our guarantee covers
manufacturing or assembly defects with the exception of all damage
English
resulting from a failure to respect the instructions, or any inappropriate
handling of the article (such as taking it apart, exposing it to heat or humidity,
etc).
* excluding the deterioration of the LCD screen.
Note: It is recommended that all packaging be kept for future reference.
Keep this instruction manual in a safe place as it contains important
information.
Disclaimer: In our constant concern for improvement, the colours and
details of the product may differ slightly from those shown on the packaging.
Reference: DKC01HSM_01
2-year warranty
©2008 LEXIBOOK®
Designed and developed in Europe – Made in China
Customer Service
LEXIBOOK UK ltd
Unit 10 Peterseld Industrial Estate
Bedford Road, Peterseld
Hampshire, GU32 3QA,
United Kingdom
Helpline: 0808 100 3015
http://www.lexibook.com
Environmental Protection
Unwanted electrical appliances can be recycled and should
not be discarded along with regular household waste! Please
actively support the conservation of resources and help protect
the environment by returning this appliance to a collection centre
(if available).
14
Copyright © Lexibook 2008
Page 15

ÍNDICE
INTRODUCCIÓN ................................................................................ 16
DESEMBALAJE DEL DKC01HSM_01 ............................................... 16
PRESENTACIÓN ............................................................................... 16
INSTALACIÓN .................................................................................... 17
CÓMO UTILIZAR EL IMAGEVIEWER CUANDO EL
DKC01HSM_01 ESTÁ CONECTADO A SU PC ................................. 17
CÓMO UTILIZAR EL DKC01HSM_01 CUANDO NO ESTÁ
CONECTADO A SU PC ...................................................................... 18
PARA CARGAR LA BATERÍA ............................................................. 19
INSTRUCCIONES DE CUIDADO Y LIMPIEZA .................................. 19
ESPECIFICACIONES TÉCNICAS ..................................................... 19
GARANTÍA ......................................................................................... 20
Español
Copyright © Lexibook 2008
15
Page 16

INTRODUCCIÓN
¡Enhorabuena por la compra de este Llavero con Marco de Fotografías
Digital DKC01HSM_01 de LEXIBOOK®!
Este elegante llavero con marco de fotografías digital ofrece numerosas
características y funciones que le permitirán disfrutar de sus fotografías
digitales y llevarlas consigo a donde quiera que vaya.
Este documento es una breve guía que describe las características y
funciones principales del DKC01HSM_01. Le recomendamos que lea este
manual atentamente, ya que le ayudará y le servirá de guía para utilizar su
nuevo producto.
Español
DESEMBALAJE DEL DKC01HSM_01
Contenido del embalaje:
- 1 llavero DKC01HSM_01 con marco de fotografías digital
- 1 cable USB
Guarde el embalaje completo en un lugar seguro para facilitar futuras
consultas.
Guarde su comprobante o factura de compra – lo necesitará para
hacer uso de la garantía.
PRESENTACIÓN
Up
Down
Mode
16
Copyright © Lexibook 2008
Page 17

INSTALACIÓN
1. Conecte el cable USB al ordenador y al marco de fotografías digital. El
ordenador detectará automáticamente el nuevo hardware y se mostrará
la ventana del ImageViewer. La pantalla de la unidad mostrará el
mensaje “PC connecting”.
2. Si no sucede así, desenchufe el cable USB del ordenador y vuelva a
enchufarlo. Esto no afectará al funcionamiento de la unidad, incluso si la
pantalla de la unidad no muestra el mensaje “PC connecting”.
3. Si desea volver al programa para editar sus fotografías, ejecute el
programa ImageViewer en el ordenador.
CÓMO UTILIZAR EL IMAGEVIEWER CUANDO
EL DKC01HSM_01 ESTÁ CONECTADO A SU PC
1. El ImageViewer mostrará automáticamente todas las fotografías que
estén almacenadas en el marco.
2. Puede seleccionar una fotografía del marco pulsando con el ratón sobre
la fotografía deseada en la caja situada a la izquierda.
3. Una vez que ha pulsado sobre una fotografía, puede moverla hacia
arriba y hacia abajo por la lista de fotografías. Esto cambia el orden en
que se mostrarán las fotografías cuando se utilice la función slideshow
del marco de fotografías digital.
4. Puede también borrar una fotografía seleccionándola y pulsando con el
ratón en “Delete”. Esto borrará permanentemente esa fotografía de la
lista.
5. Pulse con el ratón sobre “
de fotografías digital.
6. Puede utilizarse el botón “
a. En modo de edición, coloque el cursor en la esquina inferior derecha
de la fotografía. Luego, mantenga pulsado el botón del ratón. Mueva
el cursor al interior de la fotografía para cambiar el tamaño de la
selección. Mantenga pulsado el botón del ratón dentro del área de la
selección para desplazar la selección.
b. Pulse en “
fotografía y pulse en “Smooth Edit” para que la foto se vea con
claridad en el marco de fotografías.
Auto Stretch” para rellenar la pantalla completa con la
Clear” para borrar todo el contenido del marco
Edit” para recortar una fotografía.
Español
Copyright © Lexibook 2008
17
Page 18

7. Para añadir una imagen al cuadro de fotografías pulse en “Add image
as...” Luego, seleccione la carpeta en donde está guardada la fotografía
y pulse en “Open”.
a. Una vez realizado esto, la imagen aparecerá en la caja de la
izquierda.
b. En este momento, puede manipular la imagen como cualquier otra.
8. Pulse en el botón “
9. Pulse en “
la unidad, de la misma manera que seleccionaría una foto cualquiera.
Se mostrará cada vez que encienda la unidad. Esta fotografía no se
muestra durante la presentación dinámica de fotografías.
10. Pulse en “
Español
Save” para almacenar todos los cambios.
Set Logo Image” para seleccionar una foto de comienzo para
Exit” para salir del programa.
CÓMO UTILIZAR EL DKC01HSM_01 CUANDO NO
ESTÁ CONECTADO A SU PC
1. Mantenga pulsado el botón “Mode” durante 2 segundos para encender al
marco de fotografías digital.
2. Pulse “
3. Seleccione “
4. En el submenú de hora, pulse las teclas “
5. Seleccione “
6. Seleccionar “
7. Seleccione “
8. Pulse de nuevo el botón “
Mode” de nuevo para que se muestre el menú de opciones y
pulse las teclas “Up” y “Down” para desplazarse por las opciones del
menú. Pulse de nuevo “Mode” para conrmar los cambios.
Time” para que se visualice la fecha y la hora. Esta hora
está sincronizada con el reloj de su PC. No es posible ajustar la hora
desde la unidad.
Up” y “Down” para activar
una de las opciones “OSD ON” o “OSD OFF” que muestran y ocultan,
respectivamente, la fecha y la hora en la pantalla de la unidad estando
en modo de fotografía.
Slideshow” para cambiar el tiempo entre fotografías, desde
0 hasta 31 segundos, cuando se utilice la función de presentación
dinámica de fotografías. Ponga “0” para desactivar la función slideshow.
Screen save” para determinar cuando se desea que el
portafotos se desconecte automáticamente. Usar las teclas “Up” y
“Down” para seleccionar la cantidad de tiempo entre 0 y 31 minutos.
Colocarlo en “0” para desactivar la función de ahorro de energía (screen
save).
Brightness” para ajustar la luminosidad de la pantalla.
Mode” para volver al modo de fotografía.
18
Copyright © Lexibook 2008
Page 19

PARA CARGAR LA BATERÍA
• Para cargar la batería, conecte el cable USB a su PC.
• La pantalla de la unidad mostrará el símbolo de batería.
• Cuando la batería de la unidad esté demasiado gastada, la pantalla se
verá tenue y, nalmente, se apagará.
CUIDADO Y LIMPIEZA
• No limpie ninguna parte de su DKC01HSM_01 con bencina, disolvente,
u otros productos químicos – esto podría producir daños irreparables que
no están cubiertos por la garantía. Si es necesario, limpie la unidad con
un paño húmedo.
• No exponga el
los rayos directos del sol.
• Hemos puesto todo nuestro esfuerzo para asegurar que su
01 cumpla con los más altos estándares de abilidad. Sin embargo, en
caso de que observara un mal funcionamiento de la unidad, no intente
repararla usted mismo. Acuda al vendedor o consulte la ayuda de
LEXIBOOK® en Internet.
DKC01HSM_01 a ambientes con calor o humedad, o a
DKC01HSM_
ESPECIFICACIONES TÉCNICAS
Español
Formatos
compatibles:
Pantalla Pantalla OLED en color de 1,1 pulgadas
Capacidad de
almacenamiento:
Alimentación Batería de Litio de 3,7 V + cargador mediante cable
Sistema Operativo
del PC
Copyright © Lexibook 2008
JPEG, BMP, GIF
Almacena 60 fotografías
USB
Win SE / ME / XP / Vista
19
Page 20

GARANTÍA
Este producto tiene una garantía de dos años*.
Para todos los asuntos relativos a la garantía o a nuestro servicio postventa,
póngase en contacto con su vendedor y presente el comprobante de
compra. Nuestra garantía cubre los defectos de fabricación y montaje con
la excepción de cualquier daño que se produzca como resultado de no
respetar las instrucciones o de una manipulación inapropiada del producto
(como desmontarlo, exponerlo al calor o a la humedad, etc.).
* se excluye el deterioro de la pantalla LCD
Nota: Se recomienda guardar todo el embalaje para futuras consultas.
Guarde este manual de instrucciones en un lugar seguro, ya que contiene
Español
información importante.
Descargo de responsabilidad: Como resultado de nuestro empeño
constante para mejorar nuestros productos, puede suceder que los colores
y detalles del producto varíen respecto a las imágenes mostradas en el
embalaje.
Referencia: DKC01HSM_01
Garantía de 2 años
©2008 LEXIBOOK®
Diseñado y desarrollado en Europa – Fabricado en China
Servicio al cliente
Lexibook Ibérica S.L,
C/ de las Hileras 4, 4° dpcho 14,
28013 Madrid, España
Servicio consumidores: 91 548 89 32
http://www.lexibook.com
Protección ambiental
¡Los aparatos eléctricos pueden ser reciclados y no deben ser
desechados junto con la basura doméstica habitual! Apoye
activamente el aprovechamiento racional de los recursos y ayude
a proteger el medio ambiente enviando este producto a un centro
de recolección para reciclaje (en caso de estar disponible).
20
Copyright © Lexibook 2008
Page 21

ÍNDICE
INTRODUÇÃO ................................................................................... 22
RETIRAR O SEU DKC01HSM_01 DA CAIXA.................................... 22
APRESENTAÇÃO .............................................................................. 22
INSTALAÇÃO ..................................................................................... 23
USAR O IMAGEVIEWER QUANDO O DKC01HSM_01 ESTIVER
LIGADO AO SEU PC.......................................................................... 23
USAR O DKC01HSM_01 QUANDO NÃO ESTIVER LIGADO AO
SEU PC .............................................................................................. 24
CARREGAR A BATERIA .................................................................... 25
INSTRUÇÕES DE CUIDADOS E LIMPEZA ...................................... 25
CARACTERÍSTICAS TÉCNICAS ....................................................... 25
GARANTIA ......................................................................................... 26
Copyright © Lexibook 2008
21
Português
Page 22

INTRODUÇÃO
Parabéns pela aquisição do seu porta-chaves com moldura para fotos
digitais DKC01HSM_01 da LEXIBOOK®!
Este agradável porta-chaves com moldura para fotos digitais oferece várias
características e funções que lhe permitem desfrutar das suas fotos digitais
e mantê-las consigo para onde quer que vá.
Este documento é um pequeno guia que ilustra as características principais
e funções do DKC01HSM_01. Convidamo-lo a ler com atenção este
manual, pois vai ajudá-lo e orientá-lo na utilização do seu novo produto.
RETIRAR O SEU DKC01HSM_01 DA CAIXA
Dentro da caixa:
- 1 porta-chaves com moldura para fotos digitais DKC01HSM_01
Português
- 1 cabo USB
Por favor, guarde todos os elementos de empacotamento num local
seguro para futuras referências.
Por favor, guarde o seu recibo (talão) – Este é a sua garantia.
APRESENTAÇÃO
Para cima
Para baixo
Modo
22
Copyright © Lexibook 2008
Page 23

INSTALAÇÃO
1. Ligue o cabo USB ao computador e à moldura para fotos digitais. O
computador detecta automaticamente o novo hardware e aparece a
janela do ImageViewer. O ecrã da unidade apresenta a mensagem “PC
connecting.”
2. Se isto não acontecer, retire o cabo USB do computador e volte a ligálo. Isto não afecta o funcionamento da unidade, mesmo que o ecrã da
unidade não apresente a mensagem “PC connecting.”
3. Se quiser voltar ao programa para editar as suas fotos, inicie o cheiro
imageview.exe a partir do seu computador.
USAR O IMAGEVIEWER QUANDO O DKC01HSM_01
ESTIVER LIGADO AO SEU PC
1. O ImageViewer apresenta automaticamente todas as imagens que já
tenham sido carregadas para a moldura.
2. Pode escolher uma foto na moldura, clicando na foto desejada na caixa
esquerda.
3. Quando clicar numa foto, pode movê-la para cima ou para baixo na lista.
Isto altera a ordem de apresentação das fotos quando usar a função
slideshow na moldura das fotos digitais.
4. Também pode apagar uma foto, escolhendo-a e clicando em “
Isto apaga permanentemente a foto da lista.
5. Clique em
digitais.
6. O botão “
a. No modo de edição, coloque o cursor no canto inferior direito da
b. Clique em “
“Clear” para apagar todo o conteúdo da moldura para fotos
Edit” pode ser usado para cortar uma foto.
imagem. De seguida clique e mantenha o botão premido. Mova
o cursor para dentro da imagem para a redimensionar. Clique e
mantenha premido o botão na área de selecção para a mover.
Auto Stretch” para preencher todo o ecrã com a foto e
clique em “Smooth Edit”, de modo a que a foto apareça nítida na
moldura.
Delete.”
Português
Copyright © Lexibook 2008
23
Page 24

7. Para adicionar uma imagem na moldura de fotos digitais, clique em
“Add Image as …”. De seguida, escolha a directoria onde a imagem foi
guardada e clique em “Open”.
a. Quando zer isto, a imagem aparece na caixa esquerda.
b. Nesta altura, a imagem pode ser manipulada como qualquer outra.
8. Clique em “
9. Clique em “
unidade, tal como escolhe qualquer outra foto. Esta aparece cada
vez que ligar a unidade. Esta imagem não é apresentada durante a
apresentação de diapositivos.
10. Clique em “
Save” para guardar todas as alterações.
Set Logo Image” para escolher uma foto inicial para a
Exit” para sair do programa.
USAR O DKC01HSM_01 QUANDO NÃO ESTÁ
LIGADO AO SEU PC
1. Prima e mantenha premido o botão “Mode” durante 2 segundos para
Português
ligar a sua moldura para fotos digitais.
2. Prima novamente “
botões “Up” e “Down” para correr e navegar dentro do menu. Prima
novamente “Mode” para conrmar.
3. Escolha “
o relógio do seu PC. Não pode acertar a hora apenas na unidade.
4. No sub-menu das horas, prima os botões “
“OSD ON” ou “OSD OFF” para ver ou esconder as horas e a data no
ecrã da unidade no modo de imagem.
5. Escolha “
segundos quando usar a função de apresentação de diapositivos da
moldura. Se escolher “0”, desactiva a função de apresentação de
diapositivos.
6. Seleccione “
de tempo antes da moldura digital se desligar automaticamente. Use os
botões “Up” e “Down” para alterar o tempo de 0 a 31 minutos. Escolha
“0” para desligar a função de protecção de ecrã.
7. Escolha “
8. Prima novamente o botão “
Time” para ver a data e as horas. Esta hora é sincronizada com
Slideshow” para alterar o tempo entre as fotos, de 0 a 31
Brightness” para ajustar a luminosidade.
Mode” para ver o menu das opções e prima os
Up” e “Down” para escolher
Screen Save” (Protecção de Ecrã) para denir a quantidade
Mode” para voltar ao modo de imagem.
24
Copyright © Lexibook 2008
Page 25

CARREGAR A BATERIA
• Carregue a unidade, ligando o cabo USB ao seu PC.
• O ecrã da unidade apresenta o símbolo da bateria.
• Quando a unidade tiver a bateria fraca, o ecrã ca fraco e começa a
piscar, antes de nalmente se desligar.
CUIDADOS E LIMPEZA
• Não limpe nenhuma parte do seu DKC01HSM_01 com benzina,
diluentes ou outros solventes químicos. Isso pode dar origem a danos
permanentes não abrangidos pela garantia. Quando for necessário,
limpe com um pano ligeiramente embebido em água.
• Mantenha o seu
e de calor e da luz do sol forte.
• Foram feitos todos os esforços para assegurar altos padrões de
qualidade para o seu DKC01HSM_01. No entanto, se algo falhar, não
tente reparar a unidade sozinho. Consulte o seu revendedor ou a linha
de ajuda da LEXIBOOK®.
DKC01HSM_01 afastado de condições de humidade
CARACTERÍSTICAS TÉCNICAS
Formatos
suportados
Ecrã Ecrã a cores OLED de 1.1 polegadas
Capacidade de
armazenamento
Alimentação Bateria de lítio de 3.7 V + carregador do cabo USB
Sistema Operativo Win SE / ME / XP / Vista
Copyright © Lexibook 2008
JPEG, BMP, GIF
Guarda 60 imagens
25
Português
Page 26

GARANTIA
Este produto é abrangido pela nossa garantia de dois anos*.
Para qualquer assunto relacionado com a garantia ou com o nosso serviço
pós-venda, contacte o seu revendedor e apresente-lhe o recibo. A nossa
garantia cobre defeitos de fabrico ou de montagem, excepto quaisquer
danos resultantes de falhas no respeito das instruções, ou qualquer
manuseamento inadequado do artigo (como abri-lo, expô-lo ao calor ou
humidade, etc.).
* Excluindo deterioração do ecrã LCD.
Nota: Recomendamos que guarde todos os materiais de empacotamento
para futuras referências. Guarde este manual de instruções num local
seguro, pois contém informações importantes.
Não responsabilização: Na nossa constante preocupação por melhorar,
as cores e detalhes do produto podem ser ligeiramente diferentes dos
apresentados na caixa.
Português
Referência: DKC01HSM_01
Garantia de 2 anos
©2008 LEXIBOOK®
Criado e desenvolvido na Europa - Fabricado na China
Serviço de Apoio ao Cliente
Lexibook Electrónica Lda,
Quinta dos loios,
Praceta José Domingos dos Santos, 6B-8A,
2835-343 Lavradio-Barreiro, Portugal
Apoio técnico: 21 206 13 48
http://www.lexibook.com
Protecção Ambiental
Os aparelhos eléctricos indesejados podem ser reciclados e não
deverão ser eliminados juntamente com o lixo doméstico comum!
Por favor, ajude activamente a conservar os recursos e a ajudar
a proteger o ambiente, devolvendo esta unidade a um centro de
recolha (se disponível).
26
Copyright © Lexibook 2008
Page 27

INDICE
INTRODUZIONE ................................................................................ 28
TOGLIERE IL DKC01HSM_01 DALLA CONFEZIONE ...................... 28
PRESENTAZIONE ............................................................................. 28
INSTALLAZIONE ................................................................................ 29
UTILIZZARE IMAGEVIEWER QUANDO DKC01HSM_01 È
COLLEGATO AL PC ........................................................................... 29
UTILIZZARE DKC01HSM_01 QUANDO NON È
COLLEGATO AL PC ........................................................................... 30
RICARICARE LA BATTERIA .............................................................. 31
ISTRUZIONI PER PULIZIA E MANUTENZIONE ............................... 31
SPECIFICHE TECNICHE ................................................................... 31
GARANZIA ......................................................................................... 32
Italiano
Copyright © Lexibook 2008
27
Page 28

INTRODUZIONE
Complimenti per aver acquistato il Portachiavi Portafoto Digitale
DKC01HSM_01 LEXIBOOK®!
Questo allegro portachiavi portafoto digitale offre numerose caratteristiche
e funzioni che ti consentono di gioire delle tue foto digitali e di tenerle con te
ovunque tu vada.
Questo documento è una breve guida che illustra le caratteristiche e
le funzioni principali del DKC01HSM_01. Ti invitiamo a leggere questo
manuale attentamente in quanto ti aiuterà e ti guiderà nell’uso del tuo nuovo
prodotto.
TOGLIERE IL DKC01HSM_01 DALLA CONFEZIONE
La confezione contiene:
- 1 portachiavi portafoto digitale DKC01HSM_01
- 1 cavo USB
Conserva l’imballo in un luogo sicuro per eventuali riferimenti futuri.
Conserva lo scontrino/ prova d’acquisto – è la tua garanzia.
Italiano
PRESENTAZIONE
Up
Down
Mode
28
Copyright © Lexibook 2008
Page 29

INSTALLAZIONE
1. Inserire il cavo USB nel computer e nel portachiavi portafoto digitale.
Il computer rileverà automaticamente il nuovo hardware e comparirà
automaticamente la nestra ImageViewer. Sullo schermo dell’unità
comparirà “PC connecting.”
2. Se questo non succede, staccare il cavo USB dal computer e inserirlo
nuovamente. Questo non pregiudicherà il funzionamento dell’unità anche
se sullo schermo dell’unità non comparirà “PC connecting.”
3. Se vuoi tornare al programma per modicare le foto, lancia il le
imageview.exe dal computer.
UTILIZZARE IMAGEVIEWER QUANDO DKC01HSM_01
È COLLEGATO AL PC
1. ImageViewer mostrerà automaticamente tutte le foto che sono già
caricate nel portafoto.
2. Puoi selezionare una foto nel portafoto digitale cliccando sulla foto
desiderata nella casella a sinistra.
3. Una volta cliccato su una foto, puoi spostarla su o giù nell’elenco. Questo
cambia l’ordine in cui le foto vengono visualizzate quando utilizzi la
funzioni slideshow del portachiavi portafoto digitale.
4. Puoi anche cancellare una foto selezionandola e cliccando su “
Questo cancellerà in modo permanente la foto dall’elenco.
5. Clicca su “
portafoto digitale.
6. Il tasto “
a. Nella modalità editing, posiziona il cursore nell’angolo in basso a
b. Clicca “
Clear” per cancellare l’intero contenuto del portachiavi
Edit” può essere utilizzato per ritagliare una foto.
destra della foto, quindi clicca e tieni premuto. Sposta il cursore
all’interno della foto per ridimensionare la selezione. Clicca e tieni
premuto all’interno dell’area selezionata per spostare la selezione.
Auto Stretch” per riempire lo schermo intero con la foto e
clicca “Smooth Edit” perché la foto compaia chiara nel portafoto.
Delete.”
Italiano
Copyright © Lexibook 2008
29
Page 30

7. Per aggiungere un’immagine al portachiavi portafoto digitale, clicca
“Add Image as …” Quindi seleziona la directory dove è stata salvata
l’immagine e clicca su “Open.”
a. Una volta fatto questo, l’immagine comparirà nella casella a sinistra.
b. A questo punto, l’immagine può essere manipolata come qualsiasi
altra.
8. Clicca sul tasto “
9. Clicca su “
proprio come si fa per selezionare qualsiasi foto. Comparirà ogni volta
che accenderai l’unità. Questa foto non comparirà insieme alle altre
durante lo slideshow.
10. Clicca su “
Save” per salvare tutte le modiche.
Set Logo Image” per selezionare una foto di avvio per l’unità,
Exit” per uscire dal programma.
UTILIZZARE DKC01HSM_01 QUANDO NON È
COLLEGATO AL PC
1. Tieni premuto il pulsante “Mode” per 2 secondi per accendere il
portachiavi portafoto digitale.
2. Premi di nuovo “
“Up” e “Down” per scorrere il menu e per navigare all’interno. Premi di
nuovo “Mode” per confermare.
3. Seleziona “
l’orologio del PC. Non è possibile impostare l’ora direttamente sull’unità.
4. Nel sotto menu time, premi i tasti “
Italiano
ON” o “OSD OFF” per mostrare o nascondere ora e data sullo schermo
dell’unità in modalità picture.
5. Seleziona “
0 a 31 secondi utilizzando la funzione slideshow del portachiavi portafoto
digitale. Impostala a “0” per disabilitare la funzione slideshow.
6. Selezionare “
spegnimento automatico del portafoto digitale. Utilizzare i tasti “Up” (su)
e “Down” (giù) per cambiare il tempo da 0 a 31 minuti. Impostare a “0”
per disabilitare la funzione salva schermo.
7. Seleziona “
8. Premi di nuovo il tasto “
Mode” per visualizzare il Menu Option se premi i tasti
Time” per visualizzare data e ora. L’ora è sincronizzata con
Up” e “Down” per impostare “OSD
Slideshow” per modicare l’intervallo di tempo tra le foto da
Screen Save” (salva schermo) per impostare il tempo di
Brightness” per regolare la luminosità.
Mode” per tornare alla modalità picture.
30
Copyright © Lexibook 2008
Page 31

RICARICARE LA BATTERIA
• Ricarica l’unità collegando il cavo USB al PC.
• Sullo schermo dell’unità comparirà il simbolo della batteria.
• Quando l’unità ha la batteria in esaurimento, il display perde denizione e
lampeggia no a spegnersi completamente.
PULIZIA E MANUTENZIONE
• Non pulire nessuna parte del DKC01HSM_01 con benzene, solventi o
altri prodotti chimici—ciò potrebbe causare un danno permanente non
coperto da garanzia. Se necessario, puliscilo con un panno umido.
• Tieni il DKC01HSM_01 lontano da
luce diretta del sole.
• Sono stati fatti molti sforzi per garantire alti standard di afdabilità per
il DKC01HSM_01. Tuttavia, se qualcosa non funziona, non tentare
di eseguire alcuna riparazione– consulta il rivenditore o la helpline
LEXIBOOK® .
condizioni di calore e umidità e
SPECIFICHE TECNICHE
Formati supportata JPEG, BMP, GIF
Display Display colorato OLED 1.1”
Capacità Memoria Contiene 60 foto
Potenza Batteria al litio 3.7 V + caricatore cavo USB
Sistema Operativo Win SE / ME / XP / Vista
Italiano
Copyright © Lexibook 2008
31
Page 32

GARANZIA
Questo prodotto è coperto dalla nostra garanzia di due anni *.
Per tutte le questioni relative alla garanzia o al servizio post vendita, contatta
il rivenditore e tieni lo scontrino a portata di mano. La nostra garanzia copre
difetti di costruzione o di montaggio ad eccezione di tutti i danni causati dal
mancato rispetto delle istruzioni o da utilizzo non corretto dell’articolo (ad es.
aprirlo, esporlo a calore o umidità, ecc).
* escluso il deterioramento dello schermo LCD.
Nota: Si consiglia di conservare la confezione per eventuali riferimenti futuri.
Conserva il manuale di istruzioni in quanto contiene informazioni importanti.
Disclaimer: Nello sforzo costante di migliorare, i colori e i dettagli del
prodotto possono variare leggermente da quanto illustrato sulla confezione.
Riferimento: DKC01HSM_01
garanzia di 2 anni
©2008 LEXIBOOK®
Progettato e sviluppato in Europa – Prodotto in Cina
Servizio Clienti
Lexibook Italia S.r.l,
Via Eustachi, 45,
20129 Milano, Italia
Servizio consumatori : 022040 4959 (Prezzo di una chiamata locale).
Italiano
http://www.lexibook.com
Protezione Ambientale
Le apparecchiature elettriche da eliminare possono essere
riciclate e non dovrebbero essere smaltite con i normali riuti
domestici! Sostieni attivamente la conservazione delle risorse e
aiuta a proteggere l’ambiente portando questa apparecchiatura
ad un centro di raccolta (se disponibile).
32
Copyright © Lexibook 2008
Page 33

INHALTSANGABE
EINLEITUNG ...................................................................................... 34
AUSPACKEN IHRES DKC01HSM_01 ............................................... 34
PRODUKTANSICHT .......................................................................... 34
ANSCHLIESSEN AN DEN COMPUTER ............................................ 35
SO BENUTZEN SIE IMAGE VIEWER, WENN DER
DKC01HSM_01 AN IHREN PC ANGESCHLOSSEN IST................... 35
SO BENUTZEN SIE DEN DKC01HSM_01,
WENN ER NICHT AN DEN PC ANGESCHLOSSEN IST. .................. 36
AUFLADEN DER BATTERIE ............................................................. 37
REINIGUNG UND PFLEGE ............................................................... 37
TECHNISCHE DATEN ....................................................................... 37
GARANTIE ......................................................................................... 38
Copyright © Lexibook 2008
Deutsch
33
Page 34

EINLEITUNG
Wir beglückwünschen Sie zum Kauf Ihres DKC01HSM_01
Schlüsselanhängers mit digitalem Fotorahmen von Lexibook®.
Dieser praktische digitale Fotorahmen am Schlüsselanhänger hat zahlreiche
Eigenschaften und Funktionen, die Ihnen ermöglichen sich auf besondere
Weise an Ihren digitalen Fotos zu erfreuen und sie überall bei sich zu tragen.
Dieses Dokument ist eine kurze Anleitung, die Ihnen die Haupteigenschaften
und Funktionen des DKC01HSM_01 auf anschauliche Weise erklärt. Wir
bitten Sie, die Anleitung aufmerksam zu lesen. Sie wird Ihnen bei der
Benutzung Ihres neuen Produktes hilfreich sein.
AUSPACKEN DES DKC01HSM_01
Verpackungsinhalt:
- 1 DKC01HSM_01 Schlüsselanhänger mit digitalem Fotorahmen
- 1 USB-Kabel
Bitte bewahren Sie die Verpackung an einem sicheren Ort für eventuelle
spätere Benutzung auf.
Bitte bewahren Sie Ihre Quittung auf, da sie als Garantie dient.
PRODUKTANSICHT
Deutsch
Aufwärts
Abwärts
Modus
34
Copyright © Lexibook 2008
Page 35

ANSCHLIESSEN AN DEN COMPUTER
1. Verbinden Sie den digitalen Fotorahmen und Ihren Computer mit dem
USB-Kabel. Der Computer erkennt die neue Hardware automatisch
und das Image Viewer Dialogfenster sollte sich von selbst auf dem
Bildschirm öffnen. Auf der Anzeige des Fotorahmens erscheint „PC
connecting“.
2. Geschieht dies nicht, ziehen Sie bitte das USB-Kabel aus dem Computer
und stecken Sie es erneut ein. Die Funktionsweise des Fotorahmens
wird dadurch nicht beeinträchtigt, selbst wenn auf der Anzeige des
Gerätes nicht „PC connecting“ erscheint.
3. Wenn Sie in das Programm zurückkehren möchten, um Ihre Fotos
zu bearbeiten, starten Sie bitte die imageview.exe Datei auf Ihrem
Computer.
SO BENUTZEN SIE IMAGE VIEWER, WENN DER
DKC01HSM_01 AN IHREN PC ANGESCHLOSSEN IST.
1. Image Viewer zeigt automatisch alle Bilder, die bereits auf den
Fotorahmen heruntergeladen sind.
2. Sie können ein Foto auf dem digitalen Fotorahmen auswählen, indem Sie
auf das gewünschte Foto im linken Kasten klicken.
3. Sobald Sie das Foto angeklickt haben, können Sie es in der Liste aufoder abwärts schieben. Dadurch wird die Reihenfolge, in der die Fotos in
der Diashow-Funktion auf dem digitalen Fotorahmen angezeigt werden,
verändert.
4. Sie können auch ein Foto löschen, indem Sie es auswählen und „
anklicken. Das Foto wird dauerhaft aus der Liste gelöscht.
5. Klicken Sie auf „
Fotorahmens zu löschen.
6. Mit dem „
a. Positionieren Sie den Cursorpfeil, während Sie im Bearbeiten-Menü
sind, auf die untere rechte Ecke des Bildes, klicken und halten
Sie dann die Maustaste gedrückt. Schieben Sie den Cursorpfeil
in das Bild, um die Größe zu verändern. Klicken und halten Sie im
ausgewählten Bereich gedrückt, um die Auswahl zu verschieben.
b. Klicken Sie auf „
Bildschirm auszudehnen und klicken Sie auf „Smooth Edit“, damit
das Foto klar im Fotorahmen erscheint.
Clear“, um den gesamten Inhalt des digitalen
Edit“ Tastenfeld können Sie die Größe der Fotos verändern.
Auto Stretch“, um das Bild über den gesamten
Delete”
Deutsch
Copyright © Lexibook 2008
35
Page 36

7. Wenn Sie ein Bild zur Fotoliste des digitalen Fotorahmens hinzufügen
möchten, klicken Sie auf „Add Image as…”. Wählen Sie dann das
Verzeichnis, in dem das Bild gespeichert ist und klicken Sie auf „Open“.
a. Das Bild erscheint im linken Kasten, sobald dieser Vorgang beendet
ist.
b. Jetzt kann das Bild wie alle anderen bearbeitet werden.
8. Klicken Sie auf „
9. Klicken Sie auf „
Bilderrahmen auszuwählen, so wie Sie auch jedes andere Foto
auswählen würden. Dieses Bild wird jedes Mal, wenn Sie den digitalen
Bilderrahmen einschalten, angezeigt. Während der Diashow wird dieses
Bild nicht gezeigt.
10. Klicken Sie auf „
Save“, um alle Änderungen zu speichern.
Set Logo Image“, um ein Standbild für den
Exit“, um das Programm zu beenden.
SO BENUTZEN SIE DEN DKC01HSM_01, WENN ER
NICHT AN DEN PC ANGESCHLOSSEN IST.
1. Halten Sie den Modus-Knopf für zwei Sekunden heruntergedrückt, um
Ihren digitalen Fotorahmen einzuschalten.
2. Drücken Sie noch einmal „
und drücken Sie die „Up“ und „Down“ Knöpfe, um das Menü über die
Anzeige zu scrollen und im Menü zu navigieren. Drücken Sie „Mode“
noch einmal zur Bestätigung.
3. Wählen Sie „
Uhr Ihres PCs synchronisiert. Am Bilderrahmen selbst können Sie die
Zeit nicht einstellen.
4. Drücken Sie im Zeit-Untermenü die „
Sie „OSD ON“ oder „OSD OFF“ ein, um Zeit und Datum im Bildmodus
auf der Anzeige des Gerätes anzuzeigen oder auszublenden.
5. Wählen Sie „
0 auf 31 Sekunden zu ändern, wenn Sie die Diashow –Funktion des
Deutsch
Bilderrahmens benutzen. Stellen Sie die Zeit auf „0“, um die Diashow zu
deaktivieren.
6. Wählen Sie „
einzustellen, nach dem sich der Digital Fotorahmen automatisch
ausschaltet. Ändern Sie mit Hilfe der „Up” (Aufwärts) und „Down”
(Abwärts) Tasten die Zeit von 0 bis 31 Minuten. Stellen Sie die Zeit auf
„0”, um die Bildschirmschoner-Funktion zu deaktivieren.
7. Wählen Sie „
8. Drücken Sie den „
zurückzukehren.
Time“, um Datum und Zeit anzuzeigen. Die Zeit ist mit der
Slideshow“, um das Zeitintervall zwischen den Fotos von
Screen Save” (Bildschirmschoner), um den Zeitintervall
Brightness“, um die Helligkeit zu regeln.
Mode“, um das Options-Menü aufzurufen
Up“ und „Down“ Knöpfe und stellen
Mode“ Knopf noch einmal, um in den Bilder-Modus
36
Copyright © Lexibook 2008
Page 37

AUFLADEN DER BATTERIE
• Laden Sie das Gerät auf, indem Sie das USB-Kabel an Ihren PC
anschließen.
• Auf der Anzeige des Gerätes erscheint das Batteriesymbol.
• Wenn die Batterie des Gerätes schwach ist, verdunkelt sich die Anzeige
zunächst und blinkt, bevor sie sich schließlich ausschaltet.
REINIGUNG UND PFLEGE
• Reinigen Sie Ihren DKC01HSM_01 nicht mit Benzol, Lösungsmitteln oder
anderen üssigen Chemikalien, da dies dauerhafte Schäden verursachen
kann, die nicht von der Garantie abgedeckt sind. Falls notwendig,
reinigen Sie das Gerät bitte mit einem feuchten Tuch.
• Halten Sie Ihren DKC01HSM_01 von heißen, feuchten Umgebungen und
starker Sonneneinstrahlung fern.
• Es ist unser Bestreben, ein hohes Maß an Betriebssicherheit für Ihren
DKC01HSM_01 zu gewährleisten. Sollte es trotz allem zu Fehlfunktionen
kommen, reparieren Sie das Gerät auf keinen Fall selbst – wenden Sie
sich bitte an Ihren Händler oder an den LEXIBOOK® Kundenservice.
TECHNISCHE DATEN
Unterstützte
Bildformate
Anzeige 1,1 Zoll OLED Farbanzeige
Speicherkapazität Speichert 60 Bilder
Stromversorgung 3,7 V Lithiumbatterie + USB-Kabel zum Auaden
Betriebssysteme Win SE / ME / XP / Vista
Copyright © Lexibook 2008
JPEG, BMP, GIF
Deutsch
37
Page 38

GARANTIE
Für dieses Produkt gilt unsere 2-Jahres-Garantie*.
Für alle Angelegenheiten, die diese Garantie oder unseren Kundenservice
betreffen, wenden Sie sich bitte an Ihren Händler und halten Sie die
Quittung parat. Unsere Garantie deckt Fertigungsfehler oder Materialfehler
ab. Ausgeschlossen sind alle Beschädigungen, die durch Missachtung der
Bedienungsanleitung oder falsche Handhabung des Produktes entstanden
sind (z.B. Auseinandernehmen des Gerätes, Aussetzen von Hitze oder
Feuchtigkeit usw.).
*ausschließlich Verschleiß der LCD-Anzeige.
Hinweis: Es wird empfohlen, das gesamte Verpackungsmaterial
für eine eventuelle spätere Nutzung aufzubewahren. Bewahren Sie
diese Bedienungsanleitung an einem sicheren Ort auf, da sie wichtige
Informationen enthält.
Disclaimer: Da wir stets daran arbeiten, unsere Produkte weiter zu
verbessern, können die Farben und andere Details des Produktes von der
Darstellung auf der Verpackung leicht abweichen.
Referenz: DKC01HSM_01
2 Jahre Garantie
©2008 LEXIBOOK®
Entworfen und entwickelt in Europa – hergestellt in China
Kundenservice
Lexibook Deutschland - Service-Hotline/Kundendienst
Tel. 01805 010931(0,14 Euro/Minute)
savcomfr@lexibook.com
http://www.lexibook.com
Deutsch
Umweltschutz
Nicht mehr gebrauchte elektrische Geräte können recycelt
werden und sollten nicht im normalen Hausmüll entsorgt
werden! Bitte unterstützen Sie tatkräftig die Erhaltung natürlicher
Ressourcen und helfen Sie mit, die Umwelt zu schützen, indem
Sie dieses Gerät bei einer Sammelstelle (sofern vorhanden)
abgeben.
38
Copyright © Lexibook 2008
Page 39

INHOUD
INLEIDING.......................................................................................... 40
UITPAKKEN VAN JE DKC01HSM_01 ............................................... 40
PRESENTATIE ................................................................................... 40
INSTALLATIE ..................................................................................... 41
GEBRUIK VAN IMAGEVIEWER ALS DKC01HSM_01
IS AANGESLOTEN OP JE PC ........................................................... 41
GEBRUIK VAN DKC01HSM_01 ALS DEZE NIET OP
JE PC IS AANGESLOTEN ................................................................. 42
OPLADEN VAN DE BATTERIJ .......................................................... 43
INSTRUCTIES VOOR SCHOONMAKEN EN BEWAREN ................. 43
TECHNISCHE SPECIFICATIES ........................................................ 43
GARANTIE ......................................................................................... 44
Copyright © Lexibook 2008
39
Nederlands
Page 40

INLEIDING
Gefeliciteerd met de aankoop van je LEXIBOOK® DKC01HSM_01 Digitale
Fotoframe-sleutelhanger!
Deze vrolijke digitale fotoframe-sleutelhanger biedt verschillende functies
waarmee je je digitale foto’s altijd en overal bij je kunt dragen.
Dit document is een korte inleiding tot de belangrijkste kenmerken en
functies van de DKC01HSM_01. Lees deze handleiding zorgvuldig en je zult
meer plezier van je nieuwe product hebben.
UITPAKKEN VAN JE DKC01HSM_01
In de doos:
- 1 DKC01HSM_01 digitale fotoframe-sleutelhanger
- 1 USB-kabel
Bewaar de verpakking zorgvuldig voor latere naslag.
Bewaar de aankoopbon - deze is je garantie.
PRESENTATIE
Up
Down
Mode
Nederlands
40
Copyright © Lexibook 2008
Page 41

INSTALLATIE
1. Steek de USB-kabel in de computer en het digitale fotoframe. De
computer zal de nieuwe hardware automatisch herkennen en het
ImageViewer venster zal vanzelf tevoorschijn komen. Het scherm van de
sleutelhanger zal “PC connecting” tonen.
2. Als het frame niet automatisch herkend wordt, trek de USB-kabel uit
de computer, en steek deze er nogmaals in. Dit zal de werking van
het apparaat niet negatief beïnvloeden, zelfs als het scherm niet “PC
connecting” toont.
3. Als je later terug naar het programma wilt gaan om je foto’s te bewerken,
start het imageview.exe bestand vanaf je computer.
GEBRUIK VAN IMAGEVIEWER ALS DKC01HSM_01
AANGESLOTEN IS OP JE PC
1. ImageViewer zal automatisch de foto’s die al in het frame geladen zijn,
tonen.
2. Je kunt een foto in het digitale fotoframe selecteren door de gewenste
foto in het linkerblok aan te klikken.
3. Als je een foto aangeklikt hebt, kun je deze omhoog of omlaag in de lijst
verplaatsen. Hiermee verander je de volgorde waarin de foto’s getoond
worden met de slideshow functie van het digitale fotoframe.
4. Je kunt ook een foto wissen, door deze te selecteren en daarna op
“Delete” te klikken. De foto zal permanent uit de lijst verwijderd worden.
5. Klik op “
6. Met de “
Clear” om de gehele inhoud van het digitale fotoframe te wissen.
Edit” knop kun je een foto bijsnijden.
a. Plaat, in de edit-modus, de cursor in de rechteronderhoek van de
foto, klik en sleep naar de diagonale overkant en bepaal de nieuwe
uitsnede. Klik en sleep het geselecteerde gebied om deze te
verplaatsen.
b. Klik op “
Auto Stretch” om het volledige scherm met een foto op te
vullen. Klik op “Smooth Edit” om de foto vrij in het frame te laten
staan.
Copyright © Lexibook 2008
41
Nederlands
Page 42

7. Om een afbeelding aan het digitale fotoframe toe te voegen, klik op
“Add Image as …”. Zoek in de map waarin je de foto bewaart, en klik op
“Open.”
a. Als dit voltooid is zal de afbeelding in het linkerblok verschijnen.
b. Daarna kan de afbeelding gemanipuleerd worden, zoals alle anderen.
8. Klik op de “
9. Klik op “
selecteren, op dezelfde wijze zoals je een andere foto zou kiezen. Deze
zal bij het aanzetten van je sleutelhanger getoond worden. Deze foto
wordt tijdens een diashow verder niet getoond.
10. Klik op “
Save” knop om alle wijzigingen op te slaan.
Set Logo Image” om een opstartfoto voor je sleutelhanger te
Exit” om het programma te verlaten.
GEBRUIK VAN DKC01HSM_01 ALS DEZE NIET
OP JE PC IS AANGESLOTEN
1. Om je digitale fotoframe aan te zetten houdt je de “Mode” knop 2
seconden ingedrukt.
2. Druk nogmaals op “
“Up” en “Down” om in het menu te bladeren. Druk nogmaals op “Mode”
om een keuze te bevestigen.
3. Kies “
4. In het tijd-submenu, druk je op “
5. Kies “
6. Selecteer “
7. Kies “
Nederlands
8. Druk nogmaals op de “
Time” om datum en de tijd weer te geven. De tijd wordt
gesynchroniseerd met je klok van je PC. Je kunt de tijd niet op de
sleutelhanger zelf instellen.
van de standen “OSD ON” of “OSD OFF”, waarmee tijd en datum al dan
niet tegelijkertijd met de foto op de sleutelhanger getoond kan worden.
Slideshow” om bij gebruik van de diashow-functie de tijd tussen de
verschillende foto’s te wijzigen, van 0 tot 31 seconden. Zet deze functie
op “0” om de diashow-functie uit te zetten.
waarop het digitaal fotokader automatisch uitgeschakeld wordt. Gebruik
de “Up” en “Down” toetsen om de tijd te veranderen van 0 tot 31
minuten. Stel het in op “0” om de functie van schermbeveiliging uit te
schakelen.
Brightness” om de helderheid aan te passen.
van de foto’s.
Mode” om het Options Menu weer te geven. Druk op
Up” en “Down” om te kiezen tussen één
Screen Save” (schermbeveiliging) om de tijd in te stellen
Mode” knop om terug te gaan naar het weergeven
42
Copyright © Lexibook 2008
Page 43

OPLADEN VAN DE BATTERIJ
• Laad het apparaat op door de USB-kabel op je PC aan te sluiten.
• Het scherm van het apparaat zal een batterijsymbool tonen.
• Als de batterij bijna leeg is, zal de weergave vaag worden en knipperen,
en daarna uitschakelen.
SCHOONMAKEN EN BEWAREN
• Maak geen enkel onderdeel van je DKC01HSM_01 schoon met
spiritus, thinners of andere oplosmiddelen. Dit kan het apparaat blijvend
beschadigen en de schade wordt niet gedekt door de garantie. Indien
noodzakelijk schoonmaken met een vochtige doek.
• Houd je
• We hebben bijzondere aandacht besteed dat je
DKC01HSM_01 uit de buurt van hete, vochtige ruimtes en
direct zonlicht.
DKC01HSM_01
betrouwbaar werkt. Als er echter iets mis mocht gaan, probeer het
apparaat dan niet zelf te repareren – vraag je leverancier of de
LEXIBOOK® klantenservice.
TECHNISCHE SPECIFICATIES
Ondersteunde
indelingen
Weergave 1.1 inch OLED Kleurenscherm
Opslagcapaciteit 60 foto’s
Voeding 3.7 V Lithium batterij + USB kabel oplader
Besturingssysteem Win SE / ME / XP / Vista
Copyright © Lexibook 2008
JPEG, BMP, GIF
43
Nederlands
Page 44

GARANTIE
Op dit product zit twee jaar garantie*.
Voor alle zaken betreffende de garantie of service na de verkoop, neem
contact op met je winkelier en houd de aankoopbon bij de hand. Onze
garantie dekt fabrieksfouten en defecten, met uitzondering van schade
als gevolg van het niet naleven van de gebruiksaanwijzing of ongepaste
behandeling van het artikel (zoals uit elkaar halen, blootstellen aan hitte of
vochtigheid, enz.).
* met uitzondering van slijtage van het LCD scherm.
Opmerking: Het wordt aanbevolen de verpakking te bewaren, voor latere
naslag. Bewaar deze gebruiksaanwijzing op een veilige plaats, deze bevat
belangrijke informatie.
Vrijwaring: Wij proberen onze producten constant te verbeteren. Daarom
kunnen kleuren en details van dit product enigszins afwijken van de
afbeelding op de verpakking.
Referentie: DKC01HSM_01
2 jaar garantie
©2008 LEXIBOOK®
Ontworpen en ontwikkeld in Europa – Gemaakt in China
http://www.lexibook.com
Bescherming van het milieu
Overbodige elektrische apparaten kunnen gerecycled worden
en moeten niet met het normale huishoudelijke afval worden
weggegooid. Help de natuur en breng dit apparaat naar een
inzamelcentrum (indien beschikbaar).
Nederlands
44
IM Code: DKC01HSM_01IM0128
Copyright © Lexibook 2008
Page 45

YOUR OPINION MATTERS / VOTRE AVIS COMPTE
Help us make products better than ever! Please fill out the following form in English or in French, and return it to / Aidez-nous à rendre nos
produits encore meilleurs! Merci de bien vouloir remplir ce coupon en français ou en anglais et de nous le retourner à l’adresse suivante :
Name and reference of product purchased / Nom et référence du produit acheté :
Date of purchase / Date de l’achat : ____/_____/_____
Store / Enseigne :
Birth Date of the user / Date de naissance de l’utili sateur de ce produit : ____/_____/_____
What is your overall impression of the product? / Vous trouv ez le produit globalement :
Very satisfactory/Très satisfaisant
Satisfactory/Satisfaisant
Please feel free to leave your comments here / Vous pouvez à présent utiliser l’espace suivant pour nous donner vos remarques :
Find all our new products / Retrouvez toute notre act ualité: http://www.lexibook.com
First name/Prénom : Last name/Nom de famille :
Address/Adresse :
Zip code/Code Postal : Country/Pays :
Phone/Téléphone :
Email :
Average/Moyen
Disappointing/Décevant Very disappointing/Très décevant
LEXIBOOK S.A,
Mon avis compte
2, avenue de Scandinavie,
91953 Courtaboeuf Cedex
FRANCE
City/Ville :
Conformément aux articles 34 et suivants de la loi « Informatique et Libertés » du 6 janvier 1978, vous disposez d'un droit d'accès, de modification,
de rectification et de suppression des données qui vous concernent. Vous pouvez l'exercer sur simple demande à notre adresse. Si vous ne souhaitez
pas que ces données soient utilisées à des fins de prospection commerciale, veuillez cocher ici :
Page 46

LEXIBOOK S.A,
Mon avis compte,
2, avenue de Scandinavie,
91953 Courtaboeuf Cedex
FRANCE
Affranchir
ici
 Loading...