


DJ045series
Disney Digital Camera
Appareil photo numérique Disney
User Guide / Mode d’emploi
DJ045IM.indd 1 13/6/07 17:38:11
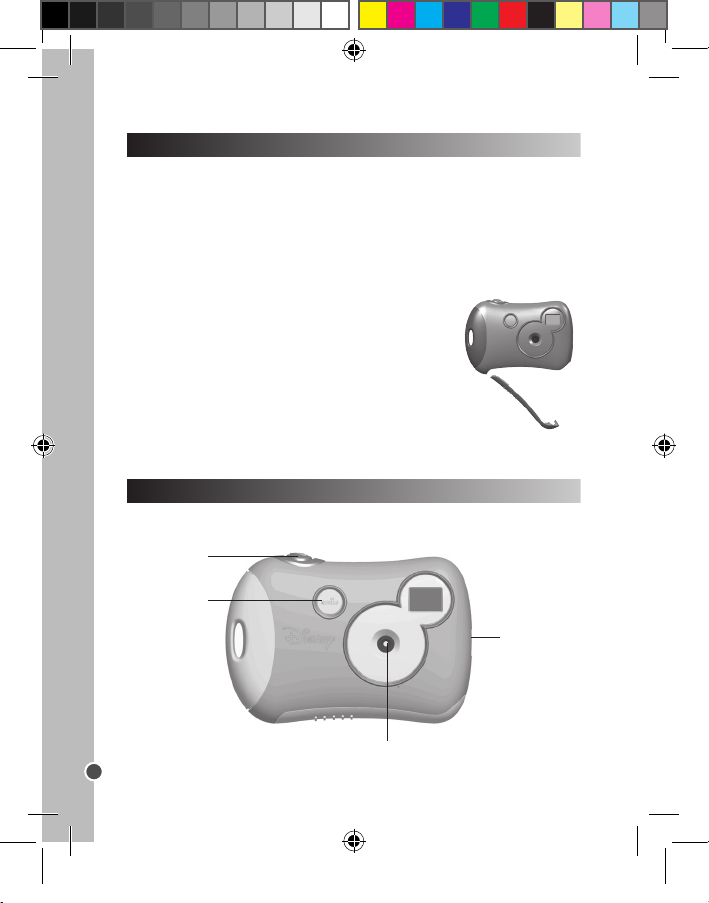
POWERING UP THE CAMERA
This camera is powered by one AAA alkaline battery.
Note: Make sure to always download your images to the computer before
removing or replacing the battery or the pictures will be permanently lost!
To install the battery:
1. Open the battery compartment by sliding the battery
door to the right.
2. Place the battery into the compartment. Make sure
to match the (-) on the battery with the (-) inside the
compartment.
3. Return the battery cover to its original position by
closing it to the left.
CAMERA CONTROLS
ENGLISH
2
SNAPSHOT Button
LED Indicator
Camera Lens
USB Connector
Front view
DJ045IM.indd 2 13/6/07 17:38:12

ENGLISH
3
SNAPSHOT Button - Use the Snapshot button to take digital pictures.
LED Indicator - Flashes to let you know when you have taken a picture.
USB Connector - To connect the camera to your computer. Use the USB
cable when you are ready to download your images.
Camera Lens - Keep the lens clean and clear of objects for the best
pictures.
Display Screen - Indicates how many pictures you have taken.
Viewnder - Center your subject in the viewnder.
DELETE Button - Use the Delete button to erase images from the camera
memory.
Battery Compartment - Open the battery compartment when you want to
change the battery.
TAKING PICTURES WITH THE CAMERA
1. Turn the camera on by pressing any button and waiting a moment.
2. Use the viewnder to locate the subject of your picture and hold the
camera steady.
3. Press the SNAPSHOT button located on the top of the camera to take
Viewnder
Display Screen
DELETE Button
Battery Compartment
Back view
DJ045IM.indd 3 13/6/07 17:38:12
ENGLISH
4
a picture. The camera will beep and the LED will ash when the photo is
taken.
Notes:
• The counter on the display will increase by one each time you take a
picture. When the camera memory is full the camera will beep three times,
the LED will ash three times, and the display will read FL (full).
• If the camera is not used for 60 seconds, it will shut itself off to save
battery power. To restart the camera, press any button.
DELETING PICTURES FROM THE CAMERA
Use the DELETE button on the camera to erase images from the camera
memory. You can delete the last picture you took or you can delete all the
photos on the camera.
•To delete the last image you took, press the DELETE button for one
second.
•To delete all images off the camera, press and hold the DELETE button for
more than two seconds. A long beep will play and the display will read 00.
INSTALLING THE SOFTWARE
Warning: this device is not currently compatible with Windows Vista.
Make sure to install the Disney Pix software before downloading images to
your computer! Insert the Disney Pix software CD in your CD-ROM drive.
If the installation program doesn’t automatically start, open My Computer
and double-click the CD-ROM drive that contains the Disney Pix software.
Double-click the install folder and run the Disney Pix 2.0 exe program.
Follow the instructions on the screen.
DJ045IM.indd 4 13/6/07 17:38:13
ENGLISH
5
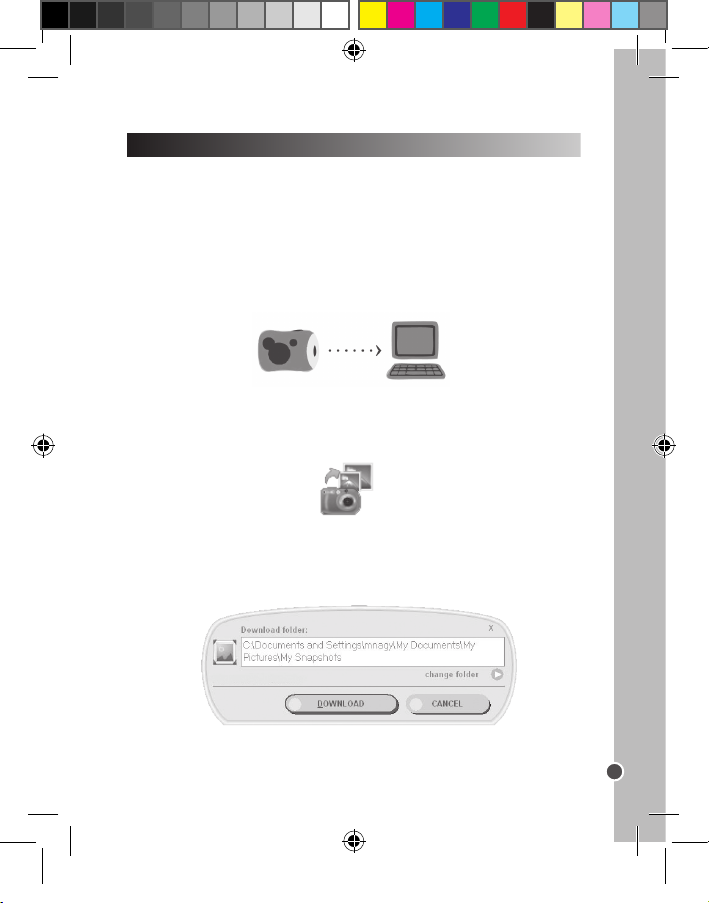
DOWNLOADING PICTURES
The Pix Micro Downloader is a separate application that will be installed
when you are installing Disney Pix. The Pix Micro Downloader allows you to
easily download your photos to your computer so you can edit them using
the software provided. To download pictures:
1. Make sure the Disney Pix software is installed on your computer.
2. Connect the camera to the PC using the supplied USB cable.
3. Launch the Downloader application by clicking on the Pix Micro
Downloader shortcut on the Desktop or by clicking on the Pix Micro Down
loader in the Disney Pix folder in the Start Menu.
When the Pix Downloader launches, the default directory will be selected.
This directory is recommended for use with Disney Pix:
My Documents\My Pictures\My Snapshots.
4. Click the DOWNLOAD button in the application window.
5. Close the Pix Micro Downloader and launch the Disney Pix software.
DJ045IM.indd 5 13/6/07 17:38:13
To save your pictures in another directory, click the change folder button.
Select the folder where you would like to save your images, and click on OK.
DELETING PICTURES FROM THE DOWNLOADER
To delete pictures from the camera using the downloader interface:
1. Complete the download process following the steps from the previous
section. Once the pictures have been downloaded, a DELETE button will
appear onscreen.
2. Press the DELETE button; all the images on the camera will be deleted.
LAUNCHING THE SOFTWARE
Make sure the Disney Pix software is installed on your computer. Launch the
software by following these steps:
1. Double-click the Disney Pix icon on your desktop.
Or:
1. From the Windows Taskbar, click on Start and select All Programs or
Programs.
2. From the Programs submenu, click on Disney Pix.
3. From the Disney Pix sub-menu click on the Disney Pix program icon.
ENGLISH
6
DJ045IM.indd 6 13/6/07 17:38:13
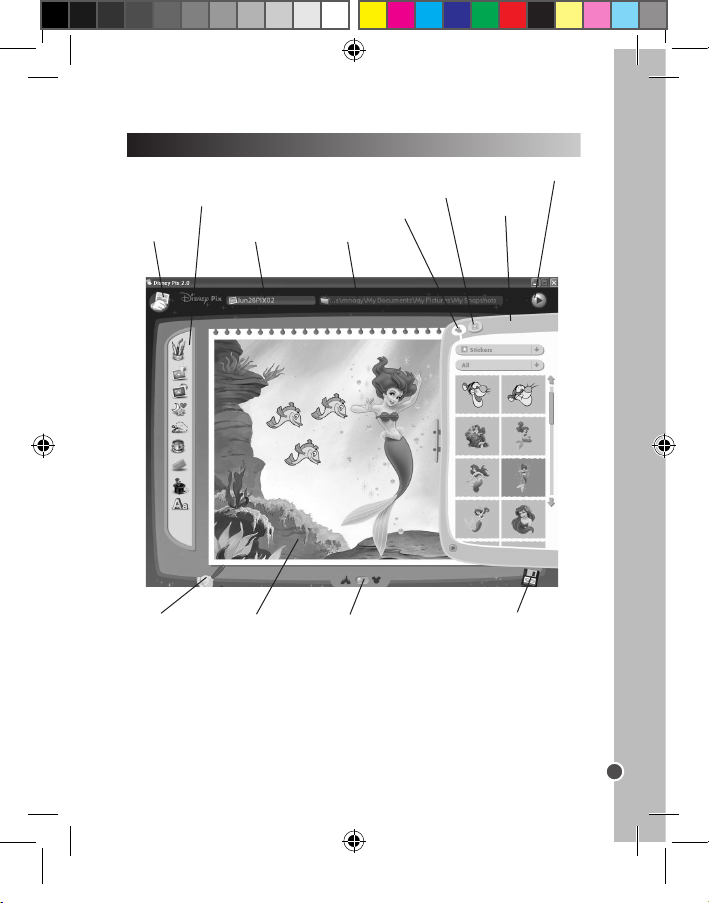
SOFTWARE COMPONENTS
ENGLISH
7
File Menu
File Name File Directory
Pix Drawer
My Pictures
Presentation mode
Desk
Start Over
Canvas
Zoom
Save
Photo Editing Palettes
DJ045IM.indd 7 13/6/07 17:38:14
Disney Pix is an user-friendly photo-editing software that allows you to
make your photos look better and add fun effects! This section will help you
become a pro in no time!
Photo Editing Palettes - There are nine palettes for editing your photos.
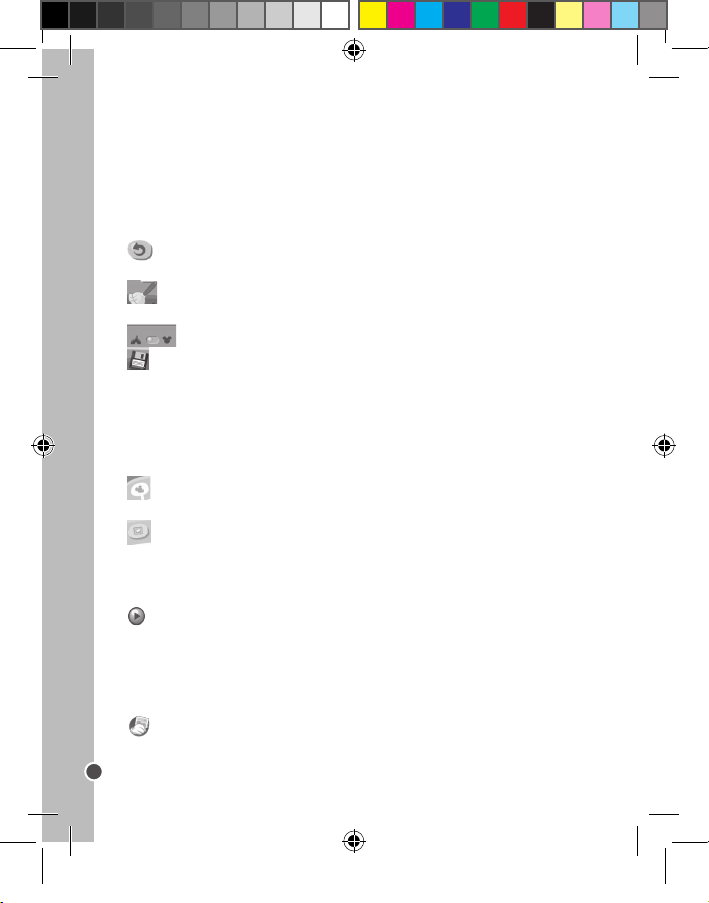
Undo - The Undo tool allows you to undo the last change you made to
your photo.
Start Over - If you press the Start Over icon, you will erase the entire
contents of the canvas!
Zoom - This slider allows you to see your pictures in more detail.
Save - Press the Save Button to make sure your latest changes are
saved.
Desk- The Desk keeps the images you will use to edit your photos. The
Desk is divided into two drawers: Pix Drawer and My Pictures. Click on
one of the 2 drawers in the upper left corner of the desk panel to view the
following:
Pix Drawer - In the Pix Drawer, you can nd all sorts of fun back-
grounds, stickers, windows and picture frames to add to your photos.
My Pictures - In My Pictures, you can view images from your desktop
and add them to the Canvas. My Pictures is also where you will nd items
you have saved.
Canvas - Drag your images on the Canvas so you can edit them.
Presentation Mode - Presentation View allows you to see all your
photos in a slideshow view.
File Directory - Displays the name of the folder where the le you are
working on is being stored.
File Name - Displays the name of the le you are currently working on.
File Menu - The File Menu provides a list of functions available in the
application including; New Snapshot, Open Snapshot, Save, Save As, Set
As Desktop, Print, Preferences, Help, and Exit.
ENGLISH
8
DJ045IM.indd 8 13/6/07 17:38:14
 Loading...