

Page 1
Plug-In Serial Interface Module
Cat. No. RZCØP
Rated: 120VAC, 60Hz
INSTALLATION INSTRUCTIONS
DI-000-RZC0P-00C
INTRODUCTION
Leviton’s ViziaTM RF components are designed
to communicate with each other via Radio
Frequency (RF) to provide remote control
of your lighting. Using RF technology allows
Leviton to provide the greatest signal integrity
possible. Each module in Leviton’s ViziaTM
RF component line is a Z-WaveTM enabled
device. In a Z-WaveTM network, each device is
designed to act as a router. These routers will
re-transmit the RF signal from one device to
another until the intended device is reached.
This ensures that the signal is received by its
intended device by routing the signal around
obstacles and radio dead spots. The Plug-in
Serial Interface Module is compatible with any
Z-Wave™ enabled network, regardless of the
manufacturer and can also be used with other
devices displaying the Z-Wave™ logo.
CAUTION:
Remember to exercise good common sense
when using the Timer features of your remote,
especially when scheduling unattended
devices. There can be some unexpected
consequences if not used with care. For
example, an empty coffee pot can be remotely
turned on. If that should happen, your coffee
pot could be damaged from overheating. If an
electric heater is turned on by remote control
while clothing is draped over it, a fire could
result.
Including Plug-In Serial
Interface Module into Z-WaveTM
Network:
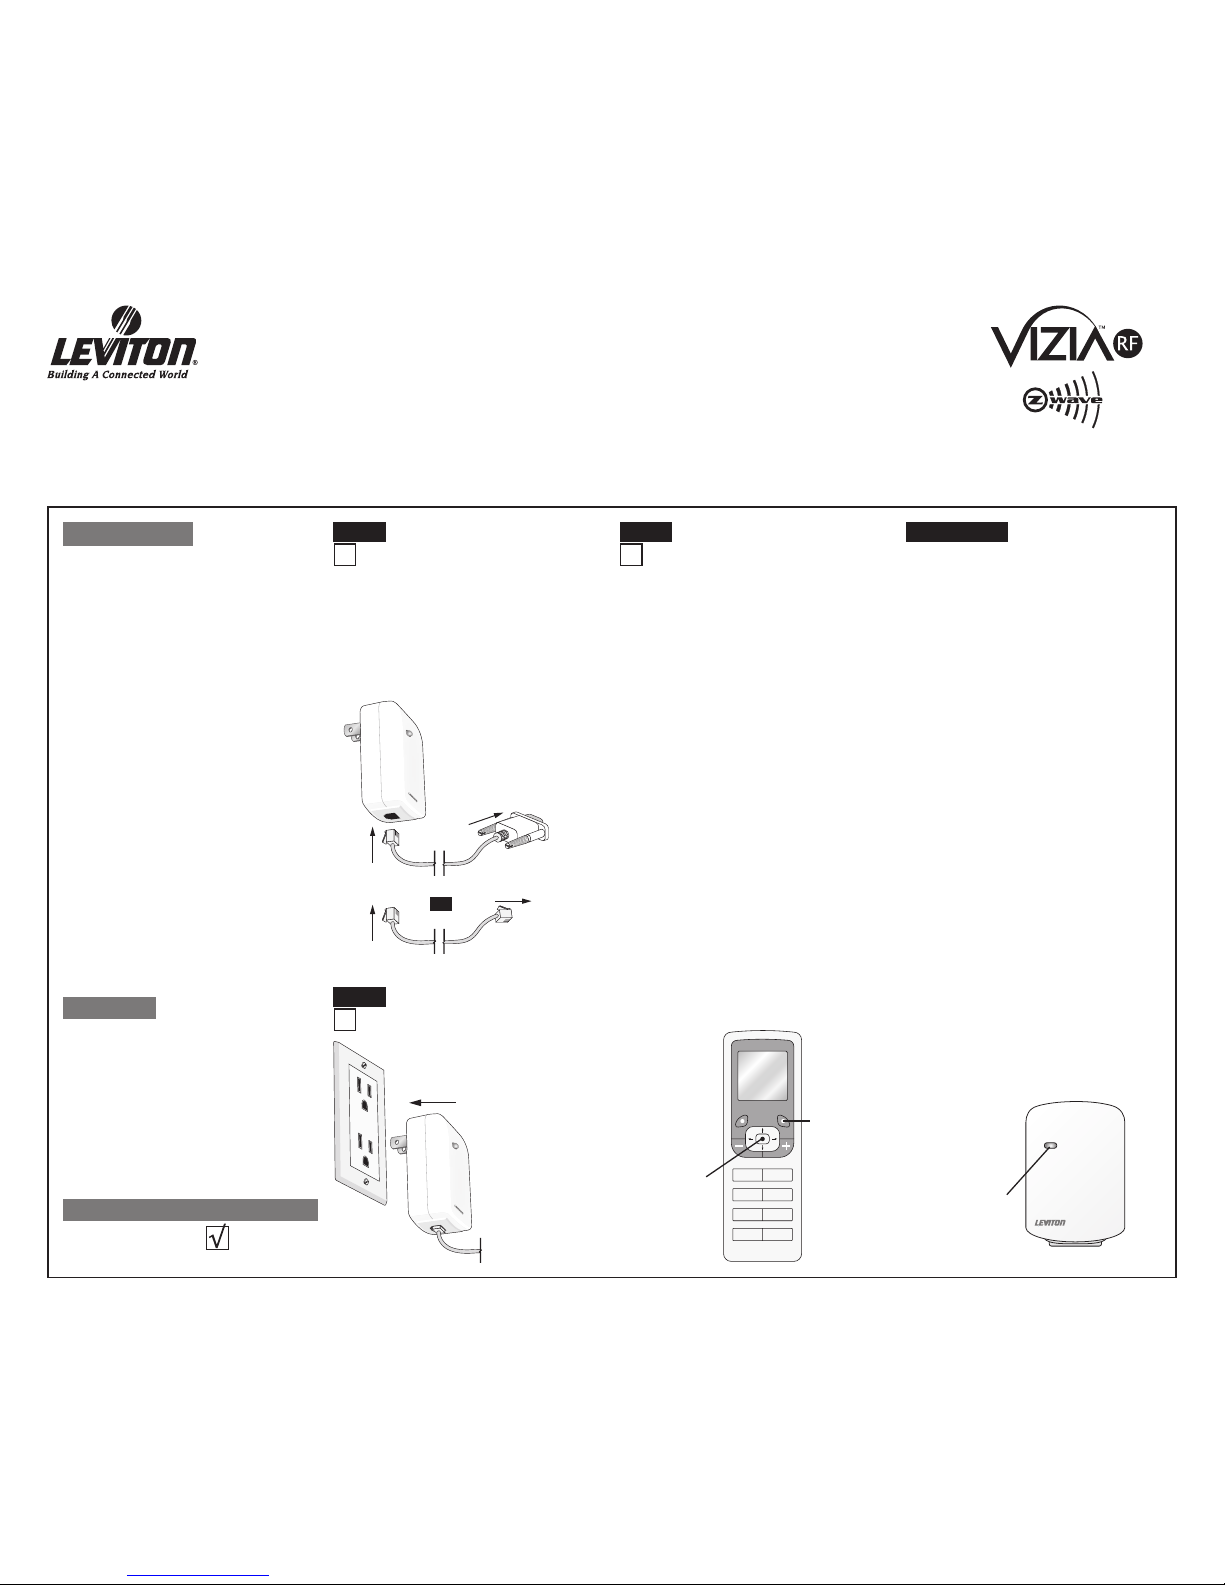
Step 3
Attaching Plug-In Serial
Interface Module to Wall
Receptacle:
Step 2
Attaching Serial-RS232 Cable
or HAI Cable to Plug-In Serial
Interface Module:
Step 1
NOTE: In order to use your ViziaTM Plug-In Serial
Interface Module in a Z-WaveTM network, it must
be Included into the network using a Primary
Programmer/Remote, such as Leviton’s Cat.
No., RZCPG. Before Including your module,
please refer to the Primary Programmer/Remote
instruction sheet for complete information. Refer
to Step 3 for further details.
NOTE: Use check boxes when Steps
are completed.
INSTALLING YOUR INTERFACE MODULE
RS232 cable
to CPU
HAI cable
to HAI controller
RS232 cable to
Interface Module
HAI cable to
Interface Module
OR
WARNINGS AND CAUTIONS:
• To be installed and/or used in accordance with appropriate electrical codes and regulations.
• If you are unsure about any part of these instructions, consult a qualified electrician.
WARNINGS AND CAUTIONS:
• Save this instruction sheet. It contains important technical data along with testing
and troubleshooting information which will be useful after installation is complete.
• RS232 - ASCII
• Scene capable
• Two way communication
• RF reliability
• Ease of installation – No new wiring
• Compatible with other Z-Wave™ enabled
devices
NOTE: This product requires the use of
third party software to function, along with a
relatively high level of programming skill.
FEATURES
Step 3 cont’d
Programming
Button
1 ON
2 ON
3 ON
4 ON
OFF
OFF
OFF
OFF
Programmer/Remote
Cat. No. RZCPG
Center Button
Menu Button
Compatible with enabled products!
TM
NOTES:
• If using a non-Leviton Programmer/Remote,
refer to the Programmer/Remote instruction
sheet.
• Plug-In Serial Interface Modules included into
a Z-WaveTM network must be updated after you
have included all other devices.
A) If using a Leviton Z-Wave
TM
Programmer/
Remote, Cat. No. RZCPG, press the Menu
button and scroll down to System Setup. Press
the center button to select System Setup Menu.
Press the center button to select Network.
Press the center button to <Include Node>.
B) If using RZCPG Programmer/Remote, you will
be prompted to prepare device for inclusion. To
do this you must put the Plug-In Serial Interface
Module into programming mode.
C) To access Program mode, press and hold
programming button until the LED turns Amber.
You are now in Programming mode.
NOTE: If the LED on the Plug-In Serial
Interface Module turns solid Red while
including, there has been a communication
error.
D) While standing close to the Plug-In Serial
Interface Module (approximately 2-5 ft.), press
the center button on the Programmer/Remote
to <Include> device in the network. NOTE:
Only one device may be included at any time.
E) The Primary Programmer/Remote will
assign a Home ID, Node ID, and Name for
this device.
NOTE: This information will be stored in the
Programmer/Remote to be used for future
reference.
NOTE: You may name or edit the node of
this device at this time.
F) The Plug-In Serial Interface Module is
now installed in the network.
G) After all devices are included into the
network, the Plug-In Serial Interface
Module must be updated to allow proper
network function. To update Plug-In Serial
Interface Module proceed as follows:
• If using a non-Leviton Programmer/
Remote, refer to the Programmer/
Remote instruction sheet for updating
Plug-In Serial Interface Module.
• If using Leviton Z-Wave
TM
Programmer/
Remote, Cat. No. RZCPG, press the
Menu button and scroll down to System
Setup. Press the center button to select
System Setup Menu. Press the center
button to select Network. Press the
center button to select Update "cntrl".
When prompted, press button on the
Plug-In Serial Interface Module.
• Wait until the RZCPG Programmer/
Remote confirms completion. Update
is done.
NOTE:
If the Plug-In Serial Interface Module
has been successfully Included in the
network and the user tries to Include it again
without first excluding it from the network, the
controller will retain the first node ID it had
received and ignore the second.
• Attach RS232 cable to PlugIn Serial Interface Module
and CPU.
OR
Attach HAI cable to Plug-In
Serial Interface Module and
HAI controller.
• Plug the Plug-in
Serial Interface
Module into wall
receptacle. Verify
that receptacle is
live. If controlled
by a wall switch,
the switch must
be kept ON
at all
times.
Page 2
LIMITED 5 YEAR WARRANTY AND EXCLUSIONS
Leviton warrants to the original consumer purchaser and not for the benefit of anyone else that this product at the time of its sale by Leviton is free of defects in materials and workmanship under normal and proper use for five years from the
purchase date. Leviton’s only obligation is to correct such defects by repair or replacement, at its option, if within such five year period the product is returned prepaid, with proof of purchase date, and a description of the problem to Leviton
Manufacturing Co., Inc., Att: Quality Assurance Department, 59-25 Little Neck Parkway, Little Neck, New York 11362-2591.
This warranty excludes and there is disclaimed liability for labor for removal of this product or reinstallation.
This warranty is void if this product is installed improperly or in an improper environment, overloaded, misused, opened, abused, or altered in any manner, or is not used under normal operating conditions or not in accordance with any
labels or instructions. There are no other or implied warranties of any kind, including merchantability and fitness for a particular purpose, but if any implied warranty is required by the applicable jurisdiction, the duration of any such
implied warranty, including merchantability and fitness for a particular purpose, is limited to five years. Leviton is not liable for incidental, indirect, special, or consequential damages, including without limitation, damage to, or
loss of use of, any equipment, lost sales or profits or delay or failure to perform this warranty obligation. The remedies provided herein are the exclusive remedies under this warranty, whether based on contract, tort or otherwise.
OPERATION
NOTE: For complete details on operating the
Primary Programmer/Remote, refer to the
instruction guide for that particular device.
The RZCØP is intended for use by developers
who want to develop products that can transmit
signals to and receive signals from ViziaRFTM
products on a Z-WaveTM network. A relatively
high level of programming knowledge is required
to develop products that use these interfaces.
The interface uses a simple ACSII protocol to
communicate to the controlling equipment. If you
are an end user who has purchased this product
to work with another product that was designed
for this purpose, please refer to that product’s
owner’s manual for operating instructions.
If you are a developer who has purchased this
interface to develop a ViziaRFTM compatible
product, you will need the RZCØP Tech Note,
which contains the information needed to allow
proper interface communication. Please visit our
website listed below to download the RZCØP
Tech note.
•
Plug-In Serial Interface Module is
functioning improperly
-
Confirm that the device is being supplied
from a 120V, 60Hz AC source ONLY.
- Confirm that the unit is programmed
properly. Repeat “INSTALLING YOUR
INTERFACE MODULE” section to verify
that it has been included into the Z-WaveTM
network.
• Programmer/Remote does not operate
lights
- Check association.
- Ensure that Plug-In Serial Interface Module
was properly updated.
TROUBLESHOOTING
DI-000-RZC0P-00C
For additional information, contact Leviton’s
Techline at 1-800-824-3005 or visit Leviton’s
website at www.ViziaRF.com
Protected under U.S. Patent Number 6,388,399
and patents pending and licensed under U.S.
Patents Numbers 5,905,442, and 5,982,103
NOTE: It is very important to accurately
Exclude devices from the network when
moving or removing a device from a Z-WaveTM
network. This ensures that all information has
been removed from your Primary Programmer/
Remote’s information table and is not counted
on to be a part of the mesh network.
A
) If using a Leviton Z-WaveTM Programmer/
Remote, Cat. No. RZCPG, press the Menu
button and scroll down to System Setup.
Press the center button to select System
Setup Menu. Press the center button to
select Network. Scroll down to <Exclude
Node> and press the center button.
B) If using RZCPG Programmer/Remote
you will be prompted to prepare device
for exclusion. To do this, you must put
the Plug-In Serial Interface Module into
programming mode.
C) To access Program mode, press and hold
programming button until the LED turns
Amber. You are now in Programming mode.
NOTE: If the LED on the Plug-In Serial
Interface Module turns solid Red while
excluding, there has been a communication
error.
D) While standing close to the Plug-In Serial
Interface Module (approximately 2-5 ft.),
press the center button to <Exclude> device
from the network.
Excluding Plug-In Serial
Interface Module from
Network:
Step 4
This equipment has been tested and found
to comply with the limits for a Class B Digital
Device, pursuant to Part 15 of the FCC
Rules. These limits are designed to provide
reasonable protection against harmful
interference in a residential installation.
This equipment generates, uses, and can
radiate radio frequency energy and, if not
installed and used in accordance with the
instructions, may cause harmful interference
to radio communications. However, there is
no guarantee that interference will not occur
in a particular installation. If this equipment
does cause harmful interference to radio or
television reception, which can be determined
by turning the equipment OFF and ON,
the user is encouraged to try to correct the
interference by one or more of the following
measures:
• Reorient or relocate the receiving Antenna.
• Increase the separation between the
equipment and the receiver.
• Connect the equipment into an outlet on
a circuit different from that to which the
receiver is connected.
• Consult the dealer or an experienced radio/
tv technician for help.
FCC COMPLIANCE STATEMENT
Factory Default:
If your module is not responding, or you are
unable to control it after you have tried to Include/
Exclude it multiple times, it may be necessary to
reset the module to its original factory settings. To
accomplish this, proceed as follows:
• Press and hold the programming button until
the LED flashes Amber and then turns solid
Red. Release the button and wait until the
LED blinks Green. NOTE: This can take up
to a minute. The module is now reset. Once
the module is reset, it will be necessary to ReInclude it to a network before it can be used.
CAUTION: SETTING A DEVICE TO A
FACTORY DEFAULT DOES NOT EXCLUDE
THAT DEVICE FROM A NETWORK. THE
EXCLUSION PROCEDURE MUST STILL BE
FOLLOWED TO REMOVE THE DEVICE FROM
THE PRIMARY REMOTE’S INFORMATION
TABLE. FAILURE TO DO SO MAY RESULT IN
SYSTEM THAT IS SLOW TO RESPOND, OR
MAY FAIL TO RESPOND TO SOME DEVICES.
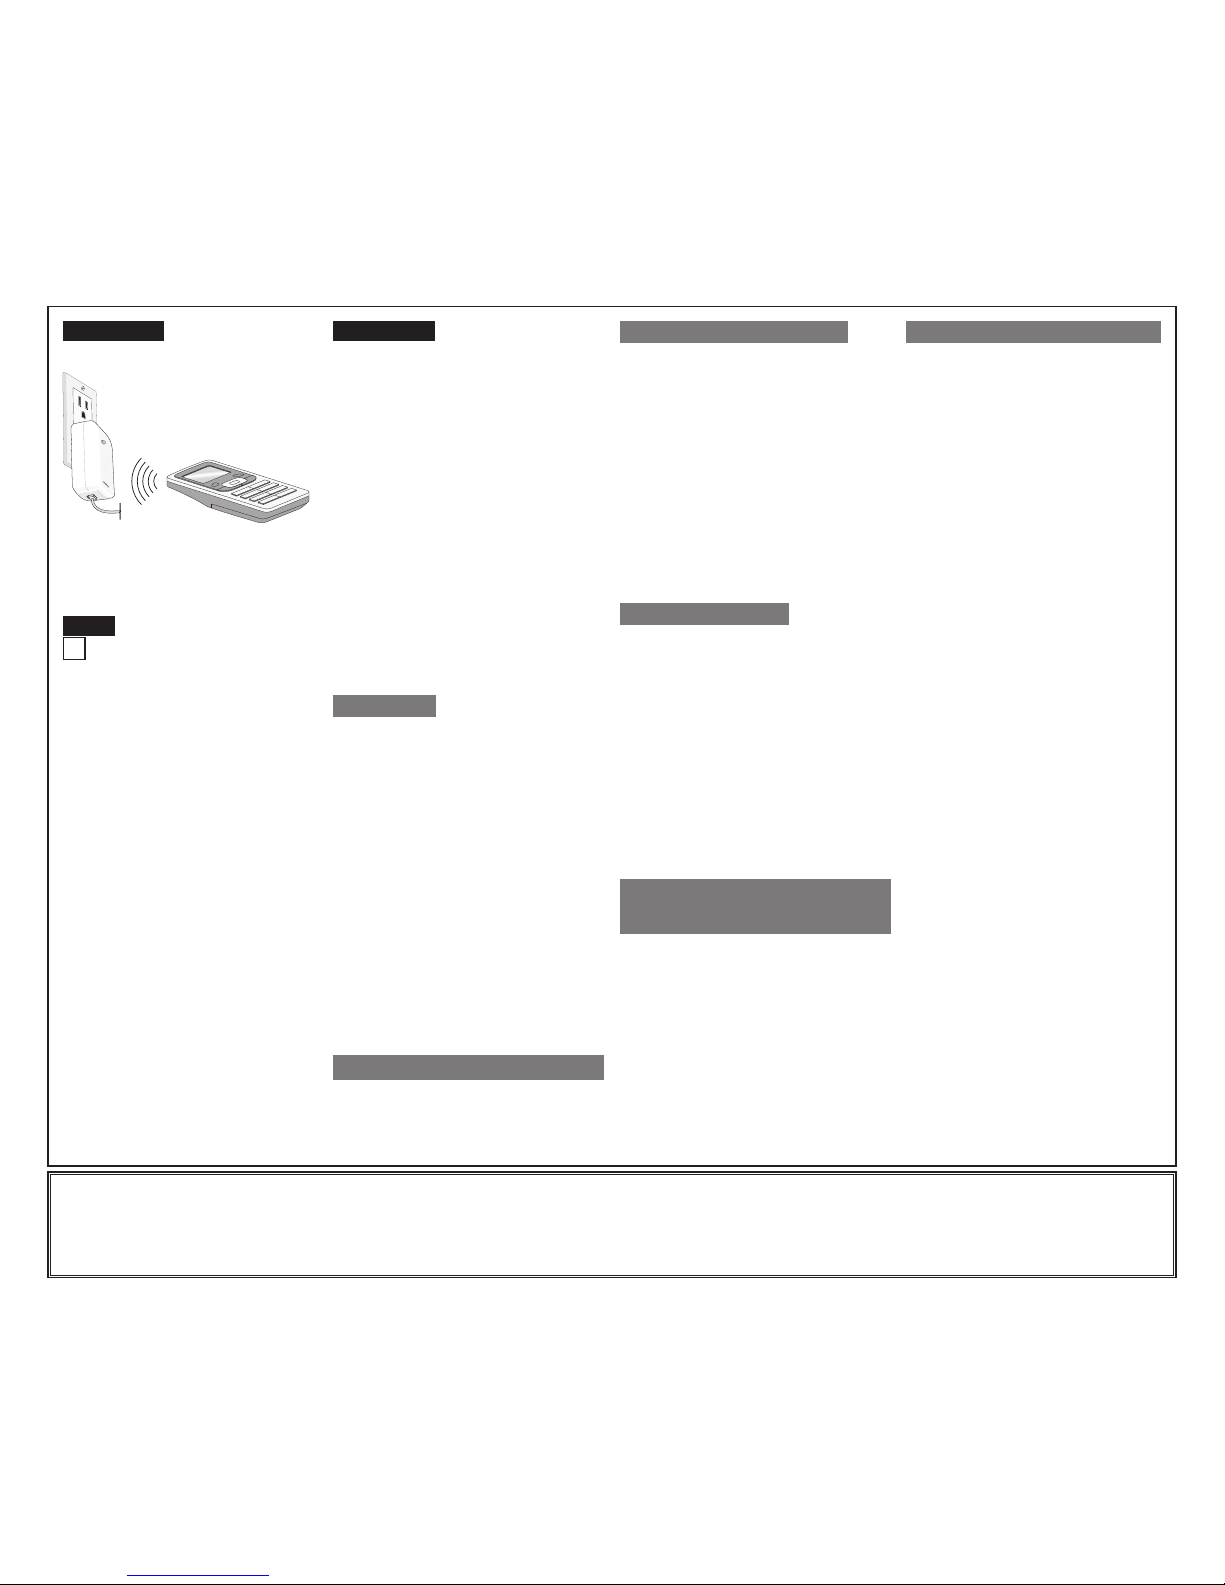
Wall Receptacle
RS232 Cable
Plug-In Serial
Interface Module
NOTE: Programmer/Remote must be in
close proximity to Plug-In Serial Interface
Module when including into network
RZCPG Programmer/
Remote
Including Plug-In
Serial Interface
Module into
Z-WaveTM Network:
Step 3 cont’d Step 4 cont’d
www.ViziaRF.com
COMMUNICATION SETTINGS
NOTE: The following general information applies
to the RS232 Interface.
To configure your device to communicate with the
interface, use the following data conventions:
9600 BAUD
8 DATA
1 STOP
NO PARITY
If you wish to send these commands from a
PC, run the Microsoft Windows® Hyper Terminal
program or an equivalent program. Then select
Local Echo, Line Feed and Carriage Return
inbound and outbound. This allows you to see the
characters that you are typing as well as keep the
responses from overwriting typed characters.
 Loading...