

Page 1
OPT 7512
DMX512 KIT
INSTALLATION GUIDE
DI-400-A7512-01B
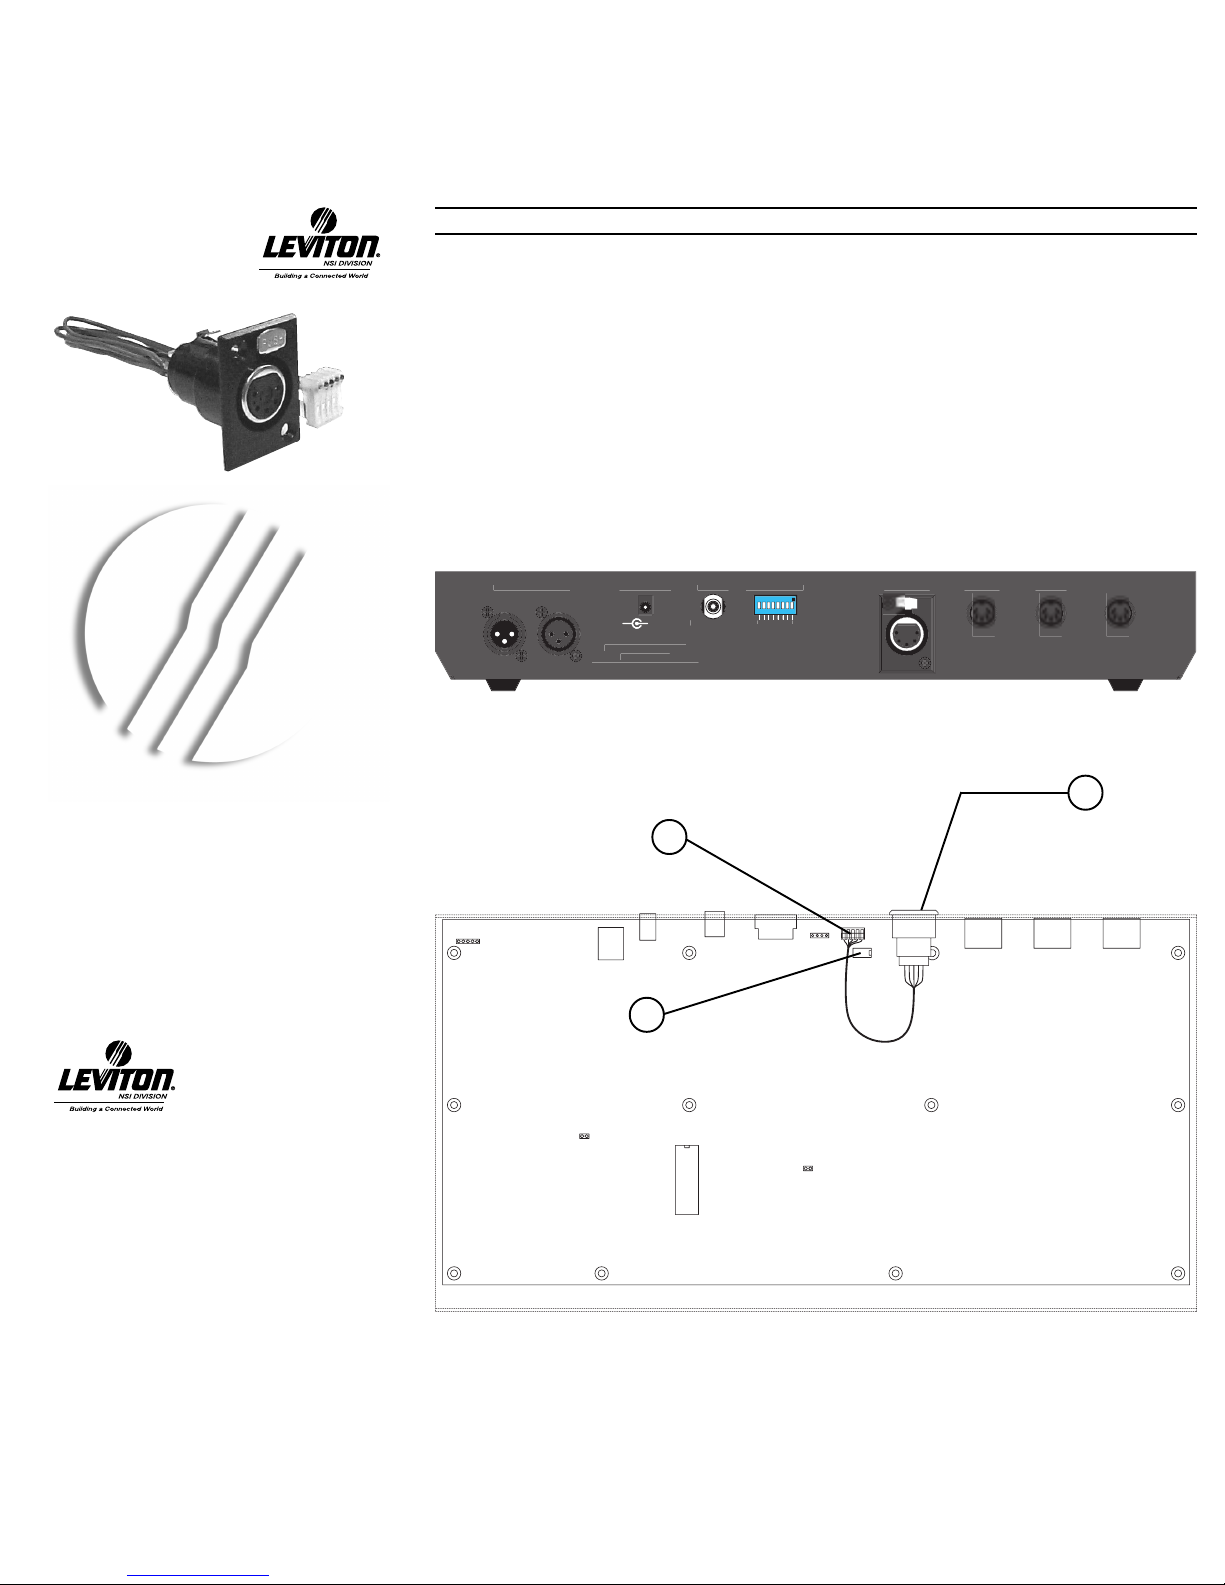
INSTALLING THE OPT 7512 DMX512 KIT ON MC 1616 CONSOLE
1. Remove screws from bottom of the MC 1616 Console and remove bottom cover.
2. Remove the 2 screws securing the DMX512 option plate and remove cover plate.
3. Insert the DMX512 5-pin connector through the mounting hole and install the hardware provided as shown.
4. Connect cable from DMX512 connector to 5-pin connection as per illustration.
5. Install 485 (3695) IC into 8-pin socket (U46) as shown, being sure to observe the orientation of the notch or dimple.
6. Replace the bottom cover and secure.
7. Since DMX512 does not provide phantom power like Micro-plex, the included power supply is required to power the
console.
U9
P1
JP4
JP1
T1
J1
AUDIO IN
S1
JP3
U46
JP2
MIDI-IN MIDI-OUT MIDI-THRU
P4
P3P2
MICROPLEX OUTPUT
S
AUX POWER INAUDIO I
N
SYS
TEM CONFI
G
DMX 515
OUT
MIDI THRUMIDI
OUT
LEVITON MFG. CO., INC
.
TUALATIN, O
R
TECH SUPPORT 1-
800-86
4-2
502
GND
+ 12-15 VD
C
1234567
8
5-pin connection
4
Install DMX512 connector thru
mounting hole with flange to
outside of chassis
3
Install 485 (3695) IC here
(Observe notch or dimple location)
5
Bottom view.
Back of PC board exposed with bottom of unit removed.
Leviton NSI Division Headquarters
20497 SW Teton Avenue, Tualatin, OR 97062
Customer Service Telephone: 800.736.6682
Customer Service Fax: 503.404.5594
Technical Services: 800.959.6004
Leviton Manufacturing Company, Incorporated.
59-25 Little Neck Parkway, Little Neck, NY 11362-2591.
Visit Leviton’s websites at http://www.nsicorp.com &
http://www.leviton.com
Copyright® 2003. Leviton Manufacturing Company, Inc. All
Rights Reserved
Specifications and pricing subject to change at any time.
Page 2
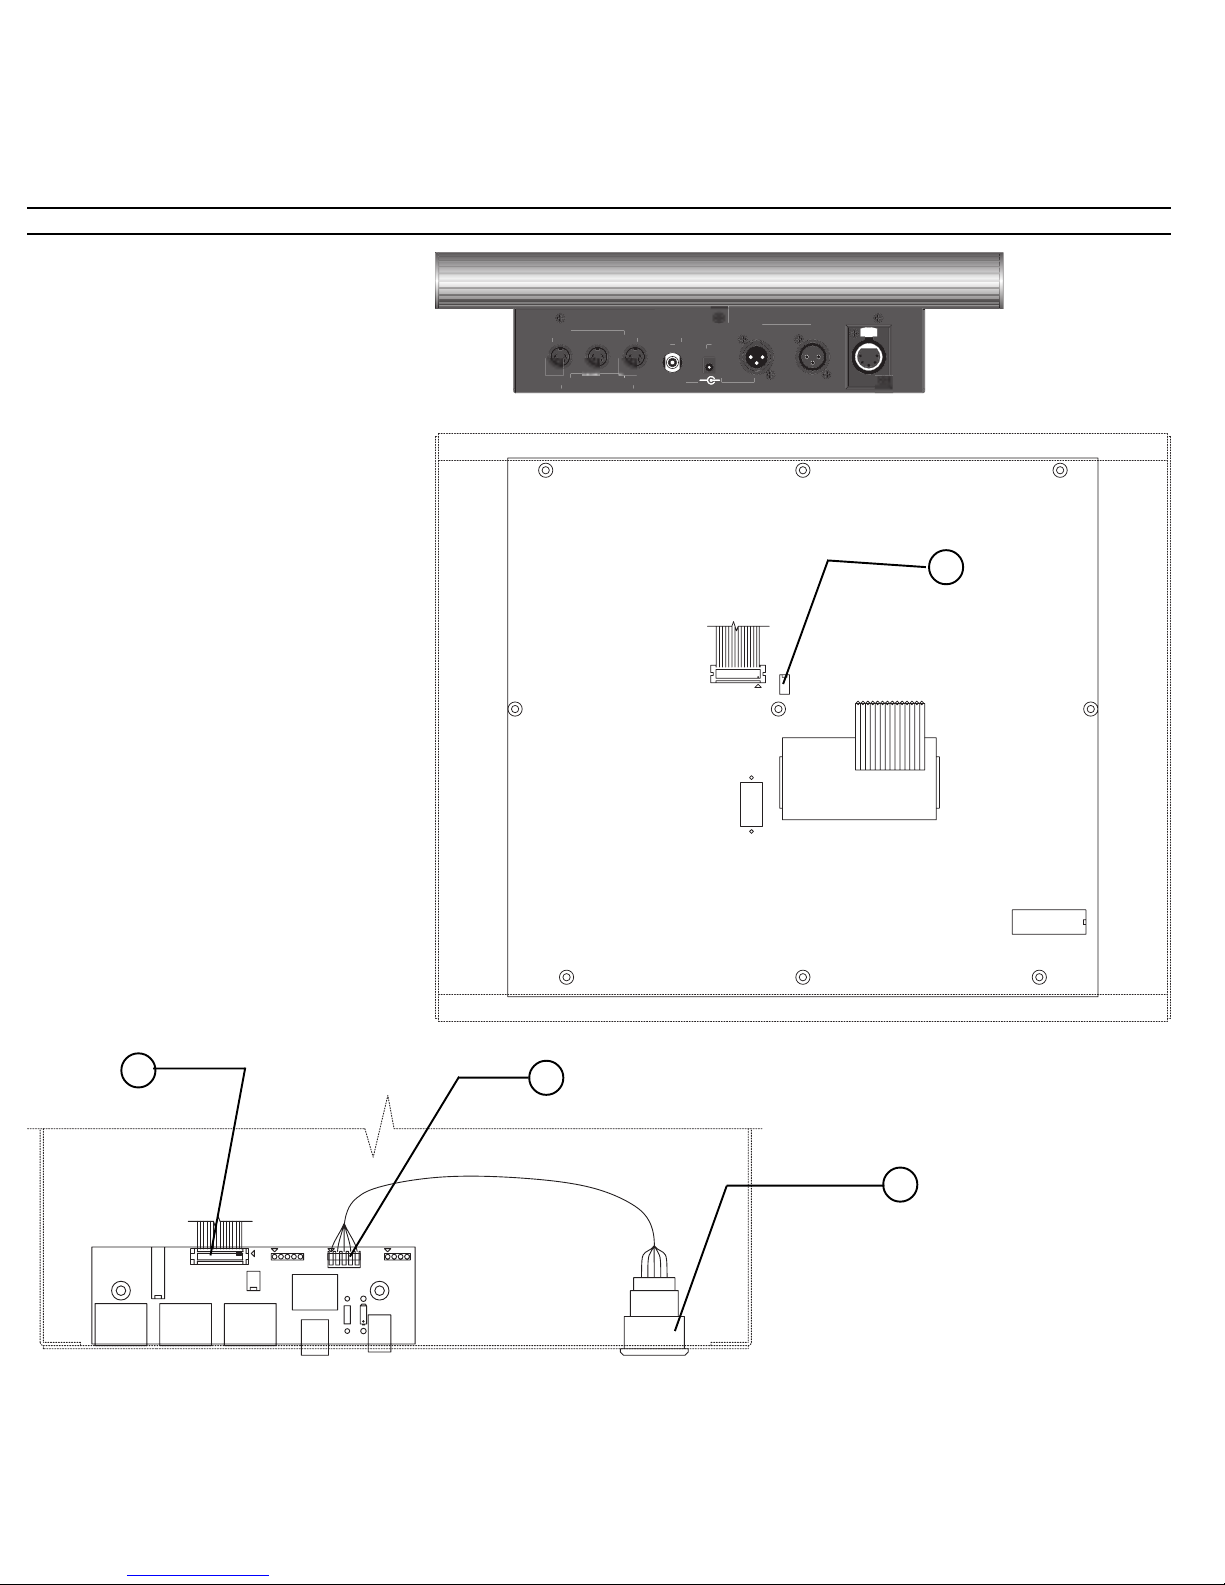
INSTALLING THE OPT 7512 DMX512 KIT ON MC 6300 CONSOLE
1. Remove 6 screws from bottom front lip and rear panel
of the MC 6300 Console and open top panel.
Disconnect data cable from I/O card (JP6) to remove
top panel.
2. Remove the 2 screws securing the DMX512 option
plate and remove cover plate.
3. Insert the DMX512 5-pin connector through the
mounting hole and install the hardware provided as
shown.
4. Connect cable from DMX512 connector to 5-pin
connection as per illustration.
5. Install 485 (3695) IC into 8-pin socket (U21) as shown,
being sure to observe the orientation of the notch or
dimple.
6. Replace top panel and secure.
7. Since DMX512 does not provide phantom power like
Micro-plex, the included power supply is required to
power the console.
P
USH
MICRO-PLEX
OUT
LEVITON MFG. CO., INC.
TUALATIN, O
R
TECH SUPPORT: 1-
800-86
4-2
502
AUDI
O
+ 12-15 VD
C
GND
POWE
R
THR
U
OUT
MIDI CONNECTOR
S
TO I/O CARD
U21
L1
U2
TO MAIN BOARD
MIDI THRU MIDI OUT MIDI IN
MICROPLEX
DMX512
AUDIO IN
JP6
T1
R57
J5
J4 J1
J3
+ 12-15 VDC
IN
JP4
JP5
JP3
IS01
5-pin connection
4
Install DMX512 connector thru
mounting hole with flange to
outside of chassis
3
Bottom view.
Back of PC board exposed with bottom of unit removed.
Install 485 (3695) IC here
(Observe notch or dimple location)
5
Data cable connection
1
DI-400-A7512-01B
Page 3
Front Panel
Front Panel
Front Panel
FOLD SCHEME
8.5¨
8.5¨
Fold Line
Panel Line
Cat. No.
Cat. No.
Cat. No.
DOCUMENTATION
LEVITON INSTRUCTION SHEET/MANUAL
SPECIFICATIONS
EC
08/02/04
Helvetica
DI-400-A7512-01B
Black
4855049
Final fold size:
20 Lb. offset
2.83" X 4.25"
Overall size:
8.5" X 8.5"
Paper size:
 Loading...