

Page 1

LevelOne
KVM-0808/KVM-8916
19” Widescreen LCD Rack Console with
8/16-Port KVM Switch
Quick Installation Guide
Page 2

Console Combo KVM Switch
Package Checklist
KVM Switch Unit
Quick Installation Guide
Page 3
Computers/Servers Installation
Each Host port connector is KVM-Cabel type. The 3-in-1 VGA cable has a KVM-Cabel male connector at one end,
plug it into PC port of KVM switch back panel, and plug the other end’s connectors to PC VGA port, and if
■ PS/2 Computers --- Connect PS/2 keyboard connector to keyboard port, and PS/2 mouse connector to mouse
port.
■ USB Computers --- connect PS/2-USB changer to PS/2 keyboard connector, then plug the changer into
available USB port. This single USB port can communicate both keyboard and mouse signals. It works as a
standard HID (Human Interface Device), no extra driver needed.
■ Note: the PS/2 mouse connector should be left disconnected.
Console Installation
Local Console --- Connect the keyboard, mouse and monitor to the local console ports.
Remote Console --- With a CAT5 cable, one end connecting to the RJ45 connector on the CAT5 extender module,
and the other end connecting to CAT5 Receiver.
The recommended Power Up sequence is as follows: monitor, KVM Switch, finally the computers.
Hotkeys & OSD
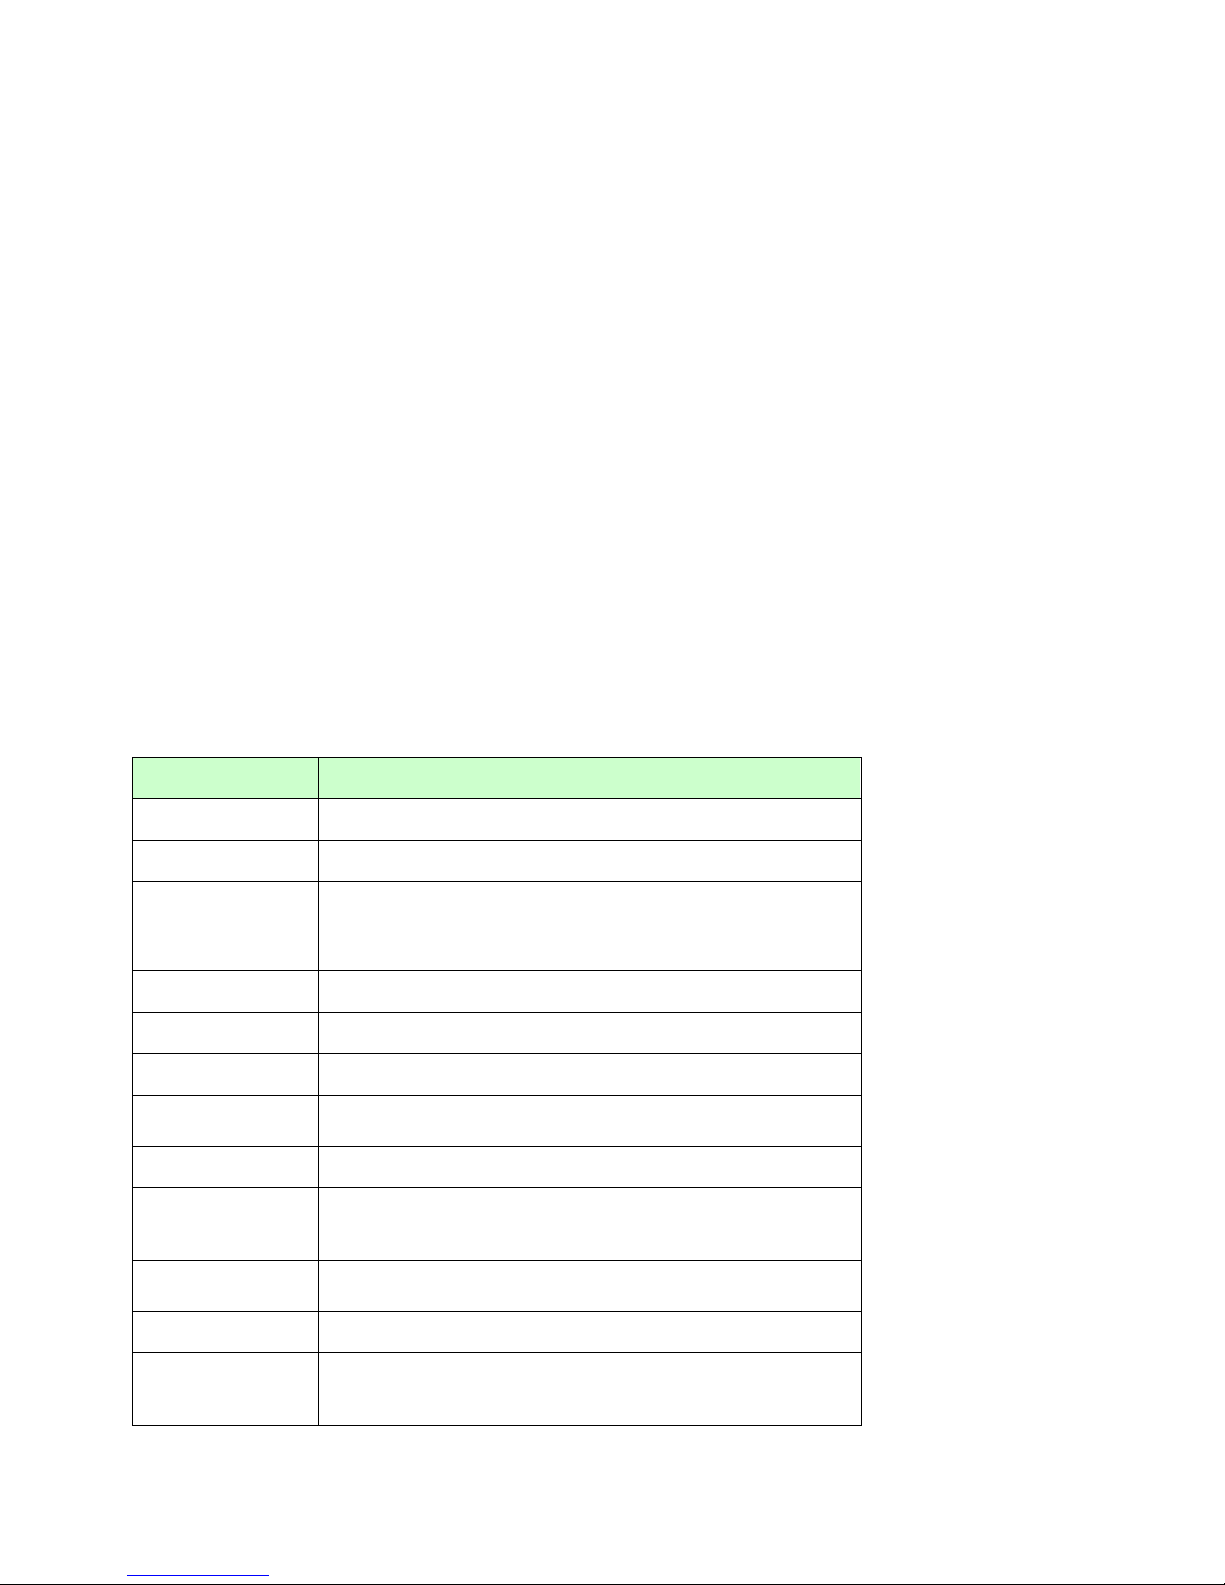
The table blow lists all supported hotkey commands.
Command
Function
Space bar
Bring up the OSD overlay screen
↑or↓
Moving Up or Down
[1,2,..,8] bank,
[01, 02,..,32] port
■ The first digit is bank number starting with “1”. The first
KVM switch unit on the Daisy chain line is of bank 1 (the
Master). A standalone KVM switch is fixed in bank 1.
■ The second & third digits are port number starting with “01”
PgUp
Previous bank
PgDn
Next bank
B
To enable/disable beep sound function
L
To enable/disable the Screen Saving function and 10min
auto-logout function. This function is default OFF (Disable).
F
To enable Firmware upgrade function
P
To log out the OSD. If Security is enabled it will show up the
Login window waiting for username and password. If Security
is disabled it will show up the Status window
R
For SUPERVISOR to set the OSD back to factory default
value (except User Security settings).
S
For SUPERVISOR to activate the Auto-Scan function
U
For SUPERVISOR to enable/disable Security function. If the
Security is off, we don’t need user name & password to access
to the KVM system. This function is default OFF (Disable).
Page 4
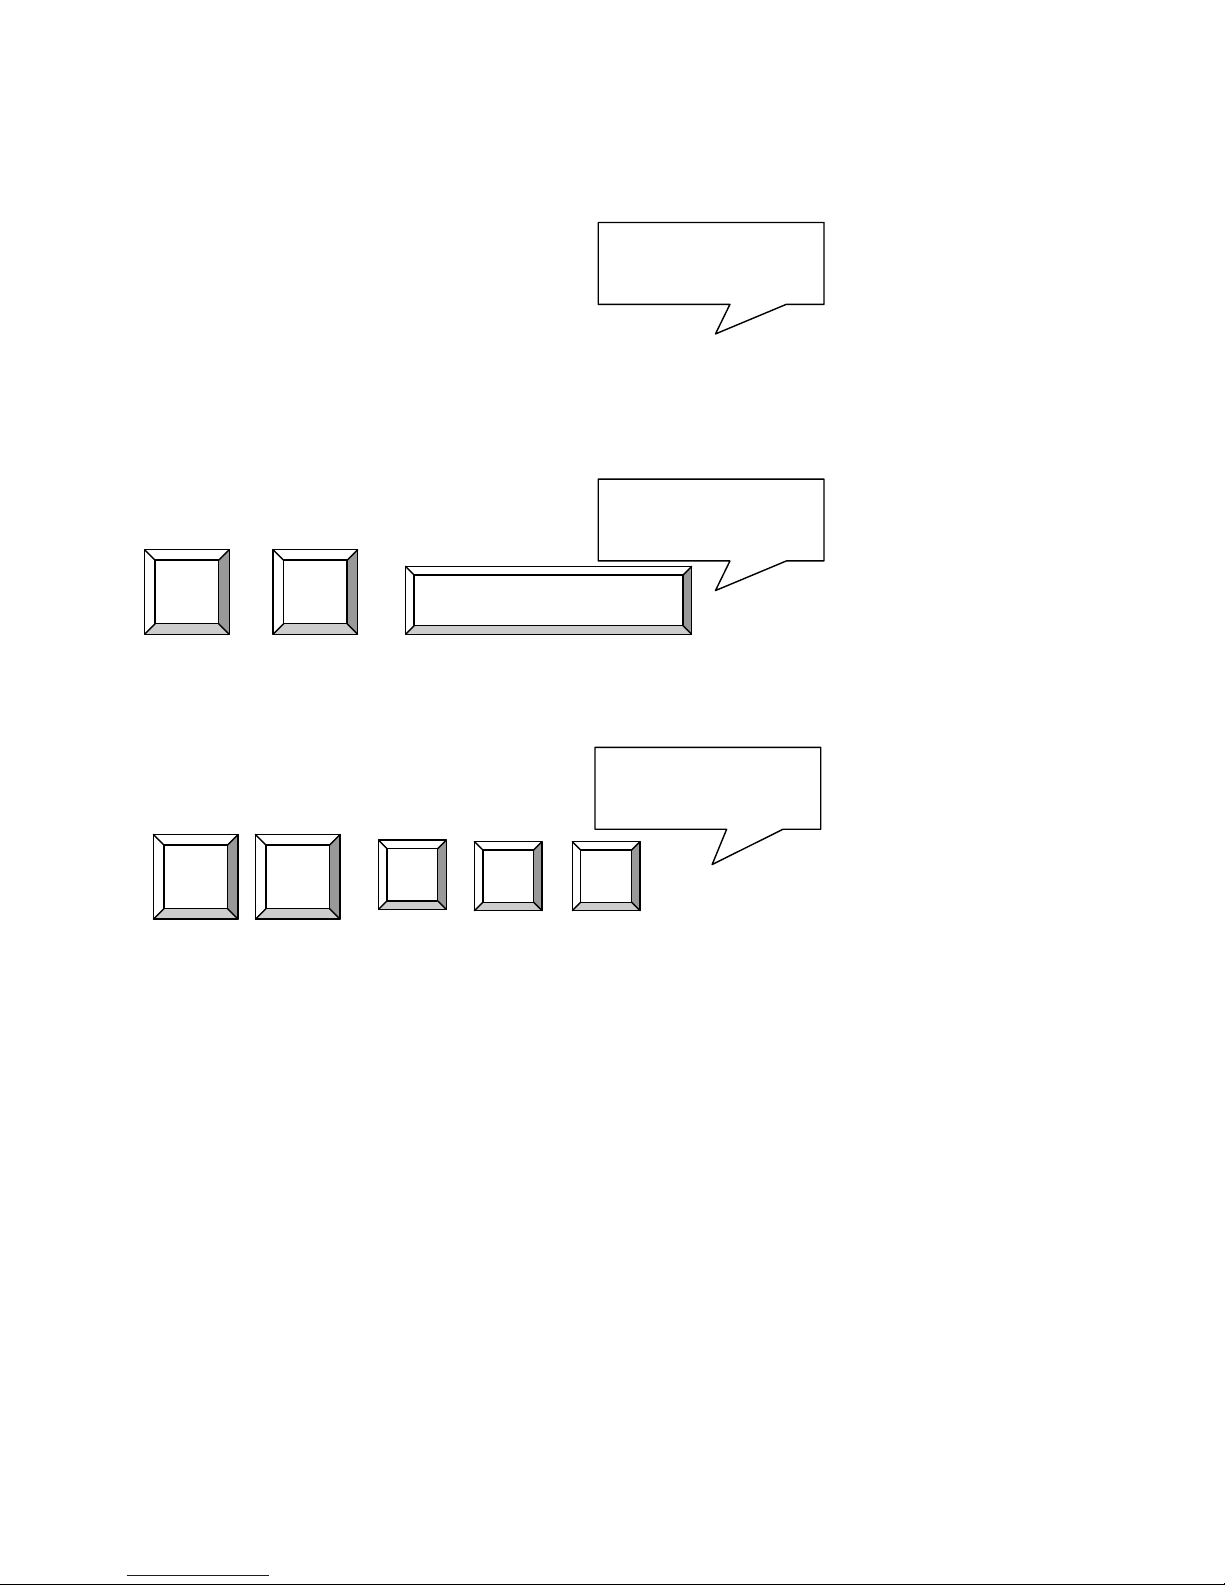
Example #1 – To bring up the OSD overlay window, press “Caps Lock”, “Caps Lock”, and the “Space Bar”.
Immediately, the OSD overlay screen will appear. The superimposed menu screen is generated by the KVM switch,
and does not affect your computers or software function in any way.
Example #1 – To bring up the OSD overlay window, press “Caps Lock”, “Caps Lock”, and the “Space Bar”.
Immediately, the OSD overlay screen will appear. The superimposed menu screen is generated by the KVM switch,
and does not affect your computers or software function in any way.
Example #2 – To switch to Bank 1 Port1, press “Caps Lock”, “Caps Lock”, and “1”, “0”, “1”.
please enter next key in
2 seconds in the
Hotkey sequence
please enter next key in
2 seconds in the
Hotkey sequence
Caps
Lock
Caps
Lock
Space Bar
please enter next key in
2 seconds in the
Hotkey sequence
Caps
Lock
Caps
Lock
1 1 0
 Loading...