

Page 1
IEC 60947...
IEC 60947...
IP 67
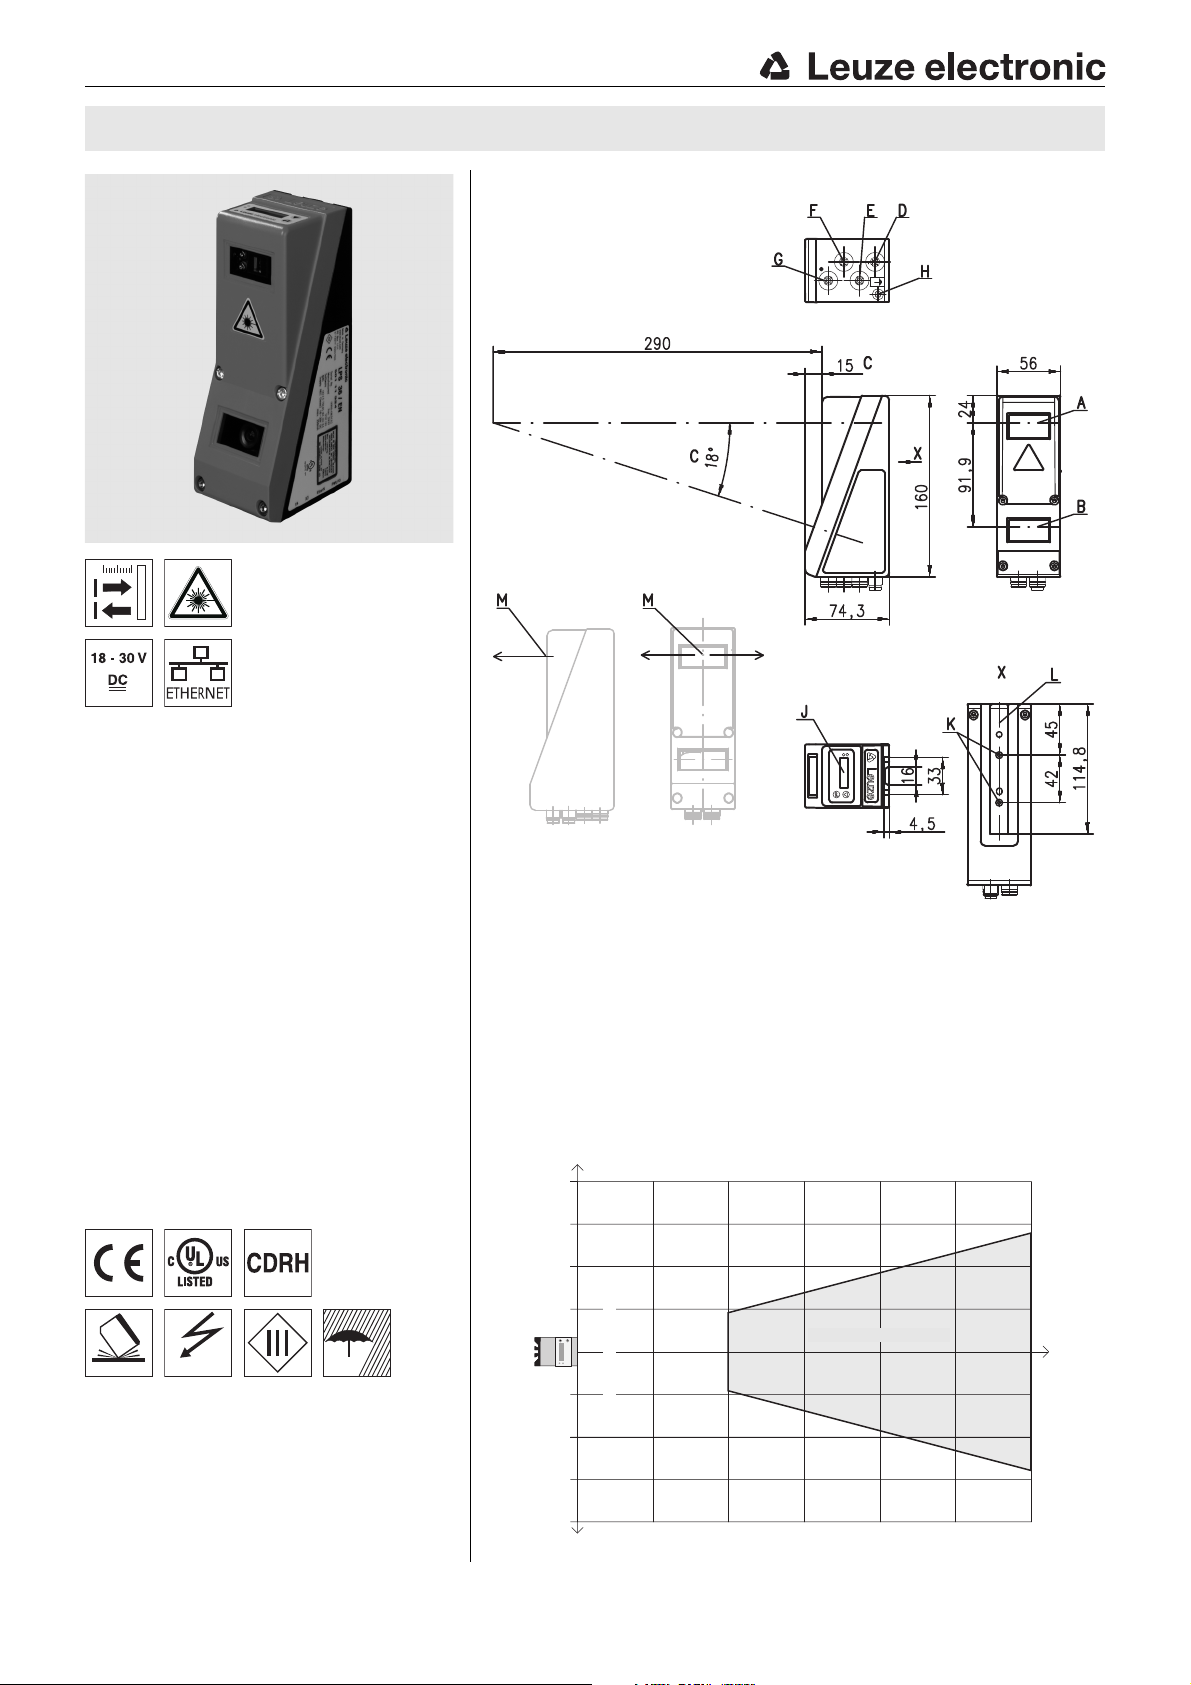
A Transmitter
B Receiver
C Optical axis
D X1: M12x1 connector, 8-pin, A coded
E X2: M 12x1 socket, 4-pin, D coded
F X3: M12x 1 socket, 8-pin, A coded (LES 36 HI/VC6)
G X4: M12x1 socket, 5-pin, A coded (LES 36 HI/VC6)
H FE screw
J OLED display and membrane keyboard
K M4 thread, 4.5 deep
L Holder for mounting system BT 56 / BT 59
M Zero point and orientation of the coordinate system for measurement data
-X+X
+Z
Measurement range z-axis
x = measurement range x-axis
Dimensions in mm
LES 36 HI Light section sensor for object measurement
Dimensioned drawing
en 02-2014/06 50122330-01
200 … 600mm
Light section sensor for object
measurement (width, height and position
measurement)
Measurement time 10ms
Measurement range: 200 … 600mm
Length of laser line: max. 140mm
Integrated analog interface
Configuration via Fast Ethernet
OLED display with key pad for alignment
aid and status display: "set inspection task"
Measurement value display in mm on OLED
display as an alignment aid
Up to 4 measurement fields / 8 detection
fields with logic operation option
Up to 16 inspection tasks
Activation input, trigger input, cascading
output
Measurement range, typical
Accessories:
(available separately)
Mounting systems BT 56, BT 59
Cable with M12 connector (K-D …)
We reserve the right to make changes • DS_LES36HI_en_50122330_01.fm
Configuration memory
K-DS M12A-8P-0,75m-LxS36-CP
Leuze electronic GmbH + Co. KG In der Braike 1 D-73277 Owen Tel. +49 (0) 7021 573-0
-100
+25
+50
+75
+100
-x
-75
-50
-25
+z
Leuze electronic
+x
1000
200 300 400 500 600
LES 36 HI… - 02
Page 2
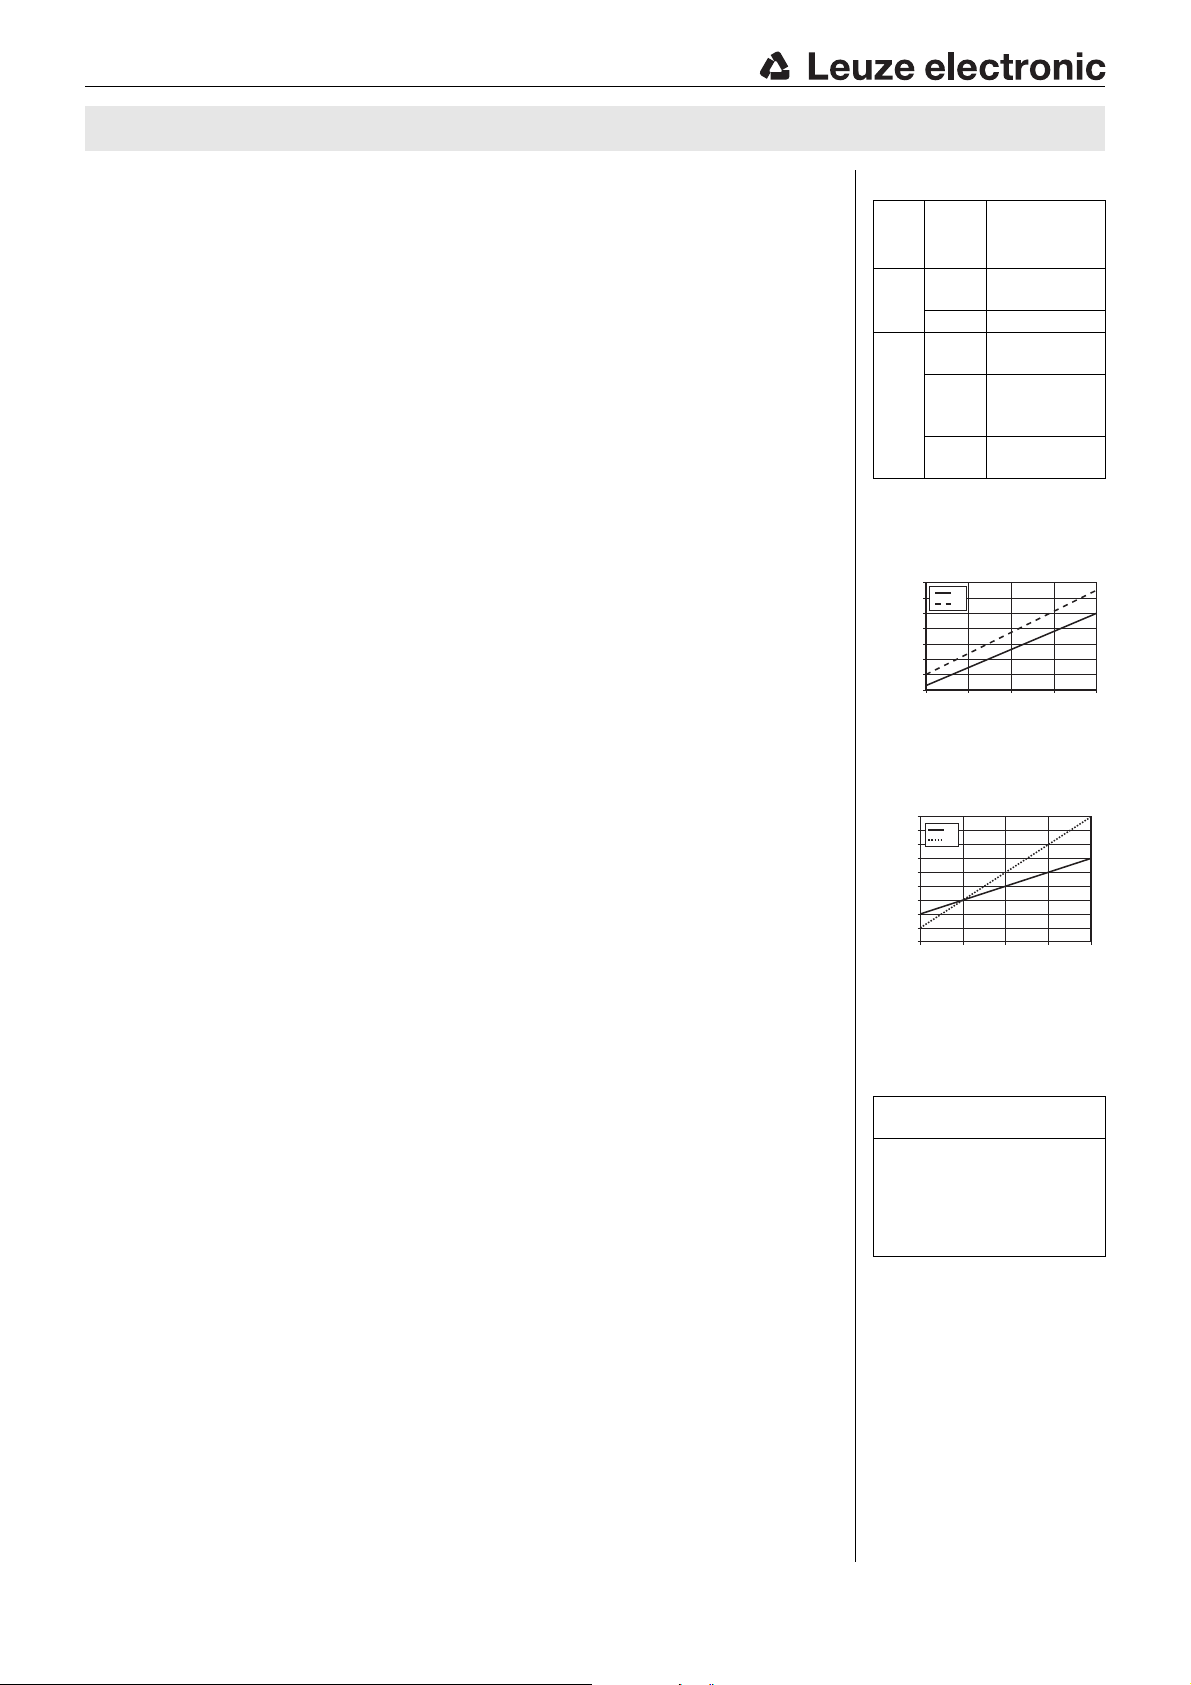
Line length/measurement range (typical)
Distance in mm
Line length/measurement
range in mm
Resolution (typical)
Distance in mm
Resolution in mm
LES 36 HI
Specifications
Optical data
Measurement range
Light source laser
Wavelength 658nm (visible red light)
Max. output power < 8mW
Pulse duration < 3ms (adjustable from 0.1ms … 1.31 ms)
Laser line approx. 170x1.5 mm at 600 mm
Error limits (relative to measurement distance)
Resolution in x direction
Resolution in z
Linearity in z direction
Repeatability in z direction
B/W detection thresh. (6 … 90% rem.) ≤ 0.5%
Object detection
Minimum object size in x direction
Minimum object size in z direction
Timing
Measurement time ≥10ms (configurable)
Delay before start-up approx. 1.5s
Electrical data
Operating voltage UB
Residual ripple ≤ 15% of UB
Open-circuit current ≤ 200mA
Ethernet interface UDP
Switching outputs 4 / 100mA / push-pull
Inputs 3 (selection of inspection task) on X3 (LES 36 HI/VC6 only)
Signal voltage high/low ≥ (U
Analog output (only LES 36 HI/VC6)
Analog output voltage 1 … 10V, RL≥ 2kΩ
Indicators
Green LED continuous light ready
Yellow LED continuous light Ethernet connection available
Mechanical data
Housing aluminum frame with plastic cover
Optics cover glass
Weight 620g
Connection type M12 connector
Environmental data
Ambient temp. (operation/storage) -30°C … +50°C/-30 °C … +70 °C
Protective circuit
VDE safety class III, protective extra-low voltage
Protection class IP 67
Laser class 2M (according to EN 60825-1 and 21 CFR 1040.10 with Laser
Standards applied IEC/EN 60947-5-2
Certifications UL 508, C22.2 No.14-13
1) Luminosity coefficient 6 % ... 90 %, entire detection range, at 20°C after 30 minutes warmup time, medium range U
2) Minimum and maximum value depend on measurement distance
3) Reflectivity 90%, identical object, identical environment conditions, measurement object ≥ 50 x 50mm²
4) Minimum value, depends on distance and object, requires testing under application conditions
5) For UL applications: for use in class 2 circuits according to NEC only
6) The push-pull switching outputs must not be connected in parallel
7) 1=transient protection, 2=polarity reversal protection, 3=short circuit protection for all outputs, requires external
protective circuit for inductive loads
8) These sensors shall be used with UL Listed Cable assemblies rated 30V, 0.5 A min,
in the field installation, or equivalent (categories: CYJV/CYJV7 or PVVA/PVVA7)
1)
2)
direction
2) 3)
3)
3)
3)
5)
200 … 600mm (z direction)
0.2 … 0.6mm
0.1 … 09mm
≤ ±0.5%
≤ 0.25%
4)
0.6 … 2mm
2)
0.4 … 3mm
18 … 30VDC (incl. residual ripple)
1 (ready) / 100mA / push-pull 6) on X1
6)
on X3 (LES 36 HI/VC6 only)
1 (cascading) / 100mA / push-pull
1 (trigger) on X1
1 (activation) on X1
-2V)/≤ 2V
B
current 4 … 20mA, RL≤ 500Ω
off no voltage
flashing Ethernet data transmission active
off no Ethernet connection available
7)
1, 2, 3
Notice No. 50)
5) 8)
6)
on X1
Tables
LED State Display during
green continu-
ous light
off Sensor not ready
yellow continu-
ous light
flashing Ethernet data
off No Ethernet
Diagrams
180
160
140
120
100
80
60
40
200 300 400 500 600
A Measurement range
B Line le ngth
0,9
X
0,8
Z
0,7
0,6
0,5
0,4
0,3
0,2
0,1
0
200 300 400 500 600
Remarks
Operate in accordance with
intended use!
B
This product is not a safety sensor
and is not intended as personnel
protection.
The product may only be put into
operation by competent persons.
Only use the product in accor-
dance with the intended use.
Warmup time:
After a warmup time of
30 min., the light section sensor has reached the operating
temperature required for an
optimum object measurement.
measurement
operation
Sensor ready
Ethernet connection established
transmission
active
connection
A
B
LES 36 HI… - 02 2014/06
Page 3
LES 36 HI Light section sensor for object measurement
Interface assignments
Pin No. Signal Color Pin No. Signal Color Pin No. Signal Explanation Color
1 +24VDC WH 1 Tx+ YE 1 n.c. Not connected BN
2 InAct (activation) BN 2 Rx+ WH 2 4-20 mA Analog current output WH
3 GND GN 3 Tx- OR 3 AGND Reference potential BU
4 OutReady (ready) YE 4 Rx- BU 4 1-10 V Analog voltage output BK
5 InTrig (trigger) GY 4-pin M12 socket, D coded 5 FE Functional earth GY
6 OutCas (cascading) PK 5-pin M12 socket, A coded
7 do not connect BU X3 - logic (LES 36 HI/VC6 only)
8 do not connect RD Pin No. Signal Color
8-pin M12 plug, A coded 1Out4 WH
1) The three InSel1-3 switching inputs are used to select inspection tasks 0-7. "000" means inspection task 0, "001" inspection task 1, etc. The
changeover time between two inspection tasks is < 100ms
X1 - logic and power X2 - Ethernet X4 - Analog Out
2Out3 BN
3GND GN
4Out2 YE
5Out1 GY
6InSel3
7InSel2
8InSel1
8-pin M12 socket, A coded
1)
1)
1)
PK
BU
RD
Order guide
Part no. Designation Line Range Sensor
50111329 LES 36HI/VC6 with analog voltage/current output and binary inputs/outputs
Leuze electronic GmbH + Co. KG In der Braike 1 D-73277 Owen Tel. +49 (0) 7021 573-0 LES 36 HI… - 02
Page 4

AVOID EXPOSURE – LASER RADIATION
IS EMITTED FROM THIS APERTURE
EXPOSITION DANGEREUSE – UN RAYONNEMENT
LASER EST ÉMIS PAR CETTE OUVERTURE
LASERSTRAHLUNG
NICHT IN DEN STRAHL BLICKEN
ODER DIREKT MIT OPTISCHEN
INSTRUMENTEN BETRACHTEN
LASER KLASSE 2M
DIN EN 60825-1:2008-05
Max. Leistung (peak):
Impulsdauer:
Wellenlänge:
LASER RADIATION
DO NOT STARE INTO BEAM
OR VIEW DIRECTLY WITH
OPTICAL INSTRUMENTS
CLASS 2M LASER PRODUCT
EN 60825-1:2007
Maximum Output (peak):
Pulse duration:
Wavelenght:
RADIAZIONE LASER
NON FISSARE IL FASCIO AD OCCHIO
NUDO NÉ GUARDARE DIRETTAMENTE
CON STRUMENTI OTTICI
APARRECCHIO LASER DI CLASSE 2M
EN 60825-1:2007
Potenza max. (peak):
Durata dell'impulso:
Lunghezza d'onda:
RAYONNEMENT LASER
NE PAS REGARDER DANS LE FAISCEAU
NI À L`ŒIL NU NI Á L`AIDE D`UN
INSTRUMENT D`OPTIQUE
APPAREIL À LASER DE CLASSE 2M
EN 60825-1:2007
Puissance max. (crête):
Durée d`impulsion:
Longueur d`onde:
RADIACIÓN LÁSER
NO MIRAR FIJAMENTE AL HAZ
NI MIRAR DIRECTAMENTE CON
INSTRUMENTOS ÓPTICOS
PRODUCTO LÁSER DE CLASE 2M
EN 60825-1:2007
Potencia máx. (peak):
Duración del impulso:
Longitud de onda:
RADIAÇÃO LASER
NÃO OLHAR FIXAMENTE O FEIXE
NEM OLHAR DIRECTAMENTE
COM INSTRUMENTOS ÓPTICOS
EQUIPAMENTO LASER CLASSE 2M
EN 60825-1:2007
Potência máx. (peak):
Período de pulso:
Comprimento de onda:
LASER RADIATION
DO NOT STARE INTO BEAM
OR VIEW DIRECTLY WITH
OPTICAL INSTRUMENTS
CLASS 2M LASER PRODUCT
EN 60825-1:2007
Complies with 21 CFR 1040.10
Maximum Output (peak):
Pulse duration:
Wavelength:
0伊䉏⏘ℶ❐
GB7247.1-2012
㦏⮶戢⒉᧤⽿⋋᧥
厘⑁㖐兼㢅梃
㽱栎
䉏⏘戟⺓
▎䦃展㒥抩扖⏘ⷵ
ⅹ⣷䦃㘴屑䦚⏘㧮
8,7 mW
3 ms
658 nm
8.7 mW
3 ms
658 nm
8,7 mW
3 ms
658 nm
8,7 mW
3 ms
658 nm
8,7 mW
3 ms
658 nm
8,7 mW
3 ms
658 nm
8.7 mW
3 ms
658 nm
8.7 mW
3 ms
658 nm
50111877-01
A Laser exit opening
B Laser warning sign
C Laser information sign with laser parameters
B
C
A
LES 36 HI
Laser safety notices
ATTENTION, LASER RADIATION – LASER CLASS 2M
Never look directly into the beam or point the beam in the direction of telescope users!
The device fulfills the EN 60825-1:2008-05 (IEC 60825-1:2007) safety regulations for a product in laser class 2M as well as the
U.S. 21 CFR 1040.10 regulations with deviations corresponding to "Laser Notice No. 50" from June 24th, 2007.
Never look directly into the laser beam or in the direction of reflecting laser beams!
If you look into the beam path over a longer time period, there is a risk of injury to the retina.
Do not point the laser beam of the device at persons!
Intercept the laser beam with an opaque, non-reflective object if the laser beam is accidentally directed towards a person.
When mounting and aligning the device, avoid reflections of the laser beam off reflective surfaces!
CAUTION! Use of controls or adjustments or performance of procedures other than specified herein may result in hazardous light
exposure.
The use of optical instruments or devices (e.g., magnifying glasses, binoculars) with the product will increase eye hazard.
Adhere to the applicable legal and local regulations regarding protection from laser beams acc. to EN 60825 (IEC 60825) in its latest
version.
The device must not be tampered with and must not be changed in any way.
There are no user-serviceable parts inside the device.
Repairs must only be performed by Leuze electronic GmbH + Co. KG.
NOTICE
Affix laser information and warning signs!
Laser information and warning signs are affixed to the device(see
(stick-on labels) are supplied in several languages (see
).
Affix the laser information sheet with the language appropriate for the place of use to the device.
When using the device in the US, use the stick-on label with the "Complies with 21 CFR 1040.10" notice.
Affix the laser information and warning signs near the device if no signs are attached to the device (e.g. because the device is too
small) or if the attached laser information and warning signs are concealed due to the installation position.
Affix the laser information and warning signs so that they are legible without exposing the reader to the laser radiation of the device
or other optical radiation.
). In addition, self-adhesive laser information and warning signs
LES 36 HI… - 02 2014/06
Page 5

LES 36 HI Light section sensor for object measurement
Configuration - Establish connection to PC
The LES is configured via a PC using the LESsoft program before it is integrated into the process control.
In order to be able to establish an UDP communication with the PC, the IP address of your PC and the IP address of the LES must lie in
the same address range. The LES has no built-in DHCP client, so that you need to set the address manually. This is done the easiest
way via the PC.
Notice!
If you are using a desktop firewall, please ensure that the control can communicate with the LES via the Ethernet interface
on ports 9008 and 5634 using UDP. Furthermore, the firewall must allow ICMP echo messages to pass through for the
connection test (ping).
If the PC is usually connected to a network using DHCP address allocation, the easiest way to access the LES is by applying an alternative configuration in the TCP/IP settings of the PC and connecting the LES directly to the PC.
Check the network address of the LES by pressing the
pressing twice and followed by pressing the
This will take you to the Ethernet submenu and enable you to read the current settings of the LES consecutively when pressing
repeatedly.
Make a note of the values for IP-Address and Net Mask Addr..
The value in Net Mask Addr. specifies which digits of the IP address of the PC and LES must match so that they can communicate
with each other.
Address of the LES Net mask Address of the PC
192.168.060.003 255.255.255.0 192.168.060.xxx
192.168.060.003 255.255.0.0 192.168.xxx.xxx
Instead of xxx you can now allocate any numbers between 000 and 255 to your PC, but NOT THE SAME numbers as contained in the
address of the LES.
For example 192.168.060.110 (but not 192.168.060.003!). If LES and PC have the same IP address, they cannot communicate with each
other.
button during normal operation of the LES twice in succession, then by
button again.
Leuze electronic GmbH + Co. KG In der Braike 1 D-73277 Owen Tel. +49 (0) 7021 573-0 LES 36 HI… - 02
Page 6

Configuring the IP address for a PC
Log in to your PC as an administrator.
Using Start->System control go to the Network connections
(Windows XP) menu or to the Network center and release center
(Windows Vista) menu.
There select the
by right clicking with the mouse.
Select the Internet protocol (TCP/IP) (by scrolling down, if necessary) and
click on Properties.
In the Internet protocol (TCP/IP) Properties window select the
Alternate configuration tab.
Configure the IP address of the PC in the address range of the LES.
Attention: do not use the same as for the LES!
Set the Subnet mask of the PC to the same value as the one for the LES.
Close the configuration dialog by confirming all windows using OK.
Connect the interface X2 of the LES directly to the LAN port of your PC. Use a
KB ET-…-SA-RJ45 cable for the connection.
The PC will first try to establish a network connection via the automatic configuration. This will take a few seconds. Following that the alternative configuration, which
you have just set up, is activated, and thus the PC can communicate with the LES.
Information about configuring the LES using LESsoft software can be found in the
Technical Description.
LAN connection
and bring up the associated Features page
Commissioning
Notice!
The LES 36HI/VC6, like all other models, is configured via Ethernet with the LESsoft software.
LES 36 HI
1.Configuring the LES - see chapter 8 of the Technical Description.
2.Programming process control - see chapter 9 of the Technical Description.
or
3.Connecting the switching inputs and outputs accordingly - see chapter 6 of the Technical Description.
4.Adapt the IP configuration of the LES via the display in such a way that it can communicate with LESsoft.
Here you can change network address and associated net mask as well as the ports via which the LES communicates with
process control. The values set via the display are not accepted immediately; they are not effective until the sensor is switched
on again.
5.You can check the connection by entering the IP address data into LESsoft in the IP Configuration area and clicking on the
Check Connectivity button.
6.Configure LES with LESsoft.
7.Connect LES to the process control.
8.Establish connections for activation, triggering and cascading, if necessary.
LES 36 HI… - 02 2014/06
Page 7

LES 36 HI Light section sensor for object measurement
Installing the configuration software
System requirements
The PC used should meet the following requirements:
-Pentium
pron). The processor must support the SSE2 instruction set.
- At least 512 MB free main memory (RAM), 1024 MB recommended
-CD-ROM drive
- Hard disk with at least 1 GB available memory.
-Ethernet port
- Microsoft® Windows XP SP2/3 / Vista SP1 (32 bit) / Windows 7 (32 bit, 64 bit).
Installation procedure
The LXSsoft_Suite_Setup.exe installation program is located on the supplied CD.
Administrator privileges are required for the next steps.
To start the installation process, double-click on file
LXSsoft_Suite_Setup.exe.
In the first window, click on Next.
In the next window, you can select whether you would like to
install LESsoft only, or LPSsoft and LRSsoft in addition.
You will need LPSsoft and LRSsoft in addition for configuring
light section sensors of the LPS or LRS series with your PC.
Select the desired options and click on Next and, in the next
window, click on Install.
®
or fas ter Int el® processor > 1.5 GHz (Pentium 4, Celeron , Xe on) or c omp ati ble mod els by A MD® (Athlon 64, Opteron, Sem-
Notice!
If present, uninstall Matlab Runtime before beginning with the installation of the LXSsoft Suite.
Notice!
Copy this file from the CD to an appropriate folder on
your hard drive.
The installation routine starts. After a few seconds, the window for
selecting the installation language for the Matlab Compiler Runtime (MCR) appears. The MCR is used for 3D visualization. It is
only available in English or Japanese.
Therefore keep in the Choose Setup Language window the
selection English and click on OK.
Leuze electronic GmbH + Co. KG In der Braike 1 D-73277 Owen Tel. +49 (0) 7021 573-0 LES 36 HI… - 02
Page 8

Depending on the configuration of your Windows system the
adjacent dialog can also appear (missing component
VCREDIST_X86).
Click on Install
Two additional installation windows will appear, which do not
require any further entry.
After some time (up to several minutes depending on the system
configuration) the start screen of the MCR installer will appear.
Click on Next.
LES 36 HI
The window for entering user data appears.
Enter your name and the company name and then click on
Next.
It is essential that you retain the default folder in the window for
the selection of the installation path (Destination Folder).
The standard path is
C:\Programs\MATLAB\MATLAB Compiler Runtime\.
Click on Next and in the next window click on Install.
LES 36 HI… - 02 2014/06
Page 9

LES 36 HI Light section sensor for object measurement
The installation will start and the adjacent status window will be
displayed. This can again take several minutes.
Following successful MCR installation, the InstallShield
Wizard Completed window appears.
Click on Finish to end the MCR-installation.
The window for selecting the installation path for LESsoft now
appears.
Keep the default folder and click on Next.
The installation of LESsoft starts. If you also selected LPSsoft
and LRSsoft for installation, upon completion of the LESsoft
installation, the same window then reappears for entering the
installation path for LPSsoft and LRSsoft.
Keep the default folder in this case as well and click on Next.
Upon completion of the installation process, the adjacent window
appears.
The installation routine added a new Leuze electronic program group in your start menu that contains the installed programs LESsoft and, if selected, LPSsoft and LRSsoft.
Click on Finish and then start the desired program from the
Start menu.
Leuze electronic GmbH + Co. KG In der Braike 1 D-73277 Owen Tel. +49 (0) 7021 573-0 LES 36 HI… - 02
Page 10

Possible error message
Depending on the system configuration the adjacent
error message can appear at this point.
The cause of this error message is a bug in the MCR
installation routine, which does not set the environment
variable Path correctly in some systems.
That, however, can easily be corrected without reinstallation of the MCR.
Open the System properties window located in the
System control of Windows under System.
Go to the
variables.
The Environment variables window opens.
Scroll down in the System variables area until you
find the
Click on
The Edit system variable window opens.
There in the Variable value field you will find the ;C:\Pro-
grams\MATLAB\MATLAB Compiler Runtime\v79\runtime\win32 entry right at the end.
If this entry is missing, copy the entry from this docu-
ment and insert it together with the preceding semicolon.
Then click on
using
Shut Windows down, restart Windows and then start
LESsoft by double-clicking on it.
Now the start screen of LESsoft appears, as described in
chapter 8 of the LES technical description.
Advanced tab and click on Environment
Path entry.
Path and then on Edit
OK and close also all further windows
OK.
LES 36 HI
LES 36 HI… - 02 2014/06
 Loading...