

Page 1
LTO-QUEST & LTO-QUEST HD
USER GUIDE
14400 NW Greenbrier Pkwy | Beaverton, OR 97006 USA | 1-800-538-7653 | leupold.com
Page 2

2
TABLE OF CONTENTS
INTRODUCTION .......................3
QUICK START GUIDE ..................4
TIPS AND TRICKS ..................4
CHARGING THE BATTERY ..........5
TURNING ON YOUR LTO-QUEST ....7
SETTING UP YOUR LTO-QUEST .....8
THERMAL IMAGING ...............10
FILTERS SCREEN ..................11
IMAGE CAPTURE SCREEN ..........12
MENU SCREEN ................... 13
GALLERY ........................ 14
DEVICE SETTINGS ................ 16
TEMPERATURE UNITS ............. 19
POWER SETTINGS ................20
DISPLAY SETTINGS ................21
FLASHLIGHT SETTINGS ...........22
ABOUT SCREEN ..................23
POWER OFF THERMAL ...........24
BATTERY LEVEL ..................25
FILTERS ..........................26
FLASHLIGHT OPERATION .............27
FLASHLIGHT SETTINGS ...........28
RESTORE FACTORY SETTINGS ........29
DOWNLOADING IMAGES .............30
CARE GUIDE .........................32
TROUBLESHOOTING .................34
APPENDIX ...........................36
Page 3

3
INTRODUCTION
WARNING
It is your responsibility to use your Leupold LTO-Quest device in a safe manner. Leupold & Stevens, Inc. will not be responsible for any property damage, injuries, or deaths
resulting from any use of this device in any activities.
This product contains a rechargeable polymer lithium-ion battery. To prevent the possibility of personal injury or product damage caused by battery exposure to extreme heat,
store the device out of direct sunlight and away from other extreme heat sources. Dispose of battery and device in a proper manner.
Mac® is a trademark of Apple, Inc., registered in the USA and other countries.
microSD™ and the microSDXC™ logos are trademarks or registered trademarks of SD-3C, LLC in the United States, other countries, or both.
Windows® is a registered trademark of Microsoft Corporation in the USA and other countries. Other trademarks and trade names are those of their respective owners.
Page 4
4
QUICK START GUIDE
Tips and Tricks
1. Fully recharge your device before use with the included (US only) power adapter for
optimal performance. For optimal battery performance, charge your LTO-Quest device after
prolonged periods of inactive use.
2. While recharging on the charging adapter, shut o thermal imaging to charge more quickly.
3. Menus can be navigated using the Prev / Up or Next / Down buttons. Within some Menu
selections, like for example setting a date or time, the Menu buttons will become - and + to
adjust a number value.
4. Accessing images via USB is recommended and faster than removal and replacement of the
microSD card. The microSD card has a tight fit for purposes of sealing the rubber door to
keep moisture out.
5. Be sure to fully close the bottom rubber door over the USB port to keep the product waterand dust-resistant.
6. Individual images can be easily renamed for quick identification once they have been
transferred to your PC. All temperature readings stay axed to the image on storage.
7. Organize your images on your PC by separating them into groups and creating descriptive
folders to hold them.
8. Be gentle when inserting the USB cable connectors to prevent damage.
9. Always perform an on-screen eject or dismount on your computer before disconnecting
the USB cable to physically ejecting the SD memory card from your computer to prevent
corruption of the SD memory card.
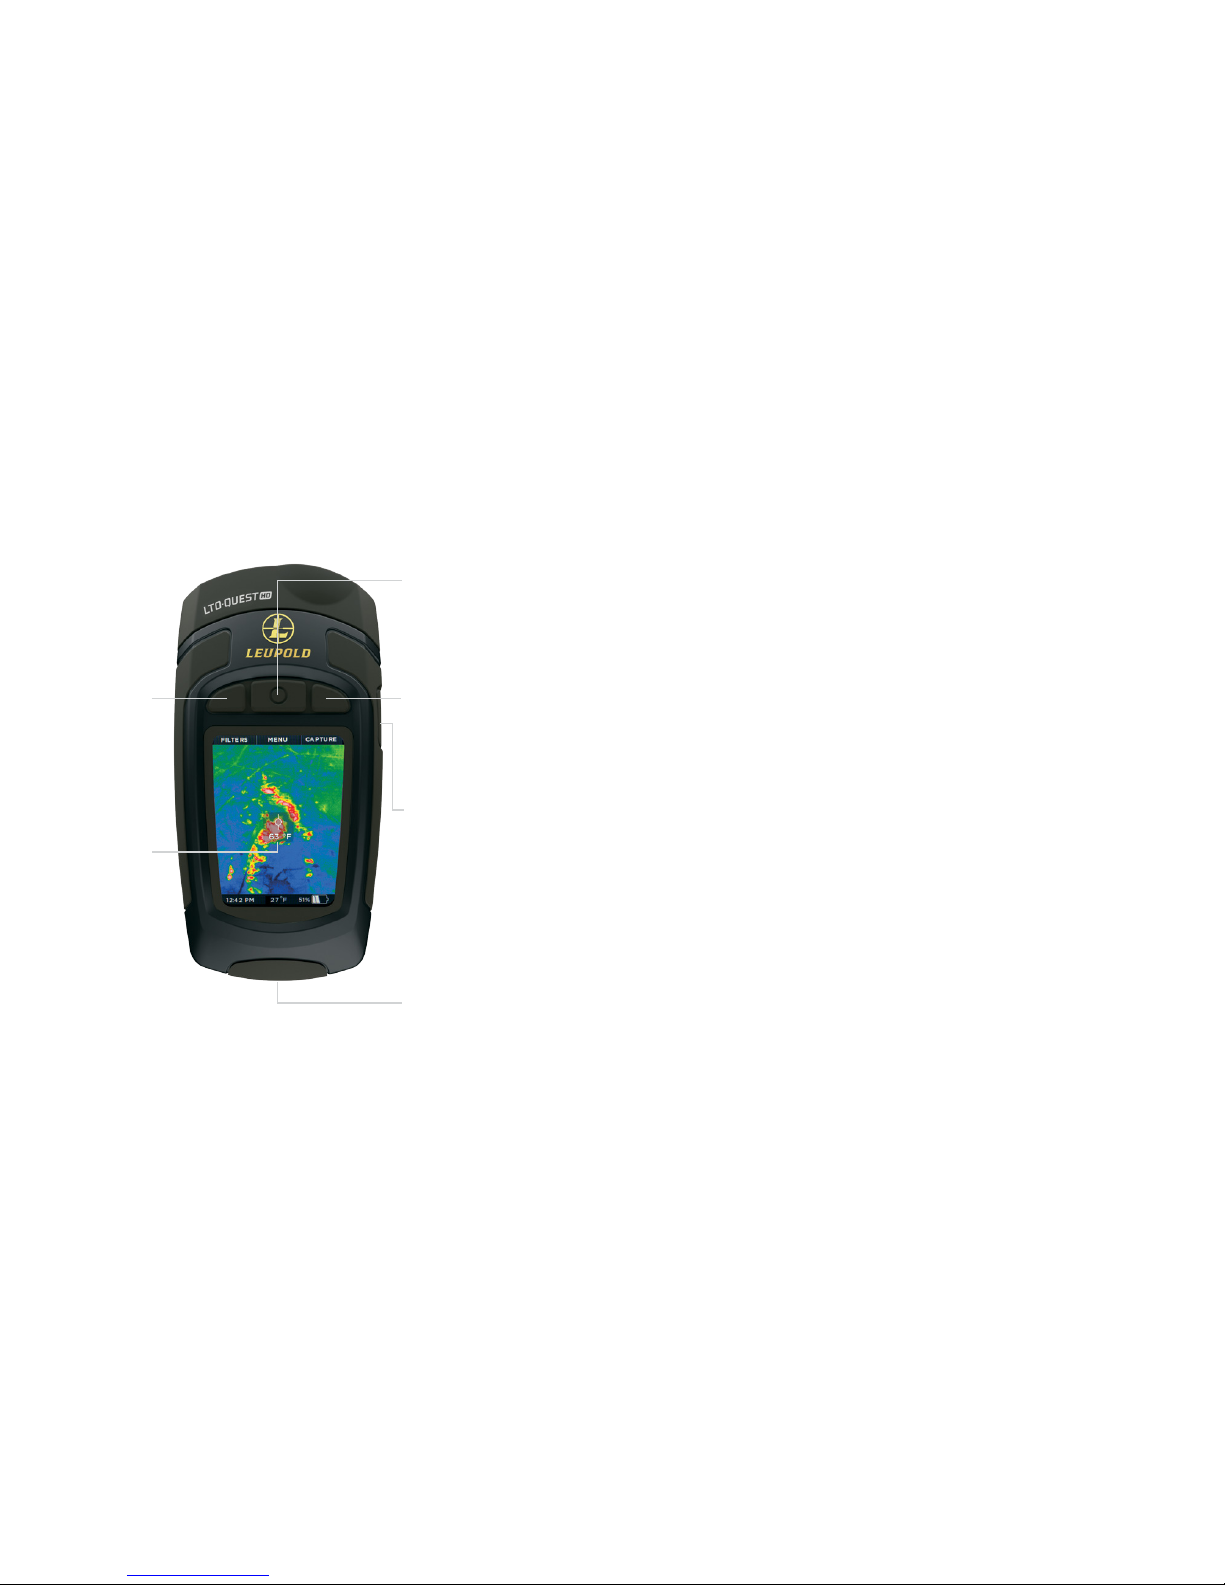
Power On/O
Select
MENU
Quickly access
common settings
from the main menu
Next / Down / +
CAPTURE IMAGE
Press the right
button to capture
images. Hold to
capture multiple
images.
Previous / Up / -
ZOOM
While imaging,
press and hold the
left button to
continuously zoom
up to 4X. You can
also set the zoom
factor manually
in Settings.
RETICLE
Enable the reticle
for precise spot
temperature
readings.
Flashlight On/O
USB Port
Micro SD Card Slot
Page 5
5
QUICK START GUIDE
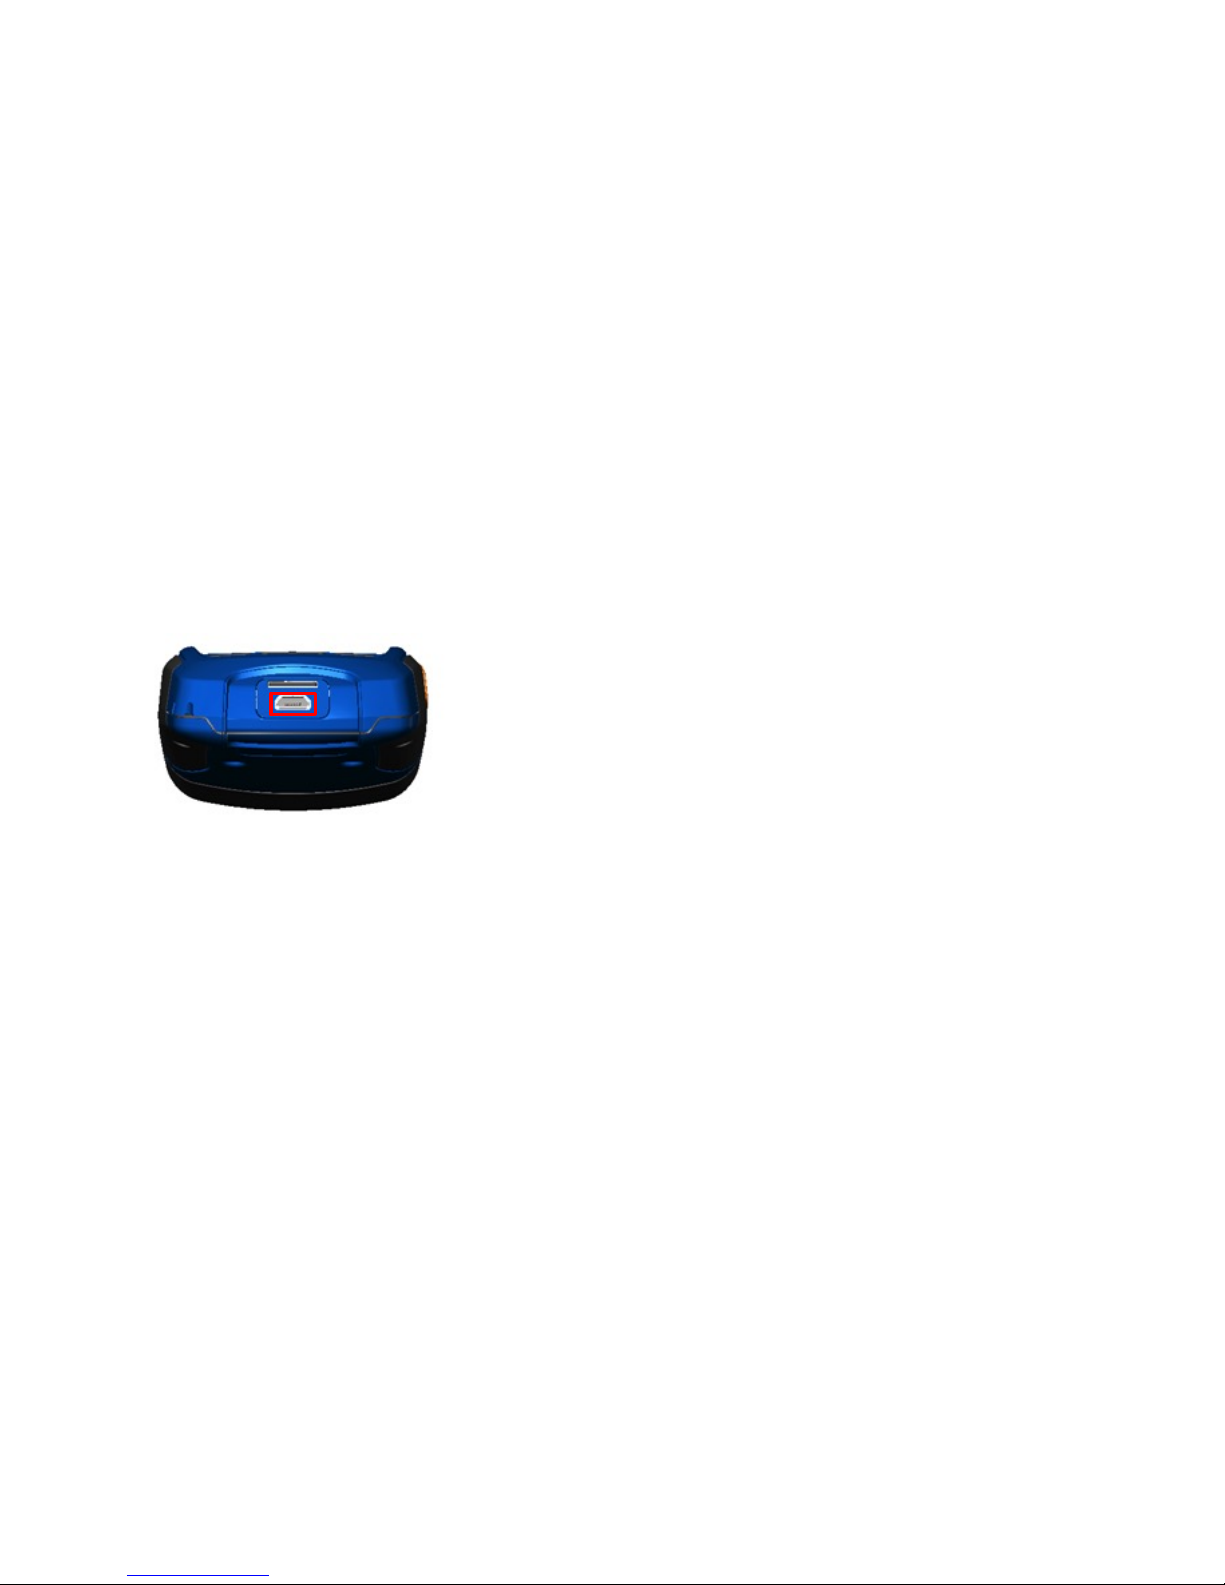
Charging the Battery
LTO-Quest showing the rear door open and the
USB port (for charging) highlighted.
For best results, Leupold recommends charging your LTO-Quest using
the included micro USB cable by connecting it to your computer or a USB
enabled wall outlet. When the thermal camera is o, the Battery Charging
screen will appear.
Page 6
6
QUICK START GUIDE
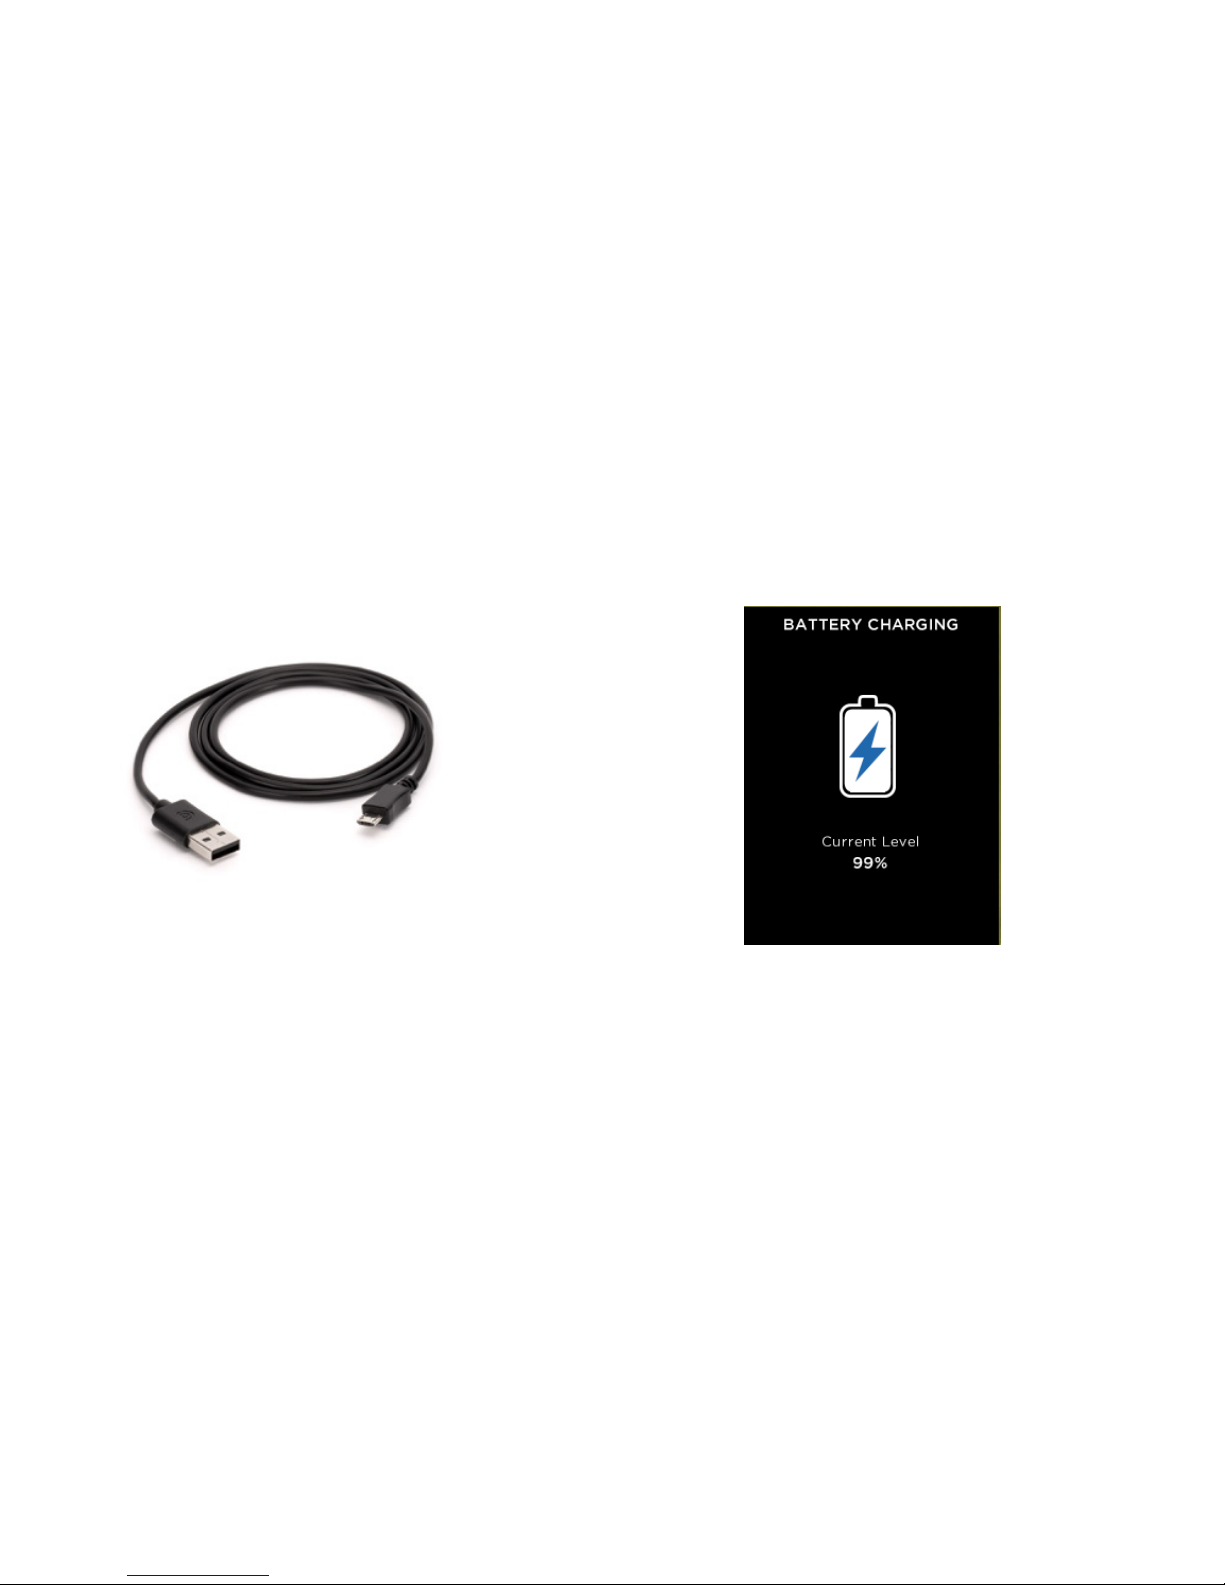
Charging the Battery
Supplied 5-pin cable between charger and LTO-Quest USB Port. Note: Not
all OTG cables are built with the same specifications through all suppliers.
The cable provided in the box is built to our specifications.
The Battery Charging screen
Page 7
7
QUICK START GUIDE
Turning on your LTO-Quest
The Splash screen
A long press of the CENTER button will cause the device to activate and
start up the software. The splash screen will then display. Note that the version is also
displayed. The startup sequence is shown on page 9.
Page 8
8
QUICK START GUIDE
Setting up your LTO-Quest First-Time Use
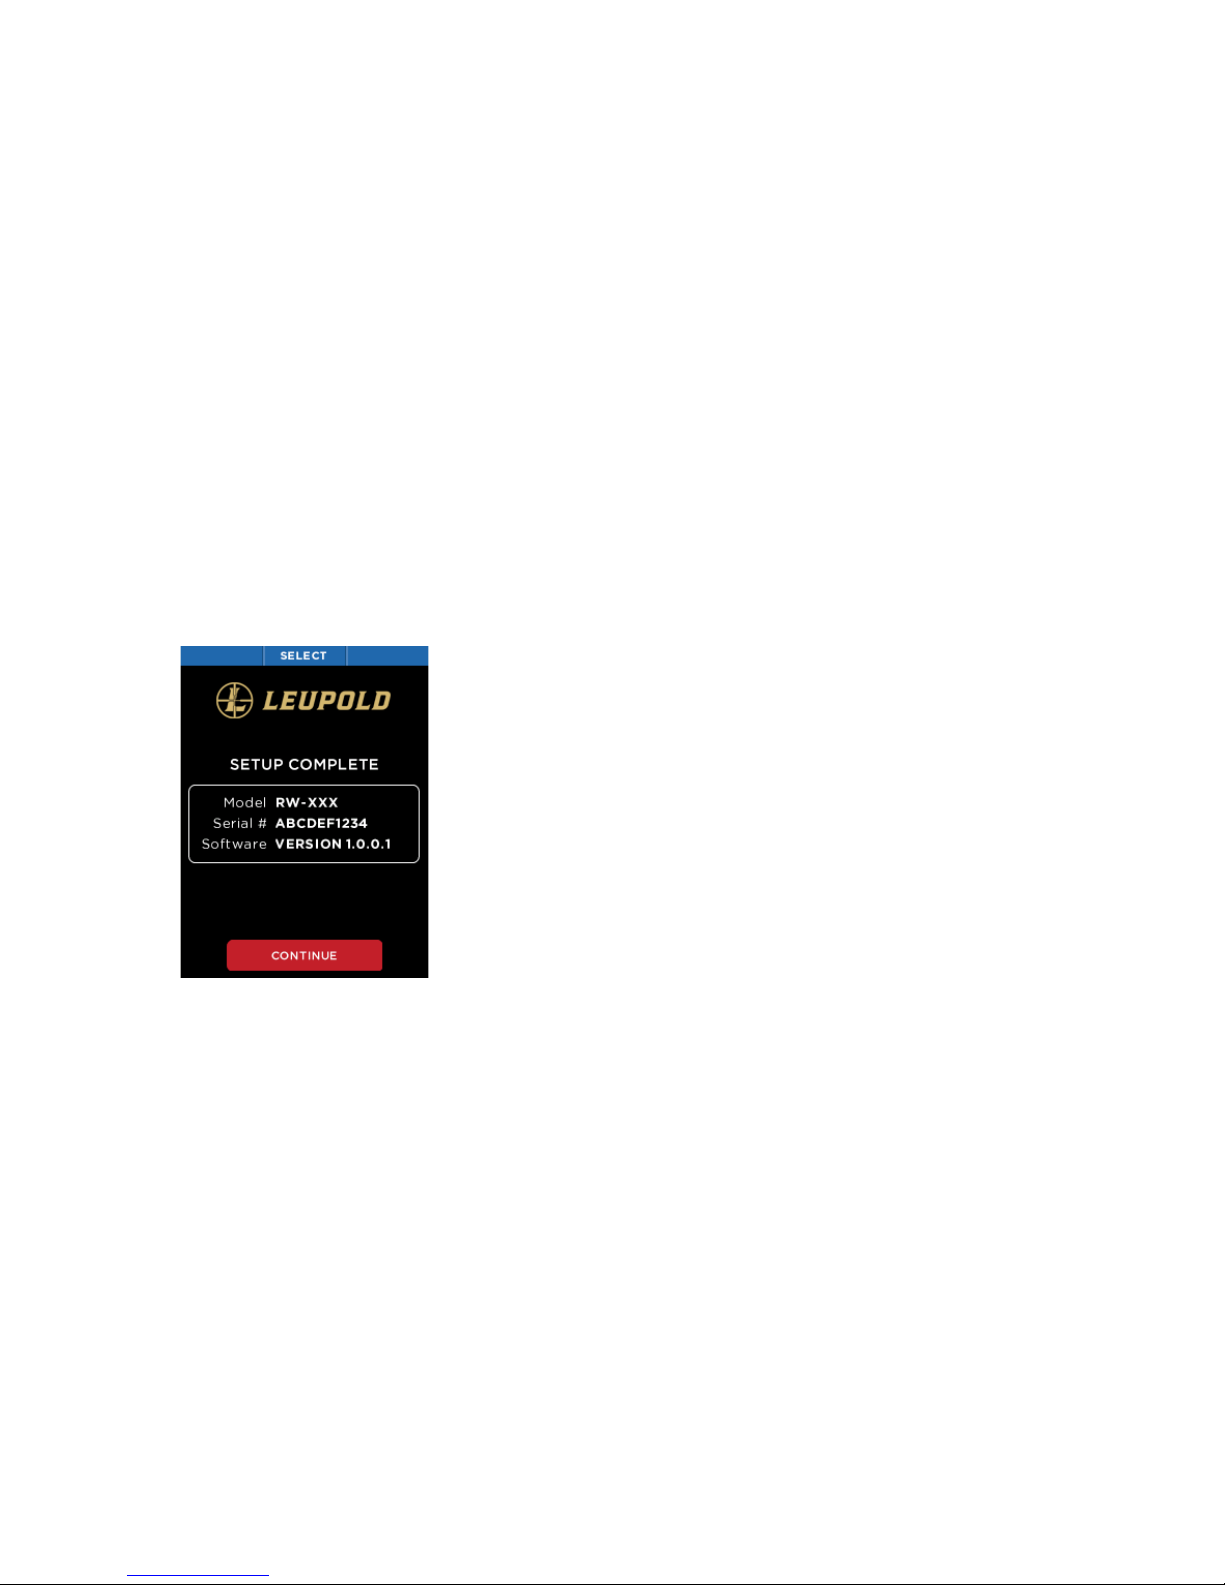
Setup complete screen
When all of the setup screens have been completed,
the Setup Complete screen is displayed.
To turn on your device, press the CENTER button and hold until the screen lights.
The button-function ribbon at the top of the screen defines the meaning of the three
buttons. For each of the setup screens, use the LEFT and RIGHT buttons to navigate,
and the CENTER button as the selector. For numerical fields, the LEFT button subtracts
from the displayed value, while the RIGHT button adds to it, as the button-function
ribbon indicates.
Page 9
9
QUICK START GUIDE
Setting up your LTO-Quest
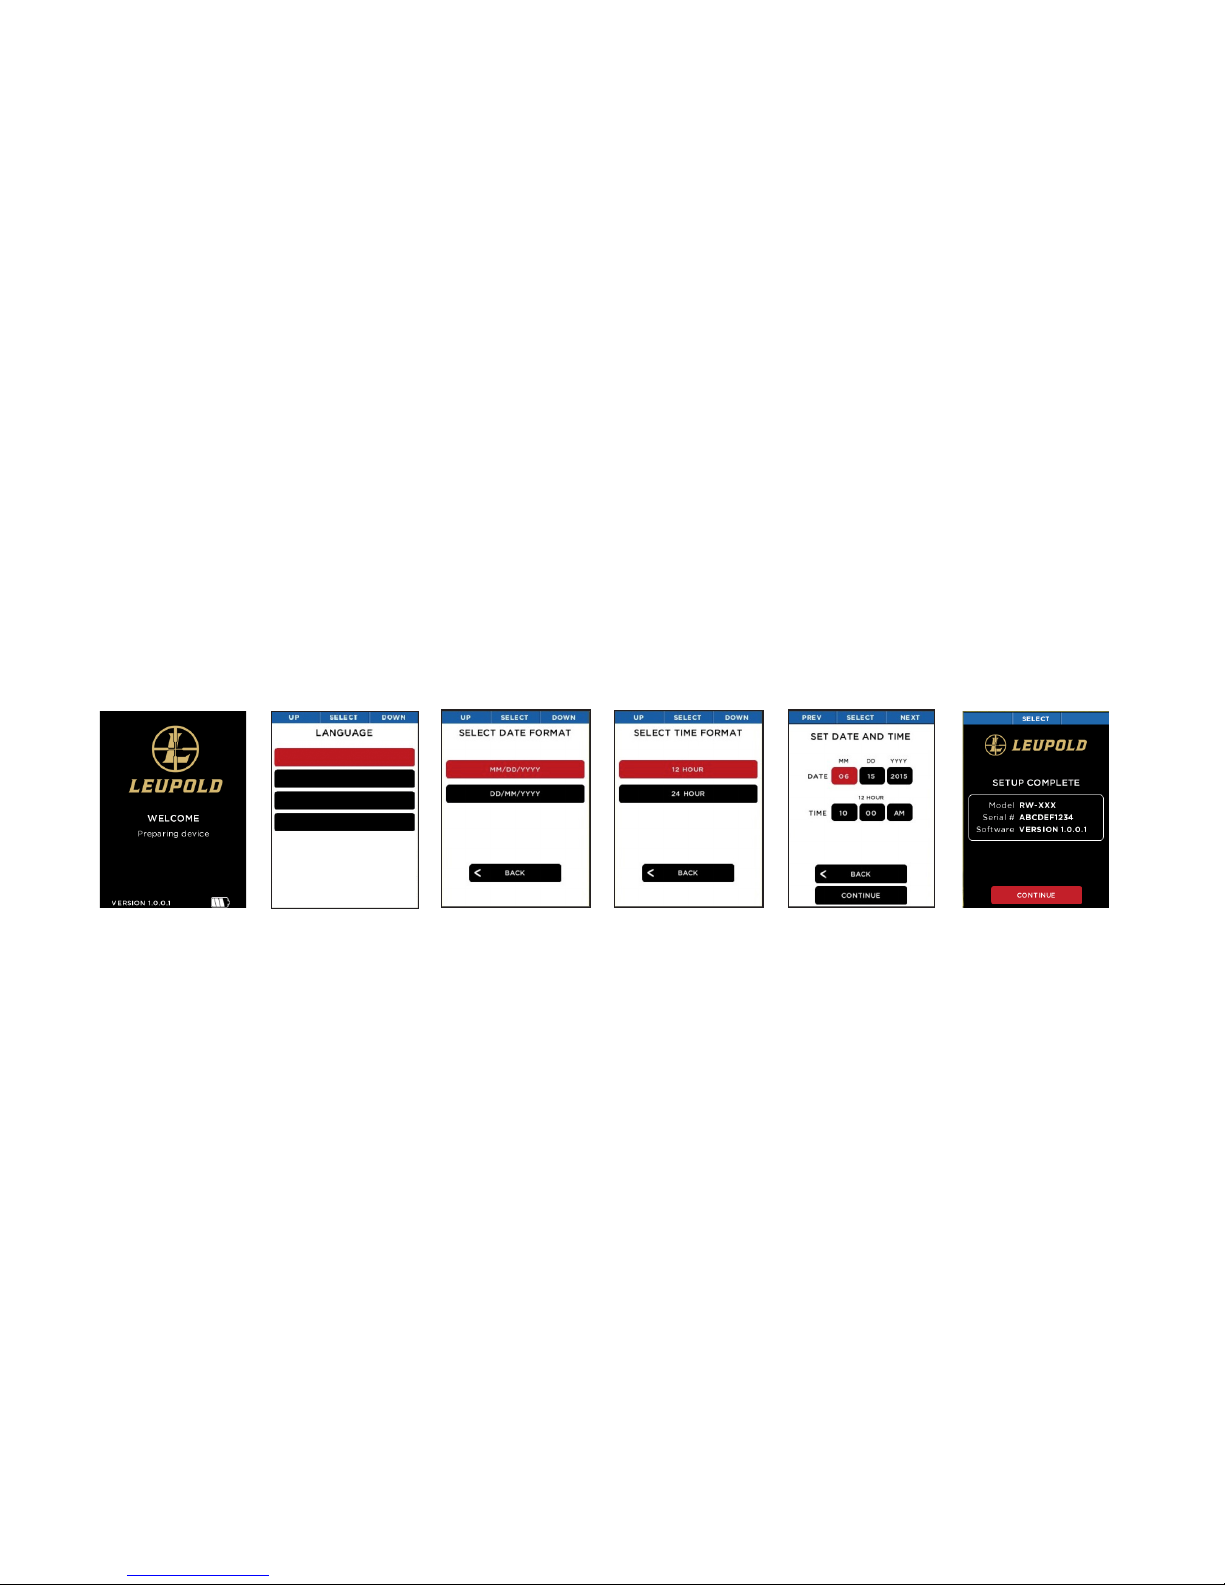
The startup sequence
Splash screen Select time
format
Setup complete screen
Enter date
and time
Select your
language
Select date
format
Press the CENTER button to power on the device
ENGLISH
ESPAÑOL
FRANÇAIS
DEUTSCH
Page 10
10
QUICK START GUIDE
Thermal Imaging
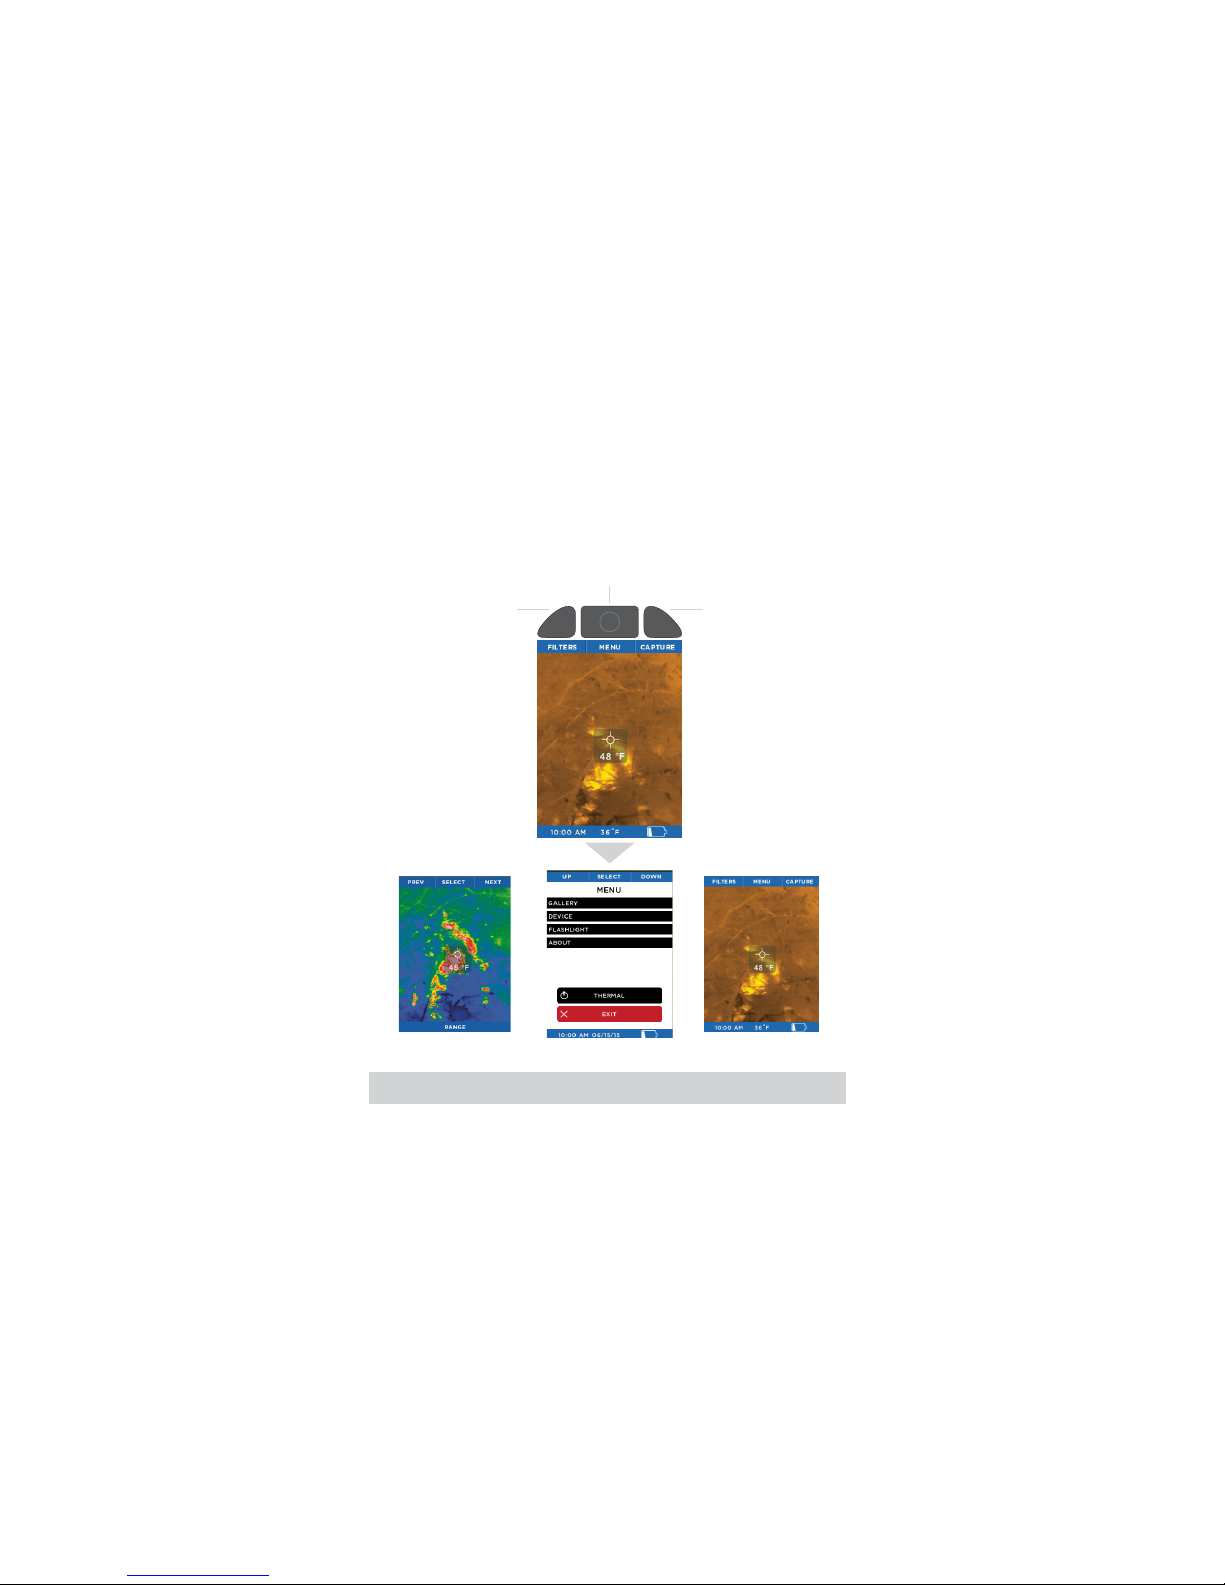
Imaging screen options
FILTERS MENU CAPTURE
LEFT button RIGHT button
CENTER button
RETURN TO DEVICE
Page 11
11
QUICK START GUIDE
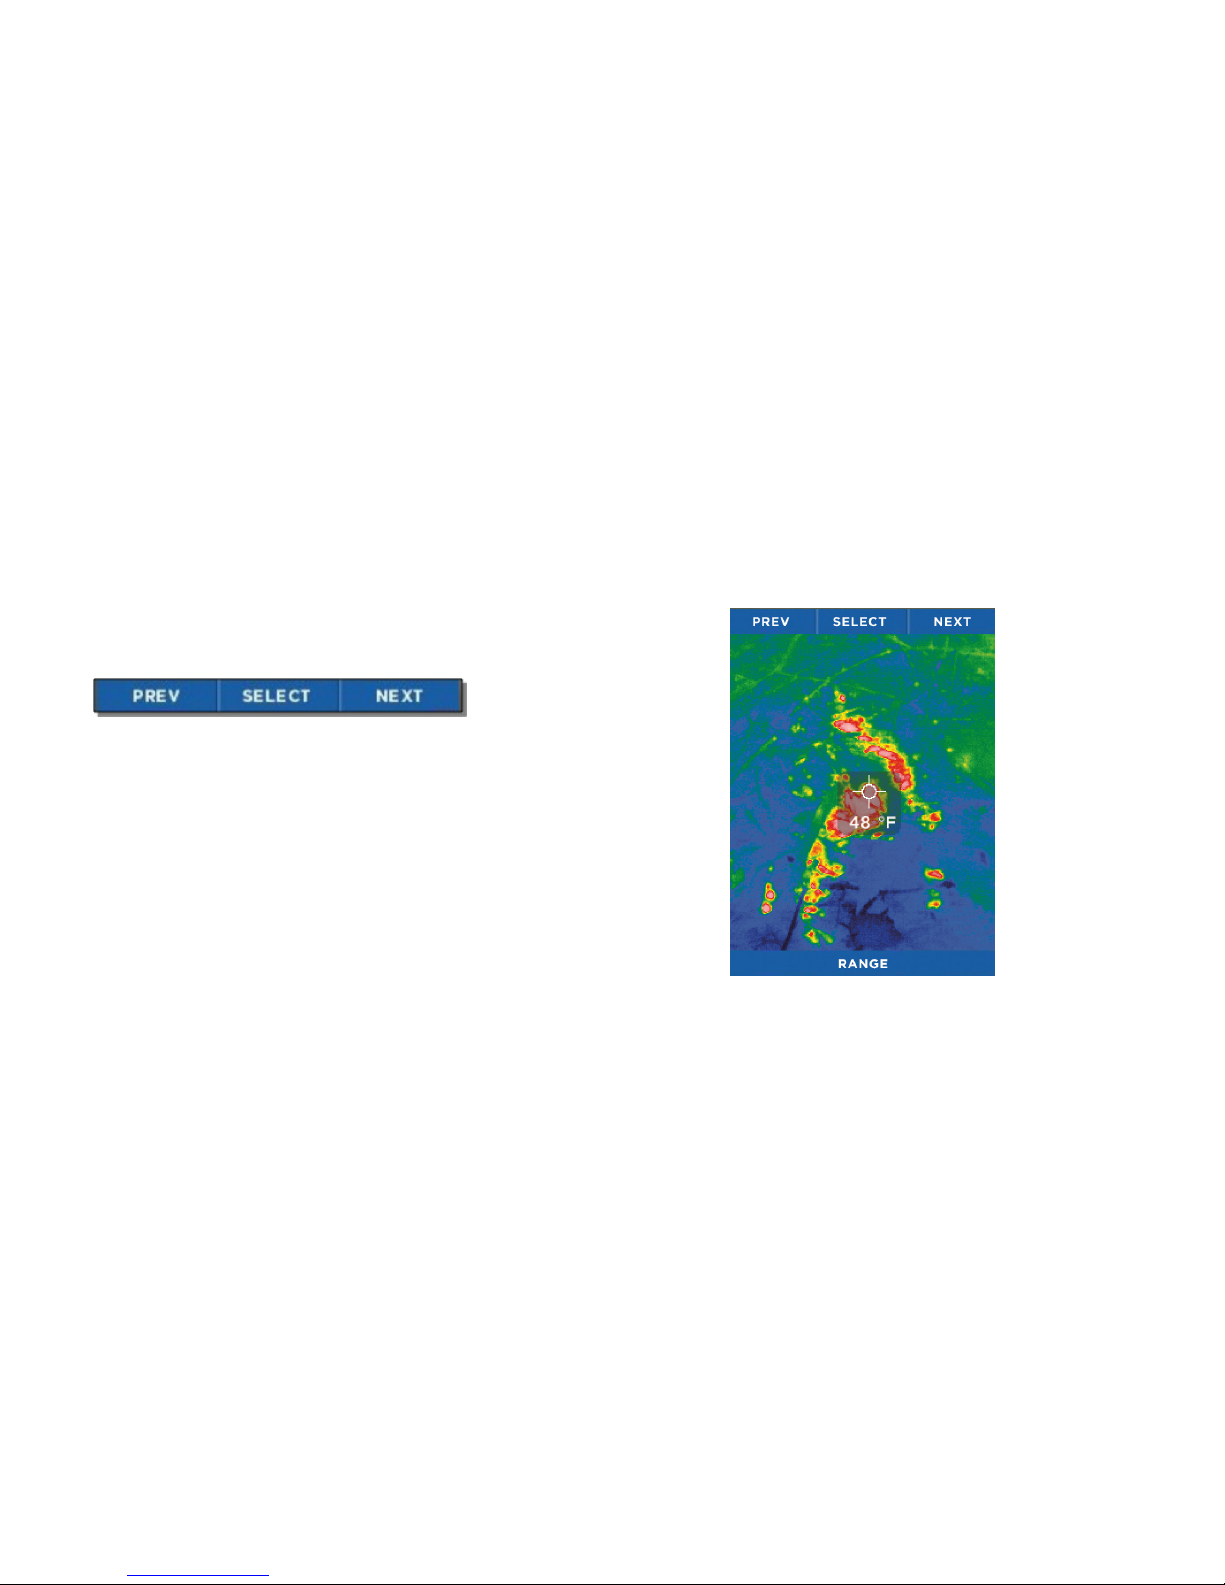
Filters Screen
Button-function ribbon on the Filters screen
The Filters screen
By pressing the LEFT button for “previous” or the RIGHT button for “next”,
the image is cycled through the available filters (technically known as look-up
tables, or LUTs). The name of the filter currently applied is displayed at the
bottom of the image. When you have reached your desired filter, press the
CENTER button to select and remember the filter. The device then returns to
the thermal imaging screen.
On the FILTERS Screen, the button-function ribbon changes to:
Page 12
12
QUICK START GUIDE
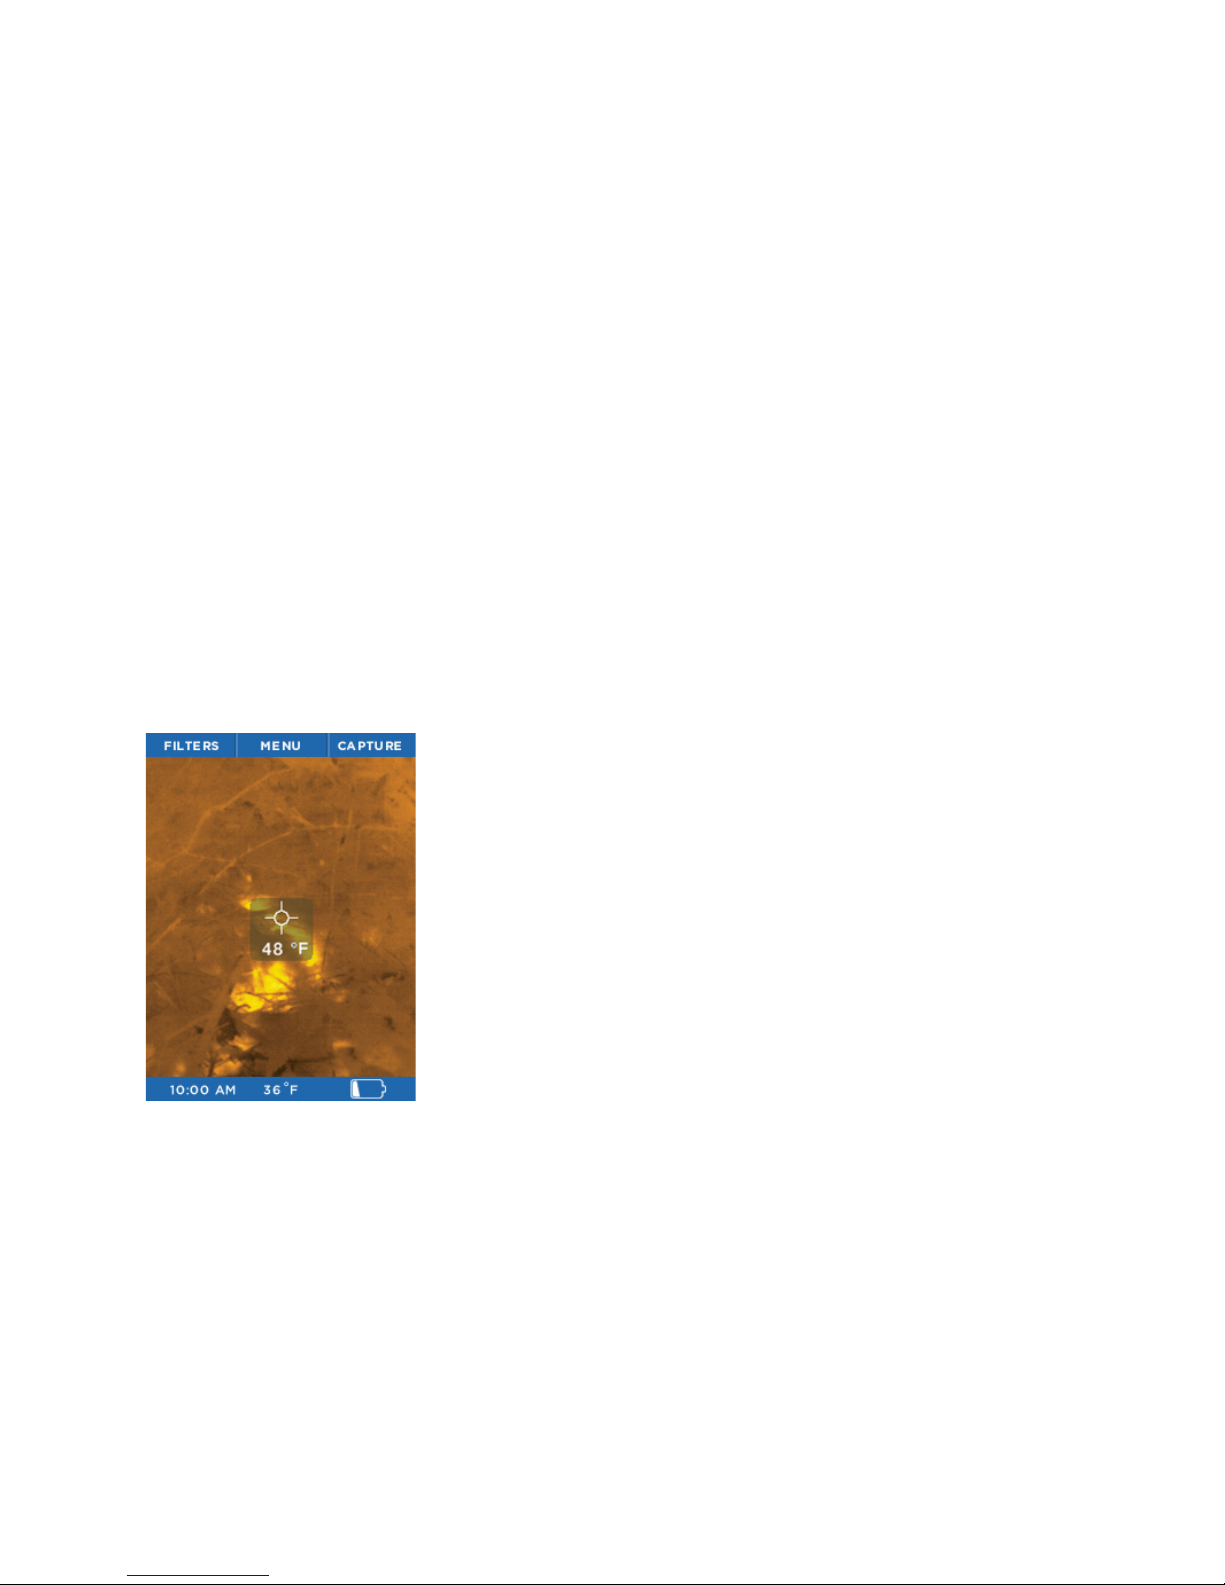
Image Capture Screen
The Image Capture screen
FPO
While the thermal imaging screen is displayed, pressing the RIGHT button will
capture and save an image to the microSD card. You can also enter the GALLERY
from this screen. The date and time of the captured image are displayed at the
bottom (center) of the screen, while the temperature (and units) for the area
within the reticle (or target) are displayed just below the reticle.
Every time the CAPTURE button is pressed, the image being captured is
displayed along with a blue progress bar (left to right) at the bottom of the
screen as it is being saved. Holding the CAPTURE button down will capture
images in rapid succession as fast as they can be saved to the microSD
card’s memory.
Page 13
13
QUICK START GUIDE
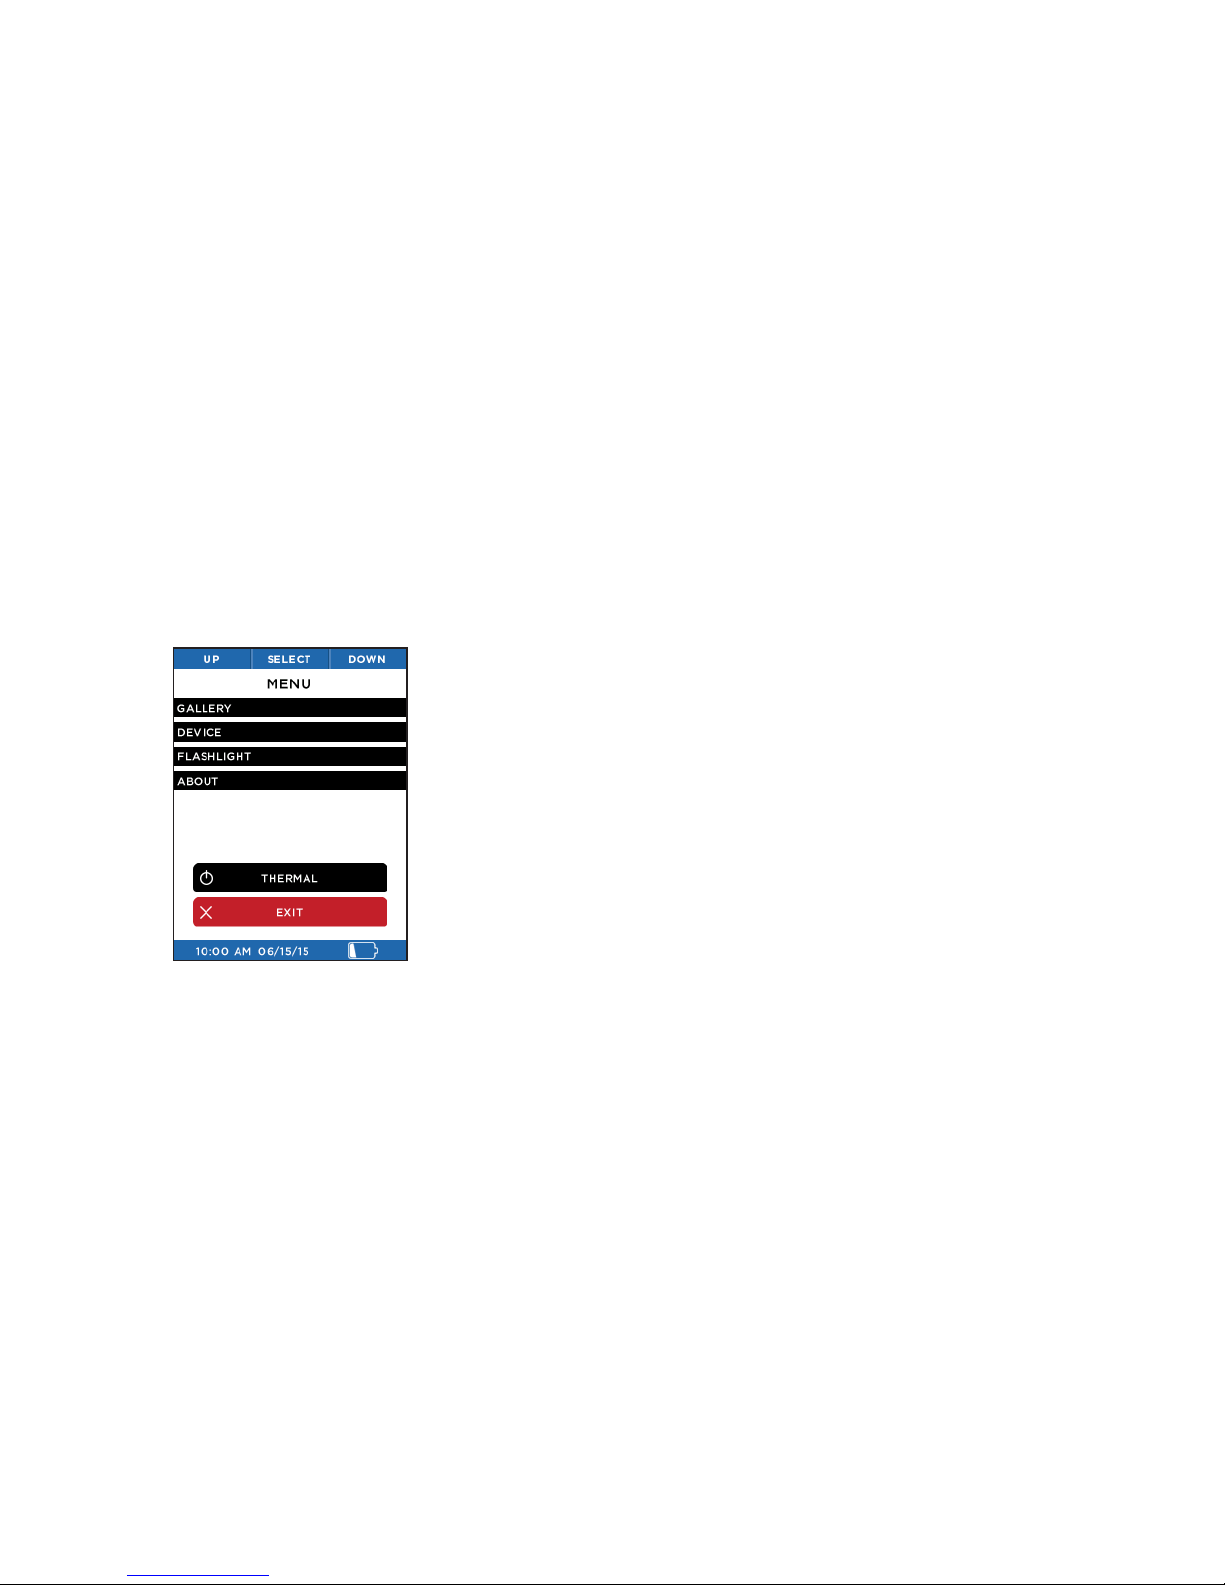
Menu Screen
The Menu screen
See the following sections for descriptions of the categories of settings
found on the Menu screen.
Page 14

14
QUICK START GUIDE
Gallery
The button-function ribbon on the Gallery screen
When you enter the Gallery, the most recently captured image is displayed. Pressing the
LEFT button repeatedly will cycle through all the images in reverse chronological order,
while pressing the RIGHT button returns you to the oldest chronological image. The date
and time of the captured images are displayed at the bottom (center) of the screen,
while the temperature (and units) for the area within the reticle (or target) is displayed.
Note that the current image number and the total number of images are also displayed
at the bottom right. If the Gallery is empty, the empty screen is displayed (see Page 15).
Pressing the CENTER button causes the OPTIONS Screen to be displayed. At this
point, you can choose to CANCEL any operations concerning this image and return to
the GALLERY, return BACK TO THERMAL imaging, or DELETE the currently displayed
image. The choice is made by using the LEFT button for the previous menu item, or the
RIGHT button for the next menu item, and then the CENTER button to make a selection.
Page 15

15
QUICK START GUIDE
Gallery
The Gallery Options screen. The Empty Gallery screen
Page 16

16
QUICK START GUIDE
Device Settings
The Device Settings screen The General Settings screen
The Device Settings screen allows you to access general camera settings,
date and time, language, power, as well as performing a factory restore.
The General Settings screen allows you to specify the units for displayed
temperature, either Celsius or Fahrenheit, and enable or disable the Overlays.
Page 17

17
QUICK START GUIDE
Device Settings
Select Date Format screen Select Time Format screen
Choosing one of the two date formats causes LTO-Quest to immediately
set all date displays and captures to the desired format.
Choosing one of the two time formats causes LTO-Quest to immediately set all
time displays and captures to the desired format.
Page 18

18
QUICK START GUIDE
Device Settings
Set Date and Time screen Language screen
Setting values for the date and time will cause LTO-Quest to update all
displays and captures of date and time.
Choosing a language causes LTO-Quest to immediately set all dialogs to the
desired language.
ENGLISH
ESPAÑOL
FRANÇAIS
DEUTSCH
Page 19

19
QUICK START GUIDE
Temperature Units
The Units screen
The user can choose to display (and capture) temperatures in one of two
available units, Fahrenheit or Celsius.
Page 20

20
QUICK START GUIDE
Power Settings
The Power screen Auto turn-o setting
The Power Settings screen allows you to choose settings for the autopower management and the LCD display screen brightness.
Enabling the Auto Turn-O setting will automatically turn o the thermal imager
after the time specified, as long as there’s no further interaction.
Page 21

21
QUICK START GUIDE
Display Settings
Display brightness setting
This setting allows you to control the amount of light generated by the LCD
display. Managing this setting allows you to conserve battery power or limit
the amount of light from the screen, depending on the situation.
Page 22

22
QUICK START GUIDE
Flashlight Settings
Low-intensity setting
You can also adjust the flashlight’s low-intensity setting, applied with the
second button “click”.
Page 23

23
QUICK START GUIDE
About
The About screen
This option displays your LTO-Quest’s model number, serial number, and software version.
Page 24

24
QUICK START GUIDE
Power O Thermal
The Power O Thermal option is an alternative to the long-hold of the CENTER button.
Power o thermal
CENTER button
Page 25

25
QUICK START GUIDE
Battery Level
Power O Less than 10%
remaining
35% to 65%
remaining
65% to 85%
remaining
More than 85%
remaining
Battery Charge
Select this option
to turn o the
thermal imager.
The device is
connected to
battery charger
or USB port.
Icon function and descriptions
10% to 35%
remaining
Page 26

26
QUICK START GUIDE
Filters
There are seven filters (also known as LUTs) you can apply to colorize the image. After selecting FILTERS via the LEFT button, press the LEFT or RIGHT button
until the desired image filter is displayed, then select it via the CENTER button. Filters are subjective to the user and preferred based on objects emitting heat.
Feel free to play around and adjust to your preference. Your LTO-Quest will remember your selected filter.
Page 27

27
FLASHLIGHT OPERATION
Flashlight On, Low Intensity screen Flashlight O screenFlashlight On, High Intensity screen
The right SIDE button on your LTO-Quest is dedicated to always be for the Flashlight. Pressing the SIDE button once powers the LED flashlight to its highintensity setting. A second press of the SIDE button powers the flashlight to its low-intensity setting, and the third press causes the flashlight to turn o. When
LTO-Quest is o, pressing the SIDE button will display the flashlight’s setting on the screen. When LTO-Quest is powered on, the flashlight’s setting will not be
displayed on the screen.
Page 28

28
Flashlight Settings
The Flashlight screen High-intensity setting
The Flashlight screen allows you to adjust the intensity level of the two
“click” levels of the LED flashlight.
You can adjust the flashlight’s high-intensity setting, applied with the first
button “click”.
FLASHLIGHT OPERATION
Page 29

29
RESTORE FACTORY SETTINGS
Successful Restore screenRestore screen
The Restore option allows the user to restore all of the settings to the default
settings and options that reflect the state of the device when it left the factory.
After power-cycling, the user will then be required to perform the setup process
again. This set up should take less than 90 seconds or so.
Page 30

30
DOWNLOADING IMAGES
microSD card
LTO-Quest showing the rear door open
and the microSD card slot highlighted.
microSD card and adapter
(adapter not included).
Insert your microSD card into the memory slot on LTO-Quest You can then use the Leupold LTO-Quest as you normally would, capturing images, transferring them
to your computer, etc. Your microSD card can also be erased and reused, whether on your PC via an adapter, in your LTO-Quest, or via a USB connection. The
Leupold LTO-Quest is designed to hold a maximum 32GB card should you choose to use one.
The microSD card is designed to fit easily into the LTO-Quest one way only. With the LTO-Quest facing up, the microSD card should be easily installed with the
notch on the right and the contacts facing downward. Do not bend the card or force it into the slot.
microSD Card
Page 31

31
DOWNLOADING IMAGES
LTO-Quest showing the rear door open and
the USB port (for connectivity) highlighted.
USB Connection screen
Connect the USB cable to your computer and the microSD card should become visible as a storage device or removable drive. Once visible, open the DCIM folder
to access the photos. You can copy or drag photos to your computer (Mac or PC or Tablet/Mobile) for storage. The photos are a standard .PNG format and can be
edited, annotated, and inserted into documents easily. At this stage, RAW File layers are not saved.
USB Port
Page 32

32
CARE GUIDE
WARNING
Failure to follow these safety instructions could result in fire, electric shock, injury, or damage to the device or other property. Read all the safety information below before using the device.
Handling: Handle your LTO-Quest with care. It is made of metal, glass, and plastic and has sensitive electronic components inside. The device can be damaged if
excessively dropped, burned, exposed to extreme temperatures, punctured, crushed, or otherwise exposed to conditions beyond the operating limitations outlined
in this document. Do not use the device if damaged (such as if the screen or lens is cracked), as it may cause injury. Cables should also be handled with care.
Always pull on the connector, not the cable, during disconnection. Frayed cables or cables with portions of their insulation missing should be replaced immediately
and not used.
Repairing: Do not open the device and do not attempt to repair it yourself. Disassembling the device may damage it or may cause injury to you. Disassembling your
device voids all warranty terms. If the device is damaged, malfunctions, or exhibits other detrimental characteristics, contact Leupold’s support team. You can find
more information about service and support at Leupold.com.
Leupold Electronics Limited Five-Year Warranty: For components not included under the Leupold Full Lifetime Guarantee, this warranty covers any defects
in materials and workmanship in the electronic components of illuminated riflescopes/sights, RX Rangefinders, GX Rangefinders, Pin Caddie Rangefinder, and
Vendetta Archery Rangefinder. This warranty lasts for five years from the date of purchase. If, during that five-year period, these products are found to have defects
in materials or workmanship, Leupold will repair, or if repair is not possible, replace the product, free of charge.
Page 33

33
CARE GUIDE
Storage
Cleaning
microSD Card and USB Port
To maximize battery longevity and life, if the device is going to be in storage for long periods of time (i.e., more than six months), it is best to recharge the battery to
75% capacity after six months.
Keep the device free from mud, grime, grease, oil, etc. To clean the screen on your LTO-Quest, use a soft, lint-free cloth. We suggest you use a microfiber cloth. Never
use a paper towel or other paper-based towels as they can leave scratches on the screen. For fingerprint smudges, dust, and lint, wipe the screen gently using a dry
microfiber cloth. Never use window cleaners, harsh chemicals, or cleaning solvents on your LTO-Quest and never spray anything directly onto the screen. Lightly
dampen a section of a microfiber cloth with water and gently wipe the screen, then go over it again with a dry section of the cloth to wipe away any moisture. Avoid
getting moisture in any of the openings. Cables should be kept free from dirt and grease, as well. Connectors should be clean and dry at both ends of the cable, too.
There are adapter cards that allow a microSD card to be used in an SD card slot or a USB port. This is a convenient way to use a microSD card with a card reader on
a PC, to transfer files between a PC and LTO-Quest. Both the microSD Card and adapters should be kept clean and free of contaminants. When handling the card or
adapter, avoid touching the exposed metal contacts. Follow the microSD card manufacturer’s recommendations.
Do not dispose of your microSD card with unsorted household waste. Improper disposal may be harmful to the environment and human health. Please refer to your
local waste authority for information on return and collection systems in your area.
Page 34

34
TROUBLESHOOTING
1. The device will not power on.
a. Try plugging the device in with the supplied wall charger or another 1-amp-rated
charger to ensure there is enough battery remaining.
b. Try performing a hard system reset by holding down the CENTER button for thirty
seconds, release and wait.
2. The device will not save or recall images.
a. Check if there a microSD card installed. Remember that it must be less than or equal
to 32GB in capacity.
b. Check if the microSD card is full. If card is full, delete images or insert a new
microsSD card.
c. Try accessing the microSD card on your PC or Mac through an adapter.
3. The thermal image appears blurry.
a. Check that the lens is clear and clean.
b. Check that the screen is clean.
4. The thermal image appears noisy.
a. Has your flashlight been on for a long time?
b. Have you suddenly cooled or heated the device quickly?
5. I cannot find the device on my computer when I plug it into my USB port.
a. Check your file system (Explorer in Windows, Finder in Mac OS) and check your
external memory devices as shown here:
LTO-Quest connected to a Windows PC
Page 35

35
TROUBLESHOOTING
6. The flashlight is dimmer than usual.
a. Is your battery charged? The flashlight is an extremely high-powered light
consuming a considerable amount of power. When the battery voltage drops
to near empty, the flashlight will begin to dim to preserve battery life and
allow the thermal imager to work.
7. The microSD Card will not stay inserted.
a. Be sure that the microSD Card or the slot is not damaged.
b. Be sure there are no foreign objects (i.e. lint, sand, etc.) in the slot preventing
the microSD Card from being seated correctly.
8. If the battery is completely discharged and thermal imaging won’t start.
a. Charge battery and power on thermal camera. If screen displays all black,
power-cycle your LTO-Quest.
If none of these suggestions work, please contact Leupold Product Service: 1 (800) 538-7653.
LTO-Quest connected to a Mac OS
Page 36

36
APPENDIX
Device Specifications
Environmental
Thermal Camera
Operating Temperature
Storage Temperature
Battery Charge Temperature
Ingress Protection
Shock
Humidity
Thermal Sensor
Technology
Resolution
Frame Rate
Spectral Response
Temperature Measurement Type
Sensitivity @ F/1
Detection Range
Accuracy @ 25˚C
14˚ to 149˚ F (-10˚ to 65˚ C)
-40˚ to 131˚ F (-40˚ to 55˚ C)
32˚ to 113˚ F (0˚ to 45˚ C)
Water and dust resistant
Drop test per 1 meter onto pavement
Operating and storing 10% to 95%, non-condensing
Uncooled Vanadium Oxide Micro-bolometer
32,136 Total Pixels in a 206x156 Pixel Array
>15 Hz
7.5 - 14 Microns
Passive
< 0.1˚C (< 0.18˚F)
-40˚ to 330˚C (-40˚ to 626˚F)
Greater of 5˚C or 5% (9˚F or 5%)
Page 37

37
APPENDIX
Device Specifications
Thermal Camera (continued)
Flashlight
Optics
Technology
Focal Length
F/#
Focus Range
Detection Distance
Type
Lumens
Default Hi
Default Low
Spot Field of View
Flood Field of View
Chalcogenide Glass w/Anti-reflective Coating
4 mm
F/1.2
6 inches to infinity
LTO-Quest HD: Up to 750 yards / LTO-Quest: Up to 300 yards
LED
300 lm
120 lm
7˚
70˚
Page 38

38
APPENDIX
Device Specifications
Display
Battery
Type
Resolution
Viewing Angle
Contrast Ratio
Technology
Capacity
Voltage
Charge Current
On included power adapter
In live USB port
Battery Life
Thermal Camera Only
Light (100%)
In storage (from 100% charge)
2.4” TFT Color LCD
LTO-Quest HD: 320x240 QVGA / LTO-Quest: 206x156 QVGA
> 70 Degrees
500:1
Polymer Lithium Ion
1900mAh
3.7V nominal
< 1A
< 0.5A
10 hours
2 hours
60 Days
Page 39

39
APPENDIX
Device Specifications
Others
Storage
SD Card
File System
Photos/Images
Time & Date Stamp
# Images (512MB) @224KB each
# Images (32GB) @224KB each
USB Connection
USB Port
Mass Storage Class
Accessories
Belt Clip/Tripod Mount
Warranty
Device
Removable microSD, up to 32GB
FAT32
Portable Network Graphics (PNG) format
Yes
> 2200
> 142000
Micro-B
Windows, MAC OS 9 & X, Linux
Refer to leupold.com for latest accessory list
Universal belt clip and 1/4”-20 mount for tripods
Leupold 5-Year Electronics Warranty
Page 40

40
APPENDIX
Conformities
Standard Description
EN 61326-1:2012
EN 61326-2-2:2013
CISPR 11: 2009
Amendment 1:2010
IEC 61000-3-2: 2005
+Amendment 1:2008
+Amendment 2:2009
IEC 61000-3-3:2008
IEC 61000-4-2:2008
IEC 61000-4-3:2006
Amendment 1:2007
Amendment 2:2010
Electrical equipment for measurement, control and laboratory use. EMC requirements. General requirements
Electrical equipment for measurement, control and laboratory use. EMC requirements. Part 2-2 Particular requirements –
Test Configurations, operational conditions and performance criteria for portable test measuring and monitoring equipment
used in low-voltage distribution systems.
Industrial, scientific and medical (ISM) radio-frequency Equipment. Electromagnetic disturbance characteristics. Limits and
methods of measurement
Electromagnetic compatibility (EMC) – Part 3-2: Limits – Limits for harmonic current emissions (equipment input current =
16 A per phase)
Electromagnetic compatibility (EMC) – Part 3-3: Limits – Limitation of voltage changes, voltage fluctuations and flicker
in public low-voltage supply systems, for equipment with rated current = 16 A per phase and not subject to conditional
connection
Electromagnetic compatibility (EMC) – Part 4-2: Testing and measurement techniques – Electrostatic discharge
immunity test
Electromagnetic compatibility (EMC) – Part 4-3: Testing and measurement techniques
– Radiated, radio-frequency, electromagnetic field immunity test
Page 41

41
APPENDIX
Conformities
Standard Description
IEC 61000-4-4:2004
Amendment 1:2010
IEC 61000-4-5:2005
IEC 61000-4-6:2008
IEC 61000-4-8:2009
IEC 61000-4-11:2004
Electromagnetic compatibility (EMC) – Part 4-4: Testing and measurement
Techniques – Electrical fast transient/burst immunity test
Electromagnetic compatibility (EMC) – Part 4-5: Testing and measurement techniques – Surge immunity test
Electromagnetic compatibility (EMC) – Part 4-6: Testing and measurement techniques – Immunity to conducted
disturbances, induced by radio-frequency fields
Electromagnetic compatibility (EMC) – Part 4-8: Testing and measurement techniques – Power frequency magnetic field
immunity test
Electromagnetic compatibility (EMC) – Part 4-11: Testing and measurement techniques – Voltage dips, short interruptions
and voltage variations immunity tests
 Loading...