

Page 1
KOMPERNASS GMBH · BURGSTRASSE 21 · D-44867 BOCHUM
www.kompernass.com
ID-Nr.: KH4001-04/08-V1
6
KH 4001
FREE-ARM SEWING MACHINE
FREE-ARM SEWING MACHINE
Operating instructions
Page 2
KH 4001
1 2345 678
9
0
q
w
r
e
t
p
a
s
d
f
g
j
h
k
l
y
x
n
bvc
m
MN B
VCXY
L
KJ H G F
z
o
u
i
Page 3
- 1 -
Read the operating instructions carefully before using the appliance for the first time and preserve this
booklet for later reference. Pass the manual on to whomsoever might acquire the scale at a later date.
CONTENT PAGE
Safety information 2
Correct Usage 2
Items supplied 2
Appliance description 2
Setup 3
Connecting the sewing machine 3
Operation of the sewing machine 3
Operating elements 4
Recommended stitch lenghts for the various types of stitches 5
Threading the needle and preparation 6
Sewing with the twin needle 7
Tensioning the thread 7
Straight stitch 9
Sewing in zigzag stitches 9
Sewing blind hems 10
Sewing with the shell stitch 10
Sewing with elastic stitches 10
Two-fold rampart stitch 11
Scallop stitch 11
Additional decorative stitches 11
Fishbone stitch 11
Finishing edges 11
Sewing material edges with feather stitch 12
Sewing with three-fold zigzag stretch stitches 12
Sewing buttonholes 12
Fine adjustment during sewing buttonholes 13
Sewing on buttons 13
Sewing in zippers 13
Gathering 14
Darning 14
Appliques 14
Monograms and embroidery 14
Changing the lamp bulb 15
Lubricating the machine 15
Cleaning 15
Storage 16
Technical data 16
Disposal 16
Warranty & Service 16
Importer 16
Troubleshooting 17
Page 4

- 2 -
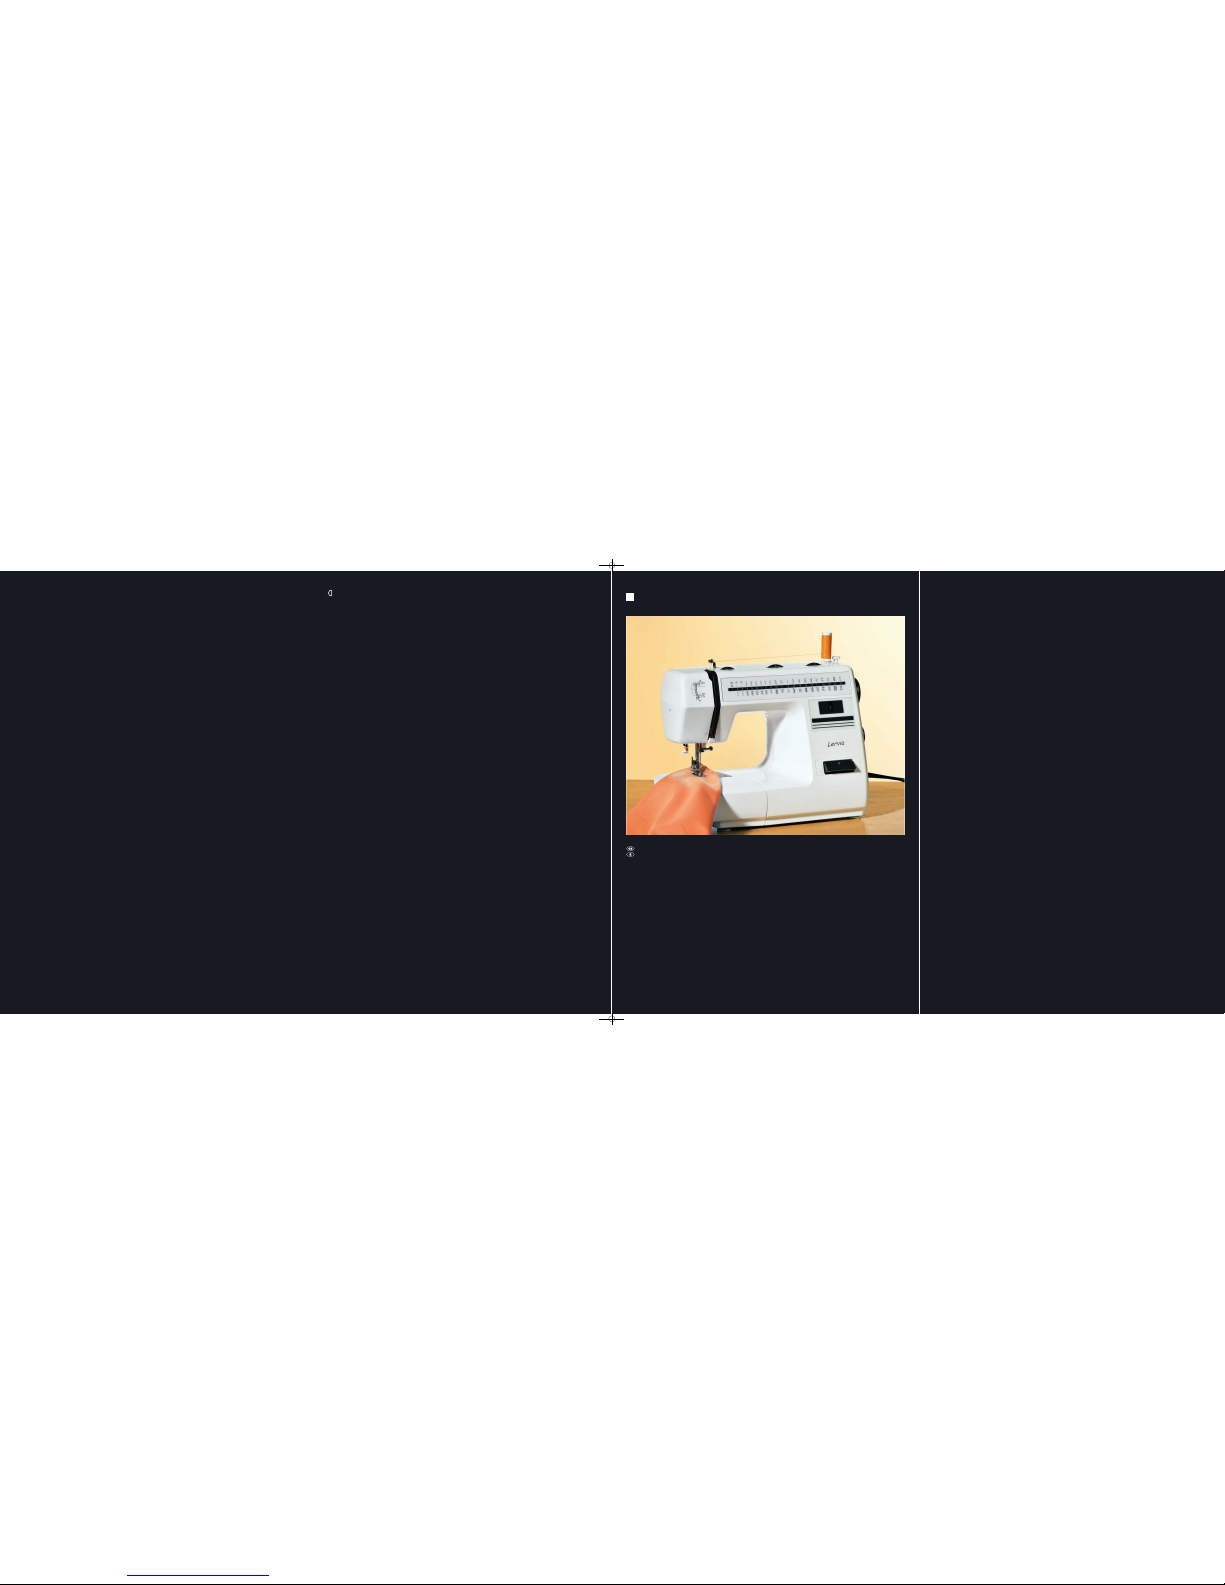
FREE-ARM SEWING MACHINE
KH 4001
Safety information
Like any other electrical device, a sewing machine can cause serious, even
life-threatening injuries. To avoid this, and in order to work safely:
• Before initial use of your sewing machine, read these operating
instructions attentively.
• Keep these operating instructions at a suitable location close to the
appliance. If you dispose of this appliance to another person,
pass on these instructions also.
• Always disconnect the power supply when leaving the machine
unattended.
This will avoid potential accidents if the machine is switched on
accidentally.
• First disconnect the power plug before changing the bulb or
performing any maintenance work on the machine.
This will avoid potentially fatal electric shocks.
• Do not remove the plug from the wall socket by the cable.
When disconnecting the plug, always hold the plug, not the lead.
• Only use the sewing machine in dry rooms.
• Arrange for defective power plugs and/or cables to be replaced at
once by qualified technicians or our Customer Service Department.
• This appliance is not intended for use by individuals (including children) with restricted physical, physiological or intellectual abilities or
deficiences in experience and/or knowledge unless they are supervised by a person responsible for their safety or receive from this person
instruction in how the appliance is to be used.
• Children should be supervised to ensure that they do not play with
the appliance.
• Never use the machine when the ventilation apertures are blocked.
Keep the ventilation apertures of the machine and the foot switch
free from fluff, dust and waste material.
Warning in regard to injuries and material damages:
As the user of an electrical appliance, you are statutorily required to observe safety-conscious behaviour and to prevent the occurrence of accidents:
• Keep your work space tidy. An untidy workplace can lead to accidents.
• Provide adequate lighting when working!
• Do not wear loose clothing or jewellery, as these can be caught in
moving parts. You should also wear a hair net if you have long hair.
• Avoid adopting an unnatural posture. Maintain secure and wellbalanced positions and postures at all times.
• Should accidents occur as a result of negligent handling of the machine,
or failure to observe the safety instructions in this manual, then the manufacturer cannot accept liability for any resulting damage.
Correct Usage
The sewing machine is intended ...
– for use as a transportable machine,
– for the sewing of typical household textiles and ...
– only for domestic household use.
The sewing machine is not intended ...
– for installation at a fixed location,
– for the processing of other materials
(e.g. leather or heavy materials such as tent or sail fabrics)
– for commercial or industrial use.
Items supplied
Sewing machine
Foot pedal with connection and power plug
Sewing table extension with accessory compartment
Sewing foot
Sewing foot for sewing button holes
Sewing foot for sewing on buttons
Sewing foot for sewing in zippers
Blind hem foot
6 Sewing needles (Multi-purpose single needles Size Nr. 14; Flat shank,
on delivery one sewing needle is already inserted)
1 twin needle
4 Bobbins (On delivery one bobbin is already inserted into the appliance)
Plate for repair work (darning)
2 screwdrivers (large and small)
additional thread roll holder
2 thread spool carriers (large and small)
Protective cover for the sewing machine
Thread cutter with brush
Threading aid
Lubrication oil for sewing machine
2 felt pads
Stitch plate opener
Check to ensure that all items have been supplied. Some accessories and
parts could be located in the accessory compartment in the sewing table
extension.
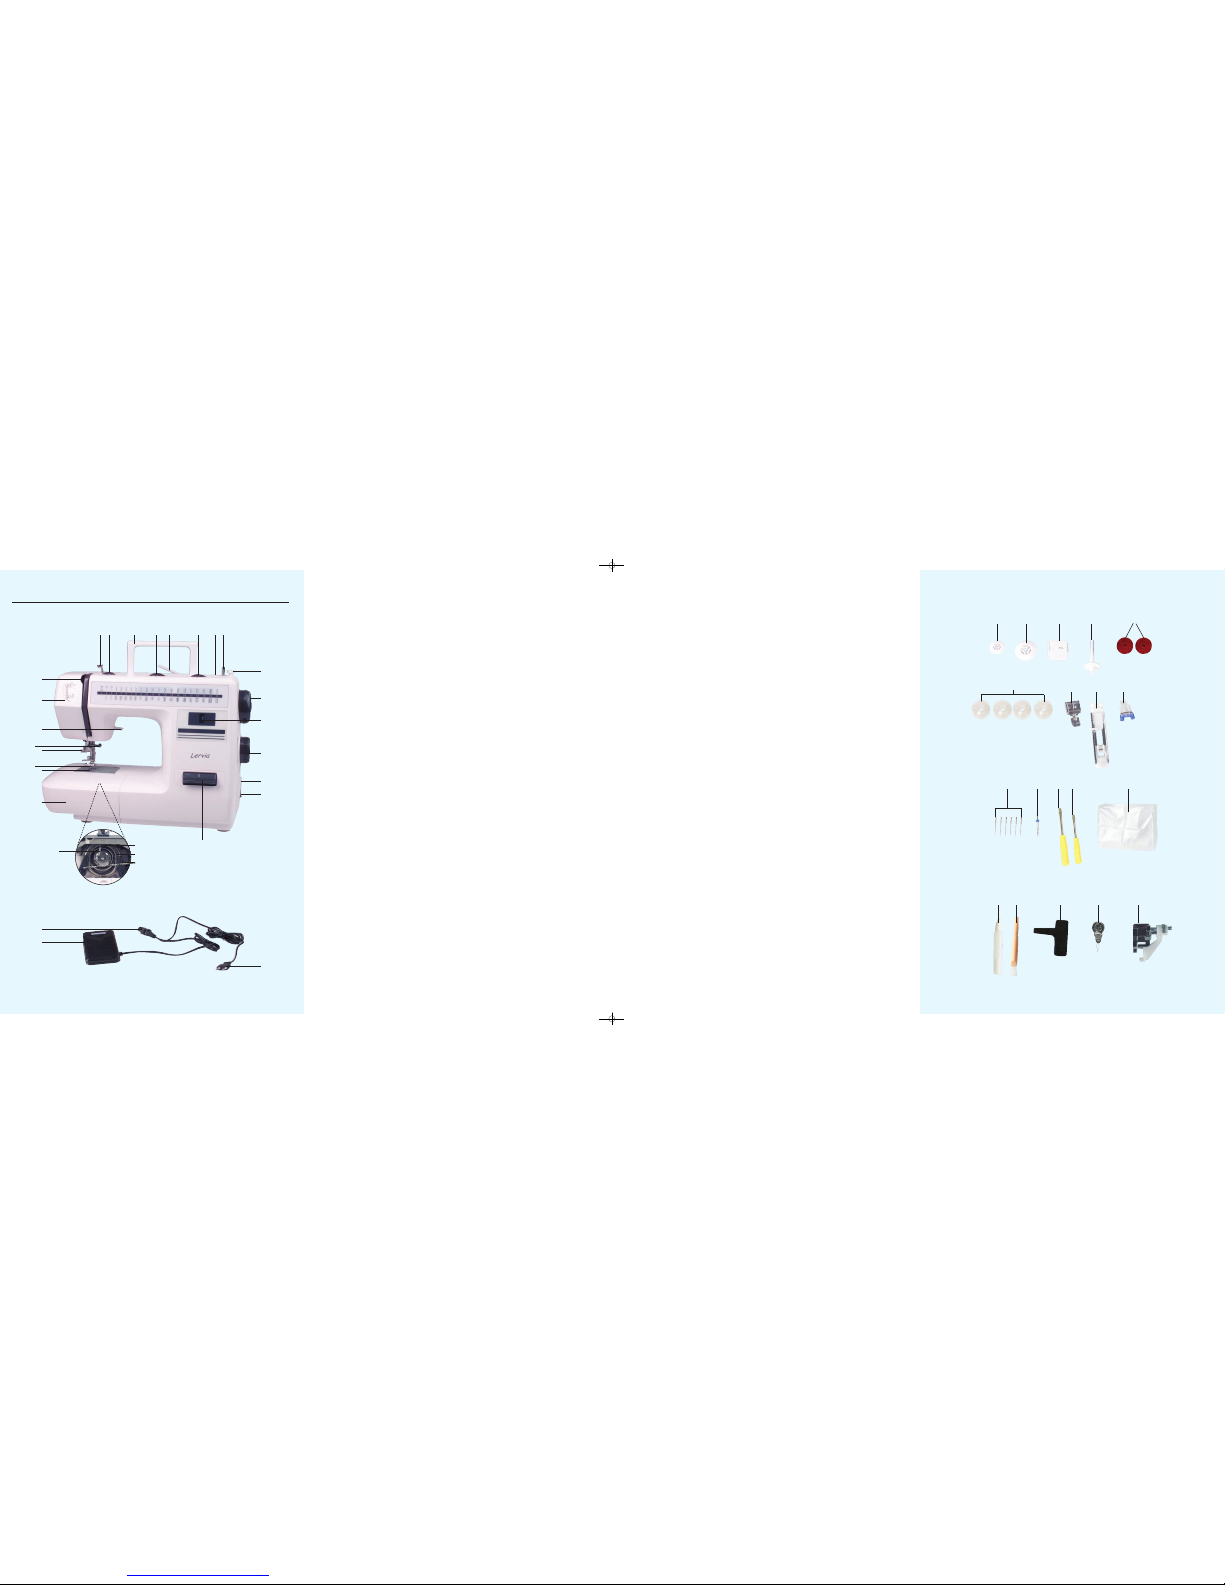
Appliance description
1
Upper thread guide
2
Upper thread tension setter
3
Gripper
4
Setting wheel single needle – twin needle
5
Thread spool carrier
6
Stitch length setter
7
Mounting orifice for addtional thread spool holders
8
Winder spindle
9
Bobbin catch
0
Handwheel
q
Inspection slot for type of stitch
w
Stitch type selector
e
Box for foot pedal connection cable
r
Power switch
t
Sewing direction changeover switch
z
Notch
u
Retainer
i
Safety catches
o
Finger
Page 5

- 3 -
p
Sewing table extension with accessory compartment
a
Stitch plate
s
Sewing foot
d
Buttonhole lever
f
Needle retaining screw
g
Sewing foot lifting lever
h
Front cover
j
Thread takeover lever
k
Power plug
l
Foot pedal
y
Sewing machine plug
Accessories
x
small thread roll holder
c
large thread roll holder
v
Darning plate
b
additional thread spool carrier
n
Felt pads
m
4 bobbins
M
Sewing foot for sewing in zippers
N
Sewing foot for sewing buttonholes
B
Sewing foot for sewing on buttons
V
6 Sewing needles
C
Twin needle
X
Large screwdriver
Y
Small screwdriver
L
Protective cover
K
Sewing machine lubrication oil
J
Brush and thread cutter
H
Stitch plate opener
G
Threading aid
F
Blind hem foot
Setup
• Remove all packaging material from the appliance and the accessories.
• Put the sewing machine onto a stable, even and non-slip table.
Connecting the sewing machine
• Connect the plug of the sewing machine ywith the box eon the
sewing machine.
• Insert the power plug
k
into a wall socket.
• Activate the power switch
r
in order to switch on the lighting of the
sewing machine.
The sewing machine is now ready for operation.
Operation of the sewing machine
Power switch
r
This switch is used rto switch the power supply and the lighting of the
sewing machine on and off.
• Set the power switch rat „I”, to switch the sewing machine on.
• Set the power switch
r
at „O”, to switch the sewing machine off.
Foot pedal
l
The machine will begin to sew at a slow speed as soon as the foot pedal
l
is gently activated. The sewing speed of the machine will increase when
more pressure is applied to the foot pedal
l
. The machine will stop running
when you take your foot from the pedal, as pressure is no longer being
applied to the pedal
l
.
Attention!
Ensure that you do not place any objects on the foot pedal l,
as this could lead to unintentional running of the machine.
Changing the sewing needles
Important
Remove the power plug kfrom the wall socket!
Otherwise the appliance could run unintentionally.
1. By turning the handwheel 0bring the needle shank into the highest
possible position.
2. Apply pressure to the sewing foot lifting lever
g
so that the sewing
foot
s
is lowered onto the stitching plate a.
3. Remove the needle by loosening the retaining screw
f
.
4. Turn the new needle into a position whereby the flattened side of
the needle is pointing to the rear and insert the needle as far as it
will go into the needle clamp from below.
5. Tighten the retaining screw.
Checking the needle
1. Sewing needles must always be straight and, so that the sewing
procedure is smooth, must possess a faultless point.
2. Lay the flat side of the needle onto a smooth, even surface to check
if the needle is bent. This permits the easiest ascertainment of whether
the needle is bent or not.
3. Replace the needle whenever it is broken or blunt.
Changing the sewing foot
Dependant on the type of sewing you wish to carry out, it may be
necessary to exchange the sewing foot
s
.
Important
Remove the power plug kfrom the wall socket! If you do not,
the appliance could start to run unintentionally.
1. By turning the handwheel 0(towards you, in an anti-clockwise direction)
bring the needle into the highest possible position and raise the sewing
foot lifting lever
g
and hence the foot bar.
2. Loosen the foot by carefully pressing the unlocking lever at the rear of
the spindle of the sewing foot upwards.
Page 6
- 4 -
3. Position the sewing foot sto be mounted with the base lying on the
stitch plate
a
in such a manner that the suspension pin on the foot and
the slot on the foot spindle are directly in line.
4. Lower the lifting lever
g
and complete connection of the sewing foot
s
with the sewing spindle. When the foot is correctly positioned, it
must click into place at the suspension pin of the foot.
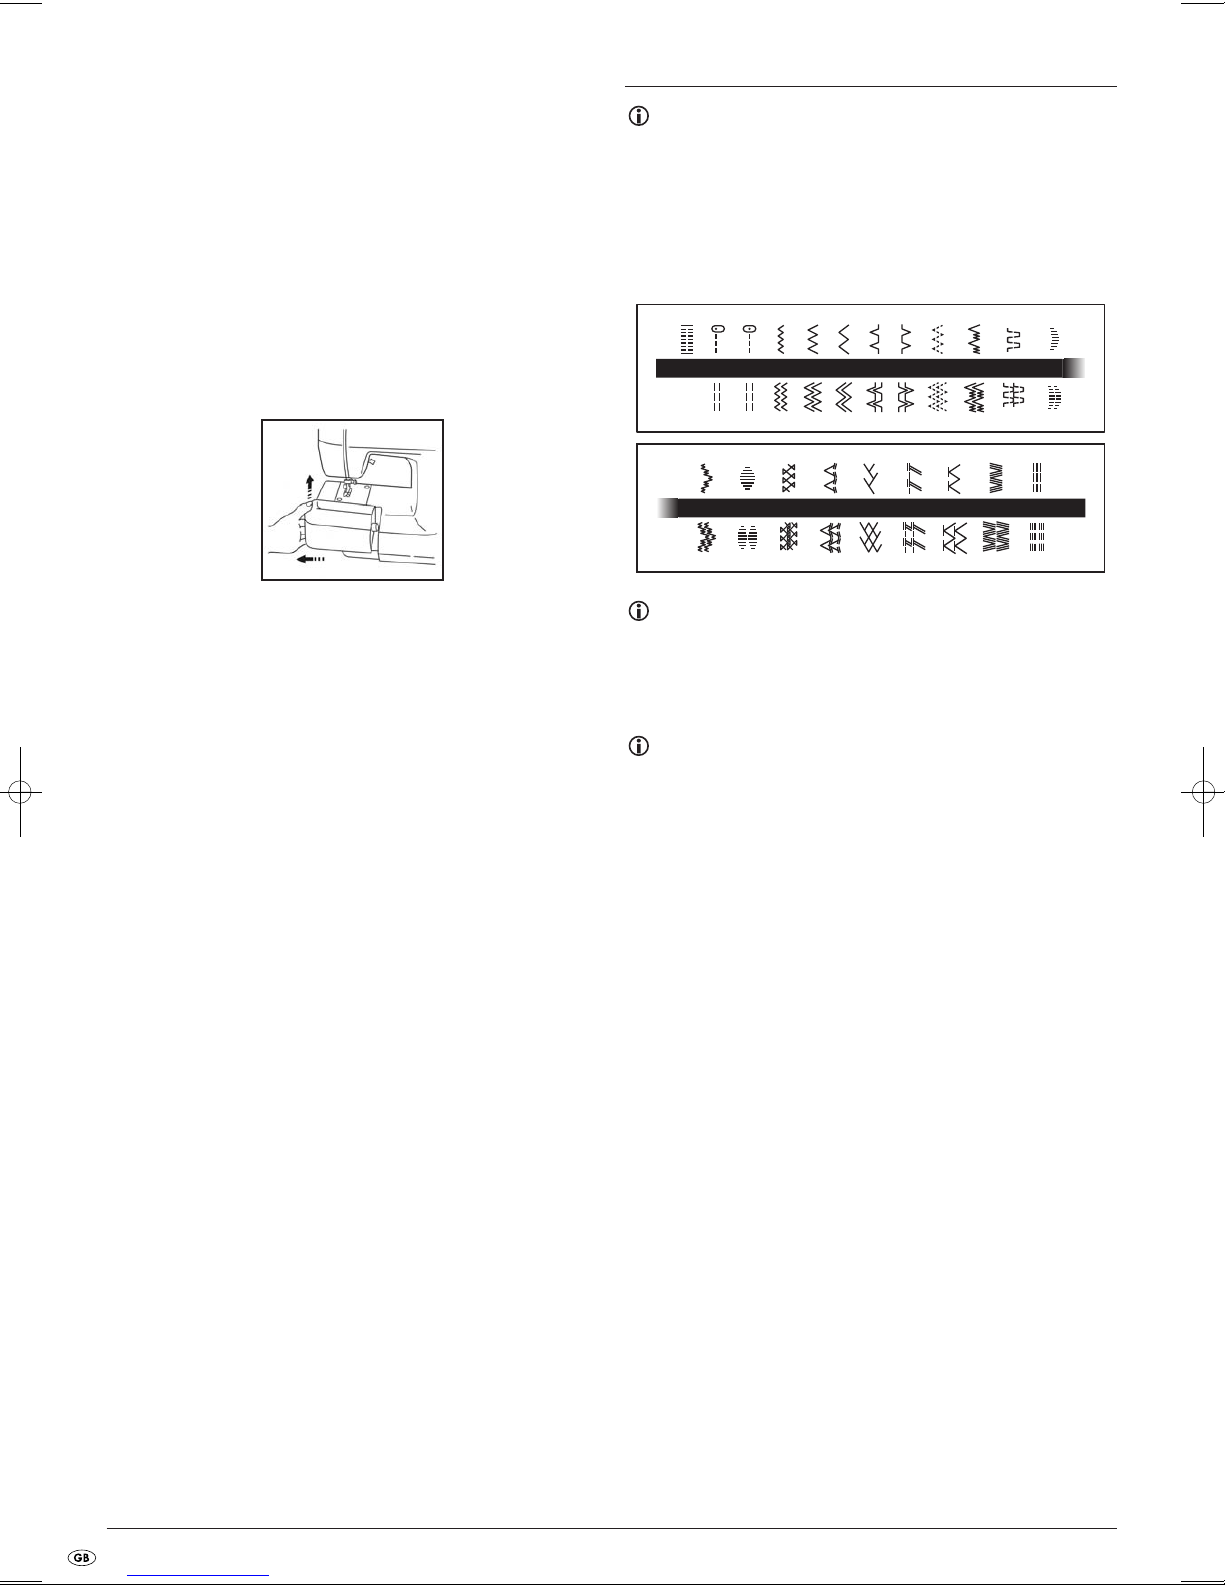
Changeover to free arm operation
Sewing with the free arm option is suitable for tube-shaped fabrics and
areas which are difficult to access on garments and other fabrics.
To change your machine over to free arm operation simply remove the
sewing table extension
p
.
1. Raise the table extension
p
until it is released from the catch.
2. Pull the sewing table extension
p
out towards the left.
Operating elements
Notice
Whenever you change the type of stitch, ALWAYS bring the
needle into the highest position to prevent it being damaged.
• In order to select a specific type of stitch, turn the stitch pattern
selector
w
, until the number of the required stitch type can be seen
in the inspection slot
q
.
Notice
All stitch patterns have preset stitch widths, which means that the type
of stitch selected is the only setting value required to be chosen by the
user. The following table shows the preset stitch width for every type
of stitch and the relevant recommended stitch length range.
Notice
Prior to setting the stitch pattern selector wby turning the stitch pattern
selector
w
you must relieve the sewing foot sby activating the lifting
lever
g
and removing the needle from the fabric.
13 14 15 16 17 18 19 20 21
123456789101112
Page 7

- 5 -
Recommended stitch lenghts for the various types of stitches
Stitch number
Designation of type
of stitch
preset stitch width
in mm (inches)
Recommended stitch length
in mm (inches)
1
Buttonhole stitch,
automatic, 1-stage
5
(13/64)
F-1.5
(1/64-1/16)
2
Straight stitch
(Needle position to the left)
0
1-4
(3/64-5/32)
3
Straight stitch
(Central needle position)
0
1-4
(3/64-5/32)
4 Zigzag stitch
1.5
(1/16)
F-4
(1/64-5/32)
5 Zigzag stitch
3.5
(9/64)
F-4
(1/64-5/32)
6 Zigzag stitch
5
(13/64)
F-4
(1/64-5/32)
7 Blind hem stitch
3
(1/8)
F-2
(1/64-5/64)
8 Shell stitch
5
(13/64)
F-3
(1/64-1/8)
9 Elastic stitch
5
(13/64)
F-2.5
(1/64-3/32)
10
Stretch blind stitch
(stretchable)
3
(1/8)
F-1.5
(1/64-1/16)
11 2-fold rampart stitch
5
(13/64)
F-3
(1/64-1/8)
12 Scallop stitch
5
(13/64)
F-1.5
(1/64-1/16)
13 Random zigzag stitch
5
(13/64)
F-1
(1/64-3/64)
14 Pearl stitch
5
(13/64)
F-1
(1/64-3/64)
15 Fishbone stitch
5
(13/64)
fixed;
2.5 (3/32)
16 Arrow point stitch
5
(13/64)
fixed;
2.5 (3/32)
17 Feather stitch
5
(13/64)
fixed;
2.5 (3/32)
18
Slant edging (open)
overlock stitch
5
(13/64)
fixed;
2.5 (3/32)
19 Elastic overlock stitch
5
(13/64)
fixed;
2.5 (3/32)
20 Triple zigzag stretch stitch
5
(13/64)
fixed;
2.5 (3/32)
21 Triple stretch stitch 0
fixed;
2.5 (3/32)
Page 8

- 6 -
Setting the stitch length
Depending on the type of stitch you have set, it may be necessary to adjust
the stitch length appropriately to achieve the best possible sewing results.
• The numbers on the thumb wheel of the stitch length selector
6
correspond to the respective stitch length in millimeters (mm), hence,
A HIGHER NUMBER MEANS THAT THE STITCH WILL BE LONGER.
• When the stitch length selector is set at „0“
6
there will be no feeding
of the product to be sewn. This setting is used for sewing buttons on.
• The range designated with „F“ is used for the creation of so-called
satin stitches (zigzag stitches sewn very closely together). Satin stitches
can be used to sew button holes or as embroidery stitches. The appropriate setting within the „F“ range required for special cases is dependant on the fabric and the sewing silk used. To find the respective required setting, you should first try out the stitch and stitch-length settings
on remants and, at the same time, observe the feeding characteristics,
varying the settings until the desired results have been obtained.
q
. Stitch length
w
. Direction of rotation required
to reduce stitch lengths
e
. Direction of rotation required
to increase stitch lengths
Sewing backwards
• To sew backwards, press the sewing direction reverse switch tas far
as it will go, keeping it pressed while simultaneously activating the foot
pedal
l
.
• To resume sewing forwards stop applying pressure to the sewing
direction reverse switch
t
, whereupon the machine will immediately
change over to sewing in a forward direction. The stitching backward
function is employed to finish off and reinforce seams.
Threading the needle and preparation
Engaging the spool
1. Tip the thread spool carrier 5upwards and fix a spool of thread on
the carrier. Secure the spool with a thread spool holder
x/c
of the
appropriate size.
2. Lay the felt pad
n
on the winder spindle 8and then place an empty
bobbin on the spindle.
3. Draw the thread through the upper thread guide
1
.
4. Wind the loose end of the thread a few times around the empty
bobbin in a clockwise direction.
5. When the first loose end windings of the thread are tautly wound
around the spool, press the spool with the winder spindle
8
against
the spool stop
9
.
6. Pull the handwheel 0on the right side of the machine out a little
to disconnect the sewing mechanism from the motor.
7. Now switch the sewing machine on and step on the foot switch l.
When the bobbin is full, cut the thread.
8. Press the winder spindle
8
back to the left and remove the full spool.
9. Press the handwheel
0
back in – otherwise the sewing mechanism
of the machine will remain disconnected from the motor.
Inserting the spool
Important
Remove the power plug kfrom the wall socket!
Otherwise, the appliance could run unintentionally.
1. By turning the handwheel 0(towards you in an anti-clockwise
direction) bring the needle into the highest possible position and
release and raise the foot with the lifting lever
g
.
2. Access the bobbin case carrier by removing the sewing table
extension
p
in the manner described above. Open the flap of the
sewing table. Remove the bobbin case by drawing its clip towards
you (flap), then remove the entire case by pulling it out from the
retaining pin towards you.
3. Unwind approximately 10 cm (4”) of the thread from the bobbin and
insert the bobbin into the bobbin case. Hold the bobbin case during
the process. Draw the thread you have unwound downwards and
then leftwards into the slit in the bobbin case, until the thread runs
into the outlet slit under the spring tab.
Page 9

- 7 -
4. Insert the bobbin case in the carrier, holding the case by the catch
and then releasing the catch. The driver
o
on the outside of the
bobbin case must catch in the notch
z
on the top of the case carrier.
Notice
If the bobbin case has not been correctly inserted in the carrier,
it will fall out as soon as you commence sewing.
Threading the upper thread
1. Raise the sewing foot sby activating the lifter lever gas illustrated.
2. By turning the handwheel
0
(in an anti-clockwise direction) bring the
needle into the highest possible position.
3. Slide a spool with thread onto the horizontally located thread spool
carrier
5
, then press one of the two supplied thread spool carriers
x/c
onto the pin so that the thread spool is held in place.
Notice
Select spools of thread complying with the thread spool carrier x/
c
in shape and size. The external diameter of the selected thread spool
carrier
x/c
should be slightly greater than the external diameter of
the winding on the spool of thread.
4. Feed the thread you have unwound from the spool through the thread
guide, as is illustrated in the diagram and on the machine.
Notice
Ensure that the thread is threaded from right to left through the eye of
the feeding lever
j
. When you thread the needle with the upper thread
make sure that the needle is threaded from the front to the back and
that the loose end of the thread has a length of at least 15 cm (6“)
from the needle eye. Use the threading aid
G
to thread the needle.
Insert the loop of the threading aid
G
through the needle eye from
the rear. Pass the tread through the loop then carefully pull the threading aid
G
back. The thread will be automatically drawn through
the eye of the needle.
Retrieving the lower thread
1. Bring both the sewing foot sand the needle into the higest
possible position.
2. Grasp the end of the upper thread with your left hand and then turn
the handwheel
0
(in an anti-clockwise direction), until the needle
has moved down and then up into the highest position.
3. Normally the upper thread will then „catch“ the lower thread in a loop
and bring it to the top. Pull the end of the upper thread towards you
and the spool will be released in a large loop of the lower thread.
4. Draw approximately 15 cm (6“) of both threads from the spool
respectively from the bobbin. Lay the upper thread upside down
between the toes of the sewing foot
s
, then draw it in the direction
of the appliance rear. Lay the lower thread, just like the upper thread,
but slanting rear right in the direction of the appliance rear.
Sewing with the twin needle
Your machine is also designed for sewing with twin needles C, meaning,
you can sew with two upper threads simultaneously. These two upper threads can be the same colour or – for decorative purposes – different colours.
• Adjust the setting wheel single needle – twin needle
4
to the symbol
„twin needle”.
Inserting the twin needles
C
The twin needles Care inserted principally in the same manner as single
needles. Also in this case the flattened side of the needle shaft must be
pointing to the rear and the rounded side of the shaft cross section must
be pointing to the front.
Positioning the additional thread spool carrier
Insert the vertical thread spool carrier into the opening 7on the machine
upper side close to the horizontal thread spool carrier
5
. Place the second
spool of thread onto the vertical thread spool carrier.
Threading the twin needles
C
Each of the two needles must be threaded separately.
1. Threading the needle on the right
Proceed in the same manner as threading single needles using the thread
from the spool on the additional thread spool carrier
b
.
Draw the thread through the thread guide on the right.
2. Threading the needle on the left
Thread the needle on the left in the same way as the needle on the right,
however, draw the thread through the guide on the left before you draw
it through the eye of the left-hand needle.
Inserting the lower thread
The spool of the lower thread is inserted in the same way as with a single
needle (see Chapter „Threading the sewing silk and preparation”).
Tensioning the thread
The tension of the thread has a fundamental influence on the quality of
the stitches. It may be necessary to adjust the thread tension if you change
the thread or sew a different kind of fabric.
Notice
Before you actually commence sewing the fabric you should carry out
a sewing test using a remnant of the same fabric, adjusting the thread
tension if necessary until a satisfactory test result is achieved.
Possible fine adjustments of the thread tension and their consequences:
Upper thread tension is too high:
Small loops are visible on the top surface of the fabric.
³ Reduce the tension of the upper thread by turning the upper
thread tension selector
2
to a lower value.
Page 10

- 8 -
Upper thread tension is too low:
Loops are visible on the bottom of the fabric.
³ Increase the tension of the upper thread by turning the upper
thread tension selector
2
to a higher value.
Notice
The lower thread tension has been preset in the factory,
ensuring that it is appropriate for general use. Hence, no changes
in the setting are required for the majority of sewing tasks.
However, if you are sewing fine fabrics with thin thread, it could happen that
the correct adjustment of the thread tension will not adjust automatically by
means of the setting of the upper thread tension. Hence the user can readjust
the lower thread tension in accordance with the procedure described below.
Lower thread tension is too low
Small loops are visible on the surface of the fabric.
³ First reduce the (upper-) thread tension, setting a lower value by
turning the upper thread tension selector
2
. If this does not lead to
satisfac-tory sewing results, even when the upper thread tension is set
at the lowest possible value, change the upper thread tension on the
spool as described below.
Spool
³ Increase the tension of the lower thread at the bobbin, using a small
screwdriver
Y
to turn the screw on the pressure tab of the bobbin
case in a clockwise direction. The screw should not be turned by
more than one complete rotation.
³ Do not forget to turn the screw back into its original position before
you recommence sewing!
Correct thread tension
The correct thread tension is important, as a tension that is too high or
too low will lead to a weakening in the strength of the seam and often
also results in a rippling of the fabric surface in the vicinity of the seam.
Notice
1. Select the right needle size and thread strength according
to the table above!
2. As a rule use the same thread strength for the upper thread
(spool of thread) and the lower thread (bobbin)!
To fabrics being sewn
Needle
sizes
Strength of thread
Very fine
fabrics
• fine tricot fabrics
• Lace
• Fine linen
• Silk
• Organza
• Chiffon
9
• Cotton thread: 80
• Man-made thread
• fine, mercerised cotton
Lightweight
fabrics
• Voile
• Taffeta
• Synthetic fabrics
• Silk
• Batiste
11
• Cotton: 60–80
• Sewing silk: „A“
• Man-made thread
mercerised: 50
Medium
heavy
fabrics
• Cotton
• Gingham
• Poplin
• Percale
• Pique
• Satin
• Velvet
• light woolen fabrics
• Fine corduroy
• Suiting materials
• Linen
• Muslin
14
(as is
sup-
plied
with the
machi-
ne)
• Cotton: 50–60
• Sewing silk: „A“
• Man-made thread
mercerised: 50–60
Heavy
• Denim
• Gabardine
• Tweed
• Corduroy
• Canvas
• Sailcloth
16
• Cotton thread: 40–50
• Mercerised:
„high-strength”
Knitted
fabrics
• Simple weave
• Double weave
• Jersey
• Tricot fabric
14
(with
tricot
border)
• Cotton polyester
thread
Page 11

- 9 -
Straight stitch
The following types of stitches are defined as straight stitches:
Commencing sewing
1. Position the adjustment wheel of the stitch type selector wsuch that the
desired number appears in the stitch-type window
q
. According to the
desired type of straight stitch you must turn the wheel to 2, 3 or 21.
2. Bring the needle into the highest possible position and raise the
sewing foot
s
.
3. If nothing has happened: retrieve the lower thread by turning the
handwheel
0
in an anticlockwise direction and drawing the upper
and lower thread together behind the foot.
4. Lay the fabric, respectively layers of fabrics, to be sewn on the sewing
table under the raised sewing foot
s
, in such a manner that the needle is located approximately 1 cm (3/8“) from the fabric edge and
above the start of the seam.
5. Lower the sewing foot
s
.
6. In order to finish off the end of the seam, by sewing backwards, press
the sewing direction reverse switch
t
as far as it will go and activate
the foot pedal
l
slightly. Backward sewing is used to combine two
seams as well as to reinforce seams.
7. After finishing sewing backwards change over to sewing in a forward
direction, releasing the direction changeover switch
t
and briefly
taking your foot from the foot pedal
l
, then pressing the foot pedal
down once again
l
.
Changing the sewing direction
1. Stop the machine at the point where you wish to change the sewing
direction, ensuring that the needle is piercing the fabric.
2. Raise the sewing foot
s
and align the fabric to the new sewing direc-
tion, whereby you can use the inserted needle as a turning point.
3. Lower the sewing foot
s
back down and then start sewing in the
new direction.
Finishing the seam
The backwards sewing function is also employed at the ends of the seam
to secure and to reinforce the seam.
1. First sew in the forward mode until you reach the end of the seam,
then stop the machine in this positon using the foot pedal
l
.
2. Press the sewing direction reverse switch
t
, then activate the foot
pedal
l
in order to sew backwards ca. 1 cm (3/8”) from the edge
or the end of the seam.
Type of stitch No. Stitch length
2 (with needle positioned
on the left)
1–4
3 (with central needle position)
21 (triple stretch stitch) firmly fixed at 2.5
Removing the fabric from the machine
1. Stop the machine.
2. Bring the needle into the highest possible position.
3. Raise the sewing foot
s
and carefully pull the sewn product out
towards the left.
4. Cut the two threads (Upper and lower threads) with the thread
cutter on the rear of the foot bar.
Take note
The thread cutter is the indentation at the rear of the foot bar. Lay the
thread that is to be cut into the indentation, hold the thread firmly to
left and right of the foot bar and then draw it downwards.
5. To prepare the machine for sewing the next seam, pull approximately
10 cm (4”) from the upper and lower threads through the toes of the
sewing foot
s
in the direction of the rear of the machine.
Edging seams and stretch materials
• Stitch type No. 2 (simple straight stitch with needle position on the left)
is used to sew hems and light-weight materials.
• Stitch type No. 21 (straight triple stretch stitch) is used to sew stretch
materials.
Sewing in zigzag stitches
Zigzag stitch
Set the stitch type number on the selector wheel waccording to the
fixed stitch width of the zigzag stitch. Set the stitch length on the stitch
length selector
6
.
It is advisable to sew a few stitches in straight stitch at the beginning
and end of a zigzag seam.
Satin stitch
The satin stitch (a close zigzag stitch, hence with very short stitch lengths) is
achieved when the stitch length selector
6
is set in the „F“ range. The satin
stitch can be used to sew buttonholes or for decorative purposes. The stitch
width is also here determined from the selected type of stitch or stitch type
number of the respective underlying zigzag stitch. Therefore, first select the
type of stitch you require in accordance with the fixed width and then set
the stitch length on the stitch length selector
6
within the „F“ range.
Type of stitch No. Stitch length
4 (stitch width 1.5 mm (1/16”))
F-45 (stitch width 3.5 mm (9/64”))
6 (stitch width 5 mm (13/64”))
Page 12

- 10 -
Sewing blind hems
The blind hem stitch is used to finish off edges of sewn products, for example, the lower edges of trouser legs ensuring that the seam is not visible
form the outside of the garment.
Employ the blind hem stitch (stitch type No. 7) for non-elastic materials
and the stretch blind stitch (No. 10) for elastic materials.
Use the blind hem foot
F
.
1. Both threads should be the same colour as the fabric to be sewn.
2. Fold the material according to the desired seam as illustrated.
Fold the material back from the edge, whereby an overlap of
ca. 6mm (1/4”) should remain between the folded fabric edge
and the required actual border.
3. Set the stitch type selector
w
at No. 7 or No.10.
4. Now sew accurately over the fold.
5. After you have folded the border once again the seam will be barely
visible – typical for a blind hem.
Notice
The stretch blind stitch is especially suitable for elastic materials.
Sewing with the shell stitch
The shell stitch can be used to create a lacy wavy edge on relatively fine
materials or to decorate exisiting borders.
1. Set the stitch type selector wat position 8.
2. Sew the fabric in a diagonal direction, arranging it under the sewing
foot
s
in such a way that the straight sections of the stitch formation
on the edge of the hem and the zigzag stitches are sewn a little over
the fold.
3. This stitch type requires a tighter thread tensioning of the upper
thread than is customary.
4. Sew at a slower speed.
Type of stitch No. Stitch length
8 (shell stitch) F-3
Type of stitch No. Stitch length
7 (Blind hem stitch) F-2
10 (Stretch blind stitch) F-1.5
Sewing with elastic stitches
The elastic stitch can be used in three areas of application: repair work
(„darning“), sewing on elastic bands (elastic braids) as well as for the
edge to edge joining of pieces of fabric. All three areas of application
will be described in greater detail below.
In all cases set the stitch type selector
w
at number 9.
Darning
1. Set the stitch length selector 6at a value between „F“ and 2.5.
2. Reinforce the tear/„rent“ to be mended with a suitable piece of
material at the back.
3. Oversew the damaged point in elastic stitch, following the run
of the tear.
Sewing on elastic bands (rubber bands)
1. Position the elastic band on the material.
2. While sewing on elastic band and braid stretch the material forwards
and backwards under the sewing foot with both your hands
s
.
Face to face sewing of pieces of fabric
The elastic stitch can be used to sew two pieces of fabric face to face and is
especially suitable for the sewing of weaves and knits. The seam is barely
visible when you use colourless nylon thread. Subject to the characteristics
of the material edges you can either sew the open cut edges together or
fold the edges prior to sewing.
1. Allow the material edges to be sewn together to touch each other
and position the joint edge below the centre of the sewing foot
s
.
2. Sew the two pieces together using the elastic stitch, making sure
that the two fabric edges or folded borders remain closely together
without overlapping.
Type of stitch No. Stitch length
9 (Elastic stitch) F-2.5
Page 13

- 11 -
Two-fold rampart stitch
This type of stitch is used to sew two pieces of material together if there
are no special requirements in relation to the elasticity of the seams,
e.g. for patchwork.
Set the stitch type selector
w
at number 11.
Scallop stitch
The machine can create a scallop stitch automatically, which may be
used to decorate the edges of the items you have sewn.
1. Set the stitch type selector wat number 12.
2. Sew the scallop stich closely along the edge of the material.
3. If you wish, you can trim the outer curve of the pattern you have
sewn after you have finished the edge. Make sure you do not cut
through the stitches.
Additional decorative stitches
Both types of stitch may be used for the creation of (edge) decorative
seams as well as smocking.
Set the stitch type selector
w
at number 13 or 14.
Fishbone stitch
This stitch is used to join two pieces of fabric when a certain space
between the edges or borders is required.
Notice
Use thicker upper and lower threads than is customary.
Type of stitch No. Stitch length
15 (Fishbone stitch) fixed at 2.5 in the factory
Type of stitch No. Stitch length
13 (Random zigzag stitch)
F-1
14 (Pearl stitch)
Type of stitch No. Stitch length
12 (Scallop stitch) F-1.5
Type of stitch No. Stitch length
11 (2-fold rampart stitch) F-3
1. Fold together the edges of the two pieces of fabric to form a narrow
hem, then tack the pieces onto a thin piece of paper, leaving a space
of a few millmeters between the two borders.
2. Set the stitch type selector
w
at number 15.
3. Sew along the gap, at the same time pulling the upper and lower threads
slightly in order to enable a correct formation of the initial stitches.
4. Remove the attached paper after finishing the sewing and close the
seam by knotting the two threads at the beginning and the end of
the seam on the underside of the material.
Finishing edges
These stitches are used to finish off pieces of fabric to prevent them from
fraying and to hem them in one process. The arrow point stitch is ideal for
finishing off a bed cover or table cloth, for example, whereas the elastic
overlock stitch and the slanted overedge stitch is especially suitable for the
finishing off of stretchable materials.
1. Set the stitch type selector
w
at 16, 18 or 19.
2. Position the fabric under the sewing foot
s
so that the line of the
seam (the arrow points of the seam pattern formation) are positioned
ca. 3mm (1/8”) left of the centre of the sewing foot
s
. This type of
stitch is most effective when the seam line is approximately 6 mm
(1/4”) from the edge of the material, because the stitching movement
extending to the right (right zigzag points) grasps the fabric edge
accurately and thus protects it from fraying.
3. If the distance between the sewing line (arrow points) and edge
should become larger, you can trim the border to the right side
of the seam.
Type of stitch No. Stitch length
16 (Arrow point stitch)
fixed at 2.5 in the factory
18 (Blind hem (open) overlock
stitch)
19 (Elastic overlock stitch)
Page 14

- 12 -
Sewing material edges with feather stitch
Use the feather stitch as a decorative border stitch or to hem bed covers,
table cloths and curtains or even for embroidery work.
1. Set the stitch type selector wat 17.
2. Position the fabric with the good side up on the sewing table of
the machine and sew the seam ca. 1 cm (3/8”) from and parallel
to the edge.
3. Trim the fabric close to the seam along the edge.
Besides this, the decorative effect of the feather stitch also prevents the
fabric edge from fraying.
Sewing with three-fold zigzag stretch stitches
This type of stitch can be used to sew heavy stretch materials whenever a
stitch with zigzag pattern is practical. It may also be used as a decorative
edge stitch.
• Set the stitch type selector
w
at 20.
Sewing buttonholes
Notice
1. It is advisable to practice the sewing of buttonholes on a remnant
of material before you actually attempt this on a garment.
2. If you want to sew buttonholes in soft and yielding materials,
it is adviseable to line the fabric with a stabilising material.
With appropriate practice and suitable settings of the machine, the automatic production of buttonholes in one working process is a simple method
that delivers reliable results.
1. Mark the position of the buttonhole on the material with tailors chalk.
2. Attach the buttonhole sewing foot
N
(see Chapter „Changing the
sewing foot”) and set the stitch type selector
w
at 1.
3. Retrieve the lower thread.
4. Lower the sewing foot, so that the markings on the buttonhole foot
N
align with the chalk markings on the material as shown in the following diagram. The front closure of the buttonhole is sewn first.
Type of stitch No. Stitch length/mm Sewing foot
1 (Buttonhole stitch) F-1.5 Buttonhole foot
Type of stitch No. Stitch length
20 (Triple zigzag stretch stitch) fixed at 2.5 in the factory
Type of stitch No. Stitch length
17 (Feather stitch) fixed at 2.5 in the factory
5. Open the caliper on the buttonhole foot Nand position the button
to be sewn on between the jaws.
6. Pull the buttonhole lever
d
down and press it backwards slightly
as shown.
7. Start the machine, at the same time holding the upper thread carefully.
8. Automatic production of the buttonhole takes place in the sequence of
the steps 1 to 4 displayed in the diagram below.
9. Stop the machine when the two side buttonhole seams and the two
finishings of the buttonhole have been completed.
Securing the edges and cutting the buttonhole
1. To secure the edging of the buttonhole, raise the sewing foot sand
turn the material through 90° in an anti-clockwise direction on the
sewing table and then lower the buttonhole foot
N
once again.
Now sew in straight stitch (Stitch type No. 3) until you have completed
the front fastening of the buttonhole.
2. Remove the material you have sewn from the machine. It is advisable
to insert pins diagonally at both ends of a buttonhole to hinder a separation of the stitches.
3. With the thread cutter
J
cut out the buttonhole, slicing through the
material in the centre between the two buttonhole seams. Proceed
carefully in order to avoid cutting the stitches themselves.
Page 15

- 13 -
Fine adjustment during sewing buttonholes
Should the buttonhole seams sewn on both sides of the buttonhole not be
uniform in appearance, a fine adjustment can be undertaken as per the
following method:
1. Set the stitch type selector
w
at „F“ and, as a test, sew the left-hand
buttonhole seam on a remant of the same material. Observe the
material feed during the process.
2. Should the sewn left-hand buttonhole seam be too coarse or too fine,
appropriately adjust the material feed using the stitch length selector
6
.
q
– left-hand buttonhole seam
w
– Stitch length
e
– shorter
r
– longer
t
– result
3. When the sewing test has produced satisfactory results for the lefthand buttonhole seam with regard to the feed, sew a right-hand
buttonhole seam and continue to observe the feed.
4. If the buttonhole seam on the right is too fine or too coarse in comparison with the left, adjust the button hole fine adjustment screw at the
rear of the machine housing as described below:
When the buttonhole seam on the right appears to be too coarse, adjust
the screw using the supplied large screwdriver
X
in the direction marked
„–“; When the right buttonhole seam is too fine, adjust the screw using
the screwdriver
X
in the direction marked „ +“.
By means of the described method of adjustment it is possible to obtain
a uniform appearance of the two buttonhole seams.
y
– Stitch length setting wheel
u
– Fine adjustment screw for sewing buttonholes
i
– Right-hand buttonhole seam
o
– Result
Sewing on buttons
1. Measure the distance between the holes of the button and select the
suitable type of stitch with the stitch type selector
w
in accordance
with the following table:
2. Replace the sewing foot
s
with the sewing foot for sewing on buttons
B
(see Chapter „Exchanging the sewing foot”).
3. Position the darning plate
v
on the stitch plate aof the machine.
The lateral pins of the darning plate
v
should slide into the holes in
the darning plate
a
.
4. Position the button to be sewn on between the foot
B
and the material
and check that the needle will pierce the left-hand hole in the button
without hitting the button itself. If this is not guaranteed return to step1.
5. Sew approximately 10 stitches at a low speed.
6. Remove the material from the machine. Cut off the upper and lower
threads and knot the two threads underneath.
Sewing in zippers
The zipper foot Mis employed to sew in different types of zippers and can
be positioned on the right or on the left of the needle without any difficulties.
If you want to sew in the right side of the zipper, fix the foot shaft at the left
side of the securing pin at the zipper
M
; If you want to sew in the left side
of the zipper, fix the shaft at the right side of the securing pin.
1. Set the stitch type selector wat 3 and the stitch length 6at a value
between 2 and 3.
2. Lower the sewing foot
s
using the lifting lever gand allow the shaft to
snap on the right or left part of the securing pin on the zipper foot
M
.
3. Fold over approximately 2 cm (3/4”) of the material and lay the
zipper under the material.
4. Lower the needle accordingly in the right or the left notch for the
needle in the zipper foot
M
.
Type of stitch No. Stitch length/mm Sewing foot
3 2–3 Zipper foot
hole distance of the button Type of stitch No.
1.5 mm (1/16”) 4
3.5 mm (6/64”) 5
5 mm (13/64”) 6
Type of stitch No. Stitch length Sewing foot Miscellaneous
4, 5 or 6 user defined Buttonhole foot Darning plate
Page 16

- 14 -
5. Now sew the both sides of the zipper in place along the zipper carrier
web from the lower to the upper edge with the zipper foot
M
. The needle should thus always pierce the side of the foot facing the teeth-row
resp. spiral of the zipper, in order to achieve the best possible results.
6. To changeover to sewing the opposite half of the zipper, after sewing
release the one side of the zipper foot
M
by activating the lever at the
rear of the spindle from the foot shaft and fix it, aligned correspondingly, over the other part of the fastening pin on the shaft and continue
sewing with the other indentation.
Gathering
1. Set the stitch type selector wat 3.
2. Reduce the upper thread tension (to approximately 2), so that the
lower thread stays on the underside during sewing and is not drawn
into the loops of the upper thread, as is usually the aim in sewing, in
this case the lower thread runs straight along the underside of the
material.
3. Sew a simple straight stitch seam or several parallel straight stitch seams.
4. Draw on the end of the lower thread in the direction of the sewing foot
in order to gather the fabric along the seam.
Darning
1. Position the darning plate von the stitch plate aof the machine.
The lateral pins of the darning plate
v
should slide into the holes
in the darning plate
a
.
2. Set the stitch type selector
w
at 3.
3. Position the area to be repaired under the sewing foot
s
and lay
a piece of reinforcing material under it.
4. Lower the sewing foot
s
using the lifting lever g.
5. Begin darning at the edge of the damaged area, carefully guiding the
material back and forth with your hand to compensate for the feeder
which, by the mounting of the darning plate, has been deactivated.
6. Repeat the backward and forward movements with a little offsetting of
the parallel seams until the damaged area is completely filled with the
stitches.
Type of stitch No. Stitch length Miscellaneous
3 user defined Darning plate
Type of stitch No. Stitch length
3 4
Appliques
An applique is created by sewing a piece of material, cut into a certain
shape, contrasting in colour or structure, to a garment or to another
creation for decorative purposes.
1. Tack the applique with the desired contour onto the designated
position by hand.
2. Carefully sew round the contour of the applique in zigzag stitch
(Stitch type No. 4, 5 or 6) in short stitch lengths.
3. If necessary trim the applique outside the seam
4. Remove the tacking stitches by pulling out the tacking thread if
necessary.
Notice
Sew a few straight stitches at the beginning and end of
the contour seam to secure and reinforce the seam.
Monograms and embroidery
Preparation for stitching motives and monograms
1. Attach the darning plate vonto the stitch plate a.
2. Set the stitch type selector
w
at the required zigzag stitch.
3. Draw the monogram (for mongram embroidery) or the motive
(motive embroidery) on the surface of the material.
4. Tense the material as tight as possible in an embroidery frame, such
that the material underside runs above the lower edge of the inner ring.
5. Position the material to be sewn under the machine needle and lower
the foot bar with the lifting lever
g
.
6. At the position where you wish to begin the embroidery draw the lower
thread through the material by manually turning the handwheel
0
in
an anti-clockwise direction and sew a few stitches for fixation of the
thread.
7. Hold the embroidery frame with the thumb and index fingers of both
hands while you press the material down into the frame with your
middle and ring fingers and guiding the frame with your little fingers.
Type of stitch No. Stitch length Sewing foot Miscellaneous
4, 5 or 6 User defined Without Darning plate
Type of stitch No. Stitch length
4, 5 or 6 F-2
Page 17

- 15 -
Monogram embrodiery
1. Sew and fill in the monogram along the script using a slow
and smooth movement of the frame.
2. Secure the monogram by sewing a few straight stitches at the
end of the last letter, remove the material from the machine in the
usual manner.
Motive embroidery
1. First sew the outline of the motive, moving the embroidery frame
accordingly.
2. Fill in the motive from the contour to the inside then back to the
outside, until the contour has been completely filled in or embroidered. Place the stitches very closely together.
Notice
A long stitch is created by moving the frame more quickly,
a shorter stitch by moving the frame more slowly.
3. When you have finished, secure the work by sewing a few straight
stitches.
Changing the lamp bulb
Important
Remove the power plug kfrom the wall socket! Danger of electric shock.
1. Loosen the screw of the front cover
h
using the screwdriver Yas
illustrated.
2. Remove the front cover
h
from the machine.
3. Exchange the bulb of the sewing machine lighting.
4. Replace the front cover
h
and tighten the retaining screw.
Lubricating the machine
Important
Remove the power plug kfrom the wall socket! Danger of electric shock.
1. Loosen the screw from the front cover
h
and remove the front cover h.
2. Apply 2 to 3 drops of sewing machine oil Kto all points indicated
in the diagram.
3. Replace the front cover
h
and insert the power plug kinto the wall
socket.
4. After lubrication, start the machine up in rapid operation, without the
needles being threaded, for a short period to distribute the oil.
5. Remove the power plug
k
from the wall socket and remove the front
cover
h
.
6. Wipe off any superfluous oil.
7. Replace the front cover
h
and tighten the screw.
Notice
The machine should be lubricated once a week if it is being used
for more than one hour a day. Lubricate the machine daily when
it is used more frequently.
Cleaning
Dismantling of the gripper
1. Bring the needle into the highest possible position or, preferentially,
dismantle the needle.
2. Open the flap on the sewing table.
3. Remove the bobbin case by the opening its flap and then pulling
the bobbin case carrier from the bobbin case carrier pin.
4. Press the two catches
i
from the rear retainer uin an outward
direction and then remove the released retainer
u
.
Page 18

- 16 -
5. Remove the gripper, by grasping the bobbin pin in the centre and
pulling the gripper out.
Notice
The gripper cannot be dismantled when the needle is lowered.
Cleaning the bobbin case carrier with the gripper track
1. Using the brush Jremove all accumulated fluff and remnants of
thread from the retainer ring
u
, from the gripper, the gripper dog
and the bobbin case carrier with the gripper track.
2. A lint-free cloth moistened with precision mechanic oil or sewing
machine oil is used to clean the gripper track from fluff.
3. Clean the dismantled gripper in the same way.
4. Reassemble the parts by reinserting the gripper and the retainer
u
in the bobbin capsule carrier and then turning the catches ito their
original position so that they keep the retainer
u
in place.
Cleaning the carrier of the feed dog on the stitch plate
1. Remove the stitch plate a, using the stitch plate opener Hto screw
out the mounting screws.
2. Clean the catch teeth of the feed dog and the outside of the bobbin
case carrier with the brush
J
.
Storage
• Remove the power plug kfrom the wall socket if you are not using
the sewing machine.
• Place the protective cover
L
over the sewing machine to protect it
from dust.
• Store the sewing machine in a dry location.
Technical data
Power supply: 220–230 V ~50Hz
Power consumption: 85 W (Lamp: 15 W, Motor: 70W)
Light bulb: E14, 15W
Protection class: II
Disposal
Do not dispose of the appliance in your normal domestic
waste. This product is subject to the European guideline
2002/96/EC.
Dispose of the appliance through an approved disposal centre or at your
community waste facility.
Observe the currently applicable regulations.
In case of doubt, please contact your waste disposal centre.
Dispose of all packaging materials in an
environmentally friendly manner.
Warranty & Service
The warranty for this appliance is for 3 years from the date of purchase.
The appliance has been manufactured with care and meticulously examined before delivery. Please retain your receipt as proof of purchase.
In the case of a warranty claim, please make contact by telephone with
our service department. Only in this way can a post-free despatch for your
goods be assured.
The warranty covers only claims for material and manufacturing defects,
not for wearing parts or for damage to fragile components. This product
is for private use only and is not intended for commercial use.
The warranty is void in the case of abusive and improper handling, use of
force and internal tampering not carried out by our authorized service
branch. Your statutory rights are not restricted in any way by this warranty.
DES Ltd
Units 14–15
Bilston Industrial Estate
Oxford Street
Bilston
WV14 7EG
Tel.: 0870 787 6177
Fax: 0870 787 6168
e-mail: support.uk@kompernass.com
Kompernass Service Ireland
c/o Irish Connection
41 Harbour view
Howth Co. Dublin
Tel: 087-99 62 077
Fax: 18398056
e-mail: support.ie@kompernass.com
Importer
KOMPERNASS GMBH
BURGSTRASSE 21
D-44867 BOCHUM
www.kompernass.com
Page 19

- 17 -
Troubleshooting
If you should find yourself confronted with any problems during sewing, first consult the respective section of the user manual, which will provide you with
further details relating to the specific operating procedure. By comparing the given details you can ensure that you are operating the machine correctly
and appropriately. If a problem cannot be prevented or rectified in this way, the following procedure could provide assistance in regard to the detection
of operational, installation and machine defects and faults as well as being an aid to trouble shooting.
Contact your nearest specialialist on sewing machines if the difficulties cannot be remedied.
Problem Cause Solution
Upper thread is breaking
• Upper thread is incorrectly inserted.
• Upper thread tension is too tight
• Upper thread „matted” (tangled).
• Spool of thread incorrectly inserted-/fitted.
• Needle is bent/blunt.
• Inappropriate combination of needle size/strength
of thread.
• Thread the upper thread correctly!
• Loosen the upper thread tension a little!
• Thread the upper thread once again!
• Insert the spool of thread once again!
• Change the needle!
• Check the combination needle size/strength of
thread!
Lower thread is breaking
• Upper thread „matted” (tangled).
• Fault in run of thread at the spool in the gripper.
• Tension of lower thread is too tight.
• Lower thread is not inserted.
• Thread the upper thread once again!
• Insert the spool correctly once again!
• Loosen the low thread tension a little!
• Insert the low thread correctly once again!
Stitches are omitted
• Needle inserted incorrectly.
• Inappropriate combination of needle size/strength
of thread.
• Dust adhering to the stitch plate
a
on the bottom.
• Sewing garn incorrectly inserted/threaded.
• Insert the needle correctly!
• Check the combination, needle size/strength
of thread!
• Clean the sewing machine!
• Thread the sewing garn correctly!
Loops and tangles in the seam • Wrong adjustment of the thread tension. • Readjust the thread tension!
Material is rippled in the vicinity
of the seam
• Thread tension is too tight on the rippled side.
• Thread run on the machine is wrong.
• An unsuitable needle has been used.
• Inappropriate combination of needle size/strength
of thread.
• Readjust the thread tension!
• Check the thread run and thread the needle correctly!
• Use the matching needle!
• Check the combination needle
size/strength of thread!
The material is not being fed correctly
• Stitch length selector 6set at „no feed”.
• Inappropriate combination needle size/
strength of thread.
• Thread is matted (tangled).
• The darning plate is installed on top of the stitch
plate
a
.
• Set the stitch length selector 6at the required stitch
length (feed)!
• Check the combination needle size/strength of
thread!
• Thread the upper thread once again!
• Remove the darning plate!
Needle keeps breaking
• Needle inserted incorrectly.
• Inappropriate combination of needle
size/strength of thread.
• You are pulling
the fabric.
• Insert the needle correctly!
• Check the combination needle size/strength of
thread!
• Only allow the material to be tranported by the
feed dog!
Machine is running noisily or slowly
• Dust adhering to the stitch plate aon the bottom.
• Machine is inadequately lubricated.
• Clean the sewing machine!
• Lubricate the sewing machine!
Machine does not start up
• The power plug kis not connected to the power
supply.
• Power switch
r
of the machine is set at „OFF” („0”).
• Foot control has not been pressed down properly.
• Coupling disconnector on the handwheel
0
is set
at „Spool wind”.
• Insert the power plug kinto
a wall socket!
• Set the power switch
r
at „ON” („I”)!
• Apply more pressure to the foot control!
• Do not forget to press
in the handwheel
0
!
Page 20

- 18 -
 Loading...