

Page 1

Webcam
Mercury Silver
Manual de Usuario
User Manual
Page 2

Introducción
Gracias por elegir nuestros productos LEOTEC. La
cámara web Mercury Silver es compatible con todos los
programas de mensajería instantánea más utilizados (MSN
Live, Messenger, Yahoo Messenger, Skype, etc.)
Brinda alta calidad de imagen, resolución y nitidez gracias
a las lentes utilizadas y su avanzada electrónica (chipset)
Es de muy fácil instalación ya que es suficiente con solo
conectarla al ordenador (para sistemas operativos
Windows, aunque si se insta la el software suministrado da
funciones adicionales)
Contenido
Webcam USB
CD-ROM con driver
Manual
Especificaciones
* Sensor Color CMOS de alta resolución
* 5 lentes de cristal (5G)
*Resolución: 1.3 Mega pixel (real 1280x1024)
(interpolado hasta 16Mpixel en foto, 5Mpixel en video)
* Interfaz: USB2.0
Page 3

*Formatos soportados
1280x1024 18cps
640x480 30cps max. (Nativo)
352x288 30cps max.
320x240 30cps max.
176x144
30cps max.
160x120 30cps max.
Resoluciones más altas (max. 16Mega Pixel) están
disponibles después de instalar los drivers
* Foco: 30mm a infinito – Ajuste manual
* Compresión de imagen integrada
* Balance de blancos Automático
* Compensación Automática del Color
* Instantánea Manual – Permite hacer fotografías
directamente pulsando un botón. Requiere instalar drivers
* Micrófono incorporado
Requisitos de sistema
* Puerto USB disponible
* Pentium 200 superior
* Windows XP/ VISTA / 7 System (compatible con Apple
OS y Linux Drivers no incluidos)
* Unidad CD/DVD para instalación
* Al menos 32MByte de memoria RAM
* Al menos 20Mbyte de espacio en disco libre
* Tarjeta VGA con soporte para DIRECTX
Page 4

Instalación Win dows XP, Vista y 7
La webcam es plug-and-play; los drivers necesarios están
incluidos en la mayoría de versiones de Windows. Todo lo
que necesita es conectar y listo.
Nota: El botón de instantánea no funcionará con este tipo
de instalación.
Si la webcam no se instala automáticamente o si desea
usar el botón de instantánea, inserte el CD y siga las
instrucciones en pantalla.
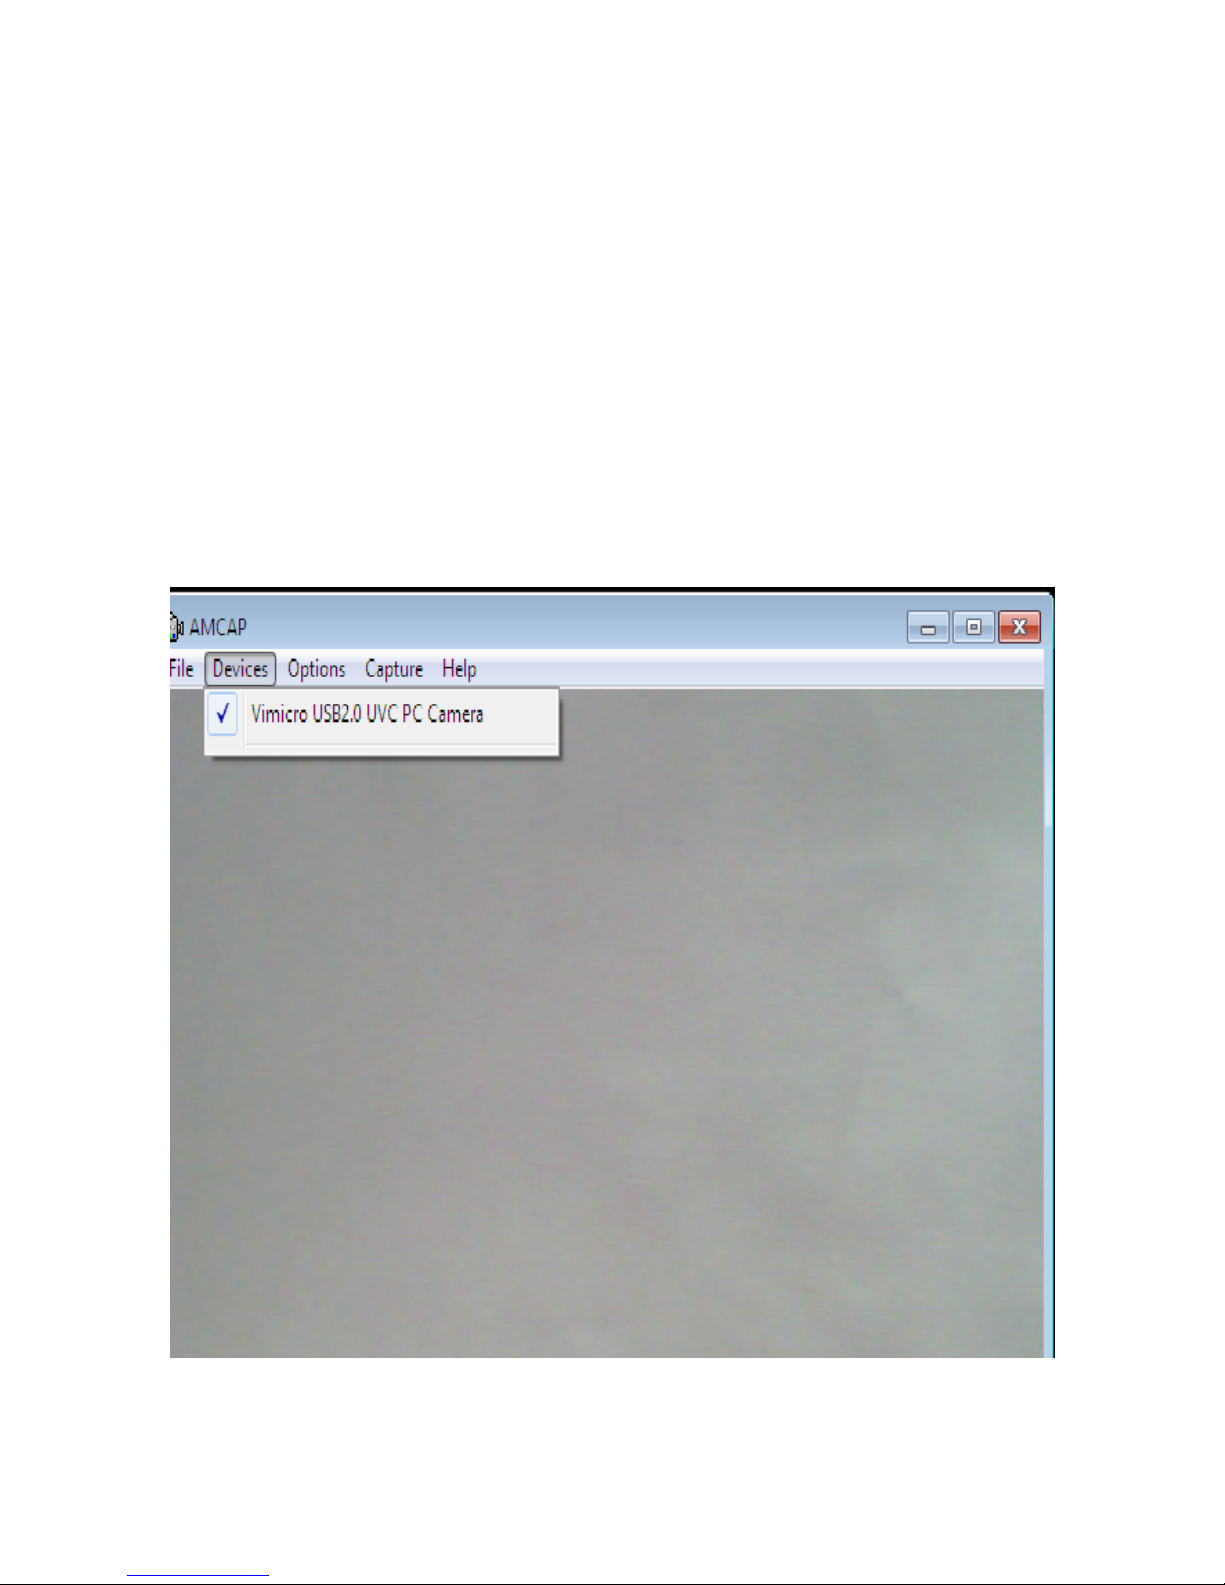
Viendo la imagen a través de la webcam
Para ver la imagen de webcam haga lo siguiente:
Doble clic en el icono “AmCap”, y seleccione “Device”,
asegúrese de seleccionar “Vimicro USB 2.0 UVC PC
Camera”.
Page 5

En “AmCap”, abra el menú “Options”, Seleccione
“Preview”. Esta opción le permite ver la imagen.
En el mismo menú, las opciones “Vi deo Ca pt ure Filt e r--- ”
and “Video Capture Pin---“ permiten cambiar los ajustes
de la webcam.
Page 6

Page 7

Importante
* No exponga la Webcam USB a temperaturas extremas.
No la exponga directamente a la luz del sol.
*No use la Webcam USB en sitios muy húmedos ni
polvorientos.
*Proteja el dispositivo de caídas y golpes – pueden dañar
la electrónica interna y / o las lentes.
*Nunca intente abrirla, no hay partes reparables dentro. La
garantía se anula al abrirla.
Garantía y responsabilidad
El fabricante otorga una garantía por 24 meses para el
reproductor y los accesorios suministrados. La garantía
comprende los daños y los vicios relacionados con
materiales defectuosos y confección imperfecta . L a
garantía no cubrirá los daños que ocurran por uso no
reglamentario o inadecuado, o por reparaciones o cambios
en el aparato efectuados sin la autorización del fabricante.
El fabricante tampoco asumirá la responsabilidad por
daños sufridos a causa de lucro cesante.
Page 8

Soporte y Servicio técnico
Para cualquier consulta técnica puede acudir a su punto de
venta o contactar con el servicio técnico de LEOTEC. Más
información disponible en el sitio web: www.leotec.com o
mediante el e-mail: soporte@leotec.com
Page 9

Product Introduction
Thank you for using the new generation digital webcam.
This webcam works with a USB port to be connected with
PC. It is an ideal webcam for its plug and play and
real-time transmission. Its mini size, easily carrying, high
resolution and high speed make your life more colorful
and make your long distance communications fresh and
vivid.
Package content
In this package you will find
Webcam USB
CD-ROM with driver
This Manual
Technical Specification
* High Resolution CMOS Color Sensor
* 5G lens
*Resolution: 1.3 Mega pixel (real 1280x1024)
(interpolated 16M)
* Interface: USB2.0
*Supported Formats
1280x1024 18fps
640x480 30fps max. (native)
352x288 30fps max.
320x240 30fps max.
176x144 30fps max.
160x120 30fps max.
Higher, interpolated resolutions like max. 16Mega Pixel
available after installing driver
Page 10

* Focus: 30mm to infinite (some models with fixed focus;
some models with focus ring, by turning it either to left or
right, the picture can be brought into focus; some models
with autofocus, the picture can be brought into focus
automatically)
* Built-in Image Compression
* Automatic White Balance
* Automatic Color Compensation
*Manual Snapshot Snapshot button is necessary for this,
a still photo can be taken by pressing this button after
installing driver
* With or without microphone for options
System Requirement
*Available USB port
* Pentium 200 or Higher CPU
* Windows XP/ VISTA / 7 System
* At least 20MB available hard drive space
* CD/DVD Drive
* At least 32MB internal storage
*VGA Display Card Av ailable for DIRECTX
Installation Wi ndows XP, Vista and 7
The webcam is plug-and-play; the necessary drivers are
included with most versions of Windows. In most cases all
you need to do is connect the webcam, and it will install
automatically.
Note: The snapshot button will not work when installing
the webcam via this method.
If the webcam does not install automatically or if you wish
Page 11
to use the snapshot button, place the CD driver in the CD
player, and follow the instructions on screen.
Vi ewing the webcam picture
The picture of the webcam can be viewed as follows:
Double click the “AmCap” icon on your desktop, and then
select “Device”, make sure to select “Vimicro USB 2.0
UVC PC Camera”.
Page 12

In “AmCap”, open the “Options” menu, Select “Preview”.
This option enables you to view the picture.
In the same menu, the “Video Capture Filter--- ” and
“Video Capture Pin---“ options enable you to change the
settings of the webcam.
Page 13

Important!
* Do not expose the Webcam USB to extreme
temperatures. Do not place the device in direct sunlight or
in the direct vicinity.
*Do not use the Webcam USB in extremely moist or dusty
surroundings.
*Protect the device against powerful shocks and falls –
they may damage the internal electronics.
*Never attempt to open the device yourself, there are no
serviceable parts inside. Opening the device will cause the
warranty to lapse.
Page 14

Guarantee and responsibility
The manufacturer gives a guarantee for 24 months for
the player and the accessories provided. The guarantee
includes the damage and defects related to defective
materials and imperfect preparation. The guarantee does
not cover the damage that can occur for incorrect or
inadequate use, or for repairs of changes in the apparatus
made without the authorization of the manufacturer. The
manufacturer does not assume the responsibility for
damage incurred due to redundant profit.
Support and Technical Service
For any technical consultation you can go to the
place of purchase or contact the technical service of
LEOTEC. There is more available information in the
website: www.leotec.com or by means of the e-mail:
support@leotec.com
 Loading...