

Page 1
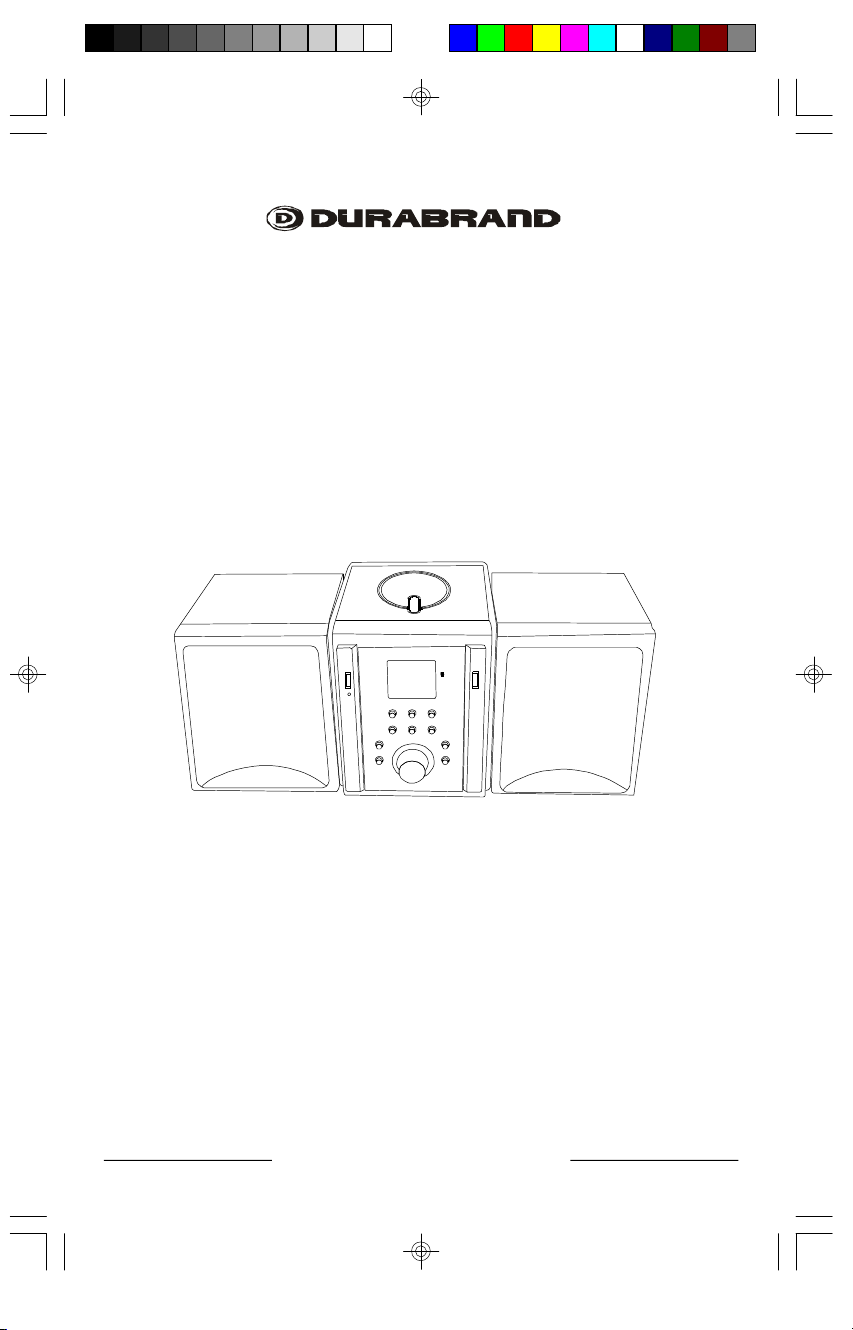
CD MICRO SYSTEM
PLL DIGITAL AM/FM RECEIVER
WITH REMOTE CONTROL
MODEL SL-515
OPERATING INSTRUCTIONS
LARGE BACKLIT LCD DISPLAY FOR CLOCK, RADIO, & CD PLAY
•
PLAYS ALL MUSIC COMPACT DISCS
•
FULLY PROGRAMMABLE CD PLAYER WITH REPEAT PLAY
•
DIGITAL RADIO WITH PRESETS
•
RECEIVES AM/FM STEREO BROADCASTS
•
PRESET GRAPHIC EQUALIZER SYSTEM
•
INCLUDES ALL FEATURE REMOTE CONTROL
•
PLEASE READ CAREFULLY BEFORE USE
IB-SL515(SY-CL)-WC-E-032505.pmd 5/17/2005, 9:07 AM1
IB-SL515(SY-CL)-WC-E-032505
Page 2
WARNING
TO PREVENT FIRE OR SHOCK HAZARD, DO NOT USE THE PLUG WITH AN EXTENSION CORD,
RECEPTACLE OR OTHER OUTLET UNLESS THE BLADES CAN BE FULLY INSERTED TO
PREVENT BLADE EXPOSURE. TO REDUCE THE RISK OF FIRE OR ELECTRIC SHOCK, DO NOT
EXPOSE THIS APPLIANCE TO RAIN OR MOISTURE. TO PREVENT ELECTRICAL SHOCK, MATCH
WIDE BLADE PLUG TO WIDE SLOT, FULLY INSERT.
CAUTION
RISK OF ELECTRIC SHOCK
DO NOT OPEN
The lightning flash with
arrowhead symbol, within an
equilateral triangle, is intended
to alert the user to the presence
of uninsulated “dangerous
voltage” within the product’s
enclosure that may be of
sufficient magnitude to
constitute a risk of electric
shock to persons.
WARNING: TO REDUCE THE
RISK OF ELECTRIC SHOCK,
DO NOT REMOVE COVER
(OR BACK). NO USER
SERVICEABLE PARTS INSIDE.
REFER SERVICING TO
QUALIFIED SERVICE
PERSONNEL.
The exclamation point within
an equilateral triangle is
intended to alert the user to
the presence of important
operating and maintenance
(servicing) instructions in the
literature accompanying the
appliance.
See the back of the set
IMPORTANT SAFETY INSTRUCTIONS
1.Read these instructions.
2.Keep these instructions.
3.Heed all warnings.
4.Follow all instructions.
5.Do not use this apparatus near water.
6.Clean only with dry cloth.
7.Do not block any ventilation openings, install in accordance with the manufacturer’s
instructions.
8.Do not install near any heat sources such as radiators, heat registers, stoves, or
other apparatus (including amplifiers) that produce heat.
9.Do not defeat the safety purpose of the polarized or grounding-type plug. A polarized
plug has two blades with one wider than the other. A grounding type plug has two
blades and a third grounding prong. The wide blade or the third prong are provided
for your safety. If the provided plug does not fit into your outlet, consult an electrician
for replacement of the obsolete outlet.
10.Protect the power cord from being walked on or pinched particularly at plugs,
convenience receptacles, and the point where they exit from the apparatus.
11.Only use attachments/accessories specified by the manufacturer.
12.Unplug this apparatus during lightning storms or when unused for long periods of time.
13.Refer all servicing to qualified service personnel. Servicing is required when the apparatus
has been damaged in any way, such as power-supply cord or plug is damaged, liquid has
been spilled or objects have fallen into the apparatus, the apparatus has been exposed
to rain or moisture, does not operate normally or has been dropped.
14.This appliance shall not be exposed to dripping or splashing water and that no object
filled with liquid such as vases shall be placed on the apparatus.
1
IB-SL515(SY-CL)-WC-E-032505
IB-SL515(SY-CL)-WC-E-032505.pmd 5/17/2005, 9:07 AM2
Page 3

IMPORTANT SAFETY INSTRUCTIONS
15.Servicing - Do not attempt to service this product yourself as opening or removing covers
may expose you to dangerous voltage or other hazards. Refer all servicing to qualified
service personnel.
16.Damage Requiring Service - Unplug this product from the wall outlet and refer servicing
to qualified service personnel under the following conditions:
a)When the power-supply cord or plug is damaged.
b)If liquid has been spilled, or objects have fallen into the product.
c)If the product has been exposed to rain or water.
d)If the product does not operate normally by following the operating instructions.
Adjust only those controls that are covered by the operating instructions as an
improper adjustment of other controls may result in damage and will often require
extensive work by a qualified technician to restore the product to its normal operation.
e) If the product has been dropped or damaged in any way.
f )When the product exhibits a distinct change in performance - this indicates a need
for service.
17.Replacement Parts - When replacement parts are required, be sure the service
technician has used replacement parts specified by the manufacturer or have the
same characteristics as the original part. Unauthorised substitutions may result in
fire, electric shock, or other hazards.
18.Safety Check - Upon completion of any services or repairs to this product, ask the
service technician to perform safety checks to determine that the product is in
proper operating condition.
ADDITIONAL SAFETY INSTRUCTIONS
1.Power Sources - The appliance should be connected to a power supply only of the
type described in the operating instructions or as marked on the appliance.
2.Wall or Ceiling Mounting - The appliance should not be mounted to a wall or ceiling.
3.Object and Liquid Entry - Care should be taken so that objects do not fall and liquids
are not spilled into the enclosure through openings.
4.Servicing - The user should not attempt to service the appliance beyond that described
in the operating instructions. All other servicing should be referred to qualified service
personnel.
Do not apply oil or petroleum products or solvents to any part of this set.
Use of controls or adjustments or performance of procedures other than those
CAUTION
specified herein may result in hazardous radiation exposure.
This compact disc player is classified as CLASS 1 LASER PRODUCT as stated
at the back of the set.
Please read important information displayed on the rating plate located on the
back enclosure before connecting to AC Mains or any operation.
This Class B digital apparatus complies with Canadian ICES-003.
2
IB-SL515(SY-CL)-WC-E-032505.pmd 5/17/2005, 9:07 AM3
IB-SL515(SY-CL)-WC-E-032505
Page 4
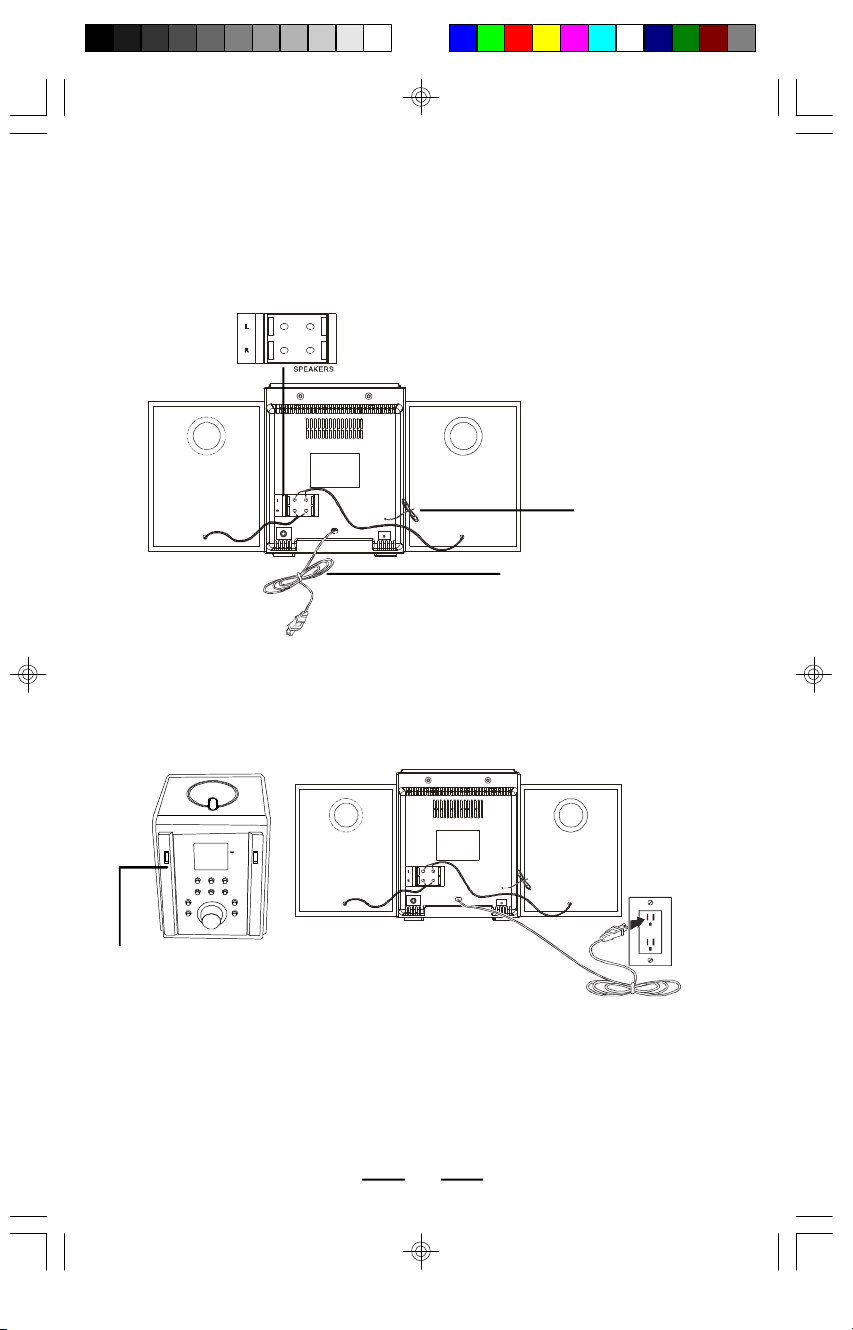
CONNECTING THE SPEAKERS
Carefully unwind and stretch out the speaker wires on the back of each speaker box
and plug the right terminals into SPEAKERS jacks marked R, and the left terminals
into SPEAKERS jacks marked L.
NOTE: Make sure the red wires are plugged into the red jacks and the black
wires are plugged into the black jacks.
FM ANTENNA
AC CORD
POWERING UP
Plug the AC POWER CORD into a 120V, 60Hz wall outlet. The STANDBY indicator
will be steadily on. This indicator shows you that the set & outlet are OK.
To a wall outlet
STANDBY indicator
NOTE: If the plug of the AC power cord does not match your outlet, do not force it.
IB-SL515(SY-CL)-WC-E-032505.pmd 5/17/2005, 9:07 AM4
Reverse it and try again. This plug is polarized and only fits one way into
the wall outlet.
3
IB-SL515(SY-CL)-WC-E-032505
Page 5
REMOTE CONTROL
You can control the player with the provided REMOTE control.
1.MUTE
2.SKIP/TUNING +
1
2
3
4
5
6
7
8
9
10
3.SKIP/TUNING -
11
12
4.RANDOM
13
5.PRESET/REPEAT
14
15
6.INTRO
16
7.MEMORY
17
18
8.AM/FM
9.CD
10.ON/STANDBY
11.STOP
12.PLAY/PAUSE
13.P. EQ
14.MODE/REMAIN
15.MONO/STEREO
16.D-BASS
17.VOLUME -
18.VOLUME +
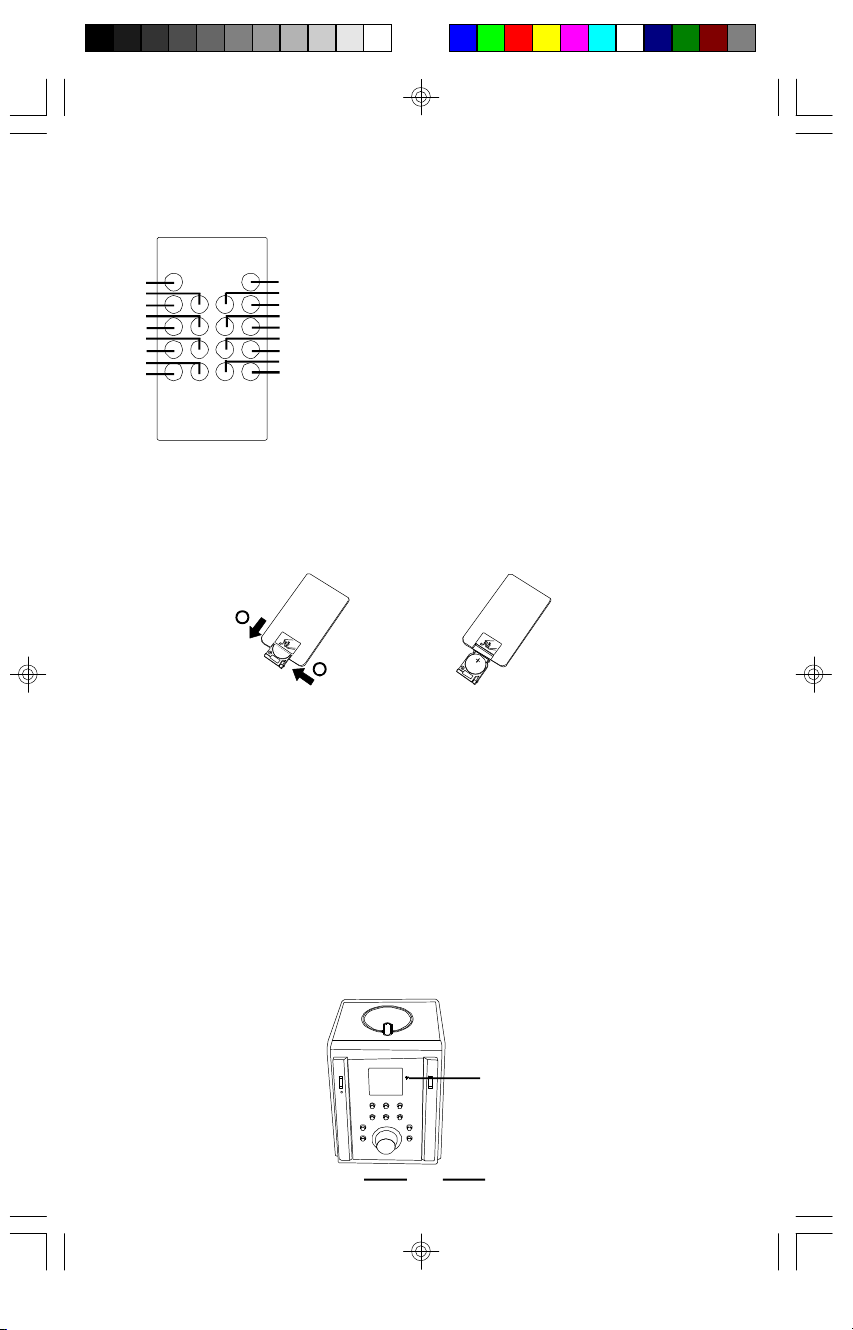
Open the battery compartment cover on the back of the remote control by pushing
the little knob on the right side to the left and then pulling the battery compartment out
(as shown in the following drawings FIG. 1, FIG. 2). Check the lithium battery
(CR2025) inside the compartment to confirm it is installed correctly so that the panel
marked + is upside. Close the battery compartment cover and then pull the transparent
PVC piece out from the battery compartment.
2
1
NOTE:
Point the remote control at the remote SENSOR.
•
The functions of the buttons on the remote control are the same as the
•
FIG. 1
FIG. 2
corresponding controls on the main unit.
When the battery is exhausted, the remote control will no longer operate the
•
system. Replace the battery with a new one.
When the remote control is not to be used for a long time (2 months or more),
•
remove the battery to avoid possible damage that may be caused by battery
leakage.
Avoid keeping the remote control in extremely hot or humid locations.
•
The remote control’s operating distance is about 0.2m (8 inches) to 5m (16.5
•
feet) away from the remote SENSOR. The operation angle is about 30o.
IB-SL515(SY-CL)-WC-E-032505.pmd 5/17/2005, 9:07 AM5
Remote SENSOR
4
IB-SL515(SY-CL)-WC-E-032505
Page 6
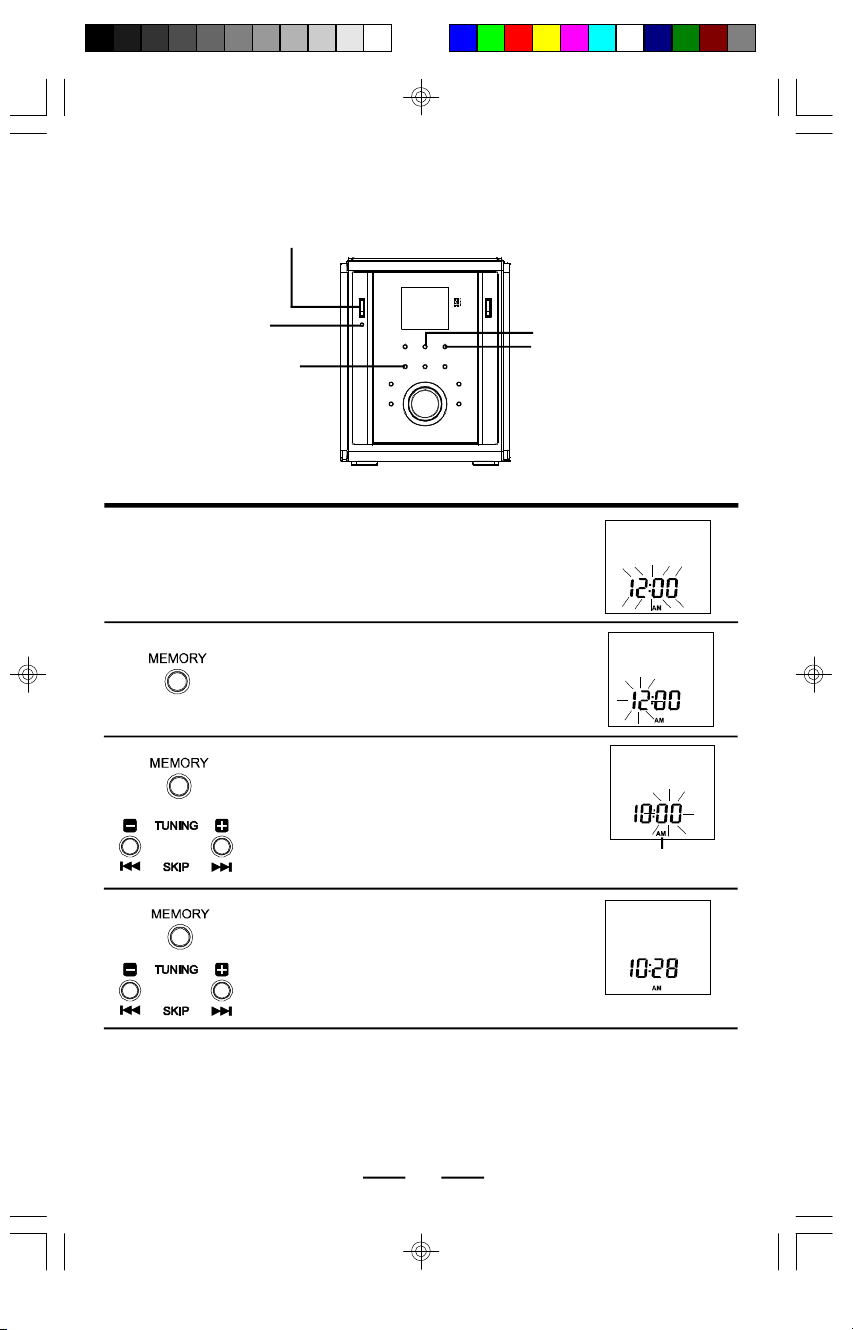
SETTING THE CLOCK
ON/STANDBY button
1
2
3
STANDBY
indicator
MEMORY button
Connect the AC power cord into a live wall
outlet (see page 3). The STANDBY indicator
will be steadily on and the display will show
“12:00” flashing.
Press the MEMORY button, the hour digits
will flash in the display.
Press the TUNING + or - button to set the
right hour time you want. Press the MEMORY
button again to confirm. The minute digits will
start to flash in the display.
TUNING - button
TUNING + button
AM will show in the
display for AM time.
4
NOTE: To change AM to PM time, advance the clock time 12 hours.
IB-SL515(SY-CL)-WC-E-032505.pmd 5/17/2005, 9:07 AM6
Press the TUNING + or - button to set the
right minute time you want. Press the
MEMORY button again to confirm.
5
IB-SL515(SY-CL)-WC-E-032505
Example: 10:28 A.M.
Page 7

PLAYING A CD
ON/STANDBY button
STANDBY indicator
PLAY/PAUSE button
1
2
3
4
5
PUSH OPEN area
PRESET EQ button
CD button
Connect the AC power cord (see page 3).
Press the ON/STANDBY button,
the STANDBY indicator will go off
and the display will light up.
Press the CD button, the display
will show 6 dashes “-- -- --”
flashing, and then show “ ”.
Open the CD door by pressing
PUSH OPEN area and push a CD
disc down onto the center
spindle. The label side of the CD
should face upward.
Close the CD door by pushing it
down. The display will show the
total tracks and playing time on
that CD.
Press the PLAY/PAUSE button.
“--:--” will flash in the display
about three seconds and then the
player will play all the tracks
(songs) once.
Total playing
time
Total tracks
6
IB-SL515(SY-CL)-WC-E-032505.pmd 5/17/2005, 9:07 AM7
Press the PRESET EQ (P. EQ on
the REMOTE) button to choose
different music effects (FLAT,
ROCK, JAZZ, POP or CLASSIC).
6
IB-SL515(SY-CL)-WC-E-032505
Page 8

USE THESE BUTTONS FOR
ADDITIONAL OPERATIONS
Open the CD door by pressing here
MODE/REMAIN
button
TIP
When CD play
is paused, the
elapsed playing
time will flash and
no music will play.
To resume play,
press the PLAY/
PAUSE button
again, the elapsed
playing time will
stop flashing and
music will play.
TIP
If you bump the set
or table it is sitting
on during CD play,
the music will stop
or skip for a few
seconds. This is
normal for this type
of player.
SKIP
PLAY/PAUSE
button
VOLUME control
To
Adjust the volume
Stop playback
Pause playback
Go to the next track
Go back to the previous
track
Locate a point in a song
To enjoy the music
without disturbing
others
To enhance the low
frequency (bass)
sounds at low listening
levels
To check the remain
time
Remove the CD
To turn off the sound
instantly
Turn off the player
7
SKIP
STOP
button
PHONES jack
Press or Adjust
VOLUME control
STOP
PLAY/PAUSE
The elapsed playing time will flash
during pause. Press again to
resume play after pause.
SKIP
SKIP
SKIP or
Press and hold down while playing
until you find the point.
Insert your headphones (not
included) plug into the PHONES
jack (at the back of the set).
Press the D-BASS button on the
REMOTE, the word “D-BASS” will
show in the display.
During play, press the MODE/
REMAIN button once, the word
REMAIN and the remain time will
show in the display.
Press the PUSH OPEN area (press
STOP first).
Press the MUTE button on the
REMOTE, the “ ” will show
in the display frequently. Press it
again to restore sound and the
“ ” will show in the display,,
and then resume normal play.
Press the ON/STANDBY button,
the STANDBY indicator will go on.
IB-SL515(SY-CL)-WC-E-032505
IB-SL515(SY-CL)-WC-E-032505.pmd 5/17/2005, 9:07 AM8
Page 9

CD REPEAT, INTRO, AND RANDOM PLAY
1. REPEAT PLAY
You can play CD tracks over and over in normal or programmed play mode (see
page 9).
ON/STANDBY button
STANDBY indicator
PLAY/PAUSE button
PRESET/REPEAT button
1.Press the ON/STANDBY button, the STANDBY indicator will go off and the display
will light up.
2. Press the CD button.
3.Select the track by pressing SKIP or , and then press PLAY/PAUSE .
4. Press the PRESET/REPEAT button.
To repeat
a single track (song)
all the tracks (all
songs)
programmed tracks
Press
Press the PRESET/REPEAT
button once
Press the PRESET/REPEAT
button twice
During programmed play,
press the PRESET/REPEAT
button twice
PRESET EQ button
SKIP
SKIP
CD button
Display shows
“REPEAT” flashing
“REPEAT” steadily on
“REPEAT” steadily on
(“MEMORY” also on)
To cancel Repeat Play
Press the PRESET/REPEAT button until the “REPEAT” disappear in the display.
2. INTRO PLAY
This plays the first 10 seconds of all songs in sequential order to introduce the songs.
1.In stop mode, press the INTRO button on the REMOTE, the word INTRO will
show in the display.
2.Press the PLAY/PAUSE button, the first 10 seconds of each song on the CD will
play in sequential order.
3.When you find a song you like, press the INTRO button again the word INTRO will
disappear from the display, normal play will be resumed, that song (and the following
songs) will play normally until you press the STOP button.
3. RANDOM PLAY
To play the songs in random order
During play, press the RANDOM button on the REMOTE, the word RANDOM will
show in the display, and the set will play all the tracks in random order.
Press SKIP button to skip to the next random song.
To resume normal play
Press the RANDOM button again, the word RANDOM will disappear.
8
IB-SL515(SY-CL)-WC-E-032505
IB-SL515(SY-CL)-WC-E-032505.pmd 5/17/2005, 9:07 AM9
Page 10

CD PROGRAM PLAY
You can make a program of up to 16 tracks in the order you want them to be played.
SKIP
MEMORY button
1.During stop mode, press the MEMORY button, the
words MEMORY and TRACK will be steadily on in
the display. The symbol “Pr:01 --” also will show in
the display.
SKIP
2.Press the SKIP button
tracks you want to program in the order you want.
The track number you selected will flash in the
display.
3.Press the MEMORY button to confirm. The symbol
“Pr:02 --” will show in the display.
4.Repeat above steps 2 and 3. You can program up to
16 tracks, then the display will show “Pr:01” again
and the first track you programmed.
5.Press the PLAY/PAUSE button to start the
programmed play. The word MEMORY will show in
the display.
NOTE:
1. Programming can only be done in STOP mode.
2. The programmed memory will be lost if the power is shut off or the door is opened.
or to select the
To change the current program
Just create a new program following the programming procedure.
To cancel Programmed Play
Press the STOP button twice.
IB-SL515(SY-CL)-WC-E-032505.pmd 5/17/2005, 9:07 AM10
9
IB-SL515(SY-CL)-WC-E-032505
Page 11

LISTENING TO THE RADIO
STEREO
ON/STANDBY button
STANDBY indicator
1
2
3
PRESET EQ button
TUNING - button
TUNING + button
AM/FM button
Connect the AC power cord (see page 3).
Press the ON/STANDBY button, the
STANDBY indicator will go off and the
display will light up.
Press the AM/FM button to choose the
proper band (AM or FM) that you want.
Tune into the station you prefer using
the TUNING + or - button. Each time
the button is pressed, the frequency
changes. Keep the button pressed, the
station will change rapidly (automatic
tuning), release the button and it will stop
at the next strong station.
(NOTE: For FM stations, unwind and
straighten out the FM antenna at the
back of the set.)
4
5
IB-SL515(SY-CL)-WC-E-032505.pmd 5/17/2005, 9:07 AM11
“ STEREO ” will light up when receiving
an FM Stereo broadcasts.
Press the PRESET EQ (P. EQ on the
REMOTE) button to choose different
music effects (FLAT, ROCK, JAZZ, POP
or CLASSIC).
10
IB-SL515(SY-CL)-WC-E-032505
Page 12

PRESETTING RADIO STATIONS
STEREO
STEREO
STEREO
Allows you to store your favorite stations for quick one button tuning.
MEMORY button
PRESET/REPEAT button
Connect the AC power cord (see page 3).
1
2
3
4
5
TIP:UP TO 12 AM AND 20 FM STATIONS CAN BE STORED INTO THE PRESET
MEMORY LOCATIONS.
Follow Steps 1 to 3 (LISTENING
TO THE RADIO on the previous
page) to select a station.
Press the MEMORY button, “CH”
will show and the station preset “-
-” will flash in the display.
While the “--” is flashing, press
the PRESET/REPEAT button to
choose a memory location (1-20
for FM and 1-12 for AM), the station
preset number will flash in the
display.
Press the MEMORY button again
to confirm, the station now
broadcasting is stored into that
preset memory location.
Repeat the above steps to store
other stations into memory.
IB-SL515(SY-CL)-WC-E-032505.pmd 5/17/2005, 9:07 AM12
11
IB-SL515(SY-CL)-WC-E-032505
Page 13

LISTENING TO THE PRESET STATIONS
(after you programmed them)
Press the ON/STANDBY button, the
1
display will light on.
Press the AM/FM button to select the
2
desired band.
Press the PRESET/REPEAT button
3
several times to choose a memory
location (1-20 for FM and 1-12 for AM).
You will receive the station you stored
into that preset memory location.
Connect the AC power cord (see page 3).
ON/STANDBY
button
PRESET/REPEAT button
AM/FM button
USE THESE BUTTONS FOR ADDITIONAL
OPERATIONS
ON/STANDBY
button
VOLUME control
PRESET EQ
button
1. Adjust the volume
2.Turn off the Radio
3.Choose different
sound effect
TIP
If the FM broadcast is noisy, press the
•
MONO/STEREO button on the REMOTE until
the word “STEREO” disappears in the display.
Next time you want to listen to the radio, just
•
press the AM/FM button, the player will
automatically start playing the previously
tuned station.
Press or AdjustTo
VOLUME control
ON/STANDBY button
PRESET EQ (P. EQ on
the REMOTE) button
TO IMPROVE BROADCAST RECEPTION
Unwind the FM ANTENNA (thin wire) at the back of the set and straighten it out for FM
reception.
Bring the set near a window, or rotate the set for better AM reception.
IB-SL515(SY-CL)-WC-E-032505.pmd 5/17/2005, 9:07 AM13
Unwind the FM ANTENNA
12
IB-SL515(SY-CL)-WC-E-032505
Page 14

SETTING THE TIMER
ON/STANDBY button
STANDBY indicator
MODE/REMAIN button
MEMORY button
TIMER button
VOLUME control
You can set the timer to wake you up at a certain time. Before setting, please select
your choice of source (AM, FM station, or CD disc). Press the ON/STANDBY button
to make sure the STANDBY indicator is steadily on and the current time will show in
the display.
1.Press the MODE/REMAIN button, “12:00” will
show and the words “TIMER ON” will flash in
the display.
2.Press the TIMER button, the word “TIMER” will
flash and you can set up the start time of CD
or radio.
3.Press the MEMORY button, the hour digits will
flash in the display. Press TUNING + or - button
to set the right hour time you want.
4.Press the MEMORY button again to confirm.
The minute digits will start to flash in the display.
5.Press the TUNING + or - button to set the right
minute time you want. Press the MEMORY
button again to confirm.
6.Press the MODE/REMAIN button, “12:00” will
show and the words “TIMER OFF” will flash in
the display.
7.Press the TIMER button, the word “TIMER” will
flash and you can set up the off time of the play.
8.Repeat above steps 3 to 5 to set up the timer off
time. Press the MODE/REMAIN button again,
the current time and the words “TIMER ON
OFF” will show in the display.
9.The music will start at the TIMER ON time and
will be off at the TIMER OFF time you setted.
NOTE:
You can check the timer on and off time at any time by pressing the MODE/REMAIN button.
To cancel the timer
1.In STANDBY mode, press the MODE/REMAIN button and then the TIMER button,
the words “TIMER ON” will flash in the display. Press the MODE/REMAIN button
again, the words “TIMER OFF” will show in the display and the TIMER ON time
is cancelled.
2.Press the TIMER button, both of the words “TIMER OFF” will flash in the display.
Press the MODE/REMAIN button again, the words “TIMER OFF” will disappear
and the TIMER OFF time is cancelled.
13
TUNING - button
TUNING + button
AM/FM button
CD button
IB-SL515(SY-CL)-WC-E-032505
IB-SL515(SY-CL)-WC-E-032505.pmd 5/17/2005, 9:07 AM14
Page 15

PRECAUTIONS
On Safety
As the laser beam used in the CD player
•
section may be harmful to the eyes, do
not attempt to disassemble the cabinet.
Refer servicing to qualified personnel
only.
Should any solid object or liquid fall into
•
the player, unplug the player, and have
it checked by qualified personnel before
operating it any further.
On Placement
Do not leave the player in a location
•
near a heat source, or in a place subject
to direct sunlight, excessive dust or
mechanical shock.
Do not place the player on an inclined or
•
unstable place.
Do not place anything within 1 inch of
•
the back of the cabinet. The ventilation
holes must not be covered for the player
to operate properly and prolong the life
of its components.
If the player is left in a car parked in the
•
sun, be sure to choose a location in the
car where the player will not be subjected
to the direct rays of the sun.
Since a strong magnet is used for the
•
speakers, keep personal credit cards
using magnetic coding or springwound
watches away from the player to prevent
possible damage from the magnets.
Notes on CDs
Before playing, clean the CD with a
•
cleaning cloth. Wipe the CD from the
center out.
Do not use solvents such as benzine,
•
thinner, commercially available cleaners
or anti-static spray intended for vinyl LPs.
Do not expose the CD to direct
•
sunlight or heat sources such as hot air
ducts, nor leave it in a car parked in direct
sunlight as there can be a considerable
rise in temperature inside the car.
Do not stick paper or stickers on the CD,
•
nor scratch the CD.
After playing, store the CD in its case.
•
If there is a scratch, dirt or fingerprints
on the CD, it may cause a tracking error
or skipping.
MAINTENANCE
Cleaning the Lens
If the lens becomes dirty, it may cause a
skipping of sound during CD operation.
Clean with a commercially available lens
cleaner and blower.
On Operation
If the player is brought directly from a
•
cold to a warm location, or is placed in
a very damp room, moisture may
condense on the lens inside the CD
player section. Should this occur, the
player will not operate properly. In this
case, remove the CD and wait about an
hour for the moisture to evaporate.
This CD player is designed to be played
•
on a stable no vibration position. If you
bump the set during CD play, the music
will stop or skip for a few seconds. This is
normal for this type of player.
IB-SL515(SY-CL)-WC-E-032505.pmd 5/17/2005, 9:07 AM15
Cleaning the Cabinet
Clean the cabinet, panel and controls with a
soft cloth slightly moistened with a mild
detergent solution. Do not use any type of
abrasive pad, scouring powder, or solvent,
such as alcohol or benzine.
14
IB-SL515(SY-CL)-WC-E-032505
Page 16

TROUBLE SHOOTING
Problem
The power is not on.
The CD/Radio function
knobs do not work.
There is no sound.
The remote has no
General
function.
The set does not work
properly.
“ ” shows in the
display even when a CD
is in place.
CD does not play.
CD Player
Remedy
Connect the AC power cord to a wall outlet
•
securely.
Press the ON/STANDBY button and make sure
•
the STANDBY indicator is off.
Adjust the volume.
•
Unplug the headphones when listening through
•
speakers.
Check the battery to confirm if it is installed
•
correctly. And make sure the transparent PVC
piece has been pulled out.
The set may need to reset. Use a pointed object
•
like a straightened paper clip and stick it into
the small hole at the back of the set (marked
RESET) for 2 seconds. All the settings and
programs will be lost and the display will resume
to the initial display.
Insert the CD with the label side up.
•
Make sure that the CD compartment is closed.
•
Place the CD with the label side up.
•
CD play is paused, press PLAY/PAUSE button
•
again.
Clean the CD.
•
Take out the CD and leave the CD DOOR open
•
for about an hour to dry moisture condensation.
Make sure the CD button is pressed.
•
Try another compact CD, this set will not play
•
MP3 or WMA discs.
The sound drops out.
The sound is weak or has
poor quality.
Radio
IB-SL515(SY-CL)-WC-E-032505.pmd 5/17/2005, 9:07 AM16
The disc is badly damaged. Clean the disc,
•
replace the disc, or buy a disc repair polisher to
repair it yourself.
Place the player in a location free from vibration.
•
Fully stretch out the FM antenna to improve FM
•
reception.
Bring the set near a window, or rotate the set
•
for better AM receptionn.
15
IB-SL515(SY-CL)-WC-E-032505
Page 17

SPECIFICATION
General Description
Speakers: 4’’ 4 ohm
Output power:
Dimensions:
CD Section
Plays disc type:
Laser wavelength:
Tracking method:
Frequency response:
AC 120V, 60HzPower source:
2.5W/channel
Width:
Depth:
Height:
Weight:
Any normal CD used in portable players
760 - 800 NM
3 - spot error detection 3.86 mm lens
50Hz - 15kHz +1/-2dB
main set speaker
5 3/4’’
9 1/2’’
7’’
4.5LBs
5 1/8’’
6 1/8’’
6 3/4’’
2.3LBs
Radio Section
Frequency range:
LENOXX reserves the right to make design and specification changes for product
improvement.
PROTECT YOUR FINE FURNITURE!
WE RECOMMEND A CLOTH OR OTHER PROTECTIVE MATERIAL BE PLACED UNDER
THE SET WHEN PLACING IT ON SURFACE WITH A NATURAL OR LACQUER FINISH.
AM: 530 - 1700 kHzFM: 88 - 108 MHz
LIMITED WARRANTY
We warrant this product to be free from defects in material and workmanship under normal use
for a period of 1 year after purchase and we will repair it free of charge or replace it at no charge,
should it become defective under this warranty, providing you submit proof of purchase (sales slip)
with the set.
During the initial 1 year period after original purchase, we will service the set that is returned to
LENOXX ELECTRONICS CORP, prepaid, at no charge. After the initial 1 year period expires, we
will exchange, at no charge, any part that is defective, but will charge for the cost of labor, return
postage paid by Lenoxx.
This warranty does not apply to any products which have been subject to misuse, neglect or
accident. This warranty does not cover broken cord or cabinet. UNDER NO CIRCUMSTANCES
WILL LENOXX ELECTRONICS CORP. BE LIABLE FOR ANY INCIDENTAL OR CONSEQUENTIAL
DAMAGES. Some states do not allow the exclusion or limitation of incidental or consequential
damages, so the above limitations or exclusions may not apply to you.
This warranty gives you specific legal rights, and you may also have other rights which vary
from state to state. The following charges apply to repairs beyond the warranty period: $20.00. Be
sure to pack carefully and return postage paid insured together with your money order (personal
checks will not be accepted) and sales receipt to:
LENOXX ELECTRONICS CORP., 2 GERMAK DRIVE, CARTERET N.J. 07008
(MONDAY - THURSDAY 08:00 AM - 05:00 PM, FRIDAY: 08:00 AM - 01:00 PM EST)
For customer service dial 1-800-315-5885
http://www.lenoxx.com
© 2005 LENOXX ELECTRONICS CORP.
MADE & PRINTED IN CHINA
IB-SL515(SY-CL)-WC-E-032505.pmd 5/17/2005, 9:07 AM17
2 GERMAK DRIVE
CARTERET, N.J. 07008
16
IB-SL515(SY-CL)-WC-E-032505
 Loading...