

Page 1
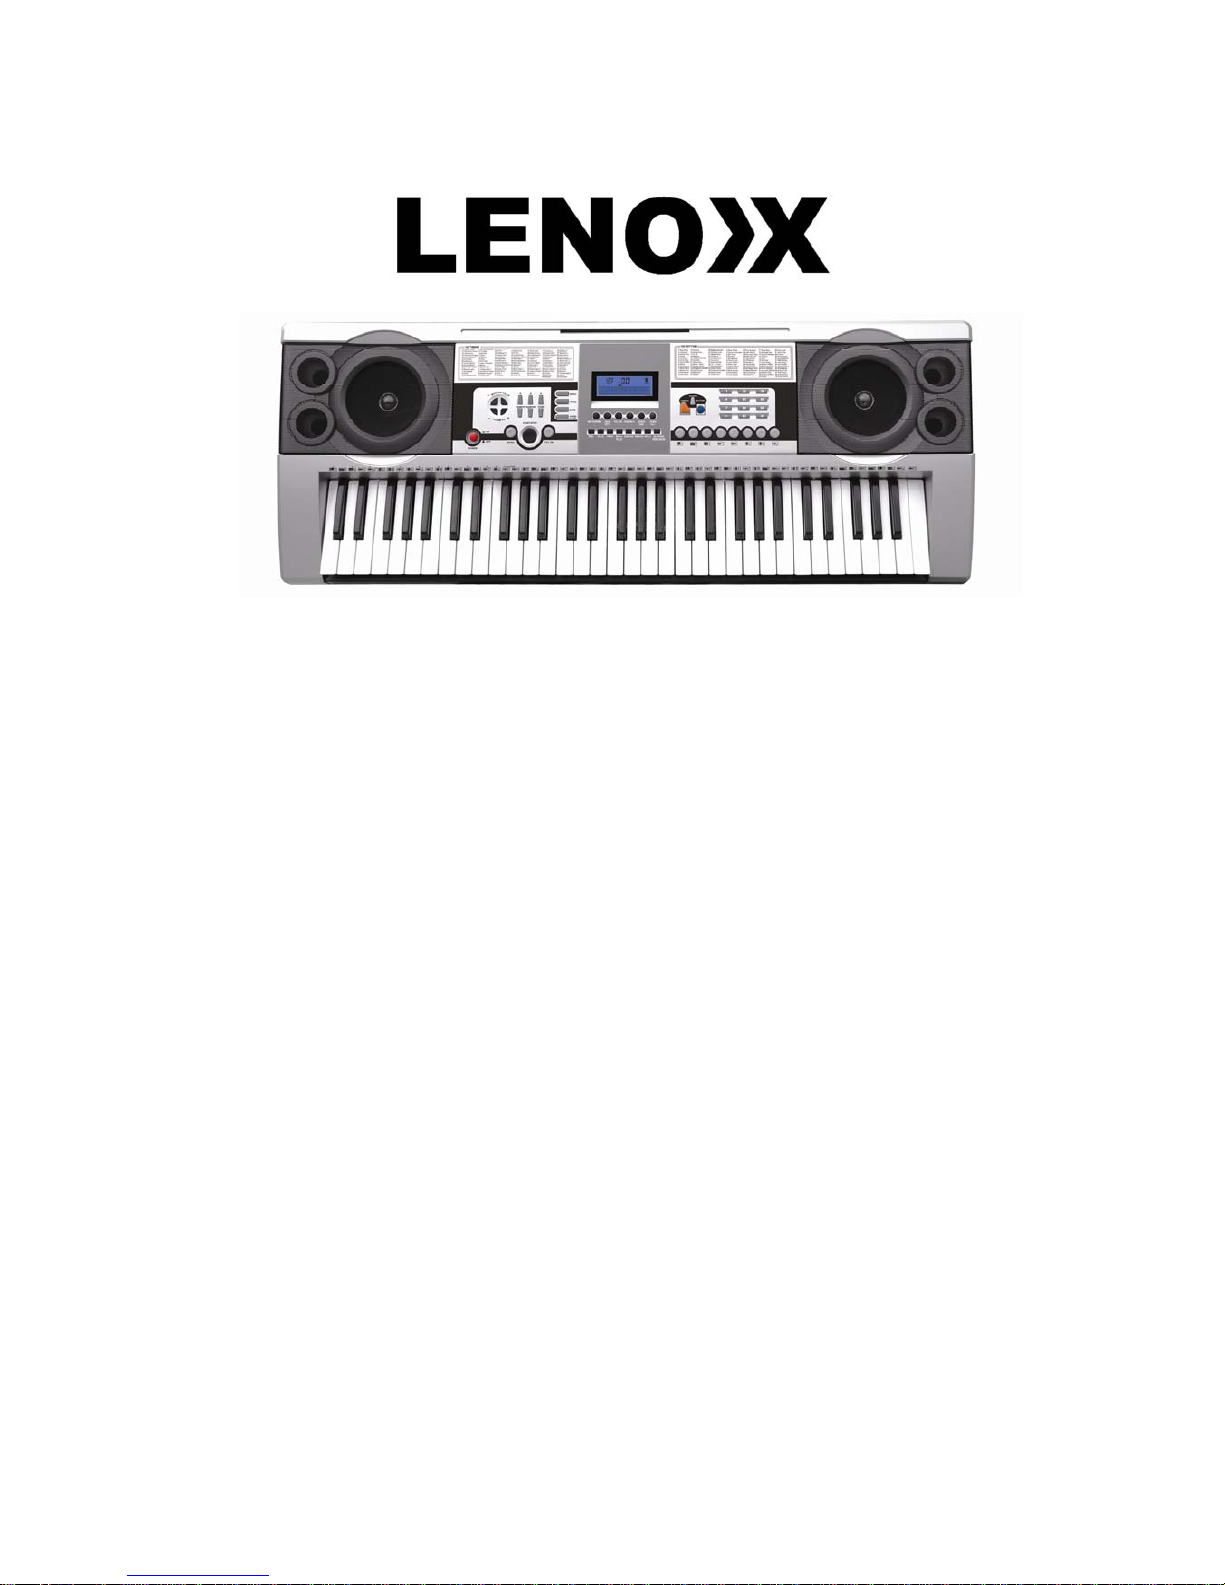
Model no: KB922
61 KEYS TEACHING-TYPE ELECTRONIC KEYBOARD
OWNER’S MANUAL
Page 2

Precautions
Read it carefully before proceeding
● Only use the supplied power adaptor. Do not use it if it is showing signs of wear and tear or
other damage.
● Do not disassemble the instrument nor make any changes inside of it. In the case of any
abnormal functions, stop using it immediately. Repairs may only be carried out by the qualified
maintenance personnel.
● Ensure the unit is turned off before connecting it with other amplifiers or speakers.
● Don’t leave the volume working in maximum or in a loud stage for a long period of time.
● Keep the instrument away from any heat sources, which may result in the
damage of the components.
● Keep the unit away from any liquid or from other particles getting into the instrument, which
may corrode the body or result in short circuit.
● Unplug the instrument before cleaning it and avoid using wet hands to
plug or unplug it.
● Clean the instrument with a piece of dry and soft cloth without paint,
alcohol or other chemicals.
● Turn off and unplug the instrument after performance or if the unit will not be used for a
long period of time.
● Warning! Please take care with using this unit close to your ears. Do not put your ears
close to the speaker when the keyboard is playing loudly. Exposing your ears to loud sounds
may cause damage to your hearing.
● The supply terminals are not to be short-circuited.
● The packaging has to be kept since it contains important information.
Contents
1 I. Panel Control and Outer Jacks
2 II. Preparation for Performance
III. Basic Method of Performance
3 IV Auto-Rhythm
5 V. Auto-Bass Chord
6 VI.Effect Control
7 VII. Record and Playback
8 VIII. Program and Null Play
IX. Intelligent Teaching Function
Page 3
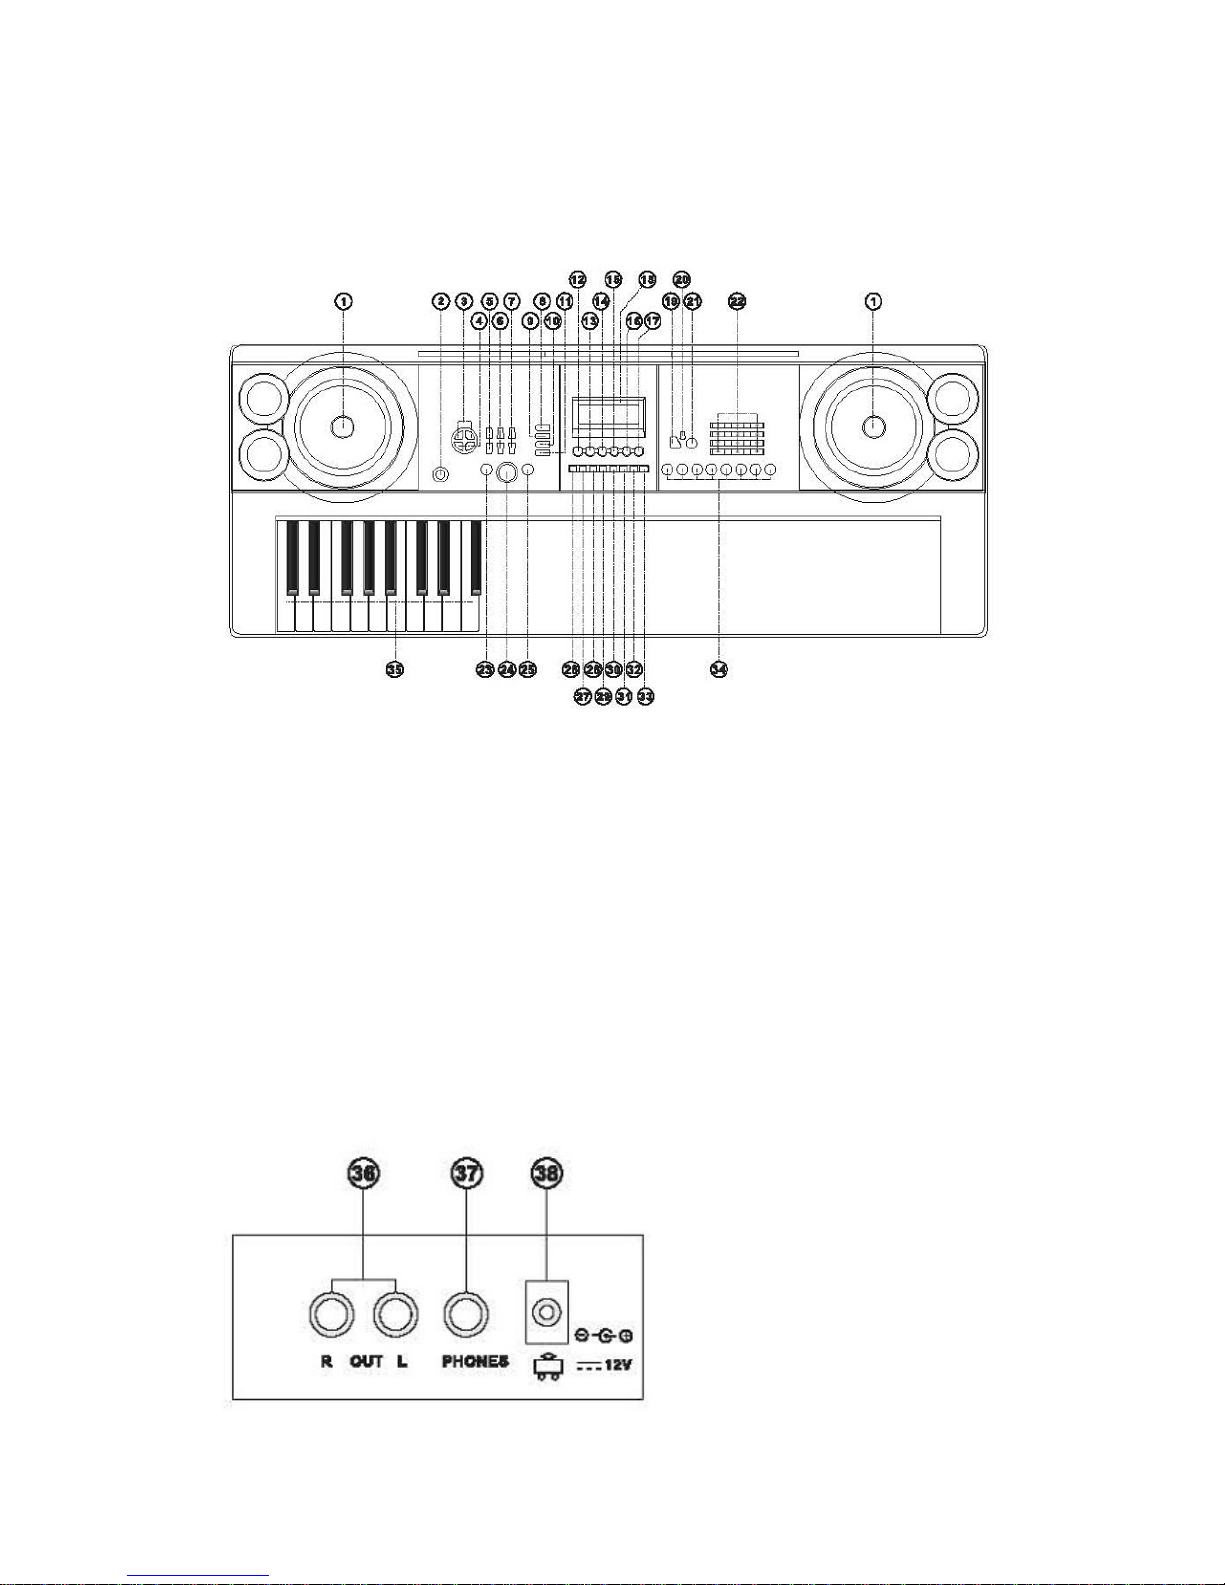
I. Panel Control
● Front panel
Speaker Chord Timbre 19 Timbre 28 Program
Power Switch 11 Chord Off 20 Song 29 Null play
Master Volume 12 Metronome 21 Rhythm 30 Sustain
Accom Volume 13 One Key 22 Numbers 31 Vibrato
Tempo 14 Follow Me 23 Sync 32 Split
Transpose 15 Ensemble 24 Start/Stop 33 Keyboard
Tune 16 Demo One 25 Fill in Percussions
Single 17 Dome All 26 Record 34 Panel Percussion
Fingered 18 LCD Display 27 Play-back 35 Chord Keyboard
● Rear-Panel
36. OUT L/R JACK 37. PHONES JACK 38. DC 12V IN JACK
P1
Page 4

II. Preparation for Performance
● Using AC/DC Power Supply Adaptor
The AC/DC power supply adaptor must be the one designated for the instrument. Please
connect one side to the power supply socket on the back-panel and the other to the city-power
network (Please notice that the input voltage should be the same as that of the power network.).
● Headphone jack
Insert the headphone (not included) into the phone jack on the back of the body, so that the
inner loudspeaker can be cut off automatically and the playing and singing can proceed without
disturbing others.
Note: Too high volume of the headphone may cause damage to hearing.
● Connection with Amplifiers or Acoustics
The instrument has an inner loudspeaker system and it can also be connected to other
amplifiers or loudhailers. First, shut off the instrument and the outer equipment, and then insert the
stereo frequency cable into the OUT L/R on the back-panel and the other into the LINE IN or
AUX IN jack of the outer equipment.
III. Basic Method of Performance
Press the [POWER] button with the back light on, the LCD display shows some information
of the present timbre, tempo,etc.
● Master Volume Adjustment
Press the [MASTER VOL +/-] button to increase or decrease the master volume. Apply the
both at the same time, the volume will turn back to the preset stage "12".
These two buttons also control the volume of accompaniment.
● Selection of Timbre
There are 100 kinds of timbres reserved in the system, ranging from "00" to "99". When
power on, the system automatically starts timbre selection with “TONE” appearing on the LCD
display. If there is no “TONE”, the function can be started by pressing the [Timbre] button.
P2
Page 5

The preset timbre is “00” standing for piano sound. The target timbre can be picked out by
the number buttons or the [+/-] buttons.
● Panel and Keyboard Percussions
There are 8 kinds of panel and keyboard percussions.
◆ Press the [Panel percussions] button, the related percussion sound can be reached.
◆ Press the [Keyboard Percussion] button, a keystroke of the black or white key
corresponds to a certain type of percussion sound. Press the button again, the function is off.
● Demonstration Songs
There are 10 pieces of demonstration songs reserved in the system, ranging from “”00 to “09”.
◆Press the [Demo one] button, the system is in the state of playing the present demo song
repeatedly. For another one, press the button to stop the present song, and again to play the next
one. In the charge of the [Song] button, the target song can also be picked out by the number
buttons or the [+/-] buttons.
◆Press the [Demo All] button, the system is in the stage of playing all the demo songs
successively.
◆In the course of playing demo songs, the timbre of the songs can be changed.
IV Auto-Rhythm
● Rhythm Selection
The system provides 100 kinds of rhythms, ranging from “00” to “99”.
Press the [Rhythm] button, “RHYTHM “appears on the LCD. The target rhythm can be picked
out by the number buttons or the [+ / -] buttons.
P3
Page 6

● Rhythm Control
1. Start Rhythm
Press the [Start/Stop] button to start the accompaniment rhythm.
Before starting the rhythm, press [SYNC] button with “SYNC” appearing on the LCD
display, any keystroke on the chord keyboard ( 19 keys on the left part of the keyboard).can
make the performance and the accompaniment rhythm go on at the same time.
2. Fill in
In the state of the rhythm press the[Fill in] button, a piece of intermezzo can be filled in
automatically.
3. Stop the Accompaniment
Press the [Start/Stop] button, the accompaniment. Rhythm quits at once.
● Auto-Metronome
There are 4 kinds of metronome reserved in the system, 1/4beat, 2/4beat, 3/4beat, and 4/4beat.
Press the [Metronome] button for the first time, the rhythm will go on at 1/4beat; for the second
time, at 2/4beat; do as this for 3/4 beat and 4/4 beat. For the fifth time, the function quits.
This function can also be stopped by press the [Start/Stop] button.
● Tempo Adjustment
The preset tempo is 120 beats/min. Press the [Tempo+ ] /[Tempo-] button, the tempo of the
rhythm can be quickened or slowed. Apply the both at the same time, the tempo turns back to
the preset one.
● Accompaniment Volume Adjustment
The same as the adjustment of the master volume..
P4
Page 7

V. Auto-Bass Chord
● Single-finger Chord
When the rhythm is playing, press the [Single] button with “SIN” appearing on the LCD display,
the single-finger chord can be performed on the chord keyboard with the Single-finger scales.
P5
Page 8

● Fingered Chord
When the rhythm playing, press the [Fingered] button with “FIN” appearing on the display, the
fingered chord can be performed on the chord keyboard with the fingered scales.
● Chord off
Press the [Chord off] button to stop the chord.
● Chord Timbre Selection
In the state of chord accompaniment, the timbre of chord can be changed by pressing the
[Chord Timbre] button, and the original timbre can be regained by pressing it again.
VI. Effect Control
● Sustain
Press the [Sustain] button with "SUS" appearing on the display, the sound of the
keystrokes takes on a sustain effect. Press the button again with "SUS"
disappearing, the function quits.
P6
Page 9

● Vibrato
Press the [Vibrato] button with “VIB” appearing on the display, the sound of the
keystrokes takes on a vibrato effect. Press the button again with "VIB" disappearing,
the function quits.
● Transpose
Press the [Transpose+/-] button to transpose the tone of the notes. The transpose
may be adjusted from”-6” to “+6”. Apply the both buttons at the same time, the
notes turns normal to the preset stage “0”.
● Tune
Press the [Tune+/-] button to accurately correct the pitch from “-99” to “+99”.
Press both buttons at the same time, the keyboard turns normal and the pitch turns
to the preset stage “0”.
● Double Keyboard
Press the [Split] button with “SPLIT” appearing on the display, the keyboard is
divided into two parts, the 24 keys on the left and the rest keys, to form a double
keyboard. The timbre of the two parts can be different. The left part keeps the
primary timbre but the right part can gain another timbre. Meanwhile, the pitch of
the left part reses by 8 degrees while that of the right part falls by 8 degrees, that is,
the pitch of the two parts become consistent. Press the [Split] button again, the
function quits.
Also, this function will exit when the auto-chord works.
VII. Record and Playback
● Record
Press the [Rec] button with the auto beats following and “RECORD “appearing
on the display. In this state, all notes that are played can be recorded with the
automatic beats. The new record will take the place of the primary one when this
function is applied again or when the program function is on.
P7
Page 10

● Stop
Press the [Rec] button again or the [Playback] button, recording stops. Also the
recording will stop automatically with “REC” disappearing when the memory is full.
● Playback
Press the [Playback] button with “PLAY” appearing on the display, all the recorded
notes can be played. Pressing the button again can get a second listening. But at the
course of playing, pressing the button can stop the playing.
VIII. Program and Null Play
● Programming
Press the [Prog] button with ”PROG” appearing on the display, the auto beats
follow and the keyboard percussion in also ready. In this state, any bit piece of the
panel or the keyboard percussion can be selected to edit a piece of rhythm. The
re-program or the full memory will stop the program. The newly edited rhythm or
the new record will take the place of the primary one.
● Null Play
Press the [Null Play] button with “PLAY” appearing on the display, the edited
rhythm can be played repeatedly. Press the button again the playing stops.
IX Intelligent Teaching Function
Intelligent teaching contains 3 steps, which can lead the beginners to playing
the instrument step by step. First, the beginners can practice and get familiar with
the melody and the beats of a certain song through [One Key], then [Follow] the
performance, at last do an [Ensemble] with the system.
P8
Page 11

● One-key
Press the [One Key] button with “LEARN” appearing on the display and the
One-Key teaching function is ready. Then press the [Song] button and choose a
demo song by number buttons or the [+/-] buttons. Also the selection of demo song
can be the first then the start of One-Key.
Now the practice of the target song’s melody can be carried out on the keyboard.
Any note key, even the wrong one, can precede the whole melody. During the
practicing, on the screen, there are also twinkling marks indicating the correct note
keys on the stave and on the keyboard.
Press the [One Key] button again, the function quits.
● Follow
The start of this function is the same as that of [One Key].
In the charge of the [Follow] button, when playing the demo song, the twinkling
marks on the screen can guide the learner to hit the right keys. When there is a
mistake, the melody of the demo song cannot go on until it is corrected.
Press the [Follow] button again, the function quits.
● Ensemble
The start of this function is the same as that of [One Key]
In the charge of the [Ensemble] button, the performer can do an ensemble together
with the system. Any keystroke can start the auto accompaniment. If there is no
keystroke within 5 seconds, the system will complete the whole melody
automatically.
Press the [Ensemble] button again, the function quits.
P9
Page 12

 Loading...