

Page 1
®
COMPCOMP
COMP
COMPCOMP
DUALDUAL
DUAL
DUALDUAL
CASSETTE AM/FM STEREO POR CASSETTE AM/FM STEREO POR
CASSETTE AM/FM STEREO POR
CASSETTE AM/FM STEREO POR CASSETTE AM/FM STEREO POR
PLAPLA
YS ALLYS ALL
PLA
YS ALL
PLAPLA
YS ALLYS ALL
FULLFULL
YY
FULL
Y
FULLFULL
YY
HIGH SPEED DUBBING FOR FHIGH SPEED DUBBING FOR F
HIGH SPEED DUBBING FOR F
HIGH SPEED DUBBING FOR FHIGH SPEED DUBBING FOR F
RECEIVES AM/FM STEREO BROADCASTSRECEIVES AM/FM STEREO BROADCASTS
RECEIVES AM/FM STEREO BROADCASTS
RECEIVES AM/FM STEREO BROADCASTSRECEIVES AM/FM STEREO BROADCASTS
BASS BOOST SWITCHBASS BOOST SWITCH
BASS BOOST SWITCH
BASS BOOST SWITCHBASS BOOST SWITCH
RECORDS FROM CD, RADIO, TRECORDS FROM CD, RADIO, T
RECORDS FROM CD, RADIO, T
RECORDS FROM CD, RADIO, TRECORDS FROM CD, RADIO, T
CONTINUOUS TCONTINUOUS T
CONTINUOUS T
CONTINUOUS TCONTINUOUS T
RECORDER DECKRECORDER DECK
RECORDER DECK
RECORDER DECKRECORDER DECK
DETDET
ACHABLE SPEAKER SYSTEMACHABLE SPEAKER SYSTEM
DET
ACHABLE SPEAKER SYSTEM
DETDET
ACHABLE SPEAKER SYSTEMACHABLE SPEAKER SYSTEM
FM STEREO AND POWER LED INDICAFM STEREO AND POWER LED INDICA
FM STEREO AND POWER LED INDICA
FM STEREO AND POWER LED INDICAFM STEREO AND POWER LED INDICA
2 W2 W
AA
YY
2 W
A
Y
2 W2 W
AA
YY
ACTACT
ACT
ACTACT
WITH DETWITH DET
WITH DET
WITH DETWITH DET
OPERAOPERA
OPERA
OPERAOPERA
MUSIC COMP MUSIC COMP
MUSIC COMP
MUSIC COMP MUSIC COMP
PROGRAMMABLE CD PLA PROGRAMMABLE CD PLA
PROGRAMMABLE CD PLA
PROGRAMMABLE CD PLA PROGRAMMABLE CD PLA
APE RELAAPE RELA
APE RELA
APE RELAAPE RELA
POWER - AC/DC POWER - AC/DC
POWER - AC/DC
POWER - AC/DC POWER - AC/DC
PLEASE READ CAREFULLY BEFORE USE
DISC PLA DISC PLA
DISC PLA
DISC PLA DISC PLA
ACHABLE SPEAKERSACHABLE SPEAKERS
ACHABLE SPEAKERS
ACHABLE SPEAKERSACHABLE SPEAKERS
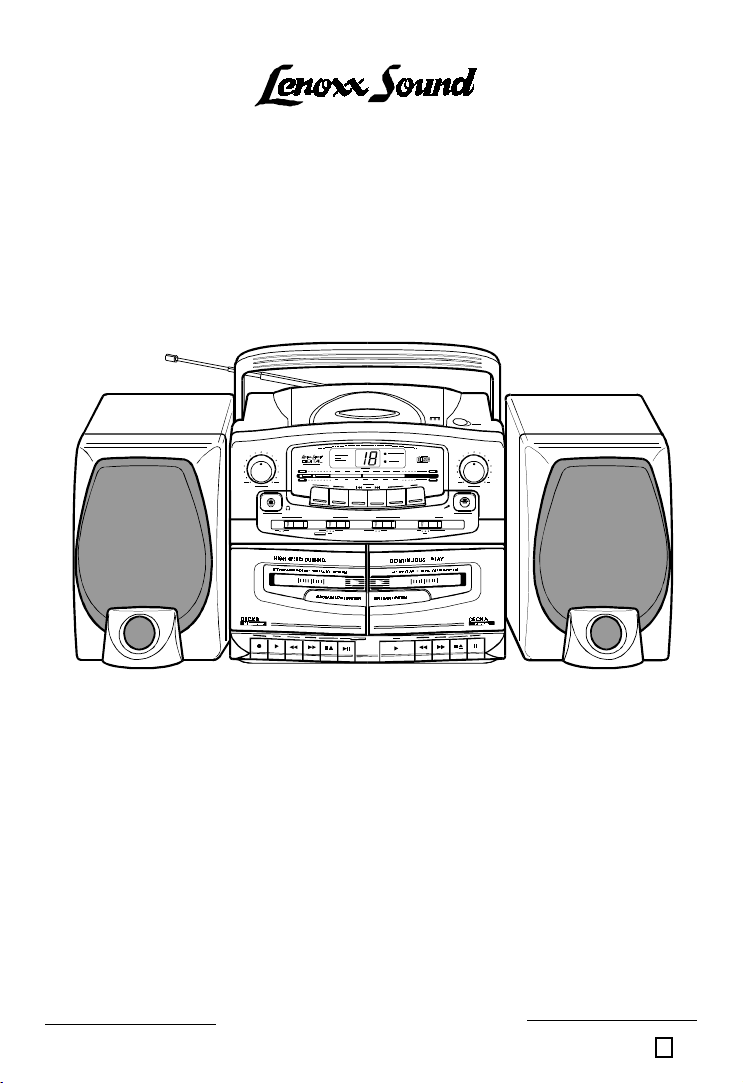
MODEL CD-155MODEL CD-155
MODEL CD-155
MODEL CD-155MODEL CD-155
TING INSTRUCTIONSTING INSTRUCTIONS
TING INSTRUCTIONS
TING INSTRUCTIONSTING INSTRUCTIONS
ACTACT
DISCS DISCS
ACT
DISCS
ACTACT
DISCS DISCS
ASTAST
AST
ASTAST
APE OR BUILAPE OR BUIL
APE OR BUIL
APE OR BUILAPE OR BUIL
YY
PLA PLA
Y
PLA
YY
PLA PLA
YER WITH REPEAYER WITH REPEA
YER WITH REPEA
YER WITH REPEAYER WITH REPEA
T T
APE COPIESAPE COPIES
T
APE COPIES
T T
APE COPIESAPE COPIES
TT
-IN MICROPHONE-IN MICROPHONE
T
-IN MICROPHONE
TT
-IN MICROPHONE-IN MICROPHONE
YY
- FROM PLA - FROM PLA
Y
- FROM PLA
YY
- FROM PLA - FROM PLA
TT
ORSORS
T
ORS
TT
ORSORS
YER TYER T
YER T
YER TYER T
CD-155S112598
YERYER
YER
YERYER
TT
ABLEABLE
T
ABLE
TT
ABLEABLE
TT
FEA FEA
TURETURE
T
FEA
TURE
TT
FEA FEA
TURETURE
OO
O
OO
E V.1
Page 2
SAFETY INSTRUCTIONSSAFETY INSTRUCTIONS
SAFETY INSTRUCTIONS
SAFETY INSTRUCTIONSSAFETY INSTRUCTIONS
CAUTIONCAUTION
CAUTION
CAUTIONCAUTION
RISK OF ELECTRICRISK OF ELECTRIC
RISK OF ELECTRIC
RISK OF ELECTRICRISK OF ELECTRIC
SHOCKSHOCK
SHOCK
SHOCKSHOCK
DO NOT OPENDO NOT OPEN
DO NOT OPEN
The lightning flash and
arrow head within the
triangle is a warning
sign alerting you of
dangerous voltage
inside the product.
WW
ARNING: TARNING: T
W
ARNING: T
WW
ARNING: TARNING: T
THESE IMPORTANT SAFETY INSTRUCTIONS ARE INCLUDED, AS APPLICABLE TO THE
APPLIANCE, CONVEYING TO THE USER THE INFORMATION ITEMIZED BELOW:
Read InstructionsRead Instructions
1.
Read Instructions - All the safety and operating instructions should be read before the
Read InstructionsRead Instructions
appliance is operated.
Retain Instructions Retain Instructions
2.
Retain Instructions - The safety and operating instructions should be retained for
Retain Instructions Retain Instructions
future reference.
Heed WarningsHeed Warnings
3.
Heed Warnings - All warnings on the appliance and in the operating instructions
Heed WarningsHeed Warnings
should be adhered to.
Follow Instructions Follow Instructions
4.
Follow Instructions - All operating and use instructions should be followed.
Follow Instructions Follow Instructions
Water and MoistureWater and Moisture
5.
Water and Moisture - The appliance should not be used near water - for example near
Water and MoistureWater and Moisture
a bathtub, washbowl, kitchen sink, laundry tub, in a wet basement, or near a swimming
pool, and the like.
Wall or Ceiling MountingWall or Ceiling Mounting
6.
Wall or Ceiling Mounting - The appliance should not be mounted to a wall or ceiling.
Wall or Ceiling MountingWall or Ceiling Mounting
VV
entilationentilation
7.
V
entilation - The appliance should be situated so that its location or position does not
VV
entilationentilation
interfere with its proper ventilation. For example, the appliance should not be situated
on a bed, sofa, rug, or similar surface that may block the ventilation openings; or,
placed in a built-in installation, such as a bookcase or cabinet that impede the flow air
through the ventilation openings.
Heat Heat
8.
Heat - The appliance should be situated away from heat sources such as radiators,
Heat Heat
heat registers, stoves, or other appliances (including amplifiers) that produce heat.
Power Sources Power Sources
9.
Power Sources - The appliance should be connected to a power supply only of the
Power Sources Power Sources
type described in the operating instructions or as marked on the appliance.
Grounding or Polarization Grounding or Polarization
10.
Grounding or Polarization - Precautions should be taken so that the grounding or
Grounding or Polarization Grounding or Polarization
polarization means of an appliance is not defeated.
Power Cord Protection Power Cord Protection
11.
Power Cord Protection - Power supply cords should be routed so that they are not
Power Cord Protection Power Cord Protection
likely to be walked on or pinched by items placed upon or against them, paying particular
attention to cords at plugs, convenient receptacles, and the point where they exit
from the appliance.
Cleaning Cleaning
12.
Cleaning - The appliance should be cleaned only as recommended by the manufacturer.
Cleaning Cleaning
Nonuse periodsNonuse periods
13.
Nonuse periods - The power cord of the appliance should be unplugged from the
Nonuse periodsNonuse periods
outlet when left unused for a long period of time.
O REDUCE THE RISK OF FIRE OR ELECTRIC SHOCK, DO NOTO REDUCE THE RISK OF FIRE OR ELECTRIC SHOCK, DO NOT
O REDUCE THE RISK OF FIRE OR ELECTRIC SHOCK, DO NOT
O REDUCE THE RISK OF FIRE OR ELECTRIC SHOCK, DO NOTO REDUCE THE RISK OF FIRE OR ELECTRIC SHOCK, DO NOT
EXPOSE THIS APPLIANCE TO RAIN OR MOISTURE.EXPOSE THIS APPLIANCE TO RAIN OR MOISTURE.
EXPOSE THIS APPLIANCE TO RAIN OR MOISTURE.
EXPOSE THIS APPLIANCE TO RAIN OR MOISTURE.EXPOSE THIS APPLIANCE TO RAIN OR MOISTURE.
DO NOT OPENDO NOT OPEN
CAUTION: TO REDUCE THE
RISK OF ELECTRIC SHOCK,
DO NOT REMOVE COVER (OR
BACK). NO USER SERVICEABLE
PARTS INSIDE. REFER
SERVICING TO QUALIFIED
SERVICE PERSONNEL.
The exclamation point
within the triangle is a
warning sign alerting you of
important instructions
accompanying the product.
1
CD-155S112598
E V.1
Page 3

SAFETY INSTRUCTIONSSAFETY INSTRUCTIONS
SAFETY INSTRUCTIONS
SAFETY INSTRUCTIONSSAFETY INSTRUCTIONS
Object and Liquid EntryObject and Liquid Entry
14.
Object and Liquid Entry - Care should be taken so that objects do not fall and liquids
Object and Liquid EntryObject and Liquid Entry
are not spilled into the enclosure through openings.
Damage Requiring Service Damage Requiring Service
15.
Damage Requiring Service - The appliance should be serviced by qualified service
Damage Requiring Service Damage Requiring Service
personnel when:
A. The power supply cord or the plug has been damaged; or
B. Objects have fallen, or liquid has been spilled into the appliance; or
C. The appliance has been exposed to rain; or
D. The appliance does not appear to operate normally or exhibits a marked change in
performance; or
E. The appliance has been dropped, or the enclosure damaged.
ServicingServicing
16.
Servicing - The user should not attempt to service the appliance beyond that described
ServicingServicing
in the operating instructions. All other servicing should be referred to qualified service
personnel.
Power linesPower lines
17.
Power lines - An outdoor antenna should be located away from power lines.
Power linesPower lines
Outdoor Antenna GroundingOutdoor Antenna Grounding
18.
Outdoor Antenna Grounding - If an outside antenna is connected to the receiver, be
Outdoor Antenna GroundingOutdoor Antenna Grounding
sure the antenna system is grounded so as to provide some protection against voltage
surges and built up static charges. Section 810 of the National Electrical Code, ANSI/
NFPA 70 provides information with respect to proper grounding of the mast and supporting
structure, grounding of the lead-in wire to an antenna discharge unit, size of grounding
conductors, location of antenna-discharge unit, connection to grounding electrodes,
and requirements for the grounding electrode. See Figure.
EXAMPLE OF ANTENNA GROUNDING AS PER
NATIONAL ELECTRICAL CODE
ANTENNA
LEAD IN WIRE
GROUND
CLAMP
ANTENNA DISCHARGE UNIT
(NEC SECTION 810-20)
ELECTRIC
SERVICE
EQUIPMENT
POWER SERVICE GROUNDING
ELECTRODE SYSTEM
(NEC ART 250, PART H)
GROUNDING CONDUCTORS
(NEC SECTION 810-21)
GROUND CLAMPS
NEC - NATIONAL ELECTRICAL CODE
It is the intent of Lenoxx that this product be used in full compliance with the
copyright laws of the United States and that prior permission be obtained from
copyright owners whenever copying tapes or CDs.
Do not apply oil or petroleum products or solvents to any part of this set.
CAUTIONCAUTION
CAUTION
CAUTIONCAUTION
Invisible laser radiation when open and interlocks defeated. Avoid exposure to beam.
CAUTIONCAUTION
CAUTION
CAUTIONCAUTION
Use of controls or adjustments or performance of procedures other than those
specified herein may result in hazardous radiation exposure.
This compact disc player is classified as CLASS 1 LASER product. The CLASS 1
LASER PRODUCT label is located on the set.
2
CD-155S112598
E V.1
Page 4

LOCALOCA
LOCA
LOCALOCA
1616
16
1616
1515
15
1515
1414
14
1414
1313
13
1313
2424
24
2424
1212
12
1212
11
1
11
22
2
22
33
3
33
44
4
44
55
5
55
66
6
66
77
7
77
1. POWER INDICATOR LAMP
2. FM STEREO INDICATOR LAMP
3. AM/FM DIAL SCALE
4. CD REPEAT/PROG. BUTTON
5. CD RANDOM BUTTON
6. CD BACK SEARCH/SKIP BUTTON
7. CD FORWARD SEARCH/SKIP BUTTON
8. CD PLAY/PAUSE BUTTON
9. CD STOP BUTTON
10. CD REPEAT LAMP
11. CD PLAY/PROG. LAMP
12. COMPACT DISC DISPLAY
13. FUNCTION AND POWER SWITCH
14. BASS BOOST SWITCH
15. STEREO HEADPHONE JACK
(headphones not included)
16. VOLUME CONTROL
17. FOLDING HANDLE
18. DUBBING SPEED SWITCH
19. BAND SWITCH
20. CD DOOR
21. CD DOOR OPEN BUTTON
TION OF CONTROLSTION OF CONTROLS
TION OF CONTROLS
TION OF CONTROLSTION OF CONTROLS
1919
19
1919
1818
18
1818
1717
17
1717
3636
36
3636
3434
34
3434
3232
32
1010
10
1010
3333
33
3333
3232
3737
37
3737
2525
25
2525
3535
35
3535
11
11
1
1
11
11
99
9
99
88
8
88
2020
20
2020
3131
31
3131
22. TUNING CONTROL
23. BUILT-IN CONDENSER MICROPHONE
24 .DETACHABLE SPEAKERS
25 . CASSETTE DOORS
26 . PAUSE BUTTON
27 . STOP/EJECT BUTTON
28 . FAST FORWARD BUTTON
29 . REWIND BUTTON
30 . PLAY BUTTON
31 . PAUSE BUTTON
32 . STOP/EJECT BUTTON
33 . FAST FORWARD BUTTON
34 . REWIND BUTTON
35 . PLAY BUTTON
36 . RECORD BUTTON
37.SPEAKER PLUGS
38 .DETACHABLE SPEAKER LOCKS
39 . BATTERY COMPARTMENT DOOR
40 .SPEAKER JACKS
41 . FM TELESCOPING ANTENNA
42 . AC SOCKET
2121
21
2121
2222
22
2222
2626
26
3030
30
3030
3838
38
3838
3
2929
29
2929
2626
2828
28
2828
2727
27
2727
3939
39
3939
(and RELAY PLAY)
2525
25
2525
4040
40
4040
2323
23
2323
FRONT VIEWFRONT VIEW
FRONT VIEW
FRONT VIEWFRONT VIEW
2424
24
2424
REAR VIEWREAR VIEW
REAR VIEW
REAR VIEWREAR VIEW
4141
41
4141
4242
42
4242
DECK A
PLAY
DECK B
PLAY/RECORD
CD-155S112598
3838
38
3838
3737
37
3737
E V.1
Page 5

INTRODUCTIONINTRODUCTION
INTRODUCTION
INTRODUCTIONINTRODUCTION
Your new COMPACT DISC PLAYER WITH AM/FM STEREO DUAL CASSETTE
RECORDER is a specially designed all solid state set which, with proper care, will give
you years of trouble-free service. Please read these operating instructions carefully
as they will help you obtain maximum performance from this set. Unpack the set
carefully and place it on a level surface, away from sources of excessive heat, such
as radiators.
POWER SUPPLPOWER SUPPL
POWER SUPPL
POWER SUPPLPOWER SUPPL
This set is designed to be operated from two different power sources as
listed below:
A. DC OPERAA. DC OPERA
A. DC OPERA
A. DC OPERAA. DC OPERA
This set runs on 8 size D batteries. For best performance, always use heavy duty
alkaline batteries.
TT
O INSTO INST
T
O INST
TT
O INSTO INST
1.Remove the Battery Door by gently pushing downward and outward.
2.Insert 8 size D batteries.
BE SURE TO PLACE THE BATTERIES AS PER THE SKETCH SHOWN.
3.Replace the Door.
NOTE:NOTE:
NOTE: Old batteries may swell and leak. To avoid damage to your set, remove the
NOTE:NOTE:
NOTE:NOTE:
NOTE: To use your set on battery power, you
NOTE:NOTE:
NOTE:NOTE:
NOTE: Do not mix old and new batteries. Do not mix rechargeable (nickel cadmium)
NOTE:NOTE:
ALLALL
BA BA
ALL
BA
ALLALL
BA BA
batteries when the set is to be stored for long periods of time or if the batteries
become exhausted (the Power Lamp will not light if batteries are completely
dead.)
the wall outlet
and regular carbon zinc or alkaline batteries.
BATTERY INSTALLATION
LOWER
+
"D"
BATTERY DOOR
YY
- 2 W- 2 W
Y
- 2 W
YY
- 2 W- 2 W
TIONTION
TION
TIONTION
TTERIESTTERIES
TTERIES
TTERIESTTERIES
ANDAND
AND the back of the set.
ANDAND
"D"
1.5V SIZE "D" BATTERY
+++
"D" "D" "D"
"D"
"D" "D"
++++
UPPER
AA
YY
SYSTEM SYSTEM
A
Y
SYSTEM
AA
YY
SYSTEM SYSTEM
MUST MUST
MUST
MUST MUST
remove the AC Cord from
BACK OF SET
AC OUTLET
BOTH BOTH
BOTH
BOTH BOTH
NOTE:NOTE:
NOTE:POLARIZED AC PLUG
NOTE:NOTE:
NOTE: The (-) side of battery touches the spring
NOTE:NOTE:
B. AC OPERAB. AC OPERA
B. AC OPERA
B. AC OPERAB. AC OPERA
Plug the AC Line Cord into the back of the set and insert the AC plug into 120 Volts AC
60Hz 15W standard household outlet.
NOTENOTE
NOTE: This cord is polarized. This means either end of the cord will only fit
NOTENOTE
NOTE:NOTE:
NOTE: If the AC Cord is plugged into the back of the set, the set will not work on
NOTE:NOTE:
into the socket or wall outlet. If it does not fit, do not force it, just reverse it and
try again.
batteries.To operate the set on batteries, remove the AC plug from the back of
the set.
TIONTION
TION
TIONTION
4
NOTE:NOTE:
ONE ONE
ONE way
ONE ONE
CD-155S112598
E V.1
 Loading...