

Page 1

ThinkPad
®
Z61
Service
an d Troubleshooting Guide
Includes:
v Introduction to other sources of information
v Important tips for taking care of your computer
v Diagnostics and troubleshooting
v Recovery options
v Help and service
v Warranty information for your computer
Page 2

Page 3

ThinkPad
®
Z61
Service
an d Troubleshooting Guide
Page 4

Note
Before using this information and the product it supports, be sure to read the following:
v Safety and Warranty Guide included in the package with this publication.
v Wireless related information in online Access Help and Appendix D, “Notices,” on page 57.
v ThinkPad Regulatory Notice included in the package with this publication.
First Edition (August 2006)
© Copyright Lenovo 2006. All rights reserved.
U.S. GOVERNMENT USERS – RESTRICTED RIGHTS: Our products and/or services are provided with RESTRICTED
RIGHTS. Use, duplication or disclosure by the Government is subject to the GSA ADP Schedule contract with Lenovo
Group Limited, if any, or the standard terms of this commercial license, or if the agency is unable to accept this
Program under these terms, then we provide this Program under the provisions set forth in Commercial Computer
Software–Restricted Rights at FAR 52.227-19, when applicable, or under Rights in Data-General, FA R 52.227.14
(Alternate III).
Page 5

Contents
Read first . . . . . . . . . . . . .v
Chapter 1. Finding information . . . . .1
This guide and other publications . . . . .1
Finding information with the ThinkVantage
button . . . . . . . . . . . . . .2
Chapter 2. Caring for your ThinkPad
computer . . . . . . . . . . . . .3
Chapter 3. Solving computer problems . .9
Frequently asked questions . . . . . . .10
Diagnosing problems . . . . . . . . .11
Diagnosing HDD from BIOS Setup Utility 12
Diagnosing problems using PC-Doctor
from the service partition . . . . . .12
Troubleshooting . . . . . . . . . . .12
Error messages . . . . . . . . . .12
Errors without messages . . . . . . .17
A password problem . . . . . . . .18
Keyboard problems . . . . . . . .19
Pointing device problems . . . . . .19
Standby or hibernation problems . . . .20
Computer screen problems . . . . . .21
Battery problems . . . . . . . . .22
A Hard disk drive problem . . . . . .23
Fingerprint authentication problems . . .23
A startup problem . . . . . . . . .23
Other problems . . . . . . . . . .23
Starting BIOS Setup Utility . . . . . . .24
Chapter 4. Recovery options . . . . . .27
Using Rescue and Recovery . . . . . . .27
Restoring factory contents . . . . . . .27
Recovering data . . . . . . . . . . .28
Installing a new operating system . . . . .28
Chapter 5. Upgrading and replacing
devices . . . . . . . . . . . . .29
Replacing the battery . . . . . . . . .29
Upgrading the hard disk drive . . . . . .30
Replacing memory . . . . . . . . . .33
Chapter 6. Getting help and service . . .39
Getting help and service . . . . . . . .39
Getting help on the We b . . . . . . . .39
Calling the Customer Support Center . . .39
Getting help around the world . . . . . .41
Appendix A. Warranty information . . . .43
Warranty Information . . . . . . . . .43
Warranty Period . . . . . . . . .43
Types of Warranty Service . . . . . .44
Worldwide telephone list . . . . . . .46
Appendix B. Customer Replaceable Units
(CRUs) . . . . . . . . . . . . .51
Appendix C. Features and Specifications 53
Features . . . . . . . . . . . . .53
Specifications . . . . . . . . . . .54
Appendix D. Notices . . . . . . . . .57
Notices . . . . . . . . . . . . . .57
Television output notice . . . . . . .58
Electronic emissions notices . . . . . . .58
Federal Communications Commission
(FCC) Statement . . . . . . . . .58
Industry Canada Class B emission
compliance statement . . . . . . . .59
Avis de conformité à la réglementation
d’Industrie Canada . . . . . . . . .59
European Union EMC Directive
conformance statement . . . . . . .59
Important information for the European
Directive 2002/96/EC . . . . . . . . .60
IBM Lotus Software Offer . . . . . . .61
Trademarks . . . . . . . . . . . .63
Index . . . . . . . . . . . . . .65
© Copyright Lenovo 2006 iii
Page 6

iv ThinkPad
®
Z61 Service and Troubleshooting Guide
Page 7
Read first
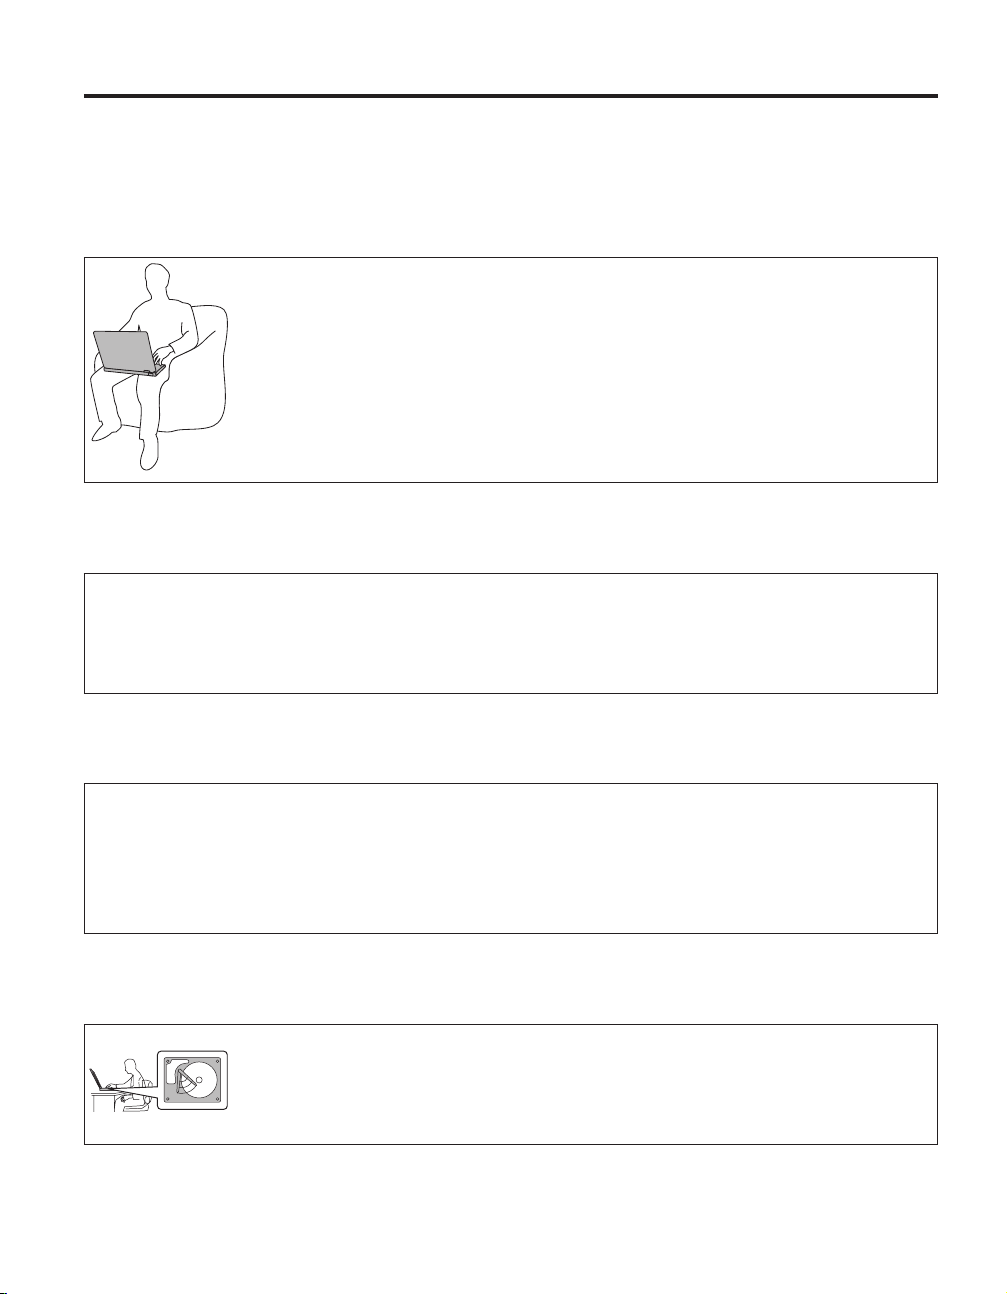
Avoid leaving the base of your computer, or any other part that
becomes hot during operation, in contact with your lap or any
part of your body for an extended period when the computer is
turned on or when the battery is charging.
When the ac adapter is connected to an electrical outlet and your computer, it
generates heat. Do not place the adapter in contact with any part of your
body while using it. Never use the ac adapter to warm your body. Extended
contact with your body, even through clothing, may cause a skin burn.
Route the cables of an ac adapter, a mouse, a keyboard, a printer, or any
other electronic device, or any communication lines, so that they cannot be
pinched by your machine or other objects, walked on, tripped over, or in any
way be subjected to treatment that could disturb the operation of your
computer. Applying strong force to the cables may damage or break them.
To prevent damage to the hard disk and subsequent data loss,
before moving your computer, press Fn+F4 to put it in standby
mode or turn it off. Make sure that the standby status indicator
is on (is green) before moving the computer.
© Copyright Lenovo 2006 v
Page 8
Read first
Do not drop, bump, scratch, twist, hit, vibrate, push or place
heavy objects on your computer, display, or external devices.
Use a quality carrying case that provides adequate cushion and
protection. Do not pack your computer in a tightly packed
suitcase or bag.
Place liquids away from your computer to avoid spills, and
keep your computer away from water to avoid the danger of
electrical shock.
vi ThinkPad
®
Z61 Service and Troubleshooting Guide
Page 9

Chapter 1. Finding information
This guide and other publications
Setup Instructions
helps you to unpack your ThinkPad computer and get started. It
includes a few tips for first-time users, and introduces software
preinstalled by Lenovo.
This Service and Troubleshooting Guide
provides information about caring for your ThinkPad computer, basic
troubleshooting information, some recovery procedures, help and
service information, and warranty information for your computer. The
troubleshooting information in this Guide applies only to problems
that might prevent you from accessing the comprehensive help and
information portal, called Productivity Center, preloaded on your
ThinkPad computer.
Access Help
is a comprehensive online manual that provides answers to most of
your questions about your computer, helps you to configure
preloaded features and tools, or solve problems. To open Access Help,
click Start, move the pointer to All Programs (in Windows
than Windows XP, Programs); then to ThinkVantage®. Click Access
Help.
®
other
Productivity Center
provides an easy access to software tools and key Lenovo sites,
eliminating the need to carry other reference manuals around. To open
Productivity Center, press the ThinkVantage button on your keyboard.
For more information about using the ThinkVantage button,
see“Finding information with the ThinkVantage button” on page 2.
Safety and Warranty Guide
includes general safety instructions and complete Lenovo Statement of
Limited Warranty.
Regulatory Notice
supplements this Guide. Read it before you use the wireless features
of your ThinkPad computer. The ThinkPad Z61 complies with the
radio frequency and safety standards of any country or region in
which it has been approved for wireless use. Yo u are requested to
install and use your ThinkPad computer in strict accordance with the
local RF regulations.
© Copyright Lenovo 2006 1
Page 10
Finding information
Finding information with the ThinkVantage button
The blue ThinkVantage button can help you in many situations when your
computer is working normally, and even when it is not. Press the
ThinkVantage button to open the Productivity Center and get access to
informative illustrations and easy-to-follow instructions for getting started and
staying productive.
You can also use the ThinkVantage button to interrupt the startup sequence of
your computer and start the Rescue and Recovery workspace, which runs
independently of the Windows operating system and is hidden from it.
2 ThinkPad
®
Z61 Service and Troubleshooting Guide
Page 11

Chapter 2. Caring for your ThinkPad computer
Though your computer is designed to function reliably in normal work
environments, you need to use common sense in handling it. By following
these important tips, you will get the most use and enjoyment out of your
computer.
Important tips:
Be careful about where and how you work
v Do not leave the base of your computer, or any other part that becomes hot
during operation, in contact with your lap or any part of your body for an
extended period when the computer is functioning or when the battery is
charging. Your computer dissipates some heat during normal operation.
This heat is a function of the level of system activity and battery charge
level. Extended contact with your body, even through clothing, could cause
discomfort or, eventually, a skin burn.
v When the ac adapter is connected to an electrical outlet and your computer,
it generates heat. Do not place the adapter in contact with any part of your
body while using it. Never use the ac adapter to warm your body.
Extended contact with your body, even through clothing, may cause a skin
burn.
v Route the cables of an ac adapter, a mouse, a keyboard, a printer, or any
other electronic device, or any communication lines, so that they cannot be
pinched by your machine or other objects, walked on, tripped over, or in
any way be subjected to treatment that could disturb the operation of your
computer. Applying strong force to the cables may damage or break them.
v Place liquids away from your computer to avoid spills, and keep your
computer away from water (to avoid the danger of electrical shock).
v Store packing materials safely out of the reach of children to prevent the
risk of suffocation from plastic bags.
v Keep your computer away from magnets, activated cellular phones,
electrical appliances, or speakers (within 13 cm/5 in).
v Avoid subjecting your computer to extreme temperatures (below 5°C/41°F
or above 35°C/95°F).
gentle with your computer
Be
v Avoid placing any objects (including paper) between the display and the
keyboard or under the keyboard.
© Copyright Lenovo 2006 3
Page 12

Caring for your ThinkPad computer
v Do not drop, bump, scratch, twist, hit, vibrate, push, or place heavy objects
on your computer, display, or external devices.
v Your computer display is designed to be opened and used at an angle
slightly greater than 90 degrees. Do not open the display beyond 180
degrees, as this might damage the computer hinge.
your computer properly
Carry
v Before moving your computer, be sure to remove any media, turn off
attached devices, and disconnect cords and cables.
v Be sure your computer is in standby or hibernation mode, or turned off,
before moving it. This will prevent damage to the hard disk drive and data
loss.
v When picking up your open computer, hold it by the bottom. Do not pick
up or hold your computer by the display.
v Use a quality carrying case that provides adequate cushion and protection.
Do not pack your computer in a tightly packed suitcase or bag.
Handle
storage media and drives properly
v Avoid inserting diskettes at an angle and attaching multiple or loose
diskette labels, as these can lodge in the drive.
v If your computer comes with an optical drive, do not touch the surface of a
disc or the lens on the tray.
v Wait until you hear the CD or DVD click into the center pivot of an optical
drive before closing the tray.
v When installing your hard disk, diskette or optical drive, follow the
instructions shipped with your hardware, and apply pressure only where
needed on the device.
care in setting passwords
Take
v Remember your passwords. If you forget a supervisor or hard disk
password, Lenovo authorized service provider will not reset it, and you
might have to replace your system board or hard disk drive.
important tips
Other
v Your computer modem might use only an analog telephone network, or
public-switched telephone network (PSTN). Do not connect the modem to a
PBX (private branch exchange) or any other digital telephone extension line
because this could damage your modem. Analog phone lines are often used
in homes, while digital phone lines are often used in hotels or office
buildings. If you are not sure which kind of phone line you are using,
contact your telephone company.
4 ThinkPad
®
Z61 Service and Troubleshooting Guide
Page 13

Caring for your ThinkPad computer
v Your computer might have both an Ethernet connector and a modem
connector. If so, be sure to connect your communication cable to the correct
one, so your connector is not damaged.
v Register your ThinkPad products with Lenovo (refer to the We b page:
www.lenovo.com/register). This can help authorities return your computer
to you if it is lost or stolen. Registering your computer also enables Lenovo
to notify you about possible technical information and upgrades.
v Only an authorized ThinkPad repair technician should disassemble and
repair your computer.
v Do not modify or tape the latches to keep the display open or closed.
v Take care not to turn your computer over while the ac adapter is plugged
in. This could break the adapter plug.
v Turn off your computer if you are replacing a device in a device bay, or else
verify that the device is warm- or hot-swappable.
v If you exchange drives in your computer, reinstall the plastic bezel faces (if
supplied).
v Store your external and removable hard disk, diskette or optical drives in
the appropriate containers or packaging when they are not being used.
v Before you install any of the following devices, touch a metal table or a
grounded metal object. This action reduces any static electricity from your
body. The static electricity could damage the device.
– PC Card
– ExpressCard
– Smart Card
– Memory Card, such as xD-Picture Card, SD Card, Memory Stick, and
MultiMediaCard
– Memory module
– PCI Expess Mini Card
– Communication Daughter Card
v When transferring data to or from a Flash Media Card, such as an SD card,
do not put your computer in standby or hibernation mode before the data
transfer is complete. To do so might cause damage to your data.
Cleaning
the cover of your computer
Occasionally clean your computer as follows:
1. Prepare a mixture of a gentle kitchen-use detergent (one that does not
contain abrasive powder or strong chemicals such as acid or alkaline). Use
5 parts water to 1 part detergent.
2. Absorb the diluted detergent into a sponge.
3. Squeeze excess liquid from the sponge.
Chapter 2. Caring for your ThinkPad computer 5
Page 14

Caring for your ThinkPad computer
4. Wipe the cover with the sponge, using a circular motion and taking care
not to let any excess liquid drip.
5. Wipe the surface to remove the detergent.
6. Rinse the sponge with clean running water.
7. Wipe the cover with the clean sponge.
8. Wipe the surface again with a dry, soft lint-free cloth.
9. Wait for the surface to dry completely and remove any cloth fibers from
the computer surface.
Cleaning
your computer keyboard
1. Absorb some isopropyl rubbing alcohol on a soft, dust-free cloth.
2. Wipe each keytop surface with the cloth. Wipe the keys one by one; if you
wipe several keys at a time, the cloth may hook onto an adjacent key and
possibly damage it. Make sure that no liquid drips onto or between the
keys.
3. Allow to dry.
4. To remove any crumbs and dust from beneath the keys, you can use a
camera blower with a brush or cool air from a hair drier.
Note: Avoid spraying cleaner directly on the display or the keyboard.
Cleaning
your computer display
1. Gently wipe the display with a dry, soft lint-free cloth. If you see a
scratchlike mark on your display, it might be a stain transferred from the
keyboard or the TrackPoint pointing stick when the cover was pressed
from the outside.
2. Wipe or dust the stain gently with a soft, dry cloth.
3. If the stain remains, moisten a soft, lint-free cloth with water or a 50-50
mixture of isopropyl alcohol and water that does not contain impurities.
4. Wring out as much of the liquid as you can.
5. Wipe the display again; do not let any liquid drip into the computer.
6. Be sure to dry the display before closing it.
6 ThinkPad
Care for the fingerprint reader
The following actions could damage the fingerprint reader or cause it not to
work properly:
v Scratching the surface of the reader with a hard, pointed object.
v Scraping the surface of the reader with your nail or anything hard.
v Using or touching the reader with a dirty finger.
®
Z61 Service and Troubleshooting Guide
Page 15

Caring for your ThinkPad computer
If you notice any of the following conditions, gently clean the surface of the
reader with a dry, soft, lint-free cloth:
v The surface of the reader is dirty or stained.
v The surface of the reader is wet.
v The reader often fails to enroll or authenticate your fingerprint.
Chapter 2. Caring for your ThinkPad computer 7
Page 16

Caring for your ThinkPad computer
8 ThinkPad
®
Z61 Service and Troubleshooting Guide
Page 17

Chapter 3. Solving computer problems
Frequently asked questions . . . . . . .10
Diagnosing problems . . . . . . . . .11
Diagnosing HDD from BIOS Setup Utility 12
Diagnosing problems using PC-Doctor
from the service partition . . . . . .12
Troubleshooting . . . . . . . . . . .12
Error messages . . . . . . . . . .12
Errors without messages . . . . . . .17
A password problem . . . . . . . .18
Pointing device problems . . . . . .19
Standby or hibernation problems . . . .20
Computer screen problems . . . . . .21
Battery problems . . . . . . . . .22
A Hard disk drive problem . . . . . .23
Fingerprint authentication problems . . .23
A startup problem . . . . . . . . .23
Other problems . . . . . . . . . .23
Starting BIOS Setup Utility . . . . . . .24
Keyboard problems . . . . . . . .19
Note: See Access Help if your system is running and Access Help is accessible. This chapter presents
information for use when Access Help is inaccessible.
© Copyright Lenovo 2006 9
Page 18

Solving computer problems
Frequently asked questions
This section lists frequently asked questions and tells where you can find
detailed answers. For details about each publication included in the package
with the ThinkPad computer, see “This guide and other publications” on page
1.
What safety precautions should I follow when using my ThinkPad
computer?
See the separate Safety and Warranty Guide for detailed information
about safety.
How can I prevent problems with my ThinkPad computer?
See “Read first” on page v, and also Chapter 2, “Caring for your
ThinkPad computer,” on page 3 of this Guide. More tips can be found
in the following sections of Access Help:
v Preventing problems
v Spills on the keyboard
What are the main hardware features of my new ThinkPad computer?
See the “ThinkPad tour” section of Access Help.
10 ThinkPad
Where can I find the detailed specifications for my machine?
See www.lenovo.com/think/support
I need to upgrade a device or I need to replace one of the following: the
hard disk drive, the PCI Express Mini Card, the Modem Daughter Card,
memory, the keyboard, or the palm rest.
See Appendix B, “Customer Replaceable Units (CRUs),” on page 51 of
this Guide for the list of Customer Replaceable Units and the location
of the instructions for removing or replacing components.
®
Z61 Service and Troubleshooting Guide
Page 19

Solving computer problems
My computer is not operating properly.
Study the “Problem solving ” section of Access Help. This Guide
describes only problems that might prevent you from accessing the
online help system.
Where are the recovery CDs?
No recovery CD or a Windows CD is provided with your computer
originally. For an explanation of the alternative recovery methods
offered by Lenovo, see “Restoring factory contents” on page 27 of this
Guide.
How can I contact the Customer Support Center?
See Chapter 6, “Getting help and service,” on page 39 of this Guide.
For the phone numbers of the Customer Support Center nearest to
you, see “Worldwide telephone list” on page 46.
Where can I find warranty information?
See the separate Safety and Warranty Guide for detailed warranty
information. For the warranty applicable to your computer, including
the warranty period and type of warranty service, see “Warranty
Information” on page 43.
Diagnosing problems
If you have a problem with your computer, you can test it by using
PC-Doctor
1. Click Start.
2. Move the pointer to All Programs (Programs in Windows 2000) and then
to PC-Doctor for Windows.
3. Click PC-Doctor.
For more information about PC-Doctor for Windows, see the Help for the
program.
Attention
Running any tests can take up to several minutes or longer. Make sure
you have time to run the entire test; do not interrupt the test while it is
running.
®
for Windows. To run PC-Doctor for Windows, do as follows:
Chapter 3. Solving computer problems 11
Page 20

Solving computer problems
When preparing to contact the Customer Support Center, be sure to print the
test log so that you can rapidly provide information to the help technician.
Diagnosing HDD from BIOS Setup Utility
You can diagnose the hard disk drive without starting up the operating
system. To diagnose the hard disk drive from the BIOS Setup Utility, do as
follows:
1. Remove any diskette from the diskette drive, and then turn off the
computer.
2. Turn on the computer.
3. While the message, “To interrupt normal startup, press the blue
ThinkVantage button,” is displayed at the lower left of the screen, press F1
to enter the BIOS Setup Utility.
4. Using cursor keys, select HDD diagnostic program. Press Enter.
5. Using cursor keys, select Main hard disk drive or Ultrabay hard disk
drive.
6. Press Enter to start the diagnostic program.
Diagnosing problems using PC-Doctor from the service partition
By using PC-Doctor from the Rescue and Recovery workspace in the service
partition of the hard disk drive, you can diagnose your system without
starting up the operating system. Do as follows:
1. Remove any diskette from the diskette drive, and then turn off the
computer.
2. Turn on the computer.
3. While the message, “To interrupt normal startup, press the blue
ThinkVantage button,” is displayed at the lower left of the screen, press
the ThinkVantage button to enter the Rescue and Recovery workspace.
4. Select Diagnose hardware. The computer restarts and PC-Doctor starts up.
For more information about PC-Doctor, press F1 to go to the Help or online
manual.
Troubleshooting
If you do not find your problem here, refer to Access Help. The following
section only describes problems that might prevent you from accessing this
help system.
Error messages
Notes:
1. In the charts, x can be any character.
2. The version of PC-Doctor referred to here is PC-Doctor for Windows.
®
12 ThinkPad
Z61 Service and Troubleshooting Guide
Page 21

Solving computer problems
Message: 0176: System Security - The System has been tampered with.
Solution: This message is displayed if you remove the Security Chip and reinstall it, or install a
new one. To clear the error, enter the BIOS Setup Utility, press F9 to set values to
default, then press F10 to save changes. If this does not solve the problem, have the
computer serviced.
Message: 0182: Bad CRC2. Enter BIOS Setup and load Setup defaults.
Solution: Checksum of the CRC2 setting in the EEPROM is not correct. Press F1 to go to BIOS
Setup Utility. Press F9 and then Enter to load the default setting. Press F10 and then
Enter to restart the system.
Message: 0185: Bad startup sequence settings. Enter BIOS Setup and load Setup defaults.
Solution: Checksum of the startup sequence setting in the EEPROM is not correct. Press F1 to go
to BIOS Setup Utility. Press F9 and then Enter to load the default setting. Press F10
and then Enter to restart the system.
Message: 0190: Critical low-battery error
Solution: The computer turned off because the battery is low. Connect the ac adapter to the
computer and charge the battery, or replace the battery with a fully charged one.
Message: 0191: System Security - Invalid remote change requested.
Solution: The system configuration change has failed. Confirm the operation and try again.To
clear the error, enter the BIOS Setup Utility, press F9 to set values to default then press
F10 to save changes.
Message: 0199: System Security - Security password retry count exceeded.
Solution: This message is displayed if you enter a wrong supervisor password more than three
times. Confirm the supervisor password and try again. To clear the error, enter the
BIOS Setup Utility.
Message: 01C8: More than one modem devices are found. Remove one of them. Press <Esc> to
continue.
Solution: Remove either a Modem Mini-PCI Card or a Modem Daughter Cards. Otherwise,
press Esc to ignore the warning message. If it does not solve this problem, have the
computer serviced.
Chapter 3. Solving computer problems 13
Page 22

Solving computer problems
Message: 01C9: More than one Ethernet devices are found. Remove one of them. Press <Esc> to
continue.
Solution: Your ThinkPad computer has a built-in Ethernet feature, and you cannot add another
such feature by installing an Ethernet device. If this error message is displayed,
remove the Ethernet device that you installed. Otherwise press Esc to ignore the
warning message. If this does not solve the problem, have the computer serviced.
Message: 0200: Hard disk error
Solution: The hard disk is not working. Make sure that the hard disk drive is attached firmly.
Run the BIOS Setup Utility; then make sure the hard disk drive is not disabled in the
Startup menu.
Message: 021x: Keyboard error
Solution: Make sure that there are no objects placed on the keyboard, or if you have one, the
external keyboard. Turn off the computer, and turn off all attached devices. Turn on
the computer first; then turn on the attached devices.
If you still see the same error code, do the following:
If an external keyboard is connected, do the following:
v Turn off the computer and disconnect the external keyboard; then turn on the
computer. Make sure that the built-in keyboard operates correctly. If it does, have
the external keyboard serviced.
v Make sure that the external keyboard is connected to the correct connector.
Test
the computer by using PC-Doctor.
v If the computer stops during the test, have the computer serviced.
Message: 0230: Shadow RAM error, 0231: System RAM error, 0232: Extended RAM error
Solution: Test your computer’s memory with PC-Doctor. If you added a memory module just
before turning the computer on, reinstall it. Then test the memory with PC-Doctor.
Message: 0250: System battery error
Solution: The backup battery, which is used to preserve the configuration information, such as
the date and time, while the computer is turned off, is depleted. Replace the battery
and run BIOS Setup Utility to verify the configuration. If you still have a problem,
have the computer serviced.
Message: 0251: System CMOS checksum bad
Solution: The system CMOS might have been corrupted by an application program. The
computer uses the default settings. Run BIOS Setup Utility to reconfigure the settings.
If you still see the same error code, have the computer serviced.
Message: 0271: Date and time error
Solution: Neither the date nor the time is set in the computer. Set the date and time, using the
BIOS Setup Utility.
®
14 ThinkPad
Z61 Service and Troubleshooting Guide
Page 23

Solving computer problems
Message: 0280: Previous boot incomplete
Solution: Your computer was previously unable to complete the boot process.
Turn the computer off; then turn it on to start the BIOS Setup Utility. Verify the
configuration and then restart the computer either by choosing the Exit Saving
Changes option under the Restart item or by pressing F10. If you still see the same
error code, have the computer serviced.
Message: 1802: Unauthorized network card is plugged in - Power off and remove the miniPCI
network card.
Solution: The miniPCI network card is not supported on this computer. Remove it.
Message: 1803: Unauthorized daughter card is plugged in-Power off and remove the daughter
card.
Solution: The daughter card is not supported on this computer. Remove it.
Message: 1810: Hard disk partition layout error
Solution: A problem in recognizing the layout of the partition on the hard disk has halted
computer startup. Either the Predesktop Area has been deleted, or the hard disk
contains corrupt data. To try to restart your computer, complete one of the following:
v If the Predesktop Area has been deleted
1. Press F1 to open the BIOS Setup Utility.
2. Select Security->Predesktop Area-> Access Predesktop Area.
3. Set this item to Disabled.
4. Save and exit.
If the above fails
v
1. Press Enter.
2. Double-click RECOVER TO FACTORY CONTENTS and follow on-screen
instructions.
This will permanently erase the entire contents of the hard disk, and then
Note:
restore software preinstalled by Lenovo.
Press
F1 to open BIOS Setup, or Enter to start the Predesktop Area.
If the computer still does not start, call the Customer Support Center. Telephone
numbers are listed in “Worldwide telephone list” on page 46.
Message: 2010: Warning: Your internal hard disk drive (HDD) may not function correctly on this
system. Ensure that your HDD is supported on this system and that the latest HDD
firmware is installed.
Solution: If in the primary drive bay you are using a non-IBM or non-Lenovo hard disk drive
(HDD) or an old generation IBM HDD that is not supported by this system, with the
risk in mind, you can still use it by pressing ESC. If in the primary drive bay you are
using a supported IBM / Lenovo HDD with old firmware, you need to update its
firmware to the latest version, available at www.lenovo.com/think/support
Chapter 3. Solving computer problems 15
Page 24

Solving computer problems
Message: 2100: Initialization error on HDD0 (Main hard disk drive), 2102: Initialization error on
HDD1 (Ultrabay hard disk drive), 2110: Read error on HDD0 (Main hard disk drive),
2112: Read error on HDD1 (Ultrabay hard disk drive)
Solution: The hard disk is not working. Have the hard disk serviced.
Message: The power-on password prompt
Solution: A power-on password or a supervisor password is set. Type the password and press
Enter to use the computer. If the power-on password is not accepted, a supervisor
password might have been set. Type the supervisor password and press Enter. If you
still see the same error message, have the computer serviced.
Message: The hard disk password prompt
Solution: A hard disk password is set. Type the password and press Enter to use the computer. If
you still see the same error message, have the computer serviced.
Message: Hibernation error
Solution: The system configuration changed between the time your computer entered
hibernation mode and the time it left this mode, and your computer cannot resume
normal operation.
v Restore the system configuration to what it was before your computer entered
hibernation mode.
v If the memory size has been changed, re-create the hibernation file.
Message: Operating system not found.
Solution: Verify the following:
v The hard disk drive is correctly installed.
v A startable diskette is in the diskette drive
you still see the same error message, check the boot sequence, using the BIOS Setup
If
Utility.
Message: EMM386 Not Installed — Unable to Set Page Frame Base Address.
Solution: Edit C:\CONFIG.SYS and change a line from
device=C:\WINDOWS\EMM386.EXE RAM
to
device=C:\WINDOWS\EMM386.EXE NOEMS
and save this file.
Message: CardBus Configuration Error —Device Disabled
Solution: Go to the BIOS Setup Utility. Press F9 and then Enter to load the default setting. Press
F10 and then Enter to restart the system.
Message: Authentication of system services failed. Press <Esc> to resume.
Solution: The Predesktop Area in the HDD is broken. If you need to use the Predesktop Area,
get a Recovery CD, then recover the Predesktop Area using it.
®
16 ThinkPad
Z61 Service and Troubleshooting Guide
Page 25

Solving computer problems
If one of the following error code messages is displayed on the screen, have the computer serviced:
0175: Bad CRC1, stop POST task
0177: Bad SVP data, stop POST task. Checksum of the supervisor password in the EEPROM is not
correct.
0187: EAIA data access error
0188: Invalid RFID serialization information area
0189: Invalid RFID configuration information area
0192: System Security - Embedded Security hardware tamper detected.
0260: System timer error
0270: Real time clock error
02D0: System cache error
02F4: EISA CMOS not writable
02F5: DMA test failed
02F6: Software NMI failed
02F7: Fail-safe timer NMI failed
Fan error
Thermal sensing error
Errors without messages
Problem: When I turn on the machine, nothing appears on the screen and the machine does not
beep while starting up.
Note: If you are not sure whether you heard any beeps, turn off the computer by
pressing and holding the power button for more than 4 seconds; then turn it on and
listen again. If you are using an external monitor, refer to “Computer screen problems”
on page 21
Solution: If a power-on password is set, press any key to display the power-on password prompt,
and then type the correct password and press Enter.
If the power-on password prompt does not appear, the brightness level might be set to
minimum brightness. Adjust the brightness level by pressing the Fn+Home.
If the screen still remains blank, make sure that:
v The battery is installed correctly.
v The ac adapter is connected to the computer and the power cord is plugged into a
working electrical outlet.
v The computer power is on. (Turn on the power switch again for confirmation.)
Chapter 3. Solving computer problems 17
Page 26

Solving computer problems
Problem: When I turn on the machine, nothing appears on the screen, but I hear two or more
beeps.
Solution: Make sure that the memory card is installed correctly. If it is, but the screen is still blank,
and you hear five beeps, have the computer serviced.
If you hear 4 cycles of 4 beeps each, the Security Chip has a problem. Have the
computer serviced.
Problem: When I turn on the machine, only a white pointer appears on a blank screen.
Solution: Reinstall your operating system (see Chapter 4, Recovery options), and turn on the
computer. If you still see only the pointer on the screen, have the computer serviced.
Problem: My screen goes blank while the computer is on.
Solution: Your screen saver or power management may be enabled. Move the TrackPoint or press
a key to exit the screen saver, or press the power switch to resume from standby or
hibernation.
A password problem
Problem: I forgot my password.
Solution: If you have registered your computer for Password Reset Service, and you forgot your
power-on or hard disk password, you can reset it by pressing the ThinkVantage button
at the password prompt.
v If you cannot reset your power-on password, you must take your computer to a
Lenovo authorized servicer or a marketing representative to have the password
canceled.
v If you cannot reset your hard disk password, Lenovo authorized servicer cannot reset
your password or recover data from the hard disk. You must take your computer to a
Lenovo authorized servicer or a marketing representative to have the hard disk drive
replaced. Proof of purchase is required, and a fee will be charged for parts and
service.
If
you forgot your supervisor password, Lenovo authorized servicer cannot reset your
password. You must take your computer to a Lenovo authorized servicer or a marketing
representative to have the system board replaced. Proof of purchase is required, and a
fee will be charged for parts and service.
18 ThinkPad
®
Z61 Service and Troubleshooting Guide
Page 27

Solving computer problems
Keyboard problems
Problem: All or some of the keys on the keyboard do not work.
Solution:
Problem: A number appears when you type a letter.
Solution: The numeric lock function is on. To disable it, press and hold Shift or Fn and then press
v If the problem occurred immediately after the computer returned from standby mode,
enter the power-on password if one has been set.
v If an external numeric keypad or a mouse is connected:
1. Turn off the computer.
2. Remove the external numeric keypad or the mouse.
3. Turn on the computer and try using the keyboard again.
If the keyboard problem is resolved, carefully reconnect the external numeric keypad,
external keyboard, or mouse, making sure that you have seated the connectors
properly.
If keys on the keyboard still do not work, have the computer serviced.
®
v If an external PS/2
keyboard is connected, the numeric keypad on your computer
does not work. Use the numeric keypad on the external keyboard.
NmLk (ScrLk).
Problem: All or some of the keys on the external numeric keypad do not work.
Solution: Make sure that the external numeric keypad is correctly connected to the computer.
Pointing device problems
Problem: The mouse buttons do not work.
Solution: If your ThinkPad computer has the TrackPoint only, this problem may occur.
Change the mouse driver to Standard PS/2 Port Mouse, and then reinstall PS/2
TrackPoint. Drivers are provided in the C:\SWTOOLS\DRIVERS directory on your hard
disk drive. If your hard disk drive does not contain device drivers, refer to the ThinkPad
Web site. For access to this Web site, press the ThinkVantage button and open the
Productivity Center.
Problem: The scrolling or magnifying glass function does not work.
Solution: Check the mouse driver in the Device Manager window, and make sure that the PS/2
TrackPoint driver is installed.
Chapter 3. Solving computer problems 19
Page 28

Solving computer problems
Standby or hibernation problems
Problem: The computer enters standby mode immediately after Power-on self-test (POST) (the
standby indicator light turns on).
Solution: Make sure that:
v The battery is charged.
v The operating temperature is within the acceptable range. Refer to “Specifications” on
page 54.
If
these items are correct, have the computer serviced.
Problem: The critical low-battery error message is displayed, and the computer immediately
turns off.
Solution: The battery power is getting low. Connect the ac adapter to the computer, or replace the
battery with a fully charged one.
Problem: When you take action to return from standby mode, the computer display remains
blank.
Solution: Check whether an external monitor was disconnected or turned off while the computer
was in standby mode. If you disconnected or turned off the external monitor, connect it
or turn it on before resuming the computer from the standby mode. When resuming the
computer from the standby mode without attaching the external monitor or turning it
on, and the computer display remains blank, press Fn+F7 to bring up the computer
display.
Note: If you use the Fn+F7 key combination to apply a presentation scheme, press
Fn+F7 at least three times in three seconds, and the image is displayed on the computer
screen.
Problem: The computer does not return from standby or hibernation mode.
Solution: If the system does not return from standby mode, it may have entered standby or
hibernation mode automatically because the battery is depleted. Check the standby
indicator.
v If the standby indicator is on, your computer is in standby mode. Connect the ac
adapter to the computer; then press any key.
v If the standby indicator is off, your computer is in hibernation mode or power-off
state. Connect the ac adapter to the computer; then press power button to resume
operation.
If the system still does not return from standby mode, your system may stop responding
and you cannot turn off the computer. Reset the computer. Unsaved data may be lost. To
reset the computer, press and hold the power button for 4 seconds or more. If it is not
reset, remove the ac adapter and the battery.
®
20 ThinkPad
Z61 Service and Troubleshooting Guide
Page 29

Solving computer problems
Problem: The computer enters standby mode unexpectedly.
Solution: If the processor overheats, the computer automatically enters standby mode to allow the
computer to cool and to protect the processor and other internal components. Also,
check the settings for standby mode, using Power Manager.
Computer screen problems
Problem: The screen is blank.
Solution:
Problem: The screen is unreadable or distorted
Solution: Make sure that:
v Press Fn+F7 to bring up the image.
Note: If you use the Fn+F7 key combination to apply a presentation scheme, press
Fn+F7 at least three times in three seconds, and the image is displayed on the
computer screen.
v If you are using the ac adapter, or using the battery, and the battery status indicator is
on (is green), press Fn+Home to make the screen brighter.
v If the standby status indicator is on (is green), press Fn to resume from the standby
mode.
v If you still have the problem, do the Solution in the following problem ″The screen is
unreadable or distorted."
v The display device driver is installed correctly.
v The screen resolution and color quality are correctly set.
v The monitor type is correct.
To
check these settings, do as follows:
1. Right-click on the desktop, click Properties, then click the Settings tab.
2. Check whether the screen resolution and color quality are correctly set.
3. Click Advanced.
4. Click the Adapter tab.
5. Make sure ″Mobile Intel(R) 945GM Express Chipset Family″, ″ATI Mobility Radeon
X1300″, or ″ATI Mobility Radeon X1400″ is shown in the adapter information
window.
6. Click the Properties button. Check the ″Device status″ box and make sure the device
is working properly. If not, click the Troubleshoot button.
7. Click the Monitor tab.
8. Make sure the information is correct.
9. Click the Properties button. Check the ″Device status″ box and make sure the device
is working properly. If not, click the Troubleshoot button.
Problem: Incorrect characters appear on the screen.
Solution: Did you install the operating system or application program correctly? If they are
installed and configured correctly, have the computer serviced.
Chapter 3. Solving computer problems 21
Page 30

Solving computer problems
Problem: Missing, discolored, or bright dots appear on the screen every time you turn on your
computer.
Solution: This is an intrinsic characteristic of the TFT technology. Your computer’s display contains
multiple thin-film transistors (TFTs). A small number of missing, discolored, or bright
dots on the screen might exist all the time.
Problem: A message, “Unable to create overlay window,” appears when you try to start DVD
playback.
or
get poor or no playback while running video playback, DVD playback, or game
You
applications.
Solution: Do either of the following:
v If you are using 32-bit color mode, change the color depth to 16-bit mode.
v If you are using a desktop size of 1280×1024 or larger, reduce the desktop size and the
color depth.
Battery problems
Problem: The battery cannot be fully charged by the power-off method in the standard charge
time for your computer.
Solution: For details, see the Battery and power category in Troubleshooting under the Problem
solving section in Access Help.
Problem: Your computer shuts down before the battery status indicator shows empty, -or- Your
computer operates after the battery status indicator shows empty.
Solution: Discharge and recharge the battery.
Problem: The operating time for a fully charged battery is short.
Solution: For details, see the Battery and power category in Troubleshooting under the Problem
solving section in Access Help.
Problem: The computer does not operate with a fully charged battery.
Solution: The surge protector in the battery might be active. Turn off the computer for one minute
to reset the protector; then turn on the computer again.
Problem: The battery does not charge.
Solution: For details, see the Battery and power category in Troubleshooting under the Problem
solving section in Access Help.
®
22 ThinkPad
Z61 Service and Troubleshooting Guide
Page 31

Solving computer problems
A Hard disk drive problem
Problem: The hard disk drive does not work.
Solution: In the startup menu in BIOS Setup Utility, make sure that the hard disk drive is in the
″Boot priority order.″ If it is in the device list of ″Excluded from boot order″, the hard
disk drive is disabled. Move it into the ″Boot priority order.″
Fingerprint authentication problems
Problem: You cannot register or authenticate your finger because it is wrinkled, rough, dry,
injured, stained, oily, wet, or different one from what you have registered.
Solution: To improve the situation, try the following:
v Clean or wipe your hands to remove any excess dirt or moisture from the fingers.
v Enroll and use a different finger for authentication.
v If your hands are too dry, apply lotion to them.
A startup problem
®
Problem: The Microsoft
Windows
Solution: Use the Rescue and Recovery workspace to help solve or identify your problem. For
details about Rescue and Recovery, see chapter 4.
®
operating system will not start.
Other problems
Problem: Your computer does not respond.
Solution:
Problem: The computer does not start from a device you want.
Solution: Refer to the Startup menu of the BIOS Setup Utility. Make sure that the startup sequence
v To turn off your computer, press and hold the power switch for 4 seconds or more. If
the computer still does not respond, remove the ac adapter and the battery.
v Your computer might lock when it enters standby mode during a communication
operation. Disable the standby timer when you are working on the network.
v IRQs for the PCI might be all set as 11. The computer does not respond because it
cannot share the IRQ with other devices. Refer to the ThinkPad Configuration
Program.
in the BIOS Setup Utility is set so that the computer starts from the device you want.
Also make sure that the device from which the computer starts is enabled. In the startup
menu in the BIOS Setup Utility, make sure that the device is included in the ″Boot
priority order″ list. If it is included in the ″Excluded from boot order″ list, it is disabled.
Select the entry for it in the list and press the x key. This moves the entry to the ″Boot
priority order″ list.
Chapter 3. Solving computer problems 23
Page 32

Solving computer problems
Problem: The computer does not turn off with the power switch.
Solution: If the standby indicator is on and you are working under battery power, replace the
battery with a fully charged one or change your power source to ac power.
If you still have a problem, press and hold the power switch for 4 seconds or more; this
forces the computer to turn off.
Starting BIOS Setup Utility
Your computer provides a program, called BIOS Setup Utility, that enables
you to select various setup parameters.
v Config: Set the configuration of your computer.
v Date/Time: Set the date and time.
v Security: Set security features.
v Startup: Set the startup device.
v Restart: Restart the system.
You can set many of these parameters more easily by using the
Note:
ThinkPad Configuration Program.
To start BIOS Setup Utility, do as follows:
1. To protect yourself against accidental loss of data, back up your data and
computer registry. For details see the “Data backup-and-restore tools”
section of Access Help.
2. Remove any diskette from the diskette drive, and then turn off the
computer.
3. Turn on the computer; then, while the message, “To interrupt normal
startup, press the blue ThinkVantage button” is displayed at the lower left
of the screen, press the ThinkVantage button. The Rescue and Recovery
workspace opens.
4. Click Access BIOS. The System Restart Required window is displayed.
5. Click Ye s. The computer restarts, and the BIOS Setup Utility menu
appears.
6. If you have set a supervisor password, the BIOS Setup Utility menu
appears after you enter the password. Yo u can start the utility by pressing
Enter instead of entering the supervisor password; however, you cannot
change the parameters that are protected by the supervisor password. For
more information, refer to the on-board help.
Using the cursor keys, move to an item you want to change. When the
item you want is highlighted, press Enter. A submenu is displayed.
24 ThinkPad
®
Z61 Service and Troubleshooting Guide
Page 33

Starting BIOS Setup Utility
7. Change the items you wish to change. To change the value of an item, use
the F5 or F6 key. If the item has a submenu, you can display it by pressing
Enter.
8. Press F3 or Esc to exit from the submenu. If you are in a nested submenu,
press Esc repeatedly until you reach the BIOS Setup Utility menu.
Note: If you need to restore the settings to their original state as of the
time of purchase, press F9 key to load the default settings. You can also
select an option in the Restart submenu to load the default settings or
discard the changes.
9. Select Restart; then press Enter. Move the cursor to the option you want
for restarting your computer; then press Enter. Your computer restarts.
Chapter 3. Solving computer problems 25
Page 34

Starting BIOS Setup Utility
26 ThinkPad
®
Z61 Service and Troubleshooting Guide
Page 35

Chapter 4. Recovery options
Using Rescue and Recovery
If Windows is not running properly, use the Rescue and Recovery workspace
to help solve or identify your problem. Do the following:
1. Turn off your PC, then turn it on again.
2. Watch the screen carefully while your PC starts. When “To interrupt
normal startup, press the blue ThinkVantage button” message is displayed
at the lower left of the screen, press the blue ThinkVantage button. The
Rescue and Recovery workspace opens.
3. After the Rescue and Recovery workspace opens, you can do the
following:
v Rescue and Restore your files, folders, or backups.
v Configure your system settings and passwords.
v Troubleshoot and diagnose problems using diagnostics.
For more information about using Rescue and Recovery features, see the
“Recovery overview” section of the Access Help.
Restoring factory contents
Instead of providing a recovery CD or a Windows CD with your computer,
Lenovo provides simpler methods of accomplishing the tasks typically
associated with these CDs. The files and programs for these alternative
methods are on your hard disk, which eliminates having to locate misplaced
CDs and problems associated with using an incorrect CD version.
The complete backup of all the files and programs that Lenovo preinstalled on
your computer resides in a hidden protected area, or partition, of the hard
disk. Although hidden, the backups in the partition consume hard disk space.
Therefore, when checking the capacity of your hard disk according to
Windows, you might note that the total capacity of the disk appears to be
smaller than anticipated. This discrepancy is explained by the contents of the
hidden partition.
The Product Recovery Program contained within this area enables you to
restore the complete contents of your hard disk to the same state as it was
when originally shipped from the factory.
© Copyright Lenovo 2006 27
Page 36

Recovery options
Notes:
1. If the optical drive is not attached to your ThinkPad computer during
2. The recovery process might take up to 2 hours.
To recover the hard disk to its original contents, do the following:
Attention: All of the files on the primary hard disk partition (usually drive C)
will be lost in the recovery process. However, before any data is overwritten,
you will be given the opportunity to save one or more files to other media.
1. If possible, save all your files and shut down your operating system.
2. Turn off your computer for at least 5 seconds.
3. Turn on your computer. Watch the display carefully. While the message,
4. Click Restore your system and follow the instructions on the screen.
recovery, DVD software and CD-recording software will not be installed.
To ensure that they will be installed correctly, install the optical drive in
the Ultrabay Slim or Ultrabay Enhanced before performing a recovery
operation.
“To interrupt normal startup, press the blue ThinkVantage button” is
displayed, press the ThinkVantage button. The ThinkVantage Rescue and
Recovery workspace opens.
Recovering data
If you performed a backup operation using the Rescue and Recovery
program, you also have one or more backups stored that reflect the contents
of the hard disk as it existed at various points in time. These backups might
be stored on your hard disk, or a network drive, or on removable media,
depending on the options you selected during the backup operation.
You can use either the Rescue and Recovery program or the Rescue and
Recovery workspace to restore the contents of the hard disk to an earlier state
using any of the stored backups. The Rescue and Recovery workspace runs
independently of the Windows operating system. Therefore, you can start it
by pressing the blue ThinkVantage button when prompted during startup.
After the Rescue and Recovery workspace opens you can perform a recovery
operation, even if you are unable to start Windows.
Installing a new operating system
For how to install a new operating system, see the Advanced configuration
section in online Access Help.
®
28 ThinkPad
Z61 Service and Troubleshooting Guide
Page 37

Chapter 5. Upgrading and replacing devices
Replacing the battery
Important
Read Safety and Warranty Guide before replacing the battery.
1. Turn off the computer, or enter hibernation mode. Then disconnect the ac
adapter and all cables from the computer.
If you are using a PC Card, the computer might not be able to enter
Note:
hibernation mode. If this happens, turn off the computer.
2. Close the computer display, and turn the computer over.
3. Unlock the battery latch by sliding it to the left 1. Then, remove the
battery 2.
4. Install a fully charged battery.
5. Turn the computer over again. Connect the ac adapter and the cables to
the computer.
© Copyright Lenovo 2006 29
Page 38

Upgrading the hard disk drive
Upgrading the hard disk drive
Important
Read Safety and Warranty Guide before replacing the hard disk drive.
You can increase the storage capacity of your computer by replacing the hard
disk drive with one of greater capacity. You can purchase a new hard disk
drive from your reseller or Lenovo marketing representative.
Notes:
1. Replace the hard disk drive only if you upgrade it or have it repaired. The
connectors and bay of the hard disk drive were not designed for frequent
changes, or drive swapping.
2. The ThinkVantage Rescue and Recovery workspace and the Product
Recovery program are not included on an optional hard disk drive.
Attention
Handling a hard disk drive
v Do not drop the drive or subject it to physical shocks. Put the drive on
a material, such as soft cloth, that absorbs the physical shock.
v Do not apply pressure to the cover of the drive.
v Do not touch the connector.
30 ThinkPad
drive is very sensitive. Incorrect handling can cause damage and
The
permanent loss of data on the hard disk. Before removing the hard disk
drive, make a backup copy of all the information on the hard disk, and
then turn the computer off. Never remove the drive while the system is
operating, in standby mode, or in hibernation mode.
To replace the hard disk drive, do the following:
1. Turn off the computer; then disconnect the ac adapter and all cables
from the computer.
2. Close the computer display, and turn the computer over.
3. Remove the battery.
®
Z61 Service and Troubleshooting Guide
Page 39

Upgrading the hard disk drive
4. ThinkPad Z61t
Remove the screw that secures the hard disk drive cover; then remove
the cover.
ThinkPad Z61m, Z61p or Z61e
Remove the screw that secures the hard disk drive cover 1 and slide
the cover 2.
1
2
Chapter 5. Upgrading and replacing devices 31
Page 40

Upgrading the hard disk drive
Lift up the hard disk cover and remove it.
5. Remove the hard disk by pulling out the tab.
ThinkPad Z61t
3
32 ThinkPad
®
Z61 Service and Troubleshooting Guide
Page 41

Upgrading the hard disk drive
ThinkPad Z61m, Z61p or Z61e
6. Detach the side rubber rails from the hard disk drive.
7. Attach the side rubber rails to a new hard disk drive.
8. Insert the hard disk drive into the hard disk drive bay; then firmly install
9. Reinstall the cover of the bay, and reinstall the screw.
10. Reinstall the battery.
11. Turn the computer over again. Connect the ac adapter and the cables to
Replacing memory
Important
Read Safety and Warranty Guide before replacing memory.
Increasing memory capacity is an effective way to make programs run faster.
You can increase the amount of memory in your computer by installing a
double data rate (DDR) 2 synchronous dynamic random access memory
it.
the computer.
Chapter 5. Upgrading and replacing devices 33
Page 42

Replacing memory
(DRAM) unbuffered small outline dual inline memory module (SO-DIMM),
available as an option, in the memory slot of your computer. SO-DIMMs with
different capacities are available.
Note: Use only the memory types supported by your computer. If you
To install an SO-DIMM, do the following:
1. Touch a metal table or a grounded metal object. This action reduces any
2. Turn off the computer; then disconnect the ac adapter and all cables
3. Close the computer display, and turn the computer over.
4. Remove the battery.
5. Remove the screws that hold the palm rest in place.
incorrectly install the optional memory or install an unsupported
memory type, a warning beep will sound when you try to start the
computer.
static electricity in your body, that could damage the SO-DIMM. Do not
touch the contact edge of the SO-DIMM.
from the computer.
34 ThinkPad
®
Z61 Service and Troubleshooting Guide
Page 43

Replacing memory
6. Turn the computer over again, and open the computer display. Pick the
palm rest off the computer as shown in the drawing below.
7. Move the palm rest carefully away from the computer until you can see
where it’s connected 1, and then detach the connector 2. Now the
palm rest has been removed.
2
1
8. If two SO-DIMMs are already installed in the memory slot, remove one
of them to make room for the new one by pressing out on the latches on
both edges of the socket at the same time. Be sure to save it for future
use.
Chapter 5. Upgrading and replacing devices 35
Page 44

Replacing memory
9. With the notched end of the SO-DIMM toward the contact edge side of
10. Attach the palm rest cable connector to the system board firmly.
the socket, firmly insert the SO-DIMM into the socket at an angle of
about 20 degrees 1; then pivot it downward until it snaps into place
2.
36 ThinkPad
®
Z61 Service and Troubleshooting Guide
Page 45

Replacing memory
11. Align the front side of the palm rest with the front edge of the system
1, then put down the palm rest to replace it 2.
2
1
12. Press the left and right top edges of the palm rest to snap them in places.
13. Close the computer display, and turn the computer over. Reinstall four
screws for the palm rest.
14. Reinstall the battery.
15. Turn the computer over agan, and re-connect the ac adapter and the
cables to the computer.
To make sure that the SO-DIMM is installed correctly, do as follows:
1. Turn the computer on.
2. While the “To interrupt normal startup, press the blue ThinkVantage
button” message is displayed at the lower-left of the screen, press the
ThinkVantage button. ThinkVantage Rescue and Recovery screen opens.
3. Click Access BIOS. The System Restart Required window is displayed.
Chapter 5. Upgrading and replacing devices 37
Page 46

Replacing memory
4. Click Ye s. The computer restarts, and the BIOS Setup Utility screen opens.
The “Installed memory” item shows the total amount of memory installed
in your computer. For example, if your computer has 256 MB of memory
and you install a 256-MB SO-DIMM in it, the quantity shown in “Installed
memory” should be 512 MB.
38 ThinkPad
®
Z61 Service and Troubleshooting Guide
Page 47

Chapter 6. Getting help and service
Getting help and service
If you need help, service, technical assistance, or just want more information
about ThinkPad computers, you will find a wide variety of sources available
from Lenovo to assist you. This section contains information about where to
go for additional information about ThinkPad computers, what to do if you
experience a problem with your computer, and whom to call for service
should it be necessary.
Microsoft Service Packs are the latest software source for Windows product
updates. They are available via We b download (connection charges may
apply) or via CD-ROM. For more specific information and links, go to
www.microsoft.com. For technical assistance with installation of, or questions
related to, Service Packs for your preloaded Microsoft Windows product, refer
to the Microsoft Product Support Services We b site at http://
support.microsoft.com/directory/,
Center at the phone number(s) listed in “Worldwide telephone list” on page
46. Some fees might apply.
or you can contact Customer Support
Getting help on the Web
The Lenovo Web site on the World Wide We b has up-to-date information
about ThinkPad computers and support. The address for the Personal
Computing home page is www.lenovo.com/think
You can find support information for your ThinkPad computer at
www.lenovo.com/think/support. Research this Web site to learn how to solve
problems, find new ways to use your computer, and learn about options that
can make working with your ThinkPad computer even easier.
Calling the Customer Support Center
If you have tried to correct the problem yourself and still need help, during
the warranty period, you can get help and information by telephone through
the Customer Support Center. The following services are available during the
warranty period:
v Problem determination - Trained personnel are available to assist you with
determining if you have a hardware problem and deciding what action is
necessary to fix the problem.
© Copyright Lenovo 2006 39
Page 48

Getting help and service
v Lenovo hardware repair - If the problem is determined to be caused by
Lenovo hardware under warranty, trained service personnel are available to
provide the applicable level of service.
v Engineering change management - Occasionally, there might be changes
that are required after a product has been sold. Lenovo or your reseller, if
authorized by Lenovo, will make selected Engineering Changes (ECs)
available that apply to your hardware.
following items are not covered:
The
v Replacement or use of parts not manufactured for or by Lenovo or
nonwarranted parts
Note: All warranted parts contain a 7-character identification in the format
v Identification of software problem sources
v Configuration of BIOS as part of an installation or upgrade
v Changes, modifications, or upgrades to device drivers
v Installation and maintenance of network operating systems (NOS)
v Installation and maintenance of application programs
determine if your machine is in warranty and when the warranty expires,
To
go to www.lenovo.com/think/support, and click Warranty, then follow the
instructions on the screen.
FRU XXXXXXX
40 ThinkPad
Refer to your Lenovo hardware warranty for a full explanation of Lenovo
warranty terms. Be sure to retain your proof of purchase to obtain warranty
service.
If possible, be near your computer when you make your call in case the
technical assistance representative needs to help you resolve a computer
problem. Please ensure that you have downloaded the most current drivers
and system updates, run diagnostics, and recorded information before you
call. When calling for technical assistance, please have the following
information available:
v Machine Type and Model
v Serial numbers of your computer, monitor, and other components, or your
proof of purchase
v Description of the problem
v Exact wording of any error messages
v Hardware and software configuration information for your system
telephone numbers for your Customer Support Center location are
The
located in the Worldwide telephone list section of this guide.
Telephone numbers are subject to change without notice. For the latest
Note:
list of Customer Support Center telephone numbers and hours of
®
Z61 Service and Troubleshooting Guide
Page 49

operation, visit the Support We b site at www.lenovo.com/support/
phone. If the number for your country or region is not listed, contact
your Lenovo reseller or Lenovo marketing representative.
Getting help around the world
If you travel with your computer or relocate it to a country where your
ThinkPad machine type is sold, your computer might be eligible for
International Warranty Service, which automatically entitles you to obtain
warranty service throughout the warranty period. Service will be performed
by service providers authorized to perform warranty service.
Service methods and procedures vary by country, and some services might
not be available in all countries. International Warranty Service is delivered
through the method of service (such as depot, carry-in, or on-site service) that
is provided in the servicing country. Service centers in certain countries might
not be able to service all models of a particular machine type. In some
countries, fees and restrictions might apply at the time of service.
To determine whether your computer is eligible for International Warranty
Service and to view a list of the countries where service is available, go to
www.lenovo.com/think/support, click Warranty, and follow the instructions
on the screen.
Getting help and service
Chapter 6. Getting help and service 41
Page 50

42 ThinkPad
®
Z61 Service and Troubleshooting Guide
Page 51

Appendix A. Warranty information
Warranty Information
This Appendix provides information regarding the warranty period and type
of warranty service applicable to your Machine in your country or region. For
the terms and conditions of the Statement of Limited Warranty that applies to
your Machine, refer to Chapter 2, Warranty Information in the Safety and
Warranty Guide included with your Machine.
Warranty Period
The warranty period may vary by country or region and is specified in the
table below. NOTE: ″Region″ means either Hong Kong or Macau Special
Administrative Region of China.
A warranty period of 3 years on parts and 1 year on labor means that Lenovo
provides warranty service without charge for:
a. parts and labor during the first year of the warranty period; and
b. parts only, on an exchange basis, in the second and third years of the
warranty period. Your Service Provider will charge you for any labor
provided in performance of the repair or replacement(s) in the second and
third year of warranty period.
Machine
Type Country or Region of Purchase Warranty period
9440 US, Canada, Mexico, Brazil Parts and Labor - 1 year
Battery pack - 1 year
Other Parts and Labor - 1 year
Battery pack - 1 year
9441 US, Canada, Mexico, Brazil,
Australia, Japan
Other Parts and Labor - 1 year
9442 US, Canada, Mexico, Brazil,
Australia, Japan
Other Parts and Labor - 3 year
9443 All Parts and Labor - 3 years
Parts and Labor - 1 year
Battery pack - 1 year
Battery pack - 1 year
Parts and Labor - 3 year
Battery pack - 1 year
Battery pack - 1 year
Battery pack - 1 year
Types of
Warranty
Service
6
1
7
1
6
1
7
1
6
1
7
1
5
1
© Copyright Lenovo 2006 43
Page 52

Types of
Machine
Type Country or Region of Purchase Warranty period
9448 US, Canada, Mexico, Brazil Parts and Labor - 3years
Battery pack - 1 year
Other Parts and Labor - 3 years
Battery pack - 1 year
9450 US, Canada, Mexico, Brazil, Parts and Labor - 1 year
Battery pack - 1 year
Other Parts and Labor - 1 year
Battery pack - 1 year
9451 US, Canada, Mexico, Brazil,
Australia, Japan
Parts and Labor - 1 year
Battery pack - 1 year
Other Parts and Labor - 1 year
Battery pack - 1 year
9452 US, Canada, Mexico, Brazil,
Australia, Japan
Parts and Labor - 3 year
Battery pack - 1 year
Other Parts and Labor - 3 year
Battery pack - 1 year
9453 All Parts and Labor - 3 years
Battery pack - 1 year
0672 US, Canada, Mexico, Brazil Parts and Labor - 1 year
Battery pack - 1 year
Other Parts and Labor - 1 year
Battery pack - 1 year
0673 US, Canada, Mexico, Brazil,
Australia, Japan
Parts and Labor - 1 year
Battery pack - 1 year
Other Parts and Labor - 1 year
Battery pack - 1 year
0674 US, Canada, Mexico, Brazil Parts and Labor - 3 years
Battery pack - 1 year
Other Parts and Labor - 3 years
Battery pack - 1 year
Warranty
Service
6
1
7
1
6
1
7
1
6
1
7
1
6
1
7
1
5
1
6
1
7
1
6
1
7
1
6
1
7
1
Types of Warranty Service
44 ThinkPad
If required, your Service Provider will provide repair or exchange service
depending on the type of warranty service specified for your Machine in the
above table and as described below. Scheduling of service will depend upon
the time of your call and is subject to parts availability. Service levels are
response time objectives and are not guaranteed. The specified level of
warranty service may not be available in all worldwide locations, additional
®
Z61 Service and Troubleshooting Guide
Page 53

charges may apply outside your Service Provider’s normal service area,
contact your local Service Provider representative or your reseller for country
and location specific information.
1. Customer Replaceable Unit (″CRU″) Service
Lenovo will ship CRUs to you for you to install, Tier 1 CRUs are easy to
install whereas Tier 2 CRUs require some technical skill and tools. CRU
information and replacement instructions are shipped with your Machine
and are available from Lenovo at any time on your request. You may
request that a Service Provider install CRUs, at no additional charge,
under the type of warranty service designated for your Machine. Lenovo
specifies in the materials shipped with a replacement CRU whether a
defective CRU must be returned. When return is required, 1) return
instructions and a container are shipped with the replacement CRU, and 2)
you may be charged for the replacement CRU if Lenovo does not receive
the defective CRU within 30 days of your receipt of the replacement.
2. On-site Service
Your Service Provider will either repair or exchange the failing Machine at
your location and verify its operation. Yo u must provide suitable working
area to allow disassembly and reassembly of the Lenovo Machine. The
area must be clean, well lit and suitable for the purpose. For some
Machines, certain repairs may require sending the Machine to a designated
service center.
3. Courier or Depot Service *
You will disconnect the failing Machine for collection arranged by your
Service Provider. A shipping container will be provided to you for you to
return your Machine to a designated service center. A courier will pick up
your Machine and deliver it to the designated service center. Following its
repair or exchange, the service center will arrange the return delivery of
the Machine to your location. Yo u are responsible for its installation and
verification.
4. Customer Carry-In or Mail-In Service
You will deliver or mail as your Service Provider specifies (prepaid unless
specified otherwise) the failing Machine suitably packaged to a designated
location. After the Machine has been repaired or exchanged, it will be
made available for your collection or, for Mail-in Service, the Machine will
be returned to you at Lenovo’s expense, unless your Service Provider
specifies otherwise. You are responsible for the subsequent installation and
verification of the Machine.
5. CRU and On-site Service
This type of Warranty Service is a combination of Type 1 and Type 2 (see
above).
6. CRU and Courier or Depot Service
Appendix A. Warranty information 45
Page 54

This type of Warranty Service is a combination of Type 1 and Type 3 (see
above).
7. CRU and Customer Carry-In or Mail-In Service
This type of Warranty Service is a combination of Type 1 and Type 4 (see
above).
a 5, 6 or 7 type of warranty service is listed, your Service Provider
When
will determine which type of warranty service is appropriate for the repair.
* This type of service is called ThinkPad EasyServ or EasyServ in some
countries.
To obtain warranty service contact a Service Provider. In Canada or the
United States, call 1-800-IBM-SERV (426-7378). In other countries, see the
telephone numbers below.
Worldwide telephone list
Phone numbers are subject to change without notice. For the most current
phone numbers, go to http://www.lenovo.com/support/phone.
Country or Region Telephone Number
Africa Africa: +44 (0)1475-555-055
South Africa: +27-11-3028888 and 0800110756
Central Africa: Contact the nearest Lenovo Business Partner
Argentina 0800-288-5366 (Spanish)
Australia 131-426 (English)
Austria Up and running support: 01-24592-5901
Warranty service and support: 01-211-454-610
(German)
Belgium Up and running support: 02-210-9820 (Dutch)
Up and running support: 02-210-9800 (French)
Warranty service and support: 02-225-3611 (Dutch, French)
Bolivia 0800-0189 (Spanish)
Brazil Sao Paulo region: (11) 3889-8986
Outside Sao Paulo region: 0800-701-4815
(Brazilian Portuguese)
Canada 1-800-565-3344
(English, French)
In Toronto only call 416-383-3344
Chile Toll Free: 1230-020-1130 (Spanish)
China 800-810-1818 ext 5070
8610 84981188 ext 5070
(Mandarin)
46 ThinkPad
®
Z61 Service and Troubleshooting Guide
Page 55

Country or Region Telephone Number
China
(Hong Kong S.A.R.)
ThinkPad (Technical enquiry hotline): 852-2516-3939
ThinkPad Service Center: 852-2825-6580
ThinkCentre Commerical PC: 8205-0333
Multimedia Home PC: 800-938-228
(Cantonese, English, Mandarin)
China
(Macau S.A.R.)
ThinkPad (Technical enquiry hotline): 0800-839
ThinkCentre (Technical enquiry hotline): 0800-336
(Cantonese, English, Mandarin)
Colombia 01-800-952-0466 (Spanish)
Costa Rica 800-011-1029 (Spanish)
Croatia 0800-0426
Cyprus +357-22-841100
Czech Republic +420-2-7213-1316
Denmark Up and running support: 4520-8200
Warranty service and support: 7010-5150
(Danish)
Dominican Republic Toll Free: 1-866-434-2080 (Spanish)
Ecuador 1-800-426911 (Spanish)
El Salvador 800-6264 (Spanish)
Estonia +386-61-1796-699
Finland Up and running support: 09-459-6960
Warranty service and support: +358-800-1-4260
(Finnish)
France Up and running support: 0238-557-450
Warranty service and support (hardware): 0810-631-213
Warranty service and support (software): 0810-631-020
(French)
Germany Up and running support: 07032-15-49201
Warranty service and support: 01805-25-35-58
(German)
Greece +30-210-680-1700
Guatemala 1800-624-0051 (Spanish)
Honduras Tegucigalpa: 232-4222
San Pedro Sula: 552-2234
(Spanish)
Hungary +36-1-382-5720
India 1800-425-6666
+91-80-2678-8970
(English)
Appendix A. Warranty information 47
Page 56

Country or Region Telephone Number
Indonesia 800-140-3555 (English)
62-21-251-2955 (Bahasa, Indonesian)
Ireland Up and running support: 01-815-9202
Warranty service and support: 01-881-1444
(English)
Israel Givat Shmuel Service Center: +972-3-531-3900
Haifa Service Center: +972-4-849-4608
(Hebrew, English)
Italy Up and running support: 02-7031-6101
Warranty service and support: +39-800-820094
(Italian)
Japan ThinkPad Products Toll Free: 0120-20-5550
International: +81-46-266-4716
Both of the above numbers will be answered with a Japanese language voice
prompt. For telephone support in English, please wait for the Japanese voice
prompt to end, and an operator will answer. Please say ″English support
please,″ and your call will be transferred to an English speaking operator.
Korea 1588-5801 (Korean)
Latvia +386-61-1796-699
Lithuania +386-61-1796-699
Luxembourg +352-298-977-5063 (French)
Malaysia 1800-88-8558 (English, Bahasa, Melayu)
Malta +356-23-4175
Mexico 01-800-123-1632 (Spanish)
Middle East +44 (0)1475-555-055
Netherlands +31-20-514-5770 (Dutch)
New Zealand 0800-733-222 (English)
Nicaragua 001-800-220-1830 (Spanish)
Norway Up and running support: 6681-1100
Warranty service and support: 8152-1550
(Norwegian)
Panama 001-866-434-2080 (Toll Free)
(Spanish)
Peru 0-800-00-966 (Spanish)
Philippines 1800-1888-1426 (English)
63-2-995-8420 (Filipino)
Poland +48-22-878-6999
Portugal +351-21-892-7147 (Portuguese)
48 ThinkPad
®
Z61 Service and Troubleshooting Guide
Page 57

Country or Region Telephone Number
Romania +4-021-224-4015
Russian Federation +7-495-940-2000 (Russian)
Singapore 1800-3172-888 (English, Bahasa, Melayu)
Slovakia +421-2-4954-1217
Slovenia +386-1-4796-699
Spain 91-714-7983
0901-100-000
(Spanish)
Sri Lanka +94-11-2448-442 (English)
Sweden Up and running support: 08-477-4420
Warranty service and support: 077-117-1040
(Swedish)
Switzerland Up and running support: 058-333-0900
Warranty service and support: 0800-55-54-54
(German, French, Italian)
Taiwan 886-2-8723-9799
0800-000-700
(Mandarin)
Thailand 1-800-299-229 (Thai)
Turkey 00800-4463-2041 (Turkish)
United Kingdom Up and running support: 01475-555-055
Warranty support: 08705-500-900
(English)
United States 1-800-426-7378 (English)
Uruguay 000-411-005-6649 (Spanish)
Venezuela 0-800-100-5722 (Spanish)
Vietnam For northern area and Hanoi: 84-4-843-6675
For southern area and Ho Chi Minh City: 84-8-829-5160
(English, Vietnamese)
Appendix A. Warranty information 49
Page 58

50 ThinkPad
®
Z61 Service and Troubleshooting Guide
Page 59

Appendix B. Customer Replaceable Units (CRUs)
For your ThinkPad computer, the following parts are designated Customer
Replaceable Unit (CRU) parts.
Listed below are the CRUs and the documentation where
removal/replacement instructions are located.
Service and
Troubleshooting
Guide
Setup
Instructions
Access
Help
Online
Hardware
Maintenance
Manual
Online
Video
Tier 1 CRUs
Battery X X X X
Hard disk
X X X X
drive
Optical drive X X X
Ultrabay device X X X
AC adapter
X
and power cord
TrackPoint cap X
Tier 2 CRUs
Memory X X X X
Keyboard X X X
Palm rest -
X X X X
integrated with
touch pad and
fingerprint
reader
PCI Express
X X X
Mini Card
Communication
X X X
Daughter Card
You can find instructions for replacing CRUs in Access Help. To open Access
Help, click Start, move the pointer to All Programs (in Windows other than
Windows XP, Programs); then to ThinkVantage. Click Access Help
© Copyright Lenovo 2006 51
Page 60

If you are unable to access these instructions or if you have difficulty
replacing a CRU, you can use either of the following additional resources:
v The Online Hardware Maintenance Manual and Online Videos available
from the Support Web site
http://www.lenovo.com/think/support/site.wss/document.do?lndocid
=part-video
v The Customer Support Center. For the telephone number of the Support
Center for your country or region, see “Worldwide telephone list” on page
46.
52 ThinkPad
®
Z61 Service and Troubleshooting Guide
Page 61

Appendix C. Features and Specifications
For details about each part and its function of your computer, see the About
your computer section in online Access Help.
Features
Processor
v See the system properties of your computer. You can do this as follows:
right-click My computer on your desktop, from the pull down menu select
Properties.
Memory
v Double data rate (DDR) 2 synchronous dynamic random access memory
(DRAM)
Storage
device
v 2.5-inch hard disk drive
Display
color display uses TFT technology:
The
v Size: 14.1 inch
Resolution:
– LCD: Up to 1440-by-900, depending on the model
– External monitor: Up to 2048-by-1536
Size: 15.4 inch
v
Resolution:
– LCD: Up to 1920-by-1200, depending on the model
– External monitor: Up to 2048-by-1536
v Brightness control
v ThinkLight
™
v Integrated camera (on some models)
Keyboard
v Fingerprint reader (on some models)
v 89-key, 90-key, or 94-key
v UltraNav
®
(TrackPoint
®
and touch pad)
v Fn key function
v ThinkVantage button
v Volume control buttons
© Copyright Lenovo 2006 53
Page 62

Features
Interface
v Stereo headphone jack
v Microphone jack
v Video-out connector (S-Video)
v 3 Universal Serial Bus (USB) connectors
v IEEE 1394 connector
v Infrared port
v RJ11 telephone connector
v RJ45 Ethernet connector
v Ultrabay
™
Enhanced (on some models)
v Ultrabay Slim (on some models)
v Docking connector (on some models)
v External-monitor connector
Card slot
PC
v Type II PC Card
v ExpressCard slot (on some models)
Specifications
Optical
drive
v CD-ROM, DVD-ROM, Combo or Multi-Burner drive depending on the
model
Wireless
features
v Integrated wireless LAN
v Integrated Bluetooth (on some models)
v Integrated wireless WA N (on some models)
Digital
media reader
v 3-in-1 or 4-in-1 digital media slot depending on the model
Size
14-inch model
v Width: 334 mm (13.14 in.)
v Depth: 228 mm (8.97 in.)
v Height: 26.6 to 30.9 mm (1.04 to 1.18 in.)
15-inch model
v Width: 357 mm (14.05 in.)
v Depth: 262.5 mm (10.33 in.)
v Height: 37.3 to 40.2 mm (1.46 to 1.58 in.)
54 ThinkPad
Environment
v Maximum altitude without pressurization: 3048 m (10,000 ft)
®
Z61 Service and Troubleshooting Guide
Page 63

Specifications
v Temperature
– At altitudes up to 2438 m (8000 ft)
- Operating with no optical disc in the drive: 5° to 35°C (41° to 95°F)
- Operating with an optical disc in the drive: 10° to 35°C (50° to 95°F)
- Non-operating: 5° to 43°C (41° to 110°F)
– At altitudes above 2438 m (8000 ft)
- Maximum operating temperature, 31.3°C (88° F)
When you charge the battery pack, its temperature must be at least
Note:
10°C (50°F).
v Relative humidity:
– Operating with no optical disc in the drive: 8% to 90%
– Operating with an optical disc in the drive: 8% to 80%
Heat output
v 65 W (222 Btu/hr) maximum or 90 W (307 Btu/hr) maximum (depending
on the model)
Power source (ac adapter)
v Sine-wave input at 50 to 60 Hz
v Input rating of the ac adapter: 100-240 V ac, 50 to 60 Hz
Battery pack
v Lithium-ion (Li-Ion) battery pack
– Nominal voltage: 10.8 V dc, 14.4 V dc or 10.8 V dc /14.4 V dc
(depending on the model)
– Capacity: 2.6 Ah, 5.2 Ah or 7.8 Ah (depending on the model)
Battery life
v For detailed information on battery life, see the Power Manager Gauge in
the task tray.
Appendix C. Features and Specifications 55
Page 64

Specifications
56 ThinkPad
®
Z61 Service and Troubleshooting Guide
Page 65

Appendix D. Notices
Notices
Lenovo may not offer the products, services, or features discussed in this
document in all countries. Consult your local Lenovo representative for
information on the products and services currently available in your area. Any
reference to a Lenovo product, program, or service is not intended to state or
imply that only that Lenovo product, program, or service may be used. Any
functionally equivalent product, program, or service that does not infringe
any Lenovo intellectual property right may be used instead. However, it is the
user’s responsibility to evaluate and verify the operation of any other product,
program, or service.
Lenovo may have patents or pending patent applications covering subject
matter described in this document. The furnishing of this document does not
give you any license to these patents. You can send license inquiries, in
writing, to:
Lenovo (United States), Inc.
500 Park Offices Drive, Hwy. 54
Research Triangle Park, NC 27709
U.S.A.
Attention: Lenovo Director of Licensing
LENOVO
GROUP LTD. PROVIDES THIS PUBLICATION “AS IS” WITHOUT
WARRANTY OF ANY KIND, EITHER EXPRESS OR IMPLIED, INCLUDING,
BUT NOT LIMITED TO, THE IMPLIED WARRANTIES OF
NON-INFRINGEMENT, MERCHANTABILITY OR FITNESS FOR A
PARTICULAR PURPOSE. Some jurisdictions do not allow disclaimer of
express or implied warranties in certain transactions, therefore, this statement
may not apply to you.
This information could include technical inaccuracies or typographical errors.
Changes are periodically made to the information herein; these changes will
be incorporated in new editions of the publication. Lenovo may make
improvements and/or changes in the product(s) and/or the program(s)
described in this publication at any time without notice.
The products described in this document are not intended for use in
implantation or other life support applications where malfunction may result
in injury or death to persons. The information contained in this document
does not affect or change Lenovo product specifications or warranties.
Nothing in this document shall operate as an express or implied license or
© Copyright Lenovo 2006 57
Page 66

indemnity under the intellectual property rights of Lenovo or third parties. All
information contained in this document was obtained in specific environments
and is presented as an illustration. The result obtained in other operating
environments may vary.
Lenovo may use or distribute any of the information you supply in any way
it believes appropriate without incurring any obligation to you.
Any references in this publication to non-Lenovo We b sites are provided for
convenience only and do not in any manner serve as an endorsement of those
Web sites. The materials at those Web sites are not part of the materials for
this Lenovo product, and use of those Web sites is at your own risk.
Any performance data contained herein was determined in a controlled
environment. Therefore, the result obtained in other operating environments
may vary significantly. Some measurements may have been made on
development-level systems and there is no guarantee that these measurements
will be the same on generally available systems. Furthermore, some
measurements may have been estimated through extrapolation. Actual results
may vary. Users of this document should verify the applicable data for their
specific environment.
Television output notice
The following notice applies to models that have the factory-installed
television-output feature.
This product incorporates copyright protection technology that is protected by
U.S. patents and other intellectual property rights. Use of this copyright
protection technology must be authorized by Macrovision, and is intended for
home and other limited viewing uses only unless otherwise authorized by
Macrovision. Reverse engineering or disassembly is prohibited.
Electronic emissions notices
The following information refers to ThinkPad Z61, machine type 9440, 9441,
9442, 9443, 9448, 9450, 9451, 9452, 9453, 0672, 0673, 0674
Federal Communications Commission (FCC) Statement
This equipment has been tested and found to comply with the limits for a
Class B digital device, pursuant to Part 15 of the FCC Rules. These limits are
designed to provide reasonable protection against harmful interference in a
residential installation. This equipment generates, used, and can radiate radio
frequency energy and, if not installed and used in accordance with the
instructions, may cause harmful interference to radio communications.
However, there is no guarantee the interference will not occur in a particular
installation. If this equipment does cause harmful interference to radio or
®
58 ThinkPad
Z61 Service and Troubleshooting Guide
Page 67

television reception, which can be determined by turning the equipment off
and on, the user is encouraged to try to correct the interference by one or
more of the following measures:
v Reorient or relocate the receiving antenna.
v Increase the separation between the equipment and receiver.
v Connect the equipment into an outlet on a circuit different from that to
which the receiver is connected.
v Consult an authorized dealer or service representative for help.
Properly shielded and grounded cables and connectors must be used in order
to meet FCC emission limits. Proper cables and connectors are available from
Lenovo authorized dealers. Lenovo is not responsible for any radio or
television interference caused by using other than recommended cables or
connectors or by unauthorized changes or modifications to this equipment.
Unauthorized changes or modifications could void the user’s authority to
operate the equipment.
This device complies with Part 15 of the FCC Rules. Operation is subject to
the following two conditions: (1) this device may not cause harmful
interference, and (2) this device must accept any interference received,
including interference that may cause undesired operation.
Responsible party:
Lenovo (United States) Inc.
One Manhattanville Road
Purchase, New York 10577
Telephone: (919) 254-0532
Industry Canada Class B emission compliance statement
This Class B digital apparatus complies with Canadian ICES-003.
Avis de conformité à la réglementation d’Industrie Canada
Cet appareil numérique de la classe B est conforme à la norme NMB-003 du
Canada.
European Union EMC Directive conformance statement
This product is in conformity with the protection requirements of EU Council
Directive 89/336/EEC on the approximation of the laws of the Member States
relating to electromagnetic compatibility. Lenovo cannot accept responsibility
Appendix D. Notices 59
Page 68

for any failure to satisfy the protection requirements resulting from a
nonrecommended modification of the product, including the fitting of
non-Lenovo option cards.
This product has been tested and found to comply with the limits for Class B
Information Technology Equipment according to CISPR 22/European
Standard EN 55022. The limits for Class B equipment were derived for typical
residential environments to provide reasonable protection against interference
with licensed communication devices.
Properly shielded and grounded cables and connectors must be used in order
to reduce the potential for causing interference to radio and TV
communications and to other electrical or electronic equipment. Such cables
and connectors are available from Lenovo authorized dealers. Lenovo cannot
accept responsibility for any interference caused by using other than
recommended cables and connectors.
Important information for the European Directive 2002/96/EC
60 ThinkPad
Notice : This mark applies only to countries within the European Union (EU)
and Norway. This appliance is labelled in accordance with European Directive
2002/96/EC concerning waste electrical and electronic equipment (WEEE).
The Directive determines the framework for the return and recycling of used
appliances as applicable throughout the European Union. This label is applied
to various products to indicate that the product is not to be thrown away, but
rather reclaimed upon end of life per this Directive.
Remarque : Cette étiquette concerne uniquement les pays de l’Union
européenne et la Norvège. Cet appareil porte une étiquette liée aux
dispositions de la Directive 2002/96/CE du Conseil Européen relative aux
déchets d’équipements électriques et électroniques (DEEE). Cette directive
détermine les dispositions générales, applicables dans l’Union européenne,
pour la récupération et le recyclage des équipements utilisés. Cette étiquette
est apposée à différents produits pour signaler qu’ils ne doivent pas être jetés
mais récupérés, selon les dispositions énoncées dans la directive.
®
Z61 Service and Troubleshooting Guide
Page 69

IBM Lotus Software Offer
About the offer: As a qualifying ThinkPad computer customer, you are
receiving a single, limited license for the Lotus Notes
a single license for the Lotus SmartSuite
to install and use this software on your new ThinkPad computer using one of
the following options:
v Media for this software is not included in this offer. If you do not
already have the appropriate Lotus Notes Client or Lotus SmartSuite
software media, you can order a CD and install the software onto your
computer. For more information, see “To order a CD” on page 62.
v If you already have a licensed copy of the software, you are entitled to
make and use one additional copy of the software you have.
About IBM Lotus Notes: With your standalone, limited use Notes client, you
can integrate your most valuable messaging, collaborative and personal
information management (PIM) resources —like e-mail, calendar, to-do list —
allowing you to access them while connected to or disconnected from your
network. The standalone license does not include the right to access any IBM
Lotus Domino servers; however this stand-alone license may be upgraded to a
full Notes license at a reduced price. For more information visit
http://www.lotus.com/notes.
®
®
software. These licenses entitle you
“standalone” client and
About IBM Lotus SmartSuite: Lotus SmartSuite contains powerful
applications with timesaving features that give you a head start on your work
and guide you through individual tasks.
v Lotus Wo r d Pro
v Lotus 1-2-3
v Lotus Freelance Graphics
v Lotus Approach
v Lotus Organizer
v Lotus FastSite
®
®
– Word Processor
– Spreadsheet
®
– Database
®
– Time, Contact, and Information Manager
®
– Web Publisher
®
– Presentation Graphics
v Lotus SmartCenter – Internet Information Manager
Customer
Support: For support information and phone numbers to help with
initial installation of software, visit http://www.lenovo.com/think/support.
To purchase technical support beyond this initial installation support, visit
http://www.lotus.com/passport.
Appendix D. Notices 61
Page 70

International Program License Agreement:The software licensed to you
under this offer does not include software upgrades or technical support, and
is subject to the terms and conditions of the IBM International Program
License Agreement (IPLA) that accompanies the software. Your use of the
Lotus SmartSuite and Lotus Notes programs described in this offer constitutes
acceptance of the terms of this Offer and the IPLA. For further information
regarding the IBM IPLA, visit http://www.ibm.com/software/sla/sladb.nsf.
These programs are not for resale.
Proof of Entitlement: The proof of purchase for your qualifying ThinkPad
computer, as well as this Offer document, should be retained as your proof of
entitlement.
Purchasing Upgrades, Additional Licenses and Technical Support
Software upgrades and technical support are available for a fee through IBM’s
Passport Advantage
licenses for Notes, SmartSuite, or other Lotus
®
Program. For information about purchasing additional
®
products, visit
http://www.ibm.com or http://www.lotus.com/passport.
To order a CD:
Important: Pursuant to this Offer, you may order one CD media per license.
You will need to provide the 7 digit serial number of the new ThinkPad
computer that you purchased. The CD is provided at no charge; however,
applicable shipping, duties and taxes may be imposed by local jurisdictions.
Please allow 10 to 20 business days from receipt of your request for delivery.
–In U. S. Or Canada:
Call 800-690-3899
–In Latin American Countries:
Via the Internet: http://smartsuite.modusmedia.com
Mail address:
IBM - Lotus Notes and SmartSuite Program
Modus Media International
501 Innovation Avenue
Morrisville, NC, USA 27560
Fax: 919-405-4495
To inquire about an order, contact:
smartsuite_ibm@modusmedia.com
–In European Countries:
Via the Internet: http://ibm.modusmedia.co.uk
Mail address:
IBM - Lotus Notes and SmartSuite Program
P.O. Box 3118
Cumbernauld, Scotland, G68 9JX
To inquire about an order, contact:
ibm_smartsuite@modusmedia.com
62 ThinkPad
®
Z61 Service and Troubleshooting Guide
Page 71

Trademarks
–In Asia Pacific Countries:
Via the Internet: http://smartsuite.modusmedia.com
Mail address:
IBM - Lotus Notes and SmartSuite Program
Modus Media International
eFulfillment Solution Center
750 Chai Chee Road
#03-10/14, Technopark at Chai Chee,
Singapore 469000
Fax: +65 6448 5830
To inquire about an order, contact:
Smartsuiteapac@modusmedia.com
The following terms are trademarks of Lenovo in the United States, other
countries, or both:
Lenovo
ThinkPad
PS/2
Rapid Restore
Rescue and Recovery
ThinkLight
ThinkPad
TrackPoint
ThinkVantage
Ultrabay
UltraNav
The following terms are trademarks of International Business Machines
Corporation in the United States, other countries, or both:
IBM
Lotus
Lotus 1-2-3
Lotus Approach
Lotus FastSite
Lotus Freelance Graphics
Lotus Notes
Lotus Organizer
Lotus SmartCenter
Lotus SmartSuite
Lotus Word Pro
Microsoft and Windows are trademarks of Microsoft Corporation in the
United States, other countries, or both.
Appendix D. Notices 63
Page 72

Intel, Pentium, and Intel SpeedStep are trademarks of Intel Corporation in the
United States and/or other countries. (For a complete list of Intel trademarks,
see www.intel.com/sites/corporate/tradmarx.htm)
Other company, product, or service names may be trademarks or service
marks of others.
64 ThinkPad
®
Z61 Service and Troubleshooting Guide
Page 73

Index
B
battery
problems 22
replacing 29
BIOS Setup Utility 24
C
carrying the computer 4
cleaning the computer 9
computer screen 21
configuration setup 24
Customer Replaceable Unit (CRU)
parts list 51
D
diagnosing problems 11
E
environment 3
error messages 12
errors without messages 17
F
features 53
fingerprint reader 53
authentication problems 23
care 6
H
hard disk
problems
upgrading 30, 33
help
and service 39
around the world 41
by telephone 39
by Web 39
hibernation problems 20
23
I
important tips 3
problems
battery 22
computer screen 21
diagnosing 11
fingerprint reader 23
hard disk 23
hibernation 20
keyboard 19
password 18
power management 20
standby 20
startup 23
troubleshooting 12
UltraNav 19
R
recovering preinstalled software 27
replacing, battery 29
Rescue and Recovery 27
S
setup
specifications 54
standby problems 20
startup problem 23
storage device upgrading 30, 33
24
BIOS
configuration 24
T
telephone, help by 39
tips, important 3
troubleshooting 12
U
UltraNav problems 19
W
warranty
information
Web, help by 39
43
K
keyboard problems 19
P
password
problems
setting 4
PC-Doctor for Windows 11
© Copyright Lenovo 2006 65
18
Page 74

66 ThinkPad
®
Z61 Service and Troubleshooting Guide
Page 75

Page 76

Part Number: 42T7750
Printed in China
(1P) P/N: 42T7750
 Loading...