

Page 1
Lenovo
Initial setup instructions
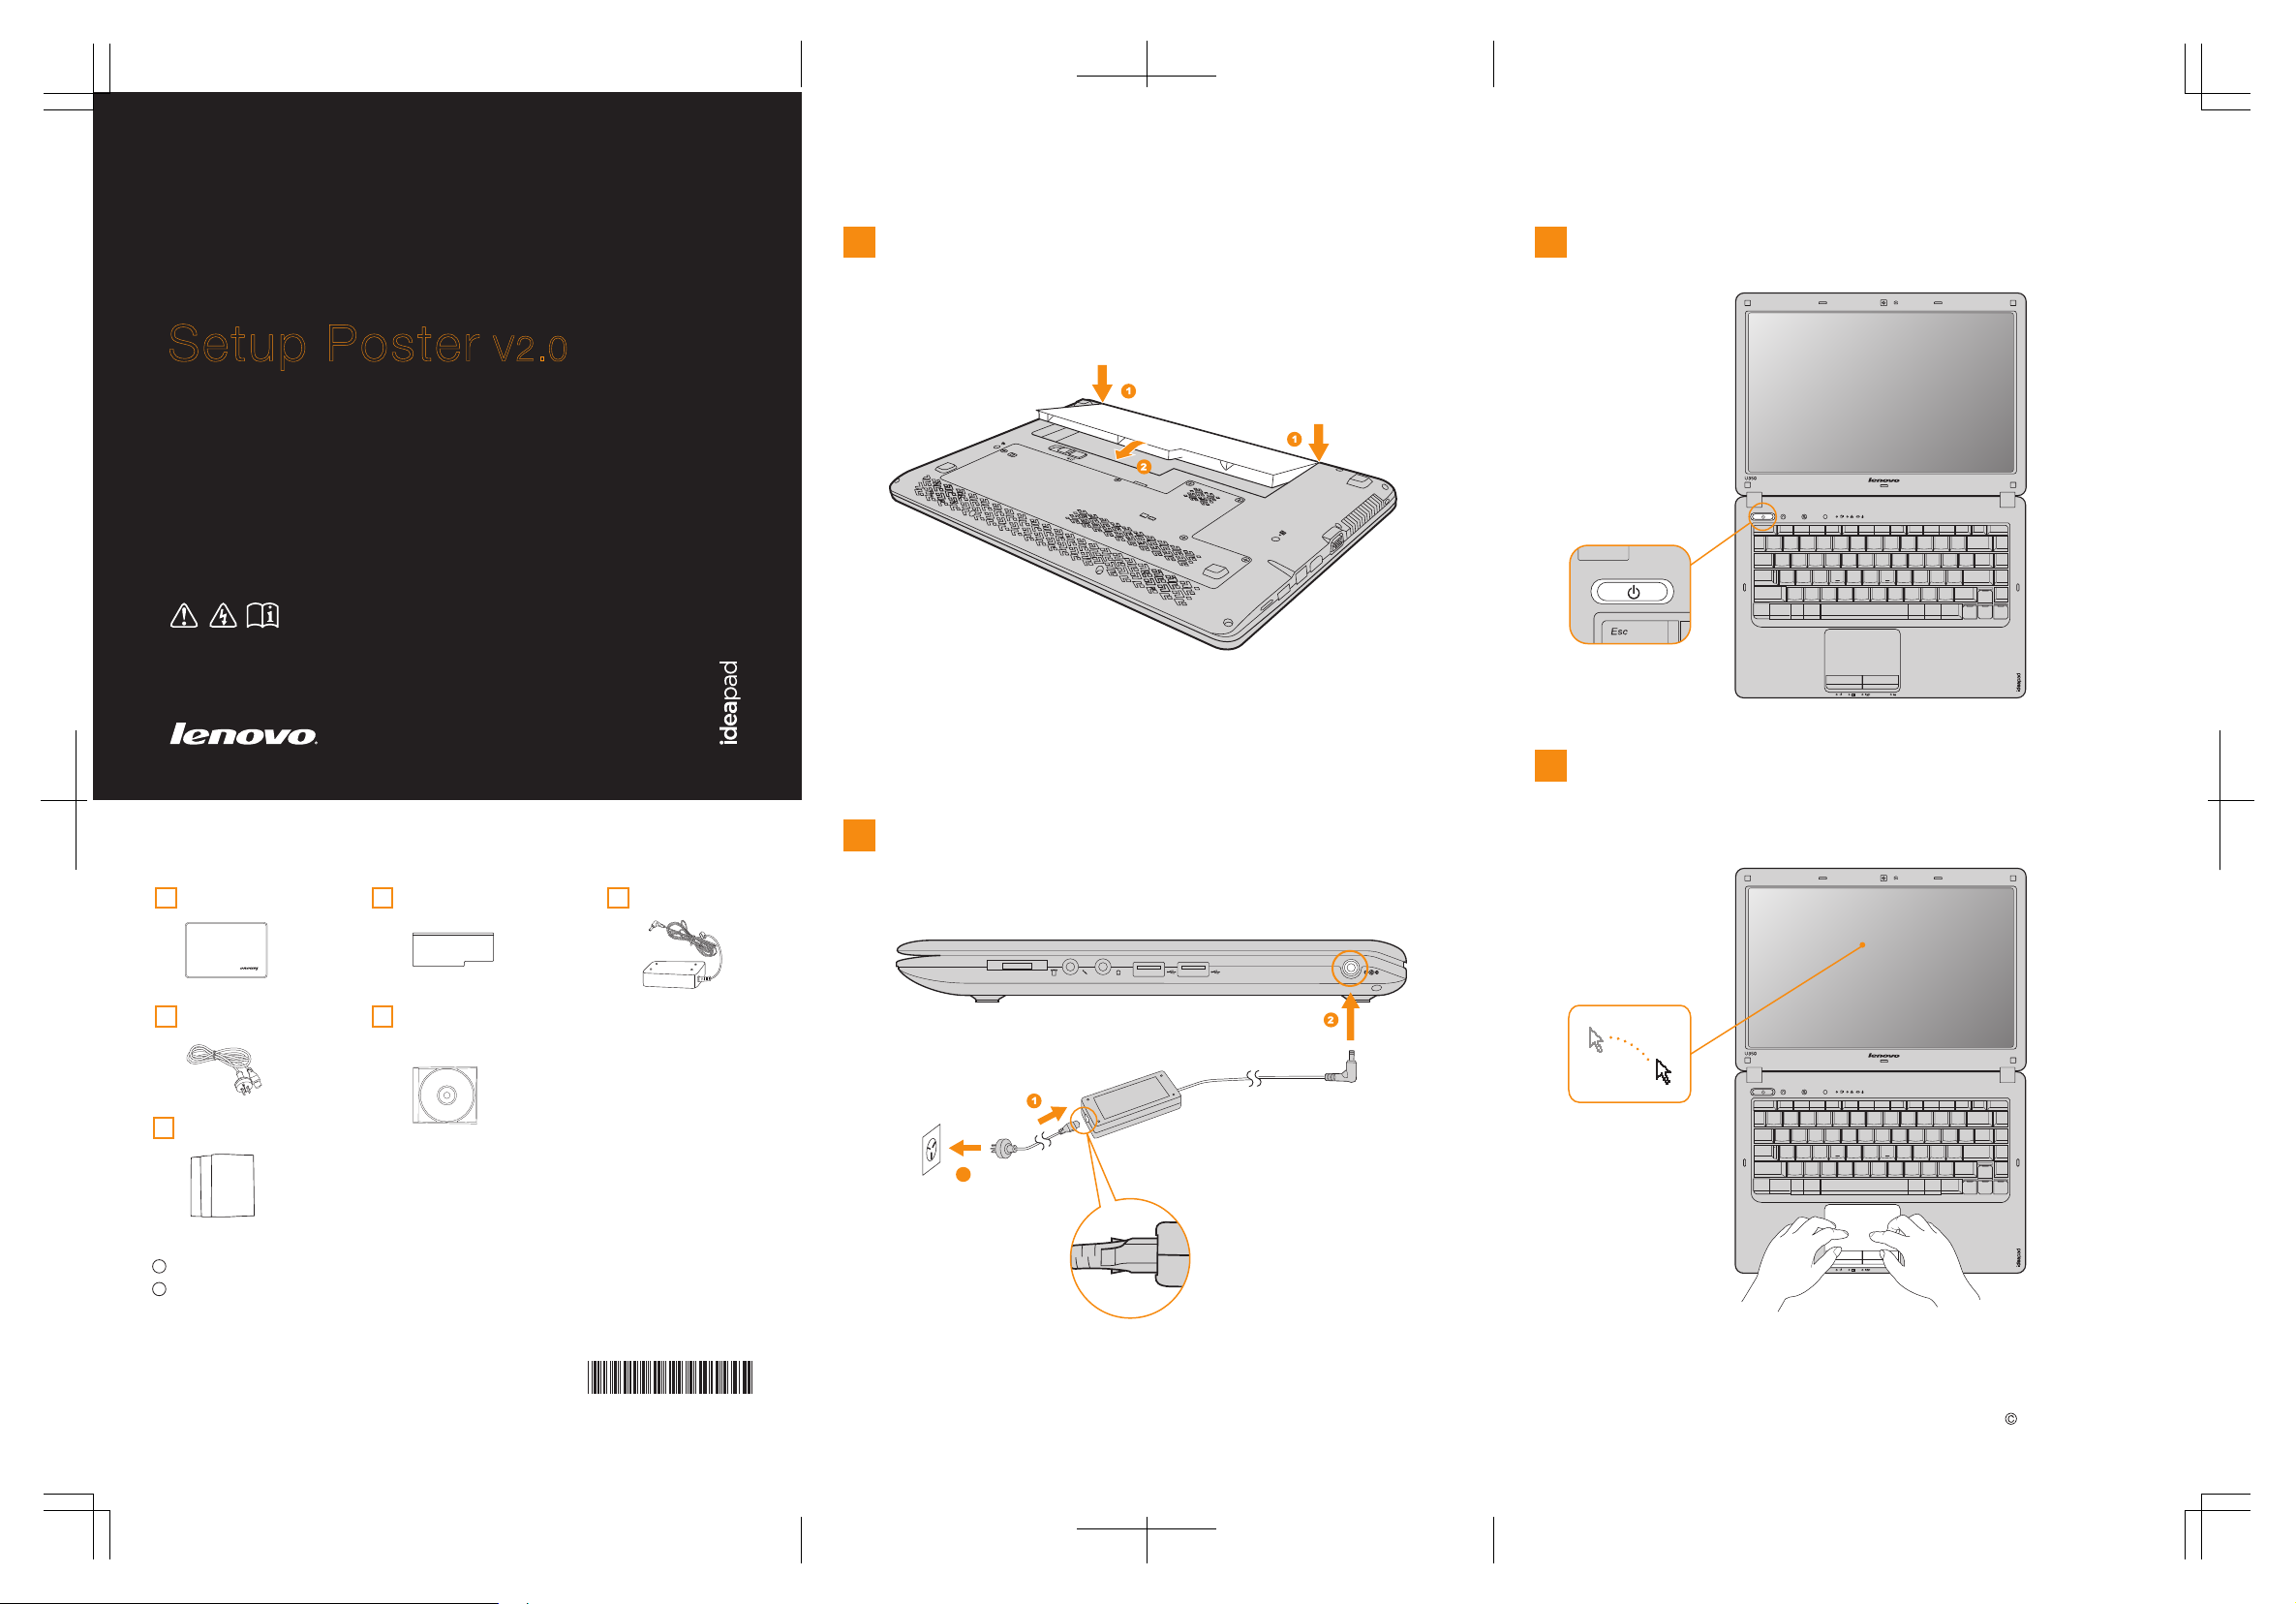
Install the battery pack
1
Press the power button
3
Lenovo IdeaPad U350 SP V2.0_EN_p1
IdeaPad U350
Setup Poster V2.0
Read the safety notices and important tips in the
included manuals before using your computer.
Unpack
1. Insert the bottom end of the battery pack into the battery bay of the
computer.
2. Press the other end (with the metal contact) until the battery pack
clicks into place.
Attention:
Make sure that the battery latch is in the locked position when installing the
battery pack. Attempts to forcibly press the battery pack in while the latch is
in the unlocked position can damage the latch mechanism.
If the latch is in the unlocked position when you attempt to install the battery
pack, remove the battery pack and the latch should immediately return to
the locked position. Reinstall the battery pack.
Connect to the power
2
Configure the operating system following the
4
on-screen instructions
Comput er Batter y pack
Power co rd *
Manual s
- Setup Poster
- User Guide
- Other publications
* Power cords vary by country/region.
1
Some models may contain items that are not listed.
2
If any item is missing or damaged, please contact your retailer.
Optica l disk(s)
(speci fi c model s only)
AC ada pt er
P/N: 148001468
Printed in China
3
Attention:
Connect the power cord to the AC adapter firmly, poor connections may
result in damages to the AC adapter.
Lenov o, Le novo logo, Ide aPad, VeriFa ce an d One Key are ei ther regis tered trade marks or trade marks of L enovo
in th e Uni ted S tates and /or o ther count ries.
Copyright Lenovo 2009.
Page 2
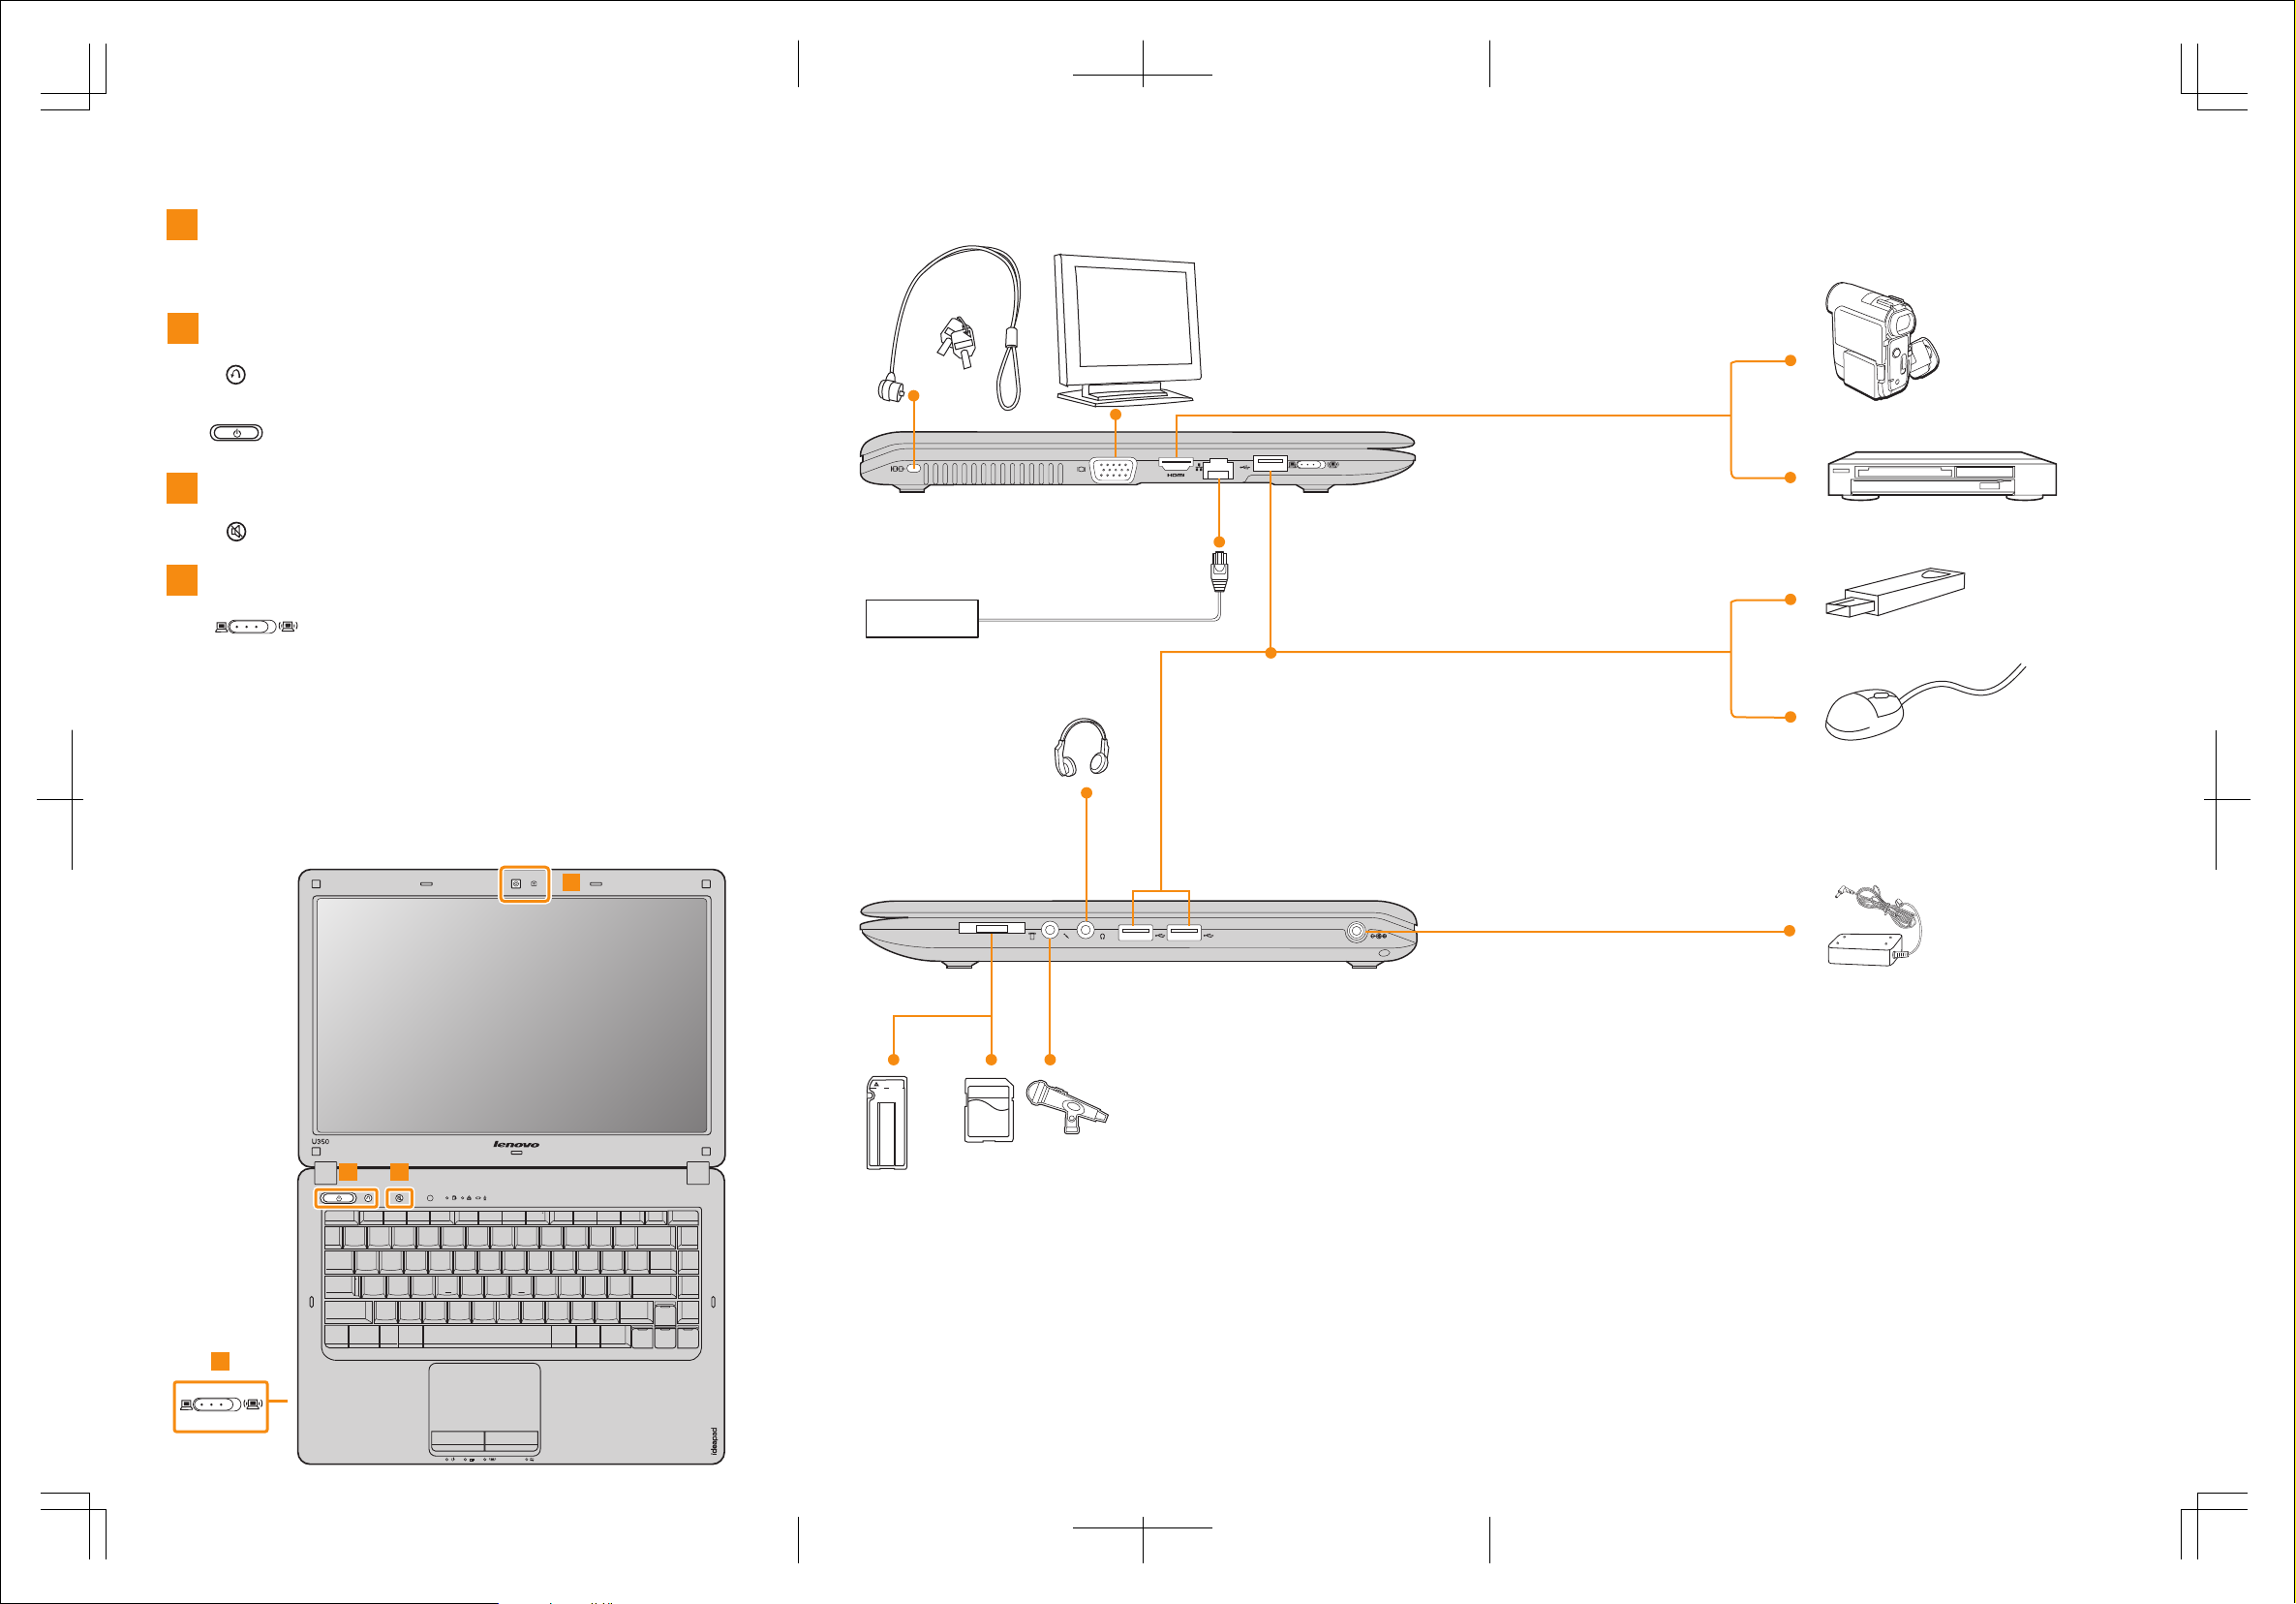
Buttons and functions External devices connection
Integrated camera
1
The integrated camera offers an improved notebook
experience for video-centric applications.
OneKey Rescue System button / Power button
2
Repair Windows system kernel files or restore the system to
its original state in case of an unrecoverable error.*
Start the computer.
3
Mute button
Mute/Unmute the computer.
Wireless radio switch
4
Lenovo IdeaPad U350 SP V2.0_EN_p2
Use this switch to turn on/off the wireless radio of all wireless
devices on your computer.
*If OneKey Rescue System is installed.
2 3
Ethernet
1
Notes :
• The above connection illustration is only for reference. You are responsible for
evaluating the quality and compatibility when purchasing external devices. Function of
all external devices is not guaranteed. Follow the instructions shipped with the devices
when connecting them to your computer.
• The illustrations in this manual may differ from the actual product.
Please refer to the actual product.
4
Attention:
Differring in backlight, the LCD on marketing can be divided into CCFL (Cold Cathode
Fluorescent Lamp) LCD and LED (Light Emitting Diode) LCD.
The LCD applied LED backlight technology which adopts LED as the light source and
is mercury-free and more energy-saving than CCFL backlight technology.
 Loading...