

Lenovo ThinkStation Software RAID Solutions [en, ar, bg, cs, da, de, el, es, fi, fr, he, hr, hu, it, ja, ko, nb, nl, pl, pt, pt, ro, ru, sh, sk, sl, sr, sv, th, tr, uk, zc, zh]
ThinkStation Software RAID Solutions
Version 1 . 0

1. Introduction
The introduction of the new P-series ThinkStation line brought with it several new technologies that are being seen for
the first time in workstation class systems. One of these critical technologies is PCIe based storage devices.
These devices offer a large increase in bandwidth over today’s standard storage solutions which are typically based on
the standard SATA bus. By using PCIe gen3 lanes that connect directly back to the CPU, PCIe based storage devices can
achieve throughputs that far exceed even gen3 SATA devices.
However, because these fast storage devices generally connect directly to the CPU, there is no host bus adapter (HBA)
available that can be used to RAID PCIe drives together in the traditional manner. This is where a software based RAID
solution can be used to increase both the performance and redundancy of PCIe based storage devices. It’s important to
note that this same software based RAID solution can also be applied to traditional storage devices (such as SATA or
SAS), however the RAID performance of the software based solution generally lags behind that of a traditional hardware
based RAID solution.
This document will instruct users in how to set up software based RAID solutions using the integrated features of the
Windows operating system.
2. Windows 7 Software RAID Solution
Windows 7 has a built in software RAID component that can easily be enabled with just a few clicks with no
need to install additional software. It is important to note that in order for drives to be RAIDed together, the
drive containing the active OS image (i.e. the boot drive) cannot be part of the RAID array. Also, Windows must
be able to see your devices in order to create the software RAID array.
Note : The following procedure will wipe out any existing data on the drives to be included in the RAID array.
Please be aware of this before proceeding and save any existing user data to another location.
Software RAID arrays can be created by following the steps below:
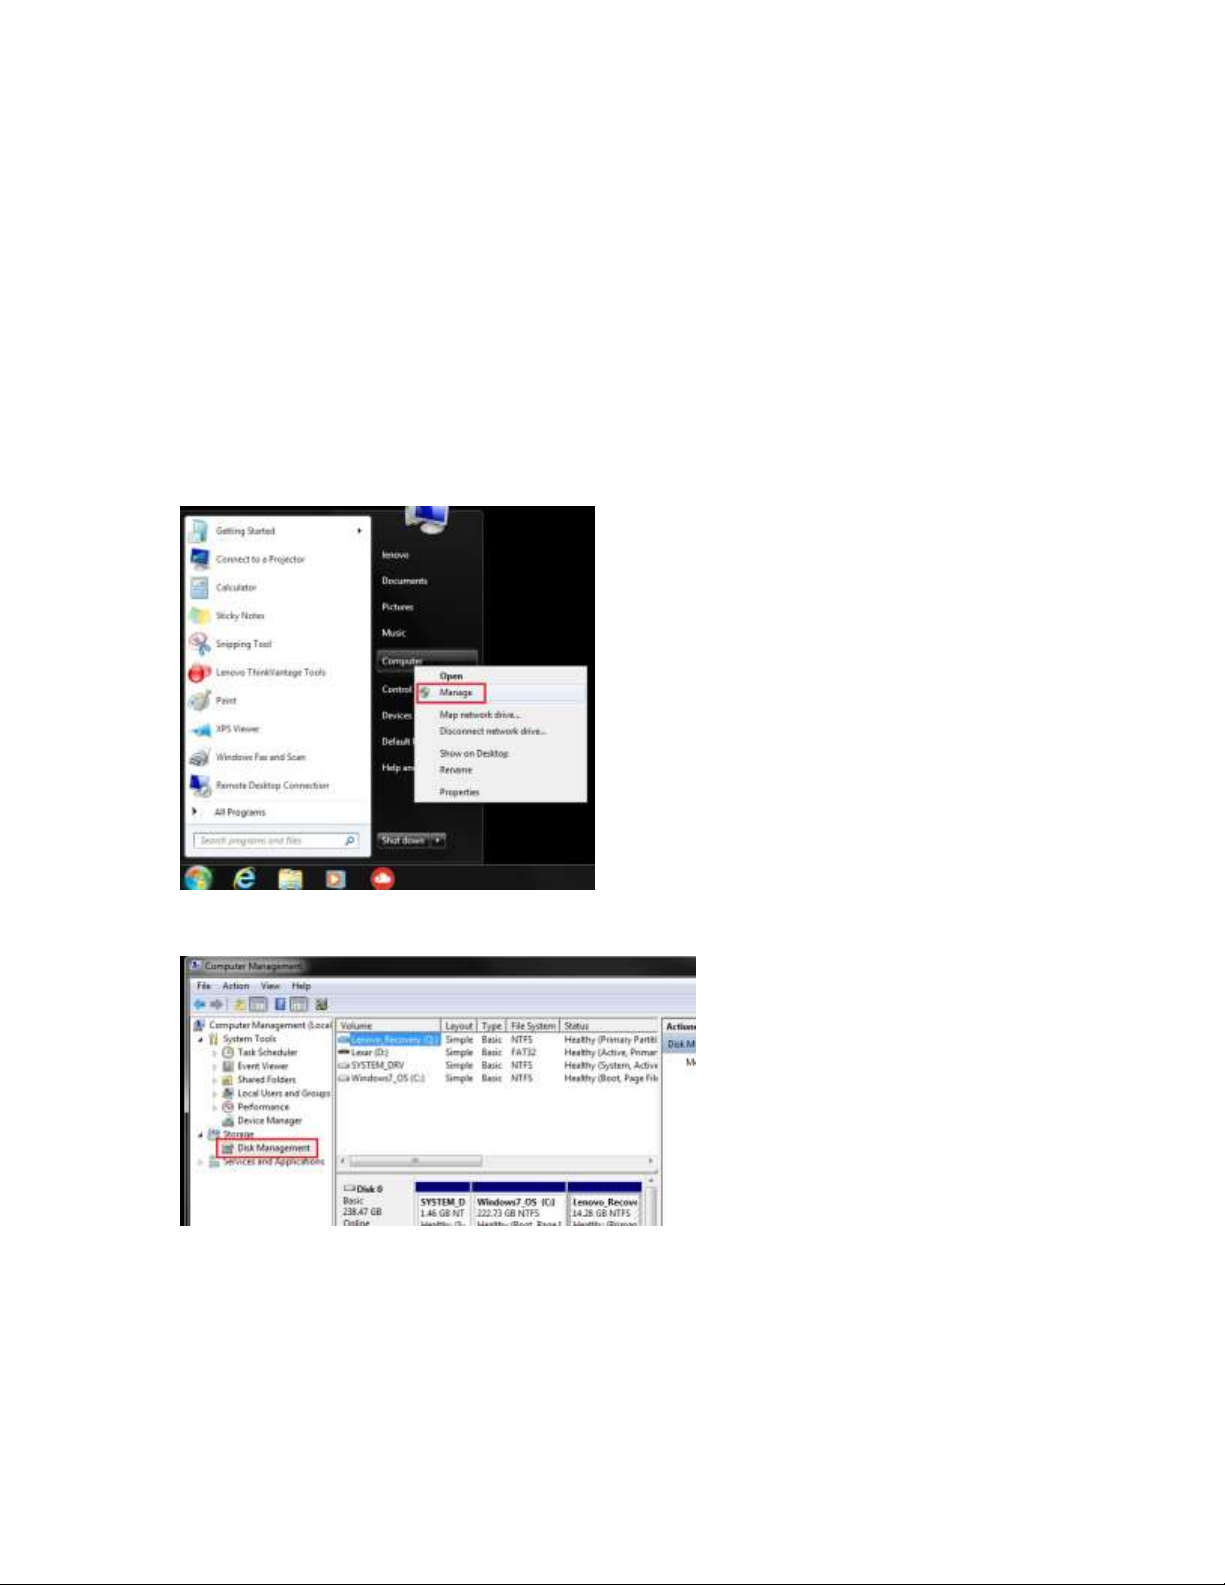
1. From the Windows 7 desktop, click “Start”, then right click on “Computer” and select “Manage”. Note that
you will have to provide administrator access to complete this step.
2. Once the Computer Management window opens, click on “Disk Management” in the left pane.
3. At this point, the upper pane will show a list of all drives currently detected by the system. The lower pane
shows a more visual representation of the drives and any partitions on each drive.

4. In the lower pane, locate the first drive you wish to add to the new RAID array. Note that in this example,
two 256GB PCIe SSDs will be used in the RAID array.
5. Right click on one of the drives to be added to the array, and then select the type of RAID array desired. For
a RAID0 array, select “New Striped Volume”. For a RAID1 array, select “New Mirrored Volume”. For this
example, a striped (RAID0) array is being created. Note that the drive must be listed as “Unallocated” for
the striped and mirrored options to be available. If a drive is listed as “Healthy”, the existing volume must
be deleted prior to selecting a striped or mirrored volume option. Existing volumes can be deleted by right
clicking the drive and selecting “Delete Volume” from the menu.
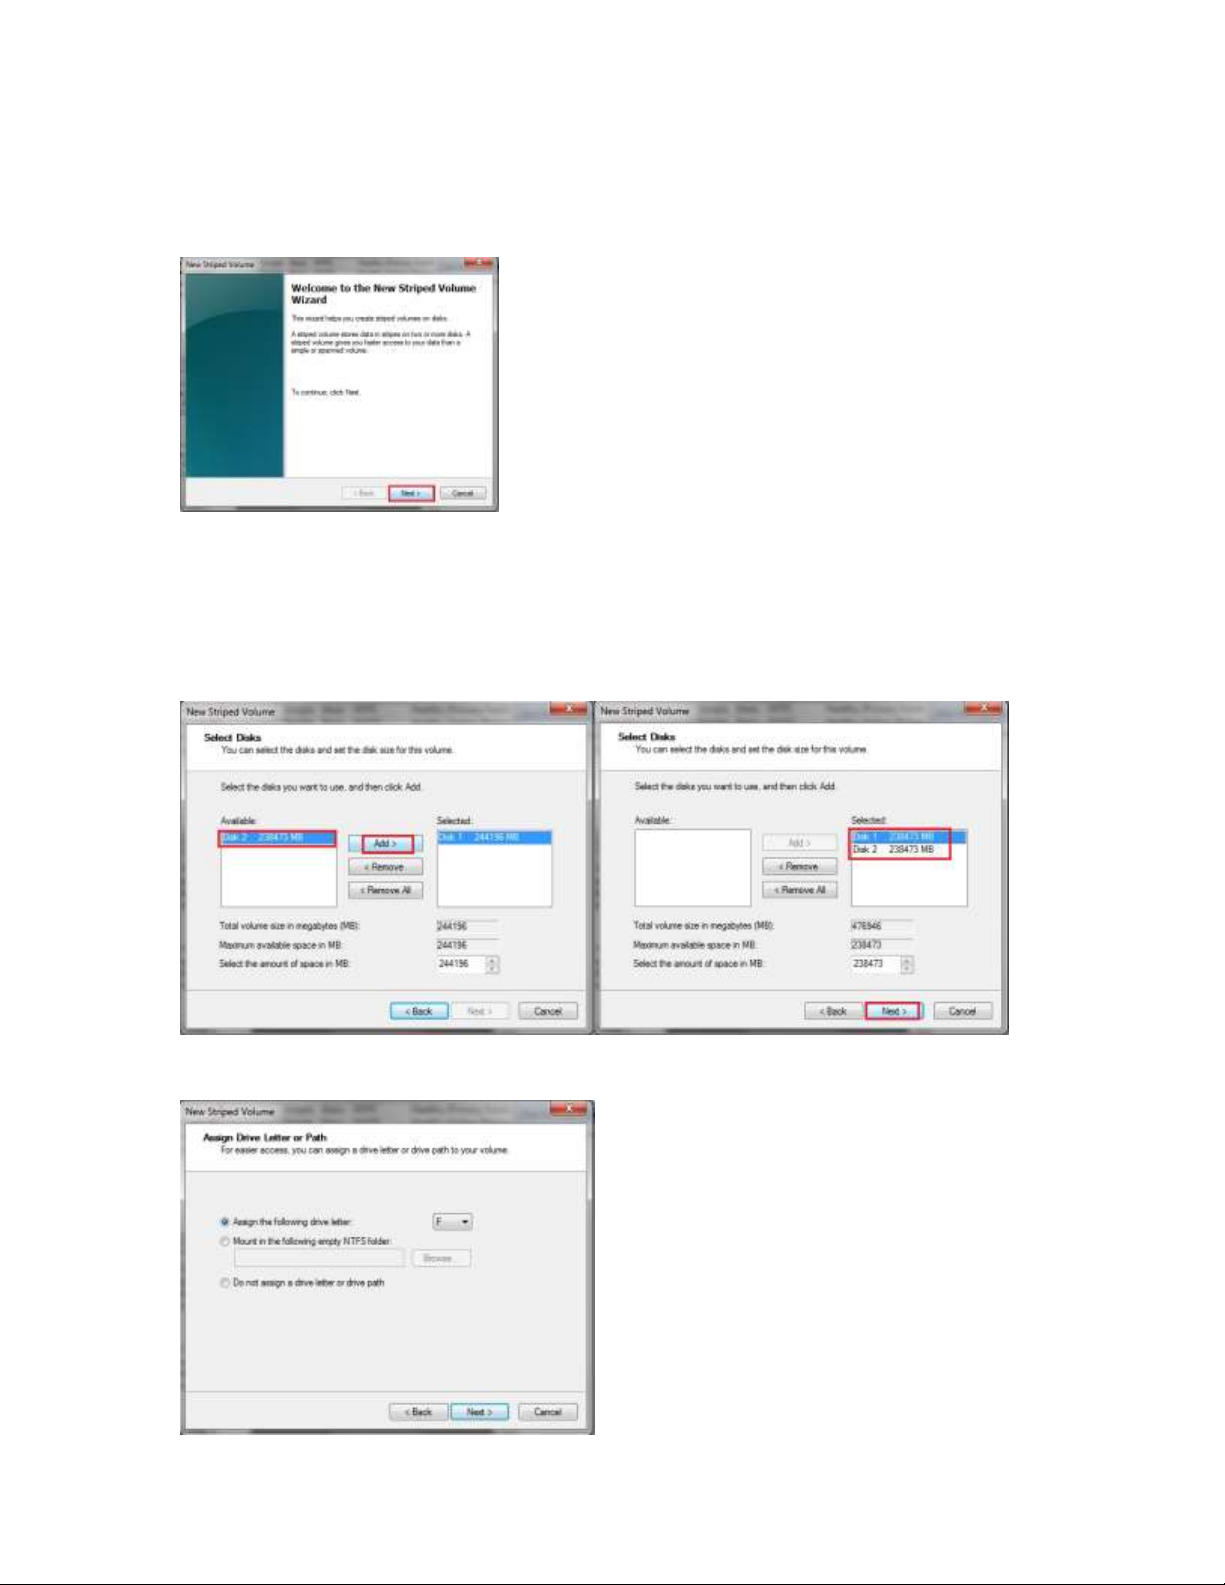
6. The New Volume Wizard will open in a new window. Click Next to continue.
7. The next step is to select the disks to be part of the array. The original disk clicked on in step 5 is already
added to the array. Locate any additional disk(s) to be added to the array in the left pane listed as
“Available”. Click the desired disk, and then click Add. Repeat this process until all desired disks are added.
When finished, click Next.
Note : The array size can also be manually adjusted at this time as well.
8. In the next window, select the drive letter to be assigned to the new array. When finished, click Next.

9. In the next window, select the formatting options (including the volume label/name) for the new array.
When finished, click Next.
10. Finally, the summary window will appear showing the selected settings for the array. Click Back to change
any previous settings, otherwise click Finish to complete the process of creating the array.
11. In many cases, the operating system will need to convert the disks in the array from basic (default) to
dynamic. Click Yes when the message appears to complete this operation.
Note : Software RAID arrays should not be set up to include the boot disk.

12. The desired RAID array should now be set up. Depending on the format options selected, when the
Computer Management screen reappears, the newly created array will be listed in both the upper and lower
panes (in this example, the new array is called “New Volume”). The operating system will then format the
volume per the settings selected during the array creation process. When formatting is finished, the volume
will be listed as online and healthy. Close the Computer Management window and the array is ready for
use.

3. Windows 8.1 Software RAID Solution
Setting up a software RAID array in Windows 8.1 is very similar to the method used for Windows 7 as described above.
The main difference is the way in which the Computer Management window is accessed.
1. From the Windows 8.1 desktop, right click on the Windows icon in the lower left corner. This will bring up a
menu from which you can select “Computer Management”. From here, follow the Windows 7 instructions
above starting with step 2.
Note: Striped volumes in Windows 7 and Windows 8.1 have overall capacities that are limited by the OS.
 Loading...