

X1 Carbon Setup Guide
X1 Carbon 6th 设置指南
X1 Carbon 設定手冊
X1 Carbon セットアップ・ガイド
X1 Carbon 설치 설명서
Printed in China
PN: SP40Q51784
E-manual | 电子手册 | 電子手冊 | E マニュアル |
전자 문서
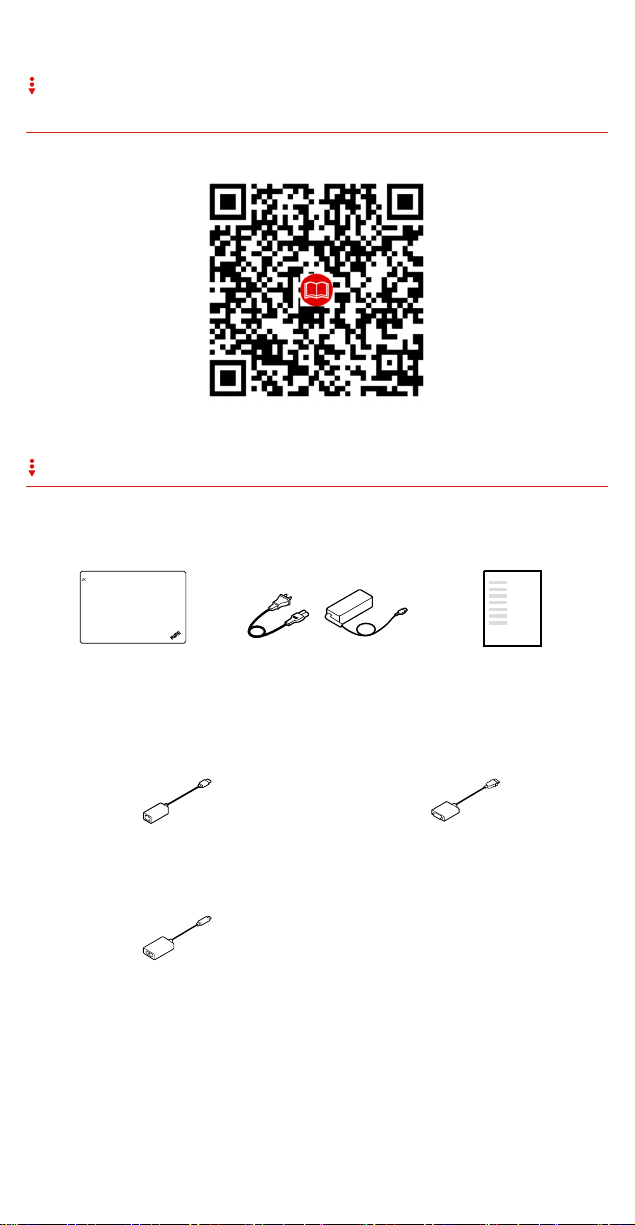
Unpack | 打开包装 | 打開包裝 | 開梱 | 패키지 내용물
Standard items | 标准物品 | 標準項目 | 標準品目 | 기본 항목
Optional accessories | 可选附件 | 選購配件 | オプションのアクセサリー |
옵션 액세서리
ThinkPad Ethernet Extension
Adapter Gen 2*
Lenovo HDMI to
VGA Adapter*
Lenovo USB-C to VGA Adapter*
* Available on some models | 某些型号配备 | 選配 | 一部のモデルで
使用可能| 일부 모델에서 사용 가능
Features | 功能部件 | 功能 | 機能 | 기능
Infrared camera*| 红外摄像头*| 紅外線攝影機*| 赤外線カメラ*|
적외선 카메라*
Securely sign in to your computer with
face authentication.
通过面部认证,安全地登录到计算机。
臉部鑑別讓您安全地登入電腦
顔認証を利用して、コンピューターに
安全にサインインします。
얼굴 인식 기능으로 안전하게 컴퓨터에
로그인.
USB-C connectors | USB-C 接口| USB-C 接頭| USB-C コネクター |
USB-C 커넥터
Both USB-C (Thunderbolt
compatible) connectors can work as
power connectors. The connectors
support data-delivery with faster rate, bidirectional power delivery, and video
output.
两个 USB-C(与 ThunderboltTM 3 兼容)
接口都可作为电源接口。接口支持更快速
率的数据传送、双向供电以及视频输出。
TM
3
兩個 USB-C(ThunderboltTM 3 相容)接
頭都可以當做電源接頭使用。這些接頭支
援速率更快的資料傳輸、雙向電源供應和
視訊輸出。
USB-C (ThunderboltTM 3 対応) コネクター
はどちらも電源コネクターとして動作し
ます。コネクターは、より高速のデータ
配信、双方向電力供給、ビデオ出力をサ
ポートします。
USB-C(ThunderboltTM 3 호환) 커넥터 둘
다 전원 커넥터로 작동할 수 있습니다.
커넥터는 빠른 속도, 양방향 전원 공급 및
비디오 출력을 통해 데이터 전달을
지원합니다.
* Available on some models | 某些型号配备 | 選配 | 一部のモデルで
使用可能 | 일부 모델에서 사용 가능

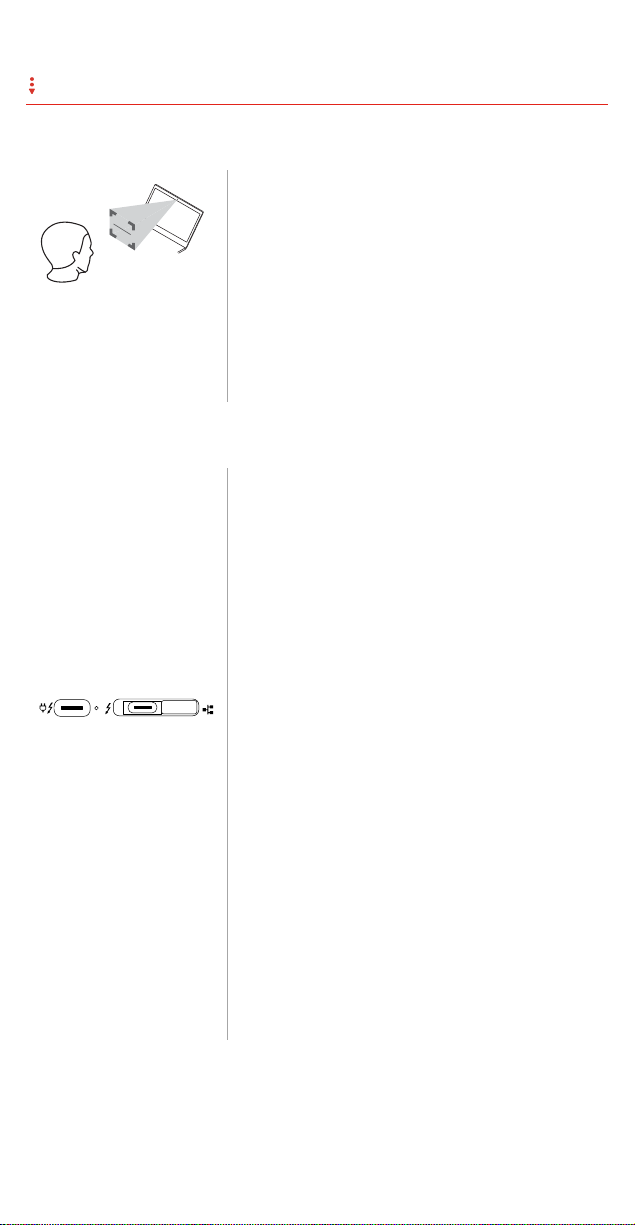
Initial setup | 初始安装 | 首次安裝 | 初期セットアップ |
초기 설정
Overview | 概述 | 概觀 | 概要 | 개요
141
3
2
1
22
7
8
9
10
21
20
19
18
17
5
16
HDMI
15
6
14
13
1112

[English]
1. Microphones
3. Conventional camera
(available on models with IR
2. Infrared camera*
4. Conventional camera with
ThinkShutter*
camera)
5. Power button 6. Fingerprint reader
7. Mini security-lock slot 8. Always On USB 3.1
connector Gen 1
9. Fan louvers 10. Audio connector
11. Nano-SIM-card slot*
12. MicroSD card slot (a dummy
microSD card is preinstalled)
13. NFC mark*
15. TrackPoint
17. HDMI connector 18. USB 3.1 connector Gen 1
19. Docking-station connector 20. Ethernet extension
®
buttons 16. TrackPoint pointing stick
14. TrackPad
connector Gen 2
21. USB-C™ connector
22. Screen
(Thunderbolt™ 3 compatible) /
power connector
* Available on some models
[简体中文]
1. 麦克风 2. 红外摄像头*
3. 传统摄像头(带红外摄像头
的型号上配备)
5. 电源按钮 6. 指纹读取器
7. 微型安全锁插槽 8. Always On USB 3.1 接口
4. 带 ThinkShutter 的传统摄
像头*
Gen 1
9. 风扇散热孔 10. 音频接口
11. Nano-SIM 卡插槽* 12. MicroSD 卡插槽(已预装防
尘待机 MicroSD 卡)
13. NFC 标志*
15. TrackPoint
17. HDMI 接口 18. USB 3.1 接口 Gen 1
19. 扩展坞接口 20. 以太网扩展接口 Gen 2
21. USB-C™ 接口(与
®
按键 16. TrackPoint 指点杆
14. TrackPad
22. 屏幕
Thunderbolt™ 3 兼容)/
电源接口
* 某些型号配备

[繁體中文]
1. 麥克風
3. 傳統攝影機(僅限配備紅外
線攝影機的型號)
5. 電源按鈕 6. 指紋辨識器
7. 迷你安全鎖插槽 8. Always On USB 3.1 接頭
2. 紅外線攝影機*
4. 附 ThinkShutter 的傳統攝
影機*
Gen 1
9. 風扇口 10. 音訊接頭
11. Nano-SIM 卡片插槽*
12. MicroSD 卡片插槽(已預先
安裝防塵待機 microSD 卡)
13. NFC 標記*
15. TrackPoint
17. HDMI 接頭 18. USB 3.1 接頭 Gen 1
19. 擴充基座接頭 20. 乙太網路擴充接頭 Gen 2
21. USB-C™ 接頭
®
按鈕 16. TrackPoint 指標按桿
14. 軌跡板
22. 螢幕
(Thunderbolt™ 3 相容)/
電源接頭
* 選配
[日本語]
1. マイクロホン 2. 赤外線カメラ*
3. 従来型カメラ (IR カメラ付
きモデルで使用可能)
5. 電源ボタン 6. 指紋センサー
7. ミニ・セキュリティー・
ロック・スロット
9. ファン放熱孔 10. オーディオ・コネクター
11. Nano-SIM カード・
スロット*
4. ThinkShutter 搭載の従来型
カメラ*
8. Always On USB 3.1 コネク
ター Gen 1
12. マイクロ SD カード・ス
ロット (ダミー・マイクロ
SD カード取り付け済み)
13. NFC マーク* 14. トラックパッド
15. TrackPoint
®
ボタン 16. TrackPoint ポインティング・
スティック
17. HDMI コネクター 18. USB 3.1 コネクター Gen 1
19. ドッキング・ステーション・
コネクター
21. USB-C™ コネクター
20. イーサネットの拡張コネク
ター Gen 2
22. 画面
(Thunderbolt™ 3 対応) /
電源コネクター
* 一部のモデルで使用可能

[한국어]
1. 마이크 2. 적외선 카메라*
3. 일반적인 카메라(IR
카메라가 있는 모델에서
4. ThinkShutter 가 있는
일반적인 카메라*
사용 가능)
5. 전원 버튼 6. 지문 판독기
7. 미니 보안 잠금 장치 슬롯 8. Always On USB 3.1 커넥터
Gen 1
9. 환풍구 10. 오디오 커넥터
11. Nano-SIM 카드 슬롯* 12. MicroSD 카드 슬롯(더미
microSD 카드는 기본
설치됨)
13. NFC 마크* 14. 트랙 패드
15. TrackPoint
17. HDMI 커넥터 18. USB 3.1 커넥터 Gen 1
19. 도킹 스테이션 커넥터 20. 이더넷 확장 커넥터 Gen 2
21. USB-C™
®
버튼 16. TrackPoint 포인팅 스틱
22. 화면
커넥터(Thunderbolt™ 3
호환)/전원 커넥터
* 일부 모델에서 사용 가능

Regulatory labels
Depending on your country or
region, you can find the
government-required regulatory
information through one of the
following methods:
On a physical label attached to
the outside of your computer
shipping carton
On a physical label attached to
your computer
Through an e lectronic-label
screen (E-label screen)
preinstalled on your computer
To access the E-label screen, do
one of the following:
Restart the computer. When the
logo screen is displayed, press
F9. The E-label screen is
displayed.
Restart the computer. When the
logo screen is displayed, press
Enter or tap the prompt to enter
the Startup Interrupt menu.
Then press F9 or tap the
Regulatory Information option.
The E-label screen is displayed.
法规信息标签
根据所在国家或地区,您可以通过
以下其中一种方法查找政府要求的
法规信息:
位于粘贴在计算机装运纸板箱外
部的实物标签上
位于粘贴在计算机上的实物标签
上
通过计算机预装的电子标签屏幕
要访问电子标签屏幕,请执行以下
操作:
重新启动计算机。当显示徽标屏
幕时,请按 F9 键。随后将显示
电子标签屏幕。
重新启动计算机。显示徽标屏幕
时,请按 Enter 键或点击提示进
入 Startup Interrupt 菜单。然后
按 F9 键或点击“法规信息”选项。
随后将显示电子标签屏幕。
中国无线电型号核准信息:
型号:ThinkPad X1 Carbon 6th
CMIIT ID: 2017AP7592
法規標籤
視您所在的國家或地區而定,您可
以透過下列其中一種方法,取得政
府要求的法規資訊:
位於黏貼在電腦運貨箱外部的實
體標籤上
位於黏貼在電腦本體的實體標籤
上
透過預先安裝於電腦上的電子標
籤畫面
若要存取電子標籤畫面,請執行下
列其中一項動作:
重新啟動電腦。顯示標誌畫面
時,請按 F9。隨即顯示電子標
籤畫面。
重新啟動電腦。顯示標誌畫面
時,請按 Enter 或輕點提示,進
入 Startup Interrupt Menu。然後
按 F9 或輕點 Regulatory
Information 選項。隨即顯示電子
標籤畫面。
規制ラベル
お住まいの国または地域によっ
て、行政機関によって必要とされ
る規制情報は次のいずれかの方法
で確認できます。
コンピューターの梱包箱外部に
貼付された物理的なラベル
コンピューターに添付された物
理的なラベル
コンピューターに初期インスト
ールされている電子ラベル画面
(E ラベル画面)
E ラベル画面にアクセスするに
は、以下のいずれかを実行しま
す。
コンピューターを再起動しま
す。ロゴ画面が表示されている

ときに、F9 キーを押します。
E ラベル画面が表示されます。
コンピューターを再起動しま
す。ロゴ画面が表示されたら、
Enter キーを押すか、Startup
Interrupt メニューに入るプロン
プトをタップします。次に、F9
キーを押すか、規制情報オプシ
ョンをタップします。E ラベル
画面が表示されます。
규정 레이블
해당 국가 또는 지역에 따라
정부에서 요구하는 규정 정보를
다음 방법 중 하나를 통해 찾을 수
있습니다.
컴퓨터 포장 상자 외부에 부착된
물리적 레이블
컴퓨터에 부착된 물리적 레이블
컴퓨터에 기본 설치된 전자
레이블 화면
전자 레이블 화면에 액세스하려면
다음 중 하나를 수행하십시오.
컴퓨터를 다시 시작하십시오.
로고 화면이 표시되면 F9 를
누르십시오. 전자 레이블 화면이
표시됩니다.
컴퓨터를 다시 시작하십시오.
로고 화면이 표시되면 Enter 를
누르거나 프롬프트를 눌러
Startup Interrupt Menu 로
들어가십시오. 그런 다음 F9를
누르거나 Regulatory
Information 옵션을 누르십시오.
전자 레이블 화면이 표시됩니다.
Compliance with the EU Radio
Equipment Directive
The following applies to models
with a radio device.
Hereby, Lenovo (Singapore) Pte.
Ltd., declares that the radio
equipment type ThinkPad X1
Carbon is in compliance with
Directive 2014/53/EU.
For further information about EU
regulatory compliance, refer to
the Safety and Warranty Guide
that comes with your computer.
Specific Absorption Rate
(ICNIRP)
YOUR DEVICE MEETS
INTERNATION AL GUIDELINES
FOR EXPOSURE TO RADIO
WAVES.
Your device is a radio transmitter
and receiver. It is designed not to
exceed the limits for exposure to
radio waves (radio frequency
electromagnetic fields)
recommended by international
guidelines. The guidelines were
developed by an independent
scientific organization (ICNIRP)
and include a substantial safety
margin designed to assure the
safety of all persons, regardless
of age and health.
The radio wave exposure
guidelines use a unit of
measurement known as the
Specific Absorption Rate, or SAR.
The Europe 10g SAR limit for
mobile devices is 2.0 W/kg. Tests
for SAR are conducted using
standard operating positions with
the device transmitting at its
highest certified power level in all
tested frequency bands. The
highest SAR values under the
ICNIRP guidelines for your device
are as follows:
Maximum body-worn SAR with
0 mm separation distance:
1.514 W/kg
During use, the actual SAR
values for your device are usually
well below the values stated. This
is because, for purposes of
system efficiency and to minimize
interference on the network, the
operating power of your mobile
device is automatically decreased
when full power is not needed for

the data connection. The lower
the power output of the device,
the lower its SAR value.
If you are interested in further
reducing your RF exposure then
you can easily do so by limiting
your usage or simply keeping the
device away from the body.
Second Edition (January 2018)
© Copyright Lenovo 2018.
LIMITED AND RESTRICTED RIGHTS NOTICE: If data or software is delivered pursuant to a General Services
Administration “GSA” contract, use, reproduction, or disclosure is subject to restrictions set forth in Contract
No. GS-35F-05925.
 Loading...