

Page 1

DANGER
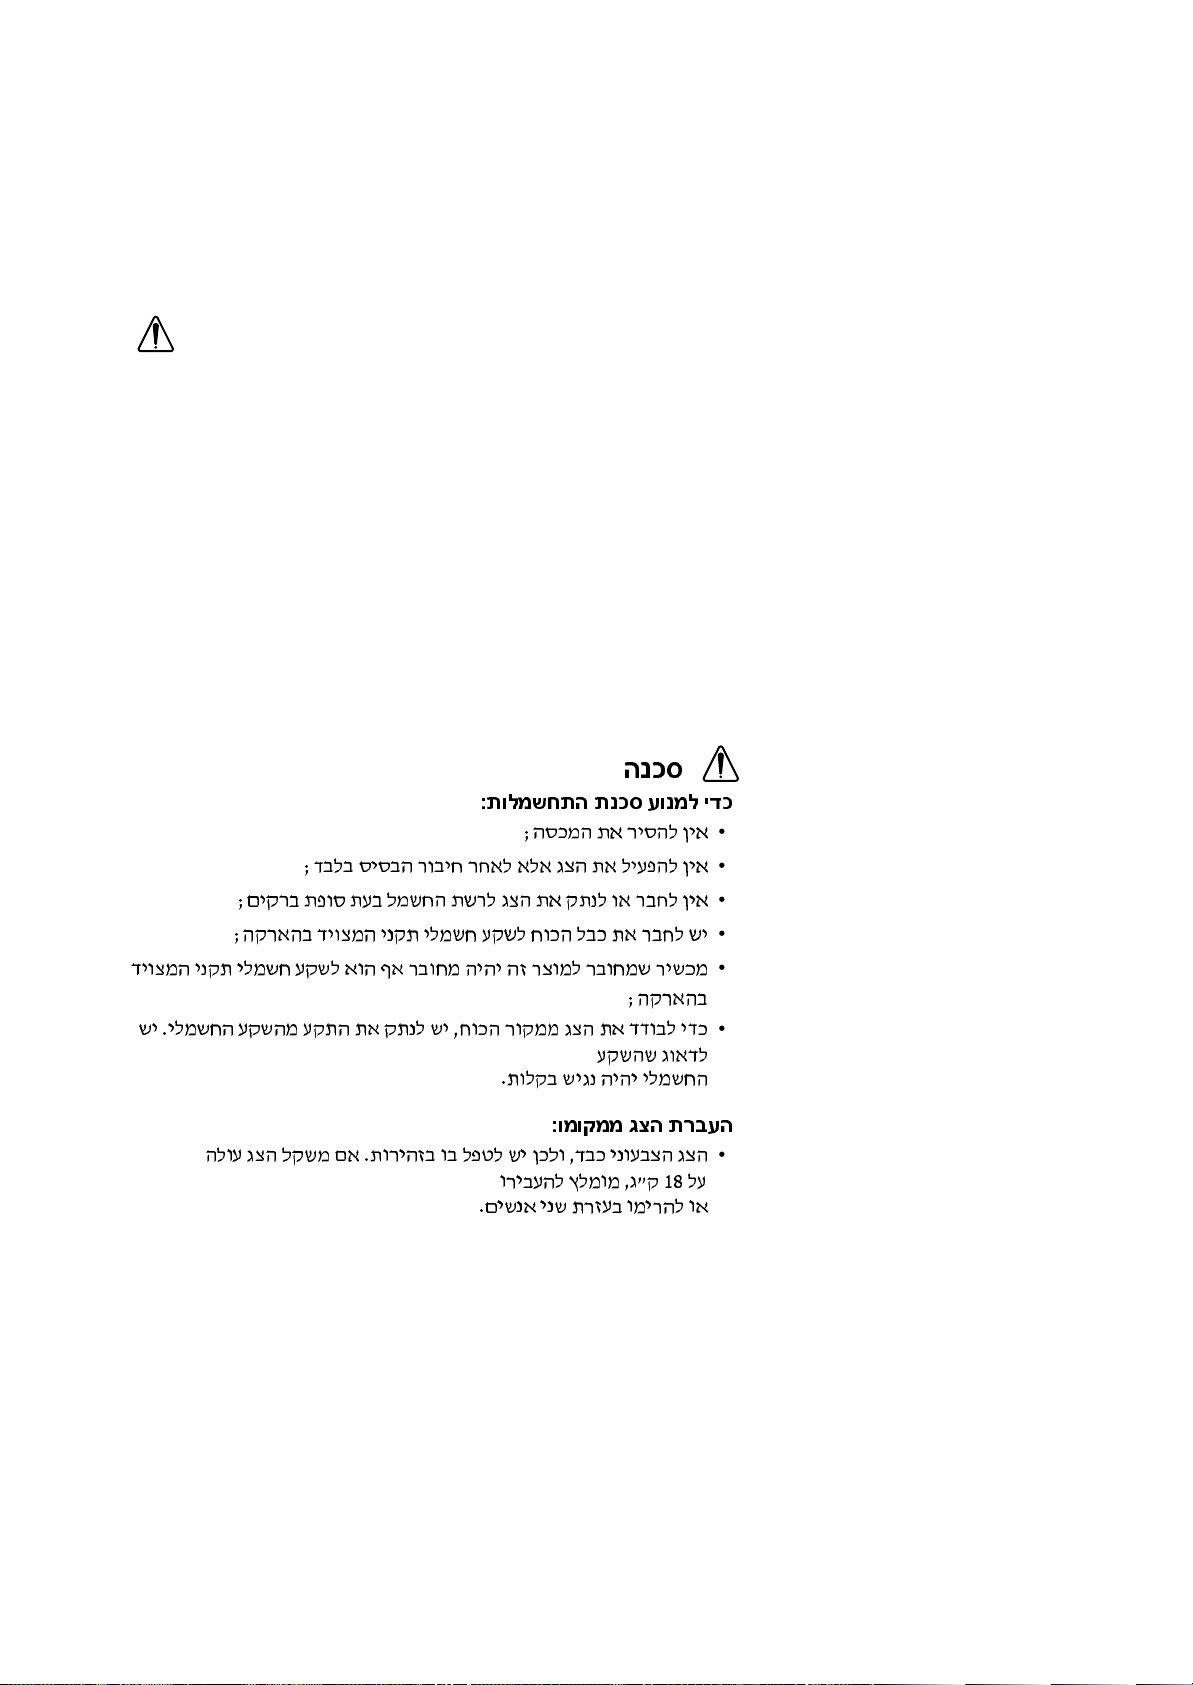
To avoid shock hazard:
• Do not remove the covers.
• Do not operate this product unless the stand is attached.
• Do not connect or disconnect this product during an electrical storm.
• The power cord plug must be connected to a properly wired and grounded power outlet.
• Any equipment to which this product will be attached must also be connected to properlywired and
grounded power outlets.
• To isolate the monitor from the electrical supply, you must remove the plug from the power outlet.
The power outlet should be easily accessible.
Handling:
• Your color monitor is heavy, so handle it with care. IBM recommends that this monitor is moved or
lifted by two people.
DANGER
Pour éviter les risques d’électrocution :
• Ne retirez pas les capots du moniteur.
• N’utilisez pas ce produit si le socle n’est pas fixé.
• Ne connectez, ni ne déconnectez ce produit pendant un orage.
• Le câble d’alimentation doit être connecté à une prise électrique correctement mise à la terre et en
bon état de marche.
• Tout équipement auquel ce produit est relié doit être également connecté à une prise correctement
mise à la terre et en bon état de marche.
• Pour isoler le moniteur de la source d’alimentation électrique, vous devez le débrancher de la prise
électrique. Cette prise doit être facile d’accès.
Manutention :
• Votre moniteur couleurs est lourd et doit donc être manipulé avec soin. IBM vous conseille de le
déplacer ou de le porter à deux.
GEFAHRENHINWEIS
Um die Gefahr eines elektrischen Schlags zu vermeiden, folgendes beachten:
• Unter keinen Umständen die Abdeckungen abnehmen.
• Das Produkt nicht in Betrieb nehmen, wenn der Sockel nicht montiert ist.
• Das Gerät nicht während eines Gewitters an eine Steckdose anschließen oder von ihr trennen.
• Das Netzkabel ist an eine ordnungsgemäß verdrahtete und geerdete Steckdose anzuschließen.
• Jedes Gerät, mit dem dieses Produkt verbunden wird, muß ebenfalls an eine ordnungsgemäß
verdrahtete und geerdete Steckdose angeschlossen werden.
• Um den Monitor von der Stromversorgung zu trennen, muß der Stecker aus der Steckdose
gezogen werden. Die Steckdose sollte leicht zugänglich sein.
Handhabungshinweis:
• Ihr Farbbildschirm ist schwer. Sie sollten daher beim Transport vorsichtig vorgehen. IBM empfiehlt
Ihnen, den Bildschirm zu zweit anzuheben bzw. zu tragen.
Page 2

GEVAAR
Ga als volgt te werk om het gevaar van een elektrische schok te voorkomen:
• Verwijder in geen enkel geval de kap.
• Stel dit produkt alleen in werking als de voet is bevestigd.
• Sluit dit apparaat niet aan op, of verbreek de aansluiting van dit apparaat niet van een
contactdoos tijdens onweer.
• Het netsnoer moet worden aangesloten op een geaarde contactdoos met correcte bedrading.
• Ook alle apparatuur waarop dit produkt wordt aangesloten moet zijn aangesloten op een
contactdoos met correcte bedrading.
• Om het beeldscherm te ontkoppelen van de netvoeding, dient u de stekker uit de contactdoos
te trekken. De contactdoos dient goed toegankelijk te zijn.
Verplaatsing:
• Uw kleurenmonitor is zwaar, ga er dus voorzichtig mee om. IBM raadt aan dat het tillen of
verplaatsen ervan door twee mensen gebeurt.
PELIGRO
Para evitar riesgos de descargas eléctricas:
• No retire bajo ningún concepto las cubiertas.
• No maneje el monitor sin antes acoplar el soporte.
• No conecte ni desconecte el equipo de una toma de alimentación durante una tormenta
eléctrica.
• El cable de alimentación debe estar conectado a un enchufe debidamente cableado y con
toma de tierra.
• Cualquier equipo al que se vaya a conectar este producto también debe estar conectado a
tomas de alimentación cableadas y conectadas a tierra correctamente.
• Para aislar el monitor del suministro eléctrico, debe retirar el enchufe de la toma de
alimentación. Esta toma deberá ser de fácil acceso.
Movimentazione del monitor:
• Il monitor a colori è pesante, si consiglia quindi di maneggiarlo con attenzione. IBM
raccomanda che il monitor venga mosso o sollevato da due persone.
PERICOLO
Per evitare il rischio di scariche elettriche:
• Non rimuovere nessuna parte del telaio.
• Non accendere il prodotto se il piedistallo non è stato montato.
• Non collegare o scollegare il prodotto nel corso di un temporale.
• La spina del cavo di alimentazione deve essere collegata ad una presa di corrente con messa
a terra, installata in maniera appropriata.
• Le apparecchiature a cui il prodotto viene attaccato devono essere collegate a prese di
corrente con messa a terra, installate in maniera appropriata.
• Per isolare il monitor dalla corrente elettrica, staccare la spina dalla presa di alimentazione, che
deve essere facilmente accessibile.
Manipulación:
• El monitor de color es pesado, por lo que debe manipularlo con cuidado. IBM recomienda
moverlo con la ayuda de dos personas.
Page 3

PERIGO
Para evitar o perigo de choques eléctricos:
• Não retire as coberturas.
• Não utilize este produto antes de montar a base.
• Não ligue nem desligue este produto durante uma tempestade eléctrica.
• O cabo de alimentação deve ser ligado a uma tomada eléctrica devidamente ligada à terra.
• Qualquer equipamento ligado a este produto deve estar ligado a tomadas eléctricas devidamente
ligadas à terra.
• Para isolar o monitor da fonte de alimentação, retire a ficha do cabo de alimentação da tomada
eléctrica. A tomada eléctrica deve ser de fácil acesso.
Manuseio:
• Seu monitor colorido é pesado, então manuseie-o com cuidado. A IBM recomenda que o monitor
seja movido ou carregado por duas pessoas.
FARE
Sådan undgår du elektrisk stød:
• Kabinettet må under ingen omstaendigheder fjernes.
• Undgå at anvende dette produkt, uden at vippe/drejefoden er monteret.
• Undgå at tilslutte eller frakoble dette produkt i tordenvejr.
• Netledningen skal vaere tilsluttet en korrekt jordet stikkontakt med korrekt ledningsføring.
• Alt udstyr, som tilsluttes dette produkt, skal også vaere tilsluttet korrekt jordede stikkontakter med
korrekt ledningsføring.
• For at isolere skaermen fra strømforsyningen, skal stikket tages ud af stikkontakten.
Stikkontakten bør vaere let tilgaengelig.
Håndtering:
• Farveskærmen er tung, så den skal håndteres forsigtigt. IBM anbefaler, at skærmen flyttes eller
løftes af to personer.
FARE
Slik unngår du fare for elektrisk støt:
• Ikke ta av dekslene.
• Ikke bruk produktet dersom sokkelen ikke er montert.
• Ikke koble produktet til eller fra under tordenvaer.
• Pluggen på strømledningen må kobles til korrekt montert og jordet strømuttak.
• Utstyr som dette produktet eventuelt blir koblet til, må også kobles til korrekt montert og jordet
strømuttak.
• For å isolere skjermen fra strømkilden må du ta ut pluggen fra strømuttaket. Strømuttaket bør
vaere lett tilgjengelig.
Käsittely:
• Värinäyttö on painava, joten käsittele sitä varoen. IBM suosittelee, että kaksi henkilöä siirtää tai
nostaa sitä.
Page 4

ARNING - LIVSFARA
För att undvika risk för elektriska stötar måste du tänka på följande:
• Ta inte bort några skyddskåpor.
• Använd inte den här produkten innan du har satt fast stativet.
• Anslut inte produkten till ett eluttag under åskväder. Koppla inte heller ur produkten från ett
eluttag under åskväder.
• Strömkabeln måste anslutas till ett felfritt och jordat uttag.
• All utrustning som den här produkten kopplas till måste också anslutas till felfria och jordade
uttag.
• För att bryta strömmen till bildskärmen måste du dra ut kontakten. Vägguttaget bör vara lätt att
komma åt.
Hantering:
• Färgskärmen är tung och bör därför hanteras försiktigt. IBM rekommenderar att den flyttas eller
lyfts av två personer.
VAARA
Sähköiskun vaaran välttämiseksi:
• ¢l‰ avaa laitteen kansia miss‰‰n tilanteessa.
• ¢lä käytä laitetta, ellei jalustaa ole kiinnitetty.
• ¢l‰ kytke laitetta pistorasiaan tai irrota sit‰ pistorasiasta ukonilman aikana.
• Virtajohto on kytkett‰ v‰ asianmukaisesti johdotettuun ja maadoitettuun pistorasiaan.
• Kaikki muutkin laitteet, joihin t‰ m‰ tuote on liitetty, on kytkett‰ v‰ asianmukaisesti
johdotettuihin pistorasioihin.
• Kun haluat erottaa näyttimen sähköverkosta, sinun pitää irrottaa sen verkkojohto pistorasiasta.
Pistorasian pitäisi olla mahdollisimman lähellä näytintä ja vaivattomasti käsillä.
Håndtering:
• Värimonitorinne on painava, joten käsitelkää sitä varovasti. IBM suosittelee, että monitorin
siirtämiseen tai kantamiseen käytetään kahta henkilöä.
KIN¢Y¡ ™
°И· ЩЛУ · ФК˘Б‹ ОИУ‰‡УФ˘ ЛПВОЩЪФ ПЛН›·˜:
• ªËÓ ·Ê·ÈÚ›Ù ٷ ηχÌÌ·Ù·.
• ФıfiУЛ ‰ВУ Ъ¤ ВИ У· ПВИЩФ˘ЪБВ› ЫВ ФЪИ˙fiУЩИ· ı¤ЫЛ.
• ªË Û˘Ó‰¤ÂÙ ‹ · ÔÛ˘Ó‰¤ÂÙ ÙÔ ÚÔ˚fiÓ Î·Ù¿ ÙË ‰È¿ÚÎÂÈ·
ЛПВОЩЪФı‡ВПП·˜.
• TФ ЛПВОЩЪИОfi О·ПТ‰ИФ ı· Ъ¤ ВИ У· Ы˘У‰¤ВЩ·И МfiУФ ЫВ Ъ›˙В˜
МВ О·Щ¿ППЛПЛ О·Пˆ‰›ˆЫЛ О·И БВ›ˆЫЛ.
• N· ¯ЪЛЫИМФ ФИВ›ЩВ ¿УЩФЩВ ЩФУ ЪФЫ·ЪМФБ¤· AC Ф˘ ˘ ¿Ъ¯ВИ
ЫЩЛ Ы˘ЫОВ˘·Ы›· ЩЛ˜ ФıfiУЛ˜.
• °И· У· · ФМФУТЫВЩВ ЩЛУ ФıfiУЛ · fi ЩЛУ ·ЪФ¯‹ ЪВ‡М·ЩФ˜,
Ú¤ ÂÈ Ó· ·Ê·ÈÚ¤ÛÂÙ ÙÔ ÊȘ · fi ÙËÓ Ú›˙·. Ú›˙· Ú¤ ÂÈ Ó·
‚Ú›ÛÎÂÙ·È Û ÛËÌÂ›Ô Â‡ÎÔÏ· ÚÔÛ ÂÏ¿ÛÈÌÔ.
TEHLIKE
Elektrik çarpmas7 tehlikesinden kaçynmak için:
• Kapaklar7 çykarmay7n7z.
• Bu cihaz7 kaidesine tak7l7 durumda de5ilken çal7ttyrmay7n7z.
Page 5
• Bu cihaz7 elektriksel f7rt7na s7ras7nda prize takmay7n7z veya prizden ç7karmay7n7z.
• Elektrik kablosunun fiti, elektrik ve toprak ba5lant7lar7 usulüne uygun olarak yap7lm7t bir prize
tak7lmal7d7r.
• Bu cihazyn ba5lanaca57di5er tüm cihazlar da elektrik ve toprak ba5lant7lar7 usulüne uygun olarak
yap7lm7t prize tak7lm7t olmal7d7r.
• Monitörün elektrikle ba5lant7s7n7 kesmek için fitini prizden çekmeniz gereklidir. Priz, kolayca
eritilebilecek bir yerde olmal7d7r.
Page 6
Page 7

Page 8
Page 9
Page 10
위험
전기 충격을 피하려면,
• 제품의 덮개를 제거하지 마십시오.
• 스탠드가 부착되어 있지 않으면 이 제품을 작동시키지 마십시오.
• 뇌우를 동반할 때는 제품을 연결하거나 분리하지 마십시오.
• 전원 코드를 올바르게 배선 및 접지된 콘센트에 연결해야 합니다.
• 이 제품에 연결할 모든 장비는 올바르게 배선 및 접지된 콘센트에 연결되어
있어야합니다.
• 모니터를 전기 공급 장치에서 분리시키려면, 콘센트에서 플러그를 제거해야
합니다. 콘센트는 접근하기 쉬운 곳에 있어야 합니다.
취급:
• 저희 컬러 모니터는 무거우므로 주의해서 다루십시오. IBM은 모니터의 무
게가 18Kg 이상일 때 두사람이 움직이거나 들어올릴 것을 권장합니다.
¥®¥·®® ¢¶¤ º¸¡²¤
¦¬ ° ¦±³¨ § ´²£ ¦®¢¦ ³£ ©¥¦ ¥ £ª¬° °
•
²£¬¦ ¯¦¨¨ ± ¦¬
§£³ª £ª³ ´²¬ ¨£²¦
´¦± ³£ª ££ £¦¨³¡
³£ £¦¨³¡ ¬±³¨ ¬±´ ´ ±´ª¦ ³£ ¡¥ ²±¨¨ ° ´ ¦ £¥
•
¬±³³ ¦
º¥¬®¹§º¤
º°«± ²¥°®¬ ©£«
«¥¨ ´ ²£«¦ ©£
•
¦ «£« ²£¡ ²¡¦ ¦ ° ´ ¦£¬®¦ ©£
•
§£±² ´®« ´¬ ¦¨³¡ ´³²¦ ° ´ ±´ª¦ ²¡¦ ©£
•
±² £°¨ £ª±´ £¦¨³¡ ¬±³¦ ¡¥ ¦¥ ´ ²¡¦ ³£
•
£°¨ £ª±´ £¦¨³¡ ¬±³¦ ²¡¨ ££ ²°¨¦ ²¡¨³ ²£³¥¨
•
±²
¤°«±
Page 11

3These user’s setup instructions cover typical user environments. The on-screen messages
may differ depending on the level of your hardware and software. In some cases you may
need to vary the setup procedures.
For more information, refer to your computer or operating system manuals or consult your
system administrator or dealer.
Ces instructions de configuration d’exploitation s’appliquent aux environnements
d’utilisation types. Les messages affichés à l’écran peuvent varier en fonction du niveau de
votre matériel et de vos logiciels informatiques. Dans certains cas, vous pouvez être amenés
à changer de procédures de configuration.
Pour de plus amples informations à ce sujet, veuillez vous reporter aux manuels de votre
ordinateur et de votre système d’exploitation, ou consultez l’administrateur de votre système
ou votre revendeur.
Diese Einstellungsanweisungen durch den Benutzer gelten für typische
Betriebsumgebungen. Die Bildschirmmeldungen können je nach Art der verwendeten
Hardware und Software auch anders lauten. In einigen Fällen müssen die
Einstellungsschritte unter Umständen abgeändert werden.
Weitere Informationen finden Sie im Computer- oder Betriebssystemhandbuch, oder wenden
Sie sich an Ihren Systemadministrator oder Fachhändler.
En estas instrucciones de configuración se describen entornos de usuarios típicos. Los
mensajes en pantalla, pueden diferir según sea el nivel del hardware y del software. En
algunos casos, necesitará seguir otros procedimientos para la configuración.
Para obtener más información, puede consultar los manuales del ordenador o del sistema
operativo o ponerse en contacto con el administrador del sistema o con el distribuidor.
Queste istruzioni di configurazione per l’utente coprono gli ambienti operativi comuni. I
messaggi che appaiono sul video possono differire a seconda dell’hardware e del software
utilizzati. In alcuni casi potrebbe essere necessario variare le procedure di configurazione.
Per ulteriori informazioni, fare riferimento ai manuali del computer o del sistema operativo, o
consultare il proprio amministratore di sistema o il concessionario.
Page 12

ii
First Edition (May / 2001)
This publication could contain technical inaccuracies or typographical errors. Changes are made periodically to the information
herein; these changes will be made in later editions. IBM may make improvements and/or changes in the product(s) and/or
program(s) at any time.
It is possible that this publication may contain reference to, or information about, IBM products (machines and programs),
programming, or services that are not announced in your country.
Requests for copies of this publication and for technical information about IBM products should be made to your IBM Authorized
Dealer or IBM Retailer.
No part of this publication may be reproduced or distributed in any form or by any means without prior permission in writing from
the International Business Machines Corporation.
© Copyright International Business Machines Corporation 2000. All rights reserved.
Note to U.S.Government users- - Documentation related to restricted rights- - use, duplication or disclosure is subject to
restrictions set forth in GSA ADP Schedule Contract with IBM Corp.
Notices
References in this publication to IBM products, programs, or services do not imply that IBM intends to make these available in all
countries in which IBM operates. Any reference to an IBM product, program or service is not intended to state or imply that only
IBM’s product, program, or service may be used. Any functionally equivalent product, program, or service that does not infringe
any of IBM’s intellectual property rights or other legally protectable rights may be used instead of the IBM product, program, or
service. Evaluation and verification of operation in conjunction with other products, programs, or services, except those expressly
designated by IBM, are the user’s responsibility.
IBM may have patents or pending patent applications covering subject matter in this document. The furnishing of this document
does not give you any license to these patents.
Trademarks
The following terms, used in this publication, are trademarks or service marks of the IBM Corporation in the United States, other
countries, or both:
HelpCenter IBM
E
NERGY STAR is a U.S. registered mark.
Microsoft®, Window®, and Windows NT@ are trademarks of Microsoft corporation in the United States, other countries, or both.
Other company, product, and service name may be trademarks or service marks of others.
Page 13

ENGLISH
1
Setup............................................................................................................................2
Hardware Requirements......................................................................................2
Handling Instructions ...........................................................................................2
Workplace preparation.........................................................................................2
Working Practices................................................................................................3
Connecting your Monitor......................................................................................4
Switching on your Monitor....................................................................................4
Adjusting the Monitor Position .............................................................................5
Caring for your Monitor........................................................................................5
Configuring your Monitor..........................................................................................6
Setup Diskette for Microsoft Windows95 or Microsoft Windows98......................6
Setup Diskette for Microsoft Windows 2000........................................................7
Auto Setup ..................................................................................................................8
Auto Setup...........................................................................................................8
Auto Setup for DOS.............................................................................................9
Auto Setup for Microsoft Windows3.1, Microsoft Windows95,
Microsoft Windows98, Microsoft Windows NT or Microsoft Windows2000
........
10
Manual Setup............................................................................................................12
Adjusting Your LCD Monitor ...................................................................................13
User controls......................................................................................................13
On-screen display (OSD) controls.....................................................................15
Further Information..................................................................................................18
Display modes ...................................................................................................18
Power Management...........................................................................................19
Troubleshooting.......................................................................................................20
Further Help.......................................................................................................22
Specifications...........................................................................................................24
Warranty....................................................................................................................27
Compliances...............................................................................see at rear of manual
Service Information....................................................................see at rear of manual
Contents
Page 14
2
Hardware Requirements
This monitor requires a computer with a suitable on-board sub-system or
Video Adapter card that can support XGA 1024 x 768, SVGA 800 x 600, or
VGA 640 x 480 at 60Hz.
Setup
Do not support the monitor
within the screen area. The
Liquid Crystal Display is glass
and can be damaged by rough
handling or excessive
pressure.
Handling InstructionsHandling Instructions
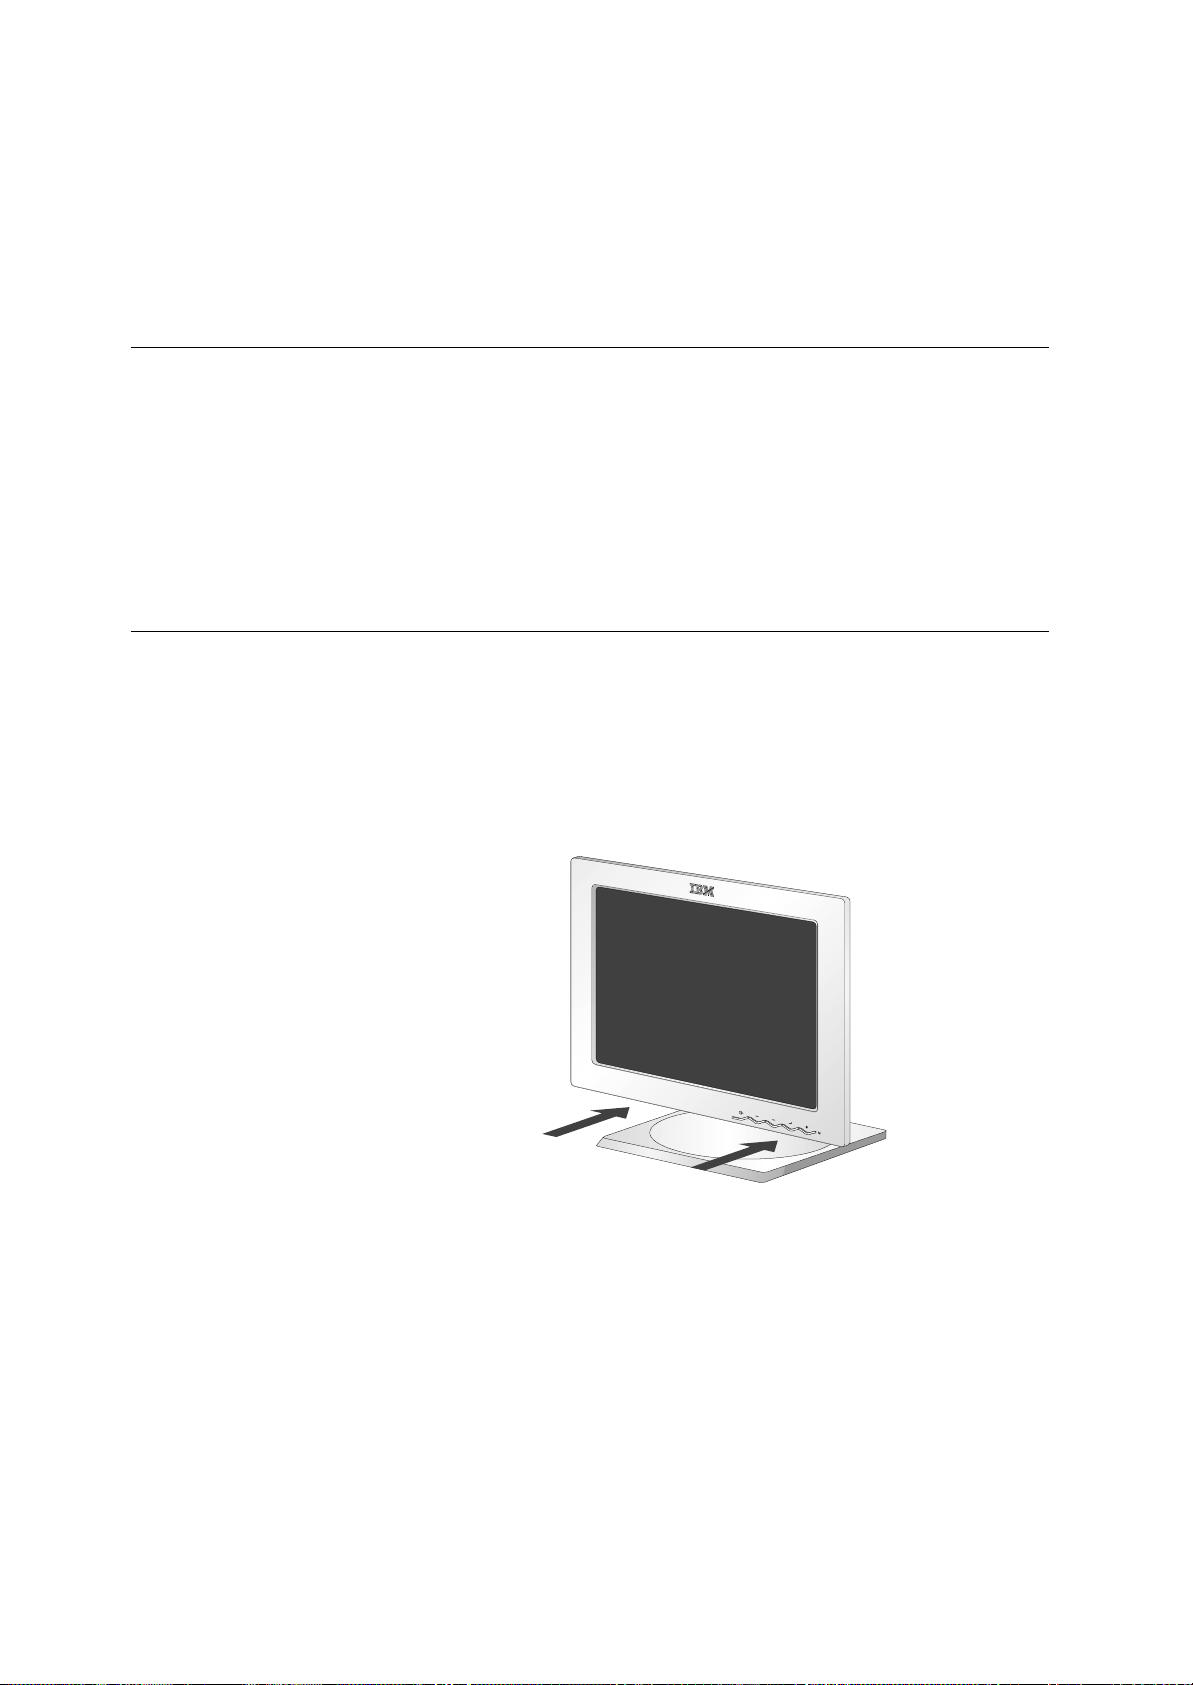
1. Lift the monitor by placing both hands under the lower part of the cover.
(The display will rise to maximum lift height when locking clip has been
removed. See page 5 for details on removing the locking clip.)
2. Before using your monitor for the first time, remove the clear protective
film from the front of the screen.
Page 15

ENGLISH
3
i
This section gives advice
on how you can work
comfortably and reduce
fatigue.
Rest
Take regular breaks. Vary your posture, stand up and stretch occasionally
as prolonged use of computer workstations can be tiring.
Back
You should sit back in your chair and use the backrest.
Hands
Use a light touch on the keyboard, keeping your hands and fingers relaxed.
Allow a space in front of the keyboard to rest your wrists when not typing.
Consider using a wristpad.
Eyesight
Working with monitors, in common with any prolonged close work, can be
visually demanding. Look away from the screen periodically and have your
eyesight checked regularly.
Screen settings
Set the screen brightness and contrast to a comfortable level. You may
have to adjust this as the lighting changes during the day. Many application
programs let you select color combinations which can help you to view in
comfort. See the User controls section on page 13 for more information.
Working Practices
i
This section gives advice
on what you should
consider before you set up
your monitor.
Workplace Preparation
Height
The monitor should be positioned so that the top of the screen is slightly
below your eye level when you sit at your workstation.
Orientation
- Choose a position that gives the least reflection from lights and windows,
usually at a right angle to any windows.
- Positon the monitor directly in front of you so that you do not have to twist
your body to use it.
- Tilt the monitor to a comfortable viewing angle.
Page 16
4
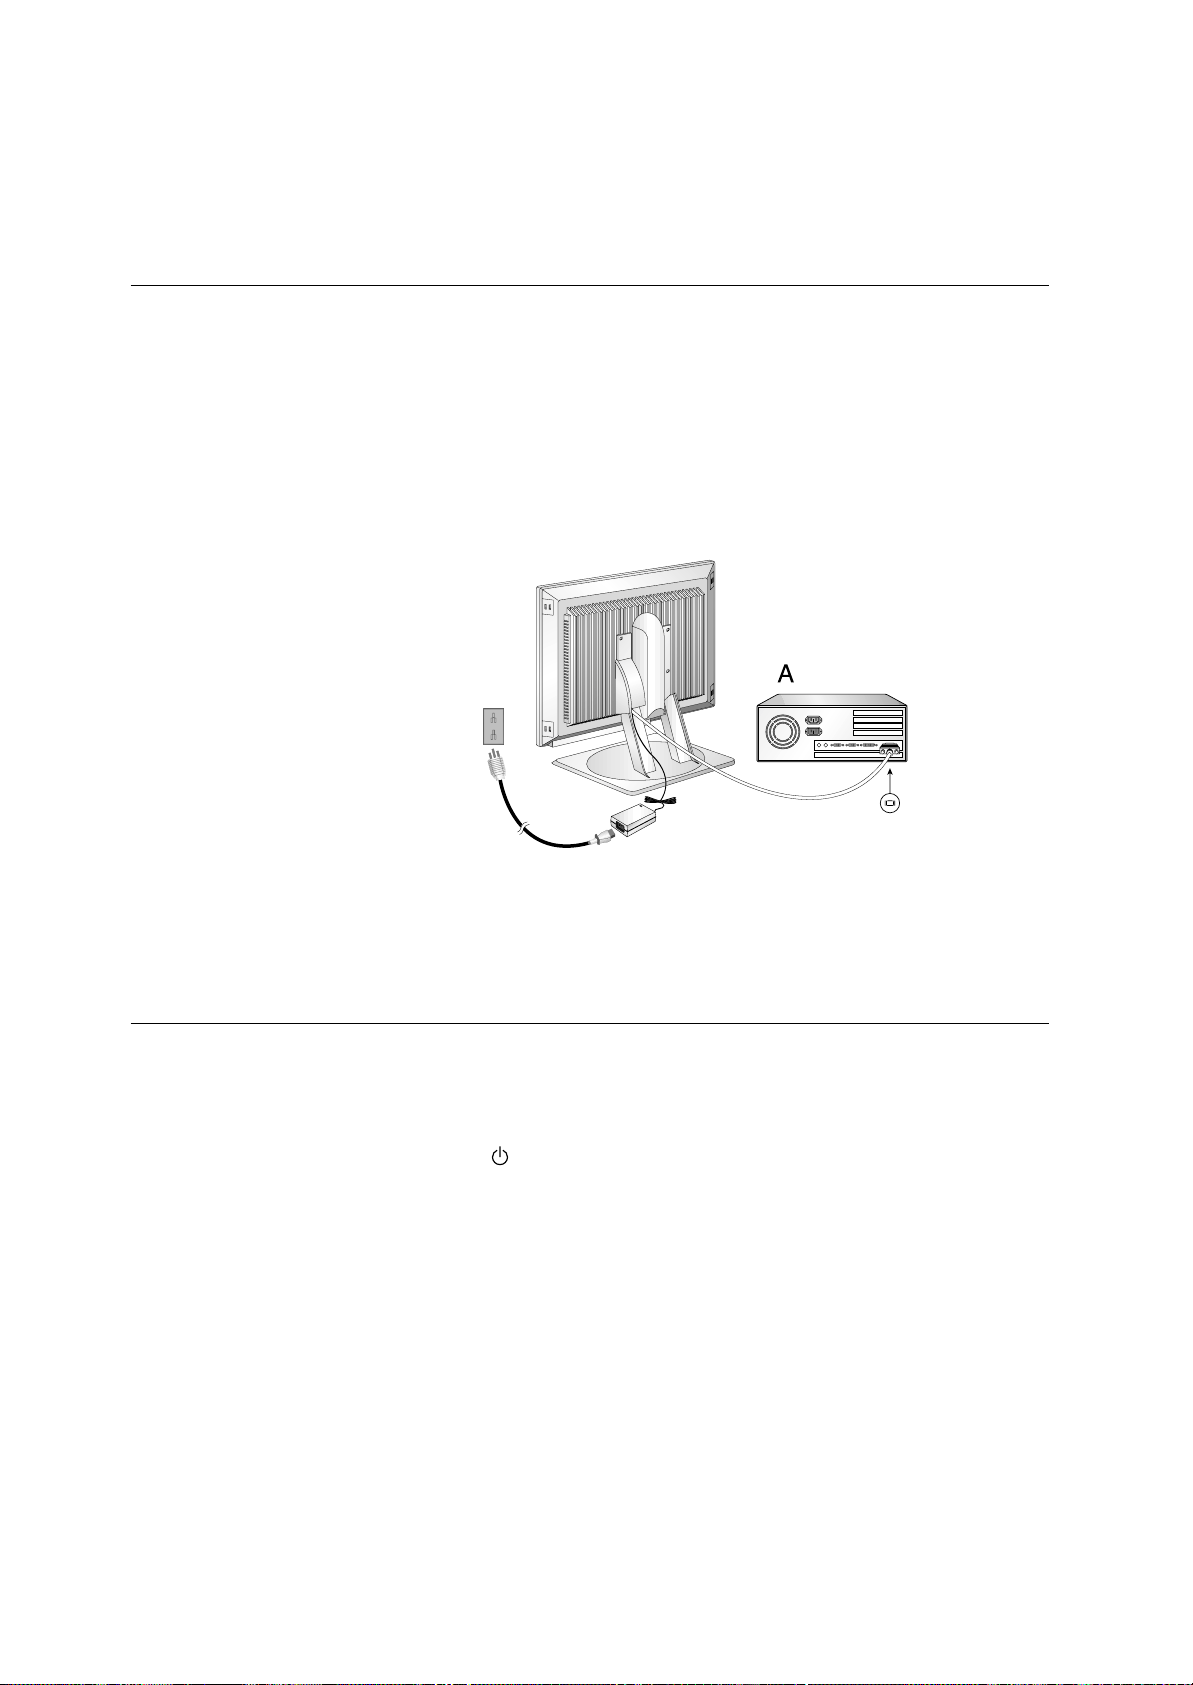
1. Turn off your computer and all attached devices.
2. Connect the monitor signal cable to the Video output of your computer
and tighten the thumscrews. Ensure that the connectors align. Do not
force the connectors as this may bend the pins.
3. Connect the power cord. Connect it to the power adapter first insert the
plug into a properly grounded outlet.
1. Switch on the power source to your monitor.
2. Switch on your monitor by pushing and releasing the power switch
marked [ ].
[To switch off your monitor, push and release the power switch again.]
3. Switch on your computer.
4. Run AUTO SETUP by following the instructions in the Auto Setup
section on page 8.
Be sure to read the ‘Safety
Information’ at the front of this
User Guide before carrying out
this procedure.
i
If you system is equipped
with a digital Video card
using a DVI connector, change
the signal cable to the DVI-D
cable provided (See page 22
for details)
i
The AC adapter and signal
cable are connected to
your monitor. If you wish to
change these or to fit a
different stand, see Further
Help on page 22.
Connecting your Monitor
Switching on your Monitor
Page 17
ENGLISH
5
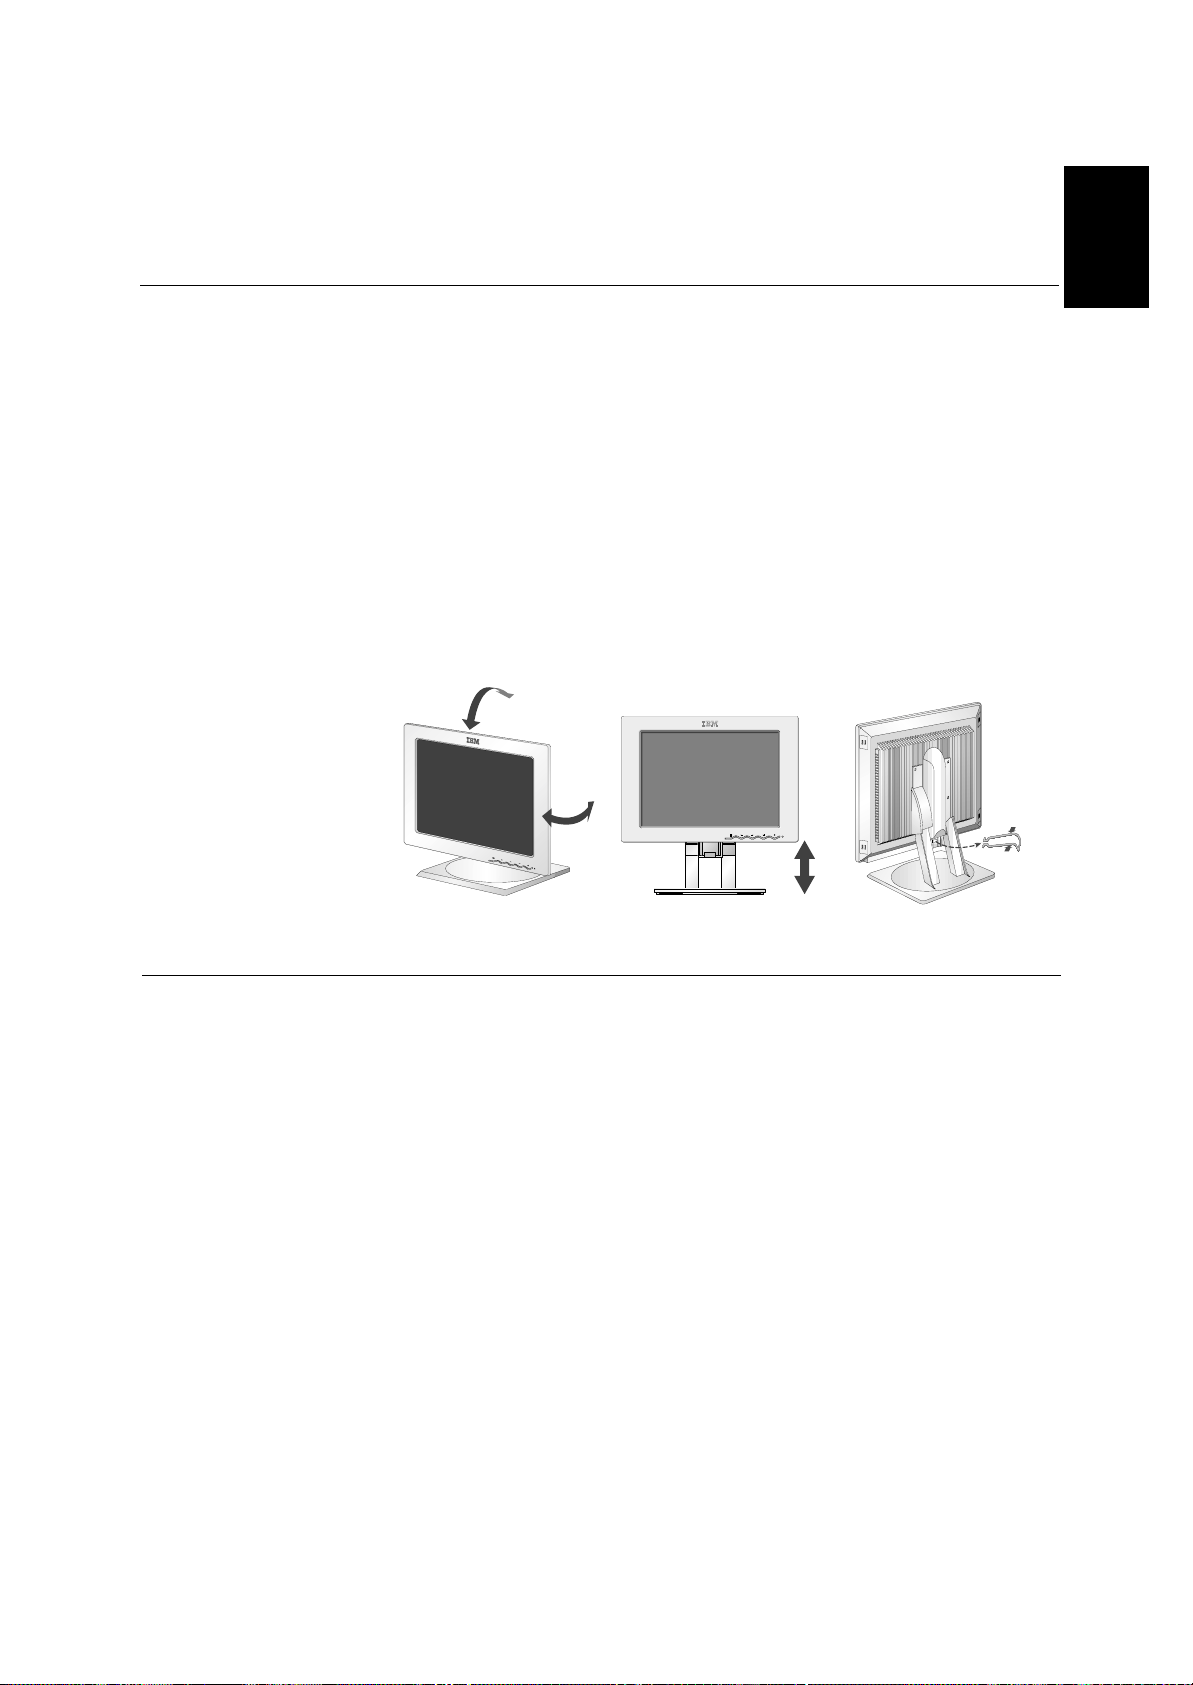
Viewing Angle
You can tilt the screen backward and forward as shown below(figure A).
Rotate
You can rotate the screen leftward and rightward as shown below(figure A).
Height
You can adjust height of the screen(figure B).
Before adjusting your monitor for the first time, remove the locking clip
on rear of the stand. Carefully put down and hold the screen of monitor
and then squeeze at arrows shown to remove(figure C).
Be sure to turn off the power before you perform any maintenance on the
monitor. Clean your monitor as follows:
• Gently wipe the covers and the screen with a soft cloth.
• Remove finger marks and grease with a damp cloth and mild detergent.
• Never use flammable cleaning materials to clean your IBM monitor or
any other electrical apparatus.
Adjusting the Monitor Position
Caring for your Monitor
(A)
(B)
(C)
038F/En
Page 18

6
To use the Plug and Play feature in Windows 95 or Windows 98, files
should be loaded from the IBM Monitor Installation diskette.
1. Turn off the computer and all attached devices.
2. Ensure that the monitor is connected correctly.
3. Turn on the monitor and then the system unit. Allow the system to boot
into Microsoft Windows95 or Microsoft Windows98.
Your computer’s Plug and Play code may warn you that your system
hardware has changed. This probably means that it has detected your
new monitor for the first time.
4. Open the DISPLAY PROPERTIES window by clicking on START, SETTINGS,
CONTROL PANEL and then double clicking on the DISPLAY icon.
5. Select the SETTINGS tab.
• In case of Windows 95 :
6 - 1. Select the CHANGE DISPLAY TYPE button.
2.Select the CHANGE MONITOR TYPE button.
• In case of Windows 98 :
6 - 1.Select the ADVANCED button.
2.Select the MONITOR tab.
3.
Open the UPGRADE DEVICE
DRIVER WIZARD
window by clicking on
C
HANGE
button and then select the N
EXT
button.
If the UPGRADE DEVICE DRIVER WIZARD is open go to step 6-3. if not
contine to step 4.
4. Select the “Display a list of the known drivers for this device so that
I can choose a specific driver” and then select the NEXT button.
7. Insert the Setup diskette into drive A: and select the HAVE DISK button.
8. Select OK.
9. Choose IBM T545H monitor and select OK. The files will be copied from
the diskette to your hard drive.
10.Close all open windows and remove the diskette.
11.Reboot the system.
The system will automatically select the maximum refresh rate and
corresponding Color Matching Profiles.
Configuring your Monitor
Setup Diskette for Microsoft®Windows®95 or Microsoft®Windows®98
This section must be
completed before
continuing with the
Microsoft Windows95 or
Microsoft Windows98 Auto
Setup on page 8.
i
On LCD monitors, unlike
CRTs, a faster refresh rate
does not improve display
quality. IBM recommends
using either 1024 x 768 at a
refresh rate of 60Hz or 640 x
480 at a refresh rate of 60Hz.
Page 19

ENGLISH
7
To use the Plug and Play feature in Windows 2000, files should be loaded
from the IBM Monitor Installation diskette.
1. Turn off the computer and all attached devices.
2. Ensure that the monitor is connected correctly.
3. Turn on the monitor and then the system unit. Allow the system to boot
into Microsoft Windows2000.
4. Open the DISPLAY PROPERTIES window by clicking on START, SETTINGS,
CONTROL PANEL and then double clicking on the DISPLAY icon.
5. Select the SETTINGS tab.
6. Select the ADVANCED button.
7. Select the M
ONITOR
tab.
8. Select the PROPERTIES button.
9. Select the DRIVER tab.
10.Open the U
PGRADE DEVICE DRIVER WIZARD
window by clicking on U
PDATE
D
RIVER
and then select the N
EXT
button.
11.Select the “Display a list of the known drivers for this device so that I can
choose a specific driver” and then select the NEXT button.
12.Insert the Setup diskette into drive A: and select the HAVE DISK button.
13.Select OK.
14.Choose IBM T545H monitor and select OK. The files will be copied
from the diskette to your hard drive.
15.Close all open windows and remove the diskette.
16.Reboot the system.
The system will automatically select the maximum refresh rate and
corresponding Color Matching Profiles.
Setup Diskette for Microsoft®Windows®2000 Professional
This section must be
completed before
continuing with the
Microsoft Windows2000 Auto
Setup on page 8.
i
On LCD monitors, unlike
CRTs, a faster refresh rate
does not improve display
quality. IBM recommends
using either 1024 x 768 at a
refresh rate of 60Hz or 640 x
480 at a refresh rate of 60Hz.
Page 20

8
When you first use your monitor you must perform Auto Setup. This procedure
sets up your monitor to process the video signals from your computer without
image discoloration or smearing. After you perform Auto Setup, the settings are
stored and used each time you turn on the monitor.
In order to optimise the displayed image a set-up utility is provided on the
IBM Monitor Installation Diskette. Operation of this utility is dependent on the
operating system on your computer. For correct operation locate the operating
system on your computer from the table below and follow the appropriate
instructions. You may choose to run AUTO SETUP for each operating system
that you use. This means that if you sometimes use your monitor while running
any version of Windows and sometimes also use it from within DOS (not a DOS
window), you must run AUTO SETUP for both Windows and DOS. You may run
versions of AUTO SETUP in any order.
Before you begin AUTO SETUP for your computer:
1. Make a backup copy of the setup diskettes supplied with the monitor.
2. Make sure the computer video mode is set in the range of the
supported screen resolution shown in the table on page18.
You should perform AUTO SETUP for each screen mode you use.
Auto Setup
Before carrying out this
section, it is very important
that The Setup Diskette for
Windows 95 or Windows 98
has been run.(see page6)
i
The Setup Utility included
on the setup diskette is for
displaying dot patterns. They
do not replace or modify the
display driver.
i
The Auto Setup
instructions require the
monitor to be warmed up for 15
minutes. This is not required
for normal operation.
i
By pressing the and
keys simultaneously allows
direct access to the auto set-up
controls.
i
If your computer does not
run with the setup
diskettes shipped with the
monitor, refer to Manual Setup
on page 12
i
The AUTO SETUP process
only applies to the current
screen mode. When a new
mode is selected, repeat this
section to reset the monitor.
Operating System
DOS
Auto Setup for DOS on page 9
Auto Setup Microsoft Windows 3.1,
Windows 95, Windows 98, Windows 2000
or Microsoft Windows NT 4.0 workstation
on page 10
Microsoft Windows 3.1
Microsoft Windows 95
Microsoft Windows 98
Microsoft Windows 2000
Microsoft Windows NT 4.0
workstation
Corresponding Auto Setup procedure
Auto Setup
Page 21

ENGLISH
9
1. Turn on the monitor first; then the computer.
If the message CHECK SIGNAL CABLE is displayed, or if nothing is
displayed check:
• that the video interface cable is not connected properly.
• the correct video adapter card is not installed.
2. Wait approximately 15 minutes, until the monitor warms up.
3. Insert the diskette labelled ‘IBM Monitor Installation Disk’ into the
diskette drive.
4. Display the command prompt screen of the DOS full-screen display.
5. At the command prompt, type ‘A:’ and press ENTER.
6. Type ‘TESTPATD’ and press ENTER.
7. Select from the screen the number for the color or text mode you want
to setup.
8. Select from the screen the number for the video mode you want to
setup.
You may repeat this process for as many of the color and video modes
as you need.
9. When the dot pattern appears, press the OSD Enter button at the
bottom of the monitor to display the initial OSD menu.
10. Use an Arrow button ( or ), to select the IMAGE SET-UP icon
and press the OSD Enter button to access the function.
11. Using an Arrow button ( or ), select AUTO and press the OSD
Enter button . This activates the AUTO SETUP procedure, which will
optimize the display settings with the provided dot patterns.
The image may be affected during this procedure and you may notice
small changes to the test pattern.
12. When finished, the OSD main menu returns.
Press the Exit button to exit from the OSD.
13. Press the ESCAPE key to exit the test pattern program.
14. Type ‘Exit’ at the command prompt to return to Windows.
If you use other operating systems, perform the appropriate AUTO SETUP
for those systems, also: see
Auto Setup Microsoft Windows 3.1, Windows 95, Windows 98,
Windows 2000 or Microsoft Windows NT on page 10.
Auto Setup for DOS
i
If the monitor is in standby
mode (STANDBY ON), it
may automatically turn off while
you are waiting for it to warm
up. If this happens, switch off
the monitor and switch it on
again after a few seconds.
i
If you are using PC-DOS/V,
change to U.S. mode by
typing ‘CHEV US’ and pressing
ENTER at the command
prompt.
You must use when you run
DOS Auto Setup.
i
The size and diversity of
the dot pattern varies with
the screen resolution.
i
If the screen flickers,
repeat the setup several
times until the flicker is
minimised, or adjust it manually
by following Manual Setup on
page 12.
Page 22

10
1. Turn on the monitor first; then the computer.
If the message CHECK SIGNAL CABLE is displayed, or if nothing is
displayed check:
• that the video interface cable is not connected properly.
• the correct video adapter card is not installed.
2. Wait approximately 15 minutes, until the monitor warms up.
3. Drag the icon bar and tool bar, if they are displayed, to the bottom of
the screen.
4. Insert the diskette labelled ‘IBM Monitor Installation Disk’ into the
diskette drive.
5. Check the operating system installed on your computer and follow the
instructions from the table below.
6. When the test pattern appears, press the OSD Enter button at the
bottom of the monitor to display the initial OSD menu.
7. Use an Arrow button ( or ), to select the IMAGE SET-UP icon
and press the OSD Enter button to access the function.
8. Using an Arrow button ( or ), select AUTO and press the OSD
Enter button . This activates the AUTO SETUP procedure, which will
optimize the display settings with the provided test pattern. The image
may be affected during this procedure and you may notice small
changes to the test pattern.
To abort the AUTO SETUP function, press the ESC key.
9. When finished, the OSD main menu returns. Press the Exit button
once to exit from the OSD.
Auto Setup for Microsoft®Windows®3.1, Windows®95 or
Microsoft®Windows®2000
i
If the monitor is in standby
mode (STANDBY ON), it
may automatically turn off while
you are waiting for it to warm up.
i
The size and diversity of the
dot pattern varies with the
screen resolution.
i
Position the mouse pointer
at the bottom center of the
screen. This allows AUTO
SETUP to run properly
Operating
System
Microsoft Windows 95
Microsoft Windows 3.1
Microsoft Windows 98
Microsoft Windows 2000
Microsoft Windows NT
Step1
Open
PROGRAM
Manger
Open
PROGRAM
Manger
Select
START
Select RUN
Select
RUN
Type
‘A:\TESTPAT’
and press
ENTER
Step2 Step3 Step4
Page 23

ENGLISH
11
10. Press the ESC key to return to Windows.
You have completed the monitor setup for Windows. If you use other operat-
ing systems, perform the appropriate AUTO SETUP for those systems, also: see
Auto Setup for DOS on page 9.
Page 24

12
Normally, you can complete the setup procedure using A
UTO SETUP, however,
if your screen image is still distorted after you perform AUTO SETUP or the
setup diskette does not run on your system, perform M
ANUAL
SETUP.
1. Have your monitor turned on for about 15 minutes, until the monitor
warms up.
2. Display the image you most frequently use on the screen.
3. Press the OSD Enter button at the bottom of the monitor to display
the initial OSD menu.
4. Use an Arrow button ( or ) to select the IMAGE SET-UP icon
and press the OSD Enter button to access the function.
5. Using an Arrow button ( or ) , select MANUAL, press and then
press once to select COARSE. Left and right arrow adjustment
indicators become illuminated (see page18).
6. Use the Arrow buttons to manually adjust to correct (as much as
possible) for noise in the video signal then press to save the
changes.
7. Use an Arrow button to select FINE and press the button.
8. Use the Arrow buttons again to tune the image to your liking.
9. When finished, press the Exit button four times to exit from the
OSD.
You have completed the monitor setup.
Manual Setup
i
If the monitor is in standby
mode (STANDBY ON), it
might automatically turn off
while you are waiting for it to
warm up.
Page 25

ENGLISH
13
Adjusting Your LCD Monitor
User controls
User control features
Icon Direct Access Function
1. Brings up Brightness control
OSD
2. Left and Right arrows
pressed together bring up
auto setup
1. Exits from menus, sub menus
2. Exits from OSD
Function Using Menu Controls
Moves the cursor to highlight icons or
make adjustments.
i
The image is already
optimized for many display
modes, however the user
controls can be used to adjust
the image to your liking.
i
The settings are saved
after adjustment and
when exiting the OSD and
will be effective thereafter.
Moves the cursor to highlight icons or
make adjustments.
1. Brings up Contrast control
OSD
2. Left and Right arrows
pressed together bring up
auto setup
Control lock activated when
pressed for 10 seconds
None
1. Displays main OSD menu
2. Enters highlighted menus and
submenus
3. Selects highlighted option
Switches the monitors on and off
Page 26

14
CONTROLS LOCK / UNLOCK
This feature allows you to secure the current control settings, while allowing
the user to adjust Brightness, Contrast and initiate Auto Setup, so that they
cannot be inadvertently changed. Push and hold the enter button[ ] for 10
seconds; the message “Controls Locked” appears.
You can unlock the OSD controls at any time by pushing the enter button[ ]
for 10 seconds; the message “Controls Unlocked” will appear.
Page 27

ENGLISH
15
The settings adjustable with the user controls are viewed through the On Screen Display (OSD). Press the enter button [ ] to display the main OSD
menu.
Initial appearance of OSD
main menu;
On-screen display (OSD) controls
i
The LCD monitor needs
time to become thermally
stable the first time you turn it
on each day. Thus, to achieve
more accurate adjustments for
parameters, allow the LCD
monitor to warm up (be On) for
at least 15 minutes before
making any screen adjustment.
MAIN MENU
Dgital Input
BRIGHTNESS
MAIN MENU
Analog Input
BRIGHTNESS
BRIGHTNESS
75
OSD functions
OSD Icon Description
sub-menu(s)
Auto
If AUTO is selected the
image will automatically
adjust
Control and
Adjustments
Adjusts brightness
Adjusts contrast
The IMAGE SET-UP function is used
to adjust the level of noise in the video
signal which causes horizontal lines or
areas on the screen where the image
appears to be unstable and jitters or
shimmers. This can be done
automatically or manually.
It is not availible when the digital
input
BRIGHTNESS
CONTRAST
IMAGE SET-UP
sub menu;
When the Digital Signal input
When the Analog Signal input
Page 28

16
OSD Icon
COLOR
Select the Color Mode you find most
comfortable and then fine tune the
colors using the User Color Mode
menu, if necessary.
Description Sub-menu(s)
Manual SETUP
• Fine
• Coarse
Preset 1
(Warm White)
Preset 2
(Normal White)
Preset 3
(Cool White)
Increases or decreases
redness
Increases or decreases
greenness
Increases or decreases
blueness
COLOR MODE
USER COLOR
MODE-
•
Red
•
Green
•
Blue
To adjust the focus of the
display. This item allows
you to remove any
horizontal noise and clear
or sharpen the image of
characters.
Fine adjustments should
be can done after
adjusting the Coarse .
If manual is selected, the user will go
to the manual adjustment screen.
Controls and
Adjustments
Changes the position of the OSD on the
screen.
OSD Position
H-POSITION
V-POSITION
Page 29

ENGLISH
17
Moves the screen up and down.
It is not availible when the digital input
Moves the screen left and right .
It is not availible when the digital input
OSD Icon
Sub-menu(S)
• YES
• NO
Controls and
Adjustments
Description
RESET
Reset should return all available functions
(apart from language which should not
change unless adjusted via the
LANGUAGE menu) fo their factory
presets.
OSD SIZE
Language
To select OSD size
The language chosen affects only the language of the OSD.
Select one of the five language to use for the OSD.
It has no effect on any software running on the computer.
• ENGLISH
• FRANCAIS
• DEUTSCH
• ITALIANO
• ESPANOL
H-POSITION
V-POSITION
• SMALL
• MID
• BIG
• INFORMATION
• PRESET MODES
• USER MODES
Use the and
buttons to move between
information screens.
Information
Display model name, serial number, year of manufacture
and microcode level.
Display all preset modes stored in the monitor.
Display all user modes stored in the monitor.
The current display mode will be shown at the base of all
information screens.
OSD time
To select OSD display duration time.
(5 - 60 seconds)
Page 30

18
The display mode the monitor uses is controlled by the computer. Therefore,
you should refer to your computer documentation for details on how to
change display modes.
The image size, position and shape may change when the display mode
changes. This is normal and the image can be readjusted using AUTO SETUP
and the monitor controls.
Unlike CRT monitors, which require a high refresh rate to minimize flicker,
TFT technology is inherently flicker-free. If possible, configure your computer
for 1024 x 768 addressability at 60Hz vertical refresh rate.
For the display modes listed below, the screen image has been optimized
during manufacture.
Factory Set Display Modes
Further Information
Display modes
Addressabillty Refresh Rate
Horizontal
Frequency
640 x 350 70 Hz 31.5 kHz
720 x 400 70 Hz 31.5 kHz
640 x 480 60 Hz 31.5 kHz
640 x 480 66 Hz 35.0 kHz
640 x 480 75 Hz 37.5 kHz
800 x 600 56 Hz 35.2 kHz
800 x 600 60 Hz 37.9 kHz
800 x 600 72 Hz 48.1 kHz
800 x 600 75 Hz 46.9 kHz
832 x 624 75 Hz 49.7 kHz
1024 x 768 † 60 Hz 48.4 kHz
1024 x 768 70 Hz 56.5 kHz
1024 x 768 75 Hz 60.0 kHz
Note : VESA timings are as detailed in the VESA “Display Monitor Timing
Specification”. Version 1.0, Revision 0.8, Dated 09/17/98.
† Recommended
Page 31

ENGLISH
19
To benefit from power management, the monitor must be used in
conjunction with a computer that implements the Video Electronics
Standards Association (VESA) Display Power Management Signalling
(DPMS) Standard.
The power management feature is invoked when the computer recognizes
that you have not used your mouse or keyboard for a user-definable period.
There are several states as described in the table below.
As an ENERGY STAR 2000 Partner, IBM has determined that this
product meets the ENERGY STAR 2000 guidelines for energy efficiency.
IBM recommends that you switch off your monitor at the end of each
working day, or whenever you expect to leave it unused for long periods
during the day.
Power Management
i
If your computer has
previously been used with
a CRT monitor and is currently
configured to a display mode
outside the range that the Flat
Panel monitor can display, you
may need to re-attach the CRT
monitor temporarily until you
have reconfigured the
computer, preferably to 1024 x
768 at 60Hz.
On
DPMS
Standby
DPMS
Suspend
DPMS Off
State
Power
Indicator
Steady green
Normal
Blank
Blank
Blank
Steady amber
Flashing
amber
(0.5 sec. interval)
Flashing
amber
(1 sec. interval)
Screen
Restoring
Operation
Compliance
Press a key or
move the mouse.
ENERGY
STAR 2000
ENERGY
STAR 2000
ENERGY
STAR 2000
Press a key or
move the mouse.‡
Press a key or
move the mouse.‡
‡ There may be a slight delay before the picture reappears.
®
®
®
®
®
Page 32

20
Troubleshooting
If you have a problem setting up or using your monitor, you may be able
to solve it yourself. Before calling your retailer or IBM, try the suggested
actions that are appropriate to your problem.
Problem
No power to
monitor.
Possible
Cause
Suggested Action Reference
Brightness
and Contrast
may be too
low.
The monitor is
in the Power
Management
Standby state.
Sreen is blank
and power
indicator is off.
Sreen is blank
and power
indicator is
steady green.
Sreen is blank
and power
indicator is
steady amber.
User
controls
section on
page 13.
Power
Management
section on
page 19.
Connecting
your
Monitor
section on
page 4.
• Adjust brightness and contrast.
• Press any key on the keyboard
or move the mouse to restore
operation.
• Check the Power Management
software on your computer.
• Press the to switch
between analog and digital
mode. If the panel is the wrong
mode for the signal being
provided, the monitor appears
to go into sleep mode.
• Ensure that the electrical outlet
and the monitor are both
switched on.
• Check that the power cord
is firmly plugged into the
electrical outlet and the power
supply unit.
• If the power cord plug has
a removalble fuse, replace it.
• Try another power cord.
• Try another electrical outlet.
Page 33

ENGLISH
21
i
For image problems, you
may want to run
AUTO
SETUP again before
consulting to this section. In
most cases, AUTO SETUP
can fix the problems. See
Auto Setup for the computer
on page 8 for details.
Problem
The monitor is
not receving a
video signal
Display mode of
the
computer
is
outside the
range of the
monitor
Possible
Cause
Suggested Action Reference
The monitor is in
the Power
Management
Suspend or Off
state.
There are noises
in the video
signal
The color setting
may be incorrect.
The LCD contains over 2,300,000 thin-film transistors (TFTs).
A small number of missing, discolored, or lighted dots may be
present on the screen, which is an intrinsic characteristic of the
TFT LCD technology and is not an LCD defect.
Sreen is blank
and power
indicator is
flashing green
every 0.5
second
Sreen is blank
and power
indicator is
flashing green
every 0.5 or 1
second
Image appears
to be smeared
Image appears
to be discolored
A few dots are
missing,
discolored, or
inappropriately
lighted.
Connecting
your monitor
section on
page 4
Further
Information
section on
page 18
User
Controls
section on
page 13
User
Controls
section on
page 13
Power
Management
section on
page 19
• Reconfigure key on the
computer to use a supported
display mode.
• Press any key on the keyboard
or move the mouse to restore
operation.
• Check the Power management
software on your computer.
• Select IMAGE SET-UP menu
in the OSD. Then select
MANUAL to adjust FINE /
COARSE settings.
• Adjust the Color settings.
• Check that the signal cabel
is firmly connected to the
computer.
• Check that no pins are bent
in the signal cable connector.
Page 34

22
Machine Name – T545H Color Monitor
Warranty Period – Three (3) Years
See the IBM Statement of Limited Warranty included in this publication for IBM’s
warranty terms and conditions.
The IBM Machine Warranty worldwide Web site at
http://www-1.ibm.com/servers/support/machine_warranties/ provides a worldwide
overview of IBM’s Limited Warranty for IBM Machines, a Glossary of IBM definitions,
Frequently Asked Questions (FAQs) and Support by Product (Machine) with links to
Product Support pages. The IBM Statement of Limited Warranty is also available
on this site in 29 languages via pdf files.
Service and support
With the original purchase of an IBM machine, you have access to extensive support
coverage. During the IBM machine warranty period, you may call IBM or your
reseller for problem determination assistance under the terms of the IBM Statement
of Limited Warranty. You may seek help as follows:
Call IBM HelpCenter ® .
In the US call 1-800-772-2227
In Canada (Toronto only) call 416-383-3344
(all others) call 1-800-565-3344
In other countries, contact your dealer, retailer, or other IBM authorized servicer.
Before calling, please have available as much of the following information as
possible:
1. Type, model and serial number from the label on the back of your monitor.
2. Purchase receipt.
3. Description of problem.
4.
computer
type and model.
5. System configuration (hardware fitted etc.).
6. System BIOS version number.
7. Operating System and version number.
8. Display driver version number.
If possible, stay by your computer system. Your technical support representative
might want to go through the problem with you during the call.
Removing the stand and cables
Alternative stands for your IBM Flat Panel Monitor may be available from specialist
suppliers.
This product is equipped with mounting facilities that conform to the VESA
Flat Panel Monitor Physical Mounting Interface Standard (FPMPMI).
This product is shipped with the signal cable and the power cord attached
to the monitor. If you want to use other cables for reasons such as having the
monitor wall-mounted, follow the instructions below:
1. Disconnect the power cord from the wall outlet.
Further Help
i
If possible, stay by your
computer. Your Technical
Support Representative may
wish to go through the problem
with you during the call.
i
More help, late-breaking
news and details of the
latest accessories for these
products may be found on the
worldwide web at:
http://www.pc.ibm.com/us/
accessories
Information about the Video
Electronics Standards
Association can be found
on the worldwide web at :
http://www.vesa.org
i
Be sure to read the Safety
Information at the front of
this user guide before carrying
out changes to stands or
cables.
Page 35

ENGLISH
23
2. Lift the bottom of the cable cover (A) and pull it off.
3. Lay the monitor facedown on a cushion and remove the four screws
holding the hinge mechanism on the monitor. Lift off the hinge and base
assembly(B).
4. If you are installing an arm or wall-mounting device, follow the directions
included with the device. If you are just changing your cables, continue
with step 5.
5. Squeeze the side of the rear cover (C) and pull it off.
6. Remove the signal cable and the power cord from the monitor by
disconnecting the corresponding adapters.
7. Connect the signal cable and the power cord and ensure the positioning
of the cables is as shown in the diagram.
8. Slide the rear cover(C) on rear panel of the monitor.
9. Put the hinge cover back on, fit the four screws to hold the hinge
mechanism on rear panel of the monitor.
10. Slide the cable cover on the base assembly(B).
To obtain the correct cables and/or to get further instructions on
installing them, call the IBM HELPCENTER at the above numbers or
contact your dealer, retailer, or other IBM authorized Servicer.
A
B
C
Page 36

24
Pin Signal(DVI-I) Pin Signal(DVI-I)
1. T. M. D. S. Data2-
2. T. M. D. S. Data2+
3. T. M. D. S. Data2/4 Shield
4. T. M. D. S. Data4-
5. T. M. D. S. Data4+
6. DDC Clock
7. DDC Data
8. Analog Vertical Sync.
9. T. M. D. S. Data1-
10. T. M. D. S. Data1+
11. T. M. D. S. Data1/3 Shield
12. T. M. D. S. Data3-
13. T. M. D. S. Data3+
14. +5V Power
15. Ground (return for +5V,
H. Sync. and V. Sync.)
16. Hot Plug Detect
17. T. M. D. S. Data0-
18. T. M. D. S. Data0+
19. T. M. D. S. Data0/5 Shield
20. T. M. D. S. Data5-
21. T. M. D. S. Data5+
22. T. M. D. S. Clock Shield
23. T. M. D. S. Clock+
24. T. M. D. S. ClockC1 Analog Red
C2 Analog Green
C3 Analog Blue
C4 Analog H. Sync.
C5 Analog Ground
i
The DVI - I (Digital Visual
Interface - integrated) port
supports analog and digital signal
inputs and also improves quality of
the displayed image by eliminating
poor video at the monitor source.
DVI-I Connector (Digital/Analog)
1
8
9
17
24
16
C1
C4
C3
C2
C5
Specifications
Page 37

ENGLISH
25
This color monitor (Type-model 9493-Axx) uses a 15.1-inch TFT LCD.
Specifications
i
Power consumption figures
are for the monitor and the
power supply combined.
Dimensions
Weight
7.1 kg (15.62 lbs)
0°
30°
Range : 125mm
Range : -150˚ / +150˚
15.1” (383.6 mm)
230.4 mm
307.2 mm
0.3 mm (H) x 0.3 mm (V)
90 - 264 Vac 60/50 ± 3Hz
3 Arms at 90 Vac
< 30 W
< 3 W
< 3 W
< 3 W
Analog /Digital Direct Drive
75 ohm 0.7V
1024 pixels (max)
768 lines (max)
78 MHz
IBM, VESA, MAC
See Factory Set Display Modes
on page 18.
See Display Mode Ranges on
page 26.
Separate (TTL)
Composite (TTL)
10 to 35° C
- 20 to 60° C
- 20 to 60° C
10 to 80%
5 to 95%
5 to 95%
Stand Range
Image
Power Input
Power
Consumption
Video Input
Communications
Sync Input
VESA DDC:
Type
2B
Supported Display
Modes
Environment
Width:
Depth:
Height:
Forward Tilt :
Backward Tilt :
Vertical Lift :
Swivel :
Viewable Image Size:
Maximum Height:
Maximum Width:
Pixel Pitch:
Supply Voltage:
Max Supply Current:
Normal Operation:
DPMS Stand-by:
DPMS Suspend:
DPMS off:
Input Signal:
Horiz. Addressability:
Vert. Addressability:
Clock Frequency:
Standard modes :
Horiz / Vert Freq:
Temperature:
Operating:
Storage:
Shipping:
Humidity:
Operating:
Storage:
Shipping:
401.3 mm
57 mm
250 mm(including stand)
338.5 mm (min lift)
463.5 mm (max lift)
Page 38

26
Addressabillty
Refresh Rate /
Range ( + / - 3%)
Horizontal Frequency /
Range ( + / - 3%)
640 x 350 67.9 ~ 72.1 Hz 30.56 ~ 31.45 kHz
720 x 400 67.9 ~ 72.1 Hz 30.56 ~ 31.45 kHz
640 x 480 58.2 ~ 61.8 Hz 30.56 ~ 31.45 kHz
640 x 480 64.0 ~ 68.0 Hz 34.95 ~ 36.05 kHz
640 x 480 72.8 ~ 77.3 Hz 36.38 ~ 38.63 kHz
800 x 600 54.3 ~ 57.7 Hz 34.14 ~ 36.26 kHz
800 x 600 58.2 ~ 61.8 Hz 36.76 ~ 39.04 kHz
800 x 600 69.8 ~ 74.2 Hz 46.66 ~ 49.54 kHz
800 x 600 72.8 ~ 77.3 Hz 45.49 ~ 48.31 kHz
832 x 624 72.8 ~ 77.3 Hz 48.21 ~ 51.19 kHz
1024 x 768 58.2 ~ 61.8 Hz 46.95 ~ 49.85 kHz
1024 x 768 67.9 ~ 72.1 Hz 54.81 ~ 58.20 kHz
1024 x 768 72.8 ~ 77.3 Hz 58.20 ~ 61.80 kHz
Display Mode Ranges
Page 39

ENGLISH
27
Part 1 - General Terms
This Statement of Limited Warranty includes Part 1 - General Terms and Part 2 - Country-unique Terms. The terms of Part 2 replace or modify those of
Part 1. The warranties provided by IBM in this Statement of Limited Warranty apply only to Machines you purchase for your use, and not for resale, from
IBM or your reseller. The term “Machine” means an IBM machine, its features, conversions, upgrades, elements, or accessories, or any combination of
them. The term “Machine” does not include any software programs, whether pre-loaded with the Machine, installed subsequently or otherwise. Unless
IBM specifies otherwise, the following warranties apply only in the country where you acquire the Machine. Nothing in this Statement of Limited
Warranty affects any statutory rights of consumers that cannot be waived or limited by contract. If you have any questions, contact IBM or your
reseller.
The IBM Warranty for Machines
IBM warrants that each Machine 1) is free from defects in materials and workmanship and 2) conforms to IBM’s Official Published Specifications
(“Specifications”). The warranty period for a Machine is a specified, fixed period commencing on its Date of Installation. The date on your sales receipt is
the Date of Installation unless IBM or your reseller informs you otherwise.
If a Machine does not function as warranted during the warranty period, and IBM or your reseller are unable to either 1) make it do so or 2) replace it with
one that is at least functionally equivalent, you may return it to your place of purchase and your money will be refunded.
Extent of Warranty
The warranty does not cover the repair or exchange of a Machine resulting from misuse, accident, modification, unsuitable physical or operating
environment, improper maintenance by you, or failure caused by a product for which IBM is not responsible. The warranty is voided by removal or
alteration of Machine or parts identification labels.
THESE WARRANTIES ARE YOUR EXCLUSIVE WARRANTIES AND REPLACE ALL OTHER WARRANTIES OR CONDITIONS,
EXPRESS OR IMPLIED, INCLUDING, BUT NOT LIMITED TO, THE IMPLIED WARRANTIES OR CONDITIONS OF
MERCHANTABILITY AND FITNESS FOR A PARTICULAR PURPOSE. THESE WARRANTIES GIVE YOU SPECIFIC LEGAL
RIGHTS AND YOU MAY ALSO HAVE OTHER RIGHTS WHICH VARY FROM JURISDICTION TO JURISDICTION. SOME
JURISDICTIONS DO NOT ALLOW THE EXCLUSION OR LIMITATION OF EXPRESS OR IMPLIED WARRANTIES, SO THE
ABOVE EXCLUSION OR LIMITATION MAY NOT APPLY TO YOU. IN THAT EVENT, SUCH WARRANTIES ARE LIMITED IN
DURATION TO THE WARRANTY PERIOD. NO WARRANTIES APPLY AFTER THAT PERIOD.
Items Not Covered by Warranty
IBM does not warrant uninterrupted or error-free operation of a Machine.
Any technical or other support provided for a Machine under warranty, such as assistance via telephone with “how-to” questions and those regarding
Machine set-up and installation, will be provided WITHOUT WARRANTIES OF ANY KIND.
Warranty Service
To obtain warranty service for a Machine, contact IBM or your reseller . If you do not register your Machine with IBM, you may be required to present
proof of purchase. During the warranty period, IBM or your reseller, if approved by IBM to provide warranty service, provides without charge certain
types of repair and exchange service to keep Machines in, or restore them to, conformance with their Specifications. IBM or your reseller will inform you
of the available types of service for a Machine based on its country of installation. At its discretion, IBM or your reseller will 1) either repair or exchange
the failing Machine and 2) provide the service either at your location or a service center. IBM or your reseller will also manage and install selected
engineering changes that apply to the Machine.
Some parts of IBM Machines are designated as Customer Replaceable Units (called “CRUs”), e.g., keyboards, memory, or hard disk drives. IBM ships
CRUs to you for replacement by you. You must return all defective CRUs to IBM within 30 days of your receipt of the replacement CRU. You are
responsible for downloading designated Machine Code and Licensed Internal Code updates from an IBM Internet Web site or from other electronic media,
and following the instructions that IBM provides.
When warranty service involves the exchange of a Machine or part, the item IBM or your reseller replaces becomes its property and the replacement
becomes yours. You represent that all removed items are genuine and unaltered. The replacement may not be new, but will be in good working order and at
least functionally equivalent to the item replaced. The replacement assumes the warranty service status of the replaced item. Many features, conversions, or
upgrades involve the removal of parts and their return to IBM. A part that replaces a removed part will assume the warranty service status of the removed
part. Before IBM or your reseller exchanges a Machine or part, you agree to remove all features, parts, options, alterations, and attachments not under
warranty service.
You also agree to
1. ensure that the Machine is free of any legal obligations or restrictions that prevent its exchange;
2. obtain authorization from the owner to have IBM or your reseller service a Machine that you do not own; and
Statement of Limited Warranty
Page 40

28
3. where applicable, before service is provided:
a. follow the problem determination, problem analysis, and service request procedures that IBM or your reseller provides;
b. secure all programs, data, and funds contained in a Machine;
c. provide IBM or your reseller with sufficient, free, and safe access to your facilities to permit them to fulfill their obligations; and
d. inform IBM or your reseller of changes in a Machine’s location.
IBM is responsible for loss of, or damage to, your Machine while it is 1) in IBM’s possession or 2) in transit in those cases where IBM is responsible for the
transportation charges.
Neither IBM nor your reseller is responsible for any of your confidential, proprietary or personal information contained in a Machine which you return to
IBM or your reseller for any reason. You should remove all such information from the Machine prior to its return.
Limitation of Liability
Circumstances may arise where, because of a default on IBM’s part or other liability, you are entitled to recover damages from IBM. In each such instance,
regardless of the basis on which you are entitled to claim damages from IBM (including fundamental breach, negligence, misrepresentation, or other
contract or tort claim), except for any liability that cannot be waived or limited by applicable laws, IBM is liable for no more than
1. damages for bodily injury (including death) and damage to real property and tangible personal property; and
2. the amount of any other actual direct damages, up to the charges (if recurring, 12 months’ charges apply) for the Machine that is subject of the claim. For
purposes of this item, the term “Machine” includes Machine Code and Licensed Internal Code.
This limit also applies to IBM’s suppliers and your reseller. It is the maximum for which IBM, its suppliers, and your reseller are collectively responsible.
UNDER NO CIRCUMSTANCES IS IBM LIABLE FOR ANY OF THE FOLLOWING: 1) THIRD-PARTY CLAIMS AGAINST YOU FOR
DAMAGES (OTHER THAN THOSE UNDER THE FIRST ITEM LISTED ABOVE); 2) LOSS OF, OR DAMAGE TO, YOUR RECORDS
OR DATA; OR 3) SPECIAL, INCIDENTAL, OR INDIRECT DAMAGES OR FOR ANY ECONOMIC CONSEQUENTIAL DAMAGES,
LOST PROFITS OR LOST SAVINGS, EVEN IF IBM, ITS SUPPLIERS OR YOUR RESELLER IS INFORMED OF THEIR POSSIBILITY.
SOME JURISDICTIONS DO NOT ALLOW THE EXCLUSION OR LIMITATION OF INCIDENTAL OR CONSEQUENTIAL
DAMAGES, SO THE ABOVE LIMITATION OR EXCLUSION MAY NOT APPLY TO YOU.
GOVERNING LAW
Both you and IBM consent to the application of the laws of the country in which you acquired the Machine to govern, interpret, and enforce all of your
and IBM’s rights, duties, and obligations arising from, or relating in any manner to, the subject matter of this Agreement, without regard to conflict of law
principles.
Part 2 - Country-unique Terms
AMERICAS
BRAZIL
Governing Law: The following is added after the first sentence:
Any litigation arising from this Agreement will be settled exclusively by the court of Rio de Janeiro.
NORTH AMERICA
Warranty Service: The following is added to this Section:
To obtain warranty service from IBM in Canada or the United States, call 1-800-IBM-SERV (426-7378).
CANADA
Governing Law: The following replaces “laws of the country in which you acquired the Machine” in the first sentence: laws in the Province of Ontario.
UNITED STATES
Governing Law: The following replaces “laws of the country in which you acquired the Machine” in the first sentence: laws of the State of New York.
ASIA PACIFIC
AUSTRALIA
The IBM Warranty for Machines: The following paragraph is added to this Section:
The warranties specified in this Section are in addition to any rights you may have under the Trade Practices Act 1974 or other similar legislation and are
only limited to the extent permitted by the applicable legislation.
Limitation of Liability: The following is added to this Section:
Where IBM is in breach of a condition or warranty implied by the Trade Practices Act 1974 or other similar legislation, IBM’s liability is limited to the
repair or replacement of the goods or the supply of equivalent goods. Where that condition or warranty relates to right to sell, quiet possession or clear
title, or the goods are of a kind ordinarily acquired for personal, domestic or household use or consumption, then none of the limitations in this paragraph
apply.
Governing Law: The following replaces “laws of the country in which you acquired the Machine” in the first sentence: laws of the State or Territory.
Page 41

ENGLISH
29
CAMBODIA, LAOS, AND VIETNAM
Governing Law: The following replaces “laws of the country in which you acquired the Machine” in the first sentence: laws of the State of New York.
The following is added to this Section:
Disputes and differences arising out of or in connection with this Agreement shall be finally settled by arbitration which shall be held in Singapore in
accordance with the rules of the International Chamber of Commerce (ICC). The arbitrator or arbitrators designated in conformity with those rules shall
have the power to rule on their own competence and on the validity of the Agreement to submit to arbitration. The arbitration award shall be final and
binding for the parties without appeal and the arbitral award shall be in writing and set forth the findings of fact and the conclusions of law.
All proceedings shall be conducted, including all documents presented in such proceedings, in the English language. The number of arbitrators shall be
three, with each side to the dispute being entitled to appoint one arbitrator.
The two arbitrators appointed by the parties shall appoint a third arbitrator before proceeding upon the reference. The third arbitrator shall act as chairman
of the proceedings. Vacancies in the post of chairman shall be filled by the president of the ICC. Other vacancies shall be filled by the respective
nominating party. Proceedings shall continue from the stage they were at when the vacancy occurred.
If one of the parties refuses or otherwise fails to appoint an arbitrator within 30 days of the date the other party appoints its, the first appointed arbitrator
shall be the sole arbitrator, provided that the arbitrator was validly and properly appointed. The English language version of this Agreement prevails over
any other language version.
HONG KONG AND MACAU
Governing Law: The following replaces “laws of the country in which you acquired the Machine” in the first sentence: laws of Hong Kong Special
Administrative Region
INDIA
Limitation of Liability: The following replaces items 1 and 2 of this Section:
1. liability for bodily injury (including death) or damage to real property and tangible personal property will be limited to that caused by IBM’s
negligence;
2. as to any other actual damage arising in any situation involving nonperformance by IBM pursuant to, or in any way related to the subject of this
Statement of Limited Warranty, IBM’s liability will be limited to the charge paid by you for the individual Machine that is the subject of the claim.
JAPAN
Governing Law: The following sentence is added to this Section:
Any doubts concerning this Agreement will be initially resolved between us in good faith and in accordance with the principle of mutual trust.
NEW ZEALAND
The IBM Warranty for Machines: The following paragraph is added to this Section:
The warranties specified in this Section are in addition to any rights you may have under the Consumer Guarantees Act 1993 or other legislation which
cannot be excluded or limited. The Consumer Guarantees Act 1993 will not apply in respect of any goods which IBM provides, if you require the goods
for the purposes of a business as defined in that Act.
Limitation of Liability: The following is added to this Section:
Where Machines are not acquired for the purposes of a business as defined in the Consumer Guarantees Act 1993, the limitations in this Section are
subject to the limitations in that Act.
PEOPLE’S REPUBLIC OF CHINA (PRC)
Governing Law: The following is replaces this Section:
Both you and IBM consent to the application of the laws of the State of New York (except when local law requires otherwise) to govern, interpret, and
enforce all your and IBM’s rights, duties, and obligations arising from, or relating in any manner to, the subject matter of this Agreement, without regard
to conflict of law principles. Any disputes arising from or in connection with this Agreement will first be resolved by friendly negotiations, failing which
either of us has the right to submit the dispute to the China International Economic and Trade Arbitration Commission in Beijing, the PRC, for arbitration
in accordance with its arbitration rules in force at the time. The arbitration tribunal will consist of three arbitrators. The language to be used therein will be
English and Chinese. An arbitral award will be final and binding on all the parties, and will be enforceable under the Convention on the Recognition and
Enforcement of Foreign Arbitral Awards (1958). The arbitration fee will be borne by the losing party unless otherwise determined by the arbitral award.
During the course of arbitration, this Agreement will continue to be performed except for the part which the parties are disputing and which is undergoing
arbitration.
EUROPE, MIDDLE EAST, AFRICA (EMEA)
THE FOLLOWING TERMS APPLY TO ALL EMEA COUNTRIES.
The terms of this Statement of Limited Warranty apply to Machines purchased from IBM or an IBM reseller.
Warranty Service:
If you purchase an IBM Machine in Austria, Belgium, Denmark, Estonia, Finland, France, Germany, Greece, Iceland, Ireland, Italy, Latvia, Lithuania,
Luxembourg, Netherlands, Norway, Portugal, Spain, Sweden, Switzerland or United Kingdom, you may obtain warranty service for that Machine in any
of those countries from either (1) an IBM reseller approved to perform warranty service or (2) from IBM.
Page 42

30
If you purchased an IBM Personal Computer Machine in Albania, Armenia, Belarus, Bosnia and Herzegovina, Bulgaria, Croatia, Czech Republic,
Georgia, Hungary, Kazakhstan, Kirghizia, Federal Republic of Yugoslavia, Former Yugoslav Republic of Macedonia (FYROM), Moldova, Poland,
Romania, Russia, Slovak Republic, Slovenia, or Ukraine, you may obtain warranty service for that Machine in any of those countries from either (1) an
IBM reseller approved to perform warranty service or (2) from IBM. If you purchase an IBM Machine in a Middle Eastern or African country, you may
obtain warranty service for that Machine from the IBM entity within the country of purchase, if that IBM entity provides warranty service in that country,
or from an IBM reseller, approved by IBM to perform warranty service on that Machine in that country. Warranty service in Africa is available within 50
kilometers of an IBM authorized service provider. You are responsible for transportation costs for Machines located outside 50 kilometers of an IBM
authorized service provider.
Governing Law:
The applicable laws, that govern, interpret and enforce rights, duties, and obligations of each of us arising from, or relating in any manner to, the subject
matter of this Statement, without regard to conflict of laws principles, as well as Country-unique terms and competent court for this Statement are those of
the country in which the warranty service is being provided , except that in 1) Albania, Bosnia-Herzegovina, Bulgaria, Croatia, Hungary, Former Yugoslav
Republic of Macedonia, Romania, Slovakia, Slovenia, Armenia, Azerbaijan, Belarus, Georgia, Kazakhstan, Kyrgyzstan, Moldava, Russia, Tajikistan,
Turkmenistan, Ukraine, and Uzbekistan, the laws of Austria apply; 2) Estonia, Latvia, and Lithuania, the laws of Finland apply; 3) Algeria, Benin, Burkina
Faso, Cameroon, Cape Verde, Central African Republic, Chad, Congo, Djibouti, Democratic Republic of Congo, Equatorial Guinea, France, Gabon,
Gambia, Guinea, Guinea-Bissau, Ivory Coast, Lebanon, Mali, Mauritania, Morocco, Niger, Senegal, Togo, and Tunisia, this Agreement will be construed
and the legal relations between the parties will be determined in accordance with the French laws and all disputes arising out of this Agreement or related to
its violation or execution, including summary proceedings, will be settled exclusively by the Commercial Court of Paris; 4) Angola, Bahrain, Botswana,
Burundi, Egypt Eritrea, Ethiopia, Ghana, Jordan, Kenya, Kuwait, Liberia, Malawi, Malta, Mozambique, Nigeria, Oman, Oman Pakistan, Qatar, Rwanda,
Sao Tome, Saudi Arabia, Sierra Leone, Somalia, Tanzania, Uganda, United Arab Emirates, United Kingdom, West Bank/Gaza, Yemen, Zambia, and
Zimbabwe, this Agreement will be governed by English Law and disputes relating to it will be submitted to the exclusive jurisdiction of the English courts;
and 5) in Greece, Israel, Italy, Portugal, and Spain any legal claim arising out of this Statement will be brought before, and finally settled by, the competent
court of Athens, Tel Aviv, Milan, Lisbon, and Madrid, respectively.
THE FOLLOWING TERMS APPLY TO THE COUNTRY SPECIFIED:
AUSTRIA and GERMANY
The IBM Warranty for Machines: The following replaces the first sentence of the first paragraph of this Section: The warranty for an IBM Machine
covers the functionality of the Machine for its normal use and the Machine’s conformity to its Specifications.
The following paragraphs are added to this Section:
The minimum warranty period for Machines is six months. In case IBM or your reseller is unable to repair an IBM Machine, you can alternatively ask for a
partial refund as far as justified by the reduced value of the unrepaired Machine or ask for a cancellation of the respective agreement for such Machine and
get your money refunded.
Extent of Warranty: The second paragraph does not apply.
Warranty Service: The following is added to this Section:
During the warranty period, transportation for delivery of the failing Machine to IBM will be at IBM’s expense.
Limitation of Liability: The following paragraph is added to this Section:
The limitations and exclusions specified in the Statement of Limited Warranty will not apply to damages caused by IBM with fraud or gross negligence and
for express warranty.
The following sentence is added to the end of the first paragraph of item 2:
IBM’s liability under this item is limited to the violation of essential contractual terms in cases of ordinary negligence.
EGYPT
Limitation of Liability: The following replaces item 2 in this Section:
as to any other actual direct damages, IBM’s liability will be limited to the total amount you paid for the Machine that is the subject of the claim. For
purposes of this item, the term “Machine” includes Machine Code and Licensed Internal Code.
Applicability of suppliers and resellers (unchanged).
FRANCE
Limitation of Liability: The following replaces the second sentence of the first paragraph of this Section:
In such instances, regardless of the basis on which you are entitled to claim damages from IBM, IBM is liable for no more than:
(items 1 and 2 unchanged).
IRELAND
Extent of Warranty: The following is added to this Section:
Except as expressly provided in these terms and conditions, all statutory conditions, including all warranties implied, but without prejudice to the generality
of the foregoing all warranties implied by the Sale of Goods Act 1893 or the Sale of Goods and Supply of Services Act 1980 are hereby excluded.
Limitation of Liability: The following replaces items one and two of the first paragraph of this Section:
1. death or personal injury or physical damage to your real property solely caused by IBM’s negligence; and
Page 43

ENGLISH
31
2. the amount of any other actual direct damages, up to 125 percent of the charges (if recurring, the 12 months’ charges apply) for the Machine that is the
subject of the claim or which otherwise gives rise to the claim.
Applicability of suppliers and resellers (unchanged).
The following paragraph is added at the end of this Section:
IBM’s entire liability and your sole remedy, whether in contract or in tort, in respect of any default shall be limited to damages.
ITALY
Limitation of Liability: The following replaces the second sentence in the first paragraph:
In each such instance unless otherwise provided by mandatory law, IBM is liable for no more than:
1. (unchanged)
2. as to any other actual damage arising in all situations involving non-performance by IBM pursuant to, or in any way related to the subject matter of this
Statement of Warranty, IBM’s liability, will be limited to the total amount you paid for the Machine that is the subject of the claim.
Applicability of suppliers and resellers (unchanged).
The following replaces the second paragraph of this Section:
Unless otherwise provided by mandatory law, IBM and your reseller are not liable for any of the following: (items 1 and 2 unchanged) 3) indirect damages,
even if IBM or your reseller is informed of their possibility.
SOUTH AFRICA, NAMIBIA, BOTSWANA, LESOTHO AND SWAZILAND
Limitation of Liability: The following is added to this Section:
IBM’s entire liability to you for actual damages arising in all situations involving nonperformance by IBM in respect of the subject matter of this Statement
of Warranty will be limited to the charge paid by you for the individual Machine that is the subject of your claim from IBM.
UNITED KINGDOM
Limitation of Liability: The following replaces items 1 and 2 of the first paragraph of this Section:
1. death or personal injury or physical damage to your real property solely caused by IBM’s negligence;
2. the amount of any other actual direct damages, up to 125 percent of the charges (if recurring, the 12 months’ charges apply) for the Machine that is the
subject of the claim or which otherwise gives rise to the claim;
The following item is added to this paragraph:
3. breach of IBM’s obligations implied by Section 12 of the Sale of Goods Act 1979 or Section 2 of the Supply of Goods and Services Act 1982.
Applicability of suppliers and resellers (unchanged).
The following is added to the end of this Section:
IBM’s entire liability and your sole remedy, whether in contract or in tort, in respect of any default will be limited to damages.
Page 44

32
You have just purchased a TCO’95 approved and labelled product! Your
choice has provided you with a product developed for professional use. Your
purchase has also contributed to reducing the burden on the environment and
to the further development of environmentally-adapted electronic products.
In many countries, environmental labelling has become an established method
for encouraging the adaptation of goods and services to the environment. The
main problem as far as computers and other electronic equipment are
concerned is that environmentally harmful substances are used both in the
products and during their manufacture. Since it has not been possible so far
for the majority of electronic equipment to be recycled in a satisfactory way,
most of these potentially damaging substances sooner or later enter Nature.
There are also other characteristics of a computer, such as energy
consumption levels, that are important from both the working and natural
environment viewpoints. Since all types of conventional electricity generation
have a negative effect on the environment (acidic- and climatic-influencing
emissions, radioactive waste, etc.), it is vital to conserve energy. Electronic
equipment in offices consumes as enormous amount of energy, since it is
often routinely left running continuously.
This product meets the requirements for the TCO’95 scheme, which provides
for international environmental labelling of personal computers. The labelling
scheme was developed as a joint effort by the TCO (The Swedish
Confederation of Professional Employees), Naturckyddsföreningen (The
Swedish Society for Nature Conservation), and NUTEK (The National Board for
Industrial and Technical Development in Sweden), and SEMKO AB (an
international certification agency).
The requirements cover a wide range of issues: environment, ergonomics,
usability, emission of electrical and magnetic fields, energy consumption and
electrical and fire safety.
The environmental demands concern, among other things, restriction on the
presence and use of heavy metals, brominated and chlorinated flame
retardants, CFCs (freons), and chlorinated solvents. The product must be
prepared for recycling, and the manufacturer is obliged to have an
environmental plan, which must be adhered to in each country where the
company implements its operational policy.
Environmental Labelling of Personal Computers
Congratulations!
Why do we have
environmentally
labelled computers?
What does the
environmenal
labelling involve?
What does the
environmenal
labelling involve?
Page 45

33
The energy requirements include a demand that the computer and/or display,
after a certain period of inactivity, shall reduce its power consumption to a
lower level, in one or more stages. The length of time to reactivate the
computer shall be reasonable for the user.
Labelled products must meet strict environmental demands, for example, in
respect of the reduction of electric and magnetic fields, along with physical
and visual ergonomics and good usability.
The following is a brief summary of the environmental requirements met by
this product. The complete environmental criteria document may be ordered
from:
TCO Development Unit
Linnegatan 14, S-11494 Stockholm, Sweden
FAX +46-8 782 92 07
E-mail (Internet): development@tco.se
Current information regarding TCO’95 approved and labelled products may
also be obtained on the Internet using the address:
http://www.tco-info.com/
TCO’95 is a co-operative project between:
Naturskydds SEMKO
föreningen Närings- och teknikutvecklingsverket
Brominated flame retardants are present in printed circuit boards, cabling,
casings, and housings, and are added to delay the spread of fire. Up to 30% of
the plastic in a computer casing can consist of flame-retardant substances.
These are related to another group of environmental toxins, PCBs, and are
suspected of giving rise to similar harm, including reproductive damage in
fish-eating birds and mammals. Flame retardants have been found in human
blood, and researchers fear that they can disturb fetus development.
Bio-accumulative1TCO’95 demands require that plastic components
weighing more than 25 grams must not contain flame retardants with
organically bound chlorine or bromine.
Lead can be found in picture tubes, display screens, solder, and capacitors.
Lead damages the nervous system and in higher doses causes lead poisoning.
The relevant bio-accumulative TCO’95 requirement permits the inclusion of
lead, as no replacement has yet been developed.
NUTEK
Environmental
requirements
APPENDIX
Page 46

34
Cadmium is present in rechargeable batteries and in the color-generating
layers of certain computer displays. Cadmium damages the nervous system
and is toxic in high doses. The relevant bio-accumulative TCO’95
requirement states that batteries may not contain more than 25 ppm (parts
per million) of cadmium. The color-generating layers of display screens
must not contain any cadmium.
Mercury is sometimes found in batteries, relays and switches. Mercury
damages the nervous system and is toxic in high doses. TCO’95 requirement
states that batteries may not contain more than 25 ppm (part oer million) of
mercury. It also demands that no mercury is present in any of the electrical
or electronics components concerned with the display unit. Mercury is, for
the time being, permitted in the back light system of flat panel monitors as
there today is no commercially available alternative. TCO aims on removing
this exception when a mercury free alternative is available.
CFCs (freons) are sometimes used for washing printed circuit boards and in
the manufacture of expanded foam for packaging. CFCs break down ozone and
thereby damage the ozone layer in the atmosphere, causing increased
reception on Earth of ultra-violet light with consequent increased risks of
skin cancer (malignant melanoma). The relevant TCO’95 requirement:
Neither CFCs nor HCFCs may be used during the manufacture of the product or
its packaging.
The packaging material can be recycled, or you can save it to return the
monitor to a service center for repair or disposal.
Cushioning material used for shipping finished monitors are not
manufactured with nor do they contain any CFC compounds.
These monitors have been designed for easy end-of-life disassembly and
recycling. Fasteners are generally of the same type for efficient disassembly.
Components made of different materials can be easily separated and plastics
have been identified using intermational symbols to aid in recycling.
ATTENTION
If you need to dispose of a monitor, ask a qualified service
representative for the proper procedure. Improper disposal
could result in personal injury from implosion.
1
Bio-accumulative means that the substance accumulates within living organisms.
Shipping Package
CFC Compounds in
Distribution Packaging
Design for
Disassembly/
Recycling
Monitor Disposal
Page 47

35
You have just purchased a TCO’99 approved and labelled product! Your choice
has provided you with a product developed for professional use. Your purchase
has also contributed to reducing the burden on the environment and also to the
further development of environmentally adapted electronics products.
In many countries, environmental labelling has become an established method
for encouraging the adaptation of goods and services to the environment. The
main problem, as far as computers and other electronics equipment are
concerned, is that environmentally harmful substances are used both in the
products and during their manufacture. Since it is not so far possible to
satisfactorily recycle the majority of electronics equipment, most of these
potentially damaging substances sooner or later enter nature.
There are also other characteristics of a computer, such as energy
consumption levels, that are important from the viewpoints of both the work
(internal) and natural (external) environments. Since all methods of
electricity generation have a negative effect on the environment (e.g. acidic
and climate-influencing emissions, radioactive waste), it is vital to save
energy. Electronics equipment in offices is often left running continuously and
thereby consumes a lot of energy.
This product meets the requirements for the TCO’99 scheme which provides
for international and environmental labelling of personal computers. The
labelling scheme was developed as a joint effort by the TCO (The Swedish
Confederation of Professional Employees), Svenska Naturskyddsforeningen
(The Swedish Society for Nature Conservation) and Statens Energimyndighet
(The Swedish National Energy Administration).
Environmental Labelling of Personal Computers
Congratulations!
Why do we have
environmentally
labelled computers?
What does labelling
involve?
APPENDIX
Page 48

36
Approval requirements cover a wide range of issues: environment,
ergonomics, usability, emission of electric and magnetic fields, energy
consumption and electrical and fire safety.
The environmental demands impose restrictions on the presence and use of
heavy metals, brominated and chlorinated flame retardants, CFCs (freons)
and chlorinated solvents, among other things. The product must be prepared
for recycling and the manufacturer is obliged to have an environmental policy
which must be adhered to in each country where the company implements its
operational policy.
The energy requirements include a demand that the computer and/or display,
after a certain period of inactivity, shall reduce its power consumption to a
lower level in one or more stages. The length of time to reactivate the
computer shall be reasonable for the user.
Labelled products must meet strict environmental demands, for example, in
respect of the reduction of electric and magnetic fields, physical and visual
ergonomics and good usability.
Below you will find a brief summary of the environmental requirements met
by this product. The complete environmental criteria document may be
ordered from:
TCO Development
SE-114 94 Stockholm, Sweden
Fax: +46 8 782 92 07
Email (Internet): development@tco.se
Current information regarding TCO’99 approved and labelled
products may also be obtained via the Internet, using the address:
http://www.tco-info.com/
Page 49

37
Flame retardants
Flame retardants are present in printed circuit boards, cables, wires,
casings and housings. Their purpose is to prevent, or at least to delay the
spread of fire. Up to 30% of the plastic in a computer casing can consist of
flame retardant substances. Most flame retardants contain bromine or
chloride, and those flame retardants are chemically related to another group
of environmental toxins, PCBs. Both the flame retardants containing bromine
or chloride and the PCBs are suspected of giving rise to severe health effects,
including reproductive damage in fish-eating birds and mammals, due to the
bio-accumulative* processes. Flame retardants have been found in human
blood and researchers fear that disturbances in foetus development may
occur.
The relevant TCO’99 demand requires that plastic components weighing more
than 25 grams must not contain flame retardants with organically bound
bromine or chlorine. Flame retardants are allowed in the printed circuit
boards since no substitutes are available.
Cadmium**
Cadmium is present in rechargeable batteries and in the colour-generating
layers of certain computer displays. Cadmium damages the nervous system
and is toxic in high doses. The relevant TCO’99 requirement states that
batteries, the colour-generating layers of display screens and the electrical
or electronics components must not contain any cadmium.
Mercury**
Mercury is sometimes found in batteries, relays and switches. Mercury
damages the nervous system and is toxic in high doses. TCO’99 requirement
states that batteries may not contain more than 25 ppm (part oer million) of
mercury. It also demands that no mercury is present in any of the electrical
or electronics components concerned with the display unit. Mercury is, for
the time being, permitted in the back light system of flat panel monitors as
there today is no commercially available alternative. TCO aims on removing
this exception when a mercury free alternative is available.
CFCs (freons)
The relevant TCO’99 requirement states that neither CFCs nor HCFCs may be
used during the manufacture and assembly of the product. CFCs (freons) are
sometimes used for washing printed circuit boards. CFCs break down ozone
and thereby damage the ozone layer in the stratosphere, causing increased
reception on earth of ultraviolet light with e.g. increased risks of skin cancer
(malignant melanoma) as a consequence.
Lead**
Lead can be found in picture tubes, display screens, solders and capacitors.
Lead damages the nervous system and in higher doses, causes lead poisoning.
The relevant TCO’99 requirement permits the inclusion of lead since no
replacement has yet been developed.
Environmental
requirements
* Bio-accumulative is defined as substances which accumulate within living organisms
** Lead, Cadmium and Mercury are heavy metals which are Bio-accumulative.
APPENDIX
Page 50

38
Service Information
The following parts are for use by IBM service, or IBM authorised dealers, to support the customer
warranty. Parts are for service use only.
P/NO Description Video Color MTM
22P7473 FRU Monitor Hybrid Stealth Black 6653-HG2
22P7474 FRU Monitor Hybrid Pearl White 6653-HW2
22P7475 FRU Video Analog Black
Interface
Cable
22P7476 FRU Video Digital Black
Interface
Cable
22P7477 FRU Stand Hybrid Stealth Black
22P7478 FRU Stand Hybrid Pearl White
22P7479 FRU Power Hybrid
Supply
Page 51

39
Compliances
Federal Communications Commission (FCC) Statement
IBM T545H color monitor
This equipment has been tested and found to comply with the limits for a Class B digital device,
pursuant to Part 15 of the FCC Rules. These limits are designed to provide reasonable protection
against harmful interference in a residential installation. This equipment generates, uses, and can
radiate radio frequency energy and, if not installed and used in accordance with the instructions, may
cause harmful interference to radio communications. However, there is no guarantee that interference
will not occur in a particular installation. If this equipment does cause harmful interference to radio or
television reception, which can be determined by turning the equipment off and on, the user is
encouraged to try to correct the interference by one or more of the following measures:
• Reorient or relocate the receiving antenna.
• Increase the separation between the equipment and receiver.
• Connect the equipment into an outlet on a circuit different from that to which the receiver is
connected.
• Consult an IBM authorized dealer or service representative for help.
Properly shielded and grounded cables and connectors must be used in order to meet FCC emission limits.
Proper cables and connectors are available from IBM authorized dealers. IBM is not responsible for any radio
or television interference caused by using other than recommended cables and connectors or by
unauthorized changes or modifications to this equipment. Unauthorized changes or modifications could void
the user’s authority to operate the equipment.
Power Cords
For your safety, IBM provides a power cord with a grounded attachment plug to use with this IBM
product. To avoid electrical shock, always use the power cord and plug with a properly grounded power
outlet.
IBM power cords used in the United States and Canada are listed by the Underwriter’s Laboratories
(UL) and certified by the Canadian Standards Association (CSA).
For units intended to be operated at 115 volts: Use a UL-listed and CSA-certified cord set consisting of
a minimum 18 AWG, Type SVT or SJT, three-conductor cord, a maximum of 15 feet in length and a
parallel blade, grounding-type attachment plug rated 15 amperes, 125 volts.
For units intended to be operated at 230 volts (U.S. use): Use a UL-listed and CSA-certified cord set
consisting of a minimum 18 AWG, type SVT or SJT, three-conductor cord, a maximum of 15 feet in
length and a tandem blade, grounding-type attachment plug rated 15 amperes, 250 volts.
Tested To Comply
With FCC Standard
FOR HOME OR OFFICE USE
APPENDIX
Page 52

40
For units intended to be operated at 230 volts (outside the U.S.): Use a cord set with a grounding-type
attachment plug. The cord set should have the appropriate safety approvals for the country in which
the equipment will be installed.
IBM power cords for a specific country or region are usually available only in that country or region.
Regions
IBM P/N
(1.8M)
IBM Fig. #
(Plug Stnd.)
4
(NEMA 5-15P)
125V
5
(NEMA 6-15P)
250V
6
(AS/NZS C112)
18
(CEE 7 - VII)
6952301
1838576
13F9939
13F9978
US, Canada, Mexico, Brazil, Costa Rica, Peru,
Colombia, Ecuador, Venezuela, Bolivia,
Panama, El Salvador, Honduras, Nicaragua,
Dominican Republic, Guatemala, Taiwan,
Saudi Arabia, Thailand, Phillipines, Japan
US, Canada, Mexico, Brazil, Costa Rica, Peru,
Colombia, Ecuador, Venezuela, Bolivia,
Panama, El Salvador, Honduras, Nicaragua,
Dominican Republic, Guatemala, Taiwan,
Saudi Arabia, Thailand, Phillipines, Japan
Australia, New Zealand
France, Germany, Sweden, Norway, Austria,
Netherlands, Finland, Belgium, Bosnia, Croatia,
Egypt, Greece, Hungary, Poland, Portugal,
Romania, Slovenia, Spain, Sweden, Turkey,
Iceland, Estonia, Lativa, Lithuania,
Luxembourg, Andorra, Guadeloupe, French
Guyana, Martinique, Monaco, New Caledonia,
Madagascar, Mauritius, Greece, Turkey,
Portugal, Albania, Armenia, Azerbaidjan,
Belarus, Bosnia, Crotia, Czech Republic,
Georgia, Hungary, Kazakhstan, Kyrhgistan,
Macedonia, Moldavia, Poland, Romania,
Serbia, Slovakia, Slovenia, Tajikistan,
Turkmenistan, Ukranine, Uzbekistan, Russia,
Lebanaon, Syria, Egypt, Iran, Algeria, Benin,
Cape Verde, Burkina Faso, Cameroon, Central
African Republic, Chad, Congo (Republic of),
Congo (Democratic Republic of), Djibouti,
Equatorial Guinea, Gabon, Guinea, Guinea
Bissau, Ivory Coast, Mali, Mauritania, Morocco,
Niger, Senegal, Togo, Tunisia, Angola,
Burundi, Ethiopia, Mozambique, Rwanda,
Somalia, Sao Tome, Eritrea, Mayotte,
Comoros, Reunion, French Polynesia,
Vanuatu, Wallis and Futuna, Korea, Vietnam,
Indonesia
Page 53

41
Industry Canada Class B emission compliance statement
This Class B digital apparatus complies with Canadian ICES-003.
Cet appareil numérique de la classe B respecte toutes les exigences du Réglement sur le matériel
brouilleur du Canada.
Avis de conformité à la réglementation d'Industrie Canada
Cet appareil numérique de classe B est conforme à la norme NMB-003 du Canada.
23
(BS 1363/A)
19
(DK2-5a)
25
(CEI 23-16)
2
(IRSM 2073)
62
(GB 2099.1)
32
(SI 32)
22
(SABS 164)
24
(1011-S24507)
14F0032
13F9996
14F0068
36L8879
02K0545
14F0086
14F0014
14F0050
UK, United Arab Emirate (Dubai), China (Hong
Kong S.A.R.), Singapore, Malaysia, Ireland,
Cyprus, Bahrain, Jordan, Kuwait, Oman,
Quatar, Yemen, Gambia, Malta, Botswana,
Seychelles, Nigeria, Ghana, Kenya, Liberia,
Malawi, Sierra Leone, Sudan, Tanzania,
Zambia, Zimbabwe
Denmark
Italy, Chile
Argentina, Uruguay, Paraguay,,
China
Israel
South Africa, India, Sri Lanka, Pakistan,
Uganda, Lesotho, Nambia, Swaziland
Switzerland, Lichtenstein
Models 6658-HWX comply with
TCO ’95 guidelines.
Models 6658-HWX comply with
TCO ’99 guidelines.
As an ENERGY STAR Partner,
IBM Corporation has determined
that this product meets the
ENERGY STAR guidelines for
energy efficiency.
APPENDIX
Page 54

42
Congratulations!
You have just purchased a TCO99 approved and labeled product! Your choice has provided you with a
product developed for professional use. Your purchase has also contributed to reducing the burden on
the environment and also to the further development of environmentally adapted electronics products.
Why do we have environmentally labeled computers?
In many countries, environmental labeling has become an established method for encouraging the
adaptation of goods and services to the environment. With the growing manufacture and usage of
electronic equipment throughout the world, there is a recognized concern for the materials and
substances used by electronic products with regards to their eventual recycling and disposal. By proper
selection of these materials and substances, the impact on the environment can be minimized. There
are also other characteristics of a computer, such as energy consumption levels, that are important
from the viewpoints of both the work (internal) and natural (external) environments. Electronic
equipment in offices is often left running continuously, resulting in unnecessary consumption of large
amounts of energy and additional power generation. From the standpoint of carbon emissions alone, it
is vital to save energy.
What does labeling involve?
This product meets the requirements for the TCO99 scheme which provides for international and
environmental labeling of personal computers. The labeling scheme was developed as a joint effort by
the TCO (The Swedish Confederation of Professional Employees), Svenska Naturskyddsforeningen
(The Swedish Society for Nature Conservation) and Statens Energimyndighet (The Swedish National
Energy Administration) Approval requirements cover a wide range of issues: environment, ergonomics,
emission of electric and magnetic fields, energy consumption and electrical safety. Environmental
criteria impose restrictions on the presence and use of heavy metals, brominated and chlorinated flame
retardants, CFCs (freons) and chlorinated solvents, and other materials.
The product must be prepared for recycling and the manufacturer is obliged to have an environmental
policy which must be adhered to in each country where the company implements its operational policy.
Energy requirements include a demand that the computer and/or display, after a certain period of
inactivity, shall reduce its power consumption to a lower level in one or more stages. The length of time
to reactivate the computer shall be reasonable for the user.
Labeled products must meet strict environmental demands, for example, in respect of the reduction of
electric and magnetic fields as well as physical and visual ergonomics.
Congratulations!
You have just purchased a TCO95 approved and labeled product! Your choice has provided you with a
product developed for professional use. Your purchase has also contributed to reducing the burden on the
environment and also to the further development of environmentally adapted electronics products.
Why do we have environmentally labeled computers?
In many countries, environmental labeling has become an established method for encouraging the adaptation
of goods and services to the environment. With the growing manufacture and usage of electronic equipment
throughout the world, there is a recognized concern for the materials and substances used by electronic
Page 55

43
products with regards to their eventual recycling and disposal. By proper selection of these materials and
substances, the impact on the environment can be minimized. There are also other characteristics of a
computer, such as energy consumption levels, that are important from the viewpoints of both the work
(internal) and natural (external) environments. Electronic equipment in offices is often left running
continuously, resulting in unnecessary consumption of large amounts of energy and additional power
generation. From the standpoint of carbon emissions alone, it is vital to save energy.
What does labeling involve?
This product meets the requirements for the TCO99 scheme which provides for international and
environmental labeling of personal computers. The labeling scheme was developed as a joint effort by the
TCO (The Swedish Confederation of Professional Employees), Svenska Naturskyddsforeningen (The
Swedish Society for Nature Conservation) and Statens Energimyndighet (The Swedish National Energy
Administration) Approval requirements cover a wide range of issues: environment, ergonomics, emission of
electric and magnetic fields, energy consumption and electrical safety. Environmental criteria impose
restrictions on the presence and use of heavy metals, brominated and chlorinated flame retardants, CFCs
(freons) and chlorinated solvents, and other materials. The product must be prepared for recycling and the
manufacturer is obliged to have an environmental policy which must be adhered to in each country where the
company implements its operational policy. Energy requirements include a demand that the computer and/or
display, after a certain period of inactivity, shall reduce its power consumption to a lower level in one or more
stages. The length of time to reactivate the computer shall be reasonable for the user. Labeled products must
meet strict environmental demands, for example, in respect of the reduction of electric and magnetic fields as
well as physical and visual ergonomics.
MPRII
This product complies with Swedish National Council for Metrology (MPR) standards issued in December
1999 (MPRII) for very low frequency (VLF) and Extremely low frequency (ELF) emissions.
Hinweise
Gemäß der Amtsblätter des BMPT Nm. 61Ú1991 und 6Ú1992 wird der Betreiber darauf aufmerksam
gemächt, daß die von ihm mit diesem Gerät zusammengestellte Anlage auch den technischen
Bestimmungen dieser Amtsblätter genügen muß.
Aus ergonomischen Gründen wird empfohlen, die Grundfarbe Blau nicht auf dunklem Untergrund zu
verwenden (schlechte Erkennbarkeit, Augenbelastung bei zu geringem Zeichenkontrast).
Aus ergonomischen Gründen sollten nur Darstellungen auf dunklem Hintergrund bei Vertikalfrequenzen ab 60
Hz (ohne Zeilensprung) benutzt werden.
Die Konvergenz des Bildes kann sich auf Grund des Magnetfeldes am Ort der Aufstellung aus der Korrekten
Grundeinstellung verändern. Zur Korrektur empfiehlt es sich deshalb, die Regler an der Frontseite für H STAT
und V STAT so einzustellen, daß die getrennt sichtbaren Farblinien für Rot. Grün und Blau bei z.B. der
Darstellung eines Buchstabens zur Deckung (Konvergenz) gelangen. Siehe hierzu auch die Erklärungen zu H
STAT und V STAT.
APPENDIX
Page 56

44
European Union (EU) Statement
This product is in conformity with the protection requirements of the EU Council Directive 89/366/ECC on
the approximation of the laws of the Member States relating to electromagnetic compatibility.
IBM can not accept responsibility for any failure to satisfy the protection requirements resulting from a nonrecommended modification of the product, including the fitting of non-IBM option cards.
This product has been tested and found to comply with the limits for Class B Information Technology
Equipment according to CISPR 22 Ú European Standard EN 55022. The limits for Class B equipment
were derived for typical residential environments to provide reasonable protection against interference with
licensed communication devices.
Properly shielded and grounded cables and connectors must be used in order to reduce the potential for
causing interference to radio and TV communications and to other electrical or electronic equipment. Such
cables and connectors are available from IBM authorised dealers.
In accordance with EN 50082-1 1992, Performance Criterion A:, it should be noted that in the presence of
certain electromagnetic fields, some screen jitter may be observed.
Spécifications de la CEE
Ce produit est conforme aux exigences de protection de la directive 89/ 336/ EEC du Conseil de l’UE sur le
rapprochement des lois des États membres en matière de compatibilité électromagnétique.
IBM ne peut accepter aucune responsabilité pour le manquement aux
exi gences de protection résultant d’une modification non recommandée du produit, y compris l’installation
de cartes autres que les cartes IBM.
Ce produit a été testé et il satisfait les conditions de l’équipement
informatique de Classe B en vertu de CISPR22 / Standard européen EN 55022. Les conditions pour
l’équipement de Classe B ont été définies en fonction d’un contexte résidentiel ordinaire afin de fournir une
protection raisonnable contre l’interférence d’appareils de communication autorisés.
Des câbles blindés et correctment reliés à la terre doivent être utilisés pour réduire les risques d’interférence
avec des communications radio et télévisées, ainsi qu’avec des équipements électriques ou électroniques.
Ces câbles et connecteurs sont disponibles auprés de vos revendeurs IBM agréés.
Conformément à la norme EN 50082- 1 1992 (Critére de Performance A), l’utilisateur doit être conscient du
fait qu’en présence de certains champs électroma gnétiques, l’image peut être instable.
Erklärung für die Europäische Union (EU)
Zulassungbescheinigunglaut dem Deutschen Gesetz uber die elektromagnetische Vertraglichkeit von
Geraten (EMVG) vom 30. August
1995 (bzw. der EMC EG Richtlinie 89/336):
Page 57

45
Dieses Gerat ist berechtigt in Ubereinstimmungmit dem Deutschen EMVG das EG-Konformitatszeichen - CE
- zu fuhren.
Verantwortlich fur die Konformitatserklarung nach Paragraph 5 des EMVG ist die:
IBM Deutschland Informationssysteme GmbH, 70548 Stuttgart.
Informationen in Hinsicht EMVG Paragraph 3 Abs. (2) 2:
EN 50082-1 Hinweis:
Wir dieses Gerat in einer industriellen Umgebung betrieben (wie in EN 50082-2 festgetlegt), dann kann es
dabei eventuell gestort werden. In solch einem FAll ist der Abstand bzw. die Abschirmungzu der industriellen
Storquelle zu vergroern.
Anmerkung:
Um die Einhaltung des EMVG sicherzustellen sind die Gerate, wie in den IBM Handbuchern angegeben, zu
installieren und zubetreiben.
Declaración de la Unión Europea (UE)
Este producto satisface los requisitos de protección del Consejo de la UE, Directiva 89/ 336/ CEE en lo que a
la le gislatura de los Estados Miembros sobre compatibilidad electroma gnética se refiere.
IBM no puede aceptar responsabilidad al guna si este producto deja de satisfacer dichos requisitos de
protección como resultado de una modificación no recomendada del producto, inclu yendo el ajuste de
tarjetas de opción que no sean IBM.
Este producto ha sido probado y satisface los límites para Equipos Informáticos Clase B de conformidad con
el Estándar CISPR22 y el Estándar Europeo EN 55022. Los límites para los equipos de Clase B se han
establecido para entornos residenciales típicos a fin de proporcionar una protección razonable contra las
interferencias con dispositivos de comunicación licenciados.
Se deben utilizar concetores y cables debidamente protegidos y conectados a tierra a fin de reducir las
posibilidades de que se produzcan interferencias con comunicaciones por radio o televisión y otros
equipos eléctricos o electrónicos. Este tipo de cables y conectores pueden adquirirse en
concesionarios autorizados de IBM.
De acuerdo con la norma EN 50082- 1 1992, Performance Criterion A, habría que destacar que en
presencia de determinados campos electroma gnéticos, podría observarse una marcada inestabilidad
e la imagen.
Dichiarazione di conformità dell’Unione Europea (EU)
Questo prodotto è conforme alle normative di protezione ai sensi della Direttiva del Consi glio
dell’Unione Europea 89/ 336/ CEE sull’armonizzazione le gislativa degli stati membri in materia di
compatibilità elettromagnetica.
Das Gerat erfullt die Schutzanforderungen nach EN 50082-1 und EN 55022 Klasse B.
APPENDIX
Page 58

46
IBM non accetta responsabilità alcuna per la mancata conformità alle
normative di protezione dovuta a modifiche non consi gliate al prodotto, compresa l’installazione di
schede e componenti di marca diversa da IBM.
Le prove effettuate sul presente prodotto hanno accertato che esso rientra nei limiti stabiliti per le le
apparecchiature di informatica Classe B ai sensi del CISPR 22 / Norma Europea EN 55022. I limiti
delle apparecchiature della Classe B sono stati stabiliti al fine di fornire ra gionevole protezione da
interferenze mediante dispositivi di comunicazione in concessione in ambienti residenziali tipici.
Utilizzare cavi e connettori colle gati a terra per ridurre il rischio potenziale di interferenza delle
comunicazioni radiotelevisive e di a; tri apparecchi elettrici o elettronici. I cavi sono disponibili presso i
rivenditori IBM.
In accordo con quando previsto nel documento EN 50082- 1 1992,
Performance Criterion A, é importante sottolineare che in presenza di
determinati campi elettroma gnetici é possibile che si verifichi un certo
tremolio delle immagini.
Europeiska unionen (EU)
Denna produkt har testats och följer gränsvärdena för Klass B Information Technology Equipment
enligt CISPR 22 Ú Europeisk standard EN 55022. Gränsvärden för Klass B-utrutning utgår frår vanliga
bostadsomräden för att ge ett rimligt skydd mot störningar i kommunikationsenheter.
Korrekt avskärmade och jordade kablar och kontakter måste användas för att minska risken för
störningar i radio- och TV-kommunikationer och annan elektrisk utrustning. Sådana kablar och
kontakter finns tillgängliga hos auktoriserade IBM-återförsäljare.
I enlighet med EN 50082-1 1992, Performance Criterion A påpekas följande: I närheten av en del
elektromagnetiska fält kan vissa bildstörningar uppstår på skårmen.
Deutsche EMV-Direktive
(electromagnetische Verträglichkeit)
Dieses Gerät ist berechtigt in Übereinstimmung mit dem deutschen EMVG vom 9.Nov.92 das EGKonformitätszeichen zu führen.
Der Aussteller der Konformitätserklärung ist die IBM UK, Greenock.
Dieses Gerät erfüllt die Bedingungen der EN 55022 Klasse B.
Page 59

47
VCCI Class B Notice (Japan Only)
This equipment complies with the limits for a Class B digital device (devices used in or adjacent to a
residential environment) and conforms to the standards for information technology equipment that are
set by the Voluntary Control Council for Interference for preventing radio frequency interference in
residential areas.
Japanese statement of compliance for products less than or equal to 20 A per phase:
Mercury Statements
The fluorescent lamp in the liquid crystal display contains mercury. Dispose of it as required by local
ordinances and regulations.
APPENDIX
 Loading...