

Page 1

ThinkPadT520,T520i,andW520
HardwareMaintenanceManual
Page 2

Page 3

ThinkPadT520,T520i,andW520
HardwareMaintenanceManual
Page 4

Note
Beforeusingthisinformationandtheproductitsupports,besuretoreadthegeneralinformationunder
AppendixA“Notices”onpage165
.
SecondEdition(March2011)
©CopyrightLenovo2011.
LIMITEDANDRESTRICTEDRIGHTSNOTICE:IfdataorsoftwarearedeliveredpursuantaGeneralServices
Administration“GSA”contract,use,reproduction,ordisclosureissubjecttorestrictionssetforthinContractNo.
GS-35F-05925.
Page 5

Contents
Aboutthismanual............v
Chapter1.Safetyinformation.....1
Generalsafety................1
Electricalsafety...............2
Safetyinspectionguide............3
Handlingdevicesthataresensitivetoelectrostatic
discharge..................3
Groundingrequirements............4
Safetynotices(multilingualtranslations)......4
Lasercompliancestatement(multilingual
translations)................17
Chapter2.Importantservice
information..............23
StrategyforreplacingFRUs.........23
Strategyforreplacingaharddiskdrive...24
Importantnoticeforreplacingasystem
board................24
Howtouseerrormessage........24
StrategyforreplacingFRUsforCTO,CMV,and
GAV...................24
Productdenition............24
FRUidenticationforCTO,CMV ,andGAV
products...............25
Powermanagement............38
Screenblankmode...........38
Sleep(standby)mode..........38
Hibernationmode...........39
Symptom-to-FRUindex...........39
Numericerrorcodes..........40
Errormessages............41
Beepsymptoms............42
No-beepsymptoms...........43
LCD-relatedsymptoms.........43
Intermittentproblems..........43
Undeterminedproblems.........44
Chapter5.Installingandconguring
RAID..................45
SupportedRAIDcongurations........45
ConguringthesystemUEFIBIOStoenable
embeddedSATARAIDfunctionality......45
CreatingRAIDvolumes...........45
DeletingRAIDvolumes...........46
Chapter6.Statusindicators.....47
Chapter7.Fnkeycombinations...51
Chapter3.Generalcheckout.....27
Whattodorst..............27
Checkoutguide..............28
DiagnosticsusingPC-DoctorforDOS....28
LenovoThinkVantageT oolbox.......30
FRUtests...............31
Powersystemcheckout...........32
Checkingtheacadapter.........33
Checkingoperationalcharging......33
Checkingthebatterypack........33
Checkingthebackupbattery.......34
Chapter4.Relatedservice
information..............35
RestoringthefactorycontentsbyusingRecovery
DiscSet.................35
Passwords................36
Power-onpassword...........36
Hard-diskpassword...........36
Supervisorpassword..........37
Howtoremovethepower-onpassword...37
Howtoremovethehard-diskpassword...37
Chapter8.FRUreplacement
notices................55
Screwnotices...............55
Retainingserialnumbers...........56
Restoringtheserialnumberofthesystem
unit.................56
RetainingtheUUID...........56
ReadingorwritingtheECAinformation...57
Chapter9.Removingandreplacinga
FRU..................59
BeforeservicingThinkPadT520,T520i,and
W520..................60
1010Batterypack.............60
1020SerialUltrabayEnhanceddeviceortravel
bezel..................61
1030DIMMslotcover............62
1040DIMM(bottomslot)...........63
1050Harddiskdriveslotcover,harddiskdrive
(HDD)andHDDrubberrailsorsolidstatedrive
(SSD)andstorageconverter.........65
1060Keyboard..............67
1070DIMM(upperslot)...........70
1080PCIExpressMiniCardforwirelessLAN..71
©CopyrightLenovo2011
iii
Page 6

1090PCIExpressMiniCardforwirelessWAN..73
1100Keyboardbezelassembly........75
1110Bluetoothdaughtercard(BDC-3.0)....77
1120Backupbattery............78
1130SmartCardorSmartCarddummyspacer.79
1140Speakerassembly...........81
1150Thermalmodule............83
1160CPU................85
1170LCDunit...............86
1180Basecoverassembly..........89
1190I/Osubcard.............91
1200Systemboardassembly,magnesium
structureframe,andmodemdaughtercard
(MDC)..................92
2010LCDbezelassembly..........96
2020LEDsubcard.............97
2030Integratedcamera...........98
2040LCDcable,cameracable,LCDpanel,and
hinges..................98
2050AntennakitandLCDrearcoverassembly..101
Chapter10.Locations.......103
Frontview................103
Rearview.................104
Bottomview...............105
Chapter11.Partslist........107
Overall..................108
LCDFRUs................149
Keyboard.................156
Miscellaneousparts............157
ACadapters...............158
Powercords...............159
Recoverydiscs..............160
Windows7HomeBasic(32bit)DVDs....160
Windows7HomePremium(64bit)DVDs..161
Windows7Professional(32bit)DVDs....162
Windows7Professional(64bit)DVDs....163
Commonservicetools...........164
AppendixA.Notices........165
Electronicemissionsnotices.........166
Trademarks................166
ivThinkPadT520,T520i,andW520HardwareMaintenanceManual
Page 7

Aboutthismanual
ThismanualcontainsserviceandreferenceinformationforthefollowingThinkPad®products.
ThinkPadT520andT520i
MT4239,4240,4241,4242,4243,4244,and4246
ThinkPadW520
MT4249,4260,4270,4276,4281,4282,and4284
Usethismanualalongwiththeadvanceddiagnosticteststotroubleshootproblems.
Important:ThismanualisintendedonlyfortrainedservicetechnicianswhoarefamiliarwithThinkPad
products.Usethismanualalongwiththeadvanceddiagnosticteststotroubleshootproblemseffectively.
BeforeservicingaThinkPadproduct,besuretoreadalltheinformationunderChapter1“Safetyinformation”
onpage1
andChapter2“Importantserviceinformation”onpage23.
©CopyrightLenovo2011
v
Page 8

viThinkPadT520,T520i,andW520HardwareMaintenanceManual
Page 9

Chapter1.Safetyinformation
Thischapterpresentsfollowingsafetyinformationthatyouneedtobefamiliarwithbeforeyouservice
aThinkPadNotebook.
•“Generalsafety”onpage1
•“Electricalsafety”onpage2
•“Safetyinspectionguide”onpage3
•“Handlingdevicesthataresensitivetoelectrostaticdischarge”onpage3
•“Groundingrequirements”onpage4
•“Safetynotices(multilingualtranslations)”onpage4
•“Lasercompliancestatement(multilingualtranslations)”onpage17
Generalsafety
Followtheserulestoensuregeneralsafety:
•Observegoodhousekeepingintheareaofthemachinesduringandaftermaintenance.
•Whenliftinganyheavyobject:
1.Makesurethatyoucanstandsafelywithoutslipping.
2.Distributetheweightoftheobjectequallybetweenyourfeet.
3.Useaslowliftingforce.Nevermovesuddenlyortwistwhenyouattempttolift.
4.Liftbystandingorbypushingupwithyourlegmuscles;thisactionremovesthestrainfromthe
musclesinyourback.Donotattempttoliftanyobjectthatweighsmorethan16kg(35lb)orthat
youthinkistooheavyforyou.
•Donotperformanyactionthatcauseshazardstothecustomer,orthatmakestheequipmentunsafe.
•Beforeyoustartthemachine,makesurethatotherservicetechniciansandthecustomer'spersonnelare
notinahazardousposition.
•Placeremovedcoversandotherpartsinasafeplace,awayfromallpersonnel,whileyouareservicing
themachine.
•Keepyourtoolcaseawayfromwalkareassothatotherpeoplewillnottripoverit.
•Donotwearlooseclothingthatcanbetrappedinthemovingpartsofamachine.Makesurethatyour
sleevesarefastenedorrolledupaboveyourelbows.Ifyourhairislong,fastenit.
•Inserttheendsofyournecktieorscarfinsideclothingorfastenitwithanonconductiveclip,about8
centimeters(3inches)fromtheend.
•Donotwearjewelry,chains,metal-frameeyeglasses,ormetalfastenersforyourclothing.
Attention:Metalobjectsaregoodelectricalconductors.
•Wearsafetyglasseswhenyouarehammering,drilling,soldering,cuttingwire,attachingsprings,using
solvents,orworkinginanyotherconditionsthatmightbehazardoustoyoureyes.
•Afterservice,reinstallallsafetyshields,guards,labels,andgroundwires.Replaceanysafetydevice
thatiswornordefective.
•Reinstallallcoverscorrectlybeforereturningthemachinetothecustomer.
•Fanlouversonthemachinehelptopreventoverheatingofinternalcomponents.Donotobstructfan
louversorcoverthemwithlabelsorstickers.
©CopyrightLenovo2011
1
Page 10

Electricalsafety
Observethefollowingruleswhenworkingonelectricalequipment.
Important:Useonlyapprovedtoolsandtestequipment.Somehandtoolshavehandlescoveredwithasoft
materialthatdoesnotinsulateyouwhenworkingwithliveelectricalcurrents.Manycustomershave,near
theirequipment,rubberoormatsthatcontainsmallconductiveberstodecreaseelectrostaticdischarges.
Donotusethistypeofmattoprotectyourselffromelectricalshock.
•Findtheroomemergencypower-off(EPO)switch,disconnectingswitch,orelectricaloutlet.Ifanelectrical
accidentoccurs,youcanthenoperatetheswitchorunplugthepowercordquickly.
•Donotworkaloneunderhazardousconditionsornearequipmentthathashazardousvoltages.
•Disconnectallpowerbefore:
–Performingamechanicalinspection
–Workingnearpowersupplies
–Removingorinstallingmainunits
•Beforeyoustarttoworkonthemachine,unplugthepowercord.Ifyoucannotunplugit,askthecustomer
topower-offthewallboxthatsuppliespowertothemachine,andtolockthewallboxintheoffposition.
•Ifyouneedtoworkonamachinethathasexposedelectricalcircuits,observethefollowingprecautions:
–Ensurethatanotherperson,familiarwiththepower-offcontrols,isnearyou.
Attention:Anotherpersonmustbetheretoswitchoffthepower,ifnecessary.
–Useonlyonehandwhenworkingwithpowered-onelectricalequipment;keeptheotherhandinyour
pocketorbehindyourback.
Attention:Anelectricalshockcanoccuronlywhenthereisacompletecircuit.Byobservingtheabove
rule,youmaypreventacurrentfrompassingthroughyourbody.
–Whenusingtesters,setthecontrolscorrectlyandusetheapprovedprobeleadsandaccessoriesfor
thattester.
–Standonsuitablerubbermats(obtainedlocally,ifnecessary)toinsulateyoufromgroundssuchas
metaloorstripsandmachineframes.
Observethespecialsafetyprecautionswhenyouworkwithveryhighvoltages;Instructionsforthese
precautionsareinthesafetysectionsofmaintenanceinformation.Useextremecarewhenmeasuring
highvoltages.
•Regularlyinspectandmaintainyourelectricalhandtoolsforsafeoperationalcondition.
•Donotusewornorbrokentoolsandtesters.
•Neverassumethatpowerhasbeendisconnectedfromacircuit.First,checkthatithasbeenpoweredoff.
•Alwayslookcarefullyforpossiblehazardsinyourworkarea.Examplesofthesehazardsaremoistoors,
nongroundedpowerextensioncables,powersurges,andmissingsafetygrounds.
•Donottouchliveelectricalcircuitswiththereectivesurfaceofaplasticdentalmirror.Thesurfaceis
conductive;suchtouchingcancausepersonalinjuryandmachinedamage.
•Donotservicethefollowingpartswiththepoweronwhentheyareremovedfromtheirnormaloperating
placesinamachine:
–Powersupplyunits
–Pumps
–Blowersandfans
–Motorgenerators
–Similarunitstolistedabove
Thispracticeensurescorrectgroundingoftheunits.
•Ifanelectricalaccidentoccurs:
–Usecaution;donotbecomeavictimyourself.
–Switchoffpower.
2ThinkPadT520,T520i,andW520HardwareMaintenanceManual
Page 11

–Sendanotherpersontogetmedicalaid.
Safetyinspectionguide
Thepurposeofthisinspectionguideistoassistyouinidentifyingpotentiallyunsafeconditions.Aseach
machinewasdesignedandbuilt,requiredsafetyitemswereinstalledtoprotectusersandservicetechnicians
frominjury.Thisguideaddressesonlythoseitems.Y oushouldusegoodjudgmenttoidentifypotential
safetyhazardsduetoattachmentofnon- ThinkPadfeaturesoroptionsnotcoveredbythisinspectionguide.
Ifanyunsafeconditionsarepresent,youmustdeterminehowserioustheapparenthazardcouldbeand
whetheryoucancontinuewithoutrstcorrectingtheproblem.
Considertheseconditionsandthesafetyhazardstheypresent:
•Electricalhazards,especiallyprimarypower(primaryvoltageontheframecancauseseriousorfatal
electricalshock)
•Explosivehazards,suchasadamagedCRTfaceorabulgingcapacitor
•Mechanicalhazards,suchaslooseormissinghardware
Todeterminewhetherthereareanypotentiallyunsafeconditions,usethefollowingchecklistatthebeginning
ofeveryservicetask.Beginthecheckswiththepoweroff,andthepowercorddisconnected.
Checklist:
1.Checkexteriorcoversfordamage(loose,broken,orsharpedges).
2.Poweroffthecomputer.Disconnectthepowercord.
3.Checkthepowercordfor:
a.Athird-wiregroundconnectoringoodcondition.Useametertomeasurethird-wireground
continuityfor0.1ohmorlessbetweentheexternalgroundpinandtheframeground.
b.Thepowercordshouldbethetypespeciedinthepartslist.
c.Insulationmustnotbefrayedorworn.
4.Checkforcrackedorbulgingbatteries.
5.Removethecover.
6.Checkforanyobviousnon-ThinkPadalterations.Usegoodjudgmentastothesafetyofany
non-ThinkPadalterations.
7.Checkinsidetheunitforanyobviousunsafeconditions,suchasmetallings,contamination,wateror
otherliquids,orsignsofreorsmokedamage.
8.Checkforworn,frayed,orpinchedcables.
9.Checkthatthepower-supplycoverfasteners(screwsorrivets)havenotbeenremovedortamperedwith.
Handlingdevicesthataresensitivetoelectrostaticdischarge
Anycomputerpartcontainingtransistorsorintegratedcircuits(ICs)shouldbeconsideredsensitiveto
electrostaticdischarge(ESD.)ESDdamagecanoccurwhenthereisadifferenceinchargebetweenobjects.
ProtectagainstESDdamagebyequalizingthechargesothatthemachine,thepart,theworkmat,andthe
personhandlingthepartareallatthesamecharge.
Notes:
1.Useproduct-specicESDprocedureswhentheyexceedtherequirementsnotedhere.
2.MakesurethattheESDprotectivedevicesyouusehavebeencertied(ISO9000)asfullyeffective.
Chapter1.Safetyinformation3
Page 12

WhenhandlingESD-sensitiveparts:
•Keepthepartsinprotectivepackagesuntiltheyareinsertedintotheproduct.
•Avoidcontactwithotherpeople.
•Wearagroundedwriststrapagainstyourskintoeliminatestaticonyourbody.
•Preventthepartfromtouchingyourclothing.Mostclothingisinsulativeandretainsachargeevenwhen
youarewearingawriststrap.
•Useagroundedworkmattoprovideastatic-freeworksurface.Thematisespeciallyusefulwhen
handlingESD-sensitivedevices.
•Selectagroundingsystem,suchasthoselistedbelow,toprovideprotectionthatmeetsthespecic
servicerequirement.
Note:TheuseofagroundingsystemtoguardagainstESDdamageisdesirablebutnotnecessary.
–AttachtheESDgroundcliptoanyframeground,groundbraid,orgreen-wireground.
–Whenworkingonadouble-insulatedorbattery-operatedsystem,useanESDcommongroundor
referencepoint.Y oucanusecoaxorconnector-outsideshellsonthesesystems.
–Usetheroundgroundprongoftheacplugonac-operatedcomputers.
Groundingrequirements
Electricalgroundingofthecomputerisrequiredforoperatorsafetyandcorrectsystemfunction.Proper
groundingoftheelectricaloutletcanbeveriedbyacertiedelectrician.
Safetynotices(multilingualtranslations)
Thesafetynoticesinthissectionareprovidedinthefollowinglanguages:
•English
•Arabic
•BrazilianPortuguese
•French
•German
•Hebrew
•Japanese
•Korean
•Spanish
•TraditionalChinese
DANGER
BeforethecomputerispoweredonafterFRUreplacement,makesureallscrews,springs,andothersmall
partsareinplaceandarenotleftlooseinsidethecomputer.Verifythisbyshakingthecomputerandlistening
forrattlingsounds.Metallicpartsormetalakescancauseelectricalshorts.
4ThinkPadT520,T520i,andW520HardwareMaintenanceManual
Page 13

DANGER
Somestandbybatteriescontainasmallamountofnickelandcadmium.Donotdisassembleastandbybattery,
rechargeit,throwitintoreorwater ,orshort-circuitit.Disposeofthebatteryasrequiredbylocalordinances
orregulations.Useonlythebatteryintheappropriatepartslisting.Useofanincorrectbatterycanresult
inignitionorexplosionofthebattery.
DANGER
Thebatterypackcontainssmallamountsofnickel.Donotdisassembleit,throwitintoreorwater,or
short-circuitit.Disposeofthebatterypackasrequiredbylocalordinancesorregulations.Useonlythe
batteryintheappropriatepartslistingwhenreplacingthebatterypack.Useofanincorrectbatterycanresult
inignitionorexplosionofthebattery.
DANGER
Thelithiumbatterycancauseare,anexplosion,orasevereburn.Donotrechargeit,removeitspolarized
connector,disassembleit,heatitabove100°C(212°F),incinerateit,orexposeitscellcontentstowater.
Disposeofthebatteryasrequiredbylocalordinancesorregulations.Useonlythebatteryintheappropriate
partslisting.Useofanincorrectbatterycanresultinignitionorexplosionofthebattery.
DANGER
IftheLCDbreaksandtheuidfrominsidetheLCDgetsintoyoureyesoronyourhands,immediatelywash
theaffectedareaswithwaterforatleast15minutes.Seekmedicalcareifanysymptomsfromtheuidare
presentafterwashing.
DANGER
Toavoidshock,donotremovetheplasticcoverthatprotectsthelowerpartoftheinvertercard.
DANGER
Thoughthemainbatterieshavelowvoltage,ashortedorgroundedbatterycanproduceenoughcurrentto
burnpersonnelorcombustiblematerials.
Chapter1.Safetyinformation5
Page 14
DANGER
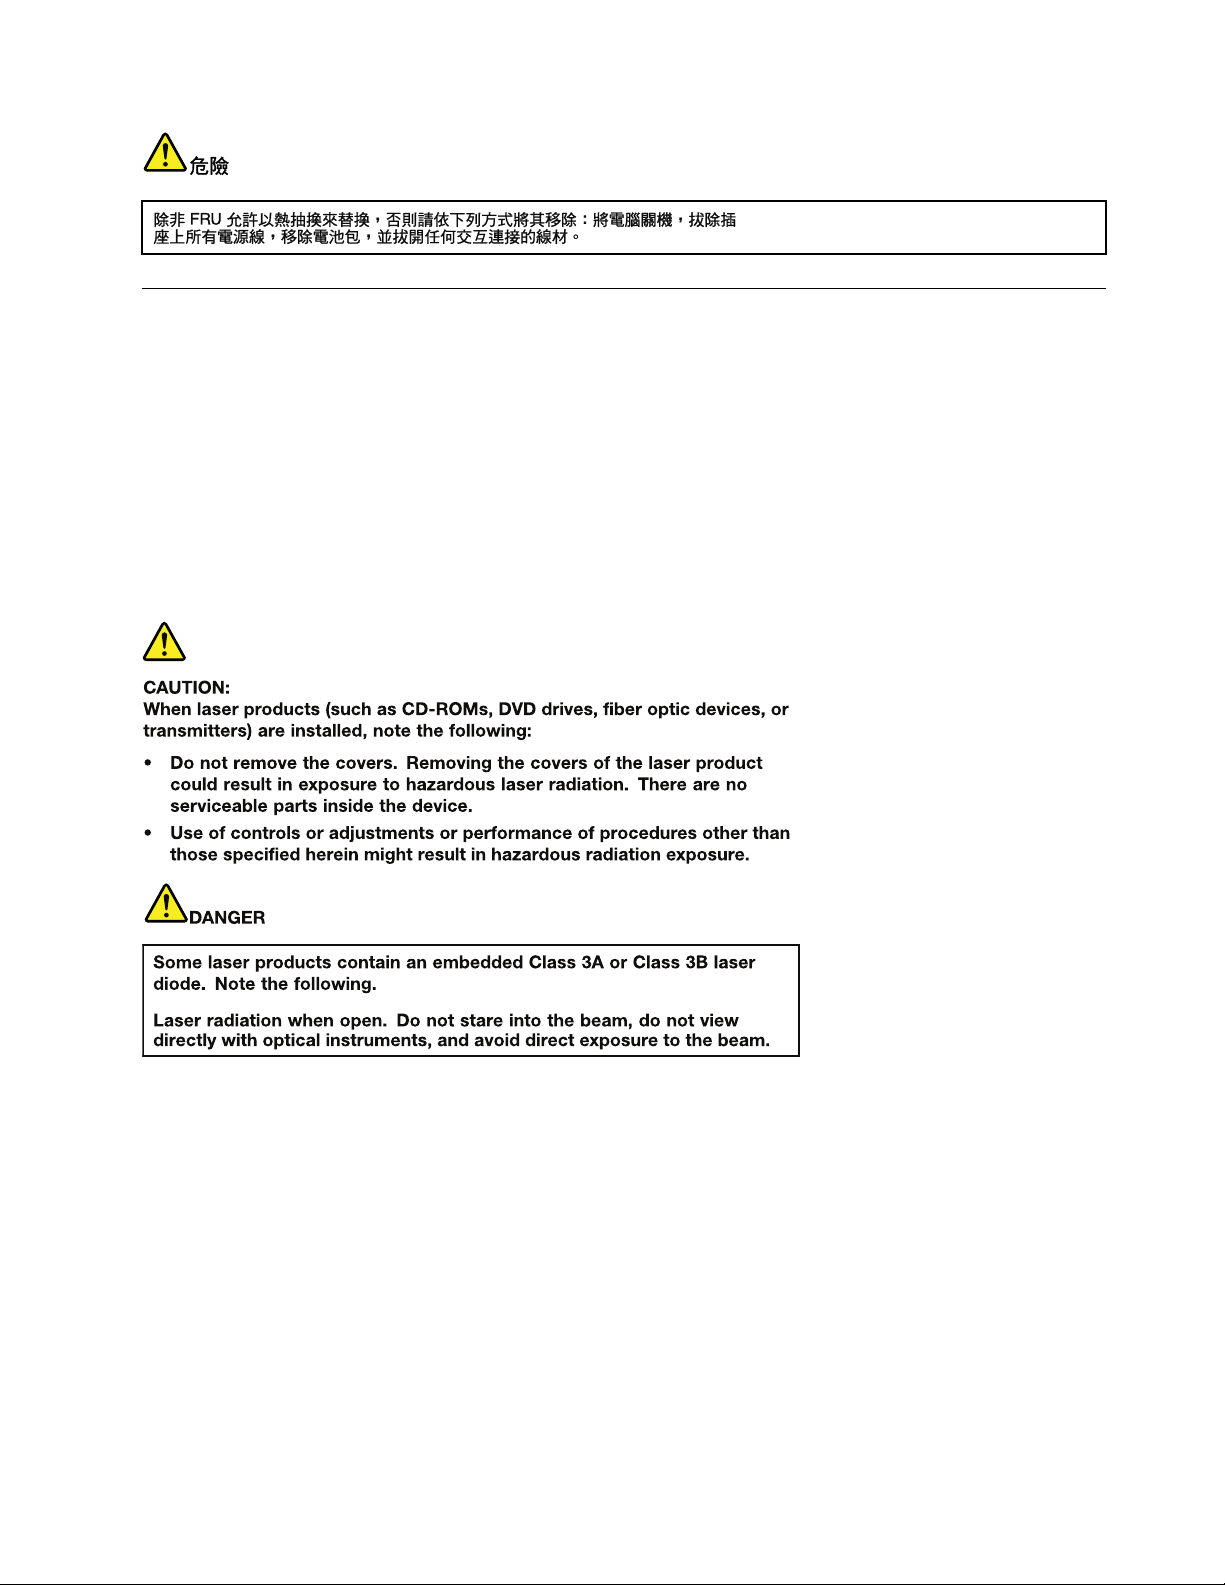
UnlesshotswapisallowedfortheFRUbeingreplaced,doasfollowsbeforeremovingit:poweroffthe
computer,unplugallpowercordsfromelectricaloutlets,removethebatterypack,anddisconnectany
interconnectingcables.
6ThinkPadT520,T520i,andW520HardwareMaintenanceManual
Page 15
PERIGO
AntesdeligarocomputadorapósasubstituiçãodaFRU,certique-sedequetodososparafusos,molase
outraspeçaspequenasestejamnolugarenãoestejamsoltosdentrodocomputador.Veriqueissosacudindo
ocomputadoreprocurandoouvirsonsdepeçassoltas.Peçasmetálicasoulascasdemetalpodemcausar
curto-circuito.
PERIGO
Algumasbateriasreservacontêmumapequenaquantidadedeníquelecádmio.Nãodesmonteumabateria
reserva,recarregue-a,jogue-anofogoounaágua,oudeixe-aentraremcurto-circuito.Descarteabateria
conformerequeridopelasleisouregulamentoslocais.Usesomenteabaterianasparteslistadasapropriadas.
Ousodeumabateriaincorretapoderesultaremcombustãoouexplosãodabateria.
PERIGO
Opacotedabateriacontémumapequenaquantidadedeníquel.Nãoodesmonte,jogue-onofogoouna
água,oudeixe-oentraremcurto-circuito.Descarteopacotedabateriaconformerequeridopelasleisou
regulamentoslocais.Usesomenteabaterianasparteslistadasapropriadasaosubstituiropacotedabateria.
Ousodeumabateriaincorretapoderesultaremcombustãoouexplosãodabateria.
PERIGO
Chapter1.Safetyinformation7
Page 16
Abateriadelítiopodecausarincêndio,explosãoougravesqueimaduras.Nãoarecarregue,removaseu
conectorpolarizado,desmonte-a,aqueça-aacimade100°C(212°F),incinere-a,ouexponhaoconteúdode
suacélulaàágua.Descarteabateriaconformerequeridopelasleisouregulamentoslocais.Usesomente
abaterianasparteslistadasapropriadas.Ousodeumabateriaincorretapoderesultaremcombustão
ouexplosãodabateria.
PERIGO
SeoLCDquebrareouidodedentrodeleentraremcontatocomseusolhosoucomsuasmãos,laveas
áreasafetadasimediatamentecomáguadurantepelomenos15minutos.Procurecuidadosmédicossealgum
sintomacausadopelouidosurgirapósalavagem.
PERIGO
Paraevitarchoqueelétrico,nãoremovaacapaplásticaqueprotegeaparteinferiordaplacainversora.
PERIGO
Emboraasprincipaisbateriaspossuambaixavoltagem,umabateriaemcurto-circuitoouaterradapode
produzircorrenteobastanteparaqueimarmateriaisdepessoalouinamáveis.
PERIGO
AmenosqueumahotswapsejapermitidaparaaFRUqueestásendosubstituída,façaoseguinteantesde
removê-la:desligueocomputador,desconectetodososcabosdeenergiadastomadas,removaopacotede
bateriasedesconectequaisquercabosdeinterconexão.
DANGER
Avantderemettrel'ordinateursoustensionaprèsremplacementd'uneunitéenclientèle,vériezquetousles
ressorts,visetautrespiècessontbienenplaceetbienxées.Pourcefaire,secouezl'unitéetassurez-vous
qu'aucunbruitsuspectneseproduit.Despiècesmétalliquesoudescopeauxdemétalpourraientcauser
uncourt-circuit.
DANGER
8ThinkPadT520,T520i,andW520HardwareMaintenanceManual
Page 17
Certainesbatteriesdesecourscontiennentdunickeletducadmium.Nelesdémontezpas,nelesrechargez
pas,nelesexposezniaufeuniàl'eau.Nelesmettezpasencourt-circuit.Pourlesmettreaurebut,
conformez-vousàlaréglementationenvigueur.Lorsquevousremplacezlapiledesauvegardeoucellede
l'horlogetempsréel,veillezàn'utiliserquelesmodèlescitésdanslalistedepiècesdétachéesadéquate.Une
batterieouunepileinappropriéerisquedeprendrefeuoud'exploser.
DANGER
Labatteriecontientdunickel.Neladémontezpas,nel'exposezniaufeuniàl'eau.Nelamettezpasen
court-circuit.Pourlamettreaurebut,conformez-vousàlaréglementationenvigueur .Lorsquevousremplacez
labatterie,veillezàn'utiliserquelesmodèlescitésdanslalistedepiècesdétachéesadéquate.Eneffet,une
batterieinappropriéerisquedeprendrefeuoud'exploser.
DANGER
Lapiledesauvegardecontientdulithium.Elleprésentedesrisquesd'incendie,d'explosionoudebrûlures
graves.Nelarechargezpas,neretirezpassonconnecteurpolariséetneladémontezpas.Nel'exposezpasà
unetemperaturesupérieureà100°C,nelafaitespasbrûleretn'enexposezpaslecontenuàl'eau.Mettezla
pileaurebutconformémentàlaréglementationenvigueur.Unepileinappropriéerisquedeprendrefeuou
d'exploser.
DANGER
Silepanneaud'afchageàcristauxliquidessebriseetquevousrecevezdanslesyeuxousurlesmainsune
partieduuide,rincez-lesabondammentpendantaumoinsquinzeminutes.Consultezunmédecinsides
symptômespersistentaprèslelavage.
DANGER
And'évitertoutrisquedechocélectrique,neretirezpaslecacheenplastiqueprotégeantlapartieinférieure
delacarted'alimentation.
DANGER
Bienquelevoltagedesbatteriesprincipalessoitpeuélevé,lecourt-circuitoulamiseàlamassed'une
batteriepeutproduiresufsammentdecourantpourbrûlerdesmatériauxcombustiblesoucauserdes
brûlurescorporellesgraves.
Chapter1.Safetyinformation9
Page 18
DANGER
Sileremplacementàchaudn'estpasautorisépourl'unitéremplaçablesursitequevousremplacez,
procédezcommesuitavantderetirerl'unité:mettezl'ordinateurhorstension,débrancheztousles
cordonsd'alimentationdesprisesdecourant,retirezleblocdebatterieetdéconnecteztouslescâbles
d'interconnexion.
VORSICHT
BevornacheinemFRU-AustauschderComputerwiederangeschlossenwird,mußsichergestelltwerden,daß
keineSchrauben,FedernoderandereKleinteilefehlenoderimGehäusevergessenwurden.DerComputermuß
geschütteltundaufKlappergeräuschegeprüftwerden.Metallteileoder-splitterkönnenKurzschlüsseerzeugen.
VORSICHT
DieBereitschaftsbatterie,diesichunterdemDiskettenlaufwerkbendet,kanngeringeMengenNickel
undCadmiumenthalten.SiedarfnurdurchdieVerkaufsstelleoderdenIBMKundendienstausgetauscht
werden.Siedarfnichtzerlegt,wiederaufgeladen,kurzgeschlossen,oderFeueroderWasserausgesetzt
werden.DieBatteriekannschwereVerbrennungenoderVerätzungenverursachen.BeiderEntsorgungdie
örtlichenBestimmungenfürSondermüllbeachten.BeimErsetzenderBereitschafts-oderSystembatterienur
BatteriendesTypsverwenden,derinderErsatzteillisteaufgeführtist.DerEinsatzfalscherBatterienkann
zuEntzündungoderExplosionführen.
VORSICHT
AkkusenthaltengeringeMengenvonNickel.Siedürfennichtzerlegt,wiederaufgeladen,kurzgeschlossen,
oderFeueroderWasserausgesetztwerden.BeiderEntsorgungdieörtlichenBestimmungenfürSondermüll
beachten.BeimErsetzenderBatterienurBatteriendesT ypsverwenden,derinderErsatzteillisteaufgeführt
ist.DerEinsatzfalscherBatterienkannzuEntzündungoderExplosionführen.
VORSICHT
DieSystembatterieisteineLithiumbatterie.Siekannsichentzünden,explodierenoderschwereVerbrennungen
hervorrufen.BatteriendiesesTypsdürfennichtaufgeladen,zerlegt,über100°Cerhitztoderverbranntwerden.
AuchdarfihrInhaltnichtmitWasserinVerbindunggebrachtoderderzurrichtigenPolungangebrachte
Verbindungssteckerentferntwerden.BeiderEntsorgungdieörtlichenBestimmungenfürSondermüll
beachten.BeimErsetzenderBatterienurBatteriendesT ypsverwenden,derinderErsatzteillisteaufgeführt
ist.DerEinsatzfalscherBatterienkannzuEntzündungoderExplosionführen.
10ThinkPadT520,T520i,andW520HardwareMaintenanceManual
Page 19
VORSICHT
DieLeuchtstoffröhreimLCD-BildschirmenthältQuecksilber.BeiderEntsorgungdieörtlichenBestimmungen
fürSondermüllbeachten.DerLCD-BildschirmbestehtausGlasundkannzerbrechen,wennerunsachgemäß
behandeltwirdoderderComputeraufdenBodenfällt.WennderBildschirmbeschädigtistunddiedarin
bendlicheFlüssigkeitinKontaktmitHautundAugengerät,solltendiebetroffenenStellenmindestens15
MinutenmitWasserabgespültundbeiBeschwerdenanschließendeinArztaufgesuchtwerden.
VORSICHT
AusSicherheitsgründendieKunststoffabdeckung,diedenunterenT eilderSpannungswandlerplatineumgibt,
nichtentfernen.
VORSICHT
ObwohlHauptbatterieneineniedrigeSpannunghaben,könnensiedochbeiKurzschlußoderErdunggenug
Stromabgeben,umbrennbareMaterialienzuentzündenoderVerletzungenbeiPersonenhervorzurufen.
VORSICHT
WenneinAustauschderFRUbeilaufendemBetriebnichterlaubtist,gehenSiebeimAustauschderFRUwie
folgtvor:SchaltenSiedenComputeraus,ziehenSiealleNetzkabelvondenNetzsteckdosenab,entfernen
SiedenAkkuundziehenSieallemiteinanderverbundenenKabelab.
Chapter1.Safetyinformation11
Page 20
12ThinkPadT520,T520i,andW520HardwareMaintenanceManual
Page 21
Chapter1.Safetyinformation13
Page 22
14ThinkPadT520,T520i,andW520HardwareMaintenanceManual
Page 23
AntesdeencenderelsistemadespuesdesustituirunaFRU,compruebequetodoslostornillos,muellesy
demáspiezaspequeñasseencuentranensusitioynoseencuentransueltasdentrodelsistema.Compruébelo
agitandoelsistemayescuchandolosposiblesruidosqueprovocarían.Laspiezasmetálicaspuedencausar
cortocircuitoseléctricos.
Algunasbateríasdereservacontienenunapequeñacantidaddeníquelycadmio.Nolasdesmonte,ni
recargue,nilasechealfuegooalaguanilascortocircuite.Deséchelastalcomodisponelanormativalocal.
Utilicesólobateríasqueseencuentrenenlalistadepiezas.Lautilizacióndeunabateríanoapropiada
puedeprovocarlaigniciónoexplosióndelamisma.
Lasbateríascontienenpequeñascantidadesdeníquel.Nolasdesmonte,nirecargue,nilasechealfuego
oalaguanilascortocircuite.Deséchelastalcomodisponelanormativalocal.Utilicesólobateríasquese
encuentrenenlalistadepiezasalsustituirlabatería.Lautilizacióndeunabateríanoapropiadapuede
provocarlaigniciónoexplosióndelamisma.
Labateríaderepuestoesunabateríadelitioypuedeprovocarincendios,explosionesoquemadurasgraves.
Nolarecargue,niquiteelconectorpolarizado,niladesmonte,nicalienteporencimadelos100°C(212°F),ni
laincinereniexpongaelcontenidodesusceldasalagua.Deséchelatalcomodisponelanormativalocal.
SilaLCDserompeyeluidodesuinteriorentraencontactoconsusojososusmanos,laveinmediatamente
lasáreasafectadasconaguadurante15minutoscomomínimo.Obtengaatenciónmedicasisepresenta
algúnsíntomadeluidodespuesdelavarse.
Paraevitardescargas,noquitelacubiertadeplásticoquerodealapartebajadelatarjetainvertida.
Aunquelasbateríasprincipalestienenunvoltajebajo,unabateríacortocircuitadaoconcontactoatierra
puedeproducirlacorrientesucientecomoparaquemarmaterialcombustibleoprovocarquemadurasen
elpersonal.
Chapter1.Safetyinformation15
Page 24
Salvoquesepermitaelintercambioencalienteparalaunidadsustituiblelocalmente,realicelosiguienteantes
deextraerla:apagueelsistema,desconectetodosloscablesdealimentacióndelastomasdealimentación
eléctrica,extraigalabateríaydesconecteloscablesdeinterconexión.
16ThinkPadT520,T520i,andW520HardwareMaintenanceManual
Page 25
Lasercompliancestatement(multilingualtranslations)
Thelasercompliancestatementsinthissectionareprovidedinthefollowinglanguages:
•English
•Arabic
•BrazilianPortuguese
•French
•German
•Hebrew
•Japanese
•Korean
•Spanish
•TraditionalChinese
Chapter1.Safetyinformation17
Page 26

18ThinkPadT520,T520i,andW520HardwareMaintenanceManual
Page 27
Chapter1.Safetyinformation19
Page 28
20ThinkPadT520,T520i,andW520HardwareMaintenanceManual
Page 29
Chapter1.Safetyinformation21
Page 30
22ThinkPadT520,T520i,andW520HardwareMaintenanceManual
Page 31

Chapter2.Importantserviceinformation
Thischapterpresentsfollowingimportantserviceinformationthatappliestoallmachinetypessupportedby
thismanual:
•“StrategyforreplacingFRUs”onpage23
–“Strategyforreplacingaharddiskdrive”onpage24
–“Importantnoticeforreplacingasystemboard”onpage24
–“Howtouseerrormessage”onpage24
•“StrategyforreplacingFRUsforCTO,CMV,andGAV”onpage24
–“Productdenition”onpage24
–“FRUidenticationforCTO,CMV,andGAVproducts”onpage25
Important:AdvisecustomerstocontacttheLenovoCustomerSupportCenteriftheyneedanyassistance
inobtainingorinstallinganysoftwarexes,drivers,andUEFIBIOSdownloads.T elephonenumbersfor
LenovoSupportareavailableat:
http://www.lenovo.com/support/phone
SystemDisassembly/ReassemblyvideosthatshowtheFRUremovalsorreplacementsfortheLenovo®
authorizedservicetechniciansareavailableinthefollowingsupportsite:
http://www.lenovoservicetraining.com/ion/
AdvisecustomerstocontacttheCustomerSupportCenterat800-426-7378iftheyneedassistancein
obtainingorinstallinganysoftwarexes,drivers,andUEFIBIOSdownloads.
CustomersinCanadashouldcalltheCustomerSupportCenterat800-565-3344forassistanceordownload
information.
StrategyforreplacingFRUs
Beforereplacingparts:
Makesurethatallsoftwarexes,drivers,andUEFIBIOSdownloadsareinstalledbeforereplacingany
FRUslistedinthismanual.
Afterasystemboardisreplaced,ensurethatthelatestUEFIBIOSisloadedtothesystemboardbefore
completingtheserviceaction.
Todownloadsoftwarexes,drivers,andUEFIBIOS,doasfollows:
1.Gotohttp://www.lenovo.com/support.
2.EntertheproductnumberofthecomputerorpressAuto-detectbuttononthescreen.
3.SelectDownloadsanddrivers.
4.Followthedirectionsonthescreenandinstallthenecessarysoftware.
UsethefollowingstrategytopreventunnecessaryexpenseforreplacingandservicingFRUs:
•IfyouareinstructedtoreplaceaFRUbutthereplacementdoesnotcorrecttheproblem,reinstall
theoriginalFRUbeforeyoucontinue.
•Somecomputershavebothaprocessorboardandasystemboard.Ifyouareinstructedtoreplaceeither
theprocessorboardorthesystemboard,andreplacingoneofthemdoesnotcorrecttheproblem,
reinstallthatboard,andthenreplacetheotherone.
©CopyrightLenovo2011
23
Page 32

•IfanadapteroradeviceconsistsofmorethanoneFRU,anyoftheFRUsmaybethecauseoftheerror.
Beforereplacingtheadapterordevice,removetheFRUs,onebyone,toseeifthesymptomschange.
ReplaceonlytheFRUthatchangedthesymptoms.
Attention:Thesetupcongurationonthecomputeryouareservicingmayhavebeencustomized.Running
AutomaticCongurationmayalterthesettings.Notethecurrentcongurationsettings(usingtheView
Congurationoption);then,whenservicehasbeencompleted,verifythatthosesettingsremainineffect.
Strategyforreplacingaharddiskdrive
Alwaystrytorunalow-levelformatbeforereplacingaharddiskdrive.Thiswillcauseallcustomerdataon
theharddisktobelost.Besurethatthecustomerhasacurrentbackupofthedatabeforedoingthistask.
Attention:Thedrivestartupsequenceinthecomputeryouareservicingmayhavebeenchanged.Be
extremelycarefulduringwriteoperationssuchascopying,saving,orformatting.Ifyouselectanincorrect
drive,dataorprogramscanbeoverwritten.
Importantnoticeforreplacingasystemboard
Somecomponentsmountedonasystemboardareverysensitive.Improperhandlingofasystemboardcan
causedamagetothosecomponents,andmaycauseasystemmalfunction.
Attention:Whenhandlingasystemboard:
•Donotdropasystemboardorapplyanyexcessiveforcetoit.
•Avoidroughhandlingofanykind.
•AvoidbendingasystemboardandhardpushingtopreventcrackingateachBGA(BallGridArray)chipset.
Howtouseerrormessage
Usetheerrorcodesdisplayedonthescreentodiagnosefailures.Ifmorethanoneerrorcodeisdisplayed,
beginthediagnosiswiththersterrorcode.Whatevercausesthersterrorcodemayalsocausefalseerror
codes.Ifnoerrorcodeisdisplayed,seewhethertheerrorsymptomislistedintheSymptom-to-FRU
Indexforthecomputeryouareservicing.
StrategyforreplacingFRUsforCTO,CMV,andGAV
Productdenition
DynamicCongureToOrder(CTO)
ThisprovidestheabilityforacustomertocongureaLenovosolutionfromaneSite,andhavethis
congurationsenttofulllment,whereitisbuiltandshippeddirectlytothecustomer.Themachinelabel,
ProductEntitlementWarehouse(PEW),eSupport,andtheHMMwillloadtheseproductsasthe4-digitMT
and3-digitmodel,wheremodel=“CTO”(Example:1829-CTO).
CustomModelVariant(CMV)
ThisisauniquecongurationthathasbeennegotiatedbetweenLenovoandthecustomer.Aunique4-digit
MTand3-digitmodelisprovidedtothecustomertoplaceorders(Example:1829-W15).ACMVisaspecial
bidoffering.Therefore,itisNOTgenerallyannounced.
•TheMTMportionofthemachinelabelisthe4-digitMTand3-digitmodel,wheremodel=“CTO”
(Example:1829-CTO).ThePRODUCTIDportionofthemachinelabelisthe4-digitMTand3-digitCMV
model(Example:1829-W15).
•ThePEWrecordisthe4-digitMTand3-digitmodel,wheremodel=“CTO”(Example:1829-CTO).
24ThinkPadT520,T520i,andW520HardwareMaintenanceManual
Page 33

•eSupportwillshowboththeCTOandCMVmachinetypemodels(Example:1829-CTOand1829-W15
willbefoundontheeSupportsite.)
•TheHMMwillhavethe4-digitMTand3-digitCTOmodelonly(Example:1829-CTO).Again,CMVsare
custommodelsandarenotfoundintheHMM.
GeneralAnnounceVariant(GAV)
Thisisastandardmodel(xedconguration).GAVsareannouncedandofferedtoallcustomers.TheMTM
portionofthemachinelabelisa4-digitMTand3-digitmodel,wheremodel=a“xedpartnumber”,not
“CTO”(Example:1829-F1U).Also,PEW,eSupport,andtheHMMwilllisttheseproductsunderthesame
xedmodelnumber.
FRUidenticationforCTO,CMV,andGAVproducts
TherearethreeinformationresourcestoidentifywhichFRUsareusedtosupportCTO,CMV,andGAV
products.ThesesourcesarePEW,eSupport,andtheHMM.
UsingPEW
•PEWistheprimarysourceforidentifyingFRUpartnumbersandFRUdescriptionsforthekeycommodities
forCTO,CMVandGAVproductsataMT-serialnumberlevel.Anexampleofkeycommoditiesarehard
diskdrives,systemboards,microprocessors,LiquidCrystalDisplays(LCDs),andmemory.
•Remember,allCTOandCMVproductsareloadedinPEWunderthe4-digitMTand3-digitmodel,where
model=“CTO”(Example:1829-CTO).GAVsareloadedinPEWunderthe4-digitMTand3-digitmodel,
wheremodel=a“xedpartnumber”,not“CTO”(Example:1829-F1U).
•PEWcanbeaccessedatthefollowingWebsite:
http://www.lenovo.com/support/site.wss/document.do?lndocid=LOOK-WARNTY
SelectWarrantylookup.InputtheMTandtheSerialnumberandthelistofkeycommoditieswillbe
returnedinthePEWrecordunderCOMPONENTINFORMA TION.
UsingeSupport
ForKeyCommodities(Examples-harddiskdrive,systemboard,microprocessor,LCD,andmemory)
•eSupportcanbeusedtoviewthelistofkeycommoditiesbuiltinaparticularmachineserial(thisisthe
samerecordfoundinPEW).
•eSupportcanbeaccessedatthefollowingWebsite:
http://www.lenovo.com/support
•Toviewthekeycommodities,clickonPARTSINFORMA TION,thenP ARTSLOOKUP .Typeinthemodel
typeandserialnumber.ThekeycommoditieswillbereturnedintheeSupportrecordunderPARTS
SHIPPEDWITHYOURSYSTEM.
FortheRemainingFRUs(thecompletelistofFRUsattheMTModellevel)
•eSupportcanbeusedtoviewthecompletelistofFRUsforamachinetypeandmodel.
•ToviewthecompletelistofFRUs,typeinthemachinetypeandmodel(Example:1829-CTO)under
QUICKPATH.Under“ViewbyDocumentType”selectPARTSINFORMA TION.Under“FilterbyCategory”
selectSERVICEP ARTS.Under“PartsInformationbyDate”selectSYSTEMSERVICEPARTS.Thelistof
servicepartsbydescription,withapplicablemachinetypemodelandFRUwillbedisplayed.
UsingtheHMM
ForKeyCommodities(Examples-harddiskdrive,systemboard,microprocessor,LCD,andmemory)
UsetheHMMasaback-uptoPEWandeSupporttoviewthecompletelistofFRUsattheMTModellevel.
Chapter2.Importantserviceinformation25
Page 34

26ThinkPadT520,T520i,andW520HardwareMaintenanceManual
Page 35

Chapter3.Generalcheckout
Thischapterpresentsfollowinginformation:
•“Whattodorst”onpage27
•“Checkoutguide”onpage28
–“DiagnosticsusingPC-DoctorforDOS”onpage28
–“LenovoThinkVantageT oolbox”onpage30
–“FRUtests”onpage31
•“Powersystemcheckout”onpage32
ThedescriptionsinthischapterapplytoanyThinkPadmodelthatsupportsthePC-Doctor®forDOS
diagnosticsprogram.Somedescriptionsmightnotapplytoyourparticularcomputer.
Beforeyougotothecheckoutguide,besuretoreadthefollowingimportantnotes.
Important:
•Onlycertiedtrainedpersonnelshouldservicethecomputer.
•BeforereplacinganyFRU,readtheentirepageonremovingandreplacingFRUs.
•WhenyoureplaceFRUs,usenewnylon-coatedscrews.
•Beextremelycarefulduringsuchwriteoperationsascopying,saving,orformatting.Drivesinthe
computerthatyouareservicingsequencemighthavebeenaltered.Ifyouselectanincorrectdrive,
dataorprogramsmightbeoverwritten.
•ReplaceaFRUonlywithanotherFRUofthecorrectmodel.WhenyoureplaceaFRU,makesurethat
themodelofthemachineandtheFRUpartnumberarecorrectbyreferringtotheFRUpartslist.
•AFRUshouldnotbereplacedbecauseofasingle,unreproduciblefailure.Singlefailurescanoccur
foravarietyofreasonsthathavenothingtodowithahardwaredefect,suchascosmicradiation,
electrostaticdischarge,orsoftwareerrors.ConsiderreplacingaFRUonlywhenaproblemrecurs.Ifyou
suspectthataFRUisdefective,cleartheerrorlogandrunthetestagain.Iftheerrordoesnotrecur,do
notreplacetheFRU.
•BecarefulnottoreplaceanondefectiveFRU.
Whattodorst
WhenyoudoreturnaFRU,youmustincludethefollowinginformationinthepartsexchangeformor
partsreturnformthatyouattachtoit:
•Nameandphonenumberofservicetechnician
•Dateofservice
•Dateonwhichthemachinefailed
•Dateofpurchase
•Failuresymptoms,errorcodesappearingonthedisplay,andbeepsymptoms
•ProcedureindexandpagenumberinwhichthefailingFRUwasdetected
•FailingFRUnameandpartnumber
•Machinetype,modelnumber,andserialnumber
•Customer'snameandaddress
Noteforwarranty:Duringthewarrantyperiod,thecustomermayberesponsibleforrepaircostsifthe
computerdamagewascausedbymisuse,accident,modication,unsuitablephysicaloroperating
environment,orimpropermaintenancebythecustomer.Followingisalistofsomecommonitemsthat
arenotcoveredunderwarrantyandsomesymptomsthatmightindicatethatthesystemwassubjected
tostressbeyondnormaluse.
©CopyrightLenovo2011
27
Page 36

Beforecheckingproblemswiththecomputer,determinewhetherthedamageiscoveredunderthewarranty
byreferringtothefollowinglist:
Thefollowingarenotcoveredunderwarranty:
•LCDpanelcrackedfromtheapplicationofexcessiveforceorfrombeingdropped
•Scratched(cosmetic)parts
•Distortion,deformation,ordiscolorationofthecosmeticparts
•Plasticparts,latches,pins,orconnectorsthathavebeencrackedorbrokenbyexcessiveforce
•Damagecausedbyliquidspilledintothesystem
•DamagecausedbytheimproperinsertionofaPCCardortheinstallationofanincompatiblecard
•Improperdiscinsertionoruseofanopticaldrive
•Diskettedrivedamagecausedbypressureonthediskettedrivecover,foreignmaterialinthedrive,
ortheinsertionofadiskettewithmultiplelabels
•Damagedorbentdisketteejectbutton
•Fusesblownbyattachmentofanonsupporteddevice
•Forgottencomputerpassword(makingthecomputerunusable)
•Stickykeyscausedbyspillingaliquidontothekeyboard
•Useofanincorrectacadapteronlaptopproducts
Thefollowingsymptomsmightindicatedamagecausedbynonwarrantedactivities:
•Missingpartsmightbeasymptomofunauthorizedserviceormodication.
•Ifthespindleofaharddiskdrivebecomesnoisy,itmayhavebeensubjectedtoexcessiveforce,
ordropped.
Checkoutguide
UsethefollowingproceduresasaguideinidentifyingandcorrectingproblemswiththeThinkPadNotebook.
Note:ThediagnostictestsareintendedtotestonlyThinkPadproducts.Theuseofnon- ThinkPadproducts,
prototypecards,ormodiedoptionscanleadtofalseindicationsoferrorsandinvalidsystemresponses.
1.Identifythefailingsymptomsinasmuchdetailaspossible.
2.Verifythesymptoms.Trytore-createthefailurebyrunningthediagnostictestorbyrepeatingthe
operation.
DiagnosticsusingPC-DoctorforDOS
TheThinkPadNotebookhasatestprogramcalledPC-DoctorforDOS(hereaftercalledPC-Doctor.)Y oucan
detecterrorsbyrunningthediagnosticstestincludedinPC-Doctor.
Note:PC-DoctorforDOSisavailableatthefollowingWebsite:http://www.lenovo.com/support
TocreatethePC-DoctordiagnosticCD,followtheinstructionsontheWebsite.
Forsomepossiblecongurationsofthecomputer,PC-Doctormightnotruncorrectly.Toavoidthisproblem,
youneedtoinitializethecomputersetupbyuseoftheThinkPadSetupbeforeyourunPC-Doctor.
ToenterThinkPadSetup,doasfollows:
1.T urnonthecomputer.
2.WhentheThinkPadlogocomesup,immediatelypressF1toentertheThinkPadSetup.
Note:Ifasupervisorpasswordhasbeensetbythecustomer,ThinkPadSetupmenuappearsafterthe
passwordisentered.Y oucanstartThinkPadSetupbypressingEnterinsteadofenteringthesupervisor
password;however,youcannotchangetheparametersthatareprotectedbythesupervisorpassword.
28ThinkPadT520,T520i,andW520HardwareMaintenanceManual
Page 37

OntheThinkPadSetupscreen,pressF9,Enter,F10,andthenEnter.
Diagnostics
Run Normal Test
Run Quick Test
CPU/Coprocessor
Systemboard
System Memory
Video Adapter
Fixed Disks
Diskette Drives
Other Devices
Communication
Interactive Tests Hardware Info Utility Quit F1=Help
PC-DOCTOR 2.0 Copyright 2008 PC-Doctor, Inc. All Rights Reserved.
Use the cursor keys and ESC to move in menus. Press ENTER to select.
Wireless LAN
Note:Whenyouinitializethecomputerconguration,somedevicesaredisabled,suchastheserialport.If
youtestoneofthesedevices,youwillneedtoenableitbyusingCongurationutilityforDOS.Theutilityis
availableonthefollowingWebsite:http://www.lenovo.com/support
PC-Doctorcannotbeusedtotestadevicethatisinthedockingstation,evenifthecomputersupportsthe
dockingstation.TotestaUSBdevice,connectittotheUSBconnectorofthecomputer.
Testingthecomputer
Note:ThePC-DoctordiagnosticCDdoesnotsupportanyopticaldrivesconnectedthroughUSBdevicesor
anyothers.ItsupportsonlytheinternalopticaldriveoftheThinkPadNotebook.
Torunthetest,doasfollows:
1.T urnoffthecomputer.
2.Makesurethattheinternalopticaldrivethatissupportedasastartupdeviceisattachedtothecomputer.
3.T urnonthecomputer.Ifthecomputercannotbepoweredon,goto“Powersystemcheckout”on
page32,andcheckthepowersources.
Ifanerrorcodeappears,goto“Symptom-to-FRUindex”onpage39.
4.WhentheThinkPadlogocomesup,immediatelypressF12toentertheBootMenu.
5.InsertthePC-DoctorCDintotheinternalopticaldrive.
6.PresscursorkeystoselectA TAPICDx(x:0,1,...)andthenpressEnter.
7.Followtheinstructionsonthescreen.
8.ThemainpanelofPC-Doctorappears.
9.SelectDiagnosticswiththearrowkeys,andpressEnter.
Note:Youcanselectanitemnotonlywiththearrowkeys,butalsowiththeTrackPoint®pointer.
InsteadofpressingEnter,clicktheleftbutton.
Apull-downmenuappears.(Itsexactformdependsonthemodel.)
Note:PC-Doctormenudoesnotmeantheformalsupportdevicelist.Someunsupporteddevicenames
mayappearinthePC-Doctormenu.
Theoptionsonthetestmenuareasfollows:
Chapter3.Generalcheckout29
Page 38

DiagnosticsInteractiveTests
•RunNormalT est
•RunQuickT est
•CPU/Coprocessor
•SystemMemory
•Systemboard
•VideoAdapter
•FixedDisks
•DisketteDrives
•OtherDevices
•ThinkPadDevices
•Communication
•WirelessLAN
Notes:
•IntheKeyboardtestinInteractiveT ests,theFnkeyshouldbehelddownforatleast2seconds;otherwise,it
cannotbesensed.
•VideoAdaptertestsupportsonlytheLCDdisplayontheThinkPadNotebook.Ifyouhaveanexternalmonitor
attachedtoyourcomputer ,detachitbeforerunningPC-DoctorforDOS.
•T otestDigitalSignatureChip,thesecuritychipmustbesettoActive.
•Keyboard
•Video
•InternalSpeaker
•Mouse
•Diskette
•SystemLoad
•OpticalDriveT est
•IntelWLANRadioTest
10.Runtheapplicablefunctiontest.
11.Followtheinstructionsonthescreen.Ifthereisaproblem,PC-Doctorshowsmessagesdescribingit.
12.T oexitthetest,selectQuit—ExitDiag.Tocancelthetest,pressEsc.
Note:AfterrunningPC-Doctor,checkthetimeanddateonthesystemandresetthemiftheyareincorrect.
DetectingsysteminformationwithPC-Doctor
PC-Doctorcandetectthefollowingsysteminformation:
HardwareInfo
•SystemConguration
•MemoryContents
•PhysicalDiskDrives
•VGAInformation
•A T ADriveInfo
•PCIInformation
•SMBIOSInfo
•VESALCDInfo
•HardwareEventsLog
Utility
•RunEnternalT ests
•BenchmarkSystem
•DOSShell
•T echSupportForm
•BatteryRundown
•EraseDriveContents
•ViewPCDRHostLog
LenovoThinkVantageToolbox
LenovoThinkVantage®ToolboxisadiagnosticprogramthatworksthroughtheWindowsoperatingsystem.
Itenablesyoutoviewsymptomsofcomputerproblemsandsolutionsforthem,andincludesautomatic
noticationwhenactionisrequired,computingassistance,advanceddiagnostics,anddiagnostichistory.
30ThinkPadT520,T520i,andW520HardwareMaintenanceManual
Page 39

Note:ThelatestLenovoThinkVantageT oolboxisavailableatthefollowingWebsite:
http://web.lenovothinkvantagetoolbox.com/
ToinstallthelatestLenovoThinkVantageT oolboxonthecomputer,followtheinstructionsontheWebsite.
Torunthisprogram,doasfollows:
ForWindows7:
WhiletheWindowsoperatingsystemisrunning,presstheThinkVantagebutton.
Youcanalsorunthisprogramasthefollowing:
•ClickStart➙ControlPanel➙SystemandSecurity➙Lenovo-SystemHealthandDiagnostics.
ForWindowsVistaandWindowsXP:
ClickStart➙AllPrograms➙ThinkVantage➙LenovoThinkVantageT oolbox.
Followtheinstructionsonthescreen.LenovoThinkVantageT oolboxalsohasproblemdeterminationaids
thatdeterminesoftwareandusageproblems.
Foradditionalinformationaboutthisprogram,seetheHelpfortheprogram.
FRUtests
ThefollowingtableshowsthetestforeachFRU.
Table1.FRUtests
FRUApplicabletest
Systemboard1.Diagnostics➙CPU/Coprocessor
2.Diagnostics➙Systemboard
3.IfthedockingstationortheportreplicatorisattachedtotheThinkPadNotebook,
detachit.
4.Placethecomputeronahorizontalsurface,andrunDiagnostics➙ThinkPad
Devices➙HDDActiveProtectionT est.
Note:Donotapplyanyphysicalshocktothecomputerwhilethetestisrunning.
Power
LCDunit
Audio
SpeakerInteractiveT ests➙InternalSpeaker
Keyboard
Diagnostics➙ThinkPadDevices➙ACAdapter ,Battery1,orBattery2
1.Diagnostics➙VideoAdapter
2.InteractiveTests➙Video
EntertheThinkPadSetupandchangeSerialATA(SA T A)settingtoCompatibility,and
runDiagnostics➙OtherDevice➙ConexantAudio
Note:OnceAudiotestisdone,thenosoundisheardthistest.Inthiscase,turnoff
andturnonthecomputer.Then,runthistestagain.
1.Diagnostics➙Systemboard➙Keyboard
2.InteractiveTests➙Keyboard
Chapter3.Generalcheckout31
Page 40

Table1.FRUtests(continued)
FRUApplicabletest
Harddiskdriveorsolidstate
drive
Diskettedrive1.Diagnostics➙DisketteDrives
Opticaldrive1.Diagnostics➙OtherDevices➙OpticalDrive
Memory
TrackPointorpointing
device
EntertheThinkPadSetupandchangeSerialATA(SA T A)settingtoCompatibility,and
runDiagnostics➙FixedDisks
Youcanalsodiagnosethedrivewithoutstartinguptheoperatingsystem.T odiagnose
thedrivefromtheThinkPadSetup,doasfollows:
1.Removeanydiskettefromthediskettedrive,andthenturnoffthecomputer.
2.Turnonthecomputer.
3.Whilethemessage,“Tointerruptnormalstartup,presstheblueThinkVangate
button,”isdisplayedatthelowerleftofthescreen,pressF1toentertheThinkPad
Setup.
4.Usingcursorkeys,selectHDDdiagnosticprogram.Pressenter.
5.Usingcursorkeys,selectMainharddiskdriveorUltrabayharddiskdrive.
6.PressEntertostartthediagnosticprogram.
2.InteractiveTests➙Diskette
2.InteractiveTests➙OpticalDriveT est
1.IftwoDIMMsareinstalled,removeoneofthemandrunDiagnostics➙System
Memory.
2.Iftheproblemdoesnotrecur,returntheDIMMtoitsplace,removetheotherone,
andrunthetestagain.
IftheT rackPointdoesnotwork,checkthecongurationasspeciedintheThinkPad
Setup.IftheT rackPointisdisabled,selectAutomatictoenableit.
AfteryouusetheT rackPoint,thepointermaydriftonthescreenforashorttime.This
driftcanoccurwhenaslight,steadypressureisappliedtotheT rackPointpointer.
Thissymptomisnotahardwareproblem.Ifthepointerstopsafterashorttime,no
serviceactionisnecessary.
IfenablingtheT rackPointdoesnotcorrecttheproblem,continuewiththefollowing:
•InteractiveTests➙Mouse
TouchPad
IftheT ouchPaddoesnotwork,checkthecongurationasspeciedintheThinkPad
Setup.IftheT ouchPadisdisabled,selectAutomatictoenableit.Ifenablingthe
TouchPaddoesnotcorrecttheproblem,continuewiththefollowing:
•InteractiveTests➙Mouse
Powersystemcheckout
Toverifyasymptom,dothefollowing:
1.T urnoffthecomputer.
2.Removethebatterypack.
3.Connecttheacadapter.
4.Checkthatpowerissuppliedwhenyouturnonthecomputer.
5.T urnoffthecomputer.
6.Disconnecttheacadapterandinstallthechargedbatterypack.
7.Checkthatthebatterypacksuppliespowerwhenyouturnonthecomputer.
Ifyoususpectapowerproblem,seetheappropriateoneofthefollowingpowersupplycheckouts:
•“Checkingtheacadapter”onpage33
•“Checkingoperationalcharging”onpage33
•“Checkingthebatterypack”onpage33
•“Checkingthebackupbattery”onpage34
32ThinkPadT520,T520i,andW520HardwareMaintenanceManual
Page 41

Checkingtheacadapter
1
2
3
(20V)
Youareherebecausethecomputerfailsonlywhentheacadapterisused.
•Ifthepowerproblemoccursonlywhenthedockingstationortheportreplicatorisused,replacethe
dockingstationortheportreplicator.
•Ifthepower-onindicatordoesnotturnon,checkthepowercordoftheacadapterforcorrectcontinuity
andinstallation.
•Ifthecomputerdoesnotchargeduringoperation,goto“Checkingoperationalcharging”onpage33
Tochecktheacadapter,dothefollowing:
1.Unplugtheacadaptercablefromthecomputer.
2.Measuretheoutputvoltageattheplugoftheacadaptercable.Seethefollowinggure:
.
Pin
1+20
20
3
Note:Outputvoltageofpinno.2oftheacadaptermaydifferentfromtheoneyouareservicing.
3.Ifthevoltageisnotcorrect,replacetheacadapter.
4.Ifthevoltageisacceptable,dothefollowing:
•Replacethesystemboard.
•Iftheproblempersists,goto“FRUtests”onpage31.
Note:Noisefromtheacadapterdoesnotalwaysindicateadefect.
Voltage(Vdc)
Ground
Checkingoperationalcharging
Tocheckwhetherthebatterychargesproperlyduringoperation,useadischargedbatterypackorabattery
packthathaslessthan50%ofthetotalpowerremainingwheninstalledinthecomputer.
Performoperationalcharging.Ifthebatterystatusindicatororicondoesnotturnon,removethebattery
packandletitreturntoroomtemperature.Reinstallthebatterypack.Ifthechargeindicatororiconstilldoes
notturnon,replacethebatterypack.
Ifthechargeindicatorstilldoesnotturnon,replacethesystemboard.Thenreinstallthebatterypack.Ifitis
stillnotcharged,gotothenextsection.
Checkingthebatterypack
BatterychargingdoesnotstartuntilthePowerManagerBatteryGaugeshowsthatlessthan96%ofthe
totalpowerremains;underthisconditionthebatterypackcanchargeto100%ofitscapacity.Thisprotects
thebatterypackfrombeingoverchargedorfromhavingashortenedlife.
Tocheckyourbattery,moveyourcursortothePowerManagerBatteryGaugeiconintheicontrayofthe
Windowstaskbarandwaitforamoment(butdonotclick),andthepercentageofbatterypowerremaining
isdisplayed.Togetdetailedinformationaboutthebattery,double-clickthePowerManagerBattery
Gaugeicon.
Chapter3.Generalcheckout33
Page 42

Note:Ifthebatterypackbecomeshot,itmaynotbeabletocharge.Removeitfromthecomputerandleave
1(+)
2(+)
3
4
5
6(-)
7(-)
Red(+)
Black(-)
itatroomtemperatureforawhile.Afteritcoolsdown,reinstallandrechargeit.
Tocheckthebatterypack,dothefollowing:
1.Poweroffthecomputer.
2.Removethebatterypackandmeasurethevoltagebetweenbatteryterminals1(+)and7(-).Seethe
followinggure:
Terminal
1+0to+12.6
7
Voltage(Vdc)
Ground(-)
3.Ifthevoltageislessthan+11.0Vdc,thebatterypackhasbeendischarged.
Note:Rechargingwilltakeatleast3hours,eveniftheindicatordoesnotturnon.
Ifthevoltageisstilllessthan+11.0Vdcafterrecharging,replacethebattery.
4.Ifthevoltageismorethan+11.0Vdc,measuretheresistancebetweenbatteryterminals5and7.
Theresistancemustbe4to30KΩ.Iftheresistanceisnotcorrect,replacethebatterypack.Ifthe
resistanceiscorrect,replacethesystemboard.
Checkingthebackupbattery
Dothefollowing:
1.Poweroffthecomputer,andunplugtheacadapterfromit.
2.T urnthecomputerupsidedown.
3.Removethebatterypack(see“1010Batterypack”onpage60).
4.Removethebackupbattery(see“1120Backupbattery”onpage78).
5.Measurethevoltageofthebackupbattery.Seethefollowinggure.
Wire
Red+2.5to+3.2
Black
Voltage(Vdc)
Ground
•Ifthevoltageiscorrect,replacethesystemboard.
•Ifthevoltageisnotcorrect,replacethebackupbattery.
•Ifthebackupbatterydischargesquicklyafterreplacement,replacethesystemboard.
34ThinkPadT520,T520i,andW520HardwareMaintenanceManual
Page 43

Chapter4.Relatedserviceinformation
Thischapterpresentsfollowinginformation:
•“RestoringthefactorycontentsbyusingRecoveryDiscSet”onpage35
•“Passwords”onpage36
•“Powermanagement”onpage38
•“Symptom-to-FRUindex”onpage39
ServiceWebsite:
Whenthelatestmaintenancedisketteandthesystemprogramservicediskettebecomeavailable,theywill
bepostedonhttp://www.lenovo.com/spm.
RestoringthefactorycontentsbyusingRecoveryDiscSet
Whentheharddiskdrive(HDD)orsolidstatedrive(SSD)isreplacedbecauseofafailure,noproductrecovery
programisonthenewdrive.Inthiscase,youmustusetheRecoveryDiscSetforthecomputer.Orderthe
RecoveryDiscSetandthedriveatthesametimesothatyoucanrecoverthenewdrivewiththepre-installed
softwarewhentheyarrive.Forinformationonwhichdiscstoorder,see“Recoverydiscs”onpage160
TherecoverydiscsetconsistsoftheuserinstructionsandthefollowingsetofDVDstorestorethecomputer
totheoriginalfactoryconguration.
OperatingSystemRecoveryDisc(onedisc)
ThisdiscrestorestheMicrosoft®Windowsoperatingsystem.Usethisdisctostarttherecoveryprocess.
ApplicationsandDriversRecoveryDisc(oneormorediscs)
Thisdiscrestoresthepreinstalledapplicationsanddriversonthecomputer.
SupplementalRecoveryDisc
Thisdisccontainsadditionalcontent,suchasupdatestothesoftwarethatwaspreinstalledonthecomputer .
NotallrecoverydiscsetscomewithaSupplementalRecoveryDisc.
.
Notes:
•YoumusthaveaDVDdrivetousetherecoverydiscs.IfyoudonothaveaninternalDVDdrive,you
canuseanexternalUSBDVDdrive.
•Duringtherecoveryprocess,alldataonthedrivewillbedeleted.Ifpossible,copyanyimportantdata
orpersonallesthatyouwanttokeepontoremovablemediaoranetworkdrivebeforeyoustartthe
recoveryprocess.
Torestorethecomputertotheoriginalfactorycongurationusingtherecoverydiscset,dothefollowing:
Note:Recoverytakesseveralhours.Thelengthoftimedependsonthemethodyouuse.Ifyouuserecovery
discs,recoverytakesatleastvehours.
1.MaketheCD/DVDdrivetherststartupdeviceinthestartupsequenceusingthefollowingprocedure:
a.PressandholddowntheF1key,andthenturnonthecomputer.Whenthelogoscreenisdisplayed
orifyouhearrepeatingbeeps,releasetheF1key.TheSetupUtilityprogramopens.
b.UsethearrowkeystoselectStartup➙Boot.
c.SelecttheCD/DVDdriveasthe1stBootDevice.
2.InserttheOperatingSystemRecoveryDiscintotheDVDdrive.
©CopyrightLenovo2011
35
Page 44

3.PressF10tosavetheSetupUtilitycongurationchanges.Followtheinstructionsonthescreento
begintherecoveryprocess.
4.SelectyourlanguageandclickNext.
5.Readthelicense.Ifyouagreewiththetermsandconditions,selectIacceptthesetermsand
conditionsandthenclickNext.Ifyoudonotagreewiththetermsandconditions,followthe
instructionsonthescreen.
6.ClickY esinthedisplayedwindowtobegintheoperatingsystemrecoveryprocess.
7.InserttheApplicationsandDriversRecoveryDiscwhenpromptedandthenclickOKtobeginthe
applicationsanddriversrecoveryprocess.
8.IfyouhaveaSupplementalRecoveryDisc,insertitwhenpromptedandclickYes.Ifyoudonothavea
SupplementalRecoveryDisc,clickNo.
9.Whenallofthedatahasbeencopiedfromthelastdiscinthesetandhasbeenprocessed,removethe
discandrestartthecomputer.
Note:Therestoftherecoveryprocessisfullyautomatedandnoactionisrequiredbyyou.The
computerwillrestartintotheMicrosoftWindowsdesktopseveraltimesandyoumightexperience
periodswhennoactivityisapparentonthescreenforseveralminutesatatime.Thisisnormal.
10.Whentherecoveryprocessiscomplete,theSetUpWindowsscreenisdisplayed.Followthe
instructionsonthescreentocompletetheWindowssetup.
11.AfteryouhavecompletedtheWindowssetup,youmightwanttorestoretheoriginalstartupsequence.
StarttheSetupUtilityprogramandthenpressF9torestorethedefaultsettings.PressF10tosaveand
exittheSetupUtility.
Note:Afterrestoringadrivetothefactorydefaultsettings,youmightneedtoreinstallsomedevicedrivers.
Passwords
AsmanyasthreepasswordsmaybeneededforanyThinkPadNotebook:thepower-onpassword(POP),
thehard-diskpassword(HDP),andthesupervisorpassword(SVP).
Ifanyofthesepasswordshasbeenset,apromptforitappearsonthescreenwheneverthecomputeris
turnedon.Thecomputerdoesnotstartuntilthepasswordisentered.
Note:IfonlyanSVPisinstalled,thepasswordpromptdoesnotappearwhentheoperatingsystemisbooted.
Power-onpassword
Apower-onpassword(POP)protectsthesystemfrombeingpoweredonbyanunauthorizedperson.The
passwordmustbeenteredbeforeanoperatingsystemcanbebooted.ForhowtoremovethePOP ,see
“Howtoremovethepower-onpassword”onpage37.
Hard-diskpassword
Therearetwohard-diskpasswords(HDPs):
•UserHDP—fortheuser
•MasterHDP—forthesystemadministrator,whocanuseittogetaccesstotheharddiskeveniftheuser
haschangedtheuserHDP
Note:TherearetwomodesfortheHDP:UseronlyandMaster+User.TheMaster+Usermoderequires
twoHDPs;thesystemadministratorentersbothinthesameoperation.Thesystemadministratorthen
providestheuserHDPtothesystemuser.
Attention:IftheuserHDPhasbeenforgotten,checkwhetheramasterHDPhasbeenset.Ifithas,itcanbe
usedforaccesstotheharddiskdrive.IfnomasterHDPisavailable,neitherLenovonorLenovoauthorized
36ThinkPadT520,T520i,andW520HardwareMaintenanceManual
Page 45

servicetechniciansprovideanyservicestoreseteithertheuserorthemasterHDP ,ortorecoverdatafrom
theharddiskdrive.Theharddiskdrivecanbereplacedforascheduledfee.
ForhowtoremovethePOP ,see“Howtoremovethehard-diskpassword”onpage37.
Supervisorpassword
Asupervisorpassword(SVP)protectsthesysteminformationstoredintheThinkPadSetup.Theusermust
entertheSVPinordertogetaccesstotheThinkPadSetupandchangethesystemconguration.
Attention:IftheSVPhasbeenforgottenandcannotbemadeavailabletotheservicetechnician,thereisno
serviceproceduretoresetthepassword.Thesystemboardmustbereplacedforascheduledfee.
Howtoremovethepower-onpassword
(A)IfnoSVPhasbeenset:
ToremoveaPOPthatyouhaveforgotten,dothefollowing:
1.T urnoffthecomputer.
2.Removethebatterypack.Forhowtoremovethebatterypack,see“1010Batterypack”onpage60.
3.Removethebackupbattery.Forhowtoremovethebackupbattery,see“1120Backupbattery”on
page78.
4.T urnonthecomputerandwaituntilthePOSTends.AfterthePOSTends,thepasswordpromptdoes
notappear.ThePOPhasbeenremoved.
5.Reinstallthebackupbatteryandthebatterypack.
(B)IfanSVPhasbeensetandisknownbytheservicetechnician:
1.T urnonthecomputer.
2.WhentheThinkPadlogocomesup,immediatelypressF1toenterThinkPadSetup.WhenPower-On
Passwordiconisappearingonthescreen,enterthePower-OnPassword.
3.T ypethesupervisorpasswordwhenthesystemrequiresitandpressenter.TheThinkPadSetup
windowopens.
4.SelectSecurity,usingthecursordirectionalkeystomovethemenu.
5.SelectPassword.
6.SelectPower-OnPassword.
7.T ypethecurrentPower-OnPasswordintheEnterCurrentPasswordeld.thenleavetheEnter
NewPasswordeldblank,andpressEntertwice.
8.Inthe“Changeshavebeensaved”window,pressEnter.
9.PressF10;then,intheSetupconrmationwindow,selectYes.
Howtoremovethehard-diskpassword
Attention:IfUseronlymodeisselectedandtheuserHDPhasbeenforgottenandcannotbemade
availabletotheservicetechnician,neitherLenovonorLenovoauthorizedservicetechniciansprovideany
servicestoresettheuserHDPsortorecoverdatafromtheharddiskdrive.Theharddiskdrivecanbe
replacedforascheduledfee.
ToremoveauserHDPthathasbeenforgotten,whentheSVPandthemasterHDPareknown,dothe
following:
1.T urnonthecomputer.
2.WhentheThinkPadlogocomesup,immediatelypressF1toenterThinkPadSetup.WhenPower-On
Passwordiconisappearingonthescreen,enterthePower-OnPassword.
Chapter4.Relatedserviceinformation37
Page 46

3.SelectSecurity,usingthecursordirectionalkeystomovethemenu.
4.SelectPassword.
5.SelectHard-diskxpassword,wherexistheletteroftheharddiskdrive.Apop-upwindowopens.
6.SelectMasterHDP.
7.T ypethecurrentmasterHDPintheEnterCurrentPasswordeld.thenleavetheEnterNewPassword
eldblank,andpressEntertwice.
8.PressF10.
9.SelectYesintheSetupCongurationwindow.BothuserHDPandmasterHDPwillhavebeenremoved.
Powermanagement
Toreducepowerconsumption,thecomputerhasthreepowermanagementmodes:screenblank,sleep
(standbyinWindowsXP),andhibernation.
Screenblankmode
Ifthetimesetonthe“T urnoffmonitor”timerintheoperatingsystemexpires,theLCDbacklightturnsoff.
Toputthecomputerintoscreenblankmode,doasfollows:
1.PressFn+F3.Apanelforselectingapowerplan(inWindowsXP ,powerscheme)appears.
2.SelectPoweroffdisplay(keepcurrentpowerplan)(inWindowsXP ,keepcurrentpowerscheme).
Youcanalsoputthecomputerintoscreenblankmode,pressThinkVantagebuttonandusetheThinkVantage
Toolbox.
Toendscreenblankmodeandresumenormaloperation,pressanykey.
Sleep(standby)mode
Whenthecomputerenterssleep(standby)mode,thefollowingeventsoccurinadditiontowhatoccurs
inscreenblankmode:
•TheLCDispoweredoff.
•Theharddiskdriveispoweredoff.
•TheCPUstops.
Toentersleep(standby)mode,pressFn+F4.
Note:YoucanchangetheactionoftheFn+F4keycombinationbychangingthesettingsinPowerManager.
Incertaincircumstances,thecomputergoesintosleep(standby)modeautomatically:
•Ifa“suspendtime”hasbeensetonthetimer,andtheuserdoesnotdoanyoperationwiththekeyboard,
theT rackPoint,theharddisk,theparallelconnector,orthediskettedrivewithinthattime.
•Ifthebatteryindicatorblinksorange,indicatingthatthebatterypowerislow.
Note:Evenifyoudonotsetthelow-batteryalarm,thechargeindicatornotiesyouwhenthebatteryislow,
andthenthecomputerentersthepower-savingmodeautomatically.
Tocausethecomputertoreturnfromsleep(standby)modeandresumeoperation,dooneofthefollowing:
•PresstheFnkey.
•OpentheLCDcover.
•Turnonthepowerswitch.
38ThinkPadT520,T520i,andW520HardwareMaintenanceManual
Page 47

Also,ineitherofthefollowingevents,thecomputerautomaticallyreturnsfromsleep(standby)modeand
resumesoperation:
•Theringindicator(RI)issignaledbyaserialdeviceoraPCCarddevice.(doesnotsupportthering
indicator(RI)resumebyPCCarddevice.)
•Thetimesetontheresumetimerelapses.
Note:Thecomputerdoesnotacceptanyinputimmediatelyafteritenterssleep(standby)mode.Waita
fewsecondsbeforetakinganyactiontoreenteroperationmode.
Hibernationmode
Inhibernationmode,thefollowingoccurs:
•Thesystemstatus,RAM,VRAM,andsetupdataarestoredontheharddisk.
•Thesystemispoweredoff.
Note:Ifthecomputerentersthehibernationmodewhileitisdockedtothedockingstation,donotundockit
beforeresumingnormaloperation.Ifyoudoundockitandthentrytoresumenormaloperation,youwillget
anerrormessage,andyouwillhavetorestartthesystem.
Tocausethecomputertoenterhibernationmode,doanyofthefollowing:
•PresstheFn+F12keys.
•Ifyouhavedenedoneofthefollowingactionsastheeventthatcausesthesystemtogointohibernation
mode,performthataction.
–Closingthelid.
–Pressingthepowerbutton.
–PressingFn+F4keys.
Also,thecomputergoesintohibernationmodeautomaticallyineitherofthefollowingconditions:
•Ifa“hibernationtime”hasbeensetonthetimer,andiftheuserdoesnotdoanyoperationwiththe
keyboard,theT rackPoint,theharddiskdrive,theparallelconnector,orthediskettedrivewithinthattime.
•Ifthetimerconditionsaresatisedinsuspendmode.
Whenthepoweristurnedon,thecomputerreturnsfromhibernationmodeandresumesoperation.The
hibernationleinthebootrecordontheharddiskdriveisread,andsystemstatusisrestoredfromthe
harddiskdrive.
Symptom-to-FRUindex
Thissectioncontainsfollowinginformation:
•“Numericerrorcodes”onpage40
•“Errormessages”onpage41
•“Beepsymptoms”onpage42
•“No-beepsymptoms”onpage43
•“LCD-relatedsymptoms”onpage43
•“Intermittentproblems”onpage43
•“Undeterminedproblems”onpage44
Thesymptom-to-FRUindexinthissectionlistssymptomsanderrorsandtheirpossiblecauses.Themost
likelycauseislistedrst,inboldfacetype.
Chapter4.Relatedserviceinformation39
Page 48

Note:DotheFRUreplacementorotheractionsinthesequenceshowninthecolumnheaded“FRUor
action,insequence.”IfreplacingaFRUdoesnotsolvetheproblem,puttheoriginalpartbackinthe
computer.DonotreplaceanondefectiveFRU.
Thisindexcanalsohelpyoudetermine,duringregularservicing,whatFRUsarelikelytoneedtobe
replacednext.
AnumericerrorisdisplayedforeacherrordetectedinPOSTorsystemoperation.Inthedisplays,ncan
beanynumber.
Ifnonumericcodeisdisplayed,checkthenarrativedescriptionsofsymptoms.Ifthesymptomisnot
describedthere,goto“Intermittentproblems”onpage43.
Note:ForadevicenotsupportedbydiagnosticcodesintheThinkPadNotebooks,seethemanualfor
thatdevice.
Numericerrorcodes
Table2.Numericerrorcodes
Symptomorerror
0177
BadSVPdata,stopPOSTtask—Thechecksumofthe
supervisorpasswordintheEEPROMisnotcorrect.
0182
BadCRC2.EnterUEFIBIOSSetupandloadSetup
defaults.—ThechecksumoftheCRS2settinginthe
EEPROMisnotcorrect.
0183
BadCRCofSecuritySettingsinEFIVariable.Enter
ThinkPadSetup.
0187
EAIAdataaccesserror—TheaccesstoEEPROMisfailed.
0188
InvalidRFIDSerializationInformationArea.
0189
InvalidRFIDcongurationinformationarea—The
EEPROMchecksumisnotcorrect.
0190
Criticallow-batteryerror
0191
SystemSecurity—InvalidRemoteChangerequested.
0199
SystemSecurity—Securitypasswordretrycount
exceeded.
0251
SystemCMOSchecksumbad—Defaultconguration
used.
0271
Real-timeclockerror.Checkdateandtimesettings.
FRUoraction,insequence
Systemboard
1.RunThinkPadSetup.PressF9,andEntertoload
thedefaultsetting.Thensavethecurrentsetting
bypressingF10.
2.Systemboard
Systemboard
Systemboard
Systemboard
1.Chargethebatterypack.
2.Batterypack
1.RunThinkPadSetup,andthensavecurrent
settingbypressingF10.
2.Systemboard
1.RunThinkPadSetup,andthensavethecurrent
settingbypressingF10.
2.Systemboard
1.Chargethebackupbatteryformorethan8hours
byconnectingtheacadapter.
2.ReplacethebackupbatteryandrunThinkPadSetup
toresetthetimeanddate.
RunThinkPadSetuptoresetthetimeanddate.
40ThinkPadT520,T520i,andW520HardwareMaintenanceManual
Page 49

Table2.Numericerrorcodes(continued)
Symptomorerror
1802
Unauthorizednetworkcardispluggedin—Turnoffand
removetheminiPCInetworkcard.
1820
Morethanoneexternalngerprintreaderisattached.
Poweroffandremoveallbutthereaderthatyousetup
withinyourmainoperatingsystem.
2000
HardDriveActiveProtectionsensordiagnosticsfailed.
Press<Esc>tocontinue.Press<F1>toenterSETUP
2100
DetectionerroronHDD0(MainHDD)
2101
DetectionerroronHDD1(UltrabayHDD)
2102
DetectionerroronHDD2(MiniSATA)
2110
ReaderroronHDD0(MainHDD)
2111
ReaderroronHDD1(UltrabayHDD)
2112
ReaderroronHDD2(MiniSA T A)
2200
MachineT ypeandSerialNumberareinvalid.
2201
MachineUUIDisinvalid.
FRUoraction,insequence
1.RemoveMiniPCInetworkcard.
2.Systemboard
Removeallbutthereaderthatyousetupforthe
authentication.
1.Undockdockingstationorportreplicatorifitis
attachedtotheThinkPadNotebook.
2.PlacetheNotebookonahorizontalsurface.Donot
applyanyphysicalshocktothecomputer.
3.RunDiagnostics➙ThinkPadDevices➙HDD
ActiveProtectionT est.
1.Reseattheharddiskdrive.
2.Mainharddiskdrive
3.Systemboard
1.Reseattheharddiskdrive.
2.Ultrabayharddiskdrive
3.Systemboard
1.ReseattheMiniSAT Adevice.
2.MiniSA T Adevice
3.Systemboard
1.Reseattheharddiskdrive.
2.Mainharddiskdrive
3.Systemboard
1.Reseattheharddiskdrive.
2.Ultrabayharddiskdrive
3.Systemboard
1.ReseattheMiniSAT Adevice.
2.MiniSA T Adevice
3.Systemboard
Systemboard
Systemboard
Errormessages
Table3.Errormessages
Symptomorerror
Fanerror.1.Fan
Thermalsensingerror.
FRUoraction,insequence
2.Thermalgrease
3.Systemboard
Systemboard
Chapter4.Relatedserviceinformation41
Page 50

Table3.Errormessages(continued)
Symptomorerror
Thissystemdoesnotsupportbatteriesthatarenot
genuineLenovo-madeorauthorized.Thesystemwill
continuetoboot,butmaynotchargeunauthorized
batteries.
Attention:Lenovohasnoresponsibilityforthe
performanceorsafetyofunauthorizedbatteries,and
providesnowarrantiesforfailuresordamagearisingout
oftheiruse.
TheconnectedACadapterhasalowerwattagethanthe
recommendedmodelwhichwasshippedwiththesystem.
Thiswillincreasethetimetochargethebattery,and
systemperformancewillbeadjustedtomatchthe
availablepower.
PleaseconnecttheACadapterwhichwasshippedwith
thesystemforbestsystemperformance.
PresstheESCkeytocontinue.Dockingstationis
removedoritsIDisdifferent,pressF3topoweroff
systemandrestorecorrectdockingstation,pressF4to
normalboot.
Beepsymptoms
Table4.Beepsymptoms
FRUoraction,insequence
Replacethebattery.
Chargetheacpoweradapter.
Symptomorerror
Onebeepandablank,unreadable,orashingLCD.1.ReseattheLCDconnector
Onelongandtwoshortbeeps,andablankorunreadable
LCD.
Twoshortbeepswitherrorcodes.
Twoshortbeepsandablankscreen.
Twoormorebeeps,oracontinuousbeep.Operating
systemstartssuccessfully.
Threeshortbeeps,pause,threemoreshortbeeps,and
oneshortbeep.
Oneshortbeep,pause,threeshortbeeps,pause,three
moreshortbeeps,andoneshortbeep.
Onlythecursorappears.
Fourcyclesoffourshortbeepsandablankscreen.
Fiveshortbeepsandablankscreen.
FRUoraction,insequence
2.LCDassembly
3.ExternalCRT
4.Systemboard
1.Systemboard
2.LCDassembly
3.DIMM
POSTerror .See“Numericerrorcodes”onpage40.
1.Systemboard
2.DIMM
Ifamini-PCIEthernetcardisinstalled,conrmthatAlert
OnLAN2inThinkPadSetupisdisabled.
1.DIMM
2.Systemboard
Reinstalltheoperatingsystem.
Systemboard(securitychip)
Systemboard
42ThinkPadT520,T520i,andW520HardwareMaintenanceManual
Page 51

No-beepsymptoms
Table5.No-beepsymptoms
Symptomorerror
Nobeep,power-onindicatoron,LCDblank,andno
POST.
Nobeep,power-onindicatoron,andLCDblankduring
POST.
Thepower-onpasswordpromptappears.Apower-onpasswordorasupervisorpasswordisset.
Thehard-diskpasswordpromptappears.Ahard-diskpasswordisset.T ypethepasswordand
FRUoraction,insequence
1.Makesurethateveryconnectorisconnected
tightlyandcorrectly.
2.DIMM
3.Systemboard
1.ReseatDIMM.
2.Systemboard
TypethepasswordandpressEnter.
pressEnter.
LCD-relatedsymptoms
Important:TheTFTLCDforthenotebookcomputercontainsmanythin-lmtransistors(TFT s).The
presenceofasmallnumberofdotsthataremissing,discolored,oralwayslightedischaracteristicofTFT
LCDtechnology,butexcessivepixelproblemscancauseviewingconcerns.IftheLCDyouareservicinghas
twoorlessvisibledefectivepixels,itshouldnotbeconsideredfaulty.However,iftheLCDhasthreeormore
visibledefectivepixels,itwillbedeemedasdefectivebyLenovoanditshouldbereplaced.
Note:
•ThispolicyappliestoallThinkPadNotebookspurchasedon1January,2008orlater.
•LenovowillnotprovidereplacementiftheLCDiswithinspecicationaswecannotguaranteethat
anyreplacementLCDwillhavezeropixeldefects.
•OnepixelconsistsofR,G,Bsub-pixels.
Table6.LCD-relatedsymptoms
Symptomorerror
Nobeep,power-onindicatoron,andablankLCDduring
POST.
•LCDbacklightnotworking
•LCDtoodark
•LCDbrightnesscannotbeadjusted.
•LCDcontrastcannotbeadjusted.
•LCDscreenunreadable
•Charactersmissingpixels
•Screenabnormal
•Wrongcolordisplayed
HorizontalorverticallinesdisplayedonLCDLCDassembly
FRUoraction,insequence
Systemboard
1.ReseattheLCDconnectors.
2.LCDassembly
3.Systemboard
1.Seeimportantnotefor“LCD-relatedsymptoms. ”
2.ReseatallLCDconnectors.
3.LCDassembly
4.Systemboard
Intermittentproblems
Intermittentsystemhangproblemscanbeduetoavarietyofcausesthathavenothingtodowithahardware
defect,suchascosmicradiation,electrostaticdischarge,orsoftwareerrors.FRUreplacementshouldbe
consideredonlywhenaproblemrecurs.
Whenanalyzinganintermittentproblem,dothefollowing:
1.Runthediagnostictestforthesystemboardinloopmodeatleast10times.
Chapter4.Relatedserviceinformation43
Page 52

2.Ifnoerrorisdetected,donotreplaceanyFRUs.
3.Ifanyerrorisdetected,replacetheFRUshownbytheFRUcode.Rerunthetesttoverifythatno
moreerrorsexist.
Undeterminedproblems
Ifthediagnostictestsdidnotidentifytheadapterordevicethathasfailed,ifwrongdevicesareinstalled,
orifthesystemsimplyisnotoperating,followtheseprocedurestoisolatethefailingFRU(donotisolate
FRUsthathavenodefects).
Verifythatallattacheddevicesaresupportedbythecomputer.
Verifythatthepowersupplybeingusedatthetimeofthefailureisoperatingcorrectly.(See“Powersystem
checkout”onpage32.)
1.T urnoffthecomputer.
2.VisuallycheckeachFRUfordamage.ReplaceanydamagedFRU.
3.Removeordisconnectallofthefollowingdevices:
a.Non- ThinkPaddevices
b.Devicesattachedtothedockingstationortheportreplicator
c.Printer,mouse,andotherexternaldevices
d.Batterypack
e.Harddiskdrive
f.Externaldiskettedriveoropticaldrive
g.DIMM
h.Opticaldiskordisketteintheinternaldrive
i.PCCards
4.T urnonthecomputer.
5.Determinewhethertheproblemhasbeensolved.
6.Iftheproblemdoesnotrecur,reconnecttheremoveddevicesoneatatimeuntilyoundthefailingFRU.
7.Iftheproblemremains,replacethefollowingFRUsoneatatime(donotreplaceanondefectiveFRU):
a.Systemboard
b.LCDassembly
44ThinkPadT520,T520i,andW520HardwareMaintenanceManual
Page 53

Chapter5.InstallingandconguringRAID
ThischapterpresentsfollowinginformationaboutattachingSATAdevicesandconguringRAIDforthe
RAID-supportedmodelsinthisproduct.
Note:WhentheUEFIBIOSwasformattedorthesystemboardwasreplacedintheRAID-supportedmodels,
RAIDisenabledbydefault.
ImportantnoticesforsettingRAID:
BeforeyouinstallandcongureRAID,makesureofthecurrentRAIDsettingonthecomputeryouare
servicing.
ThisproductsupportseitherRAIDLevel0(RAID0)orRAIDLevel1(RAID1).ConrmtheRAIDsetting
informationprovidedfromthecustomeratrst,thenproceedwiththeinstallation.
GoodornonfailingdriveshavetobeinHDDbay0ifyouhaveRAID1.
•“SupportedRAIDcongurations”onpage45
•“ConguringthesystemUEFIBIOStoenableembeddedSATARAIDfunctionality”onpage45
•“CreatingRAIDvolumes”onpage45
•“DeletingRAIDvolumes”onpage46
SupportedRAIDcongurations
ThefollowingRAIDcongurationsaresupportedonThinkPadW520:
RAIDLevel0(RAID0)–Stripeddiskarray
Betterperformanceandnofaulttolerance.
RAIDLevel1(RAID1)–Mirroreddiskarray
Improvedreadperformanceand100%redundancy .
ConguringthesystemUEFIBIOStoenableembeddedSAT ARAID
functionality
ToconguretheUEFIBIOSforRAID,doasfollows:
1.PressF1toentertheThinkPadSetupmenu.
2.SelectCong.
3.SelectSerialA TA(SA TA).
4.SelectSA T AControllerModeOption
5.SelectRAID
6.PressF10tosavethesettings.
Note:SA T AControllerModeOptionisrecoveredtoRAIDbydefault.Whenyouuseothermodebefore
loaddefaultsettinginThinkPadSetupmenusuchasF9key,youhavetorestorethesettingasyoulike.
CreatingRAIDvolumes
ThissectiondescribeshowtousetheIntel®RapidStorageT echnologyoptionROMCongurationUtilityto
createRAIDvolumes.
©CopyrightLenovo2011
45
Page 54

TocreateRAIDvolumes,doasfollows:
1.T urnonthecomputer.
2.Duringthestartup,whenaprompttopressCtrl+ItoentertheCongurationUtilityisdisplayedonthe
screen,pressandholdtheCtrlkey,andpresstheIkey.
3.ThescreenforIntelRapidStorageT echnologyoptionROMisdisplayed.Select“CreateRAIDVolume”
andpressEnter.
4.Usingtheupanddownarrowkeys,T abkeys,andEnterkeyselecttheRAIDlevelandllinotherelds.
5.Select“CreateVolume”bypressingtheEnterkey.Whenthedialogboxappears,presstheYkey.
Attention:AllexistingdatawillbeerasedwhiletheRAIDvolumeisbeingcreated.
6.ExittheCongurationUtility.
DeletingRAIDvolumes
ThissectiondescribeshowtousetheIntelRapidStorageT echnologyoptionROMCongurationUtilityto
deleteRAIDvolumes.
TodeleteRAIDvolumes,doasfollows:
1.T urnonthecomputer.
2.Duringthestartup,whenaprompttopressCtrl+ItoentertheCongurationUtilityisdisplayedonthe
screen,pressandholdtheCtrlkey,andpresstheIkey.
3.ThescreenforIntelRapidStorageT echnologyoptionROMisdisplayed.SelecttheRAIDvolumetobe
deleted,andpressDelete.
4.Whenprompted,pressYkeytoconrmthedeletionoftheselectedRAIDvolume.
5.AfterdeletingaRAIDvolume,youcan:
•Returntostep2todeleteadditionalRAIDvolume.
•See“CreatingRAIDvolumes”onpage45forRAIDvolumecreation.
•UsethearrowkeystoselectExitandpressEnter.
•UsethearrowkeystoselectResettingdiskstonon-RAID,andpressEnter.
Attention:IftheSerialAT AitemintheThinkPadSetupmenuofthecomputeryouareservicingwassetto
AHCIwhenitwasmanufactured,thentocreateaRAIDarrayyoumustrstenableRAIDinUEFIBIOS,create
RAIDvolume,andthenreinstalltheoperatingsystem.Alldataontheharddiskswillbeerasedduringthis
process.Formoreinformation,see“CreatingRAIDvolumes”onpage45.
46ThinkPadT520,T520i,andW520HardwareMaintenanceManual
Page 55

Chapter6.Statusindicators
7
8
3 4 5 621
9
12 11 10
Thischapterpresentsthesystemstatusindicatorsthatshowthestatusofthecomputer.
©CopyrightLenovo2011
47
Page 56

Table7.Statusindicators
R
IndicatorMeaning
1
Speakermute
Orange:
Thespeakerisonmute.Tosetthe
speakersonmuteorunmute,pressthe
speakermutebutton.
2
Microphonemute
Orange:
Themicrophoneisonmute.Noneofthe
recordingdevicesisavailablewhilethe
microphonemuteisonbydefault.
3
WirelessLAN,
WirelessWAN,or
WiMAXstatus
Green:ThewirelessLANfeature(theIEEE
802.11b/gstandard,802.11a/b/g,
or802.11n),wirelessWANfeature,or
WiMaxfeatureison,andtheradiolink
isreadyforuse.
Blinkinggreen:Dataisbeingtransmitted.
4
Bluetoothwireless
status
Green:
TheBluetoothwirelessfeatureison,and
theradiolinkisreadyforuse.
Blinkinggreen:Dataisbeingtransmitted.
5
Deviceaccess
Green:
Dataisbeingreadfromorwrittentothe
harddiskdrive,thediskettedrive,orthe
driveintheSerialUltrabayEnhanced
device.Whenthisindicatorison,donot
putthecomputerintosleep(standby)
modeorturnoffthecomputer.
Note:Donotmovethesystemwhilethegreendeviceaccesslightison.Sudden
physicalshockcouldcausedriveerrors.
6
Poweron
Green:
Thecomputerisonandreadytouse.
Thisindicatorstayslitaroundthe
power-onbuttonwheneverthecomputer
isonandisnotinsleep(standby)mode.
7
SerialUltrabay
Enhanceddevice
status
Green:ASerialUltrabayEnhanceddeviceis
installedandinuse.
Blinkinggreen:
ASerialUltrabayEnhanceddeviceisin
theprocessofbeingdetached.
Turnoff:
ASerialUltrabayEnhanceddeviceis
readytobeattachedordetached.
8
Fingerprintreader
status
Green:
Blinkinggreen:
Thengerprintreaderisreadytoswipe.
Thengerprintisbeingauthenticatedor
hasbeenauthenticated.
Blinkingorange:
Thengerprintcouldnotbe
authenticated.
48ThinkPadT520,T520i,andW520HardwareMaintenanceManual
Page 57

Table7.Statusindicators(continued)
IndicatorMeaning
9
Capslock
Green:CapsLockmodeisenabled.T oenable
ordisableCapsLockmode,pressthe
CapsLockkey.
10
Sleep(standbyfor
WindowsXP)status
Green:Thecomputerisinsleep(standby)mode.
Blinkinggreen:
Thecomputerisenteringsleep(standby)
modeorhibernationmode,oris
resumingnormaloperation.
11
Batterystatus
Green:
Orange:
Thebatteryhasmorethan20%charge.
Thebatteryhasbetween5%and20%
charge.
Fastblinkingorange:
Thebatteryhaslessthan5%charge.
Note:Thebatterymaybecharging.
Slowblinkingorange:
Thebatteryisbeingcharged.Whenit
reaches20%,theblinkingcolorchanges
togreen.
Slowblinkinggreen:
Thebatteryhasbetween20%and80%
charge,andchargingiscontinuing.
Whenthebatteryreaches80%charge,
blinkingstops,butthechargingmay
continueuntilthebatteryis100%
charged.
Note:Ifthecomputerisoperating
onbatterypower,thebatterystatus
indicatordoesnotworkwhilethe
computeristurnedofforisinsleep
(standby)modeorhibernationmode.
Quickblinkingorange:
Anerrorhasbeenoccurredinthebattery.
Thebatterystatusindicatorisoff:Thebatterypackofthecomputeris
detached.
12
Colorsensorstatus
Green:Calibrationiscomplete.Whenthelidis
opened,theindicatorturnsoff.
Blinkinggreen:Displaycolorsarebeingcalibrated.
Chapter6.Statusindicators49
Page 58

50ThinkPadT520,T520i,andW520HardwareMaintenanceManual
Page 59

Chapter7.Fnkeycombinations
ThefollowingtableshowsthefunctionofeachcombinationofFnwithafunctionkey.
Table8.Fnkeycombinations
KeycombinationDescription
Fn+F1Reserved.
Fn+F2Lockthecomputer.
Fn+F3
Fn+F4
Fn+F5
Fn+F6
Fn+F7Applyapresentationschemedirectly,withnoneedtostartPresentationDirector.
Selectapowerplan(inWindowsXP ,powerscheme)thathasbeencreatedbyPowerManager,
oradjustthepowerlevelbyusingtheslidercontrol.Whenyoupressthiscombination,a
panelforselectingapowerplan(powerscheme)appears.
Notes:
Tousethiscombinationofthekeys,ThinkPadPMdevicedrivermusthavebeeninstalled
onthecomputer.
IfyouhaveloggedonwithanadministratoruserIDinWindowsXP ,andyoupressFn+F3,
thepanelforselectingapowerschemeappears.Ifyouhaveloggedonwithanotheruser
IDinWindowsXP ,andyoupressFn+F3,thepaneldoesnotappear.
Putthecomputerinsleep(standby)mode.T oreturntonormaloperation,presstheFnkey
only,withoutpressingafunctionkey.
Notes:
Tousethiscombinationofthekeys,ThinkPadPMdevicedrivermusthavebeeninstalled
onthecomputer.
Ifyouwanttousethecombinationtoputthecomputerintohibernationmodeor
do-nothingmode(inWindowsXP ,shutthecomputerdownorshowthepanelforturning
offthecomputer),changethesettingsinthePowerManager.
Enableordisablethebuilt-inwirelessnetworkingfeatures.IfyoupressFn+F5,alistofwireless
featuresisdisplayed.Y oucanquicklychangethepowerstateofeachfeatureinthelist.
Notes:IfyouwanttouseFn+F5toenableordisablethewirelessfeatures,thefollowing
devicedriversmustbeinstalledonthecomputerbeforehand:
•PowerManagementdriver
•OnScreenDisplayUtility
•Wirelessdevicedrivers
Changethecameraandaudiosettings.WhenyoupressFn+F6,thecameraandaudiosetting
windowisopenedandthecamerapreviewisturnedon.
Note:Thecamerasettingsareaonlyappearsifthecomputerhasanintegratedcamera.
©CopyrightLenovo2011
TodisablethisfunctionandusetheFn+F7keycombinationforswitchingadisplayoutput
location,startPresentationDirector,andchangethesettings.
Note:IfthecomputerisanWindows7model,itdoesnotsupportpresentationschemes,
howevertheFn+F7combinationmightstillbeusedtoswitchdisplayoutputlocation.
51
Page 60

Table8.Fnkeycombinations(continued)
KeycombinationDescription
Fn+F7ForWindows7:
Switchbetweenthecomputerdisplayandanexternalmonitor.Windowswillshowthese
displayoptions:
•Computerdisplayonly(LCD)
•Computerdisplayandexternalmonitor(sameimage)
•Computerdisplayandexternalmonitor(extendeddesktopfunction)
•Externalmonitoronly
Note:T oswitchbetweenthecomputerdisplayandanexternalmonitor,theWin+Pkey
combinationisalsoavailable.
ForWindowsVistaandWindowsXP:
Switchbetweenthecomputerdisplayandanexternalmonitor.Ifanexternalmonitoris
attached,computeroutputisdisplayedinthefollowingthreepatternsbyturns:
•Externalmonitor(CRTdisplay)
•Computerdisplayandexternalmonitor(LCD+CRTdisplay)
•Computerdisplay(LCD)
Notes:
•Thisfunctionisnotsupportedifdifferentdesktopimagesaredisplayedonthecomputer
displayandtheexternalmonitor(theExtenddesktopfunction).
•ThisfunctiondoesnotworkwhileaDVDmovieoravideoclipisplaying.
•AsforThinkPadW520models,theCRTconnectordoesnotworkintheDOSenvironment
atNVIDIAOptimusmodeorIntegratedGraphicsmode,youneedtochangetoDiscrete
GraphicsmodetoturnontheCRTmonitor .IfthereisnodisplaytochangetheThinkPad
Setupsetting,pressF7toswitchtotheDiscreteGraphicsmoderightafterpower-on.
Toenablethisfunction,startPresentationDirector,andchangethesettings.
Note:MultipleuserscanlogontoasingleoperatingsystembyusingdifferentuserIDs.Each
userneedstodothefollowing:ClickStart➙AllPrograms➙ThinkVantage➙Presentation
Director,andchangetheFn+F7settings.
Fn+F8
Fn+F9Reserved.
Fn+F10Reserved.
Fn+F11Reserved.
Fn+F12Putthecomputerintohibernationmode.T oreturntonormaloperation,pressthepower
Fn+PgUp
ChangethesettingsoftheUltraNav®pointingdevice.
buttonforlessthanfourseconds.
Notes:
Tousethiscombinationofthekeys,ThinkPadPMdevicedrivermusthavebeeninstalled
onthecomputer.
ThoughthescreenfadesoutimmediatelyafterFn+F12arepressed,thecomputer
doesnotenterthehibernationmodeimmediately.Donotmovethesystemuntilthe
sleep(standby)statusindicatorstopsblinking.Movingthecomputerwhenitisentering
hibernationmightcausecorruptionoftheharddiskdrive.
TurntheThinkLight®onoroff.
Note:ThisfunctionissupportedonlyontheThinkPadNotebooksthathavetheThinkLight.
TheonoroffstatusoftheThinkLightisshownonthescreenforafewsecondswhenyou
pressFn+PgUp.
52ThinkPadT520,T520i,andW520HardwareMaintenanceManual
Page 61

Table8.Fnkeycombinations(continued)
KeycombinationDescription
Fn+HomeThecomputerdisplaybecomesbrighter.
Thepurposeofthismethodistochangethebrightnessleveltemporarily.OnWindowsVista,
thedefaultbrightnesslevelisloadedaftersleep(standby),hibernation,reboot,ordetachingor
attachinganacadapter .Tochangethedefaultbrightnesslevel,changethesettingsofthe
PowerOptionintheControlPanelorusethePowerManager.
Fn+EndThecomputerdisplaybecomesdimmer.
Thepurposeofthismethodistochangethebrightnessleveltemporarily.OnWindowsVista,
thedefaultbrightnesslevelisloadedaftersleep(standby),hibernation,reboot,ordetachingor
attachinganacadapter .Tochangethedefaultbrightnesslevel,changethesettingsofthe
PowerOptionintheControlPanelorusethePowerManager.
Fn+SpacebarEnabletheFullScreenMagnierfunction.
Fn+PrtScHavethesamefunctionastheSysRqkey.
Fn+ScrLk
Enableordisablethenumerickeypad.Theindicatorofnumericlockwillbedisplayedon
thescreen.
Fn+Pause
Fn+cursorkeys
HavethesamefunctionastheBreakkey.
ThesekeycombinationsworkwithWindowsMediaPlayer.Theyhavethefollowingfunctions:
•Fn+downarrowkey:PlayorPause
•Fn+uparrowkey:Stop
•Fn+rightarrowkey:NextT rack
•Fn+leftarrowkey:PreviousTrack
Chapter7.Fnkeycombinations53
Page 62

54ThinkPadT520,T520i,andW520HardwareMaintenanceManual
Page 63

Chapter8.FRUreplacementnotices
Thischapterpresentsnoticesrelatedtoremovingandreplacingparts.Readthischaptercarefullybefore
replacinganyFRU.
Screwnotices
Loosescrewscancauseareliabilityproblem.IntheThinkPadNotebook,thisproblemisaddressedwith
specialnylon-coatedscrewsthathavethefollowingcharacteristics:
•Theymaintaintightconnections.
•Theydonoteasilycomeloose,evenwithshockorvibration.
•Theyarehardertotighten.
•Eachoneshouldbeusedonlyonce.
Dothefollowingwhenyouservicethismachine:
•Keepthescrewkit(fortheP/N,see“Miscellaneousparts”onpage157)inyourtoolbag.
•Alwaysusenewscrews.
•Useatorquescrewdriverifyouhaveone.
Tightenscrewsasfollows:
•Plastictoplastic
Turnanadditional90degreesafterthescrewheadtouchesthesurfaceoftheplasticpart:
•Logiccardtoplastic
Turnanadditional180degreesafterthescrewheadtouchesthesurfaceofthelogiccard:
•Torquedriver
Ifyouhaveatorquedriver,refertothe“T orque”columnforeachstep.
–Makesurethatyouusethecorrectscrew.Ifyouhaveatorquescrewdriver,tightenallscrewsrmly
tothetorqueshowninthetable.Neveruseascrewthatyouremoved.Useanewone.Make
surethatallofthescrewsaretightenedrmly.
–Ensuretorquescrewdriversarecalibratedcorrectlyfollowingcountryspecications.
©CopyrightLenovo2011
55
Page 64

Retainingserialnumbers
Thissectionincludesthefollowingdescriptions:
•“Restoringtheserialnumberofthesystemunit”onpage56
•“RetainingtheUUID”onpage56
•“ReadingorwritingtheECAinformation”onpage57
Restoringtheserialnumberofthesystemunit
Whenthecomputerwasmanufactured,theEEPROMonthesystemboardwasloadedwiththeserial
numbersofthesystemandallmajorcomponents.Thesenumbersneedtoremainthesamethroughout
thelifeofthecomputer.
Ifyoureplacethesystemboard,youmustrestoretheserialnumberofthesystemunittoitsoriginalvalue.
Beforereplacingthesystemboard,savetheoriginalserialnumberbydoingthefollowing:
1.InstalltheLENOVOThinkPadHardwareMaintenanceDisketteVersion1.76orlater,andrestartthe
computer.
2.Fromthemainmenu,select1.SetSystemIdentication.
3.Select2.ReadS/NdatafromEEPROM.
Theserialnumberofeachdeviceinyourcomputerisdisplayed;theserialnumberofthesystemunitis
listedasfollows:
•20:Serialnumber
Writedownthatnumber.
Note:Theserialnumberofthesystemunitisalsowrittenonthelabelattachedtothebottomofthecomputer.
Afteryouhavereplacedthesystemboard,restoretheserialnumberbydoingthefollowing:
1.InstalltheLENOVOThinkPadHardwareMaintenanceDisketteVersion1.76orlaterandrestartthe
computer.
2.Fromthemainmenu,select1.SetSystemIdentication.
3.Select1.AddS/NdatafromEEPROM.Followtheinstructionsonthescreen.
IftheMTMandProductIDnumbersdifferfromeachotherontherearlabel,usewhatisshownforthe
ProductIDeld.Seeexamplebelow:
MTMonrearlabel:
TTTT-CTOS/NSSSSSSS
ProductIDonrearlabel:
TTTT-MMM(UsethisnumberwhensettingSerialNumber)
Intheexample,theSerialNumbertobeinputis'1STTTTMMMSSSSSSS'.
RetainingtheUUID
TheUniversallyUniqueIdentier(UUID)isa128-bitnumberuniquelyassignedtoyourcomputerat
productionandstoredintheEEPROMofyoursystemboard.
ThealgorithmthatgeneratesthenumberisdesignedtoprovideuniqueIDsuntiltheyearA.D.3400.Notwo
computersintheworldhavethesamenumber.
56ThinkPadT520,T520i,andW520HardwareMaintenanceManual
Page 65

Whenyoureplacethesystemboard,youmustsettheUUIDonthenewsystemboardasfollows:
1.InstalltheLENOVOThinkPadHardwareMaintenanceDisketteVersion1.76orlater,andrestartthe
computer.
2.Fromthemainmenu,select4.AssignUUID.AnewUUIDiscreatedandwritten.IfavalidUUIDalready
exists,itisnotoverwritten.
ReadingorwritingtheECAinformation
InformationonEngineeringChangeAnnouncements(ECA)arestoredintheEEPROMofthesystemboard.
TheelectronicstorageofthisinformationsimpliestheproceduretocheckiftheECAhasbeenpreviously
appliedtoamachine.ThemachinedoesnotneedtobedisassembledtocheckfortheECAapplication.
TocheckwhatECAshavebeenpreviouslyappliedtothemachine,usetheECAInformationRead/Write
functionontheLENOVOThinkPadHardwareMaintenanceDisketteVersion1.76orlater.
1.InserttheLENOVOThinkPadHardwareMaintenanceDisketteVersion1.76orlater,andrestartthe
computer.
2.Fromthemainmenu,select6.SetECAInformation.
3.T oreadECAinformation,select2.ReadECA/reworknumberfromEEPROMandfollowthe
instruction.
4.T oreadboxbuilddate,select5.ReadboxbuilddatefromEEPROM,andfollowtheinstructionon
thescreen.
AfteranECAhasbeenappliedtothemachine,theEEPROMmustbeupdatedtoreecttheECA's
application.UsetheLENOVOThinkPadHardwareMaintenanceDisketteVersion1.76orlatertoupdatethe
EEPROM.
Note:OnlytheECAnumberisstoredintheEEPROM.ThemachinetypeoftheECAisassumedbethesame
asthemachinetypeofthemachinethathadtheECAappliedtoit.
1.InserttheLENOVOThinkPadHardwareMaintenanceDisketteVersion1.76orlater,andrestartthe
computer.
2.Fromthemainmenu,select6.SetECAInformation.
3.T owriteECAinformation,select1.WriteECA/reworknumberfromEEPROM,andfollowthe
instruction.
4.T owriteboxbuilddate,select4.WriteboxbuilddatefromEEPROM,andfollowtheinstructionon
thescreen.
Ifthesystemboardisbeingreplaced,trytoreadtheECAinformationfromtheoldsystemboardandtransfer
theinformationtothenewsystem.Ifthesystemboardisinoperable,thiswillnotbepossible.
Chapter8.FRUreplacementnotices57
Page 66

58ThinkPadT520,T520i,andW520HardwareMaintenanceManual
Page 67

Chapter9.RemovingandreplacingaFRU
ThischapterpresentsdirectionsanddrawingsforuseinremovingandreplacingaFRU.Besuretoobserve
thefollowinggeneralrules:
1.Donottrytoserviceanycomputerunlessyouhavebeentrainedandcertied.Anuntrainedpersonruns
theriskofdamagingparts.
2.BeforereplacinganyFRU,reviewChapter8“FRUreplacementnotices”onpage55.
3.BeginbyremovinganyFRUsthathavetoberemovedbeforethefailingFRU.AnysuchFRUsarelisted
atthetopofthepage.Removethemintheorderinwhichtheyarelisted.
4.FollowthecorrectsequenceinthestepsforremovingtheFRU,asgiveninthedrawingsbythe
numbersinsquarecallouts.
5.WhenturningascrewtoreplaceaFRU,turnitinthedirectionasgivenbythearrowinthedrawing.
6.WhenremovingtheFRU,moveitinthedirectionasgivenbythearrowinthedrawing.
7.T oputthenewFRUinplace,reversetheremovalprocedureandfollowanynotesthatpertainto
replacement.Forinformationaboutconnectingandarranginginternalcables,seeChapter10
“Locations”onpage103
8.WhenreplacingaFRU,usethecorrectscrewasshownintheprocedures.
DANGER
BeforeremovinganyFRU,turnoffthecomputer,unplugallpowercordsfromelectricaloutlets,
removethebatterypack,andthendisconnectanyinterconnectingcables.
.
Attention:AfterreplacingaFRU,donotturnonthecomputeruntilyouhavemadesurethatallscrews,
springs,andothersmallpartsareinplaceandnonearelooseinsidethecomputer.Verifythisbyshaking
thecomputergentlyandlisteningforrattlingsounds.Metallicpartsormetalakescancauseelectrical
shortcircuits.
Attention:Thesystemboardissensitiveto,andcanbedamagedby,electrostaticdischarge.Before
touchingit,establishpersonalgroundingbytouchingagroundpointwithonehandorbyusingan
electrostaticdischarge(ESD)strap(P/N6405959).
©CopyrightLenovo2011
59
Page 68

BeforeservicingThinkPadT520,T520i,andW520
Table9.RemovalstepsofSIMcard
SomemodelsoftheThinkPadT520,T520i,andW520youareservicingmighthavetheSIMcardthatthecustomer
hasinstalled.
IfthecomputeryouareservicinghastheSIMcard,removeitbeforeyoustarttheservicing.
ToremovetheSIMcard,youneedtoremovethebatterypackrst.(See“1010Batterypack”onpage60
Afteryounishtheservicing,makesurethatyouinsertthecardbackintotheslotrmly.
1010Batterypack
Importantnoticeforreplacingabatterypack:
ThinkVantageT oolboxhaveanautomaticbatterydiagnosticthatdeterminesifthebatterypackisdefective.
AbatterypackFRUshouldnotbereplacedunlessthisdiagnosticshowsthatthebatteryisdefective.
.)
Theonlyexceptiontothisisifthebatterypackisphysicallydamagedoracustomerisreportingapossible
safetyissue.
IfThinkVantageT oolboxisnotinstalledinthecomputer,thecustomershoulddownloadthisprogram
beforeanon-physicallydamagedbatterypackisreplaced.Notethataphysicallydamagedbatterypack
isnon-warrantyreplacement.
Table10.Removalstepsofbatterypack
DANGER
Useonlythebatteryspeciedinthepartslistforyourcomputer.Anyotherbatterycouldigniteorexplode.
Unlockthebatterylatch1.Holdingthebatterylatchintheunlockedposition2,removethebatterypackin
thedirectionshownbyarrow3.
60ThinkPadT520,T520i,andW520HardwareMaintenanceManual
Page 69

Table10.Removalstepsofbatterypack(continued)
3
21
Wheninstalling:Installthebatterypackintheslot,andthenmakesurethatthebatterylatchisinthelockedposition.
1020SerialUltrabayEnhanceddeviceortravelbezel
Foraccess,removethisFRU:
•“1010Batterypack”onpage60
Table11.RemovalstepsofSerialUltrabayEnhanceddeviceortravelbezel
Holdingthebaylocklatchintheunlockedposition1,slidethebayejectlatch2,andthenpullouttheSerial
UltrabayEnhanceddeviceorthetravelbezelinthedirectionshownbyarrow3.
Chapter9.RemovingandreplacingaFRU61
Page 70

Table11.RemovalstepsofSerialUltrabayEnhanceddeviceortravelbezel(continued)
3
2
1
1030DIMMslotcover
Foraccess,removethisFRU:
•“1010Batterypack”onpage60
Table12.RemovalstepsofDIMMslotcover
Note:Loosenthescrews1,butdonotremovethem.
62ThinkPadT520,T520i,andW520HardwareMaintenanceManual
Page 71

Table12.RemovalstepsofDIMMslotcover(continued)
1
2
1040DIMM(bottomslot)
Foraccess,removetheseFRUsinorder:
•“1010Batterypack”onpage60
•“1030DIMMslotcover”onpage62
Chapter9.RemovingandreplacingaFRU63
Page 72

Table13.RemovalstepsofDIMM(bottomslot)
1
1
2
ForThinkPadT520andT520i:
64ThinkPadT520,T520i,andW520HardwareMaintenanceManual
Page 73

Table13.RemovalstepsofDIMM(bottomslot)(continued)
1
1
2
a b
ForThinkPadW520:
Note:IfonlyoneDIMMisusedonthecomputeryouareservicing,thecardmustbeinstalledinSLOT-0a,but
notinSLOT -2
Wheninstalling:InsertthenotchedendoftheDIMMintothesocket.PresstheDIMMrmly,andpivotituntilit
snapsintotheplace.Makesurethatitisrmlyxedintheslotanddoesnotmoveeasily.
1050Harddiskdriveslotcover,harddiskdrive(HDD)andHDDrubber
b.
railsorsolidstatedrive(SSD)andstorageconverter
Foraccess,removethisFRU:
•“1010Batterypack”onpage60
Attention:
•Donotdropthedriveorapplyanyphysicalshocktoit.Thedriveissensitivetophysicalshock.
Improperhandlingcancausedamageandpermanentlossofdata.
•Beforeremovingthedrive,havetheusermakeabackupcopyofalltheinformationonitifpossible.
•Neverremovethedrivewhilethesystemisoperatingorisinsuspendmode.
Chapter9.RemovingandreplacingaFRU65
Page 74

Table14.Removalstepsofharddiskdriveslotcover,HDDandHDDrubberrailsorSSDandstorageconverter
2
1
3
4
4
Note:Loosenthescrew1,butdonotremoveit.
Table15.RemovalstepsofHDDandHDDrubberrails
66ThinkPadT520,T520i,andW520HardwareMaintenanceManual
Page 75

Table16.RemovalstepsofSSDandSSDspacers
4
4
1
1
Wheninstalling:MakesurethattheSSDconnectororHDDconnectorisattachedrmly.
1060Keyboard
Foraccess,removetheseFRUsinorder:
•“1010Batterypack”onpage60
•“1030DIMMslotcover”onpage62
Table17.Removalstepsofkeyboard
StepScrew(quantity)Color
1
M2×14mm,wafer-head,nylon-coated(2)
Black0.181Nm
Chapter9.RemovingandreplacingaFRU67
Torque
(1.85kgfcm)
Page 76

Table17.Removalstepsofkeyboard(continued)
2
3
4
1.Pushdownthekeyboardalittletowardthearrow2untilthefrontedgeofthekeyboardisdetachedfrom
thekeyboardbezel.
2.Liftthekeyboardalittleinthedirectionshownbyarrow3,andthendetachtheconnector4.
Wheninstallingthekeyboard,doasfollows:
68ThinkPadT520,T520i,andW520HardwareMaintenanceManual
Page 77

Table18.Installationstepsofkeyboard
1
a
a
1.Attachthekeyboardconnector1.
2.Attachthekeyboardsothatthekeyboardedgesaareundertheframeasshowninthisgure.
Chapter9.RemovingandreplacingaFRU69
Page 78

Table18.Installationstepsofkeyboard(continued)
b
b
b
3.Gentlypressthekeyswithyourthumbsandtrytoslidethekeyboardtowardyou.
4.Makesurethatthefrontsideofthekeyboard(b)ishousedrmly.
5.Securethekeyboardbytighteningthescrewsfromthebottomsideofthecomputer.
1070DIMM(upperslot)
Foraccess,removetheseFRUsinorder:
•“1010Batterypack”onpage60
•“1030DIMMslotcover”onpage62
•“1060Keyboard”onpage67
70ThinkPadT520,T520i,andW520HardwareMaintenanceManual
Page 79

Table19.RemovalstepsofDIMM(upperslot)
1
1
2
a
b
Note:ForThinkPadW520,ifonlyoneDIMMisusedonthecomputeryouareservicing,thecardmustbeinstalledin
SLOT -0
Wheninstalling:InsertthenotchedendoftheDIMMintothesocket.PresstheDIMMrmly,andpivotituntilit
snapsintotheplace.Makesurethatitisrmlyxedintheslotanddoesnotmoveeasily.
a,butnotinSLOT -2b.
1080PCIExpressMiniCardforwirelessLAN
Foraccess,removetheseFRUsinorder:
•“1010Batterypack”onpage60
•“1030DIMMslotcover”onpage62
•“1060Keyboard”onpage67
Chapter9.RemovingandreplacingaFRU71
Page 80

Table20.RemovalstepsofPCIExpressMiniCardforwirelessLAN
1
1
1
3
2
Instep1,unplugthejacksbyusingtheantennaRFconnectorremovaltool(P/N:08K7159)orpicktheconnectors
withyourngersandgentlyunplugthemindirectionofthearrow.
Note:Somemodelsmighthaveonlytwoantennacablesinstep
1.
StepScrew(quantity)Color
2
M2×3mm,wafer-head,nylon-coated(1)Silver
72ThinkPadT520,T520i,andW520HardwareMaintenanceManual
Torque
0.181Nm
(1.85kgfcm)
Page 81

Table20.RemovalstepsofPCIExpressMiniCardforwirelessLAN(continued)
4
Wheninstalling:
•InmodelswithwirelessLANcardthathastwoantennaconnectors,plugthegraycableintothejacklabeled
MAINorM,andtheblackcableintothejacklabeledAUXorAonthecard.Ifthecomputeryouareservicinghas
threecables,putthewhitecableinthecableprotectiontubeasshowninthisgure.
•InmodelswithwirelessLANcardthathasthreeantennaconnectors,plugthegraycable(MAIN)intothejack
labeledTR1,thewhitecable(3rd)intojacklabeledROorTR3,andtheblackcable(AUX)intojacklabeled
TR2onthecard.
1090PCIExpressMiniCardforwirelessWAN
Foraccess,removetheseFRUsinorder:
•“1010Batterypack”onpage60
•“1030DIMMslotcover”onpage62
•“1060Keyboard”onpage67
Chapter9.RemovingandreplacingaFRU73
Page 82

Table21.RemovalstepsofPCIExpressMiniCardforwirelessWAN
1
1
3
2
Instep1,unplugthejacksbyusingtheantennaRFconnectorremovaltool(P/N:08K7159)orpicktheconnectors
withyourngersandgentlyunplugthemindirectionofthearrow.
StepScrew(quantity)Color
2
M2×3mm,wafer-head,nylon-coated(1)Silver
74ThinkPadT520,T520i,andW520HardwareMaintenanceManual
Torque
0.181Nm
(1.85kgfcm)
Page 83

Table21.RemovalstepsofPCIExpressMiniCardforwirelessWAN(continued)
4
1
2
Note:PlugtheorangecableintothejacklabeledMAIN,andthebluecableintothejacklabeledAUXonthecard.
1100Keyboardbezelassembly
Foraccess,removetheseFRUsinorder:
•“1010Batterypack”onpage60
•“1030DIMMslotcover”onpage62
•“1060Keyboard”onpage67
Attention:Beforeremovingthekeyboardbezelassembly,makesurethatyouhaveremovedExpressCard
blankbezeloranycardintheslot.
Table22.RemovalstepsofExpressCardblankbezelorExpressCard
WhenyoupresstheExpressCardblankbezelorExpressCard1,itpopsout2.
Chapter9.RemovingandreplacingaFRU75
Page 84

Table22.RemovalstepsofExpressCardblankbezelorExpressCard(continued)
1
2
2
2
1
1
1
2
2
Wheninstalling:Makesurethatthebezelorthecardiscorrectlyorientedasshowninthisgure.
Table23.Removalstepsofkeyboardbezelassembly
Note:Thespeakerassemblyisattachedtothekeyboardbezel.
StepScrew(quantity)Color
1
M2×4mm,bind-head,nylon-coated(4)
Black0.181Nm
Torque
(1.85kgfcm)
2
M2×14mm,bind-head,nylon-coated(7)
Black0.181Nm
(1.85kgfcm)
76ThinkPadT520,T520i,andW520HardwareMaintenanceManual
Page 85

Table23.Removalstepsofkeyboardbezelassembly(continued)
4
3
7
6
5
5
6
1110Bluetoothdaughtercard(BDC-3.0)
Foraccess,removetheseFRUsinorder:
•“1010Batterypack”onpage60
•“1180Basecoverassembly”onpage89
•“1060Keyboard”onpage67
•“1100Keyboardbezelassembly”onpage75
Chapter9.RemovingandreplacingaFRU77
Page 86

Table24.RemovalstepsofBDC-3.0
2
1
StepScrew(quantity)Color
1
Wheninstalling:Makesurethattheconnectorisattachedrmly.
M2×3mm,wafer-head,nylon-coated(1)Silver
1120Backupbattery
Foraccess,removetheseFRUsinorder:
•“1010Batterypack”onpage60
•“1030DIMMslotcover”onpage62
•“1060Keyboard”onpage67
•“1100Keyboardbezelassembly”onpage75
DANGER
Useonlythebatteryspeciedinthepartslistforyourcomputer.Anyotherbatterycouldignite
orexplode.
Torque
0.181Nm
(1.85kgfcm)
78ThinkPadT520,T520i,andW520HardwareMaintenanceManual
Page 87

Table25.Removalstepsofbackupbattery
1
2
Wheninstalling:Makesurethatthebatteryconnectorisattachedrmly.
1130SmartCardorSmartCarddummyspacer
Foraccess,removetheseFRUsinorder:
•“1010Batterypack”onpage60
•“1030DIMMslotcover”onpage62
•“1060Keyboard”onpage67
•“1100Keyboardbezelassembly”onpage75
Chapter9.RemovingandreplacingaFRU79
Page 88

Table26.RemovalstepsofSmartCard
1
4
3
3
1
2
6
5
5
StepScrew(quantity)Color
3
M2×3mm,wafer-head,nylon-coated(3)Silver
Torque
0.181Nm
(1.85kgfcm)
80ThinkPadT520,T520i,andW520HardwareMaintenanceManual
Page 89

Table27.Removalstepsofdummycardandspacer
2
3
1
1
StepScrew(quantity)Color
1
M2×3mm,wafer-head,nylon-coated(3)Silver
Torque
0.181Nm
(1.85kgfcm)
1140Speakerassembly
Foraccess,removetheseFRUsinorder:
•“1010Batterypack”onpage60
•“1030DIMMslotcover”onpage62
•“1060Keyboard”onpage67
•“1100Keyboardbezelassembly”onpage75
Chapter9.RemovingandreplacingaFRU81
Page 90

Table28.Removalstepsofspeakerassembly
1
1
1
1
3
2
2
4
4
4
4
4
5
5
5
5
5
StepScrew(quantity)Color
1
M2×3mm,wafer-head,nylon-coated(4)Silver
Torque
0.181Nm
(1.85kgfcm)
Wheninstalling:Makesurethatthespeakerconnectorisattachedrmly.Thenroutethecablesandsecure
themproperlyasshowninthegureabove.
82ThinkPadT520,T520i,andW520HardwareMaintenanceManual
Page 91

1150Thermalmodule
1
2
3b
3a
3c
3d
4
4
Foraccess,removetheseFRUsinorder:
•“1010Batterypack”onpage60
•“1030DIMMslotcover”onpage62
•“1060Keyboard”onpage67
•“1100Keyboardbezelassembly”onpage75
•“1140Speakerassembly”onpage81
Table29.Removalstepsofthermalmodule
Wheninstalling:Makesurethattheconnectorsareattachedrmly.
Note:Loosenthescrews3ato3dinorder,butdonotremovethem.Somemodelsdonothavescrews4.
Forthosemodels,skipstep4.
Chapter9.RemovingandreplacingaFRU83
Page 92

Table29.Removalstepsofthermalmodule(continued)
6
a
a
b
b
b
Wheninstalling:Beforeyouattachthefanassemblytothecomputer,applythermalgrease,atanamountof0.2
grams,onthepartsmarkedaasinthefollowinggures.Eithertoomuchortoolessapplicationofgreasecan
causeathermalproblemduetoimperfectcontactwithacomponent.ForthenewCPUthermaldevice/fan,you
needtopeelthethinlmofffromtherubbersmarkedb.
ForSwitchableGraphicsmodels:
84ThinkPadT520,T520i,andW520HardwareMaintenanceManual
Page 93

Table29.Removalstepsofthermalmodule(continued)
a
a
a
ForIntegratedGraphicsmodels:
ForWorkstationmodels:
1160CPU
Foraccess,removetheseFRUsinorder:
•“1010Batterypack”onpage60
•“1030DIMMslotcover”onpage62
•“1060Keyboard”onpage67
•“1100Keyboardbezelassembly”onpage75
•“1140Speakerassembly”onpage81
•“1150Thermalmodule”onpage83
Attention:CPUisextremelysensitive.WhenyouservicetheCPU,avoidanykindofroughhandling.
Chapter9.RemovingandreplacingaFRU85
Page 94

Table30.RemovalstepsofCPU
2
1 a
Rotatetheheadofthescrewinthedirectionshownbyarrow1toreleasethelock;thenremovetheCPU2.
Wheninstalling:PlacetheCPUontheCPUsocket,andthenrotatetheheadofthescrewinthedirectionshown
byarrowatosecuretheCPU.
1170LCDunit
Foraccess,removetheseFRUsinorder:
•“1010Batterypack”onpage60
•“1030DIMMslotcover”onpage62
•“1050Harddiskdriveslotcover,harddiskdrive(HDD)andHDDrubberrailsorsolidstatedrive(SSD)
andstorageconverter”onpage65
•“1060Keyboard”onpage67
•“1080PCIExpressMiniCardforwirelessLAN”onpage71
•“1090PCIExpressMiniCardforwirelessWAN”onpage73
•“1100Keyboardbezelassembly”onpage75
86ThinkPadT520,T520i,andW520HardwareMaintenanceManual
Page 95

Table31.RemovalstepsofLCDunit
2
2
1
1
3
3
StepScrewcapScrew(quantity)Color
1
2—
M2.5×6mm,wafer-head,nylon-coated(2)
M2.5×6mm,wafer-head,nylon-coated(2)
Torque
Black0.392Nm
(4.0kgfcm)
Black0.392Nm
(4.0kgfcm)
StepScrew(quantity)Color
3
M2.5×6mm,wafer-head,nylon-coated(2)
Black0.392Nm
Torque
(4.0kgfcm)
Chapter9.RemovingandreplacingaFRU87
Page 96

Table31.RemovalstepsofLCDunit(continued)
4
4
4
5
5
6
8
7
7
9
StepScrew(quantity)Color
7
M2×4mm,wafer-head,nylon-coated(2)
Black0.181Nm
Torque
(1.85kgfcm)
Wheninstalling:
•MakesurethatyouattachtheLCDconnectorrmly.
•Makesurethatyouroutethecablesrmlyandtapeupintheproperpositionsasshowninthisgure.
•Whenyouroutethecables,makesurethattheyarenotsubjectedtoanytension.T ensioncouldcausethecables
tobedamagedbythecableguides,orawiretobebroken.
88ThinkPadT520,T520i,andW520HardwareMaintenanceManual
Page 97

Table31.RemovalstepsofLCDunit(continued)
10
10
1180Basecoverassembly
Foraccess,removetheseFRUsinorder:
•“1010Batterypack”onpage60
•“1020SerialUltrabayEnhanceddeviceortravelbezel”onpage61
•“1030DIMMslotcover”onpage62
•“1050Harddiskdriveslotcover,harddiskdrive(HDD)andHDDrubberrailsorsolidstatedrive(SSD)
andstorageconverter”onpage65
•“1060Keyboard”onpage67
•“1080PCIExpressMiniCardforwirelessLAN”onpage71
•“1090PCIExpressMiniCardforwirelessWAN”onpage73
•“1100Keyboardbezelassembly”onpage75
•“1110Bluetoothdaughtercard(BDC-3.0)”onpage77
•“1120Backupbattery”onpage78
•“1130SmartCardorSmartCarddummyspacer”onpage79
•“1140Speakerassembly”onpage81
•“1150Thermalmodule”onpage83
•“1170LCDunit”onpage86
Chapter9.RemovingandreplacingaFRU89
Page 98

Table32.Removalstepsofbasecoverassembly
2
2
3
1
5
4
StepScrew(quantity)Color
1
2
3
M2×3mm,wafer-head,nylon-coated(1)Silver
M2×14mm,wafer-head,nylon-coated(2)
M2×4mm,wafer-head,nylon-coated(1)
Black0.181Nm
Black0.181Nm
Torque
0.181Nm
(1.85kgfcm)
(1.85kgfcm)
(1.85kgfcm)
Note:Applyinglabelstothebasecover
ThenewbasecoverFRUisshippedwithakitcontaininglabelsofseveralkinds.Whenyoureplacethe
basecover,youneedtoapplythefollowinglabels:
13
14
15
FCClabel
Serialnumberlabel
Homologationlabel
Followinglabelsneedtobepeeledofffromtheoldbasecover,andneedtobeputonthenewbasecover.
1
2
3
90ThinkPadT520,T520i,andW520HardwareMaintenanceManual
Windowslicenselabel(COA)
Informationlabel
IMEIbarcodelabel
Page 99

4
2005, 2010
1
3
5
16
15
14
13
4
69 8 7
12
11
10
2
5
6
7
8
9
10
11
12
16
Macaddresslabel
Vodafonelabel
Israellabel
Modemlabel(onlyforPRCmodels)
ChinawirelessWANlabel
ModemAMOMlabel(onlyforBrazil)
Bluetoothlabel(onlyforBrazil)
Wirelesscardlabel(onlyforBrazil)
SIRIMlabel
Assettaglabel
Forsomemodels,youalsoneedtoapplyoneortwoFCClabels.Checktheoldbasecover;ifithasoneor
twoFCClabels,ndduplicatesoftheminthelabelkitandapplythemtothenewbasecover.
Forthelocationofeachlabel,referthefollowinggure:
1190I/Osubcard
Note:TheI/OsubcardcontainsanEthernetportandaUSBport.
Foraccess,removetheseFRUsinorder:
•“1010Batterypack”onpage60
•“1020SerialUltrabayEnhanceddeviceortravelbezel”onpage61
•“1030DIMMslotcover”onpage62
•“1050Harddiskdriveslotcover,harddiskdrive(HDD)andHDDrubberrailsorsolidstatedrive(SSD)
andstorageconverter”onpage65
•“1060Keyboard”onpage67
•“1080PCIExpressMiniCardforwirelessLAN”onpage71
•“1090PCIExpressMiniCardforwirelessWAN”onpage73
Chapter9.RemovingandreplacingaFRU91
Page 100

•“1100Keyboardbezelassembly”onpage75
2
1
1
•“1110Bluetoothdaughtercard(BDC-3.0)”onpage77
•“1120Backupbattery”onpage78
•“1130SmartCardorSmartCarddummyspacer”onpage79
•“1140Speakerassembly”onpage81
•“1150Thermalmodule”onpage83
•“1170LCDunit”onpage86
•“1180Basecoverassembly”onpage89
Table33.RemovalstepsofI/Osubcard
StepScrew(quantity)Color
1
Wheninstalling:Makesurethattheconnectorisattachedrmly.
M2×7mm,wafer-head,nylon-coated(2)Silver
Torque
0.181Nm
(1.85kgfcm)
1200Systemboardassembly,magnesiumstructureframe,andmodem daughtercard(MDC)
Note:ThesystemboarddoesnotcontaintheEthernetport,theacpowerconnector,andthemodemport.
FortheEthernetport,see“1190I/Osubcard”onpage91.Theacpowerconnectorisinstalledonthe
magnesiumstructureframe.IfthecomputerisequippedwithanMDC,themodemportisalsoinstalledon
themagnesiumstructureframe.
Foraccess,removetheseFRUsinorder:
•“1010Batterypack”onpage60
•“1020SerialUltrabayEnhanceddeviceortravelbezel”onpage61
•“1030DIMMslotcover”onpage62
•“1040DIMM(bottomslot)”onpage63
•“1050Harddiskdriveslotcover,harddiskdrive(HDD)andHDDrubberrailsorsolidstatedrive(SSD)
andstorageconverter”onpage65
•“1060Keyboard”onpage67
•“1070DIMM(upperslot)”onpage70
•“1080PCIExpressMiniCardforwirelessLAN”onpage71
•“1090PCIExpressMiniCardforwirelessWAN”onpage73
92ThinkPadT520,T520i,andW520HardwareMaintenanceManual
 Loading...