

Page 1

P320HardwareMaintenanceManual
MachineTypes:30BG,30BH,and30BR
Page 2

Note:Beforeusingthisinformationandtheproductitsupports,besuretoreadandunderstandtheChapter
1“Readthisfirst:Importantsafetyinformation”onpage1
andAppendixG“Notices”onpage189.
FirstEdition(April2017)
©CopyrightLenovo2017.
LIMITEDANDRESTRICTEDRIGHTSNOTICE:IfdataorsoftwareisdeliveredpursuanttoaGeneralServices
Administration“GSA”contract,use,reproduction,ordisclosureissubjecttorestrictionssetforthinContractNo.
GS-35F-05925.
Page 3

Contents
Aboutthismanual............v
Chapter1.Readthisfirst:Important
safetyinformation............1
Powercordsandpoweradapters........1
Generalsafety................1
Electricalsafety...............2
Safetyinspectionguide............4
Handlingelectrostaticdischarge-sensitive
devices..................4
Groundingrequirements............5
Safetynotices(multi-lingualtranslations).....5
Chapter2.Productoverview.....27
Hardwarelocations.............27
Frontview...............27
Rearview...............28
Computercomponents.........31
MajorFRUsandCRUs..........31
Partsonthesystemboard........34
Internaldrives.............35
Machinetypeandmodellabel......36
Computerfeatures.............36
Computerspecifications...........40
Programs.................41
Accessingaprogramonyourcomputer...41
Installingaprogramthatisreadytobe
installed(Windows7only)........41
AnintroductiontoLenovoprograms....41
Chapter3.Usingyourcomputer...43
Registeringyourcomputer..........43
Settingthecomputervolume.........43
Usingadisc................43
Guidelinesaboutusingtheopticaldrive...43
Handlingandstoringadisc........43
Playingandremovingadisc.......44
Recordingadisc............44
Connectingtoanetwork...........45
Chapter4.Youandyourcomputer..47
Arrangingyourworkspace..........47
Glareandlighting............47
Aircirculation.............47
Electricaloutletlocationsandcablelengths.47
Comfort...............47
Accessibilityinformation...........48
Cleaningyourcomputer...........51
Maintenance...............51
Basicmaintenancetips.........51
Goodmaintenancepractices.......51
Keepingyourcomputercurrent......52
Movingyourcomputer...........53
Chapter5.Security..........55
Lockingyourcomputer...........55
Attachingapadlock...........55
AttachingaKensington-stylecablelock...56
Attachingacablelock..........57
Viewingandchangingsecuritysettingsinthe
SetupUtilityprogram............57
UsingpasswordsandWindowsaccounts....57
Usingthecoverpresenceswitch.......58
Usingfingerprintauthentication........58
Usingfirewalls...............59
Protectingdataagainstviruses........59
ComputraceAgentsoftwareembeddedin
firmware.................59
TrustedPlatformModule(TPM)........59
Chapter6.Advancedconfiguration..61
UsingtheSetupUtilityprogram........61
StartingtheSetupUtilityprogram.....61
Enablingordisablingadevice.......61
Enablingordisablingtheautomaticpower-on
ofyourcomputer............61
EnablingordisablingtheErPLPScompliance
mode................62
Switchingbetweenbetteracousticandbetter
thermalperformance..........62
Enablingordisablingthesystemtorecord
thermalalertlogs............63
Enablingordisablingtheconfigurationchange
detection...............63
ChangingtheBIOSsettingsbeforeinstallinga
newoperatingsystem..........63
UsingBIOSpasswords.........64
Selectingastartupdevice........65
ExitingtheSetupUtilityprogram......66
UpdatingandrecoveringtheBIOS.......66
BIOSlevels..............67
ConfiguringRAID..............67
RAIDLevel..............68
ConfiguringthesystemBIOStoenableSATA
RAIDfunctionality............68
CreatingRAIDvolumes.........68
©CopyrightLenovo2017
i
Page 4

DeletingRAIDvolumes.........68
Resettingdiskstonon-RAID.......69
Chapter7.Troubleshooting,
diagnostics,andrecovery......71
Basicprocedureforresolvingcomputer
problems.................71
Troubleshooting..............71
Startupproblems............71
Audioproblems............72
CDorDVDproblems..........73
Intermittentproblems..........74
Storagedriveproblems.........74
EthernetLANproblems.........74
WirelessLANproblem..........75
Bluetoothproblems...........76
Performanceproblems..........76
Serialconnectorproblem.........78
USBdeviceproblems..........78
Softwareanddriverproblems.......78
Diagnosingproblems............79
UEFIdiagnosticprogram...........80
Recoveryinformation............80
Chapter8.Servicecheckoutand
symptom-to-FRUindex........83
Servicecheckout..............83
Problemdeterminationtips........83
Symptom-to-FRUindex...........84
Harddiskdrivebooterror........84
Powersupplyproblems.........85
Beepsymptoms............85
POSTerrorcodes............86
Miscellaneouserrorconditions......87
Undeterminedproblems.........89
Chapter9.Hardwareinstallationand
replacement..............91
Handlingstatic-sensitivedevices.......91
Preparingyourcomputerandremovingthe
computercover..............91
Removingandinstallinghardware.......92
Externaloptions............92
Frontbezel..............92
Cardreader..............93
Powerbutton.............95
PCIecard...............96
M.2solid-statedrive..........98
Memorymodule............101
Opticaldrive..............104
Deviceinthe5.25-inchflexmodule.....107
Harddiskdriveinthefront-accessstorage
enclosure...............119
DeviceintheMulti-driveConversionKit...121
Battery................133
FrontaudioandUSBassembly......135
Internalspeaker............136
Thermalsensor............137
Coverpresenceswitch.........139
Powersupplyassembly.........140
Heatsinkandfanassembly........142
Microprocessor............143
Systemboard.............146
Primaryharddiskdrive.........148
Secondaryharddiskdrive........149
Solid-statedrive............151
Frontfanassembly...........155
Rearfanassembly...........156
Wi-Fiunits..............158
Completingthepartsreplacement.......166
Chapter10.Gettinginformation,help,
andservice.............169
Informationresources............169
Accessingtheuserguideinvarious
languages...............169
Windowshelpsystem..........169
Safetyandwarranty...........169
LenovoWebsite............169
LenovoSupportWebsite.........170
Frequentlyaskedquestions........170
Helpandservice..............170
Callingforservice............170
Usingotherservices..........171
Purchasingadditionalservices......171
AppendixA.Systemmemory
speed................173
AppendixB.Supplemental
informationabouttheUbuntu
operatingsystem..........175
AppendixC.Regulatory
information.............177
Exportclassificationnotice..........177
Electronicemissionsnotices.........177
FederalCommunicationsCommission
DeclarationofConformity........177
Eurasiancompliancemark..........179
Brazilaudionotice.............179
Mexicowireless-radiocomplianceinformation..180
Additionalregulatoryinformation.......180
iiP320HardwareMaintenanceManual
Page 5

AppendixD.WEEEandrecycling
information.............181
ImportantWEEEinformation.........181
RecyclinginformationforJapan........181
RecyclinginformationforBrazil........182
BatteryrecyclinginformationforT aiwan.....182
BatteryrecyclinginformationfortheEuropean
Union..................183
AppendixE.RestrictionofHazardous
Substances(RoHS)Directive....185
AppendixF .ENERGYSTARmodel
information.............187
AppendixG.Notices.........189
AppendixH.Trademarks......191
©CopyrightLenovo2017
iii
Page 6

ivP320HardwareMaintenanceManual
Page 7

Aboutthismanual
ThismanualprovidesserviceandreferenceinformationforThinkStation
Usethismanualalongwiththeadvanceddiagnosticteststotroubleshootproblems.
Important:ThismanualisintendedonlyfortrainedservicetechnicianswhoarefamiliarwithThinkStation
computers.Usethismanualalongwiththeadvanceddiagnosticteststotroubleshootproblemseffectively.
BeforeservicingaThinkStationcomputer,besuretoreadandunderstandChapter1“Readthisfirst:
Importantsafetyinformation”onpage1
.
®
computerslistedonthefrontcover.
©CopyrightLenovo2017
v
Page 8

viP320HardwareMaintenanceManual
Page 9

Chapter1.Readthisfirst:Importantsafetyinformation
Thischaptercontainsthesafetyinformationthatyoumustbefamiliarwith.
Powercordsandpoweradapters
Useonlythepowercordsandpoweradapterssuppliedbytheproductmanufacturer.Donotusetheac
powercordforotherdevices.
Thepowercordsshallbesafetyapproved.ForGermany,itshallbeH05VV-F,3G,0.75mm
othercountries,thesuitabletypesshallbeusedaccordingly.
Neverwrapapowercordaroundapoweradapterorotherobject.Doingsocanstressthecordinwaysthat
cancausethecordtofray,crack,orcrimp.Thiscanpresentasafetyhazard.
Alwaysroutepowercordssothattheywillnotbewalkedon,trippedover,orpinchedbyobjects.
Protectpowercordandpoweradaptersfromliquids.Forinstance,donotleaveyourpowercordorpower
adapternearsinks,tubs,toilets,oronfloorsthatarecleanedwithliquidcleansers.Liquidscancausea
shortcircuit,particularlyifthepowercordorpoweradapterhasbeenstressedbymisuse.Liquidsalsocan
causegradualcorrosionofpowercordterminalsand/ortheconnectorterminalsonapoweradapter,
whichcaneventuallyresultinoverheating.
Ensurethatallpowercordconnectorsaresecurelyandcompletelypluggedintoreceptacles.
Donotuseanypoweradapterthatshowscorrosionattheacinputpinsorshowssignsofoverheating(such
asdeformedplastic)attheacinputoranywhereonthepoweradapter.
Donotuseanypowercordswheretheelectricalcontactsoneitherendshowsignsofcorrosionor
overheatingorwherethepowercordappearstohavebeendamagedinanyway.
2
,orbetter.For
Generalsafety
Followtheserulestoensuregeneralsafety:
•Observegoodhousekeepingintheareaofthemachinesduringandaftermaintenance.
•Whenliftinganyheavyobject:
1.Ensureyoucanstandsafelywithoutslipping.
2.Distributetheweightoftheobjectequallybetweenyourfeet.
3.Useaslowliftingforce.Nevermovesuddenlyortwistwhenyouattempttolift.
4.Liftbystandingorbypushingupwithyourlegmuscles;thisactionremovesthestrainfromthe
musclesinyourback.
Attention:
Donotattempttoliftanyobjectsthatweighmorethan16kg(35lb)orobjectsthatyouthinkare
tooheavyforyou.
•Donotperformanyactionthatcauseshazardstothecustomer,orthatmakestheequipmentunsafe.
•Beforeyoustartthemachine,ensurethatotherservicerepresentativesandthecustomer'spersonnelare
notinahazardousposition.
©CopyrightLenovo2017
1
Page 10
•Placeremovedcoversandotherpartsinasafeplace,awayfromallpersonnel,whileyouareservicing
themachine.
•Keepyourtoolcaseawayfromwalkareassothatotherpeoplewillnottripoverit.
•Donotwearlooseclothingthatcanbetrappedinthemovingpartsofamachine.Ensurethatyoursleeves
arefastenedorrolledupaboveyourelbows.Ifyourhairislong,fastenit.
•Inserttheendsofyournecktieorscarfinsideclothingorfastenitwithanonconductiveclip,approximately
8centimeters(3inches)fromtheend.
•Donotwearjewelry,chains,metal-frameeyeglasses,ormetalfastenersforyourclothing.
Remember:Metalobjectsaregoodelectricalconductors.
•Wearsafetyglasseswhenyouare:hammering,drilling,soldering,cuttingwire,attachingsprings,using
solvents,orworkinginanyotherconditionsthatmightbehazardoustoyoureyes.
•Afterservice,reinstallallsafetyshields,guards,labels,andgroundwires.Replaceanysafetydevice
thatiswornordefective.
•Reinstallallcoverscorrectlybeforereturningthemachinetothecustomer.
CAUTION:
Hazardousmovingparts.Keepfingersandotherbodypartsaway.
CAUTION:
Beforeyouopenthecomputercover,turnoffthecomputerandwaitseveralminutesuntilthe
computeriscool.
Electricalsafety
CAUTION:
Electricalcurrentfrompower,telephone,andcommunicationcablescanbehazardous.Toavoid
personalinjuryorequipmentdamage,disconnecttheattachedpowercords,telecommunication
systems,networks,andmodemsbeforeyouopenthecomputercovers,unlessinstructedotherwise
intheinstallationandconfigurationprocedures.
Observethefollowingruleswhenworkingonelectricalequipment.
Important:Useonlyapprovedtoolsandtestequipment.Somehandtoolshavehandlescoveredwithasoft
materialthatdoesnotinsulateyouwhenworkingwithliveelectricalcurrents.Manycustomershave,near
theirequipment,rubberfloormatsthatcontainsmallconductivefiberstodecreaseelectrostaticdischarges.
Donotusethistypeofmattoprotectyourselffromelectricalshock.
2P320HardwareMaintenanceManual
Page 11

•Findtheroomemergencypower-off(EPO)switch,disconnectingswitch,orelectricaloutlet.Ifanelectrical
accidentoccurs,youcanthenoperatetheswitchorunplugthepowercordquickly.
•Donotworkaloneunderhazardousconditionsornearequipmentthathashazardousvoltages.
•Disconnectallpowerbefore:
–Performingamechanicalinspection
–Workingnearpowersupplies
–RemovingorinstallingFieldReplaceableUnits(FRUs)
•Beforeyoustarttoworkonthemachine,unplugthepowercord.Ifyoucannotunplugit,askthecustomer
topower-offthewallboxthatsuppliespowertothemachineandtolockthewallboxintheoffposition.
•Ifyouneedtoworkonamachinethathasexposedelectricalcircuits,observethefollowingprecautions:
–Ensurethatanotherperson,familiarwiththepower-offcontrols,isnearyou.
Remember:Anotherpersonmustbetheretoswitchoffthepower,ifnecessary.
–Useonlyonehandwhenworkingwithpowered-onelectricalequipment;keeptheotherhandinyour
pocketorbehindyourback.
Remember:Theremustbeacompletecircuittocauseelectricalshock.Byobservingtheaboverule,
youmaypreventacurrentfrompassingthroughyourbody.
–Whenusingatester,setthecontrolscorrectlyandusetheapprovedprobeleadsandaccessoriesfor
thattester.
–Standonsuitablerubbermats(obtainedlocally,ifnecessary)toinsulateyoufromgroundssuchas
metalfloorstripsandmachineframes.
Observethespecialsafetyprecautionswhenyouworkwithveryhighvoltages;theseinstructionsarein
thesafetysectionsofmaintenanceinformation.Useextremecarewhenmeasuringhighvoltages.
•Regularlyinspectandmaintainyourelectricalhandtoolsforsafeoperationalcondition.
•Donotusewornorbrokentoolsandtesters.
•Neverassumethatpowerhasbeendisconnectedfromacircuit.First,checkthatithasbeenpowered-off.
•Alwayslookcarefullyforpossiblehazardsinyourworkarea.Examplesofthesehazardsaremoistfloors,
nongroundedpowerextensioncables,powersurges,andmissingsafetygrounds.
•Donottouchliveelectricalcircuitswiththereflectivesurfaceofaplasticdentalmirror.Thesurfaceis
conductive;suchtouchingcancausepersonalinjuryandmachinedamage.
•Donotservicethefollowingpartswiththepoweronwhentheyareremovedfromtheirnormaloperating
placesinamachine:
–Powersupplyunits
–Pumps
–Blowersandfans
–Motorgenerators
andsimilarunits.(Thispracticeensurescorrectgroundingoftheunits.)
•Ifanelectricalaccidentoccurs:
–Usecaution;donotbecomeavictimyourself.
–Switchoffpower.
–Sendanotherpersontogetmedicalaid.
Chapter1.Readthisfirst:Importantsafetyinformation3
Page 12

Safetyinspectionguide
Theintentofthisinspectionguideistoassistyouinidentifyingpotentiallyunsafeconditionsonthese
products.Eachmachine,asitwasdesignedandbuilt,hadrequiredsafetyitemsinstalledtoprotectusers
andservicepersonnelfrominjury.Thisguideaddressesonlythoseitems.However,goodjudgmentshould
beusedtoidentifypotentialsafetyhazardsduetoattachmentoffeaturesoroptionsnotcoveredbythis
inspectionguide.
Ifanyunsafeconditionsarepresent,youmustdeterminehowserioustheapparenthazardcouldbeand
whetheryoucancontinuewithoutfirstcorrectingtheproblem.
Considertheseconditionsandthesafetyhazardstheypresent:
•Electricalhazards,especiallyprimarypower(primaryvoltageontheframecancauseseriousorfatal
electricalshock).
•Explosivehazards,suchasadamagedCRTfaceorbulgingcapacitor
•Mechanicalhazards,suchaslooseormissinghardware
Theguideconsistsofaseriesofstepspresentedinachecklist.Beginthecheckswiththepoweroff,and
thepowercorddisconnected.
Checklist:
1.Checkexteriorcoversfordamage(loose,broken,orsharpedges).
2.Power-offthecomputer.Disconnectthepowercord.
3.Checkthepowercordfor:
a.Athird-wiregroundconnectoringoodcondition.Useametertomeasurethird-wireground
continuityfor0.1ohmorlessbetweentheexternalgroundpinandframeground.
b.Thepowercordshouldbetheappropriatetypeasspecifiedinthepartslistings.
c.Insulationmustnotbefrayedorworn.
4.Removethecover.
5.Checkforanyobviousalterations.Usegoodjudgmentastothesafetyofanyalterations.
6.Checkinsidetheunitforanyobviousunsafeconditions,suchasmetalfilings,contamination,wateror
otherliquids,orsignsoffireorsmokedamage.
7.Checkforworn,frayed,orpinchedcables.
8.Checkthatthepower-supplycoverfasteners(screwsorrivets)havenotbeenremovedortamperedwith.
Handlingelectrostaticdischarge-sensitivedevices
Anycomputerpartcontainingtransistorsorintegratedcircuits(ICs)shouldbeconsideredsensitiveto
electrostaticdischarge(ESD).ESDdamagecanoccurwhenthereisadifferenceinchargebetweenobjects.
ProtectagainstESDdamagebyequalizingthechargesothatthemachine,thepart,theworkmat,andthe
personhandlingthepartareallatthesamecharge.
Notes:
1.Useproduct-specificESDprocedureswhentheyexceedtherequirementsnotedhere.
2.MakesurethattheESDprotectivedevicesyouusehavebeencertified(ISO9000)asfullyeffective.
WhenhandlingESD-sensitiveparts:
•Keepthepartsinprotectivepackagesuntiltheyareinsertedintotheproduct.
•Avoidcontactwithotherpeoplewhilehandlingthepart.
4P320HardwareMaintenanceManual
Page 13

•Wearagroundedwriststrapagainstyourskintoeliminatestaticonyourbody.
•Preventthepartfromtouchingyourclothing.Mostclothingisinsulativeandretainsachargeeven
whenyouarewearingawriststrap.
•Usetheblacksideofagroundedworkmattoprovideastatic-freeworksurface.Thematisespecially
usefulwhenhandlingESD-sensitivedevices.
•Selectagroundingsystem,suchasthoselistedbelow,toprovideprotectionthatmeetsthespecific
servicerequirement.
Note:TheuseofagroundingsystemisdesirablebutnotrequiredtoprotectagainstESDdamage.
–AttachtheESDgroundcliptoanyframeground,groundbraid,orgreen-wireground.
–UseanESDcommongroundorreferencepointwhenworkingonadouble-insulatedor
battery-operatedsystem.Youcanusecoaxorconnector-outsideshellsonthesesystems.
–Usetheroundground-prongoftheacplugonac-operatedcomputers.
Groundingrequirements
Electricalgroundingofthecomputerisrequiredforoperatorsafetyandcorrectsystemfunction.Proper
groundingoftheelectricaloutletcanbeverifiedbyacertifiedelectrician.
Safetynotices(multi-lingualtranslations)
Thecautionanddangersafetynoticesinthissectionareprovidedinthefollowinglanguages:
•English
•Arabic
•Brazilian/Portuguese
•Chinese(simplified)
•Chinese(traditional)
•French
•German
•Hebrew
•Italian
•Korean
•Spanish
DANGER
Electricalcurrentfrompower,telephoneandcommunicationcablesishazardous.
Toavoidashockhazard:
•Donotconnectordisconnectanycablesorperforminstallation,maintenance,orreconfiguration
ofthisproductduringanelectricalstorm.
•Connectallpowercordstoaproperlywiredandgroundedelectricaloutlet.
Chapter1.Readthisfirst:Importantsafetyinformation5
Page 14
•Connecttoproperlywiredoutletsanyequipmentthatwillbeattachedtothisproduct.
•Whenpossible,useonehandonlytoconnectordisconnectsignalcables.
•Neverturnonanyequipmentwhenthereisevidenceoffire,water,orstructuraldamage.
•Disconnecttheattachedpowercords,telecommunicationssystems,networks,andmodems
beforeyouopenthedevicecovers,unlessinstructedotherwiseintheinstallationandconfiguration
procedures.
•Connectanddisconnectcablesasdescribedinthefollowingtableswheninstalling,moving,or
openingcoversonthisproductorattacheddevices.
ToConnectToDisconnect
1.TurneverythingOFF.
2.First,attachallcablestodevices.
3.Attachsignalcablestoconnectors.
4.Attachpowercordstooutlet.
5.TurndeviceON.
1.TurneverythingOFF.
2.First,removepowercordsfromoutlet.
3.Removesignalcablesfromconnectors.
4.Removeallcablesfromdevices.
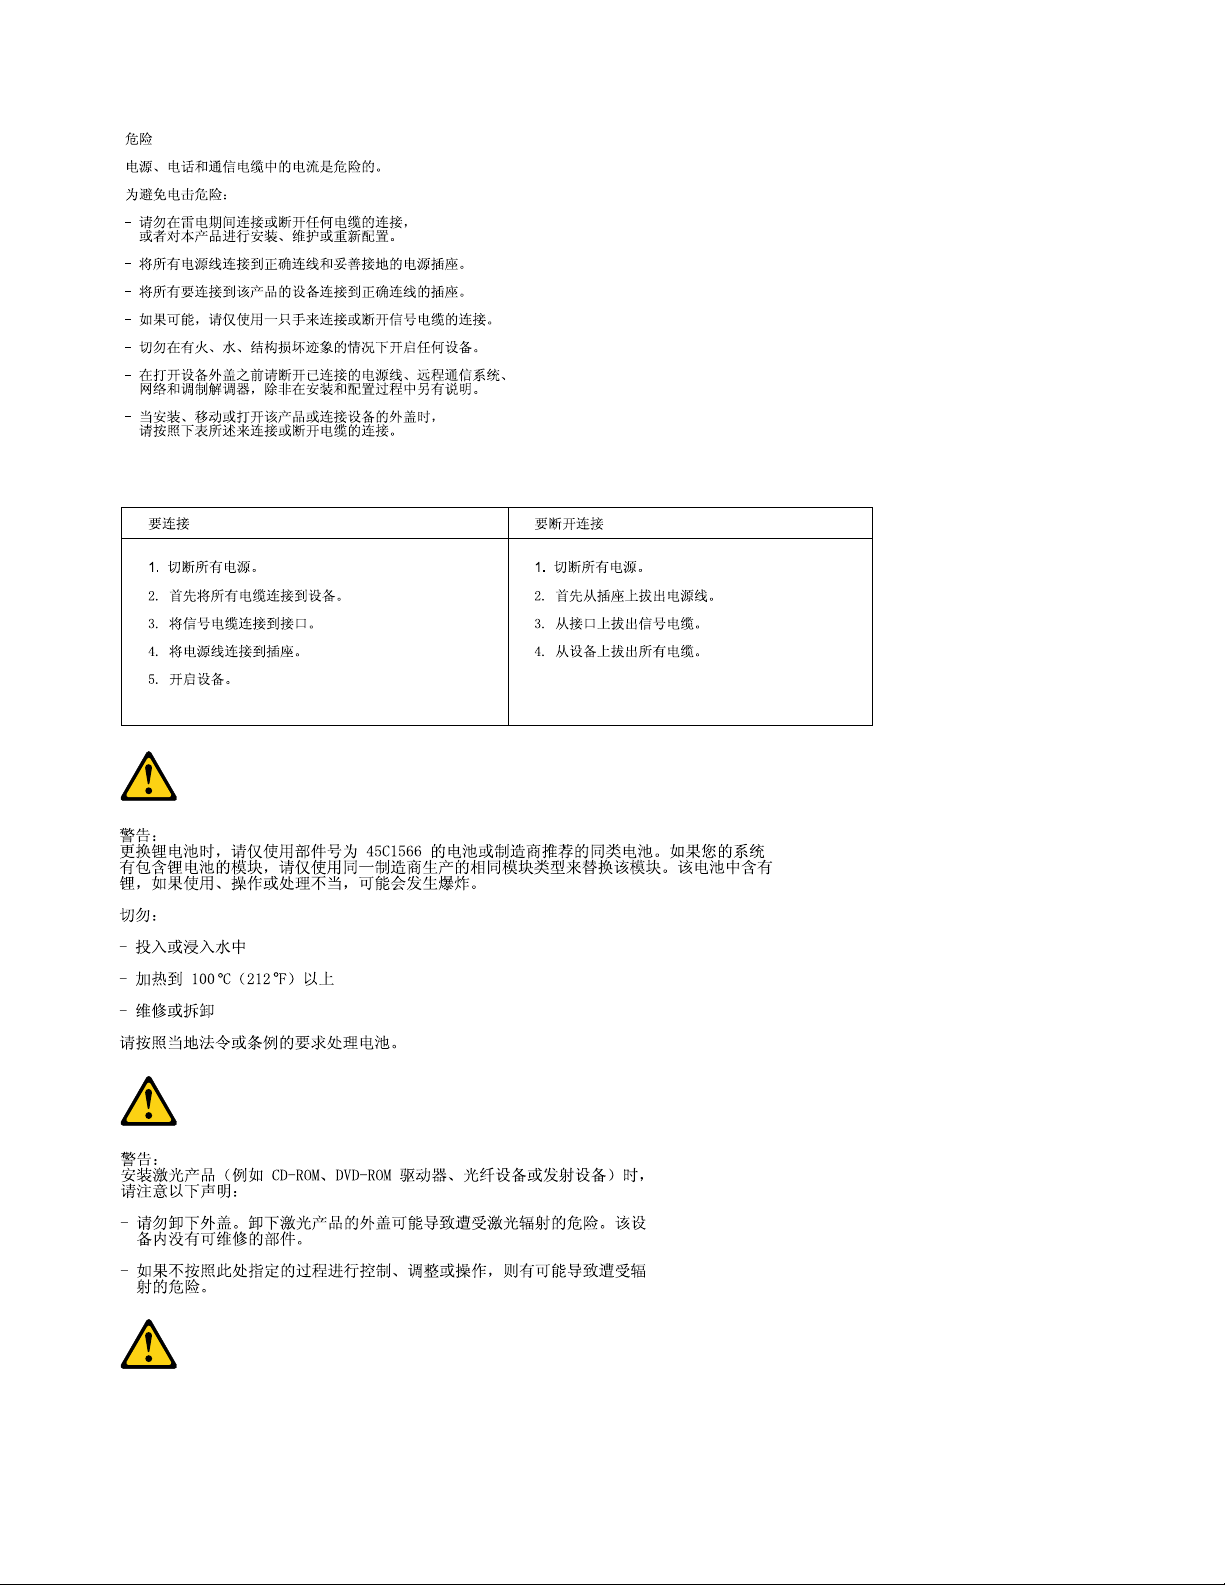
CAUTION:
Whenreplacingthelithiumbattery,useonlyPartNumber45C1566oranequivalenttypebattery
recommendedbythemanufacturer.Ifyoursystemhasamodulecontainingalithiumbattery,replace
itonlywiththesamemoduletypemadebythesamemanufacturer.Thebatterycontainslithiumand
canexplodeifnotproperlyused,handled,ordisposedof.Donot:
•Throworimmerseintowater
•Heattomorethan100°C(212°F)
•Repairordisassemble
Disposeofthebatteryasrequiredbylocalordinancesorregulations.
CAUTION:
Whenlaserproducts(suchasCD-ROMs,DVD-ROMdrives,fiberopticdevices,ortransmitters)are
installed,notethefollowing:
•Donotremovethecovers.Removingthecoversofthelaserproductcouldresultinexposureto
hazardouslaserradiation.Therearenoserviceablepartsinsidethedevice.
•Useofcontrolsoradjustmentsorperformanceofproceduresotherthanthosespecifiedherein
mightresultinhazardousradiationexposure.
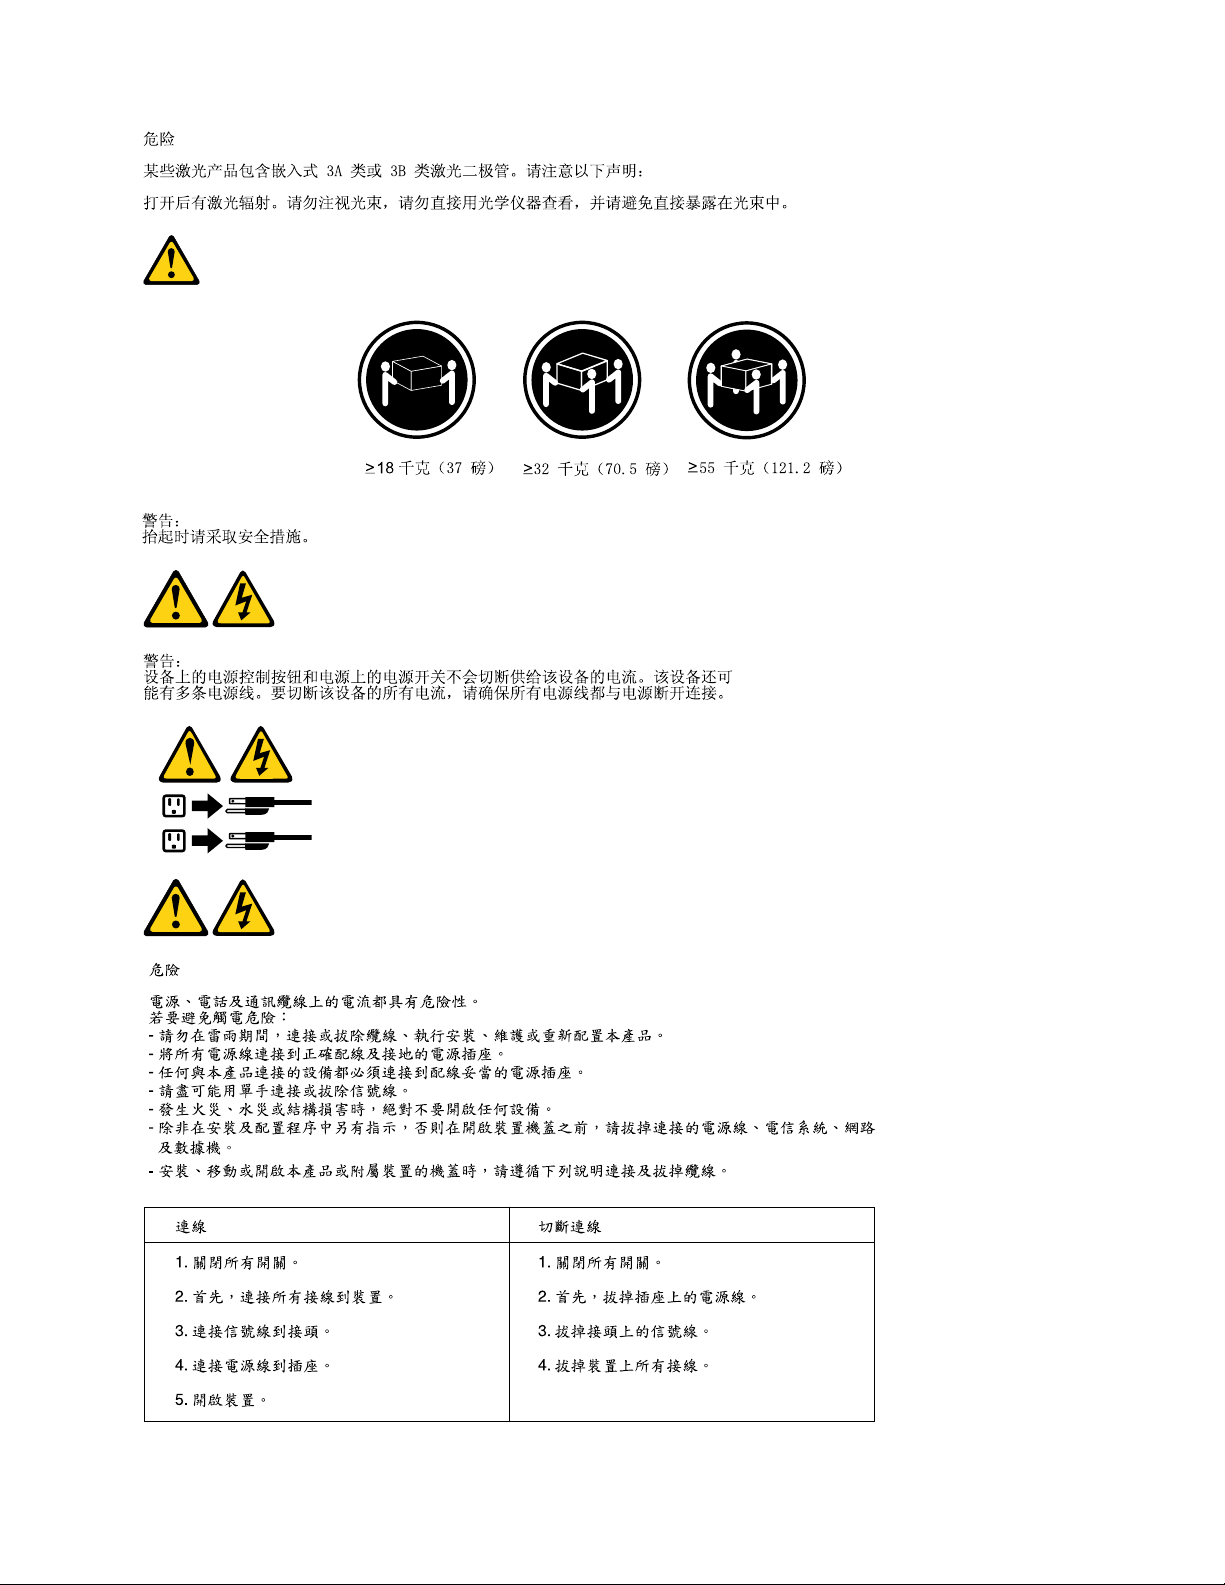
DANGER
SomelaserproductscontainanembeddedClass3AorClass3Blaserdiode.Notethefollowing:
Laserradiationwhenopen.Donotstareintothebeam,donotviewdirectlywithoptical
instruments,andavoiddirectexposuretothebeam.
6P320HardwareMaintenanceManual
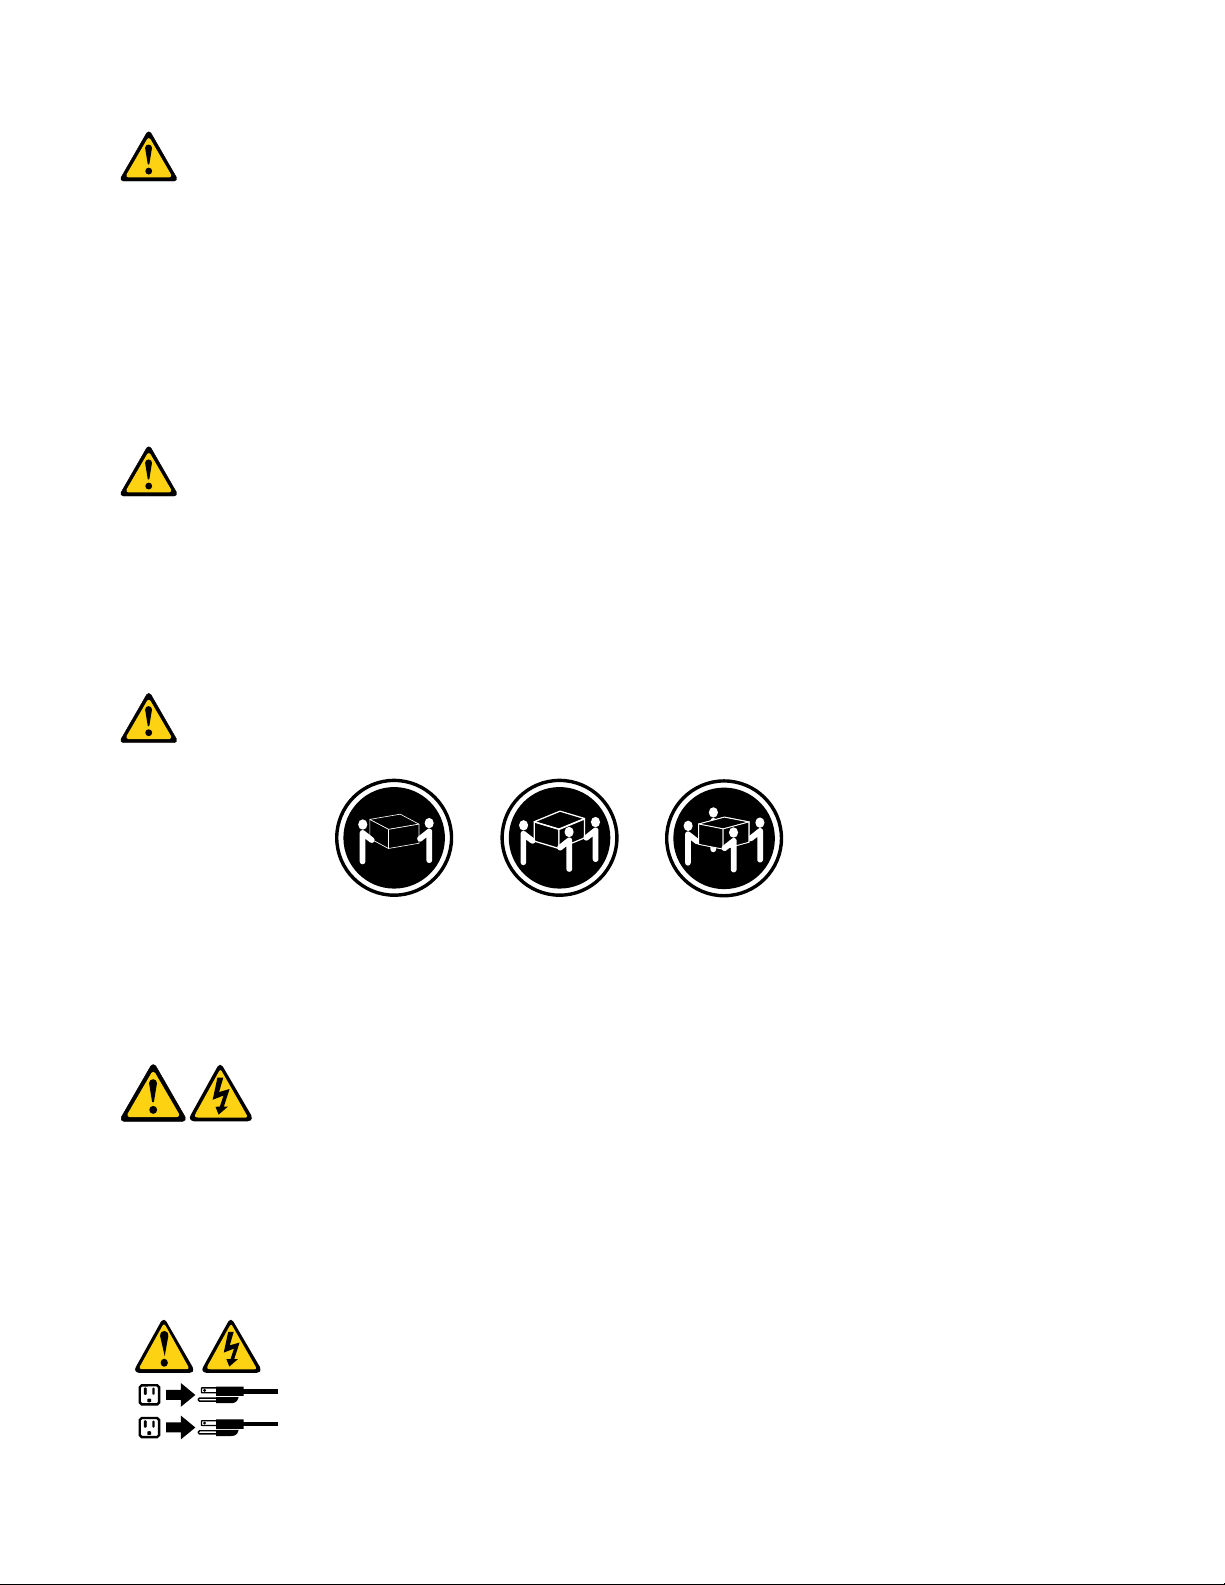
Page 15
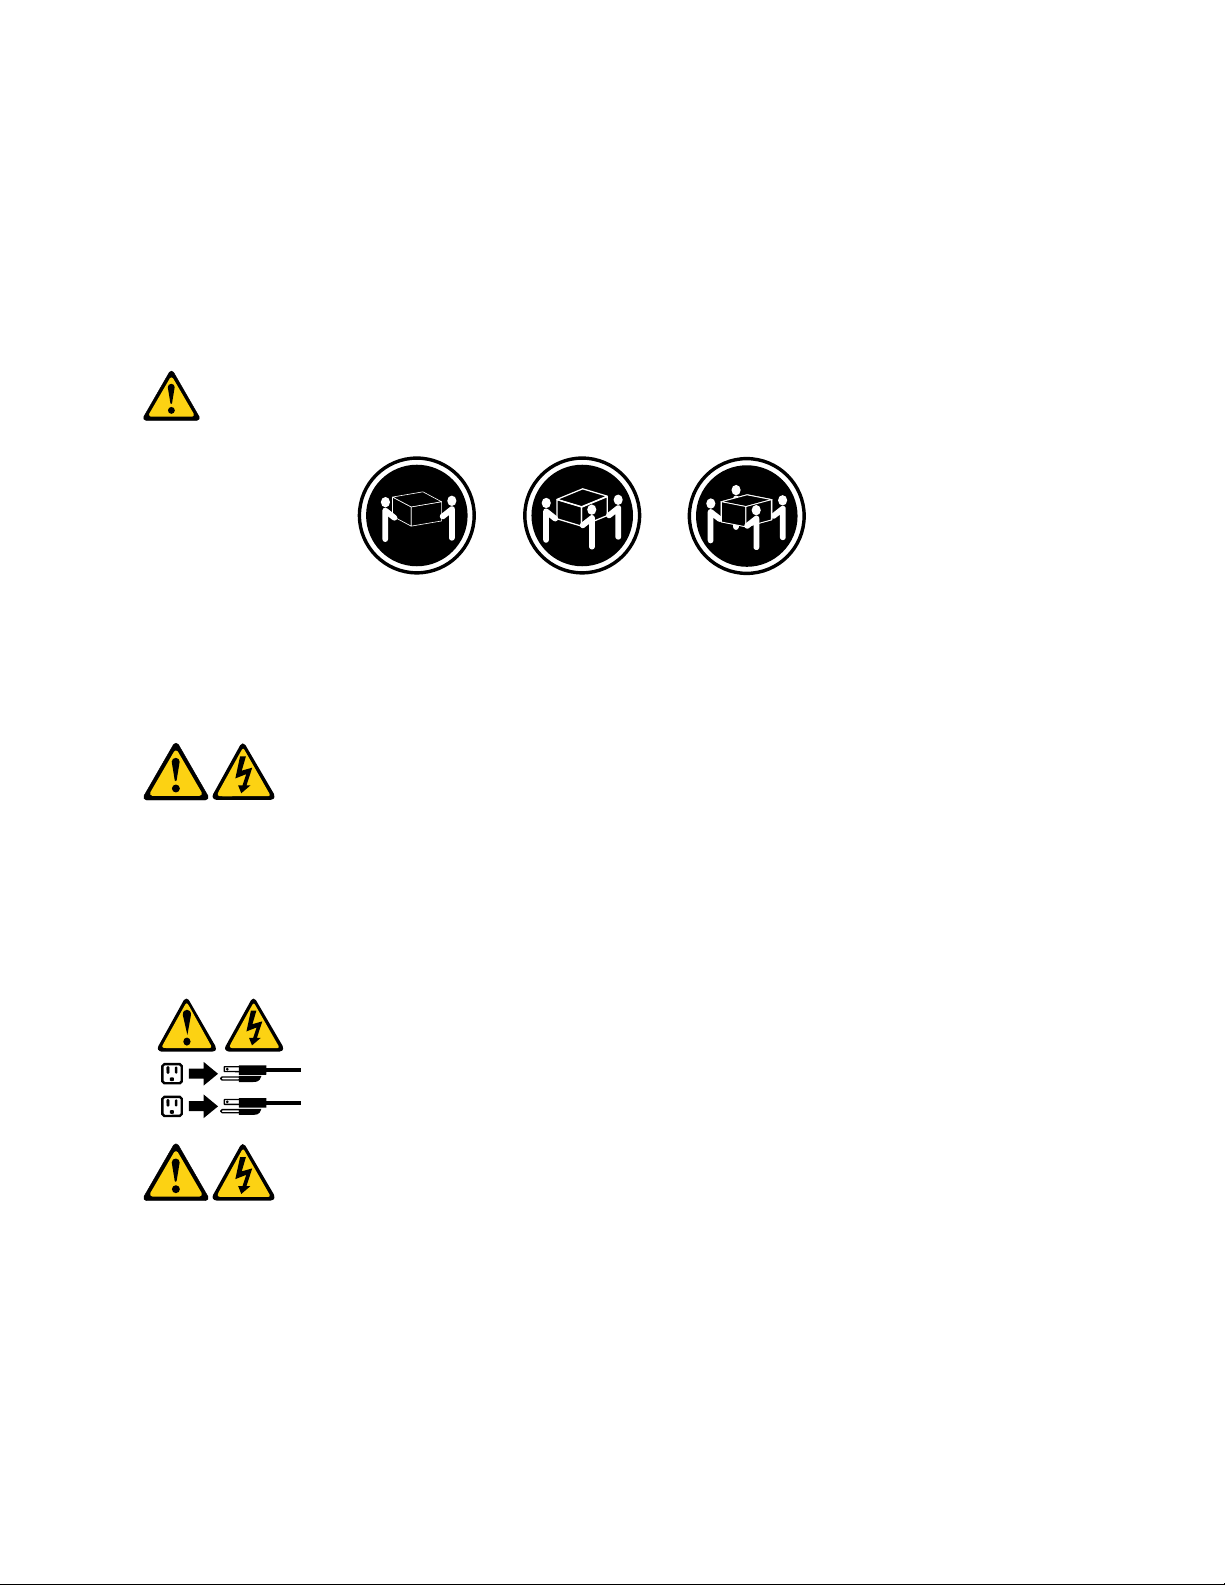
≥18kg(37lb)≥32kg(70.5lb)≥55kg(121.2lb)
1
2
CAUTION:
Usesafepracticeswhenlifting.
CAUTION:
Thepowercontrolbuttononthedeviceandthepowerswitchonthepowersupplydonotturnoff
theelectricalcurrentsuppliedtothedevice.Thedevicealsomighthavemorethanonepower
cord.Toremoveallelectricalcurrentfromthedevice,ensurethatallpowercordsaredisconnected
fromthepowersource.
Chapter1.Readthisfirst:Importantsafetyinformation7
Page 16

8P320HardwareMaintenanceManual
Page 17
≥18kg(37lb)≥32kg(70.5lb)≥55kg(121.2lb)
1
2
PERIGO
Acorrenteelétricaprovenientedecabosdealimentação,detelefoneedecomunicaçõeséperigosa.
Chapter1.Readthisfirst:Importantsafetyinformation9
Page 18
Paraevitarriscodechoqueelétrico:
•Nãoconectenemdesconectenenhumcaboouexecuteinstalação,manutençãooureconfiguração
desteprodutoduranteumatempestadecomraios.
•Conectetodososcabosdealimentaçãoatomadaselétricascorretamenteinstaladaseaterradas.
•T odoequipamentoqueforconectadoaesteprodutodeveserconectadoatomadascorretamente
instaladas.
•Quandopossível,utilizeapenasumadasmãosparaconectaroudesconectarcabosdesinal.
•Nuncaliguenenhumequipamentoquandohouverevidênciadefogo,águaoudanosestruturais.
•Antesdeabrirtampasdedispositivos,desconectecabosdealimentação,sistemasdetelecomunicação,
redesemodemsconectados,amenosqueespecificadodemaneiradiferentenosprocedimentosde
instalaçãoeconfiguração.
•Conecteedesconecteoscabosconformedescritonatabelaapresentadaaseguiraoinstalar,moverou
abrirtampasdesteprodutooudedispositivosconectados.
ParaConectar:ParaDesconectar:
1.DESLIGUETudo.
2.Primeiramente,conectetodososcabosaos
dispositivos.
3.Conecteoscabosdesinalaosconectores.
4.Conecteoscabosdealimentaçãoàstomadas.
5.LIGUEosdispositivos.
1.DESLIGUETudo.
2.Primeiramente,removaoscabosdealimentaçãodas
tomadas.
3.Removaoscabosdesinaldosconectores.
4.Removatodososcabosdosdispositivos.
CUIDADO:
Aosubstituirabateriadelítio,utilizeapenasumabateriacomNúmerodePeça45C1566ouumtipo
debateriaequivalenterecomendadopeloSeoseusistemapossuiummódulocomumabateriade
lítio,substitua-oapenasporummódulodomesmotipoedomesmofabricante.Abateriacontémlítio
epodeexplodirsenãoforutilizada,manuseadaoudescartadademaneiracorreta.
Não:
•Jogueoucoloquenaágua
•Aqueçaamaisde100°C(212°F)
•Consertenemdesmonte
Descarteabateriaconformerequeridopelasleisouregulamentoslocais.
PRECAUCIÓN:
Quandoprodutosalaser(comounidadesdeCD-ROMs,unidadesdeDVD-ROM,dispositivosdefibraótica
outransmissores)estivereminstalados,observeoseguinte:
•Nãoremovaastampas.Aremoçãodastampasdeumprodutoalaserpoderesultaremexposição
prejudicialàradiaçãodelaser.Nãoexistempeçasquepodemserconsertadasnointeriordodispositivo.
10P320HardwareMaintenanceManual
Page 19
•Autilizaçãodecontrolesouajustesouaexecuçãodeprocedimentosdiferentesdosespecificadosaqui
1
2
poderesultaremexposiçãoprejudicialàradiação.
PERIGO
AlgunsprodutosalasercontêmdiododelaserintegradodaClasse3AoudaClasse3B.Observeoseguinte:
Radiaçãoalaserquandoaberto.Nãoolhediretamenteparaofeixeaolhonuoucominstrumentosópticose
eviteexposiçãodiretaaofeixe.
≥18kg(37lb)≥32kg(70.5lb)≥55kg(121.2lb)
CUIDADO:
Utilizeprocedimentosdesegurançaparalevantarequipamentos.
CUIDADO:
Obotãodecontroledealimentaçãododispositivoeobotãoparaligar/desligardafontedealimentação
nãodesligamacorrenteelétricafornecidaaodispositivo.Odispositivotambémpodetermaisdeumcabo
dealimentação.Pararemovertodaacorrenteelétricadodispositivo,assegurequetodososcabosde
alimentaçãoestejamdesconectadosdafontedealimentação.
Chapter1.Readthisfirst:Importantsafetyinformation11
Page 20
12P320HardwareMaintenanceManual
Page 21
1
2
Chapter1.Readthisfirst:Importantsafetyinformation13
Page 22
1
2
14P320HardwareMaintenanceManual
Page 23
DANGER
Lecourantélectriqueprovenantdel'alimentation,dutéléphoneetdescâblesdetransmissionpeutprésenter
undanger.
Pourévitertoutrisquedechocélectrique:
•Nemanipulezaucuncâbleetn'effectuezaucuneopérationd'installation,d'entretienoudereconfiguration
deceproduitaucoursd'unorage.
•Brancheztouslescordonsd'alimentationsurunsocledeprisedecourantcorrectementcâbléetmisàla
terre.
•Branchezsurdessoclesdeprisedecourantcorrectementcâbléstoutéquipementconnectéàceproduit.
•Lorsquecelaestpossible,n'utilisezqu'uneseulemainpourconnecteroudéconnecterlescâbles
d'interface.
•Nemettezjamaisunéquipementsoustensionencasd'incendieoud'inondation,ouenprésencede
dommagesmatériels.
•Avantderetirerlescartersdel'unité,mettezcelle-cihorstensionetdéconnectezsescordons
d'alimentation,ainsiquelescâblesquilarelientauxréseaux,auxsystèmesdetélécommunicationetaux
modems(saufinstructioncontrairementionnéedanslesprocéduresd'installationetdeconfiguration).
•Lorsquevousinstallez,quevousdéplacez,ouquevousmanipulezleprésentproduitoudespériphériques
quiluisontraccordés,reportez-vousauxinstructionsci-dessouspourconnecteretdéconnecterles
différentscordons.
ConnexionDéconnexion
1.MettezlesunitésHORSTENSION.
2.Commencezparbranchertouslescordonssurles
unités.
3.Branchezlescâblesd'interfacesurdesconnecteurs.
4.Branchezlescordonsd'alimentationsurdesprises.
5.MettezlesunitésSOUSTENSION.
1.MettezlesunitésHORSTENSION.
2.Débranchezlescordonsd'alimentationdesprises.
3.Débranchezlescâblesd'interfacedesconnecteurs.
4.Débrancheztouslescâblesdesunités.
ATTENTION:
Remplacerlapileaulithiumusagéeparunepilederéférenceidentiqueexclusivement,(référence
45C1566),ousuivrelesinstructionsdufabricantquiendéfinitleséquivalences.Sivotresystèmeest
dotéd'unmodulecontenantunepileaulithium,vousdevezleremplaceruniquementparunmodule
identique,produitparlemêmefabricant.Lapilecontientdulithiumetpeutexploserencasde
mauvaiseutilisation,demauvaisemanipulationoudemiseaurebutinappropriée.
Nepas:
•lajeteràl'eau,
•l'exposeràdestempératuressupérieuresà100°C,
•chercheràlaréparerouàladémonter.
Nepasmettrelapileàlapoubelle.Pourlamiseaurebut,sereporteràlaréglementationenvigueur.
Chapter1.Readthisfirst:Importantsafetyinformation15
Page 24
ATTENTION:
Sidesproduitsàlaser(telsquedesunitésdeCD-ROM,deDVD-ROM,desunitésàfibresoptiques,ou
desémetteurs)sontinstallés,prenezconnaissancedesinformationssuivantes:
•Neretirezpaslecarter.Enouvrantl'unitédeCD-ROMoudeDVD-ROM,vousvousexposezau
rayonnementdangereuxdulaser.Aucunepiècedel'unitén'estréparable.
•Pourévitertoutrisqued'expositionaurayonlaser,respectezlesconsignesderéglageet
d'utilisationdescommandes,ainsiquelesprocéduresdécritesdansleprésentmanuel.
DANGER
Certainsproduitsàlasercontiennentunediodeàlaserintégréedeclasse3Aou3B.Prenez
connaissancedesinformationssuivantes:
Rayonnementlaserlorsquelecarterestouvert.Eviteztouteexpositiondirecteaurayonlaser.Evitez
deregarderfixementlefaisceauoudel'observeràl'aided'instrumentsoptiques.
≥18kg(37lb)≥32kg(70.5lb)≥55kg(121.2lb)
ATTENTION:
Soulevezlamachineavecprécaution.
ATTENTION:
L'interrupteurdecontrôled'alimentationdel'unitéetl'interrupteurdublocd'alimentationnecoupent
paslecourantélectriquealimentantl'unité.Enoutre,lesystèmepeutêtreéquipédeplusieurs
cordonsd'alimentation.Pourmettrel'unitéhorstension,vousdevezdéconnectertouslescordons
delasourced'alimentation.
16P320HardwareMaintenanceManual
Page 25
1
2
VORSICHT
AnNetz-,Telefon-undDatenleitungenkönnengefährlicheSpannungenanliegen.
AusSicherheitsgründen:
•BeiGewitterandiesemGerätkeineKabelanschließenoderlösen.FernerkeineInstallations-,
Wartungs-oderRekonfigurationsarbeitendurchführen.
•GerätnuraneineSchutzkontaktsteckdosemitordnungsgemäßgeerdetemSchutzkontakt
anschließen.
•AlleangeschlossenenGeräteebenfallsanSchutzkontaktsteckdosenmitordnungsgemäß
geerdetemSchutzkontaktanschließen.
•DieSignalkabelnachMöglichkeiteinhändiganschließenoderlösen,umeinenStromschlagdurch
BerührenvonOberflächenmitunterschiedlichemelektrischemPotenzialzuvermeiden.
•Geräteniemalseinschalten,wennHinweiseaufFeuer,WasseroderGebäudeschädenvorliegen.
•DieVerbindungzudenangeschlossenenNetzkabeln,Telekommunikationssystemen,Netzwerken
undModemsistvordemÖffnendesGehäuseszuunterbrechen,sofernindenInstallations-und
KonfigurationsprozedurenkeineanderslautendenAnweisungenenthaltensind.
•ZumInstallieren,TransportierenundÖffnenderAbdeckungendesComputersoderder
angeschlossenenEinheitendieKabelgemäßderfolgendenT abelleanschließenundabziehen.
ZumAnschließenderKabelgehenSiewiefolgtvorZumAbziehenderKabelgehenSiewiefolgtvor
1.SchaltenSiealleEinheitenAUS.
2.SchließenSieerstalleKabelandieEinheitenan.
3.SchließenSiedieSignalkabelandieBuchsenan.
4.SchließenSiedieNetzkabelandieSteckdosean.
5.SchaltenSiedieEinheitEIN.
1.SchaltenSiealleEinheitenAUS.
2.ZiehenSiezuerstalleNetzkabelausden
Netzsteckdosen.
3.ZiehenSiedieSignalkabelausdenBuchsen.
4.ZiehenSiealleKabelvondenEinheitenab.
CAUTION:
EineverbrauchteLithiumbatterienurdurcheineBatteriemitderTeilenummer45C1566odereine
gleichwertige,vomHerstellerempfohleneBatterieersetzen.EnthältdasSystemeinModulmiteiner
Lithiumbatterie,diesesnurdurcheinModuldesselbenTypsundvondemselbenHerstellerersetzen.
DieBatterieenthältLithiumundkannbeiunsachgemäßerVerwendung,HandhabungoderEntsorgung
explodieren.
DieBatterienicht:
•mitWasserinBerührungbringen.
Chapter1.Readthisfirst:Importantsafetyinformation17
Page 26
•über100Cerhitzen.
•reparierenoderzerlegen.
DieörtlichenBestimmungenfürdieEntsorgungvonSondermüllbeachten.
ACHTUNG:
BeiderInstallationvonLasergeräten(wieCD-ROM-Laufwerken,DVD-aufwerken,Einheitenmit
LichtwellenleitertechnikoderSendern)Folgendesbeachten:
•DieAbdeckungennichtentfernen.DurchEntfernenderAbdeckungendesLasergerätskönnen
gefährlicheLaserstrahlungenfreigesetztwerden.DasGerätenthältkeinezuwartendenTeile.
•WerdenSteuerelemente,EinstellungenoderDurchführungenvonProzedurenandersalshier
angegebenverwendet,kanngefährlicheLaserstrahlungauftreten.
VORSICHT
EinigeLasergeräteenthalteneineLaserdiodederKlasse3Aoder3B.BeachtenSieFolgendes:
LaserstrahlungbeigeöffneterVerkleidung.NichtindenStrahlblicken.KeineLupenoderSpiegel
verwenden.Strahlungsbereichmeiden.
≥18kg≥32kg≥55kg
ACHTUNG:
ArbeitsschutzrichtlinienbeimAnhebenderMaschinebeachten.
ACHTUNG:
MitdemNetzschalteranderEinheitundamNetzteilwirddieStromversorgungfürdieEinheit
nichtunterbrochen.DieEinheitkannauchmitmehrerenNetzkabelnausgestattetsein.Umdie
StromversorgungfürdieEinheitvollständigzuunterbrechen,müssenallezumGerätführenden
NetzkabelvomNetzgetrenntwerden.
18P320HardwareMaintenanceManual
Page 27
1
2
Chapter1.Readthisfirst:Importantsafetyinformation19
Page 28
1
2
20P320HardwareMaintenanceManual
Page 29
PERICOLO
Lacorrenteelettricaprovenientedaicavidialimentazione,deltelefonoedicomunicazionepuòessere
pericolosa.
Perevitareilrischiodiscosseelettriche:
•Noncollegareoscollegarequalsiasicavooppureeffettuarel'installazione,lamanutenzioneola
riconfigurazionedelprodottoduranteuntemporale.
•Collegaretuttiifilielettriciaunapresadialimentazionecorrettamentecablataedotatadimessaa
terra.
•Collegareallepreseelettricheappropriatetutteleapparecchiaturecheverrannoutilizzateper
questoprodotto.
•Sepossibile,utilizzaresolounamanopercollegareoscollegareicavidisegnale.
•Nonaccendereassolutamenteapparecchiatureinpresenzadiincendi,perdited'acquaodanno
strutturale.
•Scollegareicavidialimentazione,isistemiditelecomunicazione,leretieilmodemprimadi
aprireicoperchideldispositivo,salvoistruzionicontrarierelativealleprocedurediinstallazionee
configurazione.
•Collegareescollegareicavicomedescrittonellaseguentetabellaquandovengonoeffettuate
operazionidiinstallazione,spostamentooaperturadeicoperchidiquestoprodottoodelleunità
collegate.
PercollegarsiPerscollegarsi
1.SPEGNEREleapparecchiature.
2.Innanzitutto,collegaretuttiicavialleunità.
3.Collegareicavidisegnaleaiconnettori.
4.Collegareicavidialimentazioneallapresa.
5.Accenderel'unità.
1.SPEGNEREleapparecchiature.
2.Innanzitutto,rimuovereicavidialimentazionedalla
presa.
3.Rimuovereicavidisegnaledaiconnettori.
4.Rimuoveretuttiicavidalleunità.
ATTENZIONE:
Quandosisostituiscelabatteriaallitio,utilizzaresoloilNumeroparte45C1566ountipodibatteria
equivalenteconsigliatodalproduttore.Sesulsistemaèpresenteunmodulochecontieneunabatteria
allitio,sostituirlosoloconuntipodimodulodellostessotipodellastessacasadiproduzione.La
batteriacontienelitioepuòesplodereseusata,maneggiataosmaltitainmodononcorretto.
Non:
•Gettareoimmergerelabatterianell'acqua
•Riscaldarlaadunatemperaturasuperioreai100gradiC(212gradiF)
•Smontarla,ricaricarlaotentarediripararla
Lebatterieusatevannosmaltiteinaccordoallanormativainvigore(DPR915/82esuccessive
disposizioniedisposizionilocali).
Chapter1.Readthisfirst:Importantsafetyinformation21
Page 30
ATTENZIONE:
1
2
Quandovengonoinstallatiprodottilaser(qualiCD-ROM,unitàDVD-ROM,unitàafibreotticheo
trasmittenti),tenerpresentequantosegue:
•Nonrimuovereglisportelli.L'aperturadiun'unitàlaserpuòdeterminarel'esposizionearadiazioni
laserpericolose.All'internodell'unitànonvisonopartisucuieffettuarel'assistenzatecnica.
•L'utilizzodicontrolli,regolazioniol'esecuzionediprocedurenondescrittinelpresentemanuale
possonoprovocarel'esposizionearadiazionipericolose.
PERICOLO
AlcuneunitàlasercontengonoundiodolaserdiClasse3AoClasse3B.Tenerpresentequantosegue:
Aprendol'unitàvengonoemesseradiazionilaser.Nonfissareilfascio,nonguardarlodirettamente
construmentiotticiedevitarel'esposizionealfascio.
≥18kg≥32kg≥55kg
ATTENZIONE:
Prestareattenzionenelsollevarel'apparecchiatura.
ATTENZIONE:
Ilpulsantedicontrollodell'alimentazionepresentesull'unitàel'interruttoredell'alimentatorenon
disattivanol'alimentazionecorrentefornitaall'unità.E'possibilechel'unitàdispongadipiùcavidi
alimentazione.Perdisattivarel'alimentazionedall'unità,accertarsichetuttiicavidialimentazione
sianoscollegatidallafontedialimentazione.
22P320HardwareMaintenanceManual
Page 31

Chapter1.Readthisfirst:Importantsafetyinformation23
Page 32

1
2
PELIGRO
Lacorrienteeléctricaprocedentedecablesdealimentación,teléfonosycablesdecomunicaciónpuede
serpeligrosa.
Paraevitarelriesgodedescargaeléctrica:
•Noconectenidesconecteloscablesnirealiceningunatareadeinstalación,mantenimientoo
reconfiguracióndeesteproductoduranteunatormentaeléctrica.
•Conectetodosloscablesdealimentaciónatomasdecorrientedebidamentecableadasy
conectadasatierra.
•Cualquierequipoqueseconecteaesteproductotambiéndebeconectarseatomasdecorriente
debidamentecableadas.
•Siemprequeseaposible,utiliceunasolamanoparaconectarodesconectarloscablesdeseñal.
24P320HardwareMaintenanceManual
Page 33

•Noenciendanuncaunequipocuandohayseñalesdefuego,aguaodañosestructurales.
•Desconecteloscablesdealimentación,lossistemasdetelecomunicaciones,lasredesylos
módemsconectadosantesdeabrirlascubiertasdelosdispositivos,amenosqueseindiquelo
contrarioenlosprocedimientosdeinstalaciónyconfiguración.
•Conecteydesconecteloscables,comosedescribeenlatablasiguiente,cuandoinstale,muevao
abralascubiertasdeesteproductoodelosdispositivosconectados.
ParaconectarParadesconectar
1.APÁGUELOtodo.
2.Enprimerlugar,conectetodosloscablesalos
dispositivos.
3.Conecteloscablesdeseñalalosconectores.
4.Enchufeloscablesdealimentaciónalastomasde
corriente.
5.Enciendaeldispositivo.
1.APÁGUELOtodo.
2.Enprimerlugar,desenchufeloscablesdealimentación
delastomasdecorriente.
3.Desconecteloscablesdeseñaldelosconectores.
4.Desconectetodosloscablesdelosdispositivos.
PRECAUCIÓN:
Cuandosustituyaunabateríadelitio,utilicesolamenteunabateríanúmerodepieza45C1566uotra
detipoequivalenterecomendadaporelfabricante.Sisusistemadisponedeunmóduloquecontiene
unabateríadelitio,reemplácelosóloconelmismotipodemódulo,delmismofabricante.Labatería
contienelitioypuedeexplotarsinoseutiliza,manipulaodesechacorrectamente.
Nodebe:
•Arrojarlaalaguaosumergirlaenella
•Exponerlaatemperaturassuperioresa100°C(212°F)
•Repararlaodesmontarla
Deshágasedelabateríasegúnespecifiquenlasleyesonormaslocales.
PRECAUCIÓN:
Cuandohayaproductosláser(comounidadesdeCD-ROM,unidadesdeDVD,dispositivosdefibra
ópticaotransmisores)instalados,tengaencuentalosiguiente:
•Noquitelascubiertas.Siquitalascubiertasdelproductoláser,podríaquedarexpuestoaradiación
láserpeligrosa.Dentrodeldispositivonoexisteningunapiezaquerequieraserviciotécnico.
•Siusacontrolesoajustesorealizaprocedimientosquenoseanlosespecificadosaquí,podría
exponersearadiacionespeligrosas.
PELIGRO
Chapter1.Readthisfirst:Importantsafetyinformation25
Page 34

Algunosproductoslásertienenincorporadoundiodoláserdeclase3Aoclase3B.T engaencuentalo
1
2
siguiente:
Cuandoseabre,quedaexpuestoaradiaciónláser.Nomiredirectamentealrayoláser,nisiquieracon
instrumentosópticos,yeviteexponersedirectamentealrayoláser.
≥18kg≥32kg≥55kg
PRECAUCIÓN:
Adopteprocedimientossegurosallevantarelequipo.
PRECAUCIÓN:
Elbotóndecontroldealimentacióndeldispositivoyelinterruptordealimentacióndelafuentede
alimentaciónnodesconectanlacorrienteeléctricasuministradaaldispositivo.Además,eldispositivo
podríatenermásdeuncabledealimentación.Parasuprimirtodalacorrienteeléctricadeldispositivo,
asegúresedequetodosloscablesdealimentaciónesténdesconectadosdelatomadecorriente.
26P320HardwareMaintenanceManual
Page 35

Chapter2.Productoverview
Thischapterprovidesinformationaboutthefollowingtopics:
•“Hardwarelocations”onpage27
•“Computerfeatures”onpage36
•“Computerspecifications”onpage40
•“Programs”onpage41
Hardwarelocations
Thissectionprovidesinformationaboutthelocationsofyourcomputerhardware.
Frontview
Note:Thecomputerhardwaremightlookslightlydifferentfromtheillustrations.
Figure1.Frontview
1Opticaldriveeject/closebutton2USB3.0connectors(2)
3Hard-disk-driveactivityindicator4Powerindicator
5Powerbutton6Microphoneconnector
7Headsetconnector
1Opticaldriveeject/closebutton
8Cardreader(availableonsomemodels)
Pressthebuttontoejectorclosethetrayoftheopticaldrive.
©CopyrightLenovo2017
27
Page 36

2USB3.0connector
UsedtoconnectaUSB-compatibledevice,suchasaUSBkeyboard,mouse,storagedrive,orprinter.
3Hard-disk-driveactivityindicator
Thisindicatorshowsthestatusoftheinternalstoragedrives(suchasharddiskdrivesorsolid-statedrives).
On:Thestoragedrivesarereadyforuse.
Off(whencomputerpoweredon):Thestoragedrivesdonotworkcorrectlyorotherproblemsoccur..
4Powerindicator
Whenthepowerindicatorison,thecomputeristurnedon.
5Powerbutton
Pressthepowerbuttontoturnonyourcomputer.Ifyourcomputerisunresponsive,youcanturnoffthe
computerbypressingandholdingthepowerbuttonforfourormoreseconds.
6Microphoneconnector
Usethisconnectortoattachamicrophonetoyourcomputerwhenyouwanttorecordsoundorifyouuse
speech-recognitionsoftware.
7Headsetconnector
Usethisconnectortoattachaheadsettoyourcomputer.
8Cardreader(availableonsomemodels)
Thisisa9-in-1cardreader.Usedtoinsertasupportedcard-shapedstoragemediumtoreadthedata
onthemedium.
Rearview
Someconnectorsontherearofyourcomputerarecolor-codedtohelpyoudeterminewheretoconnect
thecablesonyourcomputer.
Note:Thecomputerhardwaremightlookslightlydifferentfromtheillustrations.
28P320HardwareMaintenanceManual
Page 37

Figure2.Rearview
Note:Adiscretegraphicscard,networkinterfacecard,oraudiocardmightbeinstalledinthePeripheral
ComponentInterconnect(PCI)Expresscardarea.Ifsuchacardisinstalled,ensurethatyouusethe
connectorsonthecardinsteadofthecorrespondingconnectorsonthecomputer.
1Power-cordconnector
3VGAconnector
5USB3.0connectors(4)6USB2.0connectors(2)
7Microphoneconnector
2Serialconnector
4DisplayPort
8PCIecardarea(differentcardsprovidedifferent
®
connectors
connectors)
9Audioline-inconnector
11Cable-lockslots
13Audioline-outconnector14Ethernetconnector
15PS/2keyboardconnector(availableonsomemodels)16Security-lockslot
1Powercordconnector
10Optionalserialconnector
12Padlockloop
Connectthepowercordtoyourcomputerforpowersupply.
210Serialconnector
Usethisconnectortoattachanexternalmodem,aserialprinter,orotherdevicesthatusea9-pinserial
connector.
3VGAconnector
Usedtoconnectavideographicsarray(VGA)monitororotherdevicesthatuseaVGAconnector.
Chapter2.Productoverview29
Page 38

4DisplayPortconnector
Usedtoconnectahigh-performancemonitor,adirect-drivemonitor,orotherdevicesthatuseaDisplayPort
connector.
5USB3.0connector
UsethisconnectortoattachaUSB-compatibledevice,suchasaUSBkeyboard,mouse,storagedrive,or
printer.
6USB2.0connector
UsethisconnectortoattachaUSB-compatibledevice,suchasaUSBkeyboard,mouse,storagedrive,or
printer.
7Microphoneconnector
Usethisconnectortoattachamicrophonetoyourcomputerwhenyouwanttorecordsoundorifyouuse
speech-recognitionsoftware.
8PCIecardarea(differentcardsprovidedifferentconnectors)
Toimprovetheoperatingperformanceofyourcomputer,youcanconnectPCIecardsintothisarea.
Dependingonyourcomputermodel,thecardsinstalledinthisareamightvary.
9Audioline-inconnector
Usedtoreceiveaudiosignalsfromanexternalaudiodevice,suchasastereosystem.Whenyouattachan
externalaudiodevice,acableisconnectedbetweentheaudioline-outconnectorofthedeviceandthe
audioline-inconnectorofthecomputer.
11Cable-lockslots(2)
Usedtosecureacablelock.Formoreinformation,see“Attachingacablelock”onpage57.
12Padlockloop
Connectapadlocktosecureyourcomputer.Formoreinformation,see“Attachingapadlock”onpage55.
13Audioline-outconnector
Theaudioline-outconnectorisusedtosendaudiosignalsfromthecomputertoexternaldevices,such
asheadphones.
14Ethernetconnector
ConnectanEthernetcableforalocalareanetwork(LAN).
Note:T ooperatethecomputerwithinFederalCommunicationsCommission(FCC)ClassBlimits,use
aCategory5Ethernetcable.
15PS/2keyboardconnector(availableonsomemodels)
UsethisconnectortoattachaPersonalSystem/2(PS/2)keyboard.
30P320HardwareMaintenanceManual
Page 39

16Security-lockslot
AttachaKensington-stylecablelocktothesecurity-lockslottosecureyourcomputer.Formoreinformation,
see“AttachingaKensington-stylecablelock”onpage56.
Computercomponents
Notes:
•Dependingonthemodel,someofthefollowingcomponentsmightnotbeavailable.
•T oremovethecomputercover,see“Preparingyourcomputerandremovingthecomputercover”on
page91
.
Figure3.Computercomponents
1Heatsinkandfanassembly
3Opticaldrive(availableonsomemodels)4Cardreader(availableonsomemodels)
5FrontaudioandUSBassembly
7Frontfanassembly(availableonsomemodels)
9Graphicscard(availableonsomemodels)10Coverpresenceswitch(alsocalledintrusionswitch)
11Rearfanassembly
2Memorymodule
6Frontbezel
8Harddiskdrives
(availableonsomemodels)
12Powersupplyassembly
MajorFRUsandCRUs
ThefollowingillustrationshowsthelocationsofthemajorFRUsandCustomerReplaceableUnits(CRUs)in
thecomputer.Toremovethecomputercover,see“Preparingyourcomputerandremovingthecomputer
cover”onpage91.
Chapter2.Productoverview31
Page 40

Note:Dependingonthemodel,someofthefollowingcomponentsmightnotbeavailable.
Figure4.MajorFRUsandCRUs
ThefollowingtableliststhemajorFRUsshowninFigure4“MajorFRUsandCRUs”onpage32andidentifies
whichFRUsarealsoself-serviceCRUsoroptional-serviceCRUs.
Notes:
32P320HardwareMaintenanceManual
Page 41

•Self-serviceCRUs:Partstobeinstalledorreplacedbycustomerthemselves.
•Optional-serviceCRUs:Partscanbeinstalledorreplacedbycustomersortechniciansundercertain
termsoftheapplicablewarrantyservicetypeforyourcountryorregion.
•Non-CRUs:Partsmustbeinstalledorreplacedonlybytrainedservicetechnicians.
NumberFRUdescription
1
2
3
4
PowersupplyassemblyNoYes
Heatsinkandfanassembly
Solid-statedrive(availableonsomemodels)
Multi-driveConversionKit(availableonsome
models)
4
SlimOpticalDriveAdapter(availableonsome
models)
5
Frontaccessstorageenclosure(availableon
somemodels)
6
7
8
9
10
11
12
13
14
15
16
17
18
5.25-inchflexmodule(availableonsomemodels)
Opticaldrive(availableonsomemodels)
MicroprocessorNoNo
MemorymodulesYesNo
Cardreader
FrontaudioandUSBassembly
FrontbezelYesNo
PowerbuttonNoNo
Thermalsensor(availableonsomemodels)
FrontWi-Fiantenna(availableonsomemodels)
InternalspeakerNoNo
Frontfanassembly(availableonsomemodels)
Harddiskdriveorhybriddrive(availableonsome
models)
19
20
21
Systemboard
BatteryNoYes
M.2solid-statedriveadapter(availableonsome
models)
22
23
24
25
26
27
M.2solid-statedrive(availableonsomemodels)
PCIecard(availableonsomemodels)
Wi-Ficardmodule(availableonsomemodels)
Wi-Fiadaptercard(availableonsomemodels)
RearWi-Fiantenna(availableonsomemodels)
Coverpresenceswitch(alsocalledintrusion
switch)(availableonsomemodels)
28
a
b
Rearfanassembly
LenovofactoryrecoveryUSBkey
LenovorecoverydiscsetNoNo
Self-serviceCRUOptional-serviceCRU
NoYes
YesNo
YesNo
YesNo
YesNo
YesNo
YesNo
NoNo
NoNo
NoNo
NoNo
NoYes
YesNo
NoNo
NoYes
NoYes
YesNo
NoYes
NoYes
NoNo
NoNo
NoYes
NoNo
Chapter2.Productoverview33
Page 42

NumberFRUdescription
c
d
MiscellaneouspartskitsNoNo
Powercord No
Self-serviceCRUOptional-serviceCRU
Yes
Partsonthesystemboard
Thefollowingillustrationshowsthelocationsofthepartsonthesystemboard.
Figure5.Partsonthesystemboard
1 PS/2keyboardandmouseconnector
3 Microprocessor
5 Battery
7 Memoryslot2(DIMM2) 8 Memoryslot3(DIMM3)
9 Memoryslot4(DIMM4)
11 10-pinpowerconnector
13 4-pinSATApowerconnectors
15 Parallelconnector
17 SATAconnectors
19 USBhardwaredisableheader 20 Frontbezelconnector(forconnectingLEDindicators
2 4-pinpowerconnector
4 Microprocessorfanconnector
6 Memoryslot1(DIMM1)
10 Thermalsensorconnector
12 Hard-disk-drivefanconnector
14 Thunderbolt™connector
16 eSATAconnector
18 Powerfanconnector
andthepowerbutton)
21 FrontUSB3.0connector(forconnectingUSB
connectorsonthefrontpanel)
22 USB2.0connectors(forconnectingthefrontUSB2.0
connector,cardreaderconnector,orBluetoothconnector)
34P320HardwareMaintenanceManual
Page 43

23ClearCMOS(ComplementaryMetalOxide
Semiconductor)/Recoveryjumper
25Internalspeakerconnector26Frontaudioconnector
27PCIex1cardslot228PCIex16cardslot(negotiablelinkwidthx4,x1)
29PCIex1cardslot130PCIex16cardslot(graphicscardavailableonsome
31Systemfanconnector32Coverpresenceswitchconnector(intrusionswitch
24Serial(COM2)connector
models)
connector)
Internaldrives
Internaldrivesaredevicesthatyourcomputerusestoreadandstoredata.Youcanadddrivestoyour
computertoincreasestoragecapacityandenableyourcomputertoreadothertypesofmedia.Internal
drivesareinstalledinbays.
Whenyouinstallorreplaceaninternaldrive,notethetypeandsizeofthedrivethateachbaysupportsand
correctlyconnecttherequiredcables.RefertotheappropriatesectioninChapter9“Hardwareinstallation
andreplacement”onpage91
Thefollowingillustrationshowsthelocationsofthedrivebays.
Note:Thecomputerhardwaremightlookslightlydifferentfromtheillustrations.
forinstructionsonhowtoinstallorreplaceinternaldrivesforyourcomputer.
Figure6.Drive-baylocations
1Primaryoptical-drivebay(withanopticaldrive,aflexmodule,afront-accessstorageenclosure,aMulti-drive
ConversionKit,oraSlimOpticalDriveAdapterinstalledinsomemodels)
2Secondaryoptical-drivebay(withanopticaldrive,aflexmodule,afront-accessstorageenclosure,aMulti-drive
ConversionKit,oraSlimOpticalDriveAdapterinstalledinsomemodels)
Chapter2.Productoverview35
Page 44

3Cardreader(9-in-1cardreader,availableonsomemodels)
4Secondaryhard-disk-drivebay(withaharddiskdrive,solid-statedrive,orhybriddriveinstalledinsomemodels)
5Primaryhard-disk-drivebay(withaharddiskdrive,solid-statedrive,orhybriddriveinstalledinsomemodels)
6PCIecardslots(withPCIesolid-statedrivesorotherPCIecardsinstalledinsomemodels)
Machinetypeandmodellabel
Themachinetypeandmodellabelidentifiesyourcomputer.WhenyoucontactLenovoforhelp,themachine
typeandmodelinformationhelpssupporttechnicianstoidentifyyourcomputerandprovidefasterservice.
Thefollowingisasampleofthemachinetypeandmodellabel.
Figure7.Machinetypeandmodellabel
Computerfeatures
Foryourspecificcomputermodel,somefeaturesmightvaryornotapply.
Informationaboutyourcomputer
•T oviewbasicinformation(suchasmicroprocessorandmemoryinformation)aboutyourcomputer,
dothefollowing:
1.ClicktheStartbuttontoopentheStartmenu.
2.DependingonyourMicrosoft
–ForWindows7:Right-clickComputer,andthenclickProperties.
–ForWindows10:ClickSettings➙System➙About.
36P320HardwareMaintenanceManual
®
Windows
®
operatingsystemversion,dooneofthefollowing:
Page 45

•T oviewdetailedinformationaboutthedevices(suchastheopticaldriveandnetworkadapters)onyour
computer,dothefollowing:
1.DependingonyourWindowsversion,dooneofthefollowing:
–ForWindows7:ClicktheStartbuttontoopentheStartmenu.Right-clickComputer,andthen
clickProperties.
–ForWindows10:Right-clicktheStartbuttontoopentheStartcontextmenu.
2.Locateanddouble-clickyourdeviceinDeviceManagertoviewdeviceproperties.Typethe
administratorpasswordorprovideconfirmationifprompted.
Memory
Yourcomputersupportsuptofourdoubledatarate4(DDR4)errorcorrectioncode(ECC)unbuffereddual
inlinememorymodules(UDIMMs)andnon-ECC(UDIMMs).
Formoreinformation,see“Memorymodule”onpage101
.
Storagedrives
Yourcomputersupportsthefollowingstoragedrives:
•Cardreader(9-in-1cardreader,availableonsomemodels)
•Opticaldrive(availableonsomemodels)
•SerialAdvancedT echnologyAttachment(SATA)harddiskdrive
•SATAhybriddrive(availableonsomemodels)
•SATAsolid-statedrive(availableonsomemodels)
•PCIesolid-statedrive(M.2solid-statedrive)(availableonsomemodels)
Toviewtheamountofstoragedrivespace,dothefollowing:
1.DependingonyourWindowsversion,dooneofthefollowing:
•ForWindows7:ClicktheStartbuttontoopentheStartmenu.Right-clickComputer,andthenclick
Manage.
•ForWindows10:Right-clicktheStartbuttontoopentheStartcontextmenu.
2.ClickDiskManagementandfollowtheinstructionsonthescreen.
Videofeatures
•Integratedgraphicssupportsthefollowingconnectorsonyourcomputer:
–DisplayPortconnector
–VideoGraphicsArray(VGA)connector
•DiscretegraphicscardinstalledinoneofthePCIex16graphicscardslots(availableonsomemodels)
(theconnectorsvarybygraphicscard)
Audiofeatures
Integratedaudiocontrollersupportsthefollowingconnectorsanddevicesonyourcomputer:
•Audioline-inconnector
•Audioline-outconnector
•Headsetconnector
•Internalspeaker
•Microphoneconnectors
Chapter2.Productoverview37
Page 46

Input/Output(I/O)features
•100/1000MbpsEthernetconnector
•Serialconnector
•Audioconnectors(audioline-inconnector,audioline-outconnector,microphoneconnector,andheadset
connector)
•Displayconnectors(DisplayPortconnector,DVIconnector,andMiniDisplayPort®connector)(varyby
graphicscard)
•ExternalSerialAdvancedTechnologyAttachment(eSATA)connector(availableonsomemodels)
•InstituteofElectricalandElectronicsEngineers(IEEE)1394connector(availableonsomemodels)
•PersonalSystem/2(PS/2)keyboardconnector(availableonsomemodels)
•PS/2mouseconnector(availableonsomemodels)
•USB2.0connectors
•USB3.0connectors
Formoreinformation,see“Frontview”onpage27
and“Rearview”onpage28.
Expansion
•Cardreader(9-in-1cardreader,availableonsomemodels)
•Hard-disk-drivebays
•Memoryslots
•Optical-drivebays
•PCIex1cardslots
•PCIex16cardslot(negotiablelinkwidthx4,x1)
•PCIex16graphicscardslot(graphicscardavailableonsomemodels)
Formoreinformation,see“Internaldrives”onpage35
and“Partsonthesystemboard”onpage34.
Powersupply
Yourcomputercomeswithoneofthefollowingpowersupplies:
•250-wattautomatic85%voltage-sensingpowersupply
•400-wattautomatic92%voltage-sensingpowersupply
Wirelessfeatures
Dependingonyourcomputermodel,thefollowingwirelessfeaturesaresupported:
•WirelessLAN
•Bluetooth
Systemmanagementfeatures
•Abilitytostorepower-onself-test(POST)hardwaretestresults
•DesktopManagementInterface(DMI)
DesktopManagementInterfaceprovidesacommonpathforuserstoaccessinformationaboutall
aspectsofacomputer.Theinformationincludestheprocessortype,installationdate,attachedprinters
andotherperipherals,powersources,andmaintenancehistory.
38P320HardwareMaintenanceManual
Page 47

•ErPLPScompliancemode
Theenergy-relatedproductsdirective(ErP)lowestpowerstate(LPS)compliancemodereducesthe
consumptionofelectricitywhenyourcomputerisinsleeporoffmode.Formoreinformation,see
“EnablingordisablingtheErPLPScompliancemode”onpage62
.
•IntelligentCoolingEngine(ICE)
TheIntelligentCoolingEngineisasystemthermalmanagementsolutionthatenablesyourcomputer
torunwithbetterthermalandacousticperformance.TheICEfunctionalsomonitorsthethermal
performanceofyourcomputertoidentifythermalproblems.Formoreinformation,see“Switching
betweenbetteracousticandbetterthermalperformance”onpage62and“Enablingordisablingthe
systemtorecordthermalalertlogs”onpage63
•Intel
®
StandardManageability(ISM)
.
IntelStandardManageabilitybuildscertainfunctionalitiesintocomputerhardwareandfirmware.
Therefore,computersarelessexpensiveforbusinessesandeasiertomonitor,maintain,update,upgrade,
andrepair.
•IntelActiveManagementTechnology(IntelAMT)
WithspecificIntelplatformcapabilitiesandthird-partymanagementandsecurityapplications,IntelActive
ManagementTechnologyenablesITadministratorsormanagedserviceproviderstoeasilyandremotely
discover,repair,andprotecttheirnetworkedcomputingassets.
•IntelMatrixStorageManager
IntelMatrixStorageManagerisadevicedriverthatprovidessupportforSerialAdvancedT echnology
Attachment(SATA)RedundantArrayofIndependentDisks(RAID)5arraysandSAT ARAID10arrayson
specificIntelchipsetsystemboardstoenhanceharddiskperformance.
•PrebootExecutionEnvironment(PXE)
PrebootExecutionEnvironmentenablesyoutostartcomputersusinganetworkinterface.Thismanneris
independentofstartingcomputersfromdatastoragedevices(suchastheharddiskdrive)orinstalled
operatingsystems.
•SystemManagement(SM)basicinput/outputsystem(BIOS)andSMsoftware
TheSMBIOSspecificationdefinesdatastructuresandaccessmethodsinaBIOS.Therefore,auseroran
applicationcanstoreandretrieveinformationspecificaboutthecomputerinquestion.
•WakeonLAN(WOL)
WakeonLANisanEthernetcomputernetworkingstandardthatallowsacomputertobeturnedon
orwokenupbyanetworkmessage.Themessageisusuallysentbyaprogramrunningonanother
computeronthesamelocalareanetwork.
•WakeonRing
WakeonRing,sometimesreferredtoasWakeonModem,isaspecificationthatallowssupported
computersanddevicestoresumefromsleeporhibernationmode.
•WindowsManagementInstrumentation(WMI)
WindowsManagementInstrumentationisasetofextensionstotheWindowsDriverModel.Itprovidesan
operatingsysteminterfacethroughwhichinstrumentedcomponentsprovideinformationandnotification.
Securityfeatures
•Abilitytoenableanddisableadevice
•AbilitytoenableanddisableUSBconnectorsindividually
•Antivirusprogram
•ComputraceAgentsoftwareembeddedinfirmware
•Coverpresenceswitch(alsocalledintrusionswitch)
Chapter2.Productoverview39
Page 48

•BIOSpasswordsandWindowsaccountstodeterunauthorizeduseofyourcomputer
•Fingerauthentication(availableonsomemodels)
•Firewalls
•Startupsequencecontrol
•Startupwithoutkeyboardormouse
•Supportforacomputercoverlock
•SupportforaKensington-stylecablelock
•Supportforapadlock
•T rustedPlatformModule(TPM)
Formoreinformation,seeChapter5“Security”onpage55
Preinstalledoperatingsystem
YourcomputerispreinstalledwithWindows7orWindows10operatingsystem.Additionaloperating
systemsmightbeidentifiedbyLenovoascompatiblewithyourcomputer.Todetermineifanoperating
systemhasbeencertifiedortestedforcompatibility,checktheWebsiteoftheoperatingsystemprovider.
.
Computerspecifications
Thissectionliststhephysicalspecificationsforyourcomputer.
Dimensions
•Width:175mm(6.89inches)
•Height:376mm(14.80inches)
•Depth:426mm(16.77inches)
Weight
Maximumconfigurationasshipped:13kg(28.66lb)
Environment
•Airtemperature:
–Operating:From10°C(50°F)to35°C(95°F)
–Storageinoriginalshippingpackage:From-40°C(-40°F)to60°C(140°F)
–Storagewithoutpackage:From-10°C(14°F)to60°C(140°F)
•Humidity:
–Operating:20%–80%(non-condensing)
–Storage:20%–90%(non-condensing)
•Altitude:
–Operating:From-15.2m(-50ft)to3048m(10000ft)
–Storage:From-15.2m(-50ft)to10668m(35000ft)
Electricalinput
•Inputvoltage:From100Vacto240Vac
40P320HardwareMaintenanceManual
Page 49

•Inputfrequency:50/60Hz
Programs
Thissectionprovidesinformationabouttheprogramsonyourcomputer.
Accessingaprogramonyourcomputer
Note:ForWindows7,dependingonyourcomputermodel,someoftheLenovoprogramsmightbereadyto
beinstalled,soyoumustinstallthemmanually.Then,youcanaccessandusetheseprograms.
Toaccessaprogramonyourcomputer,dooneofthefollowing:
•FromWindowsSearch:
1.DependingonyourWindowsversion,dooneofthefollowing:
–ForWindows7:ClicktheStartbuttontoopentheStartmenu,andthentypetheprogramname
intothesearchbox.
–ForWindows10:TypetheprogramnameintothesearchboxnexttotheStartbutton.
2.Inthesearchresults,clickthenameofthedesiredprogramtolaunchtheprogram.
•FromtheStartmenuorControlPanel:
1.DependingonyourWindowsversion,dooneofthefollowing:
–ForWindows7:ClicktheStartbuttontoopentheStartmenu.Iftheprogramnameisnot
displayed,clickAllProgramstodisplaytheprogramlist.Then,clickthenameofthedesired
programtolaunchtheprogram.
–ForWindows10:ClicktheStartbuttontoopentheStartmenu.Then,clickthenameofthe
desiredprogramtolaunchtheprogram.
2.IftheprogramnameisnotdisplayedontheStartmenu,accesstheprogramfromControlPanel.
a.DependingonyourWindowsversion,dooneofthefollowing:
–ForWindows7:ClickControlPanelontheStartmenu.
–ForWindows10:Right-clicktheStartbuttontoopentheStartcontextmenu,andthenclick
ControlPanel.
b.ViewControlPanelbyLargeiconsorSmallicons,andthenclickthenameofthedesiredprogram
tolaunchtheprogram.
Installingaprogramthatisreadytobeinstalled(Windows7only)
OntheWindows7operatingsystem,toinstallaprogramthatisreadytobeinstalled,dothefollowing:
1.OpentheLenovoThinkVantage
page41.
2.ClickView➙Tilestoviewtheprogramicons.
3.Followtheinstructionsundergrayed-outiconstolocatetheiconforthedesiredprogram.Then,
double-clicktheicontoinstalltheprogram.
®
Toolsprogram.See“Accessingaprogramonyourcomputer”on
AnintroductiontoLenovoprograms
ThissectionprovidesinformationaboutthemajorLenovoprogramsavailableonyouroperatingsystem.
Note:Dependingonyourcomputermodel,someofthefollowingprogramsmightnotbeavailable.
Chapter2.Productoverview41
Page 50

FingerprintManagerProor
ThinkVantageFingerprintSoftware
(Windows7)
LenovoAppExplorer
(Windows10)
LenovoCompanion
(Windows10)
LenovoPCExperience
(Windows7andWindows10)
LenovoID
(Windows10)
LenovoPowerENGAGE
TheFingerprintManagerProorThinkVantageFingerprintSoftwareprogram
enablesyoutouseafingerprintreader.Theintegratedfingerprintreader
providedonsomekeyboardsenablesyoutoenrollyourfingerprintand
associateitwithyourpower-onpassword,harddiskpassword,andWindows
password.Asaresult,fingerprintauthenticationcanreplacepasswordsand
enablesimpleandsecureuseraccess.
LenovoAppExplorerenablesyoutoquicklypersonalizeyourPCbyhelping
youfind,download,andinstallselectedappsinasecuremanner.It
recommendspopular,useful,andrelevantappsfromacuratedcatalogof
over2000titles.Therearenoadvertisements,hiddendownloads,orsoftware
bundles.You’refreetochooseonlytheappsthatyouwantwithoutbeing
concernedaboutannoyingormaliciousadd-ons.
Yourcomputer’sbestfeaturesandcapabilitiesshouldbeeasytoaccessand
understand.WithLenovoCompanion,theyare.UseLenovoCompanionto
dothefollowing:
•Optimizeyourcomputer’sperformance,monitoryourcomputer’shealth,
andmanageupdates.
•Accessyouruserguide,checkwarrantystatus,andviewaccessories
customizedforyourcomputer.
•Readhow-toarticles,exploreLenovoforums,andstayup-to-dateon
technologynewswitharticlesandblogsfromtrustedsources.
LenovoCompanionisfilledwithexclusiveLenovocontenttohelpyoulearn
moreaboutwhatyoucandowithyourcomputer.
TheLenovoPCExperienceprogramhelpsyouworkmoreeasilyand
securely.TheprogramprovideseasyaccesstoLenovoThinkVantageTools
orLenovoTools,importantsettingsandinformationaboutyourcomputer,
theLenovoSupportWebsite,andsoon.
TheLenovoIDprogramenablesyoutocreateandmanageyourLenovoID.
WithaLenovoID,youcanconnecttoeverythingLenovothroughasingle
account.UseyourLenovoIDforquickandsimpleauthenticationandthen
enjoythevariousservicesprovidedbyLenovo.Suchservicesincludeonline
shopping,appdownload,personalizeddevicesupport,specialpromotional
offers,Lenovoforums,andsoon.
TheLenovoPowerENGAGEprogramprovidespowermanagementfunction.
(Windows7)
LenovoSolutionCenter
(Windows7)
LenovoThinkVantageT ools
(Windows7)
RecoveryMedia
(Windows7)
SystemUpdate
(Windows7)
42P320HardwareMaintenanceManual
TheLenovoSolutionCenterprogramenablesyoutotroubleshootand
resolvecomputerproblems.Itcombinesdiagnostictests,systeminformation
collection,securitystatus,andsupportinformation,alongwithhintsandtips
formaximumsystemperformance.
TheLenovoThinkVantageToolsprogramprovideseasyaccesstovarious
toolstohelpyourworkmoreeasilyandsecurely.
TheRecoveryMediaprogramenablesyoutorestorethecontentsofthehard
diskdrivetothefactory-defaultsettings.
TheSystemUpdateprogramprovidesregularaccesstothesystemupdates
foryourcomputer,suchasdevicedriverupdates,softwareupdates,and
BIOSupdates.TheprogramgathersinformationfromtheLenovoHelp
Centeraboutnewupdatesforyourcomputer,andthensortsanddisplays
theupdatesfordownloadandinstallation.Youhavecompletecontrolof
whichupdatestodownloadandinstall.
Page 51

Chapter3.Usingyourcomputer
Thischapterprovidesinformationtohelpyouusethevariousfeaturesprovidedbyyourcomputer.
Registeringyourcomputer
WhenyouregisteryourcomputerwithLenovo,youenterrequiredinformationintoaLenovodatabase.The
informationenablesLenovotocontactyouwhenthereisarecallorothersevereproblemandprovide
quickerservicewhenyoucallLenovoforhelp.Inaddition,somelocationsofferextendedprivilegesand
servicestoregisteredusers.
ToregisteryourcomputerwithLenovo,gotohttp://www.lenovo.com/registerandfollowtheinstructionson
thescreen.
Settingthecomputervolume
Tosetthecomputervolume,dothefollowing:
1.ClickthevolumeiconintheWindowsnotificationareaonthetaskbar.
Note:IfthevolumeiconisnotdisplayedintheWindowsnotificationarea,addtheicontothe
notificationarea.SeetheWindowshelpsystem.
2.Followtheinstructionsonthescreenandthehovertexttoadjustthevolume,mutethespeaker,or
unmutethespeaker.
Usingadisc
Thissectionprovidesinstructionsonhowtouseadiscandtheopticaldrive.
Guidelinesaboutusingtheopticaldrive
Whenusingtheopticaldrive,followtheseguidelines:
•Donotplacethecomputerinalocationwherethedriveisexposedtoanyofthefollowingconditions:
–Hightemperature
–Highhumidity
–Excessivedust
–Excessivevibrationorsuddenshock
–Aninclinedsurface
–Directsunlight
•Donotinsertanyobjectotherthanadiscintothedrive.
•Donotinsertdamageddiscsintothedrive.Warped,scratched,ordirtydiscscandamagethedrive.
•Beforemovingthecomputer,removethediscfromthedrive.
Handlingandstoringadisc
Whenhandlingandstoringadisc,followtheseguidelines:
•Holdthediscbyitsedges.Donottouchthesurfaceofthesidethatisnotlabeled.
©CopyrightLenovo2017
43
Page 52

•T oremovedustorfingerprints,wipethediscwithaclean,softclothfromthecentertotheoutside.Wiping
thediscinacirculardirectionmightcauselossofdata.
•Donotwriteorstickpaperonthedisc.
•Donotscratchormarkthedisc.
•Donotplaceorstorethediscindirectsunlight.
•Donotusebenzene,thinners,orothercleanerstocleanthedisc.
•Donotdroporbendthedisc.
Playingandremovingadisc
Toplayadisc,dothefollowing:
1.Withthecomputeron,presstheeject/closebuttononthefrontoftheopticaldrive.Thetrayslides
outofthedrive.
2.Insertadiscintothetray.Someopticaldrivehasasnaphubinthecenterofthetray.Ifyourdrivehasa
snaphub,supportthetraywithonehandandthenpushthecenterofthediscuntilitsnapsintoplace.
3.Presstheeject/closebuttonagainorgentlypushthetrayforwardtoclosethetray.Thediscplayer
programstartsautomatically.Formoreinformation,refertothehelpsystemofthediscplayerprogram.
Toremoveadiscfromtheopticaldrive,dothefollowing:
1.Withthecomputeron,presstheeject/closebuttononthefrontoftheopticaldrive.Thetrayslides
outofthedrive.
2.Carefullyremovethediscfromthetray.
3.Presstheeject/closebuttonagainorgentlypushthetrayforwardtoclosethetray.
Note:Ifthetraydoesnotslideoutofthedrivewhenyoupresstheeject/closebutton,turnoffyourcomputer.
Then,insertastraightenedpaperclipintotheemergency-ejectholeadjacenttotheeject/closebutton.
Usetheemergencyejectonlyinanemergency.
Recordingadisc
Ifyouropticaldrivesupportsrecording,youcanrecordadisc.
RecordingadiscusingWindowstools
TorecordadiscusingWindowstools,dooneofthefollowing:
•BurnadiscusingtheAutoPlaywindow.
1.Ensurethatthediscisplayedautomatically.
a.ClicktheStartbuttontoopentheStartmenu.
b.DependingonyourWindowsversion,dooneofthefollowing:
–ForWindows7:ClickControlPanel.ViewControlPanelbyLargeiconsorSmallicons,and
thenclickAutoPlay.
–ForWindows10:ClickSettings➙Devices➙AutoPlay.
c.SelectorturnonUseAutoPlayforallmediaanddevices.
2.Insertarecordablediscintotheopticaldrivethatsupportsrecording.TheAutoPlaywindowopens.
3.Followtheinstructionsonthescreen.
•BurnadiscusingWindowsMedia
1.Insertarecordablediscintotheopticaldrivethatsupportsrecording.
2.OpenWindowsMediaPlayer.See“Accessingaprogramonyourcomputer”onpage41.
®
Player.
44P320HardwareMaintenanceManual
Page 53

3.Followtheinstructionsonthescreen.
•BurnadiscfromanISOfile.
1.Insertarecordablediscintotheopticaldrivethatsupportsrecording.
2.Double-clicktheISOfile.
3.Followtheinstructionsonthescreen.
Recordingadiscusingpreinstalledprograms
Torecordadiscusingpreinstalledprograms,dothefollowing:
1.Insertarecordablediscintotheopticaldrivethatsupportsrecording.
2.OpenthePowerDVDCreate,PowerProducer,orPower2Goprogram.See“Accessingaprogramon
yourcomputer”onpage41
3.Followtheinstructionsonthescreen.
.
Connectingtoanetwork
Thissectionprovidesinstructionsonhowtoconnecttoanetwork.
ConnectingtoanEthernetLAN
YoucanconnectyourcomputertoanEthernetLANbyconnectinganEthernetcabletotheEthernet
connector.
DANGER
Toavoidtheriskofelectricalshock,donotconnectthetelephonecabletotheEthernetconnector.
ConnectingtoawirelessLAN
YoucanconnectyourcomputertoawirelessLANwithouttheuseofanEthernetcablebutbymeansof
radiowavesonly.
Note:ThewirelessLANfeatureisavailableonlyonsomemodels.
Toestablishawireless-LANconnection,dothefollowing:
1.EnsurethatawirelessLANisavailableandthewirelessLANfeatureonyourcomputerisworking.
2.Clickthewireless-network-connection-statusiconintheWindowsnotificationareatodisplayavailable
wirelessnetworks.
Note:Ifthewireless-network-connection-statusiconisnotdisplayedintheWindowsnotificationarea,
addtheicontothenotificationarea.SeetheWindowshelpsystem.
3.ClickawirelessLAN,andthenclickConnecttoconnectyourcomputertoit.Providerequired
informationifneeded.
ConnectingtoaBluetooth-enableddevice
Bluetoothisashort-rangewirelesscommunicationstechnology.UseBluetoothtoestablishawireless
connectionbetweenyourcomputerandanotherBluetooth-enableddevicewithinadistanceofabout10
m(32.8ft).
Note:TheBluetoothfeatureisavailableonlyonsomemodels.
ToconnecttoaBluetooth-enableddevice,dothefollowing:
Chapter3.Usingyourcomputer45
Page 54

1.T urnontheBluetoothfeatureofyourcomputer.EnsurethattheBluetooth-enableddeviceislocated
withinadistanceofabout10m(32.8ft)fromyourcomputer.
2.ClicktheBluetoothiconintheWindowsnotificationareaonthetaskbar.Then,clickAddaDeviceand
followtheinstructionsonthescreen.
Note:IftheBluetoothiconisnotdisplayedintheWindowsnotificationarea,addtheicontothe
notificationarea.SeetheWindowshelpsystem.
46P320HardwareMaintenanceManual
Page 55

Chapter4.Youandyourcomputer
Thischapterprovidesinformationaboutaccessibility,ergonomic,andcleaningandmaintenance.
Arrangingyourworkspace
Arrangeyourworkspacetosuityourneedsandthekindofworkyoudo.Thissectionprovidesinformation
aboutthefactorsthataffectthewayyouarrangeyourworkspace.
Glareandlighting
Positionthemonitortominimizeglareandreflectionsfromoverheadlights,windows,andotherlightsources.
Reflectedlightfromshinysurfacescancauseannoyingreflectionsonyourscreen.Whenpossible,place
themonitoratrightanglestowindowsandotherlightsources.Ifnecessary,reduceoverheadlighting
byturningofflightsorusinglowerwattagebulbs.Ifyouinstallthemonitornearawindow,usecurtains
orblindstoblockthesunlight.Youcanadjustthebrightnessandcontrastcontrolsonthemonitorasthe
roomlightingchangesthroughouttheday.
Whereitisimpossibletoavoidreflectionsortoadjustthelighting,anantiglarefilterplacedoverthescreen
mightbehelpful.However,thesefiltersmightaffecttheclarityoftheimageonthescreen;trythemonlyafter
youhaveexhaustedothermethodsofreducingglare.
Aircirculation
Yourcomputerproducesheat.Thecomputerhasafanthatpullsinfreshairandforcesouthotairthrough
theairvents.Blockingtheairventscancauseoverheating,whichmightresultinamalfunctionordamage.
Positionthecomputersothatnothingblockstheairvents;usually,51mm(2inches)ofairspaceissufficient.
Ensurethattheventedairisnotblowingonpeople.
Electricaloutletlocationsandcablelengths
Thefollowingfactorsmightdeterminethefinalplacementofyourcomputer:
•Locationsofelectricaloutlets
•Lengthofpowercordsorpoweradapters
•Lengthofthecablesthatareconnectedtootherdevices
Formoreinformationaboutpowercordsorpoweradapters,see“Powercordsandpoweradapters”on
page1.
Comfort
Althoughnosingleworkingpositionisidealforeveryone,hereareafewguidelinestohelpyoufindaposition
thatsuitsyoubest.Thefollowingfiguresetsanexampleforyourreference.
©CopyrightLenovo2017
47
Page 56

•Screenposition:Keepthescreenatacomfortableviewingdistance,usually51–61cm(20–24inches).
Then,adjustthescreensothatthetopofthescreenisatorslightlybeloweyelevelandyoucanviewit
withouttwistingyourbody.
•Chairposition:Useachairthatgivesyougoodbacksupportandseatheightadjustment.Usechair
adjustmentstobestsuityourdesiredposture.
•Headposition:Keepyourheadandneckinacomfortableandneutral(verticalorupright)position.
•Armandhandpositions:Keepyourforearms,wrists,andhandsinarelaxedandneutral(horizontal)
position.Typewithasofttouchwithoutpoundingthekeys.
•Legposition:Keepyourthighsparalleltothefloorandyourfeetflatonthefloororonafootrest.
Makeminormodificationsinyourworkingposturetodetertheonsetofdiscomfortcausedbylongperiods
ofworkinginthesameposition.Frequentshortbreaksfromyourworkalsohelptopreventminordiscomfort
associatedwithyourworkingposture.
Accessibilityinformation
Lenovoiscommittedtoprovidinguserswhohavehearing,vision,andmobilitylimitationswithgreater
accesstoinformationandtechnology.Thissectionprovidesinformationaboutthewaystheseuserscanget
themostoutoftheircomputerexperience.Youalsocangetthemostup-to-dateaccessibilityinformation
fromthefollowingWebsite:
http://www.lenovo.com/accessibility
Keyboardshortcuts
Thefollowingtablecontainskeyboardshortcutsthatcanhelpmakeyourcomputereasiertouse.
Note:Dependingonyourkeyboard,someofthefollowingkeyboardshortcutsmightnotbeavailable.
KeyboardshortcutFunction
Windowslogokey+U
RightShiftforeightseconds
ShiftfivetimesTurnonorturnoffStickyKeys
NumLockforfivesecondsTurnonorturnoffToggleKeys
LeftAlt+LeftShift+NumLock
LeftAlt+LeftShift+PrtScn(orPrtSc)TurnonorturnoffHighContrast
OpenEaseofAccessCenter
TurnonorturnoffFilterKeys
TurnonorturnoffMouseKeys
Formoreinformation,gotohttp://windows.microsoft.com/,andthenperformasearchusinganyofthe
followingkeywords:keyboardshortcuts,keycombinations,andshortcutkeys.
48P320HardwareMaintenanceManual
Page 57

EaseofAccessCenter
EaseofAccessCenterontheWindowsoperatingsystemenablesuserstoconfiguretheircomputersto
suittheirphysicalandcognitiveneeds.
TouseEaseofAccessCenter,dothefollowing:
1.ClicktheStartbuttontoopentheStartmenu.
2.DependingonyourWindowsversion,dooneofthefollowing:
•ForWindows7:ClickControlPanel.ViewControlPanelbyLargeiconsorSmallicons,andthen
clickEaseofAccessCenter.
•ForWindows10:ClickSettings➙EaseofAccess.
3.Choosetheappropriatetoolbyfollowingtheinstructionsonthescreen.
EaseofAccessCentermainlyincludesthefollowingtools:
•Magnifier
Magnifierisausefulutilitythatenlargestheentirescreenorpartofthescreensothatyoucansee
theitemsbetter.
•Narrator
Narratorisascreenreaderthatreadsaloudwhatisdisplayedonthescreenanddescribeseventssuchas
errormessages.
•On-ScreenKeyboard
Toinputdataintoyourcomputerusingamouse,joystick,orotherpointingdevicesinsteadofaphysical
keyboard,youcanuseOn-ScreenKeyboard.
•HighContrast
HighContrastisafeaturethatheightensthecolorcontrastofsometextandimagesonyourscreen.Asa
result,thoseitemsaremoredistinctandeasiertoidentify.
•Personalizedkeyboard
Adjustkeyboardsettingstomakeyourkeyboardeasiertouse.Forexample,youcanuseyourkeyboard
tocontrolthepointerandtypecertainkeycombinationseasier.
•Personalizedmouse
Adjustmousesettingstomakeyourmouseeasiertouse.Forexample,youcanchangethepointer
appearanceandmakeiteasiertomanagewindowswiththemouse.
SpeechRecognition
SpeechRecognitionenablesyoutocontrolyourcomputerbyvoice.
Usingonlyyourvoice,youcanstartprograms,openmenus,clickobjectsonthescreen,dictatetextinto
documents,andwriteandsende-mails.Everythingyoudowiththekeyboardandmousecanbedonewith
onlyyourvoice.
TouseSpeechRecognition,dothefollowing:
1.DependingonyourWindowsversion,dooneofthefollowing:
•ForWindows7:ClicktheStartbuttontoopentheStartmenu.
•ForWindows10:Right-clicktheStartbuttontoopentheStartcontextmenu.
2.ClickControlPanel.ViewControlPanelbyLargeiconsorSmallicons,andthenclickSpeech
Recognition.
3.Followtheinstructionsonthescreen.
Chapter4.Youandyourcomputer49
Page 58

Screen-readertechnologies
Screen-readertechnologiesareprimarilyfocusedonsoftwareprograminterfaces,helpinformationsystems,
andvariousonlinedocuments.Foradditionalinformationaboutscreenreaders,seethefollowing:
•UsingPDFswithscreenreaders:
http://www.adobe.com/accessibility.html?promoid=DJGVE
•UsingtheJAWSscreenreader:
http://www.freedomscientific.com/jaws-hq.asp
•UsingtheNVDAscreenreader:
http://www.nvaccess.org/
Screenresolution
Youcanmakethetextandimagesonyourscreeneasiertoreadbyadjustingthescreenresolutionofyour
computer.
Toadjustthescreenresolution,dothefollowing:
1.Right-clickablankareaonthedesktop.
2.DependingonyourWindowsversion,dooneofthefollowing:
•ForWindows7:ClickScreenresolution.
•ForWindows10:ClickDisplaysettings.OntheDisplaytab,clickAdvanceddisplaysettings.
3.Followtheinstructionsonthescreen.
Note:Settingtheresolutiontoolowmightpreventsomeitemsfromfittingonthescreen.
Customizableitemsize
Youcanmaketheitemsonyourscreeneasiertoreadbychangingtheitemsize.
•T ochangetheitemsizetemporarily,usetheMagnifiertoolinEaseofAccessCenter.
•T ochangetheitemsizepermanently,dothefollowing:
–Changethesizeofalltheitemsonyourscreen.
1.Right-clickablankareaonthedesktop.
2.DependingonyourWindowsversion,dooneofthefollowing:
–ForWindows7:ClickScreenresolution➙Maketextandotheritemslargerorsmaller.
–ForWindows10:ClickDisplaysettings.
3.Changetheitemsizebyfollowingtheinstructionsonthescreen.
4.ClickApply.Thischangewilltakeeffectthenexttimeyoulogintotheoperatingsystem.
–ChangethesizeoftheitemsonaWebpage.
PressandholdCtrl,andthenpresstheplus-signkey(+)toenlargeortheminus-signkey(-)to
reducethetextsize.
–Changethesizeoftheitemsonthedesktoporawindow.
Note:Thisfunctionmightnotworkonsomewindows.
Ifyourmousehasawheel,pressandholdCtrl,andthenscrollthewheeltochangetheitemsize.
Industry-standardconnectors
Yourcomputerprovidesindustry-standardconnectorsthatenableyoutoconnectassistivedevices.
50P320HardwareMaintenanceManual
Page 59

Formoreinformationaboutthelocationandfunctionofeachconnector,see“Hardwarelocations”on
page27
TTY/TDDconversionmodem
Yourcomputersupportstheuseofatexttelephone(TTY)orthetelecommunicationsdeviceforthedeaf
(TDD)conversionmodem.ThemodemmustbeconnectedbetweenyourcomputerandaTTY/TDD
telephone.Then,youcantypeamessageonyourcomputerandsendittothetelephone.
Documentationinaccessibleformats
Lenovoprovideselectronicdocumentationinaccessibleformats,suchasproperlytaggedPDFfilesor
HyperTextMarkupLanguage(HTML)files.Lenovoelectronicdocumentationisdevelopedtoensure
thatvisuallyimpaireduserscanreadthedocumentationthroughascreenreader.Eachimageinthe
documentationalsoincludesadequatealternativetextsothatvisuallyimpaireduserscanunderstandthe
imagewhentheyuseascreenreader.
.
Cleaningyourcomputer
CAUTION:
Removeanymediafromthedrivesandturnoffallconnecteddevicesandthecomputer.Then,
disconnectallpowercordsfromelectricaloutletsanddisconnectallcablesthatareconnected
tothecomputer.
Itisagoodpracticetocleanyourcomputerperiodicallytoprotectthesurfacesandensuretrouble-free
operation.Useonlymildcleaningsolutionsandadampclothtocleanthepaintedsurfacesofthecomputer.
Dustbuildupcompoundsproblemsassociatedwithglare,soremembertocleanthescreenperiodically.
Wipethescreensurfacegentlywithasoft,drycloth,orblowonthescreentoremovegritandotherloose
particles.Dependingonthetypeofthescreen,moistenasoft,lint-freeclothwithanLCDcleanerorliquid
glasscleanerandthenwipethescreensurface.
Maintenance
Withappropriatecareandmaintenance,yourcomputerwillserveyoureliably.Thissectionprovides
instructionsonhowtomaintainyourcomputersothatitcankeepworkinginbettercondition.
Basicmaintenancetips
Herearesomebasicpointsaboutkeepingyourcomputerfunctioningproperly:
•Keepyourcomputerinaclean,dryenvironment.Ensurethatthecomputerrestsonaflat,steadysurface.
•Donotcoveranyofairvents.Theseairventsprovideairflowtokeepyourcomputerfromoverheating.
•Keepfoodanddrinksawayfromallpartsofyourcomputer.Foodparticlesandspillsmightmakethe
keyboardandmousestickandunusable.
•Donotgetthepowerswitchesorothercontrolswet.Moisturecandamagethesepartsandcausean
electricalhazard.
•Alwaysdisconnectapowercordbygraspingthepluginsteadofthecord.
Goodmaintenancepractices
Byperformingafewgoodmaintenancepractices,youcanmaintaingoodcomputerperformance,protect
yourdata,andbepreparedincaseofacomputerfailure.
•Emptyyourrecyclebinonaregularbasis.
Chapter4.Youandyourcomputer51
Page 60

•Usethediskdefragmentationordiskoptimizationfeatureofyouroperatingsystemoccasionallyto
preventperformanceproblemscausedbyanexcessivenumberoffragmentedfiles.
•CleanoutyourInbox,SentItems,andDeletedItemsfoldersinyoure-mailapplicationonaregularbasis.
•Backupcriticaldataregularlyonremovablemediamemory,suchasdiscsandUSBstoragedevices,
andstoretheremovablemediainasafelocation.Thefrequencyofmakingbackupcopiesdependson
howcriticalthedataistoyouoryourbusiness.
•Backupyourdataonthestoragedriveregularly.See“Recoveryinformation”onpage80
•Keepyourcomputersoftware,devicedrivers,andoperatingsystemup-to-date.See“Keepingyour
computercurrent”onpage52.
•Keepalogbook.Entriesmightincludemajorsoftwareorhardwarechanges,device-driverupdates,
intermittentproblemsandwhatyoudidtoresolvethem,andotherissuesyoumighthaveexperienced.
Thecauseofaproblemmightbechangeinhardware,changeinsoftware,oranyotheractionsthatmight
havetakenplace.AlogbookcanhelpyouoraLenovotechniciandeterminesthecauseofaproblem.
•CreateProductRecoverydiscs.See“Recoveryinformation”onpage80formoreinformationaboutusing
ProductRecoverydiscstorestoretheharddiskdrivetothefactory-defaultsettings.
.
Keepingyourcomputercurrent
Inmostcases,itisagoodpracticetohavethemostup-to-dateoperatingsystemupdatepatches,software
programs,anddevicedrivers.Thissectionprovidesinstructionsonhowtogetthelatestupdatesforyour
computer.
Gettingthelatestsystemupdates
Togetthelatestsystemupdatesforyourcomputer,ensurethatyourcomputerisconnectedtotheInternet
anddooneofthefollowing:
•UsethecorrespondingLenovoprogramtogetthesystemupdates,suchasdevicedriverupdates,
softwareupdates,andBIOSupdates:
–ForWindows7:UsetheSystemUpdateprogram.
–ForWindows10:UsetheLenovoCompanionprogram.
ToopentheSystemUpdateorLenovoCompanionprogram,see“Accessingaprogramonyourcomputer”
onpage41.Formoreinformationaboutusingtheprogram,refertothehelpsystemoftheprogram.
•UseWindowsUpdatetogetthesystemupdates,suchassecurityfixes,newversionsofWindows
components,anddevicedriverupdates.
1.ClicktheStartbuttontoopentheStartmenu.
2.DependingonyourWindowsversion,dooneofthefollowing:
–ForWindows7:ClickControlPanel.ViewControlPanelbyLargeiconsorSmallicons,and
thenclickWindowsUpdate.
–ForWindows10:ClickSettings➙Update&security➙WindowsUpdate.
3.Followtheinstructionsonthescreen.
Note:ThedevicedriversprovidedbyWindowsUpdatemightnotbetestedbyLenovo.Itis
recommendedthatyougetdevicedriversbyusingLenovoprogramsorfromtheLenovoWebsiteat
http://www.lenovo.com/support.
Gettingthelatestsystemupdates
Togetthelatestsystemupdatesforyourcomputer,ensurethatyourcomputerisconnectedtotheInternet
anddooneofthefollowing:
52P320HardwareMaintenanceManual
Page 61

•UsethecorrespondingLenovoprogramtogetthesystemupdates,suchasdevicedriverupdates,
softwareupdates,andBIOSupdates:
–ForWindows7:UsetheSystemUpdateprogram.
–ForWindows10:UsetheLenovoCompanionprogram.
ToopentheSystemUpdateorLenovoCompanionprogram,see“Accessingaprogramonyourcomputer”
onpage41
•UseWindowsUpdatetogetthesystemupdates,suchassecurityfixes,newversionsofWindows
components,anddevicedriverupdates.
1.ClicktheStartbuttontoopentheStartmenu.
2.DependingonyourWindowsversion,dooneofthefollowing:
–ForWindows7:ClickControlPanel.ViewControlPanelbyLargeiconsorSmallicons,and
–ForWindows10:ClickSettings➙Update&security➙WindowsUpdate.
3.Followtheinstructionsonthescreen.
Note:ThedevicedriversprovidedbyWindowsUpdatemightnotbetestedbyLenovo.Itis
recommendedthatyougetdevicedriversbyusingLenovoprogramsorfromtheLenovoWebsiteat
http://www.lenovo.com/support.
.Formoreinformationaboutusingtheprogram,refertothehelpsystemoftheprogram.
thenclickWindowsUpdate.
Movingyourcomputer
Beforemovingyourcomputer,takethefollowingprecautions:
1.Backupyourdataonthestoragedrive.See“Goodmaintenancepractices”onpage51.
2.Removeanymediafromthedrivesandturnoffallconnecteddevicesandthecomputer.Then,
disconnectallpowercordsfromelectricaloutletsanddisconnectallcablesthatareconnectedtothe
computer.
3.Ifyousavedtheoriginalshippingcartonsandpackingmaterials,usethemtopacktheunits.Ifyouare
usingdifferentcartons,cushiontheunitstoavoiddamage.
Movingyourcomputertoanothercountryorregion
Whenyoumoveyourcomputertoanothercountryorregion,youmusttakelocalelectricalstandardsinto
consideration.Ifthelocalelectricaloutletstyleisdifferentfromthetypeyouareusing,useeitheranelectrical
plugadapteroranewpowercord.Topurchasesuchitems,contacttheLenovoCustomerSupportCenter.
ForalistofLenovoSupportphonenumbers,gotohttp://www.lenovo.com/support/phone.Ifyoucannot
findthesupporttelephonenumberforyourcountryorregion,contactyourLenovoreseller.
Chapter4.Youandyourcomputer53
Page 62

54P320HardwareMaintenanceManual
Page 63

Chapter5.Security
Thischaptercontainsthefollowingtopics:
•“Lockingyourcomputer”onpage55
•“ViewingandchangingsecuritysettingsintheSetupUtilityprogram”onpage57
•“UsingpasswordsandWindowsaccounts”onpage57
•“Usingfingerprintauthentication”onpage58
•“Usingthecoverpresenceswitch”onpage58
•“Usingfirewalls”onpage59
•“Protectingdataagainstviruses”onpage59
•“ComputraceAgentsoftwareembeddedinfirmware”onpage59
•“TrustedPlatformModule(TPM)”onpage59
Lockingyourcomputer
Thissectionprovidesinstructionsonhowtolockyourcomputerwiththelockingdevicestokeepyour
computersafe.
Attachingapadlock
Lockingthecomputercoverhelpspreventunauthorizedpeoplefromgainingaccesstotheinsideofyour
computer.Yourcomputercomeswithapadlockloopsothatthecomputercovercannotberemoved
whenapadlockisinstalled.
Figure8.Installingapadlock
©CopyrightLenovo2017
55
Page 64

AttachingaKensington-stylecablelock
YoucanuseaKensington-stylecablelocktosecureyourcomputertoadesk,table,orothernon-permanent
fixture.Thecablelockattachestothesecurity-lockslotattherearofyourcomputer.Dependingonthetype
selected,thecablelockcanbeoperatedwithakeyorcombination.Thecablelockalsolocksthebuttons
usedtoopenthecomputercover.Thisisthesametypeoflockusedwithmanynotebookcomputers.Y ou
canordersuchacablelockdirectlyfromLenovobysearchingforKensingtonat:
http://www.lenovo.com/support
Figure9.Kensington-stylecablelock
56P320HardwareMaintenanceManual
Page 65

Attachingacablelock
Acablelockcanbeusedtosecuredevices,suchasthekeyboardandthemouse,bylockingthedevice
cablestoyourcomputer.Thecablelockattachestothecable-lockslotsontherearofyourcomputer.
Toattachacablelock,dothefollowing:
1.Inserttheclip1intothecable-lockslot4.
2.Pullthecablesyouwanttolockthroughthedentsinthecablelock.
3.Presstheclip2intothecable-lockslot3untilitsnapsintoposition.
Figure10.Installingacablelock
ViewingandchangingsecuritysettingsintheSetupUtilityprogram
ToviewandchangesecuritysettingsintheSetupUtilityprogram,dothefollowing:
1.StarttheSetupUtilityprogram.See“StartingtheSetupUtilityprogram”onpage61.
2.SelectSecurity.
3.Followtheinstructionsontherightsideofthescreentoviewandchangesecuritysettings.Youcan
referto“UsingtheSetupUtilityprogram”onpage61togetbasicinformationaboutsomemajor
securitysettings.
4.T osavesettingsandexittheSetupUtilityprogram,pressF10orFn+F10(dependingonthekeyboard).
Then,selectYesinthewindowdisplayed,andpressEnter.
UsingpasswordsandWindowsaccounts
YoucanuseBIOSpasswordsandWindowsaccountstopreventunauthorizedaccesstoyourcomputerand
data.ToenabletheBIOSpasswordsandtheWindowsaccounts,dothefollowing:
1.StarttheSetupUtilityprogram.See“StartingtheSetupUtilityprogram”onpage61.
Chapter5.Security57
Page 66

2.SelectSecurity.
3.Followtheinstructionsontherightsideofthescreentoviewandchangesecuritysettings.Youcan
referto“UsingtheSetupUtilityprogram”onpage61togetbasicinformationaboutsomemajor
securitysettings.
4.T osavesettingsandexittheSetupUtilityprogram,pressF10orFn+F10(dependingonthekeyboard),
selectY esinthewindowdisplayed,andpressEnter.
TousetheBIOSpasswordsortheWindowsaccounts,dothefollowing:
•T ouseBIOSpasswords,see“UsingBIOSpasswords”onpage64.
•T ouseWindowsaccounts,dothefollowing:
1.ClicktheStartbuttontoopentheStartmenu.
2.DependingonyourWindowsversion,dooneofthefollowing:
–ForWindows7:ClickControlPanel➙UserAccounts.
–ForWindows10:ClickSettings➙Accounts.
3.Followtheinstructionsonthescreen.
Usingthecoverpresenceswitch
Thecoverpresenceswitchpreventsyourcomputerfromloggingintotheoperatingsystemwhenthe
computercoverisnotproperlyinstalledorclosed.
Tousethecoverpresenceswitch,enablethecover-presence-switchconnectoronthesystemboard
first.Toachievethis,dothefollowing:
1.StarttheSetupUtilityprogram.See“StartingtheSetupUtilityprogram”onpage61.
2.SelectSecurity➙ChassisIntrusionDetectionandpressEnter.
3.SelectEnabledandpressEnter.
4.T osavesettingsandexittheSetupUtilityprogram,pressF10,selectYesinthewindowdisplayed,and
pressEnter.Thecover-presence-switchconnectoronthesystemboardisenabled.
Note:Forsomekeyboards,youmightneedtopressFn+F10toexittheSetupUtilityprogram.
Thecoverpresenceswitchstartsfunctioning.Iftheswitchdetectsthatthecomputercoverisnotcorrectly
installedorclosed,anerrormessageisdisplayedwhenyouturnonthecomputer.Tofixtheerrorand
logintotheoperatingsystem,dothefollowing:
1.Properlyinstallorcloseyourcomputercover.See“Removingandinstallinghardware”onpage92.
2.StartandthenexittheSetupUtilityprogram.See“StartingtheSetupUtilityprogram”onpage61and
“ExitingtheSetupUtilityprogram”onpage66
.
Usingfingerprintauthentication
Ifyourkeyboardhasafingerprintreader,youcanusefingerprintauthenticationtoreplacepasswordsfor
simpleandsecureuseraccess.Tousefingerprintauthentication,firstenrollyourfingerprintsandassociate
themwithyourpasswords(suchasthepower-onpassword,harddiskpassword,andWindowspassword).
Usethefingerprintreaderandthefingerprintprogramtocompletethisprocedure.
Tousefingerprintauthentication,dooneofthefollowing:
58P320HardwareMaintenanceManual
Page 67

•ForWindows7:UsetheFingerprintManagerProorThinkVantageFingerprintSoftwareprogramprovided
byLenovo.T oopentheprogram,see“Accessingaprogramonyourcomputer”onpage41
informationaboutusingtheprogram,refertothehelpsystemoftheprogram.
•ForWindows10:UsethefingerprinttoolprovidedbytheWindowsoperatingsystem.ClicktheStart
buttontoopentheStartmenu,andthenclickSettings➙Accounts➙Sign-inoptions.Followthe
instructionsonthescreen.
Tousethefingerprintreader,refertothedocumentationshippedwiththefingerprintkeyboardorlocatedon
theLenovoSupportWebsiteathttp://www.lenovo.com/support/keyboards.
.Formore
Usingfirewalls
Afirewallcanbehardware,software,oracombinationofbothdependingonthelevelofsecurityrequired.
Firewallsworkonasetofrulestodeterminewhichinboundandoutboundconnectionsareauthorized.If
yourcomputerispreinstalledwithafirewallprogram,ithelpsprotectagainstcomputerInternetsecurity
threats,unauthorizedaccess,intrusions,andInternetattacks.Italsoprotectsyourprivacy.Formore
informationabouthowtousethefirewallprogram,refertothehelpsystemofyourfirewallprogram.
TouseWindowsFirewall,dothefollowing:
1.DependingonyourWindowsversion,dooneofthefollowing:
•ForWindows7:ClicktheStartbuttontoopentheStartmenu.
•ForWindows10:Right-clicktheStartbuttontoopentheStartcontextmenu.
2.ClickControlPanel.ViewControlPanelbyLargeiconsorSmallicons,andthenclickWindows
Firewall.
3.Followtheinstructionsonthescreen.
Protectingdataagainstviruses
Yourcomputerispreinstalledwithanantivirusprogramtohelpyouguardagainst,detect,andeliminate
viruses.
Lenovoprovidesafullversionofantivirussoftwareonyourcomputerwithafree30-daysubscription.After
30days,youmustrenewthelicensetocontinuereceivingtheantivirussoftwareupdates.
Note:Virusdefinitionfilesmustbekeptup-to-datetoguardagainstnewviruses.
Formoreinformationabouthowtouseyourantivirussoftware,refertothehelpsystemofyourantivirus
software.
ComputraceAgentsoftwareembeddedinfirmware
TheComputraceAgentsoftwareisanITassetmanagementandcomputertheftrecoverysolution.The
softwaredetectsifchangeshavebeenmadeonthecomputer,suchashardware,software,orthecomputer
call-inlocation.YoumighthavetopurchaseasubscriptiontoactivatetheComputraceAgentsoftware.
TrustedPlatformModule(TPM)
TPMisasecurecryptoprocessorthatstorescryptographickeys,whichinturnprotectsinformationstored
inyourcomputer.
Chapter5.Security59
Page 68

60P320HardwareMaintenanceManual
Page 69

Chapter6.Advancedconfiguration
Thischaptercontainsthefollowingtopics:
•“UsingtheSetupUtilityprogram”onpage61
•“UpdatingandrecoveringtheBIOS”onpage66
•“ConfiguringRAID”onpage67
UsingtheSetupUtilityprogram
TheSetupUtilityprogramisusedtoviewandchangetheconfigurationsettingsofyourcomputer.This
sectionprovidesinformationaboutonlythemajorconfigurationsettingsavailableintheprogram.
Note:TheoperatingsystemsettingsmightoverrideanysimilarsettingsintheSetupUtilityprogram.
StartingtheSetupUtilityprogram
TostarttheSetupUtilityprogram,dothefollowing:
1.T urnonorrestartyourcomputer.
2.BeforeWindowsstartsup,repeatedlypressandreleaseF1orFn+F1(dependingonthekeyboard)until
theSetupUtilityprogramopens.IfaBIOSpasswordhasbeenset,theSetupUtilityprogramwill
notopenuntilyouenterthecorrectpassword.Formoreinformation,see“UsingBIOSpasswords”
onpage64
.
Toviewandchangetheconfigurationsettings,followtheinstructionsontherightsideofthescreen.The
keysusedtoperformvarioustasksaredisplayedatthebottomofthescreen.
Enablingordisablingadevice
Thissectionprovidesinformationabouthowtoenableordisableuseraccesstohardwaredevices(such
asUSBconnectorsorstoragedrives).
Toenableordisableadevice,dothefollowing:
1.StarttheSetupUtilityprogram.See“StartingtheSetupUtilityprogram”onpage61.
2.SelectDevices.
3.SelectthedeviceyouwanttoenableordisableandpressEnter.
4.SelectthedesiredsettingandpressEnter.
5.T osavesettingsandexittheSetupUtilityprogram,pressF10orFn+F10(dependingonthekeyboard).
Then,selectYesinthewindowdisplayed,andpressEnter.
Enablingordisablingtheautomaticpower-onofyourcomputer
TheAutomaticPowerOnitemintheSetupUtilityprogramprovidesvariousoptionsforyoutomakeyour
computerstartupautomatically.
ToenableordisabletheAutomaticPowerOnfeatures,dothefollowing:
1.StarttheSetupUtilityprogram.See“StartingtheSetupUtilityprogram”onpage61.
2.SelectPower➙AutomaticPowerOnandpressEnter.
3.SelectthefeatureyouwanttoenableordisableandpressEnter.
©CopyrightLenovo2017
61
Page 70

4.SelectthedesiredsettingandpressEnter.
5.T osavesettingsandexittheSetupUtilityprogram,pressF10orFn+F10(dependingonthekeyboard).
Then,selectYesinthewindowdisplayed,andpressEnter.
EnablingordisablingtheErPLPScompliancemode
Lenovocomputersmeettheeco-designrequirementsoftheErPLot3regulation.Formoreinformation,goto:
http://www.lenovo.com/ecodeclaration
YoucanenabletheErPLPScompliancemodeintheSetupUtilityprogramtoreducetheconsumptionof
electricitywhenyourcomputerisofforinsleepmode.
ToenableordisabletheErPLPScompliancemode,dothefollowing:
1.StarttheSetupUtilityprogram.See“StartingtheSetupUtilityprogram”onpage61.
2.SelectPower➙EnhancedPowerSavingModeandpressEnter.
3.SelectEnabledorDisableddependingonyourneeds,andthenpressEnter.IfyouselectEnabled,you
alsoneedtodisabletheWakeonLANfeature.See“Enablingordisablingtheautomaticpower-onof
yourcomputer”onpage61
4.T osavesettingsandexittheSetupUtilityprogram,pressF10orFn+F10(dependingonthekeyboard).
Then,selectYesinthewindowdisplayed,andpressEnter.
WhentheErPLPScompliancemodeisenabled,youcanwakeupyourcomputerbydoingoneofthe
following:
.
•Pressthepowerbutton.
•EnabletheWakeUponAlarmfeaturetomakeyourcomputerwakeupatasettime.See“Enablingor
disablingtheautomaticpower-onofyourcomputer”onpage61
•EnabletheAfterPowerLossfeaturetomakeyourcomputerwakeupwhenthepowersupplyresumes
afterasuddenlossofelectricity.
ToenabletheAfterPowerLossfeature,dothefollowing:
1.StarttheSetupUtilityprogram.See“StartingtheSetupUtilityprogram”onpage61.
2.SelectPower➙AfterPowerLossandpressEnter.
3.SelectPowerOnandpressEnter.
4.T osavesettingsandexittheSetupUtilityprogram,pressF10orFn+F10(dependingonthe
keyboard).Then,selectYesinthewindowdisplayed,andpressEnter.
.
Switchingbetweenbetteracousticandbetterthermalperformance
YoucanadjusttheacousticandthermalperformanceofyourcomputerthroughtheICEPerformance
Modemenu.T wochoicesareavailable:
•BetterAcousticPerformance(defaultsetting):Thiscomputerworkswithlessnoiseatanormalthermal
level.
•BetterThermalPerformance:Thecomputerworksatabetterthermallevelwithnormalacoustic
performance.
Toswitchbetweenbetteracousticperformanceandbetterthermalperformance,dothefollowing:
1.StarttheSetupUtilityprogram.See“StartingtheSetupUtilityprogram”onpage61.
2.SelectPower➙IntelligentCoolingEngine(ICE)andpressEnter.
3.SelectICEPerformanceModeandpressEnter.
62P320HardwareMaintenanceManual
Page 71

4.SelectBetterAcousticPerformanceorBetterThermalPerformanceasdesiredandpressEnter.
5.T osavesettingsandexittheSetupUtilityprogram,pressF10,selectY esinthewindowdisplayed,
andpressEnter.
Note:Forsomekeyboards,youmightneedtopressFn+F10toexittheSetupUtilityprogram.
Enablingordisablingthesystemtorecordthermalalertlogs
WhentheICEthermalalertfeatureisenabled,ifacriticalthermalsituationoccurs,analertlogiswritteninto
theWindowssystemlog.Thealertlogcanhelpyouidentifythermalproblems,suchasmalfunctioningfans,
abnormallyhightemperature,orpoorcoolingperformances.
Toenableordisablethesystemtorecordthermalalertlogs,dothefollowing:
1.StarttheSetupUtilityprogram.See“StartingtheSetupUtilityprogram”onpage61.
2.SelectPower➙IntelligentCoolingEngine(ICE)andpressEnter.
3.SelectICEThermalAlertandpressEnter.
4.SelectthedesiredsettingandpressEnter.
5.T osavesettingsandexittheSetupUtilityprogram,pressF10orFn+F10(dependingonthekeyboard).
Then,selectYesinthewindowdisplayed,andpressEnter.
Enablingordisablingtheconfigurationchangedetection
Withtheconfiguration-changedetectionenabled,ifthePOSTdetectsconfigurationchangesofsome
hardwaredevices(suchasstoragedrivesormemorymodules),anerrormessageisdisplayed.
Toenableordisabletheconfigurationchangedetection,dothefollowing:
1.StarttheSetupUtilityprogram.See“StartingtheSetupUtilityprogram”onpage61.
2.SelectSecurity➙ConfigurationChangeDetectionandpressEnter.
3.SelectthedesiredsettingandpressEnter.
4.T osavesettingsandexittheSetupUtilityprogram,pressF10orFn+F10(dependingonthekeyboard).
Then,selectYesinthewindowdisplayed,andpressEnter.
Tobypasstheerrormessageandlogintotheoperatingsystem,dooneofthefollowing:
•PressF2orFn+F2(dependingonthekeyboard).
•StartandthenexittheSetupUtilityprogram.See“StartingtheSetupUtilityprogram”onpage61
“ExitingtheSetupUtilityprogram”onpage66
.
ChangingtheBIOSsettingsbeforeinstallinganewoperatingsystem
BIOSsettingsvarybyoperatingsystem.ChangetheBIOSsettingsbeforeinstallinganewoperatingsystem.
TochangetheBIOSsettings,dothefollowing:
1.StarttheSetupUtilityprogram.See“StartingtheSetupUtilityprogram”onpage61.
2.Fromthemaininterface,selectExit➙OSOptimizedDefaultandpressEnter.
3.Dependingontheoperatingsystemtobeinstalled,dooneofthefollowing:
•T oinstalltheWindows10(64-bit)operatingsystem,selectEnabledandpressEnter.
•T oinstallanoperatingsystemotherthanWindows10(64-bit),selectDisabledandpressEnter.
4.SelectYesinthewindowdisplayedandpressEntertoconfirmyourselection.
and
Chapter6.Advancedconfiguration63
Page 72

5.T osavesettingsandexittheSetupUtilityprogram,pressF10orFn+F10(dependingonthekeyboard).
Then,selectYesinthewindowdisplayed,andpressEnter.
UsingBIOSpasswords
ByusingtheSetupUtilityprogram,youcansetpasswordstopreventunauthorizedaccesstoyourcomputer
anddata.
Youdonothavetosetanypasswordstouseyourcomputer.However,usingpasswordsimprovescomputer
security.Ifyoudecidetosetanypasswords,readthefollowingtopics.
Passwordtypes
ThefollowingtypesofpasswordsareavailableintheSetupUtilityprogram:
•Power-onpassword
Whenapower-onpasswordisset,youarepromptedtoenteravalidpasswordeachtimethecomputeris
turnedon.Thecomputercannotbeuseduntilthevalidpasswordisentered.
•Administratorpassword
Settinganadministratorpassworddetersunauthorizedusersfromchangingconfigurationsettings.Ifyou
areresponsibleformaintainingtheconfigurationsettingsofseveralcomputers,youmightwanttoset
anadministratorpassword.
Whenanadministratorpasswordisset,youarepromptedtoenteravalidpasswordeachtimeyou
trytoaccesstheSetupUtilityprogram.TheSetupUtilityprogramcannotbeaccesseduntilavalid
passwordisentered.
Ifboththepower-onpasswordandadministratorpasswordareset,youcanentereitherpassword.
However,youmustuseyouradministratorpasswordtochangeanyconfigurationsettings.
•Harddiskpassword
Settingaharddiskpasswordpreventsunauthorizedaccesstothedataontheinternalstoragedrive(such
asaharddiskdrive).Whenaharddiskpasswordisset,youarepromptedtoenteravalidpasswordeach
timeyoutrytoaccessthestoragedrive.
Notes:
–Evenifthestoragedriveisremovedfromonecomputerandinstalledinanother,thehard-disk
passwordisstillvalid.
–Iftheharddiskpasswordisforgotten,thereisnowaytoresetthepasswordorrecoverdatafrom
thestoragedrive.
Passwordconsiderations
Apasswordcanbeanycombinationofupto64alphabeticandnumericcharacters.Forsecurityreasons,it
isrecommendedtouseastrongpasswordthatcannotbeeasilycompromised.
Note:TheSetupUtilityprogrampasswordsarecase-sensitive.
Tosetastrongpassword,considerthefollowingguidelines:
•Haveatleasteightcharactersinlength
•Containatleastonealphabeticcharacterandonenumericcharacter
•Notbeyournameoryourusername
•Notbeacommonwordoracommonname
•Besignificantlydifferentfromyourpreviouspasswords
64P320HardwareMaintenanceManual
Page 73

Setting,changing,anddeletingapassword
Toset,change,ordeleteapassword,dothefollowing:
1.StarttheSetupUtilityprogram.See“StartingtheSetupUtilityprogram”onpage61.
2.SelectSecurity.
3.Dependingonthepasswordtype,selectSetPower-OnPassword,SetAdministratorPassword,or
HardDiskPasswordandpressEnter.
4.Followtheinstructionsontherightsideofthescreentoset,change,ordeleteapassword.
Note:Apasswordcanbeanycombinationofupto64alphabeticandnumericcharacters.Formore
information,see“Passwordconsiderations”onpage64.
5.T osavesettingsandexittheSetupUtilityprogram,pressF10orFn+F10(dependingonthekeyboard).
Then,selectYesinthewindowdisplayed,andpressEnter.
Erasinglostorforgottenpasswords(clearingCMOS)
Thissectionprovidesinstructionsonhowtoeraselostorforgottenpasswords,suchasauserpassword.
Note:Theinstructionsinthissectiondonotapplytotheharddiskpassword.
Toerasealostorforgottenpassword,dothefollowing:
1.Removeanymediafromthedrivesandturnoffallconnecteddevicesandthecomputer.Then,
disconnectallpowercordsfromelectricaloutletsanddisconnectallcablesthatareconnectedtothe
computer.
2.Removethecomputercover.See“Removingandinstallinghardware”onpage92.
3.LocatetheClearComplementaryMetalOxideSemiconductor(CMOS)/Recoveryjumperonthesystem
board.See“Partsonthesystemboard”onpage34.
4.Movethejumperfromthestandardposition(pin1andpin2)tothemaintenanceposition(pin2and
pin3).
5.Reinstallthecomputercoverandconnectthepowercord.See“Removingandinstallinghardware”
onpage92.
6.T urnonthecomputerandleaveitonforapproximately10seconds.Then,turnoffthecomputerby
holdingthepowerbuttonforapproximatelyfiveseconds.
7.Repeatstep1andstep2.
8.MovetheClearCMOS/Recoveryjumperbacktothestandardposition(pin1andpin2).
9.Reinstallthecomputercoverandconnectthepowercord.
Selectingastartupdevice
Ifyourcomputerdoesnotstartupfromtheexpecteddevice,youcaneitherchangethestartupdevice
sequenceorselectatemporarystartupdevice.
Changingthestartupdevicesequencepermanently
Tochangethestartupdevicesequencepermanently,dothefollowing:
1.Dependingonthetypeofthestoragedevice,dooneofthefollowing:
•Ifthestoragedeviceisinternal,gotostep2.
•Ifthestoragedeviceisadisc,ensurethatyourcomputeristurnedon.Then,insertthediscinto
theopticaldrive.
•Ifthestoragedeviceisanexternaldeviceotherthanadisc,connectthestoragedevicetothe
computer.
Chapter6.Advancedconfiguration65
Page 74

2.StarttheSetupUtilityprogram.See“StartingtheSetupUtilityprogram”onpage61.
3.SelectStartup.
4.Followtheinstructionsontherightsideofthescreentochangethestartupdevicesequence.
5.T osavesettingsandexittheSetupUtilityprogram,pressF10orFn+F10(dependingonthekeyboard).
Then,selectYesinthewindowdisplayed,andpressEnter.
Selectingatemporarystartupdevice
Note:Notalldiscsandstoragedrivesarebootable.
Toselectatemporarystartupdevice,dothefollowing:
1.Dependingonthetypeofthestoragedevice,dooneofthefollowing:
•Ifthestoragedeviceisinternal,gotostep2.
•Ifthestoragedeviceisadisc,ensurethatyourcomputeristurnedon.Then,insertthediscinto
theopticaldrive.
•Ifthestoragedeviceisanexternaldeviceotherthanadisc,connectthestoragedevicetothe
computer.
2.T urnonorrestartthecomputer.BeforeWindowsstartsup,repeatedlypressandreleaseF12orFn+F12
(dependingonthekeyboard)untilStartupDeviceMenuisdisplayed.
3.SelectthedesiredstoragedeviceandpressEnter.Thecomputerthenstartsupfromthedeviceyou
select.
Ifyouwanttoselectapermanentstartupdevice,selectEnterSetuponStartupDeviceMenuandpress
EntertostarttheSetupUtilityprogram.Formoreinformationabouthowtoselectapermanentstartup
device,see“Changingthestartupdevicesequencepermanently”onpage65.
ExitingtheSetupUtilityprogram
ToexittheSetupUtilityprogram,dooneofthefollowing:
•Ifyouwanttosavethenewsettings,pressF10orFn+F10(dependingonthekeyboardsettings).Then,
selectY esinthewindowdisplayedandpressEnter.
•Ifyoudonotwanttosavethenewsettings,selectExit➙DiscardChangesandExitandpressEnter.
Then,selectYesinthewindowdisplayedandpressEnter.
UpdatingandrecoveringtheBIOS
TheBIOSisthefirstprogramthatthecomputerrunswhenyouturnonthecomputer.TheBIOSinitializesthe
hardwarecomponentsandloadstheoperatingsystemandotherprograms.
UpdatingtheBIOS
Whenyouinstallanewprogram,hardwaredevice,ordevicedriver,youmightbeinformedtoupdate
theBIOS.YoucanupdatetheBIOSfromyouroperatingsystemoraflashupdatedisc(availableonly
onsomemodels).
ToupdatetheBIOS,dothefollowing:
1.Gotohttp://www.lenovo.com/support.
2.T oupdatetheBIOSfromyouroperatingsystem,downloadtheflashBIOSupdatedriveraccordingto
youroperatingsystemversion.ToupdatetheBIOSfromaflashupdatedisc,downloadtheISOimage
version(usedtocreateaflashupdatedisc).Then,downloadtheinstallationinstructionsfortheflash
BIOSupdatedriver.
66P320HardwareMaintenanceManual
Page 75

3.PrinttheinstallationinstructionsyoudownloadandfollowtheinstructionstoupdatetheBIOS.
Note:IfyouwanttoupdatetheBIOSfromaflashupdatedisc,theinstallationinstructionsmightnot
providetheinstructionsonhowtorecordtheupdatedisc.See“Recordingadisc”onpage44
RecoveringfromaBIOSupdatefailure
TorecoverfromaBIOSupdatefailure,dothefollowing:
1.Removeanymediafromthedrivesandturnoffallconnecteddevicesandthecomputer.Then,
disconnectallpowercordsfromelectricaloutletsanddisconnectallcablesthatareconnectedtothe
computer.
2.Removethecomputercover.See“Removingandinstallinghardware”onpage92.
3.LocatetheClearCMOS/Recoveryjumperonthesystemboard.See“Hardwarelocations”onpage27.
4.RemoveanypartsandcablesthatimpedeyouraccesstotheClearCMOS/Recoveryjumper.
5.Movethejumperfromthestandardposition(pin1andpin2)tothemaintenanceposition(pin2and
pin3).
6.Reinstallthepartsandcablesthatwereremoved.
7.Reinstallthecomputercoverandreconnectanycablesthatweredisconnected.See“Removingand
installinghardware”onpage92.
8.T urnonthecomputerandinserttheBIOSupdatediscintotheopticaldrive.Waitafewminutes.The
recoveryprocessbegins.Aftertherecoveryprocessiscompleted,yourcomputerwillshutdown
automatically.
.
Note:Ifthecomputerdoesnotstartupfromthedisc,selectthediscasthestartupdevice.See
“Selectingatemporarystartupdevice”onpage66.
9.Repeatsteps1–4.
10.MovetheClearCMOS/Recoveryjumperbacktothestandardposition(pin1andpin2).
11.Repeatstep6andstep7.Then,turnonyourcomputer.
BIOSlevels
AnincorrectlevelofBIOScancausefalseerrorsandunnecessaryFRUreplacement.Usethefollowing
informationtodeterminethecurrentlyinstalledBIOSlevel,thelatestBIOSlevelavailable,andwhereto
obtainthelatestBIOSlevel.
•T odeterminethecurrentLevelofBIOS:
StarttheSetupUtilityandviewtheBIOSRevisionlevelontheMainpage.
•SourcesforobtainingthelatestlevelBIOSavailable
–LenovosupportWebsite:http://www.lenovo.com/support/
–LenovoCustomerSupportCenter
–Levels1and2Support
ToupdatetheBIOS,see“UpdatingandrecoveringtheBIOS”onpage66.
Note:BIOSsettingsvarybyoperatingsystem.ChangetheBIOSsettingsbeforeinstallinganewoperating
system.See“ChangingtheBIOSsettingsbeforeinstallinganewoperatingsystem”onpage63
.
ConfiguringRAID
ThischapterprovidesinformationabouthowtoconfigureRedundantArrayofIndependentDisks(RAID)
foryourcomputer.
Chapter6.Advancedconfiguration67
Page 76

Note:TheinformationaboutconfiguringRAIDinthischapterisapplicableonlyforaWindowsenvironment.
ForinformationaboutconfiguringRAIDinaLinux
®
environment,contactyourLinuxsoftwareprovider.
RAIDLevel
YourcomputermusthavetheminimumnumberofSATAharddiskdrivesinstalledforthesupportedlevelof
RAIDbelow:
•RAIDLevel0–Stripeddiskarray
–T woharddiskdrivesminimum
–Betterperformancewithoutfaulttolerance
•RAIDLevel1–Mirroreddiskarray
–T woharddiskdrivesminimum
–Improvedreadperformanceand100%redundancy
Toinstallasecondaryharddiskdrive,referto“Secondaryharddiskdrive”onpage149.
ConfiguringthesystemBIOStoenableSATARAIDfunctionality
ThissectiondescribeshowtoconfigurethesystemBIOStoenableSATARAIDfunctionality.
Note:Usethearrowkeysonthekeyboardtomakeselections.
ToenableSATARAIDfunctionality,dothefollowing:
1.StarttheSetupUtilityprogram.See“StartingtheSetupUtilityprogram”onpage61.
2.SelectDevices➙ATADriveSetup.
3.SelectConfigureSA TAasandpressEnter.
4.SelectRAIDandpressEnter.
5.PressF10orFn+F10(dependingonthekeyboard)tosavethenewsettingsandexittheSetupUtility
program.
CreatingRAIDvolumes
TocreateRAIDvolumes,dothefollowing:
1.PressCtrl+IwhenpromptedtoentertheIntelMatrixStorageManageroptionROMconfigurationutility
duringthecomputerstartup.
2.UsetheupanddownarrowkeystoselectCreateRAIDVolumeandpressEnter.
3.T ypeaproperRAIDVolumenameintheNamefieldandpressTab.
4.UsethearrowkeystoselectaRAIDlevelintheRAIDLevelfieldandpressTab.
5.Ifappropriate,usethearrowkeystoselectaStripeSizeintheStripeSizefieldandpressTab.
6.T ypeavolumesizeintheCapacityfieldandpressT ab.
7.PressEntertoinitiatevolumecreation.
8.Whenprompted,pressYtoacceptthewarningmessageandcreatethevolume.
9.Returntostep2tocreateadditionalRAIDvolumes,orselectExitandpressEnter.
10.PressYwhenpromptedtoconfirmtheexit.
DeletingRAIDvolumes
TodeleteRAIDvolumes,dothefollowing:
68P320HardwareMaintenanceManual
Page 77

1.PressCtrl+IwhenpromptedtoentertheIntelMatrixStorageManageroptionROMconfigurationutility
duringthecomputerstartup.
2.UsetheupanddownarrowkeystoselectDeleteRAIDVolumeandpressEnter.
3.UsethearrowkeystoselecttheRAIDvolumetobedeletedandpressDelete.
4.Whenprompted,pressYtoconfirmthedeletionoftheselectedRAIDvolume.DeletingaRAIDvolume
willresettheharddiskdrivestonon-RAID.
5.AfterdeletingaRAIDvolume,youcan:
•Returntostep2todeleteadditionalRAIDvolumes.
•See“CreatingRAIDvolumes”onpage68
•UsetheupanddownarrowkeystoselectExitandpressEnter.
forRAIDvolumecreation.
Resettingdiskstonon-RAID
Toresetyourharddiskdrivestonon-RAID,dothefollowing:
1.PressCtrl+IwhenpromptedtoentertheIntelMatrixStorageManageroptionROMconfigurationutility
duringthecomputerstartup.
2.UsetheupanddownarrowkeystoselectResetDiskstoNon-RAIDandpressEnter.
3.Usethearrowkeysandthespacekeytomarkindividualphysicalharddiskdrivestobereset,andthen
pressEntertocompletetheselection.
4.Whenprompted,pressYtoconfirmtheresetaction.
5.Afterresettingyourharddiskdrivestonon-RAID,youcan:
•See“DeletingRAIDvolumes”onpage68forRAIDvolumedeletion.
•See“CreatingRAIDvolumes”onpage68forRAIDvolumecreation.
•UsetheupanddownarrowkeystoselectExitandpressEnter.
Chapter6.Advancedconfiguration69
Page 78

70P320HardwareMaintenanceManual
Page 79

Chapter7.Troubleshooting,diagnostics,andrecovery
Thischapterprovidessolutionstoresolveyourcomputerproblems.Followthestepsinthebasicprocedure
forresolvingcomputerproblems,whichhelpsyoumakegooduseofthetroubleshooting,diagnostics,
andrecoveryinformation.
•“Basicprocedureforresolvingcomputerproblems”onpage71
•“Troubleshooting”onpage71
•“Diagnosingproblems”onpage79
•“Recoveryinformation”onpage80
Basicprocedureforresolvingcomputerproblems
Itisrecommendedthatyouusethefollowingproceduretoresolvecomputerproblemsyouareexperiencing:
1.Ensurethat:
a.Thecablesforallconnecteddevicesareconnectedcorrectlyandsecurely.
b.Allconnecteddevicesthatrequireacpowerareconnectedtoproperlygrounded,functioning
electricaloutlets.
c.AllconnecteddevicesareenabledintheBIOSsettingsofyourcomputer.See“Enablingordisabling
adevice”onpage61
Iftheseactionsdonotresolveyourproblem,continuewiththenextstep.
2.Useanantivirusprogramtoseeifyourcomputerhasbeeninfectedbyavirus.Iftheprogramdetects
avirus,removethevirus.Iftheantivirusprogramdoesnotresolveyourproblem,continuewiththe
nextstep.
3.Goto“T roubleshooting”onpage71andfollowtheinstructionsforthetypeofproblemyouare
experiencing.Ifthesetroubleshootinginstructionsdonotresolveyourproblem,continuewiththe
nextstep.
4.Runthediagnosticprogram.See“Diagnosingproblems”onpage79.Ifthediagnosticprogramdoes
notresolveyourproblem,continuewiththenextstep.
5.Recoveryouroperatingsystem.See“Recoveryinformation”onpage80.
6.Ifnoneoftheseactionssolveyourproblem,contacttheLenovoCustomerSupportCenter.Foralistof
LenovoSupportphonenumbers,gotohttp://www.lenovo.com/support/phone.Formoreinformation
abouthelp,service,andtechnicalassistance,seeChapter10“Gettinginformation,help,andservice”
onpage169
.
.
Troubleshooting
Attention:DonotopenyourcomputerorattemptanyrepairbeforereadingandunderstandingtheChapter
1“Readthisfirst:Importantsafetyinformation”onpage1.
Usethetroubleshootinginformationtofindsolutionstoproblemsthathavedefinitesymptoms.
Startupproblems
Thecomputerdoesnotstartupwhenyoupressthepowerbutton.
Solutions:
©CopyrightLenovo2017
71
Page 80

Ensurethat:
•Thepowercordiscorrectlyconnectedtotherearofthecomputerandtoaworkingelectricaloutlet.
•Ifyourcomputerhasasecondarypowerswitchontherearofthecomputer,ensurethatitisswitchedon.
•Thepowerindicatoronthefrontofthecomputerison.
•Thecomputervoltagematchesthevoltageavailableattheelectricaloutletforyourcountryorregion.
Theoperatingsystemfailstostartup.
Solution:
EnsurethatthestartupdevicesequencesetintheSetupUtilityprogramincludesthedevicewhere
theoperatingsystemresides.Usually,theoperatingsystemisontheinternalstoragedrive.Formore
information,see“Changingthestartupdevicesequencepermanently”onpage65.
Thecomputerbeepsmultipletimesbeforetheoperatingsystemstartsup.
Solution:
Ensurethatnokeysarestuck.
Audioproblems
TheaudiocannotbeheardontheWindowsoperatingsystem.
Solutions:
•IfyouareusingpoweredexternalspeakersthathaveanOn/Offcontrol,ensurethat:
–TheOn/OffcontrolissettotheOnposition.
–Thespeakerpowercableisconnectedtoaproperlygrounded,functionalacelectricaloutlet.
•Ifyourexternalspeakershaveavolumecontrol,ensurethatthevolumeisnotsettoolow.
•ClickthevolumeiconintheWindowsnotificationareaonthetaskbar.Ensurethatthemutespeakers
settingsarenotselectedandnoneofthevolumesettingsissettoolow.
Note:IfthevolumeiconisnotdisplayedintheWindowsnotificationarea,addtheicontothenotification
area.SeetheWindowshelpsystem.
•Forsomecomputersthathaveafrontaudiopanel,ensurethatthevolumeisnotsettoolow.
•Ensurethatyourexternalspeakers(andheadphones,ifused)areconnectedtothecorrectaudio
connectorsonthecomputer.Mostspeakercablesarecolor-codedtomatchtheconnectors.
Note:Whenexternal-speakerorheadphonecablesareconnectedtotheaudioconnectors,theinternal
speaker,ifpresent,isdisabled.Inmostcases,ifanaudioadapterisinstalledinoneoftheexpansion
slots,theaudiofunctionbuiltintothesystemboardisdisabled.Therefore,youmustusetheaudio
connectorsontheaudioadapter.
•EnsurethattheprogramyouarerunningisdesignedforuseontheWindowsoperatingsystem.Ifthe
programisdesignedtoruninDOS,theprogramdoesnotusetheWindowssoundfeature.Theprogram
mustbeconfiguredtouseSoundBlasterProorSoundBlasteremulation.
•Ensurethattheaudiodevicedriversarecorrectlyinstalled.
Thesoundcomesfromoneoftheexternalspeakers.
Solutions:
•Ensurethatthespeakercableisinsertedcompletelyintotheconnectoronthecomputer.
72P320HardwareMaintenanceManual
Page 81

•ClickthevolumeiconintheWindowsnotificationareaonthetaskbar.Then,clickthespeakericonontop
ofthevolumecontrol.ClicktheLevelstabandensurethattheBalancesettingsaresetcorrectly.
Note:IfthevolumeiconisnotdisplayedintheWindowsnotificationarea,addtheicontothenotification
area.SeetheWindowshelpsystem.
CDorDVDproblems
ACDorDVDdoesnotwork.
Solutions:
•Ensurethatthepowercableandsignalcablearesecurelyconnectedtothedrive.
•Ensurethatthediscisinsertedcorrectly,withitslabelup.
•Ensurethatthediscyouareusingisclean.Toremovedustorfingerprints,wipethedisccleanwithasoft
clothfromthecentertotheoutside.Wipingadiscinacircularmotionmightcauselossofdata.
•Ensurethatthediscyouareusingisnotscratchedordamaged.Tryinsertinganotherdiscthatyou
knowisgood.Ifyoucannotreadfromaknown-gooddisc,youmighthaveaproblemwithyouroptical
driveorthecablingtoyouropticaldrive.
•IfyouhavemultipleCDorDVDdrivesinstalled(oracombinationofCDandDVDdrives),tryinsertingthe
discintotheotherdrive.Insomecases,onlyoneofthedrivesisconnectedtotheaudiosubsystem.
Abootablerecoverymedium,suchastheProductRecoveryCD,cannotbeusedtostartyour
computer.
Solution:
EnsurethattheCDorDVDdriveissetasthetoppriorityoftheBootPriorityOrderintheSetupUtility
program.Referto“Selectingatemporarystartupdevice”onpage66forinformationaboutviewingand
changingthestartupsequence.
Note:Onsomecomputermodels,thestartupsequenceispermanentlysetandcannotbechanged.
AblackscreenisdisplayedinsteadoftheDVDvideo.
Solutions:
•RestarttheDVDplayerprogram.
•T ryalowerscreenresolutionorcolordepth.
•Closeanyopenfiles,andthenrestartthecomputer.
ADVDmoviedoesnotplay.
Solutions:
•Ensurethatthediscsurfaceiscleanandnotscratched.
•Checkthediscorpackageforregionalcoding.Y oumightneedtopurchaseadiscwithcodingfor
theregionwhereyouareusingyourcomputer.
NoaudiooronlyanintermittentaudiocomesoutwhileaDVDmovieisplaying.
Solutions:
•Checkthevolumecontrolsettingsonyourcomputerandonyourspeakers.
•Ensurethatthediscsurfaceiscleanandnotscratched.
•Checkallcableconnectionstoandfromthespeakers.
Chapter7.Troubleshooting,diagnostics,andrecovery73
Page 82

•UsetheDVDmenuforthevideotoselectadifferentaudiotrack.
Theplaybackissloworchoppy.
Solutions:
•Disableanybackgroundprograms,suchasAntiVirusorDesktopThemes.
•Ensurethatvideoresolutionislowerthan1152x864pixels.
Amessageindicatinginvaliddiscornodiscfoundisdisplayed.
Solutions:
•Ensurethatthediscisinthedrivewiththeshinysideofthediscfacingdown.
•Ensurethatvideoresolutionislowerthan1152x864pixels.
•EnsurethattheDVDorCDisinsertedintoanappropriateopticaldrive.Forexample,donotinsert
aDVDintoaCD-onlydrive.
Intermittentproblems
Intermittentproblemsrefertotheproblemsoccuronlyoccasionallyandaredifficulttorepeat.
Solutions:
•Ensurethatallcablesandcordsaresecurelyconnectedtothecomputerandattacheddevices.
•Ensurethatwhenthecomputerison,thefangrillisnotblocked(thereisairflowaroundthegrill),andthe
fansareworking.Ifairflowisblockedorthefansarenotworking,thecomputermightoverheat.
•IfSmallComputerSystemInterface(SCSI)devicesareinstalled,ensurethatthelastexternaldevicein
each(SCSI)chainisterminatedcorrectly.Formoreinformation,seeyour(SCSI)documentation.
Storagedriveproblems
SomeorallstoragedrivesaremissingfromtheSetupUtilityprogram.
Solution:
Ensurethatthesignalcablesandpowercablesforallthestoragedrivesareconnectedcorrectly.
Thecomputercannotstartupfromthecorrectstoragedriveorthemessage“NoOperatingSystem
Found”isdisplayed.
Solutions:
•Ensurethatthesignalcablesandpowercablesforallthestoragedrivesareconnectedcorrectly.
•Ensurethatthecomputerstartsupfromthecorrectstoragedrive.Setthestoragedrive,onwhichthe
operatingsystemresides,asthefirststartupdeviceintheSetupUtilityprogram.Referto“Changingthe
startupdevicesequencepermanently”onpage65
Note:Inrarecases,thestoragedrivewiththeoperatingsystemmightgetcorruptedordamaged.Ifthis
problemoccurs,replacethestoragedrive.Referto“Removingandinstallinghardware”onpage92.
.
EthernetLANproblems
ThecomputercannotconnecttoanEthernetLAN.
Solutions:
74P320HardwareMaintenanceManual
Page 83

•ConnectthecablefromtheEthernetconnectortotheRJ45connectorofthehub.
•EnabletheEthernetLANfeatureintheSetupUtilityprogram.Referto“UsingtheSetupUtilityprogram”
onpage61.
•EnabletheEthernetLANadapter.
1.DependingonyourWindowsversion,dooneofthefollowing:
–ForWindows7:ClicktheStartbuttontoopentheStartmenu.
–ForWindows10:Right-clicktheStartbuttontoopentheStartcontextmenu.
2.ClickControlPanel.ViewControlPanelbyLargeiconsorSmallicons,andthenclickNetworkand
SharingCenter➙Changeadaptersettings.
3.Right-clicktheEthernetLANadaptericonandclickEnable.
•UpdateorreinstalltheEthernetLANdriver.See“Keepingyourcomputercurrent”onpage52.
•Installallnetworkingsoftwarethatisnecessaryforyournetworkenvironment.CheckwithyourLAN
administratorforthenecessarynetworkingsoftware.
•Setthesameduplexfortheswitchportandtheadapter.Ifyouconfiguredtheadapterforfullduplex,
ensurethattheswitchportisalsoconfiguredforfullduplex.Settingthewrongduplexmodemight
degradeperformance,causedataloss,orresultinlostconnections.
WhenaGigabitEthernetmodelcomputerisusedataspeedof1000Mbps,theEthernetLAN
connectionfailsorerrorsoccur.
Solution:
ConnectthenetworkcabletotheEthernetconnectorusingCategory5wiringanda100BASE-Thub/switch
(not100BASE-X).
AGigabitEthernetmodelcomputershouldconnecttothenetworkataspeedof1000Mbpsbutat
onlyaspeedof100Mbps.
Solutions:
•T ryanothercable.
•Setthelinkpartnertoauto-negotiate.
•Settheswitchtobe802.3ab-compliant(gigabitovercopper).
TheWakeOnLANfeaturedoesnotwork.
Solution:
EnabletheWakeOnLANfeatureintheSetupUtilityprogram.Referto“UsingtheSetupUtilityprogram”
onpage61.
WirelessLANproblem
Note:ThewirelessLANfeatureisavailableonlyonsomemodels.
ThewirelessLANfeaturedoesnotwork.
Solutions:
•EnablethewirelessLANfeatureintheSetupUtilityprogram.Referto“UsingtheSetupUtilityprogram”
onpage61
•ForWindows10,enablethewirelessLANfeatureinWindowsSettings.ClicktheStartbuttontoopenthe
Startmenu,andthenclickSettings➙Network&Internet➙Wi-Fi.TurnontheWi-Fifeature.
•EnablethewirelessLANadapter.
.
Chapter7.Troubleshooting,diagnostics,andrecovery75
Page 84

1.DependingonyourWindowsversion,dooneofthefollowing:
–ForWindows7:ClicktheStartbuttontoopentheStartmenu.
–ForWindows10:Right-clicktheStartbuttontoopentheStartcontextmenu.
2.ClickControlPanel.ViewControlPanelbyLargeiconsorSmallicons,andthenclickNetworkand
SharingCenter➙Changeadaptersettings.
3.Right-clickthewirelessLANadaptericonandclickEnable.
•UpdateorreinstallthewirelessLANdriver.See“Keepingyourcomputercurrent”onpage52.
Bluetoothproblems
Note:TheBluetoothfeatureisavailableonlyonsomemodels.
TheBluetoothfeaturedoesnotwork.
Solutions:
•EnabletheBluetoothfeatureintheSetupUtilityprogram.Referto“UsingtheSetupUtilityprogram”
onpage61
•T urnontheBluetoothradios.
•EnabletheBluetoothadapter.
1.DependingonyourWindowsversion,dooneofthefollowing:
–ForWindows7:ClicktheStartbuttontoopentheStartmenu.
–ForWindows10:Right-clicktheStartbuttontoopentheStartcontextmenu.
2.ClickControlPanel.ViewControlPanelbyLargeiconsorSmallicons,andthenclickNetworkand
SharingCenter➙Changeadaptersettings.
3.Right-clicktheBluetoothadaptericonandclickEnable.
•UpdateorreinstalltheBluetoothdriver.See“Keepingyourcomputercurrent”onpage52.
.
NosoundcomesfromtheBluetoothheadsetorheadphones.
Solution:
SettheBluetoothheadsetorheadphonesasthedefaultdevice.
1.Exittheapplicationthatusesthesounddevice(forexample,WindowsMediaPlayer).
2.Right-clickthevolumeiconintheWindowsnotificationareaonthetaskbar.
Note:IfthevolumeiconisnotdisplayedintheWindowsnotificationarea,addtheicontothe
notificationarea.SeetheWindowshelpsystem.
3.ClickPlaybackdevices.
4.IfyouareusingtheHeadsetprofile,selectBluetoothHands-freeAudio,andthenclickSetDefault.If
youareusingtheAVprofile,selectStereoAudio,andthenclickSetDefault.
5.ClickOK.
Performanceproblems
Excessivefragmentedfilesexistonthestoragedrives.
Solution:
UsetheWindowsdiskdefragmentationordiskoptimizationfeaturetocleanupthefiles.
76P320HardwareMaintenanceManual
Page 85

Note:Dependingonthevolumeofthestoragedrivesandamountofdatastoredonthestoragedrives,the
disk-defragmentationprocessmighttakeuptoseveralhours.
1.Closeanyopenprogramsandwindows.
2.ClicktheStartbuttontoopentheStartmenu.
3.DependingonyourWindowsversion,dooneofthefollowing:
•ForWindows7:ClickComputer.
•ForWindows10:ClickFileExplorer➙ThisPC.
4.Right-clickyourCdriveandthenclickProperties.
5.ClicktheToolstab.
6.DependingonyourWindowsversion,dooneofthefollowing:
•ForWindows7:ClickDefragmentnow.
•ForWindows10:ClickOptimize.SelectthedesireddriveandthenclickOptimize.
7.Followtheinstructionsonthescreen.
Thefreestoragedrivespaceisinsufficient.
Solutions:
Freeupthestoragedrivespace.
•CleanoutyourInbox,SentItems,andDeletedItemsfoldersfromyoure-mailapplication.
•CleanupyourCdrive.
1.ClicktheStartbuttontoopentheStartmenu.
2.DependingonyourWindowsversion,dooneofthefollowing:
–ForWindows7:ClickComputer.
–ForWindows10:ClickFileExplorer➙ThisPC.
3.Right-clickyourCdriveandthenclickProperties.
4.Checktheamountoffreespace,andthenclickDiskCleanup.
5.Alistofunnecessaryfilecategoriesisdisplayed.Selecteachfilecategoryyouwanttodelete,
andthenclickOK.
•T urnsomeWindowsfeaturesofforremovesomeunnecessaryprograms.
1.DependingonyourWindowsversion,dooneofthefollowing:
–ForWindows7:ClicktheStartbuttontoopentheStartmenu.
–ForWindows10:Right-clicktheStartbuttontoopentheStartcontextmenu.
2.ClickControlPanel.ViewControlPanelbyLargeiconsorSmallicons,andthenclickPrograms
andFeatures.
3.Dooneofthefollowing:
–T oturnsomeWindowsfeaturesoff,clickTurnWindowsfeaturesonoroff.Followthe
instructionsonthescreen.
–T oremovesomeunnecessaryprograms,selecttheprogramyouwanttoremove,andthenclick
Uninstall/ChangeorUninstall.
Thefreememoryspaceisinsufficient.
Solutions:
Chapter7.Troubleshooting,diagnostics,andrecovery77
Page 86

•Right-clickablankareaonthetaskbarandopenT askManager.Then,endsometasksyouarenot
performing.
•Installadditionalmemorymodules.See“Removingandinstallinghardware”onpage92.T opurchase
memorymodules,goto:
http://www.lenovo.com
Serialconnectorproblem
Theserialconnectorcannotbeaccessed.
Solutions:
•Connecttheserialcablefromtheserialconnectoronthecomputertotheserialdevice.Iftheserialdevice
hasitsownpowercord,connectthepowercordtoagroundedelectricaloutlet.
•T urnontheserialdeviceandkeepthedeviceonline.
•Installanyprogramssuppliedwiththeserialdevice.Refertothedocumentationthatcomeswiththe
serialdeviceformoreinformation.
•Ifyouaddedoneserial-connectoradapter,ensurethattheadapterisinstalledcorrectly.
USBdeviceproblems
AUSBdevicecannotbeaccessed.
Solutions:
•ConnecttheUSBcablefromtheUSBconnectortotheUSBdevice.IftheUSBdevicehasitsownpower
cord,connectthepowercordtoagroundedelectricaloutlet.
•T urnontheUSBdeviceandkeepthedeviceonline.
•InstallanydevicedriversorprogramssuppliedwiththeUSBdevice.Refertothedocumentationthat
comeswiththeUSBdeviceformoreinformation.
•DisconnectandreconnecttheUSBconnectortoresettheUSBdevice.
TheWindows7operatingsystemcannotbeinstalledfromanexternalopticaldriveoranexternal
USBdevice.
Solution:
Gotohttps://support.lenovo.com/us/en/documents/ht104142formoreinformation.
Softwareanddriverproblems
Forsomeprograms,datescannotbesortedincorrectorder.
Solution:
Someprogramsdevelopedbeforetheyear2000useonlythelasttwodigitsofayeartosortdates,
assumingthefirsttwodigitsare19.Consequently,datescannotbesortedincorrectordernowadays.
Checkwithyoursoftwaremanufacturertoseeifanyupdatesareavailable.Manysoftwaremanufacturers
makeupdatesavailablefromtheWorldWideWeb.
Someprogramsdonotworkasexpected.
Solutions:
1.Checkwhethertheproblemiscausedbyaprogram.
78P320HardwareMaintenanceManual
Page 87

a.Ensurethatthesoftwareiscompatiblewithyourcomputer.Refertotheinformationsuppliedwith
thesoftwareformoreinformation.
b.Verifythatothersoftwareworksproperlyonyourcomputer.
c.Verifythatthesoftwareyouareusingworksonanothercomputer.
2.Iftheproblemiscausedbyaprogram:
•Refertotheprinteddocumentationthatcomeswiththeprogramorthehelpsystemoftheprogram
fortroubleshootinginformation.
•Updatetheprogram.See“Keepingyourcomputercurrent”onpage52
•Uninstalltheprogramandthenreinstallit.T odownloadaprogramthatispreinstalledonyour
computer,gotohttp://www.lenovo.com/supportandfollowtheinstructionsonthescreen.
Adevicedoesnotworkproperlyduetodevicedriverproblems.
Solution:
Updatethedevicedriver.See“Keepingyourcomputercurrent”onpage52.
.
Diagnosingproblems
Manycomputerproblemscanbesolvedwithoutoutsideassistance.Ifyouexperienceaproblemwithyour
computer,thefirstplacetostartisthetroubleshootinginformationinyourcomputerdocumentation.If
yoususpectasoftwareproblem,seethedocumentation,includingreadmefilesandhelpinformation
systems,thatcomewiththeoperatingsystemorprogram.ThinkPadnotebookcomputerscomewithaset
ofdiagnosticprogramsthatyoucanusetohelpyouidentifyhardwareproblems.
DiagnosingproblemswithLenovoSolutionCenterontheWindows7operatingsystem
LenovoSolutionCenterispreinstalledonyourcomputerandalsoisavailablefordownloadat:
http://www.lenovo.com/diags
Notes:
•IfyouareusinganotherWindowsoperatingsystemratherthantheWindows7,youcanfindthelatest
informationaboutdiagnosticsforyourcomputerat:
http://www.lenovo.com/diagnose
•IfyouareunabletoisolateandrepairtheproblemyourselfafterrunningLenovoSolutionCenter,saveand
printthelogfilescreatedbytheprogram.YouneedthelogfileswhenyouspeaktoaLenovotechnical
supportrepresentative.
LenovoSolutionCenterenablesyoutotroubleshootandresolvecomputerproblems.Itcombinesdiagnostic
tests,systeminformationcollection,securitystatus,andsupportinformation,alongwithhintsandtipsfor
optimalsystemperformance.
Whenyouaresettingupyourcomputer,theLenovoSolutionCenterprogrampromptsyoutocreaterecovery
media.Youcanusetherecoverymediatorestorethestoragedrivetothefactorydefaultsettings.
Foradditionalinformation,seetheLenovoSolutionCenterhelpsystem.
DiagnosingproblemswithLenovoCompanionontheWindows10operatingsystem
LenovoCompanionispreinstalledonyourcomputerandalsoisavailablefordownloadat:
https://shop.lenovo.com/us/en/accessories/software/apps/lenovo-apps/companion/
Chapter7.Troubleshooting,diagnostics,andrecovery79
Page 88

Note:IfyouareunabletoisolateandrepairtheproblemyourselfafterrunningLenovoCompanion,save
andprintthelogfilescreatedbytheprogram.YouneedthelogfileswhenyouspeaktoaLenovotechnical
supportrepresentative.
LenovoCompanionsupportsthehardwarescanfunction.Itcombinesdiagnostictests,systeminformation
collection,securitystatus,andsupportinformation,alongwithhintsandtipsforoptimalsystemperformance.
Thetroubleshootinginformationorthediagnosticprogramsmighttellyouthatyouneedadditionalor
updateddevicedriversorothersoftware.Youcangetthelatesttechnicalinformationanddownloaddevice
driversandupdatesfromtheLenovoSupportWebsiteat:
http://www.lenovo.com/support
Foradditionalinformation,seetheLenovoCompanionhelpsystem.
UEFIdiagnosticprogram
AUEFIdiagnosticprogramispreinstalledonthecomputer.Itenablesyoutotestmemorymodulesand
internalstoragedevices,viewsysteminformation,andcheckandrecoverbadsectorsoninternalstorage
devices.
ToruntheUEFIdiagnosticprogram,dothefollowing:
1.T urnonthecomputer.Ifthecomputercannotbeturnedon,goto“Basicprocedureforresolving
computerproblems”onpage71.Ifanerrorcodeisdisplayed,goto“Symptom-to-FRUindex”onpage
forerrorcodedescriptionsandtroubleshootinghints.
84
2.RepeatedlypressandreleasetheF10keywhenturningonthecomputer.Themainscreenofthe
UEFIdiagnosticprogramisdisplayed.
3.Followtheinstructionsonthescreentousethediagnosticprogram.
Theoptionsonthemainscreenareasfollows:
Table1.ItemsonthemainscreenoftheUEFIdiagnosticprogram
DIAGNOSTICSTOOLS
•LCDtest
•Memory-Quicktest
•Memory-Extendedtest
•Motherboardtest
•PCI-etest
•Storage-Quicktest
•Systeminformation
•Recoverbadsectorstool
•Generateconfigurationfile
•Executefromconfigurationfile
•Exitapplication
Recoveryinformation
Thissectionprovidesinstructionsonhowtorecoveryouroperatingsystem.
Note:Ifadevicedoesnotworkcorrectlyafterrecoveringtheoperatingsystem,updatethedevicedriver.
See“Keepingyourcomputercurrent”onpage52
RecoveryinformationforWindows7
TorecoveryourWindows7operatingsystem,usethefollowingsolutions:
•UseWindowsrecoverysolutions.
.
80P320HardwareMaintenanceManual
Page 89

–UseSystemRestoretorestoresystemfilesandsettingstoanearlierpoint.
1.ClicktheStartbuttontoopentheStartmenu.
2.ClickControlPanel.ViewControlPanelbyLargeiconsorSmallicons,andthenclickRecovery
➙OpenSystemRestore.
3.Followtheinstructionsonthescreen.
–UsetheWindowsrecoveryenvironmentbydoingoneofthefollowing:
–Afterseveralconsecutivefailedbootattempts,theWindowsrecoveryenvironmentmightstart
automatically.Followtheinstructionsonthescreentochoosetheappropriaterecoverysolution.
–T urnonorrestartyourcomputer.Then,repeatedlypressandreleaseF8orFn+F8(dependingonthe
keyboard)untiltheAdvancedBootOptionswindowopens.SelectRepairYourComputer,press
Enter,andfollowtheinstructionsonthescreentochoosetheappropriaterecoverysolution.
•UsetherecoverymediumyoucreatedearlierwiththeCreateRecoveryMediaprogramtorestoreonly
theCdriveortheentirestoragedrivetothefactory-defaultsettings.
1.Selecttherecoverymediumasthestartupdevice.See“Selectingatemporarystartupdevice”
onpage66.
2.Followtheinstructionsonthescreentochoosetheappropriaterecoverysolution.
•UsetherecoverydiscsetprovidedbyLenovotorestoretheentirestoragedrivetothefactory-default
settings.
–Ifyourcomputercomeswiththerecoverydiscset,followtheinstructionsshippedwiththediscset.
–Ifyourcomputerdoesnotcomewiththerecoverydiscset,contacttheLenovoCustomerSupport
Centertoorderarecoverydiscset.See“Callingforservice”onpage170.
RecoveryinformationforWindows10
TorecoveryourWindows10operatingsystem,usethefollowingsolutions:
•UseWindowsrecoverysolutions.
–UserecoverysolutionsinWindowsSettings.
1.ClicktheStartbuttontoopentheStartmenu.
2.ClickSettings➙Update&security➙Recovery.
3.Choosetheappropriaterecoverysolutionbyfollowingtheinstructionsonthescreen.
–UseSystemRestoretorestoresystemfilesandsettingstoanearlierpoint.
1.Right-clicktheStartbuttontoopentheStartcontextmenu.
2.ClickControlPanel.ViewControlPanelbyLargeiconsorSmallicons,andthenclickRecovery
➙OpenSystemRestore.
3.Followtheinstructionsonthescreen.
–UsetheFileHistorytooltorestoreyourfilesfromabackup.
Note:IfyouusetheFileHistorytooltorestoreyourfilesfromabackup,ensurethatyoubackedup
yourdataearlierwiththetool.
1.Right-clicktheStartbuttontoopentheStartcontextmenu.
2.ClickControlPanel.ViewControlPanelbyLargeiconsorSmallicons,andthenclickFileHistory
➙Restorepersonalfiles.
3.Followtheinstructionsonthescreen.
–UsetheWindowsrecoveryenvironmentbydoingoneofthefollowing:
–Afterseveralconsecutivefailedbootattempts,theWindowsrecoveryenvironmentmightstart
automatically.Followtheinstructionsonthescreentochoosetheappropriaterecoverysolution.
Chapter7.Troubleshooting,diagnostics,andrecovery81
Page 90

–SelecttherecoverymediumyoucreatedearlierwiththeWindowstoolasthestartupdevice.See
“Selectingatemporarystartupdevice”onpage66
.Then,followtheinstructionsonthescreen
tochoosetheappropriaterecoverysolution.
•UsetherecoveryUSBkeyprovidedbyLenovotorestoretheentirestoragedrivetothefactory-default
settings.
–IfyourcomputercomeswiththerecoveryUSBkey,followtheinstructionsshippedwiththeUSBkey.
–IfyourcomputerdoesnotcomewiththerecoveryUSBkey,contacttheLenovoCustomerSupport
CentertoorderarecoveryUSBkey.See“Callingforservice”onpage170
.
82P320HardwareMaintenanceManual
Page 91

Chapter8.Servicecheckoutandsymptom-to-FRUindex
Thischapterprovidesinformationaboutgeneralservicecheckoutandsymptom-to-FRUindex.
Servicecheckout
Attention:Thedrivesinthecomputeryouareservicingmighthavebeenrearrangedorthedrivestartup
sequencechanged.Beextremelycarefulduringwriteoperationssuchascopying,saving,orformatting.
Dataorprogramscanbeoverwrittenifyouselectanincorrectdrive.
Generalerrormessagesappearifaproblemorconflictisfoundbyaprogram,theoperatingsystem,orboth.
Foranexplanationofthesemessages,refertotheinformationsuppliedwiththatsoftwarepackage.
BeforereplacinganyFRUs,ensurethatthelatestlevelofBIOSisinstalledonthesystem.Adown-levelBIOS
mightcausefalseerrorsandunnecessaryreplacementofthesystemboard.Formoreinformationabout
howtodetermineandobtainthelatestlevelBIOS,see“BIOSlevels”onpage67.
Usethefollowingproceduretohelpdeterminethecauseoftheproblem:
1.T urnoffthecomputerandallexternaldevices.
2.Checkallcablesandpowercords.
3.Setalldisplaycontrolstothemiddleposition.
4.T urnonallexternaldevices.
5.T urnonthecomputer.
•Lookfordisplayederrorcodes
•Listenforbeepcodes
•Lookforreadableinstructionsoramainmenuonthedisplay.
Ifyoudidnotreceivethecorrectresponse,proceedtostep6onpage83
Ifyoudoreceivethecorrectresponse,proceedtostep7onpage83.
6.Lookatthefollowingconditionsandfollowtheinstructions:
.
•IfyouhearbeepcodesduringPOST,goto“Beepsymptoms”onpage85
•IfthecomputerdisplaysaPOSTerror,goto“POSTerrorcodes”onpage86.
•Ifthecomputerhangsandnoerrorisdisplayed,continueatstep7onpage83.
7.RuntheDiagnosticprograms.See“Diagnosingproblems”onpage79.
•Ifyoureceiveanerror,replacethepartthatthediagnosticprogramcallsout.
•Iftheteststopsandyoucannotcontinue,replacethelastdevicetested.
.
Problemdeterminationtips
Duetothevarietyofhardwareandsoftwarecombinationsthatcanbeencountered,usethefollowing
informationtoassistyouinproblemdetermination.Ifpossible,havethisinformationavailablewhen
requestingassistancefromServiceSupportandEngineeringfunctions.
•Machinetypeandmodel
•Processororharddiskdriveupgrades
•Failuresymptom
–Dodiagnosticsindicateafailure?
–What,when,where,single,ormultiplesystems?
©CopyrightLenovo2017
83
Page 92

–Isthefailurerepeatable?
–Hasthisconfigurationeverworked?
–Ifithasbeenworking,whatchangesweremadepriortoitsfailing?
–Isthistheoriginalreportedfailure?
•Diagnosticsversion
–T ypeandversionlevel
•Hardwareconfiguration
–Print(printscreen)configurationcurrentlyinuse
–BIOSlevel
•Operatingsystemsoftware
–T ypeandversionlevel
Notes:Toeliminateconfusion,identicalsystemsareconsideredidenticalonlyifthey:
1.Aretheexactmachinetypeandmodels
2.HavethesameBIOSlevel
3.Havethesameadapters/attachmentsinthesamelocations
4.Havethesameaddressjumpers/terminators/cabling
5.Havethesamesoftwareversionsandlevels
6.HavethesameDiagnosticDiskettes(version)
7.Havethesameconfigurationoptionssetinthesystem
8.Havethesamesetupfortheoperatingsystemcontrolfiles
Comparingtheconfigurationandsoftwareset-upbetween“workingandnon-working”systemswilloften
leadtoproblemresolution.
Symptom-to-FRUindex
TheSymptom-to-FRUindexlistserrorsymptomsandpossiblecauses.Themostlikelycauseislistedfirst.
Alwaysbeginwith“Servicecheckout”onpage83
.Thisindexcanalsobeusedtohelpyoudecidewhich
FRUstohaveavailablewhenservicingacomputer.Ifyouareunabletocorrecttheproblemusingthis
index,goto“Undeterminedproblems”onpage89.
Notes:
•TheSymptom-to-FRUindexisnotspecifictoanymachinetypeandareapplicabletoallThinkStationcomputers.
•Ifyouhavebothanerrormessageandanincorrectaudioresponse,diagnosetheerrormessagefirst.
•Ifyoucannotrunthediagnostictestsoryougetadiagnosticerrorcodewhenrunningatest,butdidreceivea
POSTerrormessage,diagnosethePOSTerrormessagefirst.
•Ifyoudidnotreceiveanyerrormessage,lookforadescriptionofyourerrorsymptomsinthefirstpartofthisindex.
Harddiskdrivebooterror
Aharddiskdrivebooterrorcanhavethefollowingcauses.
ErrorFRU/Action
Thestart-updriveisnotinthebootsequencein
configuration.
Nooperatingsysteminstalledonthebootdrive.Installanoperatingsystemonthebootdrive.
Checktheconfigurationandensurethatthestart-updrive
isinthebootsequence.
84P320HardwareMaintenanceManual
Page 93

ErrorFRU/Action
Thebootsectoronthestartupdriveiscorrupted.
Thedriveisdefective.
Thedrivemustbeformatted.Dothefollowing:
1.Attempttobackupthedataonthefailingharddisk
drive.
2.Usingtheoperatingsystemprograms,formatthe
harddiskdrive.
Replacetheharddiskdrive.
Powersupplyproblems
Ifyoususpectapowerproblem,usethefollowingprocedures.
Check/VerifyFRU/Action
Checkthefollowingforproperinstallation.
•Powercord
•On/Offswitchconnector
•On/Offswitchpowersupplyconnector
•Systemboardpowersupplyconnectors
•Microprocessorconnection
Checkthepowercordforcontinuity.
Checkthepower-onswitchforcontinuity.
Reseatconnectors
Powercord
Power-onswitch
Beepsymptoms
Beepsymptomsaretonesoraseriesoftonesseparatedbypauses(intervalswithoutsound)duringPOST.
Thefollowingtabledescribesthebeepsymptoms.
BeepsymptomFRU/Action
2shortbeeps:commonPOSTerrorCommonPOSTerrorcode.Seethedetailedfailure
informationin“POSTerrorcodes”onpage86.
3shortand1longbeeps:DRAMmemoryerror
4longbeeps:insufficientshadowRAMresources
foroptionROM(errorcode:8998)orPCIe/PCIMMIO
(memorymappedinput/output)resources(errorcode:
8999)
2longand3shortbeeps:graphicscarderror
Performthefollowingactionsinorder:
1.Makesurethatthememorymodulesareproperly
seatedinthememoryslots.
2.Replacethememorymodules.
3.Replacethesystemboard(fortrainedservice
personnelonly).
Seethedetailedfailureinformationin“POSTerrorcodes”
onpage86
Performthefollowingactionsinorder:
1.Makesurethatthegraphicscardsareproperly
2.Replacethegraphicscards.
3.Replacethesystemboard(fortrainedservice
.
seatedintheslots.
personnelonly).
Chapter8.Servicecheckoutandsymptom-to-FRUindex85
Page 94

POSTerrorcodes
Eachtimeyouturnonthesystem,itperformsaseriesofteststhatchecktheoperationofthesystemand
someoptions.ThisseriesoftestsarecalledthePower-OnSelf-Test,orPOST.POSTchecksthefollowing
operations:
•Somebasicsystem-boardoperations
•Memoryoperation
•Videooperation
•Whetherthebootdriveisworking
IfthePOSTdetectsaproblem,anerrormessageappearsonthescreen.Asingleproblemmightcause
severalerrormessagestoappear.Whenyoucorrectthecauseofthefirsterrormessage,theothererror
messagesprobablywillnotappearonthescreenthenexttime.
ErrorcodePOSTerrormessageDescription/Action
0135
0211
0164MemorysizedecreasedThiserrormessageisdisplayedwhen
CPUfanfailure
Systemfanfailure
Powerfanfailure
Frontfanfailure
Rearfanfailure
Auxiliaryfanfailure
ODDfanfailure
Keyboardnotfound
Thiserrormessageisdisplayedwhen
afanfailsandthesystemmightbe
overheating.
PressF10toexit.
Thiserrormessageisdisplayedwhen
nokeyboardisdetected.
thememorysizeisdecreased.
1762
1820
1962
8998NotenoughshadowRAMresources
SATAdeviceconfigurationchange
hasoccurred
Morethanoneexternalfingerprint
readerisattached.Turnoffand
removeallbutthereaderthatyouset
upwithinyourmainoperatingsystem.
Nooperatingsystemfound.Boot
sequencewillautomaticallyrepeat.
forOPTIONROM,notalldevices
initialized.Suggesttoremovesome
add-oncards,orchangetoUEFI
modeinBIOSsetup.
PressF10toexit.
Thiserrormessageisdisplayedwhen
aharddiskdrivechangeoranoptical
drivechangehasbeenmade.
PressF10toexit.
Thiserrormessageisdisplayedwhen
morethanoneexternalfingerprint
readerisconnectedtothecomputer.
Turnoffandremoveallbutthereader
thatyousetupwithinyourmain
operatingsystem.
ThiserroroccursonlyafterthePOST
iscompleted.
Pressanykeytorepeatboot
sequence.
Thiserrormessageisdisplayedwhen
theshadowRAMresourcesforoption
ROMareinsufficient.
IfthelegacyoptionROMis
insufficient,removesomeadd-in
cards.
ForthesystemthatsupportsUEFI,
86P320HardwareMaintenanceManual
Page 95

8999
NotenoughPCIe/PCIMMIO
resources.Currentlyonlyonevideo
cardisenabled.RemovesomePCIe
cards,orenterBIOSSetupand
enable“Above4GBDecode”
Miscellaneouserrorconditions
Message/SymptomFRU/Action
ChangingdisplaycolorsDisplay/Monitor
Computerwillnotpower-off.See“Harddiskdriveboot
error”onpage84.
ComputerwillnotRPLfromserver
ComputerwillnotperformaWakeOnLAN
Deadcomputer.See“Harddiskdrivebooterror”onpage
84
.
Diskettedrivein-uselightremainsonordoesnotlight
whendriveisactive.
Blankscreenexceptforflashingcursor.
IncorrectmemorysizeduringPOST
®
(ifapplicable)1.Checkthepowersupplyandsignalcableconnections
1.PowerSwitch
2.SystemBoard
3.Risercard,ifinstalled.
1.Ensurethatthenetworkisinstartupsequenceasthe
firstdeviceorthefirstdeviceafterdiskette.
2.EnsurethatthenetworkadapterisenabledforRPL.
3.Networkadapter(Advisenetworkadministratorof
newMACaddress)
tothenetworkadapter.
2.Ensurethattheoperatingsystemsettingsaresetto
enableWakeonLAN.
3.EnsurethattheWakeOnLANfeatureisenabledin
Setup/Configuration(see“StartingtheSetupUtility
program”onpage61)
4.Ensurethatthenetworkadministratorisusingthe
correctMACaddress.
5.EnsurenointerruptorI/Oaddressconflicts.
6.Networkadapter(advisenetworkadministratorof
newMACaddress)
1.PowerSupply
2.SystemBoard
1.DisketteDrive
2.SystemBoard
3.DisketteDriveCable
1.SystemBoard
2.PrimaryHardDiskDrive
3.HardDiskDriveCable
1.RuntheMemorytests.
2.MemoryModule
3.SystemBoard
setUEFIasthefirstpriorityordisable
CSMinBIOSsetup.
Thiserrormessageisdisplayed
whenthePCIe/PCIMMIO(memory
mappedinput/output)resourcesare
insufficient.
Forthe32-bitoperatingsystem,
removesomeadd-incards.
Forthe64-bitoperatingsystem,
enableAbove4GBDecodeinBIOS
setup.
Chapter8.Servicecheckoutandsymptom-to-FRUindex87
Page 96

Message/SymptomFRU/Action
"InsertaDiskette"iconappearswithaknown-good
diagnosticsdisketteinthefirst3.5-inchdiskettedrive.
Intensityorcolorvariesfromlefttorightofcharacters
andcolorbars
Nopowerorfannotrunning
Non-systemdiskordiskerror-typemessagewitha
known-gooddiagnosticdiskette.
Otherdisplaysymptomsnotlistedabove(includingblank
orillegibledisplay)
Power-onindicatororharddiskdrivein-uselightnoton,
butcomputerworkscorrectly
Printerproblems1.Printer
Programloadsfromtheharddiskwithaknown-good
diagnosticsdisketteinthefirst3.5-inchdiskettedrive
RPLcomputercannotaccessprogramsfromitsownhard
disk.
RPLcomputerdoesnotRPLfromserver
Serialorparallelconnectordevicefailure(systemboard
connector)
Serialorparallelconnectordevicefailure(adapter
connector)
Someorallkeysonthekeyboarddonotwork
1.SystemBoard
2.DisketteDriveCable
3.NetworkAdapter
1.Display
2.Videoadapter(ifpresent)
3.SystemBoard
1.See“Harddiskdrivebooterror”onpage84.
1.DisketteDrive
2.SystemBoard
3.DisketteDriveCable
1.Display
2.SystemBoard
1.Powerswitch/LEDassembly
2.SystemBoard
2.SystemBoard
1.RuntheSetupUtilityprogramandchecktheStartup
sequence.
2.DisketteDrive
3.DisketteDriveCable
4.SystemBoard
5.PowerSupply
1.IfthenetworkadministratorisusingLCCMHybrid
RPL,checkthestartupsequence:
a.Firstdevice-network
b.Seconddevice-harddisk
2.Harddiskdrive
1.Checkthestartupsequence.
2.CheckthenetworkadapterLEDstatus.
1.ExternalDeviceSelf-TestOK?
2.ExternalDevice
3.Cable
4.SystemBoard
1.ExternalDeviceSelf-TestOK?
2.ExternalDevice
3.Cable
4.AlternateAdapter
5.SystemBoard
1.Keyboard
2.KeyboardCable
3.SystemBoard
88P320HardwareMaintenanceManual
Page 97

Undeterminedproblems
Thissectionprovidesinstructionsonhowtofindoutthefailingdevicesoradapters.
1.T urnoffthecomputer.
2.Removeordisconnectthefollowingcomponents(ifinstalled)oneatatime.
a.Externaldevices(modem,printer,ormouse)
b.Anyadapters
c.Memorymodules
d.Extendedvideomemory
e.ExternalCache
f.ExternalCacheRAM
g.Harddiskdrive
h.Diskettedrive
3.T urnonthecomputertoretestthesystem.
4.Repeatsteps1through3untilyoufindthefailingdeviceoradapter.
Ifalldevicesandadaptershavebeenremoved,andtheproblemcontinues,replacethesystemboard.See
“Systemboard”onpage146.
Chapter8.Servicecheckoutandsymptom-to-FRUindex89
Page 98

90P320HardwareMaintenanceManual
Page 99

Chapter9.Hardwareinstallationandreplacement
Thischaptercontainsthefollowingtopics:
•“Handlingstatic-sensitivedevices”onpage91
•“Preparingyourcomputerandremovingthecomputercover”onpage91
•“Removingandinstallinghardware”onpage92
•“Completingthepartsreplacement”onpage166
Handlingstatic-sensitivedevices
Donotopenthestatic-protectivepackagecontainingthenewpartuntilthedefectiveparthasbeenremoved
andyouarereadytoinstallthenewpart.Staticelectricity,althoughharmlesstoyou,canseriouslydamage
computercomponentsandoptions.
Whenyouhandleoptionsandothercomputercomponents,taketheseprecautionstoavoidstatic-electricity
damage:
•Limityourmovement.Movementcancausestaticelectricitytobuilduparoundyou.
•Alwayshandleoptionsandothercomputercomponentscarefully.HandlePCI/PCIecards,memory
modules,systemboards,andmicroprocessorsbytheedges.Nevertouchanyexposedcircuitry.
•Preventothersfromtouchingtheoptionsandothercomputercomponents.
•T ouchthestatic-protectivepackagecontainingtheparttoametalexpansion-slotcoverorother
unpaintedmetalsurfaceonthecomputerforatleasttwoseconds.Thisreducesstaticelectricityfrom
thepackageandyourbodybeforeyouinstallorreplaceanewpart.
•Whenpossible,removethenewpartfromthestatic-protectivepackage,andinstallitdirectlyinthe
computerwithoutsettingthepartdown.Whenthisisnotpossible,placethestatic-protectivepackageon
asmooth,levelsurfaceandplacethepartonthepackage.
•Donotplacethepartonthecomputercoverorothermetalsurface.
Preparingyourcomputerandremovingthecomputercover
Attention:DonotopenyourcomputerorattemptanyrepairbeforereadingandunderstandingtheChapter
1“Readthisfirst:Importantsafetyinformation”onpage1.
CAUTION:
Beforeyouopenthecomputercover,turnoffthecomputerandwaitseveralminutesuntilthe
computeriscool.
Beforeinstallingorremovinganyhardwarecomponentinyourcomputer,dothefollowingtoprepareyour
computerandremovethecomputercover:
1.Removeanymediafromthedrivesandturnoffallattacheddevicesandthecomputer.Then,disconnect
allpowercordsfromelectricaloutletsanddisconnectallcablesthatareconnectedtothecomputer.
2.Unlockanylockingdevicethatsecuresthecomputercover.See“Lockingyourcomputer”onpage55.
3.Removethetwoscrewsthatsecurethecomputercover.
©CopyrightLenovo2017
91
Page 100

4.Pressthecover-releasebuttononthesideofthecomputerandslidethecovertotherearofthe
computertoremovethecover.
Figure11.Removingthecomputercover
Removingandinstallinghardware
Thissectionprovidesinstructionsonhowtoremoveandinstallhardwareforyourcomputer.Youcanexpand
thecapabilitiesofyourcomputerandmaintainyourcomputerbyremovingorinstallinghardware.
Attention:DonotopenyourcomputerorattemptanyrepairbeforereadingandunderstandingtheChapter
1“Readthisfirst:Importantsafetyinformation”onpage1.
Externaloptions
Youcanconnectexternaloptionstoyourcomputer,suchasexternalspeakers,aprinter,orascanner.For
someexternaloptions,youmustinstalladditionalsoftwareinadditiontomakingthephysicalconnection.
Wheninstallinganexternaloption,see“Frontview”onpage27and“Rearview”onpage28toidentifythe
requiredconnector.Then,usetheinstructionsthatcomewiththeoptiontohelpyoumaketheconnection
andinstallanysoftwareordevicedriversthatarerequiredfortheoption.
Frontbezel
Attention:DonotopenyourcomputerorattemptanyrepairbeforereadingandunderstandingtheChapter
1“Readthisfirst:Importantsafetyinformation”onpage1.
Toremoveandreinstallthefrontbezel,dothefollowing:
1.Prepareyourcomputer.See“Preparingyourcomputerandremovingthecomputercover”onpage91.
92P320HardwareMaintenanceManual
 Loading...