

Lenovo Mirage Solo with Daydream User Manual

Mirage Solo with Daydream
Safety, Warranty & Quick Start Guide
Read this guide carefully before using your product.

1
Reading before using your device
Reading first - regulatory information
Device models equipped with wireless communications
comply with the radio frequency and safety standards of any
country or region in which it has been approved for wireless
use. In addition, if your product contains a telecom modem,
it complies with the requirements for connection to the
telephone network in your country.
Be sure to read the Regulatory Notice for your country or
region before using the wireless devices contained in your
device. To obtain a PDF version of the Regulatory Notice, refer
to the “Downloading publications” section below.
Getting support
To get support on network services and billing, contact your
wireless network operator. To learn how to use your device and
view its technical specifications, go to http://support.lenovo.com.
Downloading publications
Electronic versions of your publications are available from
http://support.lenovo.com. To download the publications for
your device, go to http://support.lenovo.com and follow the
instructions on the screen.
Accessing your User Guide
Your User Guide contains detailed information about your device.
To access your User Guide, go to http://support.lenovo.com and
follow the instructions on the screen.

2
Legal notices
Lenovo and the Lenovo logo are trademarks of Lenovo in the
United States, other countries, or both.
Other company, product, or service names may be trademarks
or service marks of others.
All pictures and illustrations in this document are for reference
only and may dier from the actual product.
3
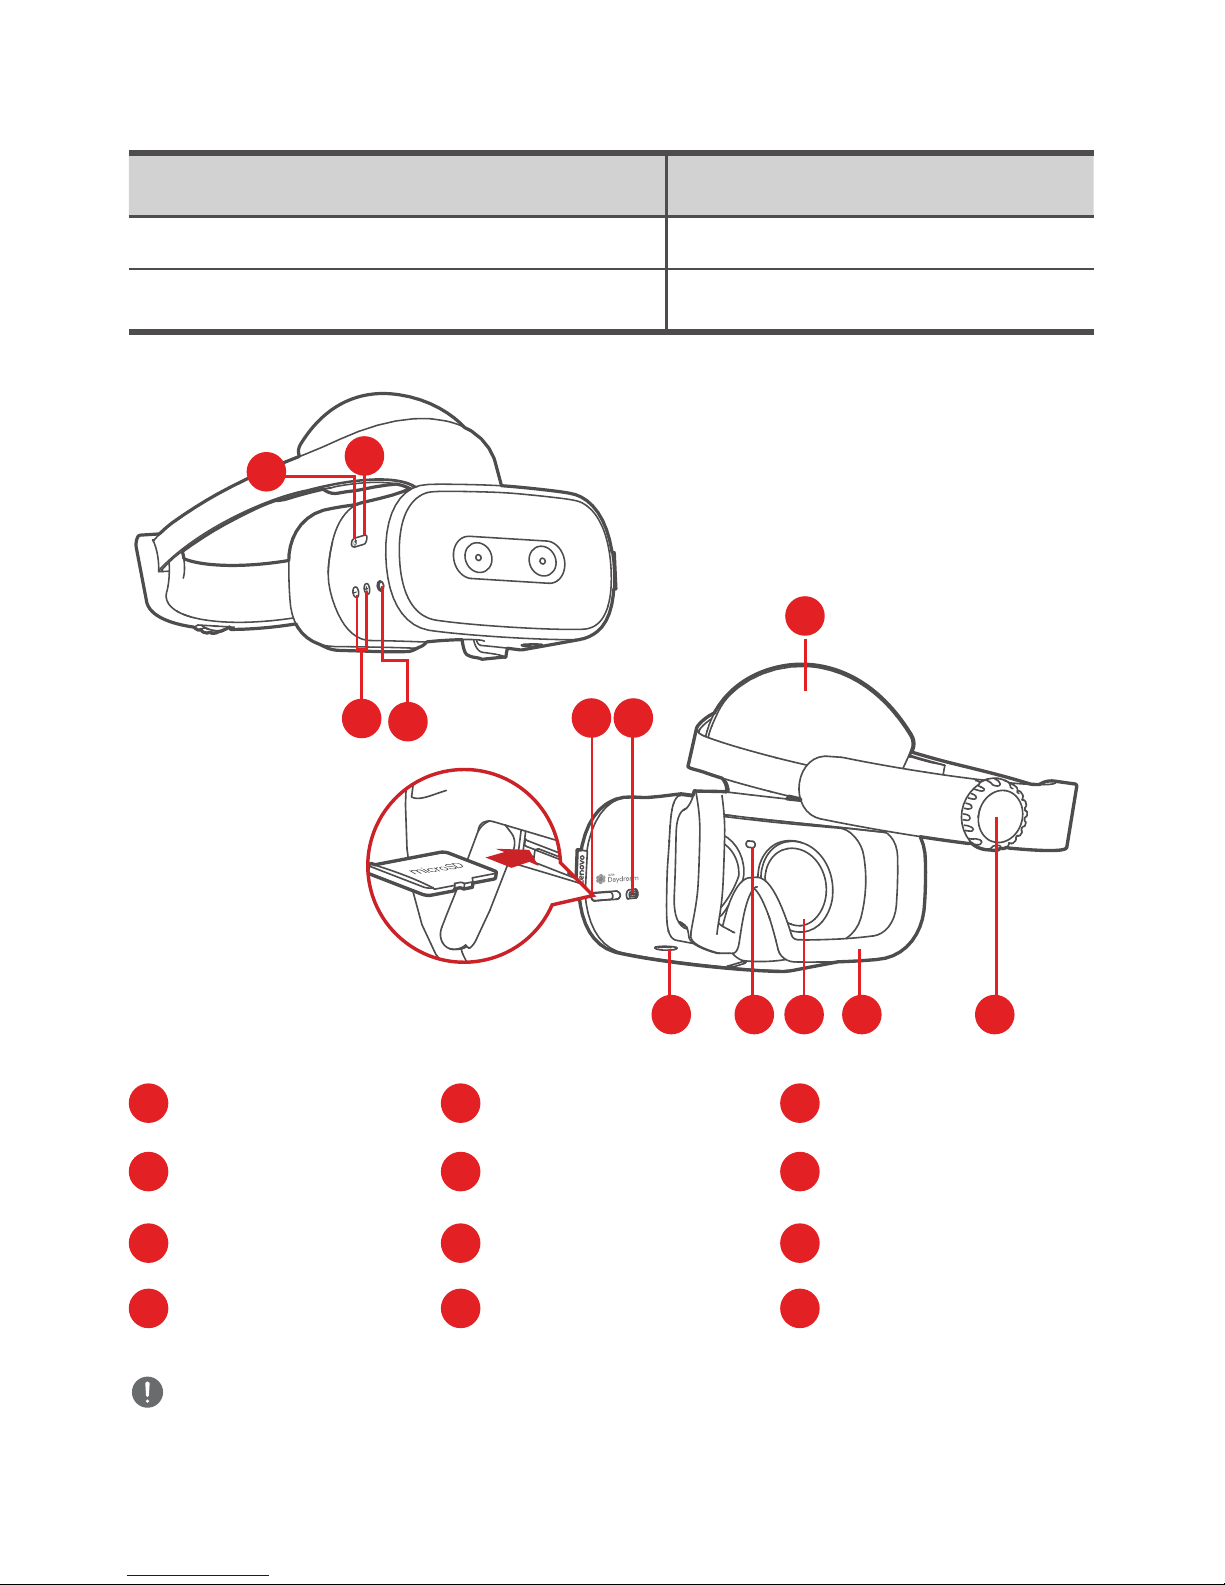
Audio jack
LED indicator
Volume buttons
Front head
support
Lenses
Adjustable dial
Proximity sensor
Face padding
Quick release
button
microSD card slot
USB Type-C
connector
Power button
Model Version
Lenovo VR-1541F WLAN
DG1CA/VAC-141B Bluetooth
912
5106
11
7
8
1
4
2
3
Product overview
1 2 3
4
7
10
8
11
9
12
5 6
Use a microSD card (sold separately) for extra storage.
Insert a microSD card into the slot as shown.
4
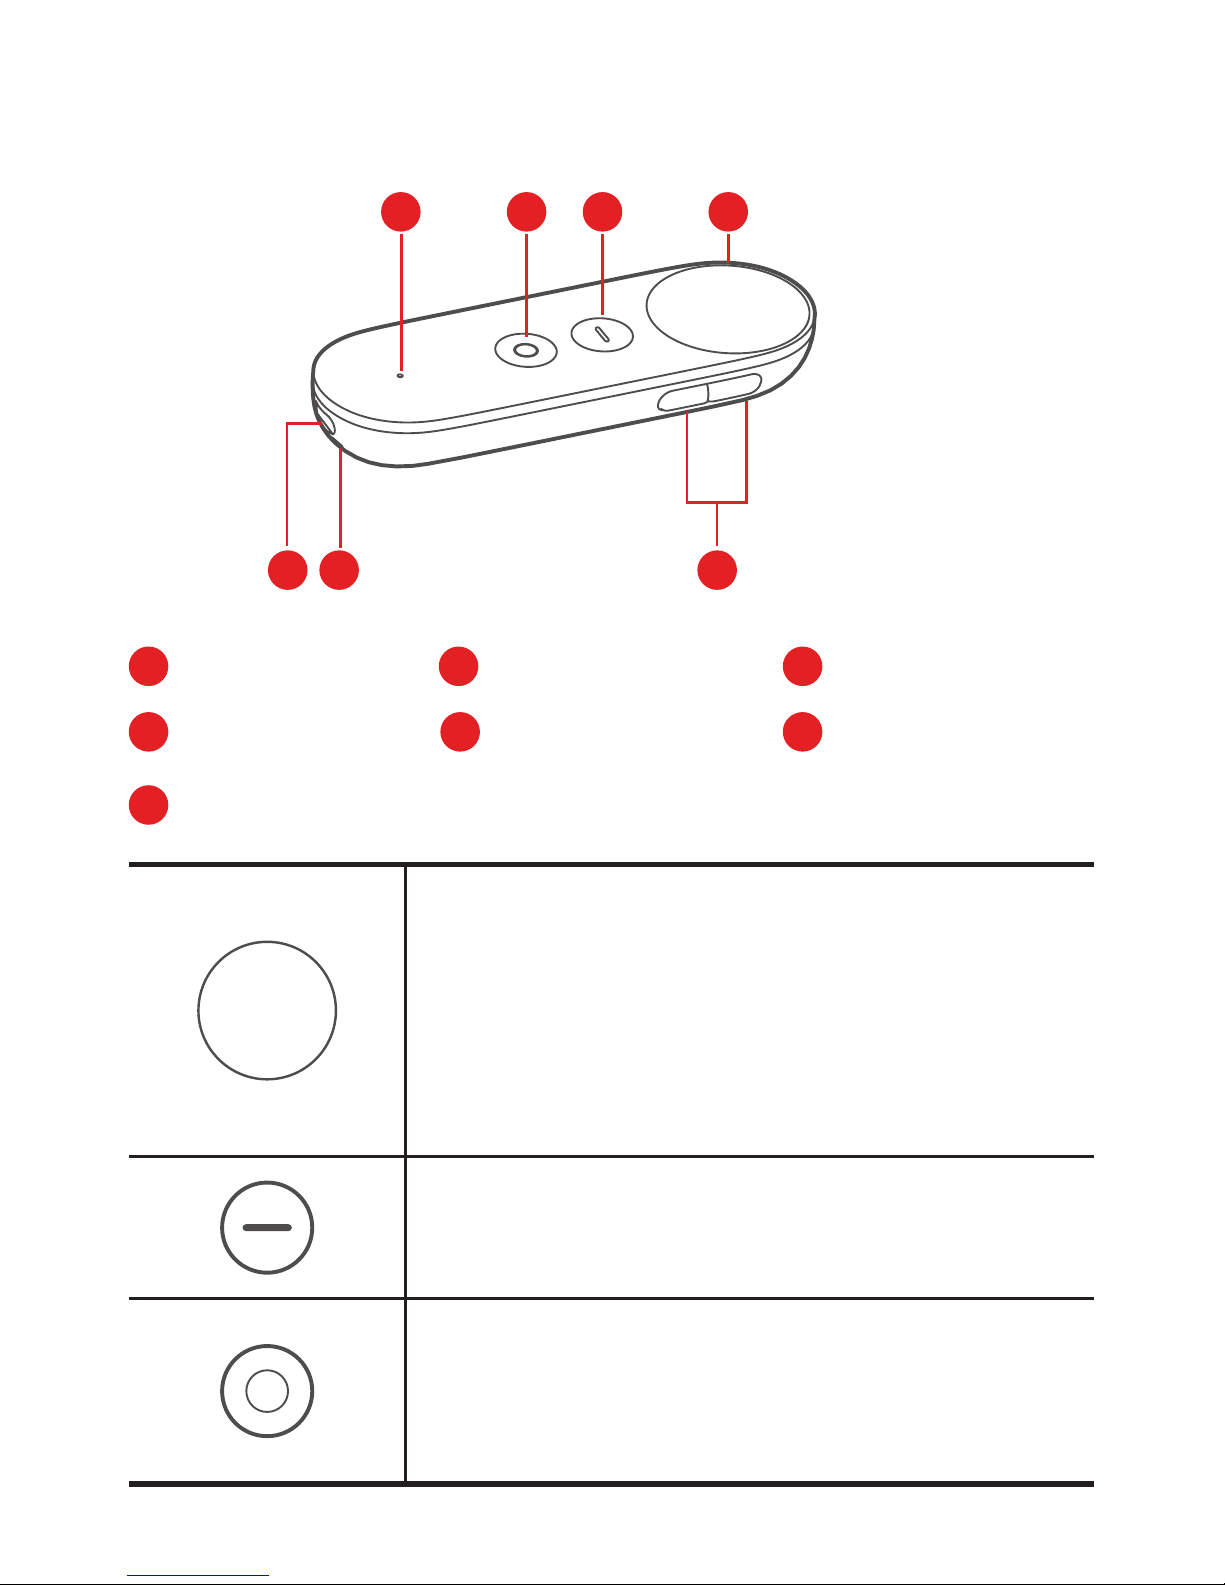
Controller
App button
Daydream button
Touchpad
Charging port
Volume buttons Wrist strap holes
Status light
5
1
1 2 3
2 3
4
7
5 6
67
• Press:Opens,selects,oractivates
whatever you press (similar to clicking
with a mouse).
• Scroll:Swipeyourngertoscroll
through what’s on the screen (similar to
scrolling with a mouse).
This button depends on the app you’re
using. For example, it might show menus,
pause, go back, or change modes.
• Press to open the Daydream
Dashboard.
• Press and hold to re-center your view
and the cursor.
4
5
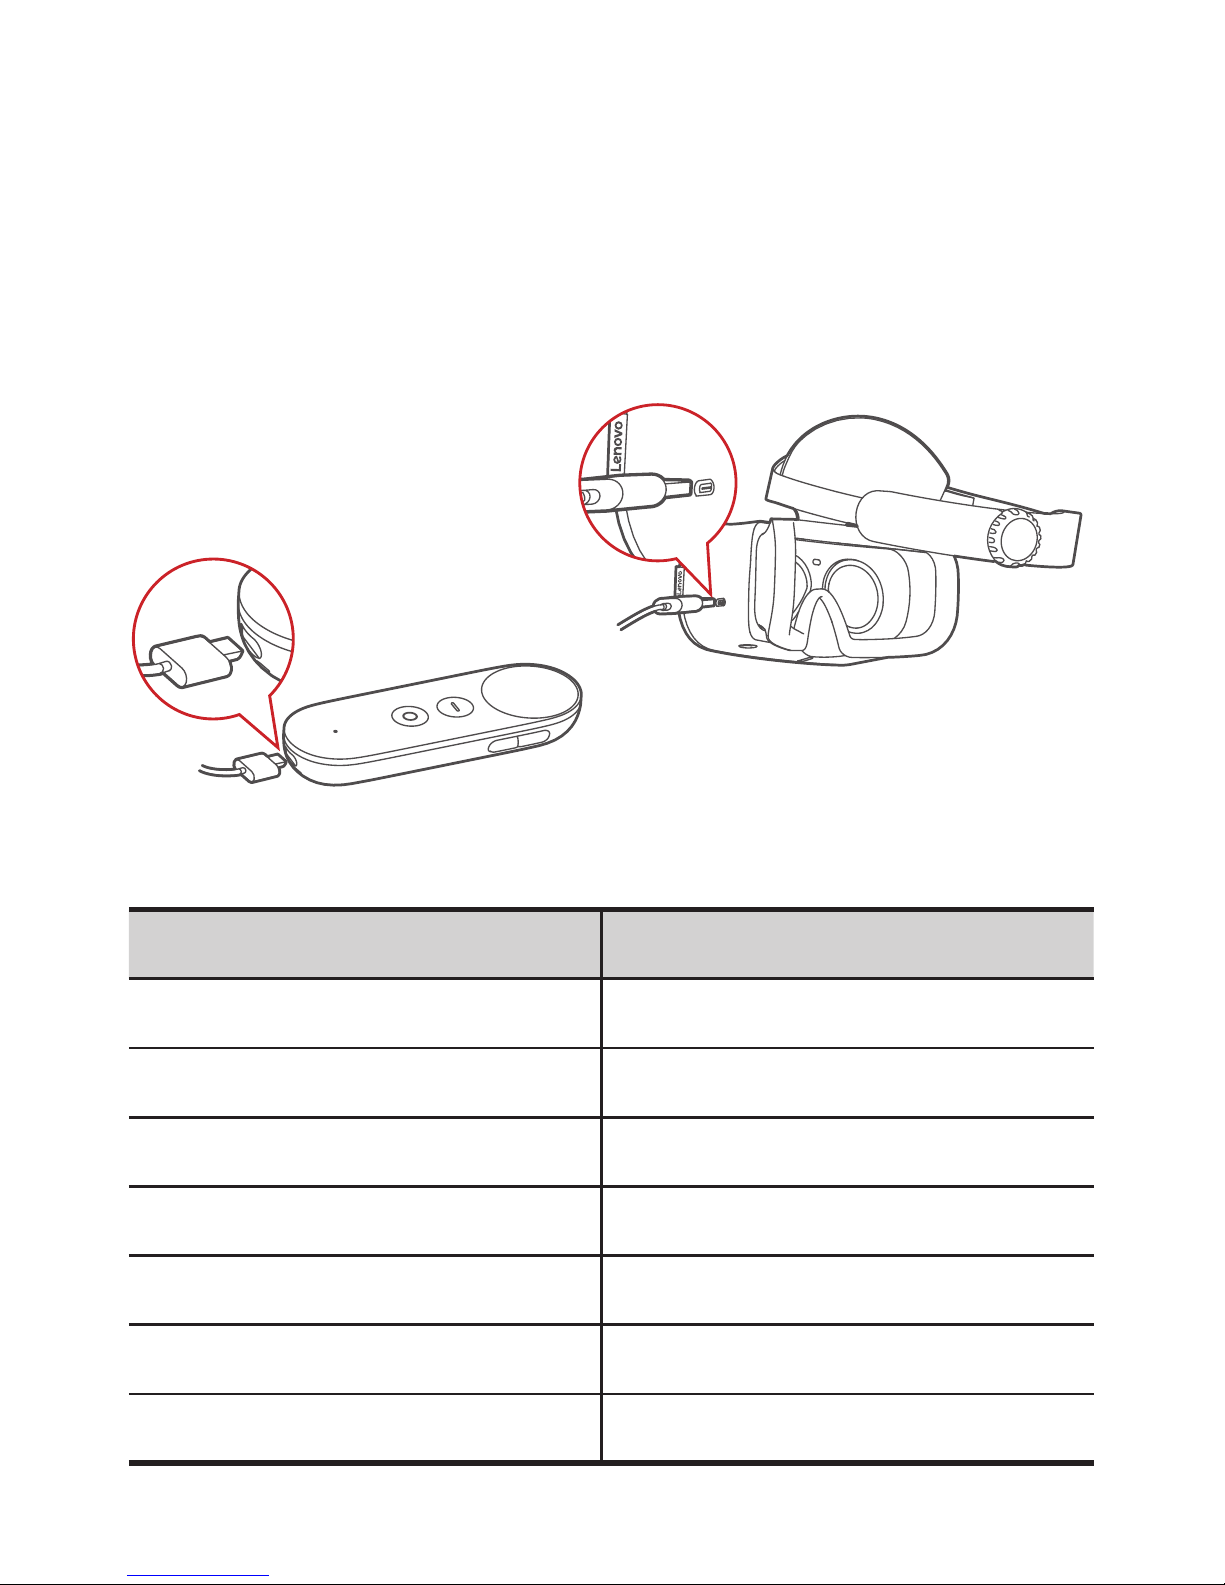
Before you start
Charging
You may need to charge your headset and controller before
using them.
Insert the charger into the charging port.
Headset LED indicator
Headset status LED Indicator
Starting up Pulsing white
Shutting down Pulsing white
Awake or in standby Solid white
Sleeping O
Charging Solid amber
Fully charged Solid white
Low battery Blinking amber

6
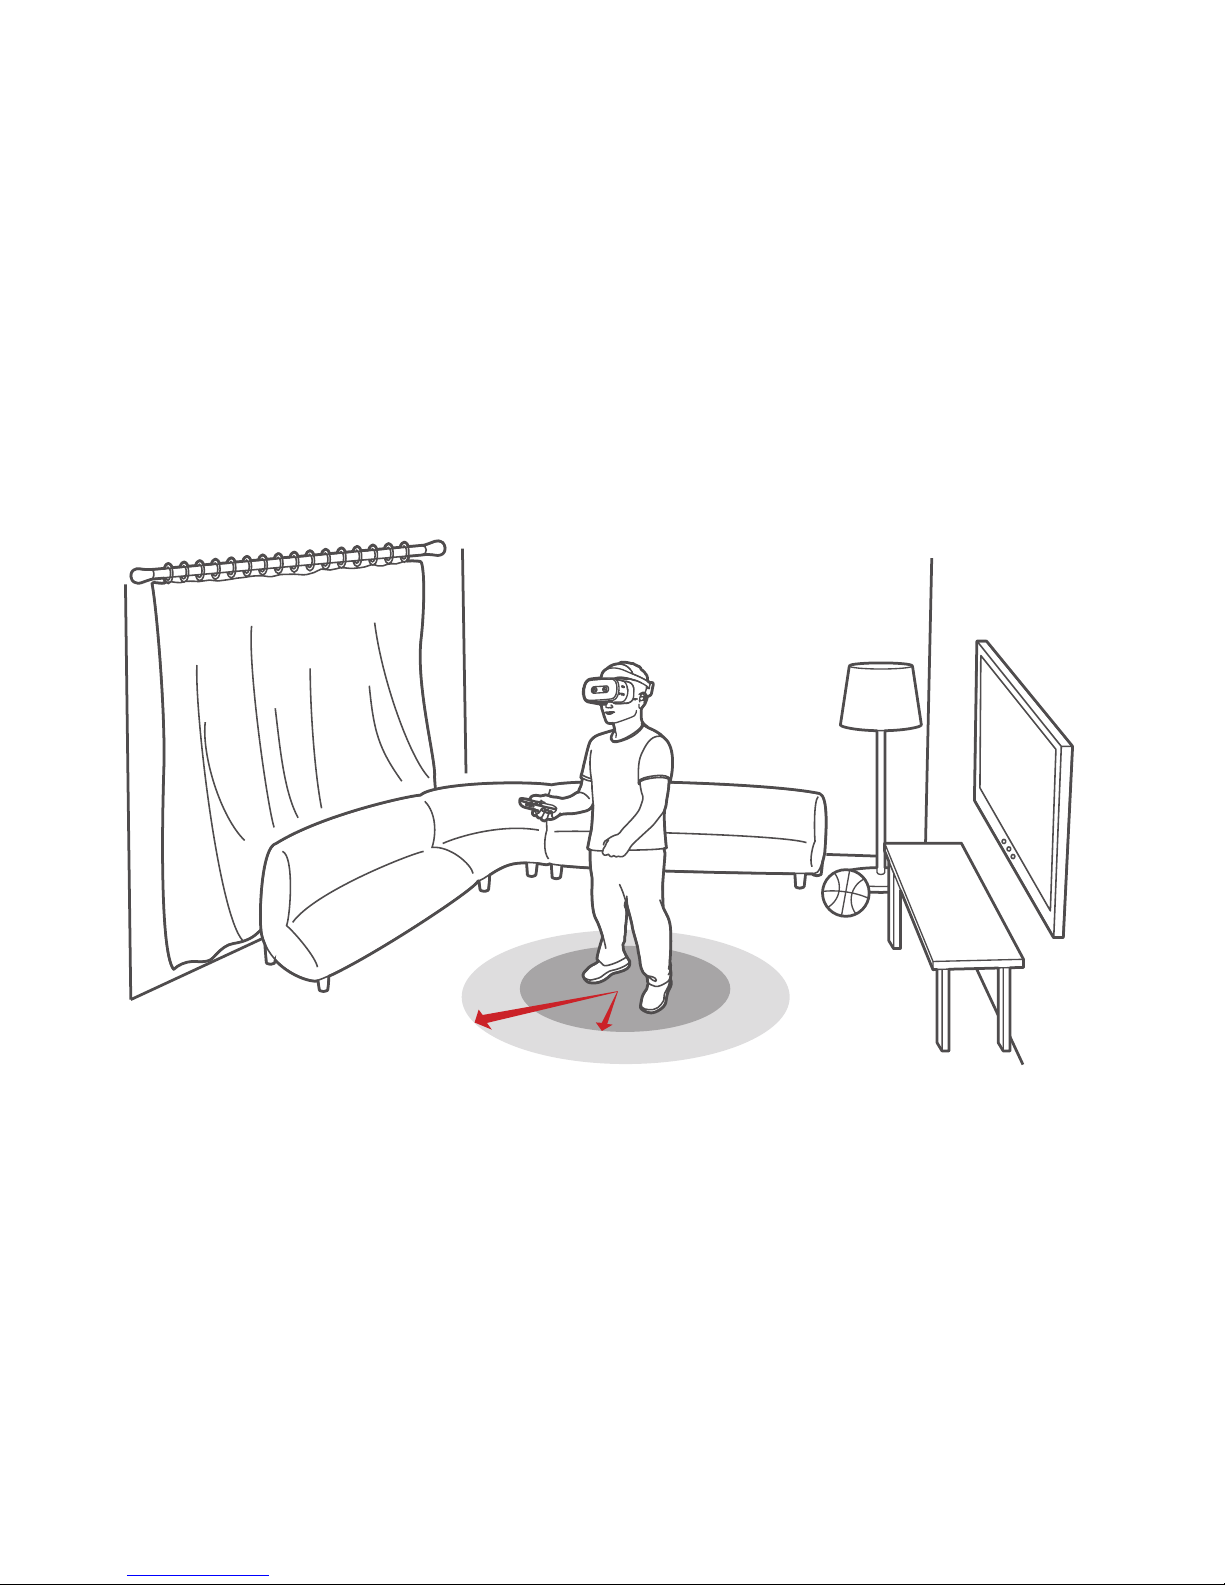
Setting up a safe play area for VR
Clear the area directly around you of objects and furniture and
always stay aware of your physical surroundings!
Put the device on your head in the center of your clear area
whether seated or standing.
Always check your physical space by lifting the headset or
partially lifting it and peaking to make sure you are still in
your clear area before you start a session or manually
recenter your view.
When you put the device on your head or when you manually
recenter using the controller the device will use your position
at that moment as the starting point and fade your view to
prevent accidental walking if you move too far from this
starting point.
Your view will fade anytime you move close to your arms
distance away from your starting point. This play area is
approximately 0.8 m in radius but you will see your view gently
start to fade after about 0.4 m of movement toward the edge.
When you notice your view starting to fade carefully move
back towards the center of your clear area.
If you exit the safe play area, your view will be fully occluded.
Carefully move back towards your original starting point while
being aware of your surroundings.
Listen to all warnings in the headset and always stay aware of
your physical surroundings.
7
0.4 m
0.8 m
Tell friends or family that when you’re in VR you won’t
be aware of their presence and for them to stay a safe
distance away.
Do not start sessions outside, near stairwells, drops or
dangerous objects or environments. When you’re in VR
you are eectively asleep to the real world. Consider if the
chosen play space is a place where you would feel comfortable
falling asleep.
 Loading...