

Lenovo Mirage Camera VR-4501F, Mirage Camera VR-4501E Quick Start Manual

Lenovo Mirage Camera
with Daydream
Quick Start Guide and Safety & Warranty
Read this guide carefully before using your device.
All information labeled with * in this guide only refers to the Wi-Fi +
LTE model (Lenovo VR-4501E).
Lenovo VR-4501F
Lenovo VR-4501E

Read before using your device
Accessing your User Guide online
Your User Guide contains detailed information about your device. To
access your User Guide, go to http://support.lenovo.com and follow the
instructions on the screen.
• Read the User Guide carefully before use since your device
diers from other cameras.
Read first - regulatory information
Device models equipped with wireless communications comply with
the radio frequency and safety standards of any country or region in
which it has been approved for wireless use. In addition, if your product
contains a telecom modem, it complies with the requirements for
connection to the telephone network in your country.
Be sure to read the Regulatory Notice for your country or region
before using the wireless devices contained in your device. To obtain
a PDF version of the Regulatory Notice, refer to the “Downloading
publications” section below.
Getting support
To get support on network services and billing, contact your wireless
network operator. To learn how to use your device and view its technical
specifications, go to http://support.lenovo.com.
Downloading publications
Electronic versions of your publications are available from http://
support.lenovo.com. To download the publications for your device, go
to http://support.lenovo.com and follow the instructions on the screen.

All pictures and illustrations in this document are for your reference
only and may dier from the final product.
Legal notices
Lenovo and the Lenovo logo are trademarks of Lenovo in the United
States, other countries, or both.
Other company, product, or service names may be trademarks or
service marks of others.
LIMITED AND RESTRICTED RIGHTS NOTICE: If data or software is
delivered pursuant a General Services Administration “GSA” contract,
use, reproduction, or disclosure is subject to restrictions set forth in
Contract No. GS-35F-05925.
1
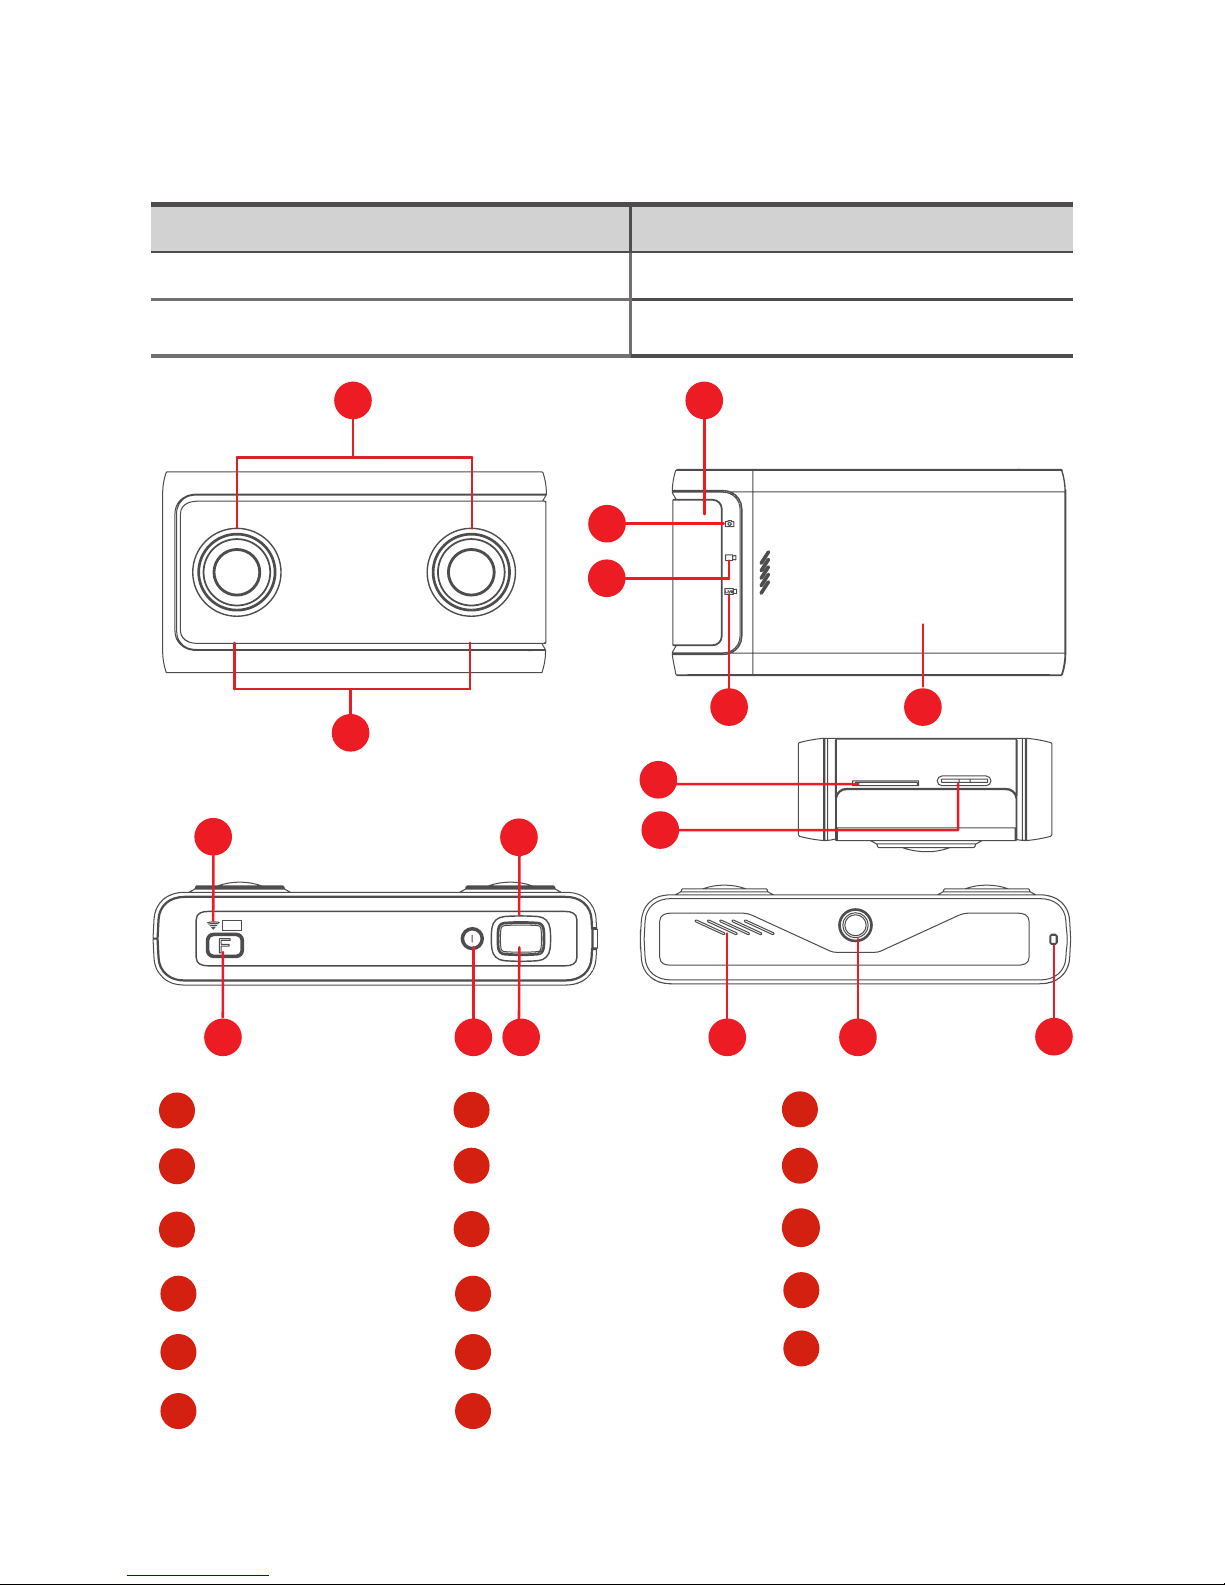
Overview
Model Version
Lenovo VR-4501F Wi-Fi
Lenovo VR-4501E Wi-Fi + LTE
1
Lenses
2
Dual microphones
3
Input/output door
4
VR photos
5
VR videos
6
VR live streaming
7
Battery cover
8
microSD card slot
9
USB-C 2.0 port
10
Wi-Fi indicator
11
Function button
12
Power button
13
Shutter button
14
Status indicator
15
Speaker
16
Accessory socket
17
Wrist strap holes
2
7
4
5
6
8
LTE
9
10
12
1513
14
16
11
MODE
-*7&
17
1 3
2
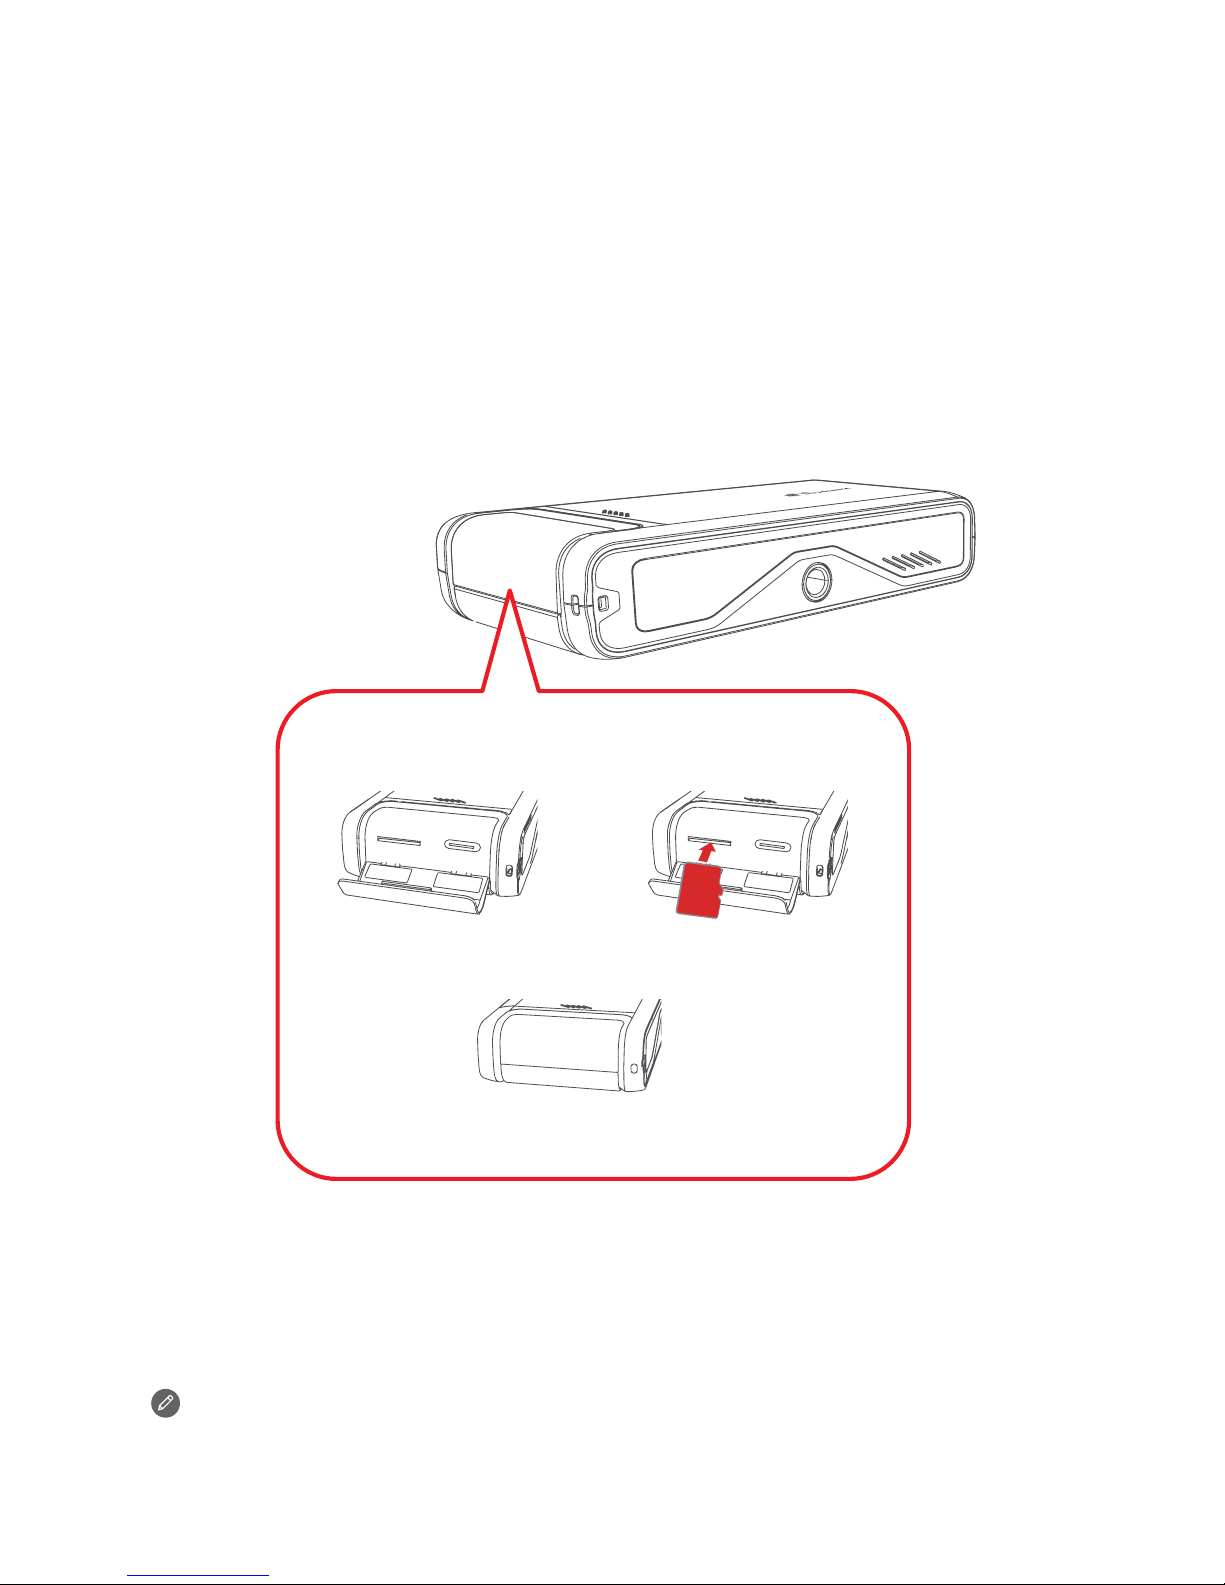
Installing the microSD card
Use a microSD card (sold separately) to store captured photos and
videos.
1. Open the input/output door.
2. Insert the microSD card.
3. Close the input/output door.
1
2
3
m
ic
ro
S
D
m
i
c
r
o
S
D
• Make sure to use a Speed Class 10 microSD card.
• Use a UHS-I U3 microSD card for best results.
3
*Installing the Nano-SIM card
To access cellular networks with your device (Wi-Fi + LTE version only model number Lenovo VR-4501E), insert a Nano-SIM card provided by
your carrier into the slot as shown below.
1. Open the battery cover.
2. Open the Nano-SIM card slot cover, and then insert the NanoSIM card as shown.
1
2
ķ
ķ
ĸ
Nano
Nano
4
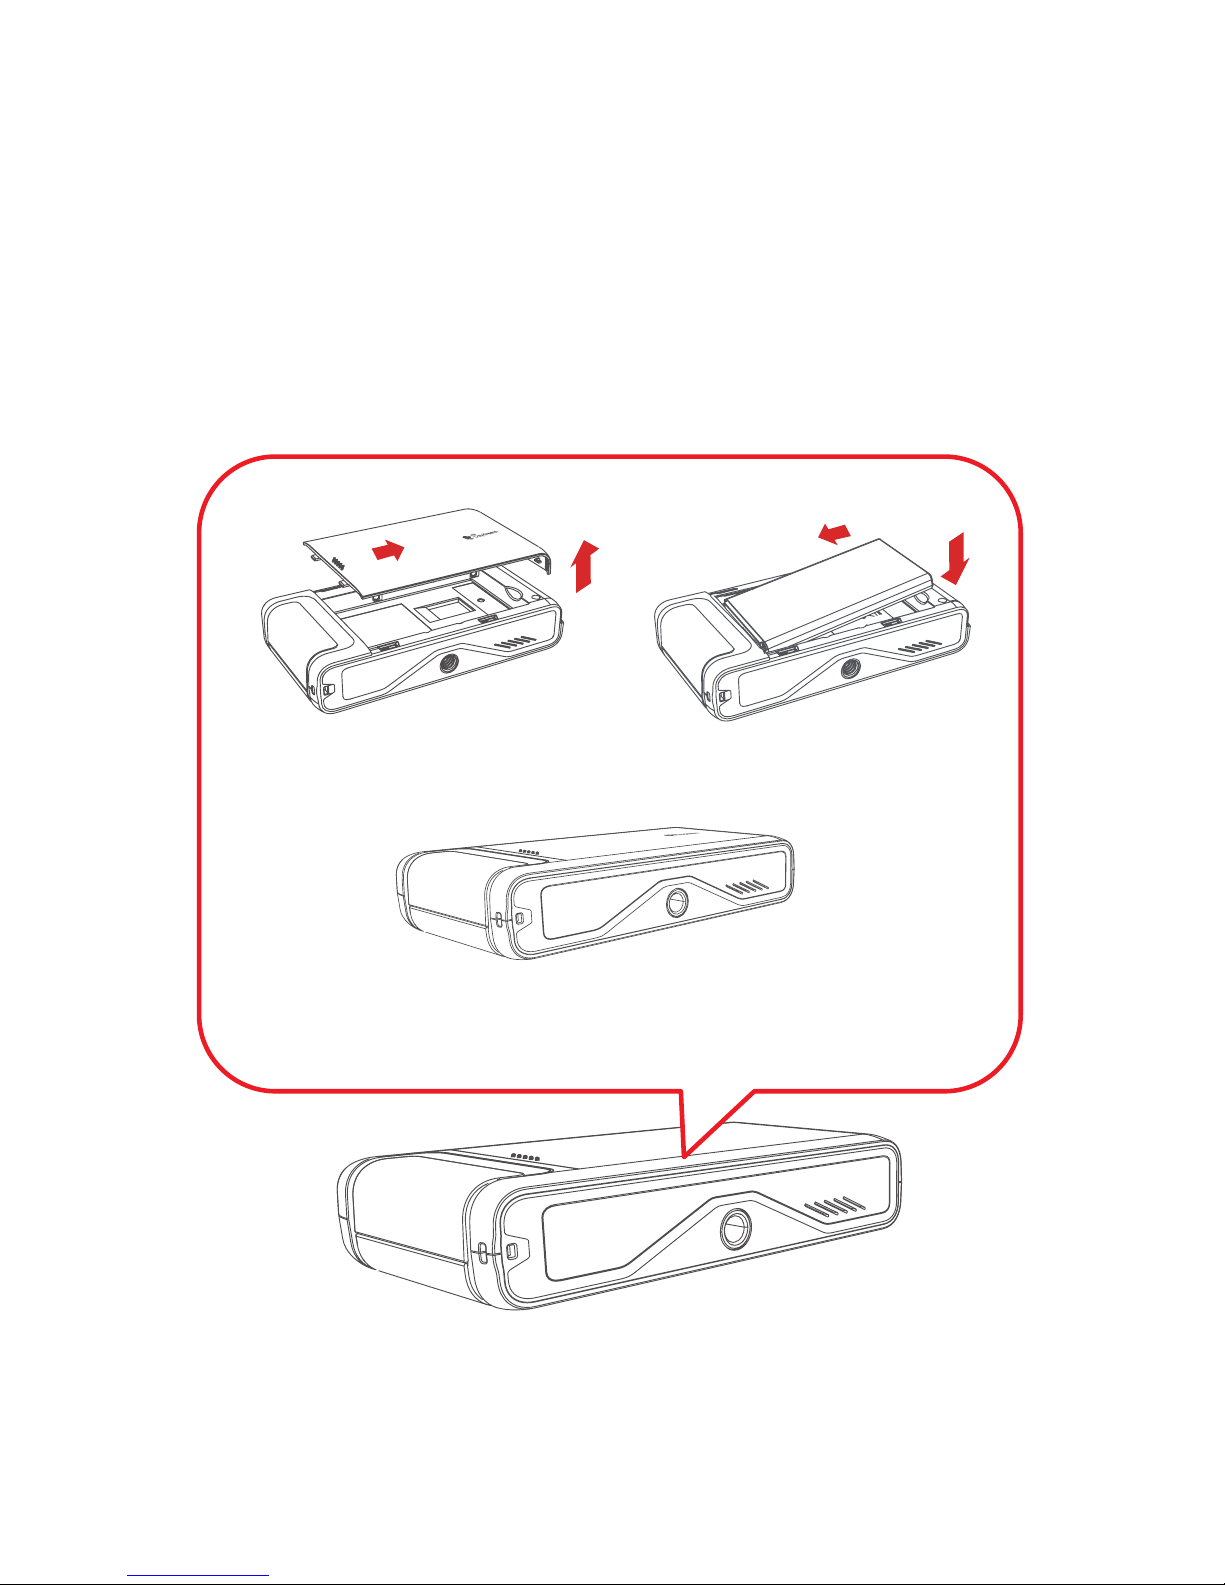
Installing the battery
1. Open the battery cover.
2. Install the battery.
3. Close the battery cover.
12
3
ķ
ķ
ĸ
ĸ
 Loading...