

LENOVO MIIX 3 User Manual

Lenovo MIIX 3-1030
User Guide
Read the safety notices and important tips in the
included manuals before using your computer.
Notes
•
Before using the product, be sure to read Lenovo Safety and General Information Guide first.
•
Some instructions in this guide may assume that you are using Windows
®
8.1. If you are
using another Windows operating system, some operations may be slightly different.
If you are using other operating systems, some operations may not apply to you.
The features described in this guide are common to most models. Some features may not
•
be available on your computer or your computer may include features that are not
described in this user guide.
This manual applies to the following models: Lenovo MIIX 3-1030 tablet/MIIX 3-1030
•
tablet with keyboard dock/MIIX 3-1030 tablet with folio case.
The illustrations in this manual may differ from the actual product. Please refer to the
•
actual product.
Regulatory Notice
For details, refer to Guides & Manuals at http://support.lenovo.com.
•
First Edition (August 2014)
© Copyright Lenovo 2014.
LIMITED AND RESTRICTED RIGHTS NOTICE: If data or software is delivered pursuant to a General
Services Administration “GSA” contract, use, reproduction, or disclosure is subject to restrictions set
forth in Contract No. GS-35F-05925.

Contents
Chapter 1. Getting to know your computer..................................................................................... 1
Top view
Left-side view
Right-side view
Bottom view
Keyboard dock top view (on select models)
Keyboard dock left-side view (on select models)
Keyboard dock right-side view (on select models)
Folio case top view (on select models)
Chapter 2. Starting to use Windows 8.1 ........................................................................................ 14
Configuring the operating system for the first time
Operating system interfaces
The charms
Putting the computer to sleep or shutting it down
Touch screen operation
Connecting to a wireless network
Help and support
Chapter 3. Recovery system .......................................................................................................... 24
Chapter 4. Troubleshooting............................................................................................................ 26
Frequently asked questions
Troubleshooting
Trademarks ...................................................................................................................................... 30
......................................................................................................................................................... 1
................................................................................................................................................ 3
.............................................................................................................................................. 5
................................................................................................................................................... 5
............................................................................................. 6
..................................................................................... 7
.................................................................................. 7
..................................................................................................... 10
.............................................................................. 14
...................................................................................................................... 14
................................................................................................................................................... 15
................................................................................ 17
.............................................................................................................................. 18
............................................................................................................ 22
........................................................................................................................................ 23
....................................................................................................................... 26
.......................................................................................................................................... 27
i

Chapter 1. Getting to know your computer
4
3 3
2
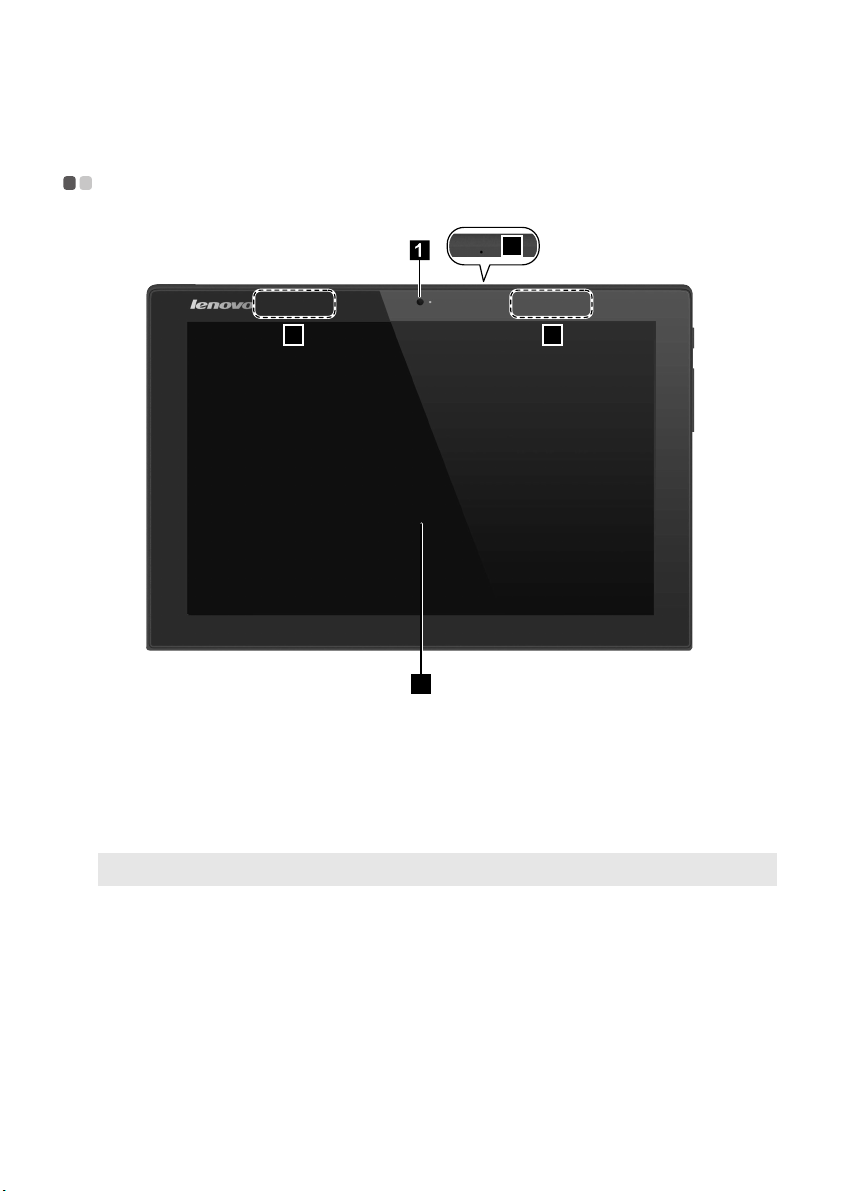
Top view - - - - - - - - - - - - - - - - - - - - - - - - - - - - - - - - - - - - - - - - - - - - - - - - - - - - - - - - - - - - - - - - - - - - - - - - - - - - - - - - - - - - - - - - - - - - - - - - - - - - - - - - - - - - - - - - - - - - - - - - - -
Front camera
a
Built-in microphone
b
Wireless LAN antennas
c
Multi-touch screen
d
Note: For details, see “Touch screen operation” on page 18.
Use the camera for video communication or taking photos.
Captures sound which can be used for video conferencing, voice
narration, or audio recording.
Connect to a wireless LAN adapter to send and receive wireless radio signals.
Functions as the visual display as well as touchpad input.
1

Chapter 1. Getting to know your computer
Screen orientation
You can rotate the display panel to your preferred orientation.
The orientation of the display automatically changes (alternating between portrait and
landscape modes) depending on how you hold it.
2
Chapter 1. Getting to know your computer
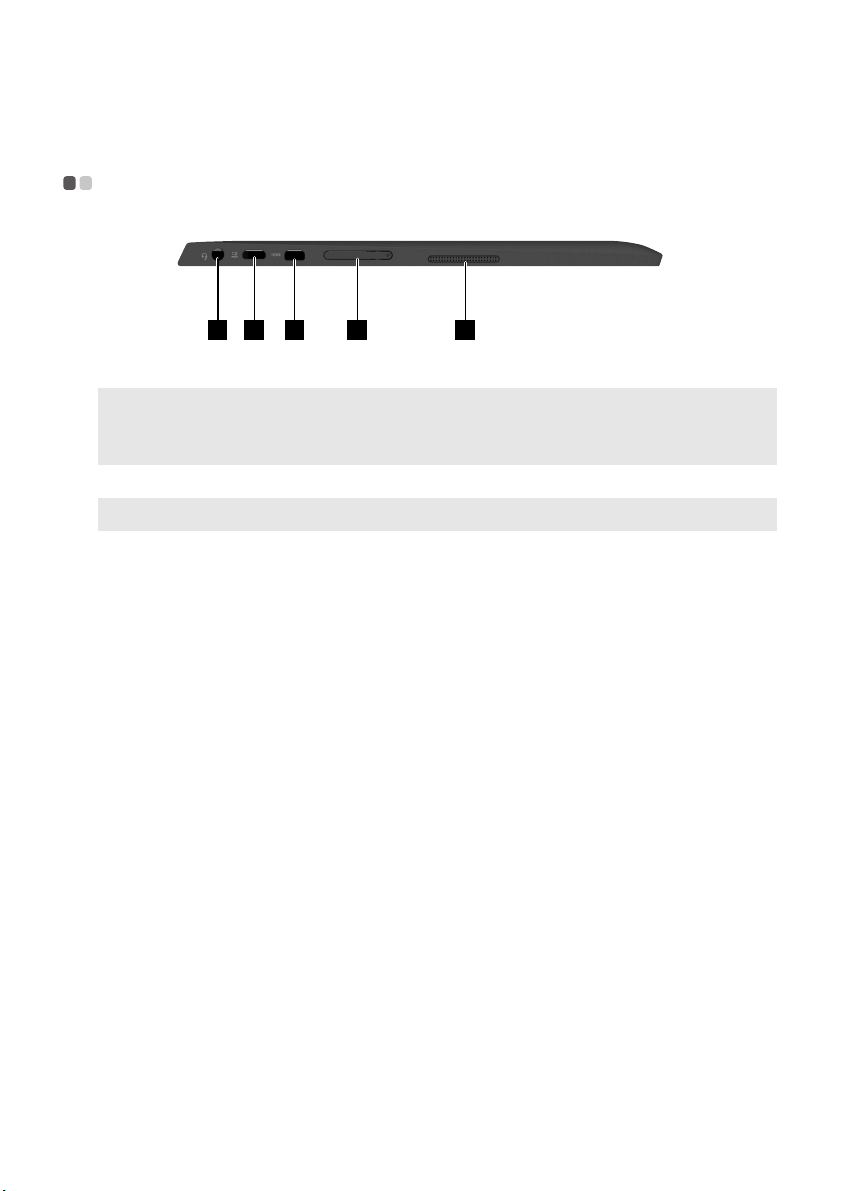
4321 5
Left-side view - - - - - - - - - - - - - - - - - - - - - - - - - - - - - - - - - - - - - - - - - - - - - - - - - - - - - - - - - - - - - - - - - - - - - - - - - - - - - - - - - - - - - - - - - - - - - - - - - - - - - - - - - - - - - -
Combo audio jack
a
Notes:
• The combo audio jack does not support conventional microphones.
• The recording function might not be supported if third-party headphones or headsets are connected,
due to different industry standards.
Micro USB port
b
Note: The Micro USB port supports charging function.
Micro HDMI port
c
Micro SD card slot
d
Speaker
e
Connects to headsets.
Connects to USB devices.
Connects to devices with HDMI inputs, such as a TV, or an external display.
Accepts a micro SD card (not supplied).
Provides audio output.
3
Chapter 1. Getting to know your computer
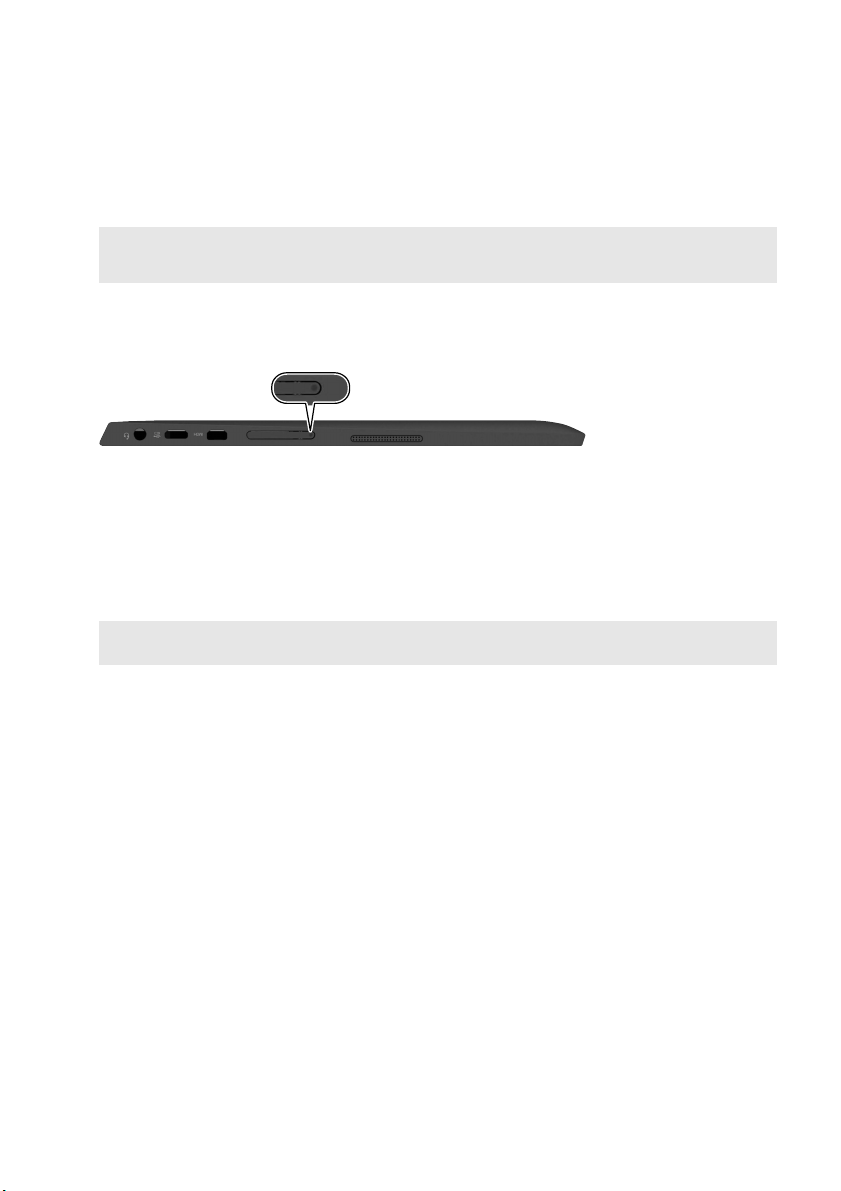
Using a micro SD card (not supplied)
Your computer supports micro Secure Digital (SD) cards.
Notes:
• Insert only one card into the slot at a time.
• This card reader does not support SDIO devices (e.g., SDIO Bluetooth, etc.).
Inserting a card
1 Open the card slot cover by pressing the point shown in the following illustration.
2 Slide the card in until it clicks into place.
Removing a card
1 Push the card in until you hear a click.
2 Gently pull the memory card out of the slot.
3 Close the card slot cover.
Note: Before removing the memory card, disable it by using the Windows safely remove hardware and eject
media utility to avoid data corruption.
4
Chapter 1. Getting to know your computer
2 31
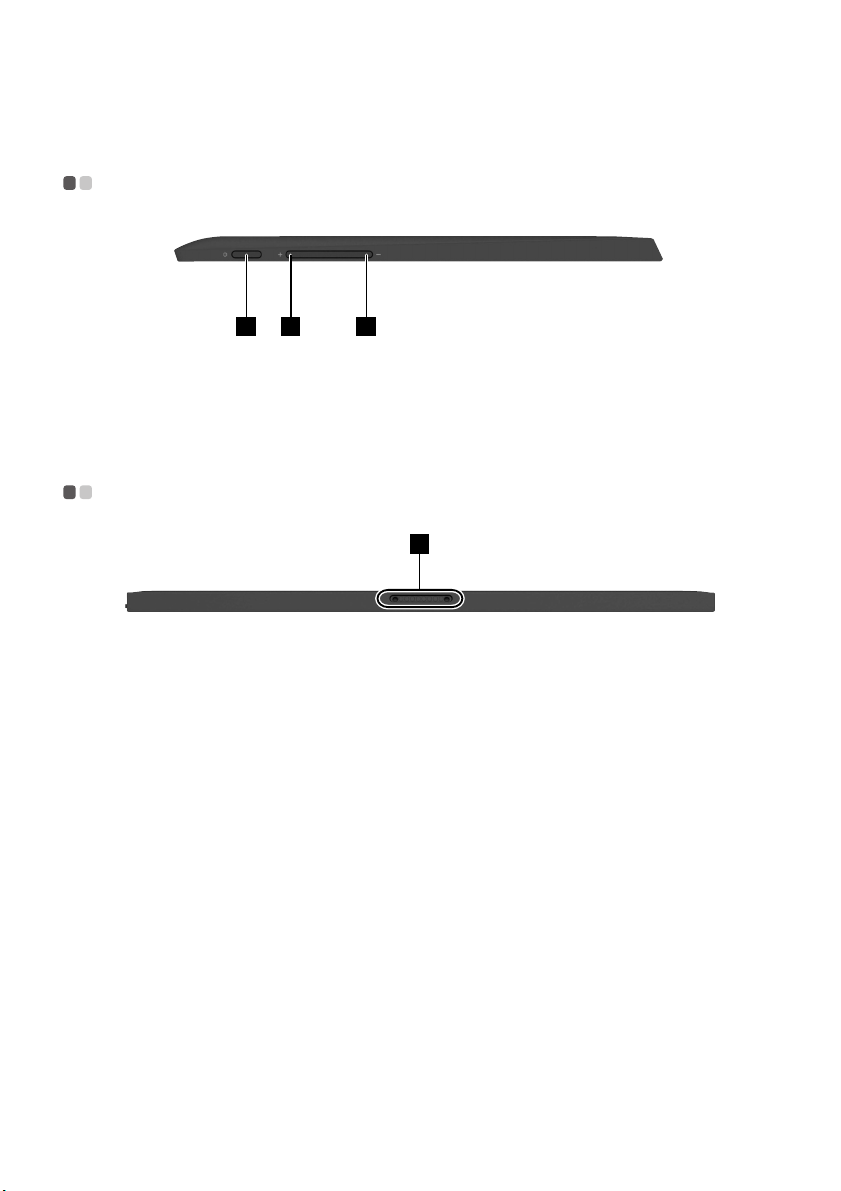
Right-side view - - - - - - - - - - - - - - - - - - - - - - - - - - - - - - - - - - - - - - - - - - - - - - - - - - - - - - - - - - - - - - - - - - - - - - - - - - - - - - - - - - - - - - - - - - - - - - - - - - - - - - - - - -
Power button
a
Volume up button
b
Volume down button
c
When the computer is off, press and hold this button to turn on the computer.
Increases the volume level.
Decreases the volume level.
Bottom view - - - - - - - - - - - - - - - - - - - - - - - - - - - - - - - - - - - - - - - - - - - - - - - - - - - - - - - - - - - - - - - - - - - - - - - - - - - - - - - - - - - - - - - - - - - - - - - - - - - - - - - - - - - - - - - - - -
1
Keyboard dock/Folio case
a
connector
Connects the tablet to keyboard dock or folio case.
5
Chapter 1. Getting to know your computer
1
2
3
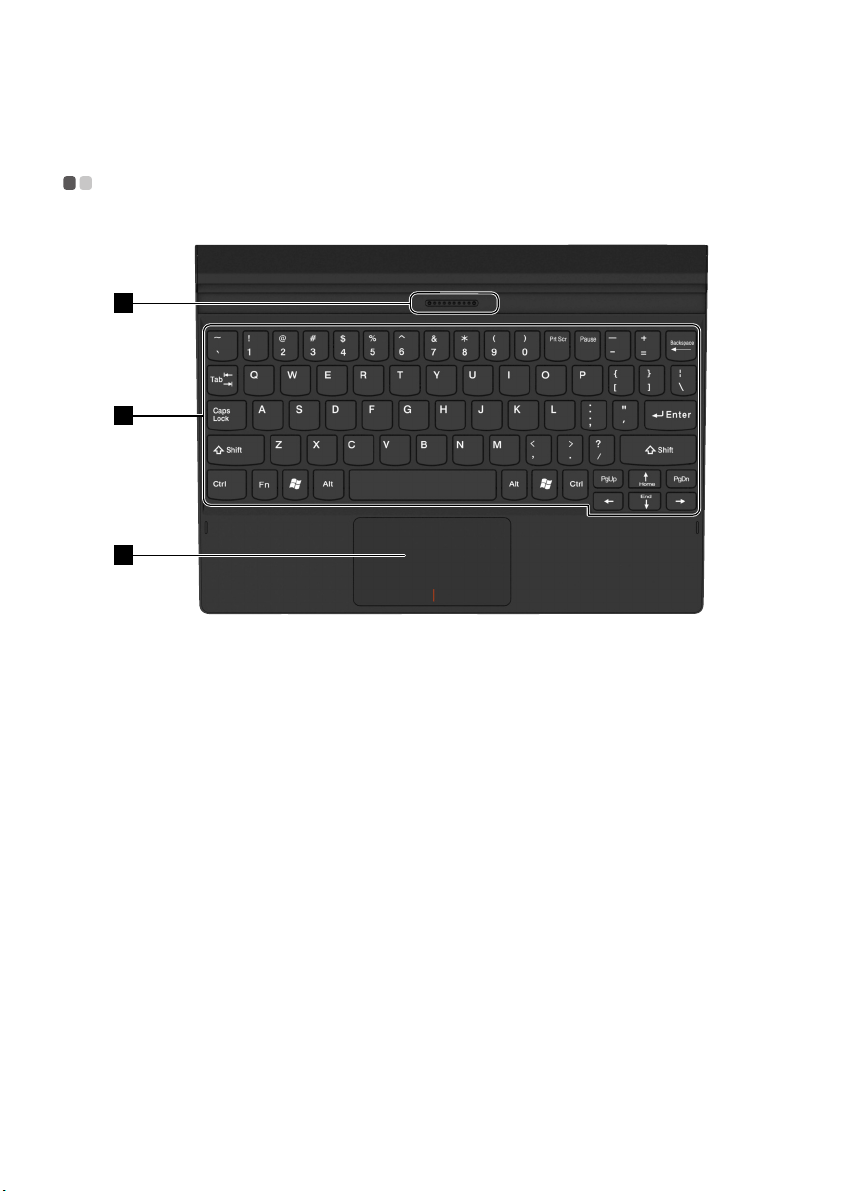
Keyboard dock top view (on select models) - - - - - - - - - - - - - - - - - - - - - - - - - - - - - - - - - - - -
Keyboard dock connector
a
Keyboard
b
Touchpad
c
Connects the tablet to the keyboard dock.
6
Chapter 1. Getting to know your computer
1
1
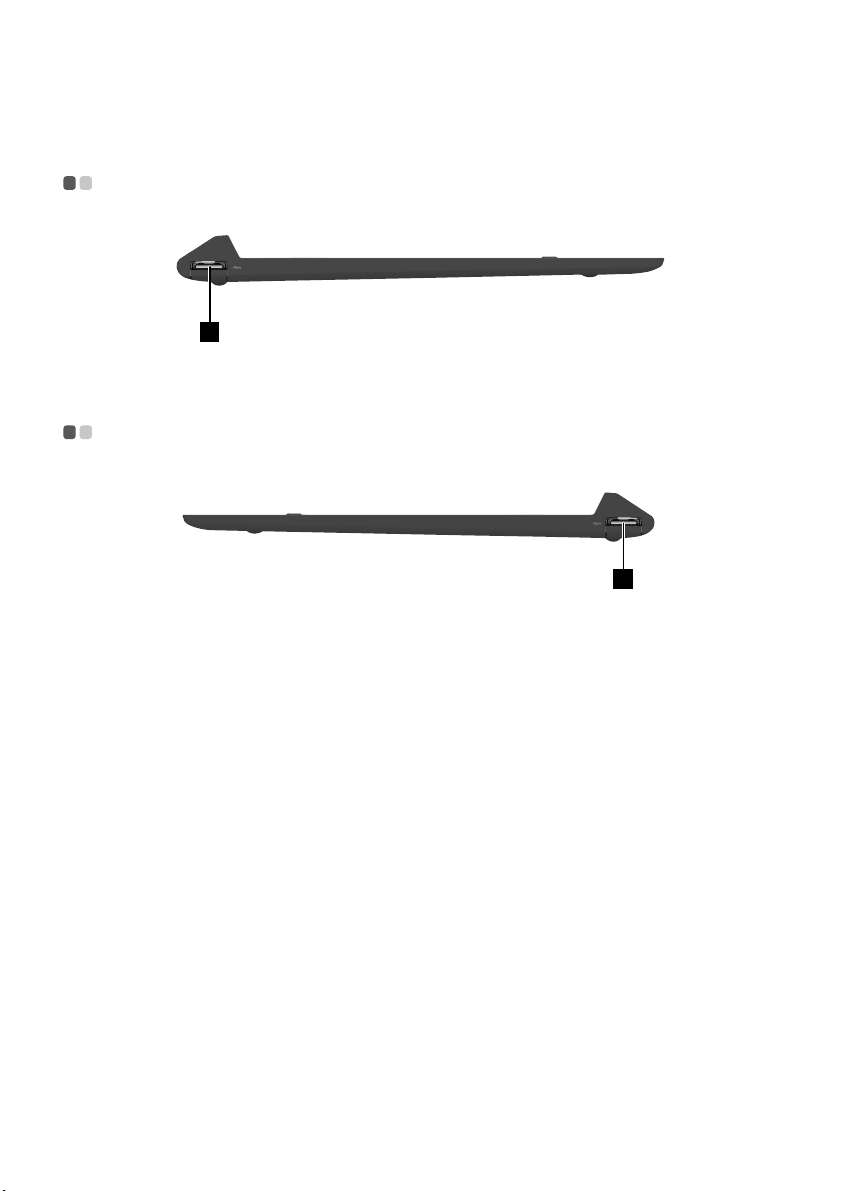
Keyboard dock left-side view (on select models) - - - - - - - - - - - - - - - - - - - - - - -
USB 2.0 port
a
Connects to USB 2.0 devices.
Keyboard dock right-side view (on select models) - - - - - - - - - - - - - - - - - - -
USB 2.0 port
a
Connects to USB 2.0 devices.
7
 Loading...