

Lenovo ideacentre AIO 310-20 ASR, ideacentre AIO 310-20IAP Hardware Maintenance Manual [en, ar, bg, cs, da, de, el, es, et, fi, fr, he, hr, hu, it, ja, ko, nb, nl, pl, pt, ro, ru, sk, sl, sr, sv, th, tr, uk, zh]
Page 1

All-In-One310DesktopHardwareMaintenance
Manual
MachineTypes:F0CK[AIO310-20ASR/EnergyStar]/F0CL[AIO
310-20IAP/EnergyStar]
Page 2

Page 3

All-In-One310Desktop
HardwareMaintenanceManual
MachineTypes:F0CK[AIO310-20ASR/EnergyStar]/F0CL[AIO
310-20IAP/EnergyStar]
Page 4

FirstEdition(August2016)14th
©CopyrightLenovo2016,2016.
LIMITEDANDRESTRICTEDRIGHTSNOTICE:IfdataorsoftwarearedeliveredpursuantaGeneralServices
Administration“GSA”contract,use,reproduction,ordisclosureissubjecttorestrictionssetforthinContractNo.
GS-35F-05925
Page 5

Contents
Chapter1.Aboutthismanual.....1
ImportantSafetyInformation.........1
Chapter2.Safetyinformation.....3
Generalsafety...............3
Electricalsafety..............3
Safetyinspectionguide...........5
Handlingelectrostaticdischarge-sensitive
devices.................5
Groundingrequirements...........6
Safetynotices...............6
Chapter3.Generalinformation....9
Specifications...............9
Chapter4.GeneralCheckout.....11
Chapter5.UsingtheSetupUtility...13
StartingtheLenovoBIOSSetupUtilityprogram.13
Viewingandchangingsettings........13
Usingpasswords..............13
Enablingordisablingadevice........15
Selectingastartupdevice..........16
Changingbootingmode...........17
ExitingtheLenovoBIOSSetupUtilityprogram..17
Chapter6.Symptom-to-FRUIndex..19
Harddiskdrivebooterror..........19
PowerSupplyProblems...........19
POSTerrorcodes.............20
Undeterminedproblems...........20
Chapter7.Locatingcomponentsand
connectors..............21
Locatingconnectors,controlsandcomponents.21
Hardwarecomponents...........24
Chapter8.Replacinghardware....27
Generalinformation.............27
Replacingthekeyboardandmouse......28
Replacingthepoweradapter.........28
Removingtherearcover...........29
Replacingamemorymodule.........30
Replacingtheharddiskdrive.........31
Replacingtheopticaldrive..........32
ReplacingtheWi-Ficard...........33
Replacingthespeakersystem........34
Replacingthepowerswitchboard.......35
ReplacingtheI/OShielding..........36
Replacingthemotherboardortheheat-sink
module.................37
Replacingthecameraandmicrophonemodule..38
ReplacingtheLEDpanel...........40
Chapter9.FRUlists-AIO-310ASR...43
Chapter10.FRU
lists-AIO-310-20IAP..........49
Chapter11.AdditionalService
Information..............55
©CopyrightLenovo2016,2016
iii
Page 6

ivAll-In-One310DesktopHardwareMaintenanceManual
Page 7
Chapter1.Aboutthismanual
ThismanualcontainsserviceandreferenceinformationforAll-In-One310desktopcomputerlistedonthe
cover.ItisintendedonlyfortrainedservicerswhoarefamiliarwithLenovocomputerproducts.
BeforeservicingaLenovoproduct,besuretoreadtheSafetyInformation.
ThedescriptionoftheTV-tunercardinthismanualappliesonlytocomputerswithaTV-tunercardinstalled.
ItdoesnotapplytocomputerswithoutaTV-tunercard.
ImportantSafetyInformation
BesuretoreadallCAUTIONandDANGERsectionsinthismanualbeforefollowinganyoftheinstructions.
VeuillezliretouteslesconsignesdetypeDANGERetATTENTIONduprésentdocumentavantd’exécuter
lesinstructions.
LesenSieunbedingtalleHinweisevomT yp“ ACHTUNG”oder“VORSICHT”indieserDokumentation,bevor
SieirgendwelcheVorgängedurchführen
LeggereleistruzioniintrodottedaA TTENZIONEePERICOLOpresentinelmanualeprimadieseguireuna
qualsiasidelleistruzioni
Certifique-sedelertodasasinstruçõesdecuidadoeperigonestemanualantesdeexecutarqualquer
umadasinstruções
Esimportantequeleatodaslasdeclaracionesdeprecauciónydepeligrodeestemanualantesdeseguir
lasinstrucciones.
©CopyrightLenovo2016,2016
1
Page 8

2All-In-One310DesktopHardwareMaintenanceManual
Page 9

Chapter2.Safetyinformation
Thischaptercontainsthesafetyinformationthatyouneedtobefamiliarwithbeforeservicingacomputer.
Generalsafety
Followtheserulestoensuregeneralsafety:
•Keeptheareasaroundthecomputerclearandcleanduringandaftermaintenance.
•Whenliftinganyheavyobject:
1.Ensureyoucanstandsafelywithoutslipping.
2.Distributetheweightoftheobjectequallyacrossbothfeet.
3.Liftslowly.Nevermovesuddenlyortwistwhenyouattempttolift.
4.Liftbystandingorbypushingupwithyourlegmuscles;thisactionremovesthestrainfromthe
musclesinyourback.
Donotattempttoliftanyobjectsthatweighmorethan16kg(35lbs.)orobjectsthatyouthink
aretooheavyforyou.
•Donotperformanyactionthatwouldcreateahazardforthecustomer,orwouldmakethecomputer
unsafe.
•Beforeyoustartthecomputer,ensurethatotherservicerepresentativesandcustomerpersonnelarenot
inapositionthatwouldcreateahazardforthem.
•Placeremovedcoversandotherpartsinasafeplace,awayfromallpersonnel,whileyouareservicingthe
computer.
•Keepyourtoolcaseawayfromareasthatpeoplemaywalkthroughtoensureno-onetripsoverit.
•Donotwearlooseclothingthatcanbetrappedinthemovingpartsofamachine.Ensurethatyoursleeves
arefastenedorrolledupaboveyourelbows.Ifyourhairislong,tieorfastenitback.
•Inserttheendsofyournecktieorscarfinsideclothingorfastenitwithanonconductiveclip,approximately
8centimeters(3inches)fromtheend.
•Donotwearjewelry,chains,metal-frameeyeglasses,ormetalfastenersforyourclothing.
Remember:Metalobjectsaregoodelectricalconductors.
•Wearsafetyglasseswhenyouare:hammering,drillingsoldering,cuttingwire,attachingsprings,using
solvents,orworkinginanyotherconditionsthatmightbehazardoustoyoureyes.
•Afterservice,reinstallallsafetyshields,guards,labels,andgroundwires.Replaceanysafetydevice
thatiswornordefective.
•Reattachallcoverscorrectlybeforereturningthecomputertothecustomer.
Electricalsafety
CAUTION:
Electricalcurrentfrompower ,telephone,andcommunicationcablescanbehazardous.Toavoid
personalinjuryorequipmentdamage,disconnectanyattachedpowercords,telecommunication
cables,networkcables,andmodemcablesbeforeyouopenthecomputercovers,unlessinstructed
otherwiseintheinstallationandconfigurationprocedures.
©CopyrightLenovo2016,2016
3
Page 10

Observethefollowingruleswhenworkingonelectricalequipment.
Important:Useonlyapprovedtoolsandtestequipment.Somehandtoolshavehandlescoveredwithasoft
materialthatdoesnotinsulateyouwhenworkingwithliveelectricalcurrents.Manycustomershaverubber
floormatsneartheirequipmentthatcontainsmallconductivefiberstodecreaseelectrostaticdischarge.
•Findtheroomemergencypower-off(EPO)switch,disconnectingswitch,orelectricaloutlet.Ifanelectrical
accidentoccurs,youcanthenoperatetheswitchorunplugthepowercordquickly.
•Donotworkaloneunderhazardousconditionsornearequipmentthathashazardousvoltages.
•Disconnectallpowerbefore:
–Performingamechanicalinspection
–Workingnearpowersupplies
–RemovingorinstallingFieldReplaceableUnits(FRUs)
•Beforeyoustarttoworkonthecomputer,unplugthepowercord.Ifyoucannotunplugit,askthe
customertopower-offtheelectricaloutletthatsuppliespowertothemachineandtolocktheelectrical
outletintheoffposition.
•Ifyouneedtoworkonacomputerthathasexposedelectricalcircuits,observethefollowingprecautions:
–Ensurethatanotherperson,familiarwiththepower-offcontrols,isnearyou.
Remember:Anotherpersonmustbetheretoswitchoffthepower,ifnecessary.
–Useonlyonehandwhenworkingwithpowered-onelectricalequipment;keeptheotherhandinyour
pocketorbehindyourback.
Remember:Theremustbeacompletecircuittocauseelectricalshock.Byobservingtheaboverule,
youmaypreventacurrentfrompassingthroughyourbody.
–Whenusingatester,setthecontrolscorrectlyandusetheapprovedprobeleadsandaccessoriesfor
thattester.
–Standonsuitablerubbermats(obtainedlocally,ifnecessary)toinsulateyoufromgroundssuchas
metalfloorstripsandmachineframes.
Observethespecialsafetyprecautionswhenyouworkwithveryhighvoltages;theseinstructionsarein
thesafetysectionsofthemaintenanceinformation.Useextremecarewhenmeasuringhighvoltages.
•Regularlyinspectandmaintainyourelectricalhandtoolstoensuretheyaresafetouse.
•Donotusewornorbrokentoolsandtesters.
•Neverassumethatpowerhasbeendisconnectedfromacircuit.First,checkthatithasbeenpoweredoff.
•Alwayslookcarefullyforpossiblehazardsinyourworkarea.Examplesofthesehazardsarewetfloors,
non-groundedpowerextensioncables,conditionsthatmaycauseorallowpowersurges,andmissing
safetygrounds.
•Donottouchliveelectricalcircuitswiththereflectivesurfaceofaplasticdentalmirror.Thissurfaceis
conductive,andtouchingalivecircuitcancausepersonalinjuryanddamagetothecomputer.
•Donotservicethefollowingpartswiththepoweronwhentheyareremovedfromtheirnormaloperating
positionsinacomputer:
–Powersupplyunits
–Pumps
–Blowersandfans
–Motorgenerators
andsimilarunits.(Thispracticeensurescorrectgroundingoftheunits.)
•Ifanelectricalaccidentoccurs:
–Usecaution;donotbecomeavictimyourself.
4All-In-One310DesktopHardwareMaintenanceManual
Page 11

–Switchoffpower.
–Sendanotherpersontogetmedicalaid.
Safetyinspectionguide
Theintentofthisinspectionguideistoassistyouinidentifyingpotentialhazardsposedbytheseproducts.
Eachcomputer,asitwasdesignedandbuilt,hadrequiredsafetyitemsinstalledtoprotectusersand
servicepersonnelfrominjury.Thisguideaddressesonlythoseitems.However,goodjudgmentshouldbe
usedtoidentifypotentialsafetyhazardsduetoattachmentoffeaturesoroptionsnotcoveredbythis
inspectionguide.
Ifanyhazardsarepresent,youmustdeterminehowserioustheapparenthazardcouldbeandwhetheryou
cancontinuewithoutfirstresolvingtheproblem.
Considerthefollowingitemsandthesafetyhazardstheypresent:
•Electricalhazards,especiallyprimarypower(primaryvoltageontheframecancauseseriousorfatal
electricalshock).
•Explosivehazards,suchasadamagedCRTfaceorbulgingcapacitor
•Mechanicalhazards,suchaslooseormissinghardware
Theguideconsistsofaseriesofstepspresentedasachecklist.Beginthecheckswiththepoweroff,and
thepowercorddisconnected.
Checklist:
1.Checkexteriorcoversfordamage(loose,broken,orsharpedges).
2.Power-offthecomputer.Disconnectthepowercord.
3.Checkthepowercordfor:
a.Athird-wiregroundconnectoringoodcondition.Useametertomeasurethird-wireground
continuityfor0.1ohmorlessbetweentheexternalgroundpinandframeground.
b.Thepowercordshouldbetheappropriatetypeasspecifiedinthepartslistings.
c.Insulationmustnotbefrayedorworn.
4.Removethecover.
5.Checkforanyobviousalterations.Usegoodjudgmentastothesafetyofanyalterations.
6.Checkinsidetheunitforanyobvioushazards,suchasmetalfilings,contamination,waterorother
liquids,orsignsoffireorsmokedamage.
7.Checkforworn,frayed,orpinchedcables.
8.Checkthatthepower-supplycoverfasteners(screwsorrivets)havenotbeenremovedortamperedwith.
Handlingelectrostaticdischarge-sensitivedevices
Anycomputerpartcontainingtransistorsorintegratedcircuits(ICs)shouldbeconsideredsensitiveto
electrostaticdischarge(ESD).ESDdamagecanoccurwhenthereisadifferenceinchargebetweenobjects.
ProtectagainstESDdamagebyequalizingthechargesothatthecomputer,thepart,theworkmat,andthe
personhandlingthepartareallatthesamecharge.
Notes:
1.Useproduct-specificESDprocedureswhentheyexceedtherequirementsnotedhere.
2.MakesurethattheESDprotectivedevicesyouusehavebeencertified(ISO9000)asfullyeffective.
WhenhandlingESD-sensitiveparts:
Chapter2.Safetyinformation5
Page 12

•Keepthepartsinprotectivepackagesuntiltheyareinsertedintotheproduct.
•Avoidcontactwithotherpeoplewhilehandlingthepart.
•Wearagroundedwriststrapagainstyourskintoeliminatestaticonyourbody.
•Preventthepartfromtouchingyourclothing.Mostclothingisinsulativeandretainsachargeeven
whenyouarewearingawriststrap.
•Usetheblacksideofagroundedworkmattoprovideastatic-freeworksurface.Thematisespecially
usefulwhenhandlingESD-sensitivedevices.
•Selectagroundingsystem,suchasthoselistedbelow,toprovideprotectionthatmeetsthespecific
servicerequirement.
Note:TheuseofagroundingsystemisdesirablebutnotrequiredtoprotectagainstESDdamage.
–AttachtheESDgroundcliptoanyframeground,groundbraid,orgreen-wireground.
–UseanESDcommongroundorreferencepointwhenworkingonadouble-insulatedor
battery-operatedsystem.Y oucanusecoaxorconnector-outsideshellsonthesesystems.
–Usetheroundground-prongoftheACplugonAC-operatedcomputers.
Groundingrequirements
Electricalgroundingofthecomputerisrequiredforoperatorsafetyandcorrectsystemfunction.Proper
groundingoftheelectricaloutletcanbeverifiedbyacertifiedelectrician.
Safetynotices
TheCAUTIONandDANGERsafetynoticesinthissectionareprovidedinthelanguageofEnglish.
DANGER
Electricalcurrentfrompower,telephoneandcommunicationcablesishazardous.
Toavoidashockhazard:
•Donotconnectordisconnectanycablesorperforminstallation,maintenance,orreconfiguration
ofthisproductduringanelectricalstorm.
•Connectallpowercordstoaproperlywiredandgroundedelectricaloutlet.
•Connectanyequipmentthatwillbeattachedtothisproducttoaproperlywiredoutlet.
•Whenpossible,useonehandonlytoconnectordisconnectsignalcables.
•Neverturnonanyequipmentwhenthereisevidenceoffire,water,orstructuraldamage.
•Disconnecttheattachedpowercords,telecommunicationscables,networkcables,andmodem
cablesbeforeyouopenthedevicecovers,unlessinstructedotherwiseintheinstallationand
configurationprocedures.
•Connectanddisconnectcablesasdescribedinthefollowingtablewheninstalling,moving,or
openingcoversonthisproductorattacheddevices.
6All-In-One310DesktopHardwareMaintenanceManual
Page 13
ToConnect
1.TurneverythingOFF .
2.First,attachallcablestodevices.
3.Attachsignalcablestoconnectors.
4.Attachpowercordstooutlet.
5.TurndeviceON.
ToDisconnect
1.TurneverythingOFF .
2.First,removepowercordsfromoutlets.
3.Removesignalcablesfromconnectors.
4.Removeallcablesfromdevices.
CAUTION:
Whenreplacingthelithiumbattery,useonlyPartNumber45C1566oranequivalenttypebattery
recommendedbythemanufacturer.Ifyoursystemhasamodulecontainingalithiumbattery,replace
itonlywiththesamemoduletypemadebythesamemanufacturer.Thebatterycontainslithiumand
canexplodeifnotproperlyused,handled,ordisposedof.
Donot:
•Throwintoorimmerseinwater
•Heattomorethan100°C(212°F)
•Repairordisassemble
Disposeofthebatteryasrequiredbylocalordinancesorregulations.
CAUTION:
Whenlaserproducts(suchasCD-ROMs,DVD-ROMdrives,fiberopticdevices,ortransmitters)are
installed,notethefollowing:
•Donotremovethecovers.Removingthecoversofthelaserproductcouldresultinexposureto
hazardouslaserradiation.Therearenoserviceablepartsinsidethedevice.
•Useofcontrolsoradjustmentsorperformanceofproceduresotherthanthosespecifiedherein
mightresultinhazardousradiationexposure.
DANGER
SomelaserproductscontainanembeddedClass3AorClass3Blaserdiode.Notethefollowing:
Thesediodesemitradiationwhenopen.Donotstareintothebeam,donotviewdirectlywith
opticalinstruments,andavoiddirectexposuretothebeam.
Chapter2.Safetyinformation7
Page 14
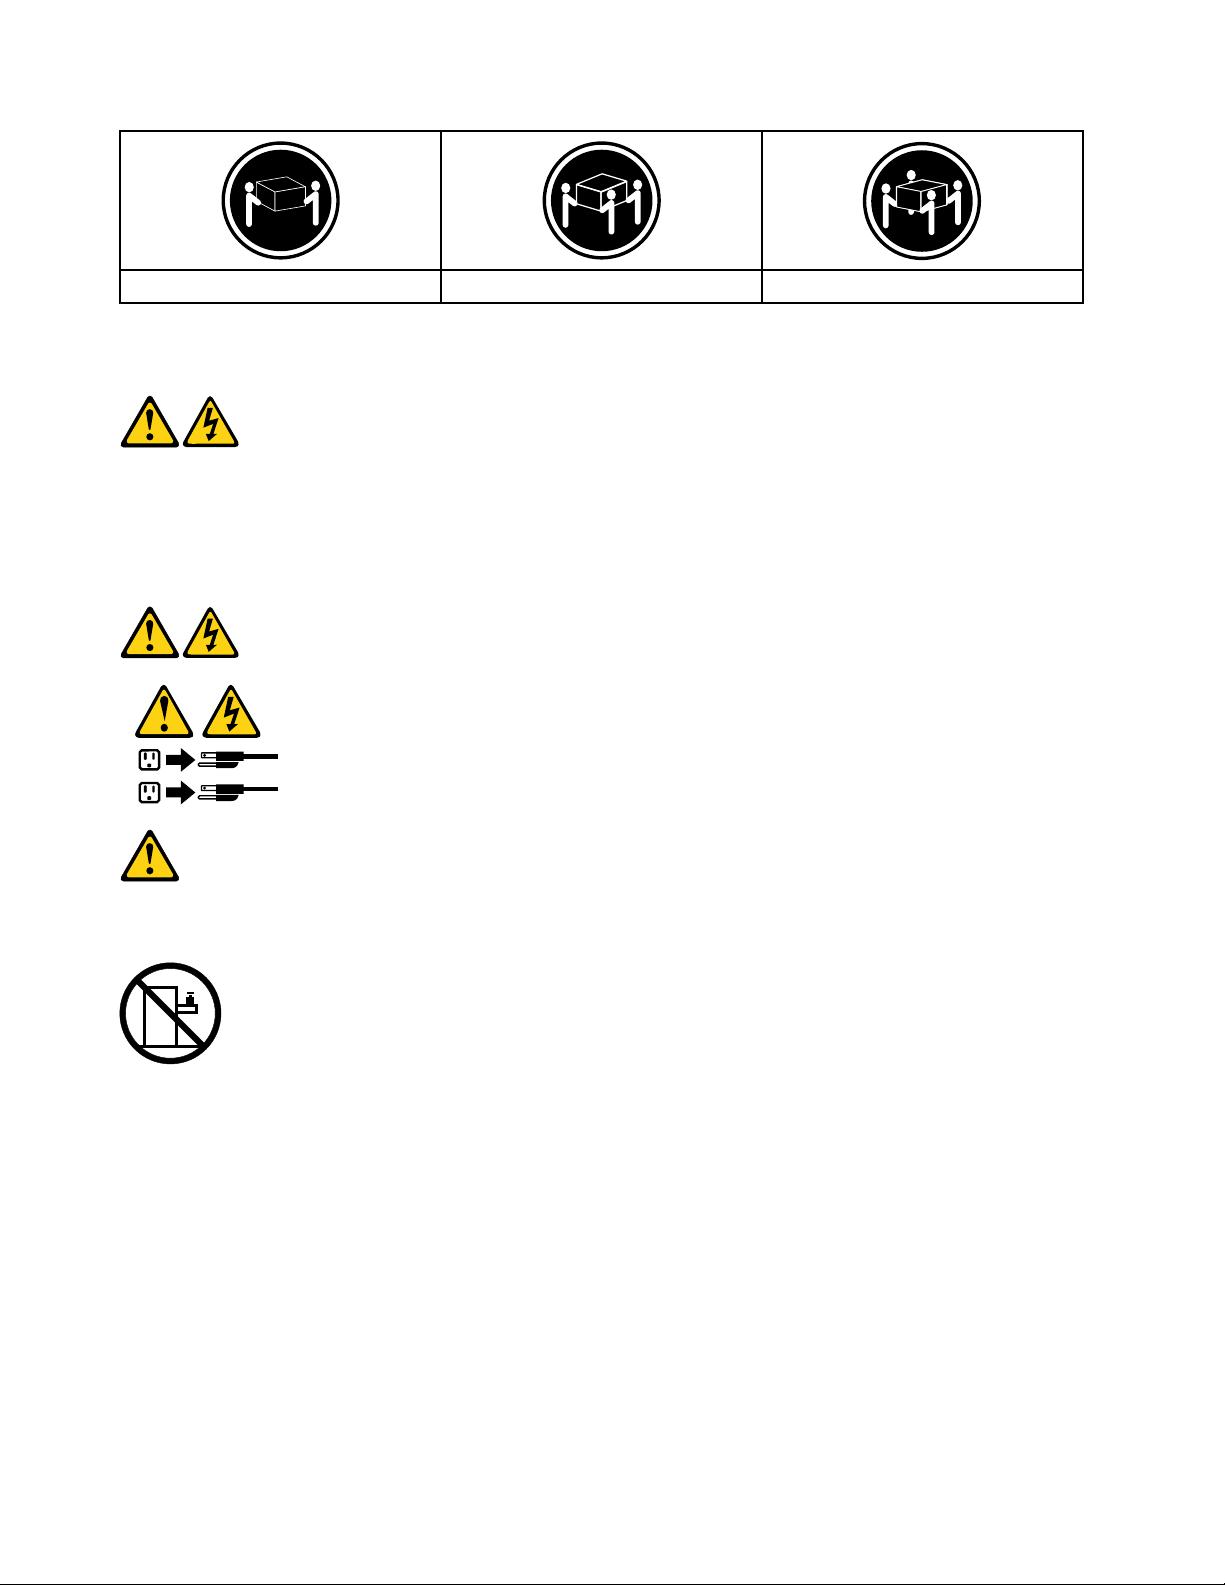
≥18kg(37lbs)≥32kg(70.5lbs)≥55kg(121.2lbs)
1
2
CAUTION:
Usesafepracticeswhenlifting.
CAUTION:
Thepowercontrolbuttononthedeviceandthepowerswitchonthepowersupplydonotturnoff
theelectricalcurrentsuppliedtothedevice.Thedevicealsomighthavemorethanonepower
cord.Toremoveallelectricalcurrentfromthedevice,ensurethatallpowercordsaredisconnected
fromthepowersource.
CAUTION:
Donotplaceanyobjectweighingmorethan82kg(180lbs.)ontopofrack-mounteddevices.
8All-In-One310DesktopHardwareMaintenanceManual
Page 15

Chapter3.Generalinformation
Thischapterprovidesgeneralinformationthatappliestoallcomputermodelscoveredbythismanual.
Specifications
Thissectionliststhephysicalspecificationsforyourcomputer.
Thissectionliststhephysicalspecificationsforyourcomputer .
TypeAll-In-One310DesktopComputer
Thissectionliststhephysicalspecifications.
Environment
Airtemperature:
Operating:10°to35°C
Transit:-20°to55°C
Humidity:
Operating:35%to80%
Transit:20%to90%(40°C)
Altitude:86KPato106KPa
Electricalinput:
Inputvoltage:90V-264V(AC)
Inputfrequency:47Hz-63Hz
©CopyrightLenovo2016,2016
9
Page 16

10All-In-One310DesktopHardwareMaintenanceManual
Page 17

Chapter4.GeneralCheckout
Attention:Thedrivesinthecomputeryouareservicingmighthavebeenrearrangedorthedrivestartup
sequencemayhavebeenchanged.Beextremelycarefulduringwriteoperationssuchascopying,saving,or
formatting.Dataorprogramscanbeoverwrittenifyouselectanincorrectdrive.
Generalerrormessagesappearifaproblemorconflictisfoundbyanapplication,theoperatingsystem,or
both.Foranexplanationofthesemessages,refertotheinformationsuppliedwiththatsoftwarepackage.
Usethefollowingproceduretohelpdeterminethecauseoftheproblem:
1.Power-offthecomputerandallexternaldevices.
2.Checkallcablesandpowercords.
3.Setalldisplaycontrolstothemiddleposition.
4.Power-onallexternaldevices.
5.Power-onthecomputer.
•Lookfordisplayederrorcodes.
•Lookforreadableinstructionsoramainmenuonthedisplay.
Ifyoudidnotreceivethecorrectresponse,proceedtostep6.
Ifyoudidreceivethecorrectresponse,proceedtostep7.
6.Ifoneofthefollowinghappens,followtheinstructiongiven:
•IfthecomputerdisplaysaPOSTerror,goto“POSTerrorcodes” .
•Ifthecomputerhangsandnoerrorisdisplayed,continueatstep7.
7.Iftheteststopsandyoucannotcontinue,replacethelastdevicetested.
©CopyrightLenovo2016,2016
11
Page 18

12All-In-One310DesktopHardwareMaintenanceManual
Page 19

Chapter5.UsingtheSetupUtility
TheSetupUtilityprogramisusedtoviewandchangetheconfigurationsettingsofyourcomputer,regardless
ofwhichoperatingsystemyouareusing.However,theoperatingsystemsettingsmightoverrideanysimilar
settingsintheSetupUtilityprogram.
StartingtheLenovoBIOSSetupUtilityprogram
TostarttheLenovoBIOSSetupUtilityprogram,dothefollowing:
1.Ifyourcomputerisalreadyonwhenyoustartthisprocedure,shutdowntheoperatingsystemand
turnoffthecomputer.
2.PressandholdtheF1keythenturnonthecomputer.WhentheLenovoBIOSSetupUtilityprogramis
displayed,releasetheF1key.
Note:IfaPower-OnPasswordoranAdministratorPasswordhasbeenset,theSetupUtilityprogrammenu
willnotbedisplayeduntilyoutypeyourpassword.Formoreinformation,see“Usingpasswords.”
Viewingandchangingsettings
SystemconfigurationoptionsarelistedintheLenovoBIOSSetupUtilityprogrammenu.Tovieworchange
settings,see“StartingtheSetupUtilityprogram.”
YoumustusethekeyboardwhenusingtheLenovoBIOSSetupUtilitymenu.Thekeysusedtoperform
varioustasksaredisplayedonthebottomofeachscreen.
Usingpasswords
YoucanusetheLenovoBIOSSetupUtilityprogramtosetpasswordstopreventunauthorizedpersons
fromgainingaccesstoyourcomputeranddata.See“StartingtheSetupUtilityprogram.”Thefollowing
typesofpasswordsareavailable:
•AdministratorPassword
•Power-OnPassword
Youdonothavetosetanypasswordstouseyourcomputer.However,ifyoudecidetosetpasswords,read
thefollowingsections.
Passwordconsiderations
Apasswordcanbeanycombinationoflettersandnumbersupto16characters(a-zand0-9).Forsecurity
reasons,itisagoodideatouseastrongpasswordthatcannotbeeasilycompromised.Wesuggestthat
passwordsshouldfollowtheserules:
•Forastrongpassword,use7-16charactersandamixoflettersandnumbers.
•Donotuseyournameoryourusername.
•Donotuseacommonwordoracommonname.
•Usesomethingsignificantlydifferentfromyourpreviouspassword.
Attention:AdministratorandPower-Onpasswordsarenotcasesensitive.
©CopyrightLenovo2016,2016
13
Page 20

AdministratorPassword
SettinganAdministratorPassworddetersunauthorizedpersonsfromchangingconfigurationsettings.You
mightwanttosetanAdministratorPasswordifyouareresponsibleformaintainingthesettingsofseveral
computers.
AfteryousetanAdministratorPassword,apasswordpromptisdisplayedeverytimeyouaccesstheLenovo
BIOSSetupUtilityprogram.
IfboththeAdministratorandPower-OnPasswordareset,youcantypeeitherpassword.However,youmust
useyourAdministratorPasswordtochangeanyconfigurationsettings.
Setting,changing,ordeletinganAdministratorPassword
TosetanAdministratorPassword,dothefollowing:
Note:Apasswordcanbeanycombinationoflettersandnumbersupto16characters(a-zand0-9).For
moreinformation,see“Passwordconsiderations”onpage13.
1.StarttheLenovoBIOSSetupUtilityprogram(see“StartingtheLenovoBIOSSetupUtilityprogram”on
page13).
2.FromtheSecuritymenu,selectSetAdministratorPasswordandpresstheEnterkey.
3.Thepassworddialogboxwillbedisplayed.TypethepasswordthenpresstheEnterkey.
4.Retypethepasswordtoconfirm,thenpresstheEnterkey.Ifyoutypedthepasswordcorrectly,the
passwordwillbeinstalled.ASetupNoticewillbedisplayedconfirmingthatyourchangeshasbeen
saved.
5.ReturntotheLenovoBIOSSetupUtilityprogrammenuandselecttheExitoption.
6.SelectSaveChangesandExitfromthemenu.
TochangeanAdministratorPassword,dothefollowing:
1.StarttheLenovoBIOSSetupUtilityprogram(see“StartingtheLenovoBIOSSetupUtilityprogram”on
page13).
2.FromtheSecuritymenu,selectSetAdministratorPasswordandpresstheEnterkey.
3.Thepassworddialogboxwillbedisplayed.TypethecurrentpasswordthenpresstheEnterkey.
4.T ypethenewpassword,thenpresstheEnterkey.Retypethenewpasswordtoconfirmit.Ifyoutyped
thenewpasswordcorrectly,thenewpasswordwillbeinstalled.ASetupNoticewillbedisplayed
confirmingthatyourchangeshavebeensaved.
5.ReturntotheLenovoBIOSSetupUtilityprogrammenuandselecttheExitoption.
6.SelectSaveChangesandExitfromthemenu.
TodeleteapreviouslysetAdministratorPassword,dothefollowing:
1.StarttheLenovoBIOSSetupUtilityprogram(see“StartingtheLenovoBIOSSetupUtilityprogram”on
page13).
2.FromtheSecuritymenu,selectSetAdministratorPasswordandpresstheEnterkey.
3.Thepassworddialogboxwillbedisplayed.TypethecurrentpasswordandpresstheEnterkey.
4.Leaveeachnewpasswordlineitemblank,thenpresstheEnterkey.ASetupNoticewillbedisplayed
confirmingthatyourchangeshavebeensaved.
5.ReturntotheLenovoBIOSSetupUtilityprogrammenuandselecttheExitoption.
6.SelectSaveChangesandExitfromthemenu.
14All-In-One310DesktopHardwareMaintenanceManual
Page 21

Power-OnPassword
WhenaPower-OnPasswordisset,youcannotstarttheLenovoBIOSSetupUtilityprogramuntilavalid
passwordistypedfromthekeyboard.
Setting,changing,ordeletingaPower-OnPassword
Note:Apasswordcanbeanycombinationoflettersandnumbersupto16characters(a-zand0-9).
TosetaPower-OnPassword,dothefollowing:
1.StarttheLenovoBIOSSetupUtilityprogram(see”StartingtheLenovoBIOSSetupUtilityprogram”on
page13).
2.FromtheSecuritymenu,selectSetPower-OnPasswordandpresstheEnterkey.
3.Thepassworddialogboxwillbedisplayed.Typethepassword,thenpresstheEnterkey.
4.Retypethepasswordtoconfirm.Ifyoutypedthepasswordcorrectly,thepasswordwillbeinstalled.
5.ReturntotheLenovoBIOSSetupUtilityprogrammenuandselecttheExitoption.
6.SelectSaveChangesandExitfromthemenu.
TochangeaPower-OnPassword,dothefollowing:
1.StarttheLenovoBIOSSetupUtilityprogram(see”StartingtheLenovoBIOSSetupUtilityprogram”on
page13).
2.FromtheSecuritymenu,selectSetPower-OnPasswordandpresstheEnterkey.
3.Thepassworddialogboxwillbedisplayed.TypethecurrentpasswordthenpresstheEnterkey.
4.T ypethenewpassword,thenpresstheEnterkey.Retypethenewpasswordtoconfirmit.Ifyoutyped
thenewpasswordcorrectly,thenewpasswordwillbeinstalled.ASetupNoticewillbedisplayed
confirmingthatyourchangeshavebeensaved.
5.ReturntotheLenovoBIOSSetupUtilityprogrammenuandselecttheExitoption.
6.SelectSaveChangesandExitfromthemenu.
TodeleteapreviouslysetPower-OnPassword,dothefollowing:
1.StarttheLenovoBIOSSetupUtilityprogram(see”StartingtheLenovoBIOSSetupUtilityprogram”on
page13).
2.FromtheSecuritymenu,selectSetPower-OnPasswordandpresstheEnterkey.
3.Thepassworddialogboxwillbedisplayed.TypethecurrentpasswordandpresstheEnterkey.
4.Leaveeachnewpasswordlineitemblank,thenpressEnter.ASetupNoticewillbedisplayedconfirming
thatyourchangeshavebeensaved.
5.ReturntotheLenovoBIOSSetupUtilityprogrammenuandselecttheExitoption.
6.SelectSaveChangesandExitfromthemenu.
Enablingordisablingadevice
TheDevicesoptionsisusedtoenableordisableuseraccesstothefollowing:
USBFunctionsSelectwhethertoenableordisableUSB(UniversalSerial
Bus)functions.Ifthefunctionsaredisabled,noUSB
devicescanbeused.
Chapter5.UsingtheSetupUtility15
Page 22

SATAModeSelectDisabled/IDE/AHCImode.Devicedriversupport
isrequiredforAHCIorRAID.Dependingonhowthehard
diskdriveimagewasinstalled,changingthissettingmay
preventthesystemfrombooting.
OnboardAudioControllerSelectwhethertoenableordisabletheOnboard
AudioController.WhenthisfeatureissettoDisabled
alldevicesconnectedtotheaudioconnectors(e.g.
headphonesoramicrophone)aredisabledandcannot
beused.
OnboardEthernetControllerorLANBootAgentSelectwhethertoenableordisabletheOnboardEthernet
Controller,orselectwhethertoenableordisableload
onboardPXE(PrebootExecutionEnvironment).
Toenableordisableadevice,dothefollowing:
1.StarttheSetupUtilityprogram(see“StartingtheSetupUtilityprogram”onpage13).
2.FromtheSetupUtilityprogrammenu,selectDevices.
3.Selectanoptionasfollows:
SelectUSBSetup,presstheEnterkey,thenselectUSBFunctions.
SelectATADriversSetup,presstheEnterkey,thenselectSAT AMode.
SelectAudioSetup,presstheEnterkey,thenselectOnboardAudioController.
SelectNetworkSetup,presstheEnterkey,thenselectOnboardEthernetSupportorLANBoot
Agent.
4.SelectDisabledorEnabledandpresstheEnterkey.
5.ReturntotheLenovoBIOSSetupUtilityprogrammenuandselecttheExitoption.
6.SelectSaveChangesandExitfromthemenu.
Notes:
a.Ifyoudonotwanttosavethesettings,selectDiscardChangesandExitfromthemenu.
Selectingastartupdevice
IfyourcomputerdoesnotbootfromadevicesuchastheCD/DVD-ROMdrivediskorharddiskasexpected,
followoneoftheproceduresbelow.
Selectingatemporarystartupdevice
Usethisproceduretostartupfromanybootdevice.
Note:NotallCDs,DVDsorharddiskdrivesarebootable.
1.T urnoffyourcomputer.
2.PressandholdtheF12keythenturnonthecomputer.WhentheStartupDeviceMenuappears,
releasetheF12key.
Note:IftheStartupDeviceMenudoesnotdisplayusingthesesteps,repeatedlypressandreleasethe
F12keyratherthankeepingitpressedwhenturningonthecomputer.
3.Use↑and↓arrowstoselectthedesiredstartupdevicefromtheStartupDeviceMenuandpress
theEnterkeytobegin.
Note:SelectingastartupdevicefromtheStartupDeviceMenudoesnotpermanentlychangethe
startupsequence.
16All-In-One310DesktopHardwareMaintenanceManual
Page 23

Selectingorchangingthestartupdevicesequence
Tovieworpermanentlychangetheconfiguredstartupdevicesequence,dothefollowing:
1.StarttheLenovoBIOSSetupUtilityprogram(see“StartingtheLenovoBIOSSetupUtilityprogram”on
page13).
2.FromtheLenovoBIOSSetupUtilityprogrammainmenu,selecttheStartupoption.
3.PresstheEnterkey,andselectthedevicesforthePrimaryBootSequence.Readtheinformation
displayedontherightsideofthescreen.
4.Use↑and↓arrowstoselectadevice.Usethe<+>or<->keystomoveadeviceupordown.Usethe
<×>keytoexcludethedevicefromorincludethedeviceinthebootsequence.
5.ReturntotheLenovoBIOSSetupUtilityprogrammenuandselecttheExitoption.
6.SelectSaveChangesandExitfromthemenu.
Notes:
a.Ifyoudonotwanttosavethesettings,selectDiscardChangesandExitfromthemenu.
b.Ifyouhavechangedthesesettingsandwanttoreturntothedefaultsettings,selectLoadOptimal
Defaultsfromthemenu.
Changingbootingmode
TherearetwobootmodesUEFIandLegacyforyourcomputer.Thedefaultbootmodeforyourcomputeris
theUEFImode.IfyouneedtoinstallalegacyWindowsoperatingsystem(anyoperatingsystembefore
Windows8)onyourcomputer,youmustchangethebootmodetoLegacysupport.ThelegacyWindows
operatingsystemcannotbeinstalledifyoudon’tchangethebootmode.
Tochangethebootingmode,dothefollowing:
1.StarttheLenovoBIOSSetupUtilityprogram(see“StartingtheLenovoBIOSSetupUtilityprogram”on
page13).
2.FromtheLenovoBIOSSetupUtilityprogrammainmenu,selecttheStartupoption.
3.SelecttheBootPriority,thenpressEnterkey.Fromthepopup“BootPriority”windowchoose
Legacymode.
4.ReturntotheLenovoBIOSSetupUtilityprogrammenuandselecttheExitoption.
5.SelectSaveChangesandExitfromthemenu.
ExitingtheLenovoBIOSSetupUtilityprogram
Afteryoufinishviewingorchangingsettings,presstheEsckeytoreturntotheLenovoBIOSSetupUtility
programmainmenu.Y oumighthavetopresstheEsckeyseveraltimes.Dooneofthefollowing:
•Ifyouwanttosavethenewsettings,selectSaveChangesandExitfromthemenu.WhentheSave
&resetwindowshows,selecttheYesbutton,andthenpresstheEnterkeytoexittheLenovoBIOS
SetupUtilityprogram.
•Ifyoudonotwanttosavethesettings,selectDiscardChangesandExitfromthemenu.Whenthe
ResetWithoutSavingwindowshows,selecttheY esbutton,andthenpresstheEnterkeytoexitthe
LenovoBIOSSetupUtilityprogram.
Chapter5.UsingtheSetupUtility17
Page 24

18All-In-One310DesktopHardwareMaintenanceManual
Page 25

Chapter6.Symptom-to-FRUIndex
TheSymptom-to-FRUindexlistserrorsymptomsandpossiblecauses.Themostlikelycauseislistedfirst.
AlwaysbeginwithChapter4,“GeneralCheckout, ”onpage11.Thisindexcanalsobeusedtohelpyou
decidewhichFRUstohaveavailablewhenservicingacomputer.Ifyouareunabletocorrecttheproblem
usingthisindex,goto“Undeterminedproblems”onpage20.
Notes:
•Ifyouhavebothanerrormessageandanincorrectaudioresponse,diagnosetheerrormessagefirst.
•Ifyoucannotrunthediagnostictestsoryougetadiagnosticerrorcodewhenrunningatestbutdid
receiveaPOSTerrormessage,diagnosethePOSTerrormessagefirst.
•Ifyoudidnotreceiveanyerrormessagelookforadescriptionofyourerrorsymptomsinthefirstpartof
thisindex.
Harddiskdrivebooterror
Aharddiskdrivebooterrorcanhavethefollowingcauses.
Error
Thestartupdriveisnotincludedinthebootsequence
configuration.
Nooperatingsystemisinstalledonthebootdrive.Installanoperatingsystemonthebootdrive.
Thebootsectoronthestartupdriveiscorrupted.
Thedriveisdefective.
FRU/Action
Checktheconfigurationandensurethestartupdriveis
inthebootsequence.
Thedrivemustbeformatted.Dothefollowing:
1.Attempttobackupthedataonthefailingharddisk
drive.
2.Usetheoperatingsystemtoformattheharddisk
drive.
Replacetheharddiskdrive.
PowerSupplyProblems
Followtheseproceduresifyoususpectthereisapowersupplyproblem.
Check/VerifyFRU/Action
Checkthatthefollowingareproperlyinstalled:
•PowerCord
•On/OffSwitchconnector
•SystemBoardPowerSupplyconnectors
•Microprocessorconnections
Checkthepowercord.PowerCord
Checkthepower-onswitch.Power-onSwitch
Reseatconnectors
©CopyrightLenovo2016,2016
19
Page 26

POSTerrorcodes
Eachtimeyouturnthecomputeron,itperformsaseriesofteststocheckthatthesystemisoperating
correctlyandthatcertainoptionsareset.ThisseriesoftestsiscalledthePower-OnSelf- T est,orPOST.
POSTdoesthefollowing:
•Checkssomebasicmotherboardoperations
•Checksthatthememoryisworkingcorrectly
•Startsvideooperations
•Verifiesthatthebootdriveisworking
POSTErrorMessageDescription/Action
Keyboarderror
RebootandSelectproperBootdeviceorInsertBoot
MediainselectedBootdevice
Cannotinitializethekeyboard.Makesurethekeyboard
isproperlyconnectedtothecomputerandthatnokeys
areheldpressedduringPOST.T opurposelyconfigure
thecomputerwithoutakeyboard,selectKeyboardless
operationinStartupandsettheoptiontoEnabled.The
BIOSthenignoresthemissingkeyboardduringPOST.
TheBIOSwasunabletofindasuitablebootdevice.Make
surethebootdriveisproperlyconnectedtothecomputer.
Makesureyouhavebootablemediainthebootdevice.
Undeterminedproblems
1.Power-offthecomputer.
2.Removeordisconnectthefollowingcomponents(ifconnectedorinstalled)oneatatime.
a.Externaldevices(modem,printer,ormouse)
b.Extendedvideomemory
c.ExternalCache
d.ExternalCacheRAM
e.Harddiskdrive
f.Diskdrive
3.Power-onthecomputertore-testthesystem.
4.Repeatsteps1through3untilyoufindthefailingdeviceorcomponent.
Ifalldevicesandcomponentshavebeenremovedandtheproblemcontinues,replacethesystemboard.
20All-In-One310DesktopHardwareMaintenanceManual
Page 27

Chapter7.Locatingcomponentsandconnectors
Thissectionprovidesillustrationstohelplocatethevariousconnectors,controlsandcomponentsofthe
computer.
Thefollowingillustrationswillhelpyoutolocatethevariouscomponentsandconnectorsonyourcomputer.
Locatingconnectors,controlsandcomponents
Thissectionprovidesillustrationstohelplocatethevariousconnectors,controlsandcomponentsofthe
computer.
Frontview
Thefollowingillustrationshowsthelocationofcontrolsandcomponentsonthefrontofthecomputer.
Attention:Becarefulnottoblockanyairventsonthecomputer.Blockedairventscancauseoverheating.
©CopyrightLenovo2016,2016
21
Page 28

1.Built-inmicrophone
2.Built-incamera
3.Cameraindicator
22All-In-One310DesktopHardwareMaintenanceManual
Page 29

Leftandrightview
Thefollowingillustrationshowsthelocationofconnectors,controlsandcomponentsontheleftandright
sideofthecomputer.
1.USB3.0connector4.Opticaldriveejectbutton
2.Memorycardreader
3.USB3.0connectors(selectedmodelsonly)
5.Opticaldrive
6.Powerbutton
Chapter7.Locatingcomponentsandconnectors23
Page 30

Rearview
Thefollowingillustrationshowsthelocationofconnectorsandcomponentsontherearofthecomputer.
1.Securitycableslot5.USB2.0connector
2.Powerconnector
3.Ethernetconnector7.Airvents
4.HDMI-outconnector
6.USB2.0connector
Hardwarecomponents
Thefollowingillustrationshowsthecomponentsthatmakeupyourcomputer.
Identifyingpartsonthemotherboard
Themotherboard(sometimescalledtheplanarorsystemboard)isthemaincircuitboardinyourcomputer.
Itprovidesbasiccomputingfunctionsandsupportsavarietyofdevicesthatarefactory-installedorthat
youcaninstalllater.Thefollowingillustrationshowsthelocationofconnectorsandcomponentsonthe
frontofthemotherboard.
24All-In-One310DesktopHardwareMaintenanceManual
Page 31

Chapter7.Locatingcomponentsandconnectors25
Page 32

1.Rearcover
2.Computerstand
3.Heat-sink10.Motherboard
4.Opticaldrive
5.Speakersystem12.Camera,microphonemodule
6.LEDpanel13.Frontbezel
8.Rubberfeet
9.EMIcover
11.Harddiskdrive
26All-In-One310DesktopHardwareMaintenanceManual
Page 33

Chapter8.Replacinghardware
Attention:Donotremovethecomputercoverorattemptanyrepairbeforereadingthe“Importantsafetyinformation”
intheSafetyandWarrantyGuidethatwasincludedwithyourcomputer.T oobtaincopiesoftheSafetyandWarranty
Guide,gototheSupportWebsiteat:http://support.lenovo.com.
Note:UseonlypartsprovidedbyLenovo.
Generalinformation
Pre-disassemblyinstructions
Beforestartingthedisassemblyprocedure,makesurethatyoudothefollowing:
1.T urnoffthepowertothesystemandallperipherals.
2.Unplugallpowerandsignalcablesfromthecomputer.
3.Placethesystemonaflat,stablesurface.
©CopyrightLenovo2016,2016
27
Page 34

Replacingthekeyboardandmouse
Toreplacethekeyboardandmouse:
Step1.Removeanymedia(disks,CDs,DVDsormemorycards)fromthedrives,shutdowntheoperating
system,andturnoffthecomputerandallattacheddevices.
Step2.Unplugallpowercordsfromelectricaloutlets.
Step3.Disconnectallcablesattachedtothecomputer.Thisincludespowercords,input/output(I/O)
cables,andanyothercablesthatareconnectedtothecomputer.Referto“Leftandrightview”
and“Rearview”forhelpwithlocatingthevariousconnectors.
Note:Y ourkeyboardwillbeconnectedtoaUSBconnectorononesideorattherearofthe
computer.
Step4.Disconnectthedefectivekeyboardcablefromthecomputerandconnectthenewkeyboardcable
tothesameconnector.
Note:Themousecanbereplacedusingthesamemethod.
Step5.ConnectthenewmouseorkeyboardtotheUSBportasshown.
Replacingthepoweradapter
Toreplacethepoweradapter:
Step1.Removeanymedia(disks,CDs,DVDs,ormemorycards)fromthedrives,shutdowntheoperating
system,andturnoffthecomputerandallattacheddevices.
Step2.Locatetheconnectorforthepowercord.Referto“Rearview” .
Step3.Disconnectthefailingpoweradapterfromthecomputer.
Step4.T oinstallthenewpoweradapter:
a.Connectthenewpoweradaptertothesameconnector.
28All-In-One310DesktopHardwareMaintenanceManual
Page 35

Removingtherearcover
Note:Turnoffthecomputerandwait3to5minutestoletitcooldownbeforeremovingtherearcover.
Note:Itmaybehelpfultoplacethecomputerface-downonasoftflatsurfaceforthisprocedure.Lenovo
recommendsthatyouuseablanket,towel,orothersoftclothtoprotectthetouchscreenfromscratches
orotherdamage.
Toremovetherearcover:
Step1.Removeanymedia(disks,CDs,DVDs,ormemorycards)fromthedrives,shutdowntheoperating
system,andturnoffthecomputerandallattacheddevices.
Step2.Unplugallpowercordsfromelectricaloutlets.
Step3.Disconnectallcablesattachedtothecomputer.Thisincludespowercords,input/output(I/O)
cables,andanyothercablesthatareconnectedtothecomputer.Referto“Leftandrightview”
and“Rearview”forhelpwithlocatingthevariousconnectors.
Step4.Liftuptherubbersthatprotectthe2screws,removethe2screwsthatsecuretherearcoverto
thefrontbezel.
Chapter8.Replacinghardware29
Page 36

Step5.Useaplasticspudgeroraflatheadscrewdrivertopriesuptherearcovertoreleasethecover
fromthe3lockingpins.Gentlyliftuptherearcover.
Step6.DisconnecttheLVDSandthemulti-functioncablesfromtheconnectorsonthemotherboard.
Step7.T oreattachtherearcover:
a.LineuptherearcoverwiththefrontbezelandreconnecttheLVDS,multi-functioncables.
b.Lineuptheholesontherearcoverwithmountingholesonthefrontbezel,andplacetherear
coverintoposition.
c.Securetherearcovertothefrontbezelwiththetwoscrews.
d.Reattachtherubbercover.
Replacingamemorymodule
Attention:Turnoffthecomputerandwait3to5minutestoletitcooldownbeforeremovingtherearcover.
Toreplaceamemorymodule:
Step1.Removeanymedia(disks,CDs,DVDs,ormemorycards)fromthedrives,shutdowntheoperating
system,andturnoffthecomputerandallattacheddevices.
Step2.Unplugallpowercordsfromelectricaloutlets.
30All-In-One310DesktopHardwareMaintenanceManual
Page 37

Step3.Disconnectallcablesattachedtothecomputer.Thisincludespowercords,input/output(I/O)
cables,andanyothercablesthatareconnectedtothecomputer.Referto“Leftandrightview”
and“Rearview”forhelpwithlocatingthevariousconnectors.
Step4.Removetherearcover.Referto“Removingtherearcover”.
Step5.Pushoutthelatchesonbothsidesofthememorysockettoreleasethememorymodule.Gently
pullthememorymoduleupwardtoremoveitfromitssocket.
Step6.T oinstallthenewmemorymodule:
a.Alignthenewmemorymodulewiththememorysocket,theninsertitandpushdownon
thetopedge.
b.Makesurethelatcheslockthememorymoduleinplace.
Step7.Reattachtherearcover.
Replacingtheharddiskdrive
Attention:Turnoffthecomputerandwait3to5minutestoletitcooldownbeforeremovingtherearcover.
Toreplacetheharddiskdrive:
Step1.Removeanymedia(disks,CDs,DVDsormemorycards)fromthedrives,shutdowntheoperating
system,andturnoffthecomputerandallattacheddevices.
Step2.Unplugallpowercordsfromelectricaloutlets.
Step3.Disconnectallcablesattachedtothecomputer.Thisincludespowercords,input/output(I/O)
cables,andanyothercablesthatareconnectedtothecomputer.Referto“Leftandrightview”
and“Rearview”forhelpwithlocatingthevariousconnectors.
Step4.Removetherearcover.Referto"Removingtherearcover".
Chapter8.Replacinghardware31
Page 38

Step5.Removethescrewthatsecurestheharddiskdrivetotherearcover.
Step6.Slidetheharddiskdriveandbayouttoremove.
Step7.Slideouttheharddiskdrivetoremoveitfromthebay.
Step8.T oinstallthenewharddiskdrive:
a.Slidethenewharddiskdriveintotheharddiskdrivebay.
b.Securethenewharddiskdrivetotherearcoverwiththescrew.
c.Reattachthenewharddiskdrivetothemotherboard.
Step9.Reattachtherearcover.
Replacingtheopticaldrive
Attention:T urnoffthecomputerandwait3to5minutestoletitcooldownbeforereplacingtheopticaldrive.
Toreplacetheopticaldrive:
Step1.Removeanymedia(disks,CDs,DVDs,ormemorycards)fromthedrives,shutdowntheoperating
system,andturnoffthecomputerandallattacheddevices.
Step2.Unplugallpowercordsfromelectricaloutlets.
Step3.Disconnectallcablesattachedtothecomputer.Thisincludespowercords,input/output(I/O)
cables,andanyothercablesthatareconnectedtothecomputer.Referto“Leftandrightview”
and“Rearview”forhelpwithlocatingthevariousconnectors.
Step4.Removetherearcover,referto“Removingtherearcover”.
32All-In-One310DesktopHardwareMaintenanceManual
Page 39

Step5.Useascrewdrivertopushouttheopticaldriveasshown..
Step6.Installthenewopticaldriveasfollows:
a.Slidethenewopticaldriveintothedrivebay,thenpushitintoposition.
b.Reattachtherearcover.
ReplacingtheWi-Ficard
Note:Turnoffthecomputerandwait3to5minutestoletitcooldownbeforeremovingtherearcover.
ToreplacetheWi-Ficard:
Step1.Removeanymedia(disks,CDs,DVDs,ormemorycards)fromthedrives,shutdowntheoperating
system,andturnoffthecomputerandallattacheddevices.
Step2.Unplugallpowercordsfromelectricaloutlets.
Step3.Disconnectallcablesattachedtothecomputer.Thisincludespowercords,input/output(I/O)
cables,andanyothercablesthatareconnectedtothecomputer.Referto“Leftandrightview”
and“Rearview”forhelpwithlocatingthevariousconnectors.
Step4.Removetherearcover.Referto"Removingtherearcover".
Chapter8.Replacinghardware33
Page 40

Step5.DisconnecttheantennaanddatacablesfromtheWi-Ficard.
Step6.RemovethescrewthatsecurestheWi-Ficardtothemotherboard.
Step7.PulltheWi-Ficardupwardtoremoveitfromthesocket.
Step8.T oinstallthenewWi-Ficard:
a.InsertthenewWi-Ficardintothecardportandsecureitwiththescrew.
b.ConnecttheantennacablestothenewWi-Ficard.
Step9.Reattachtherearcover.
Replacingthespeakersystem
Note:Turnoffthecomputerandwait3to5minutestoletitcooldownbeforeremovingtherearcover.
Toreplacethespeakersystem:
Step1.Removeanymedia(disks,CDs,DVDs,ormemorycards)fromthedrives,shutdowntheoperating
system,andturnoffthecomputerandallattacheddevices.
Step2.Unplugallpowercordsfromelectricaloutlets.
Step3.Disconnectallcablesattachedtothecomputer.Thisincludespowercords,input/output(I/O)
cables,andanyothercablesthatareconnectedtothecomputer.Referto“Leftandrightview”
and“Rearview”forhelpwithlocatingthevariousconnectors.
Step4.Removetherearcover.Referto"Removingtherearcover".
34All-In-One310DesktopHardwareMaintenanceManual
Page 41

Step5.Disconnectthespeakercablefromtheconnectoronmotherboard.
Step6.Detachthespeakersystemfromtherubberscrews.
Step7.T oinstallthenewspeakersystem:
a.Attachthenewspeakersystemtotherearcoverwiththerubberscrews..
b.Connectthenewspeakercabletotheconnectoronthemotherboard.
Step8.Reattachtherearcover.
Replacingthepowerswitchboard
Note:Turnoffthecomputerandwait3to5minutestoletitcooldownbeforeremovingtherearcover.
Toreplacethepowerswitchboard:
Step1.Removeanymedia(disks,CDs,DVDs,ormemorycards)fromthedrives,shutdowntheoperating
system,andturnoffthecomputerandallattacheddevices.
Step2.Unplugallpowercordsfromelectricaloutlets.
Step3.Disconnectallcablesattachedtothecomputer.Thisincludespowercords,input/output(I/O)
cables,andanyothercablesthatareconnectedtothecomputer.Referto“Leftandrightview”
and“Rearview”forhelpwithlocatingthevariousconnectors.
Step4.Removetherearcover.Referto"Removingtherearcover".
Chapter8.Replacinghardware35
Page 42

Step5.Removethetapecoversuptheswitchboard.
Step6.Liftuptheswitchboardtoremoveitfromtheswitchslot,disconnectthepowercablefromthe
switchboard.
Step7.T oinstallthepowerswitchboard:
a.Connectthedatacabletotheconnectoronthenewmotherboard.
b.Lineuptheswitchboardwiththeslot,placetheswitchboardintopositionandsealtheswitch
boardtotherearcoverproperlywiththetape.
Step8.Reattachtherearcover.
ReplacingtheI/OShielding
Note:Turnoffthecomputerandwait3to5minutestoletitcooldownbeforeremovingtherearcover.
ToreplacetheI/Oshielding:
Step1.Removeanymedia(disks,CDs,DVDsormemorycards)fromthedrives,shutdowntheoperating
system,andturnoffthecomputerandallattacheddevices.
Step2.Unplugallpowercordsfromelectricaloutlets.
Step3.Disconnectallcablesattachedtothecomputer.Thisincludespowercords,input/output(I/O)
cables,andanyothercablesthatareconnectedtothecomputer.Referto“Leftandrightview”
and“Rearview”forhelpwithlocatingthevariousconnectors.
Step4.Removetherearcover.Referto"Removingtherearcover".
36All-In-One310DesktopHardwareMaintenanceManual
Page 43

Step5.RemovethethreescrewsthatsecuretheI/Oshieldingmoduletothemotherboard.
Step6.LiftuptheI/Oshieldingtoremoveit.
Step7.T oinstallthenewI/Oshielding:
a.LineupthenewI/Oshieldingmodulewiththemountingholesonthemotherboard.
b.SecurethenewI/Oshieldingtothemotherboardwiththescrews.
Step8.Reattachtherearcover.
Replacingthemotherboardortheheat-sinkmodule
Note:Turnoffthecomputerandwait3to5minutestoletitcooldownbeforeremovingtherearcover.
Toreplacethemotherboard:
Step1.Removeanymedia(disks,CDs,DVDs,ormemorycards)fromthedrives,shutdowntheoperating
system,andturnoffthecomputerandallattacheddevices.
Step2.Unplugallpowercordsfromelectricaloutlets.
Step3.Disconnectallcablesattachedtothecomputer.Thisincludespowercords,input/output(I/O)
cables,andanyothercablesthatareconnectedtothecomputer.Referto“Leftandrightview”
and“Rearview”forhelpwithlocatingthevariousconnectors.
Step4.Removetherearcover.Referto“Removingtherearcover”.
Step5.Removeallmemorymodules.Referto“Replacingamemorymodule” .
Step6.Removetheheat-sink.Referto“Replacingtheheat-sink” .
Step7.RemovetheWi-Ficard.Referto“ReplacingtheWi-Ficard”.
Step8.RemovetheI/Oshielding.Referto“RemovingI/Oshielding”.
Chapter8.Replacinghardware37
Page 44

Step9.Removeallthecablesconnectedtothemotherboard.
Step10.Removethefivescrewsthatsecurethemotherboardandheat-sinktotherearcover.Slideoutthe
motherboardandheat-sinkasshown.
Step11.Removethescrewsthatsecuretheheat-sinkmoduletothemotherboard,andthenliftupthe
heat-sinktoremoveit.
Step12.T oinstallthenewmotherboardorthenewheat-sink:
a.Attachtheheat-sink,Wi-Ficard,memorymodulestothemotherboard.
b.Slideinthemotherboardandheat-sinkintopositionthensecurethemwith5screws.
c.Connecttheantennacable(s)totheWi-Ficard.
d.Connectallthecablestothenewmotherboard.
e.ReattachtheI/Oshieldingtothemotherboard.
Step13.Reattachtherearcover.
Replacingthecameraandmicrophonemodule
Note:Turnoffthecomputerandwait3to5minutestoletitcooldownbeforeremovingtherearcover.
Toreplacethecameraandmicrophonemodule:
38All-In-One310DesktopHardwareMaintenanceManual
Page 45

Step1.Removeanymedia(disks,CDs,DVDs,ormemorycards)fromthedrives,shutdowntheoperating
system,andturnoffthecomputerandallattacheddevices.
Step2.Unplugallpowercordsfromelectricaloutlets.
Step3.Disconnectallcablesattachedtothecomputer.Thisincludespowercords,input/output(I/O)
cables,andanyothercablesthatareconnectedtothecomputer.Referto“Leftandrightview”
and“Rearview”forhelpwithlocatingthevariousconnectors.
Step4.Removetherearcover.Referto“Removingtherearcover”.
Step5.Removethe2screwsthatsecurethecameraandmicrophonemoduletothefrontbezel.
Disconnectthedatacablefromeithercameraormicrophonemodule.Removethecameraor
microphonemodulefromthebracket.
Step6.T oinstallthenewcameraormicrophonemodule:
a.Connectthedatacabletothenewcameraormicrophone.
b.Attachthenewmoduletothebracket,thensecurethecameraandmicrophonemoduleto
thefrontbezelwiththe2screws.
Step7.Reattachtherearcover.
Chapter8.Replacinghardware39
Page 46

ReplacingtheLEDpanel
Note:Turnoffthecomputerandwait3to5minutestoletitcooldownbeforeremovingtherearcover.
ToreplacetheLEDpanel:
Step1.Removeanymedia(disks,CDs,DVDs,ormemorycards)fromthedrives,shutdowntheoperating
system,andturnoffthecomputerandallattacheddevices.
Step2.Unplugallpowercordsfromelectricaloutlets.
Step3.Disconnectallcablesattachedtothecomputer.Thisincludespowercords,input/output(I/O)
cables,andanyothercablesthatareconnectedtothecomputer.Referto“Leftandrightview”
and“Rearview”forhelpwithlocatingthevariousconnectors.
Step4.Removetherearcover.Referto“Removingtherearcover”.
Step5.DisconnecttheL VDS,LEDpanelpowerandthepowerswitchboardcablesfromtheconnectors
asshown.
40All-In-One310DesktopHardwareMaintenanceManual
Page 47

Step6.Removethe6screwsthatsecurestheLEDpaneltothefrontbezel.TheLEDpanelispinnedtothe
frontbezel,pushallthepinsoutwardtoreleasethepanelfromthefrontbezel.
Step7.LiftuptheLEDpaneltoseparatefromthefrontbezel,andthenremovethetwopanelbracketby
removingthetwoscrews.
Step8.Removethe4panelbracketviaremovingthe4screws.
Chapter8.Replacinghardware41
Page 48

Step9.T oinstallthenewLEDpanelmodule:
a.Attachthepanelbracketswiththenewpanel,andsecurethebracketswiththe4screws.
b.Lineupthepanelassemblywiththefrontbezel,thenplacethepanelintoposition.
c.Securethenewpaneltothefrontbezelwiththe6screwsandpins.
d.AttachallthecablestotheconnectorsonthenewLEDpanel.
e.Attachthepowercabletothepowerswitchingboard.
Step10.Reattachtherearcover.
42All-In-One310DesktopHardwareMaintenanceManual
Page 49

Chapter9.FRUlists-AIO-310ASR
Thischapterliststheinformationonthefieldreplaceableunits(FRUs)forLenovoC20–00All-In-Onedesktop
computers.
Attention:BesuretoreadandunderstandallthesafetyinformationbeforereplacinganyFRUs.
LenovoAIO310-20ASRservicepartslisting
MT:F0CK
FRUP/N
AC_ADAPTER
54Y8998AC_ADAPTER,45W,100-240Vac,3P
ANTENNA
00XJ092AIO310615/300mmantenna
BDPLANAR
01GJ023A6-9200UMAHDMIOUTWINDPK
01GJ022MBA9-9400,UMA,WINDPK
01GJ032MBA9-9400,UMA,NODPK
01GJ033A6-9200UMAHDMIOUTNODPK
01GJ034E2-9000UMAHDMIOUTWINDPK
01GJ035E2-9000UMAHDMIOUTNODPK
CABLE
00XL236Cable_LVDS
00XL237Cable_ODDSA T A
CARDPOP
01AJ797AAIO310Powerbuttonboard
Description
01AH330C2S2720PCam
00XH674USB,Calliope,KB,WH,TUR
00XH635USBCalliopeKBBKCANENG/FRA
00XH633USBCalliopeKBBKNORDIC
00XH655USB,Calliope,KB,WH,HUN
00XH672USB,Calliope,KB,WH,THAI
00XH654USB,Calliope,KB,WH,HBW
00XH666USB,Calliope,KB,WH,RUS
00XH652USB,Calliope,KB,WH,GRE
00XH604USBCalliopeKBBKHBW
©CopyrightLenovo2016,2016
CAMERA
DT_KYB
43
Page 50

00XH605USBCalliopeKBBKHUN
00XH677USB,Calliope,KB,WH,SLV
00XH607USBCalliopeKBBKIT A
00XH668USB,Calliope,KB,WH,SLK
00XH598USBCalliopeKBBKFRA
00XH685USB,Calliope,KB,WH,CAN,ENG/FRA
00XH602USBCalliopeKBBKGRE
00XH601USBCalliopeKBBKGER
00XH644USB,Calliope,KB,WH,TC/ENG
00XH627USBCalliopeKBBKSL V
00XH643USB,Calliope,KB,WH,BUL
00XH626USBCalliopeKBBKEUROENG
00XH657USB,Calliope,KB,WH,ITA
00XH610USBCalliopeKBBKKOR
00XH608USBCalliopeKBBKJPN
00XH645USB,Calliope,KB,WH,CZE
00XH658USB,Calliope,KB,WH,JPN
00XH671USB,Calliope,KB,WH,SWS
00XH680USB,Calliope,KB,WH,IND,ENG
00XH648USB,Calliope,KB,WH,FRA
00XH676USB,Calliope,KB,WH,EURO,ENG
00XH651USB,Calliope,KB,WH,GER
00XH675USB,Calliope,KB,WH,UKE
00XH621USBCalliopeKBBKSWS
00XH683USB,Calliope,KB,WH,NORDIC
00XH622USBCalliopeKBBKTHAI
00XH669USB,Calliope,KB,WH,SPA
00XH630USBCalliopeKBBKINDENG
00XH618USBCalliopeKBBKSLK
00XH625USBCalliopeKBBKUKE
00XH619USBCalliopeKBBKSP A
00XH624USBCalliopeKBBKTUR
00XH611USB,Calliope,KB,BK,LASP A
00XH660USB,Calliope,KB,WH,KOR
00XH661USBCalliopeKBWHLASP A
00XH664USB,Calliope,KB,WH,POR
00XH594USBCalliopeKBBKTC/ENG
00XH614USBCalliopeKBBKPOR
00XH638USB,Calliope,KB,WH,ARA
00XH595USBCalliopeKBBKCZE
44All-In-One310DesktopHardwareMaintenanceManual
Page 51

00XH637USB,Calliope,KB,WH,ENG
00XH593USBCalliopeKBBKBUL
00XH641USB,Calliope,KB,WH,BELENG
00XH591USB,Calliope,KB,BK,BELENG
00XH616USBCalliopeKBBKRUS
00XH587USBCalliopeKBBKENG
00XH588USBCalliopeKBBKARA
HDD_ASM
00FC428HDD,500G,5400,7mm,DT2,SAT A3,STD
00FC430HDD,1TB,5400,7mm,DT2,SAT A3,STD
00FC429HDD,1TB,5400,9mm,DT2,SAT A3,STD
HEATSINK
01EF575ASRUMATMw/oBPfor310ASR
LINECORD
00XL073Fru,LINECORD,IT ,1M,3P ,NON-LH
00XL096Fru,LINECORD,IN,1M,3P ,NON-LH
00XL082Fru,LINECORD,ZA,1M,3P ,NON-LH
00XL090Fru,LINECORD,CN,1M,3P ,NON-LH
00XL093Fru,LINECORD,TW,1M,3P ,NON-LH
00XL057Fru,LINECORD,AR,1M,3P ,NON-LH
00XL003Fru,JP ,Anti- TR,1M,2P ,NON-LH
00XL071Fru,LINECORD,CH,1M,3P ,NON-LH
00XL060Fru,LINECORD,BR,1M,3P ,NON-LH
00XL086Fru,LINECORD,IL,1M,3P ,NON-LH
00XL058Fru,LINECORD,AR,1M,3P ,NON-LH
00XL062Fru,LINECORD,BR,1M,3P ,NON-LH
00XL089Fru,LINECORD,CN,1M,3P ,NON-LH
00XL080Fru,LINECORD,AU,1M,3P ,NON-LH
00XL074Fru,LINECORD,IT ,1M,3P ,NON-LH
00XL075Fru,LINECORD,GB,1M,3P ,NON-LH
00XL072Fru,LINECORD,IT ,1M,3P ,NON-LH
00XL092Fru,LINECORD,TW,1M,3P ,NON-LH
00XL078Fru,LINECORD,AU,1M,3P ,NON-LH
00XL097Fru,LINECORD,TH,1M,3P ,NON-LH
00XL059Fru,LINECORD,AR,1M,3P ,NON-LH
00XL052Fru,US/CA,1M,3P ,NON-LH
00XL061Fru,LINECORD,BR,1M,3P ,NON-LH
00XL085Fru,LINECORD,IL,1M,3P ,NON-LH
Chapter9.FRUlists-AIO-310ASR45
Page 52

00XL064Fru,EU/KR,1M,3P ,NON-LH
00XL076Fru,LINECORD,GB,1M,3P ,NON-LH
00XL002Fru,JP ,Anti- TR,1M,2P ,NON-LH
00XL051Fru,US/CA,1M,3P ,NON-LH
00XL081Fru,LINECORD,ZA,1M,3P ,NON-LH
00XL077Fru,LINECORD,GB,1M,3P ,NON-LH
00XL069Fru,LINECORD,CH,1M,3P ,NON-LH
00XL079Fru,LINECORD,AU,1M,3P ,NON-LH
00XL083Fru,LINECORD,ZA,1M,3P ,NON-LH
00XL065Fru,EU/KR,1M,3P ,NON-LH
00XL063Fru,EU/KR,1M,3P ,NON-LH
00XL070Fru,LINECORD,CH,1M,3P ,NON-LH
00XL091Fru,LINECORD,TW,1M,3P ,NON-LH
00XL066Fru,LINECORD,DK,1M,3P ,NON-LH
00XL053Fru,US/CA,1M,3P ,NON-LH
00XL067Fru,LINECORD,DK,1M,3P ,NON-LH
00XL094Fru,LINECORD,IN,1M,3P ,NON-LH
00XL084Fru,LINECORD,IL,1M,3P ,NON-LH
00XL068Fru,LINECORD,DK,1M,3P ,NON-LH
MECH_ASM
01EF749C2_FRONT-COVER-ASSY -BK-W/O-Cam
01EF748C2_FRONT-COVER-ASSY -WT -W/O-Cam
01EF625FrameStandAIO310White
01EF627ASSY_ODD_Bezel_AIO310,White
01EF626FrameStandAIO310Black
01EF636ASSY-C2-HDD-BKT
01EF635C2_BACK-COVER-ASSY(BLACK)
01EF634C2_FRONT-COVER-ASSY(BLACK)
01EF628ASSY_ODD_Bezel_AIO310,Black
01EF632C2_FRONT-COVER-ASSY(WHITE)
01EF663panelAssy,LG,N-Cam,AIO310
01EF633C2_BACK-COVER-ASSY(WHITE)
01EF661panelAssy,LG,AIO310
MECHANICAL
01EF747C2_camera_bkt
01EF672Non-ODDcoverWhite
01EF630C2_panel_bkt
01EF631C2_panel_bkt2
01EF673Non-ODDcoverBlack
MEMORY
46All-In-One310DesktopHardwareMaintenanceManual
Page 53

01HW756FRUSoDIMM4GBDDR42400Samsung
01AG7014GBDDR42400SoDIMM
01AG7084GBDDR42400SoDIMM
01AG7094GBDDR42400SoDIMM
SCREW
00XD903ScrewwithbracketWIFIcard
01EF641ScrewlistC2
MICROPHONE
01AH402AIO510Microphone
MOUSE
00PH132USB,Calliope,Mouse,White
00PH131USBCalliopeMouseBlack(Orangewh
OPT_DRIVE
00FC442SMD,DT,SA T A,9.5mm,x8,w/obezel
SPEAKERINT
01AH931AVCAIO300AWSpeaker
WIRELESS
00JT482Wireless,CMB,CBT,8821AE
01AX709Wireless,CMB,L TN,NFA435A
Chapter9.FRUlists-AIO-310ASR47
Page 54

48All-In-One310DesktopHardwareMaintenanceManual
Page 55

Chapter10.FRUlists-AIO-310-20IAP
Thischapterliststheinformationonthefieldreplaceableunits(FRUs)forLenovoC20-30NoneT ouch
All-In-Onedesktopcomputer.
Attention:BesuretoreadandunderstandallthesafetyinformationbeforereplacinganyFRUs.
Notes:FRUsthathavea1or2intheCRUcolumnareCustomerReplaceableUnits(CRUs).
•1–identifiespartsthatarefairlysimpletoreplace,requiringfewornotools.
•2–identifiespartsthatareslightlymoredifficulttoreplace.
•N-identifiespartsthatarenottobereplacedbythecustomer.
LenovoAIO310-20IAPservicepartslisting
MT:F0CL
FRUP/N
AC_ADAPTER
54Y8998AC_ADAPTER,45W,100-240Vac,3P
ANTENNA
00XJ092AIO310615/300mmantenna
BDPLANAR
01GJ019MB,PentiumJ4205,UMA,NODPK
01GJ213MB,CeleronJ3455,UMA,WINDPK
01GJ018MB,PentiumJ4205,UMA,WINDPK
01GJ216MB,CeleronJ3355,UMA,NODPK
01GJ215MB,CeleronJ3355,UMA,WINDPK
01GJ214MB,CeleronJ3455,UMA,NODPK
CABLE
00XL236Cable_LVDS
00XL237Cable_ODDSATA
CARDPOP
01AJ797AAIO310Powerbuttonboard
CAMERA
01AH330C2S2720PCam
DT_KYB
00XH674USB,Calliope,KB,WH,TUR
00XH635USBCalliopeKBBKCANENG/FRA
00XH633USBCalliopeKBBKNORDIC
00XH655USB,Calliope,KB,WH,HUN
00XH672USB,Calliope,KB,WH,THAI
00XH654USB,Calliope,KB,WH,HBW
Description
©CopyrightLenovo2016,2016
49
Page 56

00XH666USB,Calliope,KB,WH,RUS
00XH652USB,Calliope,KB,WH,GRE
00XH604USBCalliopeKBBKHBW
00XH605USBCalliopeKBBKHUN
00XH677USB,Calliope,KB,WH,SLV
00XH607USBCalliopeKBBKIT A
00XH668USB,Calliope,KB,WH,SLK
00XH598USBCalliopeKBBKFRA
00XH685USB,Calliope,KB,WH,CAN,ENG/FRA
00XH602USBCalliopeKBBKGRE
00XH601USBCalliopeKBBKGER
00XH644USB,Calliope,KB,WH,TC/ENG
00XH627USBCalliopeKBBKSL V
00XH643USB,Calliope,KB,WH,BUL
00XH626USBCalliopeKBBKEUROENG
00XH657USB,Calliope,KB,WH,ITA
00XH610USBCalliopeKBBKKOR
00XH608USBCalliopeKBBKJPN
00XH645USB,Calliope,KB,WH,CZE
00XH658USB,Calliope,KB,WH,JPN
00XH671USB,Calliope,KB,WH,SWS
00XH680USB,Calliope,KB,WH,IND,ENG
00XH648USB,Calliope,KB,WH,FRA
00XH676USB,Calliope,KB,WH,EURO,ENG
00XH651USB,Calliope,KB,WH,GER
00XH675USB,Calliope,KB,WH,UKE
00XH621USBCalliopeKBBKSWS
00XH683USB,Calliope,KB,WH,NORDIC
00XH622USBCalliopeKBBKTHAI
00XH669USB,Calliope,KB,WH,SPA
00XH630USBCalliopeKBBKINDENG
00XH618USBCalliopeKBBKSLK
00XH625USBCalliopeKBBKUKE
00XH619USBCalliopeKBBKSP A
00XH624USBCalliopeKBBKTUR
00XH611USB,Calliope,KB,BK,LASP A
00XH660USB,Calliope,KB,WH,KOR
00XH661USBCalliopeKBWHLASP A
00XH664USB,Calliope,KB,WH,POR
00XH594USBCalliopeKBBKTC/ENG
50All-In-One310DesktopHardwareMaintenanceManual
Page 57

00XH614USBCalliopeKBBKPOR
00XH638USB,Calliope,KB,WH,ARA
00XH595USBCalliopeKBBKCZE
00XH637USB,Calliope,KB,WH,ENG
00XH593USBCalliopeKBBKBUL
00XH641USB,Calliope,KB,WH,BELENG
00XH591USB,Calliope,KB,BK,BELENG
00XH616USBCalliopeKBBKRUS
00XH587USBCalliopeKBBKENG
00XH588USBCalliopeKBBKARA
HDD_ASM
00FC428HDD,500G,5400,7mm,DT2,SAT A3,STD
00FC430HDD,1TB,5400,7mm,DT2,SAT A3,STD
00FC429HDD,1TB,5400,9mm,DT2,SAT A3,STD
HEATSINK
01EF576IAPLUMATMw/oBPfor310AP
LINECORD
00XL073F ru,LINECORD,IT,1M,3P ,NON-LH
00XL096F ru,LINECORD,IN,1M,3P ,NON-LH
00XL082F ru,LINECORD,ZA,1M,3P ,NON-LH
00XL090F ru,LINECORD,CN,1M,3P ,NON-LH
00XL093F ru,LINECORD,TW,1M,3P ,NON-LH
00XL057F ru,LINECORD,AR,1M,3P ,NON-LH
00XL003F ru,JP ,Anti-TR,1M,2P ,NON-LH
00XL071F ru,LINECORD,CH,1M,3P ,NON-LH
00XL060F ru,LINECORD,BR,1M,3P ,NON-LH
00XL086F ru,LINECORD,IL,1M,3P ,NON-LH
00XL058F ru,LINECORD,AR,1M,3P ,NON-LH
00XL062F ru,LINECORD,BR,1M,3P ,NON-LH
00XL089F ru,LINECORD,CN,1M,3P ,NON-LH
00XL080F ru,LINECORD,AU,1M,3P ,NON-LH
00XL074F ru,LINECORD,IT,1M,3P ,NON-LH
00XL075F ru,LINECORD,GB,1M,3P ,NON-LH
00XL072F ru,LINECORD,IT,1M,3P ,NON-LH
00XL092F ru,LINECORD,TW,1M,3P ,NON-LH
00XL078F ru,LINECORD,AU,1M,3P ,NON-LH
00XL097F ru,LINECORD,TH,1M,3P ,NON-LH
00XL059F ru,LINECORD,AR,1M,3P ,NON-LH
00XL052F ru,US/CA,1M,3P ,NON-LH
Chapter10.FRUlists-AIO-310-20IAP51
Page 58

00XL061F ru,LINECORD,BR,1M,3P ,NON-LH
00XL085F ru,LINECORD,IL,1M,3P ,NON-LH
00XL064F ru,EU/KR,1M,3P ,NON-LH
00XL076F ru,LINECORD,GB,1M,3P ,NON-LH
00XL002F ru,JP ,Anti-TR,1M,2P ,NON-LH
00XL051F ru,US/CA,1M,3P ,NON-LH
00XL081F ru,LINECORD,ZA,1M,3P ,NON-LH
00XL077F ru,LINECORD,GB,1M,3P ,NON-LH
00XL069F ru,LINECORD,CH,1M,3P ,NON-LH
00XL079F ru,LINECORD,AU,1M,3P ,NON-LH
00XL083F ru,LINECORD,ZA,1M,3P ,NON-LH
00XL065F ru,EU/KR,1M,3P ,NON-LH
00XL063F ru,EU/KR,1M,3P ,NON-LH
00XL070F ru,LINECORD,CH,1M,3P ,NON-LH
00XL091F ru,LINECORD,TW,1M,3P ,NON-LH
00XL066F ru,LINECORD,DK,1M,3P ,NON-LH
00XL053F ru,US/CA,1M,3P ,NON-LH
00XL067F ru,LINECORD,DK,1M,3P ,NON-LH
00XL094F ru,LINECORD,IN,1M,3P ,NON-LH
00XL084F ru,LINECORD,IL,1M,3P ,NON-LH
00XL068F ru,LINECORD,DK,1M,3P ,NON-LH
MECH_ASM
01EF749C2_FRONT-COVER-ASSY -BK-W/O-Cam
01EF748C2_FRONT-COVER-ASSY -WT -W/O-Cam
01EF625FrameStandAIO310White
01EF627ASSY_ODD_Bezel_AIO310,White
01EF626FrameStandAIO310Black
01EF636ASSY-C2-HDD-BKT
01EF635C2_BACK-COVER-ASSY(BLACK)
01EF634C2_FRONT-COVER-ASSY(BLACK)
01EF628ASSY_ODD_Bezel_AIO310,Black
01EF632C2_FRONT-COVER-ASSY(WHITE)
01EF663panelAssy,LG,N-Cam,AIO310
01EF633C2_BACK-COVER-ASSY(WHITE)
01EF661panelAssy,LG,AIO310
MECHANICAL
01EF747C2_camera_bkt
01EF672Non-ODDcoverWhite
01EF630C2_panel_bkt
01EF631C2_panel_bkt2
52All-In-One310DesktopHardwareMaintenanceManual
Page 59

01EF673Non-ODDcoverBlack
MEMORY
03T7117SODIMM,4G,DDR3L,1600
SCREW
00XD903ScrewwithbracketWIFIcard
01EF641ScrewlistC2
MICROPHONE
01AH402AIO510Microphone
MOUSE
00PH132USB,Calliope,Mouse,White
00PH131USBCalliopeMouseBlack(Orangewh
OPT_DRIVE
00FC442SMD,DT,SA T A,9.5mm,x8,w/obezel
SPEAKERINT
01AH931AVCAIO300AWSpeaker
WIRELESS
01AX709Wireless,CMB,L TN,NFA435A
00JT497Wireless,CMB,IN,3165ac
Chapter10.FRUlists-AIO-310-20IAP53
Page 60

54All-In-One310DesktopHardwareMaintenanceManual
Page 61

Chapter11.AdditionalServiceInformation
Thischapterprovidesadditionalinformationthattheservicerepresentativemightfindhelpful.
Powermanagement
Powermanagementreducesthepowerconsumptionofcertaincomponentsofthecomputersuchasthe
systempowersupply,processor,harddiskdrives,andsomemonitors.
Advancedconfigurationandpowerinterface(ACPI)BIOS
AsthiscomputerhasanACPIBIOSsystem,theoperatingsystemisallowedtocontrolthepower
managementfeaturesofthecomputerandthesettingsforAdvancedPowerManagement(APM)BIOSmode
isignored.NotalloperatingsystemssupportACPIBIOSmode.
AutomaticPower-Onfeatures
TheAutomaticPower-OnfeatureswithinthePowerManagementmenuallowyoutoenableanddisable
featuresthatturnonthecomputerautomatically.
•WakeUponAlarm:Youcanspecifyadateandtimeatwhichthecomputerwillbeturnedonautomatically.
Thiscanbeeitherasingleevent,adailyeventoraweeklyevent.
•WakeUponLAN:ThisfeatureallowsLANadaptercardtowaketheSystem.
©CopyrightLenovo2016,2016
55
 Loading...