


LenovoH520eHardwareMaintenanceManual
ideaideaideaCentreidea
MachineTypes:90AM

Note:Beforeusingthisinformationandtheproductitsupports,besuretoreadandunderstandChapter2
“Safetyinformation”onpage3andAppendixA“Notices”onpage101.
FirstEdition(January2013)
©CopyrightLenovo2013.
LIMITEDANDRESTRICTEDRIGHTSNOTICE:IfdataorsoftwareisdeliveredpursuantaGeneralServicesAdministration
“GSA”contract,use,reproduction,ordisclosureissubjecttorestrictionssetforthinContractNo.GS-35F-05925.

Contents
Chapter1.Aboutthismanual......1
Importantsafetyinformation..........1
Chapter2.Safetyinformation......3
Generalsafety................3
Electricalsafety...............3
Voltage-selectionswitch............5
Safetyinspectionguide............5
Handlingelectrostaticdischarge-sensitive
devices..................6
Groundingrequirements............6
Safetynotices(multi-lingualtranslations).....6
Chapter3.Generalinformation....29
Specifications...............29
LenovoSupportWebsite..........30
Chapter4.Generalcheckout.....31
Problemdeterminationtips..........31
Chapter5.Troubleshootingand
diagnostics..............33
Basictroubleshooting............33
AccessingControlPanelontheWindows8
operatingsystem..............34
Troubleshootingprocedure..........34
Troubleshooting..............35
Audioproblems............35
CDproblems.............37
DVDproblems.............38
Intermittentproblems..........39
Harddiskdriveproblems.........39
Keyboard,mouse,orpointingdevice
problems...............40
Monitorproblems............42
Networkingproblems..........43
Optionproblems............46
Performanceandlockupproblems.....47
Printerproblems............49
Serialportproblems...........49
Softwareproblems...........50
USBproblems.............51
Diagnostics................51
LenovoSolutionCenter.........51
Chapter6.UsingtheSetupUtility
program................53
StartingtheSetupUtilityprogram.......53
Viewingandchangingsettings........53
Usingpasswords..............53
Passwordconsiderations.........54
Power-OnPassword..........54
AdministratorPassword.........54
HardDiskPassword...........54
Setting,changing,anddeletingapassword.54
Erasinglostorforgottenpasswords(clearing
CMOS)................55
Enablingordisablingadevice........55
Selectingastartupdevice..........55
Selectingatemporarystartupdevice....55
Selectingorchangingthestartupdevice
sequence...............56
EnablingErPcompliancemode........56
ChangingtheBIOSsettingsbeforeinstallinganew
operatingsystem..............57
ExitingtheSetupUtilityprogram.......57
Chapter7.Symptom-to-FRUindex..59
Harddiskdrivebooterror..........59
Powersupplyproblems...........59
Beepsymptoms..............59
POSTerrorcodes.............60
Miscellaneouserrormessages........62
Undeterminedproblems...........63
Chapter8.Locations.........65
Locations.................65
Locatingconnectors,controls,andindicators
onthefrontofyourcomputer.......65
Locatingconnectorsontherearofyour
computer...............65
LocatingmajorFRUsandCRUs......66
Locatingpartsonthesystemboard....67
Locatinginternaldrives.........67
Chapter9.ReplacingFRUs......69
Handlingstatic-sensitivedevices.......69
Installingorreplacinghardware........69
Removingthecomputercover.......70
Removingandreinstallingthefrontbezel..71
InstallingorreplacingaPCIcard......72
Replacingthebattery..........75
Installingorreplacingamemorymodule...76
Replacingtheopticaldrive........78
Replacingtheheatsinkandfanassembly..80
Replacingthepowersupplyassembly...82
©CopyrightLenovo2013
i

Replacingthemicroprocessor.......83
Replacingthesystemboard.......85
Replacingtheprimaryharddiskdrive....87
ReplacingthefrontaudioandUSB
assembly...............89
Completingthepartsreplacement.....90
Chapter10.FRUlists.........93
Chapter11.Additionalservice
information..............97
Securityfeatures..............97
Hardware-controlledpasswords......97
Operatingsystempassword.......97
VitalProductData...........97
BIOSlevels................97
Flashupdateprocedures..........97
Updating(flashing)theBIOSfromadisc...98
Updating(flashing)theBIOSfromyour
operatingsystem............99
RecoveringfromaPOSTandBIOSupdate
failure................99
Powermanagement............100
AdvancedConfigurationandPowerInterface
(ACPI)BIOS..............100
AutomaticPower-onfeatures.......100
AppendixA.Notices.........101
Televisionoutputnotice...........102
EuropeanconformanceCEmark.......102
Trademarks................102
Index.................103
iiLenovoH520eHardwareMaintenanceManual
Chapter1.Aboutthismanual
ThismanualprovidesserviceandreferenceinformationforLenovo
ThismanualisintendedonlyfortrainedservicepersonnelwhoarefamiliarwithLenovocomputerproducts.
BeforeservicingaLenovocomputerproduct,besuretoreadChapter2“Safetyinformation”onpage3.
Chapter7“Symptom-to-FRUindex”onpage59
arenotspecifictoanymachinetype.ThesechaptersareapplicabletoallLenovoH520gcomputers.
FormajorFRUlocationsandCustomerReplaceableUnit(CRU)identification,seeChapter8“Locations”
onpage65.
ForFRUreplacementinstructions,seeChapter9“ReplacingFRUs”onpage69
andChapter11“Additionalserviceinformation”onpage97
®
computerslistedonthefrontcover.
.
Importantsafetyinformation
Besuretoreadallcautionanddangerstatementsinthismanualbeforeperforminganyoftheinstructions.
VeuillezliretouteslesconsignesdetypeDANGERetATTENTIONduprésentdocumentavantd'exécuter
lesinstructions.
LesenSieunbedingtalleHinweisevomTyp"ACHTUNG"oder"VORSICHT"indieserDokumentation,bevor
SieirgendwelcheVorgängedurchführen
LeggereleistruzioniintrodottedaATTENZIONEePERICOLOpresentinelmanualeprimadieseguireuna
qualsiasidelleistruzioni
Certifique-sedelertodasasinstruçõesdecuidadoeperigonestemanualantesdeexecutarqualquer
umadasinstruções
Esimportantequeleatodaslasdeclaracionesdeprecauciónydepeligrodeestemanualantesdeseguir
lasinstrucciones.
©CopyrightLenovo2013
1

2LenovoH520eHardwareMaintenanceManual

Chapter2.Safetyinformation
Thischaptercontainsthesafetyinformationthatyouneedtobefamiliarwithbeforeservicingacomputer.
Generalsafety
Followtheserulestoensuregeneralsafety:
•Observegoodhousekeepingintheareaofthemachinesduringandaftermaintenance.
•Whenliftinganyheavyobject:
1.Ensureyoucanstandsafelywithoutslipping.
2.Distributetheweightoftheobjectequallybetweenyourfeet.
3.Useaslowliftingforce.Nevermovesuddenlyortwistwhenyouattempttolift.
4.Liftbystandingorbypushingupwithyourlegmuscles;thisactionremovesthestrainfromthe
musclesinyourback.Donotattempttoliftanyobjectsthatweighmorethan16kg(35lb)orobjects
thatyouthinkaretooheavyforyou.
•Donotperformanyactionthatcauseshazardstothecustomer,orthatmakestheequipmentunsafe.
•Beforeyoustartthemachine,ensurethatotherservicerepresentativesandthecustomer'spersonnelare
notinahazardousposition.
•Placeremovedcoversandotherpartsinasafeplace,awayfromallpersonnel,whileyouareservicing
themachine.
•Keepyourtoolcaseawayfromwalkareassothatotherpeoplewillnottripoverit.
•Donotwearlooseclothingthatcanbetrappedinthemovingpartsofamachine.Ensurethatyoursleeves
arefastenedorrolledupaboveyourelbows.Ifyourhairislong,fastenit.
•Inserttheendsofyournecktieorscarfinsideclothingorfastenitwithanonconductiveclip,approximately
8centimeters(3inches)fromtheend.
•Donotwearjewelry,chains,metal-frameeyeglasses,ormetalfastenersforyourclothing.
Remember:Metalobjectsaregoodelectricalconductors.
•Wearsafetyglasseswhenyouare:hammering,drilling,soldering,cuttingwire,attachingsprings,using
solvents,orworkinginanyotherconditionsthatmightbehazardoustoyoureyes.
•Afterservice,reinstallallsafetyshields,guards,labels,andgroundwires.Replaceanysafetydevice
thatiswornordefective.
•Reinstallallcoverscorrectlybeforereturningthemachinetothecustomer.
Electricalsafety
CAUTION:
Electricalcurrentfrompower,telephone,andcommunicationcablescanbehazardous.Toavoid
personalinjuryorequipmentdamage,disconnecttheattachedpowercords,telecommunication
systems,networks,andmodemsbeforeyouopenthecentrecovers,unlessinstructedotherwisein
theinstallationandconfigurationprocedures.
Observethefollowingruleswhenworkingonelectricalequipment.
©CopyrightLenovo2013
3

Important:Useonlyapprovedtoolsandtestequipment.Somehandtoolshavehandlescoveredwithasoft
materialthatdoesnotinsulateyouwhenworkingwithliveelectricalcurrents.Manycustomershave,near
theirequipment,rubberfloormatsthatcontainsmallconductivefiberstodecreaseelectrostaticdischarges.
Donotusethistypeofmattoprotectyourselffromanelectricshock.
•Findtheroomemergencypower-off(EPO)switch,disconnectingswitch,orelectricaloutlet.Ifanelectrical
accidentoccurs,youcanthenoperatetheswitchorunplugthepowercordquickly.
•Donotworkaloneunderhazardousconditionsornearequipmentthathashazardousvoltages.
•Disconnectallpowerbefore:
–Performingamechanicalinspection
–Workingnearpowersupplies
–RemovingorinstallingFieldReplaceableUnits(FRU)
•Beforeyoustarttoworkonthemachine,unplugthepowercord.Ifyoucannotunplugit,askthecustomer
topower-offthewallboxthatsuppliespowertothemachineandtolockthewallboxintheoffposition.
•Ifyouneedtoworkonamachinethathasexposedelectricalcircuits,observethefollowingprecautions:
–Ensurethatanotherperson,familiarwiththepower-offcontrols,isnearyou.
Remember:Anotherpersonmustbetheretoswitchoffthepower,ifnecessary.
–Useonlyonehandwhenworkingwithpowered-onelectricalequipment;keeptheotherhandinyour
pocketorbehindyourback.
Remember:Theremustbeacompletecircuittocauseanelectricshock.Byobservingtheabove
rule,youmaypreventacurrentfrompassingthroughyourbody.
–Whenusingatester,setthecontrolscorrectlyandusetheapprovedprobeleadsandaccessoriesfor
thattester.
–Standonsuitablerubbermats(obtainedlocally,ifnecessary)toinsulateyoufromgroundssuchas
metalfloorstripsandmachineframes.
Observethespecialsafetyprecautionswhenyouworkwithveryhighvoltages;theseinstructionsarein
thesafetysectionsofmaintenanceinformation.Useextremecarewhenmeasuringhighvoltages.
•Regularlyinspectandmaintainyourelectricalhandtoolsforsafeoperationalcondition.
•Donotusewornorbrokentoolsandtesters.
•Neverassumethatpowerhasbeendisconnectedfromacircuit.First,checkthatithasbeenpowered-off.
•Alwayslookcarefullyforpossiblehazardsinyourworkarea.Examplesofthesehazardsaremoistfloors,
nongroundedpowerextensioncables,powersurges,andmissingsafetygrounds.
•Donottouchliveelectricalcircuitswiththereflectivesurfaceofaplasticdentalmirror.Thesurfaceis
conductive;suchtouchingcancausepersonalinjuryandmachinedamage.
•Donotservicethefollowingpartswiththepoweronwhentheyareremovedfromtheirnormaloperating
placesinamachine:
–Powersupplyunits
–Pumps
–Blowersandfans
–Motorgenerators
andsimilarunits.(Thispracticeensurescorrectgroundingoftheunits.)
•Ifanelectricalaccidentoccurs:
–Usecaution;donotbecomeavictimyourself.
–Switchoffpower.
–Sendanotherpersontogetmedicalaid.
4LenovoH520eHardwareMaintenanceManual

Voltage-selectionswitch
Somecomputersareequippedwithavoltage-selectionswitchlocatednearthepower-cordconnection
pointonthecomputer.Ifyourcomputerhasavoltage-selectionswitch,ensurethatyousettheswitchto
matchthevoltageavailableatyourelectricaloutlet.Settingthevoltage-selectionswitchincorrectlycan
causepermanentdamagetothecomputer.
Ifyourcomputerdoesnothaveavoltage-selectionswitch,yourcomputerisdesignedtooperateonlyatthe
voltageprovidedinthecountryorregionwherethecomputerwasoriginallypurchased.
Ifyourelocateyourcomputertoanothercountry,beawareofthefollowing:
•Ifyourcomputerdoesnothaveavoltage-selectionswitch,donotconnectthecomputertoanelectrical
outletuntilyouhaveverifiedthatthevoltageprovidedisthesameasitwasinthecountryorregion
wherethecomputerwasoriginallypurchased.
•Ifyourcomputerhasavoltage-selectionswitch,donotconnectthecomputertoanelectricaloutletuntil
youhaveverifiedthatthevoltage-selectionswitchissettomatchthevoltageprovidedinthatcountry
orregion.
Ifyouarenotsureofthevoltageprovidedatyourelectricaloutlet,contactyourlocalelectriccompanyor
refertoofficialWebsitesorotherliteraturefortravelerstothecountryorregionwhereyouarelocated.
Safetyinspectionguide
Theintentofthisinspectionguideistoassistyouinidentifyingpotentiallyunsafeconditionsonthese
products.Eachmachine,asitwasdesignedandbuilt,hadrequiredsafetyitemsinstalledtoprotectusers
andservicepersonnelfrominjury.Thisguideaddressesonlythoseitems.However,goodjudgmentshould
beusedtoidentifypotentialsafetyhazardsduetoattachmentoffeaturesoroptionsnotcoveredbythis
inspectionguide.
Ifanyunsafeconditionsarepresent,youmustdeterminehowserioustheapparenthazardcouldbeand
whetheryoucancontinuewithoutfirstcorrectingtheproblem.
Considertheseconditionsandthesafetyhazardstheypresent:
•Electricalhazards,especiallyprimarypower(primaryvoltageontheframecancauseseriousorfatal
electricalshock).
•Explosivehazards,suchasadamagedCRTfaceorbulgingcapacitor
•Mechanicalhazards,suchaslooseormissinghardware
Theguideconsistsofaseriesofstepspresentedinachecklist.Beginthecheckswiththepoweroff,and
thepowercorddisconnected.
Checklist:
1.Checkexteriorcoversfordamage(loose,broken,orsharpedges).
2.Power-offthecomputer.Disconnectthepowercord.
3.Checkthepowercordfor:
a.Athird-wiregroundconnectoringoodcondition.Useametertomeasurethird-wireground
continuityfor0.1ohmorlessbetweentheexternalgroundpinandframeground.
b.Thepowercordshouldbetheappropriatetypeasspecifiedinthepartslistings.
c.Insulationmustnotbefrayedorworn.
4.Removethecover.
Chapter2.Safetyinformation5

5.Checkforanyobviousalterations.Usegoodjudgmentastothesafetyofanyalterations.
6.Checkinsidetheunitforanyobviousunsafeconditions,suchasmetalfilings,contamination,wateror
otherliquids,orsignsoffireorsmokedamage.
7.Checkforworn,frayed,orpinchedcables.
8.Checkthatthepower-supplycoverfasteners(screwsorrivets)havenotbeenremovedortamperedwith.
Handlingelectrostaticdischarge-sensitivedevices
Anycomputerpartcontainingtransistorsorintegratedcircuits(ICs)shouldbeconsideredsensitiveto
electrostaticdischarge(ESD).ESDdamagecanoccurwhenthereisadifferenceinchargebetweenobjects.
ProtectagainstESDdamagebyequalizingthechargesothatthemachine,thepart,theworkmat,andthe
personhandlingthepartareallatthesamecharge.
Notes:
1.Useproduct-specificESDprocedureswhentheyexceedtherequirementsnotedhere.
2.MakesurethattheESDprotectivedevicesyouusehavebeencertified(ISO9000)asfullyeffective.
WhenhandlingESD-sensitiveparts:
•Keepthepartsinprotectivepackagesuntiltheyareinsertedintotheproduct.
•Avoidcontactwithotherpeoplewhilehandlingthepart.
•Wearagroundedwriststrapagainstyourskintoeliminatestaticonyourbody.
•Preventthepartfromtouchingyourclothing.Mostclothingisinsulativeandretainsachargeeven
whenyouarewearingawriststrap.
•Usetheblacksideofagroundedworkmattoprovideastatic-freeworksurface.Thematisespecially
usefulwhenhandlingESD-sensitivedevices.
•Selectagroundingsystem,suchasthoselistedbelow,toprovideprotectionthatmeetsthespecific
servicerequirement.
Note:TheuseofagroundingsystemisdesirablebutnotrequiredtoprotectagainstESDdamage.
–AttachtheESDgroundcliptoanyframeground,groundbraid,orgreen-wireground.
–UseanESDcommongroundorreferencepointwhenworkingonadouble-insulatedor
battery-operatedsystem.Youcanusecoaxorconnector-outsideshellsonthesesystems.
–Usetheroundground-prongoftheacplugonac-operatedcomputers.
Groundingrequirements
Electricalgroundingofthecomputerisrequiredforoperatorsafetyandcorrectsystemfunction.Proper
groundingoftheelectricaloutletcanbeverifiedbyacertifiedelectrician.
Safetynotices(multi-lingualtranslations)
Thecautionanddangersafetynoticesinthissectionareprovidedinthefollowinglanguages:
•English
•Arabic
•Brazilian/Portuguese
•Chinese(simplified)
•Chinese(traditional)
6LenovoH520eHardwareMaintenanceManual

•French
•German
•Hebrew
•Italian
•Korean
•Spanish
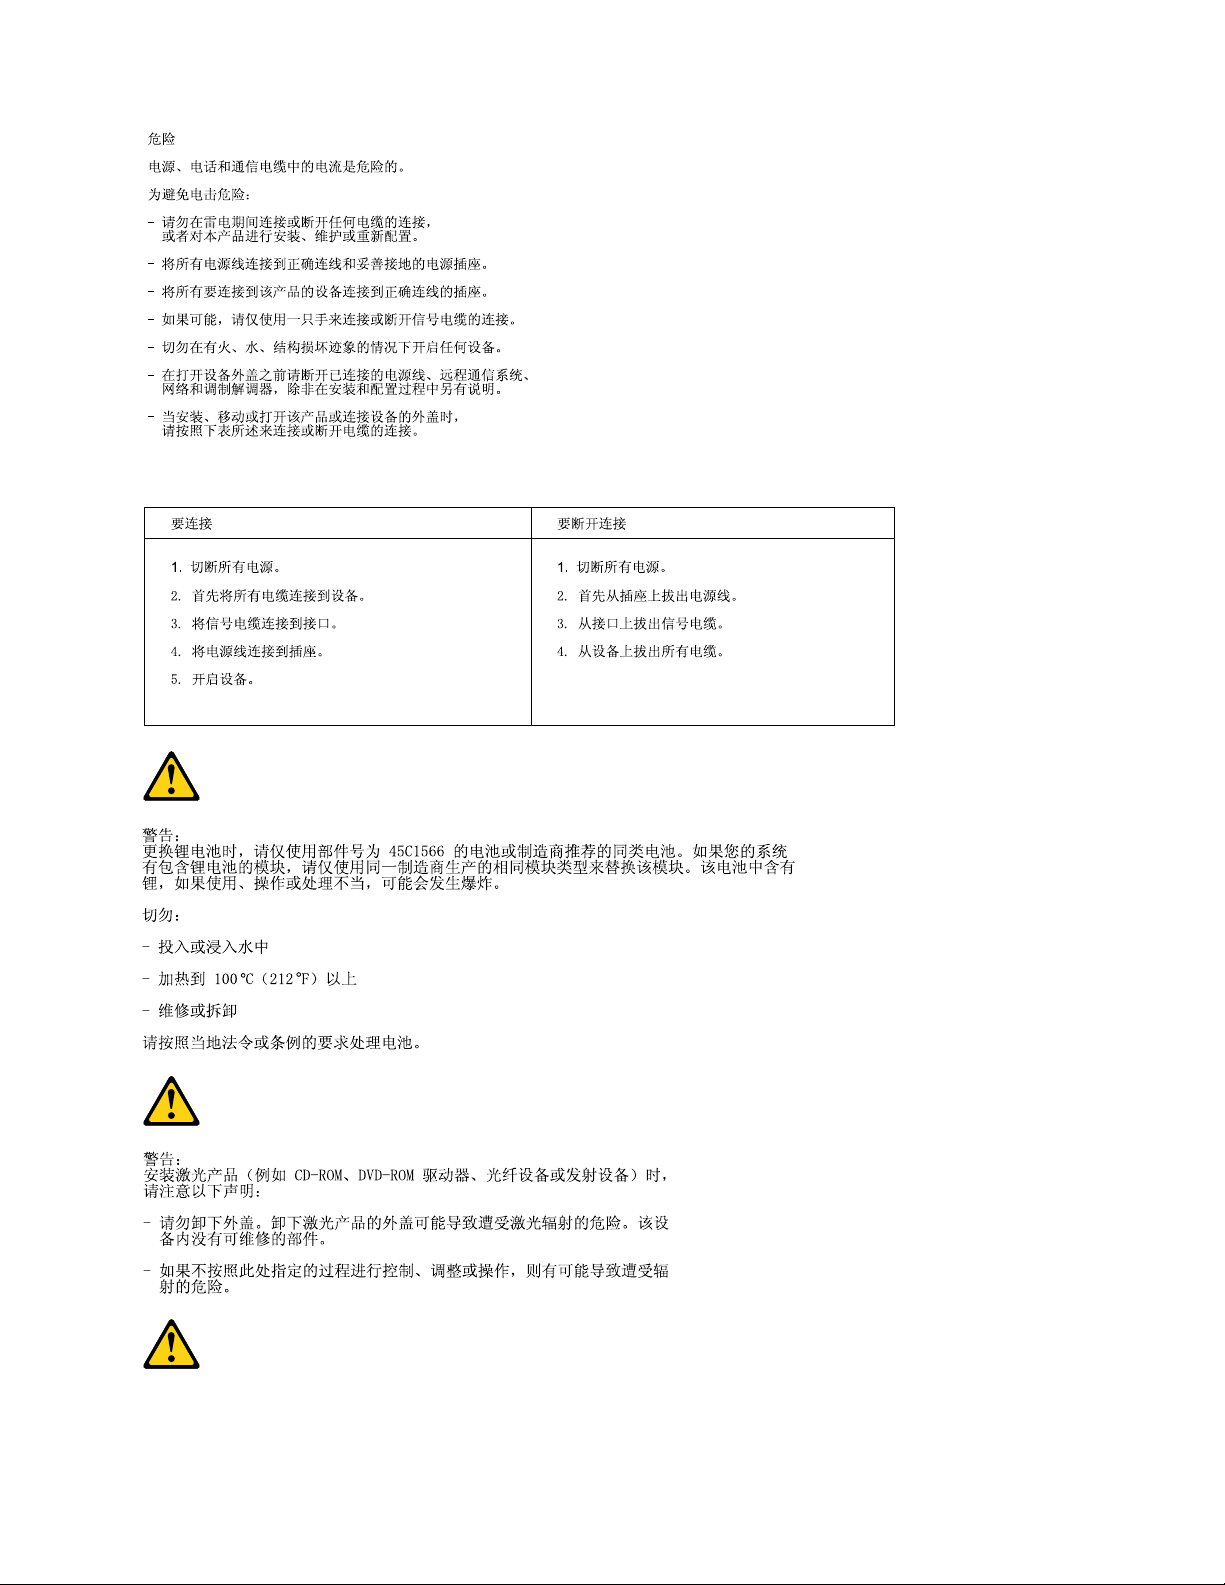
DANGER
Electricalcurrentfrompower,telephoneandcommunicationcablesishazardous.
Toavoidashockhazard:
•Donotconnectordisconnectanycablesorperforminstallation,maintenance,orreconfiguration
ofthisproductduringanelectricalstorm.
•Connectallpowercordstoaproperlywiredandgroundedelectricaloutlet.
•Connecttoproperlywiredoutletsanyequipmentthatwillbeattachedtothisproduct.
•Whenpossible,useonehandonlytoconnectordisconnectsignalcables.
•Neverturnonanyequipmentwhenthereisevidenceoffire,water,orstructuraldamage.
•Disconnecttheattachedpowercords,telecommunicationssystems,networks,andmodems
beforeyouopenthedevicecovers,unlessinstructedotherwiseintheinstallationandconfiguration
procedures.
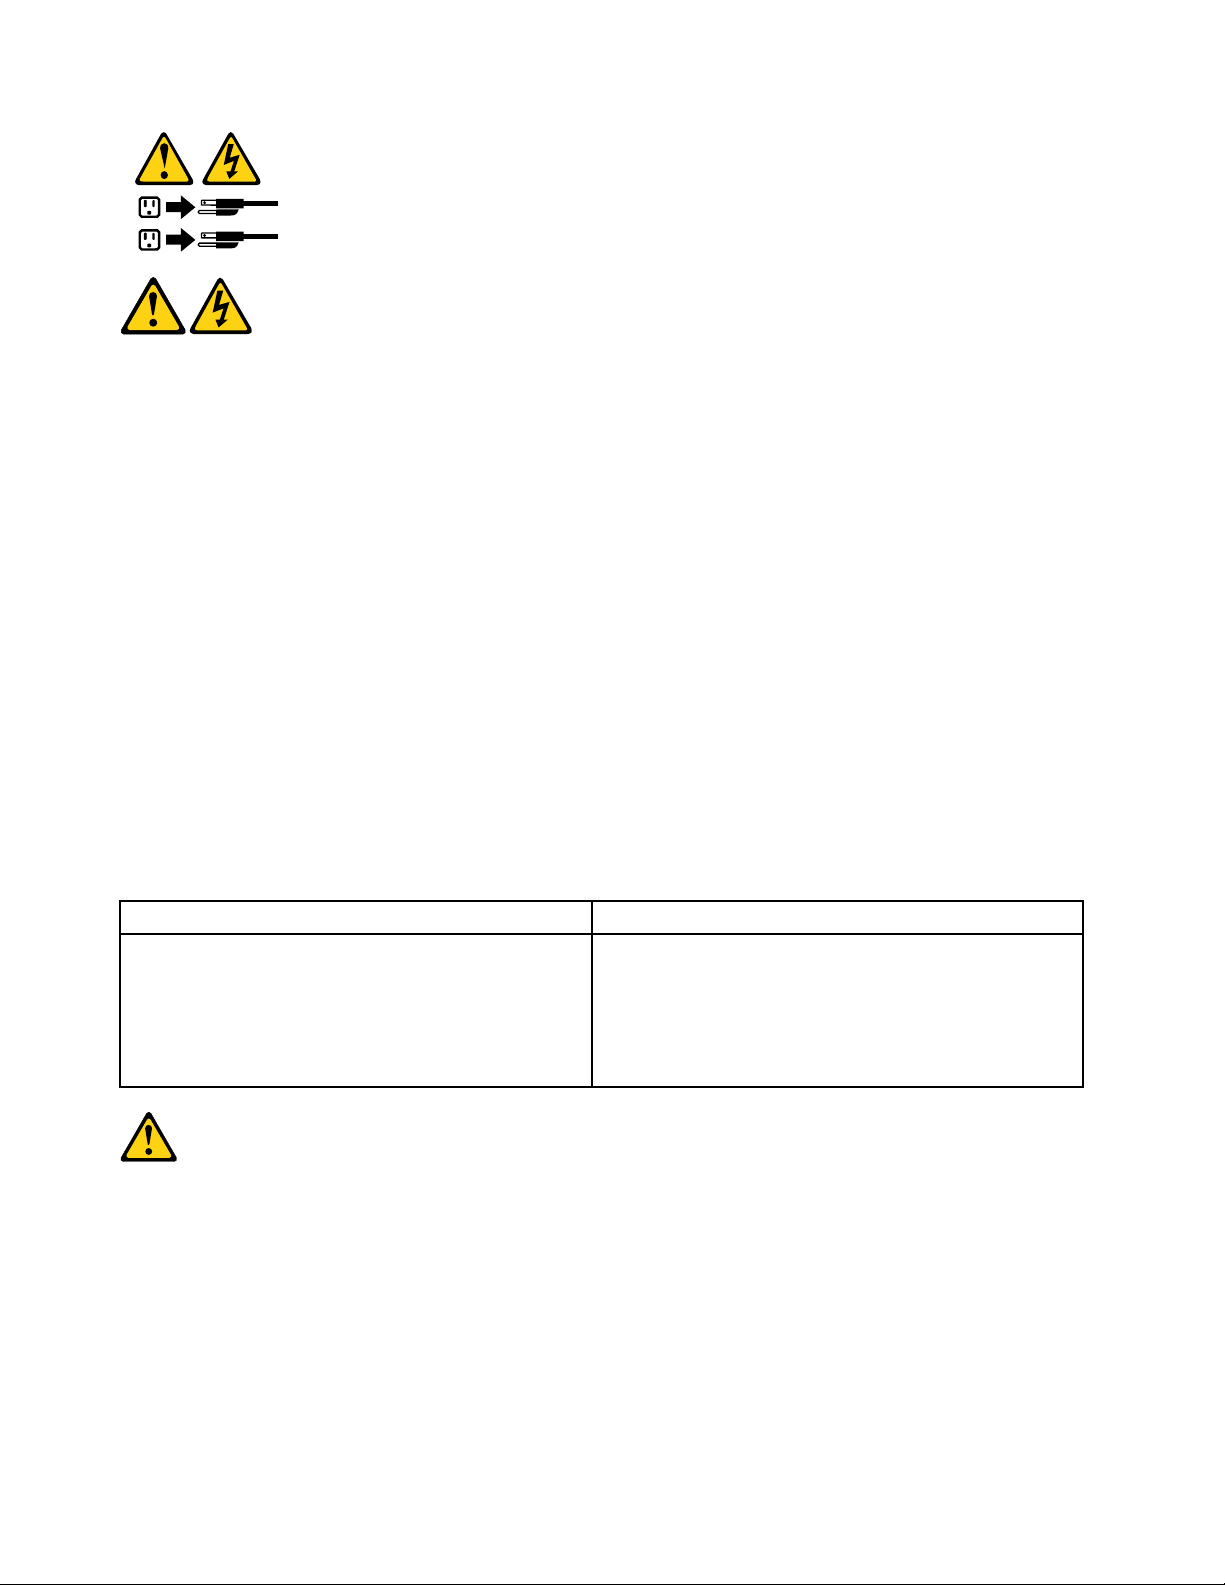
•Connectanddisconnectcablesasdescribedinthefollowingtableswheninstalling,moving,or
openingcoversonthisproductorattacheddevices.
ToConnectToDisconnect
1.TurneverythingOFF.
2.First,attachallcablestodevices.
3.Attachsignalcablestoconnectors.
4.Attachpowercordstooutlet.
5.TurndeviceON.
1.TurneverythingOFF.
2.First,removepowercordsfromoutlet.
3.Removesignalcablesfromconnectors.
4.Removeallcablesfromdevices.
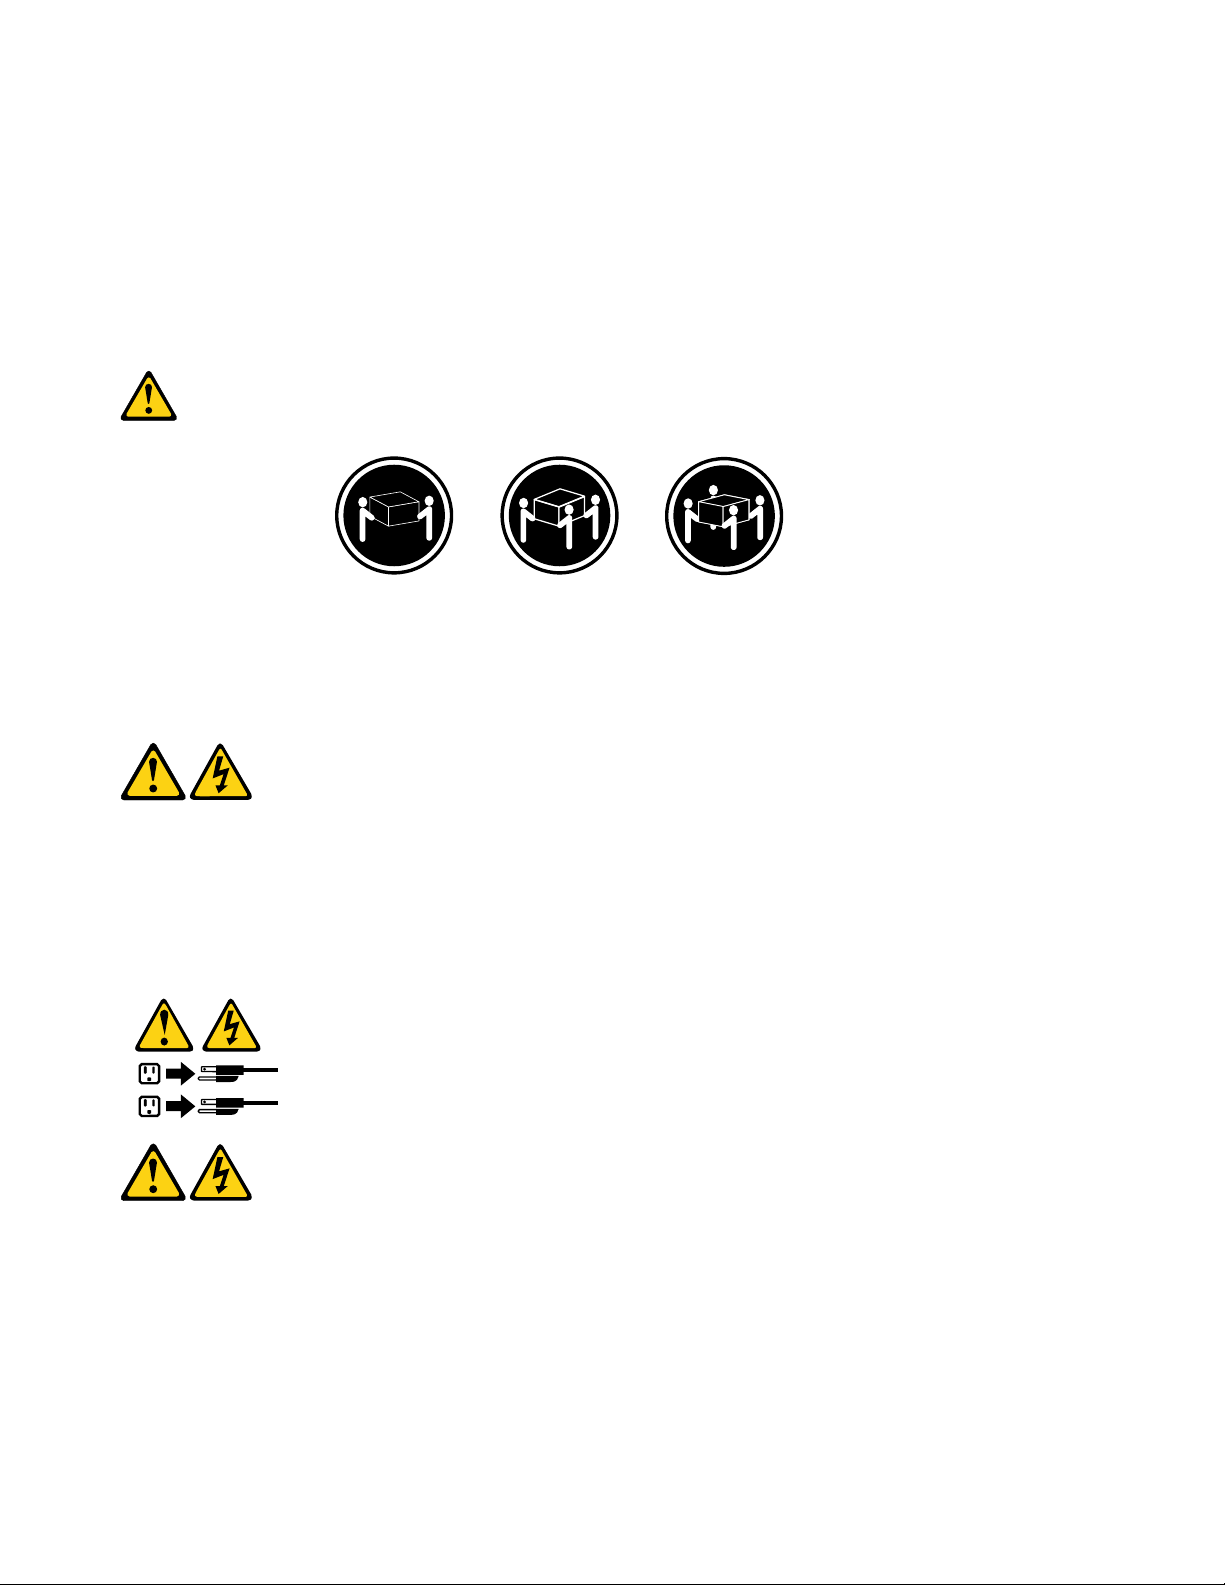
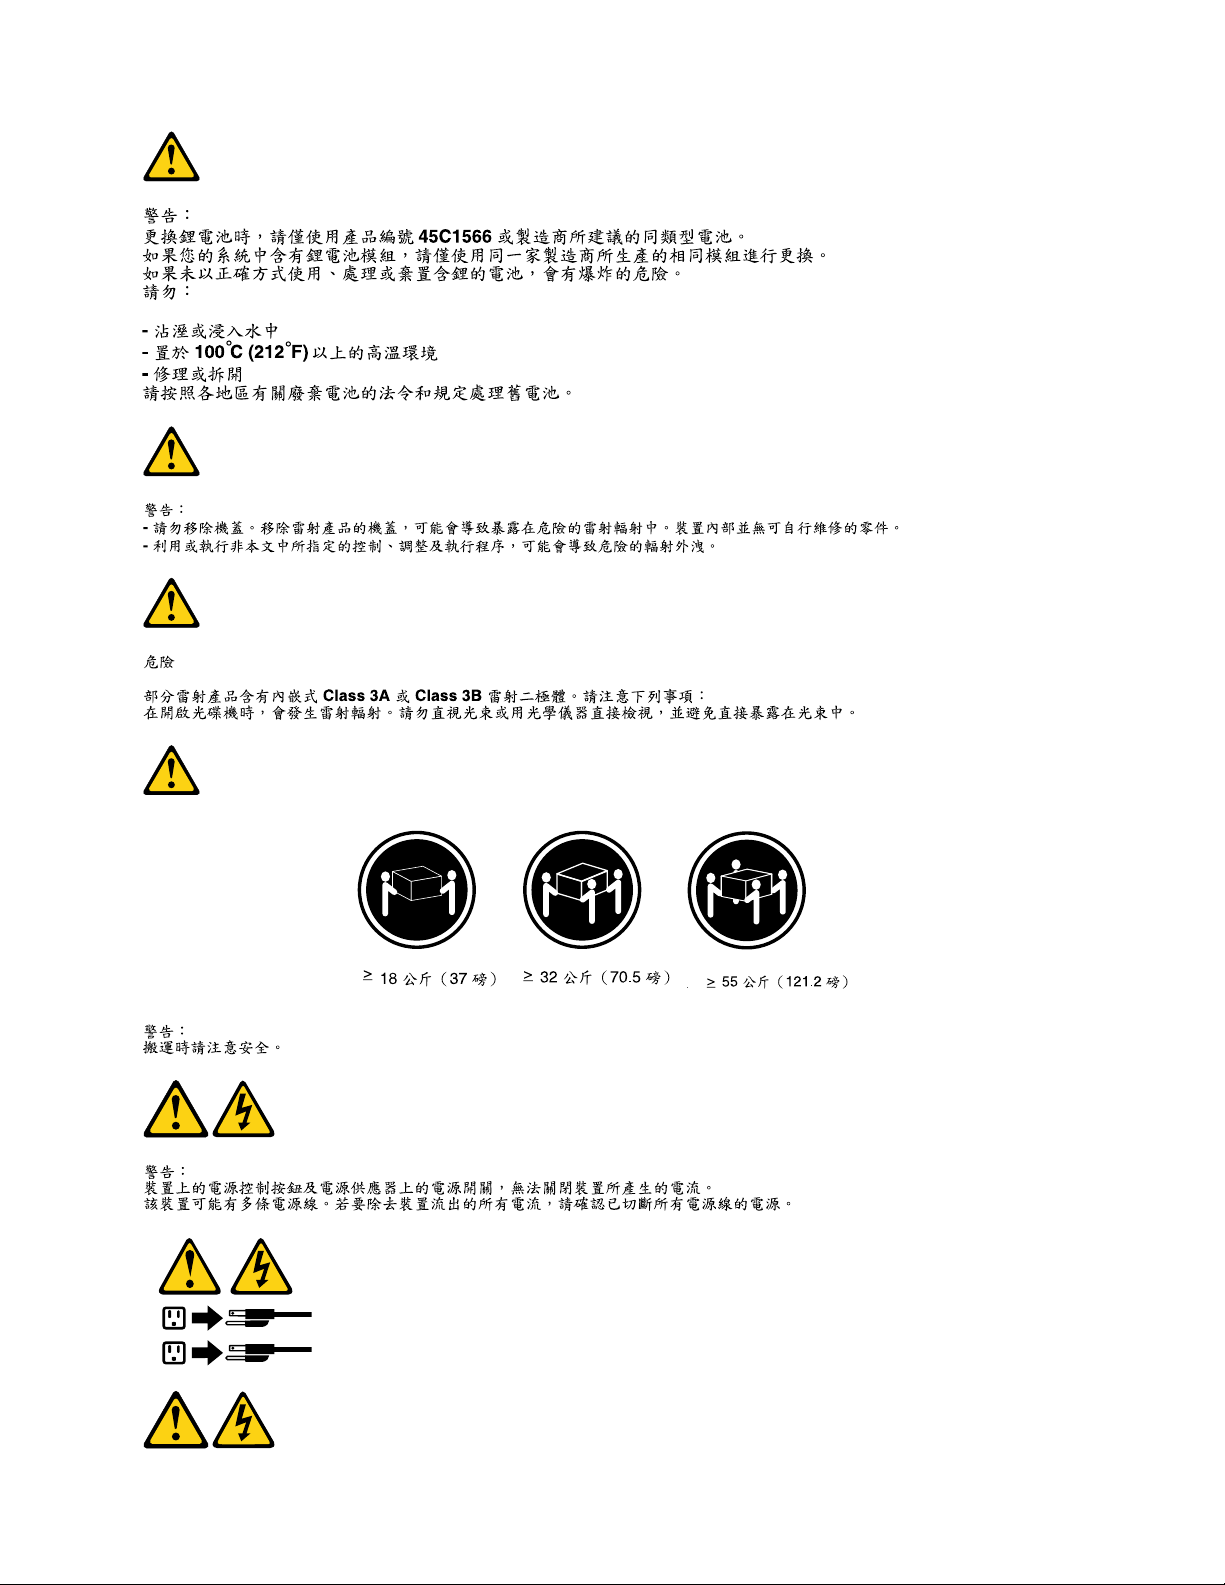
CAUTION:
Whenreplacingthelithiumbattery,useonlyPartNumber45C1566oranequivalenttypebattery
recommendedbythemanufacturer.Ifyoursystemhasamodulecontainingalithiumbattery,replace
itonlywiththesamemoduletypemadebythesamemanufacturer.Thebatterycontainslithiumand
canexplodeifnotproperlyused,handled,ordisposedof.Donot:
•Throworimmerseintowater
•Heattomorethan100°C(212°F)
•Repairordisassemble
Chapter2.Safetyinformation7
Disposeofthebatteryasrequiredbylocalordinancesorregulations.
1
2
CAUTION:
Whenlaserproducts(suchasCD-ROMs,DVD-ROMdrives,fiberopticdevices,ortransmitters)are
installed,notethefollowing:
•Donotremovethecovers.Removingthecoversofthelaserproductcouldresultinexposureto
hazardouslaserradiation.Therearenoserviceablepartsinsidethedevice.
•Useofcontrolsoradjustmentsorperformanceofproceduresotherthanthosespecifiedherein
mightresultinhazardousradiationexposure.
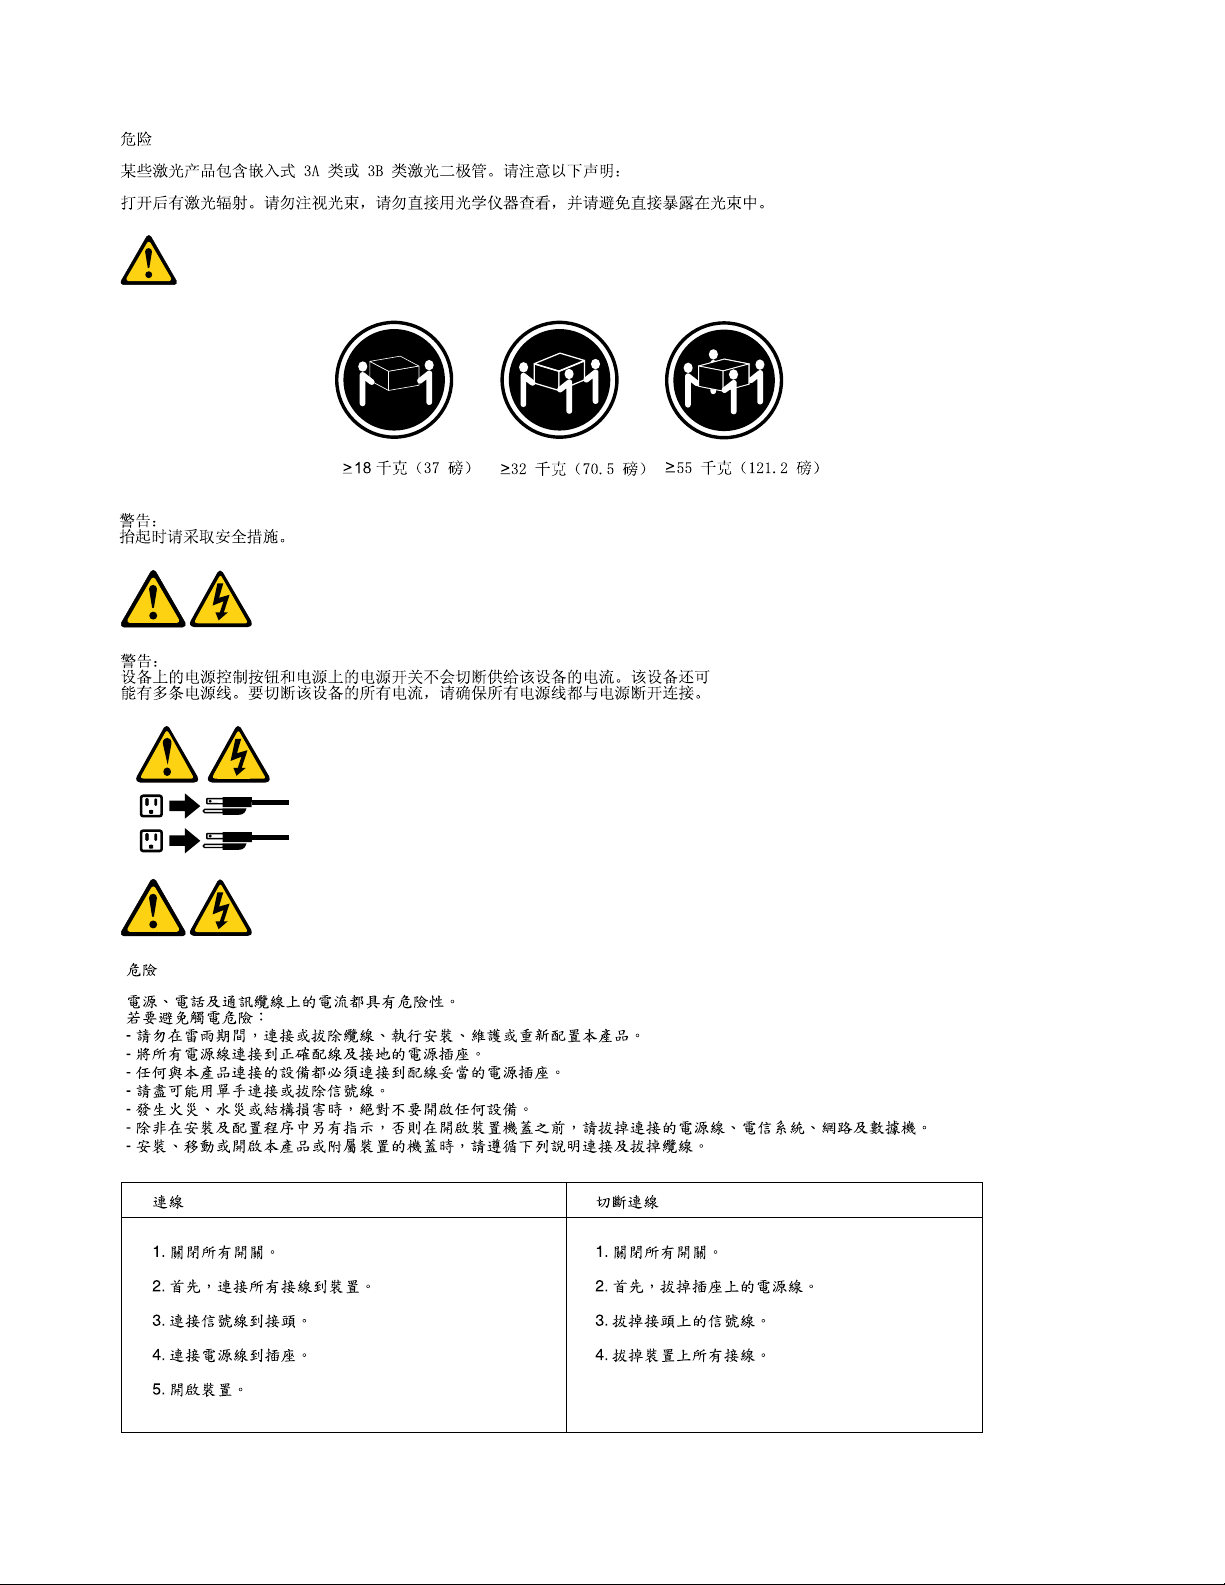
DANGER
SomelaserproductscontainanembeddedClass3AorClass3Blaserdiode.Notethefollowing:
Laserradiationwhenopen.Donotstareintothebeam,donotviewdirectlywithoptical
instruments,andavoiddirectexposuretothebeam.
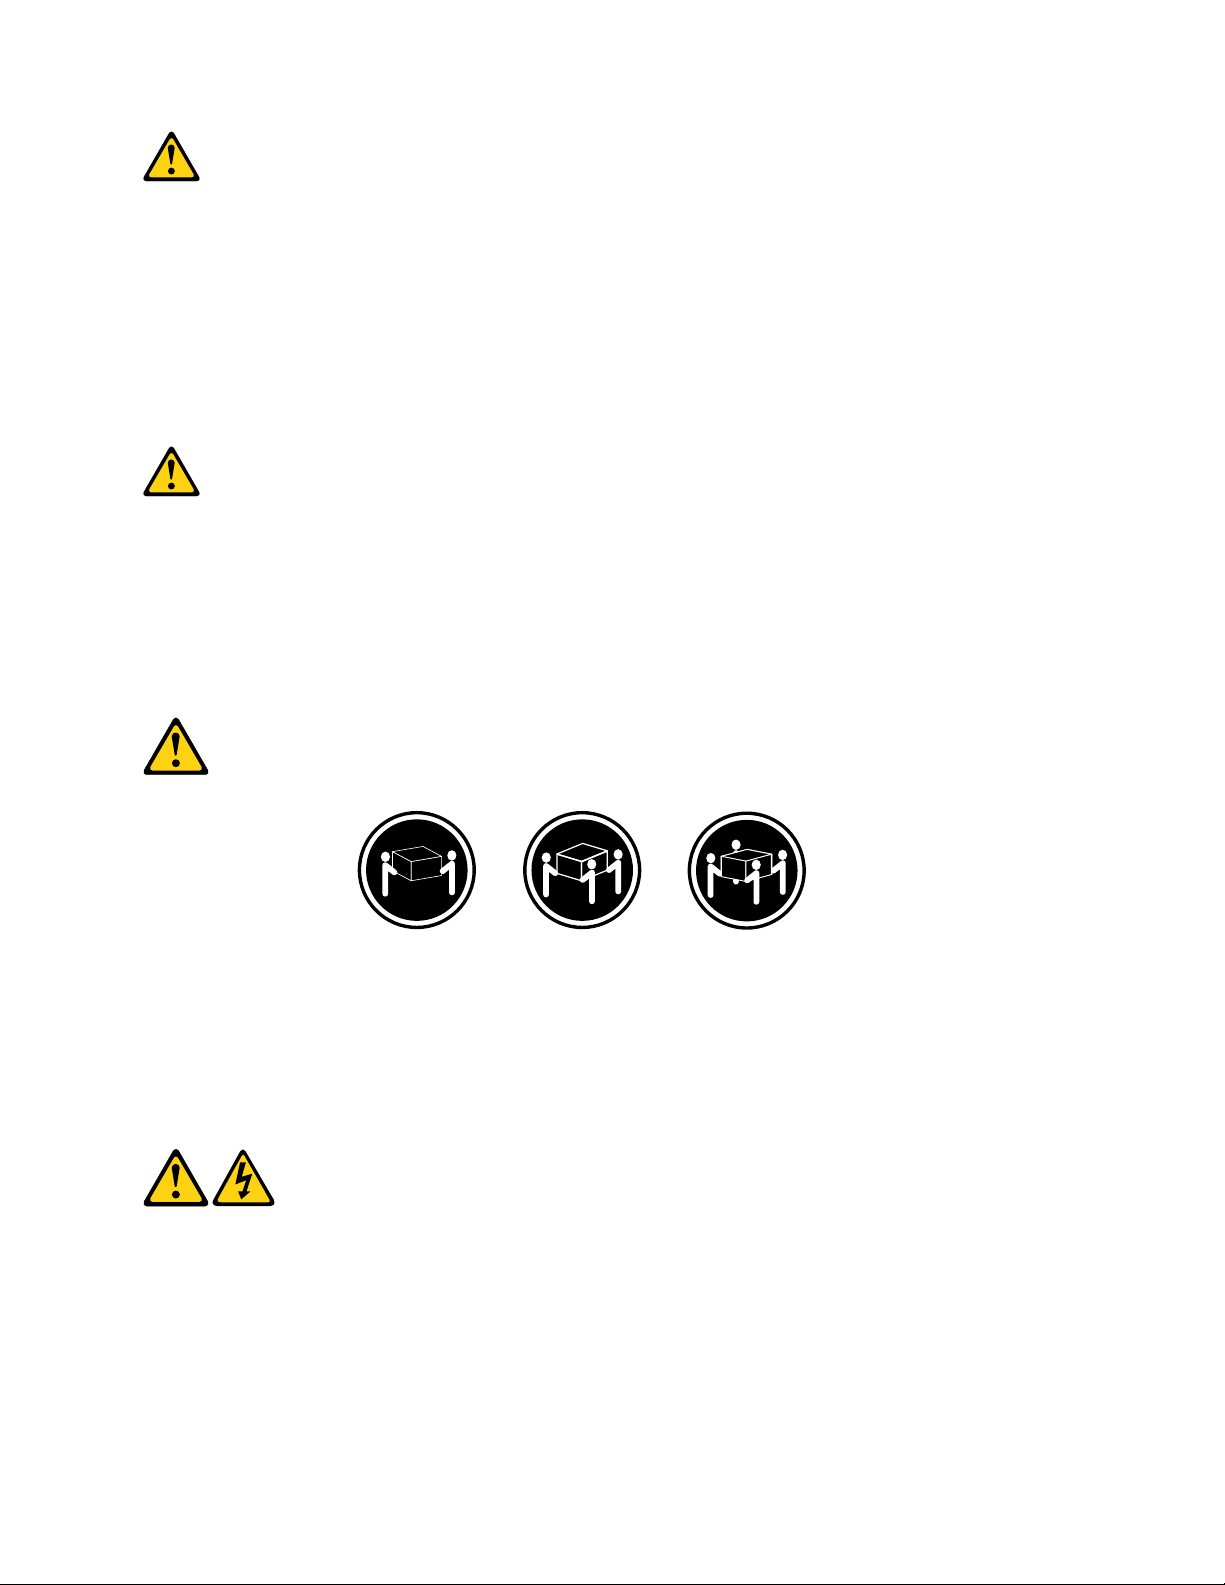
≥18kg(37lbs)≥32kg(70.5lbs)≥55kg(121.2lbs)
CAUTION:
Usesafepracticeswhenlifting.
CAUTION:
Thepowercontrolbuttononthedeviceandthepowerswitchonthepowersupplydonotturnoff
theelectricalcurrentsuppliedtothedevice.Thedevicealsomighthavemorethanonepower
cord.Toremoveallelectricalcurrentfromthedevice,ensurethatallpowercordsaredisconnected
fromthepowersource.
8LenovoH520eHardwareMaintenanceManual

Chapter2.Safetyinformation9
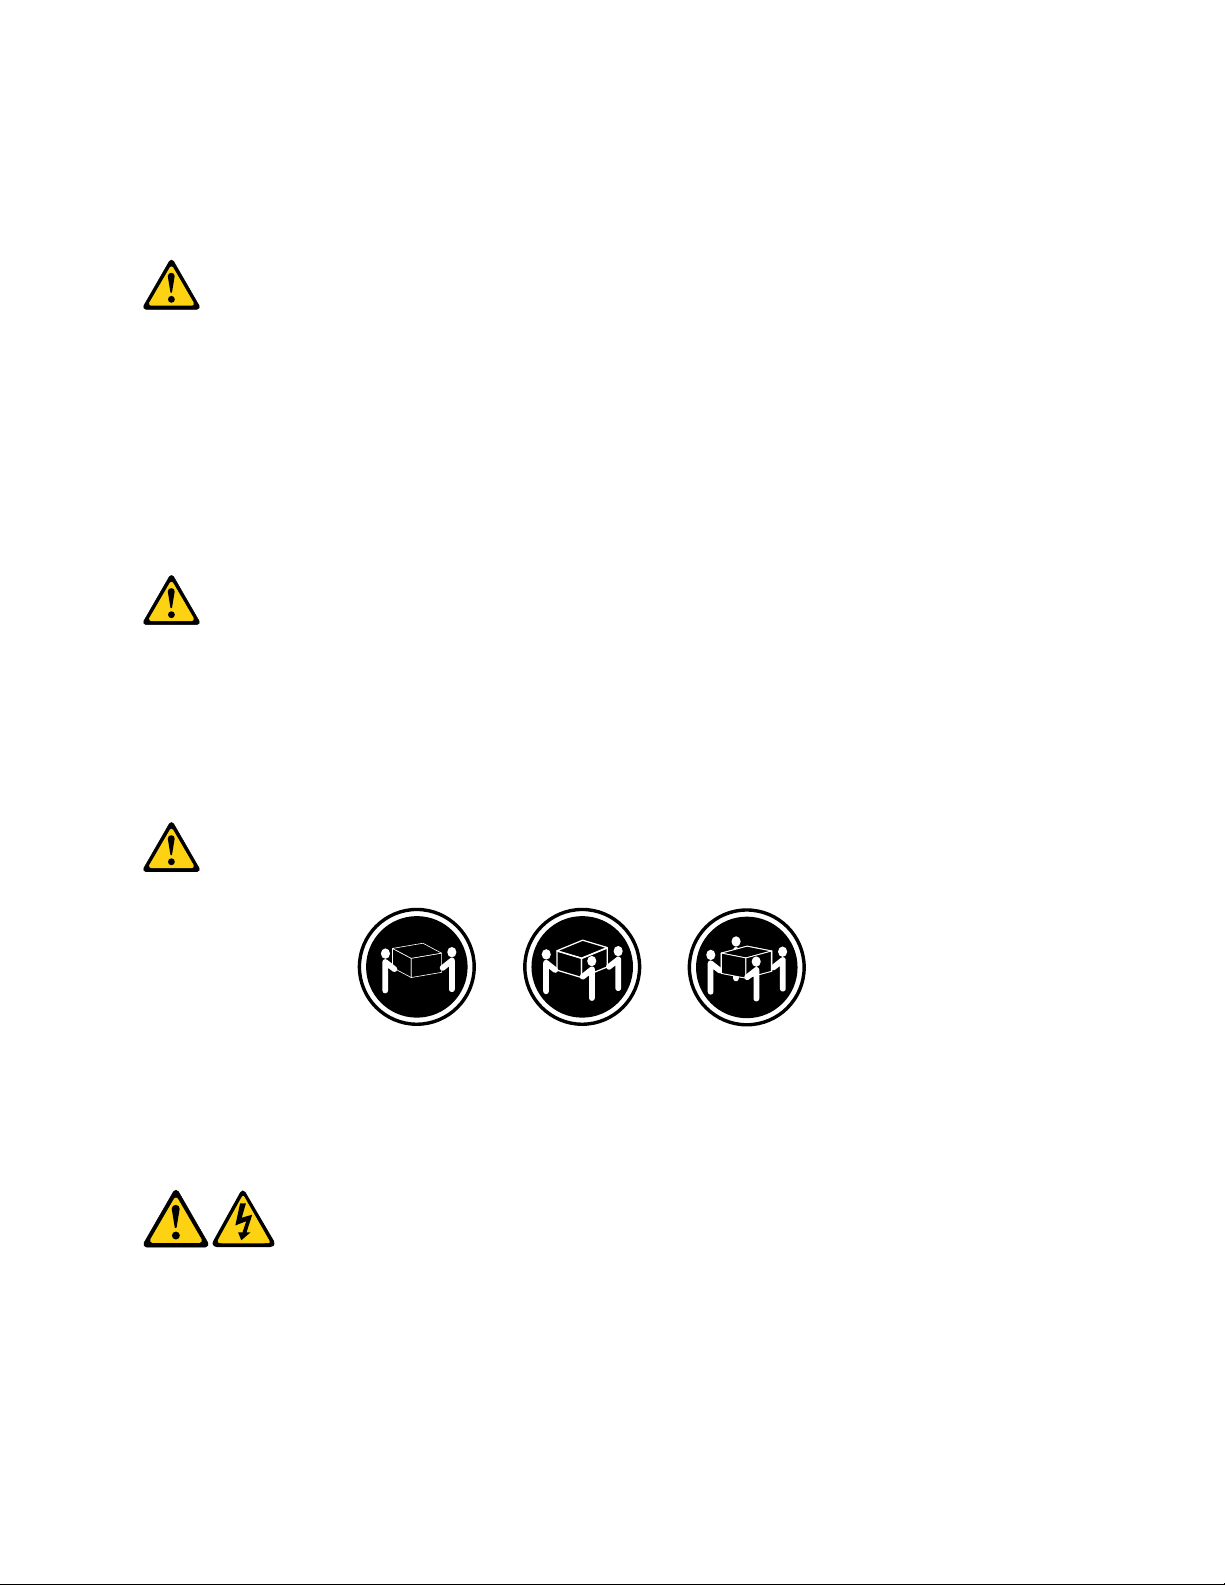
≥18kg(37lbs)≥32kg(70.5lbs)≥55kg(121.2lbs)
1
2
PERIGO
Acorrenteelétricaprovenientedecabosdealimentação,detelefoneedecomunicaçõeséperigosa.
10LenovoH520eHardwareMaintenanceManual
Paraevitarriscodechoqueelétrico:
•Nãoconectenemdesconectenenhumcaboouexecuteinstalação,manutençãooureconfiguração
desteprodutoduranteumatempestadecomraios.
•Conectetodososcabosdealimentaçãoatomadaselétricascorretamenteinstaladaseaterradas.
•Todoequipamentoqueforconectadoaesteprodutodeveserconectadoatomadascorretamente
instaladas.
•Quandopossível,utilizeapenasumadasmãosparaconectaroudesconectarcabosdesinal.
•Nuncaliguenenhumequipamentoquandohouverevidênciadefogo,águaoudanosestruturais.
•Antesdeabrirtampasdedispositivos,desconectecabosdealimentação,sistemasdetelecomunicação,
redesemodemsconectados,amenosqueespecificadodemaneiradiferentenosprocedimentosde
instalaçãoeconfiguração.
•Conecteedesconecteoscabosconformedescritonatabelaapresentadaaseguiraoinstalar,moverou
abrirtampasdesteprodutooudedispositivosconectados.
ParaConectar:ParaDesconectar:
1.DESLIGUETudo.
2.Primeiramente,conectetodososcabosaos
dispositivos.
3.Conecteoscabosdesinalaosconectores.
4.Conecteoscabosdealimentaçãoàstomadas.
5.LIGUEosdispositivos.
1.DESLIGUETudo.
2.Primeiramente,removaoscabosdealimentaçãodas
tomadas.
3.Removaoscabosdesinaldosconectores.
4.Removatodososcabosdosdispositivos.
CUIDADO:
Aosubstituirabateriadelítio,utilizeapenasumabateriacomNúmerodePeça45C1566ouumtipo
debateriaequivalenterecomendadopeloSeoseusistemapossuiummódulocomumabateriade
lítio,substitua-oapenasporummódulodomesmotipoedomesmofabricante.Abateriacontémlítio
epodeexplodirsenãoforutilizada,manuseadaoudescartadademaneiracorreta.
Não:
•Jogueoucoloquenaágua
•Aqueçaamaisde100°C(212°F)
•Consertenemdesmonte
Descarteabateriaconformerequeridopelasleisouregulamentoslocais.
PRECAUCIÓN:
Quandoprodutosalaser(comounidadesdeCD-ROMs,unidadesdeDVD-ROM,dispositivosdefibraótica
outransmissores)estivereminstalados,observeoseguinte:
•Nãoremovaastampas.Aremoçãodastampasdeumprodutoalaserpoderesultaremexposição
prejudicialàradiaçãodelaser.Nãoexistempeçasquepodemserconsertadasnointeriordodispositivo.
Chapter2.Safetyinformation11
•Autilizaçãodecontrolesouajustesouaexecuçãodeprocedimentosdiferentesdosespecificadosaqui
1
2
poderesultaremexposiçãoprejudicialàradiação.
PERIGO
AlgunsprodutosalasercontêmdiododelaserintegradodaClasse3AoudaClasse3B.Observeoseguinte:
Radiaçãoalaserquandoaberto.Nãoolhediretamenteparaofeixeaolhonuoucominstrumentosópticose
eviteexposiçãodiretaaofeixe.
≥18kg(37lbs)≥32kg(70.5lbs)≥55kg(121.2lbs)
CUIDADO:
Utilizeprocedimentosdesegurançaparalevantarequipamentos.
CUIDADO:
Obotãodecontroledealimentaçãododispositivoeobotãoparaligar/desligardafontedealimentação
nãodesligamacorrenteelétricafornecidaaodispositivo.Odispositivotambémpodetermaisdeumcabo
dealimentação.Pararemovertodaacorrenteelétricadodispositivo,assegurequetodososcabosde
alimentaçãoestejamdesconectadosdafontedealimentação.
12LenovoH520eHardwareMaintenanceManual
Chapter2.Safetyinformation13
1
2
14LenovoH520eHardwareMaintenanceManual
1
2
Chapter2.Safetyinformation15
DANGER
Lecourantélectriqueprovenantdel'alimentation,dutéléphoneetdescâblesdetransmissionpeutprésenter
undanger.
Pourévitertoutrisquedechocélectrique:
•Nemanipulezaucuncâbleetn'effectuezaucuneopérationd'installation,d'entretienoudereconfiguration
deceproduitaucoursd'unorage.
•Brancheztouslescordonsd'alimentationsurunsocledeprisedecourantcorrectementcâbléetmisàla
terre.
•Branchezsurdessoclesdeprisedecourantcorrectementcâbléstoutéquipementconnectéàceproduit.
•Lorsquecelaestpossible,n'utilisezqu'uneseulemainpourconnecteroudéconnecterlescâbles
d'interface.
•Nemettezjamaisunéquipementsoustensionencasd'incendieoud'inondation,ouenprésencede
dommagesmatériels.
•Avantderetirerlescartersdel'unité,mettezcelle-cihorstensionetdéconnectezsescordons
d'alimentation,ainsiquelescâblesquilarelientauxréseaux,auxsystèmesdetélécommunicationetaux
modems(saufinstructioncontrairementionnéedanslesprocéduresd'installationetdeconfiguration).
•Lorsquevousinstallez,quevousdéplacez,ouquevousmanipulezleprésentproduitoudespériphériques
quiluisontraccordés,reportez-vousauxinstructionsci-dessouspourconnecteretdéconnecterles
différentscordons.
ConnexionDéconnexion
1.MettezlesunitésHORSTENSION.
2.Commencezparbranchertouslescordonssurles
unités.
3.Branchezlescâblesd'interfacesurdesconnecteurs.
4.Branchezlescordonsd'alimentationsurdesprises.
5.MettezlesunitésSOUSTENSION.
1.MettezlesunitésHORSTENSION.
2.Débranchezlescordonsd'alimentationdesprises.
3.Débranchezlescâblesd'interfacedesconnecteurs.
4.Débrancheztouslescâblesdesunités.
ATTENTION:
Remplacerlapileaulithiumusagéeparunepilederéférenceidentiqueexclusivement,(référence
45C1566),ousuivrelesinstructionsdufabricantquiendéfinitleséquivalences.Sivotresystèmeest
dotéd'unmodulecontenantunepileaulithium,vousdevezleremplaceruniquementparunmodule
identique,produitparlemêmefabricant.Lapilecontientdulithiumetpeutexploserencasde
mauvaiseutilisation,demauvaisemanipulationoudemiseaurebutinappropriée.
Nepas:
•lajeteràl'eau,
•l'exposeràdestempératuressupérieuresà100°C,
•chercheràlaréparerouàladémonter.
Nepasmettrelapileàlapoubelle.Pourlamiseaurebut,sereporteràlaréglementationenvigueur.
16LenovoH520eHardwareMaintenanceManual
ATTENTION:
Sidesproduitsàlaser(telsquedesunitésdeCD-ROM,deDVD-ROM,desunitésàfibresoptiques,ou
desémetteurs)sontinstallés,prenezconnaissancedesinformationssuivantes:
•Neretirezpaslecarter.Enouvrantl'unitédeCD-ROMoudeDVD-ROM,vousvousexposezau
rayonnementdangereuxdulaser.Aucunepiècedel'unitén'estréparable.
•Pourévitertoutrisqued'expositionaurayonlaser,respectezlesconsignesderéglageet
d'utilisationdescommandes,ainsiquelesprocéduresdécritesdansleprésentmanuel.
DANGER
Certainsproduitsàlasercontiennentunediodeàlaserintégréedeclasse3Aou3B.Prenez
connaissancedesinformationssuivantes:
Rayonnementlaserlorsquelecarterestouvert.Eviteztouteexpositiondirecteaurayonlaser.Evitez
deregarderfixementlefaisceauoudel'observeràl'aided'instrumentsoptiques.
≥18kg(37lbs)≥32kg(70.5lbs)≥55kg(121.2lbs)
ATTENTION:
Soulevezlamachineavecprécaution.
ATTENTION:
L'interrupteurdecontrôled'alimentationdel'unitéetl'interrupteurdublocd'alimentationnecoupent
paslecourantélectriquealimentantl'unité.Enoutre,lesystèmepeutêtreéquipédeplusieurs
cordonsd'alimentation.Pourmettrel'unitéhorstension,vousdevezdéconnectertouslescordons
delasourced'alimentation.
Chapter2.Safetyinformation17
1
2
VORSICHT
AnNetz-,T elefon-undDatenleitungenkönnengefährlicheSpannungenanliegen.
AusSicherheitsgründen:
•BeiGewitterandiesemGerätkeineKabelanschließenoderlösen.FernerkeineInstallations-,
Wartungs-oderRekonfigurationsarbeitendurchführen.
•GerätnuraneineSchutzkontaktsteckdosemitordnungsgemäßgeerdetemSchutzkontakt
anschließen.
•AlleangeschlossenenGeräteebenfallsanSchutzkontaktsteckdosenmitordnungsgemäß
geerdetemSchutzkontaktanschließen.
•DieSignalkabelnachMöglichkeiteinhändiganschließenoderlösen,umeinenStromschlagdurch
BerührenvonOberflächenmitunterschiedlichemelektrischemPotenzialzuvermeiden.
•Geräteniemalseinschalten,wennHinweiseaufFeuer,WasseroderGebäudeschädenvorliegen.
•DieVerbindungzudenangeschlossenenNetzkabeln,Telekommunikationssystemen,Netzwerken
undModemsistvordemÖffnendesGehäuseszuunterbrechen,sofernindenInstallations-und
KonfigurationsprozedurenkeineanderslautendenAnweisungenenthaltensind.
•ZumInstallieren,TransportierenundÖffnenderAbdeckungendesComputersoderder
angeschlossenenEinheitendieKabelgemäßderfolgendenTabelleanschließenundabziehen.
ZumAnschließenderKabelgehenSiewiefolgtvorZumAbziehenderKabelgehenSiewiefolgtvor
1.SchaltenSiealleEinheitenAUS.
2.SchließenSieerstalleKabelandieEinheitenan.
3.SchließenSiedieSignalkabelandieBuchsenan.
4.SchließenSiedieNetzkabelandieSteckdosean.
5.SchaltenSiedieEinheitEIN.
1.SchaltenSiealleEinheitenAUS.
2.ZiehenSiezuerstalleNetzkabelausden
Netzsteckdosen.
3.ZiehenSiedieSignalkabelausdenBuchsen.
4.ZiehenSiealleKabelvondenEinheitenab.
CAUTION:
EineverbrauchteLithiumbatterienurdurcheineBatteriemitderTeilenummer45C1566odereine
gleichwertige,vomHerstellerempfohleneBatterieersetzen.EnthältdasSystemeinModulmiteiner
Lithiumbatterie,diesesnurdurcheinModuldesselbenTypsundvondemselbenHerstellerersetzen.
DieBatterieenthältLithiumundkannbeiunsachgemäßerVerwendung,HandhabungoderEntsorgung
explodieren.
DieBatterienicht:
•mitWasserinBerührungbringen.
18LenovoH520eHardwareMaintenanceManual
•über100Cerhitzen.
•reparierenoderzerlegen.
DieörtlichenBestimmungenfürdieEntsorgungvonSondermüllbeachten.
ACHTUNG:
BeiderInstallationvonLasergeräten(wieCD-ROM-Laufwerken,DVD-aufwerken,Einheitenmit
LichtwellenleitertechnikoderSendern)Folgendesbeachten:
•DieAbdeckungennichtentfernen.DurchEntfernenderAbdeckungendesLasergerätskönnen
gefährlicheLaserstrahlungenfreigesetztwerden.DasGerätenthältkeinezuwartendenTeile.
•WerdenSteuerelemente,EinstellungenoderDurchführungenvonProzedurenandersalshier
angegebenverwendet,kanngefährlicheLaserstrahlungauftreten.
VORSICHT
EinigeLasergeräteenthalteneineLaserdiodederKlasse3Aoder3B.BeachtenSieFolgendes:
LaserstrahlungbeigeöffneterVerkleidung.NichtindenStrahlblicken.KeineLupenoderSpiegel
verwenden.Strahlungsbereichmeiden.
≥18kg≥32kg≥55kg
ACHTUNG:
ArbeitsschutzrichtlinienbeimAnhebenderMaschinebeachten.
ACHTUNG:
MitdemNetzschalteranderEinheitundamNetzteilwirddieStromversorgungfürdieEinheit
nichtunterbrochen.DieEinheitkannauchmitmehrerenNetzkabelnausgestattetsein.Umdie
StromversorgungfürdieEinheitvollständigzuunterbrechen,müssenallezumGerätführenden
NetzkabelvomNetzgetrenntwerden.
Chapter2.Safetyinformation19

1
2
20LenovoH520eHardwareMaintenanceManual
1
2
Chapter2.Safetyinformation21

PERICOLO
Lacorrenteelettricaprovenientedaicavidialimentazione,deltelefonoedicomunicazionepuòessere
pericolosa.
Perevitareilrischiodiscosseelettriche:
•Noncollegareoscollegarequalsiasicavooppureeffettuarel'installazione,lamanutenzioneola
riconfigurazionedelprodottoduranteuntemporale.
•Collegaretuttiifilielettriciaunapresadialimentazionecorrettamentecablataedotatadimessaa
terra.
•Collegareallepreseelettricheappropriatetutteleapparecchiaturecheverrannoutilizzateper
questoprodotto.
•Sepossibile,utilizzaresolounamanopercollegareoscollegareicavidisegnale.
•Nonaccendereassolutamenteapparecchiatureinpresenzadiincendi,perdited'acquaodanno
strutturale.
•Scollegareicavidialimentazione,isistemiditelecomunicazione,leretieilmodemprimadi
aprireicoperchideldispositivo,salvoistruzionicontrarierelativealleprocedurediinstallazionee
configurazione.
•Collegareescollegareicavicomedescrittonellaseguentetabellaquandovengonoeffettuate
operazionidiinstallazione,spostamentooaperturadeicoperchidiquestoprodottoodelleunità
collegate.
PercollegarsiPerscollegarsi
1.SPEGNEREleapparecchiature.
2.Innanzitutto,collegaretuttiicavialleunità.
3.Collegareicavidisegnaleaiconnettori.
4.Collegareicavidialimentazioneallapresa.
5.Accenderel'unità.
1.SPEGNEREleapparecchiature.
2.Innanzitutto,rimuovereicavidialimentazionedalla
presa.
3.Rimuovereicavidisegnaledaiconnettori.
4.Rimuoveretuttiicavidalleunità.
ATTENZIONE:
Quandosisostituiscelabatteriaallitio,utilizzaresoloilNumeroparte45C1566ountipodibatteria
equivalenteconsigliatodalproduttore.Sesulsistemaèpresenteunmodulochecontieneunabatteria
allitio,sostituirlosoloconuntipodimodulodellostessotipodellastessacasadiproduzione.La
batteriacontienelitioepuòesplodereseusata,maneggiataosmaltitainmodononcorretto.
Non:
•Gettareoimmergerelabatterianell'acqua
•Riscaldarlaadunatemperaturasuperioreai100gradiC(212gradiF)
•Smontarla,ricaricarlaotentarediripararla
Lebatterieusatevannosmaltiteinaccordoallanormativainvigore(DPR915/82esuccessive
disposizioniedisposizionilocali).
22LenovoH520eHardwareMaintenanceManual
ATTENZIONE:
1
2
Quandovengonoinstallatiprodottilaser(qualiCD-ROM,unitàDVD-ROM,unitàafibreotticheo
trasmittenti),tenerpresentequantosegue:
•Nonrimuovereglisportelli.L'aperturadiun'unitàlaserpuòdeterminarel'esposizionearadiazioni
laserpericolose.All'internodell'unitànonvisonopartisucuieffettuarel'assistenzatecnica.
•L'utilizzodicontrolli,regolazioniol'esecuzionediprocedurenondescrittinelpresentemanuale
possonoprovocarel'esposizionearadiazionipericolose.
PERICOLO
AlcuneunitàlasercontengonoundiodolaserdiClasse3AoClasse3B.Tenerpresentequantosegue:
Aprendol'unitàvengonoemesseradiazionilaser.Nonfissareilfascio,nonguardarlodirettamente
construmentiotticiedevitarel'esposizionealfascio.
≥18kg≥32kg≥55kg
ATTENZIONE:
Prestareattenzionenelsollevarel'apparecchiatura.
ATTENZIONE:
Ilpulsantedicontrollodell'alimentazionepresentesull'unitàel'interruttoredell'alimentatorenon
disattivanol'alimentazionecorrentefornitaall'unità.E'possibilechel'unitàdispongadipiùcavidi
alimentazione.Perdisattivarel'alimentazionedall'unità,accertarsichetuttiicavidialimentazione
sianoscollegatidallafontedialimentazione.
Chapter2.Safetyinformation23
24LenovoH520eHardwareMaintenanceManual
1
2
PELIGRO
Lacorrienteeléctricaprocedentedecablesdealimentación,teléfonosycablesdecomunicaciónpuede
serpeligrosa.
Paraevitarelriesgodedescargaeléctrica:
•Noconectenidesconecteloscablesnirealiceningunatareadeinstalación,mantenimientoo
reconfiguracióndeesteproductoduranteunatormentaeléctrica.
•Conectetodosloscablesdealimentaciónatomasdecorrientedebidamentecableadasy
conectadasatierra.
•Cualquierequipoqueseconecteaesteproductotambiéndebeconectarseatomasdecorriente
debidamentecableadas.
•Siemprequeseaposible,utiliceunasolamanoparaconectarodesconectarloscablesdeseñal.
Chapter2.Safetyinformation25
•Noenciendanuncaunequipocuandohayseñalesdefuego,aguaodañosestructurales.
•Desconecteloscablesdealimentación,lossistemasdetelecomunicaciones,lasredesylos
módemsconectadosantesdeabrirlascubiertasdelosdispositivos,amenosqueseindiquelo
contrarioenlosprocedimientosdeinstalaciónyconfiguración.
•Conecteydesconecteloscables,comosedescribeenlatablasiguiente,cuandoinstale,muevao
abralascubiertasdeesteproductoodelosdispositivosconectados.
ParaconectarParadesconectar
1.APÁGUELOtodo.
2.Enprimerlugar,conectetodosloscablesalos
dispositivos.
3.Conecteloscablesdeseñalalosconectores.
4.Enchufeloscablesdealimentaciónalastomasde
corriente.
5.Enciendaeldispositivo.
1.APÁGUELOtodo.
2.Enprimerlugar,desenchufeloscablesdealimentación
delastomasdecorriente.
3.Desconecteloscablesdeseñaldelosconectores.
4.Desconectetodosloscablesdelosdispositivos.
PRECAUCIÓN:
Cuandosustituyaunabateríadelitio,utilicesolamenteunabateríanúmerodepieza45C1566uotra
detipoequivalenterecomendadaporelfabricante.Sisusistemadisponedeunmóduloquecontiene
unabateríadelitio,reemplácelosóloconelmismotipodemódulo,delmismofabricante.Labatería
contienelitioypuedeexplotarsinoseutiliza,manipulaodesechacorrectamente.
Nodebe:
•Arrojarlaalaguaosumergirlaenella
•Exponerlaatemperaturassuperioresa100°C(212°F)
•Repararlaodesmontarla
Deshágasedelabateríasegúnespecifiquenlasleyesonormaslocales.
PRECAUCIÓN:
Cuandohayaproductosláser(comounidadesdeCD-ROM,unidadesdeDVD,dispositivosdefibra
ópticaotransmisores)instalados,tengaencuentalosiguiente:
•Noquitelascubiertas.Siquitalascubiertasdelproductoláser,podríaquedarexpuestoaradiación
láserpeligrosa.Dentrodeldispositivonoexisteningunapiezaquerequieraserviciotécnico.
•Siusacontrolesoajustesorealizaprocedimientosquenoseanlosespecificadosaquí,podría
exponersearadiacionespeligrosas.
PELIGRO
26LenovoH520eHardwareMaintenanceManual

Algunosproductoslásertienenincorporadoundiodoláserdeclase3Aoclase3B.T engaencuentalo
1
2
siguiente:
Cuandoseabre,quedaexpuestoaradiaciónláser.Nomiredirectamentealrayoláser,nisiquieracon
instrumentosópticos,yeviteexponersedirectamentealrayoláser.
≥18kg≥32kg≥55kg
PRECAUCIÓN:
Adopteprocedimientossegurosallevantarelequipo.
PRECAUCIÓN:
Elbotóndecontroldealimentacióndeldispositivoyelinterruptordealimentacióndelafuentede
alimentaciónnodesconectanlacorrienteeléctricasuministradaaldispositivo.Además,eldispositivo
podríatenermásdeuncabledealimentación.Parasuprimirtodalacorrienteeléctricadeldispositivo,
asegúresedequetodosloscablesdealimentaciónesténdesconectadosdelatomadecorriente.
Chapter2.Safetyinformation27

28LenovoH520eHardwareMaintenanceManual

Chapter3.Generalinformation
Thischapterprovidesgeneralinformationthatappliestoallmachinetypessupportedbythismanual.
Specifications
Thissectionliststhephysicalspecificationsforyourcomputer.
Dimensions
Width:160mm(6.3inches)
Height:375.3mm(14.78inches)
Depth:422.5mm(16.63inches)
Weight
Maximumconfigurationasshipped:6.8kg(15.0lb)(withoutpackage)
Maximumconfigurationasshipped:7.8kg(17.2lb)(withpackage)
Environment
•Airtemperature:
Operating:10°Cto35°C(50°Fto95°F)
Non-operating:-40°Cto60°C(-40°Fto140°F)
Non-operating:-10°Cto60°C(14°Fto140°F)(withoutpackage)
•Humidity:
Operating:20%to80%(non-condensing)
Non-operating:20%to90%(non-condensing)
•Altitude:
Operating:-15.2to3048m(-50to10000ft)
Non-operating:-15.2to10668m(-50to35000ft)
Electricalinput
•Inputvoltage:
–Lowrange:
Minimum:100Vac
Maximum:127Vac
Inputfrequencyrange:50/60Hz
Voltage-selectionswitchsetting:115Vac
–Highrange:
Minimum:200Vac
Maximum:240Vac
Inputfrequencyrange:50/60Hz
Voltage-selectionswitchsetting:230Vac
©CopyrightLenovo2013
29

LenovoSupportWebsite
TechnicalsupportinformationisavailableontheLenovoSupportWebsiteat:
http://www.lenovo.com/support
ThisWebsiteisupdatedwiththelatestsupportinformationsuchasthefollowing:
•Driversandsoftware
•Diagnosticsolutions
•Productandservicewarranty
•Productandpartsdetails
•Userguidesandmanuals
•Knowledgebaseandfrequentlyaskedquestions
30LenovoH520eHardwareMaintenanceManual

Chapter4.Generalcheckout
Attention
Thedrivesinthecomputeryouareservicingmighthavebeenrearrangedorthedrivestartupsequencemight
havebeenchanged.Beextremelycarefulduringwriteoperationssuchascopying,saving,orformatting.
Dataorprogramscanbeoverwrittenifyouselectanincorrectdrive.
Generalerrormessagesappearifaproblemorconflictisfoundbyanapplicationprogram,theoperating
system,orboth.Fortheexplanationofthesemessages,refertotheinformationsuppliedwiththatsoftware
package.
BeforereplacingaFRU,ensurethatthelatestlevelofBIOSisinstalledonthesystem.Adown-levelBIOS
mightcausefalseerrorsandunnecessaryreplacementofthesystemboard.Formoreinformationonhowto
determineandobtainthelatestlevelBIOS,see“BIOSlevels”onpage97
Usethefollowingproceduretohelpdeterminethecauseofaproblem:
1.Power-offthecomputerandallexternaldevices.
2.Checkallcablesandpowercords.
3.Setalldisplaycontrolstothemiddleposition.
4.Power-onallexternaldevices.
5.Power-onthecomputer.
•Lookfordisplayederrorcodes
•Listenforbeepcodes
•Lookforreadableinstructionsoramainmenuonthedisplay.
Ifyoudidnotreceivethecorrectresponse,proceedtostep6.
Ifyoudoreceivethecorrectresponse,proceedtostep7.
6.Lookatthefollowingconditionsandfollowtheinstructions:
.
•IfyouhearbeepcodesduringPOST,goto“Beepsymptoms”onpage59.
•IfthecomputerdisplaysaPOSTerror,goto“POSTerrorcodes”onpage60.
•Ifthecomputerhangsandnoerrorisdisplayed,turnoffthecomputerandthepower.Then,turnthe
powerandthecomputerbackon,continueatstep7.
7.RuntheDiagnosticprograms.See“Diagnostics”onpage51.
•Ifyoureceiveanerror,replacethepartthatthediagnosticprogramcallsout.
•Iftheteststopsandyoucannotcontinue,replacethelastdevicetested.
Problemdeterminationtips
Duetothevarietyofhardwareandsoftwarecombinationsthatcanbeencountered,usethefollowing
informationtoassistyouinproblemdetermination.Ifpossible,havethisinformationavailablewhen
requestingassistancefromServiceSupportandEngineeringfunctions.
•Machinetypeandmodel
•Processororharddiskdriveupgrades
•Failuresymptom
–Dodiagnosticsindicateafailure?
–What,when,where,single,ormultiplesystems?
–Isthefailurerepeatable?
©CopyrightLenovo2013
31

–Hasthisconfigurationeverworked?
–Ifithasbeenworking,whatchangesweremadepriortoitfailing?
–Isthistheoriginalreportedfailure?
•Diagnosticsversion
–Typeandversionlevel
•Hardwareconfiguration
–Print(printscreen)configurationcurrentlyinuse
–BIOSlevel
•Operatingsystemsoftware
–Typeandversionlevel
Note:Toeliminateconfusion,identicalsystemsareconsideredidenticalonlyifthey:
1.Aretheexactmachinetypeandmodels
2.HavethesameBIOSlevel
3.Havethesameadapters/attachmentsinthesamelocations
4.Havethesameaddressjumpers/terminators/cabling
5.Havethesamesoftwareversionsandlevels
6.Havethesamediagnosticdiskettes(version)
7.Havethesameconfigurationoptionssetinthesystem
8.Havethesamesetupforoperating-system-controlledfiles
Comparingtheconfigurationandsoftwareset-upbetween“workingandnon-working”systemswilloften
leadtoproblemresolution.
32LenovoH520eHardwareMaintenanceManual

Chapter5.Troubleshootinganddiagnostics
Thischapterdescribessomebasictroubleshootinganddiagnosticprograms.Ifyourcomputerproblemis
notdescribedhere,see“LenovoSupportWebsite”onpage30foradditionaltroubleshootingresources.
Basictroubleshooting
Thefollowingtableprovidesinformationtohelpyoutroubleshootyourcomputerproblems.
Note:Ifyoucannotcorrecttheproblem,havethecomputerserviced.Foralistofserviceandsupport
telephonenumbers,refertotheSafety,Warranty,andSetupGuidethatcomeswithyourcomputerorgoto
theLenovoSupportWebsiteathttp://www.lenovo.com/support/phone.
SymptomAction
Thecomputerdoesnotstart
whenyoupressthepower
switch.
Themonitorscreenisblank.
Thekeyboarddoesnotwork.
Themousedoesnotwork.
Verifythat:
•Thepowercordiscorrectlyconnectedtotherearofthecomputerandtoa
workingelectricaloutlet.
•Ifyourcomputerhasasecondarypowerswitchontherearofthecomputer,
makesurethatitisswitchedon.
•Thepowerindicatoronthefrontofthecomputerison.
•Thecomputervoltagematchesthevoltageavailableattheelectricaloutletfor
yourcountryorregion.
Verifythat:
•Themonitorsignalcableiscorrectlyconnectedtothemonitorandtothe
appropriatemonitorconnectoronthecomputer.
•Themonitorpowercordiscorrectlyconnectedtothemonitorandtoaworking
electricaloutlet.
•Themonitoristurnedonandthebrightnessandcontrastcontrolsareset
correctly.
•Thecomputervoltagematchesthevoltageavailableattheelectricaloutletfor
yourcountryorregion.
•Ifyourcomputerhastwomonitorconnectors,besuretousetheconnector
onthegraphicscard.
Verifythat:
•Thecomputeristurnedon.
•ThekeyboardissecurelyconnectedtoaUSBconnectoronthecomputer.
•Nokeysarestuck.
Verifythat:
•Thecomputeristurnedon.
•ThemouseissecurelyconnectedtoaUSBconnectoronthecomputer.
•Themouseisclean.
©CopyrightLenovo2013
33

SymptomAction
Theoperatingsystemdoesnot
start.
Thecomputerbeepsmultiple
timesbeforetheoperating
systemstarts.
Verifythat:
•Thestartupsequenceincludesthedevicewheretheoperatingsystemresides.
Usually,theoperatingsystemisontheharddiskdrive.Formoreinformation,
see“Selectingastartupdevice”onpage55
Verifythatnokeysarestuck.
.
AccessingControlPanelontheWindows8operatingsystem
OntheWindowsoperatingsystem,youcanviewandchangecomputersettingsthroughControlPanel.To
accessControlPanelontheWindows8operatingsystem,dooneofthefollowing:
•Fromthedesktop
1.Movethecursortothetop-rightorbottom-rightcornerofthescreentodisplaythecharms.
2.ClickSettings.
3.ClickControlPanel.
•FromtheStartscreen
1.Movethecursortothetop-rightorbottom-rightcornerofthescreentodisplaythecharms.
2.ClickSearch.
3.OntheAppsscreen,scrolltotherightside,andclickControlPanelintheWindowsSystemsection.
Troubleshootingprocedure
Usethefollowingprocedureasastartingpointfordiagnosingproblemsyouareexperiencingwithyour
computer:
1.Verifythatthecablesforallattacheddevicesareconnectedcorrectlyandsecurely.
2.Verifythatallattacheddevicesthatrequireacpowerareconnectedtoproperlygrounded,functioning
electricaloutlets.
3.VerifythatallattacheddevicesareenabledintheBIOSsettingsofyourcomputer.Formoreinformation
aboutaccessingandchangingtheBIOSsettings,refertoyourChapter6“UsingtheSetupUtility
program”onpage53
4.Gotothe“T roubleshooting”onpage35andfollowtheinstructionsforthetypeofproblemyouare
experiencing.IftheTroubleshootinginformationdoesnothelpyouresolveaproblem,continuewiththe
nextstep.
5.T ryusingapreviouslycapturedconfigurationtoseeifarecentchangetohardwareorsoftwaresettings
hascausedaproblem.Beforerestoringapreviousconfiguration,captureyourcurrentconfigurationin
casetheolderconfigurationsettingsdonotsolvetheproblemorhaveadverseaffects.Torestorea
capturedconfiguration,dothefollowing:
•ForWindows7:ClickStart➙ControlPanel➙SystemandSecurity➙System➙System
Protection➙SystemRestore.
•ForWindows8:OpenControlPanel,andthenclickSystemandSecurity➙System➙System
Protection➙SystemRestore.
Ifthisdoesnotcorrecttheproblem,continuewiththenextstep.
6.Runthediagnosticprogram.See“LenovoSolutionCenter”onpage51formoreinformation.
.
•Ifthediagnosticprogramdetectsahardwarefailure,contacttheLenovoCustomerSupportCenter.
See“LenovoSupportWebsite”onpage30
formoreinformation.
34LenovoH520eHardwareMaintenanceManual

•Ifyouareunabletorunthediagnosticprogram,contacttheLenovoCustomerSupportCenter.See
“LenovoSupportWebsite”onpage30
•Ifthediagnosticprogramdoesnotdetectahardwarefailure,continuewiththenextstep.
7.Useanantivirusprogramtoseeifyourcomputerhasbeeninfectedbyavirus.Iftheprogramdetectsa
virus,removethevirus.
8.Ifnoneoftheseactionssolvetheproblem,seektechnicalassistance.See“LenovoSupportWeb
site”onpage30formoreinformation.
formoreinformation.
Troubleshooting
Usethetroubleshootinginformationtofindsolutionstoproblemsthathavedefinitesymptoms.
Ifthesymptomyourcomputerisexperiencingoccurredimmediatelyafteryouinstalledanewhardware
optionornewsoftware,dothefollowingbeforereferringtothetroubleshootinginformation:
1.Removethenewhardwareoptionorsoftware.Ifyoumustremovethecomputercovertoremovea
hardwareoption,makesureyoureviewandfollowtheelectricalsafetyinformationprovidedwithyour
computer.Foryoursafety,donotoperatethecomputerwiththecoverremoved.
2.Runthediagnosticprogramstoensureyourcomputerisoperatingcorrectly.
3.Reinstallthenewhardwareoptionorsoftwarefollowingthemanufacturer'sinstructions.
Selecttheproblemyourcomputerisexperiencingfromthefollowinglist:
•“Audioproblems”onpage35
•“CDproblems”onpage37
•“DVDproblems”onpage38
•“Intermittentproblems”onpage39
•“Harddiskdriveproblems”onpage39
•“Keyboard,mouse,orpointingdeviceproblems”onpage40
•“Monitorproblems”onpage42
•“Networkingproblems”onpage43
•“Optionproblems”onpage46
•“Performanceandlockupproblems”onpage47
•“Printerproblems”onpage49
•“Serialportproblems”onpage49
•“Softwareproblems”onpage50
•“USBproblems”onpage51
Audioproblems
Selectyoursymptomfromthefollowinglist:
•“NoaudioinWindows”onpage36
•“AnaudiodiscorAutoPlay-enableddiscdoesnotautomaticallyplaywhenitisinsertedintoadrive”
onpage36
•“Soundcomesfromoneexternalspeakeronly”onpage36
•“NoaudioinDOSapplicationsorgames”onpage36
Chapter5.Troubleshootinganddiagnostics35

NoaudioinWindows
Symptom:NoaudioinWindows
Actions:
•IfyouareusingpoweredexternalspeakersthathaveanOn/Offcontrol,verifythattheOn/Offcontrolis
settotheOnpositionandthespeakerpowercableisconnectedtoaproperlygrounded,functionalac
electricaloutlet.
•Ifyourexternalspeakershaveavolumecontrol,verifythatthevolumecontrolisnotsettoolow.
•Double-clickthespeakericonintheWindowsnotificationarea.Amastervolume-controlwindowopens.
VerifythattheMutesettingsarenotcheckedandnoneofthevolumesettingsissettoolow.
•Verifythatyourexternalspeakers(andheadphones,ifused)areconnectedtothecorrectaudioconnector
onthecomputer.Mostspeakercablesarecolor-codedtomatchtheconnector.
Note:Whenexternal-speakerorheadphonecablesareattachedtotheaudioconnector,theinternal
speaker,ifpresent,isdisabled.Inmostcases,ifanaudioadapterisinstalledinoneoftheexpansionslots,
theaudiofunctionbuiltintothesystemboardisdisabled;usetheaudiojacksontheadapter.
•MakesurethattheprogramyouarerunningisdesignedforuseintheMicrosoftWindowsoperating
system.IftheprogramisdesignedtoruninDOS,theprogramdoesnotusetheWindowssoundfeature
andmustbeconfiguredtouseSoundBlasterProorSoundBlasteremulation.
•Verifythattheaudiodevicedriversarecorrectlyinstalled.SeeMicrosoftWindowshelpsystemfor
moreinformation.
Iftheseactionsdonotcorrecttheproblem,runthediagnosticprograms(see“LenovoSolutionCenter”on
page51forinstructions).Ifyouneedtechnicalassistance,see“LenovoSupportWebsite”onpage30.
AnaudiodiscorAutoPlay-enableddiscdoesnotautomaticallyplaywhenitis
insertedintoadrive
Symptom:AnaudiodiscorAutoPlay-enableddiscdoesnotautomaticallyplaywhenitisinsertedintoadrive
Action:See“CDproblems”onpage37.
Soundcomesfromoneexternalspeakeronly
Symptom:Soundcomesfromoneexternalspeakeronly.
Actions:
•Ensurethatthespeakercableisinsertedcompletelyintotheconnectoronthecomputer.
•Makesurethecablethatattachestheleftspeakertotherightspeakerissecurelyconnected.
•Double-clickthespeakericonintheWindowsnotificationarea.Amastervolume-controlwindowopens.
VerifythattheBalancesettingsaresetcorrectly.
Iftheseactionsdonotcorrecttheproblem,youmighthaveafailingspeaker.Havethespeakerserviced.If
youneedtechnicalassistance,see“LenovoSupportWebsite”onpage30
.
NoaudioinDOSapplicationsorgames
Symptom:NoaudioinDOSapplicationsorgames
Actions:
•MakesuretheDOSapplicationorgameisconfiguredtouseSoundBlasterProorSoundBlaster
emulation.Refertothedocumentationthatcomeswiththeapplicationorgameforinstructionson
settingsound-cardsettings.
36LenovoH520eHardwareMaintenanceManual

•Iftheseactionsdonotcorrecttheproblem,runthediagnosticprograms(see“LenovoSolutionCenter”on
page51
forinstructions).Ifyouneedtechnicalassistance,see“LenovoSupportWebsite”onpage30.
CDproblems
Selectyoursymptomfromthefollowinglist:
•“AnaudiodiscorAutoPlay-enableddiscdoesnotautomaticallyplaywhenitisinsertedintoaCD
drive”onpage37
•“ACDorDVDdoesnotwork”onpage37
•“Unabletouseastartable(bootable)recoverymedium,suchastheProductRecoveryCD,tostart
yourcomputer”onpage37
AnaudiodiscorAutoPlay-enableddiscdoesnotautomaticallyplaywhenitis
insertedintoaCDdrive
Symptom:AnaudiodiscorAutoPlay-enableddiscdoesnotautomaticallyplaywhenitisinsertedinto
aCDdrive.
Actions:
•IfyouhavemultipleCDorDVDdrivesinstalled(oracombinationofCDandDVDdrives),tryinsertingthe
discintotheotherdrive.Insomecases,onlyoneofthedrivesisconnectedtotheaudiosubsystem.
•IfyouareusingtheWindows7operatingsystem,followtheactionfor“ACDorDVDdoesnotwork”
onpage37
.
Ifthisdoesnotcorrecttheproblem,followtheactionfor“ACDorDVDdoesnotwork”onpage37
.
ACDorDVDdoesnotwork
Symptom:ACDorDVDdoesnotwork.
Actions:
•Verifythatthediscisinsertedcorrectly,withitslabelup.
•Makesurethatthediscyouareusingisclean.Toremovedustorfingerprints,wipethedisccleanwitha
softclothfromthecentertotheoutside.Wipingadiscinacircularmotionmightcauselossofdata.
•Verifythatthediscyouareusingisnotscratchedordamaged.Tryinsertinganotherdiscthatyouknow
isgood.Ifyoucannotreadfromaknown-gooddisc,youmighthaveaproblemwithyourCDorDVD
driveorthecablingtoyourCDorDVDdrive.Makesurethatthepowercableandsignalcableare
securelyconnectedtothedrive.
Unabletouseastartable(bootable)recoverymedium,suchastheProductRecovery
CD,tostartyourcomputer
Symptom:Unabletouseastartable(bootable)recoverymedium,suchastheProductRecoveryCD,
tostartyourcomputer.
Action:MakesurethattheCDorDVDdriveisinthestartupsequencebeforetheharddiskdrive.Refer
toyour“Selectingorchangingthestartupdevicesequence”onpage56
changingthestartupsequence.Notethatonsomemodelsthestartupsequenceispermanentlysetand
cannotbechanged.
forinformationonviewingand
Iftheseactionsdonotcorrecttheproblem,runthediagnosticprograms(see“LenovoSolutionCenter”on
page51
forinstructions).Ifyouneedtechnicalassistance,see“LenovoSupportWebsite”onpage30.
Chapter5.Troubleshootinganddiagnostics37

DVDproblems
Selectyoursymptomfromthefollowinglist:
•“BlackscreeninsteadofDVDvideo”onpage38
•“DVDmoviewillnotplay”onpage38
•“NoaudioorintermittentaudiowhileplayingDVDmovie”onpage38
•“Playbackisverysloworchoppy”onpage38
•“Invaliddiscornodiscfoundmessage”onpage39
BlackscreeninsteadofDVDvideo
Symptom:BlackscreeninsteadofDVDvideo
Actions:
•RestarttheDVDplayerprogram.
•Closeanyopenfiles,turnoffthecomputer,andthenrestartthecomputer.
•Tryalowerscreenresolutionorcolordepth.
Iftheseactionsdonotcorrecttheproblem,runthediagnosticprograms(see“LenovoSolutionCenter”on
page51
DVDmoviewillnotplay
Symptom:DVDmoviewillnotplay.
forinstructions).Ifyouneedtechnicalassistance,see“LenovoSupportWebsite”onpage30.
Actions:
•Makesurethatthediscsurfaceiscleanandnotscratched.
•Checkthediscorpackageforregionalcoding.Youmightneedtopurchaseadiscwithcodingfor
theregionwhereyouareusingyourcomputer.
Iftheseactionsdonotcorrecttheproblem,runthediagnosticprograms(see“LenovoSolutionCenter”on
page51
forinstructions).Ifyouneedtechnicalassistance,see“LenovoSupportWebsite”onpage30.
NoaudioorintermittentaudiowhileplayingDVDmovie
Symptom:NoaudioorintermittentaudiowhileplayingDVDmovie.
Actions:
•Checkthevolumecontrolsettingsonyourcomputerandonyourspeakers.
•Makesurethatthediscsurfaceiscleanandnotscratched.
•Checkallcableconnectionstoandfromthespeakers.
•UsetheDVDmenuforthevideotoselectadifferentaudiotrack.
Iftheseactionsdonotcorrecttheproblem,runthediagnosticprograms(see“LenovoSolutionCenter”on
page51
forinstructions).Ifyouneedtechnicalassistance,see“LenovoSupportWebsite”onpage30.
Playbackisverysloworchoppy
Symptom:Playbackisverysloworchoppy.
Actions:
•Disableanybackgroundprograms,suchasAntiVirusorDesktopThemes.
38LenovoH520eHardwareMaintenanceManual

•Ensurethatvideoresolutionissettolessthan1152x864.
Iftheseactionsdonotcorrecttheproblem,runthediagnosticprograms(see“LenovoSolutionCenter”on
page51forinstructions).Ifyouneedtechnicalassistance,see“LenovoSupportWebsite”onpage30.
Invaliddiscornodiscfoundmessage
Symptom:Invaliddiscornodiscfoundmessage
Actions:
•EnsurethataDVDdiscisinthedrivewiththeshinysideofthediscfacingdown.
•Ensurethatvideoresolutionissettolessthan1152x864.
•OncomputersthathaveaCD-ROMorCD-RWdriveinadditiontoaDVD-ROMdrive,makesurethatthe
DVDdiscisinthedrivelabeled“DVD”.
Iftheseactionsdonotcorrecttheproblem,runthediagnosticprograms(see“LenovoSolutionCenter”on
page51forinstructions).Ifyouneedtechnicalassistance,see“LenovoSupportWebsite”onpage30.
Intermittentproblems
Symptom:Aproblemoccursonlyoccasionallyandisdifficulttorepeat.
Actions:
•Verifythatallcablesandcordsaresecurelyconnectedtothecomputerandattacheddevices.
•Verifythatwhenthecomputerison,thefangrillisnotblocked(thereisairflowaroundthegrill),andthe
fansareworking.Ifairflowisblockedorthefansarenotworking,thecomputermightoverheat.
Iftheseactionsdonotcorrecttheproblem,runthediagnosticprograms(see“LenovoSolutionCenter”on
page51
forinstructions).Ifyouneedtechnicalassistance,see“LenovoSupportWebsite”onpage30.
Harddiskdriveproblems
Selectyoursymptomfromthefollowinglist:
•“SomeorallharddiskdrivesmissingfromtheSetupUtilityprogram”onpage39
•“"NoOperatingSystemFound"messageorthesystemnotstartingfromthecorrectharddiskdrive”
onpage40
SomeorallharddiskdrivesmissingfromtheSetupUtilityprogram
Symptom:SomeorallharddiskdrivesmissingfromtheSetupUtilityprogram
Actions:
•Ensurethatallharddiskdrivesignalcablesandpowercablesareconnectedcorrectly.
•Ensurethatyourcomputerisconfiguredcorrectlytosupporttheharddiskdrives.
–IfyourcomputerisinstalledwithfiveSATAharddiskdrives,ensurethattheSATAharddiskdrive
enablementmodule(onetofiveharddiskdrives)isinstalled.
–IfyourcomputerisinstalledwithSASharddiskdrives,ensurethattheSASharddiskdriveenablement
module(onetofiveharddiskdrives)ortheLSIMegaRAIDSASadapterisinstalled.
Iftheseactionsdonotcorrecttheproblem,runthediagnosticprogramLenovoSolutionCenter.See“Lenovo
SolutionCenter”onpage51
.Ifyouneedtechnicalassistance,see“LenovoSupportWebsite”onpage30.
Chapter5.Troubleshootinganddiagnostics39

"NoOperatingSystemFound"messageorthesystemnotstartingfromthecorrect
harddiskdrive
Symptom:"NoOperatingSystemFound"messageorthesystemnotstartingfromthecorrectharddiskdrive
Actions:
•Ensurethatallharddiskdrivesignalcablesandpowercablesareconnectedcorrectly.
•EnsurethattheharddiskdriveyourcomputerstartsfromislistedasthefirststartupdeviceintheSetup
Utilityprogram.Referto“Selectingastartupdevice”onpage55.
Note:Inrarecases,theharddiskdrivewiththeoperatingsystemmightgetcorruptedordamaged.Insuch
cases,youmightneedtoreplacetheharddiskdrive.
Iftheseactionsdonotcorrecttheproblem,runthediagnosticprogramLenovoSolutionCenter.See“Lenovo
SolutionCenter”onpage51.Ifyouneedtechnicalassistance,see“LenovoSupportWebsite”onpage30.
Keyboard,mouse,orpointingdeviceproblems
Selectyoursymptomfromthefollowinglist:
•“Allorsomekeysonthekeyboarddonotwork”onpage40
•“Themouseorpointingdevicedoesnotwork”onpage41
•“Thepointeronthescreendoesnotmovesmoothlywiththemouse”onpage41
•“Thewirelesskeyboarddoesnotwork”onpage41
Allorsomekeysonthekeyboarddonotwork
Symptom:Allorsomekeysonthekeyboarddonotwork.
Actions:
•Verifythatthekeyboardcableissecurelyconnectedtothecorrectconnectoronthecomputer.
•IfyouareusinganEnhancedPerformanceUSBkeyboardandoneormoreoftheRapidAccessbuttons
aretheonlykeysthatarenotworking,thesebuttonsmighthavebeendisabledorhavenotbeenassigned
toafunction.UsethehelpsystemintheEnhancedPerformanceCustomizationKeyboardprogramto
helpdiagnoseproblemswiththeRapidAccessbuttons.
ToopentheEnhancedPerformanceCustomizationKeyboardprogram,dooneofthefollowing:
–OntheWindows7operatingsystem,dothefollowing:
1.ClickStart➙ControlPanel.
2.ClickHardwareandSound.
3.ClickDevicesandPrinters.
4.Double-clickUSBEnhancedPerformanceKeyboard.TheUSBEnhancedPerformance
KeyboardCustomizationprogramstarts.
–OntheWindows8operatingsystem,dothefollowing:
1.OpenControlPanel.
2.ClickHardwareandSound.
3.ClickDevicesandPrinters.
4.Double-clickUSBEnhancedPerformanceKeyboard.TheUSBEnhancedPerformance
KeyboardCustomizationprogramstarts.
40LenovoH520eHardwareMaintenanceManual

Iftheseactionsdonotcorrecttheproblem,havethecomputerandkeyboardserviced.See“Lenovo
SupportWebsite”onpage30
fordetails.
Themouseorpointingdevicedoesnotwork
Symptom:Themouseorpointingdevicedoesnotwork.
Actions:
•Verifythatthemouseorpointing-devicecableissecurelyattachedtothecorrectconnectoronthe
computer.Dependingonthetypeofmouseyouhave,themousecablewillconnecttoeitherthe
mouse,serial,orUSBconnector.SomekeyboardshaveintegratedUSBconnectorsthatcanbeused
foraUSBmouseorpointingdevice.
•Verifythatthedevicedriversforthemouseorpointingdeviceareinstalledcorrectly.
•IfyouareusingaUSBkeyboardormouse,verifythattheUSBconnectorsareenabledintheBIOS
settings.See“Enablingordisablingadevice”onpage55.
Iftheseactionsdonotcorrecttheproblem,runthediagnosticprograms(see“LenovoSolutionCenter”on
page51
forinstructions).Ifyouneedtechnicalassistance,see“LenovoSupportWebsite”onpage30.
Thepointeronthescreendoesnotmovesmoothlywiththemouse
Symptom:Thepointeronthescreendoesnotmovesmoothlywiththemouse.
Action:Erraticmovementofthemousepointerisgenerallycausedbyabuildupofdirt,oils,andother
contaminantsontheballinsidethemouse.Cleanthemouse.
Thefingerprintreaderdoesnotwork
Symptom:Thefingerprintreaderdoesnotwork.
Action:Thefollowingcouldcausethefingerprintreadernottooperateproperly:
•Notenrollingyourfingerprintcorrectly.
•Scratchingthesurfaceofthereaderwithahard,pointedobject.
•Scrapingthesurfaceofthereaderwithyournailoranythinghard.
•Usingortouchingthereaderwithadirtyfinger.
•Thesurfaceofyourfingerisverydifferentfromwhenyouenrolledyourfingerprint.
Thewirelesskeyboarddoesnotwork
Symptom:Thewirelesskeyboarddoesnotwork.
Action:IftheTransceiverCommunicationsLEDisonandthewirelessKeyboarddoesnotwork,restartyour
computer.Ifrestartingyourcomputerdoesnotsolvetheproblem,verifythatthefollowingconditionsaremet:
•Thebatteriesareproperlyinstalled.
•Thebatteriesstillretaintheircurrent.
•ThewirelessKeyboardislocatedlessthantenmetersawayfromthetransceiver.
•Thetransceiverisfullyinstalled.
Action:IftheTransceiverCommunicationsLEDisnoton,reconnectthetransceiverandthekeyboard.
Chapter5.Troubleshootinganddiagnostics41

Monitorproblems
Note:Manymonitorshavestatus-indicatorlightsandbuilt-incontrolsforadjustingbrightness,contrast,
width,height,andotherpictureadjustments.However,thecontrolsvaryfrommonitortypetomonitortype.
Forinformationaboutthestatuslightsandusingthecontrols,refertothedocumentationthatcomes
withyourmonitor.
Selectyoursymptomfromthefollowinglist:
•“Wrongcharactersappearonthescreen”onpage42
•“Themonitorworkswhenyouturnonthecomputer,butgoesblankaftersomeperiodofcomputer
inactivity”onpage42
•“Themonitorworkswhenyouturnonthecomputer,butgoesblankwhenyoustartsomeapplication
programs”onpage42
•“Theimageappearstobeflickering”onpage42
•“Theimageisdiscolored”onpage43
Wrongcharactersappearonthescreen
Symptom:Wrongcharactersappearonthescreen.
Action:Havethecomputerserviced.Fordetails,see“LenovoSupportWebsite”onpage30
.
Themonitorworkswhenyouturnonthecomputer,butgoesblankaftersomeperiod
ofcomputerinactivity
Symptom:Themonitorworkswhenyouturnonthecomputer,butgoesblankaftersomeperiodofcomputer
inactivity.
Action:Thecomputerisprobablysetforenergysavingswiththepower-managementfeature.Ifthe
power-managementfeatureisenabled,disablingitorchangingthesettingsmightsolvetheproblem.
Iftheseactionsdonotcorrecttheproblem,runthediagnosticprograms(see“LenovoSolutionCenter”on
page51forinstructions).Ifyouneedtechnicalassistance,see“LenovoSupportWebsite”onpage30.
Themonitorworkswhenyouturnonthecomputer,butgoesblankwhenyoustart
someapplicationprograms
Symptom:Themonitorworkswhenyouturnonthecomputer,butgoesblankwhenyoustartsome
applicationprograms.
Actions:
•Makesurethemonitorsignalcableissecurelyconnectedtothemonitorandthemonitorconnectoron
thecomputer.Aloosecablecancauseintermittentproblems.
•Verifythatthenecessarydevicedriversfortheapplicationprogramsareinstalled.Refertothe
documentationfortheaffectedapplicationprogramtoseeifdevicedriversarerequired.
Iftheseactionsdonotcorrecttheproblem,runthediagnosticprograms(see“LenovoSolutionCenter”on
page51forinstructions).Ifyouneedtechnicalassistance,see“LenovoSupportWebsite”onpage30.
Theimageappearstobeflickering
Symptom:Theimageappearstobeflickering.
Actions:
42LenovoH520eHardwareMaintenanceManual

•Themonitormightbeoperatinginalow-refreshratedisplaymode.Setthemonitortothehighest,
noninterlacedrefreshratesupportedbyyourmonitorandthevideocontrollerinyourcomputer.
Attention:Usingaresolutionorrefreshratethatisnotsupportedbyyourmonitormightdamageit.
Checkthedocumentationthatcomeswithyourmonitortoverifythesupportedrefreshrates.
•Themonitormightbeaffectedbyinterferencefromnearbyequipment.Magneticfieldsaroundother
devices,suchastransformers,appliances,fluorescentlights,andothermonitorsmightbecausingthe
problem.Movefluorescentdesklightingoranyequipmentthatproducesmagneticfieldsfartheraway
fromthemonitor.Ifthisdoesnotcorrecttheproblem,dothefollowing:
1.T urnoffthemonitor.(Movingacolormonitorwhileitisturnedonmightcausescreendiscoloration.)
2.Adjusttheplacementofthemonitorandotherdevicessothattheyareatleast305mm(12inches)
apart.
3.T urnonthemonitor.
•YoucanresettherefreshratethroughyouroperatingsystemControlPanel:
OntheWindows7operatingsystem,clickStart➙ControlPanel➙HardwareandSound➙Adjust
screenresolution➙AdvancedSettings.ThenclicktheMonitortabandselectanewrefreshrate.
OntheWindows8operatingsystem,openControlPanelandclickHardwareandSound➙Adjust
screenresolution➙AdvancedSettings.ThenclicktheMonitortabandselectanewrefreshrate.
•Seeyouroperatingsystemdocumentationorhelpforfurtherinformationonmonitorsettings.
Iftheseactionsdonotcorrecttheproblem,yourmonitormightneedservice.See“LenovoSupportWeb
site”onpage30fordetails.
Theimageisdiscolored
Symptom:Theimageisdiscolored.
Action:Themonitormightbeaffectedbyinterferencefromnearbyequipment.Magneticfieldsaroundother
devices,suchastransformers,appliances,fluorescentlights,andothermonitorsmightbecausingthe
problem.Movefluorescentdesklightingoranyequipmentthatproducesmagneticfieldsfurtherawayfrom
themonitor.Ifthisdoesnotcorrecttheproblem,dothefollowing:
1.T urnoffthemonitor.(Movingacolormonitorwhileitisturnedonmightcausescreendiscoloration.)
2.Adjusttheplacementofthemonitorandotherdevicessothattheyareatleast305mm(12inches)apart.
3.T urnonthemonitor.
Iftheseactionsdonotcorrecttheproblem,yourmonitormightneedservice.See“LenovoSupportWeb
site”onpage30fordetails.
Networkingproblems
Thefollowingarethemostcommonnetworkingproblems.Selectyournetworkingproblemfromthe
followinglist:
•“Ethernetproblems”onpage43
Formoreinformation,see“LenovoSupportWebsite”onpage30.
Ethernetproblems
ForEthernetproblems,selectyoursymptomfromthefollowinglist:
•“Yourcomputercannotconnecttothenetwork”onpage44
•“Theadapterstopsworkingfornoapparentreason”onpage44
Chapter5.Troubleshootinganddiagnostics43

•“IfyourcomputerisaGigabitEthernetmodelandyouuseaspeedof1000Mbps,theconnectionfails
orerrorsoccur”onpage45
•“IfyourcomputerisaGigabitEthernetmodel,itcannotconnecttothenetworkat1000Mbps.Instead,
itconnectsat100Mbps”onpage45
Yourcomputercannotconnecttothenetwork
Symptom:Y ourcomputercannotconnecttothenetwork.
Actions:Ensurethat:
•Thecableisinstalledproperly.
ThenetworkcablemustbesecurelyconnectedtoboththeEthernetconnectorofyourcomputerand
theRJ45connectorofthehub.Themaximumallowabledistancefromthecomputertohubis100
meters.Ifthecableisconnectedandthedistanceiswithinacceptablelimitsbuttheproblempersists,try
adifferentcable.
•Thecableisinstalledproperly.
•Youareusingthecorrectdevicedriver.
OntheWindows7operatingsystem,dothefollowing:
1.ClickStart➙ControlPanel.
2.ClickHardwareandSound.
3.ClickDeviceManager.Ifyouarepromptedforanadministratorpasswordorconfirmation,typethe
passwordorprovideconfirmation.
4.IfanexclamationmarkisdisplayednexttoanadapternameunderNetworkadapters,youmight
notbeusingthecorrectdriverorthedriverisnotenabled.T oupdatethedriver,right-clickthe
highlightedadapter.
5.ClickUpdateDriverSoftware,andthenfollowtheinstructionsonthescreen.
OntheWindows8operatingsystem,dothefollowing:
1.OpenControlPanel.
2.ClickHardwareandSound.
3.ClickDeviceManager.Ifyouarepromptedforanadministratorpasswordorconfirmation,typethe
passwordorprovideconfirmation.
4.IfanexclamationmarkisdisplayednexttoanadapternameunderNetworkadapters,youmight
notbeusingthecorrectdriverorthedriverisnotenabled.T oupdatethedriver,right-clickthe
highlightedadapter.
5.ClickUpdateDriverSoftware,andthenfollowtheinstructionsonthescreen.
•Theswitchportandtheadapterhavethesameduplexsetting.
Ifyouconfiguredtheadapterforfullduplex,ensurethattheswitchportisalsoconfiguredforfullduplex.
Settingthewrongduplexmodecandegradeperformance,causedataloss,orresultinlostconnections.
•Youhaveinstalledallnetworkingsoftwarethatisnecessaryforyournetworkenvironment.
CheckwithyourLANadministratorforthenecessarynetworkingsoftware.
Theadapterstopsworkingfornoapparentreason
Symptom:Theadapterstopsworkingfornoapparentreason.
Action:Thenetworkdriverfilesmaybecorruptormissing.Updatethedriverbyreferringtothe“Solution”
descriptionfortheproceduretomakesurethatthecorrectdevicedriverisinstalled.
44LenovoH520eHardwareMaintenanceManual

TheWakeonLANfeatureisnotworking
Symptom:TheWakeonLAN(WOL)featureisnotworking.
Actions:
•MakesurethatWOLisenabledintheBIOSSetupUtilityprogram.
•Ifitis,checkwithyourLANadministratorforthenecessarysettings.
IfyourcomputerisaGigabitEthernetmodelandyouuseaspeedof1000Mbps,theconnection
failsorerrorsoccur
Symptom:IfyourcomputerisaGigabitEthernetmodelandyouuseaspeedof1000Mbps,theconnection
failsorerrorsoccur.
Actions:
•UseCategory5wiringandmakesurethatthenetworkcableissecurelyconnected.
•Connecttoa1000BASE-Thub/switch(not1000BASE-X).
IfyourcomputerisaGigabitEthernetmodel,itcannotconnecttothenetworkat1000Mbps.Instead,
itconnectsat100Mbps
Symptom:IfyourcomputerisaGigabitEthernetmodel,itcannotconnecttothenetworkat1000Mbps.
Instead,itconnectsat100Mbps.
Actions:
•Tryanothercable.
•Makesurethatthelinkpartnerissettoauto-negotiate.
•Makesurethattheswitchis802.3ab-compliant(gigabitovercopper).
AwirelessLANproblem
Symptom:Youcannotconnectusingthebuilt-inwirelessnetworkingcard.
Actions:
•MakesurethatyourwirelessLANdriveristhelatestversion.ChecktheWebsiteandverifythedriver
versionsupportedbyAccessConnectionsisthelatestdocumentedinthereadmefile.
•Makesurethatyourcomputeriswithinrangeofawirelessaccesspoint.
•Makesurethatthewirelessradioisenabledbydouble-clickingtheAccessConnectionsiconinthe
Windowsnotificationarea.
Note:OntheWindows7operatingsystem,clickShowhiddeniconsintheWindowsnotification
area.TheAccessConnectionsiconisdisplayed.Formoreinformationabouttheicon,seetheHelpin
AccessConnections.
•CheckNetworkName(SSID),andyourencryptioninformation.UseAccessConnectionstoverifythis
case-sensitiveinformation.
AwirelessWANproblem
Message:UnauthorizedWANcardispluggedin-PoweroffandremovetheWANcard.
Action:TheWANcardisnotsupportedonthiscomputer.Removeit.
Note:SomecomputermodelsdonothaveawirelessWAN.
Chapter5.Troubleshootinganddiagnostics45

Bluetoothproblems
ForBluetoothproblems,selectyoursymptomfromthefollowinglist:
•“SounddoesnotcomefromtheBluetoothheadphone”onpage46
•“PIMitemssentfromtheWindows7operatingsystemcannotbereceivedcorrectly”onpage46
SounddoesnotcomefromtheBluetoothheadphone
Symptom:SounddoesnotcomefromtheBluetoothheadset/headphonebutcomesfromthelocalspeaker
eventhoughtheheadset/headphoneisconnectedusingHeadsetprofileorAVprofile.
Action:Dothefollowing:
1.Exittheapplicationthatusesthesounddevice(forexample,WindowsMediaPlayer).
2.OpentheControlPanelbyclickingStart➙ControlPanel.
3.ClickHardwareandSound➙Sound.
4.SelectthePlaybacktab.
5.IfyouareusingHeadsetprofile,selectBluetoothHands-freeAudioandclicktheSetDefaultbutton.If
youareusingAVprofile,selectStereoAudioandclicktheSetDefaultbutton.
6.ClickOKtoclosetheSoundwindow.
PIMitemssentfromtheWindows7operatingsystemcannotbereceivedcorrectly
Symptom:PersonalInformationManager(PIM)itemssentfromtheWindows7operatingsystemcannotbe
receivedcorrectlyintotheaddressbookofanyotherBluetooth-enableddevice.
Action:TheWindows7operatingsystemsendsPIMitemsinXMLformat,butmostBluetooth-enabled
deviceshandlePIMitemsinvCardformat.IfanotherBluetooth-enableddevicecanreceiveafilethrough
Bluetooth,aPIMitemsentfromtheWindows7operatingsystemmightbesavedasafilewiththeextension
.contact.
Optionproblems
UsethisinformationtodiagnoseproblemswithLenovohardwareoptionsthatdonothavetheirown
troubleshootinginformation.
Selectyoursymptomfromthefollowinglist:
•“Anoptionthatwasjustinstalleddoesnotwork”onpage46
•“Anoptionthatpreviouslyworkeddoesnotworknow”onpage47
Anoptionthatwasjustinstalleddoesnotwork
Symptom:Anoptionthatwasjustinstalleddoesnotwork.
Action:Verifythat:
•Theoptionisdesignedforyourcomputer.
•Youfollowedtheinstallationinstructionssuppliedwiththeoptionandtheinstallationinstructionsprovided
withyourcomputer,andalloptionfiles(suchasdevicedrivers,ifrequired)areinstalledcorrectly.
•Youhavenotloosenedotherinstalledoptionsorcables.
•Iftheoptionisanadapter,youhaveprovidedenoughhardwareresourcesfortheadaptertofunction
correctly.Seethedocumentationsuppliedwiththeadapter(aswellasthedocumentationforanyother
installedadapters)todeterminetheresourcesrequiredforeachadapter.
46LenovoH520eHardwareMaintenanceManual

Iftheseactionsdonotcorrecttheproblem,runthediagnosticprograms(see“LenovoSolutionCenter”on
page51
forinstructions).Ifyouneedtechnicalassistance,see“LenovoSupportWebsite”onpage30.
Anoptionthatpreviouslyworkeddoesnotworknow
Symptom:Anoptionthatpreviouslyworkeddoesnotworknow.
Actions:
•Verifythatalloptionhardwareandcableconnectionsaresecure.
•Iftheoptioncomeswithitsowntestinstructions,usethoseinstructionstotesttheoption.
•IfthefailingoptionisaSCSIoption,verifythat:
–ThecablesforallexternalSCSIoptionsareconnectedcorrectly.
–ThelastoptionineachSCSIchain,ortheendoftheSCSIcable,isterminatedcorrectly.
–AllexternalSCSIoptionsareturnedon.ExternalSCSIoptionsmustbeturnedonbeforethecomputer
isturnedon.Formoreinformation,seeyourSCSIdocumentation.
•Verifythattheoptionandanyrequireddevicedriversareinstalledcorrectly.
Iftheseactionsdonotcorrecttheproblem,runthediagnosticprograms(see“LenovoSolutionCenter”on
page51
forinstructions).Ifyouneedtechnicalassistance,see“LenovoSupportWebsite”onpage30.
Performanceandlockupproblems
Poorperformanceandlockupproblemscanbearesultofanyofthefollowing:
•“Insufficientfreeharddiskdrivespace”onpage47
•“Excessivenumberoffragmentedfiles”onpage48
•“Insufficientmemory”onpage49
Makeaselectionfromtheabovelisttofindoutmoreaboutthecorrectiveactionsyoucantake.
Insufficientfreeharddiskdrivespace
Symptom:Insufficientfreeharddiskdrivespace
TheWindowsoperatingsystemwillslowdownandmightproduceerrorsiftheharddiskdrivegetstoofull.
TochecktheamountoffreespaceontheWindows7operatingsystem,dothefollowing:
1.ClickStart➙Computer.
2.Right-clickyourCdriveentryandthenclickProperties.Theamountoffreediskspaceisdisplayed.
TochecktheamountoffreespaceontheWindows8operatingsystem,dothefollowing:
1.OpentheWindowsExplorerandclickComputer.
2.Right-clickyourCdriveentryandthenclickProperties.Theamountoffreediskspaceisdisplayed.
Tofreeupdiskspace,doanyofthefollowing:
•Procedure1
1.OntheWindows7operatingsystem,clickStart➙Computer.OntheWindows8operatingsystem,
opentheWindowsExplorerandclickComputer.
2.Right-clickyourCdriveentryandthenclickProperties.
3.ClickDiskCleanup.
Chapter5.Troubleshootinganddiagnostics47

4.Alistofunnecessaryfilecategoriesisdisplayed.Selecteachfilecategoryyouwanttodelete,
andthenclickOK.
•Procedure2
1.OpenControlPanel.
2.ClickPrograms.
3.ClickTurnWindowsfeaturesonoroff.
4.AlistofoptionalWindowscomponentsisdisplayed.Followtheinstructionsonthescreen.
•Procedure3
1.OntheWindows7operatingsystem,clickStart➙Computer.OntheWindows8operatingsystem,
opentheWindowsExplorerandclickComputer.
2.Right-clickyourCdriveentryandthenclickProperties.
3.ClickDiskCleanup.
4.ClickCleanupsystemfiles.
5.ClicktheMoreOptionstab.
6.IntheProgramsandFeaturesarea,clicktheCleanupbutton.
7.Alistofinstalledprogramsisdisplayed.Selecttheprogramthatyouwanttoremove.Click
Uninstall/Change.
•CleanoutyourInbox,SentItems,andDeletedItemsfoldersfromyoure-mailapplication.Thefolder
namesandproceduresvarydependingonyoure-mailapplication.Ifyouneedassistance,seethe
helpsystemforyoure-mailapplication.
Excessivenumberoffragmentedfiles
Symptom:Excessivenumberoffragmentedfiles
Action:RuntheWindowsDiskDefragmenterprogram.
Note:Dependingonthesizeoftheharddiskdriveandamountofdatacurrentlystoredontheharddisk
drive,thedisk-defragmentationprocessmighttakeuptoseveralhourstocomplete.
OntheWindows7operatingsystem,dothefollowing:
1.Closeanyprogramsthatarecurrentlyrunningandcloseanyopenwindows.
2.ClickStart➙Computer.
3.Right-clickyourCdriveentryandthenclickProperties.
4.ClicktheToolstab.
5.ClickDefragmentNow,thenclickContinue.
6.ClickDefragmentNowagaintostartadisk-defragmentationprocess.
OntheWindows8operatingsystem,dothefollowing:
1.Closeanyprogramsthatarecurrentlyrunningandcloseanyopenwindows.
2.OpentheWindowsExplorerandclickComputer.
3.Right-clickyourCdriveentryandthenclickProperties.
4.ClicktheToolstab.
5.ClickOptimize.
6.ClickOptimizeagaintostartadisk-defragmentationprocess.
48LenovoH520eHardwareMaintenanceManual

Insufficientmemory
Symptom:Insufficientmemory
Ingeneral,themorememorythatisinstalled,thebettertheWindowsoperatingsystemruns.
Action:Installadditionalmemory.Forinformationaboutpurchasingmemory,see“LenovoSupportWeb
site”onpage30
module”onpage76
Iftheseactionsdonotcorrecttheproblem,runthediagnosticprograms(see“LenovoSolutionCenter”on
page51forinstructions).Ifyouneedtechnicalassistance,see“LenovoSupportWebsite”onpage30.
.Forstep-by-stepinstructionsoninstallingmemory,see“Installingorreplacingamemory
.
Printerproblems
Symptom:Theprinterdoesnotwork.
Actions:Verifythat:
1.Theprinteristurnedonandisonline.
2.Paperisloadedcorrectly.
3.Theprintersignalcableissecurelyconnectedtothecorrectparallel,serial,orUSBconnectoronthe
computer.
Note:Non-IEEE-approvedprintersignalcablesmightcauseunpredictableproblems.
1.Anydevicedriversandothersoftwarethatcamewiththeprinterarecorrectlyinstalled.
2.Y ouhaveassignedtheprinterportcorrectlyinyouroperatingsystem,applicationprogram,orBIOS
settings.FormoreinformationaboutBIOSsettings,seeChapter6“UsingtheSetupUtilityprogram”
onpage53.
Iftheproblempersists,runthetestsdescribedinthedocumentationthatcomeswithyourprinter.Ifyou
cannotcorrecttheproblem,havethecomputerserviced.See“LenovoSupportWebsite”onpage30.
Serialportproblems
Usethisinformationtotroubleshoottheserialportanddevicesattachedtotheserialport.
Symptom:Serialportcannotbeaccessed.
Actions:
•Makesuretheserialcableissecurelyconnectedtotheserialportonthecomputerandtotheserial
device.Iftheserialdevicehasitsownpowercord,makesureitisattachedtoaproperlygrounded
electricaloutlet.
•IftheserialdevicehasitsownOn/Offswitch,makesureitisintheOnposition.
•IftheserialdevicehasanOnlineswitch,makesureitisintheOnlineposition.
•Iftheserialdeviceisaprinter,makesurepaperisloadedcorrectly.
•Verifythatanysoftwaresuppliedwiththeserialdeviceiscorrectlyinstalled.Refertothedocumentation
fortheserial-deviceoption.
•Makesurethattheserial-portadapter,ifyouaddedone,isproperlyinstalledandfirmlyseated.
Iftheseactionsdonotcorrecttheproblem,runthediagnosticprograms(see“LenovoSolutionCenter”on
page51
forinstructions).Ifyouneedtechnicalassistance,see“LenovoSupportWebsite”onpage30.
Chapter5.Troubleshootinganddiagnostics49

Softwareproblems
Selectyoursymptomfromthefollowinglist:
•“Whenusingasortfeature,datesdonotsortinthecorrectorder”onpage50
•“Softwaredoesnotworkasexpected”onpage50
Whenusingasortfeature,datesdonotsortinthecorrectorder
Symptom:Whenusingasortfeature,datesdonotsortinthecorrectorder.
Action:Somesoftwaredevelopedbeforetheyear2000usedonlythelasttwodigitsofayeartosort
dates,alwaysassumingthefirsttwodigitswere19.Consequently,theseprogramssortdatesoutoforder.
Checkwithyoursoftwaremanufacturertoseeifanyupdatesareavailable.Manysoftwaremanufacturers
makeupdatesavailablefromtheWorldWideWeb.
Softwaredoesnotworkasexpected
Symptom:Softwaredoesnotworkasexpected.
Actions:
•Mostsoftwareprogramshavebuilt-inhelpsystemsthatprovideinstructionsformosttasks.Ifyouare
havingdifficultyperformingaspecifictaskwithinasoftwareprogram,refertothehelpsystemforthat
program.Helpsystemsaretypicallyaccessiblefromamenuorbuttonintheprogram,andfrequently
fromtheF1key.
•IfyouarehavingdifficultywiththeWindowsoperatingsystemoroneofitscomponents,refertothe
Windowshelpsystem.ItisaccessiblefromtheWindowsStartmenu.
•Todetermineifproblemsarecausedbynewlyinstalledsoftware,verifythat:
–Yourcomputerhastheminimummemoryrequirementsneededtousethesoftware.Seethe
informationsuppliedwiththesoftwaretoverifymemoryrequirements.(Ifyoujustinstalledanadapter
ormemory,youmighthaveamemory-addressconflict.)
–Thesoftwareisdesignedtooperateonyourcomputer.
–Othersoftwareworksonyourcomputer.
–Thesoftwareyouareusingworkscorrectlyonanothercomputer.
•Ifyoureceivedanyerrormessageswhileusingthesoftwareprogram,seetheprinteddocumentation
suppliedwiththesoftwareorthehelpsystemforthatsoftwareforadescriptionofthemessagesand
solutionstotheproblem.
•Checkwithyoursoftwaremanufacturertoseeifanyupdatesareavailable.Manysoftwaremanufacturers
makeupdatesavailablefromtheWorldWideWeb.
•Ifthesoftwareprogramusedtoworkcorrectly,butdoesnotworkcorrectlynow,dothefollowing:
–OntheWindows7operatingsystem,clickStart➙ControlPanel➙SystemandSecurity➙System
➙SystemProtection➙SystemRestore.Then,followtheinstructionsonthescreen.
–OntheWindows8operatingsystem,openControlPanelandclickSystemandSecurity➙System➙
SystemProtection➙SystemRestore.Then,followtheinstructionsonthescreen.
•Ifyouareunabletoresolvetheproblemthroughothermethods,uninstallthesoftwareprogramand
reinstallit.
Iftheseactionsdonotcorrecttheproblem,youmightneedtechnicalassistance.Contactyoursoftware
manufacturerorsee“LenovoSupportWebsite”onpage30fordetails.
50LenovoH520eHardwareMaintenanceManual

USBproblems
Symptom:TheUSBconnectorscannotbeaccessed.
Actions:
•MakesuretheUSBcableissecurelyconnectedtotheUSBconnectorandtotheUSBdevice.IftheUSB
devicehasitsownpowercord,makesureitisattachedtoaproperlygroundedelectricaloutlet.
•IftheUSBdevicehasitsownOn/Offswitch,makesureitisintheOnposition.
•IftheUSBdevicehasanOnlineswitch,makesureitisintheOnlineposition.
•IftheUSBdeviceisaprinter,makesurepaperisloadedcorrectly.
•MakesureanydevicedriversorothersoftwaresuppliedwiththeUSBdeviceiscorrectlyinstalled.
RefertothedocumentationfortheUSBdevice.
•ResetthedevicebydetachingandreattachingtheUSBconnector.
Iftheseactionsdonotcorrecttheproblem,runthediagnosticprogramstotesttheUSBconnector(see
“LenovoSolutionCenter”onpage51forinstructions).IftheUSBdevicecamewithitsowndiagnostics,
runthosediagnosticsagainsttheUSBdevice.Ifyouneedtechnicalassistance,see“LenovoSupport
Website”onpage30
.
Diagnostics
Thediagnosticprogramisusedtotesthardwarecomponentsofyourcomputer.Thediagnosticprogramcan
alsoreportoperating-system-controlledsettingsthatinterferewiththecorrectoperationofyourcomputer.
Youcanusethepreinstalleddiagnosticprogramtodiagnosecomputerproblems,ifyourcomputeris
runningtheWindowsoperatingsystem.
Notes:
1.Y ourcomputerispreinstalledwiththeLenovoSolutionCenterprogramfordiagnosticpurposes.For
moreinformationabouttheLenovoSolutionCenterprogram,see“LenovoSolutionCenter”onpage51.
2.Ifyouareunabletoisolateandrepairtheproblemyourselfafterrunningthediagnosticprogram,save
andprintthelogfilescreatedbythediagnosticprogram.Youwillneedthelogfileswhenyouspeaktoa
Lenovotechnicalsupportrepresentative.
LenovoSolutionCenter
TheLenovoSolutionCenterprogramenablesyoutotroubleshootandresolvecomputerproblems.It
combinesdiagnostictests,systeminformationcollection,securitystatus,andsupportinformation,along
withhintsandtipsformaximumsystemperformance.
Notes:
•TheLenovoSolutionCenterprogramcanbedownloadedfromhttp://www.lenovo.com/diags.
•IfyouareusingotherWindowsoperatingsystemratherthanWindows7andWindows8,goto
http://www.lenovo.com/diagsforthelatestinformationondiagnosticsforyourcomputer.
ToruntheLenovoSolutionCenterprogram,see“Lenovoprograms”onpage.
Foradditionalinformation,refertotheLenovoSolutionCenterhelpsystem.
Note:Ifyouareunabletoisolateandrepairtheproblemyourselfafterrunningtheprogram,saveandprint
thelogfiles.YouwillneedthelogfileswhenyouspeaktoaLenovotechnicalsupportrepresentative.
Chapter5.Troubleshootinganddiagnostics51

52LenovoH520eHardwareMaintenanceManual

Chapter6.UsingtheSetupUtilityprogram
TheSetupUtilityprogramisusedtoviewandchangetheconfigurationsettingsofyourcomputer,regardless
ofwhichoperatingsystemyouareusing.However,theoperatingsystemsettingsmightoverrideanysimilar
settingsintheSetupUtilityprogram.
StartingtheSetupUtilityprogram
TostarttheSetupUtilityprogram,dothefollowing:
1.Makesureyourcomputeristurnedoff.
2.RepeatedlypressandreleasetheF1keywhenturningonthecomputer.Whenyouhearmultiple
beepsorseealogoscreen,releasetheF1key.
Note:IfaPower-OnPasswordoranAdministratorPasswordhasbeenset,theSetupUtilityprogram
menuwillnotbedisplayeduntilyoutypethecorrectpassword.Formoreinformation,see“Using
passwords”onpage53
WhenthePOSTdetectsthattheharddiskdrivehasbeenremovedfromyourcomputerorthememory
modulesizehasdecreased,anerrormessagewillbedisplayedwhenyoustartthecomputerandyouwillbe
promptedtodooneofthefollowing:
•PressF1toentertheSetupUtilityprogram.
Note:AfteryouentertheSetupUtilityprogram,selectSaveChangesandExitatthebottomofthe
screen.Theerrormessagewillnotbedisplayedagain.
•PressF2tobypasstheerrormessageandlogintotheoperatingsystem.
.
Viewingandchangingsettings
TheSetupUtilityprogrammenulistsvariousitemsaboutthesystemconfiguration.Tovieworchange
settings,starttheSetupUtilityprogram.See“StartingtheSetupUtilityprogram”onpage53.Then,follow
theinstructionsonthescreen.
YoucanuseeitherthekeyboardorthemousetonavigatethroughBIOSmenuchoices.Thekeysusedto
performvarioustasksaredisplayedatthebottomofeachscreen.
Usingpasswords
ByusingtheSetupUtilityprogram,youcansetpasswordstopreventunauthorizedaccesstoyourcomputer
anddata.Thefollowingtypesofpasswordsareavailable:
•Power-OnPassword
•AdministratorPassword
•HardDiskPassword
Youdonothavetosetanypasswordstouseyourcomputer.However,usingpasswordsimproves
computingsecurity.Ifyoudecidetosetanypasswords,readthefollowingsections.
©CopyrightLenovo2013
53

Passwordconsiderations
Apasswordcanbeanycombinationofupto64alphabeticandnumericcharacters.Forsecurityreasons,it
isrecommendedtouseastrongpasswordthatcannotbeeasilycompromised.T osetastrongpassword,
usethefollowingguidelines:
•Haveatleasteightcharactersinlength
•Containatleastonealphabeticcharacterandonenumericcharacter
•SetupUtilityprogramandharddiskdrivepasswordsarenotcasesensitive
•Notbeyournameoryourusername
•Notbeacommonwordoracommonname
•Besignificantlydifferentfromyourpreviouspasswords
Power-OnPassword
WhenaPower-OnPasswordisset,youarepromptedtotypeavalidpasswordeachtimethecomputeris
turnedon.Thecomputercannotbeuseduntilthevalidpasswordistypedin.
AdministratorPassword
SettinganAdministratorPassworddetersunauthorizedusersfromchangingconfigurationsettings.Ifyou
areresponsibleformaintainingtheconfigurationsettingsofseveralcomputers,youmightwanttosetan
AdministratorPassword.
WhenanAdministratorPasswordisset,youarepromptedtotypeavalidpasswordeachtimeyoutryto
accesstheSetupUtilityprogram.TheSetupUtilityprogramcannotbeaccesseduntilavalidpassword
istypedin.
IfboththePower-OnPasswordandAdministratorPasswordareset,youcantypeeitherpassword.However,
youmustuseyourAdministratorPasswordtochangeanyconfigurationsettings.
HardDiskPassword
SettingaHardDiskPasswordpreventsunauthorizedaccesstothedataontheharddiskdrive.Whena
HardDiskPasswordisset,youarepromptedtotypeavalidpasswordeachtimeyoutrytoaccessthe
harddiskdrive.
Notes:
•AfteryousetaHardDiskPassword,yourdataontheharddiskdriveisprotectedeveniftheharddisk
driveisremovedfromonecomputerandinstalledinanother.
•IftheHardDiskPasswordisforgotten,thereisnowaytoresetthepasswordorrecoverdatafromthe
harddiskdrive.
Setting,changing,anddeletingapassword
Toset,change,ordeleteapassword,dothefollowing:
1.StarttheSetupUtilityprogram.See“StartingtheSetupUtilityprogram”onpage53.
2.FromtheSetupUtilityprogrammainmenu,selectSecurity.
3.Dependingonthepasswordtype,selectSetPower-OnPassword,SetAdministratorPassword,or
HardDiskPassword.
4.Followtheinstructionsontherightsideofthescreentoset,change,ordeleteapassword.
54LenovoH520eHardwareMaintenanceManual

Note:Apasswordcanbeanycombinationofupto64alphabeticandnumericcharacters.Formore
information,see“Passwordconsiderations”onpage54.
Erasinglostorforgottenpasswords(clearingCMOS)
Thissectionprovidesinstructionsonhowtoeraselostorforgottenpasswords,suchasauserpassword.
Toerasealostorforgottenpassword,dothefollowing:
1.Removeallmediafromthedrivesandturnoffallattacheddevicesandthecomputer.Then,disconnect
allpowercordsfromelectricaloutletsanddisconnectallcablesthatareconnectedtothecomputer.
2.Removethecomputercover.
3.LocatetheClearCMOS/Recoveryjumperonthesystemboard.
4.Movethejumperfromthestandardposition(pin1andpin2)tothemaintenanceposition(pin2and
pin3).
5.Reinstallthecomputercoverandconnectthepowercord.
6.T urnonthecomputerandleaveitonforapproximately10seconds.Then,turnoffthecomputerby
holdingthepowerswitchforapproximatelyfiveseconds.
7.Repeatstep1throughstep3.
8.MovetheClearCMOS/Recoveryjumperbacktothestandardposition(pin1andpin2).
9.Reinstallthecomputercoverandconnectthepowercord.
Enablingordisablingadevice
Thissectionprovidesinformationonhowtoenableordisableuseraccesstothefollowingdevices:
USBSetupUsethisoptiontoenableordisableaUSBconnector.WhenaUSBconnectoris
disabled,thedeviceconnectedtotheUSBconnectorcannotbeused.
SATAControllerWhenthisfeatureissettoDisable,alldevicesconnectedtotheSATAconnectors
(suchasharddiskdrivesortheopticaldrive)aredisabledandcannotbeaccessed.
Toenableordisableadevice,dothefollowing:
1.StarttheSetupUtilityprogram.See“StartingtheSetupUtilityprogram”onpage53.
2.FromtheSetupUtilityprogrammainmenu,selectDevices.
3.Dependingonthedeviceyouwanttoenableordisable,dooneofthefollowing:
•SelectUSBSetuptoenableordisableaUSBdevice.
•SelectA TADrivesSetup➙SATAControllertoenableordisableaSATAdevice.
4.SelectthedesiredsettingsandpressEnter.
5.PressF10tosaveandexittheSetupUtilityprogram.See“ExitingtheSetupUtilityprogram”onpage57.
Selectingastartupdevice
Ifyourcomputerdoesnotstartupfromadevicesuchasthediscorharddiskdriveasexpected,dooneof
thefollowingtoselectthestartupdeviceyouwant.
Selectingatemporarystartupdevice
Usethisproceduretoselectatemporarystartupdevice.
Note:Notalldiscsandharddiskdrivesarebootable.
Chapter6.UsingtheSetupUtilityprogram55

1.T urnoffyourcomputer.
2.RepeatedlypressandreleasetheF12keywhenturningonthecomputer.WhentheStartupDevice
Menuwindowdisplays,releasetheF12key.
3.SelectthedesiredstartupdeviceandpressEnter.Thecomputerwillstartupfromthedeviceyou
selected.
Note:SelectingastartupdevicefromtheStartupDeviceMenuwindowdoesnotpermanentlychange
thestartupsequence.
Selectingorchangingthestartupdevicesequence
Tovieworpermanentlychangetheconfiguredstartupdevicesequence,dothefollowing:
1.StarttheSetupUtilityprogram.See“StartingtheSetupUtilityprogram”onpage53.
2.FromtheSetupUtilityprogrammainmenu,selectStartup.
3.SelectthedevicesforthePrimaryStartupSequence,theAutomaticStartupSequence,andtheError
StartupSequence.Readtheinformationdisplayedontherightsideofthescreen.
4.PressF10tosaveandexittheSetupUtilityprogram.See“ExitingtheSetupUtilityprogram”onpage57.
EnablingErPcompliancemode
Youcanenabletheenergy-relatedproductsdirective(ErP)compliancemodethroughthePowermenuinthe
SetupUtilityprogramtoreducetheconsumptionofelectricitywhenyourcomputerisinstandbyoroffmode.
ToenableErPcompliancemodeintheSetupUtilityprogram,dothefollowing:
1.StarttheSetupUtilityprogram.See“StartingtheSetupUtilityprogram”onpage53.
2.FromtheSetupUtilityprogrammainmenu,selectPower➙EnhancedPowerSavingMode,and
pressEnter.
3.SelectEnabledandpressEnter.
4.FromthePowermenu,selectAutomaticPowerOnandpressEnter.
5.SelectWakeonLanandpressEnter.
6.SelectDisabledandpressEnter.
7.PressF10tosavechangesandexittheSetupUtilityprogram.PressEnterwhenpromptedtoconfirm
theexit.
Note:WhenErPcompliancemodeisenabled,youcanwakeupyourcomputerbydoingoneofthefollowing:
•Pressingthepowerswitch
•Enablingthewakeuponalarmfeature
Thewakeuponalarmfeatureenablesyourcomputertowakeupatasettime.T oenablethewake
uponalarmfeature,dothefollowing:
1.StarttheSetupUtilityprogram.See“StartingtheSetupUtilityprogram”onpage53.
2.FromtheSetupUtilityprogrammainmenu,selectPower➙AutomaticPowerOn,andpressEnter.
3.SelectWakeUponAlarmandpressEnter.Thenfollowtheinstructionsonthescreen.
4.PressF10tosavechangesandexittheSetupUtilityprogram.PressEnterwhenpromptedto
confirmtheexit.
•Enablingtheafterpowerlossfeature
Theafterpowerlossfeatureenablesyourcomputertowakeupwhenthepowersupplyresumesaftera
suddenlossofelectricity.Toenabletheafterpowerlossfeature,dothefollowing:
1.StarttheSetupUtilityprogram.See“StartingtheSetupUtilityprogram”onpage53.
56LenovoH520eHardwareMaintenanceManual

2.FromtheSetupUtilityprogrammainmenu,selectPower➙AfterPowerLoss,andpressEnter.
3.SelectPowerOnandpressEnter.
4.PressF10tosavechangesandexittheSetupUtilityprogram.PressEnterwhenpromptedto
confirmtheexit.
ChangingtheBIOSsettingsbeforeinstallinganewoperatingsystem
BIOSsettingsvarybyoperatingsystem.ChangetheBIOSsettingsbeforeinstallinganewoperatingsystem.
TochangetheBIOSsettings,dothefollowing:
1.StarttheSetupUtilityprogram.See“StartingtheSetupUtilityprogram”onpage53.
2.FromtheSetupUtilityprogrammainmenu,selectExit➙OSOptimizedDefault.
3.Dependingontheoperatingsystemtobeinstalled,dooneofthefollowing:
•ToinstalltheWindows8(64-bit)operatingsystem,selectEnabled.
•ToinstallanoperatingsystemotherthanWindows8(64-bit),selectDisabled.
4.SelectYesinthewindowdisplayedandpressEntertoconfirmyourselection.
5.PressF10tosavechangesandexittheSetupUtilityprogram.See“ExitingtheSetupUtilityprogram”
onpage57.
ExitingtheSetupUtilityprogram
Afteryoufinishviewingorchangingsettings,pressEsctoreturntotheSetupUtilityprogrammainmenu.
YoumighthavetopressEscseveraltimes.Dooneofthefollowing:
•Ifyouwanttosavethenewsettings,pressF10tosaveandexittheSetupUtilityprogram.
•Ifyoudonotwanttosavethesettings,selectExit➙DiscardChangesandExit,andthenpress
Enter.WhentheResetWithoutSavingwindowopens,selectYes,andthenpressEntertoexitthe
SetupUtilityprogram.
•Ifyouwanttoreturntothedefaultsettings,pressF9toloadthedefaultsettings,andthenpressF10to
saveandexittheSetupUtilityprogram.
Chapter6.UsingtheSetupUtilityprogram57

58LenovoH520eHardwareMaintenanceManual

Chapter7.Symptom-to-FRUindex
TheSymptom-to-FRUindexlistserrorsymptomsandpossiblecauses.Themostlikelycauseislistedfirst.
AlwaysbeginwiththeChapter4“Generalcheckout”onpage31.Y oucanusethisindextohelpyoudecide
whichFRUsareneededwhenservicingacomputer.Ifyouareunabletocorrecttheproblemusingthis
index,goto“Undeterminedproblems”onpage63
Notes:
1.Ifyouhavebothanerrormessageandanincorrectaudioresponse,diagnosetheerrormessagefirst.
2.Ifyoucannotrunthediagnostictests,butdidreceiveaPOSTerrormessage,diagnosethePOSTerrormessage
first.
3.Ifyoudidnotreceiveanyerrormessage,lookforadescriptionofyourerrorsymptomsinthefirstpartofthisindex.
Harddiskdrivebooterror
Aharddiskdrivebooterror(errorcodes1962andI999030X)canhavethefollowingcauses.
ErrorFRU/Action
Thestart-updriveisnotinthebootsequencein
configuration.
Nooperatingsysteminstalledonthebootdrive.Installanoperatingsystemonthebootdrive.
Thebootsectoronthestart-updriveiscorrupted.
Thedriveisdefective.
.
Checktheconfigurationandensurethestart-updriveis
inthebootsequence.
Thedrivemustbeformatted.Dothefollowing:
1.Attempttobackupthedataonthefailingharddisk
drive.
2.Usingtheoperatingsystemsprogram,formatthe
harddiskdrive.
Replacetheharddiskdrive.
Powersupplyproblems
Ifyoususpectapowerproblem,usethefollowingprocedures.
Check/VerifyFRU/Action
Checkthefollowingforproperinstallation:
•Powercord
•On/Offswitchconnector
•On/Offswitchpowersupplyconnector
•Systemboardpowersupplyconnectors
•Microprocessor(s)connection
Checkthepowercordforcontinuity.
Checkthepower-onswitchforcontinuity.
Reseatconnectors
Powercord
Power-onswitch
Beepsymptoms
Beepsymptomsaretonesoraseriesoftonesseparatedbypauses(intervalswithoutsound)duringPOST.
©CopyrightLenovo2013
59

Thefollowingtablesdescribesbeepsymptoms.
BeepSymptomFRU/Action
2shortbeepsCMOSsettingerror
3shortbeepsandthen1longbeepDRAMmemory
error
Performthefollowingactionsinorder.
1.StarttheSetupUtilityprogramandpressF10to
Saveandexit.SeeChapter6“UsingtheSetupUtility
program”onpage53
2.StarttheSetupUtilityprogramandpressF9toload
defaultsandthenpressF10toSaveandexit.
3.PerformaBoot-blockrecovery.See“Recovering
fromaPOSTandBIOSupdatefailure”onpage99.
Performthefollowingactionsinorder.
1.Makesurethememorymodule(s)areproperlyseated
intheconnector(s).
2.Replacethememorymodule(s).
3.Replacethesystemboard.
.
POSTerrorcodes
Eachtimeyoupower-onthesystem,itperformsaseriesofteststhatchecktheoperationofthesystem
andsomeoptions.ThisseriesoftestsiscalledthePower-OnSelf-Test,orPOST.POSTdoesthefollowing
operations.
•Checkssomebasicsystem-boardoperations
•Checksthememoryoperation
•Startsthevideooperation
•Verifiesthatthebootdriveisworking
IfthePOSTdetectsaproblem,anerrormessageappearsonthescreen.Asingleproblemcancauseseveral
errormessagestoappear.Whenyoucorrectthecauseofthefirsterrormessage,theothererrormessages
probablywillnotappearonthescreenthenexttimeyouturnonthesystem.
POSTErrorcodePOSTErrormessageDescription/Action
00CEMachineTypeorSerialNumberisINVALID
0211
0135
0164MemorysizedecreasedThiserrormessageisdisplayedwhenthememory
Keyboardnotfound
Fanfailure
Thiserrormessageisdisplayedwhenthemachine
typeortheserialnumberisinvalid.
Thiserrormessageisdisplayedwhenthereisno
keyboarddetected.
Thesystemmightbeoverheating.
PressF1toentertheSetupUtilityprogram.
ThenpressF10tosaveandexittheSetupUtility
program.
Note:Iftheproblemiscausedbythe
microprocessorfan,pressingF10willnotsolve
theproblem.
sizehasdecreased.
60LenovoH520eHardwareMaintenanceManual
PressF1toentertheSetupUtilityprogram.
ThenpressF10tosaveandexittheSetupUtility
program.

POSTErrorcodePOSTErrormessageDescription/Action
1762
1820
Configurationchangehasoccurred
Morethanoneexternalfingerprintreader
isattached.Poweroffandremoveallbut
thereaderthatyousetupwithinyourmain
operatingsystem.
1962
Nooperatingsystemfound.Pressanykey
torepeatbootsequence.
0162
0167
0175
0176
SetupdataintegritycheckfailurePressF1toentertheSetupUtilityprogram.
Noprocessormicrocodeupdatefound
SystemSecurity-SecuritydatacorruptedPressF1toentertheSetupUtilityprogram.
SystemSecurity-Thesystemhasbeen
tamperedwith
Thiserrormessageisdisplayedwhenaharddisk
driveoropticaldrivechangehasbeenmade.
PressF1toentertheSetupUtilityprogram.
ThenpressF10tosaveandexittheSetupUtility
program.
Ifmorethanoneexternalfingerprintreaderis
connectedtoacomputer,thiserrormessagewill
bedisplayedtoinformyoutoremoveallofthe
fingerprintkeyboardsexcepttheonecompatible
withthefingerprintapplicationonyourcomputer.
ThiserroroccursonlyafterthePOSTiscompleted.
Pressanykeytorepeatbootsequence.
ThenpressF10tosaveandexittheSetupUtility
program.
Thiserrormessageindicatesthatthereis
nomicrocodeupdateimageforthecurrent
microprocessor.
ThenpressF10tosaveandexittheSetupUtility
program.
Thiserrormessageisdisplayedwhenthe
computeristurnedonwiththecoveropenor
removed.
PressF1toentertheSetupUtilityprogram.
ThenpressF10tosaveandexittheSetupUtility
program.
0189
SystemSecurity-Cannotreadthe
SecurityEEPROM
ThiserrormessageindicatesthattheSecurity
EEPROMmaybebrokenorremoved.
PressF1toentertheSetupUtilityprogram.
ThenpressF10tosaveandexittheSetupUtility
program.
0197
SystemSecurity-Unauthorizedsecurity
datachangedetected
PressF1toentertheSetupUtilityprogram.
ThenpressF10tosaveandexittheSetupUtility
program.
0190
SystemSecurity-Invalidsecuritychange
requested
PressF1toentertheSetupUtilityprogram.
ThenpressF10tosaveandexittheSetupUtility
program.
0199
SystemSecurity-Securitypasswordretry
countexceeded
PressF1toentertheSetupUtilityprogram.
ThenpressF10tosaveandexittheSetupUtility
program.
Chapter7.Symptom-to-FRUindex61

Miscellaneouserrormessages
Message/SymptomFRU/Action
ChangingdisplaycolorsDisplay/Monitor
Computerwillnotpower-off.See“Harddiskdriveboot
error”onpage59.
ComputerwillnotRPLfromserver
ComputerwillnotperformaWakeonLAN(ifapplicable)1.Checkpowersupplyandsignalcableconnections
Deadcomputer.See“Harddiskdrivebooterror”onpage
59
.
Diskettedrivein-uselightremainsonordoesnotlight
whendriveisactive.
Flashingcursorwithanotherwiseblankdisplay.
IncorrectmemorysizeduringPOST
"InsertaDiskette"iconappearswithaknown-good
diagnosticsdisketteinthefirst3.5-inchdiskettedrive.
Intensityorcolorvariesfromlefttorightofcharacters
andcolorbars
Nopowerorfannotrunning
1.PowerSwitch
2.SystemBoard
3.Risercard,ifinstalled
1.Ensurethatnetworkisinstartupsequenceasfirst
deviceorfirstdeviceafterdiskette
2.EnsurethatnetworkadapterisenabledforRPL
3.Networkadapter(Advisenetworkadministratorof
newMACaddress)
tonetworkadapter
2.Ensurethattheoperatingsystemsettingsaresetto
enableWakeonLAN
3.EnsureWakeonLANfeatureisenabledin
Setup/Configuration(see“StartingtheSetupUtility
program”onpage53)
4.EnsurenetworkadministratorisusingcorrectMAC
address
5.EnsurenointerruptorI/Oaddressconflicts
6.Networkadapter(advisenetworkadministratorof
newMACaddress)
1.PowerSupply
2.SystemBoard
1.DisketteDrive
2.SystemBoard
3.DisketteDriveCable
1.SystemBoard
2.PrimaryHardDiskDrive
3.HardDiskDriveCable
1.RuntheMemorytests
2.MemoryModule
3.SystemBoard
1.SystemBoard
2.DisketteDriveCable
3.NetworkAdapter
1.Display
2.Videoadapter(ifpresent)
3.SystemBoard
1.See“Harddiskdrivebooterror”onpage59.
62LenovoH520eHardwareMaintenanceManual

Message/SymptomFRU/Action
Non-systemdiskordiskerror-typemessagewitha
known-gooddiagnosticdiskette.
Otherdisplaysymptomsnotlistedabove(includingblank
orillegibledisplay)
Power-onindicatororharddiskdrivein-uselightnoton,
butcomputerworkscorrectly
Printerproblems1.Printer
Programloadsfromtheharddiskwithaknown-good
diagnosticsdisketteinthefirst3.5-inchdiskettedrive
RPLcomputercannotaccessprogramsfromitsownhard
disk.
RPLcomputerdoesnotRPLfromserver
Serialorparallelportdevicefailure(systemboardport)1.ExternalDeviceSelf-TestOK?
Serialorparallelportdevicefailure(adapterport)1.ExternalDeviceSelf-TestOK?
Someorallkeysonthekeyboarddonotwork
1.DisketteDrive
2.SystemBoard
3.DisketteDriveCable
1.Display
2.SystemBoard
1.Powerswitch/LEDassembly
2.SystemBoard
2.SystemBoard
1.RunSetupandcheckStartupsequence.
2.DisketteDrive
3.DisketteDriveCable
4.SystemBoard
5.PowerSupply
1.IfnetworkadministratorisusingLCCMHybridRPL,
checkstartupsequence:
a.Firstdevice-network
b.Seconddevice-harddisk
2.Harddiskdrive
1.Checkstartupsequence
2.CheckthenetworkadapterLEDstatus
2.ExternalDevice
3.Cable
4.SystemBoard
2.ExternalDevice
3.Cable
4.AlternateAdapter
5.SystemBoard
1.Keyboard
2.KeyboardCable
3.SystemBoard
Undeterminedproblems
Ifyouencounterundeterminedproblems,dothefollowing:
1.T urnoffthecomputerandthepower.
2.Removeordisconnectthefollowingcomponents(ifinstalled)oneatatime.
a.Externaldevices(modem,printer,ormouse)
b.Anyadaptercards
c.Memorymodules
Chapter7.Symptom-to-FRUindex63

d.Extendedvideomemory
e.ExternalCache
f.ExternalCacheRAM
g.Harddiskdrive
h.Diskettedrive
3.T urnonthepowerandthecomputertore-testthesystem.
4.Repeatsteps1through3untilyoufindthefailingdeviceoradaptercards.
Ifalldevicesandadaptercardshavebeenremoved,andtheproblemcontinues,replacethesystemboard.
64LenovoH520eHardwareMaintenanceManual

Chapter8.Locations
Thischapterintroducesthelocationsofthecomputerhardwarecomponents.
Locations
Thissectionprovidesinformationtohelpyoulocateyourcomputerconnectors,components,partson
thesystemboard,andinternaldrives.
Note:Thecomponentsinyourcomputermightlookslightlydifferentfromtheillustrations.
Locatingconnectors,controls,andindicatorsonthefrontofyour computer
Figure1“Frontconnector,control,andindicatorlocations”onpage65showsthelocationsofthe
connectors,controls,andindicatorsonthefrontofyourcomputer.
Figure1.Frontconnector,control,andindicatorlocations
1Powerswitch5Headphoneconnector
2Harddiskdriveactivityindicator6Microphoneconnector
3Opticaldriveeject/closebutton7USBconnectors(USBports2)
4Memorycardreader(optional)
Locatingconnectorsontherearofyourcomputer
Figure2“Rearconnectorlocations”onpage65showsthelocationsoftheconnectorsontherearofyour
computer.Someconnectorsontherearofyourcomputerarecolor-codedtohelpyoudeterminewhereto
connectthecablesonyourcomputer.
Figure2.Rearconnectorlocations
1Voltage-selectionswitch(availableonsome
models)
2Powercordconnector
3DVImonitorconnector
4VGAmonitorconnector
5USBconnectors(USBports3to6)13Optionalserialport
6Microphoneconnector14Ethernetconnector
7Audioline-outconnector
8Audioline-inconnector
9PCIExpressx16graphicscardslot
10PCIExpressx1cardslots(2)
11Integratedcablelock(Kingstonlock)slot
12Padlockloop
15Optionalserialport
©CopyrightLenovo2013
65

LocatingmajorFRUsandCRUs
Figure3“Componentlocations”onpage66showsthelocationsofthevariouscomponentsinyour
computer.Toremovethecomputercover,see“Removingthecomputercover”onpage70
.
Figure3.Componentlocations
ThefollowingtableliststhemajorFRUsshowninFigure3“Componentlocations”onpage66
andidentifies
whichFRUsalsoareself-serviceCRUsoroptional-serviceCRUs.
Notes:
•Self-serviceCRUs:TheseCRUsunplugoraresecuredbynomorethantwoscrews.Examplesof
thesetypesofCRUsincludethekeyboard,themouse,anyUSBdevice,andthepowercord.Other
self-serviceCRUsdependingonproductdesignmightincludememorymodules,adaptercards,hard
diskdrives,andopticaldrives.
•Optional-serviceCRUs:TheseCRUsareisolatedpartswithinthecomputerandareconcealedbyan
accesspanelthatistypicallysecuredbymorethantwoscrews.Oncetheaccesspanelisremoved,the
specificCRUisvisible.
NumberFRUdescription
1
2
3
4
5
6
7
8
Heatsinkandfanassembly
MemorymodulesYesNo
FrontbezelYesNo
HarddiskdriveNoYes
PCIcard(installedinsomemodels)
PCIExpressx16graphicscardslot
Systemboard
PowersupplyassemblyNoYes
Self-serviceCRUOptional-serviceCRU
NoYes
YesNo
Yes
NoNo
NO
66LenovoH520eHardwareMaintenanceManual

Locatingpartsonthesystemboard
Figure4“Systemboardpartlocations”onpage67showsthelocationsofthepartsonthesystemboard.
Figure4.Systemboardpartlocations
14-pinpowerconnector
2Microprocessor
3Microprocessorfanconnector
4Memoryslot1(DIMM1)
5Memoryslot2(DIMM2)16Serial(COM2)connector
6Thermalsensorconnector17Frontaudioconnector
724-pinpowerconnector18Internalspeakerconnector
8Powerfanconnector
9SATAconnectors(3)20PCIExpressx16graphicscardslot
10Frontpanelconnector(forconnectingLED
indicatorsandpowerswitch)
11FrontUSBconnector1(forconnectingUSB
ports1and2onthefrontbezel)
12ClearCMOS(ComplementaryMetalOxideSemiconductor)
/Recoveryjumper
13FrontUSBconnector2(forconnectingadditionalUSB
devices)
14FrontUSBconnector3(forconnectingadditionalUSB
devices)
15Battery
19PCIExpressx1cardslots(2)
21Systemfanconnector
Locatinginternaldrives
Internaldrivesaredevicesthatyourcomputerusestoreadandstoredata.Y oucanadddrivestoyour
computertoincreasestoragecapacityandenableyourcomputertoreadothertypesofmedia.Internal
drivesareinstalledinbays.Inthismanual,thebaysarereferredtoasbay1,bay2,andsoon.
Wheninstallingorreplacinganinternaldrive,itisimportanttonotethetypeandsizeofthedrivethatyou
caninstallorreplaceineachbayandcorrectlyconnectthecablestothedriveinstalled.Refertothe
appropriatesectionin“Installingorreplacinghardware”onpage69
forinstructionsonhowtoinstallor
replaceinternaldrivesforyourcomputer.
Chapter8.Locations67

Figure5“Drivebaylocations”onpage68showsthelocationsofthedrivebays.
Figure5.Drivebaylocations
1Bay1-Opticaldrivebay(withanopticaldriveinstalledonsomemodels)
2Bay2-Primaryharddiskdrivebay(witha3.5-inchSATAharddiskdriveinstalled)
3Bay3-Secondaryharddiskdrivebay
68LenovoH520eHardwareMaintenanceManual

Chapter9.ReplacingFRUs
Important:BesuretoreadandunderstandChapter2“Safetyinformation”onpage3beforeyoureplace
anyFRU.Theseprecautionsandguidelineswillhelpyouworksafely.
FRUreplacementsaretobedoneonlybytrainedservicetechnicians.
ThischapterdoesnotcontaintheremoveorreplaceprocedureforallFRUs.OnlythemajorFRUsare
documented.
Handlingstatic-sensitivedevices
Donotopenthestatic-protectivepackagecontainingthenewpartuntilthedefectiveparthasbeenremoved
fromthecomputerandyouarereadytoinstallthenewpart.Staticelectricity,althoughharmlesstoyou,can
seriouslydamagecomputercomponentsandparts.
Whenyouhandlecomputerpartsandcomponents,taketheseprecautionstoavoidstatic-electricitydamage:
•Limityourmovement.Movementcancausestaticelectricitytobuilduparoundyou.
•Alwayscarefullyhandlethepartsandothercomputercomponents.HandlePCIcards,memorymodules,
systemboards,andmicroprocessorsbytheedges.Nevertouchexposedcircuitry.
•Preventothersfromtouchingthepartsandothercomputercomponents.
•Beforeyoureplaceanewpart,touchthestatic-protectivepackagecontainingthenewparttoametal
expansion-slotcoverorotherunpaintedmetalsurfaceonthecomputerforatleasttwoseconds.This
reducesstaticelectricityfromthepackageandyourbody.
•Removethenewpartfromthestatic-protectivepackageanddirectlyinstallitinthecomputerwithout
placingitonanyothersurface.Ifitishardforyoutodothisinyourspecificsituation,placethe
static-protectivepackageofthenewpartonasmooth,levelsurface,andthenplacethenewparton
thestatic-protectivepackage.
•Donotplacethepartonthecomputercoverorothermetalsurface.
Installingorreplacinghardware
Thissectionprovidesinstructionsonhowtoinstallorreplacehardwareforyourcomputer.Youcanexpand
thecapabilitiesofyourcomputerandmaintainyourcomputerbyinstallingorreplacinghardware.
Attention:
Donotopenyourcomputerorattemptanyrepairbeforereadingandunderstandingthe“Importantsafetyinformation”
intheUserGuide.ToobtainacopyoftheUserGuide,goto:
http://www.lenovo.com/ThinkCentreUserGuides
Notes:
1.UseonlycomputerpartsprovidedbyLenovo.
2.Wheninstallingorreplacinganoption,usetheappropriateinstructionsinthissectionalongwiththe
instructionsthatcomewiththeoption.
©CopyrightLenovo2013
69

Removingthecomputercover
Attention:
Donotopenyourcomputerorattemptanyrepairbeforereadingandunderstandingthe“Importantsafetyinformation”
intheUserGuide.ToobtainacopyoftheUserGuide,goto:
http://www.lenovo.com/ThinkCentreUserGuides
Thissectionprovidesinstructionsonhowtoremovethecomputercover.
CAUTION:
Turnoffthecomputerandwaitthreetofiveminutestoletthecomputercoolbeforeremovingthe
computercover.
Toremovethecomputercover,dothefollowing:
1.Removeanymediafromthedrivesandturnoffallattacheddevicesandthecomputer.
2.Disconnectallpowercordsfromelectricaloutlets.
3.Disconnectthepowercords,Input/Outputcables,andanyothercablesthatareconnectedtothe
computer.See“Locatingconnectors,controls,andindicatorsonthefrontofyourcomputer”onpage
and“Locatingconnectorsontherearofyourcomputer”onpage65.
65
4.Removeanylockingdevicethatsecuresthecomputercover,suchasapadlockoranintegrated
cablelock.
5.Removethetwoscrewsthatsecurethecomputercoverandslidethecomputercovertotherearto
removeit.
Figure6.Removingthecomputercover
70LenovoH520eHardwareMaintenanceManual

Removingandreinstallingthefrontbezel
Attention:
Donotopenyourcomputerorattemptanyrepairbeforereadingandunderstandingthe“Importantsafetyinformation”
intheUserGuide.ToobtainacopyoftheUserGuide,goto:
http://www.lenovo.com/ThinkCentreUserGuides
Thissectionprovidesinstructionsonhowtoremoveandreinstallthefrontbezel.
Toremoveandreinstallthefrontbezel,dothefollowing:
1.T urnoffthecomputeranddisconnectallpowercordsfromelectricaloutlets.
2.Removethecomputercover.See“Removingthecomputercover”onpage70.
3.Removethefrontbezelbyreleasingthethreeplastictabsontheleftsideandpivotingthefrontbezel
outward.
Figure7.Removingthefrontbezel
Chapter9.ReplacingFRUs71

4.T oreinstallthefrontbezel,alignthethreeplastictabsontherightsideofthefrontbezelwiththe
correspondingholesinthechassis,thenpivotthefrontbezelinwardsuntilitsnapsintopositionon
theleftside.
Figure8.Reinstallingthefrontbezel
5.T ocompletetheinstallationorreplacement,goto“Completingthepartsreplacement”onpage90.
InstallingorreplacingaPCIcard
Attention:
Donotopenyourcomputerorattemptanyrepairbeforereadingandunderstandingthe“Importantsafetyinformation”
intheUserGuide.ToobtainacopyoftheUserGuide,goto:
http://www.lenovo.com/ThinkCentreUserGuides
ThissectionprovidesinstructionsonhowtoinstallorreplaceaPCIcard.YourcomputerhastwoPCI
Expressx1cardslotsandonePCIExpressx16graphicscardslot.
ToinstallorreplaceaPCIcard,dothefollowing:
1.T urnoffthecomputeranddisconnectallpowercordsfromelectricaloutlets.
2.Removethecomputercover.See“Removingthecomputercover”onpage70.
72LenovoH520eHardwareMaintenanceManual

3.Attherearofthecomputer,removethescrewthatsecuresthePCIcardlatch.
Figure9.RemovingthescrewthatsecuresthePCIcardlatch
4.DependingonwhetheryouareinstallingorreplacingaPCIcard,dooneofthefollowing:
•IfyouareinstallingaPCIcard,removetheappropriatemetalslotcover.
Chapter9.ReplacingFRUs73

•IfyouarereplacinganoldPCIcard,grasptheoldcardthatiscurrentlyinstalledandgentlypullit
outoftheslot.
Figure10.RemovingaPCIcard
Notes:
a.Thecardfitstightlyintothecardslot.Ifnecessary,alternatemovingeachsideofthecardasmall
amountuntilitisremovedfromthecardslot.
b.Ifthecardisheldinplacebyaretaininglatch,pressthecardretaininglatch1asshownto
disengagethelatch.Graspthecardandgentlypullitoutoftheslot.
5.RemovethenewPCIcardfromitsstatic-protectivepackage.
6.InstallthenewPCIcardintotheappropriateslotonthesystemboard.See“Locatingpartsonthe
systemboard”onpage67
.
Note:IfyouareinstallingaPCIExpressx16graphicscard,makesurethememoryslotretainingclips
areclosedbeforeyouinstallthegraphicscard.
7.PivotthecardlatchtotheclosedpositiontosecurethePCIcard.
74LenovoH520eHardwareMaintenanceManual

Figure11.InstallingaPCIcard
8.ReinstallthescrewtosecurethePCIcardlatchinplace.
9.T ocompletetheinstallationorreplacement,goto“Completingthepartsreplacement”onpage90.
Replacingthebattery
Attention:
Donotopenyourcomputerorattemptanyrepairbeforereadingandunderstandingthe“Importantsafetyinformation”
intheUserGuide.ToobtainacopyoftheUserGuide,goto:
http://www.lenovo.com/ThinkCentreUserGuides
Yourcomputerhasaspecialtypeofmemorythatmaintainsthedate,time,andsettingsforbuilt-infeatures,
suchasparallel-portassignments(configuration).Abatterykeepsthisinformationactivewhenyouturn
offthecomputer.
Thebatterynormallyrequiresnochargingormaintenancethroughoutitslife;however,nobatterylasts
forever.Ifthebatteryfails,thedate,time,andconfigurationinformation(includingpasswords)arelost.An
errormessageisdisplayedwhenyouturnonthecomputer.
Refertothe“Lithiumbatterynotice”intheSafety,Warranty,andSetupGuideforinformationaboutreplacing
anddisposingofthebattery.
Toreplacethebattery,dothefollowing:
1.T urnoffthecomputeranddisconnectallpowercordsfromelectricaloutlets.
2.Removethecomputercover.See“Removingthecomputercover”onpage70.
3.Locatethebattery.See“Locatingpartsonthesystemboard”onpage67.
Chapter9.ReplacingFRUs75

4.Removetheoldbattery.
Figure12.Removingtheoldbattery
5.Installanewbattery.
Figure13.Installinganewbattery
6.Reinstallthecomputercoverandconnectthecables.See“Completingthepartsreplacement”on
page90
.
Note:Whenthecomputeristurnedonforthefirsttimeafterreplacingthebattery,anerrormessage
mightbedisplayed.Thisisnormalafterreplacingthebattery.
7.T urnonthecomputerandallattacheddevices.
8.UsetheSetupUtilityprogramtosetthedate,time,andanypasswords.SeeChapter6“UsingtheSetup
Utilityprogram”onpage53
.
9.T ocompletetheinstallationorreplacement,goto“Completingthepartsreplacement”onpage90.
Installingorreplacingamemorymodule
Attention:
Donotopenyourcomputerorattemptanyrepairbeforereadingandunderstandingthe“Importantsafetyinformation”
intheUserGuide.ToobtainacopyoftheUserGuide,goto:
http://www.lenovo.com/ThinkCentreUserGuides
Thissectionprovidesinstructionsonhowtoinstallorreplaceamemorymodule.
YourcomputerhastwoslotsforinstallingorreplacingDDR3UDIMMsthatprovideuptoamaximumof8
GBsystemmemory.Wheninstallingorreplacingamemorymodule,use1GB,2GB,or4GBDDR3
UDIMMsinanycombinationuptoamaximumof8GB.
Toinstallorreplaceamemorymodule,dothefollowing:
1.T urnoffthecomputeranddisconnectallpowercordsfromelectricaloutlets.
2.Removethecomputercover.See“Removingthecomputercover”onpage70.
3.Laythecomputeronitssideforeasieraccesstothesystemboard.
4.Locatethememoryslots.See“Locatingpartsonthesystemboard”onpage67.
5.Removeanypartsthatmightpreventyouraccesstothememoryslots.Dependingonyourcomputer
model,youmightneedtoremovethePCIExpressx16graphicscardforeasieraccesstothememory
slots.See“InstallingorreplacingaPCIcard”onpage72.
6.Dependingonwhetheryouareinstallingorreplacingamemorymodule,dooneofthefollowing:
76LenovoH520eHardwareMaintenanceManual

•Ifyouarereplacinganoldmemorymodule,opentheretainingclipsandgentlypullthememory
moduleoutofthememoryslot.
Figure14.Removingamemorymodule
•Ifyouareinstallingamemorymodule,opentheretainingclipsofthememoryslotintowhichyou
wanttoinstallthememorymodule.
Figure15.Openingtheretainingclips
Chapter9.ReplacingFRUs77

7.Positionthenewmemorymoduleoverthememoryslot.Makesurethatthenotch1onthememory
modulealignscorrectlywiththeslotkey2onthesystemboard.Pushthememorymodulestraight
downintotheslotuntiltheretainingclipsclose.
Figure16.Installingamemorymodule
8.ReinstallthePCIExpressx16graphicscardifyouhaveremovedit.
9.T ocompletetheinstallationorreplacement,goto“Completingthepartsreplacement”onpage90.
Replacingtheopticaldrive
Attention:
Donotopenyourcomputerorattemptanyrepairbeforereadingandunderstandingthe“Importantsafetyinformation”
intheUserGuide.ToobtainacopyoftheUserGuide,goto:
http://www.lenovo.com/ThinkCentreUserGuides
Thissectionprovidesinstructionsonhowtoinstallorreplacetheopticaldrive.
Note:Theopticaldriveisonlyavailableinsomemodels.
Toreplaceanopticaldrive,dothefollowing:
1.T urnoffthecomputeranddisconnectallpowercordsfromelectricaloutlets.
2.Removethecomputercover.See“Removingthecomputercover”onpage70.
3.Removethefrontbezel.See“Removingandreinstallingthefrontbezel”onpage71.
4.Removethethreescrewsthatsecuretheopticaldrive.Then,slidetheopticaldriveoutofthefront
ofthecomputer.
78LenovoH520eHardwareMaintenanceManual

Figure17.Removingtheopticaldrive
5.Slidethenewopticaldriveintothedrivebayfromthefrontandalignthescrewholesinthenewoptical
drivewiththecorrespondingholesinthedrivebay.Then,installthethreescrewstosecurethenew
opticaldriveinplace.
Figure18.Installingtheopticaldrive
Chapter9.ReplacingFRUs79

6.Connectoneendofthesignalcabletotherearofthenewopticaldriveandtheotherendtoanavailable
SATAconnectoronthesystemboard.See“Locatingpartsonthesystemboard”onpage67.Then,
locateanavailablefive-wirepowerconnectorandconnectittotherearofthenewopticaldrive.
Figure19.Connectingtheopticaldrive
7.T ocompletetheinstallationorreplacement,goto“Completingthepartsreplacement”onpage90.
Replacingtheheatsinkandfanassembly
Attention:
Donotopenyourcomputerorattemptanyrepairbeforereadingandunderstandingthe“Importantsafetyinformation”
intheUserGuide.ToobtainacopyoftheUserGuide,goto:
http://www.lenovo.com/ThinkCentreUserGuides
Thissectionprovidesinstructionsonhowtoreplacetheheatsinkandfanassembly.
DANGER
Attention/Caution/Dangericon,warningusersandservicersofahotsurfacenearbyTheheatsink
andfanassemblymightbeveryhot.Turnoffthecomputerandwaitthreetofiveminutestoletthe
computercoolbeforeremovingthecomputercover.
Toreplacetheheatsinkandfanassembly,dothefollowing:
1.T urnoffthecomputeranddisconnectallpowercordsfromelectricaloutlets.
2.Removethecomputercover.See“Removingthecomputercover”onpage70.
3.Laythecomputeronitssideforeasieraccesstothesystemboard.
4.Locatetheheatsinkandfanassembly.See“LocatingmajorFRUsandCRUs”onpage66.
5.Disconnecttheheatsinkandfanassemblycablefromthemicroprocessorfanconnectoronthesystem
board.See“Locatingpartsonthesystemboard”onpage67.
80LenovoH520eHardwareMaintenanceManual

6.Followthissequencetoremovethefourscrewsthatsecuretheheatsinkandfanassemblytothe
systemboard:
a.Partiallyremovescrew1,thenfullyremovescrew2,andthenfullyremovescrew1.
b.Partiallyremovescrew3,thenfullyremovescrew4,andthenfullyremovescrew3.
Note:Carefullyremovethefourscrewsfromthesystemboardtoavoidanypossibledamagetothe
systemboard.Thefourscrewscannotberemovedfromtheheatsinkandfanassembly.
Figure20.Removingtheheatsinkandfanassembly
7.Liftthefailingheatsinkandfanassemblyoffthesystemboard.
Notes:
a.Y oumighthavetogentlytwisttheheatsinkandfanassemblytofreeitfromthemicroprocessor.
b.Whenhandlingtheheatsinkandfanassembly,donottouchthethermalgreaseonthebottom
oftheheatsinkandfanassembly.
8.Placethenewheatsinkandfanassemblyonthesystemboardsothatthefourscrewsarealignedwith
thecorrespondingholesinthesystemboard.
Note:Positionthenewheatsinkandfanassemblysothattheheatsinkandfanassemblycableis
towardthemicroprocessorfanconnectoronthesystemboard.
9.Followthefollowingsequencetoinstallthefourscrewstosecurethenewheatsinkandfanassembly.
Donotover-tightenthescrews.
a.Partiallytightenscrew1,thenfullytightenscrew2,andthenfullytightenscrew1.
b.Partiallytightenscrew3,thenfullytightenscrew4,andthenfullytightenscrew3.
10.Connectthenewheatsinkandfanassemblycabletothemicroprocessorfanconnectoronthesystem
board.See“Locatingpartsonthesystemboard”onpage67.
11.T ocompletetheinstallationorreplacement,goto“Completingthepartsreplacement”onpage90.
Chapter9.ReplacingFRUs81

Replacingthepowersupplyassembly
Attention:
Donotopenyourcomputerorattemptanyrepairbeforereadingandunderstandingthe“Importantsafetyinformation”
intheUserGuide.ToobtainacopyoftheUserGuide,goto:
http://www.lenovo.com/ThinkCentreUserGuides
Thissectionprovidesinstructionsonhowtoreplacethepowersupplyassembly.
Althoughtherearenomovingpartsinyourcomputerafterthepowercordhasbeendisconnected,the
followingwarningsarerequiredforyoursafetyandproperUnderwritersLaboratories(UL)certification.
DANGER
Hazardousmovingparts.Keepfingersandotherbodypartsaway.
DANGER
Neverremovethecoveronapowersupplyoranypartthathasthefollowinglabelattached.
Hazardousvoltage,current,andenergylevelsarepresentinsideanycomponentthathasthislabel
attached.Therearenoserviceablepartsinsidethesecomponents.Ifyoususpectaproblemwith
oneoftheseparts,contactaservicetechnician.
Toreplacethepowersupplyassembly,dothefollowing:
1.T urnoffthecomputeranddisconnectallpowercordsfromelectricaloutlets.
2.Removethecomputercover.See“Removingthecomputercover”onpage70.
3.Disconnectthepowersupplyassemblycablesfromalldrivesandfromthe24-pinpowerconnectorand
4-pinpowerconnectoronthesystemboard.See“Locatingpartsonthesystemboard”onpage67
4.Laythecomputeronitssideandremovethefourscrewsattherearofthechassisthatsecurethe
powersupplyassembly.
.
Figure21.Removingthescrewsforthepowersupplyassembly
82LenovoH520eHardwareMaintenanceManual

5.Slidethepowersupplyassemblytothefrontofthecomputerandthenliftitoutofthechassis.
6.Makesurethatthenewpowersupplyassemblyisthecorrectreplacement.Somepowersupply
assembliesautomaticallysensethevoltage,somepowersupplyassembliesarevoltagespecific,and
somepowersupplyassemblieshaveavoltage-selectionswitch.Ifyourpowersupplyassemblyhas
avoltage-selectionswitch,makesurethatyousetthevoltage-selectionswitchtomatchthevoltage
availableatyourelectricaloutlet.Ifnecessary,useaballpointpentoslidethevoltage-selectionswitch
tothecorrectposition.
•Ifthevoltagesupplyrangeinyourlocalcountryorregionis100–127Vac,setthevoltage-selection
switchto115V.
•Ifthevoltagesupplyrangeinyourlocalcountryorregionis200–240Vac,setthevoltage-selection
switchto230V.
7.Installthenewpowersupplyassemblyintothechassissothatthescrewholesinthepowersupply
assemblyalignwiththoseinthechassis.
8.Installandtightenthefourscrewstosecurethepowersupplyassembly.
Note:UseonlyscrewsprovidedbyLenovo.
9.Reconnectthepowersupplyassemblycablestothesystemboardandeachofthedrives.
10.Securethepowersupplyassemblycableswiththecableclipsandtiesinthechassis.
11.T ocompletetheinstallationorreplacement,goto“Completingthepartsreplacement”onpage90.
Replacingthemicroprocessor
Attention:
Donotopenyourcomputerorattemptanyrepairbeforereadingandunderstandingthe“Importantsafetyinformation”
intheUserGuide.ToobtainacopyoftheUserGuide,goto:
http://www.lenovo.com/ThinkCentreUserGuides
Thissectionprovidesinstructionsonhowtoreplacethemicroprocessor.
CAUTION:
Theheatsinkandmicroprocessormightbeveryhot.Turnoffthecomputerandwaitthreetofive
minutestoletthecomputercoolbeforeremovingthecomputercover.
Toreplacethemicroprocessor,dothefollowing:
1.T urnoffthecomputeranddisconnectallpowercordsfromelectricaloutlets.
2.Removethecomputercover.See“Removingthecomputercover”onpage70.
3.Laythecomputeronitssideforeasieraccesstothesystemboard.
4.Removetheheatsinkandfanassembly.See“Replacingtheheatsinkandfanassembly”onpage80.
Note:Placetheheatsinkandfanassemblyonitssidesothatthethermalgreaseonthebottomofit
doesnotgetincontactwithanything.
Chapter9.ReplacingFRUs83

5.Liftthesmallhandle1andopentheretainer2toaccessthemicroprocessor3.
Figure22.Accessingthemicroprocessor
6.Liftthemicroprocessorstraightupandoutofthemicroprocessorsocket.
Figure23.Removingthemicroprocessor
Notes:
a.Y ourmicroprocessorandsocketmightlookdifferentfromtheoneillustrated.
b.Notetheorientationofthemicroprocessorinthesocket.Youcaneitherlookforthesmalltriangle1
ononecornerofthemicroprocessorornotetheorientationofthenotches2onthemicroprocessor.
Thisisimportantwheninstallingthenewmicroprocessoronthesystemboard.
c.Touchonlytheedgesofthemicroprocessor.Donottouchthegoldcontactsonthebottom.
d.Donotdropanythingontothemicroprocessorsocketwhileitisexposed.Thesocketpinsmustbe
keptascleanaspossible.
7.Makesurethatthesmallhandleisintheraisedpositionandthemicroprocessorretainerisfullyopen.
8.Removetheprotectivecoverthatprotectsthegoldcontactsofthenewmicroprocessor.
9.Holdthenewmicroprocessorbyitssidesandalignthesmalltriangleononecornerofthenew
microprocessorwiththecorrespondingsmalltriangleononecornerofthemicroprocessorsocket.
84LenovoH520eHardwareMaintenanceManual

10.Lowerthenewmicroprocessorstraightdownintothemicroprocessorsocketonthesystemboard.
Figure24.Installingthemicroprocessor
11.Closethemicroprocessorretainerandlockitintopositionwiththesmallhandletosecurethenew
microprocessorinthesocket.
12.Reinstalltheheatsinkandfanassembly.See“Replacingtheheatsinkandfanassembly”onpage80.
13.Reconnectallcablesthatweredisconnectedfromthesystemboard.
14.T ocompletethereplacement,goto“Completingthepartsreplacement”onpage90.
Replacingthesystemboard
Attention:
Donotopenyourcomputerorattemptanyrepairbeforereadingandunderstandingthe“Importantsafetyinformation”
intheUserGuide.ToobtainacopyoftheUserGuide,goto:
http://www.lenovo.com/ThinkCentreUserGuides
Thissectionprovidesinstructionsonhowtoreplacethesystemboard.
CAUTION:
Theheatsinkandmicroprocessormightbeveryhot.Turnoffthecomputerandwaitthreetofive
minutestoletthecomputercoolbeforeremovingthecomputercover.
Toreplacethesystemboard,dothefollowing:
1.Removeallmediafromthedrivesandturnoffallattacheddevicesandthecomputer.Then,disconnect
allpowercordsfromelectricaloutletsanddisconnectallcablesthatareconnectedtothecomputer.
2.Removethecomputercover.See“Removingthecomputercover”onpage70.
3.Laythecomputeronitssideforeasieraccesstothesystemboard.
4.RemoveallmemorymodulesandPCIcardsthatarecurrentlyinstalled.See“Installingorreplacinga
memorymodule”onpage76and“InstallingorreplacingaPCIcard”onpage72.
5.Carefullytakenoteofthelocationsofallcableconnectionsonthesystemboardanddisconnectall
thecables.See“Locatingpartsonthesystemboard”onpage67.
6.Removetheheatsinkandfanassemblyfromthefailingsystemboard.See“Replacingtheheatsinkand
fanassembly”onpage80
.
Chapter9.ReplacingFRUs85

7.Removethesixscrewsthatsecurethesystemboard.
Figure25.Removingthesixscrewsthatsecurethesystemboard
8.Carefullyslidethesystemboardsothatitcanbereleasedfromthemountingstudsthatsecurethe
systemboardinplace.
9.Liftthesystemboardoutofthechassis.
10.Removethemicroprocessorfromthefailingsystemboardandinstallitonthenewsystemboard.
See“Replacingthemicroprocessor”onpage83
.
11.Installthenewsystemboardintothechassisbyaligningthesixmountingstudsinthechassiswiththe
correspondingholesinthenewsystemboard.Carefullyslidethenewsystemboardintothechassisuntil
itissecuredinplacebythemountingstuds.Then,installthesixscrewstosecurethesystemboard.
12.Installtheheatsinkandfanassemblyandconnecttheheatsinkandfanassemblycabletothenew
systemboard.See“Replacingtheheatsinkandfanassembly”onpage80
.
13.InstallallmemorymodulesandPCIcardsremovedfromthefailingsystemboardonthenewsystem
board.See“Installingorreplacingamemorymodule”onpage76and“InstallingorreplacingaPCI
card”onpage72.
14.Reconnectallremainingcablestothesystemboard.See“Locatingpartsonthesystemboard”
onpage67
.
15.T ocompletethereplacement,goto“Completingthepartsreplacement”onpage90.
Thefailingsystemboardmustbereturnedwithamicroprocessorsocketcovertoprotectthepinsduring
shippingandhandling.
Toinstallthemicroprocessorsocketcover,dothefollowing:
86LenovoH520eHardwareMaintenanceManual

1.Releasetheleversecuringthemicroprocessorretainerandopentheretainertoaccessthe
microprocessor.
2.Graspthemicroprocessoronthesidesandliftitstraightupandoutofthesocket.Donottouchthe
contactsonthemicroprocessorsocket.
3.Lowerthemicroprocessorretainer,andthenlowerthelevertosecuretheretainer.Makesurethe
leverislockedintoposition.
4.Notetheorientationofthesocketcover,andinstallonesideofthesocketcoverintothemicroprocessor
socket.
Figure26.Installingonesideofthesocketcoverintothemicroprocessorsocket
Note:Yourmicroprocessorsocketandcovermightlookslightlydifferentfromtheillustration.
5.Carefullypresstheothersideofthesocketcoverdownwarduntilthesocketcoversnapsintoposition.
6.Carefullycheckthefourcornersofthesocketcovertomakesurethatthecoverissecuredinthe
microprocessorsocket.
7.Followanyadditionalinstructionsincludedwiththereplacementpartyoureceived.
Replacingtheprimaryharddiskdrive
Attention:
Donotopenyourcomputerorattemptanyrepairbeforereadingandunderstandingthe“Importantsafetyinformation”
intheUserGuide.ToobtainacopyoftheUserGuide,goto:
http://www.lenovo.com/ThinkCentreUserGuides
Thissectionprovidesinstructionsonhowtoreplacetheprimaryharddiskdrive.
Toreplacetheprimaryharddiskdrive,dothefollowing:
1.T urnoffthecomputeranddisconnectallpowercordsfromelectricaloutlets.
2.Removethecomputercover.See“Removingthecomputercover”onpage70.
3.Locatetheprimaryharddiskdrive.See“Locatinginternaldrives”onpage67.
Note:Thereisalsoasecondaryharddiskdrivebayforyoutopurchaseandinstallasecondaryhard
diskdrivebyyourself.Ifyouwanttoinstallasecondaryharddiskdrive,usethesamewayofinstalling
theprimaryharddiskdrive.
4.Disconnectthesignalcableandthepowercablefromtheharddiskdrive.
5.Removethefourscrewsthatsecuretheharddiskdrive.Then,slidetheharddiskdriveoutofthechassis.
Chapter9.ReplacingFRUs87

Figure27.Removingtheprimaryharddiskdrive
6.Slidethenewharddiskdriveintotheharddiskdrivebayandalignthescrewholesinthenewhard
diskdrivewiththecorrespondingholesinthedrivebay.Then,installthefourscrewstosecurethe
newharddiskdriveinplace.
Figure28.Installingtheharddiskdrive
7.Connectoneendofthesignalcabletotherearofthenewharddiskdriveandtheotherendtoan
availableSATAconnectoronthesystemboard.See“Locatingpartsonthesystemboard”onpage67.
Then,locateanavailablefive-wirepowerconnectorandconnectittotherearofthenewharddiskdrive.
88LenovoH520eHardwareMaintenanceManual

Figure29.ConnectingaSATAharddiskdrive
8.T ocompletetheinstallationorreplacement,goto“Completingthepartsreplacement”onpage90.
ReplacingthefrontaudioandUSBassembly
Attention:
Donotopenyourcomputerorattemptanyrepairbeforereadingandunderstandingthe“Importantsafetyinformation”
intheUserGuide.ToobtainacopyoftheUserGuide,goto:
http://www.lenovo.com/ThinkCentreUserGuides
ThissectionprovidesinstructionsonhowtoreplacethefrontaudioandUSBassembly.
ToreplacethefrontaudioandUSBassembly,dothefollowing:
1.T urnoffthecomputeranddisconnectallpowercordsfromelectricaloutlets.
2.Removethecomputercover.See“Removingthecomputercover”onpage70.
3.Removethefrontbezel.See“Removingandreinstallingthefrontbezel”onpage71.
4.LocatethefrontaudioandUSBassembly.
5.DisconnectthefrontaudioandUSBassemblycablesfromthesystemboard.See“Locatingpartson
thesystemboard”onpage67.
Note:Makesureyounotethelocationsofthecableswhenyoudisconnectthecablesfromthesystem
board.
Chapter9.ReplacingFRUs89

6.RemovethescrewthatsecuresthefrontaudioandUSBassemblybrackettothechassistoremove
thebracketfromthechassis.
Figure30.RemovingthefrontaudioandUSBassembly
7.InstallthenewfrontaudioandUSBassemblyintothechassisandalignthescrewholeinthebracket
withthecorrespondingholeinthechassis.
8.InstallthescrewtosecurethenewfrontaudioandUSBassemblytothechassis.
9.ReconnectthefrontaudioandUSBassemblycablestothefrontaudioconnectorandthefrontUSB
connectoronthesystemboard.See“Locatingpartsonthesystemboard”onpage67.
10.T ocompletetheinstallationorreplacement,goto“Completingthepartsreplacement”onpage90.
Completingthepartsreplacement
Aftercompletingtheinstallationorreplacementforallparts,youneedtoreinstallthecomputercoverand
reconnectcables.Dependingonthepartsyouinstalledorreplaced,youmightneedtoconfirmtheupdated
informationintheSetupUtilityprogram.RefertoChapter6“UsingtheSetupUtilityprogram”onpage53.
Toreinstallthecomputercoverandreconnectcablestoyourcomputer,dothefollowing:
1.Makesurethatallcomponentshavebeenreassembledcorrectlyandthatnotoolsorloosescrews
areleftinsideyourcomputer.See“LocatingmajorFRUsandCRUs”onpage66
variouscomponentsinyourcomputer.
2.Makesurethatthecablesareroutedcorrectly.Keepcablesclearofthehingesandsidesofthe
computerchassistoavoidinterferencewithclosingthecomputercover.
3.Ifyouhaveremovedthefrontbezel,reinstallit.See“Removingandreinstallingthefrontbezel”on
page71.
forthelocationsof
90LenovoH520eHardwareMaintenanceManual

4.Positionthecomputercoveronthechassissothattherailguidesonthebottomofthecomputer
coverengagetherailsonthechassis.Then,pushthecovertothefrontofthecomputeruntilitsnaps
intoposition.
Figure31.Reinstallingthecomputercover
5.Ifthereisapadlockavailable,lockthecomputercover.
6.Ifthereisanintegratedcablelockavailable,lockthecomputer.
7.Reconnecttheexternalcablesandpowercordstothecomputer.See“Locatingconnectorsonthe
rearofyourcomputer”onpage65
.
8.T oupdateyourconfiguration,refertoChapter6“UsingtheSetupUtilityprogram”onpage53.
Note:Inmostareasoftheworld,LenovorequiresthereturnofthedefectiveCustomerReplaceableUnit
(CRU).InformationaboutthiswillcomewiththeCRUorwillcomeafewdaysaftertheCRUarrives.
Chapter9.ReplacingFRUs91

92LenovoH520eHardwareMaintenanceManual

Chapter10.FRUlists
Thischapterliststheinformationonthefieldreplaceableunits(FRUs)forLenovodesktopcomputer.
Attention:BesuretoreadandunderstandallthesafetyinformationbeforereplacinganyFRUs.
Notes:FRUsthathavea1or2intheCRUcolumnareCustomerReplaceableUnits(CRUs).
•1–identifiespartsthatarefairlysimpletoreplace,requiringfewornotools.
•2–identifiespartsthatareslightlymoredifficulttoreplace.
•N-identifiespartsthatarenottobereplacedbythecustomer.
Description
Motherboard
IntelH61IVBDDR3mATX(GALevel)Sumba-WIN8
IntelH61IVBDDR3mATX(GALevel)Sumba-WIN8pro
IntelH61IVBDDR3mATX(GALevel)Sumba-non-WIN8
EmATXIVBTPA@H61_ALC662_R8111E®-WIN8
EmATXIVBTPA@H61_ALC662_R8111E®-WIN8pro
EmATXIVBTPA@H61_ALC662_R8111E®-nonWIN8
Processors
i7-3770SIvyBridge8MBLGA3.10GHz65W
i5-3570SIvyBridge6MBLGA3.10GHz65W
i5-3470SIvyBridge6MBLGA2.9GHz65W
i3-324055WIvyBridge3.4GHz3MB2CLGA
i3-322055WIvyBridge3.3GHz3MB2CLGA
PentiumG2020IvyBridge3MBLGA2.9GHz55W
CeleronG1610IvyBridge2MBLGA2.6GHz55W
CeleronG550SANDYBRIDGE2MB2CFCLGA2.6GHZ65W
Memory
2GBPC3-128001600MHzDDR3UDIMM
2GBPC3-128001600MHzDDR4UDIMM
2GBPC3-128001600MHzDDR5UDIMM
2GBPC3-128001600MHzDDR6UDIMM
4GBPC3-128001600MHzDDR3UDIMM
4GBPC3-128001600MHzDDR4UDIMM
4GBPC3-128001600MHzDDR5UDIMM
4GBPC3-128001600MHzDDR6UDIMM
HardDiskDrive
SATA250GB7200RPM/3Gb/8M
Servicepartnumber
(FRU)
03T7136N
03T7137N
03T7147N
03T7136N
03T7137N
03T7147N
03T6578N
03T6558N
03T6573N
03T8186N
03T8185N
03T7106N
03T7108N
03T6671N
03T65801
03T65801
03T65801
03T65801
03T65661
03T65661
03T65661
03T65661
40Y90362
CRUID
©CopyrightLenovo2013
93

SATA250GB7200RPM/3Gb/8M
SATA250GB7200RPM/3Gb/8M
SATA250GB7200RPM/3Gb/8M
SATA250GB7200RPM/3Gb/8M
SATA250GB7200RPM/3Gb/8M
SATA250GB7200RPM/3Gb/8M
SATA250GB7200RPM/3Gb/8M
SATA500GB7200RPM/3Gb/16M
SATA500GB7200RPM/3Gb/16M
SATA500GB7200RPM/3Gb/16M
SATA500GB7200RPM/3Gb/16M
SATA500GB7200RPM/3Gb/16M
SATA500GB7200RPM/3Gb/16M
SATA500GB7200RPM/3Gb/16M
SATA500GB7200RPM/3Gb/16M
SATA500GB7200RPM/3Gb/16M
SATA1TB7200RPM/3Gb
SATA1TB7200RPM/3Gb
SATA1TB7200RPM/3Gb
SATA1TB7200RPM/3Gb
SATA1TB7200RPM/3Gb
SATA1TB7200RPM/3Gb
OpticalDrive
DVD-ROMDrive-16x/48x-SATAforDOS
DVD-ROMDrive-16x/48x-SATAforDOS
DVD-ROMDrive-16x/48x-SATAforDOS
DVD-ROMDrive-16x/48x-SATAforDOS
DVD-ROMDrive-16x/48x-SATAforDOS
DVD-ROMDrive-16x/48x-SATAforDOS
DVD-ROMDrive-16x/48x-SATAforDOS
DVD-ROMDrive-16x/48x-SATAforDOS
DVDRecorderRambo8-SATA12XRAMWRITEforDOS
DVDRecorderRambo8-SATA12XRAMWRITEforDOS
DVDRecorderRambo8-SATA12XRAMWRITEforDOS
DVDRecorderRambo8-SATA12XRAMWRITEforDOS
DVDRecorderRambo8-SATA12XRAMWRITEforDOS
DVDRecorderRambo8-SATA12XRAMWRITEforDOS
DVDRecorderRambo8-SATA12XRAMWRITEforDOS
DVDRecorderRambo8-SATA12XRAMWRITEforDOS
DVDRecorderRambo8-SATA12XRAMWRITEforDOS
45K04082
45K04082
45K04082
03T70392
03T70392
45K06272
03T70392
45K04102
45K04102
45K04102
45K04102
03T70412
03T70412
45K06302
45K06292
03T70412
45K04122
45K04122
45K04122
03T70422
03T70422
45K06232
71Y55431
71Y55431
71Y55431
71Y55431
71Y55431
71Y55431
71Y55431
71Y55431
71Y55451
71Y55451
71Y55451
71Y55451
71Y55451
71Y55451
71Y55451
71Y55451
71Y55451
94LenovoH520eHardwareMaintenanceManual

VideoAdapter
HD74501G64bitDVI+DPWIN8A TXVIDEOCARD
DVI_I(M)-VGA(F)adpater
HD7350512M64bitDVI+DPWIN8ATXVIDEOCARD
DVI_I(M)-VGA(F)adpater
MSIG605512MDVI+DPWIN8ATXVideoCard
DVI_I(M)-VGA(F)adpater
03T70911
54Y82551
03T70931
54Y82551
03T70961
54Y82551
Keyboard
LenovoSlimNewF5USBKeyboard-WIN8
LenovoSlimNewF5USBKeyboard-WIN8
54Y94941
54Y94941
Mouse
LenovoEnhancedOpticalUSBMouse
LenovoEnhancedOpticalUSBMouse
45J48891
45J48891
PowerCord
C13PowerCord
C13PowerCord
C13PowerCord
45J95951
45J95951
45J95951
PowerSupply
TowerPS3180WforWW,exceptforJapan
TowerPS3181WforWW,exceptforJapan
TowerPS3182WforWW,exceptforJapan
54Y88472
54Y88472
54Y88472
Thermal
TowerIntelLGA115595W/65WCoolerKit
TowerIntelLGA115595W/65WCoolerKit
TowerIntelLGA115595W/65WCoolerKit
SensorCable(300mm)kit(withholder)
SensorCable(300mm)kit(withholder)
03T9513N
03T9513N
03T9513N
54Y9919N
54Y9919N
Speaker
LenovospeakerM0620(Black)
03T71421
CardReader
FRUSingleSlotSD
03T70441
FRUBLDsingleslot400mm-hcardreader03T90041
Fru-Cardreaderkit
03T95161
Mechanicals
FRU,Mechanicalkit,Sumba/321ZT,Foxconn
FRU,TWRFrontpanelAss'yforbrazil,Sumba
FRU,TWRChassisAss'yforbrazil,Sumba
FRU,RearIOShield,ATX,H61(WithoutPS2),FOF,Punch
FRU,USB-ASSY,forbrazil,TaipaiIVY20L
FRU,Cardreaderbracket,Metal,T aipaiIVY20L
03T9955N
03T99561
03T9957N
03T9631N
03T9958N
03T9959N
Chapter10.FRUlists95

FRU,SM_321BT_SIDE_PANEL,forbrazil,TaipaiIVY20L
FRU,BELT,Sumba20L
FRU,WIRE_CLIP ,Sumba20L
FRU,MB_RUBBER_01,Sumba20L
FRU,MB_RUBBER_02,Sumba20L
Frontmain41R6206N
FRUFrontI_Ocable
FRUSATACABLE
FRUSATACABLE
03T9960N
03T9982N
03T9983N
03T9984N
03T9985N
54Y8274N
54Y9929N
54Y9948N
96LenovoH520eHardwareMaintenanceManual
 Loading...