

Page 1

HardwareMaintenanceManual
LenovoB575e
Page 2

Note:Beforeusingthisinformationandtheproductitsupports,besuretoreadthegeneralinformation
underAppendixA“Notices”onpage93.
FirstEdition(July2012)
©CopyrightLenovo2012.
LIMITEDANDRESTRICTEDRIGHTSNOTICE:IfdataorsoftwareisdeliveredpursuantaGeneralServicesAdministration
“GSA”contract,use,reproduction,ordisclosureissubjecttorestrictionssetforthinContractNo.GS-35F-05925.
Page 3

Contents
Aboutthismanual...........iii
Chapter1.Safetyinformation......1
Generalsafety................1
Electricalsafety...............2
Safetyinspectionguide............3
Handlingdevicesthataresensitivetoelectrostatic
discharge..................3
Groundingrequirements............4
Safetynotices(multilingualtranslations)......4
Lasercompliancestatement(multilingual
translations)................19
Chapter2.Importantservice
information..............27
StrategyforreplacingFRUs.........27
Strategyforreplacingaharddiskdrive...28
Importantnoticeforreplacingasystem
board................28
ImportantinformationaboutreplacingRoHS
compliantFRUs..............28
Chapter3.Generalcheckout.....29
Whattodorst..............29
Powersystemcheckout...........30
Checkingtheacpoweradapter......30
Checkingoperationalcharging......31
Checkingthebatterypack........31
Chapter6.FRUreplacement
notices................41
Screwnotices...............41
Chapter7.Removingandreplacinga
FRU..................43
1010Batterypack.............43
1020Bottomslotcover...........44
1030Harddiskdrive............45
1040Opticaldrive.............46
1050Memorymodules...........47
1060PCIExpressMiniCardforwirelessLAN..48
1070Backupbattery............50
1080Keyboard..............51
1090Keyboardbezel............54
1100LEDboardandpowerboard.......58
1110Microphoneassembly.........59
1120I/OboardandRJ45Ethernetboard....59
1130Systemboardassembly.........63
1140LCDunit...............65
1150Thermalfanassembly.........67
1160Speakerassembly...........69
1170DC-insubcardandbasecover......70
2010LCDfrontbezel............72
2020Integratedcamera...........74
2030LCDpanel,LCDcable,andhinges....74
2040Antennaassembly...........76
Chapter4.Relatedservice
information..............33
Recoveringthecomputersettings.......33
Passwords................33
Power-onpassword...........33
Supervisorpassword..........33
Powermanagement............34
Screenblankmode...........34
Sleepmode..............34
Hibernationmode...........34
Chapter5.LenovoB575e.......37
Specications...............37
Statusindicators..............38
Fnkeycombinations............39
©CopyrightLenovo2012
Chapter8.Locations.........79
Frontview................79
Bottomview...............80
Chapter9.Partslist..........81
Overall..................82
LCDFRUs................84
Keyboard.................85
Miscellaneousparts............88
acpoweradapters.............88
Powercords...............88
AppendixA.Notices..........93
Electronicemissionsnotices.........94
Trademarks................94
i
Page 4

iiHardwareMaintenanceManual
Page 5

Aboutthismanual
ThismanualprovidesserviceandreferenceinformationforthefollowingLenovo
Machine
LenovoB575e3685,20189
Machinetype(MT)
®
products.
Usethismanualtotroubleshootproblems.
Themanualisdividedintothefollowingsections:
•Thecommonsectionsprovidegeneralinformation,guidelines,andsafetyinformationrequiredfor
servicingcomputers.
•Theproduct-specicsectionsincludeservice,reference,andproduct-specicpartsinformation.
Important:
•ThismanualisintendedonlyfortrainedservicetechnicianswhoarefamiliarwithLenovoproducts.Use
thismanualtotroubleshootproblemseffectively.
•BeforeservicingaLenovoproduct,besuretoreadalltheinformationunderChapter1“Safety
information”onpage1
andChapter2“Importantserviceinformation”onpage27.
©CopyrightLenovo2012
iii
Page 6

ivHardwareMaintenanceManual
Page 7

Chapter1.Safetyinformation
Thischapterpresentsthefollowingsafetyinformationthatyouneedtobefamiliarwithbeforeyouservicea
Lenovonotebookcomputer.
•“Generalsafety”onpage1
•“Electricalsafety”onpage2
•“Safetyinspectionguide”onpage3
•“Handlingdevicesthataresensitivetoelectrostaticdischarge”onpage3
•“Groundingrequirements”onpage4
•“Safetynotices(multilingualtranslations)”onpage4
•“Lasercompliancestatement(multilingualtranslations)”onpage19
Generalsafety
Followtheserulestoensuregeneralsafety:
•Observegoodhousekeepingintheareaofthemachinesduringandaftermaintenance.
•Whenliftinganyheavyobject:
1.Makesurethatyoucanstandsafelywithoutslipping.
2.Distributetheweightoftheobjectequallybetweenyourfeet.
3.Useaslowliftingforce.Nevermovesuddenlyortwistwhenyouattempttolift.
4.Liftbystandingorbypushingupwithyourlegmuscles;thisactionremovesthestrainfromthe
musclesinyourback.Donotattempttoliftanyobjectthatweighsmorethan16kg(35lb)orthatyou
thinkistooheavyforyou.
•Donotperformanyactionthatcauseshazardstothecustomer,orthatmakestheequipmentunsafe.
•Beforeyoustartthemachine,makesurethatotherservicetechniciansandthecustomer'spersonnelare
notinahazardousposition.
•Placeremovedcoversandotherpartsinasafeplace,awayfromallpersonnel,whileyouareservicing
themachine.
•Keepyourtoolcaseawayfromwalkareassothatotherpeoplewillnottripoverit.
•Donotwearlooseclothingthatcanbetrappedinthemovingpartsofamachine.Makesurethatyour
sleevesarefastenedorrolledupaboveyourelbows.Ifyourhairislong,fastenit.
•Inserttheendsofyournecktieorscarfinsideclothingorfastenitwithanonconductiveclip,about8
centimeters(3inches)fromtheend.
•Donotwearjewelry,chains,metal-frameeyeglasses,ormetalfastenersforyourclothing,becausemetal
objectsaregoodelectricalconductors.
•Wearsafetyglasseswhenyouarehammering,drilling,soldering,cuttingwire,attachingsprings,using
solvents,orworkinginanyotherconditionsthatmightbehazardoustoyoureyes.
•Afterservice,reinstallallsafetyshields,guards,labels,andgroundwires.Replaceanysafetydevice
thatiswornordefective.
•Reinstallallcoverscorrectlybeforereturningthemachinetothecustomer.
•Fanlouversonthemachinehelptopreventoverheatingofinternalcomponents.Donotobstructfan
louversorcoverthemwithlabelsorstickers.
©CopyrightLenovo2012
1
Page 8

Electricalsafety
Observethefollowingruleswhenworkingonelectricalequipment.
Important:
Useonlyapprovedtoolsandtestequipment.Somehandtoolshavehandlescoveredwithasoftmaterial
thatdoesnotinsulateyouwhenworkingwithliveelectricalcurrents.
Manycustomershave,neartheirequipment,rubberoormatsthatcontainsmallconductivebersto
decreaseelectrostaticdischarges.Donotusethistypeofmattoprotectyourselffromelectricalshock.
•Findtheroomemergencypower-off(EPO)switch,disconnectingswitch,orelectricaloutlet.Ifanelectrical
accidentoccurs,youcanthenoperatetheswitchorunplugthepowercordquickly.
•Donotworkaloneunderhazardousconditionsornearequipmentthathashazardousvoltages.
•Disconnectallpowerbefore:
–Performingamechanicalinspection
–Workingnearpowersupplies
–Removingorinstallingmainunits
•Beforeyoustarttoworkonthemachine,unplugthepowercord.Ifyoucannotunplugit,askthecustomer
topower-offthewallboxthatsuppliespowertothemachine,andtolockthewallboxintheoffposition.
•Ifyouneedtoworkonamachinethathasexposedelectricalcircuits,observethefollowingprecautions:
–Ensurethatanotherperson,familiarwiththepower-offcontrols,isnearyou.
Attention:Anotherpersonmustbetheretoswitchoffthepower,ifnecessary.
–Useonlyonehandwhenworkingwithpowered-onelectricalequipment;keeptheotherhandinyour
pocketorbehindyourback.
Attention:Anelectricalshockcanoccuronlywhenthereisacompletecircuit.Byobservingtheabove
rule,youmaypreventacurrentfrompassingthroughyourbody.
–Whenusingtesters,setthecontrolscorrectlyandusetheapprovedprobeleadsandaccessoriesfor
thattester.
–Standonsuitablerubbermats(obtainedlocally,ifnecessary)toinsulateyoufromgroundssuchas
metaloorstripsandmachineframes.
Observethespecialsafetyprecautionswhenyouworkwithveryhighvoltages;Instructionsforthese
precautionsareinthesafetysectionsofmaintenanceinformation.Useextremecarewhenmeasuring
highvoltages.
•Regularlyinspectandmaintainyourelectricalhandtoolsforsafeoperationalcondition.
•Donotusewornorbrokentoolsandtesters.
•Neverassumethatpowerhasbeendisconnectedfromacircuit.First,checkthatithasbeenpoweredoff.
•Alwayslookcarefullyforpossiblehazardsinyourworkarea.Examplesofthesehazardsaremoistoors,
nongroundedpowerextensioncables,powersurges,andmissingsafetygrounds.
•Donottouchliveelectricalcircuitswiththereectivesurfaceofaplasticdentalmirror.Thesurfaceis
conductive;suchtouchingcancausepersonalinjuryandmachinedamage.
•Donotservicethefollowingpartswiththepoweronwhentheyareremovedfromtheirnormaloperating
placesinamachine:
–Powersupplyunits
–Pumps
–Blowersandfans
–Motorgenerators
–Similarunitstolistedabove
Thispracticeensurescorrectgroundingoftheunits.
•Ifanelectricalaccidentoccurs:
2HardwareMaintenanceManual
Page 9

–Usecaution;donotbecomeavictimyourself.
–Switchoffpower.
–Sendanotherpersontogetmedicalaid.
Safetyinspectionguide
Thepurposeofthisinspectionguideistoassistyouinidentifyingpotentiallyunsafeconditions.Aseach
machinewasdesignedandbuilt,requiredsafetyitemswereinstalledtoprotectusersandservicetechnicians
frominjury.Thisguideaddressesonlythoseitems.Y oushouldusegoodjudgmenttoidentifypotential
safetyhazardsduetoattachmentofnon-Lenovofeaturesoroptionsnotcoveredbythisinspectionguide.
Ifanyunsafeconditionsarepresent,youmustdeterminehowserioustheapparenthazardcouldbeand
whetheryoucancontinuewithoutrstcorrectingtheproblem.
Considertheseconditionsandthesafetyhazardstheypresent:
•Electricalhazards,especiallyprimarypower(primaryvoltageontheframecancauseseriousorfatal
electricalshock)
•Explosivehazards,suchasadamagedCRTfaceorabulgingcapacitor
•Mechanicalhazards,suchaslooseormissinghardware
Todeterminewhetherthereareanypotentiallyunsafeconditions,usethefollowingchecklistatthebeginning
ofeveryservicetask.Beginthecheckswiththepoweroff,andthepowercorddisconnected.
Checklist:
1.Checkexteriorcoversfordamage(loose,broken,orsharpedges).
2.Poweroffthecomputer.Disconnectthepowercord.
3.Checkthepowercordfor:
a.Athird-wiregroundconnectoringoodcondition.Useametertomeasurethird-wireground
continuityfor0.1ohmorlessbetweentheexternalgroundpinandtheframeground.
b.Thepowercordshouldbethetypespeciedinthepartslist.
c.Insulationmustnotbefrayedorworn.
4.Checkforcrackedorbulgingbatteries.
5.Removethecover.
6.Checkforanyobviousnon-Lenovoalterations.Usegoodjudgmentastothesafetyofanynon-Lenovo
alterations.
7.Checkinsidetheunitforanyobviousunsafeconditions,suchasmetallings,contamination,wateror
otherliquids,orsignsofreorsmokedamage.
8.Checkforworn,frayed,orpinchedcables.
9.Checkthatthepower-supplycoverfasteners(screwsorrivets)havenotbeenremovedortamperedwith.
Handlingdevicesthataresensitivetoelectrostaticdischarge
Anycomputerpartcontainingtransistorsorintegratedcircuits(ICs)shouldbeconsideredsensitiveto
electrostaticdischarge(ESD.)ESDdamagecanoccurwhenthereisadifferenceinchargebetweenobjects.
ProtectagainstESDdamagebyequalizingthechargesothatthemachine,thepart,theworkmat,andthe
personhandlingthepartareallatthesamecharge.
Notes:
1.Useproduct-specicESDprocedureswhentheyexceedtherequirementsnotedhere.
Chapter1.Safetyinformation3
Page 10
2.MakesurethattheESDprotectivedevicesyouusehavebeencertied(ISO9000)asfullyeffective.
WhenhandlingESD-sensitiveparts:
•Keepthepartsinprotectivepackagesuntiltheyareinsertedintotheproduct.
•Avoidcontactwithotherpeople.
•Wearagroundedwriststrapagainstyourskintoeliminatestaticonyourbody.
•Preventthepartfromtouchingyourclothing.Mostclothingisinsulativeandretainsachargeevenwhen
youarewearingawriststrap.
•Useagroundedworkmattoprovideastatic-freeworksurface.Thematisespeciallyusefulwhen
handlingESD-sensitivedevices.
•Selectagroundingsystem,suchasthoselistedbelow,toprovideprotectionthatmeetsthespecic
servicerequirement.
Note:TheuseofagroundingsystemtoguardagainstESDdamageisdesirablebutnotnecessary.
–AttachtheESDgroundcliptoanyframeground,groundbraid,orgreen-wireground.
–Whenworkingonadouble-insulatedorbattery-operatedsystem,useanESDcommongroundor
referencepoint.Y oucanusecoaxorconnector-outsideshellsonthesesystems.
–Usetheroundgroundprongoftheacplugonac-operatedcomputers.
Groundingrequirements
Electricalgroundingofthecomputerisrequiredforoperatorsafetyandcorrectsystemfunction.Proper
groundingoftheelectricaloutletcanbeveriedbyacertiedelectrician.
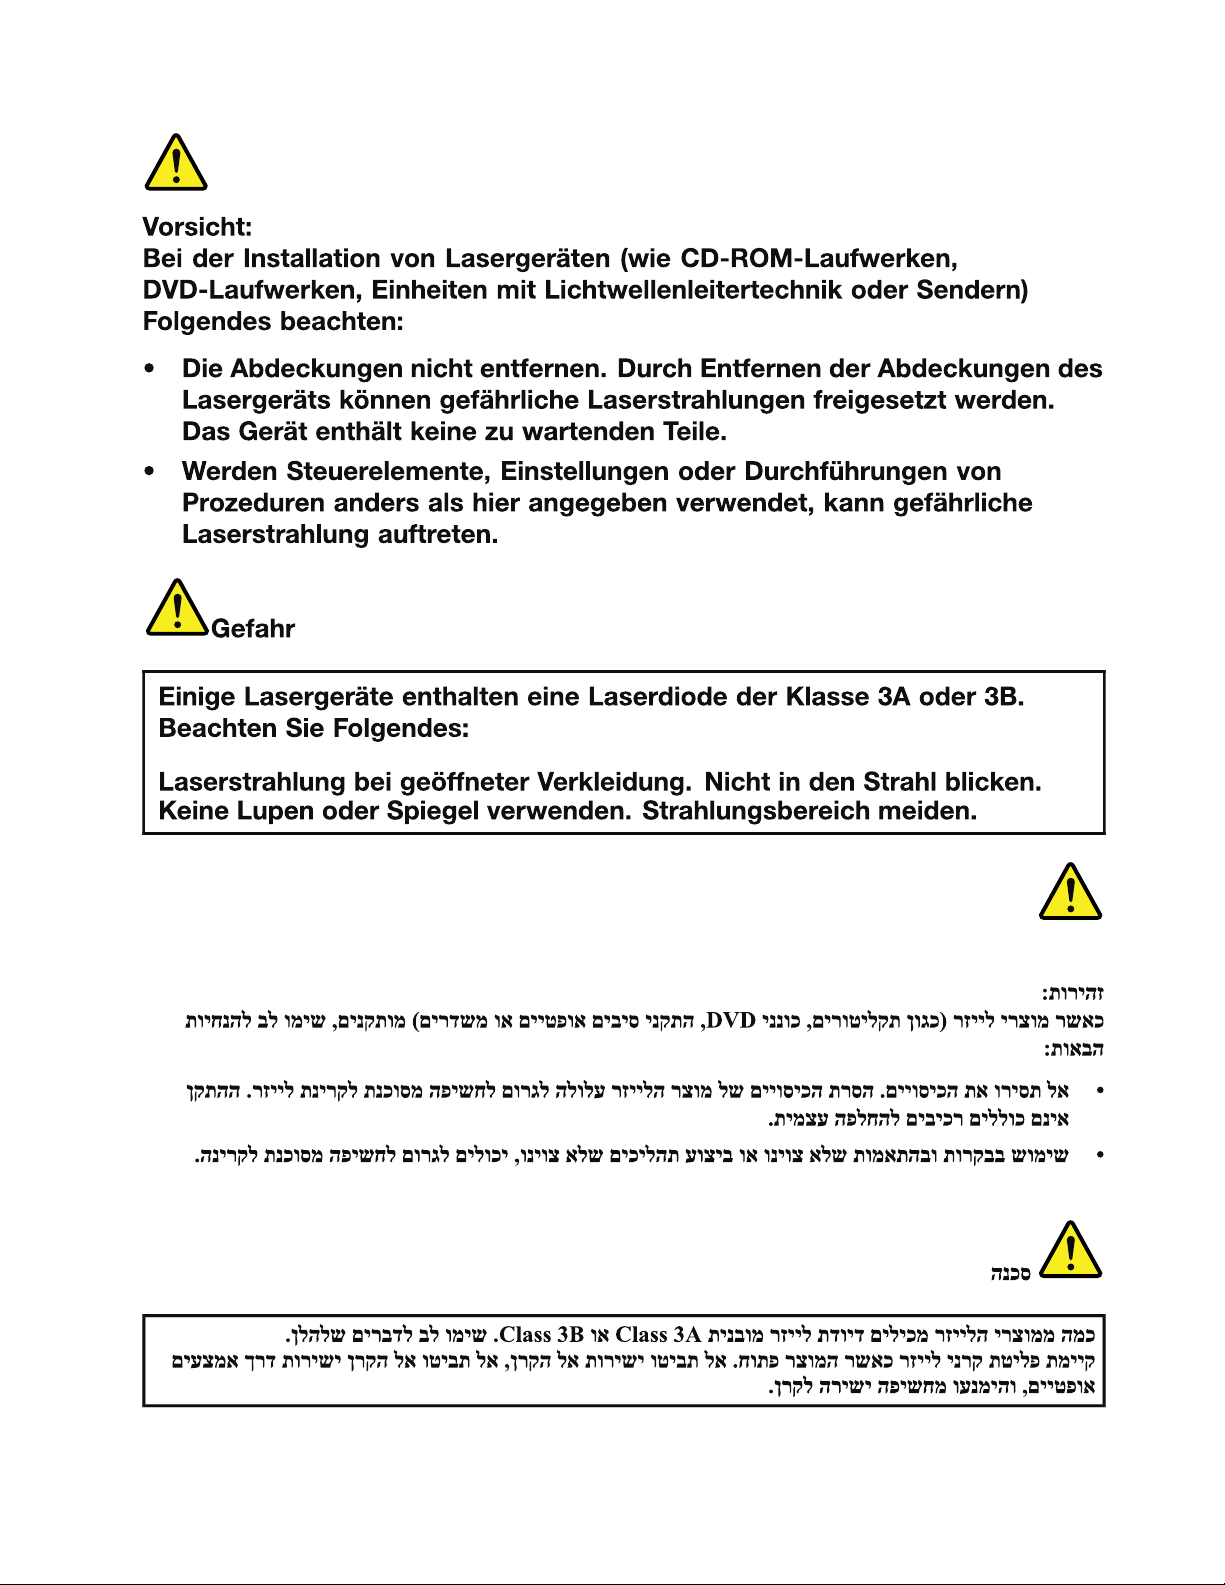
Safetynotices(multilingualtranslations)
Thesafetynoticesinthissectionareprovidedinthefollowinglanguages:
•English
•Arabic
•BrazilianPortuguese
•French
•German
•Hebrew
•Japanese
•Korean
•Spanish
•T raditionalChinese
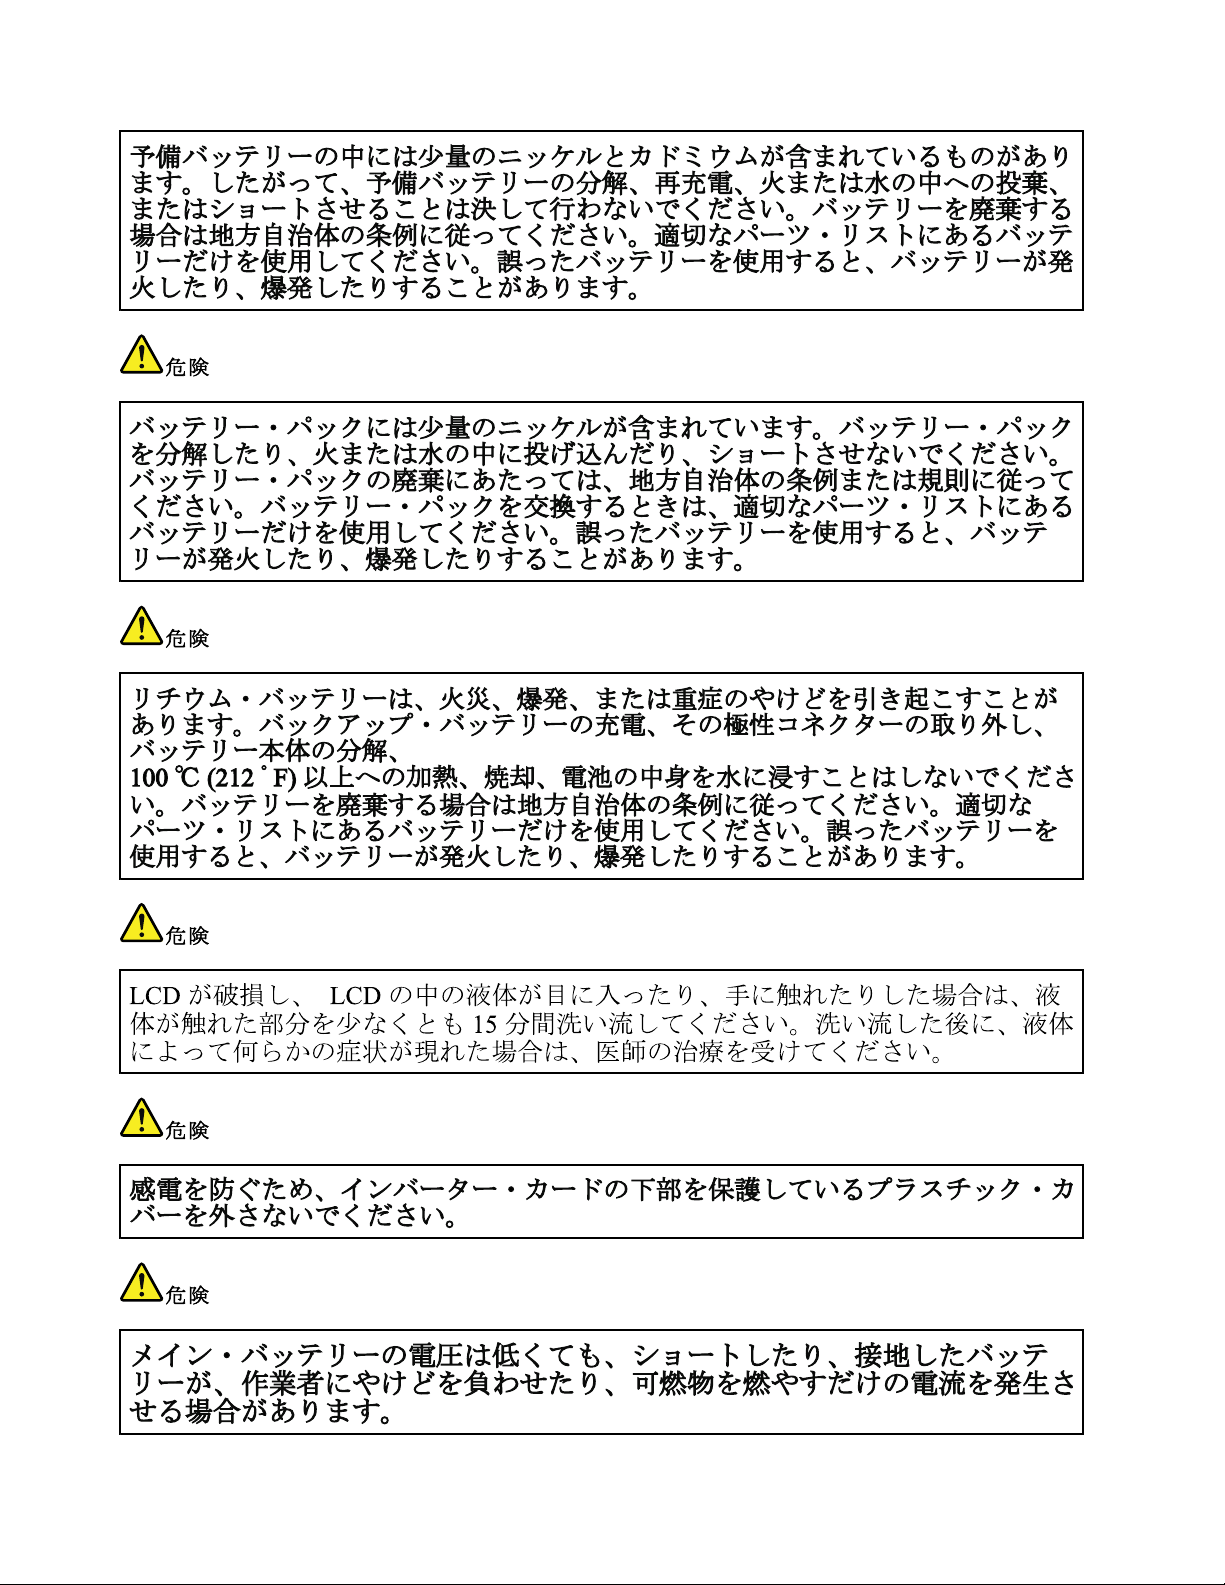
DANGER
DANGER
4HardwareMaintenanceManual
Page 11
DANGER
DANGER
DANGER
DANGER
DANGER
Chapter1.Safetyinformation5
Page 12

DANGER
6HardwareMaintenanceManual
Page 13
Chapter1.Safetyinformation7
Page 14

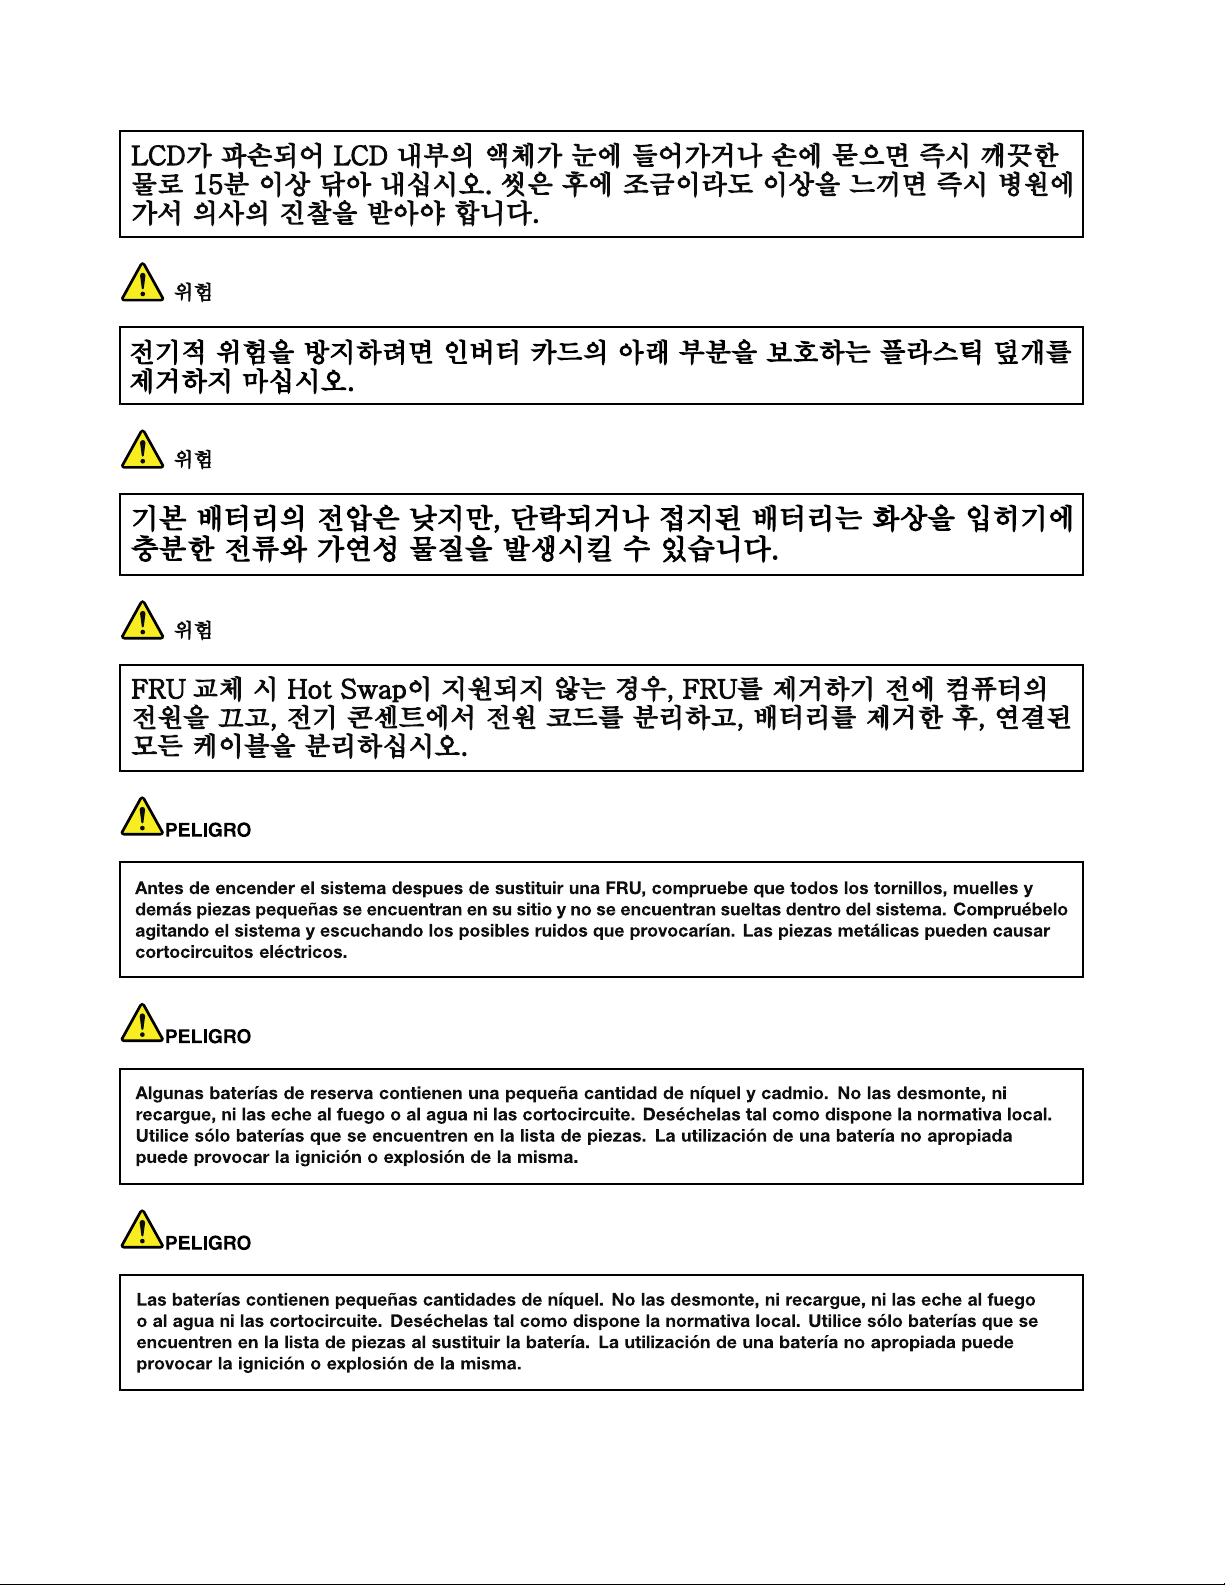
PERIGO
PERIGO
PERIGO
PERIGO
PERIGO
PERIGO
8HardwareMaintenanceManual
Page 15
PERIGO
PERIGO
DANGER
DANGER
DANGER
Chapter1.Safetyinformation9
Page 16
DANGER
DANGER
DANGER
DANGER
DANGER
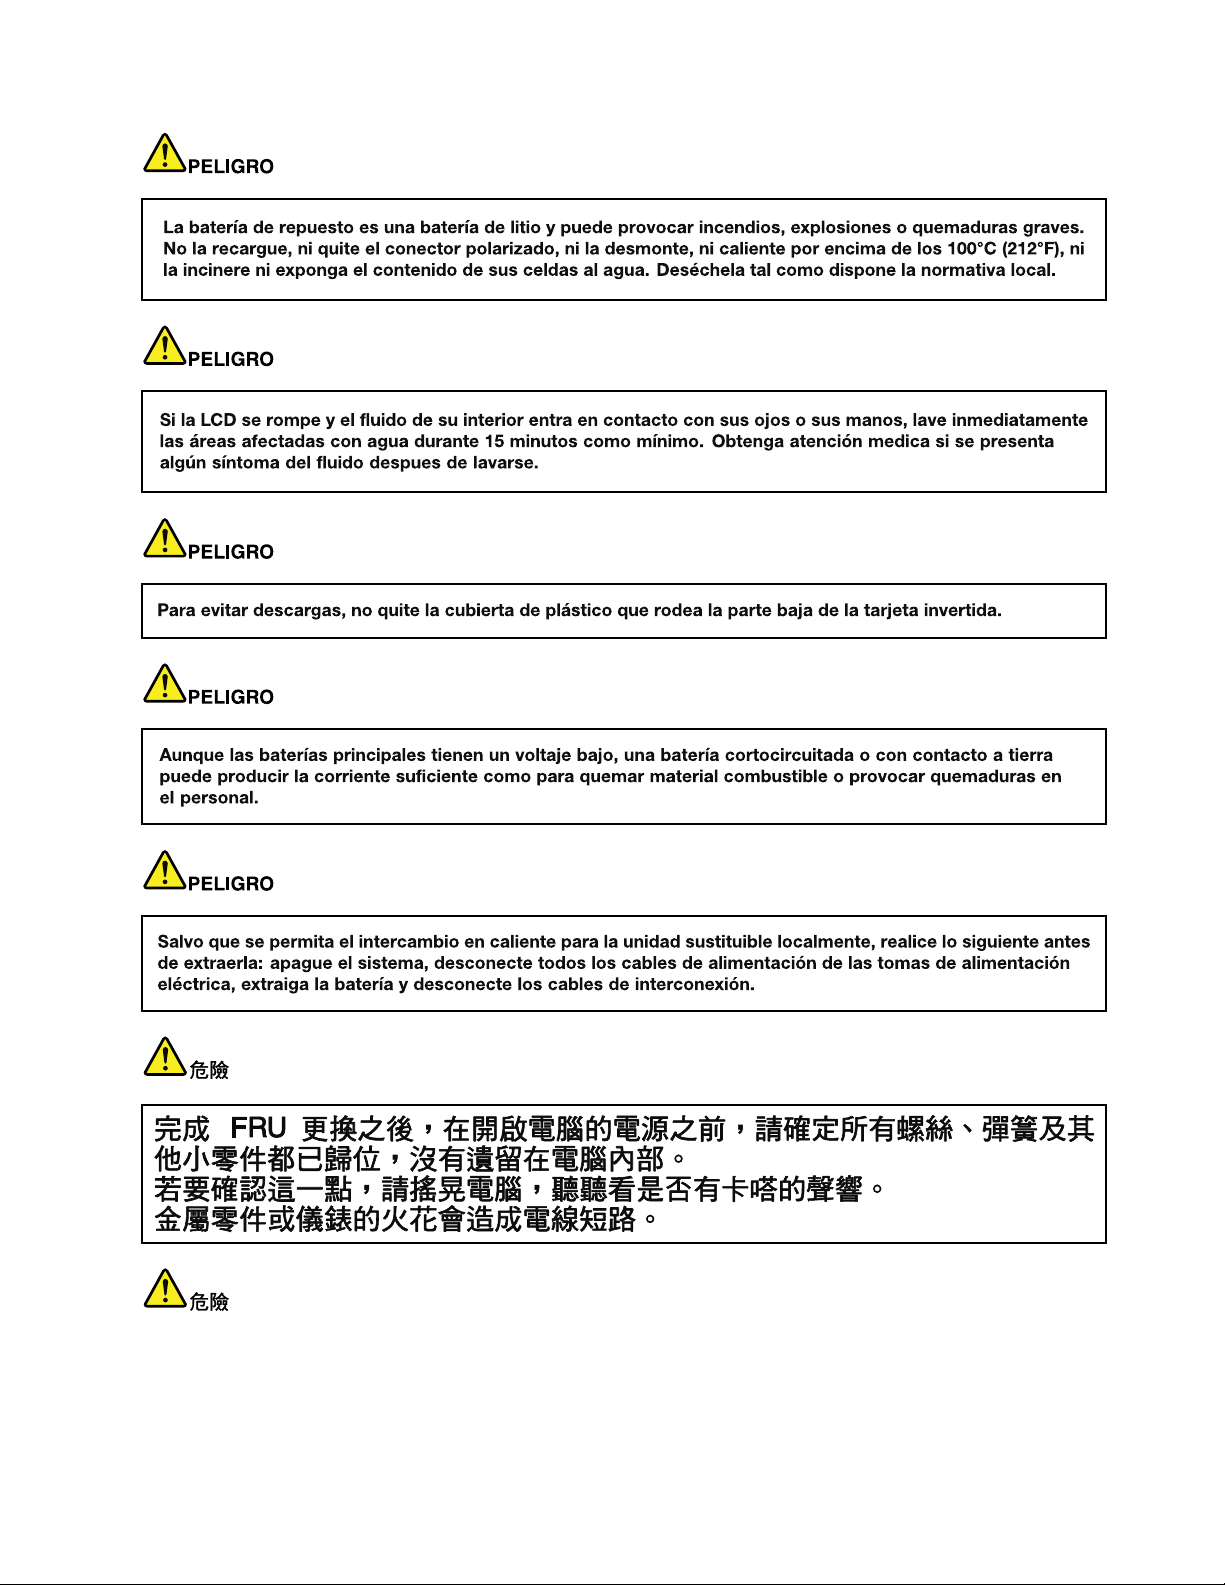
VORSICHT
10HardwareMaintenanceManual
Page 17
VORSICHT
VORSICHT
VORSICHT
VORSICHT
Chapter1.Safetyinformation11
Page 18
VORSICHT
VORSICHT
VORSICHT
12HardwareMaintenanceManual
Page 19
Chapter1.Safetyinformation13
Page 20
14HardwareMaintenanceManual
Page 21

Chapter1.Safetyinformation15
Page 22
16HardwareMaintenanceManual
Page 23
Chapter1.Safetyinformation17
Page 24
18HardwareMaintenanceManual
Page 25
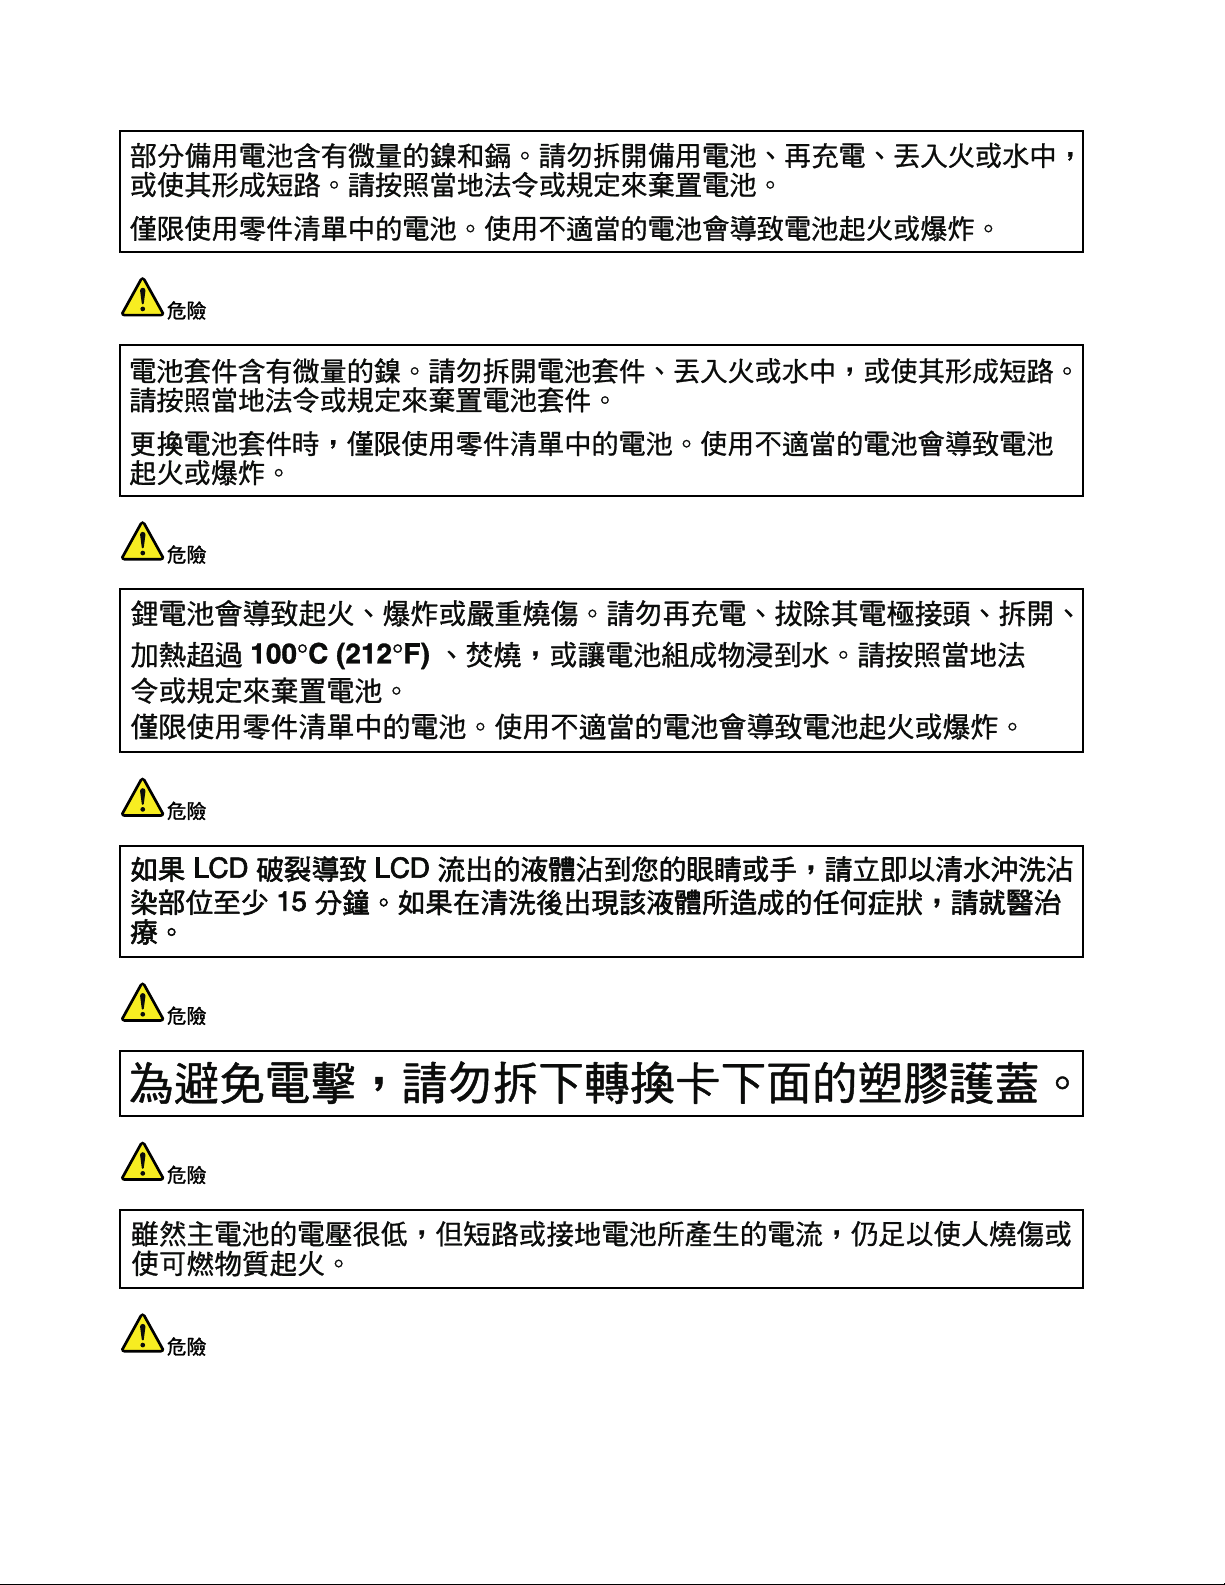
Lasercompliancestatement(multilingualtranslations)
Thelasercompliancestatementsinthissectionareprovidedinthefollowinglanguages:
•English
•Arabic
•BrazilianPortuguese
•French
•German
•Hebrew
•Japanese
•Korean
•Spanish
•T raditionalChinese
Chapter1.Safetyinformation19
Page 26
20HardwareMaintenanceManual
Page 27
Chapter1.Safetyinformation21
Page 28
22HardwareMaintenanceManual
Page 29
Chapter1.Safetyinformation23
Page 30
24HardwareMaintenanceManual
Page 31

Chapter1.Safetyinformation25
Page 32

26HardwareMaintenanceManual
Page 33

Chapter2.Importantserviceinformation
Thischapterpresentsthefollowingimportantserviceinformationthatappliestoallmachinetypessupported
bythismanual:
•“StrategyforreplacingFRUs”onpage27
–“Strategyforreplacingaharddiskdrive”onpage28
–“Importantnoticeforreplacingasystemboard”onpage28
•“ImportantinformationaboutreplacingRoHScompliantFRUs”onpage28
Important:BIOSanddevicedriverxesarecustomer-installable.TheBIOSanddevicedriversareavailable
athttp://www.lenovo.com/support.
StrategyforreplacingFRUs
Beforereplacingparts:
Makesurethatallsoftwarexes,drivers,andBIOSdownloadsareinstalledbeforereplacinganyFRUs
listedinthismanual.
Afterasystemboardisreplaced,ensurethatthelatestBIOSisinstalledtothesystemboardbefore
completingtheserviceaction.
Todownloadsoftwarexes,drivers,andBIOS,dothefollowing:
1.Gotohttp://www.lenovo.com/support.
2.ClickDownloadDrivers&Software.TheWebsiteoffersthreeoptionstobeginyoursearch:
•Searchbyproductnumber
•Searchthroughtheproductauto-detectfunction
•Searchbyproductcategory
3.Followthedirectionsonthescreenandinstallthenecessarysoftware.
Notes:Ifyouneedtoimprovethecomputerperformance,youalsocoulddownloadandinstallthelatest
BIOSutilityfromtheSupportWebsite.
•DonottrytoupdatetheBIOSsettingsforanycomputerunlessyouhavebeentrainedandcertied.An
untrainedpersonrunstheriskofdamagingthecomputer.
•Beforeinstallingthelatestutility,makesurethatthebatteryisfullychargedandanacpoweradapteris
connected.
•Donotturnofforputyourcomputerintosleeporhibernationuntiltheupdatehasbeencompleted.
Otherwise,thesystemboardmightbedamaged.
UsethefollowingstrategytopreventunnecessaryexpenseforreplacingandservicingFRUs:
•IfyouareinstructedtoreplaceaFRUbutthereplacementdoesnotcorrecttheproblem,reinstall
theoriginalFRUbeforeyoucontinue.
•Somecomputershavebothaprocessorboardandasystemboard.Ifyouareinstructedtoreplaceeither
theprocessorboardorthesystemboard,andreplacingoneofthemdoesnotcorrecttheproblem,
reinstallthatboard,andthenreplacetheotherone.
©CopyrightLenovo2012
27
Page 34

•IfanadapteroradeviceconsistsofmorethanoneFRU,anyoftheFRUsmaybethecauseoftheerror.
Beforereplacingtheadapterordevice,removetheFRUs,onebyone,toseeifthesymptomschange.
ReplaceonlytheFRUthatchangedthesymptoms.
Strategyforreplacingaharddiskdrive
Alwaystrytorunalow-levelformatbeforereplacingaharddiskdrive(HDD).Thiswillcauseallcustomerdata
ontheharddisktobelost.Besurethatthecustomerhasacurrentbackupofthedatabeforedoingthistask.
Attention:Thedrivestartupsequenceinthecomputeryouareservicingmayhavebeenchanged.Be
extremelycarefulduringwriteoperationssuchascopying,saving,orformatting.Ifyouselectanincorrect
drive,dataorprogramscanbeoverwritten.
Importantnoticeforreplacingasystemboard
Somecomponentsmountedonasystemboardareverysensitive.Improperhandlingofasystemboardcan
causedamagetothosecomponents,andmaycauseasystemmalfunction.
Attention:Whenhandlingasystemboard:
•Donotdropasystemboardorapplyanyexcessiveforcetoit.
•Avoidroughhandlingofanykind.
•AvoidbendingasystemboardandhardpushingtopreventcrackingateachBGA(BallGridArray)chipset.
ImportantinformationaboutreplacingRoHScompliantFRUs
RoHS,TheRestrictionofHazardousSubstancesinElectricalandElectronicEquipmentDirective
(2002/95/EC)isaEuropeanUnionlegalrequirementaffectingtheglobalelectronicsindustry.RoHS
requirementsmustbeimplementedonLenovoproductsplacedonthemarketafterJune2006.Products
onthemarketbeforeJune2006arenotrequiredtohaveRoHScompliantparts.IftheoriginalFRUparts
arenon-compliant,thereplacementpartsalsocanbenon-compliant.Thatis,iftheoriginalFRUpartsare
RoHScompliant,thereplacementpartalsomustbeRoHScompliant.
Note:RoHSandnon-RoHSFRUpartnumberswiththesametandfunctionareidentiedbytheunique
FRUpartnumbers.
LenovoplanstotransittoRoHScompliancebeforetheimplementationdateandexpectsitssupplierstobe
readytomeetLenovo’srequirementsandscheduleintheEuropeanUnion.Productssoldbetween2005
and2006mightcontainsomeRoHScompliantFRUs.Thefollowingstatementpertainstotheproducts
withRoHScompliantFRUs.
RoHScompliantFRUshaveuniqueFRUpartnumbers.BeforeoraftertheRoHSimplementationdate,the
failedRoHScompliantpartsmustbereplacedwithcompliantpartsandonlythefollowingFRUscanbe
used:identiedascompliantintheHardwareMaintenanceManualordirectsubstitutionscanbeused.
•CompliantFRUsidentiedinHardwareMaintenanceManual
•DirectsubstitutionswithdifferentFRUpartnumbersautomaticallyshippedbythedistributioncenterat
thetimeoforder
ForproductsshippedafterJune2006
Currentororiginalpart
MustbeRoHSMustbeRoHS
28HardwareMaintenanceManual
ReplacementFRU
Page 35

Chapter3.Generalcheckout
Thischapterpresentsfollowinginformation:
•“Whattodorst”onpage29
•“Powersystemcheckout”onpage30
Beforeyougotothecheckoutguide,besuretoreadthefollowingimportantnotes.
Importantnotes:
•Onlycertiedtrainedpersonnelshouldservicethecomputer.
•BeforereplacinganyFRU,readtheentirepageonremovingandreplacingFRUs.
•WhenyoureplaceFRUs,itisrecommendedtousenewnylon-coatedscrews.
•Beextremelycarefulduringsuchwriteoperationsascopying,saving,orformatting.Drivesinthecomputer
thatyouareservicingsequencemighthavebeenaltered.Ifyouselectanincorrectdrive,dataorprograms
mightbeoverwritten.
•ReplaceaFRUonlywithanotherFRUofthecorrectmodel.WhenyoureplaceaFRU,makesurethatthemodel
ofthemachineandtheFRUpartnumberarecorrectbyreferringtotheFRUpartslist.
•AFRUshouldnotbereplacedbecauseofasingle,unreproduciblefailure.Singlefailurescanoccurfora
varietyofreasonsthathavenothingtodowithahardwaredefect,suchascosmicradiation,electrostaticdischarge,
orsoftwareerrors.ConsiderreplacingaFRUonlywhenaproblemrecurs.IfyoususpectthataFRUisdefective,
cleartheerrorlogandrunthetestagain.Iftheerrordoesnotrecur,donotreplacetheFRU.
•BecarefulnottoreplaceanondefectiveFRU.
Whattodorst
WhenyoudoreturnaFRU,youmustincludethefollowinginformationinthepartsexchangeformor
partsreturnformthatyouattachtoit:
1.Nameandphonenumberofservicetechnician
2.Dateofservice
3.Dateonwhichthemachinefailed
4.Dateofpurchase
5.ProcedureindexandpagenumberinwhichthefailingFRUwasdetected
6.FailingFRUnameandpartnumber
7.Machinetype,modelnumber,andserialnumber
8.Customer'snameandaddress
Note:Duringthewarrantyperiod,thecustomermayberesponsibleforrepaircostsifthecomputerdamage
wascausedbymisuse,accident,modication,unsuitablephysicaloroperatingenvironment,orimproper
maintenancebythecustomer.Followingisalistofsomecommonitemsthatarenotcoveredunderwarranty
andsomesymptomsthatmightindicatethatthesystemwassubjecttostressbeyondnormaluse.
Beforecheckingproblemswiththecomputer,determinewhetherthedamageiscoveredunderthewarranty
byreferringtothefollowinglist:
Thefollowingarenotcoveredunderwarranty:
•LCDpanelcrackedfromtheapplicationofexcessiveforceorfrombeingdropped
•Scratched(cosmetic)parts
•Distortion,deformation,ordiscolorationofthecosmeticparts
•Plasticparts,latches,pins,orconnectorsthathavebeencrackedorbrokenbyexcessiveforce
•Damagecausedbyliquidspilledintothesystem
•DamagecausedbytheimproperinsertionofaPCCardortheinstallationofanincompatiblecard
•Improperdiscinsertionoruseofanopticaldrive
©CopyrightLenovo2012
29
Page 36

•Diskettedrivedamagecausedbypressureonthediskettedrivecover,foreignmaterialinthedrive,
2
1
ortheinsertionofadiskettewithmultiplelabels
•Damagedorbentdisketteejectbutton
•Fusesblownbyattachmentofanonsupporteddevice
•Forgottencomputerpassword(makingthecomputerunusable)
•Stickykeyscausedbyspillingaliquidontothekeyboard
•Useofanincorrectacpoweradapteronlaptopproducts
Thefollowingsymptomsmightindicatedamagecausedbynonwarrantedactivities:
•Missingpartsmightbeasymptomofunauthorizedserviceormodication.
•Ifthespindleofaharddiskdrivebecomesnoisy,itmayhavebeensubjecttoexcessiveforce,ordropped.
Powersystemcheckout
Toverifyasymptom,dothefollowing:
1.Turnoffthecomputer.
2.Removethebatterypack.
3.Connecttheacpoweradapter.
4.Checkthatpowerissuppliedwhenyouturnonthecomputer.
5.Turnoffthecomputer.
6.Disconnecttheacpoweradapterandinstallthechargedbatterypack.
7.Checkthatthebatterypacksuppliespowerwhenyouturnonthecomputer.
Ifyoususpectapowerproblem,seetheappropriateoneofthefollowingpowersupplycheckouts:
•“Checkingtheacpoweradapter”onpage30
•“Checkingoperationalcharging”onpage31
•“Checkingthebatterypack”onpage31
Checkingtheacpoweradapter
Youareherebecausethecomputerfailsonlywhentheacpoweradapterisused.
•Ifthepower-onindicatordoesnotturnon,checkthepowercordoftheacpoweradapterforcorrect
continuityandinstallation.
•Ifthecomputerdoesnotchargeduringoperation,goto“Checkingoperationalcharging”onpage31
Tochecktheacpoweradapter,dothefollowing:
1.Unplugtheacpoweradaptercablefromthecomputer.
2.Measuretheoutputvoltageattheplugoftheacpoweradaptercable.Seethefollowinggure:
Pin
1+20
20
Note:Outputvoltageofpinno.2oftheacpoweradaptermaydifferentfromtheoneyouareservicing.
3.Ifthevoltageisnotcorrect,replacetheacpoweradapter.
4.Ifthevoltageisacceptable,dothefollowing:
Voltage(Vdc)
•Replacethesystemboard.
•Iftheproblempersists,gotoChapter5“LenovoB575e”onpage37
30HardwareMaintenanceManual
.
Page 37

Note:Noisefromtheacpoweradapterdoesnotalwaysindicateadefect.
1(+)
2(+)
3
4
5
6(-)
7(-)
Checkingoperationalcharging
Tocheckwhetherthebatterychargesproperlyduringoperation,useadischargedbatterypackorabattery
packthathaslessthan50%ofthetotalpowerremainingwheninstalledinthecomputer.
Performoperationalcharging.Ifthebatterystatusindicatororicondoesnotturnon,removethebattery
packandletitreturntoroomtemperature.Reinstallthebatterypack.Ifthechargeindicatororiconstilldoes
notturnon,replacethebatterypack.
Ifthechargeindicatorstilldoesnotturnon,replacethesystemboard.Thenreinstallthebatterypack.Ifitis
stillnotcharged,gotothenextsection.
Checkingthebatterypack
Batterychargingdoesnotstartuntilthepowermetershowsthatlessthan95%ofthetotalpowerremains;
underthisconditionthebatterypackcanchargeto100%ofitscapacity.Thisprotectsthebatterypackfrom
beingoverchargedorfromhavingashortenedlife.
Tocheckyourbattery,moveyourcursortothepowermetericonintheicontrayoftheWindows
andwaitforamoment(butdonotclickit),andthepercentageofbatterypowerremainingisdisplayed.To
getdetailedinformationaboutthebattery,double-clickthepowermetericon.
Note:Ifthebatterypackbecomeshot,itmaynotbeabletobecharged.Removeitfromthecomputerand
leaveitatroomtemperatureforawhile.Afteritcoolsdown,reinstallandrechargeit.
Tocheckthebatterypack,dothefollowing:
1.Poweroffthecomputer.
2.Removethebatterypackandmeasurethevoltagebetweenbatteryterminals1(+)and7(-).Seethe
followinggure:
Terminal
1+0to+14
7
3.Ifthevoltageislessthan+11.0Vdc,thebatterypackhasbeendischarged.
Voltage(Vdc)
Ground(-)
®
taskbar
Note:Rechargingwilltakeatleast3hours,eveniftheindicatordoesnotturnon.
Ifthevoltageisstilllessthan+11.0Vdcafterrecharging,replacethebattery.
4.Ifthevoltageismorethan+11.0Vdc,measuretheresistancebetweenbatteryterminals5and7.
Theresistancemustbe4to30KΩ.
Iftheresistanceisnotcorrect,replacethebatterypack.Iftheresistanceiscorrect,replacethesystem
board.
Chapter3.Generalcheckout31
Page 38

32HardwareMaintenanceManual
Page 39

Chapter4.Relatedserviceinformation
Thischapterpresentsthefollowinginformation:
•“Recoveringthecomputersettings”onpage33
•“Passwords”onpage33
•“Powermanagement”onpage34
Recoveringthecomputersettings
PerformingbackupandrecoveryoperationsusingtheOneKeyRecoveryProprogram
TheOneKeyRecoveryProprogramenablesyoutobackupallyourharddiskdrivecontentsincludingthe
operatingsystem,datales,softwareprograms,andpersonalsettings.Youcandesignatewherethe
OneKeyRecoveryProprogramstoresthebackup.Afteryouhavebackedupthecontentsontheharddisk
drive,youcanrestorethecompletecontentsoftheharddiskdrive,restoreonlytheselectedles,orrestore
onlytheWindowsoperatingsystemandapplications.
RestoringfactorycontentsusingtheProductRecoveryprogram
OntheWindows7operatingsystem,youcanuserecoverymediatorestorethecomputersettingstothe
factorycontentsonly.
Attention:WhenyouusetheProductRecoveryprogramtorestorethecomputersettings,allthedatayou
havestoredontheharddiskdrivewillbedeletedandthecomputersettingswillberestoredtothefactory
contents.Duringtherestoringprocess,youwillbegiventheoptiontosaveoneormorelescurrentlyonthe
harddiskdrivetoothermediabeforethedataisdeleted.
Passwords
AsmanyastwopasswordsmightbeneededforaLenovonotebookcomputer:thepower-onpassword,the
harddiskpassword,andthesupervisorpassword.
Ifanyofthesepasswordshasbeenset,apromptforitwillbedisplayedonthescreenwheneverthe
computeristurnedon.Thecomputerdoesnotstartuntilthepasswordisentered.
Note:Ifonlyasupervisorpasswordisset,thepasswordpromptwillnotbedisplayedwhentheoperating
systemisstarted.
Power-onpassword
Apower-onpassword(POP)protectsthesystemfrombeingpoweredonbyanunauthorizedperson.The
passwordmustbeenteredbeforeanoperatingsystemcanbebooted.
Supervisorpassword
Asupervisorpassword(SVP)protectsthesysteminformationstoredintheBIOS.Theusermustenterthe
SVPinordertogetaccesstotheBIOSandchangethesystemconguration.
Attention:IftheSVPhasbeenforgottenandcannotbemadeavailabletotheservicetechnician,thereisno
serviceproceduretoresetthepassword.Thesystemboardmustbereplacedforascheduledfee.
©CopyrightLenovo2012
33
Page 40

Powermanagement
Note:PowermanagementmodesarenotsupportedforAPMoperatingsystem.
Toreducepowerconsumption,thecomputerhasthreepowermanagementmodes:screenblank,sleep,
andhibernation.
Screenblankmode
Ifthetimesetonthe“Turnoffmonitor”timerintheoperatingsystemexpires,theLCDbacklightturnsoff.
YoualsocanturnofftheLCDbacklightbypressingFn+F2.
Toendscreenblankmodeandresumenormaloperation,pressanykey.
Sleepmode
Whenthecomputerenterssleepmode,thefollowingeventsoccurinadditiontowhatoccursinscreen
blankmode:
•TheLCDispoweredoff.
•Theharddiskdriveispoweredoff.
•TheCPUstops.
Toentersleepmode,pressFn+F1.
Incertaincircumstances,thecomputergoesintosleepmodeautomatically:
•Ifa“suspendtime”hasbeensetonthetimer,andtheuserdoesnotdoanyoperationwiththekeyboard,
theharddiskdrive,theparallelconnector,orthediskettedrivewithinthattime.
•Ifthebatteryindicatorblinksorange,indicatingthatthebatterypowerislow.
Tocausethecomputertoreturnfromsleepmodeandresumetheoperation,dooneofthefollowing:
•PresstheFnkey.
•OpentheLCDcover.
•T urnonthepowerbutton.
Also,whenthetimesetontheresumetimerelapses,thecomputerautomaticallyreturnsfromsleepmode
andresumesoperation.
Note:Thecomputerdoesnotacceptanyinputimmediatelyafteritenterssleepmode.Waitafewseconds
beforetakinganyactiontoreenteroperationmode.
Hibernationmode
Inhibernationmode,thefollowingoccurs:
•Thesystemstatus,RAM,VRAM,andsetupdataarestoredontheharddiskdrive.
•Thesystemispoweredoff.
Ifyouhavedenedoneofthefollowingactionsastheeventthatcausesthesystemtogointohibernation
mode,performthataction.
•Closingthelid.
•Pressingthepowerbutton.
Also,thecomputergoesintohibernationmodeautomaticallyineitherofthefollowingconditions:
34HardwareMaintenanceManual
Page 41

•Ifa“hibernationtime”hasbeensetonthetimer,andiftheuserdoesnotdoanyoperationwiththe
keyboard,theharddiskdrive,theparallelconnector,orthediskettedrivewithinthattime.
•Ifthetimerconditionsaresatisedinsuspendmode.
Whenthepoweristurnedon,thecomputerreturnsfromhibernationmodeandresumesoperation.The
hibernationleinthebootrecordontheharddiskdriveisread,andsystemstatusisrestoredfromthe
harddiskdrive.
Chapter4.Relatedserviceinformation35
Page 42

36HardwareMaintenanceManual
Page 43

Chapter5.LenovoB575e
Thischapterpresentsthefollowingproduct-specicservicereferencesandpartsinformation:
•“Specications”onpage37
•“Statusindicators”onpage38
•“Fnkeycombinations”onpage39
Specications
ThistopicliststhephysicalfeaturesfortheLenovoB575emodels.
Processor
•T oviewtheprocessorinformationofyourcomputer,clickStart,right-clickComputer,andthenclick
Properties.
Memory
•Doubledatarate3(DDR3)synchronousdynamicrandomaccessmemory(SDRAM)
Storagedevice
•2.5-inch(7mmheightor9.5mmheight)harddiskdrive
Display
•Size:15.6inch(396mm)
•Resolution:
–LCD:1366-by-768
–Externalmonitor:Maximum2048-by-1536
•Integratedcamera(onsomemodels)
Keyboard
•6-rowLenovokeyboard
•One-keyRecoveryProprogrambutton
Interface
•T woUSB2.0connectors
•OneUSB3.0connector
•RJ45Ethernetconnector
•HDMIport
•Externalmonitorconnector
•4-in-1digitalmediacardreaderslot
Opticaldrive
•12.7mmRamboopticaldrive
Wirelessfeatures
©CopyrightLenovo2012
37
Page 44

•IntegratedBluetooth(onsomemodels)
4 5 6
1 2 3
•IntegratedWiMAX
•100/1000MbpsEthernetcommunication
Statusindicators
Thistopicpresentsthesystemstatusindicatorsthatshowthestatusofthecomputer.
Table1.Statusindicators
IndicatorMeaning
1
CapslockindicatorWhite:Capslockmodeisenabled.Y oucanenterallalphabeticcharacters(A-Z)in
2
Numericlock
indicator
3
Deviceaccess
statusindicator
4
Poweronindicator
uppercasewithoutpressingtheShiftkey.T oenableordisableCapslockmode,press
theCapslockkey(CapsLk).
White:Theseparatenumerickeypadonthekeyboardisenabled.Toenableordisable
thenumerickeypad,pressthenumericlockkey(NmLk).
On:Theharddiskdriveoropticaldriveisreadingorwritingdata.
Attention:
•Whentheindicatorison,donotputthecomputerintosleepmodeorturnoffthe
computer.
•Whentheindicatorison,donotmovethecomputer .Suddenphysicalshockcould
causedriveerrors.
•White:Systemisenabled.
•Blinkingwhite:Systemisinsleepmode.
•Off:Systemisinhibernatemodeorshutdown.
38HardwareMaintenanceManual
Page 45

Table1.Statusindicators(continued)
IndicatorMeaning
5
Batterystatus
indicator
6
Wirelessstatus
indicator
•Blinkingorange(500msoff/1son):Theremainingpowerofthebatteryislessthan
5%ofitscapacity.
•Blinkingorange(100msoff/3.2son):Thebatteryisbeingchargedwiththe
remainingpowerbetween5%and20%ofitscapacity.
•Orange:Thecomputerisoperatingonbatterypowerwiththeremainingpower
between5%and20%ofitscapacity.
•Blinkingwhite:Thebatteryisbeingchargedwiththeremainingpowerbetween
20%and80%ofitscapacity.
•Off:Theremainingpowerofthebatteryismorethan80%ofitscapacity,orthe
computerisoperatingonbatterypowerwiththeremainingpowerbetween20%
and80%ofitscapacity.
•White:Anyoneofthewirelessdevicesisenabled.
•Off:Allthewirelessdevicesaredisabled.
Fnkeycombinations
ThefollowingtabledescribesthefunctionsofFnkeycombinations.
Table2.Functionkeycombinations
KeycombinationDescription
Fn+EscLaunchthecameraandaudiosettings.
Fn+F1Entersleepmode.
Fn+F2
Fn+F3
Fn+F5
Fn+F6Enableordisablethetouchpad.
Fn+F8Enableordisablethenumerickeypad.
Fn+F9
Fn+F10
Fn+F11
Fn+F12
Fn+PgUp
Fn+PrtSc
Fn+Home
Fn+End
Fn+PgDn
Fn+Up/Downarrow
Fn+Left/Rightarrow
Enableordisablethebacklightfeatureofthecomputerscreen.
Switchbetweenthecomputerdisplayandanexternalmonitor.
Enableordisablethebuilt-inwirelessfeatures.
StartorpauseplaybackofWindowsMediaPlayer.
StopplaybackofWindowsMediaPlayer.
Skiptotheprevioustrack.
Skiptothenexttrack.
Enableordisablethescrolllockfunction.
Activatethesystemrequest.
Activatethepausefunction.
Activatethebreakfunction.
Activatetheinsertfunction.
Increaseordecreasethedisplaybrightnesslevel.
Increaseordecreasethesoundvolume.
Chapter5.LenovoB575e39
Page 46

40HardwareMaintenanceManual
Page 47

Chapter6.FRUreplacementnotices
Thischapterpresentsnoticesrelatedtoremovingandreplacingparts.Readthischaptercarefullybefore
replacinganyFRU.
Screwnotices
Loosescrewscancauseareliabilityproblem.IntheLenovonotebookcomputer,thisproblemisaddressed
withspecialnylon-coatedscrewsthathavethefollowingcharacteristics:
•Theymaintaintightconnections.
•Theydonoteasilycomeloose,evenwithshockorvibration.
•Theyarehardertotighten.
Dothefollowingwhenyouservicethecomputer:
•Keepthescrewkitinyourtoolbag.
•Itisrecommendedtousenewscrews.
•Itrecommendedtouseeachscrewonlyonce.
•Useatorquescrewdriverifyouhaveone.
Tightenscrewsasfollows:
•Plastictoplastic
Turnanadditional90degreesafterthescrewheadtouchesthesurfaceoftheplasticpart.
•Logiccardtoplastic
Turnanadditional180degreesafterthescrewheadtouchesthesurfaceofthelogiccard.
•T orquedriver
Ifyouhaveatorquescrewdriver,refertotheTorquecolumninthescrewinformationtableforeachstep.
•Ensurethatyouusethecorrectscrew.Itisrecommendedtousenewscrewsforreplacements.Ifyou
haveatorquescrewdriver,tightenallscrewsrmlytothetorquespeciedinthescrewinformation
tableforeachstep.
•Ensurethattorquescrewdriversarecalibratedcorrectlyfollowingcountryspecications.
©CopyrightLenovo2012
41
Page 48

42HardwareMaintenanceManual
Page 49

Chapter7.RemovingandreplacingaFRU
ThischapterpresentsdirectionsanddrawingsforuseinremovingandreplacingaFRU.Besuretoobserve
thefollowinggeneralrules:
1.Donottrytoserviceanycomputerunlessyouhavebeentrainedandcertied.Anuntrainedpersonruns
theriskofdamagingparts.
2.BeforereplacinganyFRU,reviewChapter6“FRUreplacementnotices”onpage41.
3.BeginbyremovinganyFRUsthathavetoberemovedbeforereplacingthefailingFRU.Anysuch
FRUsarelistedatthebeginningofeachFRUreplacementprocedure.Removethemintheorderin
whichtheyarelisted.
4.FollowthecorrectsequenceinthestepsforremovingaFRU,asgiveninthedrawingsbythenumbers
insquarecallouts.
5.Whenturningascrew,turnitinthedirectionasgivenbythearrowinthedrawing.
6.WhenremovingaFRU,moveitinthedirectionasgivenbythearrowinthedrawing.
7.ToputthenewFRUinplace,reversetheremovalprocedureandfollowanynotesthatpertainto
replacement.Forinformationaboutconnectingandarranginginternalcables,seeChapter8“Locations”
onpage79.
8.WhenreplacingaFRU,usethecorrectscrew(s)asshowninthereplacementprocedures.
DANGER
BeforeremovinganyFRU,turnoffthecomputer ,unplugallpowercordsfromelectricaloutlets,
removethebatterypack,andthendisconnectanyinterconnectingcables.
Attention:AfterreplacingaFRU,donotturnonthecomputeruntilyouhavemadesurethatallscrews,
springs,andothersmallpartsareinplaceandnonearelooseinsidethecomputer.Verifythisbyshaking
thecomputergentlyandlisteningforrattlingsounds.Metallicpartsormetalakescancauseelectrical
shortcircuits.
Attention:Thesystemboardissensitiveto,andcanbedamagedby,electrostaticdischarge.Before
touchingit,establishpersonalgroundingbytouchingagroundpointwithonehandorbyusingan
electrostaticdischarge(ESD)strap(P/N6405959).
1010Batterypack
Removalstepsofbatterypack
DANGER
Useonlythebatteryspeciedinthepartslistforyourcomputer .Anyotherbatterycouldignite
orexplode.
©CopyrightLenovo2012
43
Page 50

Unlockthemanualbatterylatch1.Holdingthespring-loadedbatterylatchintheunlockedposition,remove
1
1
2
2
2
1
1
thebatterypackinthedirectionshownbythearrow2.
Wheninstalling:Installthebatterypackintheslot.Makesurethatthebatterylatchesareinthelocked
position.
1020Bottomslotcover
Foraccess,removethisFRU:
•“1010Batterypack”onpage43
Removalstepsofbottomslotcover
Loosenthescrews1,thenremovethebottomslotcover2.
44HardwareMaintenanceManual
Page 51

1030Harddiskdrive
1
2
Foraccess,removetheseFRUsinorder:
•“1010Batterypack”onpage43
•“1020Bottomslotcover”onpage44
Attention:
•Donotdropthedriveorapplyanyphysicalshocktoit.Thedriveissensitivetophysicalshock.Improper
handlingcancausedamageandpermanentlossofdata.
•Beforeremovingthedrive,havetheusermakeabackupcopyofalltheinformationonitifpossible.
•Neverremovethedrivewhilethecomputerisoperatingorinsuspendmode.
Removalstepsofharddiskdriveassembly
Removethescrew1.
StepScrew(quantity)Color
1
M2×3mm,at-head,nylon-coated(1)
Black
Torque
1.6kgfcm
Pullthetabinthedirectionshownbythearrow2toremovetheharddiskdrivefromtheslot.
Wheninstalling:Makesurethattheharddiskdriveconnectorisattachedrmly.
Chapter7.RemovingandreplacingaFRU45
Page 52

Removalstepsofharddiskdrivebracket
1
1
1
1
2
Removethescrews1.
StepScrew(quantity)Color
1
M3×2.8mm,at-head,nylon-coated(4)Silver
Torque
4kgfcm
Removetheharddiskdrivebracketinthedirectionshownbythearrow2.
1040Opticaldrive
Foraccess,removetheseFRUsinorder:
•“1010Batterypack”onpage43
•“1020Bottomslotcover”onpage44
Removalstepsoftheopticaldrive
Removethescrew1,insertascrewdriverintothescrewholeandpushtheopticaldriveinthedirection
shownbythearrow2.Pulltheopticaldriveout.
46HardwareMaintenanceManual
Page 53

1
StepScrew(quantity)Color
3
2
1
M2×3mm,at-head,nylon-coated(1)
Black
Insertascrewdriverintothescrewholeandpushtheopticaldrive.Pulltheopticaldriveout.
Torque
1.6kgfcm
1050Memorymodules
Foraccess,removetheseFRUsinorder:
•“1010Batterypack”onpage43
•“1020Bottomslotcover”onpage44
Chapter7.RemovingandreplacingaFRU47
Page 54

Removalstepsofmemorymodules
1
1
2
a
b
Releasethetwolatchesonbothedgesofthesocketatthesametimeinthedirectionshownbythearrows
1,andthenunplugtheDIMMinthedirectionshownbythearrow2.
Note:Ifonlyonememorymoduleisusedonthecomputeryouareservicing,thecardmustbeinstalledin
SLOT -0(a:lowerslot),butnotinSLOT-1(b:upperslot).
Wheninstalling:Insertthenotchedendofthememorymoduleintothesocket.Pressthememorymodule
rmly,andpivotituntilitsnapsintoplace.Makesurethatitisrmlyinstalledintheslotanddoesnot
moveeasily.
1060PCIExpressMiniCardforwirelessLAN
Foraccess,removetheseFRUsinorder:
•“1010Batterypack”onpage43
•“1020Bottomslotcover”onpage44
48HardwareMaintenanceManual
Page 55

RemovalstepsofPCIExpressMiniCardforwirelessLAN
2
1
1
DisconnectthecablefromthecardusingtheremovaltoolantennaRFconnector(P/N:08K7159)orpick
upthecablewithyourngersandthengentlydisconnectitfromthecardinthedirectionofthearrow
1.Thenremovethescrew2.
StepScrew(quantity)Color
2
M2×3mm,at-head,nylon-coated(1)
Torque
Black
1.6kgfcm
Chapter7.RemovingandreplacingaFRU49
Page 56

Removethecardinthedirectionshownbythearrow3.
3
Wheninstalling:Plugtheblackcable(MAIN)intothejacklabeledA,andthewhitecable(AUX)intothejack
labeledBonthecard.
1070Backupbattery
Foraccess,removetheseFRUsinorder:
•“1010Batterypack”onpage43
•“1020Bottomslotcover”onpage44
Removalstepsofbackupbattery
DANGER
Useonlythebatteryspeciedinthepartslistforyourcomputer .Anyotherbatterycouldignite
orexplode.
50HardwareMaintenanceManual
Page 57

Insertascrewdriverintothebackupbatteryholeandpushthebackupbatteryuntilthebatterypopsup.
1080Keyboard
Foraccess,removetheseFRUsinorder:
•“1010Batterypack”onpage43
•“1020Bottomslotcover”onpage44
Chapter7.RemovingandreplacingaFRU51
Page 58

Removalstepsofkeyboard
1
1
1
2
2
Removethescrews1.
Wheninstalling:Makesurethescrewshavebeenfastenedtosecurethekeyboard.
StepScrew(quantity)Color
1
M2.5×7mm,at-head,nylon-coated(3)
Black
Pushhardinthedirectionshownbythearrows2tounlatchtherearedgeofthekeyboard.
Torque
3.0kgfcm
52HardwareMaintenanceManual
Page 59

Thekeyboardwillopenupslightly3.
3
Chapter7.RemovingandreplacingaFRU53
Page 60

Carefullyliftthekeyboarduntilyoucanseehowitisconnected.Holdthekeyboardabovethecomputer4,
4
5
6
andthendetachtheconnectorinthedirectionshownbythearrows5and6.
1090Keyboardbezel
Foraccess,removetheseFRUsinorder:
•“1010Batterypack”onpage43
•“1020Bottomslotcover”onpage44
•“1030Harddiskdrive”onpage45
•“1080Keyboard”onpage51
54HardwareMaintenanceManual
Page 61

Removalstepsofkeyboardbezel
1
1
1
1
1
1
1
2
2
2
1
1
1
Removescrews1and2thatsecurethekeyboardbezel.
StepScrew(quantity)Color
1
2
M2.5×7mm,at-head,nylon-coated(10)
M2×3mm,at-head,nylon-coated(3)
Black
Black
Torque
3.0kgfcm
1.6kgfcm
Chapter7.RemovingandreplacingaFRU55
Page 62

Removethescrew3.
3
StepScrew(quantity)Color
3
M2×5mm,at-head,nylon-coated(1)
Torque
Black
1.6kgfcm
56HardwareMaintenanceManual
Page 63

Detachtheconnectors.
7
6
5
4
10
9
8
11
11
11
11
11
11
11
11
11
12
Wheninstalling:Makesurethattheconnectorsareattachedrmlytothesystemboard.
Removethekeyboardbezel.
Chapter7.RemovingandreplacingaFRU57
Page 64

1100LEDboardandpowerboard
1
2
1
2
Foraccess,removetheseFRUsinorder:
•“1010Batterypack”onpage43
•“1020Bottomslotcover”onpage44
•“1030Harddiskdrive”onpage45
•“1040Opticaldrive”onpage46
•“1050Memorymodules”onpage47
•“1060PCIExpressMiniCardforwirelessLAN”onpage48
•“1070Backupbattery”onpage50
•“1080Keyboard”onpage51
•“1090Keyboardbezel”onpage54
RemovalstepsofLEDboard
Peeloffthemylartape1andthenremovetheLEDboard.
Removalstepsofpowerboard
Removethescrew1andthenremovethepowerboard2.
StepScrew(quantity)Color
1
M2×3mm,at-head,nylon-coated(1)
58HardwareMaintenanceManual
Torque
Black
1.85kgfcm
Page 65

1110Microphoneassembly
1
2
Foraccess,removetheseFRUsinorder:
•“1010Batterypack”onpage43
•“1020Bottomslotcover”onpage44
•“1030Harddiskdrive”onpage45
•“1040Opticaldrive”onpage46
•“1050Memorymodules”onpage47
•“1060PCIExpressMiniCardforwirelessLAN”onpage48
•“1070Backupbattery”onpage50
•“1080Keyboard”onpage51
•“1090Keyboardbezel”onpage54
Removalstepsofmicrophoneassembly
Peeloffthetapesthatsecurethemicrophoneassembly1.
Removethemicrophoneassemblyfromtheholder2.
Wheninstalling:Makesurethattheconnectorisattachedrmlytothesystemboard.
1120I/OboardandRJ45Ethernetboard
Foraccess,removetheseFRUsinorder:
•“1010Batterypack”onpage43
•“1020Bottomslotcover”onpage44
•“1030Harddiskdrive”onpage45
•“1040Opticaldrive”onpage46
Chapter7.RemovingandreplacingaFRU59
Page 66

•“1050Memorymodules”onpage47
2
1
•“1060PCIExpressMiniCardforwirelessLAN”onpage48
•“1070Backupbattery”onpage50
•“1080Keyboard”onpage51
•“1090Keyboardbezel”onpage54
RemovalstepsofI/Oboard
Removethescrew1,andthendetachthecable.
StepScrew(quantity)Color
1
M2×5mm,at-head,nylon-coated(1)
Wheninstalling:Makesurethatthecableisattachedrmlytothesystemboard.
60HardwareMaintenanceManual
Torque
Black
1.85kgfcm
Page 67

RemovetheI/Oboard4.
3
Chapter7.RemovingandreplacingaFRU61
Page 68

RemovalstepsofRJ45Ethernetboard
1
1
3
2
Removethescrews1,andthendetachthecable.
StepScrew(quantity)Color
1
M2×5mm,at-head,nylon-coated(2)
Black
Wheninstalling:Makesurethatthecableisattachedrmlytothesystemboard.
Torque
1.85kgfcm
62HardwareMaintenanceManual
Page 69

RemovetheRJ45Ethernetboard4.
4
1130Systemboardassembly
Importantnoticesforhandlingthesystemboard:
Whenhandlingthesystemboard,bearthefollowinginmind:
•Becarefulnottodropthesystemboardonabenchtopthathasahardsurface,suchasmetal,wood,orcomposite.
•Avoidroughhandlingofanykind.
•Ateverypointintheprocess,besurenottodroporstackthesystemboard.
•Ifyouputasystemboarddown,besuretoputitonlyonapaddedsurfacesuchasanESDmatoracorrugated
conductivesurface.
Foraccess,removetheseFRUsinorder:
•“1010Batterypack”onpage43
•“1020Bottomslotcover”onpage44
•“1030Harddiskdrive”onpage45
•“1040Opticaldrive”onpage46
•“1050Memorymodules”onpage47
•“1060PCIExpressMiniCardforwirelessLAN”onpage48
•“1070Backupbattery”onpage50
•“1080Keyboard”onpage51
•“1090Keyboardbezel”onpage54
Chapter7.RemovingandreplacingaFRU63
Page 70

Removalstepsofsystemboard
5
4
7
6
3
8
2
1
Removethescrew1.Detachtheconnectors.
StepScrew(quantity)Color
1
M2×5mm,at-head,nylon-coated(1)
Wheninstalling:Makesurethatalltheconnectorsareattachedrmly.
Torque
Black
3.0kgfcm
64HardwareMaintenanceManual
Page 71

Detachtheconnector9andremovethesystemboardinthedirectionshownbythearrow10.
9
10
1140LCDunit
Foraccess,removetheseFRUsinorder:
•“1010Batterypack”onpage43
•“1020Bottomslotcover”onpage44
•“1030Harddiskdrive”onpage45
•“1040Opticaldrive”onpage46
•“1050Memorymodules”onpage47
•“1060PCIExpressMiniCardforwirelessLAN”onpage48
•“1070Backupbattery”onpage50
•“1080Keyboard”onpage51
•“1090Keyboardbezel”onpage54
•“1130Systemboardassembly”onpage63
Chapter7.RemovingandreplacingaFRU65
Page 72

RemovalstepsofLCDunit
1
1
1
1
Releasetheantennacablesfromthecableguides.Thenremovethescrews2.
StepScrew(quantity)Color
2
M2×5mm,at-head,nylon-coated(4)
Black
Torque
1.6kgfcm
Wheninstalling:
•Routetheantennacablesalongthecableguides.Asyouroutethecables,makesurethattheyarenot
subjecttoanytension.Tensioncouldcausethecablestobedamagedbythecableguides,orawireto
bebroken.
•MakesurethattheLCDconnectorisattachedrmlyandmakesurethatyou••donotpinchtheantenna
cableswhenyouattachtheLCDassembly.RoutetheLCDcablealongthecableguides.
66HardwareMaintenanceManual
Page 73

RemovetheLCDunitinthedirectionshownbythearrow2.
2
1150Thermalfanassembly
Foraccess,removetheseFRUsinorder:
•“1010Batterypack”onpage43
•“1020Bottomslotcover”onpage44
•“1030Harddiskdrive”onpage45
•“1040Opticaldrive”onpage46
•“1050Memorymodules”onpage47
•“1060PCIExpressMiniCardforwirelessLAN”onpage48
•“1070Backupbattery”onpage50
•“1080Keyboard”onpage51
•“1090Keyboardbezel”onpage54
•“1130Systemboardassembly”onpage63
•“1140LCDunit”onpage65
Chapter7.RemovingandreplacingaFRU67
Page 74

Removalstepsofthermalfanassembly
1
4
3
2
Detachtheconnectorinthedirectionshownbythearrow1.
Wheninstalling:Makesurethattheconnectorisattachedrmly.
Loosenthescrews2to4,butdonotremovethem.
68HardwareMaintenanceManual
Page 75

Liftthethermalfanassemblyinthedirectionshownbythearrow5.
5
a
Attention:Becarefulnottodamagetheconnector.
Attention:Donothandlethethermalfanassemblyroughly.Improperhandlingcancausedistortionor
deformationandimperfectcontactwithcomponents.
Wheninstalling:Beforeyouattachthethermalfanassemblytothecomputer,applythermalgrease,atan
amountof0.2grams,onthepartmarkedaasshownintheaboveillustration.Eithertoomuchortooless
applicationofgreasecancauseathermalproblemduetoimperfectcontactwithacomponent.
1160Speakerassembly
Foraccess,removetheseFRUsinorder:
•“1010Batterypack”onpage43
•“1020Bottomslotcover”onpage44
•“1030Harddiskdrive”onpage45
•“1040Opticaldrive”onpage46
•“1050Memorymodules”onpage47
•“1060PCIExpressMiniCardforwirelessLAN”onpage48
•“1070Backupbattery”onpage50
•“1080Keyboard”onpage51
•“1090Keyboardbezel”onpage54
•“1130Systemboardassembly”onpage63
•“1140LCDunit”onpage65
Chapter7.RemovingandreplacingaFRU69
Page 76

Removalstepsofspeakerassembly
1
2
1
2
1
1
Removethescrews1.Thenremovethespeakerassembly2.
StepScrew(quantity)Color
1
M2×5mm,at-head,nylon-coated(4)
1170DC-insubcardandbasecover
Foraccess,removetheseFRUsinorder:
•“1010Batterypack”onpage43
•“1020Bottomslotcover”onpage44
•“1030Harddiskdrive”onpage45
•“1040Opticaldrive”onpage46
•“1050Memorymodules”onpage47
•“1060PCIExpressMiniCardforwirelessLAN”onpage48
•“1070Backupbattery”onpage50
•“1080Keyboard”onpage51
•“1090Keyboardbezel”onpage54
•“1130Systemboardassembly”onpage63
•“1140LCDunit”onpage65
Torque
Black
4.0kgfcm
70HardwareMaintenanceManual
Page 77

RemovalstepsofDC-insubcard
1
Removethescrews1,andthenremovetheDC-insubcardinthedirectionshownbythearrow2.
StepScrew(quantity)Color
1
M2×3mm,at-head,nylon-coated(2)
Torque
Black
1.85kgfcm
Chapter7.RemovingandreplacingaFRU71
Page 78

Applyinglabelstothebasecover
2
1
12
13
3
4
11
5
6
7
8
10
9
ThenewbasecoverFRUisshippedwithakitcontaininglabelsofseveralkinds.
IftheWindowsCerticateofAuthenticationlabel(COA)
12isattachedtoapartthatisreplaced,returnthe
oldpartwiththelabelattachedtothecustomer,orprovidealettertothecustomerstatingwhatthelabel
wasoriginallyonthesystemandwhatthelabelpartnumber,serialnumber,andproductkeywere.
Thefollowinglabelsneedtobepeeledofffromtheoldbasecover,andneedtobeputonthenewbasecover.
1WistronlabelIndonesiaDsidelabel7IndonesiaWLANandBluetoothlabel
2BrazilBluetoothlabelorBluetoothlabelforUS/CA/TW
WWANIMEIbarcodelabel
3BrazilWLANlabelorWLANlabelforUS/CA/TW9MalaysiaSIRIMlabel
4BrazilWLANlabelorWLANlabelforUS/CA/TW
5Israellabel
6IsraellabelPPTlabel13Ratinglabel
8IndonesiaWLANandBluetoothlabel
10PPTlabel
11PRClabelorKCClabel
Forsomemodels,youneedtoapplytwoFCClabels.Checktheoldbasecover;ifithastwoFCClabels,
applybothtothenewbasecover.
Forthelocationofeachlabel,refertothefollowinggure:
2010LCDfrontbezel
Foraccess,removetheseFRUsinorder:
•“1010Batterypack”onpage43
•“1020Bottomslotcover”onpage44
•“1030Harddiskdrive”onpage45
•“1040Opticaldrive”onpage46
•“1050Memorymodules”onpage47
•“1060PCIExpressMiniCardforwirelessLAN”onpage48
•“1070Backupbattery”onpage50
•“1080Keyboard”onpage51
72HardwareMaintenanceManual
Page 79

•“1090Keyboardbezel”onpage54
1
1
2
2
2
2
•“1130Systemboardassembly”onpage63
•“1140LCDunit”onpage65
RemovalstepsofLCDfrontbezel
Removethescrews1.
StepScrew(quantity)Color
1
M2×5mm,at-head,nylon-coated(2)
Black
Torque
1.85kgfcm
RemovetheLCDfrontbezelinthedirectionshownbythearrows2.
Wheninstalling:Makesurethatallthelatchesareattachedrmly.Thensecurethebezelwiththescrews.
Chapter7.RemovingandreplacingaFRU73
Page 80

2020Integratedcamera
1
2
Foraccess,removetheseFRUsinorder:
•“1010Batterypack”onpage43
•“1080Keyboard”onpage51
•“1090Keyboardbezel”onpage54
•“1130Systemboardassembly”onpage63
•“1140LCDunit”onpage65
•“2010LCDfrontbezel”onpage72
Removalstepsofintegratedcamera
RemovetheintegratedcamerafromtheLCDcoverasshowninthefollowingillustration.
Note:TheintegratedcameraisstuckonthetopcenteroftheLCDcover.
Wheninstalling:SticktheintegratedcameratothetopcenteroftheLCDcoverandadjusttheplacementto
makesurethattheconnectorisattachedrmly.
2030LCDpanel,LCDcable,andhinges
Foraccess,removetheseFRUsinorder:
•“1010Batterypack”onpage43
•“1020Bottomslotcover”onpage44
•“1080Keyboard”onpage51
•“1090Keyboardbezel”onpage54
•“1130Systemboardassembly”onpage63
•“1140LCDunit”onpage65
•“2010LCDfrontbezel”onpage72
74HardwareMaintenanceManual
Page 81

RemovalstepsofLCDpanelandhinges
2
2
2
2
2
2
3
1
5
4
4
4
4
5
Disconnecttheintegratedcameraconnectorinthedirectionshownbythearrow1.Removethescrews2.
ThenlifttheLCDpanelinthedirectionshownbythearrow3.
StepScrew(quantity)Color
1
M2×3mm,at-head,nylon-coated(6)
Black
Torque
1.6kgfcm
Wheninstalling:Makesurethattheconnectorisattachedrmly.
Removethescrews4andthenremovethehingesinthedirectionshownbythearrows5.
StepScrew(quantity)Color
4
M2×3mm,at-head,nylon-coated(4)
Black
Torque
1.6kgfcm
Chapter7.RemovingandreplacingaFRU75
Page 82

RemovalstepsofLCDcable
6
7
1
1
Peelofftheadhesivetapeanddetachtheconnector.
Wheninstalling:Makesurethattheconnectorisattachedrmly.
2040Antennaassembly
Foraccess,removetheseFRUsinorder:
•“1010Batterypack”onpage43
•“1020Bottomslotcover”onpage44
•“1080Keyboard”onpage51
•“1090Keyboardbezel”onpage54
•“1130Systemboardassembly”onpage63
•“1140LCDunit”onpage65
•“2010LCDfrontbezel”onpage72
•“2030LCDpanel,LCDcable,andhinges”onpage74
Removalstepsofantennaassembly
Detachtheantennasinthedirectionshownbythearrows1.
76HardwareMaintenanceManual
Page 83

ReleasetheantennacablesfromthecableguidesoftheLCDrearcoverassemblyandfromthehingesin
2
2
thedirectionshownbythearrows2.
Cablerouting:Routetheantennacablesalongthecableguidesandsecuretheantennaboardswithtapes.
Asyouroutethecables,makesurethattheyarenotsubjecttoanytension.T ensioncouldcausethecables
tobedamagedbythecableguides,orawiretobebroken.
Chapter7.RemovingandreplacingaFRU77
Page 84

78HardwareMaintenanceManual
Page 85

Chapter8.Locations
1
2
4
5
6
7
13
14
15
4
16
12
8
9
10
11
3
Thischapterintroducesthelocationsofthecomputerhardwarecomponents.
Frontview
Figure1.LenovoB575efrontview
1Integratedcamera(onsomemodels)
2Wirelessantennas(onsomemodels)
3Statusindicators
4Speakers
5Ethernetconnector
6USBconnector
7Opticaldrive
1
9Microphonejack
10Headphonejack
11Mediacardreaderslot
12T ouchpad
13Statusindicators
2
14Built-inmicrophone
15Powerbutton
8USBconnector16OneKeyRecoveryProprogrambutton
1
and2:Forthedescriptionoftheindicators,see“Statusindicators”onpage38.
©CopyrightLenovo2012
79
Page 86

Bottomview
1
2
3
8
6
5
9
10
4
7
Figure2.LenovoB575ebottomview
1Batterylatch(manual)
2Batterypack
3Batterylatch(spring-loaded)8HDMIport(onsomemodels)
4Securitykeyhole9USBconnector
5acpowerconnector
1
:Thememorymodules,harddiskdrive,andwirelesscardsarelocatedunderneaththebottomslotcover.
6Fanlouvers
7VGAport
10Bottomslotcover
1
80HardwareMaintenanceManual
Page 87

Chapter9.Partslist
Thischaptercontainsthefollowinglistsoftheserviceparts.
•“Overall”onpage82
•“LCDFRUs”onpage84
•“Keyboard”onpage85
•“Miscellaneousparts”onpage88
•“acpoweradapters”onpage88
•“Powercords”onpage88
Note:EachFRUisavailableforalltypesormodels,unlessspecictypesormodelsarespecied.
©CopyrightLenovo2012
81
Page 88

Overall
15
14
13
12
10
11
c
1
2
3
4
6
5
a
7
b
8
9
Table3.Partslist—Overall
No.
FRU(Overall)
1
LCDunit(see“LCDFRUs”onpage84)
2
LB57LEDBOARDW/CABLE
3
LB575BUpperCaseW/TP
4
Battery,2200mA6cell,48Wh3S2PSanyoL09S6Y023S2P48Whbty(LH)Comm01
4
Battery,2200mA6cell,48Wh3S2PSanyoL09S6Y023S2P48Whbty(LH)Comm01+EUlable
FRUno.
31048995
90201316
121001091
121500090
82HardwareMaintenanceManual
Page 89

Table3.Partslist—Overall(continued)
No.
FRU(Overall)
4
Battery,2200mA6cell,48Wh3S2PSMP/LGL09M6Y023S2P48Whbty(LH)Comm01
4
Battery,2200mA6cell,48Wh3S2PSMP/LGL09M6Y023S2P48Whbty(LH)Comm01+EUlable
4
Battery,2200mA6cell,48Wh3S2PCelx/SL10C6Y023S2P48Whbty(LH)Comm01
5
LB575BUSBBoardW/Cable
6
LB57LLowerCaseW/DCINCable/SPK
7
ODD,12.7mmT ray-inRambo,PLDS,DS-8A8SH
7
ODD,12.7mmT ray-inRambo,SonyOptiarc,AD-7740H
7
ODD,12.7mmT ray-inRambo,TSST,SN-208AB
FRUno.
121001094
121500091
121001071
90000552
90200227
25201487
25201106
25201108
7
ODD,12.7mmT ray-inRambo,PSNPSNUJ8C1
8
WLAN,Non-Intel1x111bgn+BT4.0Combo,Broadcom4313+20702
8
WLAN,Non-Intel1x111bgn,BroadcomBCM43131*1BGNMOW
8
WLAN,Non-Intel1x111bgn,Realtekbgn1x1HMCWLANStockton
9
LB575BIOBoardW/Cable
10
LA57HDDDOORASSY
11
HDD,320G5400rpm,T oshibaCapricornBS(H6sp),ToshibaMK3265GSX5400RPM320G
11
HDD,320G5400rpm,HGSTJaquarB7,HGSTHTS545032A7E3805400PRM7mm320G
11
HDD,320G5400rpm,SeagateSapta15,SeagateST320LT0205400RPM7MM320G
11
HDD,500G5400rpm,WDML500M,WD5000BPVT-08A1Y
11
HDD,500G5400rpm,WDML375M,WD5000BPVT-08HXZ
11
HDD,500G5400rpm,T oshibaCapricornBS(H6sp),ToshibaMK5065GSX5400RPM500G
11
HDD,500G5400rpm,HGSTJaquarB7,HGSTHTS545050A7E3805400PRM7mm500G
11
HDD,500G5400rpm,Seagate(M8)SeagateM9.55400500G
11
HDD,750G5400rpm,WDML500M,WD7500BPVT-08A1Y
11
HDD,750G5400rpm,WDML375M,WD7500BPVT-08HXZ
11
HDD,750G5400rpm,HGSTJaguarB,HTS541075A9E680
11HDD,1TB5400rpmWDML500MWD10JPVT-08A1Y16200120
11
HDD,1TB5400rpmHGSTJaquarBHTS541010A9E680
11
HDD,320G7200rpm,WDMX320S-1,WD3200BEKT-08PVM
11
HDD,320G7200rpm,ToshibaCapricornCS(H6sp),TSBMK3261GSY7200PRM9.5mm320GHDD
11
HDD,320G7200rpm,HGSTJaquarC7,HTS725032A7E630
11
HDD,320G7200rpm,SeagateJulius14K,SeagateST320L T0077200RPM7MM320G
11
HDD,500G7200rpm,WDMX375M,WD5000BPKT-08PK4T
11
HDD,500G7200rpm,ToshibaCapricornCS(H6sp),TSBMK5061GSY7200PRM9.5mm500GHDD
11
HDD,500G7200rpm,JaguarC7,HTS725050A7E630
12
RAM,DDRIII16002GB,Samsung,M471B5773DH0-CK0DDR316002GB
12
RAM,DDRIII16002GB,Hynix,HMT325S6CFR8C-PBDDR316002GB
12
RAM,DDRIII16002GB,Ramaxel,RMT3150ED58E8W-1600DDR316002GB
25201499
20200100
20200101
20200102
20200016
90000550
31048978
16200097
16200068
16005211
16200118
16200090
16200098
16200067
16200210
16200119
16200121
16200192
16200193
16200092
16200099
16200194
16005030
16200124
16200100
16200195
11200340
11200343
11200392
Chapter9.Partslist83
Page 90

Table3.Partslist—Overall(continued)
1
2
3
4
5
6
No.
FRU(Overall)
12
RAM,DDRIII16004GB,Samsung,M471B5273DH0-CK0DDR316004GB
12
RAM,DDRIII16004GB,Hynix,HMT351S6CFR8C-PBDDR316004GB
12
RAM,DDRIII16004GB,Ramaxel,RMT3160ED58E9W-1600DDR316004GB
13
LB575BMBUMAE-3001.3GW/U3/HDMI
13
LB575BMBUMAE2-18001.7GW/U3/HDMI
14LB575BPowerBoard90000551
15
Keyboard(see“Keyboard”onpage85
–
acpoweradapter(see“acpoweradapters”onpage88.)
–
LB57TOUCHPADBRACKET
–
LA57TOUCHPADCABLE
–
LA57POWERBOARDCABLE
.)
LCDFRUs
A14-inchhigh-denition(HD)TFTLCDisusedinLenovoB575emodels.Seethetablebelow.
FRUno.
11200341
11200344
11200393
90000553
90000554
31048996
31048986
31048984
84HardwareMaintenanceManual
Page 91

Table4.Partslist-LCD
No.FRUFRUno.
1
LB575BLCDbezelwithcamerahole
1
LB575BLCDbezelwithoutcamerahole
2
LB57LLCDhingeL&R6K.4VECS.001
3
LA48camera1M56.18011.462/07.962/06.362
3LB48camera0.3M56.18011.47290000224
4
LB57LLCDCoverW/Antenna60.4VE02.001
4
LB575BLCDCoverW/Antenna2
5
LA57LCDCABLEW/CAMERACABLE
5
LB57LLCDCable50.4VE01.001
6
Panel15.6HDWedgeGlossySECLTN156AT24-L01
6
Panel15.6HDWedgeGlossyLGDLP156WH4- TLN1
6
Panel15.6HDWedgeGlossyAUOB156XTN02.0
6
Panel15.6HDWedgeAnti-GlareAUOB156XTN02.1
6
Panel15.6HDWedgeAnti-GlareSECL TN156AT24-401
6
Panel15.6HDWedgeAnti-GlareCMIN156BGE-L11
6
Panel15.6HDWedgeAnti-GlareLGDLP156WH4- TLP1
–
LB575BLCDBezelScrewPad
90201314
90201315
90200228
90200517
90200229
90201313
31048972
90200222
18200114
18200158
18200157
18200649
18200650
18200651
18200652
90201317
Keyboard
Table5.Partslist-Keyboard(Dafon)
LanguageFRUno.
Arabic25204626
Belgian25204634
BrazilianPortuguese25204627
Bulgarian25204640
French,English25204620
Czech,Slovak
C&Nordics
Dutch25204629
French25204624
German
Greek
Hebrew25204631
Hungarian25204632
Icelandic25204635
Indian25204641
Italian25204614
25204639
25204633
25204625
25204630
Chapter9.Partslist85
Page 92

Table5.Partslist-Keyboard(Dafon)(continued)
LanguageFRUno.
Korean25204621
Latin25204619
Portuguese25204618
Russian25204623
Slovenian
Swiss
Spanish
Thai25204617
TraditionalChinese
Turkish25204616
U.K.English25204613
U.S.English
U.S.English(International,withaEurosymbol)
Table6.Partslist-Keyboard(Sunrex)
LanguageFRUno.
Arabic25204656
Belgian25204664
BrazilianPortuguese25204657
Bulgarian25204670
Czech,Slovak
C&Nordics
Dutch25204659
French25204654
French,English25204650
German
Greek
Hebrew25204661
Hungarian25204662
Icelandic25204665
Indian25204671
Italian25204644
Japanese25204658
Korean25204651
Latin25204649
Portuguese25204648
Russian25204653
Swiss
25204636
25204637
25204615
25204622
25204612
25204638
25204669
25204663
25204655
25204660
25204667
86HardwareMaintenanceManual
Page 93

Table6.Partslist-Keyboard(Sunrex)(continued)
LanguageFRUno.
Spanish
Slovenian
Thai25204647
TraditionalChinese
Turkish25204646
U.K.English25204643
U.S.English
U.S.English(International,withaEurosymbol)
Table7.Partslist-Keyboard(Chicony)
LanguageFRUno.
Arabic25204597
Belgian25204604
BrazilianPortuguese25204598
Bulgarian25204610
Czech,Slovak
C&Nordics
Dutch25204599
French25204595
French,English25204591
German
Greek
Hebrew25204601
Hungarian25204602
Indian25204611
Icelandic25204605
Italian25204585
Japanese25204584
Korean25204592
Latin25204590
Portuguese25204589
Russian25204594
Slovenian
Swiss
Spanish
Thai25204588
TraditionalChinese
Turkish25204587
25204645
25204666
25204652
25204642
25204668
25204609
25204603
25204596
25204600
25204606
25204607
25204586
25204593
Chapter9.Partslist87
Page 94

Table7.Partslist-Keyboard(Chicony)(continued)
LanguageFRUno.
U.K.English25204583
U.S.English
U.S.English(International,withaEurosymbol)
Miscellaneousparts
Table8.Partslist-Miscellaneousparts
FRUFRUno.
(a)LB575BODDbracket
(b)LA57ODDbezelassemblytrayinRambo
(c)LA57HDDbracketassembly
Note:Italicizedlettersinparenthesesarereferencestotheexplodedviewin“Overall”onpage82.
acpoweradapters
Table9.Partslist—3-pin(65W)acpoweradapters
FRUFRUno.
DeltaADP-65KHBD20V/3.25A
LiteonPA-1650-56LC
ChiconyCPA-A06520V3.25A
36001929
36001651
36001943
25204582
25204608
90201312
31048981
31048979
Table10.Partslist—3-pin(40W)acpoweradapters
FRUFRUno.
DeltaADP-40NHB36001648
LiteonPA-1400-12LC
HIPROLN-A0403A3C
Powercords
ALenovopowercordforaspeciccountryorregionisusuallyavailableonlyinthatcountryorregion.
Table11.Partslist-3-pinpowercords(Linetek)
Countryorregion
Argentina
•LINETEKLS15+H03VV-F+LP391m
Australia,NewZealand
•LINETEKLS15+H03VV-F+LP-23A1m
Brazil
•LINETEKLS15H03VV-FLP26A1m
36001653
36001672
FRUno.
145000599
145000589
145000596
88HardwareMaintenanceManual
Page 95

Table11.Partslist-3-pinpowercords(Linetek)(continued)
Countryorregion
CE
•LINETEKLP-34+H03VV-F+LS151m
China
•LINETEKPC323+RVV300/300+LS151m
Denmark
•LINETEKLS15+H03VV-F+LP-381m
Indian
•LINETEKPE-361+H05VV-F+LS151m
Israel
•LINETEKLS15+H03VV-F+LP-411m
Italy
•LINETEKLS15+H03VV-F+PE-3361m
Japan
•LINETEKLS15+VCTF+LP-541m
Korea
•LINETEKLS15+H05VV-F+LP-E04A1m
SouthAfrica
•LINETEKLS15+H03VV-F+PE-3641m
Switzerland
•LINETEKLS15+H03VV-F+LP-371m
Taiwan
•LINETEKLS15+VCTF+LP-531m
U.K.
•LINETEKLP-61L+H03VV-F+LS151m
UL
•LINETEKLP-30B+SPT -2+LS151m
FRUno.
145000585
145000600
145000598
145000592
145000595
145000591
145000587
145000590
145000586
145000597
145000588
145000593
145000594
Table12.Partslist-3-pinpowercords(Longwell)
Countryorregion
Argentina
•LongwellLP-24+H03VV-F+LS-181m
Australia,NewZealand
•LongwellLP-23A+LFC-3R+LS-181m
Brazil
•LongwellLP-46+H03VV-F+LS-181m
CE
•LongwellLP-34A+H03VV-F+LS-181m
FRUno.
145000567
145000557
145000564
145000553
Chapter9.Partslist89
Page 96

Table12.Partslist-3-pinpowercords(Longwell)(continued)
Countryorregion
China
•LongwellLSG-31+RVV300/300+LS-181m
Denmark
•LongwellLP-40+H03VV-F+LS-181m
Indian
•LongwellLP-67+BIS+LS-181m
Israel
•LongwellLP-41+H03VV-F+LS-181m
Italy
•LongwellLP-22+H03VV-F+LS-181m
Japan
•LongwellLP-54+VCTF+LS-181m
Korea
•LongwellLP-486+KTLH03VV-F+LS-51m
SouthAfrica
•LongwellLP-39+H03VV-F+LS-181
Switzerland
•LongwellLP-37+H03VV-F+LS-181m
Taiwan
•LongwellLP-71+VCTF+LS-331m
U.K.
•LongwellLP-61L+H03VV-F+LS-181m
UL
•LongwellLP-30B+SPT-218AWG+LS-181m
FRUno.
145000568
145000566
145000560
145000563
145000559
145000555
145000558
145000554
145000565
145000556
145000561
145000562
Table13.Partslist-3-pinpowercords(Volex)
Countryorregion
Argentina
•VOLEXVA2073+H03VV-F+VAC5S1m
Australia,NewZealand
•VOLEXAU10S3+H03VV-F+VAC5S1m
Brazil
•VOLEXCH10S3+H03VV-F+VAC5S1m
CE
•VOLEXM2511+HO3VV-F+VAC5S1m
China
•VOLEXGB10S3+RVV300/500+VAC5S1m
90HardwareMaintenanceManual
FRUno.
145000528
145000532
145000527
145000525
145000538
Page 97

Table13.Partslist-3-pinpowercords(Volex)(continued)
Countryorregion
Denmark
•VOLEXMP233D+H03VV-F+VAC5S1m
Indian
•VOLEXIA6A3+IS694+VAC5S1m
Israel
•VOLEXSI16S3+H03VV-F+VAC5S1m
Italy
•VOLEXIT10S3+HO3VV-F+VAC5S1m
Japan
•VOLEXVAC5S+VCTF+M7551m
Korea
•VOLEXM2511+KETIIEC+VAC5S1m
SouthAfrica
•VOLEXSA16A+HO3VV-F+VAC5S1m
Switzerland
•VOLEXMP232+H03VV-F+VAC5S1m
Taiwan
•VOLEXTW15CS3+VCTF+VAC5S1m
U.K.
•VOLEXMP5004+H03VV-F+VAC5S1m
UL
•VolexUS15S3+SPT-2+VAC5S1m
FRUno.
145000534
145000536
145000526
145000535
145000530
145000533
145000529
145000524
145000531
145000605
145000537
Chapter9.Partslist91
Page 98

92HardwareMaintenanceManual
Page 99

AppendixA.Notices
Lenovomaynotoffertheproducts,services,orfeaturesdiscussedinthisdocumentinallcountries.Consult
yourlocalLenovorepresentativeforinformationontheproductsandservicescurrentlyavailableinyour
area.AnyreferencetoaLenovoproduct,program,orserviceisnotintendedtostateorimplythatonlythat
Lenovoproduct,program,orservicemaybeused.Anyfunctionallyequivalentproduct,program,orservice
thatdoesnotinfringeanyLenovointellectualpropertyrightmaybeusedinstead.However,itistheuser's
responsibilitytoevaluateandverifytheoperationofanyotherproduct,program,orservice.
Lenovomayhavepatentsorpendingpatentapplicationscoveringsubjectmatterdescribedinthis
document.Thefurnishingofthisdocumentdoesnotgiveyouanylicensetothesepatents.Y oucansend
licenseinquiries,inwriting,to:
Lenovo(UnitedStates),Inc.
1009ThinkPlace-BuildingOne
Morrisville,NC27560
U.S.A.
Attention:LenovoDirectorofLicensing
LENOVOPROVIDESTHISPUBLICA TION“ASIS”WITHOUTWARRANTYOFANYKIND,EITHEREXPRESS
ORIMPLIED,INCLUDING,BUTNOTLIMITEDTO,THEIMPLIEDWARRANTIESOFNON-INFRINGEMENT ,
MERCHANTABILITYORFITNESSFORAP ARTICULARPURPOSE.Somejurisdictionsdonotallow
disclaimerofexpressorimpliedwarrantiesincertaintransactions,therefore,thisstatementmaynotapply
toyou.
Thisinformationcouldincludetechnicalinaccuraciesortypographicalerrors.Changesareperiodically
madetotheinformationherein;thesechangeswillbeincorporatedinneweditionsofthepublication.
Lenovomaymakeimprovementsand/orchangesintheproduct(s)and/ortheprogram(s)describedinthis
publicationatanytimewithoutnotice.
Theproductsdescribedinthisdocumentarenotintendedforuseinimplantationorotherlifesupport
applicationswheremalfunctionmayresultininjuryordeathtopersons.Theinformationcontainedinthis
documentdoesnotaffectorchangeLenovoproductspecicationsorwarranties.Nothinginthisdocument
shalloperateasanexpressorimpliedlicenseorindemnityundertheintellectualpropertyrightsofLenovo
orthirdparties.Allinformationcontainedinthisdocumentwasobtainedinspecicenvironmentsandis
presentedasanillustration.Theresultobtainedinotheroperatingenvironmentsmayvary.
Lenovomayuseordistributeanyoftheinformationyousupplyinanywayitbelievesappropriatewithout
incurringanyobligationtoyou.
Anyreferencesinthispublicationtonon-LenovoWebsitesareprovidedforconvenienceonlyanddonotin
anymannerserveasanendorsementofthoseWebsites.ThematerialsatthoseWebsitesarenotpartof
thematerialsforthisLenovoproduct,anduseofthoseWebsitesisatyourownrisk.
Anyperformancedatacontainedhereinwasdeterminedinacontrolledenvironment.Therefore,theresult
obtainedinotheroperatingenvironmentsmayvarysignicantly.Somemeasurementsmayhavebeen
madeondevelopment-levelsystemsandthereisnoguaranteethatthesemeasurementswillbethesame
ongenerallyavailablesystems.Furthermore,somemeasurementsmayhavebeenestimatedthrough
extrapolation.Actualresultsmayvary.Usersofthisdocumentshouldverifytheapplicabledatafortheir
specicenvironment.
©CopyrightLenovo2012
93
Page 100

Electronicemissionsnotices
ForelectronicemissioninformationonClassBdigitaldevices,refertothecorrespondinginformationin
theUserGuide.
Trademarks
ThefollowingtermsaretrademarksofLenovointheUnitedStates,othercountriesorboth:
Lenovo
OneKey
WindowsisatrademarkoftheMicrosoftgroupofcompanies.
IntelisatrademarkofIntelCorporationoritssubsidiariesintheUnitedStates,othercountries,orboth.
Othercompany,product,orservicenamesmaybethetrademarksorservicemarksofothers.
94HardwareMaintenanceManual
 Loading...