

Page 1

LenovoB40–30All-In-OneComputer
HardwareMaintenanceManual
MachineTypes:F0AW[B40-30]
Page 2

Page 3

LenovoB40–30All-In-OneComputer
HardwareMaintenanceManual
MachineTypes:F0AW[B40-30]
Page 4

FirstEdition(May2014)15
©CopyrightLenovo2014.
LIMITEDANDRESTRICTEDRIGHTSNOTICE:IfdataorsoftwarearedeliveredpursuantaGeneralServices
Administration“GSA”contract,use,reproduction,ordisclosureissubjecttorestrictionssetforthinContractNo.
GS-35F-05925
Page 5

Contents
Chapter1.Aboutthismanual......1
ImportantSafetyInformation..........1
Chapter2.Safetyinformation......3
Generalsafety................3
Electricalsafety...............3
Safetyinspectionguide............5
Handlingelectrostaticdischarge-sensitive
devices..................5
Groundingrequirements............6
Safetynotices................6
Chapter3.Generalinformation.....9
Specifications................9
Chapter4.GeneralCheckout.....11
Chapter5.UsingtheSetupUtility...13
StartingtheLenovoBIOSSetupUtilityprogram.13
Viewingandchangingsettings........13
Usingpasswords..............13
Enablingordisablingadevice........15
Selectingastartupdevice..........16
ExitingtheLenovoBIOSSetupUtilityprogram..17
Chapter6.Symptom-to-FRUIndex..19
Harddiskdrivebooterror..........19
PowerSupplyProblems...........19
POSTerrorcodes.............20
Undeterminedproblems...........20
Chapter7.Replacinghardware....21
Generalinformation.............21
Replacingthekeyboardandmouse......22
Replacingtheadapter............22
Removingthestandbase..........23
Removingthefootcover...........24
Replacingthememorymodule........25
Replacingtheharddiskdrive.........26
Replacingtheopticaldrive..........27
Removingthestandholder..........28
Removingthemiddlecover.........29
Replacingtheconverterboard........31
RemovingtheEMIcover...........31
ReplacingtheWi-Ficard...........32
ReplacingtheTVtunercard.........33
Replacingtheheat-sink...........34
ReplacingtheCPU.............35
Replacingthesystemfan..........37
Replacingthespeakersystem........38
Replacingthepowerswitchboard.......39
Replacingthemotherboard..........40
Removingthereardeco...........42
Replacingthecamera............43
ReplacingtheLEDpanelmodule.......44
Chapter8.FRUlists..........49
Chapter9.Generalinformation....57
AdditionalServiceInformation........57
©CopyrightLenovo2014
iii
Page 6

ivLenovoB40–30All-In-OneComputerHardwareMaintenanceManual
Page 7
Chapter1.Aboutthismanual
ThismanualcontainsserviceandreferenceinformationforLenovoB40–30All-In-Onecomputerslistedon
thecover.ItisintendedonlyfortrainedservicerswhoarefamiliarwithLenovocomputerproducts.
BeforeservicingaLenovoproduct,besuretoreadtheSafetyInformation.
ThedescriptionoftheTV-tunercardinthismanualappliesonlytocomputerswithaTV-tunercardinstalled.
ItdoesnotapplytocomputerswithoutaTV-tunercard.
ImportantSafetyInformation
BesuretoreadallCAUTIONandDANGERsectionsinthismanualbeforefollowinganyoftheinstructions.
VeuillezliretouteslesconsignesdetypeDANGERetATTENTIONduprésentdocumentavantd’exécuter
lesinstructions.
LesenSieunbedingtalleHinweisevomTyp“ACHTUNG”oder“VORSICHT”indieserDokumentation,bevor
SieirgendwelcheVorgängedurchführen
LeggereleistruzioniintrodottedaA TTENZIONEePERICOLOpresentinelmanualeprimadieseguireuna
qualsiasidelleistruzioni
Certifique-sedelertodasasinstruçõesdecuidadoeperigonestemanualantesdeexecutarqualquer
umadasinstruções
Esimportantequeleatodaslasdeclaracionesdeprecauciónydepeligrodeestemanualantesdeseguir
lasinstrucciones.
©CopyrightLenovo2014
1
Page 8

2LenovoB40–30All-In-OneComputerHardwareMaintenanceManual
Page 9

Chapter2.Safetyinformation
Thischaptercontainsthesafetyinformationthatyouneedtobefamiliarwithbeforeservicingacomputer.
Generalsafety
Followtheserulestoensuregeneralsafety:
•Keeptheareasaroundthecomputerclearandcleanduringandaftermaintenance.
•Whenliftinganyheavyobject:
1.Ensureyoucanstandsafelywithoutslipping.
2.Distributetheweightoftheobjectequallyacrossbothfeet.
3.Liftslowly.Nevermovesuddenlyortwistwhenyouattempttolift.
4.Liftbystandingorbypushingupwithyourlegmuscles;thisactionremovesthestrainfromthe
musclesinyourback.
Donotattempttoliftanyobjectsthatweighmorethan16kg(35lb)orobjectsthatyouthinkare
tooheavyforyou.
•Donotperformanyactionthatwouldcreateahazardforthecustomer,orwouldmakethecomputer
unsafe.
•Beforeyoustartthecomputer,ensurethatotherservicerepresentativesandcustomerpersonnelarenot
inapositionthatwouldcreateahazardforthem.
•Placeremovedcoversandotherpartsinasafeplace,awayfromallpersonnel,whileyouareservicingthe
computer.
•Keepyourtoolcaseawayfromareasthatpeoplemaywalkthroughtoensureno-onetripsoverit.
•Donotwearlooseclothingthatcanbetrappedinthemovingpartsofamachine.Ensurethatyoursleeves
arefastenedorrolledupaboveyourelbows.Ifyourhairislong,tieorfastenitback.
•Inserttheendsofyournecktieorscarfinsideclothingorfastenitwithanon-conductiveclip,
approximately8centimeters(3inches)fromtheend.
•Donotwearjewelry,chains,metal-frameeyeglasses,ormetalfastenersforyourclothing.
Remember:Metalobjectsaregoodelectricalconductors.
•Wearsafetyglasseswhenyouare:hammering,drillingsoldering,cuttingwire,attachingsprings,using
solvents,orworkinginanyotherconditionsthatmightbehazardoustoyoureyes.
•Afterservice,reinstallallsafetyshields,guards,labels,andgroundwires.Replaceanysafetydevice
thatiswornordefective.
•Reattachallcoverscorrectlybeforereturningthecomputertothecustomer.
Electricalsafety
CAUTION:
Electricalcurrentfrompower,telephone,andcommunicationcablescanbehazardous.T oavoid
personalinjuryorequipmentdamage,disconnectanyattachedpowercords,telecommunication
cables,networkcables,andmodemcablesbeforeyouopenthecomputercovers,unlessinstructed
otherwiseintheinstallationandconfigurationprocedures.
©CopyrightLenovo2014
3
Page 10

Observethefollowingruleswhenworkingonelectricalequipment.
Important:Useonlyapprovedtoolsandtestequipment.Somehandtoolshavehandlescoveredwithasoft
materialthatdoesnotinsulateyouwhenworkingwithliveelectricalcurrents.Manycustomershaverubber
floormatsneartheirequipmentthatcontainsmallconductivefiberstodecreaseelectrostaticdischarge.
•Findtheroomemergencypower-off(EPO)switch,disconnectingswitch,orelectricaloutlet.Ifanelectrical
accidentoccurs,youcanthenoperatetheswitchorunplugthepowercordquickly.
•Donotworkaloneunderhazardousconditionsornearequipmentthathashazardousvoltages.
•Disconnectallpowerbefore:
–Performingamechanicalinspection
–Workingnearpowersupplies
–RemovingorinstallingFieldReplaceableUnits(FRUs)
•Beforeyoustarttoworkonthecomputer,unplugthepowercord.Ifyoucannotunplugit,askthe
customertopower-offtheelectricaloutletthatsuppliespowertothemachineandtolocktheelectrical
outletintheoffposition.
•Ifyouneedtoworkonacomputerthathasexposedelectricalcircuits,observethefollowingprecautions:
–Ensurethatanotherperson,familiarwiththepower-offcontrols,isnearyou.
Remember:Anotherpersonmustbetheretoswitchoffthepower,ifnecessary.
–Useonlyonehandwhenworkingwithpowered-onelectricalequipment;keeptheotherhandinyour
pocketorbehindyourback.
Remember:Theremustbeacompletecircuittocauseelectricalshock.Byobservingtheaboverule,
youmaypreventacurrentfrompassingthroughyourbody.
–Whenusingatester,setthecontrolscorrectlyandusetheapprovedprobeleadsandaccessoriesfor
thattester.
–Standonsuitablerubbermats(obtainedlocally,ifnecessary)toinsulateyoufromgroundssuchas
metalfloorstripsandmachineframes.
Observethespecialsafetyprecautionswhenyouworkwithveryhighvoltages;theseinstructionsarein
thesafetysectionsofthemaintenanceinformation.Useextremecarewhenmeasuringhighvoltages.
•Regularlyinspectandmaintainyourelectricalhandtoolstoensuretheyaresafetouse.
•Donotusewornorbrokentoolsandtesters.
•Neverassumethatpowerhasbeendisconnectedfromacircuit.First,checkthatithasbeenpoweredoff.
•Alwayslookcarefullyforpossiblehazardsinyourworkarea.Examplesofthesehazardsarewetfloors,
non-groundedpowerextensioncables,conditionsthatmaycauseorallowpowersurges,andmissing
safetygrounds.
•Donottouchliveelectricalcircuitswiththereflectivesurfaceofaplasticdentalmirror.Thissurfaceis
conductive,andtouchingalivecircuitcancausepersonalinjuryanddamagetothecomputer.
•Donotservicethefollowingpartswiththepoweronwhentheyareremovedfromtheirnormaloperating
positionsinacomputer:
–Powersupplyunits
–Pumps
–Blowersandfans
–Motorgenerators
andsimilarunits.(Thispracticeensurescorrectgroundingoftheunits.)
•Ifanelectricalaccidentoccurs:
–Usecaution;donotbecomeavictimyourself.
4LenovoB40–30All-In-OneComputerHardwareMaintenanceManual
Page 11

–Switchoffpower.
–Sendanotherpersontogetmedicalaid.
Safetyinspectionguide
Theintentofthisinspectionguideistoassistyouinidentifyingpotentialhazardsposedbytheseproducts.
Eachcomputer,asitwasdesignedandbuilt,hadrequiredsafetyitemsinstalledtoprotectusersand
servicepersonnelfrominjury.Thisguideaddressesonlythoseitems.However,goodjudgmentshouldbe
usedtoidentifypotentialsafetyhazardsduetoattachmentoffeaturesoroptionsnotcoveredbythis
inspectionguide.
Ifanyhazardsarepresent,youmustdeterminehowserioustheapparenthazardcouldbeandwhetheryou
cancontinuewithoutfirstresolvingtheproblem.
Considerthefollowingitemsandthesafetyhazardstheypresent:
•Electricalhazards,especiallyprimarypower(primaryvoltageontheframecancauseseriousorfatal
electricalshock).
•Explosivehazards,suchasadamagedCRTfaceorbulgingcapacitor
•Mechanicalhazards,suchaslooseormissinghardware
Theguideconsistsofaseriesofstepspresentedasachecklist.Beginthecheckswiththepoweroff,and
thepowercorddisconnected.
Checklist:
1.Checkexteriorcoversfordamage(loose,broken,orsharpedges).
2.Power-offthecomputer.Disconnectthepowercord.
3.Checkthepowercordfor:
a.Athird-wiregroundconnectoringoodcondition.Useametertomeasurethird-wireground
continuityfor0.1ohmorlessbetweentheexternalgroundpinandframeground.
b.Thepowercordshouldbetheappropriatetypeasspecifiedinthepartslistings.
c.Insulationmustnotbefrayedorworn.
4.Removethecover.
5.Checkforanyobviousalterations.Usegoodjudgmentastothesafetyofanyalterations.
6.Checkinsidetheunitforanyobvioushazards,suchasmetalfilings,contamination,waterorother
liquids,orsignsoffireorsmokedamage.
7.Checkforworn,frayed,orpinchedcables.
8.Checkthatthepower-supplycoverfasteners(screwsorrivets)havenotbeenremovedortamperedwith.
Handlingelectrostaticdischarge-sensitivedevices
Anycomputerpartcontainingtransistorsorintegratedcircuits(ICs)shouldbeconsideredsensitiveto
electrostaticdischarge(ESD).ESDdamagecanoccurwhenthereisadifferenceinchargebetweenobjects.
ProtectagainstESDdamagebyequalizingthechargesothatthecomputer,thepart,theworkmat,andthe
personhandlingthepartareallatthesamecharge.
Notes:
1.Useproduct-specificESDprocedureswhentheyexceedtherequirementsnotedhere.
2.MakesurethattheESDprotectivedevicesyouusehavebeencertified(ISO9000)asfullyeffective.
WhenhandlingESD-sensitiveparts:
Chapter2.Safetyinformation5
Page 12

•Keepthepartsinprotectivepackagesuntiltheyareinsertedintotheproduct.
•Avoidcontactwithotherpeoplewhilehandlingthepart.
•Wearagroundedwriststrapagainstyourskintoeliminatestaticonyourbody.
•Preventthepartfromtouchingyourclothing.Mostclothingisinsulativeandretainsachargeeven
whenyouarewearingawriststrap.
•Usetheblacksideofagroundedworkmattoprovideastatic-freeworksurface.Thematisespecially
usefulwhenhandlingESD-sensitivedevices.
•Selectagroundingsystem,suchasthoselistedbelow,toprovideprotectionthatmeetsthespecific
servicerequirement.
Note:TheuseofagroundingsystemisdesirablebutnotrequiredtoprotectagainstESDdamage.
–AttachtheESDgroundcliptoanyframeground,groundbraid,orgreen-wireground.
–UseanESDcommongroundorreferencepointwhenworkingonadouble-insulatedor
battery-operatedsystem.Y oucanusecoaxorconnector-outsideshellsonthesesystems.
–Usetheroundground-prongoftheACplugonAC-operatedcomputers.
Groundingrequirements
Electricalgroundingofthecomputerisrequiredforoperatorsafetyandcorrectsystemfunction.Proper
groundingoftheelectricaloutletcanbeverifiedbyacertifiedelectrician.
Safetynotices
TheCAUTIONandDANGERsafetynoticesinthissectionareprovidedinthelanguageofEnglish.
DANGER
Electricalcurrentfrompower,telephoneandcommunicationcablesishazardous.
Toavoidashockhazard:
•Donotconnectordisconnectanycablesorperforminstallation,maintenance,orreconfiguration
ofthisproductduringanelectricalstorm.
•Connectallpowercordstoaproperlywiredandgroundedelectricaloutlet.
•Connectanyequipmentthatwillbeattachedtothisproducttoaproperlywiredoutlet.
•Whenpossible,useonehandonlytoconnectordisconnectsignalcables.
•Neverturnonanyequipmentwhenthereisevidenceoffire,water,orstructuraldamage.
•Disconnecttheattachedpowercords,telecommunicationscables,networkcables,andmodem
cablesbeforeyouopenthedevicecovers,unlessinstructedotherwiseintheinstallationand
configurationprocedures.
•Connectanddisconnectcablesasdescribedinthefollowingtablewheninstalling,moving,or
openingcoversonthisproductorattacheddevices.
6LenovoB40–30All-In-OneComputerHardwareMaintenanceManual
Page 13
ToConnect
1.T urneverythingOFF .
2.First,attachallcablestodevices.
3.Attachsignalcablestoconnectors.
4.Attachpowercordstooutlet.
5.T urndeviceON.
ToDisconnect
1.T urneverythingOFF .
2.First,removepowercordsfromoutlets.
3.Removesignalcablesfromconnectors.
4.Removeallcablesfromdevices.
CAUTION:
Whenreplacingthelithiumbattery,useonlyPartNumber45C1566oranequivalenttypebattery
recommendedbythemanufacturer.Ifyoursystemhasamodulecontainingalithiumbattery,replace
itonlywiththesamemoduletypemadebythesamemanufacturer.Thebatterycontainslithiumand
canexplodeifnotproperlyused,handled,ordisposedof.
Donot:
•Throwintoorimmerseinwater
•Heattomorethan100°C(212°F)
•Repairordisassemble
Disposeofthebatteryasrequiredbylocalordinancesorregulations.
CAUTION:
Whenlaserproducts(suchasCD-ROMs,DVD-ROMdrives,fiberopticdevices,ortransmitters)are
installed,notethefollowing:
•Donotremovethecovers.Removingthecoversofthelaserproductcouldresultinexposureto
hazardouslaserradiation.Therearenoserviceablepartsinsidethedevice.
•Useofcontrolsoradjustmentsorperformanceofproceduresotherthanthosespecifiedherein
mightresultinhazardousradiationexposure.
DANGER
SomelaserproductscontainanembeddedClass3AorClass3Blaserdiode.Notethefollowing:
Thesediodesemitradiationwhenopen.Donotstareintothebeam,donotviewdirectlywith
opticalinstruments,andavoiddirectexposuretothebeam.
Chapter2.Safetyinformation7
Page 14
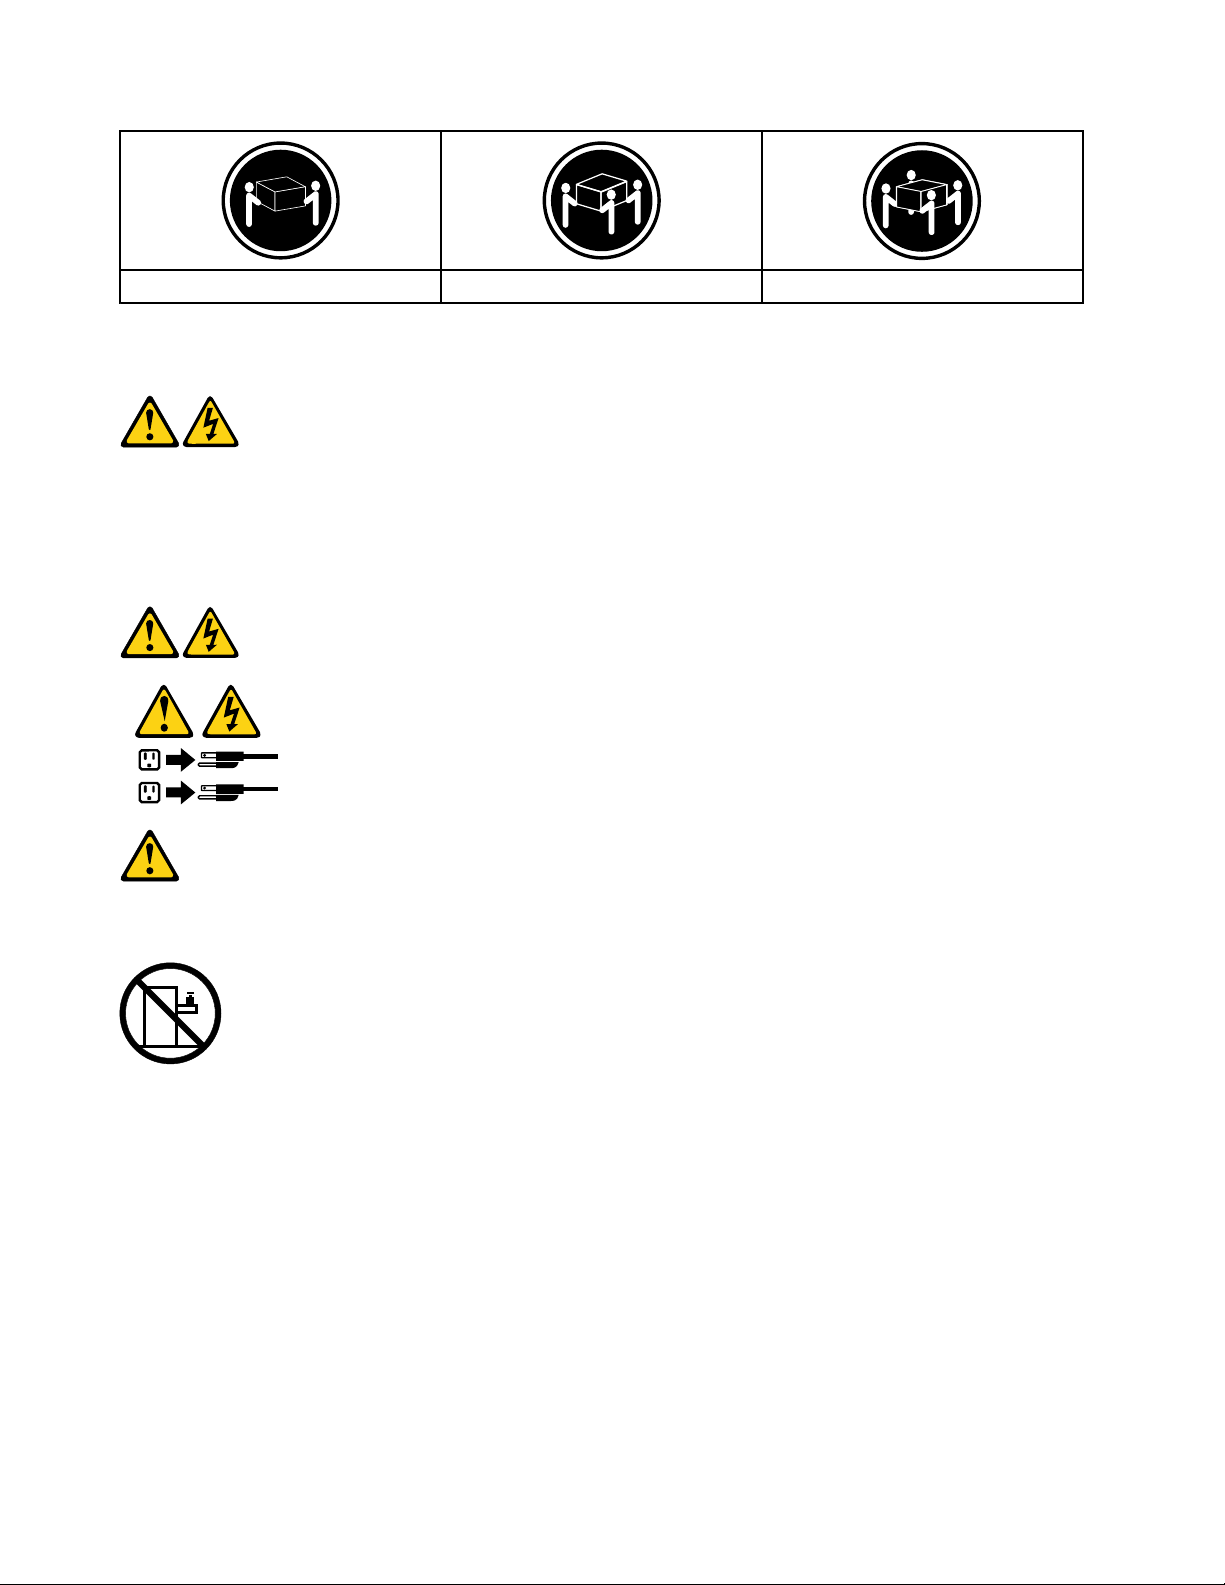
≥18kg(37lbs)≥32kg(70.5lbs)≥55kg(121.2lbs)
1
2
CAUTION:
Usesafepracticeswhenlifting.
CAUTION:
Thepowercontrolbuttononthedeviceandthepowerswitchonthepowersupplydonotturnoff
theelectricalcurrentsuppliedtothedevice.Thedevicealsomighthavemorethanonepower
cord.Toremoveallelectricalcurrentfromthedevice,ensurethatallpowercordsaredisconnected
fromthepowersource.
CAUTION:
Donotplaceanyobjectweighingmorethan82kg(180lbs.)ontopofrack-mounteddevices.
8LenovoB40–30All-In-OneComputerHardwareMaintenanceManual
Page 15

Chapter3.Generalinformation
Thischapterprovidesgeneralinformationthatappliestoallcomputermodelscoveredbythismanual.
Specifications
Thissectionliststhephysicalspecificationsforyourcomputer.
Thissectionliststhephysicalspecificationsforyourcomputer.
TypeLenovoB40–30
Thissectionliststhephysicalspecifications.
Environment
Airtemperature:
Operating:10°to35°C
Transit:-20°to55°C
Humidity:
Operating:35%to80%
Transit:20%to90%(40°C)
Altitude:86KPato106KPa
Electricalinput:
Inputvoltage:90V-264V(AC)
Inputfrequency:47Hz-63Hz
©CopyrightLenovo2014
9
Page 16

10LenovoB40–30All-In-OneComputerHardwareMaintenanceManual
Page 17

Chapter4.GeneralCheckout
Attention:Thedrivesinthecomputeryouareservicingmighthavebeenrearrangedorthedrivestartup
sequencemayhavebeenchanged.Beextremelycarefulduringwriteoperationssuchascopying,saving,or
formatting.Dataorprogramscanbeoverwrittenifyouselectanincorrectdrive.
Generalerrormessagesappearifaproblemorconflictisfoundbyanapplication,theoperatingsystem,or
both.Foranexplanationofthesemessages,refertotheinformationsuppliedwiththatsoftwarepackage.
Usethefollowingproceduretohelpdeterminethecauseoftheproblem:
1.Power-offthecomputerandallexternaldevices.
2.Checkallcablesandpowercords.
3.Setalldisplaycontrolstothemiddleposition.
4.Power-onallexternaldevices.
5.Power-onthecomputer.
•Lookfordisplayederrorcodes.
•Lookforreadableinstructionsoramainmenuonthedisplay.
Ifyoudidnotreceivethecorrectresponse,proceedtostep6.
Ifyoudidreceivethecorrectresponse,proceedtostep7.
6.Ifoneofthefollowinghappens,followtheinstructiongiven:
•IfthecomputerdisplaysaPOSTerror,goto“POSTerrorcodes” .
•Ifthecomputerhangsandnoerrorisdisplayed,continueatstep7.
7.Iftheteststopsandyoucannotcontinue,replacethelastdevicetested.
©CopyrightLenovo2014
11
Page 18

12LenovoB40–30All-In-OneComputerHardwareMaintenanceManual
Page 19

Chapter5.UsingtheSetupUtility
TheSetupUtilityprogramisusedtoviewandchangetheconfigurationsettingsofyourcomputer,regardless
ofwhichoperatingsystemyouareusing.However,theoperatingsystemsettingsmightoverrideanysimilar
settingsintheSetupUtilityprogram.
StartingtheLenovoBIOSSetupUtilityprogram
TostarttheLenovoBIOSSetupUtilityprogram,dothefollowing:
1.Ifyourcomputerisalreadyonwhenyoustartthisprocedure,shutdowntheoperatingsystemand
turnoffthecomputer.
2.PressandholdtheF1keythenturnonthecomputer.WhentheLenovoBIOSSetupUtilityprogramis
displayed,releasetheF1key.
Note:IfaPower-OnPasswordoranAdministratorPasswordhasbeenset,theSetupUtilityprogrammenu
willnotbedisplayeduntilyoutypeyourpassword.Formoreinformation,see“Usingpasswords.”
Viewingandchangingsettings
SystemconfigurationoptionsarelistedintheLenovoBIOSSetupUtilityprogrammenu.T ovieworchange
settings,see“StartingtheSetupUtilityprogram.”
YoumustusethekeyboardwhenusingtheLenovoBIOSSetupUtilitymenu.Thekeysusedtoperform
varioustasksaredisplayedonthebottomofeachscreen.
Usingpasswords
YoucanusetheLenovoBIOSSetupUtilityprogramtosetpasswordstopreventunauthorizedpersons
fromgainingaccesstoyourcomputeranddata.See“StartingtheSetupUtilityprogram. ”Thefollowing
typesofpasswordsareavailable:
•AdministratorPassword
•Power-OnPassword
Youdonothavetosetanypasswordstouseyourcomputer.However,ifyoudecidetosetpasswords,read
thefollowingsections.
Passwordconsiderations
Apasswordcanbeanycombinationoflettersandnumbersupto16characters(a-zand0-9).Forsecurity
reasons,itisagoodideatouseastrongpasswordthatcannotbeeasilycompromised.Wesuggestthat
passwordsshouldfollowtheserules:
•Forastrongpassword,use7-16charactersandamixoflettersandnumbers.
•Donotuseyournameoryourusername.
•Donotuseacommonwordoracommonname.
•Usesomethingsignificantlydifferentfromyourpreviouspassword.
Attention:AdministratorandPower-Onpasswordsarenotcasesensitive.
©CopyrightLenovo2014
13
Page 20

AdministratorPassword
SettinganAdministratorPassworddetersunauthorizedpersonsfromchangingconfigurationsettings.Y ou
mightwanttosetanAdministratorPasswordifyouareresponsibleformaintainingthesettingsofseveral
computers.
AfteryousetanAdministratorPassword,apasswordpromptisdisplayedeverytimeyouaccesstheLenovo
BIOSSetupUtilityprogram.
IfboththeAdministratorandPower-OnPasswordareset,youcantypeeitherpassword.However,youmust
useyourAdministratorPasswordtochangeanyconfigurationsettings.
Setting,changing,ordeletinganAdministratorpassword
TosetanAdministratorPassword,dothefollowing:
Note:Apasswordcanbeanycombinationoflettersandnumbersupto16characters(a-zand0-9).For
moreinformation,see“Passwordconsiderations”onpage13.
1.StarttheLenovoBIOSSetupUtilityprogram(see“StartingtheLenovoBIOSSetupUtilityprogram”on
page13).
2.FromtheSecuritymenu,selectSetAdministratorPasswordandpresstheEnterkey.
3.Thepassworddialogboxwillbedisplayed.TypethepasswordthenpresstheEnterkey.
4.Re-typethepasswordtoconfirm,thenpresstheEnterkey.Ifyoutypedthepasswordcorrectly,
thepasswordwillbeinstalled.
TochangeanAdministratorPassword,dothefollowing:
1.StarttheLenovoBIOSSetupUtilityprogram(see“StartingtheLenovoBIOSSetupUtilityprogram”on
page13).
2.FromtheSecuritymenu,selectSetAdministratorPasswordandpresstheEnterkey.
3.Thepassworddialogboxwillbedisplayed.TypethecurrentpasswordthenpresstheEnterkey.
4.Typethenewpassword,thenpresstheEnterkey.Re-typethepasswordtoconfirmthenewpassword.
Ifyoutypedthenewpasswordcorrectly,thenewpasswordwillbeinstalled.ASetupNoticedconfirming
thatchangeshavebeensavedwillbedisplayed.
TodeleteapreviouslysetAdministratorPassword,dothefollowing:
1.FromtheSecuritymenu,selectSetAdministratorPasswordandpresstheEnterkey.
2.Thepassworddialogboxwillbedisplayed.TypethecurrentpasswordandpresstheEnterkey.
3.TodeleteanAdministratorPassword,leaveeachnewpasswordlineitemblank,thenpresstheEnter
key.ASetupNoticeconfirmingthatchangeshavebeensavedwillbedisplayed.
4.ReturntotheLenovoBIOSSetupUtilityprogrammenuandselecttheExitoption.
5.SelectSavechangesandExitfromthemenu.
Power-OnPassword
WhenaPower-OnPasswordisset,youcannotstarttheLenovoBIOSSetupUtilityprogramuntilavalid
passwordistypedfromthekeyboard.
Setting,changing,ordeletingaPower-OnPassword
Note:Apasswordcanbeanycombinationoflettersandnumbersupto16characters(a-zand0-9).
14LenovoB40–30All-In-OneComputerHardwareMaintenanceManual
Page 21

TosetaPower-OnPassword,dothefollowing:
1.StarttheLenovoBIOSSetupUtilityprogram(See”StartingtheLenovoBIOSSetupUtilityprogram”on
page13.)
2.FromtheSecuritymenu,selectSetPower-OnPasswordandpresstheEnterkey.
3.Thepassworddialogboxwillbedisplayed.Typethepassword,thenpresstheEnterkey.
4.Re-typethepasswordtoconfirm.Ifyoutypedthepasswordcorrectly,thepasswordwillbeinstalled.
TochangeaPower-OnPassword,dothefollowing:
1.StarttheLenovoBIOSSetupUtilityprogram(See”StartingtheLenovoBIOSSetupUtilityprogram”on
page13.)
2.FromtheSecuritymenu,selectSetPower-OnPasswordandpresstheEnterkey.
3.Thepassworddialogboxwillbedisplayed.TypethecurrentpasswordthenpresstheEnterkey.
4.Typethenewpassword,thenpresstheEnterkey.Re-typethepasswordtoconfirmthenewpassword.
Ifyoutypedthenewpasswordcorrectly,thenewpasswordwillbeinstalled.ASetupNoticedconfirming
thatchangeshavebeensavedwillbedisplayed.
TodeleteapreviouslysetPower-OnPassword,dothefollowing:
1.FromtheSecuritymenu,selectSetPower-OnPasswordandpresstheEnterkey.
2.Thepassworddialogboxwillbedisplayed.TypethecurrentpasswordandpresstheEnterkey.
3.TodeletethePower-OnPassword,leaveeachnewpasswordlineitemblank,thenpressEnter.ASetup
Noticeconfirmingthatchangeshavebeensavedwillbedisplayed.
4.ReturntotheLenovoBIOSSetupUtilityprogrammenuandselecttheExitoption.
5.SelectSavechangesandExitfromthemenu.
Enablingordisablingadevice
TheDevicesoptionsisusedtoenableordisableuseraccesstothefollowingdevices:
USBFunctionsSelectwhethertoenableordisableUSB(UniversalSerial
Bus)functions.Ifthefunctionsaredisabled,noUSB
devicescanbeused.
SATAMode
OnboardAudioControllerSelectwhethertoenableordisabletheOnboard
OnboardEthernetControllerorLANBootAgentSelectwhethertoenableordisabletheOnboardEthernet
Toenableordisableadevice,dothefollowing:
1.StarttheSetupUtilityprogram(see“StartingtheSetupUtilityprogram”onpage13).
2.FromtheSetupUtilityprogrammenu,selectDevices.
3.Selectanoptionasfollows:
WhenthisfeatureissettoDisabled,alldevices
connectedtotheSATAconnectors(e.g.harddiskdrives
ortheopticaldiskdrive)aredisabledandcannotbe
accessed.
AudioController.WhenthisfeatureissettoDisabled
alldevicesconnectedtotheaudioconnectors(e.g.
headphonesoramicrophone)aredisabledandcannot
beused.
Controller,orselectwhethertoenableordisableload
onboardPXE(PrebootExecutionEnvironment).
SelectUSBSetup,presstheEnterkey,thenselectUSBFunctions.
Chapter5.UsingtheSetupUtility15
Page 22

SelectATADeviceSetup,presstheEnterkey,thenselectSATAMode.
SelectAudioSetup,presstheEnterkey,thenselectOnboardAudioController.
SelectNetworkSetup,presstheEnterkey,thenselectOnboardEthernetSupportorLANBoot
Agent.
4.SelectDisabledorEnabledandpresstheEnterkey.
5.ReturntotheLenovoBIOSSetupUtilityprogrammenuandselecttheExitoption.
6.SelectSavechangesandExitfromthemenu.
Notes:
a.Ifyoudonotwanttosavethesettings,selectDiscardchangesandExitfromthemenu.
b.SelectIDE/AHCIMode:DevicedriversupportisrequiredforACHI.Dependingonhowtheharddisk
imagewasinstalled,changingthissettingmaypreventthesystemfrombooting.
Selectingastartupdevice
IfyourcomputerdoesnotbootfromadevicesuchastheCD/DVD-ROMdrivediskorharddiskasexpected,
followoneoftheproceduresbelow.
Selectingatemporarystartupdevice
Usethisproceduretostartupfromanybootdevice.
Note:NotallCDs,DVDsorharddiskdrivesarebootable.
1.Turnoffyourcomputer.
2.PressandholdtheF12keythenturnonthecomputer.WhentheStartupDeviceMenuappears,
releasetheF12key.
Note:IftheStartupDeviceMenudoesnotdisplayusingthesesteps,repeatedlypressandreleasethe
F12keyratherthankeepingitpressedwhenturningonthecomputer.
3.Use↑and↓arrowstoselectthedesiredstartupdevicefromtheStartupDeviceMenuandpress
theEnterkeytobegin.
Note:SelectingastartupdevicefromtheStartupDeviceMenudoesnotpermanentlychangethe
startupsequence.
Selectingorchangingthestartupdevicesequence
Tovieworpermanentlychangetheconfiguredstartupdevicesequence,dothefollowing:
1.StarttheLenovoBIOSSetupUtilityprogram(see“StartingtheLenovoBIOSSetupUtilityprogram”on
page13).
2.FromtheLenovoBIOSSetupUtilityprogrammainmenu,selecttheStartupoption.
3.PresstheEnterkey,andselectthedevicesforthePrimaryBootSequence.Readtheinformation
displayedontherightsideofthescreen.
4.Use↑and↓arrowstoselectadevice.Usethe<+>or<->keystomoveadeviceupordown.Usethe
<×>keytoexcludethedevicefromorincludethedeviceinthebootsequence.
5.ReturntotheLenovoBIOSSetupUtilityprogrammenuandselecttheExitoption.
6.SelectSavechangesandExitfromthemenu.
Notes:
16LenovoB40–30All-In-OneComputerHardwareMaintenanceManual
Page 23

a.Ifyoudonotwanttosavethesettings,selectDiscardchangesandExitfromthemenu.
b.Ifyouhavechangedthesesettingsandwanttoreturntothedefaultsettings,selectLoadOptimal
Defaultsfromthemenu.
ExitingtheLenovoBIOSSetupUtilityprogram
Afteryoufinishviewingorchangingsettings,presstheEsckeytoreturntotheLenovoBIOSSetupUtility
programmainmenu.Y oumighthavetopresstheEsckeyseveraltimes.Dooneofthefollowing:
•Ifyouwanttosavethenewsettings,selectSavechangesandExitfromthemenu.WhentheSave&
resetwindowshows,selecttheYesbutton,andthenpresstheEnterkeytoexittheLenovoBIOS
SetupUtilityprogram.
•Ifyoudonotwanttosavethesettings,selectDiscardchangesandExitfromthemenu.Whenthe
ResetWithoutSavingwindowshows,selecttheY esbutton,andthenpresstheEnterkeytoexitthe
LenovoBIOSSetupUtilityprogram.
Chapter5.UsingtheSetupUtility17
Page 24

18LenovoB40–30All-In-OneComputerHardwareMaintenanceManual
Page 25

Chapter6.Symptom-to-FRUIndex
TheSymptom-to-FRUindexlistserrorsymptomsandpossiblecauses.Themostlikelycauseislistedfirst.
AlwaysbeginwithChapter4,“GeneralCheckout,”onpage11.Thisindexcanalsobeusedtohelpyou
decidewhichFRUstohaveavailablewhenservicingacomputer.Ifyouareunabletocorrecttheproblem
usingthisindex,goto“Undeterminedproblems”onpage20.
Notes:
•Ifyouhavebothanerrormessageandanincorrectaudioresponse,diagnosetheerrormessagefirst.
•Ifyoucannotrunthediagnostictestsoryougetadiagnosticerrorcodewhenrunningatestbutdid
receiveaPOSTerrormessage,diagnosethePOSTerrormessagefirst.
•Ifyoudidnotreceiveanyerrormessagelookforadescriptionofyourerrorsymptomsinthefirstpartof
thisindex.
Harddiskdrivebooterror
Aharddiskdrivebooterrorcanbecausedbythefollowing.
Error
Thestartupdriveisnotincludedinthebootsequence
configuration.
Nooperatingsystemisinstalledonthebootdrive.Installanoperatingsystemonthebootdrive.
Thebootsectoronthestartupdriveiscorrupted.
Thedriveisdefective.
FRU/Action
Checktheconfigurationandensurethestartupdriveis
inthebootsequence.
Thedrivemustbeformatted.Dothefollowing:
1.Attempttobackupthedataonthefailingharddisk
drive.
2.Usetheoperatingsystemtoformattheharddisk
drive.
Replacetheharddiskdrive.
PowerSupplyProblems
Followtheseproceduresifyoususpectthereisapowersupplyproblem.
Check/VerifyFRU/Action
Checkthatthefollowingareproperlyinstalled:
•PowerCord
•On/OffSwitchconnector
•SystemBoardPowerSupplyconnectors
•Microprocessorconnections
Checkthepowercord.PowerCord
Checkthepower-onswitch.Power-onSwitch
Reseatconnectors
©CopyrightLenovo2014
19
Page 26

POSTerrorcodes
Eachtimeyouturnthecomputeron,itperformsaseriesofteststocheckthatthesystemisoperating
correctlyandthatcertainoptionsareset.ThisseriesoftestsiscalledthePower-OnSelf-Test,orPOST.
POSTdoesthefollowing:
•Checkssomebasicmotherboardoperations
•Checksthatthememoryisworkingcorrectly
•Startsvideooperations
•Verifiesthatthebootdriveisworking
POSTErrorMessageDescription/Action
Keyboarderror
RebootandSelectproperBootdeviceorInsertBoot
MediainselectedBootdevice
Cannotinitializethekeyboard.Makesurethekeyboard
isproperlyconnectedtothecomputerandthatnokeys
areheldpressedduringPOST.T opurposelyconfigure
thecomputerwithoutakeyboard,selectKeyboardless
operationinStartupandsettheoptiontoEnabled.The
BIOSthenignoresthemissingkeyboardduringPOST.
TheBIOSwasunabletofindasuitablebootdevice.Make
surethebootdriveisproperlyconnectedtothecomputer.
Makesureyouhavebootablemediainthebootdevice.
Undeterminedproblems
1.Power-offthecomputer.
2.Removeordisconnectthefollowingcomponents(ifconnectedorinstalled)oneatatime.
a.Externaldevices(modem,printer,ormouse)
b.Extendedvideomemory
c.ExternalCache
d.ExternalCacheRAM
e.Harddiskdrive
f.Diskdrive
3.Power-onthecomputertore-testthesystem.
4.Repeatsteps1through3untilyoufindthefailingdeviceorcomponent.
Ifalldevicesandcomponentshavebeenremovedandtheproblemcontinues,replacethesystemboard.
20LenovoB40–30All-In-OneComputerHardwareMaintenanceManual
Page 27

Chapter7.Replacinghardware
Attention:Donotremovethecomputercoverorattemptanyrepairbeforereadingthe“Importantsafetyinformation”
intheSafetyandWarrantyGuidethatwasincludedwithyourcomputer.T oobtaincopiesoftheSafetyandWarranty
Guide,gototheSupportWebsiteat:http://consumersupport.lenovo.com.
Note:UseonlypartsprovidedbyLenovo.
Generalinformation
Pre-disassemblyinstructions
Beforestartingthedisassemblyprocedure,makesurethatyoudothefollowing:
1.Turnoffthepowertothesystemandallperipherals.
2.Unplugallpowerandsignalcablesfromthecomputer.
3.Placethesystemonaflat,stablesurface.
©CopyrightLenovo2014
21
Page 28

Replacingthekeyboardandmouse
Note:YourkeyboardwillbeconnectedtoaUSBconnectorateithersideorattherearofthecomputer.
Toreplacethekeyboard:
Step1.Removeanymedia(disks,CDs,ormemorycards)fromthedrives,shutdownthecomputer,and
turnoffallattacheddevices.
Step2.Unplugallpowercordsfromelectricaloutlets.
Step3.Locatetheconnectorforthekeyboard.Referto“Sideviewofthecomputer”and“Rearviewof
thecomputer”.
Step4.Disconnectthedefectivekeyboardcablefromthecomputerandconnectthenewkeyboardcable
tothesameconnector.
Step5.Themousecanbereplacedusingthesamemethod.
Replacingtheadapter
Attention:T urnoffthecomputerandwait3to5minutestoletitcooldownbeforeremovingthecover.
Step1.Removeanymedia(disks,CDs,ormemorycards)fromthedrives,shutdowntheoperating
system,andturnoffthecomputerandallattacheddevices.
22LenovoB40–30All-In-OneComputerHardwareMaintenanceManual
Page 29

Step2.Disconnectthepowercordfromtheconnectoronthecomputer1,thenunplugthepowercord
B40-30
B40-30
fromelectricaloutlet.
2
Step3.Connectthenewadaptercordasshown.
Removingthestandbase
Attention:T urnoffthecomputerandwait3to5minutestoletitcooldownbeforeremovingthecover.
Note:Itmaybehelpfultoplacethecomputerface-downonasoftflatsurfaceforthisprocedure.Lenovo
recommendsthatyouuseablanket,towel,orothersoftclothtoprotectthetouchscreenfromscratches
orotherdamage.
Step1.Removeanymedia(disks,CDs,ormemorycards)fromthedrives,shutdowntheoperating
system,andturnoffthecomputerandallattacheddevices.
Chapter7.Replacinghardware23
Page 30

Step2.Unplugallpowercordsfromelectricaloutlets.
1
2
3
Step3.Disconnectallcablesattachedtothecomputer.Thisincludespowercords,input/output(I/O)
cables,andanyothercablesthatareconnectedtothecomputer.Referto“Leftandrightviews”
and“Rearview”forhelpwithlocatingthevariousconnectors.
Step4.Twistthehandscrewringcounter-clockwiseuntilthebasecomesloosetoreleasethestandbase
fromthestandholder.12
Step5.Slidethestandbaseoutfromtheholderthenputitaside.3
Step6.Referto“Installingthecomputerstand”toreinstallthestandbase.
Removingthefootcover
Attention:T urnoffthecomputerandwait3to5minutestoletitcooldownbeforeremovingthecover.
Note:Itmaybehelpfultoplacethecomputerface-downonasoftflatsurfaceforthisprocedure.Lenovo
recommendsthatyouuseablanket,towel,orothersoftclothtoprotectthetouchscreenfromscratches
orotherdamage.
Step1.Removeanymedia(disks,CDs,ormemorycards)fromthedrives,shutdowntheoperating
system,andturnoffthecomputerandallattacheddevices.
Step2.Unplugallpowercordsfromelectricaloutlets.
Step3.Disconnectallcablesattachedtothecomputer.Thisincludespowercords,input/output(I/O)
cables,andanyothercablesthatareconnectedtothecomputer.Referto“Leftandrightviews”
Step4.Removethefootbase.Referto“Removingthefootbase” .
and“Rearview”forhelpwithlocatingthevariousconnectors.
24LenovoB40–30All-In-OneComputerHardwareMaintenanceManual
Page 31

Step5.Liftupthestandholderthenslideoutthefootcoverasshown.
1
2
Step6.Toreattachthefootcover:
a.Liftupthestandholder.
b.Lineupthefootcoverwithmountingholesonthebackofthecomputer,thenslideitbackinto
position.
Replacingthememorymodule
Attention:T urnoffthecomputerandwait3to5minutestoletitcooldownbeforeremovingthecover.
Note:Itmaybehelpfultoplacethecomputerface-downonasoftflatsurfaceforthisprocedure.Lenovo
recommendsthatyouuseablanket,towel,orothersoftclothtoprotectthetouchscreenfromscratches
orotherdamage.
Step1.Removeanymedia(disks,CDs,ormemorycards)fromthedrives,shutdowntheoperating
system,andturnoffthecomputerandallattacheddevices.
Step2.Unplugallpowercordsfromelectricaloutlets.
Step3.Disconnectallcablesattachedtothecomputer.Thisincludespowercords,input/output(I/O)
cables,andanyothercablesthatareconnectedtothecomputer.Referto“Leftandrightviews”
and“Rearview”forhelpwithlocatingthevariousconnectors.
Step4.Removethestandbase.Referto“Removingthestandbase” .
Step5.Removethefootcover.Referto“Removingthefootcover”.
Chapter7.Replacinghardware25
Page 32

Step6.Removethememoryshieldingasshown.
Step7.Pushoutthelatchesonbothsidesofthememorysockettoreleasethememorymodule1and
gentlypullthememorymoduleupwardtoremoveitfromitssocket.2
Step8.Toinstallthenewmemorymodule:
a.Alignthenewmemorymodulewiththememorysocket,theninsertitandpushdownonthe
topedge.Makesurethelatcheslockthememorymoduleinplace.
b.Reattachthememoryshielding.
Step9.Reattachthefootcoverandstandbase.
Replacingtheharddiskdrive
Attention:T urnoffthecomputerandwait3to5minutestoletitcooldownbeforeremovingthecover.
Note:Itmaybehelpfultoplacethecomputerface-downonasoftflatsurfaceforthisprocedure.Lenovo
recommendsthatyouuseablanket,towel,orothersoftclothtoprotectthetouchscreenfromscratches
orotherdamage.
Step1.Removeanymedia(disks,CDs,ormemorycards)fromthedrives,shutdowntheoperating
system,andturnoffthecomputerandallattacheddevices.
Step2.Unplugallpowercordsfromelectricaloutlets.
Step3.Disconnectallcablesattachedtothecomputer.Thisincludespowercords,input/output(I/O)
cables,andanyothercablesthatareconnectedtothecomputer.Referto“Leftandrightviews”
and“Rearview”forhelpwithlocatingthevariousconnectors.
Step4.Removethestandbase.Referto“Removingthestandbase” .
Step5.Removethefootcover.Referto“Removingthefootcover”.
26LenovoB40–30All-In-OneComputerHardwareMaintenanceManual
Page 33

Step6.Liftouttheharddiskdriveandbracketasshown.
Step7.Pushthelockpinsoutwardtoreleasetheharddiskdrivefromthebracket.
Step8.Toinstallthenewharddiskdrive:
a.Lineupthenewharddiskdrivewiththebracketandsecureitwiththepins.
b.Connectthedataandpowercablestothenewharddiskdrive.
c.Slidetheharddiskdriveandbracketbackintoposition.
Step9.Reattachthefootcoverandstandbase.
Replacingtheopticaldrive
Attention:T urnoffthecomputerandwait3to5minutestoletitcooldownbeforeremovingthecover.
Note:Itmaybehelpfultoplacethecomputerface-downonasoftflatsurfaceforthisprocedure.Lenovo
recommendsthatyouuseablanket,towel,orothersoftclothtoprotectthetouchscreenfromscratches
orotherdamage.
Step1.Removeanymedia(disks,CDs,ormemorycards)fromthedrives,shutdowntheoperating
system,andturnoffthecomputerandallattacheddevices.
Step2.Unplugallpowercordsfromelectricaloutlets.
Step3.Disconnectallcablesattachedtothecomputer.Thisincludespowercords,input/output(I/O)
cables,andanyothercablesthatareconnectedtothecomputer.Referto“Leftandrightviews”
and“Rearview”forhelpwithlocatingthevariousconnectors.
Step4.Removethestandbase.Referto“Removingthestandbase” .
Step5.Removethefootcover.Referto“Removingthefootcover”.
Chapter7.Replacinghardware27
Page 34

Step6.Locatetheopticalremovalnotch,andthenuseascrewdriverpushtheopticaldriveout.
Step7.Pushasmallironstick(paperclip)intothesmallholeontheopticaldrivecoversothatthedisk
springsoutasshown.
Step8.Removethe2screwsthatsecuretheopticaldrivetothemetalbracket.1
Step9.Useasmallflatheadscrewdrivertopressandpushoutthepinsthatsecurethecovertothe
disk.23
Step10.Separatethecoverfromthedefectiveopticaldrive.
Step11.Toinstallthenewopticaldrive:
a.Alignthenewopticaldrivewiththecover,andthenpushthecoverbackintoposition.
b.Slidethenewopticaldriveintothedrivebay.
Step12.Reattachthefootcoverandstandbase.
Removingthestandholder
Note:Turnoffthecomputerandwait3to5minutestoletitcooldownbeforeremovingthecover.
28LenovoB40–30All-In-OneComputerHardwareMaintenanceManual
Page 35

Note:Itmaybehelpfultoplacethecomputerface-downonasoftflatsurfaceforthisprocedure.Lenovo
1
recommendsthatyouuseablanket,towel,orothersoftclothtoprotectthecomputerscreenfromscratches
orotherdamage.
Toremovethestandholder:
Step1.Removeanymedia(disks,CDs,DVDs,ormemorycards)fromthedrives,shutdowntheoperating
system,andturnoffthecomputerandallattacheddevices.
Step2.Unplugallpowercordsfromelectricaloutlets.
Step3.Disconnectallcablesattachedtothecomputer.Thisincludespowercords,input/output(I/O)
cables,andanyothercablesthatareconnectedtothecomputer.Referto“Leftandrightview”
and“Rearview”forhelpwithlocatingthevariousconnectors.
Step4.Removethestandbase.Referto“Removingthestandbase” .
Step5.Removethefootcover.Referto“Removingthefootcover”.
Step6.Removethefourscrewsthatsecurethestandholdertothechassis,thenliftupthestandholderto
removeit.
Step7.Toreattachthestandholder:
a.Aligntheholesonthestandholderwithmountingholesonthechassis,placethestand
holderbackintoposition.
b.Securethestandholdertothechassiswiththefourscrews.
Step8.Lineupthefootcoverwithmountingholesonthebackofthecomputer,thenslideitbackinto
position.
Step9.Reattachthestandbase.
Removingthemiddlecover
Note:Turnoffthecomputerandwait3to5minutestoletitcooldownbeforeremovingthecover.
Note:Itmaybehelpfultoplacethecomputerface-downonasoftflatsurfaceforthisprocedure.Lenovo
recommendsthatyouuseablanket,towel,orothersoftclothtoprotectthecomputerscreenfromscratches
orotherdamage.
Toremovethemiddlecover:
Step1.Removeanymedia(disks,CDs,DVDs,ormemorycards)fromthedrives,shutdowntheoperating
system,andturnoffthecomputerandallattacheddevices.
Chapter7.Replacinghardware29
Page 36

Step2.Unplugallpowercordsfromelectricaloutlets.
Step3.Disconnectallcablesattachedtothecomputer.Thisincludespowercords,input/output(I/O)
cables,andanyothercablesthatareconnectedtothecomputer.Referto“Leftandrightview”
and“Rearview”forhelpwithlocatingthevariousconnectors.
Step4.Removethestandbase.Referto“Removingthestandbase” .
Step5.Removethefootcover.Referto“Removingthefootcover”.
Step6.Removethestandholder.Referto“Removingthestandholder” .
Step7.Removethesixscrewsthatsecurethemiddlecovertothechassis,then
Step8.Liftupthemiddlecoverasshowntoremoveit.
Step9.Toreattachthemiddlecover:
a.Lineupthemiddlecoverwithchassis,thenplacethemiddlecoverback.
b.Securethemiddlecovertothechassiswiththesixscrews.
Step10.Reattachthestandholder,footcoverandstandbase.
30LenovoB40–30All-In-OneComputerHardwareMaintenanceManual
Page 37

Replacingtheconverterboard
Note:Turnoffthecomputerandwait3to5minutestoletitcooldownbeforeremovingthecover.
Note:Itmaybehelpfultoplacethecomputerface-downonasoftflatsurfaceforthisprocedure.Lenovo
recommendsthatyouuseablanket,towel,orothersoftclothtoprotectthecomputerscreenfromscratches
orotherdamage.
Toreplacetheconverterboard:
Step1.Removeanymedia(disks,CDs,DVDs,ormemorycards)fromthedrives,shutdowntheoperating
system,andturnoffthecomputerandallattacheddevices.
Step2.Unplugallpowercordsfromelectricaloutlets.
Step3.Disconnectallcablesattachedtothecomputer.Thisincludespowercords,input/output(I/O)
cables,andanyothercablesthatareconnectedtothecomputer.Referto“Leftandrightview”
and“Rearview”forhelpwithlocatingthevariousconnectors.
Step4.Removethestandbase.Referto“Removingthestandbase” .
Step5.Removethefootcover.Referto“Removingthefootcover”.
Step6.Removethestandholder.Referto“Removingthestandholder” .
Step7.Removethemiddlecover.Referto“Removingthemiddlecover” .
Step8.Disconnectthetwocablesfromtheconverter,andthenremovethetwoscrewsthatsecurethe
converterboardtothechassis.
Step9.Liftuptheconverterboardouttoremoveit.
Step10.Toinstallthenewconverterboard:
a.Connectthetwocablestothenewconverterboard.
b.Alignthenplacethenewconverterboardintoposition.
c.Securethenewconverterboardwiththescrews.
Step11.Reattachthemiddlecover,standholder,footcoverandstandbase.
RemovingtheEMIcover
Note:Turnoffthecomputerandwait3to5minutestoletitcooldownbeforeremovingthecover.
Chapter7.Replacinghardware31
Page 38

Note:Itmaybehelpfultoplacethecomputerface-downonasoftflatsurfaceforthisprocedure.Lenovo
recommendsthatyouuseablanket,towel,orothersoftclothtoprotectthecomputerscreenfromscratches
orotherdamage.
ToreplacetheEMIcover
Step1.Removeanymedia(disks,CDs,DVDs,ormemorycards)fromthedrives,shutdowntheoperating
system,andturnoffthecomputerandallattacheddevices.
Step2.Unplugallpowercordsfromelectricaloutlets.
Step3.Disconnectallcablesattachedtothecomputer.Thisincludespowercords,input/output(I/O)
cables,andanyothercablesthatareconnectedtothecomputer.Referto“Leftandrightview”
and“Rearview”forhelpwithlocatingthevariousconnectors.
Step4.Removethestandbase.Referto“Removingthestandbase” .
Step5.Removethefootcover.Referto“Removingthefootcover”.
Step6.Removethestandholder.Referto“Removingthestandholder” .
Step7.Removethemiddlecover.Referto“Removingthemiddlecover” .
Step8.RemovetheeightscrewsthatsecuretheEMIcovertothechassis,andthenliftitup.
Step9.ToreattachtheEMIcover:
a.LineuptheholesontheEMIcoverwithmountingholesonthechassis,thenplaceEMIcover
backintoposition.
b.SecuretheEMIcovertothechassiswitheightscrews.
Step10.Reattachthemiddlecover,standholder,footcoverandstandbase.
ReplacingtheWi-Ficard
Note:Turnoffthecomputerandwait3to5minutestoletitcooldownbeforeremovingthecover.
Note:Itmaybehelpfultoplacethecomputerface-downonasoftflatsurfaceforthisprocedure.Lenovo
recommendsthatyouuseablanket,towel,orothersoftclothtoprotectthecomputerscreenfromscratches
orotherdamage.
ToreplacetheWi-Ficard:
32LenovoB40–30All-In-OneComputerHardwareMaintenanceManual
Page 39

Step1.Removeanymedia(disks,CDs,DVDs,ormemorycards)fromthedrives,shutdowntheoperating
system,andturnoffthecomputerandallattacheddevices.
Step2.Unplugallpowercordsfromelectricaloutlets.
Step3.Disconnectallcablesattachedtothecomputer.Thisincludespowercords,input/output(I/O)
cables,andanyothercablesthatareconnectedtothecomputer.Referto“Leftandrightview”
and“Rearview”forhelpwithlocatingthevariousconnectors.
Step4.Removethestandbase.Referto“Removingthestandbase” .
Step5.Removethefootcover.Referto“Removingthefootcover”.
Step6.Removethestandholder.Referto“Removingthestandholder” .
Step7.Removethemiddlecover.Referto“Removingthemiddlecover” .
Step8.RemovetheEMIcover.Referto“RemovingtheEMIcover”.
Step9.DisconnecttheantennacablesfromtheWi-Ficard.
Step10.RemovethescrewthatsecurestheWi-Ficardtothemotherboard.
Step11.LiftuptheWi-Ficardtoremoveitfromthesocket.
Step12.ToinstallthenewWi-Ficard:
a.InsertthenotchedendoftheWi-Ficardintothecardportonthemotherboard.
b.SecurenewtheWi-Ficardtothemotherboardwiththescrew.
c.ConnecttheantennacablestothenewWi-Ficard.
Step13.ReattachtheEMIcover,middlecover,standholder,footcoverandstandbase.
ReplacingtheTVtunercard
Note:Turnoffthecomputerandwait3to5minutestoletitcooldownbeforeremovingthecover.
Note:Itmaybehelpfultoplacethecomputerface-downonasoftflatsurfaceforthisprocedure.Lenovo
recommendsthatyouuseablanket,towel,orothersoftclothtoprotectthecomputerscreenfromscratches
orotherdamage.
ToreplacetheTVtunercard
Step1.Removeanymedia(disks,CDs,DVDs,ormemorycards)fromthedrives,shutdowntheoperating
system,andturnoffthecomputerandallattacheddevices.
Chapter7.Replacinghardware33
Page 40

Step2.Unplugallpowercordsfromelectricaloutlets.
Step3.Disconnectallcablesattachedtothecomputer.Thisincludespowercords,input/output(I/O)
cables,andanyothercablesthatareconnectedtothecomputer.Referto“Leftandrightview”
and“Rearview”forhelpwithlocatingthevariousconnectors.
Step4.Removethestandbase.Referto“Removingthestandbase” .
Step5.Removethefootcover.Referto“Removingthefootcover”.
Step6.Removethestandholder.Referto“Removingthestandholder” .
Step7.Removethemiddlecover.Referto“Removingthemiddlecover” .
Step8.RemovetheEMIcover.Referto“RemovingtheEMIcover”.
Step9.DisconnecttheantennacablefromtheTV-Tunercard.
Step10.RemovethescrewthatsecurestheTV- T unercardtothemotherboard.
Step11.PulltheTV- T unercardupwardtoremoveitfromthecardportonthemotherboard.
Step12.ToinstallthenewTV-T unercard:
a.InsertthenotchedendoftheTV- T unercardintothecardportonthemotherboard.
b.SecurenewtheTV- Tunercardtothemotherboardwiththescrew.
c.ConnecttheantennacabletothenewTV-T unercard.
Step13.ReattachtheEMIcover,middlecover,standholder,footcoverandstandbase.
Replacingtheheat-sink
Note:Turnoffthecomputerandwait3to5minutestoletitcooldownbeforeremovingthecover.
Note:Itmaybehelpfultoplacethecomputerface-downonasoftflatsurfaceforthisprocedure.Lenovo
recommendsthatyouuseablanket,towel,orothersoftclothtoprotectthecomputerscreenfromscratches
orotherdamage.
Toreplacetheheat-sink:
Step1.Removeanymedia(disks,CDs,DVDs,ormemorycards)fromthedrives,shutdowntheoperating
system,andturnoffthecomputerandallattacheddevices.
Step2.Unplugallpowercordsfromelectricaloutlets.
34LenovoB40–30All-In-OneComputerHardwareMaintenanceManual
Page 41

Step3.Disconnectallcablesattachedtothecomputer.Thisincludespowercords,input/output(I/O)
cables,andanyothercablesthatareconnectedtothecomputer.Referto“Leftandrightview”
and“Rearview”forhelpwithlocatingthevariousconnectors.
Step4.Removethestandbase.Referto“Removingthestandbase” .
Step5.Removethefootcover.Referto“Removingthefootcover”.
Step6.Removethestandholder.Referto“Removingthestandholder” .
Step7.Removethemiddlecover.Referto“Removingthemiddlecover” .
Step8.RemovetheEMIcover.Referto“RemovingtheEMIcover”.
Step9.Removethesealingtapebetweenthesystemfanandheat-sink.
Step10.Removetheninescrewsthatsecuretheheat-sinktothemotherboardandchassis.
Step11.Liftuptheheat-sinktoremoveit.
Attention:Placetheheat-sinkupsidedownonaflatsurfacetopreventthermalgreasefromcontaminating
othercomponents.
Attention:UseanalcoholpadtowipethethermalgreaseofftheCPU.
Step12.Toinstallthenewheat-sink:
a.Lineupthenewheat-sinkwithmountingholesonthemotherboard,thenplaceitintoposition.
b.Followthenumbersprintedonthenewheat-sinktosecureitinorderusingthescrews.
c.Usethesealingtapetosealthegapin-betweenthesystemfanandheat-sink.
Step13.ReattachtheEMIcover,middlecover,standholder,footcoverandstandbase.
ReplacingtheCPU
Note:Turnoffthecomputerandwait3to5minutestoletitcooldownbeforeremovingthecover.
Note:Itmaybehelpfultoplacethecomputerface-downonasoftflatsurfaceforthisprocedure.Lenovo
recommendsthatyouuseablanket,towel,orothersoftclothtoprotectthecomputerscreenfromscratches
orotherdamage.
ToreplacetheCPU
Chapter7.Replacinghardware35
Page 42

Step1.Removeanymedia(disks,CDs,DVDs,ormemorycards)fromthedrives,shutdowntheoperating
system,andturnoffthecomputerandallattacheddevices.
Step2.Unplugallpowercordsfromelectricaloutlets.
Step3.Disconnectallcablesattachedtothecomputer.Thisincludespowercords,input/output(I/O)
cables,andanyothercablesthatareconnectedtothecomputer.Referto“Leftandrightview”
and“Rearview”forhelpwithlocatingthevariousconnectors.
Step4.Removethestandbase.Referto“Removingthestandbase” .
Step5.Removethefootcover.Referto“Removingthefootcover”.
Step6.Removethestandholder.Referto“Removingthestandholder” .
Step7.Removethemiddlecover.Referto“Removingthemiddlecover” .
Step8.RemovetheEMIcover.Referto“RemovingtheEMIcover”.
Step9.Removetheheat-sink.Referto“Replacingtheheatsink” .
Step10.Liftthesmallhandleandopentheretainer.
Step11.Liftthemicroprocessorstraightupandoutofthesocket.3
Attention:Donottouchthegoldcontactsonthebottomofthemicroprocessor.Whenhandlingthe
microprocessor,touchonlythesides.
Note:Donotdropanythingontothemicroprocessorsocketwhileitisexposed.Thesocketpinsmust
bekeptascleanaspossible.
36LenovoB40–30All-In-OneComputerHardwareMaintenanceManual
Page 43

Step12.Holdingthesidesofthemicroprocessorwithyourfingers,removetheprotectivecover1that
protectsthegoldcontactsonthenewmicroprocessor.
2
Step13.Holdingthesidesofthemicroprocessorwithyourfingers,positionthemicroprocessorsothatthe
notchesonthemicroprocessorarealignedwiththetabsinthemicroprocessorsocket.
Important:Toavoiddamagingthemicroprocessorcontacts,keepthemicroprocessorcompletelylevel
whileinstallingitintothesocket.
Step14.Lowerthemicroprocessorstraightdownintoitssocketonthemotherboard.
Step15.Tosecurethemicroprocessorinthesocket,closethemicroprocessorretainerandlockitinto
positionwiththesmallhandle.
Step16.Useathermalgreasesyringetoplace5dropsofgreaseonthetopofthemicroprocessor.Each
dropofgreaseshouldbe0.03ml(3tickmarksonthegreasesyringe).
Step17.Reattachtheheat-sink,EMIcover,middlecover,standholder,footcoverandstandbase.
Replacingthesystemfan
Note:Turnoffthecomputerandwait3to5minutestoletitcooldownbeforeremovingthecover.
Chapter7.Replacinghardware37
Page 44

Note:Itmaybehelpfultoplacethecomputerface-downonasoftflatsurfaceforthisprocedure.Lenovo
recommendsthatyouuseablanket,towel,orothersoftclothtoprotectthecomputerscreenfromscratches
orotherdamage.
Toreplacethesystemfan
Step1.Removeanymedia(disks,CDs,DVDs,ormemorycards)fromthedrives,shutdowntheoperating
system,andturnoffthecomputerandallattacheddevices.
Step2.Unplugallpowercordsfromelectricaloutlets.
Step3.Disconnectallcablesattachedtothecomputer.Thisincludespowercords,input/output(I/O)
cables,andanyothercablesthatareconnectedtothecomputer.Referto“Leftandrightview”
and“Rearview”forhelpwithlocatingthevariousconnectors.
Step4.Removethestandbase.Referto“Removingthestandbase” .
Step5.Removethefootcover.Referto“Removingthefootcover”.
Step6.Removethestandholder.Referto“Removingthestandholder” .
Step7.Removethemiddlecover.Referto“Removingthemiddlecover” .
Step8.RemovetheEMIcover.Referto“RemovingtheEMIcover”.
Step9.Removethesealingtapebetweenthesystemfanandheat-sink.
Step10.Removethethreescrewsthatsecurethesystemfantothechassis.
Step11.Disconnectthepowercablefromthemotherboard.
Step12.Liftupthesystemfantoremoveit.
Step13.Toinstallthenewsystemfan:
a.Placethenewsystemfanintoposition,andthensecureittothechassiswiththreescrews.
b.Connectthesystemfanpowercabletotheconnectoronthemotherboard.
c.Usethesealingtapetosealthegapin-betweenthesystemfanandheat-sink.
Step14.ReattachtheEMIcover,middlecover,standholder,footcoverandstandbase.
Replacingthespeakersystem
Note:Turnoffthecomputerandwait3to5minutestoletitcooldownbeforeremovingthecover.
38LenovoB40–30All-In-OneComputerHardwareMaintenanceManual
Page 45

Note:Itmaybehelpfultoplacethecomputerface-downonasoftflatsurfaceforthisprocedure.Lenovo
recommendsthatyouuseablanket,towel,orothersoftclothtoprotectthecomputerscreenfromscratches
orotherdamage.
Toreplacethespeakersystem:
Step1.Removeanymedia(disks,CDs,DVDs,ormemorycards)fromthedrives,shutdowntheoperating
system,andturnoffthecomputerandallattacheddevices.
Step2.Unplugallpowercordsfromelectricaloutlets.
Step3.Disconnectallcablesattachedtothecomputer.Thisincludespowercords,input/output(I/O)
cables,andanyothercablesthatareconnectedtothecomputer.Referto“Leftandrightview”
and“Rearview”forhelpwithlocatingthevariousconnectors.
Step4.Removethestandbase.Referto“Removingthestandbase” .
Step5.Removethefootcover.Referto“Removingthefootcover”.
Step6.Removethestandholder.Referto“Removingthestandholder” .
Step7.Removethemiddlecover.Referto“Removingthemiddlecover” .
Step8.RemovetheEMIcover.Referto“RemovingtheEMIcover”.
Step9.Disconnectthespeakercablesfromtheconnectoronthemotherboard.
Step10.Liftupthespeakersystemtoremoveit.
Step11.Toinstallthenewspeakersystem:
a.Placethenewspeakersystemintoposition,thensecureitwithfourscrews.
b.Connectthenewspeakercablestotheconnectoronthemotherboard.
Step12.ReattachtheEMIcover,middlecover,standholder,footcoverandstandbase.
Replacingthepowerswitchboard
Note:Turnoffthecomputerandwait3to5minutestoletitcooldownbeforeremovingthecover.
Note:Itmaybehelpfultoplacethecomputerface-downonasoftflatsurfaceforthisprocedure.Lenovo
recommendsthatyouuseablanket,towel,orothersoftclothtoprotectthecomputerscreenfromscratches
orotherdamage.
Toreplacethepowerswitchboard
Chapter7.Replacinghardware39
Page 46

Step1.Removeanymedia(disks,CDs,DVDs,ormemorycards)fromthedrives,shutdowntheoperating
system,andturnoffthecomputerandallattacheddevices.
Step2.Unplugallpowercordsfromelectricaloutlets.
Step3.Disconnectallcablesattachedtothecomputer.Thisincludespowercords,input/output(I/O)
cables,andanyothercablesthatareconnectedtothecomputer.Referto“Leftandrightview”
and“Rearview”forhelpwithlocatingthevariousconnectors.
Step4.Removethestandbase.Referto“Removingthestandbase” .
Step5.Removethefootcover.Referto“Removingthefootcover”.
Step6.Removethestandholder.Referto“Removingthestandholder” .
Step7.Removethemiddlecover.Referto“Removingthemiddlecover” .
Step8.Pushthelockingpinoutwardtoreleasethepowerswitchboard,thenliftupthepowerswitch
boardtoremoveit.12
Step9.Disconnectthedatacablefromthepowerswitchboard.
Step10.Toinstallthepowerswitchboard:
a.Lineupthenotchesonthenewpowerswitchboardwiththekeysintheslot.
b.Securethepowerswitchboardwiththelockingpin.
Step11.Reattachthemiddlecover,standholder,footcoverandstandbase.
Replacingthemotherboard
Note:Turnoffthecomputerandwait3to5minutestoletitcooldownbeforeremovingthecover.
Note:Itmaybehelpfultoplacethecomputerface-downonasoftflatsurfaceforthisprocedure.Lenovo
recommendsthatyouuseablanket,towel,orothersoftclothtoprotectthecomputerscreenfromscratches
orotherdamage.
Toreplacethemotherboard:
Step1.Removeanymedia(disks,CDs,DVDs,ormemorycards)fromthedrives,shutdowntheoperating
system,andturnoffthecomputerandallattacheddevices.
Step2.Unplugallpowercordsfromelectricaloutlets.
40LenovoB40–30All-In-OneComputerHardwareMaintenanceManual
Page 47

Step3.Disconnectallcablesattachedtothecomputer.Thisincludespowercords,input/output(I/O)
cables,andanyothercablesthatareconnectedtothecomputer.Referto“Leftandrightview”
and“Rearview”forhelpwithlocatingthevariousconnectors.
Step4.Removethestandbase.Referto“Removingthestandbase” .
Step5.Removethefootcover.Referto“Removingthefootcover”.
Step6.Removethememorymodules.Referto“Replacingamemorymodule” .
Step7.Removetheopticaldrive.Referto“Replacingtheopticaldrive” .
Step8.Removethestandholder.Referto“Removingthestandholder” .
Step9.Removethemiddlecover.Referto“Removingthemiddlecover” .
Step10.RemovetheEMIcover.Referto“RemovingtheEMIcover”.
Step11.Removetheheat-sink.Referto“Replacingtheheat-sink” .
Step12.RemovetheCPU.Referto“ReplacingtheCPU”.
Step13.RemovetheTV-T unercard.Referto“ReplacingtheTVtunercard” .
Step14.RemovetheWLANcard.Referto“ReplacingtheWLANcard” .
Step15.RemovetheTV-Tunerantennajackasshown.
Step16.Unplugthefollowingcablesfromconnectorsonthemotherboard:
•Convertercable
•Systemfanpowercable
•T ouchcontrolboardcable
•OpticaldriveSATAcable(Red)
•HarddiskdriveSATAcable(Black)
•Powersupplycable
•Harddiskdrivepowercable
•Powerswitchboardcable
•Speakersystemcable
•Cameracable
•LVDScable
Chapter7.Replacinghardware41
Page 48

Step17.Removethesevenscrewsthatsecurethemotherboardtothechassisandliftthemotherboard
uptoremoveit.
Step18.Toinstallthenewmotherboard:
a.Lineuptheholesonthenewmotherboardwiththemountingholeschassisandplacethenew
motherboardintoposition.
b.Usethescrewstosecurethenewmotherboardtothechassis.
c.Connectallthecablestothenewmotherboard.
Step19.Installthefollowingpartstothenewmotherboard:
•Wi-Ficard
•TV-Tunercard
•CPU
•Heat-sink
•Memorymodule
•TV-Tunerantennajack
Step20.ReattachtheEMIcover,middlecover,opticaldrive,standholder,footcoverandstandbase.
Removingthereardeco
Note:Turnoffthecomputerandwait3to5minutestoletitcooldownbeforeremovingthecover.
Note:Itmaybehelpfultoplacethecomputerface-downonasoftflatsurfaceforthisprocedure.Lenovo
recommendsthatyouuseablanket,towel,orothersoftclothtoprotectthecomputerscreenfromscratches
orotherdamage.
Toremovethereardeco:
Step1.Removeanymedia(disks,CDs,DVDs,ormemorycards)fromthedrives,shutdowntheoperating
system,andturnoffthecomputerandallattacheddevices.
Step2.Unplugallpowercordsfromelectricaloutlets.
Step3.Disconnectallcablesattachedtothecomputer.Thisincludespowercords,input/output(I/O)
cables,andanyothercablesthatareconnectedtothecomputer.Referto“Leftandrightview”
and“Rearview”forhelpwithlocatingthevariousconnectors.
42LenovoB40–30All-In-OneComputerHardwareMaintenanceManual
Page 49

Step4.Removethestandbase.Referto“Removingthestandbase” .
Step5.Removethefootcover.Referto“Removingthefootcover”.
Step6.Removetheopticaldrive.Referto“Replacingtheopticaldrive” .
Step7.Removethestandholder.Referto“Removingthestandholder” .
Step8.Removethemiddlecover.Referto“Removingthemiddlecover” .
Step9.Removethepowerswitchboard.Referto“Replacingthepowerswitchboard” .
Step10.Removethefourscrewsthatsecurethereardecotothechassis,thenslidethereardecoupward
toremoveit.
Step11.Toreattachthereardeco:
a.Lineupthereardecowiththeguidetrackonthechassis.
b.Securethereardecotothechassiswiththetwoscrews.
Step12.Reattachthepowerswitchboard,middlecover,standholder,opticaldrive,footcoverandstand
base.
Replacingthecamera
Note:Turnoffthecomputerandwait3to5minutestoletitcooldownbeforeremovingthecover.
Note:Itmaybehelpfultoplacethecomputerface-downonasoftflatsurfaceforthisprocedure.Lenovo
recommendsthatyouuseablanket,towel,orothersoftclothtoprotectthecomputerscreenfromscratches
orotherdamage.
Toreplacethecamera:
Step1.Removeanymedia(disks,CDs,DVDs,ormemorycards)fromthedrives,shutdowntheoperating
system,andturnoffthecomputerandallattacheddevices.
Step2.Unplugallpowercordsfromelectricaloutlets.
Step3.Disconnectallcablesattachedtothecomputer.Thisincludespowercords,input/output(I/O)
cables,andanyothercablesthatareconnectedtothecomputer.Referto“Leftandrightview”
and“Rearview”forhelpwithlocatingthevariousconnectors.
Step4.Removethestandbase.Referto“Removingthestandbase” .
Step5.Removethefootcover.Referto“Removingthefootcover”.
Chapter7.Replacinghardware43
Page 50

Step6.Removetheharddiskdrive.Referto“Replacingtheharddiskdrive” .
Step7.Removetheopticaldrive.Referto“Replacingtheopticaldrive” .
Step8.Removethestandholder.Referto“Removingthestandholder” .
Step9.Removethemiddlecover.Referto“Removingthemiddlecover” .
Step10.Removethereardeco.Referto“Replacingthereardeco” .
Step11.Pushingthecameralockingpinoutwardtoreleasethecamera.1
Step12.Slideoutthecameraasshown.2
Step13.Disconnectthecameradatacablefromtheconnectoronthecamera.
Step14.Toinstallthenewcamera:
a.Connectthedatacabletothenewcamera.
b.Placethenewcameraintoposition,securethecameratothefrontbezelwiththelockingpins.
Step15.Reattachthereardeco,middlecover,opticaldrive,standholder,harddiskdrive,footcover
andstandbase.
ReplacingtheLEDpanelmodule
Note:Turnoffthecomputerandwait3to5minutestoletitcooldownbeforeremovingthecover.
Note:Itmaybehelpfultoplacethecomputerface-downonasoftflatsurfaceforthisprocedure.Lenovo
recommendsthatyouuseablanket,towel,orothersoftclothtoprotectthecomputerscreenfromscratches
orotherdamage.
ToreplacetheLEDpanelmodule:
Step1.Removeanymedia(disks,CDs,DVDs,ormemorycards)fromthedrives,shutdowntheoperating
system,andturnoffthecomputerandallattacheddevices.
Step2.Unplugallpowercordsfromelectricaloutlets.
Step3.Disconnectallcablesattachedtothecomputer.Thisincludespowercords,input/output(I/O)
cables,andanyothercablesthatareconnectedtothecomputer.Referto“Leftandrightview”
and“Rearview”forhelpwithlocatingthevariousconnectors.
Step4.Removethestandbase.Referto“Removingthestandbase” .
Step5.Removethefootcover.Referto“Removingthefootcover”.
44LenovoB40–30All-In-OneComputerHardwareMaintenanceManual
Page 51

Step6.Removetheharddiskdrive.Referto“Replacingtheharddiskdrive” .
Step7.Removetheopticaldrive.Referto“Replacingtheopticaldrive” .
Step8.Removethestandholder.Referto“Removingthestandholder” .
Step9.Removethemiddlecover.Referto“Removingthemiddlecover” .
Step10.RemovetheEMIcover.Referto“RemovingtheEMIcover”.
Step11.Removethesystemfan.Referto“Replacingthesystemfan”.
Step12.Removethespeakersystem.Referto“Replacingthespeakersystem”.
Step13.Removethepowerswitchboard.Referto“Replacingthepowerswitchboard” .
Step14.Removethereardeco.Referto“Removingthereardeco”.
Step15.Removethecamera.Referto“Replacingthecamera” .
Step16.RemovethetwelvescrewsthatsecurethechassistotheLEDpanelmodule.
Step17.DisconnecttheLVDScablefromconnectorasshown.12
Step18.Disconnectthetouchcontrolboardcablesfromconnector.3
Step19.DisconnecttheconvertercablefromtheconnectorontheLEDpanel.4
Chapter7.Replacinghardware45
Page 52

Step20.LiftupthechassistoseparatethechassisfromtheLEDpanelmodule.
Step21.ToinstallthenewtheLEDpanelmodule:
ThenewLEDpanelmoduleincluding:1.LEDpanel
a.LineupthechassiswithnewLEDpanelmodule,placethechassisintoposition.
b.ConnecttheconvertercabletotheconnectorontheLEDpanel.
c.ConnecttheLVDScabletotheconnectoronthemotherboard.
d.Connectthetouchcontrolboardcablestotheconnectoronthetouchcontrolboard.
e.SecuretheLEDpaneltothechassiswiththetwelvescrews.
f.AttachthecameratothenewLEDmodule.
46LenovoB40–30All-In-OneComputerHardwareMaintenanceManual
2.LVDScable
3.T ouchcontrolboardandtouchcable.(Touch
modelonly)
Page 53

g.LineupthereardecowiththeguidetrackontheLEDmodule,thenslidethereardecointo
position.
h.SecurethereardecotothenewLEDmodulewiththetwoscrews.
i.Reattachthepowerswitchboardtothereardeco.
j.AttachthespeakermoduletothenewLEDmodule.
Step22.Reattachthesystemfan,EMIcover,middlecover,opticaldrive,harddiskdrive,computerstand,
footcoverandstandbase.
Chapter7.Replacinghardware47
Page 54

48LenovoB40–30All-In-OneComputerHardwareMaintenanceManual
Page 55

Chapter8.FRUlists
Thischapterliststheinformationonthefieldreplaceableunits(FRUs)forLenovoB40–30All-In-Onedesktop
computer.
Attention:BesuretoreadandunderstandallthesafetyinformationbeforereplacinganyFRUs.
Notes:FRUsthathavea1or2intheCRUcolumnareCustomerReplaceableUnits(CRUs).
•1–identifiespartsthatarefairlysimpletoreplace,requiringfewornotools.
•2–identifiespartsthatareslightlymoredifficulttoreplace.
•N-identifiespartsthatarenottobereplacedbythecustomer.
Item#DescriptionLenovoPN
CPU
II7-4785T2.2/1600/4C/8M/115035WCPU
II5-4460T1.9/1600/4C/6M/115035WCPU
II3-4150T3.0/1600/2C/3M/115035WCPU
IG3240T2.7/1333/2C/3M/115035WCPU
IG1840T2.5/1333/2C/2M/115035WCPU
IG1820T2.4/1333/2C/2M/115035CPU
MB
TB4030NOKUMAMB5B20G53342
TB4030NOK1GGPUMB5B20G53297
TB4030NOK2GGPUMB5B20G53329
TB4030NOK1GGPUW/HDMIMB5B20G53319
TB4030W8SUMAMB5B20G53309
TB4030W8S1GGPUMB5B20G53302
TB4030W8S2GGPUMB5B20G53294
TB4030W8S1GGPUW/HDMIMB5B20G53288
TB4030W8PUMAMB
TB4030W8P1GGPUMB5B20G53333
TB4030W8P2GGPUMB5B20G53324
TB4030W8P1GGPUW/HDMIMB5B20G53314
1101090
1101092
1101093
1101094
1101096
1101030
5B20G53340
CRU
ID
N
N
©CopyrightLenovo2014
49
Page 56

RAM
M471B5674QH0-YK02GBD3L -1600S内存-HF
HMT425S6AFR6A-PB2GBD3L -1600S内存-HF
MT4KTF25664HZ-1G6E12GBD3L -1600S内存
Mic_RD9PSH2GBD3L-1600S内存-HF
M471B5173DB0-YK04GBD3L -1600S内存-HF
HMT451S6BFR8A-PB4GBD3L -1600S内存-HF
MT8KTF51264HZ-1G6E14GBD3L-1600S内存-HF
Mic_RD9QBJ4GBD3L-1600S内存-HF
M471B5173DB0-YK04GBD3L -1600S内存-HF
HMT451S6BFR8A-PB4GBD3L -1600S内存-HF
MT8KTF51264HZ-1G6E14GBD3L-1600S内存-HF
Mic_RD9QBJ4GBD3L-1600S内存-HF
M471B1G73DB0-YK08GBD3L -1600S内存-HF
HMT41GS6BFR8A-PB8GBD3L -1600S内存-HF
MT16KTF1G64HZ-1G6E1
Mic_RD9QBJ8GBD3L-1600S内存-HF
M471B5674QH0-YK02GBD3L -1600S内存-HF
M471B5173DB0-YK04GBD3L -1600S内存-HF
HMT425S6AFR6A-PB2GBD3L -1600S内存-HF
HMT451S6BFR8A-PB4GBD3L -1600S内存-HF
Mic_RD9PSH2GBD3L-1600S内存-HF
Mic_RD9QBJ4GBD3L-1600S内存-HF
M471B5173DB0-YK04GBD3L -1600S内存-HF
M471B1G73DB0-YK08GBD3L -1600S内存-HF
HMT451S6BFR8A-PB4GBD3L -1600S内存-HF
HMT41GS6BFR8A-PB8GBD3L -1600S内存-HF
Mic_RD9QBJ4GBD3L-1600S内存-HF
Mic_RD9QBJ8GBD3L-1600S内存-HF
M471B1G73DB0-YK08GBD3L -1600S内存-HF
HMT41GS6BFR8A-PB8GBD3L -1600S内存-HF
MT16KTF1G64HZ-1G6E1
Mic_RD9QBJ8GBD3L-1600S内存-HF
2
1100983
1100643
1100956
1100965
1100942
1100985
1100957
1100967
1100942
1100985
1100957
1100967
1100943
1100986
1100635
1101012
1100983
1100942
1100643
1100985
1100965
1100967
1100942
1100943
1100985
1100986
1100967
1101012
1100943
1100986
1100635
1101012
50LenovoB40–30All-In-OneComputerHardwareMaintenanceManual
Page 57

HDD
TSBMars4K500GDT01ACA050-LH
WDXL500AWD5000AAKX-08U6AA0500GHDD-LH
STPharaoh4KNon-MCST500DM002500GHDD
3.5inchSATA6G7.2KGrenadaBP1.51TB
TSBMars4K1TBDT01ACA100-LH
3.5inchSATA6G7.2KWDXL1000B1TB
3.5inchSATA6G7.2KGrenadaBP1.52TB
TSBMars4K2TBDT01ACA200-LH
SSHD
SGTGrenada1TBST1000DX001SSHD-LH
SGTGrenada2TBST2000DX001SSHD-LH
ODD
PSNUJ8FB9.5mmTrayRambow/obezel
PLDSDU-8A5SH-L T rayRambow/obezelLSOPU
HLDSGU90NSlimTrayRambow/obezel
Cable
SATADateB4030Cable5C10F78951
CableCameraTB40305C10G53327
CableSATAODD+HDDTB40305C10G53315
CablePowerBoardTB40305C10G53328
CableConvertertoMBTB40305C10G53317
SATAPowerB4030Cable5C10F78950
WebCamB4030cable5C10F78943
WebCamB4030cable5C10F78943
WebCamB4030cable5C10F78943
AntennaB4030cable5A30F78952
LCDModule
LCDModuleTB4030TSBLK5D10G53346
LCDModuleTB4030NTBLK5D10G53336
LCDModuleTB4030TSSilver5D10G53326
LCDModuleTB4030NTSilver5D10G53313
POWER
DELTAADP-120ZBBBHTcommon120Wadapter36200439
LiteonPA-1121-04LB120wcommonadapter36200440
2
16200512
16200544
16200674
16200528
16200513
16200613
16200529
16200514
2
16200534
16200535
2
25215310
25214499
25214073
N
N
1
Chapter8.FRUlists51
Page 58

WifiCombo
LiteonWB3351x1BGN+BT4.0HMC无线网卡
LTNRTL8723BE1x1bgn+BTHMCWLAN
BCMIEEE802.11bg(n)_Japan
LTNRTL8821AE1x1ac+BT4.0ComboHMC
CbtRTL8821AE1x1AC+BT4.0PCIEM.2WLAN
TVtuner
AvermediaH334DVB-TMiniTVCard
B360PFcabelNTSC
B360PFcabelPAL31507277
T&ITVtunerbracketB40-30®
Philips43keyIRremoterblack888900018
PhilipsIRreceiver888900019
Camera
AVC1080P58302724WB1DMSCam
T&I2DcameraholderB40-30®
Bison1080P58302724WB1DMSCam
T&I2DcameraholderB40-30®
LT1080P58302724WB1DMSCam
T&I2DcameraholderB40-30®
SPEAKER
B36X3WAWSpeaker
B36X3WSXSpeaker
FAN
FANSystemTB40-30DIS/UMAAvc
FANSystemTB40-30DIS/UMADelta
HEATSINK
HEATSINKTB40-30DISCM
HEATSINKTB40-30DISAvc
HEATSINKTB40-30UMACM
HEATSINKTB40-30UMAAvc
CARDPOP
PowerBoardTB4030
PowerBoardTB4030W/HDMI5C50G53301
ConverterBoardTB40305C50G53291
N
20200437
20200439
144003719
11202485
20200571
2
11201071
31507278
31507268
N
20200633
31507267
20200634
31507267
20200664
31507267
1
25216359
25216360
N
5F10F77361
5F10F77359
N
5H40F77358
5H40F77360
5H40F77362
5H40F77363
N
5C50G53305
52LenovoB40–30All-In-OneComputerHardwareMaintenanceManual
Page 59

Accessory
MiddleCoverTB4030W/HDMIBLK5CB0G53304
MiddleCoverTB4030BLK5CB0G53295
MiddleCoverTB4030W/HDMISilver5CB0G53287
MiddleCoverTB4030Silver5CB0G53338
MBEMIShieldTB40305M20G53331
MBEMIShieldTB4030W/TV5M20G53318
MBEMIShieldTB4030W/HDMI5M20G53320
MBEMIShieldB4030W/TV_HDMI5M20G53310
RearCoverTB4030BLK5CB0G53306
RearCoverTB4030W/TVBLK5CB0G53296
RearCoverTB4030W/HDMIBLK5CB0G53290
RearCoverTB4030W/TV_HDMIBLK5CB0G53341
RearCoverTB4030Silver5CB0G53330
RearCoverTB4030W/TVSilver5CB0G53316
RearCoverTB4030W/HDMISilver5CB0G53307
RearCoverTB4030W/TV_HDMISilver5CB0G53298
SlideCoverTB4030BLK5CB0G53289
SlideCoverTB4030W/TVBLK5CB0G53339
SlideCoverTB4030W/HDMIBLK5CB0G53344
SlideCoverTB4030W/TV_HDMIBLK5CB0G53334
SlideCoverTB4030Silver5CB0G53322
SlideCoverTB4030W/TVSilver5CB0G53311
SlideCoverTB4030W/HDMISilver5CB0G53299
SlideCoverB4030W/TVHDMISilver5CB0G53293
SpeakerTB40303W5SB0G53345
StandTopTB4030BLK5SE0G53335
StandBaseTB4030BLK5SE0G53325
StandTopTB4030Silver5SE0G53312
StandBaseTB4030Silver5SE0G53300
BracketCameraTB40305B40G53292
HousingHDDTB4030
BezelODDTB4030BLK5CB0G53332
BezelODDTB4030Silver5CB0G53321
AntennaTB4030
BracketTVT unerTB4030
ShieldingHDDTB40305M20G53303
CoverDDRTB40305M20G53323
B540ODDLockingBracket
C360TVT unerCableForPType
N
5B40G53343
5A30G53337
5B40G53308
90200895
90204663
Chapter8.FRUlists53
Page 60

KB&MS
BlackSilkUSBKB-L VT8(US)Black
BlackSilkUSBKB-L VT8(TW)Black
BlackSilkUSBKB-L VT8(TH)Black
BlackSilkUSBKB-LVT8(CZ-SL)Black
BlackSilkUSBKB-L VT8(IN)Black
BlackSilkUSBKB-L VT8(RU)Black
BlackSilkUSBKB-L VT8(UK)Black
BlackSilkUSBKB-LVT8(Nordic)Black
BlackSilkUSBKB-L VT8(LA)Black
BlackSilkUSBKB-L VT8(AR)Black
BlackSilkUSBKB-L VT8(SW)Black
BlackSilkUSBKB-L VT8(GE)Black
BlackSilkUSBKB-L VT8(TR)Black
BlackSilkUSBKB-L VT8(SP)Black
BlackSilkUSBKB-L VT8(SL)Black
BlackSilkUSBKB-L VT8(IT)Black
BlackSilkUSBKB-L VT8(HB)Black
BlackSilkUSBKB-L VT8(FR)Black
BlackSilkUSBKB-L VT8(GK)Black
BlackSilkUSBKB-L VT8(HG)Black
BlackSilkUSBKB-L VT8(BG)Black
BlackSilkUSBKB-L VT8(HR)Black
BlackSilkUSBKB-L VT8(JP)Black
BlackSilkUSBKB-LVT8(EN-FR)Black
BlackSilkUSBKB-L VT8(PT)Black
BlackSilkUSBKB-LVT8(BE-EN)Black
BlackSilkUSBKB-L VT8(DU)Black
BlackSilkMouseBlack
PrimaxM300USBgesturemouseBLK
SilverSilk2.4GKB-L VT(US)Black8
SilverSilk2.4GKB-LVT(US-MY)Black8
SilverSilk2.4GKB-L VT(TW)Black8
SilverSilk2.4GKB-L VT(TH)Black8
SilverSilk2.4GKB-LVT(CS-SK)Black8
SilverSilk2.4GKB-LVT(US-IN)Black8
SilverSilk2.4GKB-L VT(RU)Black8
SilverSilk2.4GKB-L VT(GB)Black8
1
25209111
25209112
25209114
25209115
25209116
25209117
25209118
25209119
25209120
25209121
25209122
25209123
25209124
25209125
25209126
25209127
25209128
25209129
25209130
25209131
25209132
25209133
25209134
25209135
25209136
25209137
25209138
25209139
25200528
25200530
25213876
25209175
25209176
25209177
25209178
25209179
25209180
25209181
25209182
54LenovoB40–30All-In-OneComputerHardwareMaintenanceManual
Page 61

SilverSilk2.4GKB-LVT(Nordic)Black8
SilverSilk2.4GKB-L VT(LA)Black8
SilverSilk2.4GKB-LVT(LA-AR)Black8
SilverSilk2.4GKB-L VT(SA)Black8
SilverSilk2.4GKB-L VT(CH)Black8
SilverSilk2.4GKB-L VT(DE)Black8
SilverSilk2.4GKB-L VT(TR)Black8
SilverSilk2.4GKB-L VT(ES)Black8
SilverSilk2.4GKB-L VT(SL)Black8
SilverSilk2.4GKB-L VT(IT)Black8
SilverSilk2.4GKB-L VT(IL)Black8
SilverSilk2.4GKB-L VT(FR)Black8
SilverSilk2.4GKB-L VT(GR)Black8
SilverSilk2.4GKB-L VT(HU)Black8
SilverSilk2.4GKB-L VT(BG)Black8
SilverSilk2.4GKB-L VT(KR)Black8
SilverSilk2.4GKB-L VT(JP)Black8
SilverSilk2.4GKB-LVT(EN-FR)Black8
SilverSilk2.4GKB-L VT(PT)Black8
SilverSilk2.4GKB-LVT(BE-EN)Black8
SilverSilk2.4GKB-L VT(DU)Black8
SilverSilkMouse(WW)Black
SilverSilkMouseBlack(NoBattery)
SilverSilkMouse(MY)Black
SilverSilkMouse(JP)Black
SilverSilk2.4GKB-L VT(US)Silver8
SilverSilk2.4GKB-LVT(US-MY)Silver8
SilverSilk2.4GKB-L VT(TW)Silver8
SilverSilk2.4GKB-L VT(TH)Silver8
SilverSilk2.4GKB-LVT(CS-SK)Silver8
SilverSilk2.4GKB-LVT(US-IN)Silver8
SilverSilk2.4GKB-L VT(RU)Silver8
SilverSilk2.4GKB-L VT(GB)Silver8
SilverSilk2.4GKB-LVT(Nordic)Silver8
SilverSilk2.4GKB-L VT(LA)Silver8
SilverSilk2.4GKB-LVT(LA-AR)Silver8
SilverSilk2.4GKB-L VT(SA)Silver8
SilverSilk2.4GKB-L VT(CH)Silver8
SilverSilk2.4GKB-L VT(DE)Silver8
SilverSilk2.4GKB-L VT(TR)Silver8
25209183
25209184
25209185
25209186
25209187
25209188
25209189
25209190
25209191
25209192
25209193
25209194
25209195
25209196
25209197
25209198
25209199
25209200
25209201
25209202
25209203
25203464
25203465
25203466
25205773
25209204
25209205
25209206
25209207
25209208
25209209
25209210
25209211
25209212
25209213
25209214
25209215
25209216
25209217
25209218
Chapter8.FRUlists55
Page 62

SilverSilk2.4GKB-L VT(ES)Silver8
SilverSilk2.4GKB-L VT(SL)Silver8
SilverSilk2.4GKB-L VT(IT)Silver8
SilverSilk2.4GKB-L VT(IL)Silver8
SilverSilk2.4GKB-L VT(FR)Silver8
SilverSilk2.4GKB-L VT(GR)Silver8
SilverSilk2.4GKB-L VT(HU)Silver8
SilverSilk2.4GKB-L VT(BG)Silver8
SilverSilk2.4GKB-L VT(KR)Silver8
SilverSilk2.4GKB-L VT(JP)Silver8
SilverSilk2.4GKB-LVT(EN-FR)Silver8
SilverSilk2.4GKB-L VT(PT)Silver8
SilverSilk2.4GKB-LVT(BE-EN)Silver8
SilverSilk2.4GKB-L VT(DU)Silver8
SilverSilkMouse(WW)Silver
SilverSilkMouseSilver(NoBattery)
SilverSilkMouse(MY)Silver
SilverSilkMouse(JP)Silver
25209219
25209220
25209221
25209222
25209223
25209224
25209225
25209226
25209227
25209228
25209229
25209230
25209231
25209232
25203606
25203607
25203608
25205774
56LenovoB40–30All-In-OneComputerHardwareMaintenanceManual
Page 63

Chapter9.Generalinformation
Thischapterprovidesgeneralinformationthatappliestoallcomputermodelscoveredbythismanual.
AdditionalServiceInformation
Thischapterprovidesadditionalinformationthattheservicerepresentativemightfindhelpful.
Powermanagement
Powermanagementreducesthepowerconsumptionofcertaincomponentsofthecomputersuchasthe
systempowersupply,processor,harddiskdrives,andsomemonitors.
Advancedconfigurationandpowerinterface(ACPI)BIOS
AsthiscomputerhasanACPIBIOSsystem,theoperatingsystemisallowedtocontrolthepower
managementfeaturesofthecomputerandthesettingsforAdvancedPowerManagement(APM)BIOSmode
isignored.NotalloperatingsystemssupportACPIBIOSmode.
AutomaticPower-Onfeatures
TheAutomaticPower-OnfeatureswithinthePowerManagementmenuallowyoutoenableanddisable
featuresthatturnonthecomputerautomatically.
•WakeUponAlarm:Youcanspecifyadateandtimeatwhichthecomputerwillbeturnedonautomatically.
Thiscanbeeitherasingleevent,adailyeventoraweeklyevent.
•WakeUponLAN:ThisfeatureallowsLANadaptercardtowaketheSystem.
©CopyrightLenovo2014
57
 Loading...