

Lenovo 9308-4PX, 9308-4EX Installation Manual

Lenovo 42U Enterprise Primary Rack and 42U
Enterprise Expansion Rack
Installation Guide

Note: Before using this information and the product it supports, read the general information in Appendix B
“Notices” on page 25, the Rack Safety Information and Environmental Notices and User Guide documents on
the Lenovo Documentation CD, and the Important Notices document that comes with the product.
Second Edition (August 2018)
© Copyright Lenovo 2001, 2010.
LIMITED AND RESTRICTED RIGHTS NOTICE: If data or software is delivered pursuant to a General Services
Administration (GSA) contract, use, reproduction, or disclosure is subject to restrictions set forth in Contract No.
GS-35F-05925

Contents
Safety . . . . . . . . . . . . . . . . . . . ii
Chapter 1. Introduction . . . . . . . . . 1
The Lenovo Documentation CD . . . . . . . . . 1
Hardware and software requirements . . . . . 1
Using the Documentation Browser . . . . . . 1
Notices and statements in this document. . . . . . 2
Chapter 2. Installing a rack cabinet . . . 3
Size and weight specifications . . . . . . . . . . 3
Lowering the leveling feet and installing the
stabilizer bracket . . . . . . . . . . . . . . . 4
Removing and installing the lower and upper side
covers . . . . . . . . . . . . . . . . . . . 5
Removing and installing the lower side
covers. . . . . . . . . . . . . . . . . . 5
Removing and installing the upper 6U side
covers. . . . . . . . . . . . . . . . . . 6
Removing and installing rack doors . . . . . . . . 7
Removing and installing the front door . . . . . 7
Removing and installing the rear door . . . . . 9
Removing and installing the upper 6U portion . . . 10
Attaching rack cabinets in a suite . . . . . . . . 10
Installing optional devices. . . . . . . . . . . 12
Installing clip nuts . . . . . . . . . . . . 12
Chapter 3. Managing cables . . . . . 13
Using the cable-access opening in the top of the
rack . . . . . . . . . . . . . . . . . . . 14
Chapter 4. Moving a rack cabinet. . . 15
Chapter 5. Customer replaceable
unit parts . . . . . . . . . . . . . . . . 19
Appendix A. Getting help and
technical assistance . . . . . . . . . . 21
Before you call . . . . . . . . . . . . . . . 21
Using the documentation . . . . . . . . . . . 22
Getting help and information from the World Wide
Web . . . . . . . . . . . . . . . . . . . 22
How to send DSA data . . . . . . . . . . . . 22
Creating a personalized support web page . . . . 22
Software service and support . . . . . . . . . 23
Hardware service and support . . . . . . . . . 23
Taiwan product service . . . . . . . . . . . . 23
Appendix B. Notices. . . . . . . . . . 25
Trademarks . . . . . . . . . . . . . . . . 26
Important notes. . . . . . . . . . . . . . . 26
Particulate contamination . . . . . . . . . . . 26
Telecommunication regulatory statement. . . . . 27
Electronic emission notices . . . . . . . . . . 27
Federal Communications Commission (FCC)
statement . . . . . . . . . . . . . . . 27
Industry Canada Class A emission compliance
statement . . . . . . . . . . . . . . . 28
Avis de conformité à la réglementation
d'Industrie Canada. . . . . . . . . . . . 28
Australia and New Zealand Class A
statement . . . . . . . . . . . . . . . 28
European Union EMC Directive conformance
statement . . . . . . . . . . . . . . . 28
Germany Class A statement . . . . . . . . 28
Japan VCCI Class A statement . . . . . . . 29
Japan Electronics and Information
Technology Industries Association (JEITA)
statement . . . . . . . . . . . . . . . 29
Korea Communications Commission (KCC)
statement . . . . . . . . . . . . . . . 29
Russia Electromagnetic Interference (EMI)
Class A statement . . . . . . . . . . . . 30
People's Republic of China Class A electronic
emission statement . . . . . . . . . . . 30
Taiwan Class A compliance statement . . . . 30
Index . . . . . . . . . . . . . . . . . . 31
© Copyright Lenovo 2001, 2010 i

Safety
Before installing this product, read the Safety Information.
Antes de instalar este produto, leia as Informações de Segurança.
Læs sikkerhedsforskrifterne, før du installerer dette produkt.
Lees voordat u dit product installeert eerst de veiligheidsvoorschriften.
Ennen kuin asennat tämän tuotteen, lue turvaohjeet kohdasta Safety Information.
Avant d'installer ce produit, lisez les consignes de sécurité.
Vor der Installation dieses Produkts die Sicherheitshinweise lesen.
Prima di installare questo prodotto, leggere le Informazioni sulla Sicurezza.
Les sikkerhetsinformasjonen (Safety Information) før du installerer dette produktet.
Antes de instalar este produto, leia as Informações sobre Segurança.
Antes de instalar este producto, lea la información de seguridad.
Läs säkerhetsinformationen innan du installerar den här produkten.
Each caution and danger statement in this document is labeled with a number. This number is used to cross
reference an English-language caution or danger statement with translated versions of the caution or danger
statement in the Lenovo Rack Safety Information document. For example, if a caution statement is labeled
“Statement 1,” translations for that caution statement are in the Lenovo Rack Safety Information document
under “Statement 1.”
Be sure to read all caution and danger statements in this document before you perform the procedures.
Read any additional safety information that comes with the server or optional device before you install the
device.
Statement 1
CAUTION:
To ensure safety, all configurations of the rack cabinet must be certified by a nationally recognized
testing laboratory in order to verify compliance with country-specific safety regulations. This process
ensures that the end product remains safe for the operator and service personnel under normal and
forseeable misuse conditions.
Statement 2
DANGER
• Always lower the leveling pads on the rack cabinet.
• Always install stabilizer brackets on the rack cabinet.
• Always install servers and optional devices starting from the bottom of the rack cabinet.
• Always install the heaviest devices in the bottom of the rack cabinet.
Statement 3
DANGER
• Do not extend more than one sliding device at a time.
• The maximum allowable weight for devices on slide rails is 80 kg (176 lb). Do not install sliding
devices that exceed this weight.
Statement 4
DANGER
Electrical current from power, telephone, and communication cables is hazardous.
To avoid a shock hazard:
• Do not connect or disconnect any cables or perform installation, maintenance, or reconfiguration
of this product during an electrical storm.
• Connect all power cords to a properly wired and grounded electrical outlet.
• Connect to properly wired outlets any equipment that will be attached to this product.
• When possible, use one hand only to connect or disconnect signal cables.
• Never turn on any equipment when there is evidence of fire, water, or structural damage.
• Disconnect the attached power cords, telecommunications systems, networks, and modems
before you open the device covers, unless instructed otherwise in the installation and
configuration procedures.
• Connect and disconnect cables as described in the following table when installing, moving, or
opening covers on this product or attached devices.
To Connect: To Disconnect:
1. Turn everything OFF.
2. First, attach all cables to devices.
3. Attach signal cables to connectors.
4. Attach power cords to outlet.
5. Turn device ON.
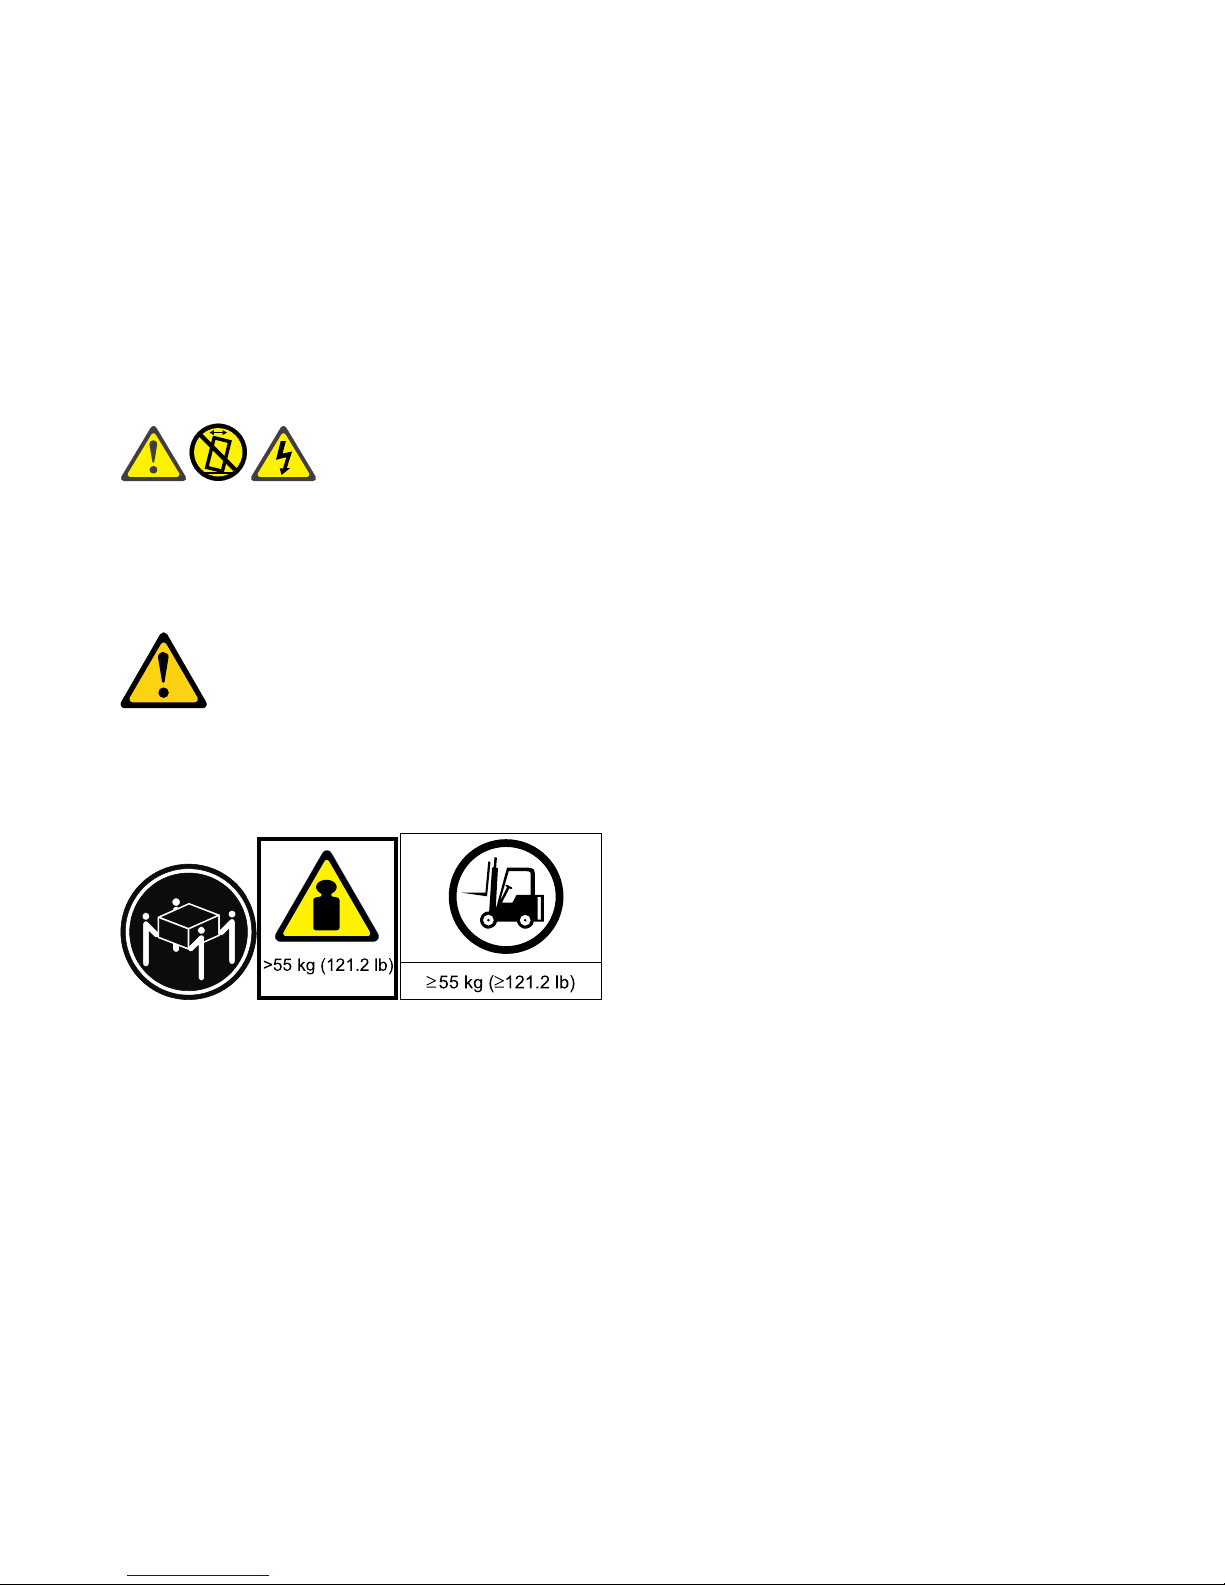
Statement 5
1. Turn everything OFF.
2. First, remove power cords from outlet.
3. Remove signal cables from connectors.
4. Remove all cables from devices.

≥ 18 kg (39.7 lb) ≥ 32 kg (70.5 lb) ≥ 55 kg (121.2 lb)
CAUTION:
Use safe practices when lifting.
Statement 6
CAUTION:
Do not place any object on top of a rack-mounted device unless that rack-mounted device is intended
for use as a shelf.
Statement 8

DANGER
• Plug power cords from devices in the rack cabinet into electrical outlets that are located near the
rack cabinet and are easily accessible.
• Each rack cabinet might have more than one power cord. Be sure to disconnect all power cords
in the rack cabinet before servicing any device in the rack cabinet.
• Install an emergency-power-off switch if more than one power device (power distribution unit or
uninterruptible power supply) is installed in the same rack cabinet.
• Connect all devices installed in a rack cabinet to power devices installed in the same rack
cabinet. Do not plug a power cord from a device installed in one rack cabinet into a power device
installed in a different rack cabinet.
Statement 10
CAUTION:
Removing components from the upper positions in the Enterprise Rack cabinet improves rack
stability during relocation. Follow these general guidelines whenever you relocate a populated rack
cabinet within a room or building:
• Reduce the weight of the rack cabinet by removing equipment starting at the top of the rack
cabinet. When possible, restore the rack cabinet to the configuration of the rack cabinet as you
received it. If this configuration is not known, you must do the following:
– Remove all devices in the 32U position and above.
– Ensure that the heaviest devices are installed in the bottom of the rack cabinet.
– Ensure that there are no empty U-levels between devices installed in the rack cabinet below the
32U level.
• If the rack cabinet you are relocating is part of a suite of rack cabinets, detach the rack cabinet
from the suite.
• Inspect the route that you plan to take to eliminate potential hazards.
• Verify that the route that you choose can support the weight of the loaded rack cabinet. Refer to the
documentation that comes with your rack cabinet for the weight of a loaded rack cabinet.
• Verify that all door openings are at least 760 x 2030 mm (30 x 80 in.)
• Ensure that all devices, shelves, drawers, doors, and cables are secure.
• Ensure that the four leveling pads are raised to their highest position.
• Ensure that there is no stabilizer bracket installed on the rack cabinet.
• Do not use a ramp inclined at more than ten degrees.
• Once the rack cabinet is in the new location, do the following:
– Lower the four leveling pads.
– Install stabilizer brackets on the rack cabinet.
– If you removed any devices from the rack cabinet, repopulate the rack cabinet from the lowest
position to the highest position.
If a long distance relocation is required, restore the rack cabinet to the configuration of the rack
cabinet as you received it. Pack the rack cabinet in the original packaging material, or equivalent.
Also, lower the leveling pads to raise the casters off of the pallet and bolt the rack cabinet to the
pallet.
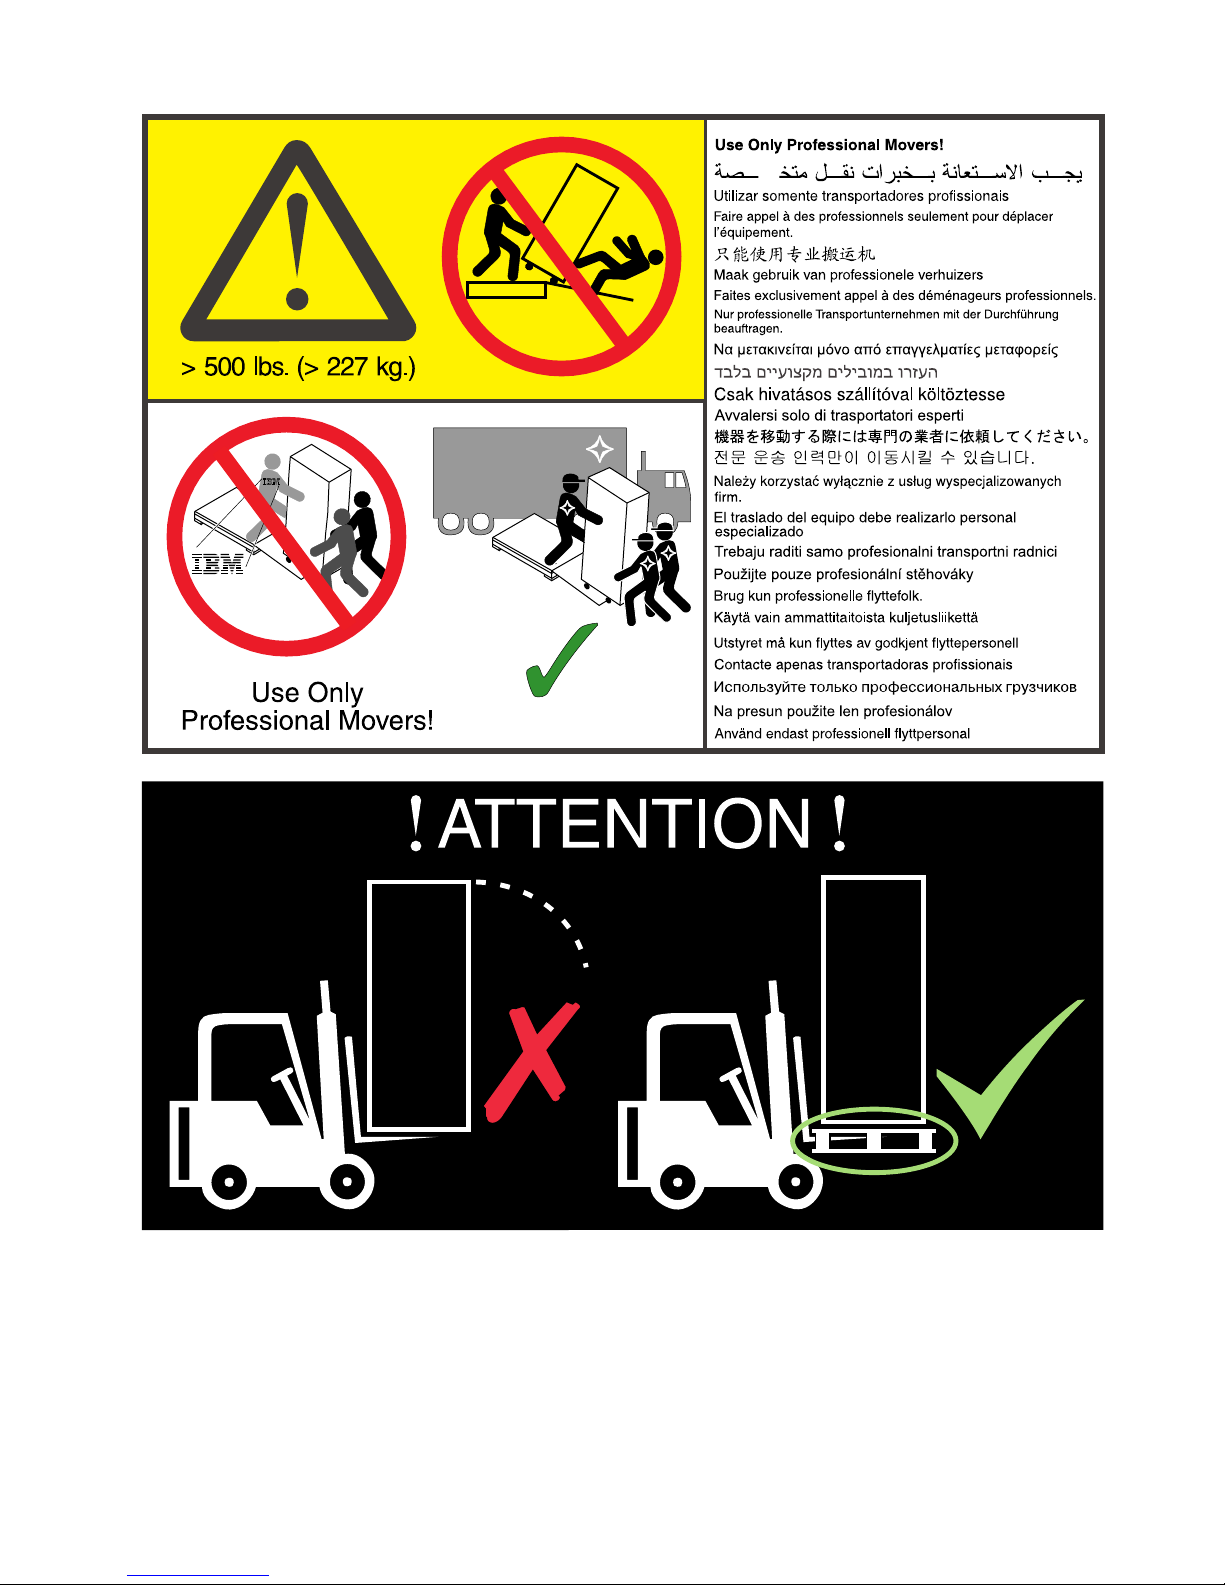
Statement 12
CAUTION:
See the instructions in the rack documentation before you install devices, remove devices, or relocate
the rack.
Statement 13
CAUTION:
The weight of this part or unit is more than 55 kg (121.2 lb). It takes specially trained persons, a lifting
device, or both to safely lift this part or unit.

Note: Each stand-alone rack must be attached to the floor by a trained service technician according to your
local building codes. Place a fastener in each corner of the rack. Each fastener must have a rated pull-out
force of at least 460 newtons.
United Kingdom - Notice to Customers:
This apparatus is approved under approval number NS/G/1234/J/100003 for indirect connection to public
telecommunication systems in the United Kingdom.

Chapter 1. Introduction
This document contains general installation instructions for the Lenovo 42U Enterprise Rack and Lenovo 42U
Enterprise Expansion Rack cabinets. Always read the documentation that comes with your server or optional
device for detailed installation instructions.
Installing the rack cabinet consists of the following tasks:
1. Unpack the rack according to the Unpacking Instructions document that comes with the rack cabinet.
2. Locate the rack according to the Lenovo eServer xSeries Rack Planning Guide.
3. Install rack stabilizer brackets on all racks.
4. Prepare the rack for optional devices:
• Remove the side covers, if applicable.
• Remove the front and rear doors from all racks, if necessary.
• Attach expansion racks to a standard rack or to each other to form suites.
5. Install one or more optional devices.
Note: Install the heaviest devices in the bottom of the rack cabinet.
6. Complete the rack cabinet installation:
• Reinstall side covers on all racks or on the outermost racks in a suite.
• Reinstall front and rear doors on all racks cabinets.
If documentation updates are available, you can download them from the Lenovo website. The rack cabinet
might have features that are not described in the documentation that comes with the rack, and the
documentation might be updated occasionally to include information about those features, or technical
updates might be available to provide additional information that is not included in the rack documentation.
Changes are made periodically to the website.
The Lenovo Documentation CD
The Lenovo Documentation CD contains documentation for the rack cabinet in Portable Document Format
(PDF) and includes the Lenovo Documentation Browser to help you find information quickly.
Hardware and software requirements
The Documentation CD requires the following minimum hardware and software:
• MicrosoftWindows XP, Windows 2000, or Red Hat Linux
• 100 MHz microprocessor
• 32 MB of RAM
• Adobe Acrobat Reader 3.0 (or later) or xpdf, which comes with Linux operating systems
Using the Documentation Browser
Use the Documentation Browser to browse the contents of the CD, read brief descriptions of the documents,
and view documents, using Adobe Acrobat Reader or xpdf. The Documentation Browser automatically
detects the regional settings in your computer and displays the documents in the language for that region (if
© Copyright Lenovo 2001, 2010 1

available). If a document is not available in the language for that region, the English-language version is
displayed.
Use one of the following procedures to start the Documentation Browser:
• If Autostart is enabled, insert the CD into the CD or DVD drive. The Documentation Browser starts
automatically.
• If Autostart is disabled or is not enabled for all users, use one of the following procedures:
– If you are using a Windows operating system, insert the CD into the CD or DVD drive and click Start -->
Run. In the Open field, type
e:\win32.bat
where e is the drive letter of the CD or DVD drive, and click OK.
– If you are using Red Hat Linux, insert the CD into the CD or DVD drive; then, run the following
command from the /mnt/cdrom directory:
sh runlinux.sh
Select the rack cabinet from the Product menu. The Available Topics list displays all the documents for the
rack. Some documents might be in folders. A plus sign (+) indicates each folder or document that has
additional documents under it. Click the plus sign to display the additional documents.
When you select a document, a description of the document is displayed under Topic Description. To select
more than one document, press and hold the Ctrl key while you select the documents. Click View Book to
view the selected document or documents in Acrobat Reader or xpdf. If you selected more than one
document, all the selected documents are opened in Acrobat Reader or xpdf.
To search all the documents, type a word or word string in the Search field and click Search. The
documents in which the word or word string appears are listed in order of the most occurrences. Click a
document to view it, and press Crtl+F to use the Acrobat search function, or press Alt+F to use the xpdf
search function within the document.
Click Help for detailed information about using the Documentation Browser.
Notices and statements in this document
The caution and danger statements in this document are also in the multilingual Lenovo Rack Safety
Information document that comes with the rack cabinet. Each statement is numbered for reference to the
corresponding statement in your language in the Rack Safety Information document.
The following notices and statements are used in this document:
• Note: These notices provide important tips, guidance, or advice.
• Important: These notices provide information or advice that might help you avoid inconvenient or
problem situations.
• Attention: These notices indicate potential damage to programs, devices, or data. An attention notice is
placed just before the instruction or situation in which damage might occur.
• Caution: These statements indicate situations that can be potentially hazardous to you. A caution
statement is placed just before the description of a potentially hazardous procedure step or situation.
• Danger: These statements indicate situations that can be potentially lethal or extremely hazardous to you.
A danger statement is placed just before the description of a potentially lethal or extremely hazardous
procedure step or situation.
2
Lenovo 42U Enterprise Primary Rack and 42U Enterprise Expansion Rack Installation Guide
 Loading...