

Lenovo 20074CU, 20074EU, 200763U, 2007G3U, 8741C5U User Manual
...
ThinkVantage Access Connections 4.1
User’s Gui d e


ThinkVantage Access Connections 4.1
User’s Gui d e

Note: Before using this information and the product it supports, read the general information in Appendix D,
“Notices,” on page 81.
First Edition (January 2006)
© Copyright Lenovo 2006.
Portions © Copyright International Business Machines Corporation 2006.
All rights reserved.
U.S. GOVERNMENT USERS – RESTRICTED RIGHTS: Our products and/or services are provided with
RESTRICTED RIGHTS. Use, duplication or disclosure by the Government is subject to the GSA ADP Schedule
contract with Lenovo Group Limited, if any, or the standard terms of this commercial license, or if the agency is
unable to accept this Program under these terms, then we provide this Program under the provisions set forth in
Commercial Computer Software–Restricted Rights at FAR 52.227-19, when applicable, or under Rights in
Data-General, FAR 52.227.14 (Alternate III).

Contents
Figures . . . . . . . . . . . . . . . . . . . . . . . . . . . .v
About this book . . . . . . . . . . . . . . . . . . . . . . . . vii
How this book is organized . . . . . . . . . . . . . . . . . . . . vii
Notices used in this book . . . . . . . . . . . . . . . . . . . . . vii
Syntax conventions that are used in this book . . . . . . . . . . . . . vii
ThinkVantage Access Connections resources on the World Wide Web . . . . viii
Chapter 1. Introducing Access Connections . . . . . . . . . . . . .1
System requirements . . . . . . . . . . . . . . . . . . . . . . .1
Supported operating systems . . . . . . . . . . . . . . . . . . .1
New features in Access Connections v.4.1 . . . . . . . . . . . . . . .1
Updating Access Connections . . . . . . . . . . . . . . . . . . .2
Chapter 2. Using location profiles . . . . . . . . . . . . . . . . .3
Creating a location profile . . . . . . . . . . . . . . . . . . . . .3
Additional settings . . . . . . . . . . . . . . . . . . . . . . .25
Wireless security settings . . . . . . . . . . . . . . . . . . . .28
Editing VPN settings . . . . . . . . . . . . . . . . . . . . . .40
Managing location profiles . . . . . . . . . . . . . . . . . . . . .42
Using shortcut icons . . . . . . . . . . . . . . . . . . . . . .43
Connecting to a network . . . . . . . . . . . . . . . . . . . . .44
Connecting to a wireless network . . . . . . . . . . . . . . . . .45
Switching location profiles automatically . . . . . . . . . . . . . . . .47
Viewing the connection status . . . . . . . . . . . . . . . . . . .48
Diagnostics . . . . . . . . . . . . . . . . . . . . . . . . . .53
Chapter 3. Configuration options . . . . . . . . . . . . . . . . .55
Network global settings . . . . . . . . . . . . . . . . . . . . . .55
Notification global settings . . . . . . . . . . . . . . . . . . . . .57
User preferences . . . . . . . . . . . . . . . . . . . . . . . .59
Toolbar options . . . . . . . . . . . . . . . . . . . . . . . . .60
Peer-to-peer options . . . . . . . . . . . . . . . . . . . . . . .61
Chapter 4. Using a wireless WAN connection . . . . . . . . . . . .63
Creating and applying a wireless WAN profile . . . . . . . . . . . . .63
Using Short Message Service (SMS) interface . . . . . . . . . . . . .64
Chapter 5. Introducing a peer-to-peer connection . . . . . . . . . . .65
Preparing the peer-to-peer connection . . . . . . . . . . . . . . . .65
Creating the peer-to-peer connection . . . . . . . . . . . . . . . . .68
Using peer-to-peer connection . . . . . . . . . . . . . . . . . . .71
Appendix A. Frequently asked questions . . . . . . . . . . . . . .73
Appendix B. Command line interface . . . . . . . . . . . . . . . .77
Appendix C. Getting help and technical assistance . . . . . . . . . .79
Before you call . . . . . . . . . . . . . . . . . . . . . . . . .79
Using the documentation . . . . . . . . . . . . . . . . . . . . .79
Getting help and information from the World Wide Web . . . . . . . . . .79
Appendix D. Notices . . . . . . . . . . . . . . . . . . . . . .81
© Lenovo 2006. Portions © IBM Corp. 2006. iii

Appendix E. Trademarks . . . . . . . . . . . . . . . . . . . . .83
Index . . . . . . . . . . . . . . . . . . . . . . . . . . . .85
iv ThinkVantage Access Connections 4.1: User’s Guide

Figures
1. Updating Access Connections . . . . . . . . . . . . . . . . . . . . . . . . . .2
2. Welcome to Access Connections window . . . . . . . . . . . . . . . . . . . . . .3
3. More Information window . . . . . . . . . . . . . . . . . . . . . . . . . . . .4
4. Access Connections main window—main menu . . . . . . . . . . . . . . . . . . . .4
5. Main menu—Locations . . . . . . . . . . . . . . . . . . . . . . . . . . . . .5
6. Profile wizard window . . . . . . . . . . . . . . . . . . . . . . . . . . . . .5
7. Profile wizard—Insert Profile Name . . . . . . . . . . . . . . . . . . . . . . . .6
8. Pull-down menu for Location icon . . . . . . . . . . . . . . . . . . . . . . . . .7
9. Pull-down menu for the type of network connection . . . . . . . . . . . . . . . . . .8
10. Create New Profile - Best Available Network . . . . . . . . . . . . . . . . . . . . .9
11. Create New Profile—Wired LAN (Ethernet) . . . . . . . . . . . . . . . . . . . . .10
12. Create New Profile—Wireless LAN (802.11) . . . . . . . . . . . . . . . . . . . . .11
13. Create New Profile—Wired Broadband (DSL or Cable Modem) . . . . . . . . . . . . . .12
14. Creating New Profile—Dial-up (modem or cellular phone) . . . . . . . . . . . . . . . .13
15. Creating New Profile—Wireless WAN . . . . . . . . . . . . . . . . . . . . . . .14
16. Authentication Properties window . . . . . . . . . . . . . . . . . . . . . . . . .15
17. Wireless network configuration window . . . . . . . . . . . . . . . . . . . . . . .16
18. Wireless security types . . . . . . . . . . . . . . . . . . . . . . . . . . . .17
19. Advanced Wireless Settings window . . . . . . . . . . . . . . . . . . . . . . . .18
20. Phonebook settings window . . . . . . . . . . . . . . . . . . . . . . . . . . .20
21. Enter Your DSL Account Details window . . . . . . . . . . . . . . . . . . . . . .21
22. Find my dialer program window . . . . . . . . . . . . . . . . . . . . . . . . .22
23. Choose Custom Dialer window . . . . . . . . . . . . . . . . . . . . . . . . . .23
24. Manual dialer setup window . . . . . . . . . . . . . . . . . . . . . . . . . . .24
25. Additional settings window . . . . . . . . . . . . . . . . . . . . . . . . . . .25
26. Security Settings window . . . . . . . . . . . . . . . . . . . . . . . . . . . .26
27. Add Programs window . . . . . . . . . . . . . . . . . . . . . . . . . . . . .26
28. TCP/IP Settings . . . . . . . . . . . . . . . . . . . . . . . . . . . . . . .27
29. Static WEP Settings window . . . . . . . . . . . . . . . . . . . . . . . . . .28
30. Wi-Fi Settings window . . . . . . . . . . . . . . . . . . . . . . . . . . . . .29
31. 802.1x Settings window . . . . . . . . . . . . . . . . . . . . . . . . . . . .30
32. 802.1x Settings—Access Connections window . . . . . . . . . . . . . . . . . . . .31
33. Select Certificate window . . . . . . . . . . . . . . . . . . . . . . . . . . . .32
34. LEAP Settings window . . . . . . . . . . . . . . . . . . . . . . . . . . . . .36
35. EAP-FAST Settings window . . . . . . . . . . . . . . . . . . . . . . . . . . .38
36. VPN settings—using an application provided by my company window . . . . . . . . . . .40
37. VPN settings—Manually set up a VPN connection window . . . . . . . . . . . . . . .41
38. Manage Location Profiles window . . . . . . . . . . . . . . . . . . . . . . . . .42
39. Manage Location Profiles window—Create Shortcut . . . . . . . . . . . . . . . . . .43
40. On-screen window . . . . . . . . . . . . . . . . . . . . . . . . . . . . . .44
41. Find Wireless Networks window . . . . . . . . . . . . . . . . . . . . . . . . .45
42. Find Wireless Networks window—detailed view . . . . . . . . . . . . . . . . . . .46
43. Automatic Location Switching window . . . . . . . . . . . . . . . . . . . . . . .47
44. Diagnostic Tools . . . . . . . . . . . . . . . . . . . . . . . . . . . . . . .53
45. Global Settings—Network tab . . . . . . . . . . . . . . . . . . . . . . . . . .56
46. Global Settings—Notification tab . . . . . . . . . . . . . . . . . . . . . . . . .58
47. User preferences . . . . . . . . . . . . . . . . . . . . . . . . . . . . . . .59
48. Customized toolbar . . . . . . . . . . . . . . . . . . . . . . . . . . . . . .60
49. Peer to Peer Options window . . . . . . . . . . . . . . . . . . . . . . . . . .61
50. Activation process wizard . . . . . . . . . . . . . . . . . . . . . . . . . . . .63
51. Windows Security . . . . . . . . . . . . . . . . . . . . . . . . . . . . . .65
52. Windows Firewall window . . . . . . . . . . . . . . . . . . . . . . . . . . .66
53. Add a Program window . . . . . . . . . . . . . . . . . . . . . . . . . . . .67
© Lenovo 2006. Portions © IBM Corp. 2006. v

54. Main AC window—Location Profile tab . . . . . . . . . . . . . . . . . . . . . . .68
55. Peer to Peer Community tab—Join button . . . . . . . . . . . . . . . . . . . . .69
56. NetMeeting window . . . . . . . . . . . . . . . . . . . . . . . . . . . . . .70
57. Peer to Peer community tab—Leave button . . . . . . . . . . . . . . . . . . . . .71
vi ThinkVantage Access Connections 4.1: User’s Guide

About this book
This book provides information about using ThinkVantage
v.4.1.
How this book is organized
Chapter 1, “Introducing Access Connections,” on page 1 contains an overview of
the Access Connections application and its features.
Chapter 2, “Using location profiles,” on page 3 contains instructions for creating
profiles and making a network connection.
Chapter 3, “Configuration options,” on page 55 contains instructions for configuring
various options.
Chapter 4, “Using a wireless WAN connection,” on page 63 contains instructions for
using a wireless WAN connection.
Chapter 5, “Introducing a peer-to-peer connection,” on page 65 contains instructions
for using a peer-to-peer connection.
®
Access Connections
Appendix A, “Frequently asked questions,” on page 73 contains answers to
frequently asked questions about Access Connections.
Appendix B, “Command line interface,” on page 77 contains a list of commands that
can be entered from the command line.
Appendix C, “Getting help and technical assistance,” on page 79 contains
information about accessing ThinkVantage Support Web sites for help and technical
assistance.
Appendix D, “Notices,” on page 81 contains product notices and trademarks.
Notices used in this book
This book contains the following notices designed to highlight key information:
v Notes: These notices provide important tips, guidance, or advice.
v Important: These notices provide information or advice that might help you avoid
inconvenience or difficulty.
v Attention: These notices warn of possible damage to programs, devices, or
data. An attention notice is placed just before an instruction or situation that
might lead to damage.
Syntax conventions that are used in this book
The syntax in this book adheres to the following conventions:
v Commands are shown in lowercase letters.
v Variables are shown in italics and explained immediately afterward.
v Optional commands or variables are enclosed in brackets.
v Where you must type one of two or more parameters, the parameters are
separated by vertical bars.
© Lenovo 2006. Portions © IBM Corp. 2006. vii

v Default values are underlined.
v Repeatable parameters are enclosed in braces.
ThinkVantage Access Connections resources on the World Wide Web
The following Web pages provide resources for understanding, using, and
troubleshooting Access Connections and other systems-management tools.
ThinkVantage Access Connections home page
http://www.pc.ibm.com/us/think/thinkvantagetech/accessconnections.html
Go to this Web page to download the latest Access Connections software
and documentation.
ThinkVantage Personal Computing Support - ThinkVantage Technologies page
http://www.pc.ibm.com/us/think/thinkvantagetech.html
Consult this Web page for information about ThinkVantage Technologies.
ThinkVantage Personal Computing Support page
http://www.lenovo.com/think/support
Go to this Web page for access to the ThinkVantage Personal Computing
Support Web site.
viii ThinkVantage Access Connections 4.1: User’s Guide

Chapter 1. Introducing Access Connections
Access Connections is a connectivity assistant program for your ThinkPad
computer that enables you to create and manage location profiles. Each location
profile stores all of the network and Internet configuration settings that are needed
to connect to a network infrastructure from a specific location such as home or
work. The location profile also enables users to specify different default printers,
default home pages for Internet Explorer and the Firefox Browser, security settings
for specific locations, and to start different applications automatically in different
locations.
By switching between location profiles, when moving their computers from place to
place, users can quickly and easily connect to a network without having to manually
reconfigure settings or restart the computer each time. Access Connections also
enables the user to view and connect to Bluetooth devices, and to set Bluetooth
security options. It enables users to switch network and Internet settings quickly by
selecting a location profile.
The network connection can be made using a modem, a wired network adapter
(Ethernet), a broadband device (Digital Subscriber Line (DSL), cable modem, or
Integrated Services Digital Network (ISDN), satellite connection devices, a wireless
LAN or a wireless WAN adapter. Virtual Private Networking (VPN) connections are
also supported.
®
System requirements
Before installing Access Connections, you must consider where it will be installed
and what network profiles you will want to create. The following is a list of system
considerations and limitations that must be considered before installing Access
Connections.
Supported operating systems
Operating systems supported:
v Windows 2000
v Windows XP
Access
Connections is language-independent, that is can be used with any
language operating system.
New features in Access Connections v.4.1
Access Connections v.4.1 includes the following new features and improvements:
v Peer-to-peer connection
v Support for Sierra Wireless 1xEV-DO Network Adapter for Verizon Wireless WAN
service
v Support for Vodafone HSDPA/WCDMA Communication Manager software.
Note: For WAN connection service, Access Connections provides an integration
v Support for Firefox Internet browser
v New Mini-PCI cards supported
© Lenovo 2006. Portions © IBM Corp. 2006. 1
with WAN communication software developed by Vodafone. Yo u can
specify in the WAN profile that this application software is to be launched.
– Intel Pro/Wireless 3945 ABG Wireless LAN adapter
– Broadcomm 4318/4311 Wireless LAN Adapter
Notes on use of Access Connections when using Broadcomm 4318/4311
Wireless LAN adapter:
1. Limited support is offered on Windows XP. For access to it, enable
Windows Zero Configuration Service.
2. Find Wireless Network and Peer to Peer Community features are not
supported.
3. To configure wireless connection go to the Windows XP wireless network
setup menu.
4. Access Connections v.4.1 supports only wireless radio control and signal
status display.
Updated easy-to-use graphic user interface
v
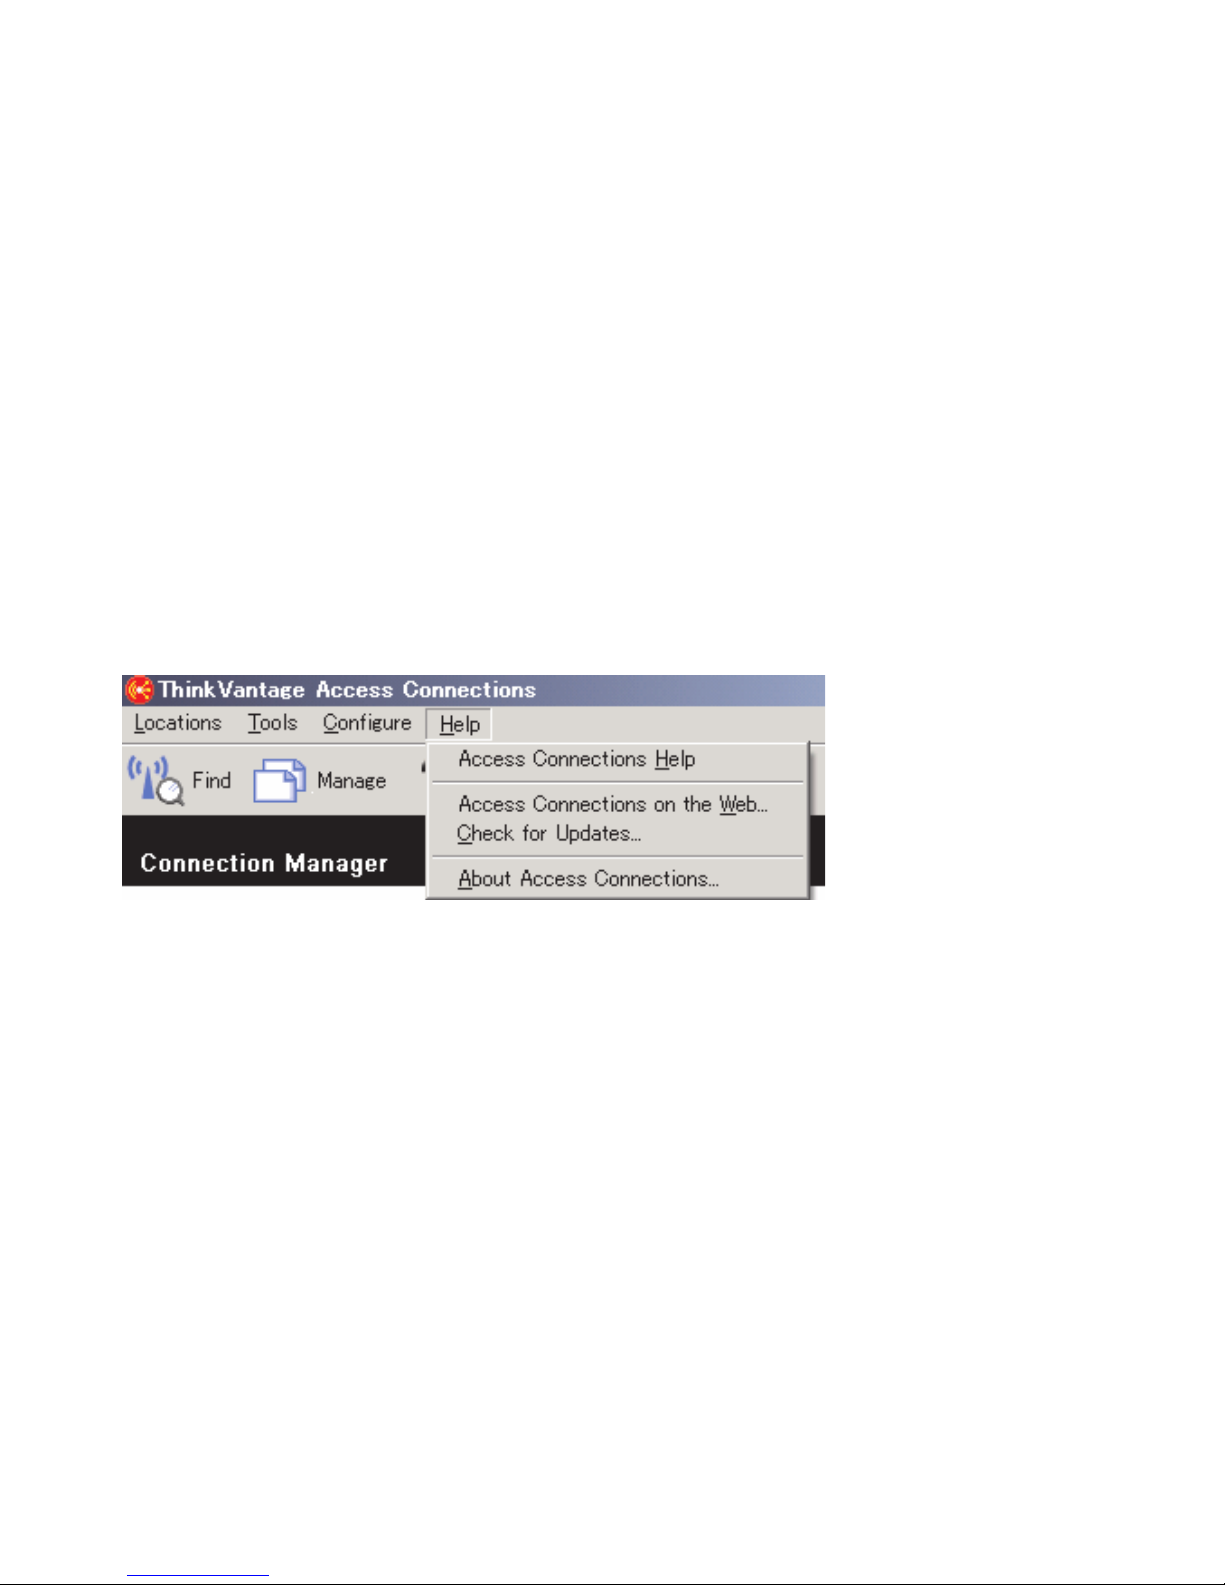
Updating Access Connections
Access Connections can check whether a version later than the one you have is
offered on the support web site. If updated version is available, Access Connections
will download and install it automatically. To enable this feature, go to the main tool
bar and select Help. On the pop-up menu click Check for Updates.
Figure 1. Updating Access Connections
2 ThinkVantage Access Connections 4.1: User’s Guide

Chapter 2. Using location profiles
ThinkVantage Access Connections is a software utility that manages your network
connectivity at multiple locations through location profiles. A location profile stores
the network configuration required to connect to a desired network, along with
location-specific settings such as your browser home page, proxy configuration,
firewall status, file and printer sharing, and default printer. By switching between
location profiles as you move your computer from place to place, Access
Connections can quickly and easily connect to a network with no need for you to
reconfigure network settings manually.
Creating a location profile
A location profile defines all of the settings required to establish a connection to a
given network, along with other settings that are location-specific, such as the
default printer and the browser settings. Access Connections provides a profile
wizard that helps you create location profiles for networks of different types.
To create a new location profile, do the following:
1. Start Access Connections. If this is your first time to access Access
Connections, the Welcome to Access Connections window is displayed.
Figure 2. Welcome to Access Connections window
© Lenovo 2006. Portions © IBM Corp. 2006. 3
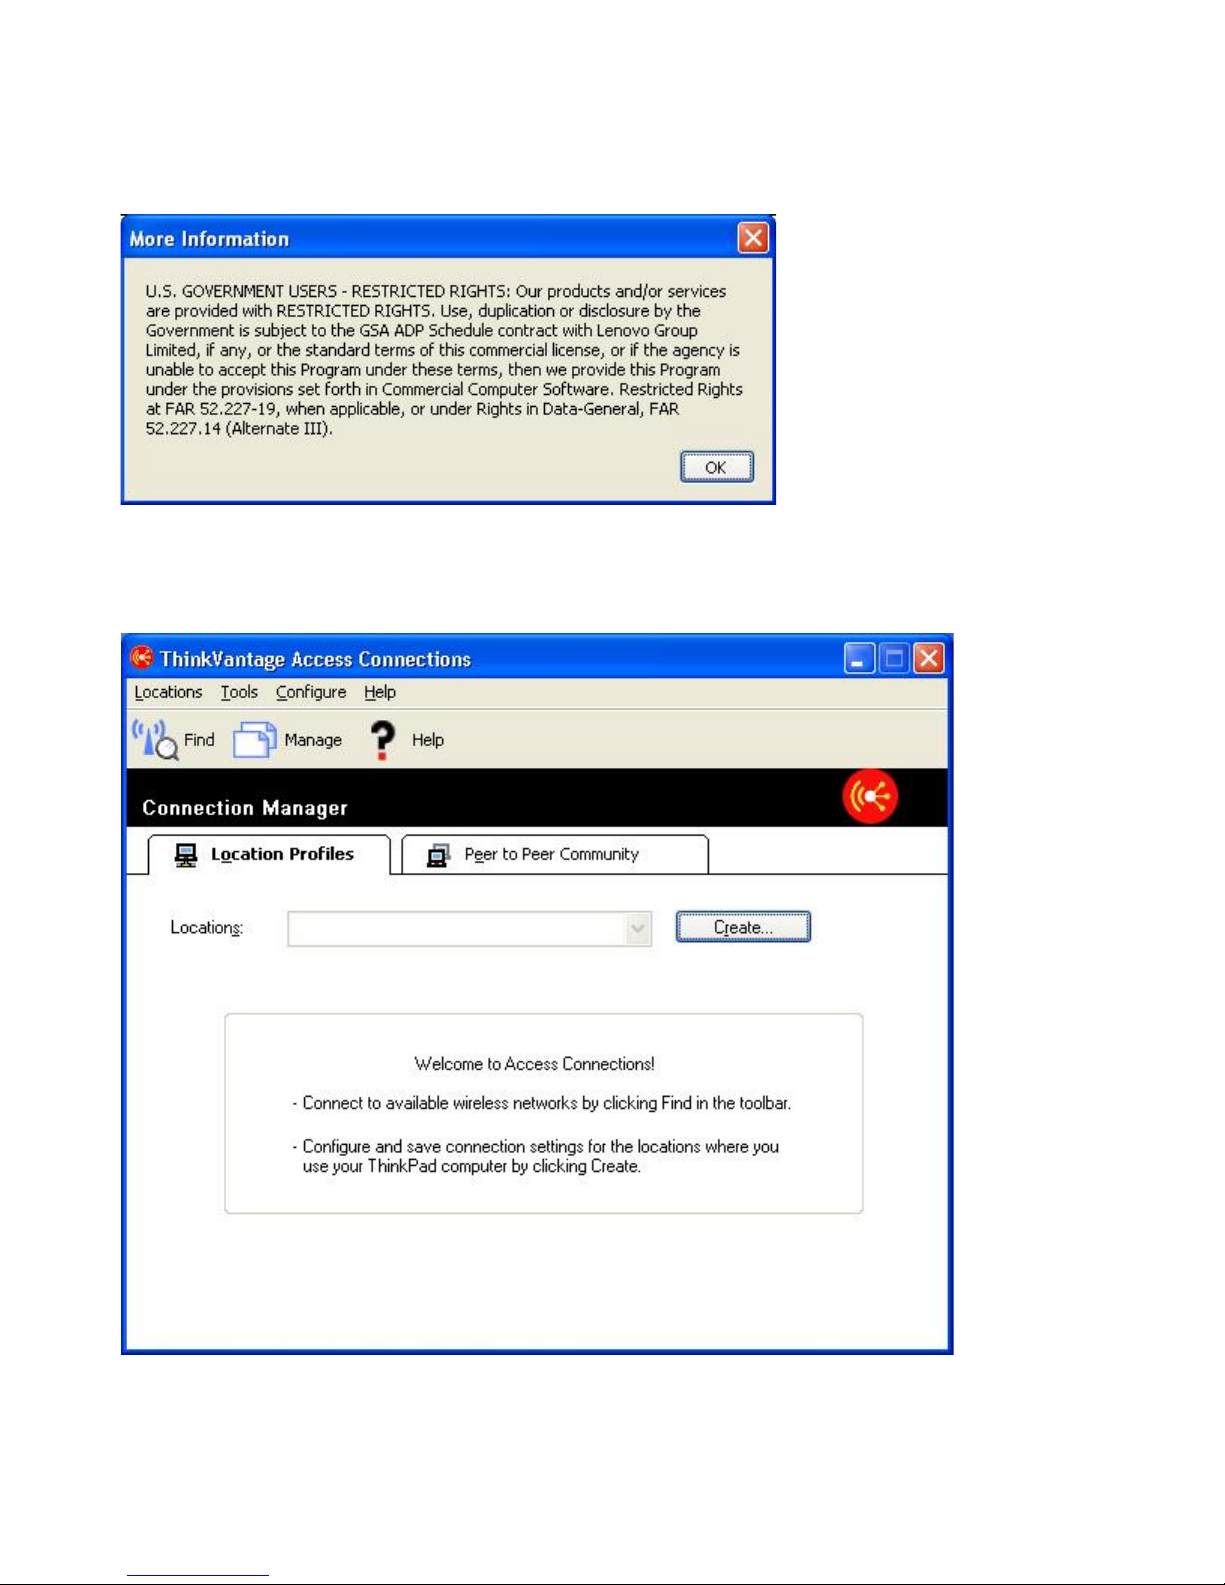
To display more details about the copyright statement, press More
Information.
Figure 3. More Information window
2. Press OK. The main window opens.
Figure 4. Access Connections main window—main menu
4 ThinkVantage Access Connections 4.1: User’s Guide

3. On the toolbar, click Locations.
Figure 5. Main menu—Locations
On the popup, click Create New Profile. The profile wizard starts.
Figure 6. Profile wizard window
Chapter 2. Using location profiles 5
4. Insert the profile name. It may be the physical location of the network or any
other easily recognizable name.
Figure 7. Profile wizard—Insert Profile Name
6 ThinkVantage Access Connections 4.1: User’s Guide
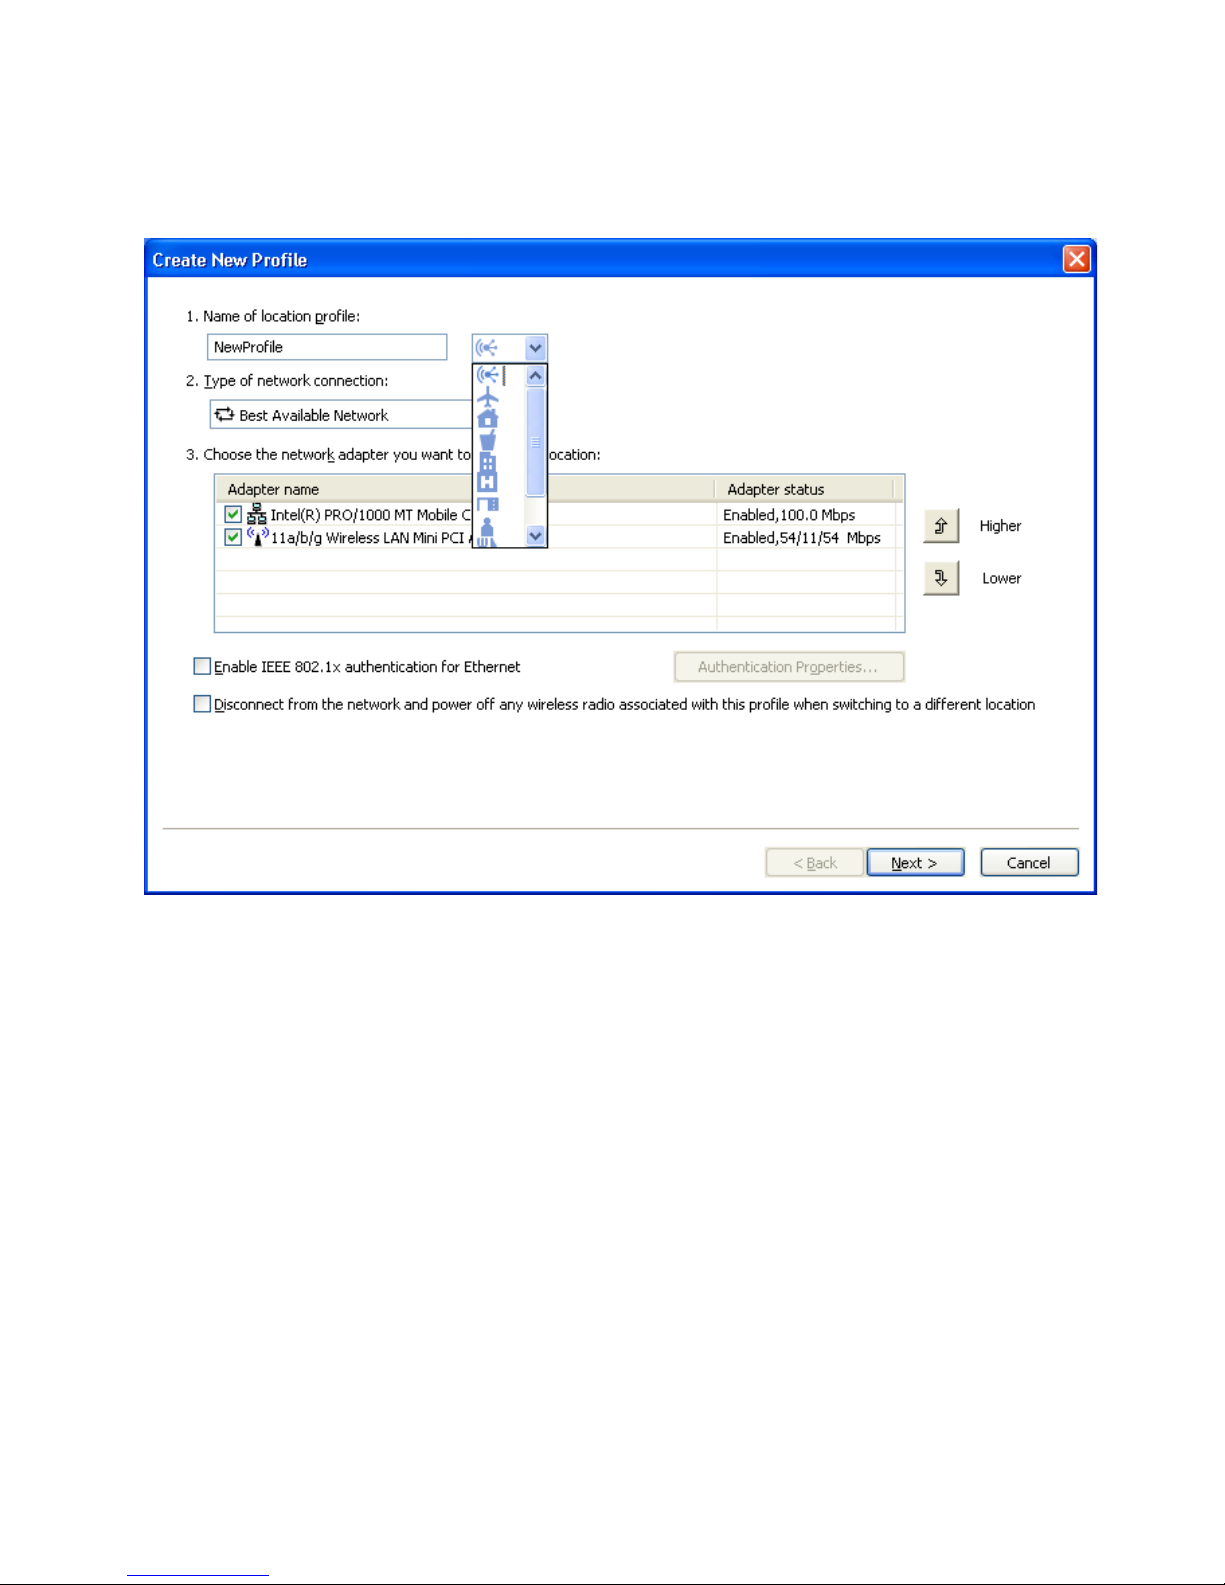
For any profile created, you can also select one of the location icons that
Access Connections provides for home, office, airport, hotspot, hotel , train, or
meeting area.
Figure 8. Pull-down menu for Location icon
Chapter 2. Using location profiles 7
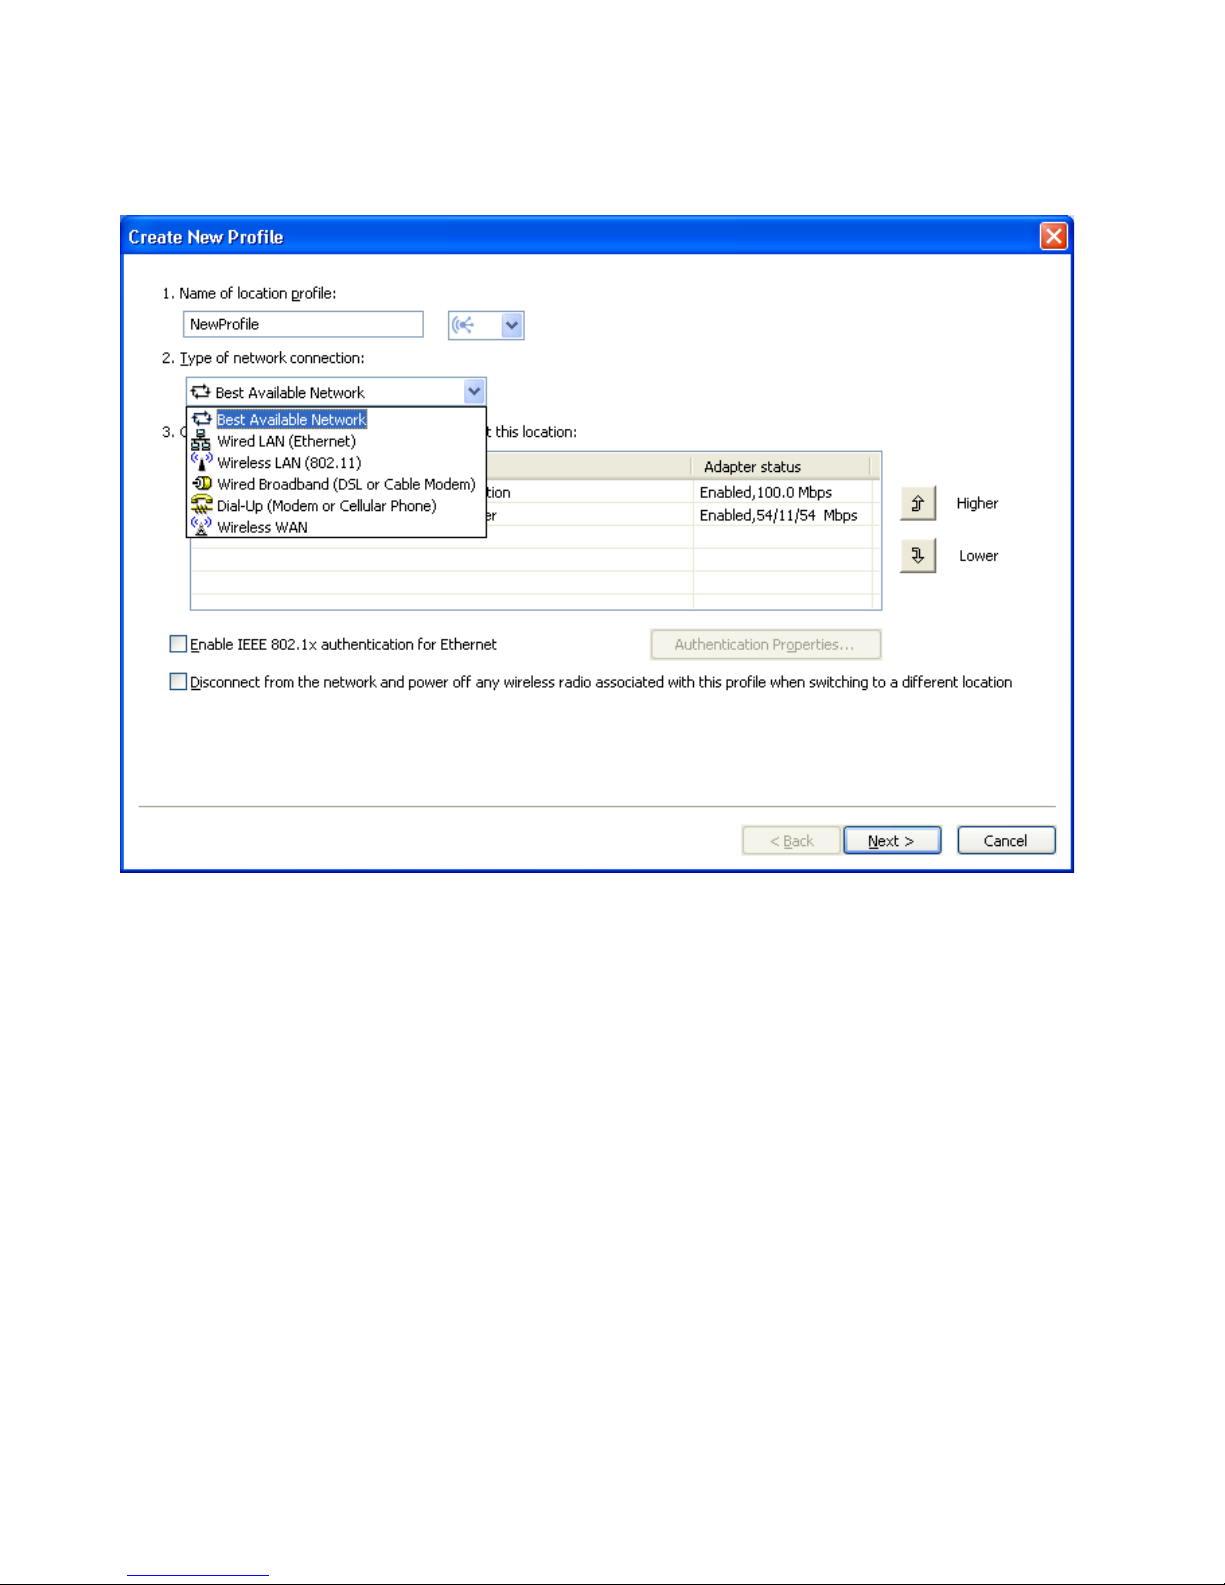
5. Select the type of network connection. Yo u can select any of the types listed
on the screen below:
Figure 9. Pull-down menu for the type of network connection
8 ThinkVantage Access Connections 4.1: User’s Guide

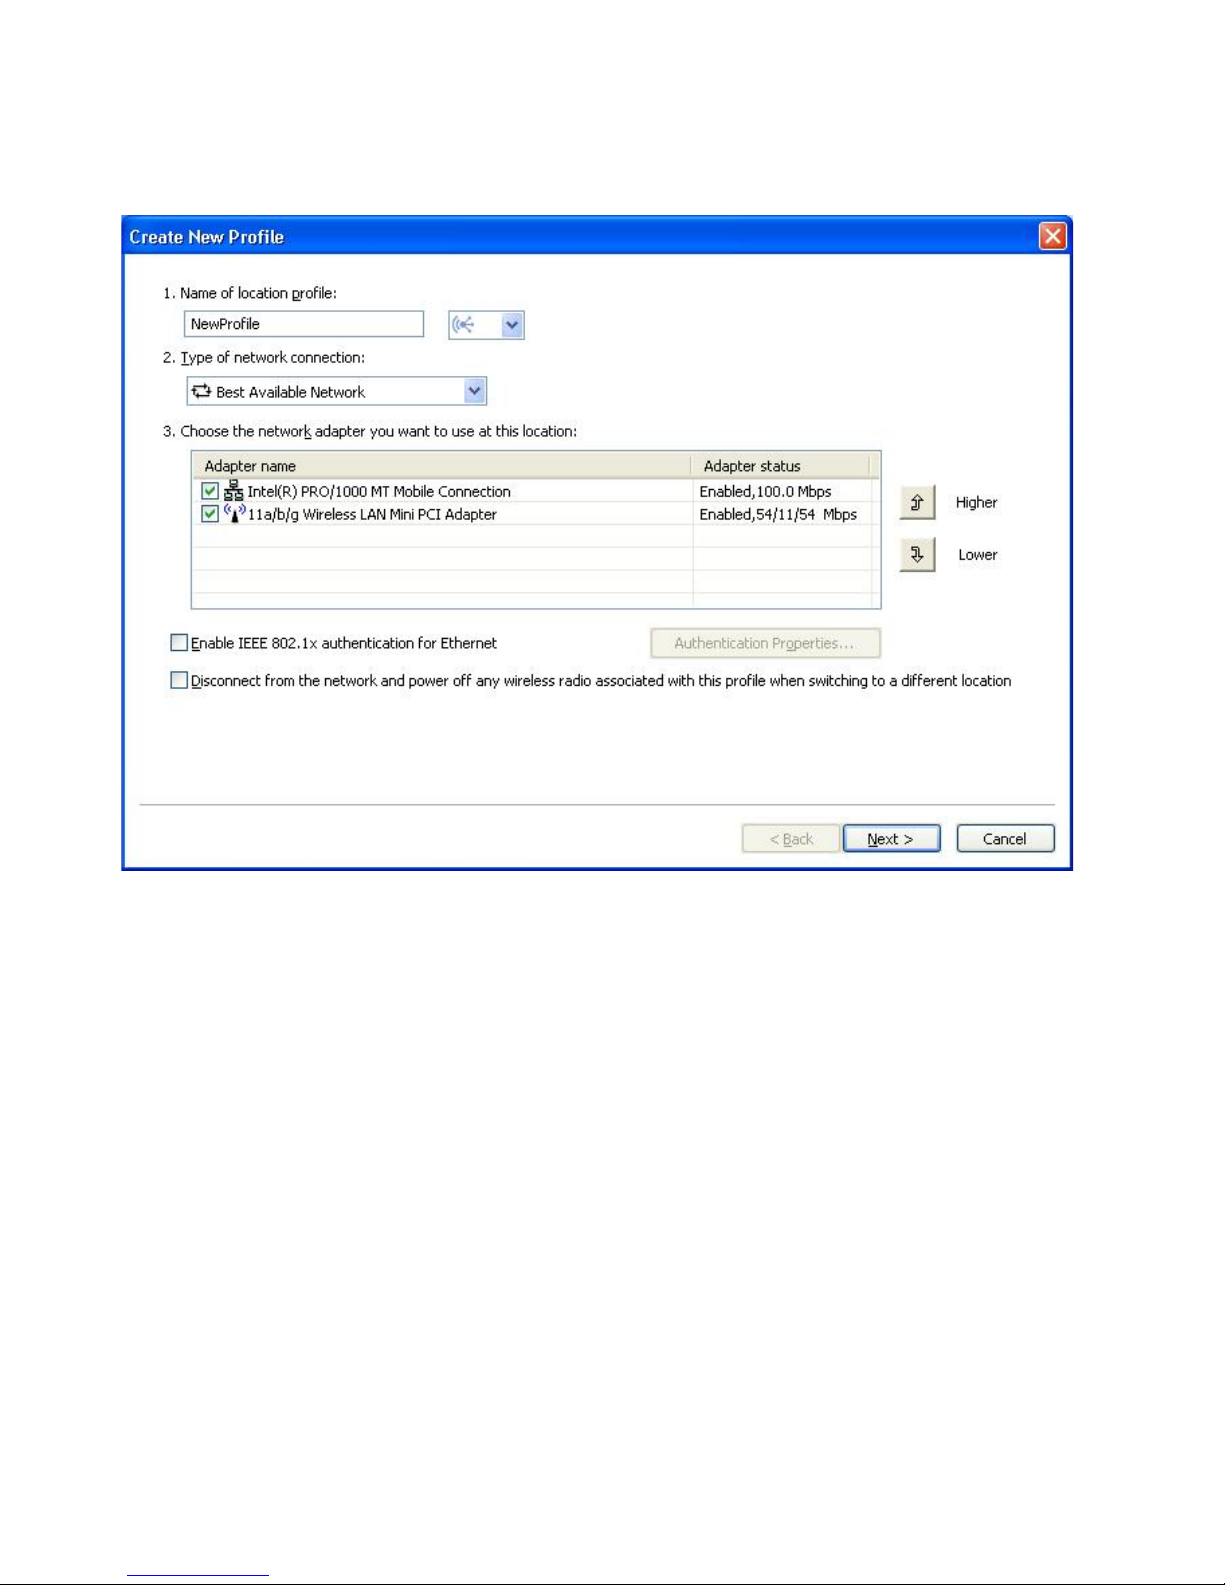
Best Available Network
Choose this type of network connection to create a profile that will
automatically select either a wired Ethernet network or a wireless
802.11 networks at the same location. This capability is useful when
you move frequently within a location - for instance, between a wired
connection at your desk and a wireless LAN connection elsewhere in
the same building. Access Connections will automatically determine
which adapters in your computer support this type of network
connection, and show them in the table. Choose all of the adapters
you want to use. When more than one network adapter has access to
a network at this location, Access Connections will attempt to connect,
using the adapter highest in the list first. To change the priorities for
connections, select an adapter from the table and then click Higher or
Lower.
Figure 10. Create New Profile - Best Available Network
Chapter 2. Using location profiles 9
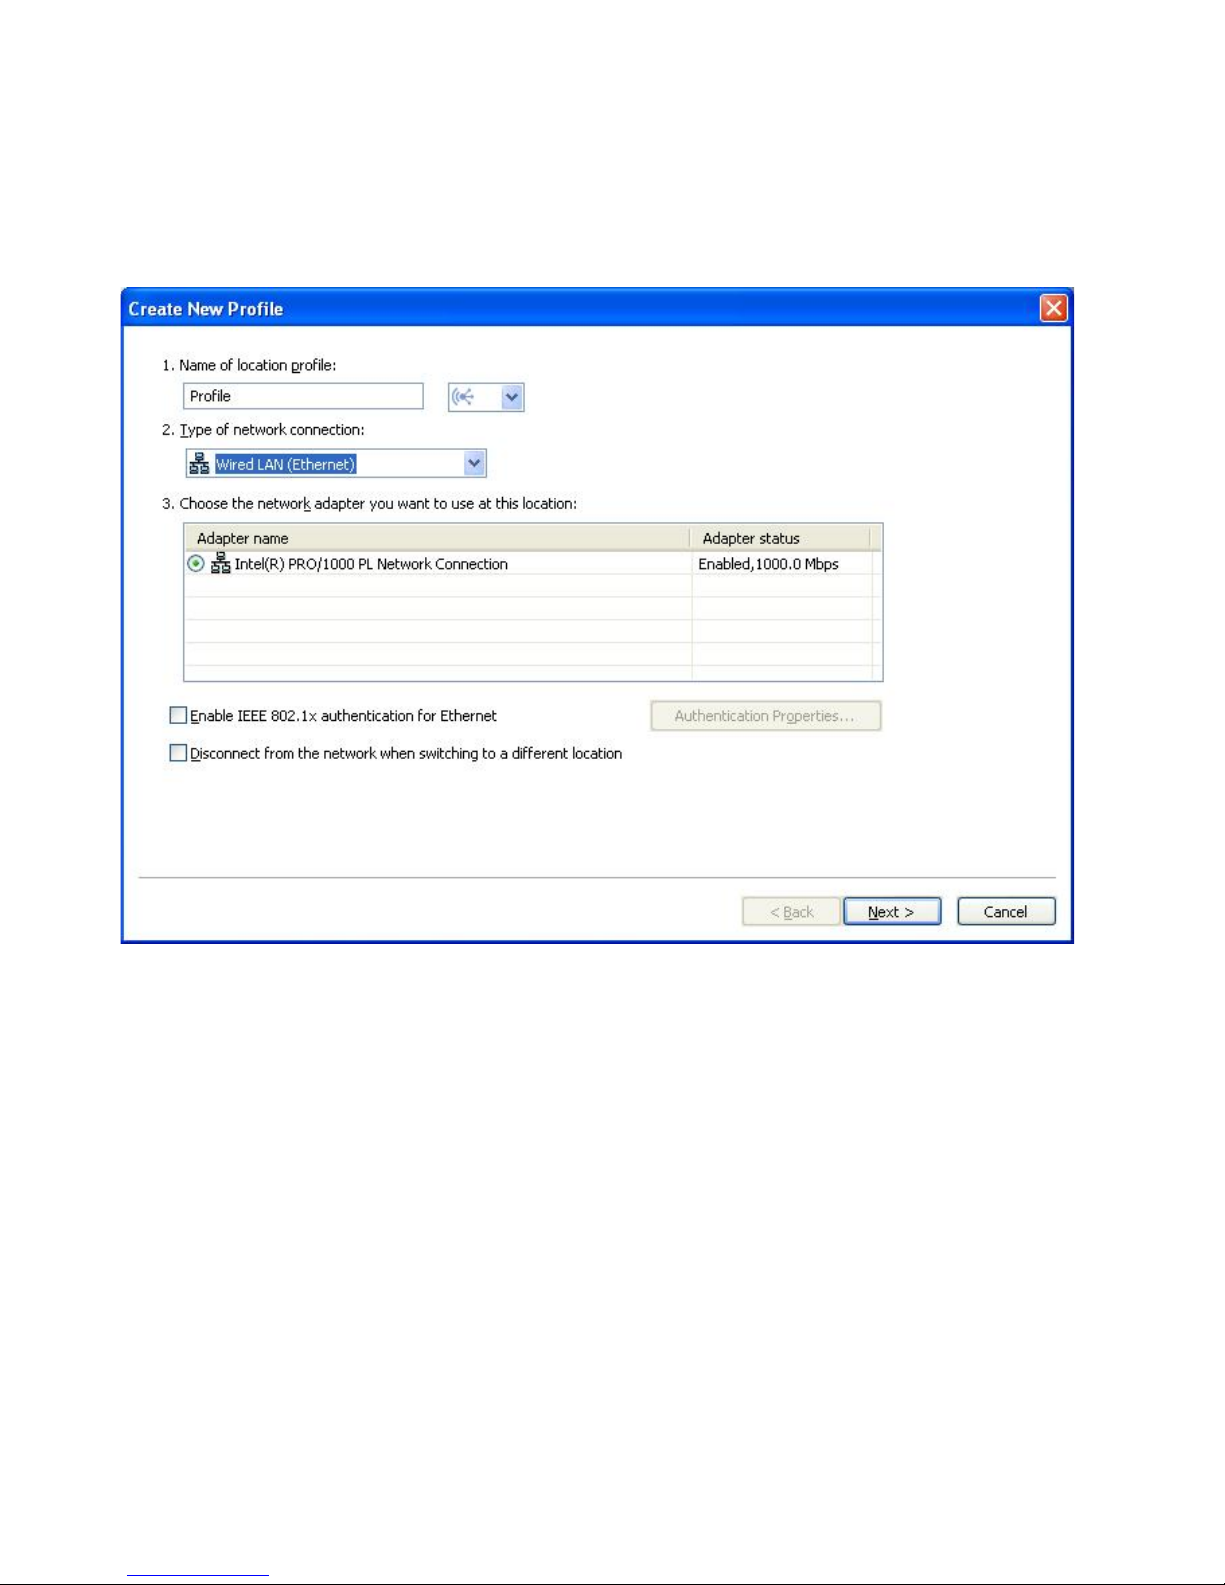
Wired LAN (Ethernet)
Choose this type of network connection if the profile will be used only
to connect to a Wired LAN (Ethernet). Access Connections will
automatically determine which adapters in your computer support this
type of network connection, and show them in the table.
Figure 11. Create New Profile—Wired LAN (Ethernet)
10 ThinkVantage Access Connections 4.1: User’s Guide
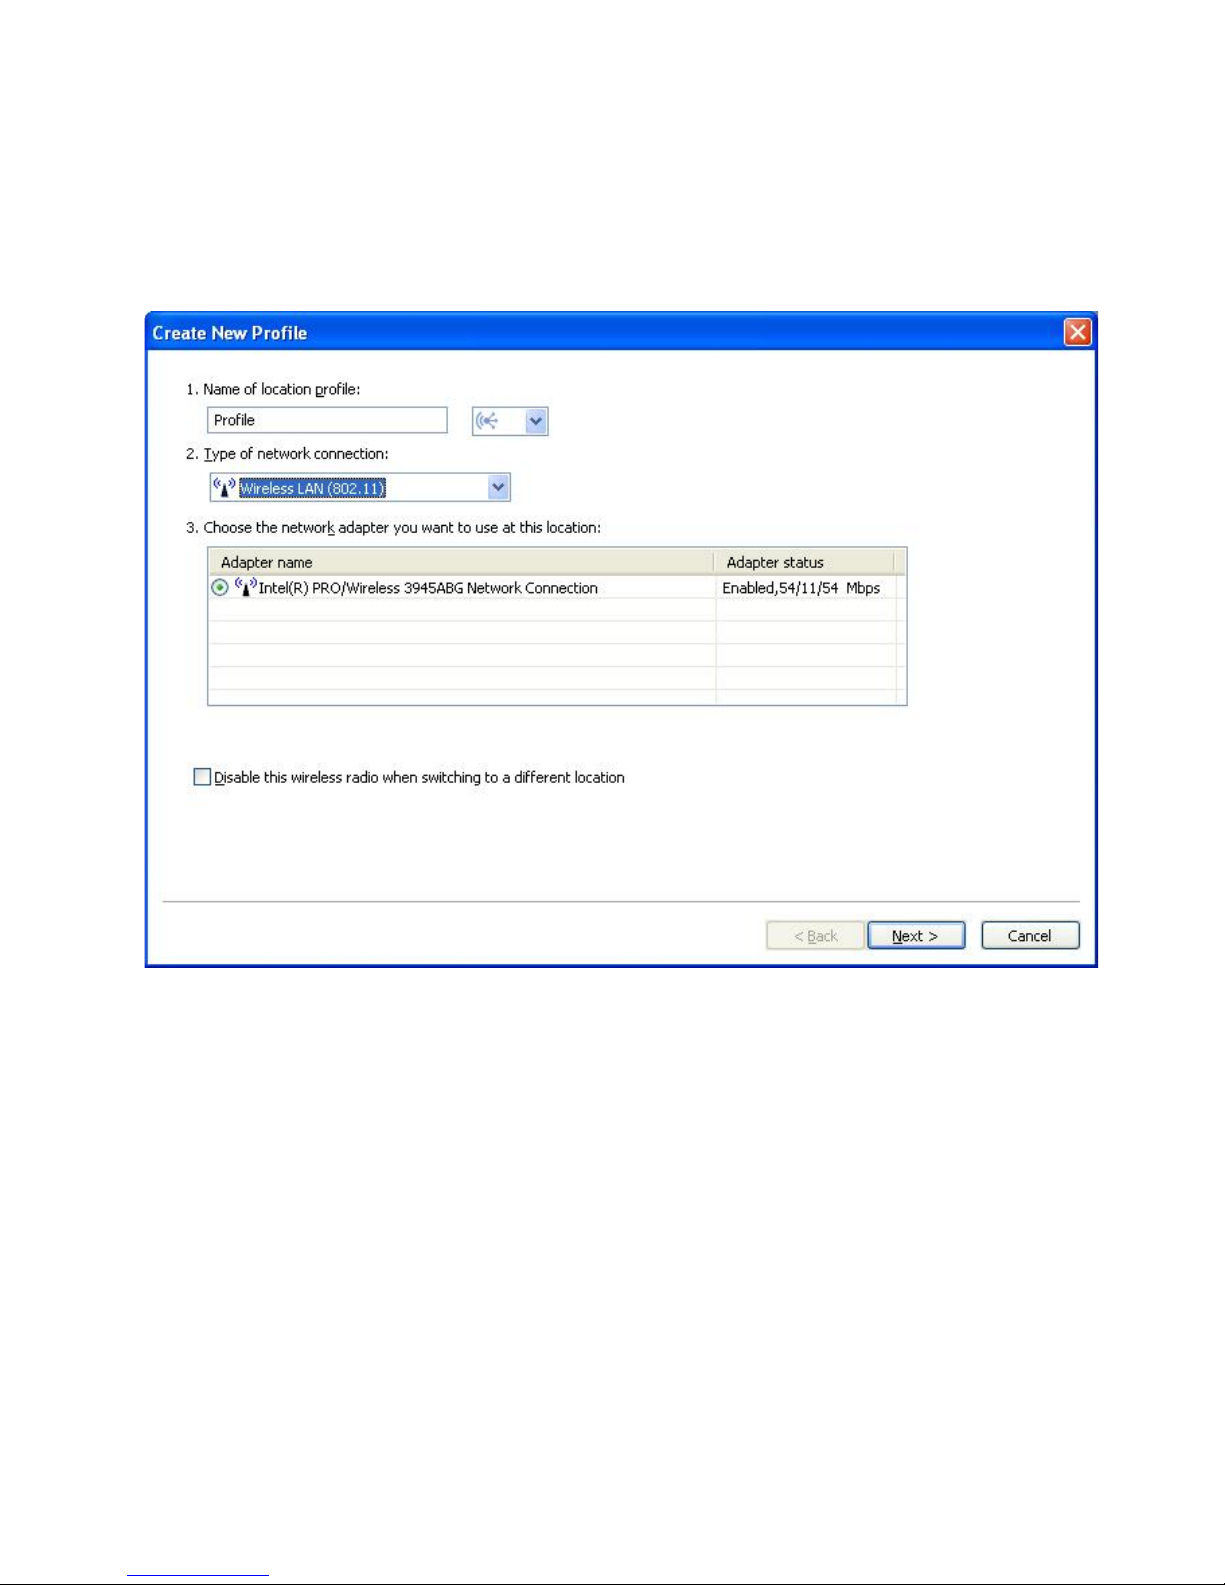
Wireless LAN (802.11)
Choose this type of network connection if the profile will be used to
connect to an 802.11 a, b, or g wireless LAN only. Access Connections
will automatically determine which adapters in your computer support
this type of network connection, and show them in the table. You can
configure the settings for authentication and encryption.
Figure 12. Create New Profile—Wireless LAN (802.11)
Chapter 2. Using location profiles 11
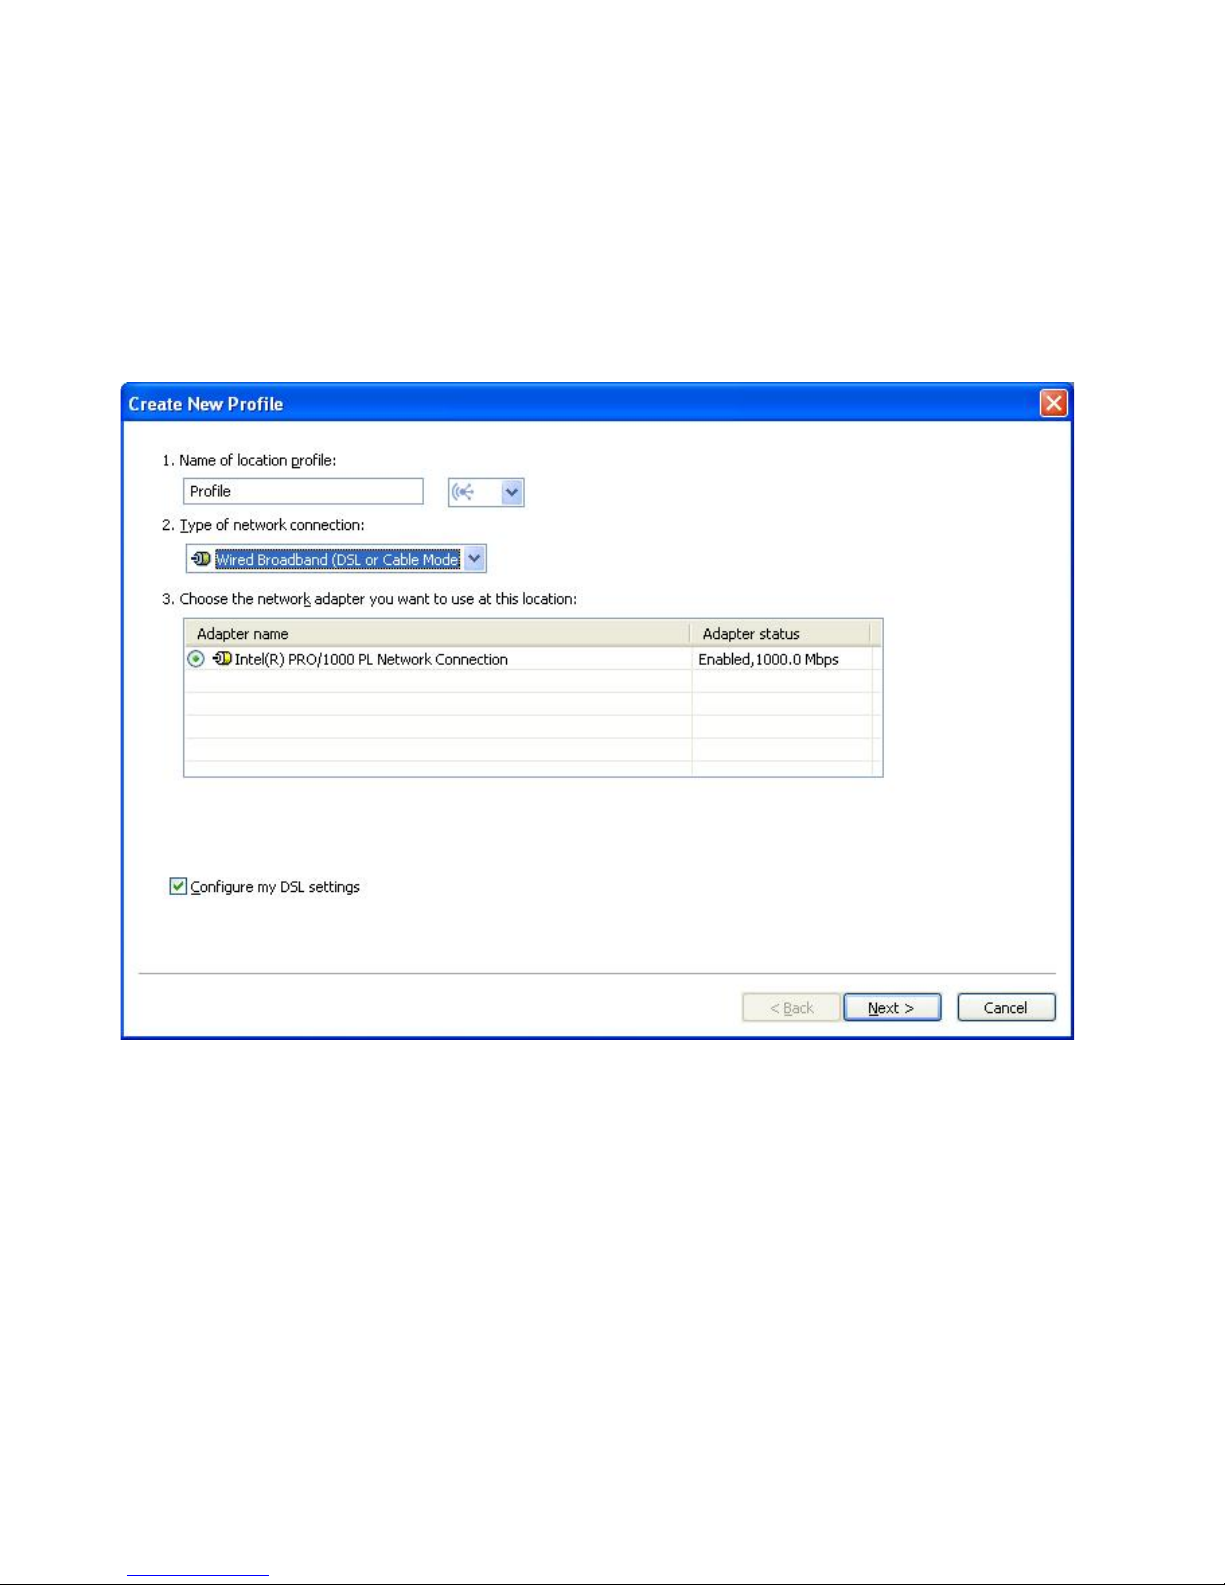
Wired Broadband (DSL or Cable Modem)
Choose this type of network connection if the profile will be used only
to connect to wired broadband. The broadband connections are DSL,
cable modem, and ISDN. Typically, your computer will connect to the
broadband network through an Ethernet adapter. Access Connections
will automatically determine which adapters in your computer support
this type of network connection, and show them in the table. Choose
the one you want to use. If your broadband connection is DSL, you
also must select Configure my DSL settings.
Figure 13. Create New Profile—Wired Broadband (DSL or Cable Modem)
12 ThinkVantage Access Connections 4.1: User’s Guide
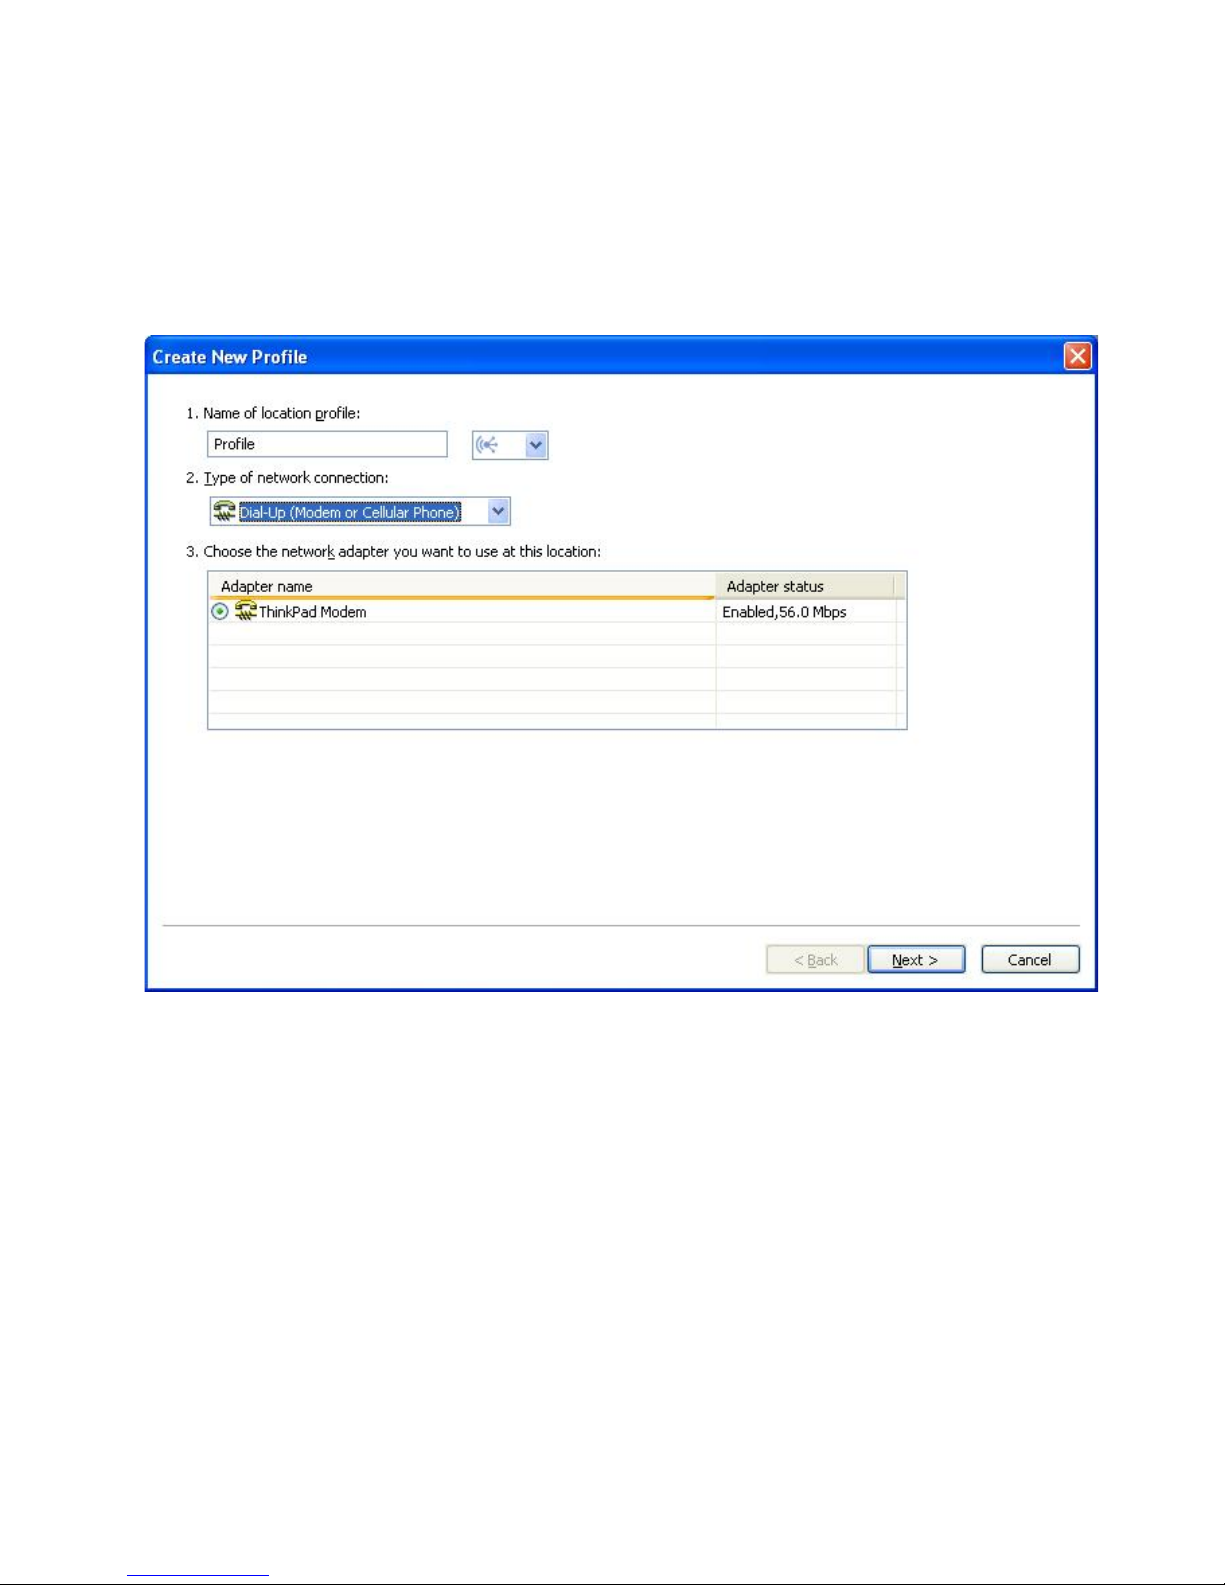
Dial-up (modem or cellular phone)
Choose this type of network connection if the profile will be used only
to connect to dial-up. Examples of dial-up connections are a standard
modem attached to a telephone line, and a Bluetooth modem
wirelessly connected to a cellular phone. Access Connections will
automatically determine which adapters in your computer support this
type of network connection, and show them in the table.
Figure 14. Creating New Profile—Dial-up (modem or cellular phone)
Chapter 2. Using location profiles 13
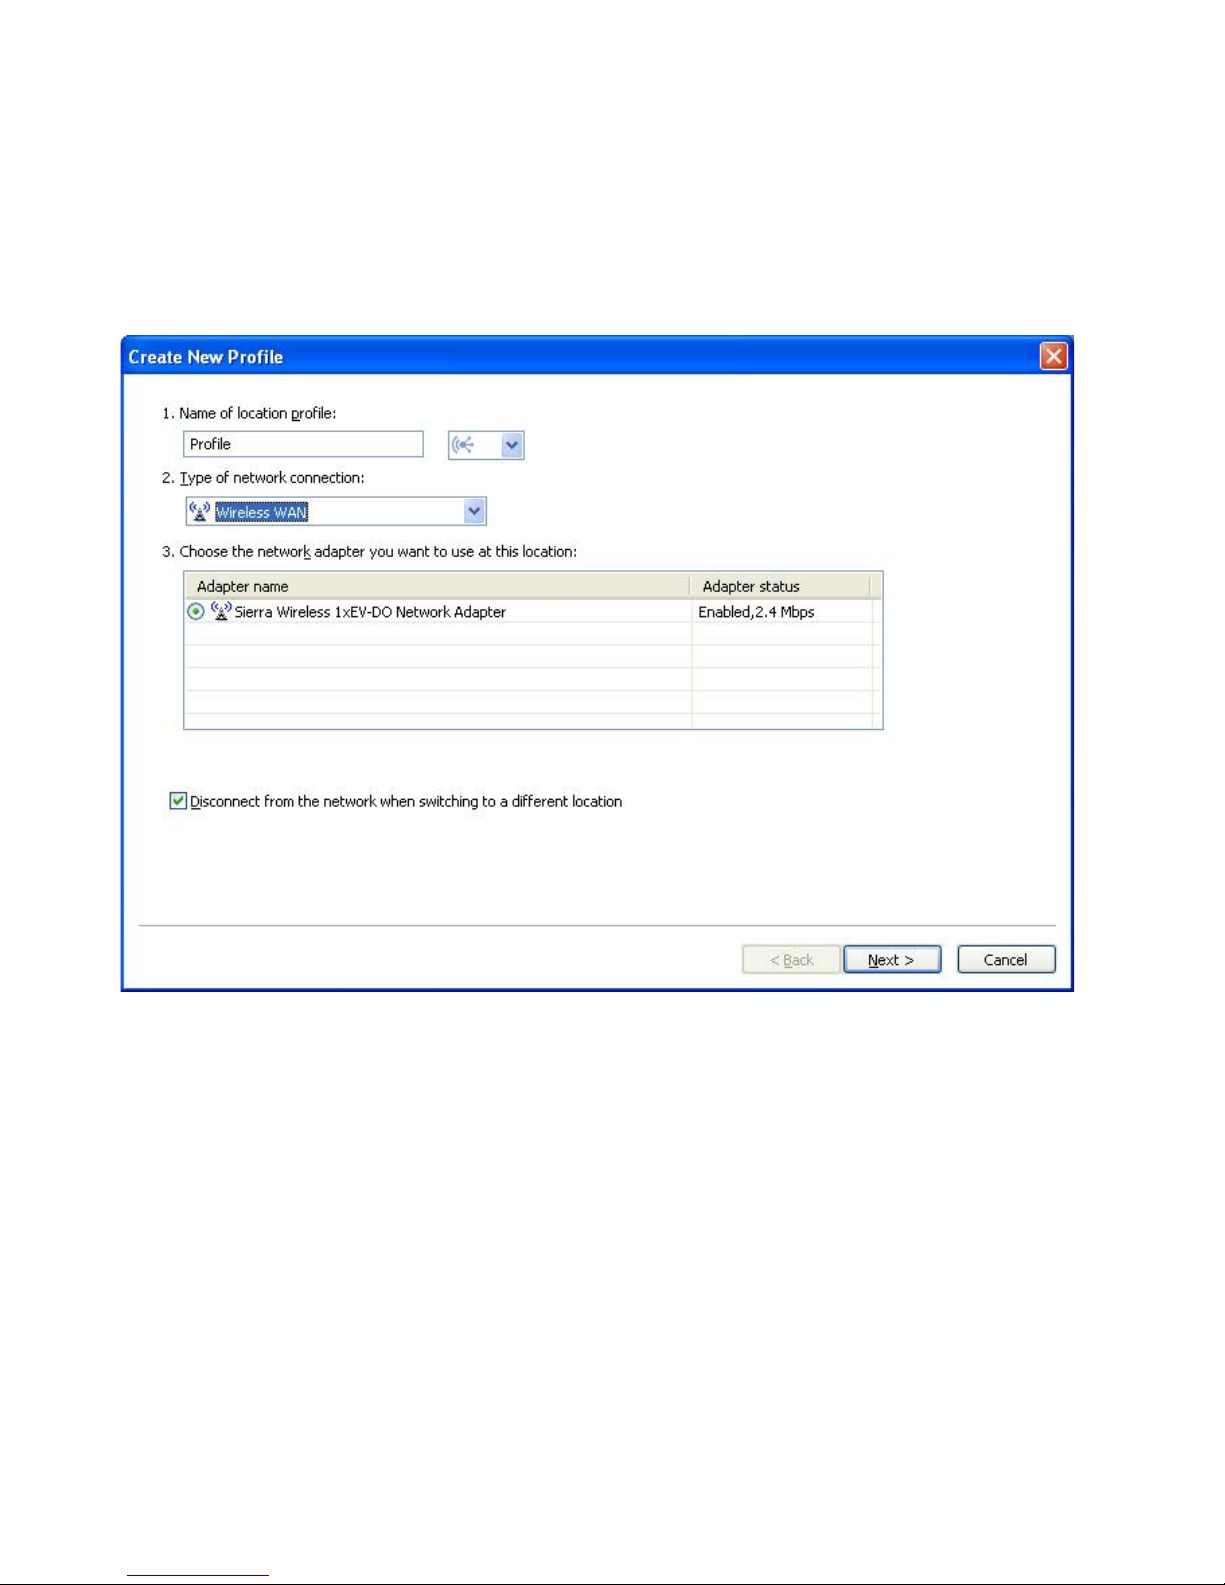
Wireless WAN
Choose this type of network connection if the profile will be used only
to connect to a wireless WAN (wide area network). Wireless WAN
connections require a service subscription to connect successfully.
Access Connections will automatically determine which adapters in
your computer support this type of network connection, and show them
in the table. Choose the one you want to use.
Figure 15. Creating New Profile—Wireless WAN
6. If you selected Best Available Network in step 5 on page 8, you can enable
optional IEEE 802.1x authentication (EAP over LAN). Do as follows:
a. Select Enable IEEE 802.1x authentication for Ethernet.
14 ThinkVantage Access Connections 4.1: User’s Guide
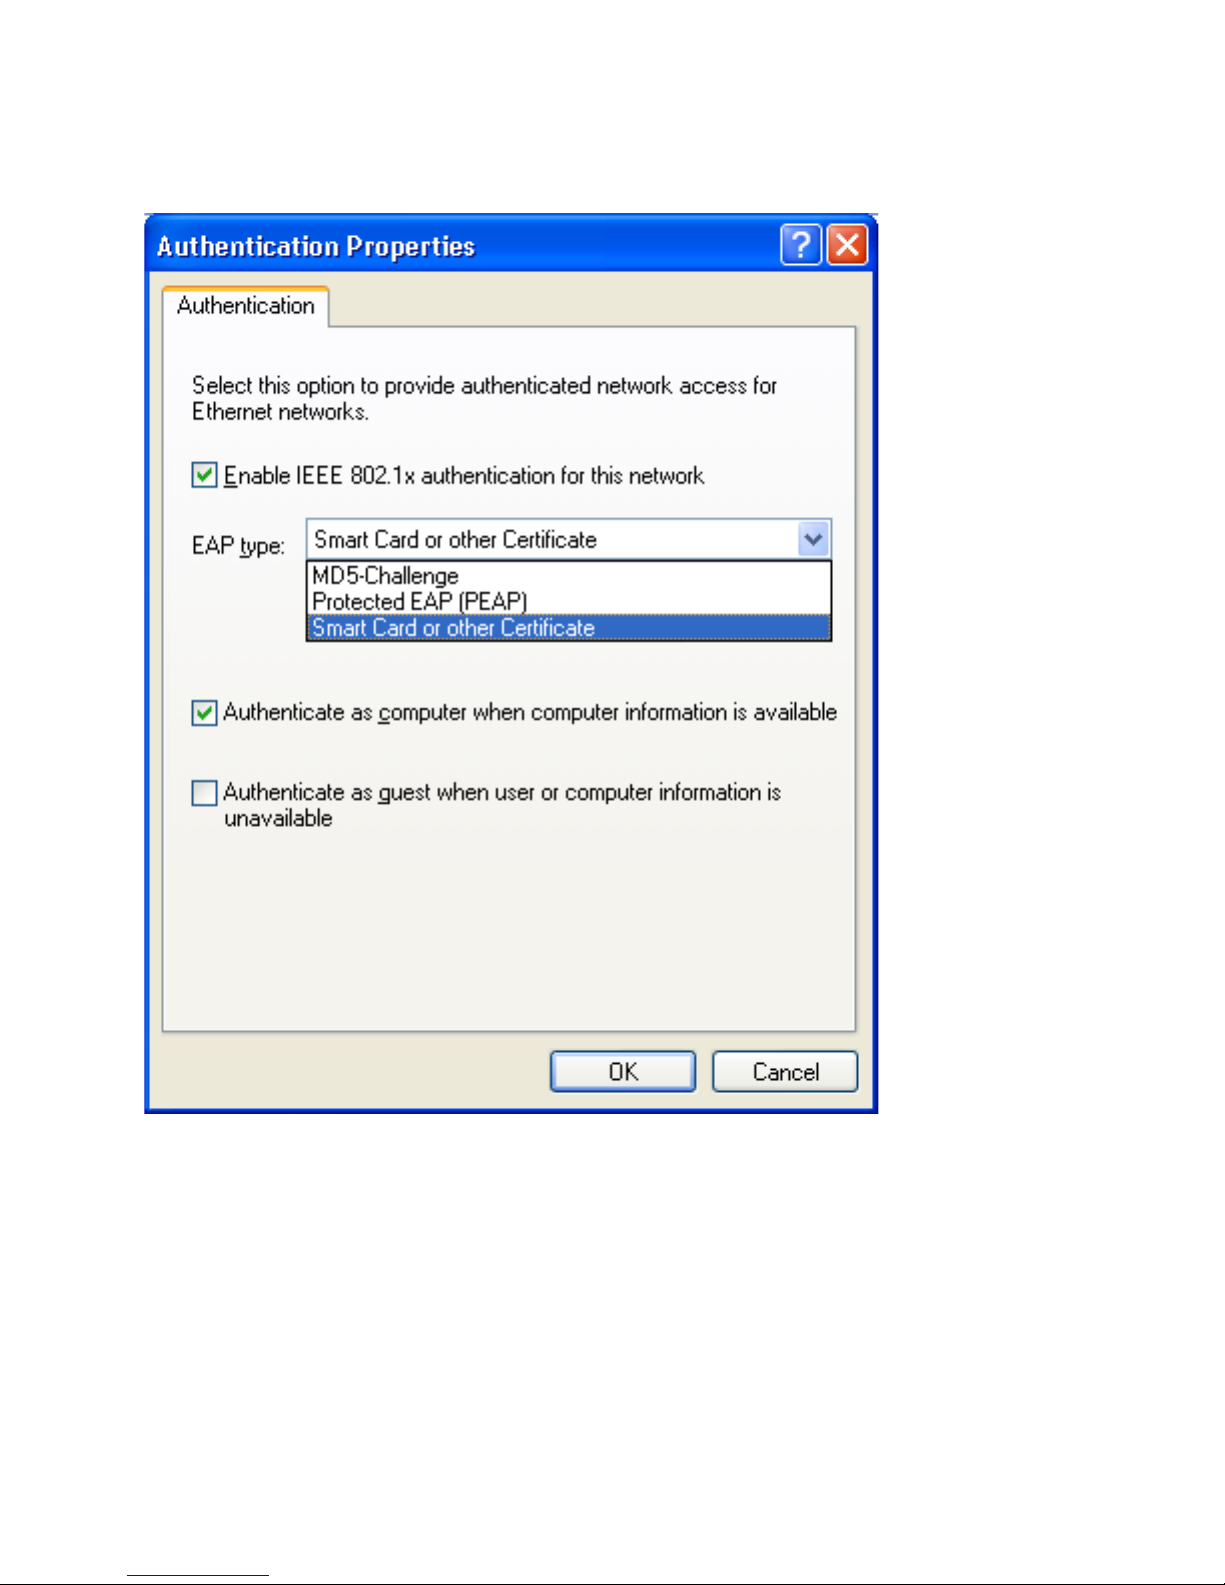
b. Click Authentication Properties; then enter the authentication settings
provided by your network administrator.
Figure 16. Authentication Properties window
c. Click OK.
7. Yo u can prevent multiple simultaneous connections, and thus conserve battery
life, by selecting Disconnect from the network and power off any wireless
radio associated with this profile when switching to a different location.
8. Click Next.
9. Enter your wireless network configuration; then click Next.
10. Go to step 38 on page 25.
11. If you selected Wired LAN (Ethernet) in step 5 on page 8, you can enable
IEEE 802.1x authentication for the wired network (EAPoL). Do as follows:
a. Select Enable IEEE 802.1x authentication for Ethernet.
Chapter 2. Using location profiles 15
b. Click Authentication Properties; then enter the authentication settings
provided by your network administrator.
c. Click OK.
To disconnect from the network when you switch to a different location profile,
12.
select Disconnect from the network when switching to a different
location.
13. Click Next.
14. Go to step 38 on page 25.
15. If you selected Wireless LAN (802.11) in step 5 on page 8, you can conserve
battery life by preventing multiple simultaneous connections. To do this, select
Disable this wireless radio when switching to a different location.
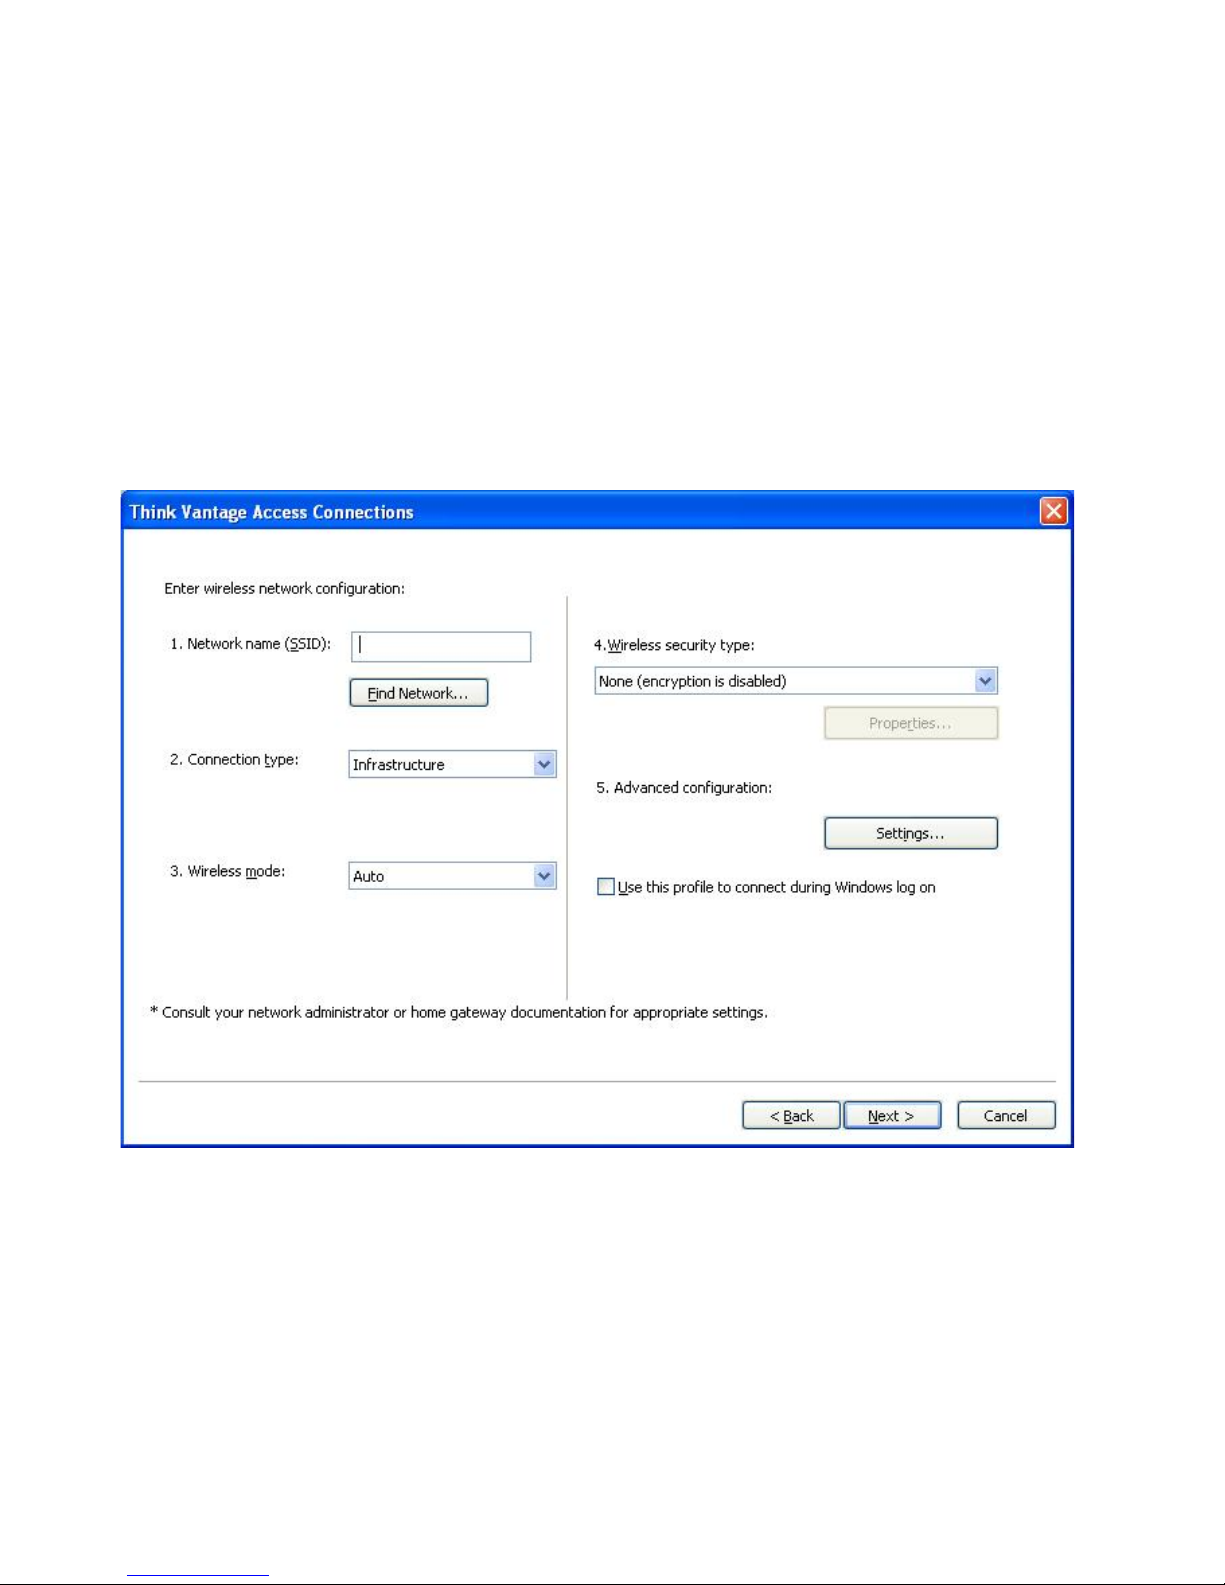
16. Click Next. The wireless network configuration window appears.
Figure 17. Wireless network configuration window
17. Enter the name of the wireless network to which you are attempting to
connect. (The network name is also known as the SSID.) To scan for wireless
networks within range of your computer and display the names of those being
broadcasted by access points, click Find Network. To connect to any available
non-secured (open) wireless network that is in range, leave the SSID field
blank. For more information about connecting to a wireless network, see
“Connecting to a wireless network” on page 45.
16 ThinkVantage Access Connections 4.1: User’s Guide
18. Next, select the connection type. Tw o types are available:
Infrastructure
Use this connection type when your computer will be communicating
with wireless access points.
Adhoc
Use this connection type to communicate directly with another
computer without connecting to a wireless access point first.
Select either Auto, 802.11b, 802.11g or 802.11a for Wireless Mode. This
19.
setting is available only if the installed adapter is compatible with different
standards. If you select Auto, the adapter will automatically run in the mode
that is compatible with in-range access points. If you set the same mode as on
the in-range access point, the connection will be established faster.
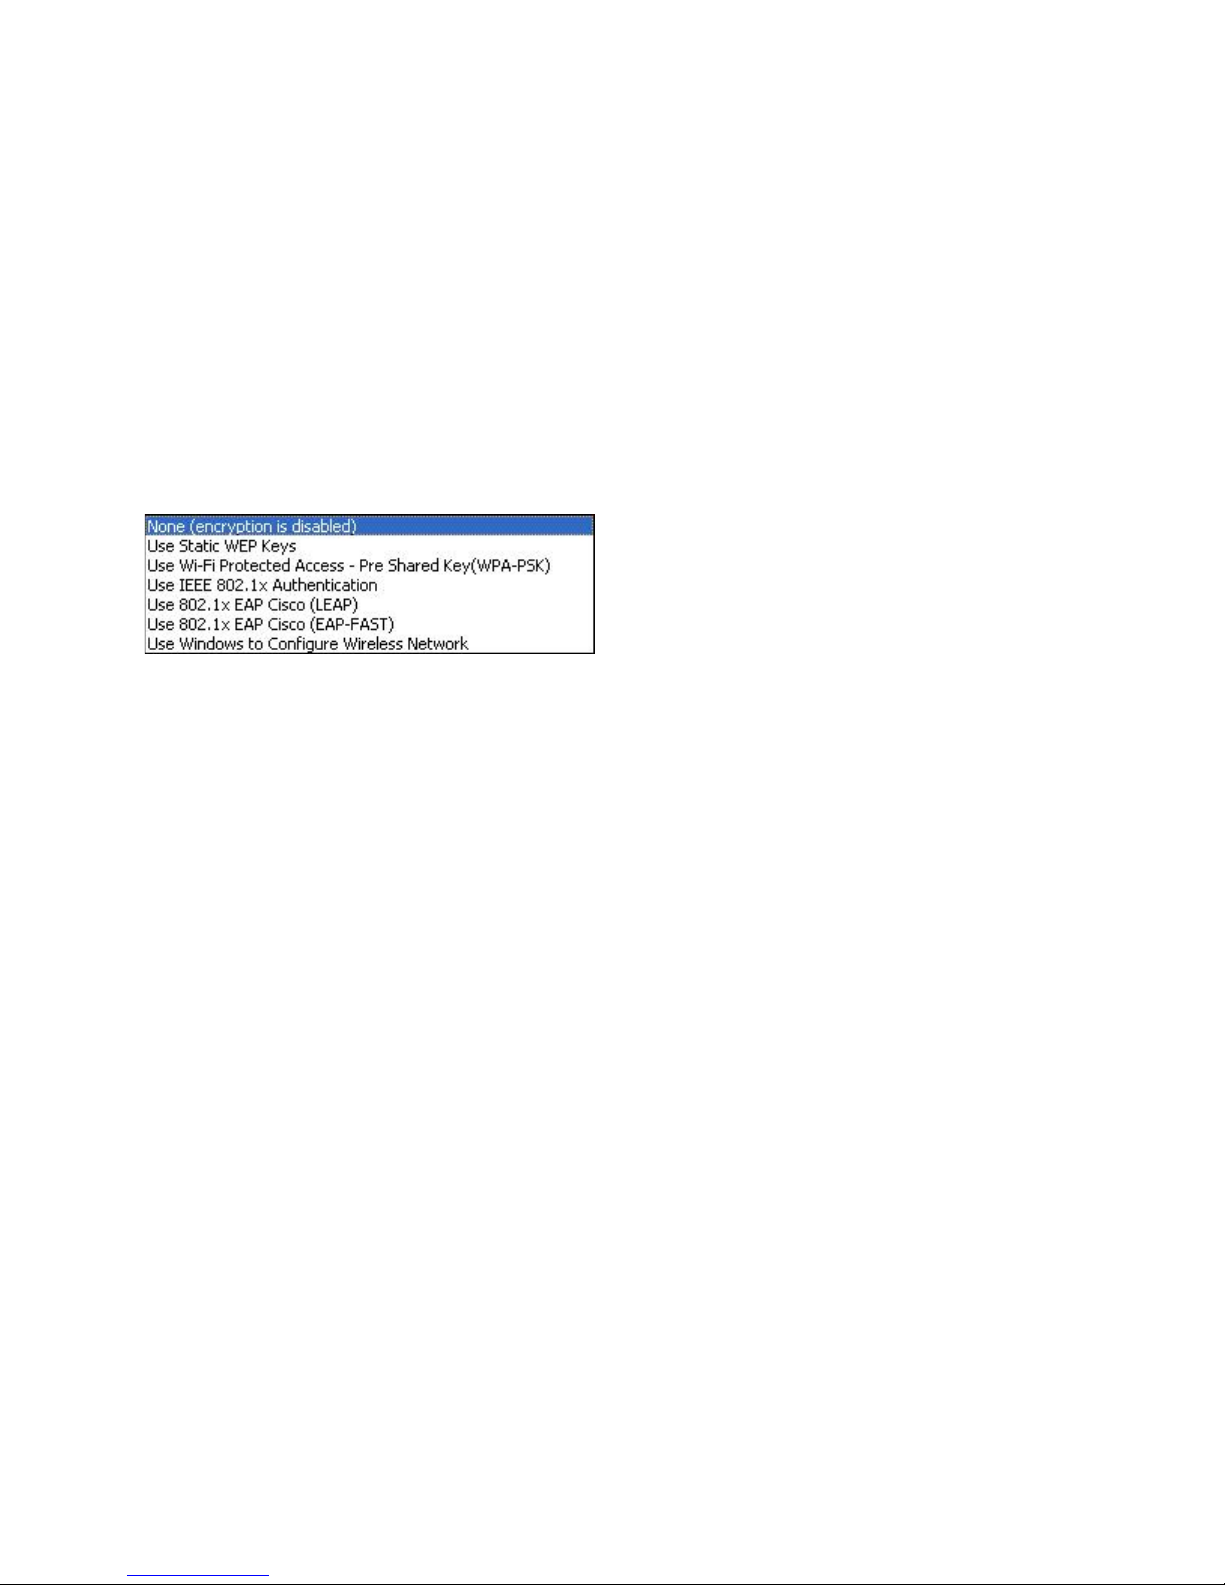
20. Select one of the wireless security types, listed in the figure:
Figure 18. Wireless security types
None (encryption is disabled)
Use Static WEP Keys
Use Wi-Fi Protected Access - Pre-Shared Key (WPA-PSK)
Select this option when connecting to non-secured (open) wireless
networks such as public hotspots. Optionally, you can establish a
wireless LAN connection before logging on to Windows. To do so,
select Use this profile to connect during Windows logon.
A wireless network that implements this type of security uses
predefined alphanumeric or hexadecimal strings (keys) in encrypting
and decrypting data that is transmitted and received through the
wireless network. Usually, you enter these keys only once. They are
then automatically associated with your wireless adapter each time the
adapter is inserted or your computer is started. Optionally, if you want
to use this profile to establish a wireless LAN connection before
logging on to Windows, select Use this profile to connect during
Windows logon.
Wireless networks that implement this type of security require users to
authenticate with a Pre-Shared Key. Data transmitted and received
through the wireless network can be encrypted and decrypted by use
of WEP or TKIP data encryption. Optionally, if you want to establish a
wireless LAN connection before logging on to Windows, select Use
this profile to connect during Windows logon.
Use IEEEE 802.1x Authentication
Wireless networks that implement IEEE 802.1x Extensible
Authentication Protocol (EAP) security require each user to
authenticate his or her identity with a username and password or a
certificate credential before being allowed to connect. Data is
encrypted and decrypted by use of either static or dynamic WEP keys.
Dynamic keys are session-based and are generated each time an
authentication attempt is made.
Chapter 2. Using location profiles 17
Use 802.1x - EAP Cisco (LEAP)
This version of EAP is available only when a Cisco or
Cisco-compatible wireless adapter is installed in your system. It uses
authentication and dynamic encryption keys to secure the wireless
network.
Use 802.1x - EAP Cisco (EAP-FAST)
This version of EAP is available only when a Cisco or
Cisco-compatible wireless adapter is installed in your system. It is an
improved version of 802.1x EAP Cisco (LEAP). It uses Protected
Access Credentials (PAC) and users' credentials to secure the wireless
network.
Use Windows to configure wireless network
Choose this option to have the Windows Zero configuration service
manage this wireless connection. The settings for configuring security
for this wireless connection will be managed by Windows, and cannot
be exported by Access Connections.
more information about each of the wireless security types, see “Wireless
For
security settings” on page 28.
21. Click Properties; then enter the additional settings for your selected security
type. These settings are usually provided by your network administrator.
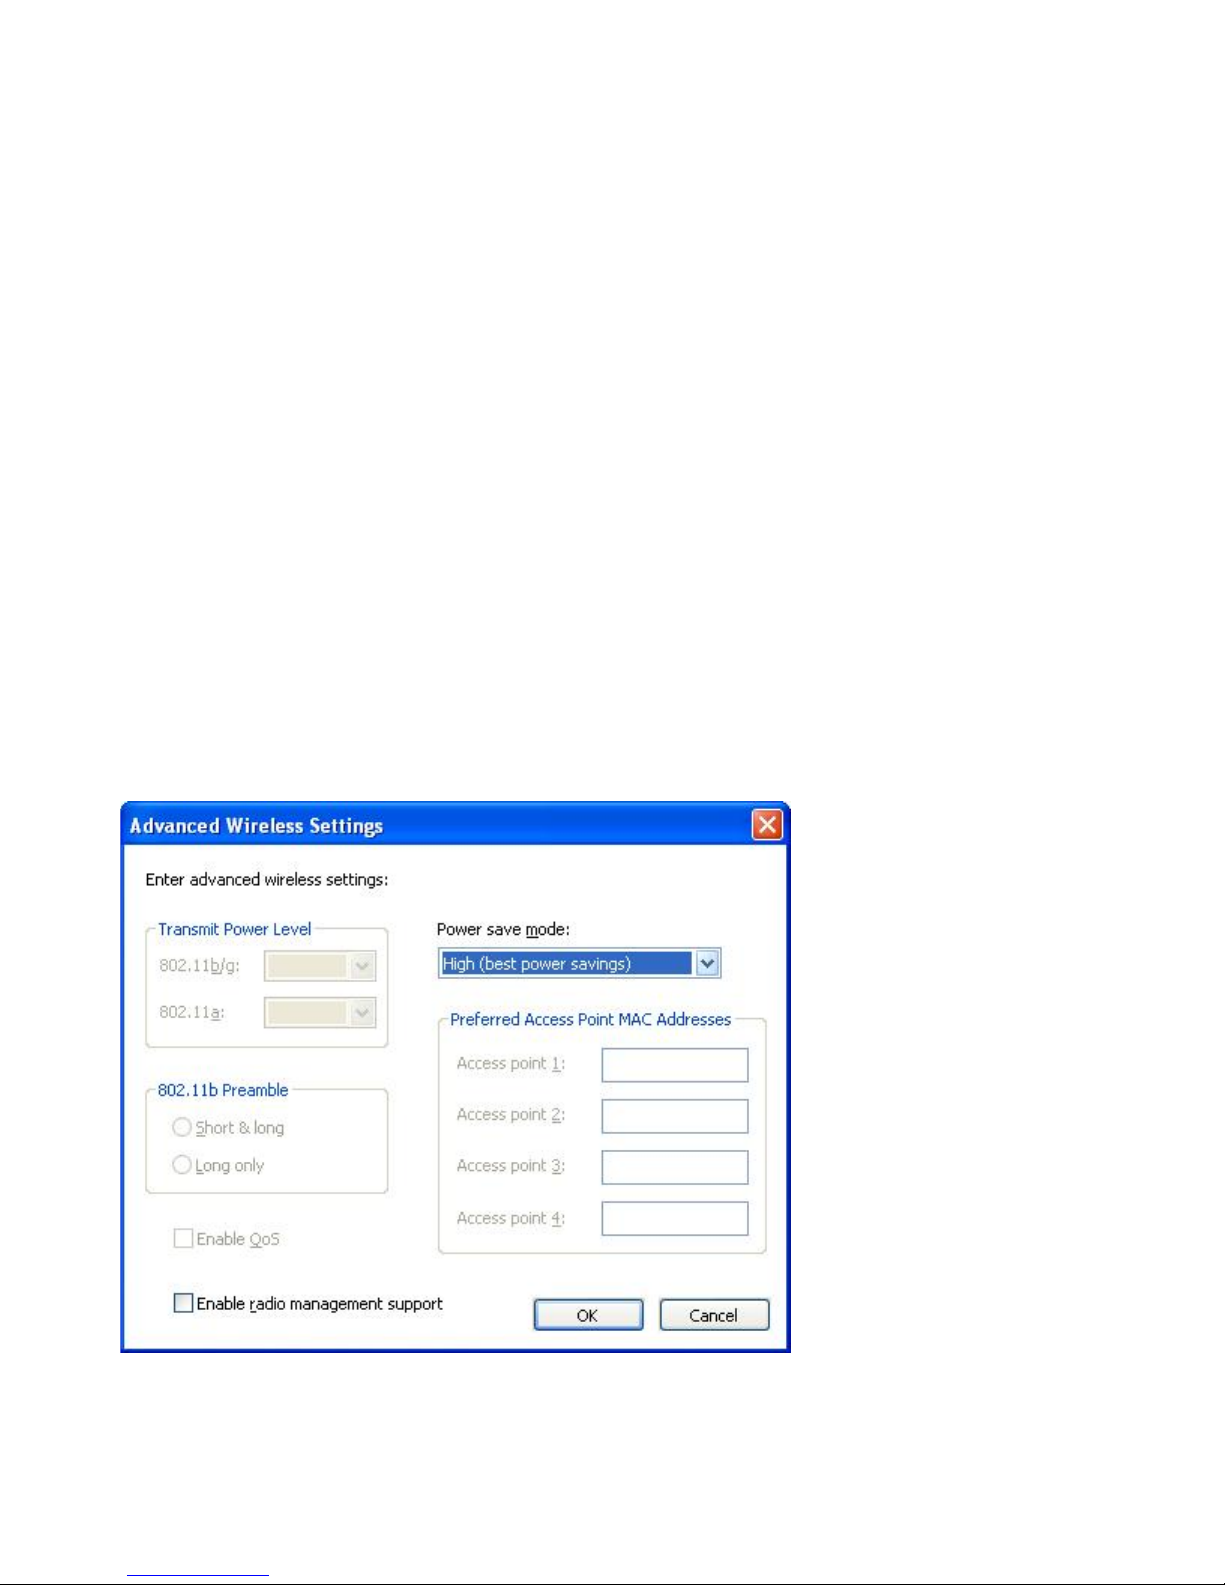
22. To configure radio power management, quality of service, transmitting power
level, 802.11b preamble, and preferred access points, click Settings in the
Advanced Configuration section. This invokes the Advanced Wireless Settings
window.
Figure 19. Advanced Wireless Settings window
18 ThinkVantage Access Connections 4.1: User’s Guide

The following settings are available:
Transmit Power Level
Choose a transmitting power level, from the minimum 10%, to the
maximum, 100%. Use it to transmit at the lower level. The value is set
automatically in response to a notice from the access point.
802.11b Preamble
The default setting is Short&long. This setting is included for
compatibility with the old access points, which do not accept a long
preamble.
Enable QoS
Select this check box if you need to set the priority when transmitting
data such as video stream.
Power save mode
You can adjust the power saving mode in three stages. The mode can
be set for each location profile.
Preferred Access Point MAC Addresses
If you specify a MAC address for the access point, the connection will
be made only to that address. If you do not specify a MAC address,
the system will find an SSID automatically and connect to that SSID.
Contact your network administrator for the appropriate settings.
23. Click Next.
24. Go to step 38 on page 25.
25. If you selected Wired Broadband (DSL or Cable Modem) in step 5 on page
8, and your broadband connection is DSL, you must also select Configure my
DSL settings.
Chapter 2. Using location profiles 19
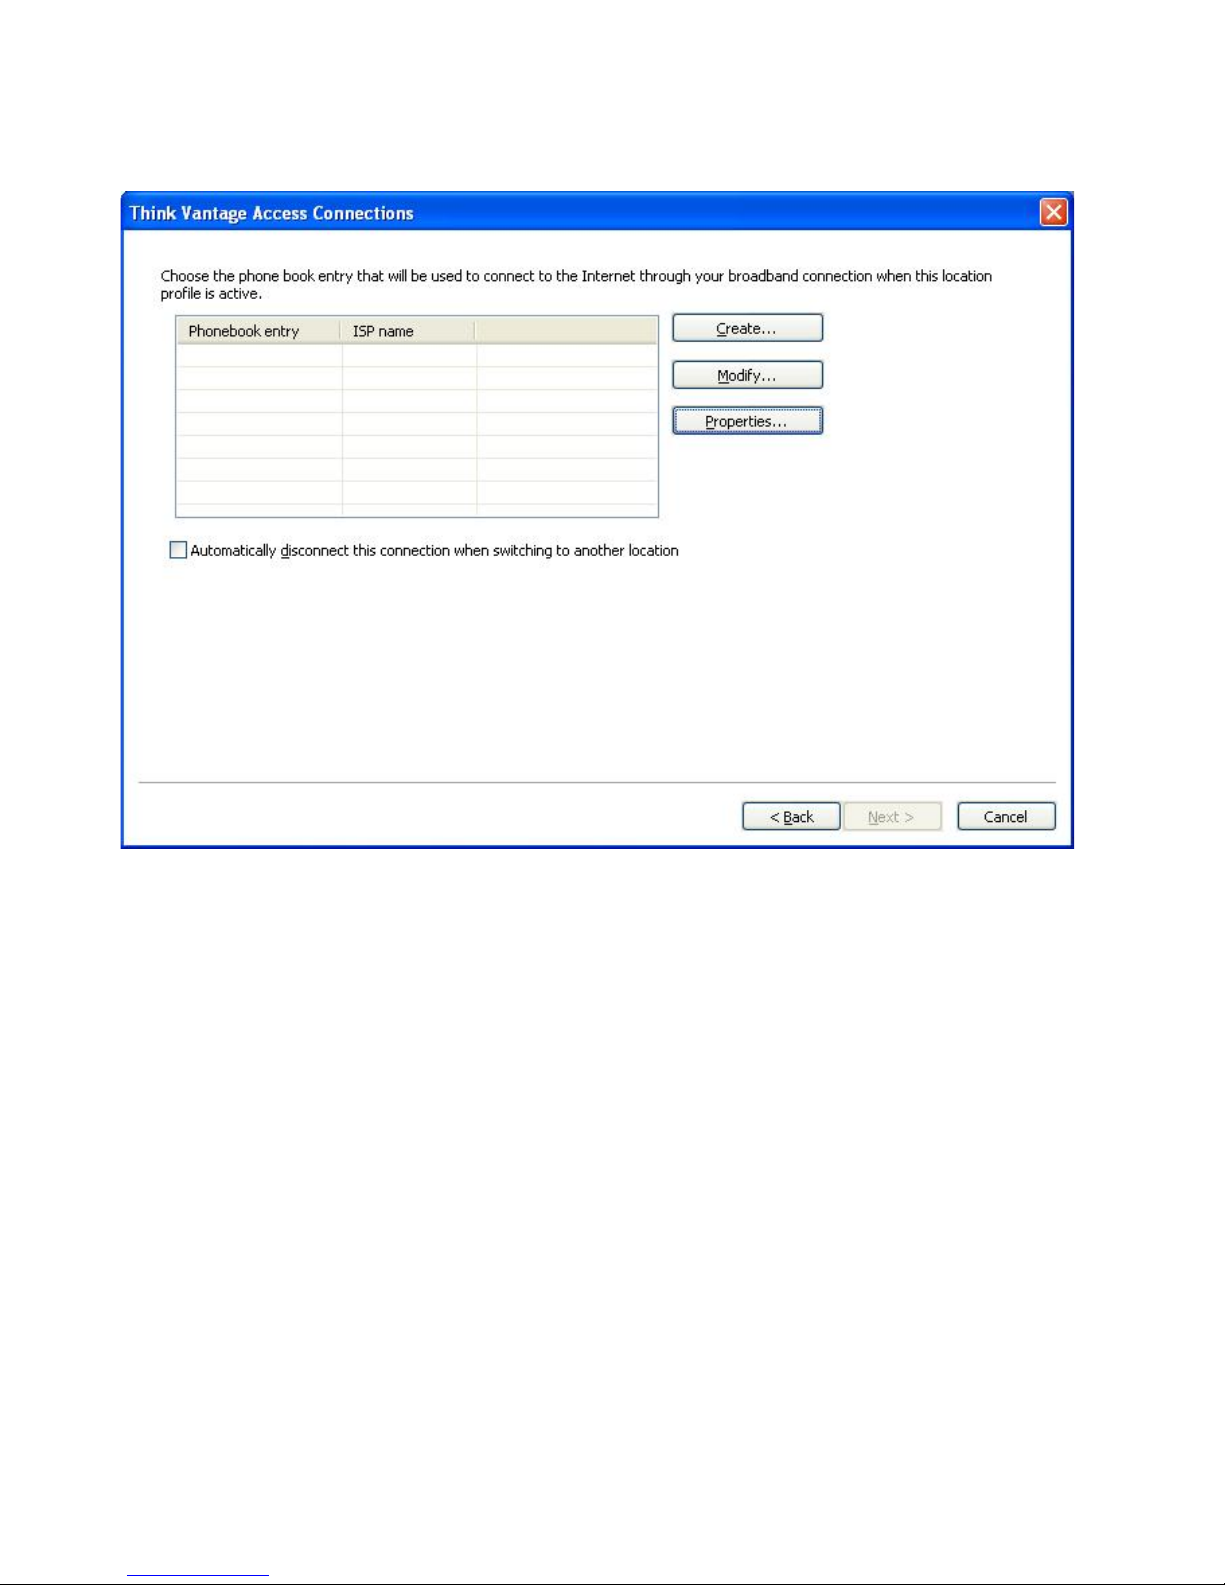
26. Click Next. The phonebook settings page is displayed.
Figure 20. Phonebook settings window
27. Choose or create a phonebook entry. To enter the details of the DSL account,
click Properties.
20 ThinkVantage Access Connections 4.1: User’s Guide
 Loading...