

Page 1

UserGuide
ThinkPadX1Carbon
Page 2

Notes:Beforeusingthisinformationandtheproductitsupports,besuretoreadandunderstandthe
following:
•Safety,Warranty,andSetupGuide
•RegulatoryNotice
•“Importantsafetyinformation”onpagevi
•AppendixD“Notices”onpage121
TheSafety,Warranty,andSetupGuideandtheRegulatoryNoticehavebeenuploadedtotheWebsite.
Torefertothem,gotohttp://www.lenovo.com/ThinkPadUserGuides.
FourthEdition(December2012)
©CopyrightLenovo2012.
LIMITEDANDRESTRICTEDRIGHTSNOTICE:IfdataorsoftwareisdeliveredpursuantaGeneralServicesAdministration
“GSA”contract,use,reproduction,ordisclosureissubjecttorestrictionssetforthinContractNo.GS-35F-05925.
Page 3

Contents
Readthisrst..............v
Importantsafetyinformation..........vi
Conditionsthatrequireimmediateaction..vii
Safetyguidelines............vii
Chapter1.Productoverview......1
Locatingcomputercontrols,connectors,and
indicators..................1
Frontview................1
Rearview................3
Right-sideview..............3
Left-sideview..............5
Bottomview...............6
Statusindicators.............6
Locatingimportantproductinformation......9
Machinetypeandmodellabel........9
FCCIDandICCerticationnumberlabel...9
CerticateofAuthenticitylabel.......9
Features.................10
Specications...............11
Operatingenvironment...........11
Lenovoprograms.............12
AccessingLenovoprogramsontheWindows
7operatingsystem...........12
AccessingLenovoprogramsontheWindows
8operatingsystem...........14
AnintroductiontoLenovoprograms....14
Chapter2.Usingyourcomputer...17
Registeringyourcomputer..........17
Frequentlyaskedquestions.........17
Specialkeysandbuttons..........19
Functionkeycombinations........19
Volumeandmutebuttons........20
Windowskey.............21
Usingthemulti-touchscreen.........22
UsingtheUltraNavpointingdevice.......23
UsingtheTrackPointpointingdevice....23
Usingthetouchpad...........25
DisablingtheUltraNavpointingdeviceand
usinganexternalmouse.........26
AddingtheUltraNavicontotheWindows
noticationarea............26
Powermanagement............27
Checkingthebatterystatus........27
Usingtheacpoweradapter........27
Chargingthebattery..........28
Disablingthebuilt-inbattery.......28
Maximizingthebatterylife........28
Managingthebatterypower.......28
Power-savingmodes..........29
Connectingtothenetwork..........30
Ethernetconnections..........30
Wirelessconnections..........30
Presentationsandmultimedia.........34
Changingdisplaysettings........34
Connectingaprojectororanexternal
monitor................34
Usingdualdisplays...........36
Usingaudiofeatures............37
Usingthecamera.............38
Usingaashmediacard...........38
Chapter3.Youandyourcomputer..41
Accessibilityandcomfort..........41
Ergonomicinformation..........41
Comfort...............42
Accessibilityinformation.........42
Travelingwithyourcomputer.........43
Traveltips...............43
Travelaccessories...........44
Chapter4.Security..........45
Attachingamechanicallock.........45
Usingpasswords..............45
Passwordsandsleepmode........45
Typingpasswords...........45
Power-onpassword...........46
Harddiskpasswords..........46
Supervisorpassword..........48
Solid-statedrivesecurity...........50
Settingthesecuritychip...........50
Usingangerprintreader..........51
Noticeondeletingdatafromyoursolid-state
drive...................55
Usingrewalls...............56
Protectingdataagainstviruses........56
Chapter5.Recoveryoverview....57
RecoveryoverviewforWindows7models....57
Creatingandusingrecoverymedia.....57
Performingbackupandrecoveryoperations.58
UsingtheRescueandRecoveryworkspace.59
Creatingandusingarescuemedium....60
©CopyrightLenovo2012
i
Page 4

Reinstallingpreinstalledapplicationsand
devicedrivers.............61
Solvingrecoveryproblems........62
RecoveryoverviewforWindows8models....62
RecoverysolutionsforWindows8models..62
Chapter6.Advancedconguration..65
Installinganewoperatingsystem.......65
Beforeyoubegin............65
InstallingtheWindows7operatingsystem..66
InstallingtheWindows8operatingsystem..67
Installingdevicedrivers...........67
Installingthedriverforthe4-in-1mediacard
reader................67
InstallingthedriverforUSB3.0onthe
Windows7operatingsystem.......67
InstallingtheThinkPadmonitorlefor
Windows2000/XP/Vista/7/8ontheWindows
7operatingsystem...........68
Installingotherdevicedriversandsoftwareon
theWindows7operatingsystem......68
ThinkPadSetup..............68
Mainmenu..............69
Congmenu..............70
Date/Timemenu............76
Securitymenu.............76
Startupmenu.............81
Restartmenu.............83
UpdatingyoursystemUEFIBIOS.....84
Usingsystemmanagement..........84
Systemmanagement..........84
Chapter7.Preventingproblems...85
Generaltipsforpreventingproblems......85
Makingsuredevicedriversarecurrent.....86
Takingcareofyourcomputer.........86
Cleaningthecoverofyourcomputer....88
Chapter8.Troubleshootingcomputer
problems...............89
Diagnosingproblems............89
Troubleshooting..............89
Computerstopsresponding.......89
Spillsonthekeyboard..........90
Errormessages............90
Errorswithoutmessages.........92
Beeperrors..............93
Memorymoduleproblems........93
Networkingproblems..........93
Problemswiththekeyboardandotherpointing
devices................95
Problemswiththedisplayandmultimedia
devices................96
Fingerprintreaderproblems........100
Batteryandpowerproblems.......100
Solid-statedriveproblems........103
Softwareproblems...........103
USBproblems.............103
Chapter9.Gettingsupport.....105
BeforeyoucontactLenovo..........105
Gettinghelpandservice...........105
Usingdiagnosticprograms........106
LenovoSupportWebsite.........106
CallingLenovo.............106
FindingThinkPadoptions........107
Purchasingadditionalservices........107
AppendixA.Regulatory
information.............109
Wirelessrelatedinformation.........109
LocationoftheUltraConnect™wireless
antennas...............110
Locatingwirelessregulatorynotices....111
Exportclassicationnotice..........111
Electronicemissionnotices..........111
FederalCommunicationsCommission
DeclarationofConformity........111
IndustryCanadaClassBemissioncompliance
statement...............111
EuropeanUnion-Compliancetothe
ElectromagneticCompatibilityDirective...112
GermanClassBcompliancestatement...112
KoreaClassBcompliancestatement....113
JapanVCCIClassBcompliancestatement..113
Japancompliancestatementforproducts
whichconnecttothepowermainswith
ratedcurrentlessthanorequalto20Aper
phase................113
Lenovoproductserviceinformationfor
Taiwan................113
AppendixB.WEEEandrecycling
statements.............115
ImportantWEEEinformation.........115
Japanrecyclingstatements.........115
RecyclinginformationforBrazil........116
BatteryrecyclinginformationforTaiwan.....116
BatteryrecyclinginformationfortheEuropean
Union..................117
BatteryrecyclinginformationfortheUnitedStates
andCanada................117
iiUserGuide
Page 5

AppendixC.ENERGYSTARmodel
information.............119
AppendixD.Notices.........121
Trademarks................122
AppendixE.RestrictionofHazardous
SubstancesDirective(RoHS)....123
ChinaRoHS................123
TurkishRoHS...............123
UkraineRoHS...............123
IndiaRoHS................124
©CopyrightLenovo2012
iii
Page 6

ivUserGuide
Page 7
Readthisrst
Besuretofollowtheimportanttipsgivenheretogetthemostuseandenjoymentoutofyourcomputer.
Failuretodosomightleadtodiscomfortorinjury,orcauseyourcomputertofail.
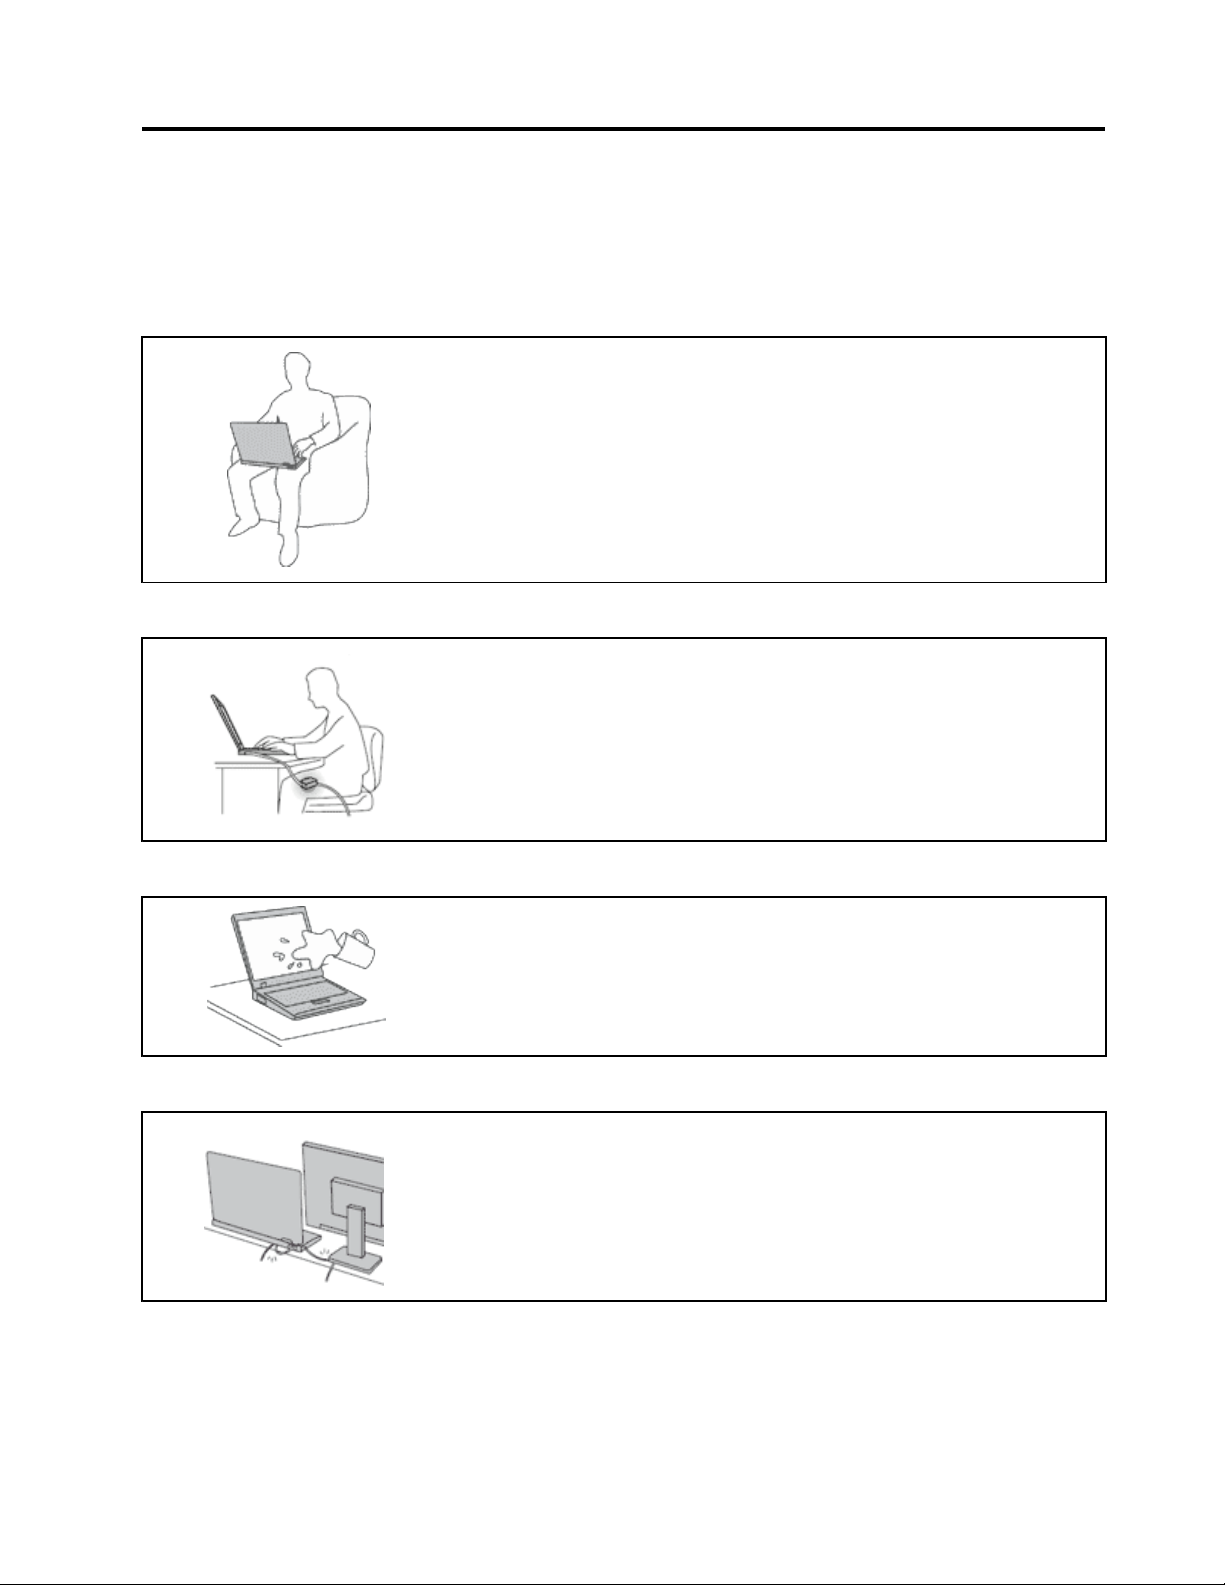
Protectyourselffromtheheatthatyourcomputergenerates.
Whenyourcomputeristurnedonorthebatteryischarging,thebase,thepalm
rest,andsomeotherpartsmaybecomehot.Thetemperaturetheyreach
dependsontheamountofsystemactivityandthelevelofchargeinthebattery.
Extendedcontactwithyourbody,eventhroughclothing,couldcause
discomfortorevenaskinburn.
•Avoidkeepingyourhands,yourlap,oranyotherpartofyourbodyin
contactwithahotsectionofthecomputerforanyextendedtime.
•Periodicallytakehandsfromusingthekeyboardbyliftingyourhandsfrom
thepalmrest.
Protectyourselffromtheheatgeneratedbytheacpoweradapter.
Whentheacpoweradapterisconnectedtoanelectricaloutletandyour
computer,itgeneratesheat.
Extendedcontactwithyourbody,eventhroughclothing,maycauseaskin
burn.
•Donotplacetheacpoweradapterincontactwithanypartofyourbody
whileitisinuse.
•Neveruseittowarmyourbody.
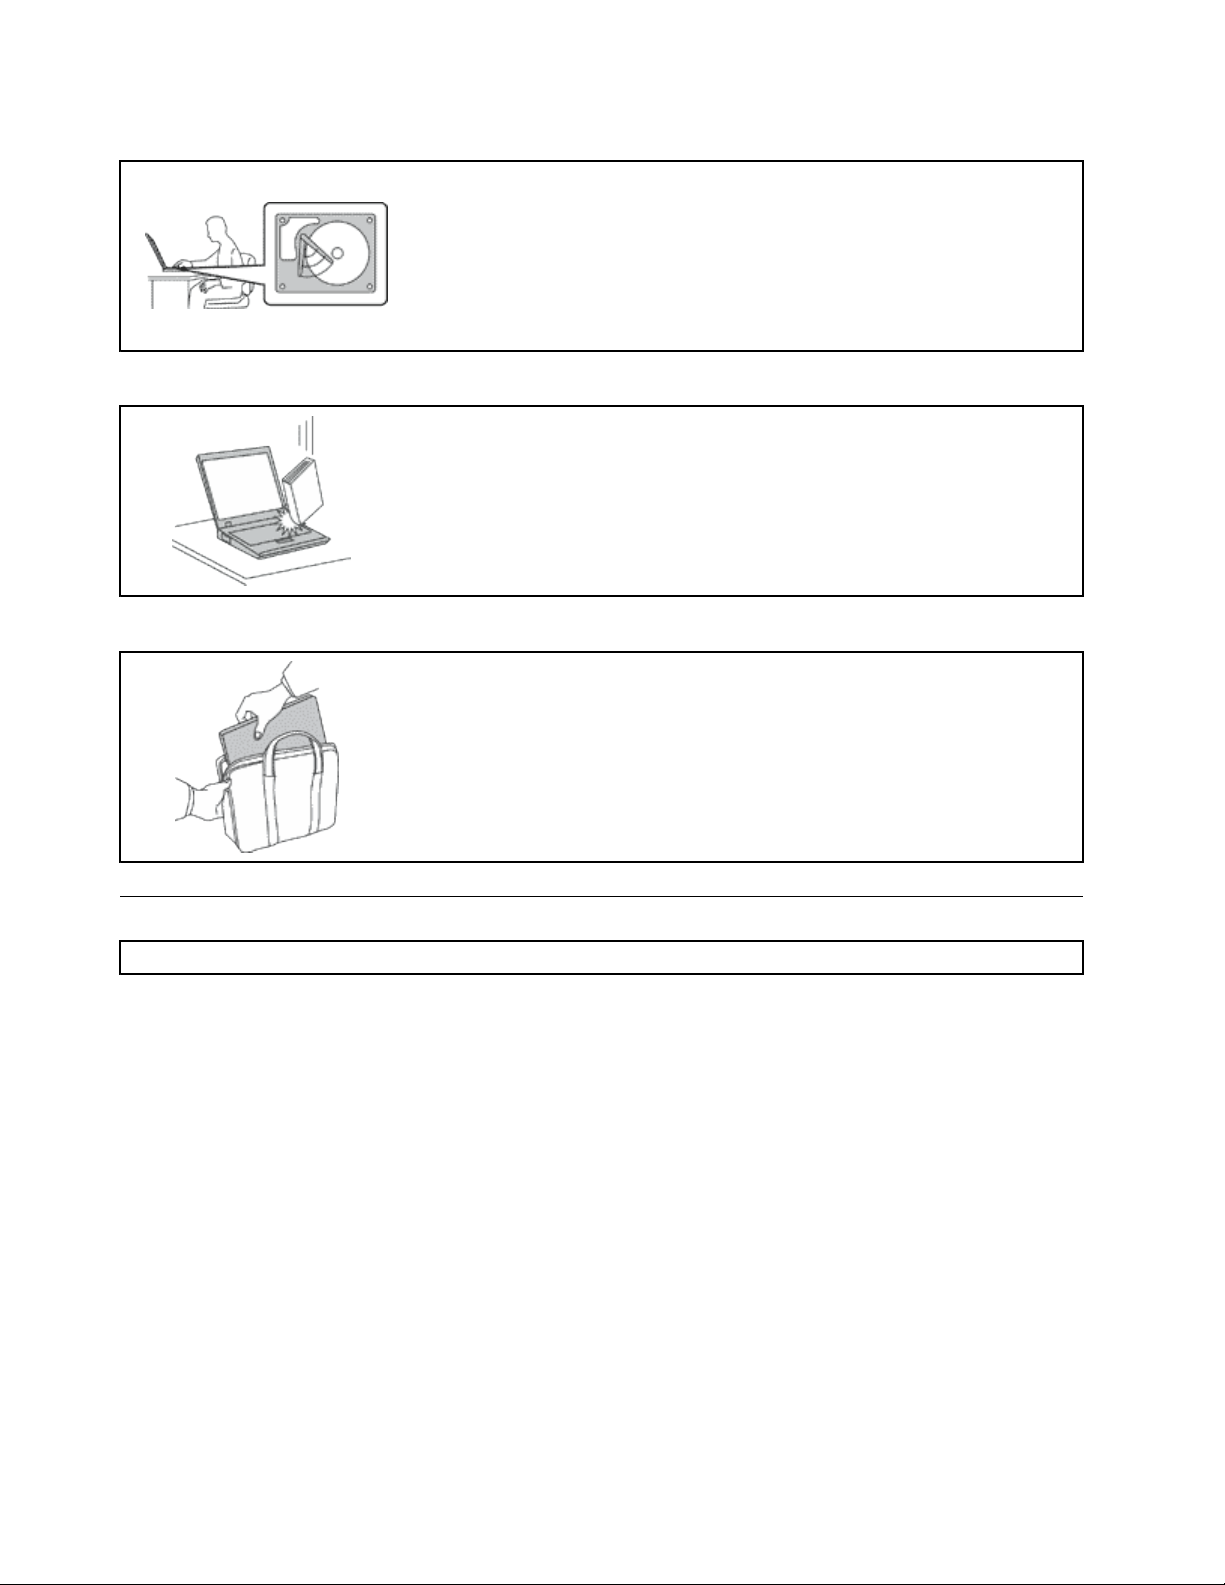
Preventyourcomputerfromgettingwet.
Protectthecablesfrombeingdamaged.
Toavoidspillsandthedangerofelectricalshock,keepliquidsawayfromyour
computer.
Applyingstrongforcetocablesmaydamageorbreakthem.
Routecommunicationlines,orthecablesofanacpoweradapter,amouse,a
keyboard,aprinter,oranyotherelectronicdevice,sothattheycannotbewalked
on,trippedover,pinchedbyyourcomputerorotherobjects,orinanyway
subjectedtotreatmentthatcouldinterferewiththeoperationofyourcomputer.
©CopyrightLenovo2012
v
Page 8
Protectyourcomputeranddatawhenmovingit.
Beforemovingacomputerequippedwithaharddiskdrive,dooneofthe
following,andmakesurethatthepowerswitchisofforisblinking:
•Turnitoff.
•Putitinsleepmode.
•Putitinhibernationmode.
Thiswillhelptopreventdamagetothecomputer,andpossiblelossofdata.
Handleyourcomputergently.
Donotdrop,bump,scratch,twist,hit,vibrate,push,orplaceheavyobjectson
yourcomputer,display,orexternaldevices.
Carryyourcomputercarefully.
•Useaqualitycarryingcasethatprovidesadequatecushioningandprotection.
•Donotpackyourcomputerinatightlypackedsuitcaseorbag.
•Beforeputtingyourcomputerinacarryingcase,ensurethatitisoff,insleep
mode,orinhibernationmode.Donotputacomputerinacarryingcasewhileit
isturnedon.
Importantsafetyinformation
Note:Readtheimportantsafetyinformationrst.
Thisinformationcanhelpyousafelyuseyournotebookcomputer.Followandretainallinformationincluded
withyourcomputer.Theinformationinthisdocumentdoesnotalterthetermsofyourpurchaseagreement
ortheLenovo
andSetupGuidethatcomeswithyourcomputer.
Customersafetyisimportant.Ourproductsaredevelopedtobesafeandeffective.However,personal
computersareelectronicdevices.Powercords,poweradapters,andotherfeaturescancreatepotential
safetyrisksthatcanresultinphysicalinjuryorpropertydamage,especiallyifmisused.Toreducethese
risks,followtheinstructionsincludedwithyourproduct,observeallwarningsontheproductandinthe
operatinginstructions,andreviewtheinformationincludedinthisdocumentcarefully.Bycarefullyfollowing
theinformationcontainedinthisdocumentandprovidedwithyourproduct,youcanhelpprotectyourself
fromhazardsandcreateasafercomputerworkenvironment.
Note:Thisinformationincludesreferencestopoweradaptersandbatteries.Inadditiontonotebook
computers,someproducts(suchasspeakersandmonitors)shipwithexternalpoweradapters.Ifyouhave
suchaproduct,thisinformationappliestoyourproduct.Inaddition,computerproductscontainacoin-sized
internalbatterythatprovidespowertothesystemclockevenwhenthecomputerisunplugged,sothe
batterysafetyinformationappliestoallcomputerproducts.
®
LimitedWarranty.Formoreinformation,see“WarrantyInformation”intheSafety,Warranty,
viUserGuide
Page 9

Conditionsthatrequireimmediateaction
Productscanbecomedamagedduetomisuseorneglect.Someproductdamageisseriousenough
thattheproductshouldnotbeusedagainuntilithasbeeninspectedand,ifnecessary,repairedby
anauthorizedservicer.
Aswithanyelectronicdevice,paycloseattentiontotheproductwhenitisturnedon.Onveryrare
occasions,youmightnoticeanodororseeapuffofsmokeorsparksventfromyourproduct.Oryou
mighthearsoundslikepopping,crackingorhissing.Theseconditionsmightmerelymeanthatan
internalelectroniccomponenthasfailedinasafeandcontrolledmanner.Or ,theymightindicate
apotentialsafetyissue.However,donottakerisksorattempttodiagnosethesituationyourself.
ContacttheCustomerSupportCenterforfurtherguidance.ForalistofServiceandSupportphone
numbers,seethefollowingWebsite:
http://www.lenovo.com/support/phone
Frequentlyinspectyourcomputeranditscomponentsfordamageorwearorsignsofdanger.Ifyou
haveanyquestionabouttheconditionofacomponent,donotusetheproduct.ContacttheCustomer
SupportCenterortheproductmanufacturerforinstructionsonhowtoinspecttheproductand
haveitrepaired,ifnecessary.
Intheunlikelyeventthatyounoticeanyofthefollowingconditions,orifyouhaveanysafetyconcerns
withyourproduct,stopusingtheproductandunplugitfromthepowersourceandtelecommunication
linesuntilyoucanspeaktotheCustomerSupportCenterforfurtherguidance.
•Powercords,plugs,poweradapters,extensioncords,surgeprotectors,orpowersuppliesthatare
cracked,broken,ordamaged.
•Signsofoverheating,smoke,sparks,orre.
•Damagetoabattery(suchascracks,dents,orcreases),dischargefromabattery,orabuildupofforeign
substancesonthebattery.
•Acracking,hissingorpoppingsound,orstrongodorthatcomesfromtheproduct.
•Signsthatliquidhasbeenspilledoranobjecthasfallenontothecomputerproduct,thepowercordor
poweradapter.
•Thecomputerproduct,powercord,orpoweradapterhasbeenexposedtowater.
•Theproducthasbeendroppedordamagedinanyway.
•Theproductdoesnotoperatenormallywhenyoufollowtheoperatinginstructions.
Note:Ifyounoticetheseconditionswithaproduct(suchasanextensioncord)thatisnotmanufacturedfor
orbyLenovo,stopusingthatproductuntilyoucancontacttheproductmanufacturerforfurtherinstructions,
oruntilyougetasuitablereplacement.
Safetyguidelines
Alwaysobservethefollowingprecautionstoreducetheriskofinjuryandpropertydamage.
Serviceandupgrades
DonotattempttoserviceaproductyourselfunlessinstructedtodosobytheCustomerSupportCenteror
yourdocumentation.OnlyuseaServiceProviderwhoisapprovedtorepairyourparticularproduct.
Note:Somecomputerpartscanbeupgradedorreplacedbythecustomer.Upgradestypicallyare
referredtoasoptions.ReplacementpartsapprovedforcustomerinstallationarereferredtoasCustomer
ReplaceableUnits,orCRUs.Lenovoprovidesdocumentationwithinstructionswhenitisappropriatefor
customerstoinstalloptionsorreplaceCRUs.Youmustcloselyfollowallinstructionswheninstallingor
replacingparts.TheOffstateofapowerindicatordoesnotnecessarilymeanthatvoltagelevelsinsidea
productarezero.Beforeyouremovethecoversfromaproductequippedwithapowercord,alwaysensure
©CopyrightLenovo2012
vii
Page 10
thatthepoweristurnedoffandthattheproductisunpluggedfromanypowersource.Ifyouhaveany
questionsorconcerns,contacttheCustomerSupportCenter.
Althoughtherearenomovingpartsinyourcomputerafterthepowercordhasbeendisconnected,the
followingwarningsarerequiredforyoursafety.
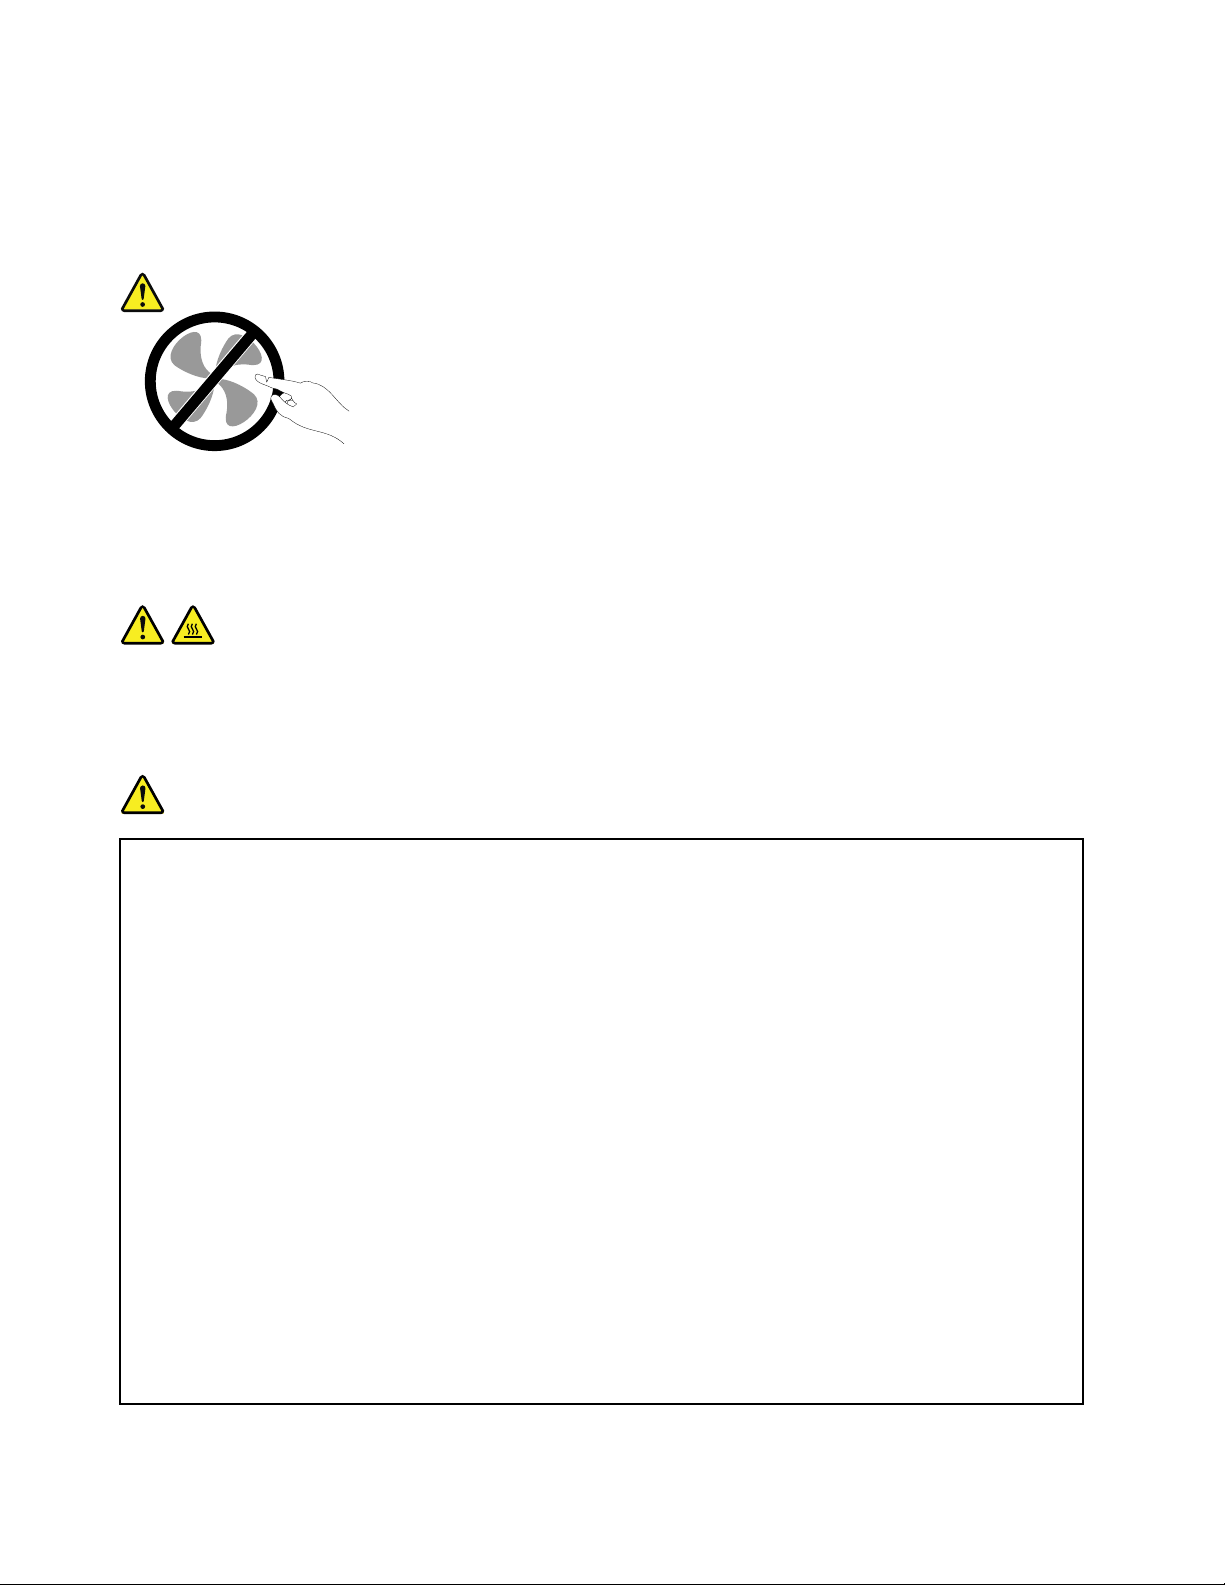
CAUTION:
Hazardousmovingparts.Keepngersandotherbodypartsaway.
CAUTION:
BeforereplacinganyCRUs,turnoffthecomputerandwaitthreetoveminutestoletthecomputer
coolbeforeopeningthecover.
Powercordsandpoweradapters
DANGER
Useonlythepowercordsandpoweradapterssuppliedbytheproductmanufacturer.
Thepowercordsshallbesafetyapproved.ForGermany,itshallbeH05VV-F,3G,0.75mm
better.Forothercountries,thesuitabletypesshallbeusedaccordingly.
Neverwrapapowercordaroundapoweradapterorotherobject.Doingsocanstressthecordin
waysthatcancausethecordtofray,crack,orcrimp.Thiscanpresentasafetyhazard.
Alwaysroutepowercordssothattheywillnotbewalkedon,trippedover,orpinchedbyobjects.
Protectpowercordsandpoweradaptersfromliquids.Forinstance,donotleaveyourpowercord
orpoweradapternearsinks,tubs,toilets,oronoorsthatarecleanedwithliquidcleansers.
Liquidscancauseashortcircuit,particularlyifthepowercordorpoweradapterhasbeenstressed
bymisuse.Liquidsalsocancausegradualcorrosionofpowercordterminalsand/ortheconnector
terminalsonapoweradapter,whichcaneventuallyresultinoverheating.
Ensurethatallpowercordconnectorsaresecurelyandcompletelypluggedintoreceptacles.
Donotuseanypoweradapterthatshowscorrosionattheacinputpinsorshowssignsof
overheating(suchasdeformedplastic)attheacinputpinsoranywhereonthepoweradapter.
2
,or
Donotuseanypowercordswheretheelectricalcontactsoneitherendshowsignsofcorrosionor
overheatingorwherethepowercordappearstohavebeendamagedinanyway.
viiiUserGuide
Page 11
Topreventpossibleoverheating,donotcoverthepoweradapterwithclothingorotherobjects
whenthepoweradapterispluggedintoanelectricaloutlet.
Extensioncordsandrelateddevices
Ensurethatextensioncords,surgeprotectors,uninterruptiblepowersupplies,andpowerstripsthatyouuse
areratedtohandletheelectricalrequirementsoftheproduct.Neveroverloadthesedevices.Ifpowerstrips
areused,theloadshouldnotexceedthepowerstripinputrating.Consultanelectricianformoreinformation
ifyouhavequestionsaboutpowerloads,powerrequirements,andinputratings.
Plugsandoutlets
DANGER
Ifareceptacle(poweroutlet)thatyouintendtousewithyourcomputerequipmentappearstobe
damagedorcorroded,donotusetheoutletuntilitisreplacedbyaqualiedelectrician.
Donotbendormodifytheplug.Iftheplugisdamaged,contactthemanufacturertoobtain
areplacement.
Donotshareanelectricaloutletwithotherhomeorcommercialappliancesthatdrawlargeamounts
ofelectricity;otherwise,unstablevoltagemightdamageyourcomputer,data,orattacheddevices.
Someproductsareequippedwithathree-prongedplug.Thisplugtsonlyintoagrounded
electricaloutlet.Thisisasafetyfeature.Donotdefeatthissafetyfeaturebytryingtoinsertitinto
anon-groundedoutlet.Ifyoucannotinserttheplugintotheoutlet,contactanelectricianforan
approvedoutletadapterortoreplacetheoutletwithonethatenablesthissafetyfeature.Never
overloadanelectricaloutlet.Theoverallsystemloadshouldnotexceed80percentofthebranch
circuitrating.Consultanelectricianformoreinformationifyouhavequestionsaboutpowerloads
andbranchcircuitratings.
Ensurethatthepoweroutletyouareusingisproperlywired,easilyaccessible,andlocatedcloseto
theequipment.Donotfullyextendpowercordsinawaythatwillstressthecords.
Ensurethatthepoweroutletprovidesthecorrectvoltageandcurrentfortheproductyouare
installing.
Carefullyconnectanddisconnecttheequipmentfromtheelectricaloutlet.
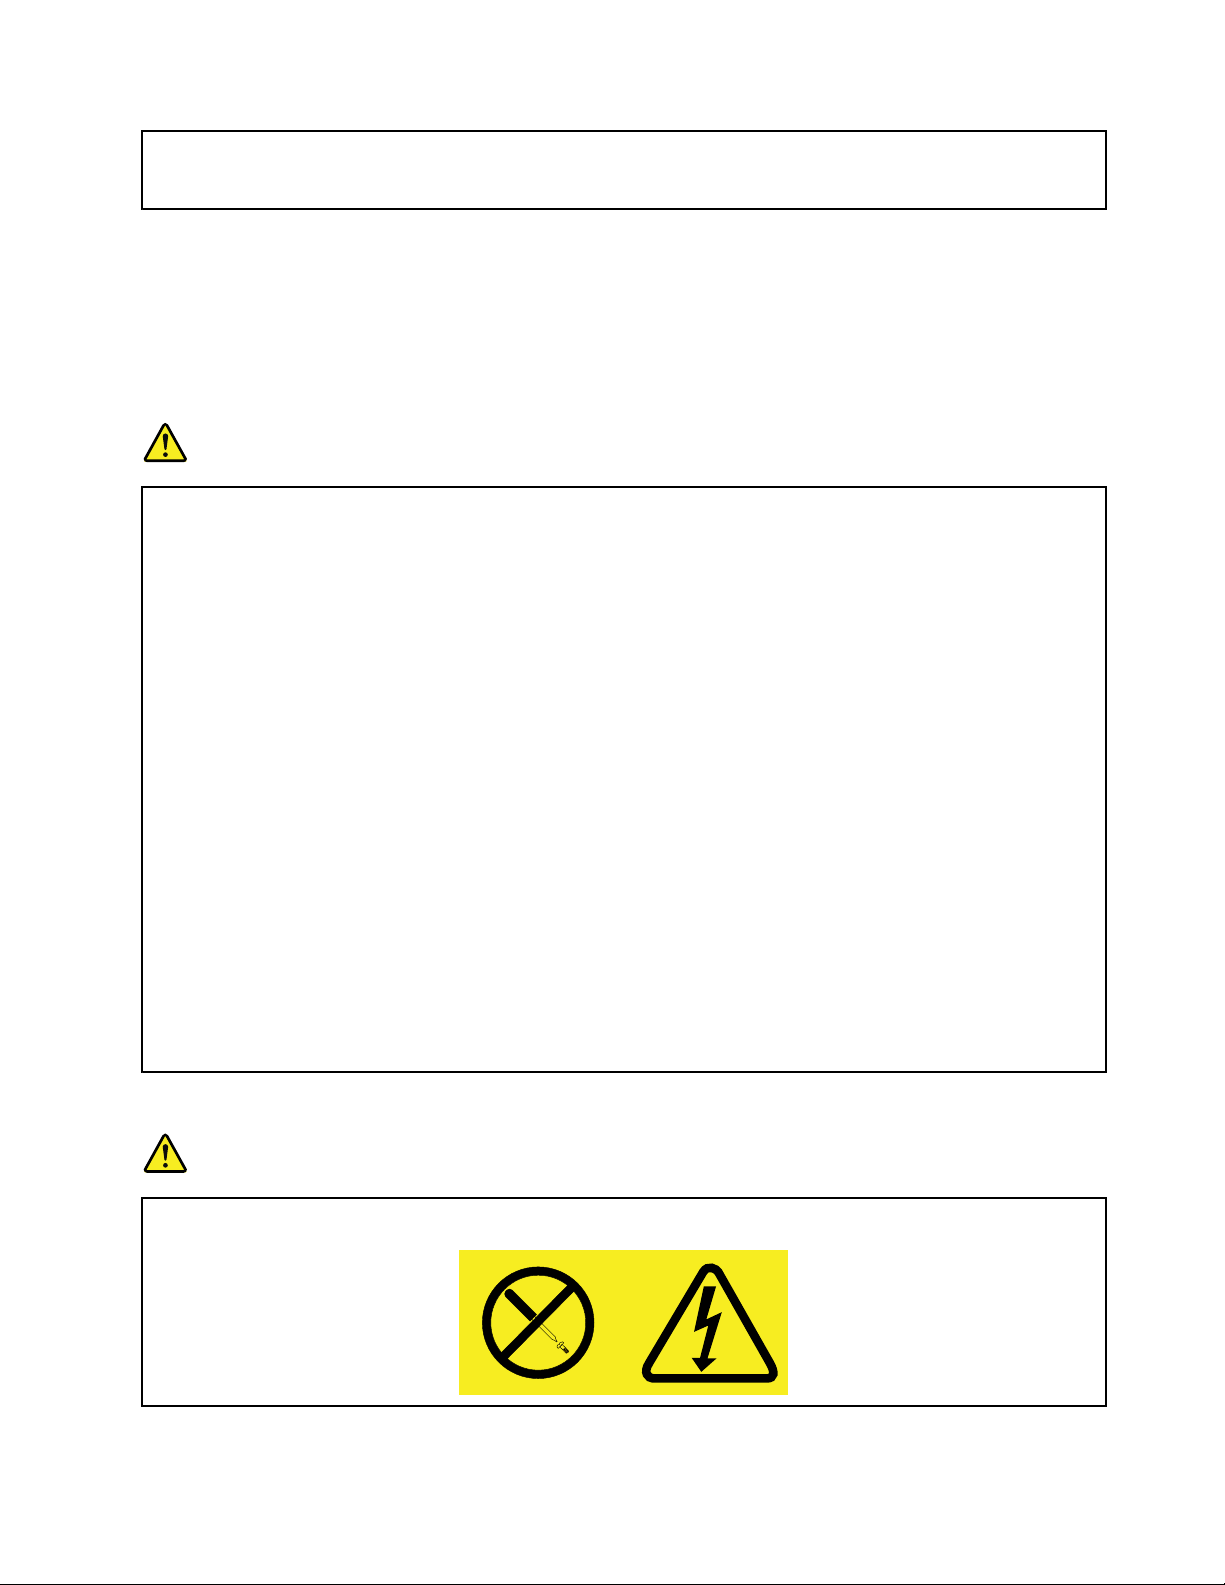
Powersupplystatement
DANGER
Neverremovethecoveronapowersupplyoranypartthathasthefollowinglabelattached.
©CopyrightLenovo2012
ix
Page 12

Hazardousvoltage,current,andenergylevelsarepresentinsideanycomponentthathasthislabel
attached.Therearenoserviceablepartsinsidethesecomponents.Ifyoususpectaproblemwith
oneoftheseparts,contactaservicetechnician.
Externaldevices
CAUTION:
DonotconnectordisconnectanyexternaldevicecablesotherthanUSBwhilethecomputerpoweris
on;otherwise,youmightdamageyourcomputer.T oavoidpossibledamagetoattacheddevices,wait
atleastvesecondsafterthecomputerisshutdowntodisconnectexternaldevices.
Noticeforlithiumcoincellbattery
DANGER
Dangerofexplosionifbatteryisincorrectlyreplaced.
Donot:
•Throworimmerseintowater
•Heattomorethan100°C(212°F)
•Repairordisassemble
Disposeofthebatteryasrequiredbylocalordinancesorregulations.
ThefollowingstatementappliestousersinthestateofCalifornia,U.S.A.
CaliforniaPerchlorateInformation:
Productscontainingmanganesedioxidelithiumcoincellbatteriesmaycontainperchlorate.
PerchlorateMaterial-specialhandlingmayapply,See
www.dtsc.ca.gov/hazardouswaste/perchlorate
Noticeforbuilt-inrechargeablebatteries
DANGER
Donotattempttoreplacetheinternalrechargeablelithiumbatteries.ContactLenovoSupportfor
factoryreplacement.
Heatandproductventilation
DANGER
Computers,acpoweradapters,andmanyaccessoriescangenerateheatwhenturnedonandwhen
batteriesarecharging.Notebookcomputerscangenerateasignicantamountofheatduetotheir
compactsize.Alwaysfollowthesebasicprecautions:
•Whenyourcomputeristurnedonorthebatteryischarging,thebase,thepalmrest,andsome
otherpartsmaybecomehot.Avoidkeepingyourhands,yourlap,oranyotherpartofyour
bodyincontactwithahotsectionofthecomputerforanyextendedlengthoftime.Whenyou
usethekeyboard,avoidkeepingyourpalmsonthepalmrestforaprolongedperiodoftime.
xUserGuide
Page 13

Yourcomputergeneratessomeheatduringnormaloperation.Theamountofheatdependson
theamountofsystemactivityandthebatterychargelevel.Extendedcontactwithyourbody,
eventhroughclothing,couldcausediscomfortorevenaskinburn.Periodicallytakebreaks
fromusingthekeyboardbyliftingyourhandsfromthepalmrest;andbecarefulnottouse
thekeyboardforanyextendedlengthoftime.
•Donotoperateyourcomputerorchargethebatterynearammablematerialsorinexplosive
environments.
•Ventilationslots,fansand/orheatsinksareprovidedwiththeproductforsafety,comfort,and
reliableoperation.Thesefeaturesmightinadvertentlybecomeblockedbyplacingtheproducton
abed,sofa,carpet,orotherexiblesurface.Neverblock,cover,ordisablethesefeatures.
•Whentheacpoweradapterisconnectedtoanelectricaloutletandyourcomputer,itgenerates
heat.Donotplacetheadapterincontactwithanypartofyourbodywhileusingit.Neverusethe
acpoweradaptertowarmyourbody.Extendedcontactwithyourbody,eventhroughclothing,
maycauseaskinburn.
Foryoursafety,alwaysfollowthesebasicprecautionswithyourcomputer:
•Keepthecoverclosedwheneverthecomputerispluggedin.
•Regularlyinspecttheoutsideofthecomputerfordustaccumulation.
•Removedustfromventsandanyperforationsinthebezel.Morefrequentcleaningsmightbe
requiredforcomputersindustyorhigh-trafcareas.
•Donotrestrictorblockanyventilationopenings.
•Donotoperateyourcomputerinsidefurniture,asthismightincreasetheriskofoverheating.
•Airowtemperaturesintothecomputershouldnotexceed35°C(95°F).
Electricalcurrentsafetyinformation
DANGER
Electriccurrentfrompower,telephone,andcommunicationcablesishazardous.
Toavoidashockhazard:
•Donotuseyourcomputerduringalightningstorm.
•Donotconnectordisconnectanycablesorperforminstallation,maintenance,orreconguration
ofthisproductduringanelectricalstorm.
•Connectallpowercordstoaproperlywiredandgroundedelectricaloutlet.
•Connecttoproperlywiredoutletsanyequipmentthatwillbeattachedtothisproduct.
•Wheneverpossible,useonehandonlytoconnectordisconnectsignalcables.
•Neverturnonanyequipmentwhenthereisevidenceofre,water,orstructuraldamage.
•Donotuseyoucomputeruntilallinternalpartsenclosuresarefastenedintoplace.Neveruse
thecomputerwheninternalpartsandcircuitsareexposed.
©CopyrightLenovo2012
xi
Page 14

DANGER
Connectanddisconnectcablesasdescribedinthefollowingprocedureswheninstalling,moving,
oropeningcoversonthisproductorattacheddevices.
Toconnect:
1.TurneverythingOFF .
2.First,attachallcablestodevices.
3.Attachsignalcablestoconnectors.
4.Attachpowercordstooutlets.
5.TurndevicesON.
Todisconnect:
1.TurneverythingOFF .
2.First,removepowercordsfromoutlets.
3.Removesignalcablesfromconnectors.
4.Removeallcablesfromdevices.
Thepowercordmustbedisconnectedfromthewalloutletorreceptaclebeforeinstallingallotherelectrical
cablesconnectedtothecomputer.
Thepowercordmaybereconnectedtothewalloutletorreceptacleonlyafterallotherelectricalcables
havebeenconnectedtothecomputer.
Liquidcrystaldisplay(LCD)notice
CAUTION:
TheLCDismadeofglass,androughhandlingordroppingthecomputercancausetheLCDtobreak.
IftheLCDbreaksandtheinternaluidgetsintoyoureyesoronyourhands,immediatelywashthe
affectedareaswithwaterforatleast15minutes;ifanysymptomsarepresentafterwashing,get
medicalcare.
Note:Forproductswithmercury-containinguorescentlamps(forexample,non-LED),theLiquidcrystal
display(LCD)containsmercury;disposeofaccordingtolocal,state,orfederallaws.
Usingheadphonesorearphones
CAUTION:
Excessivesoundpressurefromearphonesandheadphonescancausehearingloss.Adjustmentof
theequalizertomaximumincreasestheearphoneandheadphoneoutputvoltageandthesound
pressurelevel.Therefore,toprotectyourhearing,adjusttheequalizertoanappropriatelevel.
Excessiveuseofheadphonesorearphonesforalongperiodoftimeathighvolumecanbedangerousifthe
outputoftheheadphoneorearphoneconnectorsdonotcomplywithspecicationsofEN50332-2.The
headphoneoutputconnectorofyourcomputercomplieswithEN50332-2Subclause7.Thisspecication
limitsthecomputer’smaximumwidebandtrueRMSoutputvoltageto150mV.T ohelpprotectagainst
hearingloss,ensurethattheheadphonesorearphonesyouusealsocomplywithEN50332-2(Clause7
limits)forawidebandcharacteristicvoltageof75mV.UsingheadphonesthatdonotcomplywithEN
50332-2canbedangerousduetoexcessivesoundpressurelevels.
IfyourLenovocomputercamewithheadphonesorearphonesinthepackage,asaset,thecombinationof
theheadphonesorearphonesandthecomputeralreadycomplieswiththespecicationsofEN50332-1.
Ifdifferentheadphonesorearphonesareused,ensurethattheycomplywithEN50332-1(Clause6.5
LimitationValues).UsingheadphonesthatdonotcomplywithEN50332-1canbedangerousdueto
excessivesoundpressurelevels.
xiiUserGuide
Page 15

Additionalsafetyinformation
DANGER
Plasticbagscanbedangerous.Keepplasticbagsawayfrombabiesandchildrentoavoiddanger
ofsuffocation.
NoticeforusersintheU.S.A.
Manypersonalcomputerproductsandaccessoriescontaincords,cablesorwires,suchaspowercordsor
cordstoconnecttheaccessorytoapersonalcomputer.Ifthisproducthassuchacord,cableorwire,then
thefollowingwarningapplies:
WARNING:Handlingthecordonthisproductorcordsassociatedwithaccessoriessoldwiththisproduct
willexposeyoutolead,achemicalknowntotheStateofCaliforniatocausecancer,andbirthdefectsor
otherreproductiveharm.Washhandsafterhandling.
Savetheseinstructions.
©CopyrightLenovo2012
xiii
Page 16

xivUserGuide
Page 17
Chapter1.Productoverview
Thischapterprovidesinformationaboutthelocationsofconnectors,locationsofimportantproductlabels,
computerfeatures,specications,operatingenvironment,andpreinstalledprograms.
Thischaptercontainsthefollowingtopics:
•“Locatingcomputercontrols,connectors,andindicators”onpage1
•“Locatingimportantproductinformation”onpage9
•“Features”onpage10
•“Specications”onpage11
•“Operatingenvironment”onpage11
•“Lenovoprograms”onpage12
Locatingcomputercontrols,connectors,andindicators
Thissectionintroducesthecomputerhardwarefeaturestogiveyouthebasicinformationyouwillneed
tostartusingthecomputer.
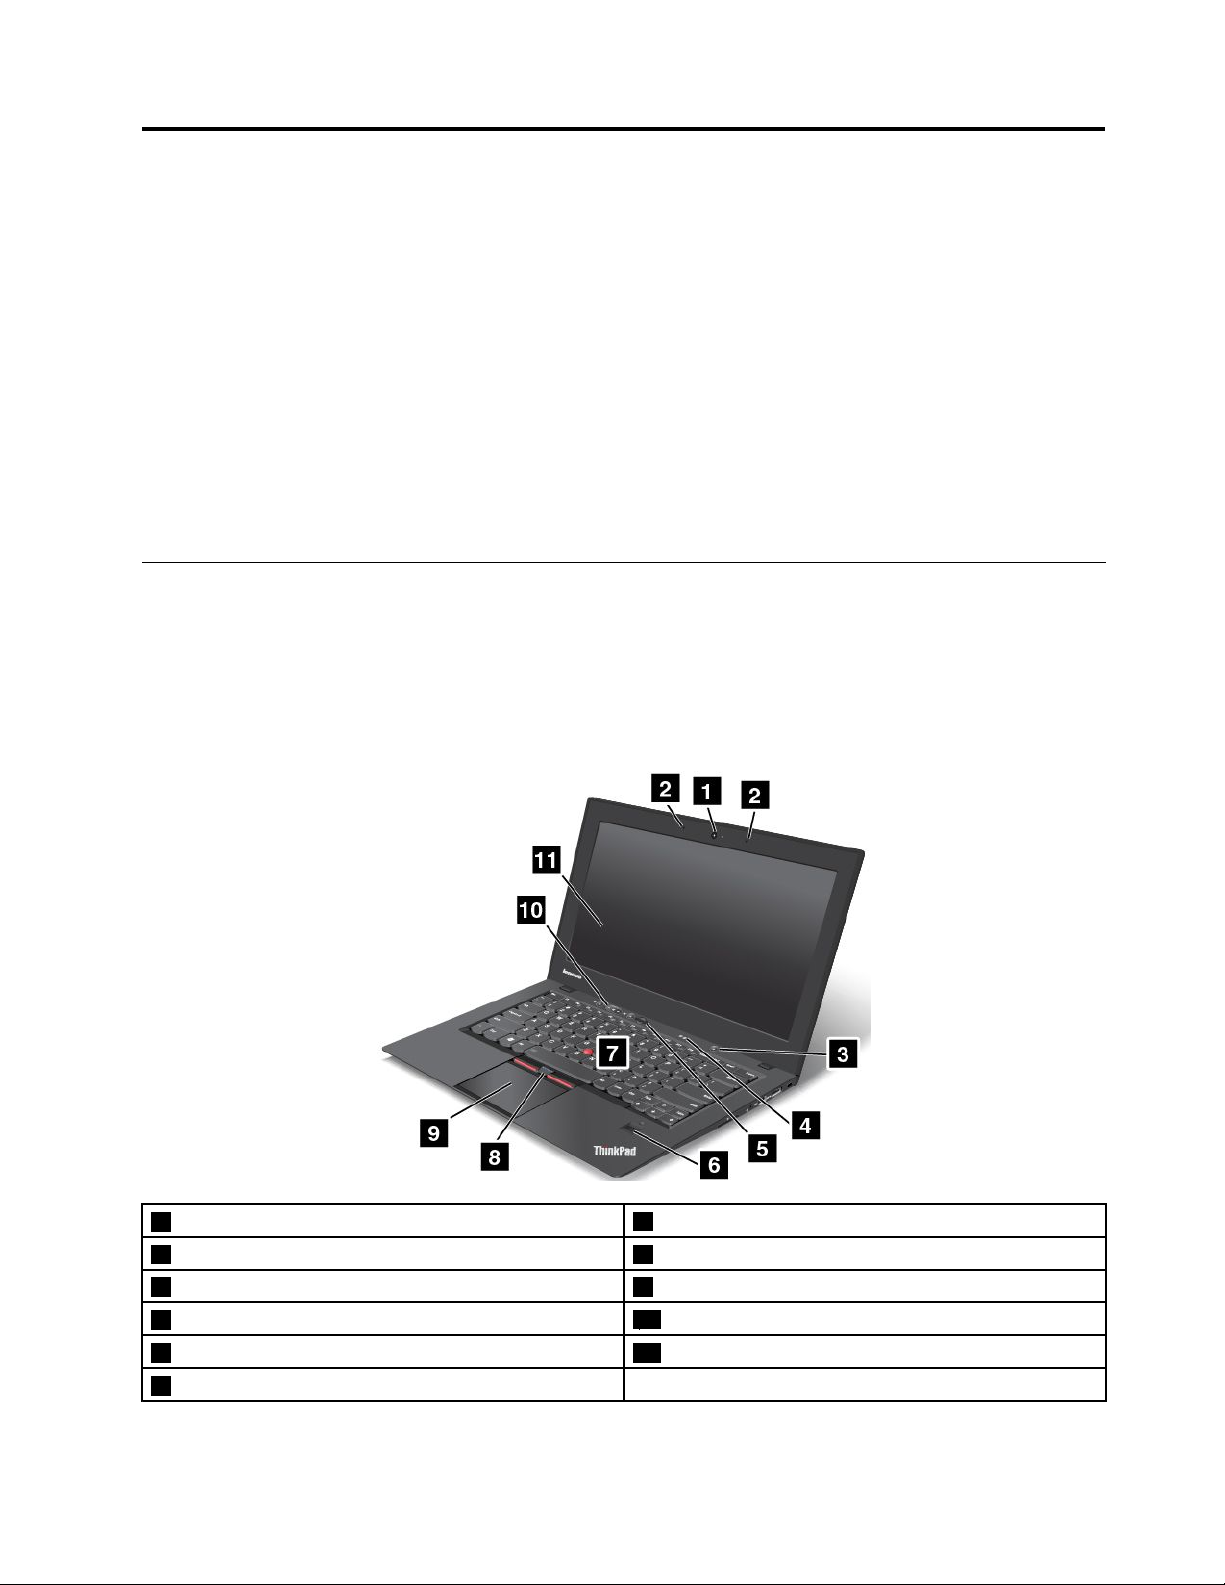
Frontview
Note:Yourcomputermighthaveslightvariationsfromthefollowingillustration.
1Camera
2Microphones8T rackPointbuttons
3Powerbutton9T ouchpad
4Statusindicators
5Blackbutton
6Fingerprintreader
©CopyrightLenovo2012
7TrackPoint
10Volumecontrolbuttons
11Screen(multi-touchscreenonsomemodels)
®
pointingstick
1
Page 18

1Camera
Usethecameratotakepicturesorholdavideoconference.
2Microphones
Themicrophonescapturesoundandvoicewhenusedwithanapplicationprogramcapableofhandling
audio.
3Powerbutton
Usethepowerbuttontoturnonthecomputer.
Toturnoffthecomputer,usetheStartmenushutdownoptionontheWindows
®
7operatingsystem.For
theWindows8operatingsystem,movethecursortothebottomrightcornerofthescreentobringupthe
charms.ThenclickSettings➙Power➙Shutdown.
Ifyourcomputerstopsrespondingandyoucannotturnitoff,pressandholdthepowerbuttonforfour
secondsormore.Ifthecomputerstillisnotresponding,removetheacpoweradapterandusethe
emergencyresetholetoresetthecomputer.See“Bottomview”onpage6.
Youalsocanprogramthepowerbuttonsothatbypressingthepowerbuttonyoucanshutdownthe
computerorputitintosleeporhibernationmode.Toachievethis,youneedtochangeyourpowerplan
settings.Toaccesspowerplansettings,dothefollowing:
•ForWindows7:StartthePowerManagerprogramandthenclickthePowerPlantab.Forinstructionson
howtostartthePowerManagerprogram,see“AccessingLenovoprogramsontheWindows7operating
system”onpage12
.
•ForWindows8:ClickthebatterystatusiconfromtheWindowsnoticationareaandclickMorepower
options.ThenclickChoosewhatthepowerbuttonsdo.
4Statusindicators
Yourcomputerhasseveralstatusindicators.Forthedetailedinformationaboutthelocationandmeaningof
eachindicator,see“Statusindicators”onpage6
5Blackbutton
.
Whentheoperatingsystemisworkingnormally,pressingtheblackbuttonlaunchestheSimpleTapprogram
ontheWindows7operatingsystemortheLenovoPCDeviceExperienceprogramontheWindows8
operatingsystem.
OntheWindows7operatingsystem,youalsocanusetheblackbuttontointerruptthestartupsequence
ofyourcomputertostarttheRescueandRecovery®workspace.ToaccesstheRescueandRecovery
workspace,turnonyourcomputerandpresstheblackbuttonwhentheThinkPadlogoisdisplayedon
thescreen.FormoreinformationabouttheRescueandRecoveryWorkspace,see“UsingtheRescue
andRecoveryworkspace”onpage59
6Fingerprintreader
.
Somemodelshaveangerprintreader.Thengerprintauthenticationtechnologyenablesyoutouseyour
ngerprinttostartthecomputer,entertheThinkPad
®
Setupprogram,orentertheWindows
®
operating
system.
UltraNav
®
pointingdevice
7TrackPointpointingstick
8TrackPointbuttons
9Touchpad
2UserGuide
Page 19
ThekeyboardcontainstheLenovouniqueUltraNavpointingdevice.Pointing,selecting,anddraggingareall
partofasingleprocessthatyoucanperformwithoutmovingyourngersfromatypingposition.
10Volumecontrolbuttons
Thevolumecontrolbuttonsenableyoutoquicklyadjustthesoundvolume,mutethespeakers,ormutethe
microphonesofyourcomputer.
11Screen(multi-touchscreenonsomemodels)
Formoreinformation,referto“Usingthemulti-touchscreen”onpage22.
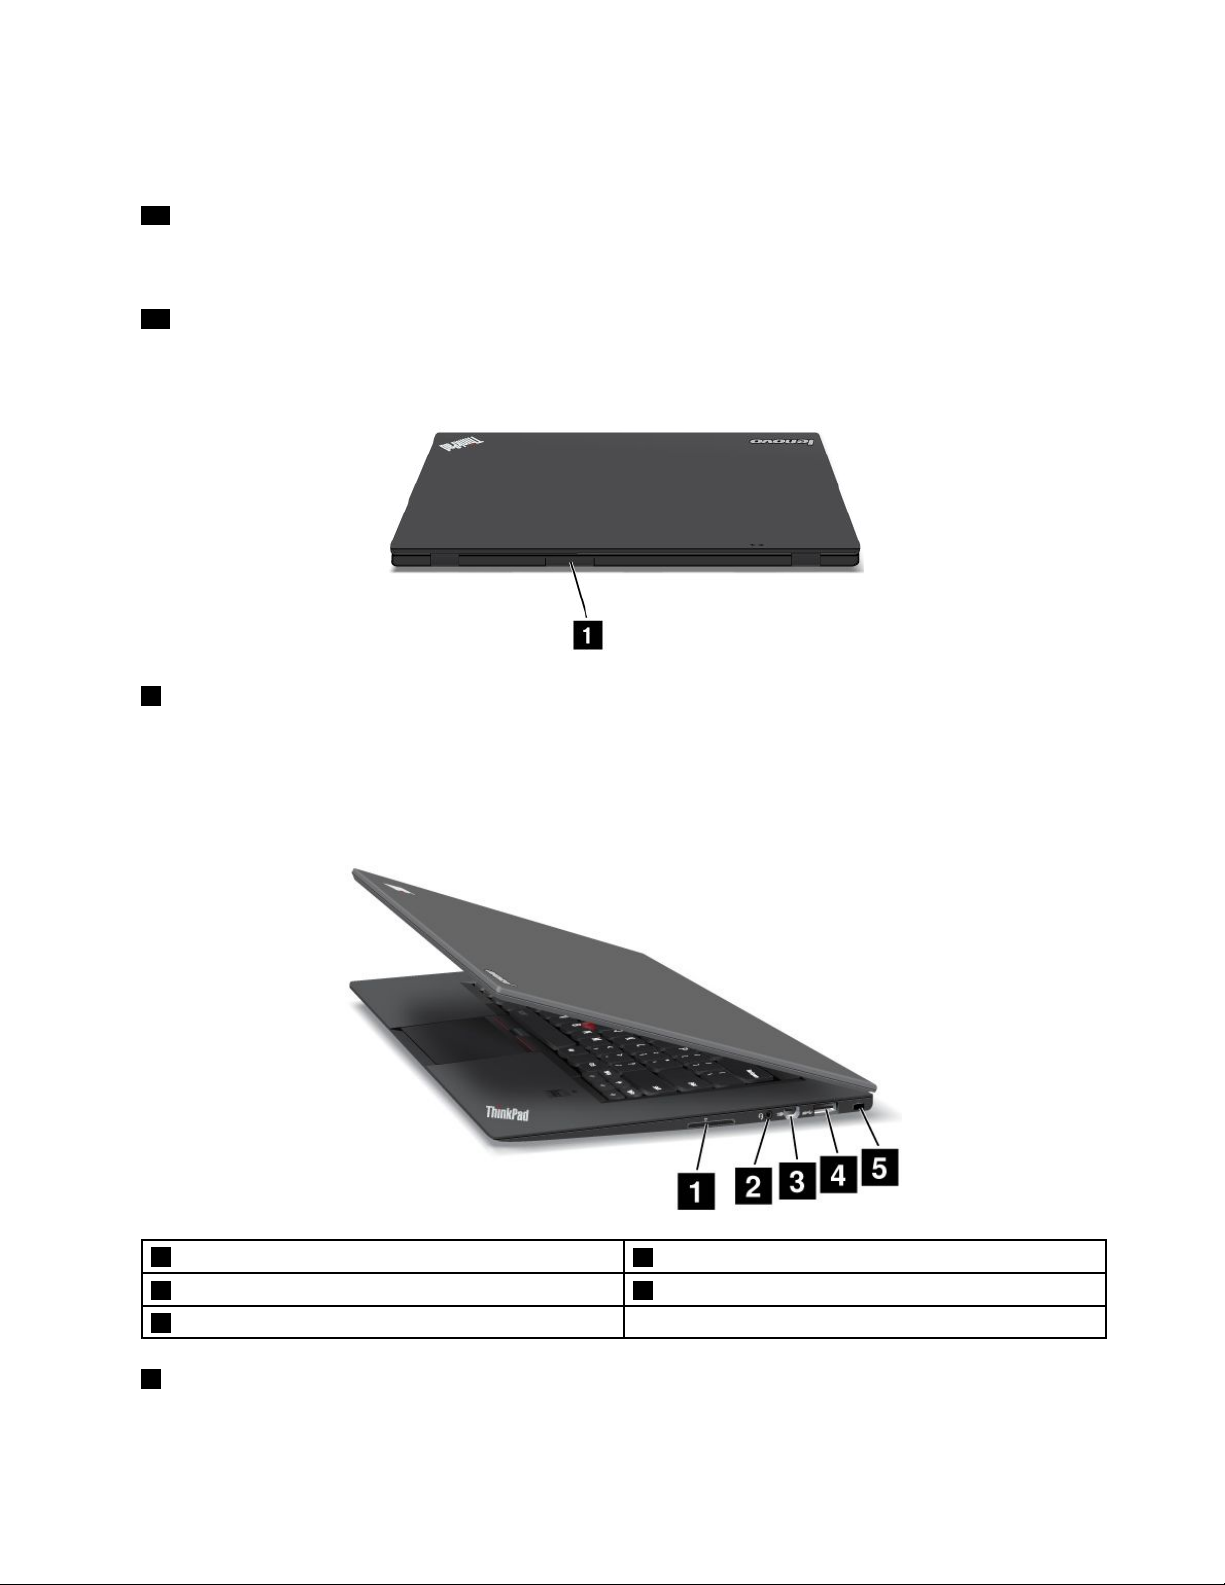
Rearview
1SIMcardslot
IfyourcomputerhasawirelessWANfeature,itmightrequireaSubscriberIdenticationModule(SIM)card
toestablishwirelessWANconnections.Dependingonthecountryofdelivery,theSIMcardmightbe
alreadyinstalledintheSIMcardslot.
Right-sideview
14-in-1mediacardreaderslot
2Comboaudiojack5Securitykeyhole
3MiniDisplayPortconnector
14-in-1mediacardreaderslot
The4-in-1mediacardreadersupportsthefollowingcards:
4USB3.0connector
•SecureDigital(SD)card
Chapter1.Productoverview3
Page 20

•SecureDigitalHigh-Capacity(SDHC)card
•SecureDigitaleXtended-Capacity(SDXC)card
•MultiMediaCard(MMC)
Fordetails,referto“Usingaashmediacard”onpage38
.
Note:YourcomputerdoesnotsupporttheContentProtectionforRecordableMedia(CPRM)featurefor
SDcards.
2Comboaudiojack
Tolistentothesoundfromyourcomputer,connectaheadphoneoraheadsetthathasa3.5mm4-pole
plugtothecomboaudiojack.
Notes:
•Ifyouareusingaheadsetwithafunctionswitch,forexample,aheadsetforaniPhonemobiledigital
device,donotpressthisswitchwhileusingtheheadset.Ifyoupressit,theheadsetmicrophonewillbe
disabled,andthemicrophonesonthecomputerwillbeenabledinstead.
•Thecomboaudiojackdoesnotsupportaconventionalmicrophone.
3MiniDisplayPortconnector
UsetheMiniDisplayPortconnectortoconnectyourcomputertoacompatibleprojector,externalmonitor,or
high-denitiontelevision.
YourcomputermightcomewithaMiniDisplayPorttoVGAadapter.Usetheadaptertoconnectyour
computertoacompatibledigitalaudiodeviceorvideomonitorsuchasahigh-denitiontelevision.
4USB3.0connector
TheUniversalSerialBus(USB)3.0connectorisusedforconnectingdevicescompatiblewithaUSB
interface,suchasaUSBprinteroradigitalcamera.
Note:WhenyouattachaUSBcabletotheconnector,ensurethattheUSBmarkisfacingupward.
Otherwisetheconnectormightbedamaged.
5Securitykeyhole
Purchaseasecuritycablelockthattsthiskeyholetolockyourcomputertoastationaryobjecttoprotect
yourcomputerfromtheft.
4UserGuide
Page 21
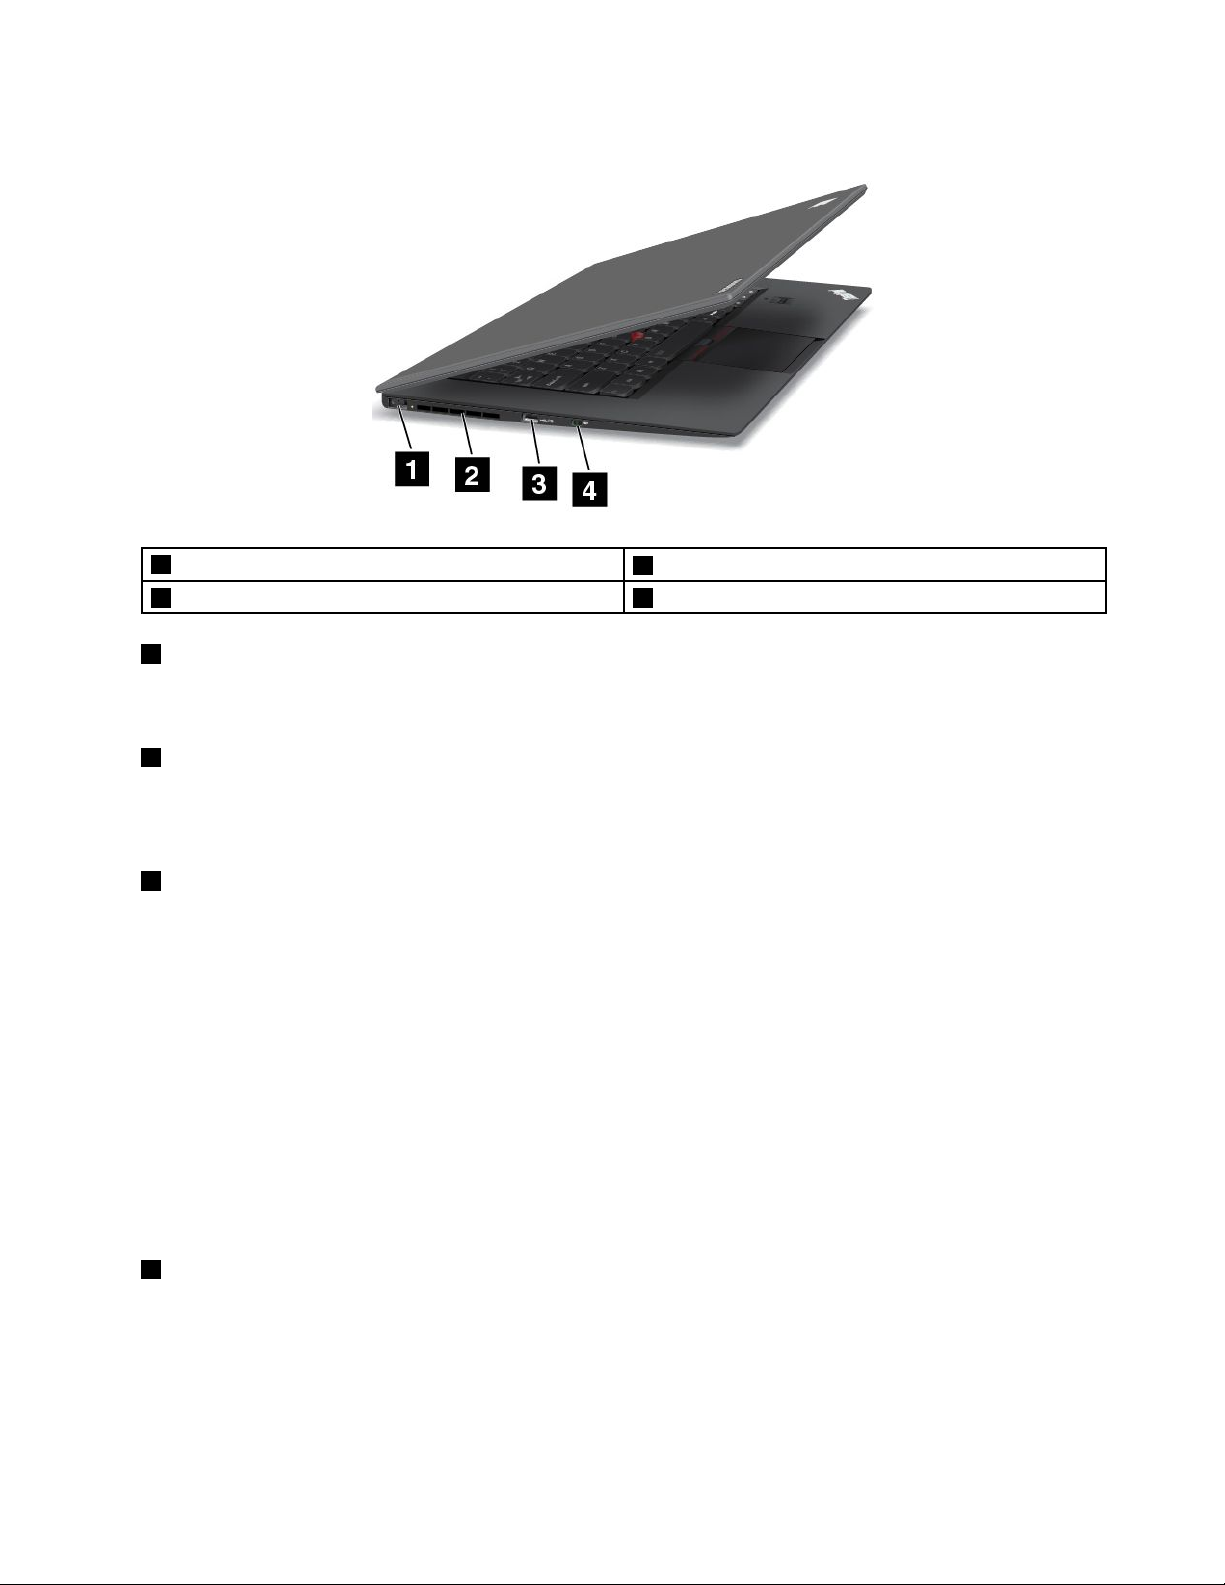
Left-sideview
1acpowerconnector
2Fanlouvers4Wirelessradioswitch
1acpowerconnector
3AlwaysOnUSBconnector
Connecttheacpoweradaptertotheacpowerconnectortoprovideacpowertothecomputerandcharge
thebattery.
2Fanlouvers
Theinternalfanandlouversenableairtocirculateinthecomputerandcoolthecentralprocessor.
Note:Toavoidimpedingairow,donotplaceanyobstacleinfrontofthefan.
3AlwaysOnUSBconnector
Bydefault,theAlwaysOnUSBconnectorenablesyoutochargesomemobiledigitaldevicesand
smartphoneswhenyourcomputerisinsleeporhibernationmode.
Ifyouwanttochargethesedeviceswhenyourcomputeristurnedoff,dothefollowing:
1.Connectthecomputertoanacpowersupply.
2.GotoThinkPadSetupandenableAlwaysOnUSBChargeinoffmode.Formoreinformation,see
“Congmenu”onpage70.
3.Dooneofthefollowing:
•ForWindows7:StartthePowerManagerprogramandclicktheGlobalPowerSettingstab.Then
selecttheEnableAlwaysOnUSBcheckbox.
•ForWindows8:PresstheWindowskeytogototheStartscreen.ClickLenovoSettings➙Power.
ThenselecttheEnablewhenthecomputerisoffcheckbox.
4Wirelessradioswitch
Usethisswitchtoquicklyturnonorturnoffallwirelessconnections.
Chapter1.Productoverview5
Page 22
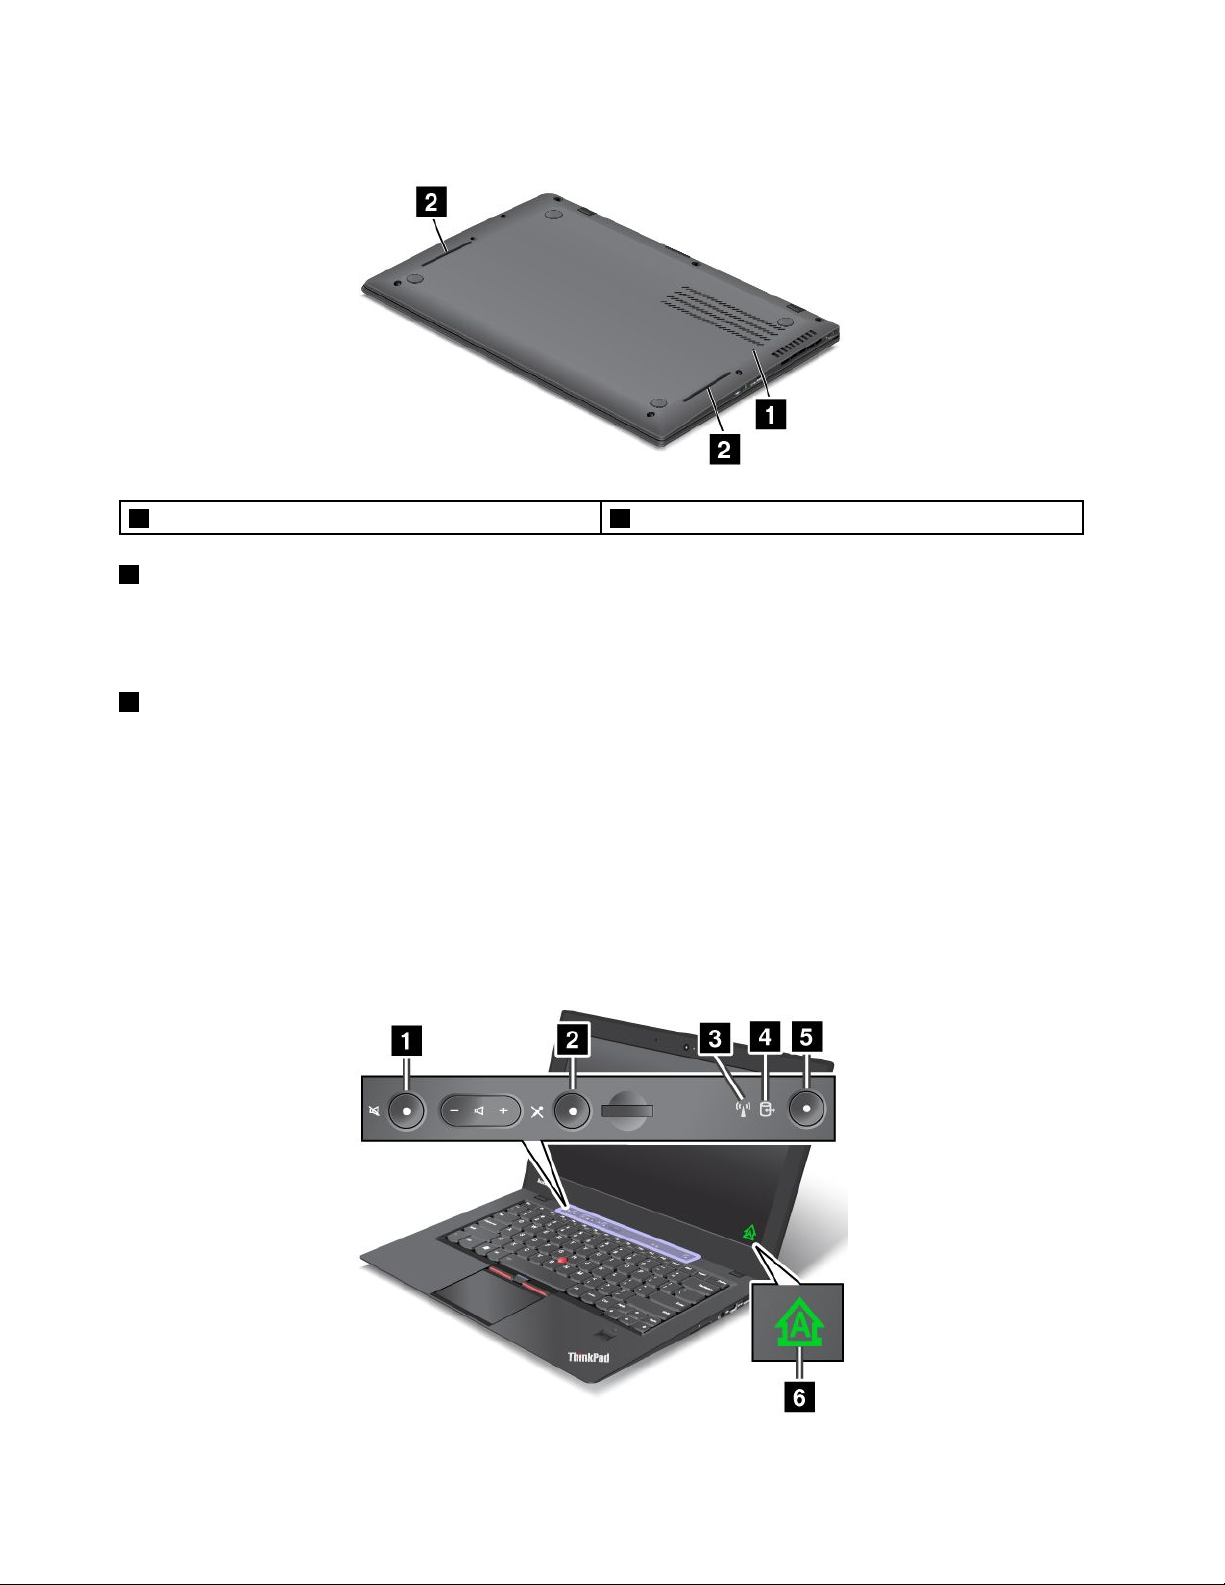
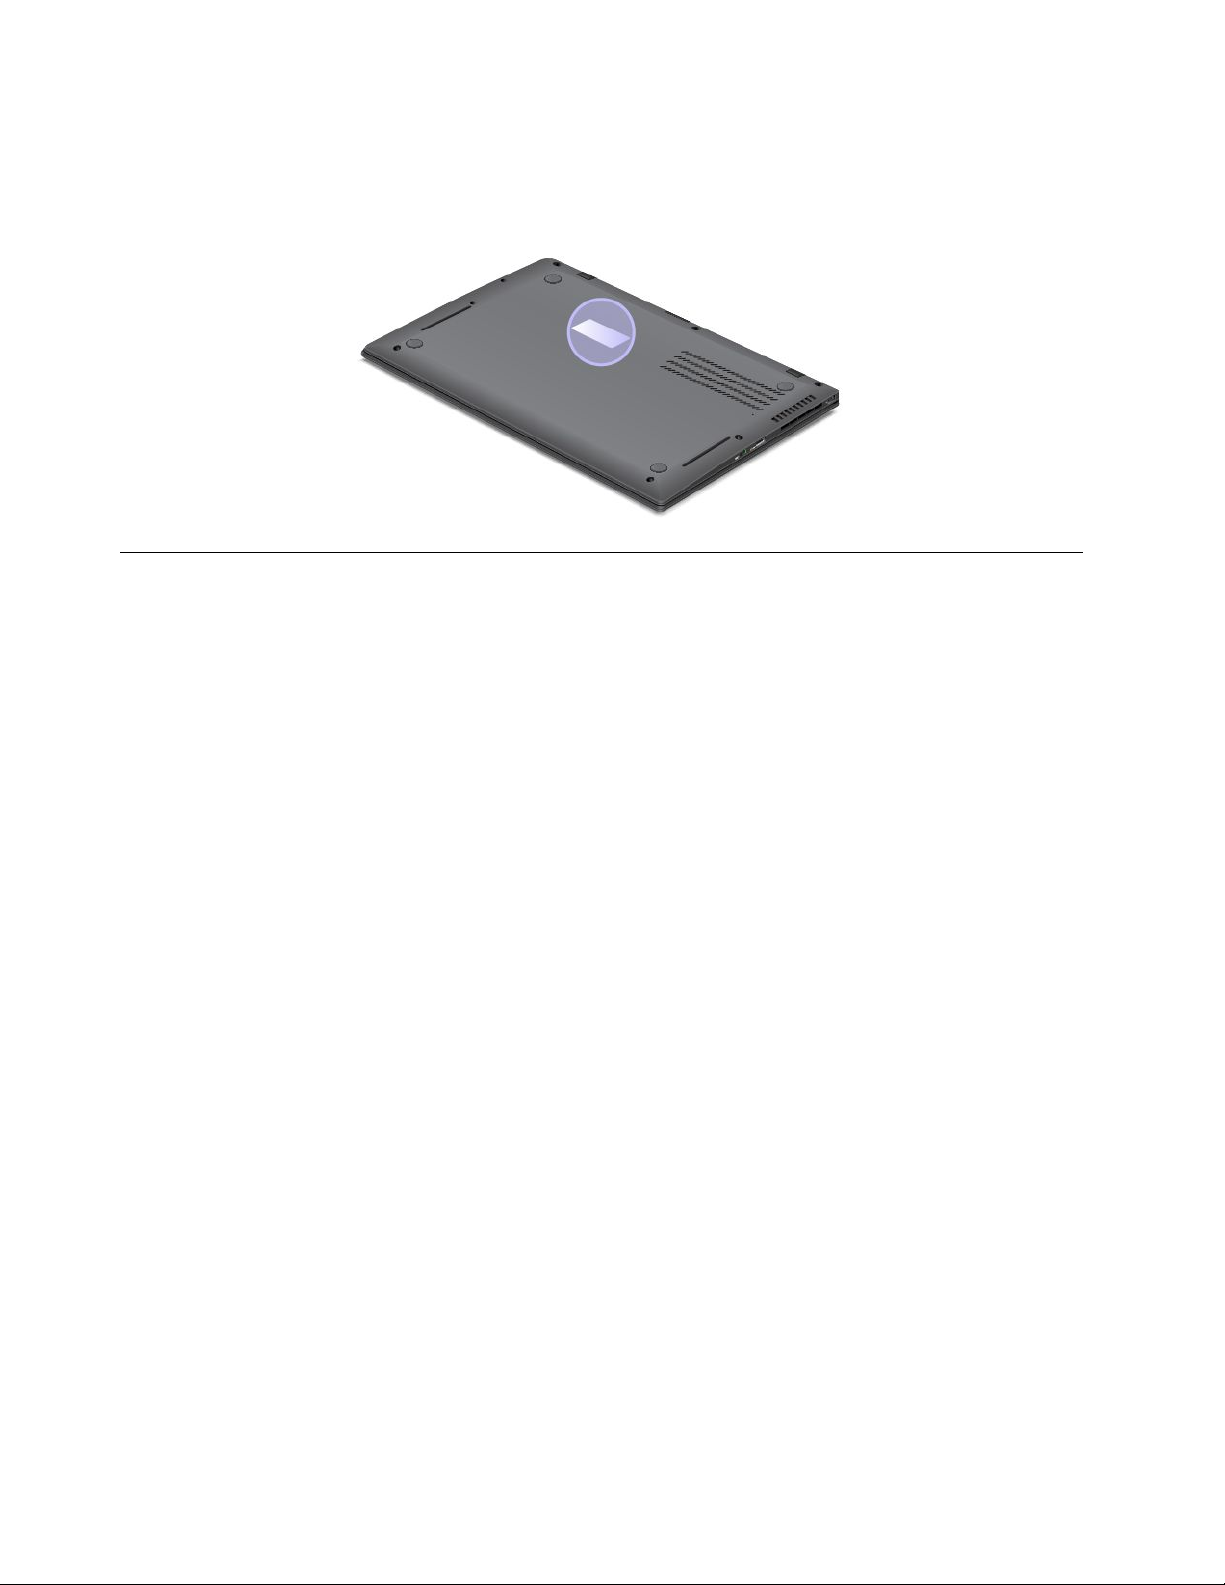
Bottomview
1Emergencyresethole
1Emergencyresethole
Ifyourcomputerstopsrespondingandyoucannotturnitoffbypressingthepowerbutton,removetheac
poweradapterandresetthecomputerbyinsertinganeedleorastraightenedpaperclipintotheemergency
resetholetoturnoffthecomputer.
2Speakers
Fordetails,referto“Volumeandmutebuttons”onpage20.
2Speakers
Statusindicators
Thestatusindicatorsshowthecurrentstatusofyourcomputer.
Systemstatusindicators
Yourcomputerhassystemstatusindicators.Thefollowingillustrationsshowthelocationandthemeaning
ofeachindicator.
Note:Yourcomputermighthaveslightvariationsfromthefollowingillustrations.
6UserGuide
Page 23

1Speakermuteindicator
Whentheindicatorisoninred,thespeakermutemodeisenabled.
2Microphonemuteindicator
Whentheindicatorisoninred,themicrophonemutemodeisenabled.
3WirelessLAN/WAN/Bluetoothstatusindicator
•Green:ThewirelessLAN,WAN,Bluetoothfeatureison.
•Off:Wirelessnetworkdevicesaredisabledorthewirelessradioisturnedoff.
4Deviceaccessstatusindicator
Whentheindicatorison,thesmallformfactorsolid-statedriveisreadingorwritingdata.
5Power-onstatusindicator
•On:Thecomputerison.
•Blinking:Thecomputerisinsleepmode.
•Off:Thecomputerisoff.
6CapsLockindicator
Whentheindicatorison,theCapsLockmodeisenabled.Y oucantypeallalphabeticcharacters(A-Z)in
uppercasewithoutpressingtheShiftkey.
7IlluminateddotintheThinkPadlogo(onsomemodels)
TheilluminateddotintheThinkPadlogofunctionsasasystemstatusindicator.
•Red:Thecomputerison.
•Fastblinkingred:Thecomputeristurningoff.
•Slowblinkingred:Thecomputerisinsleepmode.
•Off:Thecomputerisoff.
Powerstatusindicators
Thecomputerhasstatusindicatorsthatshowthepowermode(sleep,hibernation,ornormal),acpower
status,andbatterystatus.Thefollowingshowsthelocationsandthemeaningoftheindicators:
Thefollowingillustrationshowsthelocationsoftheacpowerstatusindicator.
Chapter1.Productoverview7
Page 24

•Green:Theacpoweradapterisconnected.
•Off:Theacpoweradapterisnotconnected.
Thefollowinggureshowsthelocationsofthesleepmodestatusindicatorandthebatterystatusindicator.
Note:Yourcomputermighthaveslightvariationsfromthefollowingillustration.
1Sleepstatusindicator(onsomemodels)
•Green:Thecomputerisinsleepmode.
•Blinkinggreen:Thecomputerisenteringsleeporhibernationmode,orisresumingnormaloperation.
2Batterystatusindicator(onsomemodels)
•Green:Thebatterychargelevelis20%ormore.
•Orange:Thebatterychargelevelisbetween5%and20%.
•Fastblinkingorange:Thebatterychargelevelis5%orless,orthebatteryischarging.
•Slowblinkingorange:Thebatteryisbeingcharged.Whenthechargelevelreaches20%,theblinking
colorchangestogreen.
•Slowblinkinggreen:Thebatterychargelevelisbetween20%and80%,andchargingiscontinuing.
Whenthebatterychargelevelreaches80%,thebatterystatusindicatorstopsblinking,butthecharging
mightcontinueuntilthebatteryis100%charged.
•Quickblinkingorange:Anerrorhasoccurredwiththebattery.
•Off:Thebatteryisdetachedorthecomputerispoweredoff.
8UserGuide
Page 25

Note:Ifthecomputerisoperatingonbatterypower,thebatterystatusindicatordoesnotworkwhilethe
computeristurnedofforisinsleepmodeorhibernationmode.
Locatingimportantproductinformation
Thissectionprovidesinformationtohelpyoulocateyourmachinetypeandmodellabel,FCCIDandIC
Certicationlabel,andtheMicrosoft
®
CerticateofAuthenticity(COA)label.
Machinetypeandmodellabel
Themachinetypeandmodellabelidentiesyourcomputer.IfyoucontactLenovoforhelp,themachine
typeandmodelnumberwillhelpsupporttechnicianstoidentifyyourcomputerandprovidethehighest
levelofservice.
Youcanndthemachinetypeandmodelofyourcomputeronthelabelasshownbelow:
FCCIDandICCerticationnumberlabel
YoucanndtheFCCIDandICCerticationnumbersfortheinstalledtransmittercardsonthebottomof
yourcomputerasshownbelow.
CerticateofAuthenticitylabel
TheMicrosoftCerticateofAuthenticitylabelforthepreinstalledoperatingsystemisattached.Printedonthis
labelaretheproductIDandtheproductkeyinformationforyourcomputer.Recordthisinformationandkeep
itinasafeplace.Youmightneedthesenumberstostartyourcomputerorreinstalltheoperatingsystem.
Chapter1.Productoverview9
Page 26
Note:TheCerticateofAuthenticitylabelappliesonlytocomputerspreinstalledwiththeWindows7
operatingsystem.
TheWindowsCerticateofAuthenticitylabelofyourcomputerisshownasbelow:
Features
Processor
•Toviewtheprocessorinformationofyourcomputer,dothefollowing:
–ForWindows7:ClickStart,right-clickComputer.ThenclickProperties.
–ForWindows8:Fromthedesktop,movethecursortothetop-rightorbottom-rightcornerofthe
screentodisplaythecharms.ThenclickSettings➙PCinfo.
Memory
•Doubledatarate3lowvoltage(DDR3L)synchronousdynamicrandomaccessmemory(SDRAM)
Storagedevice
•Smallformfactorsolid-statedrive
Display
ThecolordisplayusesThinFilmTransistor(TFT)technology.
•Size:14inches(355mm)
•LCDresolution:upto1600-by-900
•Brightnesscontrol
•Camera
•Digitaldualarraymicrophones
•Multi-touchscreen(onsomemodels)
Keyboard
•6-rowfullsizebacklitkeyboard
•UltraNavpointingdevice(TrackPointpointingdeviceandtouchpad)
•Fnkeyfunction
•Blackbutton
•Volumecontrolbuttons
10UserGuide
Page 27

•Speakermutebutton
•Microphonemutebutton
Interface
•Externalmonitorconnector(MiniDisplayPortconnector)
•Comboaudiojack
•OneUSB3.0connector
•OneAlwaysonUSBconnector
•4-in-1mediacardreader
Wirelessfeatures
•IntegratedwirelessLAN
•IntegratedBluetooth(onsomemodels)
•IntegratedwirelessWAN(onsomemodels)
Securityfeatures
•Fingerprintreader(onsomemodels)
Specications
Size
•Width:13.03inches(331mm)
•Depth:8.90inches(226mm)
•Height:
–Modelswithamulti-touchscreen:0.82inches(20.85mm)
–Modelswithoutamulti-touchscreen:0.31to0.68inches(8.0to17.3mm)
Heatoutput
•65W(222Btu/hr)maximumor90W(307Btu/hr)maximum(dependingonthemodel)
Powersource(acpoweradapter)
•Sine-waveinputat50to60Hz
•Inputratingofacadapter:100to240Vac,50to60Hz
Batterylife
•Forthepercentageofremainingbatterypower,checkthebatterystatusiconintheWindowsnotication
area.
Operatingenvironment
Thissectionprovidesinformationaboutyourcomputeroperatingenvironment.
Environment:
•Maximumaltitudewithoutpressurization:3048m(10000ft)
•Temperature
Chapter1.Productoverview11
Page 28

–Ataltitudesupto2438m(8000ft)
–Operating:5.0°Cto35.0°C(41°Fto95°F)
–Storage:5.0°Cto43.0°C(41°Fto109°F)
–Ataltitudesabove2438m(8000ft)
–Maximumtemperaturewhenoperatingundertheunpressurizedcondition:31.3°C(88°F)
Note:Whenyouchargethebatterypack,itstemperaturemustbeatleast10°C(50°F).
•Relativehumidity:
–Operating:8%to80%
–Storage:5%to95%
Ifpossible,placeyourcomputerinawell-ventilatedanddryareawithoutdirectexposuretosunshine.
Keepelectricalappliancessuchasanelectricfan,radio,airconditioner,andmicrowaveovenawayfrom
yourcomputerbecausethestrongmagneticeldsgeneratedbytheseappliancescandamagethemonitor
anddataonthesolid-statedrive.
Donotplaceanybeveragesontopoforbesidethecomputerorotherattacheddevices.Ifliquidisspilledon
orinthecomputeroranattacheddevice,ashortcircuitorotherdamagemightoccur.
Donoteatorsmokeoveryourkeyboard.Particlesthatfallintoyourkeyboardcancausedamage.
Lenovoprograms
YourcomputercomeswithLenovoprogramstohelpyouworkmoreeasilyandsecurely.Dependingon
theWindowsoperatingsystempreinstalled,theprogramsmightvary.
TolearnmoreabouttheprogramsandothercomputingsolutionsofferedbyLenovo,goto
http://www.lenovo.com/support
AccessingLenovoprogramsontheWindows7operatingsystem
OntheWindows7operatingsystem,youcanaccessThinkVantageprogramsfromtheLenovoThinkVantage
ToolsprogramorfromControlPanel.
•AccessingprogramsfromtheLenovoThinkVantageT oolsprogram
ClickStart➙AllPrograms➙LenovoThinkVantageTools.Double-clickaprogramicontoaccess
theapplication.
Note:IfaprogramiconintheLenovoThinkVantageToolsapplicationnavigationwindowisdimmed,it
indicatesthatyouneedtoinstalltheapplicationmanually.Toinstalltheapplicationmanually,double-click
theapplicationicon.Then,followtheinstructionsonthescreen.Whentheinstallationprocesscompletes,
theapplicationiconwillbeactivated.
Table1.ProgramsintheLenovoThinkVantageToolsprogram
ProgramIconname
AccessConnections™InternetConnection
CommunicationsUtilityWebConferencing
FingerprintSoftware
LenovoSolutionCenterSystemHealthandDiagnostics
FingerprintReader
12UserGuide
Page 29

Table1.ProgramsintheLenovoThinkVantageToolsprogram(continued)
ProgramIconname
MobileBroadbandConnect3GMobileBroadband
PasswordManagerPasswordVault
PowerManager
RecoveryMediaFactoryRecoveryDisks
RescueandRecoveryEnhancedBackupandRestore
SimpleTapSimpleTap
SystemUpdate
PowerControls
UpdateandDrivers
Note:Dependingonyourcomputermodel,someoftheprogramsmightnotbeavailable.
•AccessingprogramsfromControlPanel
ClickStart➙ControlPanel.Dependingontheapplicationyouwanttoaccess,clickthecorresponding
sectionandthenclickthecorrespondinggreentext.
Note:IfyoudonotndtheapplicationyouneedinControlPanel,opentheLenovoThinkVantageTools
applicationnavigationwindowanddouble-clickthedimmedicontoinstalltheapplicationyouneed.
Then,followtheinstructionsonthescreen.Whentheinstallationprocesscompletes,theapplicationicon
willbeactivated,andyoucanndtheapplicationinControlPanel.
TheprogramsandthecorrespondingsectionsandgreentextsinControlPanelarelistedinthefollowing
table.
Table2.ProgramsinControlPanel
Program
AccessConnections
CommunicationsUtilityHardwareandSoundLenovo-WebConferencing
FingerprintSoftwareSystemandSecurity
LenovoSolutionCenterSystemandSecurityLenovo-SystemHealthand
MessageCenterPlus
MobileBroadbandConnect
PasswordManager
PowerManager
RecoveryMedia
SimpleTap
SystemUpdateSystemandSecurity
RescueandRecovery
ControlPanelsectionGreentextinControlPanel
NetworkandInternet
HardwareandSound
Programs
NetworkandInternet
SystemandSecurity
UserAccountsandFamilySafety
HardwareandSound
SystemandSecurity
SystemandSecurity
Programs
SystemandSecurity
Lenovo-InternetConnection
Lenovo-FingerprintReader
or
Lenovo-NotebookFingerprint
Reader
Diagnostics
MessagesfromLenovo
Lenovo-3GMobileBroadband
Lenovo-PasswordVault
Lenovo-PowerControls
Lenovo-FactoryRecoveryDisks
Lenovo-SimpleTap
Lenovo-UpdateandDrivers
Lenovo-EnhancedBackupand
Restore
Note:Dependingonyourcomputermodel,someoftheprogramsmightnotbeavailable.
Chapter1.Productoverview13
Page 30

AccessingLenovoprogramsontheWindows8operatingsystem
IfyourcomputerispreinstalledwiththeWindows8operatingsystem,youcanaccessLenovoprogramsby
pressingtheWindowskeytogototheStartscreen,andthenclickaLenovoprogramtolaunchit.Ifyou
cannotndtheprogramyouneed,movethecursortothebottomrightcornerofthescreentobringupthe
charms.ThenclicktheSearchcharmtosearchforthedesiredprogram.
YourcomputersupportsthefollowingLenovoprograms:
•FingerprintSoftware
•LenovoCompanion
•LenovoSettings
•LenovoMobileAccess
•LenovoSolutionCenter
•LenovoSupport
•LenovoThinkVantageT ools
•PasswordManager
•SystemUpdate
Foranintroductiontotheseprograms,see“AnintroductiontoLenovoprograms”onpage14
.
AnintroductiontoLenovoprograms
ThistopicprovidesabriefintroductiontosomeLenovoprograms.
Note:Dependingonyourcomputermodel,someoftheprogramsmightnotbeavailable.
•AccessConnections
TheAccessConnectionsprogramisaconnectivityassistantprogramforcreatingandmanaginglocation
proles.EachlocationprolestoresallthenetworkandInternetcongurationsettingsneededfor
connectingtoanetworkinfrastructurefromaspeciclocationsuchasahomeoranofce.
Byswitchingbetweenlocationprolesasyoumoveyourcomputerfromplacetoplace,youcanquickly
andeasilyconnecttoanetworkwithnoneedtorecongureyoursettingsmanuallyandrestartthe
computereachtime.
•ClientSecuritySolution
TheClientSecuritySolutionprogramprotectsyourcomputerbysecuringclientdataanddeecting
securitybreachattempts.Italsocanhelpmanageyourpasswords,recoveraforgottenpassword,
monitorsecuritysettingsonyourcomputer,andsuggesthowtoenhanceyourcomputersecurity.
•CommunicationsUtility
UsetheCommunicationsUtilityprogramtoconguresettingsforthecameraandaudiodevices.
•FingerprintSoftware
Ifyoursystemcomeswithangerprintreader,theFingerprintSoftwareprogramenablesyoutoenroll
yourngerprintandassociateitwithyourWindowspassword.Asaresult,thengerprintauthentication
canreplaceyourpasswordandenablesimpleandsecureuseraccess.
•GPSEnabler
IfthePCIExpressMiniCardinstalledinyourcomputersupportsGPS,yourcomputercanreceivesignals
fromGPSsatellitesanddetermineitslocation.IfyourcomputerisconnectedtotheInternet,youcannd
yourlocationonareal-timemapprovidedbyGoogleMapsorMicrosoftBing™Maps.
•LenovoCompanion
14UserGuide
Page 31

ThroughtheLenovoCompanionprogram,youcangettheinformationabouttheaccessoriesforyour
computer,viewbolgsandarticlesaboutyourcomputer,andcheckforotherrecommendedprograms.
•LenovoSettings
UsetheLenovoSettingsprogramtoenhanceyourcomputingexperiencebyturningyourcomputerintoa
portablehotspot,conguringcameraandaudiosettings,optimizingyourpowersettings,andcreating
andmanagingmultiplenetworkproles.
•LenovoMobileAccess
TheLenovoMobileAccessprogramenablesyoutomanageyourmobilebroadbandconnection.Y ou
cancreateanaccount,addmoneytotheaccount,andpurchasemobilebroadbandsessionsusing
youraccount.
•LenovoSolutionCenter
TheLenovoSolutionCenterprogramenablesyoutotroubleshootandresolvecomputerproblems.It
combinesdiagnostictests,systeminformationcollection,securitystatus,andsupportinformation,along
withhintsandtipsformaximumsystemperformance.
•LenovoSupport
TheLenovoSupportprogramenablesyoutoregisteryourcomputerwithLenovo,checkthecomputer
healthconditionandbatterystatus,downloadandviewusermanualsforyourcomputer,getthewarranty
informationofyourcomputer,andexplorehelpandsupportinformation.
•LenovoThinkVantageT ools
TheLenovoThinkVantageToolsprogramhelpsyouworkmoreeasilyandsecurelybyprovidingeasy
accesstovariousprograms,suchasFingerprintSoftware,LenovoSolutionCenter,andsoon.
•MessageCenterPlus
TheMessageCenterPlusprogramautomaticallydisplaysmessagestoinformyouaboutimportantnotices
fromLenovo,suchasalertsonsystemupdatesandalertsonconditionsthatrequireyourattention.
•MobileBroadbandConnect
TheMobileBroadbandConnectprogramenablesyourcomputertoconnecttothemobilebroadband
(3G)networkthroughasupportedwirelessWANcard.
•PasswordManager
ThePasswordManagerprogramautomaticallycapturesandllsinauthenticationinformationfor
WindowsprogramsandWebsites.
•PowerManager
ThePowerManagerprogramprovidesconvenient,exible,andcompletepowermanagementforyour
computer.Itenablesyoutoadjustyourcomputerpowersettingstoachievethebestbalancebetween
performanceandpowersaving.
•RecoveryMedia
TheRecoveryMediaprogramenablesyoutorestorethecontentsoftheharddiskdrivetothefactory
defaultsettings.
•RescueandRecovery
TheRescueandRecoveryprogramisaone-buttonrecoveryandrestoresolutionthatincludesasetof
self-recoverytoolstohelpyoudiagnosecomputerproblems,gethelp,andrecoverfromsystemcrashes,
evenifyoucannotstarttheWindowsoperatingsystem.
•SimpleT ap
TheSimpleTapprogramprovidesyouwithaquickwaytocustomizesomebasiccomputersettingssuch
asmutingthespeakers,adjustingthevolume,lockingthecomputeroperatingsystem,launchinga
program,openingaWebpage,openingale,andsoon.YoualsocanusetheSimpleTapprogramto
accesstheLenovoAppShop,fromwhichyoucandownloadvariousprogramsandcomputersoftware.
Chapter1.Productoverview15
Page 32

TostarttheSimpleTapprograminaquickway,doanyofthefollowing:
–ClicktheredSimpleT aplaunchpointonthedesktop.Theredlaunchpointisavailableonthedesktop
afteryouhavelaunchedtheSimpleTapprogramforthersttime.
–Presstheblackbuttononthekeyboard(nexttothevolumecontrolbuttons).
Note:TheSimpleTapprogramisonlyavailableoncertainmodelspreinstalledwiththeWindows7
operatingsystem.IfyourWindows7modelisnotpreinstalledwiththeSimpleTapprogram,youcan
downloaditfromhttp://www.lenovo.com/support.
•SystemUpdate
TheSystemUpdateprogramhelpsyoukeepthesoftwareonyourcomputerup-to-datebydownloading
andinstallingsoftwareupdatepackages(Lenovoprograms,devicedrivers,UEFIBIOSupdates,and
otherthirdpartyprograms).
16UserGuide
Page 33

Chapter2.Usingyourcomputer
Thischapterprovidesinformationonusingsomeofthecomputercomponents.
•“Registeringyourcomputer”onpage17
•“Frequentlyaskedquestions”onpage17
•“Specialkeysandbuttons”onpage19
•“Usingthemulti-touchscreen”onpage22
•“UsingtheUltraNavpointingdevice”onpage23
•“Powermanagement”onpage27
•“Connectingtothenetwork”onpage30
•“Presentationsandmultimedia”onpage34
•“Usingaudiofeatures”onpage37
•“Usingthecamera”onpage38
•“Usingaashmediacard”onpage38
Registeringyourcomputer
Whenyouregisteryourcomputer,informationisenteredintoadatabase,whichenablesLenovotocontact
youincaseofarecallorothersevereproblem.AfteryouregisteredyourcomputerwithLenovo,youwill
alsoreceivequickerservicewhenyoucallLenovoforhelp.Inaddition,somelocationsofferextended
privilegesandservicestoregisteredusers.
ToregisteryourcomputerwithLenovo,dooneofthefollowing:
•Gotohttp://www.lenovo.com/registerandfollowtheinstructionsonthescreentoregisteryourcomputer.
•ConnectyourcomputertotheInternetandregisteryourcomputerthroughapreinstalledregistration
program:
–ForWindows7:ThepreinstalledLenovoProductRegistrationprogramlaunchesautomaticallyafteryou
haveusedyourcomputerforatime.Followtheinstructionsonthescreentoregisteryourcomputer.
–ForWindows8:OpentheLenovoSupportprogram.ThenclickRegistrationandfollowtheinstructions
onthescreentoregisteryourcomputer.
Frequentlyaskedquestions
HereareafewtipsthatwillhelpyouoptimizetheuseofThinkPadnotebook.
Toensurethatyoureceivethebestperformancefromyourcomputer,browsethefollowingWebpagetond
informationsuchasaidsfortroubleshootingandanswerstofrequentlyaskedquestionsat:
http://www.lenovo.com/support/faq.
CanIgetmyuserguideinanotherlanguage?
•Todownloadtheuserguideinanotherlanguage,gotohttp://www.lenovo.com/support.Thenfollow
theinstructionsonthescreen.
Onthegoandneedtousebatterypowermoreeffectively?
©CopyrightLenovo2012
17
Page 34

•Toconservepower,ortosuspendoperationwithoutexitingapplicationsorsavingles,seethe
explanationabout“Power-savingmodes”onpage29.
•Toachievethebestbalancebetweenperformanceandpowersaving,changepowerplansettings.
See“Managingthebatterypower”onpage28.
•Ifyourcomputerwillbeturnedoffforanextendedperiodoftime,followtheinstructionsin“Disabling
thebuilt-inbattery”onpage28todisabletheinternalbuilt-inbatterysoastopreventbatterypower
fromdraining.
Concernedaboutsecurityorneedtosecurelydisposeofdatastoredonyoursolid-statedrive?
•StudyChapter4“Security”onpage45
tondouthowyoucanprotectyourcomputerfromtheftand
unauthorizeduse.
•UsethePasswordManagerprogramtoprotectthedatastoredonyourcomputer.Fordetails,seethe
helpinformationsystemoftheprogram.
•Beforeyoudisposeofthedataonthesolid-statedrive,besuretoread“Noticeondeletingdatafromyour
solid-statedrive”onpage55.
Gettingconnectedindifferentlocationsisachallenge?
•Totroubleshootawirelessnetworkingissue,gotohttp://www.lenovo.com/support/faq.
•TakeadvantageofthenetworkingfeaturesprovidedbytheAccessConnectionsprogram(onthe
Windows7operatingsystem)orLocationAwarenessintheLenovoSettingsprogram(ontheWindows8
operatingsystem).
•Tolearnmoreaboutusingthewirelessfeaturesofyourcomputer,referto“Wirelessconnections”on
page30
.
•Totravelmorecondently,besuretocheckthetipsin“Travelingwithyourcomputer”onpage43.
•PressFn+F5,orusethewirelessradioswitchtoenableordisablethewirelessfeatures.
Needtogivepresentationsorattachanexternalmonitoroften?
•UseFn+F7keycombinationtoswitchdisplayoutputlocation.
•Ensurethatyoufollowtheprocedureof“Attachinganexternalmonitor”onpage34
.
•WiththeExtenddesktopfunction,youcandisplayoutputonboththecomputerdisplayandanexternal
monitor.
Youhavebeenusingyourcomputerforsometimealready,anditisgettingslower?
•Followthegeneraltipsforpreventingproblemsintroducedin“Generaltipsforpreventingproblems”
onpage85
.
•Youcandiagnoseproblemsyourselfbyfollowingtheinstructionsin“Diagnosingproblems”onpage89.
•AlsoRecoverytoolisprovidedonyourcomputersolid-statedrive.Formoreinformation,seeChapter5
“Recoveryoverview”onpage57.
Printthefollowingsectionsandkeepthemwithyourcomputerincaseyouareunabletoaccessthis
onlinehelpwhennecessary.
•“Installinganewoperatingsystem”onpage65
•“Computerstopsresponding”onpage89
•“Powerproblems”onpage101
18UserGuide
Page 35

Specialkeysandbuttons
Yourcomputerhasseveralspecialkeysandbuttonstohelpyouworkmoreeasilyandeffectively.
Functionkeycombinations
Tousethefunctionkeycombination,pressandholdtheFnkey1,thenpressoneofthefunctionkeys.
Releasebothkeys.
Note:Yourcomputermighthaveslightvariationsfromthefollowingillustration.
Powerconservation
Putyourcomputerintosleepmode.Toreturntonormaloperation,presstheFnkeyonly.
Ifyouwanttousethecombinationtoputthecomputerintohibernationmode,youneedtochangeyour
powerplansettings.T oaccesspowerplansettings,dothefollowing:
•ForWindows7:StartthePowerManagerprogramandthenclickthePowerPlantab.Forinstructionson
howtostartthePowerManagerprogram,see“AccessingLenovoprogramsontheWindows7operating
system”onpage12.
•ForWindows8:Right-clickthebatterystatusiconfromtheWindowsnoticationareaandclickPower
Options.ThenclickChangeplansettingsthatisnexttoyourpowerplan.
Switchingadisplayoutputlocation
•Fn+F7
Switchthedisplayoutputlocationbetweenthecomputerdisplayandanexternalmonitorbyselecting
oneofthefollowingoptions:
–Computerdisplayonly
–Computerdisplayandexternalmonitor(sameimage)
–Computerdisplayandexternalmonitor(extendeddesktopfunction)
–Externalmonitoronly
Note:TheWindows+PkeycombinationhasthesamefunctionalityasFn+F7.
Chapter2.Usingyourcomputer19
Page 36

Enablingordisablingthewirelessfeatures
•Fn+F5
Enableordisablethebuilt-inwirelessnetworkingfeatures.IfyoupressFn+F5,alistofwirelessfeaturesis
displayed.Y oucanquicklychangetheradiostateofeachfeatureinthelist.
ToenableordisablethewirelessfeaturesbyusingFn+F5,thefollowingdevicedriversmustbeinstalled
onyourcomputerbeforehand:
–PowerManagementDriver
–OnScreenDisplayUtility
–Wirelessdevicedrivers
Forinformationonthewirelessfeatures,referto“Wirelessconnections”onpage30.
Launchingthecameraandaudiosettings
•Fn+F6
–ForWindows7:OpentheCommunicationssettingswindow,inwhichyoucanpreviewyourvideo
image,takeasnapshotofyourcurrentimage,andchangethecameraandaudiosettings.
–ForWindows8:StarttheLenovoSettingsprogram.Tousethecameraorchangethecamerasettings,
clickCamera.Toadjusttheaudiosettings,clickAudio.
Adjustingthebrightnesslevelofthecomputerdisplay
•Fn+F8:Thecomputerdisplaybecomesdimmer.
•Fn+F9:Thecomputerdisplaybecomesbrighter.
Thisfunctionkeycombinationchangesthebrightnessleveltemporarily.Tochangethedefaultbrightness
level,modifythesettingsofthePowerOptioninControlPanelorusePowerManager.
Multimediacontrol
•Fn+F10:Previoustrack/scene
•Fn+F11:Playorpause
•Fn+F12:Nexttrack/scene
Otherfunctions
•Fn+Spacebar:Thiscombinationisusedtocontrolthekeyboardbacklight.
Therearethreestatesforthekeyboardbacklight:On(Low),On(High),andOff.
PressFn+Spacebaroncetoturnonthekeyboardbacklightinlowbrightnesslevel.T oadjustthebacklight
toahighbrightnesslevel,pressthekeycombinationagain.Pressingthekeycombinationforathird
timeturnsoffthekeyboardbacklight.
•Fn+F3:Lockyourcomputer.
•Fn+B:HasthesamefunctionastheBreakkeyontheconventionalkeyboard.
•Fn+K:HasthesamefunctionastheScrLKkeyontheconventionalkeyboard.
•Fn+P:HasthesamefunctionasthePausekeyontheconventionalkeyboard.
•Fn+S:HasthesamefunctionastheSysRqkeyontheconventionalkeyboard.
Volumeandmutebuttons
Youcanadjustthesoundlevelofthespeakersbyusingthefollowingthreebuttons:
Note:Yourcomputermighthaveslightvariationsfromthefollowingillustration.
20UserGuide
Page 37

1Speakermutebutton
2Volumecontrolbutton
3Microphonemutebutton
Ifyoumutethesoundandthenturnoffyourcomputer,thesoundwillremainmutedwhenyouturnonyour
computeragain.Toturnonthesound,presstheplus(+)orminus(-)button.
Settingthevolume
Toopenthewindowforadjustingtheoutputvolumeortherecordingvolume,dothefollowing:
1.GotoControlPanelandclickHardwareandSound➙Sound.TheSoundwindowopens.
2.ClickthePlaybacktaborRecordingtab,andthenclickadevice,whichyouwanttocustomize.
3.ClickthePropertiesbutton.
4.ClicktheLevelstab,andthenchangethevolumebymovingtheslider.
Youalsocangetaccesstothedesktopvolumecontrolbyusingthevolumeicononthetaskbaratthelower
rightofthescreen.Fordetailsaboutcontrollingvolume,refertoyourWindowshelpinformationsystem.
Settingthemicrophonemutebutton
Bydefault,youcantoggleallofyourrecordingdevicesbetweenthemutestateandtheun-mutestateby
pressingthemicrophonemutebutton.
Ifyouwanttotoggleoneoftherecordingdevicesbetweenthemutestateandtheun-mutestate,do
thefollowing:
1.PressFn+F6.TheCommunicationssettingswindowopens.
2.ClicktheManageSettingsbutton.TheCommunicationsUtilitywindowopens.
3.OntheVoIPCallSettingstab,clickMicrophonemutebuttonsettings.TheSettingforMicrophone
Mutewindowopens.
4.SelectOnlytherecordingdeviceselectedbelow:andthenselecttherecordingdevicefromthe
drop-downlistbox.
5.ClickOK.
Windowskey
Note:Yourcomputermighthaveslightvariationsfromthefollowingillustration.
Chapter2.Usingyourcomputer21
Page 38

OntheWindows7operatingsystem,presstheWindowskeytoopentheStartmenu.OntheWindows8
operatingsystem,presstheWindowskeytoswitchbetweenthecurrentworkspaceandtheStartscreen.
YoualsocanusetheWindowskeytogetherwithanotherkeytoachieveotherfunctions.Fordetails,referto
thehelpinformationsystemoftheWindowsoperatingsystem.
Usingthemulti-touchscreen
Thistopicprovidesinstructionsonhowtousethemulti-touchscreenthatisavailableonsomemodels.
Tap
Taponthescreenwithyourngertiptolaunchanapplication,selectanitem,oropenamenu.
Pressandhold
Pressandholdanitemorablankareaonthescreenforafewsecondstoopenthecontextmenu.
Drag
Tapandholdyourngeronanitem,suchasanimageoranicononthescreen,thenpullitalongwithyour
ngertothedesiredlocation.Afteryouhavemovedtheitemtothedesiredlocation,dropit.
Swipeorslide
MoveyourngerinaverticalorhorizontaldirectiononthescreentoscrollthroughtheStartscreen,Web
pages,lists,picturethumbnails,andsoon.
Zoominorzoomout
Movetwongersclosertogetheronthescreentozoomin,ormovetwongersapartonthescreento
zoomout.
Rotate
Puttwoormorengersonanitemandthenrotateyourngers.Thisoperationenablesyoutorotatethe
selecteditemsinadirectionyoumoveyourngers.
Doubletap
Forsomeapplications,quicklytaptwiceonthescreentozoomin.Double-tapagaintozoomout.
22UserGuide
Page 39

Tipsonusingthemulti-touchscreen
•Themulti-touchscreenisaglasspanelcoveredwithaplasticlm.Donotapplypressureorplaceany
metallicobjectonthescreen,whichmightdamagethetouchpanelorcauseittomalfunction.
•Donotuseinanimateobjects,ngernails,orglovedngersforinputonthescreen.
•Regularlycalibratetheaccuracyofthengerinputtoavoidadiscrepancy.
Tipsoncleaningthemulti-touchscreen
•Turnoffthecomputerbeforecleaningthemulti-touchscreen.
•Useadry,soft,andlint-freeclothorapieceofabsorbentcottontoremovengerprintsordustfromthe
multi-touchscreen.Donotapplysolventstothecloth.
•Gentlywipethescreenusingtop-downmotion.Donotapplyanypressureonthescreen.
UsingtheUltraNavpointingdevice
YourcomputercomeswiththeUltraNavpointingdevice.TheUltraNavpointingdeviceconsistsofthe
TrackPointpointingdeviceandthetouchpad,eachofwhichisitselfapointingdevicewithbothbasicand
extendedfunctions.Youcancongurebothdevicesbychoosingthesettingsyoupreferasfollows:
•SetboththeTrackPointpointingdeviceandthetouchpadaspointingdevices.
ThissettingenablestheuseofallthebasicandextendedfunctionsoftheTrackPointpointingdevice
andthetouchpad.
•SettheT rackPointpointingdeviceasthemainpointingdeviceandthetouchpadforextended
functionsonly.
ThissettingenablestheuseofallbasicandextendedfunctionswiththeTrackPointpointingdevicewhile
limitingtheuseofthetouchpadtoscrolling,tapzones,andslow-motionpointerfunctions.
•SettheTrackPointpointingdeviceasthemainpointingdevice,anddisablethetouchpad.
•Setthetouchpadasthemainpointingdevice,anddisabletheTrackPointpointingdevice.
ChangingtheUltraNavpointingdevicesettings
TochangeyourUltraNavpointingdevicesettings,gotoControlPanelandclickHardwareandSound➙
Mouse➙UltraNav.Thenchangethesettingsasdesired.
UsingtheTrackPointpointingdevice
TheTrackPointpointingdeviceconsistsofapointingstick1onthekeyboardandthreeclickbuttonsatthe
bottomofthekeyboard.T omovethepointer5onthescreen,youapplypressuretothenonslipcaponthe
pointingstickinanydirectionparalleltothekeyboard;thepointingstickitselfdoesnotmove.Thespeedat
whichthepointermovesdependsonthepressureyouapplytothepointingstick.Thefunctionsoftheleft
andright2clickbuttonscorrespondtothoseoftheleftandrightmousebuttonsonaconventionalmouse.
TheTrackPointcenterbutton3,calledthescrollbar,enablesyoutoscrollWebpagesordocumentsinany
directionwithnoneedtousethegraphicscrollbarsonthesideofthewindow.
Note:Yourcomputermighthaveslightvariationsfromthefollowingillustration.
4
Chapter2.Usingyourcomputer23
Page 40

IfyouarenotfamiliarwiththeTrackPoint,theseinstructionswillhelpyougetstarted:
1.Placeyourhandsinthetypingposition,andpressgentlywitheitherindexngeronthepointingstickin
thedirectioninwhichyouwantthepointertomove.
Tomovethepointer,pressthepointingstickawayfromyoutomoveitup,towardyoutomoveit
down,toonesideortheothertomoveitsideways.
Note:Thepointermightdrift.Thisisnotadefect.StopusingtheT rackPointpointingdevicefora
fewseconds;thenthepointerwillstopmoving.
2.Toselectanddragasrequiredbyyoursoftware,presstheleftorrightclickbuttonwitheitherthumb
andmovetheT rackPointpointingstick.
ByenablingPress-to-Select,youcanmaketheTrackPointpointingstickfunctionthesameasthe
leftorrightclickbutton.
CustomizingthesettingsoftheTrackPointpointingdevice
YoucancustomizetheTrackPointpointingdeviceanditsbuttonsasfollows:
•Switchthefunctionsoftheleftandrightbuttons.
•ChangethesensitivityoftheTrackPointpointingdevice.
•EnablethePress-to-Selectfunction.
•EnabletheTrackPointScrollingTips.
TocustomizethesettingsoftheTrackPointpointingdevice,dothefollowing:
1.GotoControlPanelandclickHardwareandSound➙Mouse➙UltraNav.
2.UnderTrackPoint,proceedtochangingthesettings.
Changingthecap
Thecap1ontheendoftheTrackPointpointingstickisremovable.Youcanreplaceitasshownin
thedrawing.
24UserGuide
Page 41

Note:Ifyoureplacethekeyboard,anewkeyboardisshippedwiththedefaultcap.Ifyouwish,youcan
keepthecapfromyouroldkeyboardanduseitonthenewone.
Usingthetouchpad
Thetouchpadisapad1belowtheTrackPointbuttonsatthebottomofthekeyboard.Tomovethepointer
2onthescreen,slideyourngertipoverthepadinthedirectioninwhichyouwantthepointertomove.
Note:Yourcomputermighthaveslightvariationsfromthefollowingillustration.
Thewholetouchpad1isanactiveareasensitivetongermovement.Thebottomareaofthetouchpad
consistsofaleftclickzone3andarightclickzone2.
Movementonthetouchpademulatesoperationsonthemouse.Beforeinteractingwiththetouchpad,make
surethecursorstaysontheobjectthatyouwanttooperate.
Chapter2.Usingyourcomputer25
Page 42

•Leftclick:T omimicasingleleftclickonamouse,tapanywhereonthetouchpadonceorpressthe
leftclickzone3once.Tomimicadoubleclickonamouse,tapanywhereonthetouchpadtwice
orpresstheleftclickzone3twice.
•Rightclick:T omimicarightclickonamouse,presstherightclickzone2once.
•Leftclickanddrag:T omimicaleftclickanddragonamouse,doeitherofthefollowing:
–Tapanywhereonthetouchpadtwiceandholdthengeronthetouchpad,slidethesamengeror
anotherngeronthetouchpad,whicheverismoreconvenientandthenreleasethenger(s).
–Presstheleftclickzone
pad,andthenreleasebothngers.
•Rightclickanddrag:T omimicarightclickanddragonamouse,presstherightclickzone2andhold
thengeronthetouchpad,slideanotherngeronthetouchpad,andreleasebothngers.
Usingthemulti-touchtouchpad
Thetouchpadofyourcomputersupportsmulti-touchwithwhichyoucanzoomin,zoomout,orscrollon
thescreenwhilebrowsingtheInternetorreadingoreditingadocument.
Fordetails,refertotheHelpinUltraNav.
Customizingthetouchpad
Tocustomizethetouchpad,dothefollowing:
1.GotoControlPanelandclickHardwareandSound➙Mouse➙UltraNav.
2.UnderTouchPad,proceedtochangingthesettings.
3andholdthengeronthetouchpad,slideanotherngeronthetouch
DisablingtheUltraNavpointingdeviceandusinganexternalmouse
IfyouattachanexternalmousetoaUSBconnector,youcanusetheexternalmousesimultaneouslywith
theT rackPointpointingdeviceandthetouchpad.
DisablingtheTrackPointpointingdeviceorthetouchpad
TodisabletheTrackPointpointingdeviceorthetouchpad,dothefollowing:
1.GotoControlPanelandclickHardwareandSound➙Mouse➙UltraNav.
2.TodisabletheTrackPointpointingdevice,clearthecheckboxforEnableTrackPoint.Todisablethe
touchpad,clearthecheckboxforEnableT ouchPad.
3.ClickOK.
AddingtheUltraNavicontotheWindowsnoticationarea
ForeasyaccesstotheUltraNavproperties,youcanenablethedisplayoftheUltraNaviconintheWindows
noticationarea.
ToenablethedisplayoftheUltraNaviconintheWindowsnoticationarea,dothefollowing:
1.GotoControlPanelandclickHardwareandSound➙Mouse➙UltraNav.
2.SelectthecheckboxforShowUltraNavicononthesystemtray.
3.ClickOK.YoucannowchangethepropertiesoftheUltraNavpointingdevicebyclickingtheUltraNav
iconintheWindowsnoticationarea.
Note:IfyoucannotseetheUltraNavicon,clickthetriangulariconintheWindowsnoticationarea
toshowhiddenicons.
26UserGuide
Page 43

Powermanagement
Whenyouneedtouseyourcomputerawayfromelectricaloutlets,youdependonbatterypowertokeep
yourcomputerrunning.Differentcomputercomponentsconsumepoweratdifferentrates.Themoreyou
usethepower-intensivecomponents,thefasteryouconsumebatterypower.
SpendmoretimeunpluggedwithThinkPadbatteries.Mobilityhasrevolutionizedbusinessbyallowing
youtotakeyourworkwhereveryougo.WithThinkPadbatteries,youwillbeabletoworklongerwithout
beingtiedtoanelectricaloutlet.
Checkingthebatterystatus
ThebatteryiconintheWindowsnoticationareadisplaysthepercentageofbatterypowerremaining.
Therateatwhichyouusebatterypowerwilldeterminehowlongyoucanusethebatteryofyourcomputer
betweencharges.Becauseeachcomputeruserhasdifferenthabitsandneeds,itisdifculttopredicthow
longabatterychargewilllast.Therearetwomainfactors:
•Howmuchenergyisstoredinthebatterywhenyoubegintowork.
•Thewayyouuseyourcomputer:
–Howoftenyouaccessthesolid-statedrive.
–Howbrightyoumakethecomputerdisplay.
Tocheckfordetailedbatterystatusinformation,dothefollowing:
•ForWindows7:OpenthePowerManagerprogramandclicktheBatterytab.
•ForWindows8:OpentheLenovoSupportprogramandclickBatteryHealth,oropentheLenovo
SettingsprogramandclickPower.
Usingtheacpoweradapter
Thepowertorunyourcomputercancomeeitherfromthelithium-ion(Li-ion)built-inbatteryprovidedwithit,
orfromacpowerthroughtheacpoweradapter.Whileyouuseacpower,thebatterychargesautomatically.
Theacpoweradapterthatcomeswithyourcomputerhastwobasiccomponents:
•Thetransformerpackthatconvertsacpoweradapterforusewiththecomputer.
•Thepowercordthatplugsintotheacoutletandintothetransformerpack.
Attention:Usinganimproperpowercordcouldcauseseveredamagetoyourcomputer.
Connectingtheacpoweradapter
Tousetheacpoweradapter,dothefollowing.Besuretotakethesestepsintheorderinwhichtheyare
givenhere.
1.Connecttheacpoweradaptertotheacpowerconnectorofthecomputer.
2.Connectthepowercordtothetransformerpack.
3.Plugthepowercordintoanelectricaloutlet.
Tipsonusingtheacpoweradapter
Youcancheckthestatusofyourbatteryatanytimebylookingatthebatterymeteratthebottomofyour
display.
•Whentheacpoweradapterisnotinuse,disconnectitfromtheelectricaloutlet.
Chapter2.Usingyourcomputer27
Page 44

•Donotbindthepowercordtightlyaroundtheacpoweradaptertransformerpackwhenitisconnectedto
thetransformer.
•Beforeyouchargethebattery,ensurethatitstemperatureisatleast10°C(50°F).
•Youcanchargethebatterywhentheacpoweradapterisconnectedtothecomputer.Youneedto
chargeitinanyofthefollowingconditions:
–Whenanewbatteryisinstalled.
–Ifthebatterystatusindicatorstartsblinking
–Ifthebatteryhasnotbeenusedforalongtime
Chargingthebattery
Whenyoucheckbatterystatusandndthatthepercentageofpowerremainingisloworwhenthepower
alarmalertsyouthattheremainingpowerislow,youneedtochargeyourbattery.
Ifanacoutletisconvenient,plugtheacpoweradapterintoit,andtheninsertthejackintothecomputer.
Thebatterywillbefullychargedinabout2hours.Thisisaffectedbythebatterysizeandthephysical
environment.Thebatterystatusindicatorwillletyouknowthatthebatteryischarging,andwillalsonotify
youwhenthebatteryisfullycharged.
Note:Toincreasethelifeofthebattery,thecomputerdoesnotstartrechargingthebatteryiftheremaining
powerisgreaterthan95%.
Disablingthebuilt-inbattery
Youneedtodisablethebuilt-inbatteryinthefollowingsituations:
•Yourcomputerwillbeturnedoffforanextendedperiodoftime.
•YourSIMcardneedstobereplaced.
Todisablethebuilt-inbattery,dothefollowing:
1.Turnoffyourcomputeranddisconnecttheacpoweradapterandallcablesfromthecomputer.
2.Turnonyourcomputer.PressF1toenterThinkPadSetupwhentheThinkPadlogoappears.
3.SelectCong➙Power.Thesubmenuisdisplayed.
4.SelectDisableBuilt-inBattery.
5.ClickYesintheSetupWarningwindow.Waitforafewminutestilltheinsideofthecomputercools.
Maximizingthebatterylife
Tomaximizethelifeofthebattery,dothefollowing:
•Usethebatteryuntilthechargeiscompletelydepleted;thatis,usethebatteryuntilthebatterystatus
indicatorstartsblinkingorange.
•Rechargethebatterycompletelybeforeusingit.Thebatteryisfullychargedifthebatteryindicatorshows
greenwhentheacpoweradapterispluggedin.
•Alwaysusepowermanagementfeaturessuchaspowermodes,screenblank,sleep,andhibernation.
Managingthebatterypower
Toachievethebestbalancebetweenperformanceandpowersaving,adjustyourpowerplansettings.
Toaccesspowerplansettings,dothefollowing:
28UserGuide
Page 45

•ForWindows7:StartthePowerManagerprogramandthenclickthePowerPlantab.Forinstructionson
howtostartthePowerManagerprogram,see“AccessingLenovoprogramsontheWindows7operating
system”onpage12.
•ForWindows8:Right-clickthebatterystatusiconfromtheWindowsnoticationareaandclickPower
Options.ThenclickChangeplansettingsthatisnexttoyourpowerplan.
Formoreinformation,refertothehelpinformationsystemoftheprogram.
Power-savingmodes
Thereareseveralmodesthatyoucanuseatanytimetoconservepower.Thissectionintroduceseach
modeandgivestipsontheeffectiveuseofthebatterypower.
Understandingthepower-savingmodes
•Screenblank(fortheWindows7operatingsystemonly)
Thecomputerdisplayrequiresconsiderablebatterypower.Toturnoffpowertothedisplay,right-clickthe
batterygaugeiconfromtheWindowsnoticationareaandselectPoweroffdisplay.
•Sleep
Insleepmode,yourworkissavedtomemory,andthenthesolidstatedriveortheharddiskdriveandthe
computerdisplayareturnedoff.Whenyourcomputerwakesup,yourworkisrestoredwithinseconds.
Toputyourcomputerintosleepmode,pressFn+F4.Toreturnfromsleepmode,presstheFnkey.
Dependingonthecomputermodel,yourcomputermightsupportthe30DayStandbyfunction.Whenthis
functionisenabled,thecomputerconsumesevenlesspowerinsleepmodeandtakesonlyseconds
toresumenormaloperationwhenyoupressthepowerbutton.Formoreinformationaboutthe30Day
Standbyfunction,dothefollowing:
–ForWindows7:RefertothehelpinformationsystemofthePowerManagerprogram.Forinstructions
onhowtostartthePowerManagerprogram,see“AccessingLenovoprogramsontheWindows7
operatingsystem”onpage12
–ForWindows8:OpentheLenovoSettingsprogramandclickPower.
•Hibernation
Byusingthismode,youcanturnoffyourcomputercompletelywithoutsavinglesorexitingfromany
programsthatarerunning.Whenthecomputerentershibernation,allopenprograms,folders,andles
aresavedtotheharddisk,andthenthecomputerturnsoff.
Toputthecomputerintohibernationmode,changeyourpowerplansettings.Toaccesspowerplan
settings,dothefollowing:
–ForWindows7:StartthePowerManagerprogramandthenclickthePowerPlantab.Forinstructions
onhowtostartthePowerManagerprogram,see“AccessingLenovoprogramsontheWindows7
operatingsystem”onpage12
–ForWindows8:Right-clickthebatterystatusiconfromtheWindowsnoticationareaandclickPower
Options.ThenclickChangeplansettingsthatisnexttoyourpowerplan.
•Wirelessoff
Whenyouarenotusingthewirelessfeatures,suchasBluetoothorwirelessLAN,turnthemoff.Thiswill
helpconservepower.Toturnoffthewirelessfeatures,pressFn+F5orusethewirelessradioswitch.
Enablingthewakeupfunction
Ifyouputyourcomputerintohibernationmode,andthewakeupfunctionisdisabled(thisisthedefault
setting),thecomputerdoesnotconsumeanypower.Ifthewakeupfunctionisenabled,itconsumesasmall
amountofpower.Toenablethefunction,dothefollowing:
1.GotoControlPanelandclickSystemandSecurity➙AdministrativeT ools.
2.ClickAdministrativeTools.
.
.
Chapter2.Usingyourcomputer29
Page 46

3.ClickT askScheduler.Ifyouarepromptedforanadministratorpasswordorconrmation,typethe
passwordorprovideconrmation.
4.Fromtheleftpane,selectthetaskfolderforwhichyouwanttoenablethewakeupfunction.The
scheduledtasksaredisplayed.
5.Clickascheduledtask,andthenclicktheConditionstab.
6.UnderPower,selectthecheckboxforWakethecomputertorunthistask.
EnablingthebatteryalarmontheWindows7operatingsystem
FortheWindows7operatingsystem,youcanprogramyourcomputersothatwhenthebatterypowerfalls
belowacertainlevel,threeeventsoccur:
•Thealarmgoesoff.
•Awarningmessageisdisplayed.
•TheLCDisturnedoff.
Toenablethebatteryalarm,dothefollowing:
1.StartPowerManager.
2.ClicktheGlobalPowerSettingstab.
3.ForLowbatteryalarmorCriticallylowbatteryalarm,setthepercentageofthepowerlevelandset
theaction.
Note:Ifyourcomputerenterssleeporhibernationmodewhenthebatteryislow,butthealarmmessage
hasnotyetbeendisplayed,themessagewillbedisplayedwhenthecomputerresumes.Toresumenormal
operation,clickOK.
Connectingtothenetwork
YourcomputermighthaveoneormorenetworkcardsforconnectingtotheInternetandtoyourcompany's
wirelessLANnetwork.
Note:Somemodelscomewithabuilt-inwirelessWANcardenablingyoutoestablishcellularwireless
connectionstoremotepublicorprivatenetworks.
TheAccessConnectionsprogramisaconnectivityassistantprogramforcreatingandmanaginglocation
proles.EachlocationprolestoresallthenetworkandInternetcongurationsettingsneededforconnecting
toanetworkinfrastructurefromaspeciclocationsuchasahomeoranofce.
Ethernetconnections
YoucanconnecttoyourlocalnetworkorabroadbandconnectionbyuseoftheEthernetfeaturebuiltinto
yourcomputer.IfyourareusingtheWindows7operatingsystem,theAccessConnectionsprogramalso
enablesyoutomanageyourlocationproles.Formoreinformation,see“AccessingLenovoprograms
ontheWindows7operatingsystem”onpage12.
DANGER
YourcomputerhasanEthernetconnector.T oavoidtheriskofelectricalshock,donotconnect
thetelephonecabletotheEthernetconnector.
Wirelessconnections
Wirelesscommunicationisthetransferofdatawithouttheuseofcablesbutbymeansofradiowavesonly.
30UserGuide
Page 47

Dependingonthewirelessdeviceusedinyourcomputer,youmightbeabletoconnecttothefollowing
categoriesofwirelessnetworks.
WirelessLAN
Awirelesslocalareanetwork(LAN)coversarelativelysmallgeographicarea,suchasanofcebuildingora
house.Devicesbasedonthe802.11standardscanconnecttothisnetwork.
Yourcomputercomeswithabuilt-inwirelessnetworkcardandacongurationutilitytohelpyoumake
wirelessconnectionsandmonitorthestatusofyourconnection,sothatyoucanstayconnectedtoyour
networkwhileyouareintheofce,inameetingroom,orathome,withnoneedforawiredconnection.
TipsforusingthewirelessLANfeature
Toachievethebestconnection,usethefollowingguidelines:
•PlaceyourcomputersothatthereareasfewobstaclesaspossiblebetweenthewirelessLANaccess
pointandthecomputer.
•Openyourcomputerdisplaytoanangleofslightlymorethan90degrees.
•Ifyouusethewirelessfeature(the802.11standard)ofyourcomputersimultaneouslywithaBluetooth
option,thedatatransmissionspeedcanbedelayedandtheperformanceofthewirelessfeaturecanbe
degraded.
WirelessWAN
WirelessWideAreaNetwork(wirelessWAN),usingcellularnetworksfordatatransmission,enablesyou
toestablishwirelessconnectionsoverremotepublicorprivatenetworks.Theseconnectionscanbe
maintainedoveralargegeographicalarea,suchasacityoranentirecountry,byuseofmultipleantenna
sitesorsatellitesystemsmaintainedbywirelessserviceproviders.
SomeThinkPadnotebookcomputerscomewithabuilt-inwirelessWANcardintegratingsomewireless
WANtechnologies,suchas1xEV-DO,HSPA,3G,GPRSorLTE.Byusingthebuilt-inwirelessWANcardand
thecongurationutilitythatcomeswithyourcomputer,youcanestablishwirelessWANconnectionsand
monitorthestatusofyourconnection.
Note:WirelessWANserviceisprovidedbyauthorizedserviceprovidersinsomecountries.
TipsforusingthewirelessWANfeature
Toachievethebestconnection,usethefollowingguidelines:
•Keepyourcomputerawayfromyourbody.
•Placeyourcomputeronaatsurfaceandopenyourcomputerdisplaytoanangelofslightlymore
than90degrees.
•Placeyourcomputerawayfromconcreteorbrickwallsthatmightdampencellularsignals.
•Bestreceptionwillbeavailablenearwindowsandotherlocationswherecellularphonereceptionisthe
strongest.
Bluetooth
Bluetoothisoneofanumberoftechnologiesusedtocreateawirelesspersonalareanetwork.Bluetooth
canconnectdevicesashortdistancefromoneanother,andiscommonlyusedforconnectingperipheral
devicestoacomputer,transferringdatabetweenhand-helddevicesandapersonalcomputer,orremotely
controllingandcommunicatingwithdevicessuchasmobilephones.
Establishingawirelessconnection
Toestablishawirelessconnection,dothefollowing:
Chapter2.Usingyourcomputer31
Page 48

1.PressFn+F5toturnonthewirelessfeature.
2.ClickthewirelessnetworkconnectionstatusiconintheWindowsnoticationarea.Alistofavailable
wirelessnetworksisdisplayed.
3.Double-clickanetworktoconnecttoit.Providerequiredinformationifneeded.
Ifyouneedtoconnecttodifferentwirelessnetworksindifferentlocations,usethefollowingsoftwareto
managemultiplenetworkprolessothatthecomputerconnectstoanavailablenetworkautomaticallywhen
thelocationchanges:
•ForWindows7:UsetheAccessConnectionsprogram.ForinstructionsonhowtostarttheAccess
Connectionsprogram,see“AccessingLenovoprogramsontheWindows7operatingsystem”onpage12
•ForWindows8:OpentheLenovoSettingsprogramandclickLocationAwareness.See“Accessing
LenovoprogramsontheWindows8operatingsystem”onpage14.
Attention:
•Ifyouwanttousethewirelessfeaturesonanairplane,checkthewirelessserviceswiththeairlinebefore
boardingtheairplane.
•Iftherearerestrictionsontheuseofcomputerwirelessfeaturesonanairplane,youneedtodisableyour
computerwirelessfeaturesbeforeboarding.Todisablethewirelessfeatures,see“Enablingordisabling
thewirelessfeatures”onpage34
.
UsingBluetooth
SomemodelsareequippedwithaBluetoothcardthatiscompliantwithBluetoothSpecication4.0.
.
ToenabletheBluetoothfeatureontheWindows7operatingsystem,pressFn+F5toopenthewireless
radioswitchboard.ThenturnontheBluetoothradio.FortheWindows8operatingsystem,theBluetooth
featureisonbydefault.
SendingdatatoaBluetooth-enableddevice
TosenddatatoaBluetooth-enableddevice,dothefollowing:
1.EnabletheBluetoothfeature.
2.Right-clickthedatathatyouwanttosend.
3.SelectSendTo➙BluetoothDevices.
4.SelectaBluetoothdeviceandthenfollowtheinstructionsonthescreen.
Note:Ifyouusethewirelessfeature(the802.11standard)ofyourcomputersimultaneouslywithaBluetooth
option,thedatatransmissionspeedcanbedelayedandtheperformanceofthewirelessfeaturecanbe
degraded.
FormoreinformationaboutusingtheBluetoothfeature,refertotheWindowshelpinformationsystemand
theBluetoothhelpinformationsystem.
Checkingthewirelessnetworkconnectionstatus
Youcancheckyourcomputerwirelessnetworkconnectionstatusandwirelesssignalstrengththroughthe
wirelessnetworkconnectionstatusiconintheWindowsnoticationarea.Themorebarsencompassed,the
betterthesignal.
FortheWindows7operatingsystem,youalsocanchecktheAccessConnectionsgauge,theAccess
Connectionsstatusicon,ortheAccessConnectionswirelessnetworkconnectionstatusiconinthe
Windowsnoticationarea.
32UserGuide
Page 49

AccessConnectionsgauge
OntheWindows7operatingsystem,theAccessConnectionsgaugeintheWindowsnoticationarea
displaysthestatusandsignalstrengthofyourwirelessconnection.
Youcanndmoredetailedinformationaboutthestatusandsignalstrengthofyourwirelessconnection
byopeningtheAccessConnectionsprogramorbyright-clickingtheAccessConnectionsgaugeinthe
WindowsnoticationareaandselectingViewStatusofWirelessConnection.
•AccessConnectionsgaugestates:wirelessLAN
–
–
Powertothewirelessradioisoffornosignal.
Powertothewirelessradioison.Thesignalstrengthofthewirelessconnectionispoor.To
improvethesignalstrength,moveyourcomputerclosertothewirelessaccesspoint.
–
Powertothewirelessradioison.Thesignalstrengthofthewirelessconnection
ismarginal.
–Powertothewirelessradioison.Thesignalstrengthofthewirelessconnectionis
excellent.
•AccessConnectionsgaugestates:wirelessWAN
–Nosignal
–Signallevel1
–Signallevel2
–
Signallevel3
AccessConnectionsstatusicon
TheAccessConnectionsstatusicondisplaysgeneralconnectionstatus.
•AccessConnectionsstatusiconstates
–
Nolocationproleisactiveornoneexists.
–Currentlocationproleisdisconnected.
–Currentlocationproleisconnected.
AccessConnectionswirelessstatusicon
TheAccessConnectionswirelessstatusicondisplaysthestatusandsignalstrengthofyourwireless
connection.
Youcanndmoredetailedinformationaboutthestatusandsignalstrengthofyourwirelessconnection
eitherbyopeningtheAccessConnectionsprogramorbydouble-clickingtheAccessConnectionswireless
statusiconintheWindowsnoticationarea.
•Wirelessstatusiconstates:wirelessLAN
–
Powertothewirelessradioisoff.
–Powertothewirelessradioison.Noassociation.
–Powertothewirelessradioison.Nosignal.
–Powertothewirelessradioison.Thesignalstrengthofthewirelessconnectionisexcellent.
–Powertothewirelessradioison.Thesignalstrengthofthewirelessconnectionismarginal.
Chapter2.Usingyourcomputer33
Page 50

–Powertothewirelessradioison.Thesignalstrengthofthewirelessconnectionispoor.Toimprove
thesignalstrength,moveyourcomputerclosertothewirelessaccesspoint.
•Wirelessstatusiconstates:wirelessWAN
–Powertothewirelessradioisoff.
Noassociation
–
–Nosignal
–Signallevel1
–Signallevel2
–Signallevel3
Note:Ifyouhavetroubleinmakingaconnection,trymovingyourcomputerclosertoyourwirelessaccess
point.
Enablingordisablingthewirelessfeatures
Toenableordisablethewirelessfeatures,dooneofthefollowing:
•ForWindows7:PressFn+F5toopenthewirelessradioswitchboard.Turnonorturnoffthewireless
featureasdesired.
•ForWindows8:PressFn+F5toenableordisabletheAirplanemode.WhentheAirplanemodeisenabled,
allofyourwirelessdevicesareturnedoff.
Youalsocanusethewirelessradioswitchtoturnonorturnoffthewirelessradiosofallthewirelessdevices
onyourcomputer.
Presentationsandmultimedia
Youcanconnectyourcomputertoaprojectortogivepresentationsoryoucanconnectyourcomputer
toanexternalmonitortoexpandyourworkspace.
Changingdisplaysettings
Youcanchangethedisplaysettings,suchasdisplayresolution,fontsizeandsoon.
Tochangethedisplaysettings,dothefollowing:
1.OpenControlPanelandclickAppearanceandPersonalization.
2.ClickDisplayforfurtherconguration.
3.ClickApply.Thechangewilltakeeffectafteryoulogoff.
Connectingaprojectororanexternalmonitor
Thistopicprovidesinformationaboutconnectingaprojectororanexternalmonitor.
Attachinganexternalmonitor
Note:Ifyouattachanexternalmonitor,avideointerfacecablewithaferritecoreinstalledonthecable
isrequired.
Yourcomputersupportsamaximumvideoresolutionofupto1920x1200(withanexternalmonitorattached
toyourcomputerthroughaMiniDisplayPorttoVGAadapter),providedthattheexternalmonitoralso
supportsthatresolution.Fordetails,refertothemanualprovidedwiththeexternalmonitor.
34UserGuide
Page 51

Youcansetanyresolutionforeitherthecomputerdisplayortheexternalmonitor.Whenyouusebothatthe
sametime,theresolutionofbothisthesame.Ifyousetahigherresolutionforthecomputerdisplay,you
canseeonlypartofthescreenatatime.YoucanseeotherpartsbymovingtheimagewiththeTrackPoint
pointingdeviceoranotherpointingdevice.
Youcanmovethedisplayoutputtothecomputerdisplay,theexternalmonitor,orbothintheDisplay
Settingswindow.
Connectinganexternalmonitor
Toattachanexternalmonitor,dothefollowing:
1.ConnecttheexternalmonitortotheminiDispalyPortconnector;thenconnectthemonitortoan
electricaloutlet.
2.Turnontheexternalmonitor.
3.ChangethedisplayoutputlocationbypressingFn+F7.Thisenablesyoutoswitchbetweenviewing
outputontheexternalmonitor,thecomputermonitor,andbothmonitors.
Note:Ifyourcomputercannotdetecttheexternalmonitor,right-clickonthedesktop,thenselectScreen
resolution.ClicktheDetectbutton.
Notes:
•Donotchangethedisplayoutputlocationwhileamovingpictureisbeingdrawn,forexample,while
playingamovieoragame,orviewingabusinesspresentation.Closetheapplicationbeforechangingthe
displayoutputlocation,orchangethedisplaymodebeforeyouopenanMPEGletoplay.
•IfyouareattachinganexternalmonitorthatsupportsonlyVGAmode(640x480resolution),donotview
outputonboththecomputerdisplayandtheexternalmonitor.Doingsowouldcausetheexternalmonitor
screentobescrambledandtheoutputnottobedisplayed;inaddition,itcouldcausedamagetothe
screen.Usetheexternalmonitoronly.
•IftheexternalTFTmonitoryouconnecthasananaloginterface,ickersorripplesmightappearonsome
displays,suchastheshutdownscreenoftheWindowsoperatingsystem.Thisiscausedbytheexternal
TFTmonitor,andcannotbexedbyadjustingtheexternalTFTmonitororthecomputersidesettings.
Settingtheexternalmonitortype
Tosetyourexternalmonitortype,dothefollowing:
1.ConnecttheexternalmonitortotheMiniDisplayPortconnector,andthenconnectthemonitortoan
electricaloutlet.
2.Turnontheexternalmonitor.
3.Right-clickonthedesktop,andclickScreenresolution.
Note:Ifyourcomputercannotdetecttheexternalmonitor,clicktheDetectbutton.
4.SetResolution.
5.ClickAdvancedSettings.
6.ClicktheMonitortab.Checkthemonitorinformationwindowtoensurethatthemonitortypeiscorrect.
Ifitis,clickOKtoclosethewindow;otherwiseproceedwiththefollowingsteps.
7.Ifmorethantwomonitortypesaredisplayed,selectGenericPnPMonitororGenericNon-PnP
Monitor.
8.ClickProperties.Ifyouarepromptedforanadministratorpasswordorconrmation,typethepassword
orprovideconrmation.
9.ClicktheDrivertab.
10.ClickUpdateDriver.
Chapter2.Usingyourcomputer35
Page 52

11.ClickBrowsemycomputerfordriversoftware,andthenclickLetmepickfromalistofdevice
driversonmycomputer.
12.CleartheShowcompatiblehardwarecheckbox.
13.SelectManufacturerandModelforyourmonitor.Ifyoucannotndyourmonitoronthelist,stopthe
installationofthisdriverandusethedrivershippedwithyourmonitor.
14.Afterupdatingthedriver,clickClose.
15.FortheWindows7operatingsystem,tochangethecolorsettings,right-clickonthedesktop,andclick
Screenresolution.ClickAdvancedSettings,selecttheMonitortab,thensetColors.
16.ClickOK.
Note:Tochangethecolorsettings,right-clickonthedesktop,andclickScreenresolution.ClickAdvanced
Settings,selecttheMonitortab,thensetColors.
Considerationsforattachinganexternalmonitor
•Wheninstallinganoperatingsystem,youmustinstallthedisplaydriverforyourmonitorthatissupplied
withthecomputer,andthemonitorINFlethatissuppliedwiththeexternalmonitor.
•Ifyousetaresolutionhigherthantheresolutionyouareusingonthecomputermonitor,andusean
externalmonitorthatdoesnotsupportthatresolution,takeadvantageofthevirtualscreenfunction,
whichenablesyoutodisplayonlyapartofthehigh-resolutionscreenimageyourcomputerproduces.
YoucanseeotherpartsoftheimagebymovingthescreenwiththeTrackPointpointingdeviceoranother
pointingdevice.
•Iftheexternalmonitoryouareusingisoutdated,theresolutionandtherefreshratemightbelimited.
UsingtheMiniDisplayPortconnector
YourcomputerhasaMiniDisplayPortconnector,thelatestdigitaldisplayinterfaceforconnectiontovarious
externaldevices,suchasCRTmonitors,projectors,orevenhigh-denitiontelevisions.Thiscompact
connectorenablesaplug-and-playsetupandsupportsadaptersthatcanplugintoDVI,VGA,orHDMI
connectors.
Usingdualdisplays
ThissectionintroducestheExtenddesktopfunctionthatenablesyoutodisplayoutput(thesameordifferent)
onboththecomputerdisplayandanexternalmonitor.
UsingtheExtenddesktopfunction
YourcomputersupportsafunctionnamedtheExtenddesktop.WiththeExtenddesktopfunction,you
candisplayoutputonboththecomputerdisplayandanexternalmonitor.Youalsocandisplaydifferent
desktopimagesoneachmonitor.
YoucanusetheExtenddesktopfunctionwithoutchanginganysettings.Ifthefunctiondoesnotwork,refer
to“EnablingtheExtenddesktopfunction”onpage37toenableit.
ConsiderationsforusingtheExtenddesktopfunction
•IfyouwanttoshowDOSfull-screenwhileintheExtenddesktopmode,onlytheprimarydisplayshows
DOS;theotherdisplayisblackedout.
•IfyourcomputerhastheIntelgraphicscard,youcandesignatetheotherdisplayastheprimarydisplay
bydoingthefollowing:
1.Right-clickonthedesktopandselectScreenResolution.
2.ClickthedesireddisplayimageandselecttheMakethismymaindisplaycheckbox.
3.ClickOK.
36UserGuide
Page 53

•WhenanapplicationusingDirectDraworDirect3Displayedinfull-screenmode,itisshownonlyonthe
primarydisplay.
•YoucannotusethedisplayswitchingfunctionwhenyouareintheExtenddesktopmode.
EnablingtheExtenddesktopfunction
ToenabletheExtenddesktopfunction,dothefollowing:
1.Connecttheexternalmonitortothemonitorconnector;thenconnectthemonitortoanelectricaloutlet.
2.Turnontheexternalmonitor.
3.PressFn+F7,thenselectExtend.
Tochangetheresolutionforeachmonitor,dothefollowing:
1.Right-clickonthedesktop,andclickScreenresolution.
2.ClicktheMonitor-1icon(fortheprimarydisplay,thecomputerdisplay).
3.Settheresolutionfortheprimarydisplay.
4.ClicktheMonitor-2icon(forthesecondarydisplay,theexternaldisplay).
5.Settheresolutionforthesecondarydisplay.
6.ClickAdvancedsettingsandsetupthecolorqualityontheMonitortab.
7.ClickOKtoapplythechanges.
Note:Tochangethecolorsettings,right-clickonthedesktop,andclickScreenresolution.ClickAdvanced
Settings,selecttheMonitortab,thensetColors.
Usingaudiofeatures
Yourcomputerisequippedwiththefollowing:
•Comboaudiojack,1/8inch(3.5mm)indiameter
•Speakers
•Dualarraydigitalmicrophone
Yourcomputeralsohasanaudiochipthatenablesyoutoenjoyvariousmultimediaaudiofeatures,such
asthefollowing:
•RecordingandplaybackofPCMandWAVles
•PlaybackofMIDIandMP3les
•Recordingfromvarioussoundsources,suchasaheadsetattached
Thefollowingtableshowswhichfunctionsoftheaudiodevicesattachedtothejacksonyourcomputerare
supported.
Table3.Audiofeaturelist
JackHeadsetwitha3.5mm
4-poleplug
Comboaudiojack
Headphoneand
microphonefunctions
supported
ConventionalheadphoneConventionalmicrophone
Headphonefunction
supported
Notsupported
Tocongurethemicrophoneforoptimizedsoundrecording,usetheRealtekHDAudioManagerprogram.To
starttheprogram,gotoControlPanelandclickHardwareandSound➙RealtekHDAudioManager.
Chapter2.Usingyourcomputer37
Page 54

Usingthecamera
Ifyourcomputerhasacamera,youcanusethecameratopreviewyourvideoimageandtakeasnapshot
ofyourcurrentimage.
Tostartthecamera,dothefollowing:
•ForWindows7:PressFn+F6toopentheCommunicationssettingswindow.
•ForWindows8:PressFn+F6tostarttheLenovoSettingsprogram.ThenclickCamera.
Whenthecameraisstarted,thegreencamera-in-useindicatorturnson.
Youalsocanusethecamerawithotherprogramsthatprovidefeaturessuchasphotographing,video
capturing,andvideoconferencing.Tousethiswithotherprograms,openoneoftheprogramsandstartthe
photographing,videocapturing,orvideoconferencingfunction.Then,thecamerawillstartautomatically
andthegreencamera-in-useindicatorwillturnon.Formoreinformationaboutusingthecamerawitha
program,refertothehelpinformationsystemoftheprogram.
Conguringcamerasettings
Youcancongurethecamerasettingstomeetyourneeds,suchasadjustingthequalityofthevideooutput.
Tocongurethecamerasettings,dothefollowing:
•ForWindows7:PressFn+F6.TheCommunicationssettingswindowopens.ClicktheManageSettings
buttonandcongurethecamerasettingsasdesired.
•ForWindows8,dooneofthefollowing:
–Congurethecamerasettingsdirectlyfromtheprogramthatisusingthecamera.Fordetails,seethe
helpinformationsystemoftheprogram.
–ClickLenovoSettingsfromtheStartscreen.ThenclickCamera.Followtheinstructionsonthe
screentocongurethecamerasettingsasdesired.
Usingaashmediacard
Yourcomputersupportsamediacardreaderslot.Itsupportsthefollowingcards:
•SecureDigital(SD)card
•SecureDigitalHigh-Capacity(SDHC)card
•SecureDigitaleXtended-Capacity(SDXC)card
•MultiMediaCard(MMC)
Notes:
•YourcomputerdoesnotsupporttheCPRMfeaturefortheSDcard.
•Whiletransferringdatatoorfromaashmediacard,suchasanSDcard,donotputyourcomputerinto
sleeporhibernationmodebeforethedatatransferiscomplete;otherwise,yourdatacouldbecome
damaged.
Installingaashmediacard
Attention:Beforeyoustartinstallingacard,touchametaltableoragroundedmetalobject.Thisaction
reducesanystaticelectricityfromyourbody.Thestaticelectricitycoulddamagethecard.
Toinstallacard,dothefollowing:
1.Makesurethemetalcontactsofthecardarefacingdownandpointingtowardthecardslot.
38UserGuide
Page 55

2.Pressthecardrmlyintothecardslot.
Iftheplug-and-playfeatureisnotenabledfortheinstalledashmediacard,dothefollowingtoenable
thefeature:
1.OpenControlPanel.
2.ClickHardwareandSound.
3.ClickDeviceManager.Ifyouarepromptedforanadministratorpasswordorconrmation,typethe
passwordorprovideconrmation.
4.FromtheActionmenu,selectAddlegacyhardware.TheAddHardwareWizardstarts.
5.Followtheinstructionsonthescreen.
Removingaashmediacard
Attention:
•Beforeremovingacard,stopthecardrst.Otherwise,dataonthecardmightbecorruptedorlost.
•Donotremoveacardwhilethecomputerisinsleepmodeorhibernationmode.Otherwise,thesystem
mightnotrespondwhenyoutrytoresumeoperation.
Toremoveacard,dothefollowing:
1.ClickthetriangulariconintheWindowsnoticationareatoshowhiddenicons.Then,right-clickthe
SafelyRemoveHardwareandEjectMediaicon.
2.Selecttheitemyouwanttoremovetostopthecard.
3.Pressthecardtoejectitfromyourcomputer.
4.Removethecardandstoreitsafelyforfutureuse.
Note:IfyoudonotremovethecardfromyourcomputerafteryouejectthecardfromtheWindowsoperating
system,thecardcannolongerbeaccessed.T oaccessthecard,youmustremoveitrst,theninsertitagain.
Chapter2.Usingyourcomputer39
Page 56

40UserGuide
Page 57

Chapter3.Youandyourcomputer
Thischapterprovidesinformationaboutaccessibility,comfort,andtravellingwithyourcomputer.
Thischaptercontainsthefollowingtopics:
•“Accessibilityandcomfort”onpage41
•“Travelingwithyourcomputer”onpage43
Accessibilityandcomfort
Goodergonomicpracticeisimportanttogetthemostfromyourpersonalcomputerandtoavoiddiscomfort.
Arrangeyourworkplaceandtheequipmentyouusetosuityourindividualneedsandthekindofwork
thatyouperform.Inaddition,usehealthyworkhabitstomaximizeyourperformanceandcomfortwhile
usingyourcomputer.
Thefollowingtopicsprovideinformationaboutarrangingyourworkarea,settingupyourcomputer
equipment,andestablishinghealthyworkhabits.
Lenovoiscommittedtoprovidingthelatestinformationandtechnologytoourcustomerswithdisabilities.
Refertoouraccessibilityinformationwhichoutlinesoureffortsinthisarea.
Ergonomicinformation
Workinginthevirtualofcemightmeanadaptingtofrequentchangesinyourenvironment.Followingsome
simpleruleswillmakethingseasierandbringyouthemaximumbenetsofyourcomputer.Keepinginmind
suchbasicsasgoodlightingandproperseating,forexample,canhelpyouimproveyourperformance
andachievegreatercomfort.
Thisexampleshowssomeoneinaconventionalsetting.Evenwhennotinsuchasetting,youcanfollow
manyofthesetips.Developgoodhabits,andtheywillserveyouwell.
Generalposture:Makeminormodicationsinyourworkingposturetodetertheonsetofdiscomfortcaused
bylongperiodsofworkinginthesameposition.Frequent,shortbreaksfromyourworkalsohelptoprevent
minordiscomfortassociatedwithyourworkingposture.
©CopyrightLenovo2012
41
Page 58

Display:Positionthedisplaytomaintainacomfortableviewingdistanceof510-760mm(20-30inches).
Avoidglareorreectionsonthedisplayfromoverheadlightingoroutsidesourcesoflight.Keepthedisplay
screencleanandsetthebrightnesstolevelsthatenableyoutoseethescreenclearly.PressFn+F8
orFn+F9toadjustdisplaybrightness.
Headposition:Keepyourheadandneckinacomfortableandneutral(vertical,orupright)position.
Chair:Useachairthatgivesyougoodbacksupportandseatheightadjustment.Usechairadjustmentsto
bestsuityourdesiredposture.
Armandhandposition:Ifavailable,usechairarmrestsoranareaonyourworkingsurfacetoprovide
weightsupportforyourarms.Keepyourforearms,wrists,andhandsinarelaxedandneutral(horizontal)
position.Typewithasofttouchwithoutpoundingthekeys.
Legposition:Keepyourthighsparalleltotheoorandyourfeetatontheoororonafootrest.
Whatifyouaretraveling?
Itmightnotbepossibletoobservethebestergonomicpracticeswhenyouareusingyourcomputer
whileonthemoveorinacasualsetting.Regardlessofthesetting,trytoobserveasmanyofthetipsas
possible.Sittingproperlyandusingadequatelighting,forexample,willhelpyoumaintaindesirablelevels
ofcomfortandperformance.
Questionsaboutvision?
ThevisualdisplayscreensofThinkPadnotebookcomputersaredesignedtomeetthehigheststandards
andtoprovideyouwithclear,crispimagesandlarge,brightdisplaysthatareeasytosee,yeteasyonthe
eyes.Ofcourse,anyconcentratedandsustainedvisualactivitycanbetiring.Ifyouhavequestionsoneye
fatigueorvisualdiscomfort,consultavisioncarespecialistforadvice.
Comfort
Observethefollowingguidelinestoachievegreatercomfortandimproveperformance.
Activesittingandrestbreaks:Thelongeryousitandworkwithyourcomputer,themoreimportantitisto
observeyourworkingposture.Follow“Ergonomicinformation”onpage41andpractice“activesitting”to
avoiddiscomfortassociatedwithyourworkingpostures.Makingminorvoluntaryposturalchangesand
takingshortfrequentworkbreaksarethekeyingredientsforhealthycomputing.Yourcomputerislightand
mobile;youcaneasilyrepositionyourworkingsurfacetoaccommodatemanyposturemodications.
Workareasetupoptions:Familiarizeyourselfwithallofyourofcefurnituresothatyouknowhowto
adjustyourworksurface,seat,andotherworktoolstoaccommodateyourpreferencesforcomfort.
Ifyourworkareaisnotinanofcesetting,besuretotakespecialnoteofemployingactivesitting
andtakingworkbreaks.ManyThinkPadproductsolutionsareavailabletohelpyoumodifyandexpand
yourcomputertobestsuityourneeds.AccessthefollowingWebsitetoviewsomeoftheseoptions:
http://www.lenovo.com/accessories/services/index.html.Exploreyouroptionsforexternalproductsthat
providetheadjustabilityandfeaturesthatyouwant.
Accessibilityinformation
Lenovoiscommittedtoprovidingpeoplewithdisabilitiesgreateraccesstoinformationandtechnology.
Asaresult,thefollowinginformationprovideswaystohelpusersthathavehearing,vision,andmobility
limitationsgetthemostoutoftheircomputerexperience.
42UserGuide
Page 59

Assistivetechnologiesenableuserstoaccessinformationinthemostappropriateway.Someofthese
technologiesarealreadyprovidedinyouroperatingsystem.Otherscanbepurchasedthroughvendors,or
accessedthroughtheWorldWideWebhttp://www.lenovo.com/healthycomputing.
Assistivetechnologies
SomeaccessibilitytechnologiesareavailablethroughtheAccessibilityOptionsprogram.Depending
onyouroperatingsystem,thenumberofaccessibilityoptionsavailablevaries.Ingeneral,accessibility
optionsenhancethewayuserswithhearing,vision,ormobilitylimitationsnavigateandusetheircomputer.
Forexample,someusersmightnothavethenemotorskillsrequiredtouseamouseorselectkey
combinations.Otherusersmightrequirelargerfontsorhigh-contrastdisplaymodes.Insomecases,
magniersandbuilt-inspeechsynthesizersareavailable.Fordetailedinformationabouteachofthese
features,consulttheMicrosofthelpinformationsystem.
TousetheAccessibilityOptionsprogram,openControlPanelandclickEaseofAccess➙Easeof
AccessCenter.
Screen-readertechnologies
Screen-readertechnologiesareprimarilyfocusedonsoftwareapplicationinterfaces,helpinformation
systems,andavarietyofonlinedocuments.However,inthecasewhereascreenreadercannotread
documents,thedocumentmustrstgothroughaconversionprocess.OnesolutionconvertsAdobe
PDFlesintoaformatthatisreadbythescreen-readerprograms.ThissolutionisaWeb-basedservice
providedbyAdobeSystemsIncorporated.Throughhttp://access.adobe.com,AdobePDFdocumentscan
beconvertedtoHTMLorplaintextinmanylanguages.OneconversionoptionconvertsPDFdocuments
ontheInternet.AsecondoptionenablesuserstosubmittheURLofanAdobePDFlethroughe-mailto
convertittoHTMLorASCIItext.AdobePDFlesonalocalsolid-statedrive,localCD-ROM,orLANalso
canbeconvertedbyattachingtheAdobePDFletoane-mailmessage.
Travelingwithyourcomputer
Thistopicprovidesinformationtohelpyouworkwithyourcomputerwhenyouaretravelling.
Traveltips
Usethefollowingtraveltipstotravelmorecondentlyandefcientlywithyourcomputer.
•Althoughitissafetoallowyourcomputertogothroughthex-raymachinesatairportsecuritystations,it
isimportanttokeepyoureyesonthecomputeratalltimestopreventtheft.
•Considerbringinganelectricaladapterforuseinanairplaneorautomobile.
•Ifyoucarryanacpoweradapter,detachtheaccordfromittoavoiddamagingthecord.
Traveltipsonairplanes
Ifyoucarryyourcomputerintoanairplane,takenoteofthefollowingtips:
•Ifyouintendtouseyourcomputerorwirelessservices(suchasInternetandBluetooth),checkwiththe
airlineforrestrictionsandavailabilityofservicesbeforeboardingtheairplane.Iftherearerestrictions
ontheuseofcomputerswithwirelessfeaturesontheairplane,youmustabidebythoserestrictions.If
necessary,disablewirelessfeaturesbeforeboarding.
•Becarefulabouttheseatinfrontofyouonairplanes.Angleyourcomputerdisplaysothatitdoesnotget
caughtwhenthepersoninfrontofyouleansback.
•Whentakingoff,remembertoturnoffyourcomputerorputitintohibernatemode.
Chapter3.Youandyourcomputer43
Page 60

Travelaccessories
Thefollowingisachecklistofitemstoconsiderpackingwhenyouaregoingtotravel:
•ThinkPadacpoweradapter
•ThinkPadAC/DCComboAdapter
•LenovoUSB2.0EthernetAdapter
•Mini-DisplayPorttoVGAadapter
•Externalmouse,ifyouareaccustomedtousingone
•Aqualitycarryingcasethatprovidesadequatecushionandprotection
•Externalstoragedevice
Ifyouaretravelingtoanothercountry,youmightwanttoconsiderthisitem:
•Anacpoweradapterforthecountrytowhichyouaretravelling
Topurchasetravelaccessories,gotohttp://www.lenovo.com/accessories.
44UserGuide
Page 61

Chapter4.Security
Thischapterprovidesinformationabouthowtoprotectyourcomputerfromtheftandunauthorizeduse.
•“Attachingamechanicallock”onpage45
•“Usingpasswords”onpage45
•“Solid-statedrivesecurity”onpage50
•“Settingthesecuritychip”onpage50
•“Usingangerprintreader”onpage51
•“Noticeondeletingdatafromyoursolid-statedrive”onpage55
•“Usingrewalls”onpage56
•“Protectingdataagainstviruses”onpage56
Attachingamechanicallock
Youcanattachamechanicallocktoyourcomputer,tohelppreventitfrombeingremovedwithoutyour
permission.
Attachamechanicallocktothekeyholeofthecomputer;thensecurethechainonthelocktoastationary
object.Refertotheinstructionsshippedwiththemechanicallock.
Note:Y ouareresponsibleforevaluating,selecting,andimplementingthelockingdevicesandsecurity
features.Lenovomakesnocomments,judgments,orwarrantiesaboutthefunction,quality,orperformance
oflockingdevicesandsecurityfeatures.
Usingpasswords
Byusingpasswords,youcanhelppreventyourcomputerfrombeingusedbyothers.Onceyouseta
password,apromptisdisplayedonthescreeneachtimeyouturnonthecomputer.Enteryourpasswordat
theprompt.Youcannotusethecomputerunlessyoutypethecorrectpassword.
Passwordsandsleepmode
IfyouhavesetpasswordsandyouputyourcomputerintosleepmodebypressingFn+F4:
•Youarenotpromptedtotypethepasswordwhenresumingoperation.
•Ifthesolid-statedrivehasaharddiskpassword,itisunlockedautomaticallywhenyouresumeoperation.
Note:IfaWindowspasswordhasbeenset,youwillbepromptedtoenterit.
Typingpasswords
Ifthisiconisdisplayed,typeapower-onpasswordorasupervisorpassword.
Ifthisiconisdisplayed,typeauserharddiskpassword.Ifyouwanttotypeamasterharddisk
password,dothefollowing:
1.PressF1.Theiconchangestothis:
©CopyrightLenovo2012
45
Page 62

2.Typethemasterharddiskpassword.
Note:Toreturntotheicon,pressF1again.
Ifthisiconisdisplayed,typeasupervisorpassword.
Power-onpassword
Youcansetapower-onpasswordtohelpprotectyourcomputeragainstaccessbyunauthorizedusers.
Ifyousetapower-onpassword,thepasswordpromptisdisplayedonthescreenwheneveryouturnonthe
computer.Youmustenterthecorrectpasswordtostartusingthecomputer.
Settingapower-onpassword
1.Printtheseinstructions.
2.Saveallopenles,andexitallprograms.
3.Turnyourcomputeroffandthenturnitonagain.
4.Whenthelogoscreenisdisplayed,pressF1.TheThinkPadSetupprogrammainmenuopens.
5.SelectSecurity,usingthecursordirectionalkeystomovedownthemenu.
6.SelectPassword.
7.SelectPower-onPassword.
8.IntheEnterNewPasswordeld,typeadesiredpassword,andpressEnter.
9.IntheConrmNewPasswordeld,retypethepasswordandpressEnter.
Note:Youmightwanttorecordyourpasswordandstoreitinasafeplace.Otherwise,ifyouforgetit,
youhavetotakeyourcomputertoaLenovoreselleroramarketingrepresentativetohavethepassword
canceled.
10.IntheSetupNoticewindowthatisdisplayed,pressEntertocontinue.
11.PressF10.TheSetupConrmationwindowopens.SelectYestosavecongurationchangesandexit.
Changingorremovingthepower-onpassword
Tochangethepower-onpassword,followsteps1through7.Enteryourcurrentpassword.WhentheEnter
NewPasswordeldisdisplayed,typeanewpasswordintheeldandthenretypeittoverify.Toremove
thepassword,followsteps1through7.Typeyourcurrentpassword.WhentheEnterNewPasswordeld
isdisplayed,leaveitblankandpressEntertwice.
Harddiskpasswords
Twotypesofharddiskpasswordshelpprotecttheinformationstoredonthesolid-statedrive:
•Userharddiskpassword
•Masterharddiskpassword,whichrequiresauserharddiskpassword
Ifauserharddiskpasswordhasbeenset,butnomasterharddiskpasswordhasbeen,theusermustenter
theuserharddiskpasswordinordertogainaccesstolesandapplicationsonthesolid-statedrive.
Themasterpasswordcanbesetandusedonlybyasystemadministrator.Likeamasterkey,itenablesthe
administratortogetaccesstothesolid-statedriveinasystem.Theadministratorsetsthemasterpassword;
nooneelseknowsit.Thentheadministratorsetsauserpasswordforeachcomputerinthenetwork,and
46UserGuide
Page 63

tellseachuserthepasswordforhisorhercomputer.Theusercanthenchangetheuserpasswordas
desired,buttheadministratorstillcangetaccessbyusingthemasterpassword.
Note:Whenamasterharddiskpasswordisset,onlytheadministratorcanremovetheuserharddisk
password.
Settingaharddiskpassword
1.Printtheseinstructions.
2.Saveallopenles,andexitallapplications.
3.Turnyourcomputeroffandthenonagain.
4.Whenthelogoscreenisdisplayed,pressF1.TheThinkPadSetupprogrammainmenuopens.
5.SelectSecurity,usingthecursordirectionalkeystomovedownthemenu.
6.SelectPassword.
7.SelectHardDisk1Password.
8.Apasswordwindowopens.Y ouarepromptedtoselectUserorUser+Master.SelectUserifyouwant
tosetonlyoneharddiskpassword.Ifyouareanadministratororsupervisor,youcanselectUser+
Mastertosettwopasswords.(Theusercanchangetheuserpasswordlater.)
•IfyouselectUser+Master,dothefollowing:
a.Whenawindowfortypingthenewuserharddiskpasswordopens,typeyournewpasswordin
theEnterNewPasswordeld.PressEnter.
b.IntheConrmNewPasswordeld,retypethepasswordyoujustenteredtoverifyit.PressEnter.
c.Amessagewindowopensandpromptsyoutosetthemasterharddiskpassword.PressEnterto
continue.
d.Awindowfortypingthenewmasterharddiskpasswordopens.Typeyournewpasswordin
theEnterNewPasswordeld.PressEnter.
e.IntheConrmNewPasswordeld,retypethepasswordyoujustenteredtoverifyit.PressEnter.
•IfyouselectUseronly,dothefollowing:
a.Whenawindowfortypingthenewpasswordopens,typeyournewpasswordintheEnterNew
Passwordeld.PressEnter.
Notes:
–YoucansettheminimumlengthofaharddiskpasswordthroughtheSecuritymenu.
–Ifyousetaharddiskpasswordofoversevencharacters,thesolid-statedrivecanbeused
onlywithacomputerthatcanrecognizeaharddiskpasswordofoversevencharacters.Ifyou
theninstallthesolid-statedriveinacomputerthatcannotrecognizeaharddiskpasswordthat
containsmorethansevencharacters,youcannotgetaccesstothedrive.
b.IntheConrmNewPasswordeld,retypethepasswordyoujustenteredtoverifyit.PressEnter.
Attention:Youmightwanttorecordyourpasswordsandstoretheminasafeplace.Otherwise,ifyou
forgettheuserpassword,orbothuserandmasterpasswords,Lenovocannotresetyourpasswords
orrecoverdatafromthesolid-statedrive.YoumusttakeyourcomputertoaLenovoresellerora
marketingrepresentativetohavethesolid-statedrivereplaced.Proofofpurchaseisrequired,andafee
willbechargedforpartsandservice.
9.IntheSetupNoticewindowthatisdisplayed,pressEntertocontinue.
10.PressF10.TheSetupConrmationwindowopens.SelectYestosavecongurationchangesandexit.
Thenexttimeyouturnonyourcomputer,youwillhavetotypetheuserormasterharddiskpasswordin
ordertostartyourcomputerandgetaccesstoyouroperatingsystem.
Chapter4.Security47
Page 64

Changingorremovingaharddiskpassword
Followsteps1through7in“Settingaharddiskpassword”onpage47,typingyourpasswordtogetaccess
totheThinkPadSetupprogram.
Tochangeorremovetheuserharddiskpassword,dothefollowing:
•Tochangetheharddiskpassword,typethecurrentpasswordintheEnterCurrentPasswordeld.Then
typethenewpasswordintheEnterNewPasswordeld,andretypethepasswordyoujustenteredto
verifyitintheConrmNewPasswordeld.PressEnter,andaSetupNoticewindowisdisplayed.Press
EntertoexitfromtheSetupNoticewindow.Theuserharddiskpasswordwillbechanged.
•Toremovetheharddiskpassword,typethecurrentpasswordintheEnterCurrentPasswordeld.Then
leavetheEnterNewPasswordandConrmNewPasswordeldsblank,andpressEnter.ASetup
Noticewindowisdisplayed.PressEntertoexitfromtheSetupNoticewindow.Theuserharddisk
passwordwillberemoved.
TochangeorremovetheUser+Masterharddiskpasswords,selectUserHDPorMasterHDP.
SelectMasterHDP,dothefollowing:
•Tochangethemasterharddiskpassword,typethecurrentmasterharddiskpasswordintheEnter
CurrentPasswordeld.ThentypethenewmasterharddiskpasswordintheEnterNewPassword
eld,andretypethepasswordyoujustenteredtoverifyitintheConrmNewPasswordeld.Press
Enter,andaSetupNoticewindowisdisplayed.PressEntertoexitfromtheSetupNoticewindow.The
masterharddiskpasswordischanged.
•Toremovethemasterharddiskpassword,typethecurrentmasterharddiskpasswordintheEnter
CurrentPasswordeld.ThenleavetheEnterNewPasswordandConrmNewPasswordeldsblank,
andpressEnter.ASetupNoticewindowisdisplayed.PressEntertoexitfromtheSetupNoticewindow.
Boththeuserandmasterharddiskpasswordswillberemoved.
Supervisorpassword
ThesupervisorpasswordprotectsthesysteminformationstoredinThinkPadSetup.Withoutit,noonecan
changethecongurationofthecomputer.Itprovidesthefollowingsecurityfeatures:
•Ifasupervisorpasswordisset,apasswordpromptisdisplayedwhenyoutrytostarttheThinkPadSetup
program.Unauthorizeduserscannotgetaccesstocongurationdata.
•Thesystemadministratorcanusethesupervisorpasswordtogetaccesstoacomputereveniftheuserof
thatcomputerhassetapower-onpassword.Thesupervisorpasswordoverridesthepower-onpassword.
•Ifbothasupervisorpasswordandapower-onpasswordareset,youcandothefollowingonlyifyou
havethesupervisorpassword:
–Deletingthepower-onpassword
–Changingordeletingthesupervisorpassword
–Changingdateandtime
–EnablingordisablingtheLockUEFIBIOSSettingsfeature
–EnablingordisablingthePasswordatunattendedbootfeature
–Specifyingtheminimumlengthforpower-onpasswordsandharddiskpasswords
–Changingthesettingforthesecuritychip
–EnablingordisablingtheBootDeviceListF12Optionfeature
–EnablingordisablingtheBootOrderLockfeature
–EnablingordisablingtheFlashBIOSUpdatingbyEnd-Usersfeature
–Enablingordisablingtheinternalwirelessdevice
48UserGuide
Page 65

–EnablingordisablingtheinternalBluetoothdevice
–EnablingordisablingtheinternalwirelessWANdevice
–EnablingordisablingtheSecuritymode
–Enablingordisablingthengerprintreaderpriority
–Erasingthengerprintdata
Notes:
•ThesystemadministratorcansetthesamesupervisorpasswordonmanyThinkPadnotebookcomputers
tomakeadministrationeasier.
•ByenablingtheLockUEFIBIOSSettingsfeatureonthePasswordmenuwhenyousetthesupervisor
password,youmakeitimpossibleforanyonebutyoutomakechanges.
Setting,changing,orremovingasupervisorpassword
Onlyasystemadministratorcanset,change,orremoveasupervisorpassword.
Toset,change,orremoveasupervisorpassword,dothefollowing:
1.Printtheseinstructions.
2.Saveallopenles,andexitallapplications.
3.Turnyourcomputeroffandthenturnitonagain.
4.Whenthelogoscreenisdisplayed,pressF1.TheThinkPadSetupprogrammainmenuopens.
5.SelectSecurity,usingthecursordirectionalkeystomovedownthemenu.
6.SelectPassword.
7.SelectSupervisorPassword.
8.Awindowopens,promptingyoutoenteranewpassword.Dependingonyourneeds,dooneofthe
following:
•Tosetapassword,dothefollowing:
a.IntheEnterNewPasswordeld,typeadesiredpasswordandpressEnter.
b.IntheConrmNewPasswordeld,retypethepasswordandpressEnter.
•Tochangeapassword,dothefollowing:
a.IntheEnterCurrentPasswordeld,typethecurrentsupervisorpasswordandpressEnter.
b.IntheEnterNewPasswordeld,typethenewsupervisorpassword;thenretypethepassword
youjustenteredtoverifyitintheConrmNewPasswordeld.PressEnter.
•Toremoveapassword,dothefollowing:
a.IntheEnterCurrentPasswordeld,typethecurrentsupervisorpasswordandpressEnter.
b.LeavetheEnterNewPasswordandConrmNewPasswordeldsblank.PressEnter.
Attention:Youmightwanttorecordyourpasswordandstoreitinasafeplace.Ifyouforgetyour
supervisorpassword,Lenovocannotresetyourpassword.YoumusttakeyourcomputertoaLenovo
reselleroraLenovomarketingrepresentativetohavethesystemboardreplaced.Proofofpurchaseis
required,andafeewillbechargedforpartsandservice.
9.IntheSetupNoticewindowthatisdisplayed,pressEntertocontinue.
10.PressF10.TheSetupConrmationwindowopens.SelectYestosavecongurationchangesandexit.
ThenexttimeyouopentheThinkPadSetupprogram,youwillbepromptedtotypeyourpasswordtoproceed.
Chapter4.Security49
Page 66

Solid-statedrivesecurity
Toprotectpasswordsfromunauthorizedsecurityattacks,severalofthelatesttechnologiesandalgorithms
areintegratedintoUEFIBIOSandhardwaredesignofThinkPadnotebookcomputers.
Tomaximizesecurity,dothefollowing:
1.Setapower-onpasswordaswellasaharddiskpasswordforyourinternalsolid-statedrive.Referto
theproceduresin“Power-onpassword”onpage46and“Harddiskpasswords”onpage46.For
security,alongerpasswordisrecommended.
2.ToprovidereliablesecurityforUEFIBIOS,usethesecuritychipandasecurityprogramwithaT rusted
PlatformModulemanagementfeature.Referto“Settingthesecuritychip”onpage50.
Note:TheMicrosoftWindows7andWindows8operatingsystemsupporttheTPMmanagement
feature.
3.Ifasolid-statedriveequippedwithEncryptionfeaturesisinstalledinyourcomputer,besureto
protectthecontentsofyourcomputermemoryfromunauthorizedaccessbyuseofdriveencryption
software,suchasMicrosoftWindowsBitLocker
DriveEncryption”onpage50.
4.Beforeyoudisposeof,sell,orhandoveryourcomputer,besuretodeletedatastoredonit.Referto
“Noticeondeletingdatafromyoursolid-statedrive”onpage55
Note:Thesolid-statedrivebuiltintoyourcomputercanbeprotectedbyUEFIBIOS.
UsingWindowsBitLockerDriveEncryption
Tohelpprotectyourcomputeragainstunauthorizedaccess,besuretousedriveencryptionsoftware,such
asWindowsBitLockerDriveEncryption.
®
DriveEncryption.See“UsingWindowsBitLocker
.
WindowsBitLockerDriveEncryptionisanintegralsecurityfeatureofWindows7andandWindows8
operatingsystems.ItissupportedintheUltimateandEnterpriseeditionsoftheWindows7operating
systemandWindows8operatingsystem.Itcanhelpyouprotecttheoperatingsystemanddatastored
onyourcomputer,evenifyourcomputerislostorstolen.BitLockerworksbyencryptingalluserand
systemles,includingtheswapandhibernationles.
BitLockerusesaTrustedPlatformModuletoprovideenhancedprotectionforyourdataandtoensureearly
bootcomponentintegrity.AcompatibleTPMisdenedasaV1.2TPM.
TochecktheBitLockerstatus,gotoControlPanelandclickSystemandSecurity➙BitLockerDrive
Encryption.
FordetailsaboutWindowsBitLockerDriveEncryption,seethehelpinformationsystemoftheWindows
operatingsystem,orsearchfor“MicrosoftWindowsBitLockerDriveEncryptionStep-by-StepGuide”on
theMicrosoftWebsite.
Settingthesecuritychip
Strictsecurityrequirementsareimposedonnetworkclientcomputersthattransfercondentialinformation
electronically.Dependingontheoptionsyouordered,yourcomputermighthaveanembeddedsecuritychip,
acryptographicmicroprocessor.WiththesecuritychipandClientSecuritySolution,youcandothefollowing:
•Protectyourdataandsystem
•Strengthenaccesscontrols
•Securecommunications
50UserGuide
Page 67

Settingthesecuritychip
ThechoicesofferedontheSecurityChipsubmenuundertheSecuritymenuofThinkPadSetupareas
follows:
•SecurityChip:activate,inactivate,ordisablethesecuritychip.
•SecurityReportingOptions:enableordisableeachsecurityreportingoption.
•ClearSecurityChip:cleartheencryptionkey.
Notes:
1.EnsurethatthesupervisorpasswordhasbeensetinThinkPadSetup.Otherwiseanyonecanchange
thesettingsforthesecuritychip.
2.IfyouareusingClientSecuritySolution,handlethesecuritychipbydoingthefollowing:
•Donotclearthesecuritychip.Ifyoudo,thefunctionsassignedtothekeyswillbeerased.
•Donotdisablethesecuritychip.Ifyoudo,ClientSecuritySolutionwillnotwork.
3.Ifthesecuritychipisremovedorreplaced,oranewonehasbeenadded,thecomputerwillnotstart.
Youwillhearfourcyclesoffourbeepseach,oryouseeerrormessage0176or0192.
4.Ifthesecuritychipisinactiveordisabled,theClearSecurityChipoptionwillnotbedisplayed.
5.Whenyouclearthesecuritychip,besuretoturnyourcomputeroffandthenturnitonagainafteryou
setthesecuritychiptoActive.Otherwise,theClearSecurityChipoptionisnotdisplayed.
TosetanitemontheSecurityChipsubmenu,dothefollowing:
1.Printtheseinstructions.
2.Saveallopenles,andexitallprograms.
3.Turnyourcomputeroffandthenturnitonagain.
4.Whenthelogoscreenisdisplayed,pressF1.TheThinkPadSetupprogrammainmenuopens.
5.Usingthecursorkeys,movetoSecurity.TheSecuritymenuopens.
6.Usingthecursorkeys,movetoSecurityChip,andpressEnter.TheSecurityChipsubmenuopens.
7.Usingthecursorkeys,movetoanitemyouwanttoset.Whentheitemishighlighted,pressEnter.
8.Setotheritemsthatyouwanttoset.
9.PressF10tosavechangesandexit.
10.PressEnterintheSetupConrmationwindowtoconrmtheexit.
Tosetthesecuritychip,youhavetostartClientSecuritySolution,andfollowtheinstructionsonthescreen.
Note:ClientSecuritySolutionisnotpreinstalledonWindows7andWindows8models.T ocongure
thesecuritychip,youneedtodownloadthelatestversionofClientSecuritySolutionfromtheLenovo
Website.TodownloadClientSecuritySolution,gotohttp://www.lenovo.com/support.Thenfollowthe
instructionsonthescreen.
Usingangerprintreader
Dependingontheoptionsyouordered,yourcomputermayhaveanintegratedngerprintreader.By
enrollingyourngerprintandassociatingitwithapower-onpassword,aharddiskpassword,orboth
passwordsbeforehand,youcanstartthecomputer,logontothesystem,andentertheThinkPadSetupby
swipingyourngeroverthereader,withouttypingapassword.Thusngerprintauthenticationcanreplace
passwordsandenablesimpleandsecureuseraccess.
Chapter4.Security51
Page 68

Enrollingyourngerprint
1.Turnonyourcomputer.
2.TostartLenovoFingerprintsoftware,referto“Lenovoprograms”onpage12.
3.Followtheinstructionsonthescreentoenrollyourngerprint.Fordetails,refertotheHelpforthe
program.
LEDbehaviorofthengerprintreader
Note:Yourcomputermighthaveslightvariationsfromthefollowingillustration.
Table4.LEDbehaviorofngerprintreader
IndicatorDescription
Steadygreen
Blinkinggreenonce
Blinkinggreen
Blinkingamber
Steadyamberfor15seconds
Swipingyourngeroverthereader
Toswipeyourngeroverthereader,doasfollows:
Thengerprintreaderisreadytoswipe.
Thengerprintisbeingauthenticatedorhasbeen
authenticated.
Thengerprintreaderisreadytoswipeinpower-on
authenticationstate.
Thengerprintcouldnotbeauthenticated.
Thepower-onauthenticationfeatureisdisabledafter
threebadngerprintswipes.
52UserGuide
Page 69

1.Placetheballofyournger–thatis,thecentralpartofthengerprint–onthesmallcircleabovethe
reader.Ensurethattheentiretopjointofthengerisonthereader.
Note:Yourcomputermighthaveslightvariationsfromthefollowingillustration.
2.Applylightpressureandswipeyourngeracrossthereaderinonesmoothmotion.
Note:Yourcomputermighthaveslightvariationsfromthefollowingillustration.
Loggingontothesystem
Afteryouenrollyourngerprint,logontothesystemasfollows:
1.Setapower-onpasswordoraharddiskpassword,orboth.
2.Turnyourcomputeroffandthenonagain.
3.Whenprompted,swipeyourngeroverthereader.
4.Onrequest,typeyourpower-onpassword,yourharddiskpassword,orboth.Theenrolledngerprintis
nowassociatedwithyourpower-onpassword,yourharddiskpassword,orboth.
Chapter4.Security53
Page 70

Thenexttimeyoustartthecomputer,youcanlogontothesystembyswipingyourngeroverthe
readeronce.
Attention:Ifyoualwaysuseyourngerprinttologontothesystem,youmayforgetyourpassword.Write
downyourpassword,andkeepitinasafeplace.Ifyouforgetitandforsomereasonyoucannotswipeyour
ngeracrossthereader—forexample,ifyouinjurethatnger—youcannotstartthecomputerorchange
thepassword.Ifyouforgetyourpower-onpassword,youmusttakeyourcomputertoaLenovoauthorized
serviceroramarketingrepresentativetohavethepasswordcanceled.
Ifyouforgetyourharddiskpassword,Lenovocannotresetyourpasswordorrecoverdatafromthe
solid-statedrive.YoumusttakeyourcomputertoaLenovoauthorizedserviceroramarketingrepresentative
tohavethesolid-statedrivereplaced.Proofofpurchaseisrequired,andafeewillbechargedforparts
andservice.
Settingthengerprintreader
Ifyouwanttochangethesettingsofthengerprintreader,followtheprocedurebelow.
ThengerprintsubmenuundertheSecuritymenuoftheThinkPadSetupoffersthefollowingchoices:
•PredesktopAuthentication:Enablesordisablesngerprintauthenticationbeforetheoperatingsystem
isloaded.
•ReaderPriority:Denesthepriorityforngerprintreadersifanexternalngerprintreaderisattached.
•SecurityMode:Speciesthesettingsofthesecuritymode.
•PasswordAuthentication:Enablesordisablespasswordauthentication.
Note:ThisitemappearsifHighsecuritymodeisselected.
•ResetFingerprintData:Bychoosingthisitem,youeraseallofthengerprintdatastoredineitherthe
internalorexternalngerprintreader.
Tosetaniteminthengerprintsubmenu:
1.Printtheseinstructions.Tocongurethengerprintreader,youmustturnyourcomputeroffand
thenonagain.
2.Saveallopenles,andexitallprograms.
3.Turnyourcomputeroffandthenonagain.
4.Whenthelogoscreenisdisplayed,pressF1.TheThinkPadSetupopens.
5.Usingthecursorkeys,movetoSecurity,andpressEnter.TheSecuritymenuopens.
6.Usingthecursorkeys,movetoFingerprint,andpressEnter.TheFingerprintsubmenuopens.
7.Usingthecursorkeys,movetoanitemyouwanttoset.Whenthatitemishighlighted,pressEnter.
8.Settheitemsyouwanttoset.
9.PressF10toexit.
10.IntheSetupConrmationwindow,selectYes.
Careforthengerprintreader
Thefollowingactionscoulddamagethengerprintreaderorcauseitnottoworkproperly:
•Scratchingthesurfaceofthereaderwithahard,pointedobject.
•Scrapingthesurfaceofthereaderwithyourngernailoranythinghard.
•Usingortouchingthereaderwithadirtynger.
54UserGuide
Page 71

Ifyounoticeanyofthefollowingconditions,gentlycleanthesurfaceofthereaderwithadry,soft,lint-free
cloth:
•Thesurfaceofthereaderisdirtyorstained.
•Thesurfaceofthereaderiswet.
•Thereaderoftenfailstoenrollorauthenticateyourngerprint.
Ifyourngerhasanyofthefollowingconditions,youmaynotbeabletoregisterorauthenticateit:
•Yourngeriswrinkled.
•Yourngerisrough,dry,orinjured.
•Yourngerisverydry.
•Yourngerisstainedwithdirt,mud,oroil.
•Thesurfaceofyourngerisverydifferentfromwhenyouenrolledyourngerprint.
•Yourngeriswet.
•Angerisusedthathasnotbeenenrolled.
Toimprovethesituation,trythefollowing:
•Cleanorwipeyourhandstoremoveanyexcessdirtormoisturefromthengers.
•Enrollanduseadifferentngerforauthentication.
•Ifyourhandsaretoodry,applylotiontothem.
Noticeondeletingdatafromyoursolid-statedrive
Ascomputersspreadintoeverycorneroflife,theyprocessmoreandmoreinformation.Thedataonyour
computer,someofwhichmightbesensitive,isstoredonthesolid-statedrive.Beforeyoudisposeof,sell,or
handoveryourcomputer,besuretodeletedatastoredonit.
Handingyourcomputerovertosomeoneelsewithoutdeletingtheloadedsoftware,suchasoperating
systemsandprogram,mightevenviolatelicenseagreements.Youareadvisedtocheckthetermsand
conditionsofthoselicenseagreements.
Therearemethodsthatseemtodeletethedata:
•Movethedatatotherecyclebin,andthenemptytherecyclebin.
•UsetheDeleteoption.
•Formatyoursolid-statedrive,usingthesoftwareforinitializingit.
•Usingtherecoveryprogramtosettheharddiskdrivebacktothefactorydefaultsettings.
Theseoperations,however,onlychangetheleallocationofthedata;theydonotdeletethedataitself.In
otherwords,thedataretrievalprocessingisdisabledunderanoperatingsystemsuchasWindows.Thedata
isstillthere,eventhoughitseemstobelost.Thus,itissometimespossibletoreadthedatabyuseofspecial
softwarefordatarecovery.Thereisariskthatthisdatacanberetrievedandusedforunexpectedpurposes.
Topreventleakageofdata,itbecomesveryimportantthatyoutakeresponsibilityfordeletingallthedata
fromthesolid-statedrivewhenyoudisposeof,sell,orhandoveryourcomputer.Youcandestroythedata
physicallybysmashingthesolid-statedrivewithahammer,ormagneticallybymeansofstrongmagnetic
power,thusmakingthedataunreadable.Butwerecommendthatyoumakeuseofthesoftware(payware)or
service(payservice)specicallydevelopedforthepurpose.
Chapter4.Security55
Page 72

Fordisposingofdataonthesolid-statedrive,LenovoprovidestheSecureDataDisposaltool.Todownload
thetool,goto:http://www.lenovo.com/support.
Note:Runningeitherprogramwilltakeacoupleofhours.
Ifasolid-statedriveequippedwithencryptionfeaturesissupportedandinstalledinyourcomputer,you
canlogicallydisposeofallthedataonthedriveinaveryshorttimebyerasingthecryptographickey.The
dataencryptedwiththeoldkeyisnotphysicallyerasedbutremainsonthedrive;however,itcannotbe
decryptedwithouttheoldkey.ThisfeatureisenabledbyThinkPadSetupMenuExtensionUtilityandis
availableasamenuiteminThinkPadSetup.
Usingrewalls
Ifyoursystemispreinstalledwitharewallprogram,itprotectsagainstcomputerInternetsecuritythreats,
unauthorizedaccesses,intrusions,andInternetattacks.Italsoprotectsyourprivacy.
Formoreinformationabouthowtousetherewallprogram,refertothehelpinformationsystemthat
comeswiththeprogram.
Protectingdataagainstviruses
Yourcomputerispreinstalledwithanantivirusprogramsoyoucandetectandeliminateviruses.The
antivirusprogramisdesignedtohelpyoudetectandeliminateviruses.
Lenovoprovidesafullversionofantivirussoftwareonyourcomputerwithafree30-daysubscription.After
30days,youmustrenewthelicensetocontinuereceivingtheantivirussoftwareupdates.
Formoreinformationabouthowtouseyourantivirussoftware,refertothehelpinformationsystemof
yourantivirussoftware.
56UserGuide
Page 73

Chapter5.Recoveryoverview
ThischapterprovidesinformationabouttherecoverysolutionsoncomputerspreinstalledwiththeWindows
7operatingsystemortheWindows8operatingsystem.
•“RecoveryoverviewforWindows7models”onpage57
•“RecoveryoverviewforWindows8models”onpage62
RecoveryoverviewforWindows7models
ThissectionprovidesinformationabouttherecoverysolutionsprovidedbyLenovooncomputers
preinstalledwiththeWindows7operatingsystem.
Notes:
•Thereareavarietyofmethodstochoosefromwhenconsideringhowtorecoverintheeventofasoftwareorhardware-relatedproblem.Somemethodsvarydependingonthetypeofyouroperatingsystem.
•Theproductontherecoverymediamightbeusedonlyforthefollowingpurposes:
–Restoretheproductpreinstalledonyourcomputer
–Reinstalltheproduct
–ModifytheproductusingtheAdditionalFiles
Notes:Topreventpotentialperformancerisksorunexpectedbehaviorthatmightbecausedbythenew
harddiskdrivetechnology,itisrecommendedthatyouuseoneofthefollowingback-upsoftwareprograms:
•ThinkVantageRescueandRecoveryversion4.3orlater
•SymantecNortonGhostversion15orlater
Notes:Tousethisprogram,dothefollowing:
1.ClickStart➙Run.TheRunwindowopens.
2.Typecmdintheeld.ThenclickOK.
3.Typeghost-align=1mbandpressEnter.
•AcronisTrueImage2010orlater
•ParagonBackup&Recovery10Suitorlater,ParagonBackup&Recovery10Homeorlater
Creatingandusingrecoverymedia
Youcanuserecoverymediatorestorethesolid-statedrivetothefactorydefaultsettings.Recoverymedia
areusefulifyoutransferthecomputertoanotherarea,sellthecomputer,recyclethecomputer,orputthe
computerinanoperationalstateafterallothermethodsofrecoveryhavefailed.Asaprecautionarymeasure,
itisimportanttocreaterecoverymediaasearlyaspossible.
Note:Therecoveryoperationsyoucanperformusingrecoverymediavarydependingontheoperating
systemfromwhichtherecoverymediawerecreated.Therecoverymediamightcontainabootmedium
andadatamedium.Y ourMicrosoftWindowslicensepermitsyoutocreateonlyonedatamedium,soitis
importantthatyoustoretherecoverymediainasafeplaceafteryouhavemadethem.
Creatingrecoverymedia
Thissectionprovidesinstructionsonhowtocreaterecoverymedia.
©CopyrightLenovo2012
57
Page 74

Note:YoucancreaterecoverymediausingdiscsorexternalUSBstoragedevices.
Tocreaterecoverymedia,clickStart➙AllPrograms➙LenovoThinkVantageT ools➙FactoryRecovery
Disks.Then,followtheinstructionsonthescreen.
Usingrecoverymedia
Thissectionprovidesinstructionsonhowtouserecoverymedia.
Youcanuserecoverymediatorestorethecomputertothefactorydefaultsettingsonly.Youcanuse
recoverymediatoputthecomputerinanoperationalstateafterallothermethodsofrecoveryhavefailed.
Attention:Whenyouuserecoverymediatorestorethecomputertothefactorydefaultsettings,alltheles
currentlyonthesolid-statedrivewillbedeletedandreplacedbythefactorydefaultsettings.
Touserecoverymedia,dothefollowing:
1.Dependingonthetypeofyourrecoverymedia,connectthebootmedium(memorykeyorotherUSB
storagedevice)tothecomputer,orinsertthebootdiscintotheopticaldrive.
2.RepeatedlypressandreleasetheF12keywhenturningonthecomputer.WhentheBootMenuwindow
opens,releasetheF12key.
3.SelectthedesiredstartupdeviceandpressEnter.Therestoreprocessbegins.
4.Followtheinstructionsonthescreentocompletetheoperation.
Notes:
1.Afterrestoringyourcomputertothefactorydefaultsettings,youmighthavetoreinstalldevicedrivers
forsomedevices.See“Reinstallingpreinstalledapplicationsanddevicedrivers”onpage61
2.SomecomputerscomewithMicrosoftOfceorMicrosoftWorkspreinstalled.Ifyouneedtorecover
orreinstallyourMicrosoftOfceorMicrosoftWorksapplications,youmustusetheMicrosoftOfce
CDorMicrosoftWorksCD.ThesediscsareprovidedonlywithcomputerspreinstalledwithMicrosoft
OfceorMicrosoftWorks.
.
Performingbackupandrecoveryoperations
TheRescueandRecoveryprogramenablesyoutobackupallyoursolid-statedrivecontentsincludingthe
operatingsystem,datales,softwareprograms,andpersonalsettings.Y oucandesignatewherethe
RescueandRecoveryprogramstoresthebackup:
•Inaprotectedareaofyoursolid-statedrive
•OnanattachedexternalUSBharddiskdrive
•Onanetworkdrive
•Onrecordablediscs(arecordableopticaldriveisrequiredforthisoption)
Afteryouhavebackedupthecontentsonthesolid-statedrive,youcanrestorethecompletecontentsof
thesolid-statedrive,restoreonlytheselectedles,orrestoreonlytheWindowsoperatingsystemand
applications.
Performingabackupoperation
ThissectionprovidesinstructionsonhowtoperformabackupoperationusingtheRescueandRecovery
programondifferentoperatingsystems.
ToperformabackupoperationusingtheRescueandRecoveryprogram,dothefollowing:
1.FromtheWindowsdesktop,clickStart➙AllPrograms➙LenovoThinkVantageTools➙Enhanced
BackupandRestore.TheRescueandRecoveryprogramopens.
58UserGuide
Page 75

2.IntheRescueandRecoverymainwindow,clicktheLaunchadvancedRescueandRecoveryarrow.
3.ClickBackupyourharddriveandselectbackupoperationoptions.Then,followtheinstructionson
thescreentocompletethebackupoperation.
Performingarecoveryoperation
ThissectionprovidesinstructionsonhowtoperformarecoveryoperationusingtheRescueandRecovery
programondifferentoperatingsystems.
ToperformarecoveryoperationusingtheRescueandRecoveryprogram,dothefollowing:
1.FromtheWindowsdesktop,clickStart➙AllPrograms➙LenovoThinkVantageTools➙Enhanced
BackupandRestore.TheRescueandRecoveryprogramopens.
2.IntheRescueandRecoverymainwindow,clicktheLaunchadvancedRescueandRecoveryarrow.
3.ClicktheRestoreyoursystemfromabackupicon.
4.Followtheinstructionsonthescreentocompletetherecoveryoperation.
FormoreinformationaboutperformingarecoveryoperationfromtheRescueandRecoveryworkspace,see
“UsingtheRescueandRecoveryworkspace”onpage59
.
UsingtheRescueandRecoveryworkspace
TheRescueandRecoveryworkspaceresidesinaprotected,hiddenareaofyoursolid-statedrivethat
operatesindependentlyfromtheWindowsoperatingsystem.Thisenablesyoutoperformrecovery
operationsevenifyoucannotstarttheWindowsoperatingsystem.Y oucanperformthefollowingrecovery
operationsfromtheRescueandRecoveryworkspace:
•Rescuelesfromyoursolid-statedriveorfromabackup
TheRescueandRecoveryworkspaceenablesyoutolocatelesonyoursolid-statedriveandtransfer
themtoanetworkdriveorotherrecordablemedia,suchasaUSBdeviceoradisc.Thissolutionis
availableevenifyoudidnotbackupyourlesorifchangesweremadetothelessinceyourlastbackup
operation.YoualsocanrescueindividuallesfromaRescueandRecoverybackuplocatedonyourlocal
solid-statedrive,aUSBdevice,oranetworkdrive.
•Restoreyoursolid-statedrivefromaRescueandRecoverybackup
Ifyouhavebackedupyoursolid-statedriveusingtheRescueandRecoveryprogram,youcanrestorethe
solid-statedrivefromaRescueandRecoverybackup,evenifyoucannotstarttheWindowsoperating
system.
•Restoreyoursolid-statedrivetothefactorydefaultsettings
TheRescueandRecoveryworkspaceenablesyoutorestorethecompletecontentsofyoursolid-state
drivetothefactorydefaultsettings.Ifyouhavemultiplepartitionsonyoursolid-statedrive,youhave
theoptiontorestorethefactorydefaultsettingstotheC:partitionandleavetheotherpartitionsintact.
BecausetheRescueandRecoveryworkspaceoperatesindependentlyfromtheWindowsoperating
system,youcanrestorethefactorydefaultsettingsevenifyoucannotstarttheWindowsoperating
system.
Attention:Ifyourestorethesolid-statedrivefromaRescueandRecoverybackuporrestorethesolid-state
drivetothefactorydefaultsettings,alllesontheprimarysolid-statedrivepartition(usuallydriveC:)willbe
deletedintherecoveryprocess.Ifpossible,makecopiesofimportantles.Ifyouareunabletostartthe
Windowsoperatingsystem,youcanusetherescuelesfeatureoftheRescueandRecoveryworkspaceto
copylesfromyoursolid-statedrivetoothermedia.
TostarttheRescueandRecoveryworkspace,dothefollowing:
1.Ensurethatthecomputeristurnedoff.
Chapter5.Recoveryoverview59
Page 76

2.RepeatedlypressandreleasetheF11keywhenturningonthecomputer.Whenyouhearbeepsor
seealogoscreen,releasetheF11key.
3.IfyouhavesetaRescueandRecoverypassword,typeyourpasswordwhenprompted.TheRescue
andRecoveryworkspaceopensafterashortdelay.
Note:IftheRescueandRecoveryworkspacefailstoopen,see“Solvingrecoveryproblems”onpage62.
4.Dooneofthefollowing:
•Torescuelesfromyoursolid-statedriveorfromabackup,clickRescuelesandfollowthe
instructionsonthescreen.
•Torestoreyoursolid-statedrivefromaRescueandRecoverybackuportorestoreyoursolid-state
drivetothefactorydefaultsettings,clickRestoreyoursystemandfollowtheinstructionsonthe
screen.
FormoreinformationaboutthefeaturesoftheRescueandRecoveryworkspace,clickHelp.
Notes:
1.Afterrestoringyoursolid-statedrivetothefactorydefaultsettings,youmighthavetoreinstalldevice
driversforsomedevices.See“Reinstallingpreinstalledapplicationsanddevicedrivers”onpage61.
2.SomecomputerscomewithMicrosoftOfceorMicrosoftWorkspreinstalled.Ifyouneedtorecover
orreinstallyourMicrosoftOfceorMicrosoftWorksapplications,youmustusetheMicrosoftOfce
CDorMicrosoftWorksCD.ThesediscsareprovidedonlywithcomputerspreinstalledwithMicrosoft
OfceorMicrosoftWorks.
Creatingandusingarescuemedium
Witharescuemedium,suchasadiscoraUSBharddiskdrive,youcanrecoverthecomputerfromfailures
thatpreventyoufromgainingaccesstotheRescueandRecoveryworkspaceonyoursolid-statedrive.
Notes:
1.Therecoveryoperationsyoucanperformusingarescuemediumvarydependingontheoperating
system.
2.Therescuedisccanbestartedinalltypesofopticaldrives.
Creatingarescuemedium
Thissectionprovidesinstructionsonhowtocreatearescuemediumondifferentoperatingsystems.
Tocreatearescuemedium,dothefollowing:
1.FromtheWindowsdesktop,clickStart➙AllPrograms➙LenovoThinkVantageTools➙Enhanced
BackupandRestore.TheRescueandRecoveryprogramopens.
2.IntheRescueandRecoverymainwindow,clicktheLaunchadvancedRescueandRecoveryarrow.
3.ClicktheCreateRescueMediaicon.TheCreateRescueandRecoveryMediawindowopens.
4.IntheRescueMediaarea,selectthetypeoftherescuemediumyouwanttocreate.Youcancreatea
rescuemediumusingadisc,aUSBharddiskdrive.
5.ClickOKandfollowtheinstructionsonthescreentocreatearescuemedium.
Usingarescuemedium
Thissectionprovidesinstructionsonhowtousetherescuemediumyouhavecreated.
•Ifyouhavecreatedarescuemediumusingadisc,usethefollowinginstructionstousetherescuemedium:
1.Turnoffyourcomputer.
60UserGuide
Page 77

2.RepeatedlypressandreleasetheF12keywhenturningonthecomputer.WhentheBootMenu
windowopens,releasetheF12key.
3.IntheBootMenuwindow,selectthedesiredopticaldriveastherstbootdevice.Then,insertthe
rescuediscintotheopticaldriveandpressEnter.Therescuemediumstarts.
•IfyouhavecreatedarescuemediumusingaUSBharddiskdrive,usethefollowinginstructionsto
usetherescuemedium:
1.AttachtheUSBharddiskdrivetooneoftheUSBconnectorsonyourcomputer.
2.RepeatedlypressandreleasetheF12keywhenturningonthecomputer.WhentheBootMenu
windowopens,releasetheF12key.
3.IntheBootMenuwindow,selecttheUSBharddiskdriveastherstbootdeviceandpressEnter.
Therescuemediumstarts.
Whentherescuemediumstarts,theRescueandRecoveryworkspaceopens.Thehelpinformationfor
eachfeatureisavailablefromtheRescueandRecoveryworkspace.Followtheinstructionstocomplete
therecoveryprocess.
Reinstallingpreinstalledapplicationsanddevicedrivers
Yourcomputerhasprovisionsthatenableyoutoreinstallselectedfactory-installedapplicationsanddevice
drivers.
Reinstallingpreinstalledapplications
Toreinstallselectedapplicationprograms,dothefollowing:
1.Turnonyourcomputer.
2.GototheC:\SWTOOL Sdirectory.
3.OpentheAPPSfolder.Initareseveralsubfoldersnamedforthevariouspreinstalledapplications.
4.Openthesubfolderfortheapplicationyouarereinstalling.
5.Double-clickSetup,andthenfollowtheon-screenstepstoreinstalltheprogram.
Reinstallingpreinstalleddevicedrivers
Attention:Whenyoureinstalldevicedrivers,youarechangingthecurrentcongurationofyourcomputer.
Reinstalldevicedriversonlywhenitisnecessarytocorrectaproblemwithyourcomputer.
Toreinstalladevicedriverforafactory-installeddevice,dothefollowing:
1.Turnonyourcomputer.
2.GototheC:\SWTOOL Sdirectory.
3.OpentheDRIVERSfolder.WithintheDRIVERSfolderareseveralsubfoldersnamedforthevarious
devicesinstalledinyourcomputer(forexample,AUDIOandVIDEO).
4.Openthesubfolderforthedevice.
5.Reinstallthedevicedriverbyoneofthefollowingmethods:
•Inthesubfolderforthedevice,lookforatextle(alewiththeextension.txt).Thetextlecontains
informationonhowtoreinstallthatdevicedriver.
•Ifthesubfolderforthedevicecontainsaleofsetupinformation(alewiththeextension.inf),you
canusetheAddNewHardwareprogram(intheWindowsControlPanel)toreinstallthedevicedriver.
Notalldevicedriverscanbereinstalledbyuseofthisprogram.IntheAddNewHardwareprogram,
whenpromptedforthedevicedriveryouwanttoinstall,clickHaveDiskandBrowse.Thenselect
thedevicedriverlefromthedevicesubfolder.
Chapter5.Recoveryoverview61
Page 78

•Inthesubfolderforthedevice,lookfortheexecutablele(alewiththeextension.exe).Double-click
thele,andfollowtheinstructionsonthescreen.
Attention:Ifyouneedupdateddevicedrivers,donotdownloadthemfromtheWindowsUpdateWebsite.
ObtainthemfromLenovo.Formoreinformation,see“Makingsuredevicedriversarecurrent”onpage86.
Solvingrecoveryproblems
IfyouareunabletoaccesstheRescueandRecoveryworkspaceortheWindowsenvironment,doone
ofthefollowing:
•UsearescuemediumtostarttheRescueandRecoveryworkspace.See“Creatingandusingarescue
medium”onpage60
•Userecoverymediaifallothermethodsofrecoveryhavefailedandyouneedtorestorethesolid-state
drivetothefactorydefaultsettings.See“Creatingandusingrecoverymedia”onpage57.
Note:IfyouareunabletoaccesstheRescueandRecoveryworkspaceortheWindowsenvironmentfrom
arescuemediumorrecoverymedia,youmightnothavetherescuedevice(aninternalsolid-statedrive,
adisc,aUSBharddiskdrive,orotherexternaldevices)setastherstbootdeviceinthestartupdevice
sequence.Youmustrstensurethatyourrescuedeviceissetastherstbootdeviceinthestartupdevice
sequenceintheThinkPadSetupprogram.Fordetailedinformationonhowtotemporarilyorpermanently
changethestartupdevicesequence,see“”onpage.
Itisimportanttocreatearescuemediumandasetofrecoverymediaasearlyaspossibleandstorethem
inasafeplaceforfutureuse.
.
RecoveryoverviewforWindows8models
ThissectionprovidesinformationabouttherecoverysolutionsprovidedbyLenovooncomputers
preinstalledwiththeWindows8operatingsystem.
RecoverysolutionsforWindows8models
Refreshingyourcomputer
Ifyourcomputerdoesnotperformwellandtheproblemmightbecausedbyarecentlyinstalledprogram,
youcanrefreshyourcomputerwithoutlosingyourpersonallesorchangingyoursettings.
Attention:Ifyourefreshyourcomputer,theprogramsthatcamewithyourcomputerandtheprogramsthat
youinstalledfromWindowsStorewillbereinstalled,butallotherprogramswillberemoved.
Torefreshyourcomputer,dothefollowing:
1.Moveyourcursortothebottomrightcornerofthescreentobringupthecharms.ClickSettings
➙ChangePCsettings➙General.
2.IntheRefreshyourPCwithoutaffectingyourlessection,clickGetstarted.
Resettingyourcomputertothefactorydefaultsettings
Youcanresetyourcomputertothefactorydefaultsettings.Resettingthecomputerwillreinstallthe
operatingsystem,andreinstallalltheprogramsandsettingsthatcamewithyourcomputer.
Attention:Ifyouresetyourcomputer,allyourpersonallesandsettingswillbedeleted.Toavoiddataloss,
makeabackupcopyofallthedatathatyouwanttokeep.
Toresetyourcomputer,dothefollowing:
62UserGuide
Page 79

1.Moveyourcursortothebottomrightcornerofthescreentobringupthecharms.ClickSettings
➙ChangePCsettings➙General.
2.IntheRemoveeverythingandreinstallWindowssection,clickGetstarted.
Advancedstartupoptions
AdvancedstartupoptionsenableyoutochangethestartupsettingsofyourWindowsoperatingsystem,
startthecomputerfromanexternaldevice,orrestoretheWindowsoperatingsystemfromasystemimage.
Tousetheadvancedstartupoptions,dothefollowing:
1.Moveyourcursortothebottomrightcornerofthescreentobringupthecharms.ClickSettings
➙ChangePCsettings➙General.
2.IntheAdvancedstartupsection,clickRestartnow➙Troubleshoot➙Advancedoptions.
3.Restartyourcomputerfollowingtheinstructionsonthescreen.
FormoredetailsabouttherecoverysolutionsprovidedoncomputerspreinstalledwiththeWindows8
operatingsystem,refertothehelpinformationsystemoftheWindows8operatingsystem.
Chapter5.Recoveryoverview63
Page 80

64UserGuide
Page 81

Chapter6.Advancedconguration
Whileitisimportanttoprotectles,data,andsettingsthatareonthesolid-statedrive,youalsomight
needtoinstallanewoperatingsystem,installnewdevicedrivers,updateyoursystemUEFIBIOS,or
recoverpreinstalledsoftware.Thisinformationwillhelpyouhandleyourcomputerwithpropercareand
keepitintopworkingshape.
•“Installinganewoperatingsystem”onpage65
•“Installingdevicedrivers”onpage67
•“ThinkPadSetup”onpage68
•“Usingsystemmanagement”onpage84
Installinganewoperatingsystem
Ifyouinstallanewoperatingsysteminyourcomputer,youneedtoinstallthesupplementlesandThinkPad
devicedriversforitatthesametime.
•IfyouinstallanewWindows7operatingsystem,thenecessarylesarelocatedinthefollowingdirectories
ofyoursolidstate-driveorharddiskdrive:
–ThesupplementlesfortheoperatingsystemsupportedareintheC:\SWTOOLS\OSFIXESdirectory.
–ThedevicedriversfortheoperatingsystemsupportedareintheC:\SWTOOLS\DRIVERSdirectory.
–ThepreloadedsoftwareprogramsareintheC:\SWTOOLS\APPSdirectory.
Note:Ifyoucannotndthesupplementles,thedevicedrivers,andprogramsoftwareyouneedon
yourharddiskdrive,orifyouwanttoreceiveupdatesandthelatestinformationaboutthem,goto
http://www.lenovo.com/ThinkPadDrivers.
•IfyouinstallanewWindows8operatingsystem,gotohttp://www.lenovo.com/ThinkPadDriversforthe
latestdevicedrivers,andthenfollowtheinstructionsonthescreen.
Note:Theprocessofinstallingthenewoperatingsystemdeletesallthedataonyourharddiskdrive,
includingbackupsorimagesthatwerestoredinahiddenfolderbyuseoftheRescueandRecoveryprogram.
Beforeyoubegin
Beforeyouinstalltheoperatingsystem,dothefollowing:
•IfyouinstallanewWindows7operatingsystem,copyallthesubdirectoriesandlesintheC:\SWTOOLS
directorytoaremovablestoragedevice,toavoidlosinglesduringtheinstallation.
•Printtheinstructionsyouwilluse.Gotothesectionfortheoperatingsystemyouareusing:
–“InstallingtheWindows7operatingsystem”onpage66
–“InstallingtheWindows8operatingsystem”onpage67
Notes:
–TheUEFIBIOSfeaturesaresupportedontheWindows7operatingsystem(64-bit)andtheWindows8
operatingsystem(64-bit).EnsurethattheUEFI/LegacyBootsettinginThinkPadSetupissettoyour
preferencetobootthedesiredoperatingsystem.
–Afterinstallingtheoperatingsystem,youshouldnotchangetheinitialUEFI/LegacyBootsettingin
ThinkPadSetup.TheUEFI/LegacyBootsettingmustbethesameasitwaswhentheWindows
operatingsystemimagewasinstalled.Otherwise,theoperatingsystemwillnotbootcorrectly.
©CopyrightLenovo2012
65
Page 82

Forthecountryorregioncoderequiredintheinstallation,useoneofthefollowing:
Countryorregion:Code
China:SC
Denmark:DK
Finland:FI
France:FR
Germany:GR
Italy:IT
Japan:JP
Netherlands:NL
Norway:NO
Spain:SP
Sweden:SV
TaiwanandHongKong:TC
UnitedStates:US
InstallingtheWindows7operatingsystem
Beforeyoustart,printtheseinstructions.
ToinstalltheWindows7operatingsystemanditsrelatedsoftwareonyourcomputer,dothefollowing:
1.StartThinkPadSetup.
2.SelectStartup.
3.SelectUEFI/LegacyBoot.
4.Dooneofthefollowing:
•IfyouwanttoinstalltheWindows7(32–bit)operatingsystem,selectLegacyOnlyorBoth.
•IfyouwanttoinstalltheWindows7(64–bit)operatingsysteminLegacymode,selectLegacyOnly.
•IfyouwanttoinstalltheWindows7(64–bit)operatingsysteminUEFImode,selectUEFIOnly.
5.PressF10.
6.ConnectthedrivethatcontainstheWindows7operatingsysteminstallertoyourcomputer,and
restartthecomputer.
7.RestoreC:\SWTOOLSfromthebackupcopyyoumadebeforestartingtheinstallation.
8.InstalltheIntelChipsetSupportforWindows2000/XP/Vista/7/8.Todothis,runSetup.exein
C:\SWTOOLS\DRIVERS\INTELINF\innst_autol.
9.Installdevicedrivers.See“InstallingotherdevicedriversandsoftwareontheWindows7operating
system”onpage68
InstallingtheregistrypatchesforWindows7
Gotohttp://www.lenovo.com/supportandinstallthefollowingregistrypatches:
•RegistrypatchenablingWakeUponLANfromStandbyforEnergyStar
•FixforIssueofHDDwithHDDetection
InstallingtheWindows7xmodules
TheWindows7xmodulesareinthefollowingdirectory:
C:\SWTOOLS\OSFIXES\
.
Thenameofeachsubfolderisthenumberofaxmodule.Forinformationabouteachxmodule,goto
theMicrosoftKnowledgeBasehomepageathttp://support.microsoft.com/,typethenumberofthex
moduleyouneedinthesearcheld,andclickSearch.
66UserGuide
Page 83

Toinstallaxmodule,runtheEXEleinasubfolderandfollowtheinstructionsonthescreen.
InstallingtheWindows8operatingsystem
Beforeyoustart,printtheseinstructions.
Beforeyoustart,printtheseinstructions.
ToinstalltheWindows8operatingsystemanditsrelatedsoftwareonyourcomputer,dothefollowing:
1.StartThinkPadSetup.
2.SelectStartup➙Boot.
3.ChangethebootpriorityordertobootyourcomputerfromthedrivethatcontainstheWindows
8operatingsysteminstaller.
4.PressF10.
5.ConnectthedrivethatcontainstheWindows8operatingsysteminstallertoyourcomputer,and
restartthecomputer.
6.InstalltheIntelChipsetSupportforWindows2000/XP/Vista/7/8.Todothis,runSetup.exein
C:\SWTOOLS\DRIVERS\INTELINF\innst_autol.
7.Installdevicedrivers.See“InstallingotherdevicedriversandsoftwareontheWindows7operating
system”onpage68.
InstallingtheWindows8updatemodulepackage
Forinformationabouteachxmodule,gototheMicrosoftKnowledgeBasehomepageat
http://support.microsoft.com/,typethenumberofthexmoduleyouneedinthesearcheld,andclick
Search.
Note:TheWebsiteaddressmightchangewithoutnotice.Ifthehomepageisnotdisplayed,searchforit
fromtheMicrosofttoppage.
Installingdevicedrivers
Thedevicedriversareavailableathttp://www.lenovo.com/ThinkPadDrivers.Selecttheproductnameof
yourcomputerintheCurrentThinkPadsystemslisttoseeallthedevicedriversforyourcomputer.
Attention:Alwaysgotohttp://www.lenovo.com/ThinkPadDriversforthelatestdevicedrivers.Donot
downloadthemfromtheWindowsUpdateWebsite.
Installingthedriverforthe4-in-1mediacardreader
Tousethe4-in-1mediacardreader,youneedtodownloadandinstalltheRicohMultiCardReaderDriver
fromtheLenovoSupportWebsiteat:
http://www.lenovo.com/support
InstallingthedriverforUSB3.0ontheWindows7operatingsystem
IfyourcomputerisinstalledwiththeWindows7operatingsystem,itsupportsUSB3.0functions.Touse
theUSB3.0connectors,youneedtodownloadandinstalltheUSB3.0driverafteryoureinstalledthe
Windows7operatingsystembydoingthefollowing:
1.Gotohttp://www.lenovo.com/support.Findyourmodelanddisplaythedriverlinks.
2.SelecttheUSB3.0driverforthe32-bitor64-bitoperatingsystemandextractittoyourlocalhard
diskdrive.
3.Double-clicktheSetup.exeleintheC:\DRIVERS\WIN\USB3.0\directory.
Chapter6.Advancedconguration67
Page 84

4.ClickNext.Ifthedevicedriverisalreadyinstalled,clickCancel.Followtheinstructionsonthescreen
untiltheinstallationisnished.
InstallingtheThinkPadmonitorleforWindows2000/XP/Vista/7/8on
theWindows7operatingsystem
TheThinkPadmonitorleforWindows2000/XP/Vista/7/8isinthefollowingdirectory:
C:\SWTOOLS\DRIVERS\MONITOR
Note:Ifyoucannotndthisdirectoryonyourharddiskdriveorsolidstatedrive,downloadtheThinkPad
monitorleforWindows2000/XP/Vista/7/8fromtheThinkPadWebsiteat:
http://www.lenovo.com/ThinkPadDrivers
Note:Beforeyouinstallthisle,makesurethatthecorrectvideodriverhasbeeninstalled.
Toinstallthecorrectvideodriver,dothefollowing:
1.Right-clickonthedesktop,andclickPersonalize.
2.ClickDisplayattheleft.
3.ClickChangedisplaysettings.
4.ClickAdvancedSettings.
5.ClicktheMonitortab.
6.ClickProperties.
7.ClicktheDrivertab.
8.ClickUpdateDriver.
9.SelectBrowsemycomputerfordriversoftware,andthenclickLetmepickfromalistofdevice
driversonmycomputer.
10.ClickHaveDisk.
11.SpecifypathC:\SWTOOL S\DRIVERS\MONITORtothismonitorINFle.Then,clickOpen.
12.ClickOK.
13.Conrmthecorrectdisplaytype,thenclickNext.
14.Wheninstallationcompletes,clickClose.
15.ClickClosetoclosetheDisplayPropertieswindow.
16.ClickOKontheMonitortab.
17.ClickOKandclosetheDisplaySettingswindow.
InstallingotherdevicedriversandsoftwareontheWindows7operating system
ThedevicedriversareprovidedintheC:\SWTOOLS\DRIVERSdirectoryonyourharddiskdrive.Y ouwillalso
needtoinstallprogramsoftware,whichisprovidedintheC:\SWTOOLS\APPSdirectoryonyourharddiskdrive.
Todothis,refertotheinstructionsin“Reinstallingpreinstalledapplicationsanddevicedrivers”onpage61.
Note:IfyoucannotndtheSupplementles,devicedrivers,andprogramsoftwareyouneedon
yourharddiskdrive,orifyouwanttoreceiveupdatesandthelatestinformationaboutthem,goto
http://www.lenovo.com/ThinkPadDrivers.
ThinkPadSetup
YourcomputercomeswiththeThinkPadSetupprogramtoenableyoutoselectvarioussetupparameters.
68UserGuide
Page 85

TostartThinkPadSetup,dothefollowing:
1.Turnonthecomputer.Whenthelogoscreenisdisplayed,presstheF1key.TheThinkPadSetup
programmainmenuopens.
Ifyouhavesetasupervisorpassword,theThinkPadSetupprogrammainmenuwillbedisplayed
afteryouenterthepassword.Y oucanstartThinkPadSetupbypressingEnterinsteadofenteringthe
supervisorpassword.However,youcannotchangetheparametersthatareprotectedbythesupervisor
password.Formoreinformation,referto“Usingpasswords”onpage45.
2.Movetoanitemyouwanttochange,byusingthecursorkeys.Whentheitemishighlighted,press
Enter.Asubmenuisdisplayed.
3.Changetheitemsyouwishtochange,bypressingthefollowingkeys:
•F6orThecombinationofShiftand+:Changetoahighervalue.
•F5or–:Changetoalowervalue.
Iftheitemhasasubmenu,youcandisplayitbypressingEnter.
4.PressEsctoexitfromthesubmenu.
5.Ifyouareonanestedsubmenu,pressEscrepeatedlyuntilyoureachtheThinkPadSetupprogram
mainmenu.
Note:Ifyouneedtorestorethesettingstotheiroriginalstateasofthetimeofpurchase,pressF9to
loadthedefaultsettings.YoualsocanselectanoptionontheRestartsubmenutoloadthedefault
settingsordiscardthechanges.
6.SelectRestart.Movethecursortotheoptionyouwantforrestartingyourcomputer;thenpressEnter.
Yourcomputerrestarts.
Note:Dependingontheoperatingsystemyouareusing,somemenuitemsmightnotbeavailableonyour
computer,andsomemenuitemslistedinthischaptermightbeslightlydifferentwiththeactualmenuitems
displayedonyourcomputer.
Mainmenu
TheMainmenuistherstinterfaceyouseeafteryouenterThinkPadSetup.Itdisplaysthefollowing
congurationofyourcomputer:
•UEFIBIOSVersion
•UEFIBIOSDate(Year-Month-Day)
•EmbeddedControllerVersion
•MachineTypeModel
•System-unitserialnumber
•Systemboardserialnumber
•AssetTag
•CPUType
•CPUSpeed
•Installedmemory
•UUID
•MACaddress(InternalLAN)
•Preinstalledoperatingsystemlicense
•UEFIsecureboot
Chapter6.Advancedconguration69
Page 86

Congmenu
Ifyouneedtochangethecongurationofyourcomputer,selectCongfromtheThinkPadSetupprogram
mainmenu.
ThefollowingtableshowsthecontentsoftheCongmenu.
Notes:
•Defaultvaluesareinboldface.Thedefaultsettingsarealreadyoptimizedforyou.Ifyouconsider
changingthecomputerconguration,proceedwithextremecaution.Settingthecongurationincorrectly
mightcauseunexpectedresults.
•Oneachsubmenu,presstheEnterkeytoshowselectableoptionsandselectadesiredoptionbyusing
cursorkey,ortypedesiredvaluesfromthekeyboarddirectly.
•Someitemsaredisplayedonthemenuonlyifthecomputersupportsthecorrespondingfeatures.
Table5.Congmenuitems
Menuitem
Network
SubmenuitemSelectionComments
WakeOnLAN
EthernetLANOptionROM
(forLegacyOnlyboot
modeorBothwithLegacy
rst)
UEFIIPv4NetworkStack
(forUEFIOnlybootmode
orBothwithUEFIrst)
UEFIIPv6NetworkStack
(forUEFIOnlybootmode
orBothwithUEFIrst)
•Disabled
•AConly
•ACandBattery
•Disabled
•Enabled
•Disabled
•Enabled
•Disabled
•Enabled
Enablethesystemtopower
onwhentheEthernet
controllerreceivesamagic
packet(aspecialnetwork
message).
IfyouselectACOnly,Wake
onLANisenabledonly
whentheacpoweradapter
isattached.
IfyouselectACand
Battery,WakeonLANis
enabledwithanypower
sources.
Notes:
•Themagicpackettype
WakeonLANrequires
acpower.
•TheWakeonLAN
functiondoesnot
workwhenaharddisk
passwordisset.
LoadtheEthernetLAN
OptionROMtoenable
startupfromanintegrated
networkdevice.
EnableordisableInternet
ProtocolVersion4(IPv4)
networkstackforUEFI
environment.
EnableordisableInternet
ProtocolVersion6(IPv6)
networkstackforUEFI
environment.
70UserGuide
Page 87

Table5.Congmenuitems(continued)
Menuitem
USB
SubmenuitemSelectionComments
UEFIPXEBootPriority(for
BothwithUEFIrstboot
mode,andIPv6andIPv4
•IPv6First
•IPv4First
stacksarebothenabled.)
USBUEFIBIOSSupport
•Disabled
•Enabled
AlwaysOnUSB
•Disabled
•Enabled
AlwaysOnUSBChargein
offmode
USB3.0Mode
•Disabled
•Enabled
•Disabled
•Enabled
•Auto
Selectnetworkstack
priorityforUEFIPXEboot.
Enablesordisablesboot
supportforUSBdeviceand
USBopticaldrive.
IfyouselectEnabled,the
externalUSBdevicescan
bechargedthroughUSB
connectorsevenwhenthe
systemisinlowpower
mode(sleep,hibernate,or
power-off).
IfyouselectEnabled,the
AlwaysOnUSBconnector
enablesyoutochargesome
mobiledigitaldevicesand
smartphoneswhenthe
computerispoweredoff,
providedthattheacpower
adapterisconnected.
SettheUSB3.0controller
modefortheportsshared
betweenUSB2.0andUSB
3.0controllers.
IfyouselectAuto,itenables
youtoconnectandroute
appropriateUSB3.0or
USB2.0connectors.
IfyouselectEnabled,it
enablesUSB3.0mode
andallowsUSB3.0tobe
supportedintheoperating
system.
IfyouselectDisabled,it
disablesandhidestheUSB
3.0controller,andUSB3.0
connectorswillworkas
USB2.0connectors.
Chapter6.Advancedconguration71
Page 88

Table5.Congmenuitems(continued)
Menuitem
Keyboard/Mouse
DisplayBootDisplayDevice
SubmenuitemSelectionComments
TrackPoint•Disabled
TouchPad•Disabled
FnandCtrlKeyswap
FnKeyLock•Disabled
KeyboardIllumination
Control
•Enabled
•Enabled
•Disabled
•Enabled
•Enabled
•ThinkLightOnly
•KeyboardbacklightOnly
•Both
•ThinkPadLCD
•Analog(VGA)
•DigitalonThinkPad
•Digital1ondock
•Digital2ondock
Enableordisablethe
built-inTrackPointdevice.
Note:Ifyouwanttouse
anexternalmouse,select
Disabled.
Enableordisablethe
built-intouchpad.
Note:Ifyouwanttouse
anexternalmouse,select
Disabled.
IfyouselectEnabled,the
FnkeyworksastheCtrl
key,andtheCtrlkeyworks
astheFnkey.
Note:EvenwhenEnabled
isselected,youneedto
presstheFnkeytoresume
thecomputerfromsleep
modetonormaloperation.
IfyouselectEnabled,you
canpresstheFnkeyonce
tokeepitinapressed
condition,andthenpress
thedesiredfunctionkey.
Theactionisequivalentto
pressingsimultaneously.If
youpresstheFnkeytwice,
thestateislockeduntilyou
presstheFnkeyagain.
EnabletheThinkLight
lightfeature,thekeyboard
backlightfeature,orboth.
Afteryoumakeaselection,
youcanactivatethe
correspondingfeature(s)by
pressingFn+Space.
Selectthedisplaydevice
thatistobeactiveatboot
time.Thisselectionis
effectiveforboottime,
passwordprompt,and
ThinkPadSetup.
DigitalonThinkpadisthe
MiniDisplayPortonyour
computer.
72UserGuide
Digital1ondockand
Digital2ondock
areDisplayPortorDVI
connectorsonadocking
station.
Page 89

Table5.Congmenuitems(continued)
Menuitem
Power
SubmenuitemSelectionComments
IntelSpeedStep
technology(Intel
SpeedStepmounted
modelsonly)
®
•Disabled
•Enabled
ModeforAC
•MaximumPerformance
•BatteryOptimized
ModeforBattery
•MaximumPerformance
•BatteryOptimized
AdaptiveThermal
Management
SchemeforAC
•MaximizePerformance
•Balanced
SchemeforBattery
•MaximizePerformance
•Balanced
CPUPowerManagement
•Disabled
•Enabled
PCIExpressPower
Management
PowerOnwithACAttach
•Disabled
•Enabled
•Disabled
•Enabled
SelectthemodeofIntel
SpeedSteptechnologyat
runtime.
•Maximum
Performance:Always
highestspeed
•BatteryOptimized:
Alwayslowestspeed
•Disabled:Noruntime
support,lowestspeed
Selectathermal
managementscheme
touse.
MaximizePerformance:
ReducesCPUthrottling
Balanced:Balances
sound,temperature,and
performance
Note:Eachschemeaffects
fansound,temperature,
andperformance.
Enablesordisablesthe
powersavingfeaturethat
stopsthemicroprocessor
clockautomaticallywhen
therearenosystem
activities.Normally,it
isnotnecessarytochange
thesetting.
Enableordisableafeature
thatautomaticallyadjusts
powermanagementwhen
thereisnoPCIExpress
activity.Normally,itisnot
necessarytochangethe
setting.
Enableordisableafeature
thatpowersonthesystem
whentheacpoweradapter
isattached.
IfyouselectEnabled,the
systemispoweredonwhen
theacpoweradapteris
attached.Whenthesystem
isinhibernatestate,the
systemresumes.
IfyouselectDisabled,the
systemisnotpoweredon
Chapter6.Advancedconguration73
Page 90

Table5.Congmenuitems(continued)
Menuitem
SubmenuitemSelectionComments
Intel(R)RapidStart
Technology
DisableBuilt-inBattery•Yes
•Disabled
Enabled
Enterafter:
•Immediately
•1minute
•2minutes
•5minutes
•10minutes
•15minutes
•30minutes
•1hour
•2hours
•3hours
•No
norresumedwhentheac
poweradapterisattached.
Tousethisfeature,aspecial
partitiononthesolid-state
driveisrequired.
Whenenabled,the
computerentersalower
powerstateafterthe
speciedtimeinsleep
state.Andittakesonly
secondstoresumenormal
operation.
Temporarilydisablebattery
forservicingthesystem.
Afterselectingthisitem,the
systemwillbeautomatically
poweredoff.Thesystemis
thenreadytobeserviced.
BeepandAlarm
SerialAT A(SA T A)SATAControllerMode
PasswordBeep•Disabled
KeyboardBeep•Disabled
Option
Note:Theacpoweradapter
mustbedisconnectedfrom
thesystemtoperformthis
operation.Thebatterywill
beautomaticallyre-enabled
whentheacpoweradapter
isreconnectedtothe
system.
Enablesthisoptionto
•Enabled
•Enabled
•Compatibility
•AHCI
haveabeepsoundwhen
thesystemiswaitingfor
apower-on,harddisk,
orsupervisorpassword.
Differentbeepswillsound
whentheenteredpassword
matchesordoesnotmatch
theconguredpassword.
Enablesordisables
keyboardbeepwhen
unmanageablekey
combinationsarepressed.
SelectsSATAcontroller
operationmode.
74UserGuide
Page 91

Table5.Congmenuitems(continued)
Menuitem
CPU
IntelAMT
SubmenuitemSelectionComments
CoreMulti-Processing
•Disabled
•Enabled
IntelHyper-Threading
Technology
IntelAMTControl
•Disabled
•Enabled
•Disabled
•Enabled
•PermanentlyDisabled
Enableordisableadditional
executioncoreunitswithin
aCPU.
Note:Ifyouareusinga
computerwithasingle-core
processor,thisitemisnot
available.
Enableordisableadditional
logicalprocessorswithina
processorcore.
IfyouselectEnabledIntel
AMT(ActiveManagement
Technology)iscongured
andadditionalsetupitems
areprovidedinMEBx
(ManagementEngineBIOS
Extension)Setup.
IfyouselectPermanently
Disabled,Youwillneverbe
abletoenableitagain.Be
cautiouswhenyouwantto
usethisoption.
CIRATimeout
ConsoleType
0–255
Note:Thedefaultvalueis
60seconds.
•VT100
•PC-ANSI
•VT100+
•VT-UTF8
Note:Y oucanenterthe
MEBxSetupmenuby
pressingtheCtrl-Pkey
combinationintheStartup
InterruptMenuwindow.To
displaytheStartupInterrupt
Menuwindow,pressthe
EnterkeyduringthePOST.
Setthetimeoutoptionfor
CIRAconnectiontobe
established.1though254
secondsareselectable.
Ifyouselect0,use60
secondsasdefaulttimeout
value.
Ifyouselect255,waiting
timeforestablishinga
connectionisunlimited.
Selecttheconsoletypefor
AMT.
Note:Thisconsoletype
shouldmatchtheIntelAMT
remoteconsole.
Chapter6.Advancedconguration75
Page 92

Date/Timemenu
Ifyouneedtosetthecurrentdateandtimeofyourcomputer,selectDate/TimefromtheThinkPadSetup
programmainmenu.Thefollowingsubmenuisdisplayed:
•SystemDate
•SystemTime
Tochangethedateandtime,dothefollowing:
1.Usingtheupanddownarrowkeys,selecttheitemtochangethedateortime.
2.PressTab,Shift+Tab,orEntertoselectaeld.
3.Typethedateortime.
Note:Anotherwaytoadjustthedateandtimeispressingthe“–”or“+”key.
Securitymenu
Ifyouneedtosetthesecurityfeaturesofyourcomputer,selectSecurityfromtheThinkPadSetupprogram
mainmenu.
ThefollowingtableliststheSecuritymenuitems.
Notes:
•Defaultvaluesareinboldface.Thedefaultsettingsarealreadyoptimizedforyou.Ifyouconsider
changingthecomputerconguration,proceedwithextremecaution.Settingthecongurationincorrectly
mightcauseunexpectedresults.
•Ineachsubmenu,presstheEnterkeytoshowselectableoptionsandselectadesiredoptionbyusing
cursorkey,ortypedesiredvaluesfromthekeyboarddirectly.
•Someitemsaredisplayedonthemenuonlyifthecomputersupportsthecorrespondingfeatures.
Table6.Securitymenuitems
Menuitem
Password
SubmenuitemSelectionComments
HardwarePassword
Manager
SupervisorPassword
LockUEFIBIOSSettings
(Windows7)
LockUEFISettings
(Windows8)
Passwordatunattended
boot
•Disabled
•Enabled
•Disabled
•Enabled
•Disabled
•Enabled
•Disabled
•Enabled
Managingyourpower-on
password,supervisor
password,andyourhard
diskpasswordsbythe
managementserver.
See“Supervisorpassword”
onpage48.
Enableordisablethe
functionthatprotectsitems
inThinkPadSetupprogram
frombeingchangedbya
userwhodoesnothave
thesupervisorpassword.
Bydefault,thisissetto
Disabled.Ifyousetthe
supervisorpasswordand
enablethisfunction,noone
butyoucanchangeany
itemsinThinkPadSetup.
Ifyouselectandenable
Passwordatunattended
boot,apasswordprompt
76UserGuide
Page 93

Table6.Securitymenuitems(continued)
Menuitem
SubmenuitemSelectionComments
Passwordatrestart•Disabled
•Enabled
SetMinimumLength
•Disabled
•xcharacters(4≤x≤12)
Power-OnPassword
•Disabled
•Enabled
HardDiskxPassword•Disabled
•Enabled
isdisplayedwhenthe
computeristurnedon,
fromeitherapower-off
stateorhibernationstate.
IfyouselectDisabled,
nopasswordpromptis
displayed;thecomputer
goesaheadandloads
theoperatingsystem.
Topreventunauthorized
access,settheuser
authenticationonthe
operatingsystem.
Ifyouselectandenable
Passwordatrestart,
apasswordpromptis
displayedwhenyourestart
thecomputer.Ifyouselect
Disabled,nopassword
promptisdisplayed;the
computergoesaheadand
loadstheoperatingsystem.
Topreventunauthorized
access,settheuser
authenticationonthe
operatingsystem.
Specifyaminimumlength
forpower-onpasswords
andharddiskpasswords.
Ifyousetthesupervisor
passwordandspecify
aminimumlengthfor
passwords,noonebutyou
canchangethelength.
See“Power-onpassword”
onpage46
.
Referto“Harddisk
passwords”onpage
46
.
Notes:
•HardDisk1meansthe
harddiskdrivebuiltinto
yourcomputer.
•HardDisk2isdisplayed
onthePassword
submenuonlyifa
secondaryharddisk
driveisinstalledin
theSerialUltrabay
Enhancedbay.
Chapter6.Advancedconguration77
Page 94

Table6.Securitymenuitems(continued)
Menuitem
Fingerprint
SecurityChip
SubmenuitemSelectionComments
PredesktopAuthentication•Disabled
•Enabled
ReaderPriority•External➙Internal
•InternalOnly
SecurityMode
PasswordAuthentication•Disabled
ResetFingerprintData•EnterThisoptionisusedtoerase
SecurityChip
SecurityReportingOptions
•Normal
•High
•Enabled
•Active
•Inactive
•Disabled
Enableordisablengerprint
authenticationbeforethe
operatingsystemisloaded.
IfExternal➙Internal
isselected,anexternal
ngerprintreaderisused
ifattached.Otherwise,an
internalngerprintreader
isused.IfInternalOnly
isselected,aninternal
ngerprintreaderisused.
Ifngerprintauthentication
fails,youcanstillstart
thecomputerbyentering
apassword.Ifyouhave
selectedNormal,entera
power-onpasswordora
supervisorpassword;ifyou
haveselectedHigh,entera
supervisorpassword.
Enableordisablepassword
authentication.Ifhigh
securitymodeisselected,
thisitemisdisplayed.
allngerprintdatastored
inthengerprintreader
andresetsettingstothe
factorystate(e.g.Power-on
security,LEDs,etc.)As
aresult,anypower-on
securityfeaturespreviously
enabledwillnotbeable
toworkuntiltheyare
re-enabledinthengerprint
software.
IfyouselectActive,the
securitychipisfunctional.
IfyouselectInactive,
theSecurityChipoption
isdisplayed,butisnot
functional.Ifyouselect
Disablethesecuritychipis
hiddenandisnotfunctional.
Enableordisablethe
followingSecurity
ReportingOptions;
•BIOSROMString
Reporting(Windows7)
orUEFIROMString
Reporting(Windows8):
BIOStextstring
•CMOSReporting:
CMOSdata
78UserGuide
Page 95

Table6.Securitymenuitems(continued)
Menuitem
SubmenuitemSelectionComments
ClearSecurityChip
IntelTXTFeature•Disabled
PhysicalPresencefor
Provisioning
PhysicalPresenceforClear
UEFIBIOSUpdateOption
orUEFIFirmwareUpdate
Option
FlashBIOSUpdatingby
End-Users(Windows7)
FlashFirmwareUpdating
byEnd-Users
SecureRollBackPrevention
MemoryProtectionExecutionPrevention•Disabled
•Enter
•Enabled
•Disabled
•Enabled
•Disabled
•Enabled
•Disabled
•Enabled
•Disabled
•Enabled
•Enabled
•NVRAMReporting:
Securitydatastoredin
theAssetID
•SMBIOSReporting:
SMBIOSdata
Cleartheencryptionkey.
Note:Onlyifyouselect
Activeforthesecuritychip,
thisitemwillbedisplayed.
EnableordisableIntel
TrustedExecution
Technology.
Thisoptionenablesor
disablestheconrmation
messagewhenyouchange
thesettingsofthesecurity
chip.
Thisoptionenableor
disablestheconrmation
messagewhenyouclear
thesecuritychip.
IfyouselectEnabled,
alluserscanupdatethe
UEFIBIOS.Ifyouselect
Disabled,onlytheperson
whoknowsthesupervisor
passwordcanupdatethe
UEFIBIOS.
IfyouselectEnabled,you
canchoosetoashtothe
previousversionofthe
UEFIBIOS
Somecomputerviruses
andwormscausememory
bufferstooverowby
runningcodewhereonly
dataisallowed.Ifthe
DataExecutionPrevention
featurecanbeusedwith
youroperatingsystem,then
byselectingEnabledyou
canprotectyourcomputer
againstattacksbysuch
virusesandworms.Ifafter
choosingEnabledyou
ndthatanprogramdoes
notruncorrectly,select
Disabledandresetthe
setting.
Chapter6.Advancedconguration79
Page 96

Table6.Securitymenuitems(continued)
Menuitem
Virtualization
Anti-Theft
SubmenuitemSelectionComments
IntelVirtualization
Technology
IntelVT-dFeature•Disabled
IntelATModuleActivation•Disabled
IntelATSuspend
•Disabled
•Enabled
•Enabled
•Enabled
•PermanentlyDisabled
•EnterThisoptionisdisplayed
IfyouselectEnabled,a
VirtualMachineMonitor
(VMM)canutilizethe
additionalhardware
capabilitiesprovidedby
VirtualizationTechnology.
IntelVT -disIntel
VirtualizationT echnology
forDirectedI/O.When
enabled,aVMMcanutilize
theplatforminfrastructure
forI/Ovirtualization.
Note:Thissubmenuisnot
supportedinmodelswith
anAMDCPU.
EnableordisabletheUEFI
BIOSinterfacetoactivate
theIntelATmodule,which
isanoptionalAnti- Theft
servicefromIntel.
Note:IfyousettheIntel
ATmoduleactivationto
PermanentlyDisabled,
youwillbeunabletoenable
thissettingagain.
onlywhentheanti-theft
functionisactivated.
ComputraceModule
Activation
•Disabled
•Enabled
•PermanentlyDisabled
TheIntelanti-theftsuspend
screenwillbedisplayed
atnextboottoenterthe
suspendmode.
Enablesordisablesthe
UEFIBIOSinterfaceto
activatethecomputrace
module.Computraceisan
optionalmonitoringservice
fromAbsoluteSoftware.
Note:Ifyousetthe
computracemodule
activationtoPermanently
Disabled,youwillbe
unabletoenablethis
settingagain.
80UserGuide
Page 97

Table6.Securitymenuitems(continued)
Menuitem
SecureBoot
SubmenuitemSelectionComments
SecureBoot
PlatformMode
SecureBootMode•StandardMode
ResettoSetupMode
RestoreFactoryKeysThisoptionisusedto
•Disabled
•Enabled
•UserMode
•SetupMode
•CustomMode
Enableordisablethe
UEFISecureBootfeature.
SelectEnabletoprevent
unauthorizedoperating
systemsfromrunningat
boottime.SelectDisabled
toallowanyoperating
systemstorunatboottime.
Specifythesystem
operatingmode.
IndicatesSecureBoot
modeisstandardmodeor
custommode.
Thisoptionisusedtoclear
thecurrentplatformkey
andputthesysteminto
setupmode.Youcaninstall
yourownplatformkeyand
customizetheSecureBoot
signaturedatabasesin
setupmode.
SecureBootmodewillbe
settocustommode.
restoreallkeysand
certicatesinSecure
Bootdatabasestofactory
defaults.Anycustomized
SecureBootsettings
willbeerased,andthe
defaultplatformkeywillbe
re-establishedalongwith
theoriginalsignature
databasesincluding
certicateforWindows
8operatingsystem.
Startupmenu
Youmightneedtochangethestartupsequenceofyourcomputer.Todoso,selectStartupfromthe
ThinkPadSetupmainmenu.
Attention:
•Afteryouchangeyourstartupsequence,youmustbeextremelycarefulnottospecifyawrongdevice
duringacopy,asave,oraformatoperation.Ifyouspecifyawrongdevice,yourdataandprograms
mightbeerasedoroverwritten.
•IfyouareusingtheBitLockerdriveencryption,youshouldnotchangethestartupsequence.BitLocker
driveencryptiondetectsthechangeofstartupsequenceandlocksthecomputerfrombooting.
Chapter6.Advancedconguration81
Page 98

Changingthestartupsequence
Changingthestartupsequence
Tochangethestartupsequence,dothefollowing:
1.SelectBoot;thenpressEnter.Thedefaultbootlistisdisplayed,showingtheorderinwhichdeviceswill
bestartedup,evendevicesthatarenotattachedtoorinstalledonyourcomputerarelisted.
•UsetheBootsubmenutospecifythestartupsequencethatrunswhenyouturnonthepower..
2.Setthestartuporderbysingthefollowingkeys:
•Usecursorkeystoselectadevice.
•UseF6orthecombinationofShiftand+tomovethedeviceuptoahigherpriority.
•UseF5or–tomovethedevicedowntoalowerpriority.
•UsethecombinationofShiftand!toexcludeorincludeadevice.
3.PressF10tosavethechangesandrestartthesystem.
Tochangethestartupsequencetemporarilysothatthesystemstartsupfromadifferentdrive,dothe
following:
1.Turnoffthecomputer.
2.Turnonthecomputer;then,whiletheThinkPadlogoisdisplayed,pressF12.
3.Selectthedeviceyouwanttostartrst.
Note:Tobootmenuwillbedisplayedwhenthesystemcannotbootfromanydevicesortheoperating
systemcannotbefound.
ThefollowingtableliststheStartupmenuitems.
Notes:
•Defaultvaluesareinboldface.
•Ineachsubmenu,presstheEnterkeytoshowselectableoptionsandselectadesiredoptionbyusing
cursorkey.
•Someitemsaredisplayedonthemenuonlyifthecomputersupportsthecorrespondingfeatures.
Table7.Startupmenuitems
Menuitem
Boot
NetworkBoot
SelectionComments
Referto“Changingthestartup
sequence”onpage82
Selectthebootdevicewhenthe
systemwakesfromLAN.IfWake
OnLANisenabled,thenetwork
administratorcanturnonallofthe
computersinaLANremotelybyuse
ofnetworkmanagementsoftware.
.
82UserGuide
Page 99

Table7.Startupmenuitems(continued)
Menuitem
UEFI/LegacyBoot
BootMode
OptionKeyDisplay
BootDeviceListF12Option
BootOrderLock
SelectionComments
•Both
–UEFI/LegacyBootPriority
–UEFIrst
–Legacyrst
•UEFIOnly
•LegacyOnly
CSMSupport(forUEFIOnly)
•Yes
•No
•Quick
•Diagnostics
Note:Y oualsocanenterthe
DiagnosticmodebypressingEsc
duringPOST.
•Disabled
•Enabled
•Disabled
•Enabled
•Disabled
•Enabled
Selectsystembootcapability.
•Both:Selectpriorityofboot
optionsbetweenUEFIandLegacy.
•UEFIOnly:Thesystemwillboot
fromtheUEFIenabledoperating
system.
•LegacyOnly:Thesystemwillboot
fromanyoperatingsystemother
thantheUEFIenabledone.
Note:IfyouselectUEFIOnly,
thesystemcannotbootfromthe
bootabledevicesthatdonothavethe
UEFIenabledoperatingsystem.
CompatibilitySupportModule(CSM)
isrequiredforbootingthelegacy
operatingsystem.IfyouselectUEFI
Only,CSMSupportisselectable.
ForBothorLegacyOnlymode,CSM
Supportisnotselectable.
ScreenduringPOST:
•Quick:TheThinkPadLogoscreen
isdisplayed.
•Diagnostics:Testmessagesare
displayed.
IfyouselectDisabled,themessage
“Tointerruptnormalstartup,press
Enter.”messageisnotdisplayed
duringthePOST.
IfyouselectEnabled,theF12key
isrecognizedandtheBootMenu
windowisdisplayed.
IfyouselectEnabled,theboot
priorityislockedforyourfutureuse.
Restartmenu
IfyouneedtoclosetheThinkPadSetupprogramandrestartthesystem,selectRestartfromtheThinkPad
Setupprogrammainmenu.Thefollowingsubmenuisdisplayed:
•ExitSavingChanges:Restartthesystemaftersavingthechanges.
•ExitDiscardingChanges:Restartthesystemwithoutsavingthechanges.
•LoadSetupDefaults:Loadthedefaultsettingthatwasineffectatthetimeofpurchase.
EnableOSOptimizedDefaultstomeettheMicrosoftWindows8certicationrequirements.Whenyou
changethissetting,someothersettingsarechangedautomatically.TheaffectedsettingsareCSM
Support,UEFI/LegacyBoot,SecureBoot,andSecureRollBackPrevention.
•DiscardChanges:Discardthechanges.
•SaveChanges:Savethechanges.
Chapter6.Advancedconguration83
Page 100

UpdatingyoursystemUEFIBIOS
TheUniedExtensibleFirmwareInterface(UEFI)BIOSisapartofthesystemprogramsthatmakeupthe
basiclayerofsoftwarebuiltintoyourcomputer.TheUEFIBIOStranslatestheinstructionsfromother
softwarelayers.
YourcomputersystemboardhasamodulecalledEEPROM,alsoreferredtoasashmemory.Youcan
updatetheUEFIBIOSandtheThinkPadSetupprogrambystartingyourcomputerwithaashupdate
opticaldiscorashupdateprogramrunningintheWindowsenvironment.
Insomeinstanceswhenyouaddsoftware,hardware,oradevicedriver,youmightbeinformedthatyou
needtoupdateyourUEFIBIOSinorderforthenewadditiontoworkproperly.
ToupdateyourUEFIBIOS,gotothefollowingWebsiteandfollowtheinstructionsonthescreen:
http://www.lenovo.com/ThinkPadDrivers
Usingsystemmanagement
Thissectionisintendedprimarilyfornetworkadministrators.
Yourcomputerisdesignedformanageability,sothatyoucanredirectmoreofyourresourcestobetter
meetyourbusinessobjectives.
Thismanageability,or“TotalCostofOwnership”(TCO),enablesyoutoremotelyoperateclientcomputers
inthesamewayasyouoperateyourowncomputer,suchasturningonaclientcomputer,formatting
solid-statedrive,andinstallingsoftware.
Oncethecomputerisconguredandoperational,youcanmanageitbyuseofsoftwareandmanageability
featuresalreadyintegratedintotheclientsystemandthenetwork.
Systemmanagement
Readthistopictolearnmoreaboutfeaturesofsystemmanagement.
DesktopManagementInterface
ThesystemBIOS(UEFIBIOS)ofyourcomputersupportsaninterfacecalledSystemManagementBIOS
ReferenceSpecication(SMBIOS)V2.6.1.SMBIOSprovidesinformationaboutthehardwarecomponents
ofyoursystem.ItistheresponsibilityoftheBIOStosupplythisdatabasewithinformationaboutitself
andthedevicesonthesystemboard.Thisspecicationdocumentsthestandardsforgettingaccessto
thisBIOSinformation.
PrebooteXecutionEnvironment
ThePrebooteXecutionEnvironment(PXE)technologymakesyourcomputermoremanageable(itisPXE
2.1-compliant)byenablingittoboot(loadanoperatingsystemoranotherexecutableimage)froma
server.YourcomputersupportsthepersonalcomputerfunctionsthatPXErequires.Forexample,withthe
appropriateLANcard,yourcomputercanbebootedfromthePXEserver.
Note:RemoteProgramLoad(RPL)cannotbeusedwithyourcomputer.
AssetIDEEPROM
TheAssetIDEEPROMcontainsinformationaboutthesystem,includingitscongurationandtheserial
numbersofkeycomponents.Italsoincludesanumberofblankeldsinwhichyoucanrecordinformation
abouttheendusersinyournetwork.
84UserGuide
 Loading...