

Page 1

UserGuide
ThinkPadT431s
Page 2

Notes:Beforeusingthisinformationandtheproductitsupports,ensurethatyoureadandunderstand
thefollowing:
•Safety,Warranty,andSetupGuide
•RegulatoryNotice
•“Importantsafetyinformation”onpagevi
•AppendixD“Notices”onpage149
TheSafety,Warranty,andSetupGuideandtheRegulatoryNoticehavebeenuploadedtotheWebsite.
Torefertothem,gotohttp://www.lenovo.com/ThinkPadUserGuides.
FirstEdition(March2013)
©CopyrightLenovo2013.
LIMITEDANDRESTRICTEDRIGHTSNOTICE:IfdataorsoftwareisdeliveredpursuantaGeneralServicesAdministration
“GSA”contract,use,reproduction,ordisclosureissubjecttorestrictionssetforthinContractNo.GS-35F-05925.
Page 3

Contents
Readthisrst..............v
Importantsafetyinformation..........vi
Conditionsthatrequireimmediateaction..vii
Safetyguidelines............vii
Chapter1.Productoverview......1
Locatingcomputercontrols,connectors,and
indicators..................1
Frontview................1
Right-sideview..............3
Left-sideview..............4
Bottomview...............5
Rearview................6
Statusindicators.............6
Locatingimportantproductinformation......8
Machinetypeandmodelinformation.....8
FCCIDandICCerticationinformation....8
Features..................9
Specications...............10
Operatingenvironment...........11
Lenovoprograms.............11
AccessingLenovoprogramsontheWindows
7operatingsystem...........11
AccessingLenovoprogramsontheWindows
8operatingsystem...........13
Lenovoprogramoverview........14
Chapter2.Usingyourcomputer...17
Registeringyourcomputer..........17
Frequentlyaskedquestions.........17
Specialkeys...............19
Functionkeys.............19
Windowskey.............20
UsingtheThinkPadpointingdevice......20
Powermanagement............22
Checkingthebatterystatus........22
Usingtheacpoweradapter........23
Chargingthebattery..........23
Maximizingthebatterylife........23
Managingthebatterypower.......24
Power-savingmodes..........24
Connectingtothenetwork..........25
Ethernetconnections..........25
Wirelessconnections..........26
Usinganexternalmonitor..........29
Changingdisplaysettings........31
UsingtheExtenddesktopfunction.......31
Settingupapresentation..........32
Usingaudiofeatures............32
Usingthecamera.............33
Usingamediacard.............34
Insertingamediacard..........34
Removingamediacard.........34
Chapter3.Y ouandyourcomputer..35
Accessibilityandcomfort..........35
Ergonomicinformation..........35
Comfort...............36
Accessibilityinformation.........36
Travelingwithyourcomputer.........37
Traveltips...............37
Travelaccessories...........38
Chapter4.Security..........39
Attachingamechanicallock.........39
Usingpasswords..............39
Passwordsandsleepmode........39
Typingpasswords...........39
Power-onpassword...........40
Harddiskpasswords..........40
Supervisorpassword..........42
Harddisksecurity.............44
Settingthesecuritychip...........45
Usingthengerprintreader..........46
Noticeondeletingdatafromyourharddiskdrive
orsolid-statedrive.............48
Usingrewalls...............48
Protectingdataagainstviruses........48
Chapter5.Recoveryoverview....51
RecoveryoverviewfortheWindows7operating
system..................51
Creatingandusingarecoverymedia....51
Performingbackupandrecoveryoperations.52
UsingtheRescueandRecoveryworkspace.53
Creatingandusingarescuemedium....54
Reinstallingpreinstalledprogramsanddevice
drivers................55
Solvingrecoveryproblems........55
RecoveryoverviewfortheWindows8operating
system..................56
Refreshingyourcomputer........56
Resettingyourcomputertothefactorydefault
settings................56
Advancedstartupoptions........56
©CopyrightLenovo2013
i
Page 4

Chapter6.Replacingdevices.....59
Staticelectricityprevention..........59
Disablingthebuilt-inbattery.........59
InstallingorreplacingtheSIMcard.......60
Replacingthebasecoverassembly......61
Replacingtheharddiskdriveorsolid-statedrive.62
Replacingamemorymodule.........64
ReplacinganM.2wirelessLANcard......65
ReplacinganM.2wirelessWANcard......68
Replacingthebackupbattery.........71
Replacingthekeyboard...........72
Chapter7.Enhancingyour
computer...............79
FindingThinkPadoptions..........79
ThinkPadportreplicatorsanddockingstations..79
Frontview...............80
Rearview...............82
AttachingaThinkPadportreplicatoror
dockingstation.............84
DetachingaThinkPadportreplicatoror
dockingstation.............86
Securityfeature............87
Usingthesystemlockkey........88
Chapter8.Advancedconguration..89
Installinganewoperatingsystem.......89
Beforeyoubegin............89
InstallingtheWindows7operatingsystem..90
InstallingtheWindows8operatingsystem..91
Installingdevicedrivers...........91
Installingthedriverforthe4-in-1mediacard
reader................91
InstallingthedriverforUSB3.0(forWindows
7)..................91
InstallingtheThinkPadmonitorlefor
Windows2000/XP/Vista/7/8(forWindows
7)..................92
Installingotherdriversandsoftware(for
Windows7)..............92
ThinkPadSetup..............92
Mainmenu..............93
Congmenu..............93
DateandTimemenu..........99
Securitymenu.............99
Startupmenu.............103
Restartmenu.............105
UpdatingyoursystemUEFIBIOS.....106
Usingsystemmanagement..........106
Systemmanagement..........106
Settingmanagementfeatures.......107
Chapter9.Preventingproblems..109
Generaltipsforpreventingproblems......109
Makingsuredevicedriversarecurrent.....110
Takingcareofyourcomputer.........111
Cleaningthecoverofyourcomputer....112
Chapter10.T roubleshooting
computerproblems.........115
Diagnosingproblems............115
Troubleshooting..............115
Computerstopsresponding.......115
Spillsonthekeyboard..........116
Errormessages............116
Errorswithoutmessages.........118
Beeperrors..............119
Memorymoduleproblems........119
Networkingproblems..........120
Problemswiththekeyboardandotherpointing
devices................121
Problemswiththedisplayandmultimedia
devices................122
Fingerprintreaderproblems........127
Batteryandpowerproblems.......127
Problemswithdrivesandotherstorage
devices................130
Asoftwareproblem...........131
Problemswithportsandconnectors....131
Chapter11.Gettingsupport....133
BeforeyoucontactLenovo..........133
Gettinghelpandservice...........134
Usingdiagnosticprograms........134
LenovoSupportWebsite.........134
CallingLenovo.............134
FindingThinkPadoptions........135
Purchasingadditionalservices........135
AppendixA.Regulatory
information.............137
Wirelessrelatedinformation.........137
LocationsoftheUltraConnectwireless
antennas...............138
Locatingwirelessregulatorynotices....139
Exportclassicationnotice..........139
Electronicemissionnotices..........139
FederalCommunicationsCommission
DeclarationofConformity........139
IndustryCanadaClassBemissioncompliance
statement...............139
EuropeanUnion-Compliancetothe
ElectromagneticCompatibilityDirective...140
GermanClassBcompliancestatement...140
iiUserGuide
Page 5

KoreaClassBcompliancestatement....141
JapanVCCIClassBcompliancestatement..141
Japancompliancestatementforproducts
whichconnecttothepowermainswith
ratedcurrentlessthanorequalto20Aper
phase................141
Lenovoproductserviceinformationfor
Taiwan................141
AppendixB.WEEEandrecycling
statements.............143
ImportantWEEEinformation.........143
Japanrecyclingstatements.........143
RecyclinginformationforBrazil........144
BatteryrecyclinginformationfortheEuropean
Union..................144
BatteryrecyclinginformationforTaiwan.....145
BatteryrecyclinginformationfortheUnitedStates
andCanada................145
AppendixC.ENERGYST ARmodel
information.............147
AppendixD.Notices.........149
Trademarks................150
AppendixE.RestrictionofHazardous
SubstancesDirective(RoHS)....151
ChinaRoHS................151
TurkishRoHS...............151
UkraineRoHS...............151
IndiaRoHS................152
AppendixF .EurAsiaCompliance
Mark.................153
©CopyrightLenovo2013
iii
Page 6

ivUserGuide
Page 7
Readthisrst
Ensurethatyoufollowtheimportanttipsgivenheretogetthemostuseandenjoymentoutofyourcomputer.
Failuretodosomightleadtodiscomfortorinjury,orcauseyourcomputertofail.
Protectyourselffromtheheatthatyourcomputergenerates.
Whenyourcomputeristurnedonorthebatteryischarging,thebase,thepalm
rest,andsomeotherpartsmaybecomehot.Thetemperaturetheyreach
dependsontheamountofsystemactivityandthelevelofchargeinthebattery.
Extendedcontactwithyourbody,eventhroughclothing,couldcause
discomfortorevenaskinburn.
•Avoidkeepingyourhands,yourlap,oranyotherpartofyourbodyin
contactwithahotsectionofthecomputerforanyextendedtime.
•Periodicallytakehandsfromusingthekeyboardbyliftingyourhandsfrom
thepalmrest.
Protectyourselffromtheheatgeneratedbytheacpoweradapter.
Whentheacpoweradapterisconnectedtoanelectricaloutletandyour
computer,itgeneratesheat.
Extendedcontactwithyourbody,eventhroughclothing,maycauseaskin
burn.
•Donotplacetheacpoweradapterincontactwithanypartofyourbody
whileitisinuse.
•Neveruseittowarmyourbody.
Preventyourcomputerfromgettingwet.
Protectthecablesfrombeingdamaged.
Toavoidspillsandthedangerofelectricalshock,keepliquidsawayfromyour
computer.
Applyingstrongforcetocablesmaydamageorbreakthem.
Routecommunicationlines,orthecablesofanacpoweradapter,amouse,a
keyboard,aprinter,oranyotherelectronicdevice,sothattheycannotbewalked
on,trippedover,pinchedbyyourcomputerorotherobjects,orinanyway
subjectedtotreatmentthatcouldinterferewiththeoperationofyourcomputer.
©CopyrightLenovo2013
v
Page 8
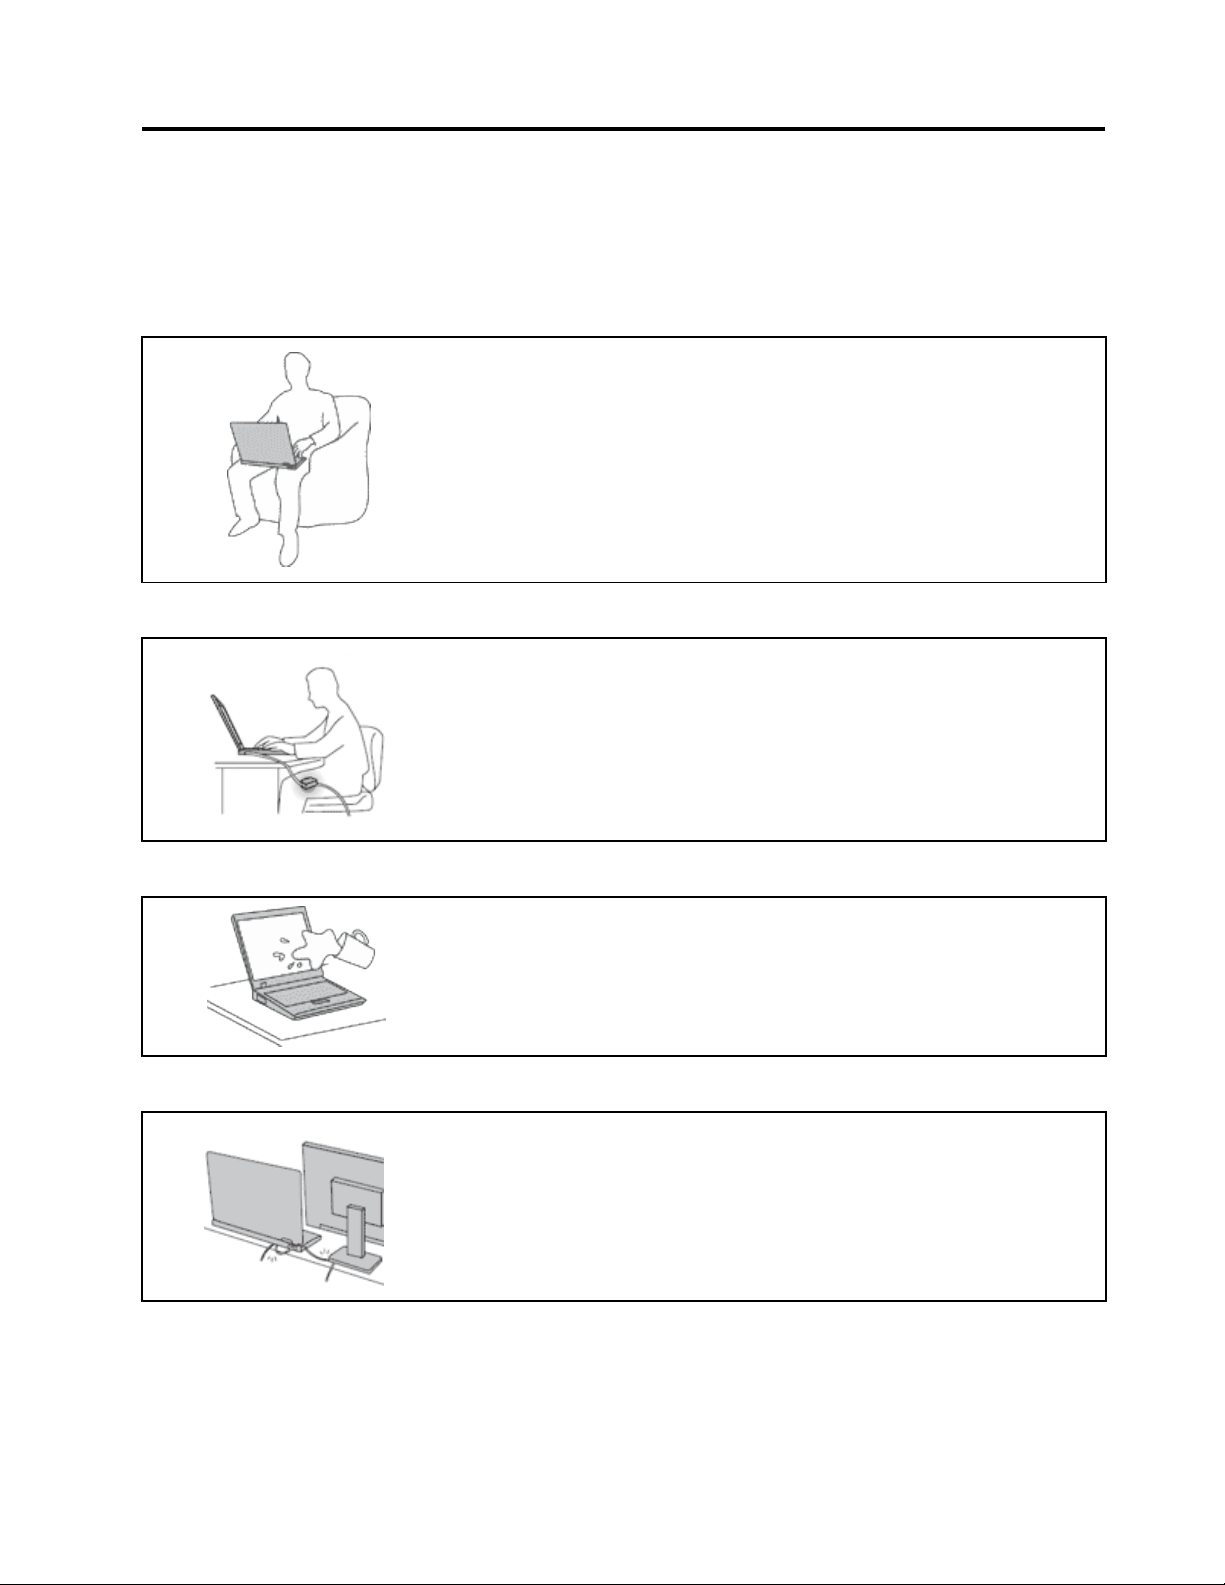
Protectyourcomputeranddatawhenmovingit.
Beforemovingacomputerequippedwithaharddiskdrive,dooneofthe
following,andensurethatthepowerbuttonisofforisblinking:
•Turnitoff.
•Putitinsleepmode.
•Putitinhibernationmode.
Thiswillhelptopreventdamagetothecomputer,andpossiblelossofdata.
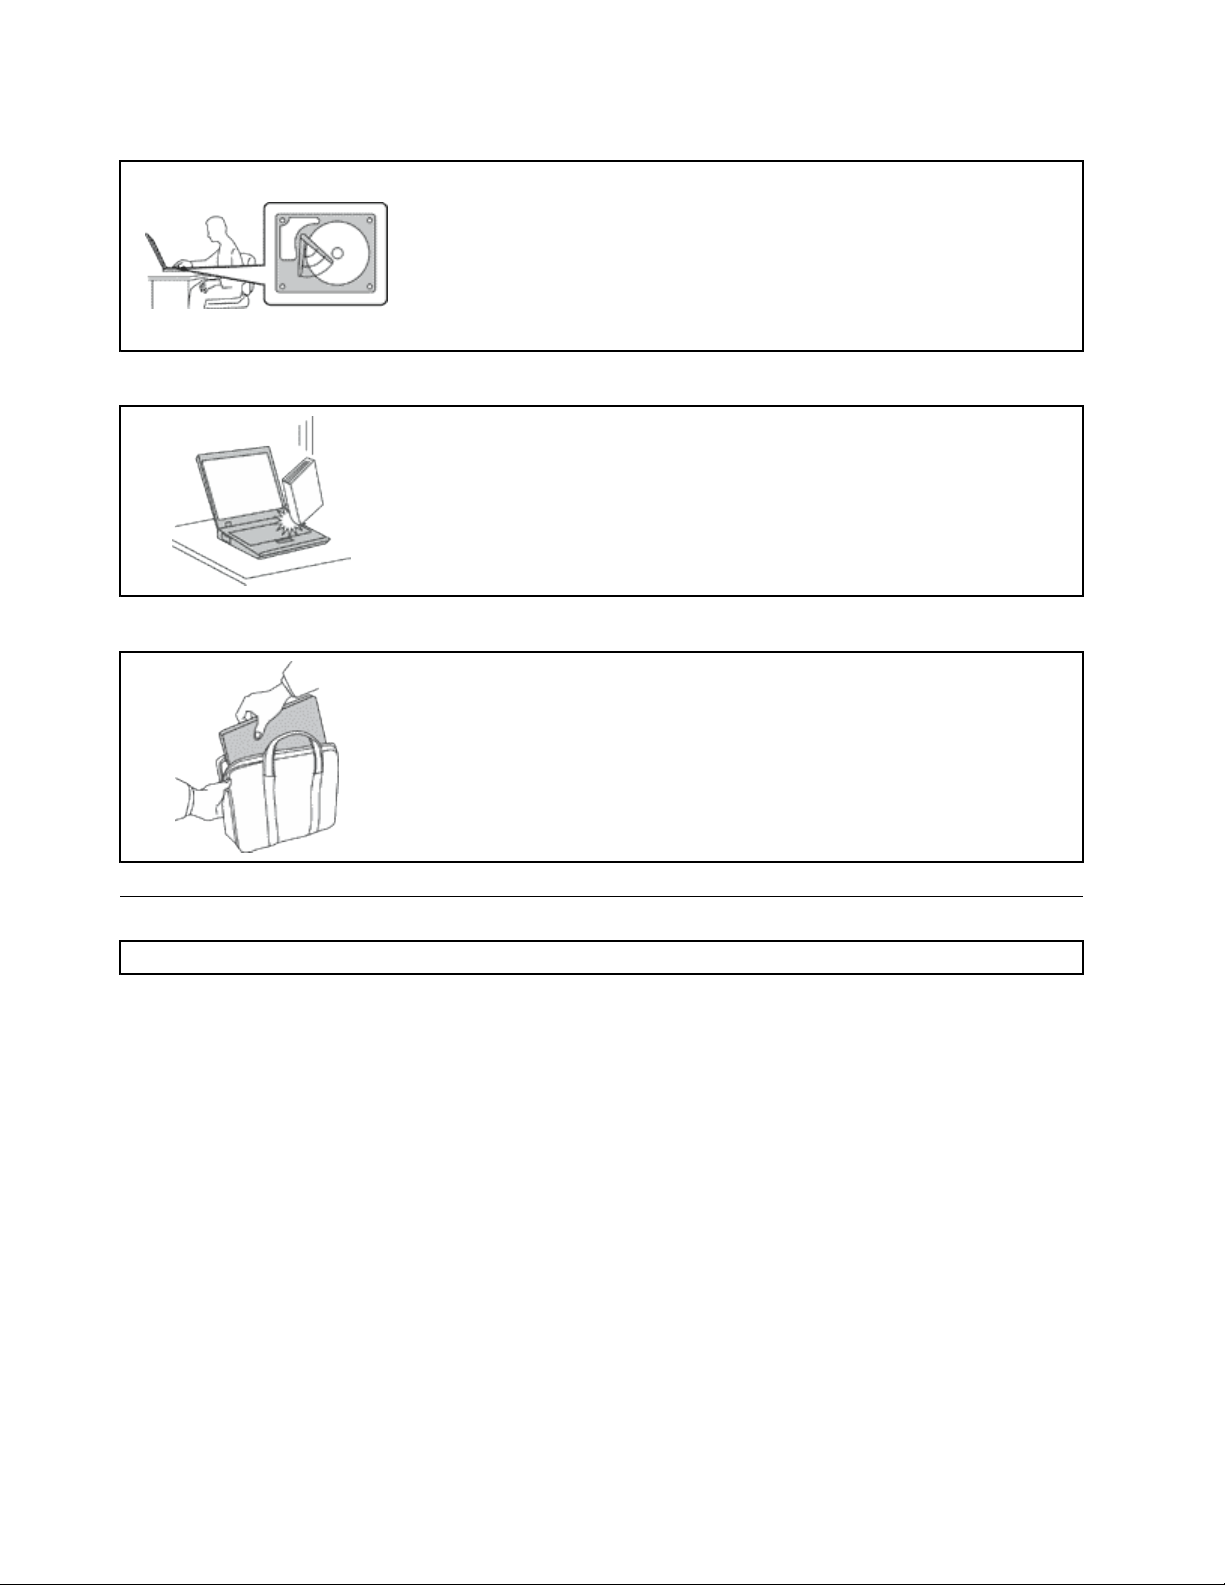
Handleyourcomputergently.
Donotdrop,bump,scratch,twist,hit,vibrate,push,orplaceheavyobjectson
yourcomputer,display,orexternaldevices.
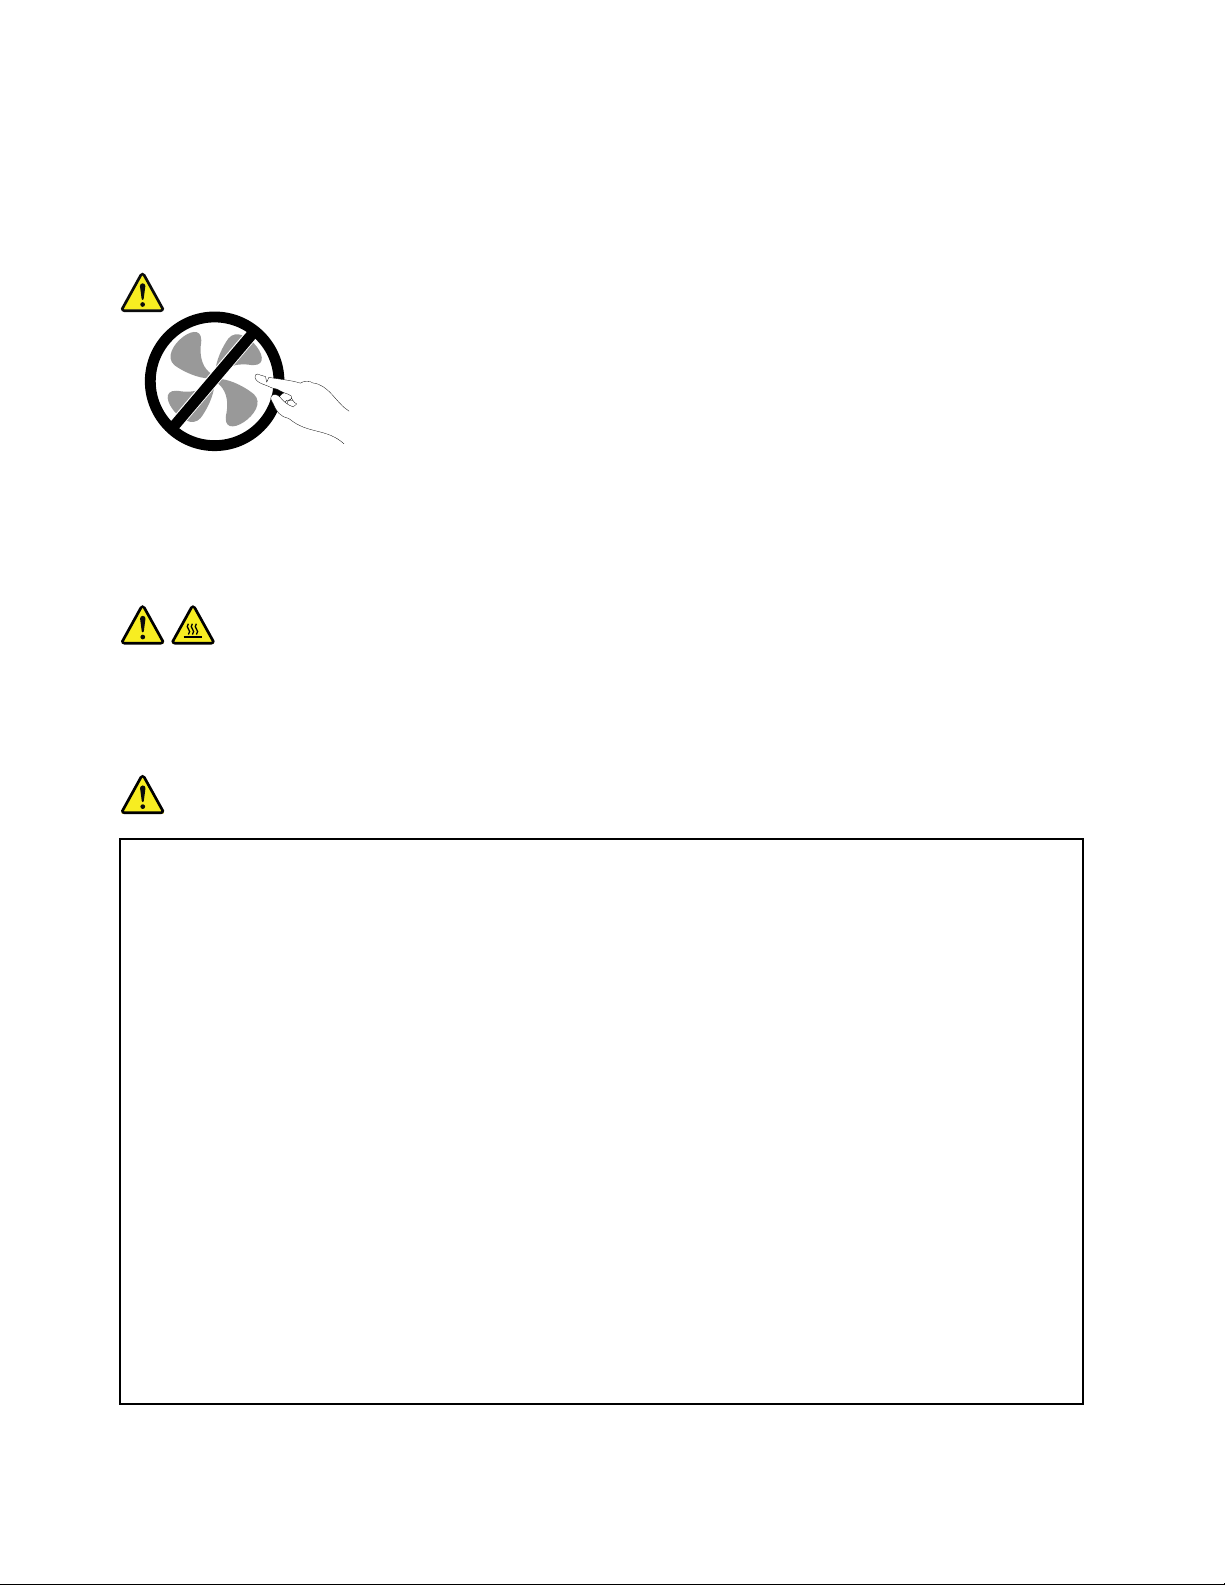
Carryyourcomputercarefully.
•Useaqualitycarryingcasethatprovidesadequatecushioningandprotection.
•Donotpackyourcomputerinatightlypackedsuitcaseorbag.
•Beforeputtingyourcomputerinacarryingcase,ensurethatitisoff,insleep
mode,orinhibernationmode.Donotputacomputerinacarryingcasewhileit
isturnedon.
Importantsafetyinformation
Note:Readtheimportantsafetyinformationrst.
Thisinformationcanhelpyousafelyuseyournotebookcomputer.Followandretainallinformationincluded
withyourcomputer.Theinformationinthisdocumentdoesnotalterthetermsofyourpurchaseagreement
ortheLenovo
andSetupGuidethatcomeswithyourcomputer.
Customersafetyisimportant.Ourproductsaredevelopedtobesafeandeffective.However,personal
computersareelectronicdevices.Powercords,poweradapters,andotherfeaturescancreatepotential
safetyrisksthatcanresultinphysicalinjuryorpropertydamage,especiallyifmisused.Toreducethese
risks,followtheinstructionsincludedwithyourproduct,observeallwarningsontheproductandinthe
operatinginstructions,andreviewtheinformationincludedinthisdocumentcarefully.Bycarefullyfollowing
theinformationcontainedinthisdocumentandprovidedwithyourproduct,youcanhelpprotectyourself
fromhazardsandcreateasafercomputerworkenvironment.
Note:Thisinformationincludesreferencestopoweradaptersandbatteries.Inadditiontonotebook
computers,someproducts(suchasspeakersandmonitors)shipwithexternalpoweradapters.Ifyouhave
suchaproduct,thisinformationappliestoyourproduct.Inaddition,computerproductscontainacoin-sized
internalbatterythatprovidespowertothesystemclockevenwhenthecomputerisunplugged,sothe
batterysafetyinformationappliestoallcomputerproducts.
®
LimitedWarranty.Formoreinformation,see“WarrantyInformation”intheSafety,Warranty,
viUserGuide
Page 9

Conditionsthatrequireimmediateaction
Productscanbecomedamagedduetomisuseorneglect.Someproductdamageisseriousenough
thattheproductshouldnotbeusedagainuntilithasbeeninspectedand,ifnecessary,repairedby
anauthorizedservicer.
Aswithanyelectronicdevice,paycloseattentiontotheproductwhenitisturnedon.Onveryrare
occasions,youmightnoticeanodororseeapuffofsmokeorsparksventfromyourproduct.Oryou
mighthearsoundslikepopping,crackingorhissing.Theseconditionsmightmerelymeanthatan
internalelectroniccomponenthasfailedinasafeandcontrolledmanner.Or,theymightindicate
apotentialsafetyissue.However,donottakerisksorattempttodiagnosethesituationyourself.
ContacttheCustomerSupportCenterforfurtherguidance.ForalistofServiceandSupportphone
numbers,seethefollowingWebsite:
http://www.lenovo.com/support/phone
Frequentlyinspectyourcomputeranditscomponentsfordamageorwearorsignsofdanger.Ifyou
haveanyquestionabouttheconditionofacomponent,donotusetheproduct.ContacttheCustomer
SupportCenterortheproductmanufacturerforinstructionsonhowtoinspecttheproductand
haveitrepaired,ifnecessary.
Intheunlikelyeventthatyounoticeanyofthefollowingconditions,orifyouhaveanysafetyconcerns
withyourproduct,stopusingtheproductandunplugitfromthepowersourceandtelecommunication
linesuntilyoucanspeaktotheCustomerSupportCenterforfurtherguidance.
•Powercords,plugs,poweradapters,extensioncords,surgeprotectors,orpowersuppliesthatare
cracked,broken,ordamaged.
•Signsofoverheating,smoke,sparks,orre.
•Damagetoabattery(suchascracks,dents,orcreases),dischargefromabattery,orabuildupofforeign
substancesonthebattery.
•Acracking,hissingorpoppingsound,orstrongodorthatcomesfromtheproduct.
•Signsthatliquidhasbeenspilledoranobjecthasfallenontothecomputerproduct,thepowercordor
poweradapter.
•Thecomputerproduct,powercord,orpoweradapterhasbeenexposedtowater.
•Theproducthasbeendroppedordamagedinanyway.
•Theproductdoesnotoperatenormallywhenyoufollowtheoperatinginstructions.
Note:Ifyounoticetheseconditionswithaproduct(suchasanextensioncord)thatisnotmanufacturedfor
orbyLenovo,stopusingthatproductuntilyoucancontacttheproductmanufacturerforfurtherinstructions,
oruntilyougetasuitablereplacement.
Safetyguidelines
Alwaysobservethefollowingprecautionstoreducetheriskofinjuryandpropertydamage.
Serviceandupgrades
DonotattempttoserviceaproductyourselfunlessinstructedtodosobytheCustomerSupportCenteror
yourdocumentation.OnlyuseaServiceProviderwhoisapprovedtorepairyourparticularproduct.
Note:Somecomputerpartscanbeupgradedorreplacedbythecustomer.Upgradestypicallyare
referredtoasoptions.ReplacementpartsapprovedforcustomerinstallationarereferredtoasCustomer
ReplaceableUnits,orCRUs.Lenovoprovidesdocumentationwithinstructionswhenitisappropriatefor
customerstoinstalloptionsorreplaceCRUs.Youmustcloselyfollowallinstructionswheninstallingor
replacingparts.TheOffstateofsystemstatusindicatordoesnotnecessarilymeanthatvoltagelevelsinside
aproductarezero.Beforeyouremovethecoversfromaproductequippedwithapowercord,always
©CopyrightLenovo2013
vii
Page 10
ensurethatthepoweristurnedoffandthattheproductisunpluggedfromanypowersource.Ifyouhave
anyquestionsorconcerns,contacttheCustomerSupportCenter.
Althoughtherearenomovingpartsinyourcomputerafterthepowercordhasbeendisconnected,the
followingwarningsarerequiredforyoursafety.
CAUTION:
Hazardousmovingparts.Keepngersandotherbodypartsaway.
CAUTION:
BeforereplacinganyCRUs,turnoffthecomputerandwaitthreetoveminutestoletthecomputer
coolbeforeopeningthecover.
Powercordsandpoweradapters
DANGER
Useonlythepowercordsandpoweradapterssuppliedbytheproductmanufacturer.
Thepowercordsshallbesafetyapproved.ForGermany,itshallbeH05VV-F ,3G,0.75mm
better.Forothercountries,thesuitabletypesshallbeusedaccordingly.
Neverwrapapowercordaroundapoweradapterorotherobject.Doingsocanstressthecordin
waysthatcancausethecordtofray,crack,orcrimp.Thiscanpresentasafetyhazard.
Alwaysroutepowercordssothattheywillnotbewalkedon,trippedover ,orpinchedbyobjects.
Protectpowercordsandpoweradaptersfromliquids.Forinstance,donotleaveyourpowercord
orpoweradapternearsinks,tubs,toilets,oronoorsthatarecleanedwithliquidcleansers.
Liquidscancauseashortcircuit,particularlyifthepowercordorpoweradapterhasbeenstressed
bymisuse.Liquidsalsocancausegradualcorrosionofpowercordterminalsand/ortheconnector
terminalsonapoweradapter,whichcaneventuallyresultinoverheating.
Ensurethatallpowercordconnectorsaresecurelyandcompletelypluggedintoreceptacles.
Donotuseanypoweradapterthatshowscorrosionattheacinputpinsorshowssignsof
overheating(suchasdeformedplastic)attheacinputpinsoranywhereonthepoweradapter .
2
,or
Donotuseanypowercordswheretheelectricalcontactsoneitherendshowsignsofcorrosionor
overheatingorwherethepowercordappearstohavebeendamagedinanyway.
viiiUserGuide
Page 11
Topreventpossibleoverheating,donotcoverthepoweradapterwithclothingorotherobjects
whenthepoweradapterispluggedintoanelectricaloutlet.
Extensioncordsandrelateddevices
Ensurethatextensioncords,surgeprotectors,uninterruptiblepowersupplies,andpowerstripsthatyouuse
areratedtohandletheelectricalrequirementsoftheproduct.Neveroverloadthesedevices.Ifpowerstrips
areused,theloadshouldnotexceedthepowerstripinputrating.Consultanelectricianformoreinformation
ifyouhavequestionsaboutpowerloads,powerrequirements,andinputratings.
Plugsandoutlets
DANGER
Ifareceptacle(poweroutlet)thatyouintendtousewithyourcomputerequipmentappearstobe
damagedorcorroded,donotusetheoutletuntilitisreplacedbyaqualiedelectrician.
Donotbendormodifytheplug.Iftheplugisdamaged,contactthemanufacturertoobtain
areplacement.
Donotshareanelectricaloutletwithotherhomeorcommercialappliancesthatdrawlargeamounts
ofelectricity;otherwise,unstablevoltagemightdamageyourcomputer,data,orattacheddevices.
Someproductsareequippedwithathree-prongedplug.Thisplugtsonlyintoagrounded
electricaloutlet.Thisisasafetyfeature.Donotdefeatthissafetyfeaturebytryingtoinsertitinto
anon-groundedoutlet.Ifyoucannotinserttheplugintotheoutlet,contactanelectricianforan
approvedoutletadapterortoreplacetheoutletwithonethatenablesthissafetyfeature.Never
overloadanelectricaloutlet.Theoverallsystemloadshouldnotexceed80percentofthebranch
circuitrating.Consultanelectricianformoreinformationifyouhavequestionsaboutpowerloads
andbranchcircuitratings.
Besurethatthepoweroutletyouareusingisproperlywired,easilyaccessible,andlocatedclose
totheequipment.Donotfullyextendpowercordsinawaythatwillstressthecords.
Besurethatthepoweroutletprovidesthecorrectvoltageandcurrentfortheproductyouare
installing.
Carefullyconnectanddisconnecttheequipmentfromtheelectricaloutlet.
Powersupplystatement
DANGER
Neverremovethecoveronapowersupplyoranypartthathasthefollowinglabelattached.
©CopyrightLenovo2013
ix
Page 12

Hazardousvoltage,current,andenergylevelsarepresentinsideanycomponentthathasthislabel
attached.Therearenoserviceablepartsinsidethesecomponents.Ifyoususpectaproblemwith
oneoftheseparts,contactaservicetechnician.
Externaldevices
CAUTION:
DonotconnectordisconnectanyexternaldevicecablesotherthanUSBcablewhilethecomputer
powerison;otherwise,youmightdamageyourcomputer.T oavoidpossibledamagetoattached
devices,waitatleastvesecondsafterthecomputerisshutdowntodisconnectexternaldevices.
Generalbatterynotice
DANGER
PersonalcomputersmanufacturedbyLenovocontainacoincellbatterytoprovidepowerto
thesystemclock.Inaddition,manymobileproducts,suchasnotebookcomputers,utilizea
rechargeablebatterypacktoprovidesystempowerwheninportablemode.Batteriessuppliedby
Lenovoforusewithyourproducthavebeentestedforcompatibilityandshouldonlybereplaced
withapprovedparts.
Neverattempttoopenorserviceanybattery.Donotcrush,puncture,orincineratebatteriesor
shortcircuitthemetalcontacts.Donotexposethebatterytowaterorotherliquids.Onlyrecharge
thebatterypackstrictlyaccordingtoinstructionsincludedintheproductdocumentation.
Batteryabuseormishandlingcancausethebatterytooverheat,whichcancausegassesorame
to“vent”fromthebatterypackorcoincell.Ifyounoticeanysignsofbulging,leakageorcorrosion
ontheexterioroftheproduct,thismaybetheresultofaninternalbatteryfault.Ifthisoccurs,stop
usingtheproductimmediatelyandpleasecontacttheLenovoSupportteamforfurtherinstructions.
Factoryreplacementofthebatteriesmayberequired.
Batteriescandegradewhentheyareleftunusedforlongperiodsoftime.Forsomerechargeable
batteries(particularlyLithiumIonbatteries),leavingabatteryunusedinadischargedstatecould
increasetheriskofabatteryshortcircuit,whichcouldshortenthelifeofthebatteryandcanalso
poseasafetyhazard.DonotletrechargeableLithium-Ionbatteriescompletelydischargeorstore
thesebatteriesinadischargedstate.
Built-inrechargeablebatterynotice
DANGER
Donotattempttoreplacetheinternalrechargeablelithiumionbatteries.ContactLenovoSupport
forfactoryreplacement.
xUserGuide
Page 13

Lithiumcoincellbatterynotice
DANGER
Dangerofexplosionifbatteryisincorrectlyreplaced.
Whenreplacingthelithiumcoincellbattery,useonlythesameoranequivalenttypethatis
recommendedbythemanufacturer.Thebatterycontainslithiumandcanexplodeifnotproperly
used,handled,ordisposedof.
Donot:
•Throworimmerseintowater
•Heattomorethan100°C(212°F)
•Repairordisassemble
Disposeofthebatteryasrequiredbylocalordinancesorregulations.
ThefollowingstatementappliestousersinthestateofCalifornia,U.S.A.
CaliforniaPerchlorateInformation:
Productscontainingmanganesedioxidelithiumcoincellbatteriesmaycontainperchlorate.
PerchlorateMaterial-specialhandlingmayapply,See
www.dtsc.ca.gov/hazardouswaste/perchlorate
Heatandproductventilation
DANGER
Computers,acpoweradapters,andmanyaccessoriescangenerateheatwhenturnedonandwhen
batteriesarecharging.Notebookcomputerscangenerateasignicantamountofheatduetotheir
compactsize.Alwaysfollowthesebasicprecautions:
•Whenyourcomputeristurnedonorthebatteryischarging,thebase,thepalmrest,andsome
otherpartsmaybecomehot.Avoidkeepingyourhands,yourlap,oranyotherpartofyour
bodyincontactwithahotsectionofthecomputerforanyextendedlengthoftime.Whenyou
usethekeyboard,avoidkeepingyourpalmsonthepalmrestforaprolongedperiodoftime.
Yourcomputergeneratessomeheatduringnormaloperation.Theamountofheatdependson
theamountofsystemactivityandthebatterychargelevel.Extendedcontactwithyourbody,
eventhroughclothing,couldcausediscomfortorevenaskinburn.Periodicallytakebreaks
fromusingthekeyboardbyliftingyourhandsfromthepalmrest;andbecarefulnottouse
thekeyboardforanyextendedlengthoftime.
•Donotoperateyourcomputerorchargethebatterynearammablematerialsorinexplosive
environments.
•Ventilationslots,fansand/orheatsinksareprovidedwiththeproductforsafety,comfort,and
reliableoperation.Thesefeaturesmightinadvertentlybecomeblockedbyplacingtheproducton
abed,sofa,carpet,orotherexiblesurface.Neverblock,cover,ordisablethesefeatures.
•Whentheacpoweradapterisconnectedtoanelectricaloutletandyourcomputer,itgenerates
heat.Donotplacetheadapterincontactwithanypartofyourbodywhileusingit.Neverusethe
acpoweradaptertowarmyourbody.Extendedcontactwithyourbody,eventhroughclothing,
maycauseaskinburn.
©CopyrightLenovo2013
xi
Page 14

Foryoursafety,alwaysfollowthesebasicprecautionswithyourcomputer:
•Keepthecoverclosedwheneverthecomputerispluggedin.
•Regularlyinspecttheoutsideofthecomputerfordustaccumulation.
•Removedustfromventsandanyperforationsinthebezel.Morefrequentcleaningsmightbe
requiredforcomputersindustyorhigh-trafcareas.
•Donotrestrictorblockanyventilationopenings.
•Donotoperateyourcomputerinsidefurniture,asthismightincreasetheriskofoverheating.
•Airowtemperaturesintothecomputershouldnotexceed35°C(95°F).
Electricalcurrentsafetyinformation
DANGER
Electriccurrentfrompower,telephone,andcommunicationcablesishazardous.
Toavoidashockhazard:
•Donotuseyourcomputerduringalightningstorm.
•Donotconnectordisconnectanycablesorperforminstallation,maintenance,orreconguration
ofthisproductduringanelectricalstorm.
•Connectallpowercordstoaproperlywiredandgroundedelectricaloutlet.
•Connecttoproperlywiredoutletsanyequipmentthatwillbeattachedtothisproduct.
•Wheneverpossible,useonehandonlytoconnectordisconnectsignalcables.
•Neverturnonanyequipmentwhenthereisevidenceofre,water,orstructuraldamage.
•Disconnectallattachedcablesanddisablebatteriesbeforeopeninganyaccessibledevice
coversunlessinstructedotherwiseintheinstallationandcongurationprocedures.
•Donotuseyourcomputeruntilallinternalpartsenclosuresarefastenedintoplace.Neveruse
thecomputerwheninternalpartsandcircuitsareexposed.
DANGER
Connectanddisconnectcablesasdescribedinthefollowingprocedureswheninstalling,moving,
oropeningcoversonthisproductorattacheddevices.
Toconnect:
1.TurneverythingOFF .
2.First,attachallcablestodevices.
3.Attachsignalcablestoconnectors.
4.Attachpowercordstooutlets.
5.TurndevicesON.
Todisconnect:
1.TurneverythingOFF .
2.First,removepowercordsfromoutlets.
3.Removesignalcablesfromconnectors.
4.Removeallcablesfromdevices.
Thepowercordmustbedisconnectedfromthewalloutletorreceptaclebeforeinstallingallother
electricalcablesconnectedtothecomputer.
Thepowercordmaybereconnectedtothewalloutletorreceptacleonlyafterallotherelectrical
cableshavebeenconnectedtothecomputer .
xiiUserGuide
Page 15

Liquidcrystaldisplay(LCD)notice
CAUTION:
Theliquidcrystaldisplay(LCD)ismadeofglass,androughhandlingordroppingthecomputercan
causetheLCDtobreak.IftheLCDbreaksandtheinternaluidgetsintoyoureyesoronyour
hands,immediatelywashtheaffectedareaswithwaterforatleast15minutes;ifanysymptomsare
presentafterwashing,getmedicalcare.
Usingheadphonesorearphones
CAUTION:
Excessivesoundpressurefromearphonesandheadphonescancausehearingloss.Adjustmentof
theequalizertomaximumincreasestheearphoneandheadphoneoutputvoltageandthesound
pressurelevel.Therefore,toprotectyourhearing,adjusttheequalizertoanappropriatelevel.
Excessiveuseofheadphonesorearphonesforalongperiodoftimeathighvolumecanbedangerousifthe
outputoftheheadphoneorearphoneconnectorsdonotcomplywithspecicationsofEN50332-2.The
headphoneoutputconnectorofyourcomputercomplieswithEN50332-2Subclause7.Thisspecication
limitsthecomputer’smaximumwidebandtrueRMSoutputvoltageto150mV.Tohelpprotectagainst
hearingloss,ensurethattheheadphonesorearphonesyouusealsocomplywithEN50332-2(Clause7
limits)forawidebandcharacteristicvoltageof75mV.UsingheadphonesthatdonotcomplywithEN
50332-2canbedangerousduetoexcessivesoundpressurelevels.
IfyourLenovocomputercamewithheadphonesorearphonesinthepackage,asaset,thecombinationof
theheadphonesorearphonesandthecomputeralreadycomplieswiththespecicationsofEN50332-1.
Ifdifferentheadphonesorearphonesareused,ensurethattheycomplywithEN50332-1(Clause6.5
LimitationValues).UsingheadphonesthatdonotcomplywithEN50332-1canbedangerousdueto
excessivesoundpressurelevels.
Additionalsafetyinformation
DANGER
Plasticbagscanbedangerous.Keepplasticbagsawayfrombabiesandchildrentoavoiddanger
ofsuffocation.
Noticefortabletpersonalcomputerusers
SafetynoticeforusersinAustralia
DANGER
Donotconnectphonelinewhileusingtabletmode.
NoticeforusersintheU.S.A.
Manypersonalcomputerproductsandaccessoriescontaincords,cablesorwires,suchaspowercordsor
cordstoconnecttheaccessorytoapersonalcomputer.Ifthisproducthassuchacord,cableorwire,then
thefollowingwarningapplies:
WARNING:Handlingthecordonthisproductorcordsassociatedwithaccessoriessoldwiththisproduct
willexposeyoutolead,achemicalknowntotheStateofCaliforniatocausecancer,andbirthdefectsor
otherreproductiveharm.Washhandsafterhandling.
Savetheseinstructions.
©CopyrightLenovo2013
xiii
Page 16

xivUserGuide
Page 17
Chapter1.Productoverview
Thischapterprovidesinformationabouttheconnectorlocations,importantproductlabels,computer
features,specications,operatingenvironment,andpreinstalledprograms.
Thischaptercontainsthefollowingtopics:
•“Locatingcomputercontrols,connectors,andindicators”onpage1
•“Locatingimportantproductinformation”onpage8
•“Features”onpage9
•“Specications”onpage10
•“Operatingenvironment”onpage11
•“Lenovoprograms”onpage11
Locatingcomputercontrols,connectors,andindicators
Thissectionintroducesthecomputerhardwarefeaturestogiveyouthebasicinformationyouneedto
startusingthecomputer.
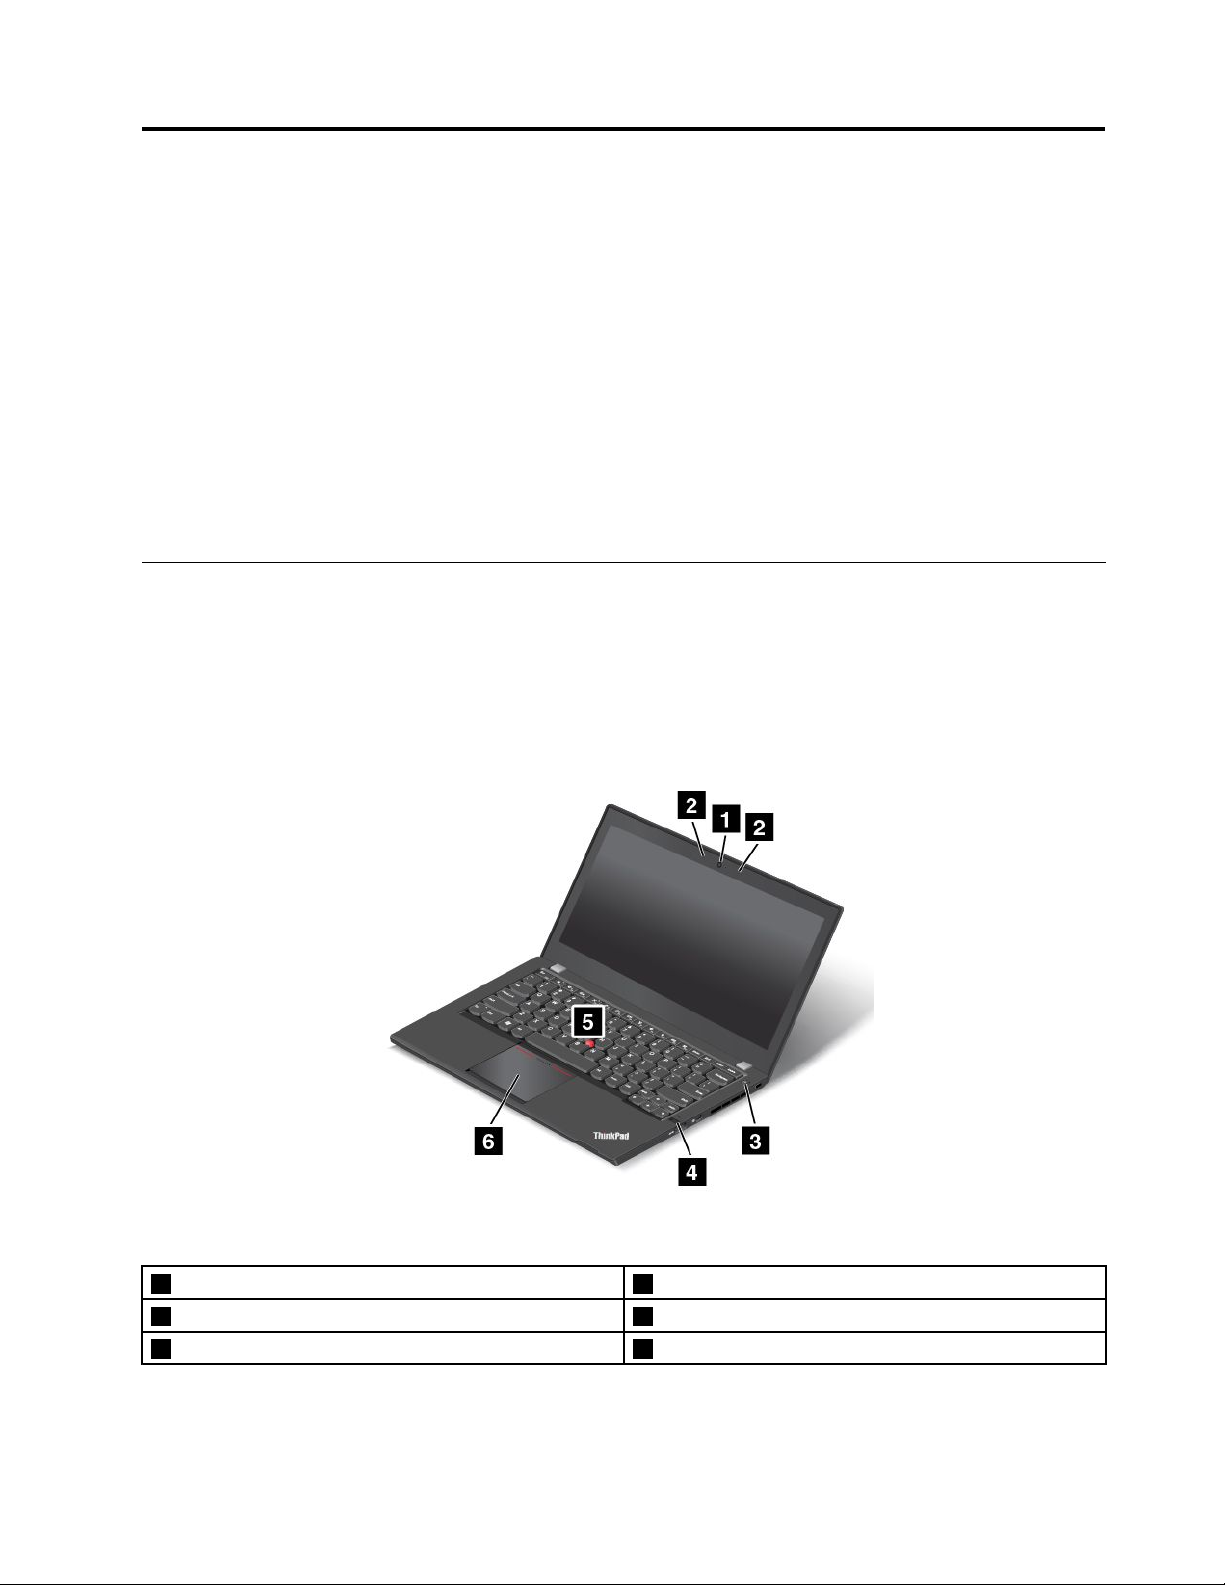
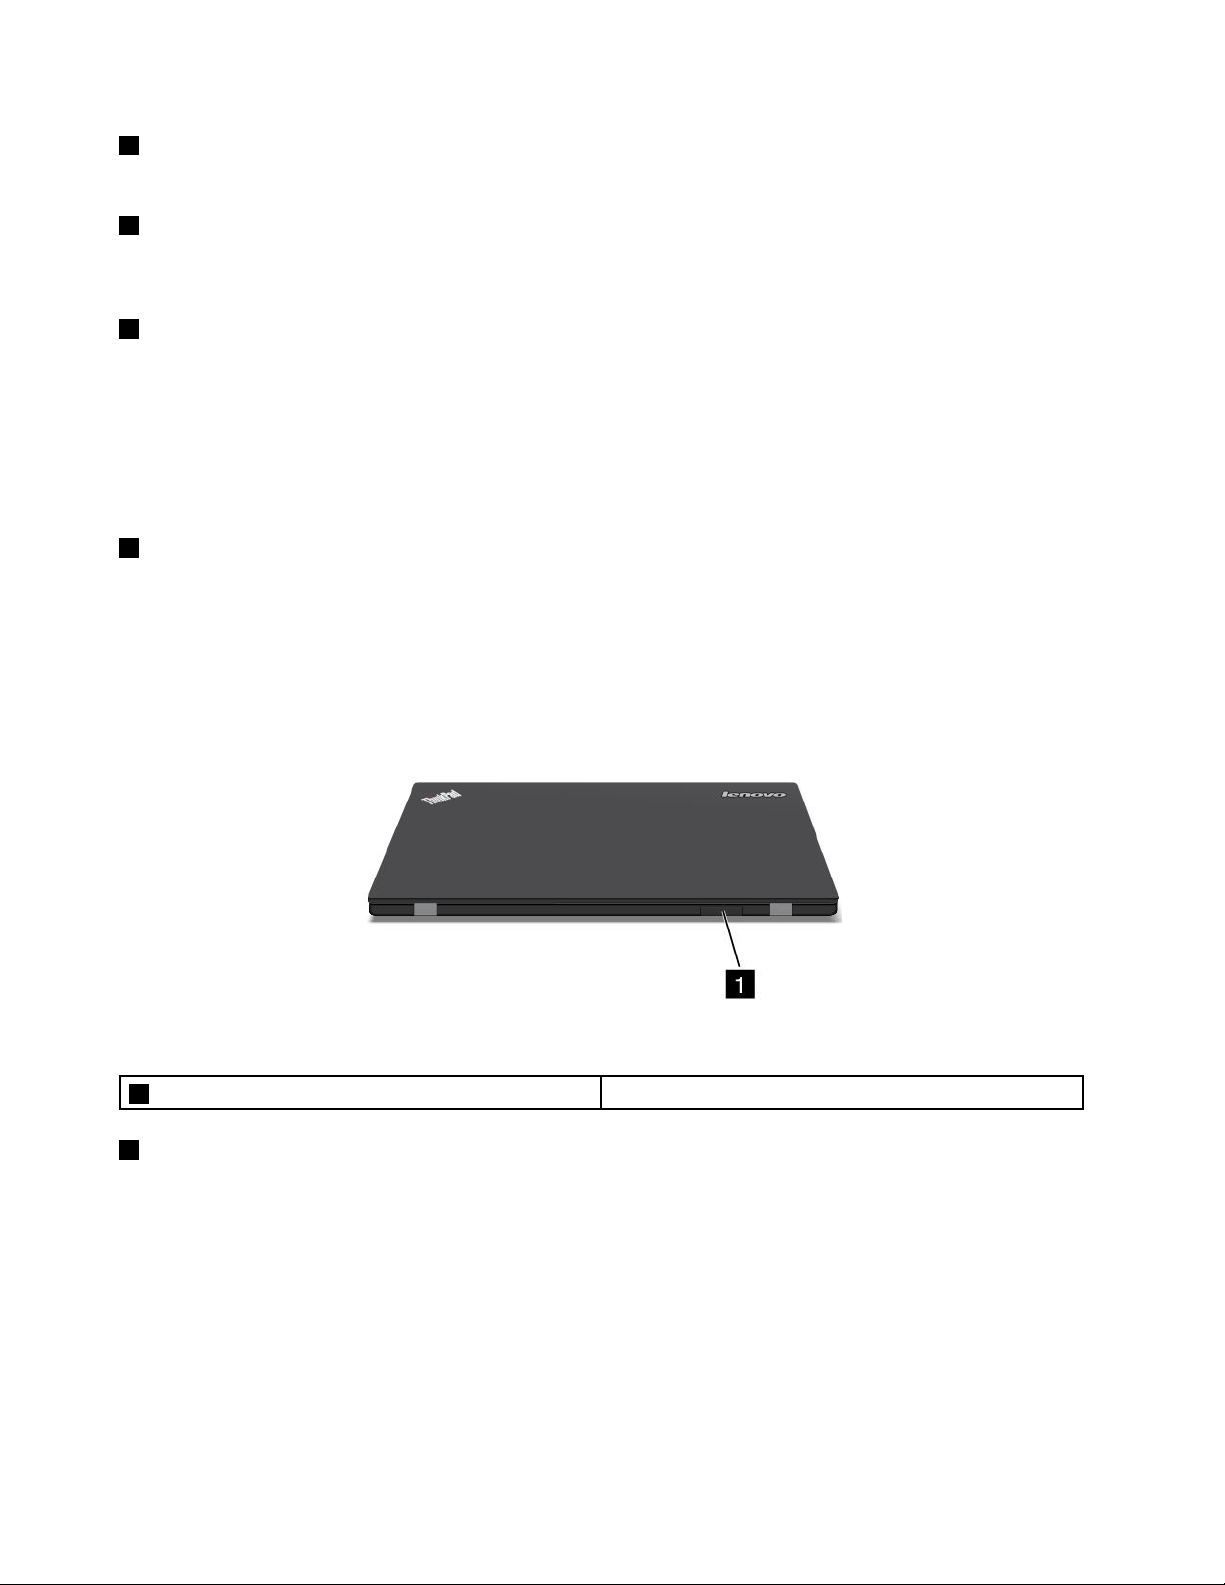
Frontview
Figure1.Frontview
1Camera(onsomemodels)4Fingerprintreader(onsomemodels)
2Microphones5TrackPoint
3Powerbutton6Touchpad
©CopyrightLenovo2013
®
pointingstick
1
Page 18

1Camera
Usethecameratotakepicturesorholdavideoconference.Formoreinformation,see“Usingthecamera”
onpage33.
2Microphones
Themicrophonescapturesoundandvoicewhenusedwithaprogramcapableofhandlingaudio.
3Powerbutton
Usethepowerbuttontoturnonthecomputer.
Toturnoffthecomputer,usetheStartmenushutdownoptionontheMicrosoft
®
Windows
®
7operating
system.FortheMicrosoftWindows8operatingsystem,movethecursortothebottom-rightcornerofthe
screentodisplaythecharms.ThenclickSettings➙Power➙Shutdown.
Ifyourcomputerstopsrespondingandyoucannotturnitoff,pressandholdthepowerbuttonforfour
secondsormore.Ifthecomputerstillisnotresponding,removetheacpoweradapterandresetthe
computerbyinsertingastraightenedpaperclipintotheemergencyresetholetoturnoffthecomputer.To
locatetheemergencyresethole,see“Bottomview”onpage5
.
Youalsocanprogramthepowerbuttonsothatbypressingthepowerbuttonyoucanturnoffthecomputer
orputthecomputerintosleeporhibernationmode.Toachievethis,youneedtochangeyourpowerplan
settings.Toaccesspowerplansettings,dothefollowing:
•ForWindows7:StartthePowerManagerprogramandthenclickthePowerPlantab.Forinstructionson
howtostartthePowerManagerprogram,see“AccessingLenovoprogramsontheWindows7operating
system”onpage11.
•ForWindows8:ClickthebatterystatusiconfromtheWindowsnoticationareaandclickMorepower
options➙Choosewhatthepowerbuttonsdo.
4Fingerprintreader(onsomemodels)
Somemodelshaveangerprintreader.Thengerprintauthenticationtechnologyenablesyoutouseyour
ngerprinttostartthecomputer,entertheThinkPadSetupprogram,orentertheWindowsoperatingsystem.
Formoreinformation,see“Usingthengerprintreader”onpage46.
ThinkPad
5TrackPointpointingstick
6T ouchpad
®
pointingdevice
ThekeyboardcontainstheLenovouniqueThinkPadpointingdevice.Pointing,selecting,anddraggingareall
partofasingleprocessthatyoucanperformwithoutmovingyourngersfromatypingposition.Formore
information,see“UsingtheThinkPadpointingdevice”onpage20.
2UserGuide
Page 19
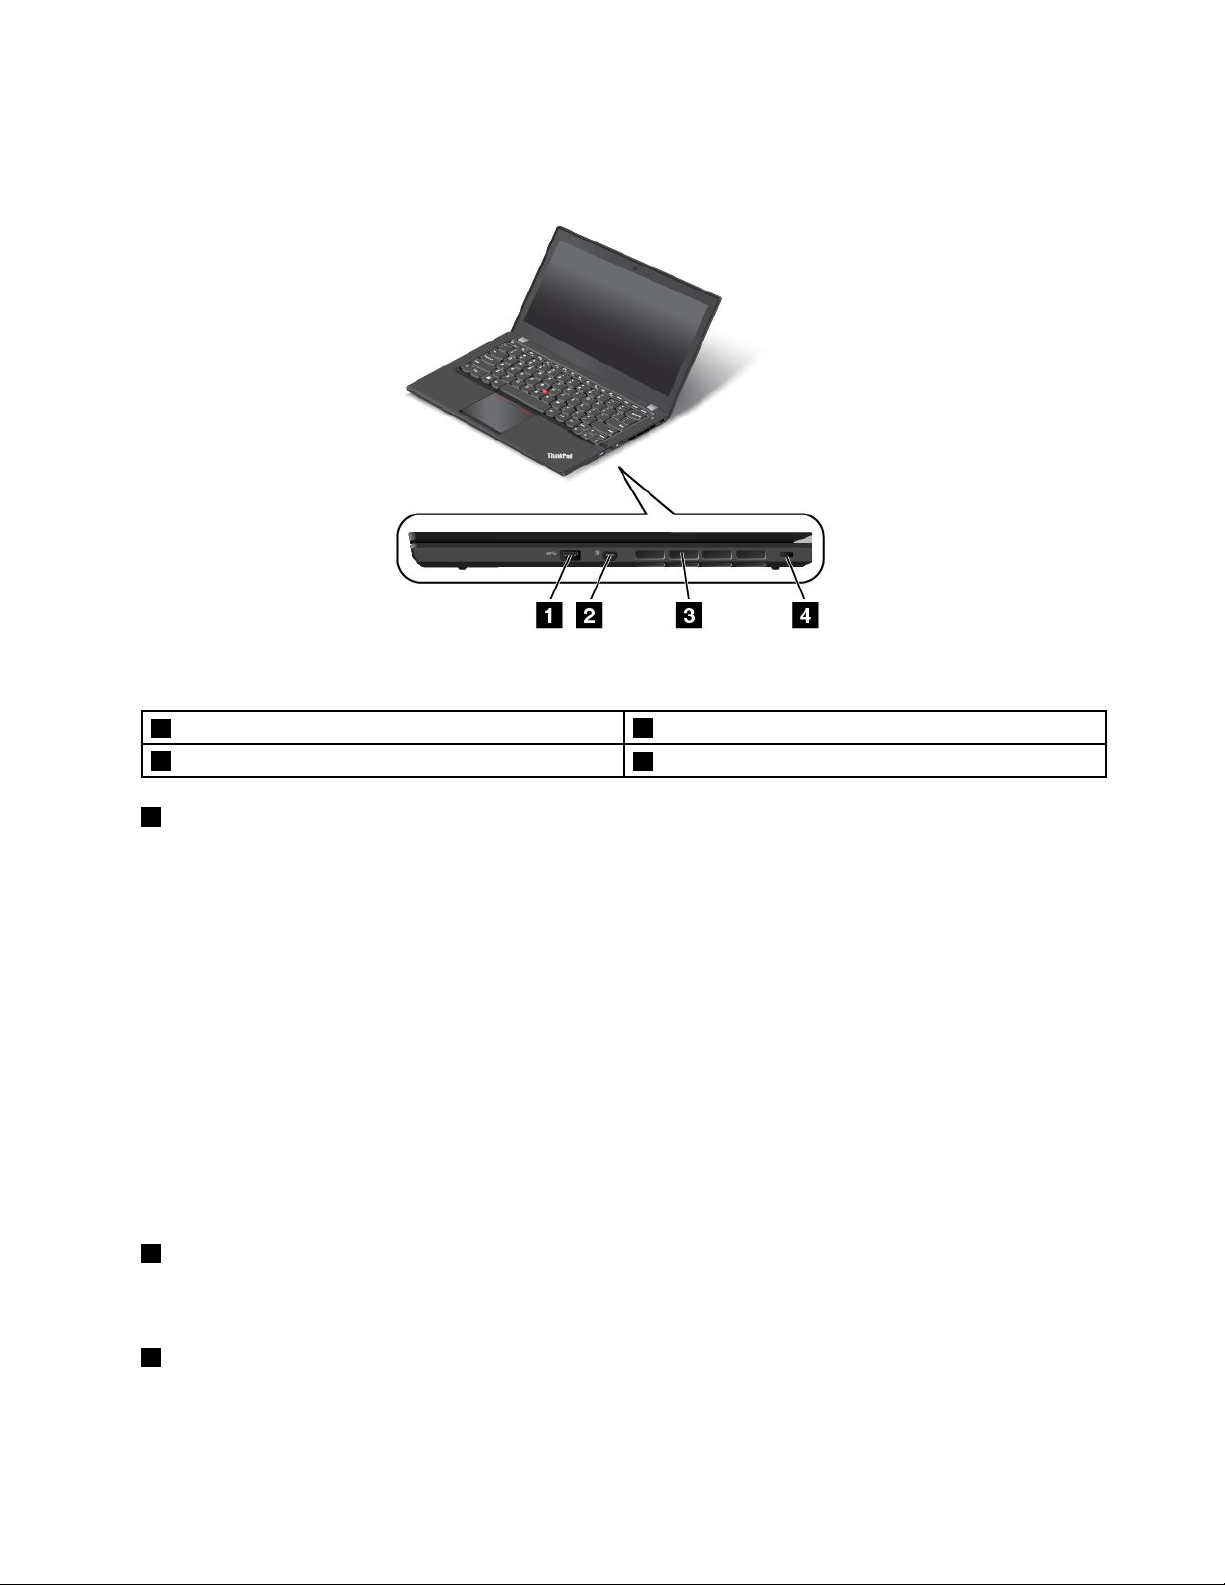
Right-sideview
Figure2.Right-sideview
1AlwaysOnUSB3.0connector
2MiniDisplayPortconnector
1AlwaysOnUSB3.0connector
3Fanlouvers
4Securitykeyhole
Bydefault,theAlwaysOnUSB3.0connectorenablesyoutochargesomemobiledigitaldevicesand
smartphoneswhenyourcomputerisinsleepmode.
Ifyouwanttochargethesedeviceswhenyourcomputerisinhibernationmode,orturnedoff,dothe
following:
1.Connectthecomputertoanacpowersupply.
2.GotoThinkPadSetupandenableAlwaysOnUSBChargeinoffmode.Formoreinformation,see
“Congmenu”onpage93.
3.Dooneofthefollowing:
•ForWindows7:StartthePowerManagerprogramandclicktheGlobalPowerSettingstab.Then
selecttheEnableAlwaysOnUSBcheckbox.ForinstructionsonhowtostartthePowerManager
program,see“AccessingLenovoprogramsontheWindows7operatingsystem”onpage11.
•ForWindows8:PresstheWindowskeytogototheStartscreen.ClickLenovoSettings➙Power.
ThenselecttheEnablewhenthecomputerisoffcheckbox.
2MiniDisplayPortconnector
UsetheminiDisplayPortconnectortoconnectyourcomputertoacompatibleprojector,externalmonitor,or
high-denitiontelevision.
3Fanlouvers
Theinternalfanandlouversenableairtocirculateinthecomputertoensurepropercooling,especiallythe
coolingofthemicroprocessor.
Chapter1.Productoverview3
Page 20
Note:Toensureproperairow,donotplaceanyobstaclesinfrontofthefan.
6Securitykeyhole
Toprotectyourcomputerfromtheft,youcanpurchaseasecuritycablelockthattsthesecuritykeyholeto
lockthecomputertoastationaryobject.
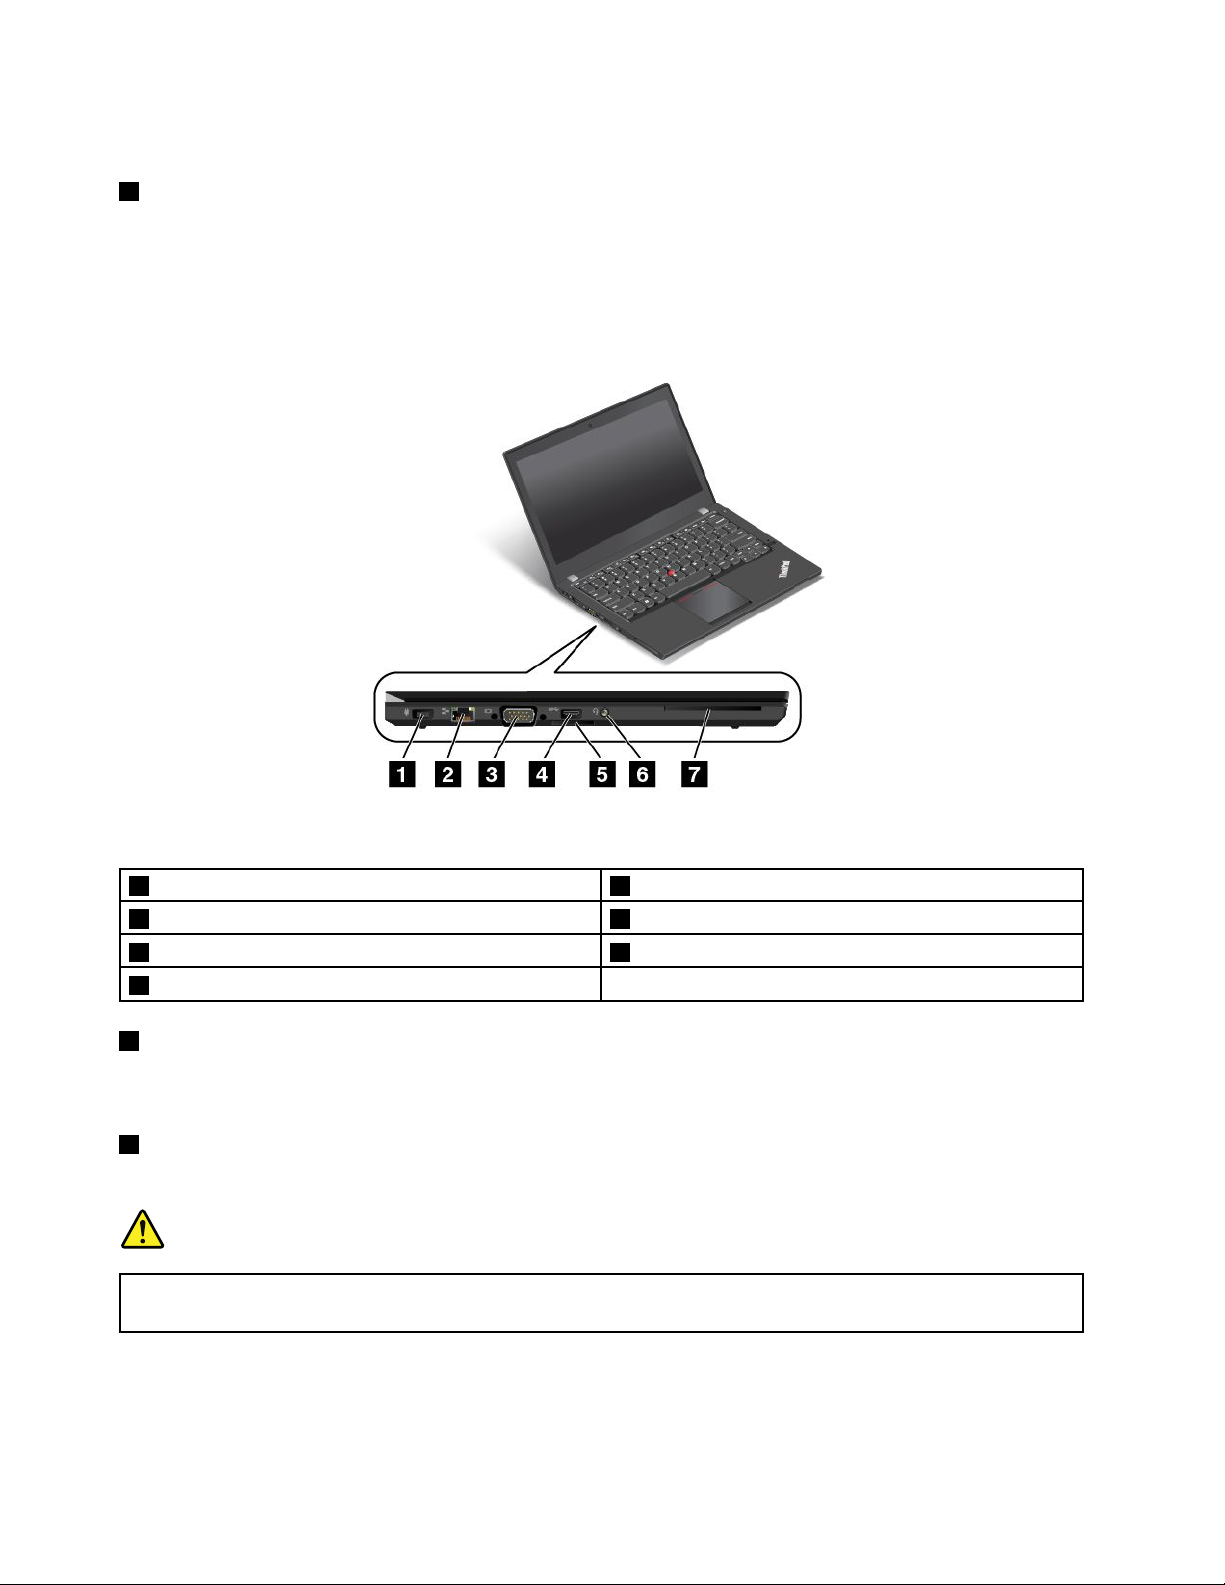
Left-sideview
Figure3.Left-sideview
1Powerconnector5Mediacardreaderslot
2Ethernetconnector
3VGAconnector7Smartcardslot(onsomemodels)
4USB3.0connector
1Powerconnector
6Comboaudiojack
Connecttheacpoweradaptertothepowerconnectortoprovideacpowertothecomputerandcharge
thebattery.
2Ethernetconnector
Connectyourcomputertoalocalareanetwork(LAN)withtheEthernetconnector.
DANGER
Toavoidtheriskofelectricalshock,donotconnectthetelephonecabletotheEthernetconnector .
YoucanonlyconnectanEthernetcabletothisconnector.
TheEthernetconnectorhastwoindicatorsthatshowthestatusofthenetworkconnection.Whenyour
computerconnectstoaLANandasessionwiththenetworkisavailable,thetop-leftindicatorissolidgreen.
Whiledataisbeingtransmitted,thetop-rightindicatorblinksyellow.
4UserGuide
Page 21
3VGAconnector
UsetheVideoGraphicsArray(VGA)connectortoconnectthecomputertoaVGA-compatiblevideodevice,
suchasaVGAmonitor.
Note:Ifyouattachyourcomputertoadockingstationorportreplicator,usetheVGAconnectoronthe
dockingstationorportreplicator,insteadoftheoneonthecomputer.
4USB3.0connector
UsetheUSB3.0connectortoconnectdevicescompatiblewithaUSBinterface,suchasaUSBprinteror
adigitalcamera.
Attention:WhenyouattachaUSBcable,ensurethattheUSBmarkisfacingupward.Otherwisethe
connectormightbedamaged.
5Mediacardreaderslot
Dependingonthemodel,yourcomputermighthaveamediacardreaderslot.Insertyourashmediacard
intothisslottoreadthedataonthecard.
6Comboaudiojack
Tolistentothesoundfromyourcomputer,connectaheadphoneoraheadsetthathasa3.5-mm(0.14-inch),
4-poleplugtothecomboaudiojack.
Notes:
•Ifyouareusingaheadsetwithafunctionswitch,forexample,aheadsetforamobiledigitaldevice,do
notpressthisswitchwhileusingtheheadset.Ifyoupresstheswitch,theheadsetmicrophonewillbe
disabled,andtheintegratedmicrophonesonthecomputerwillbeenabledinstead.
•Thecomboaudiojackdoesnotsupportaconventionalmicrophone.Formoreinformation,see“Using
audiofeatures”onpage32
7Smartcardslot(onsomemodels)
.
Youcaninsertasupportedsmartcardintothesmartcardslot.
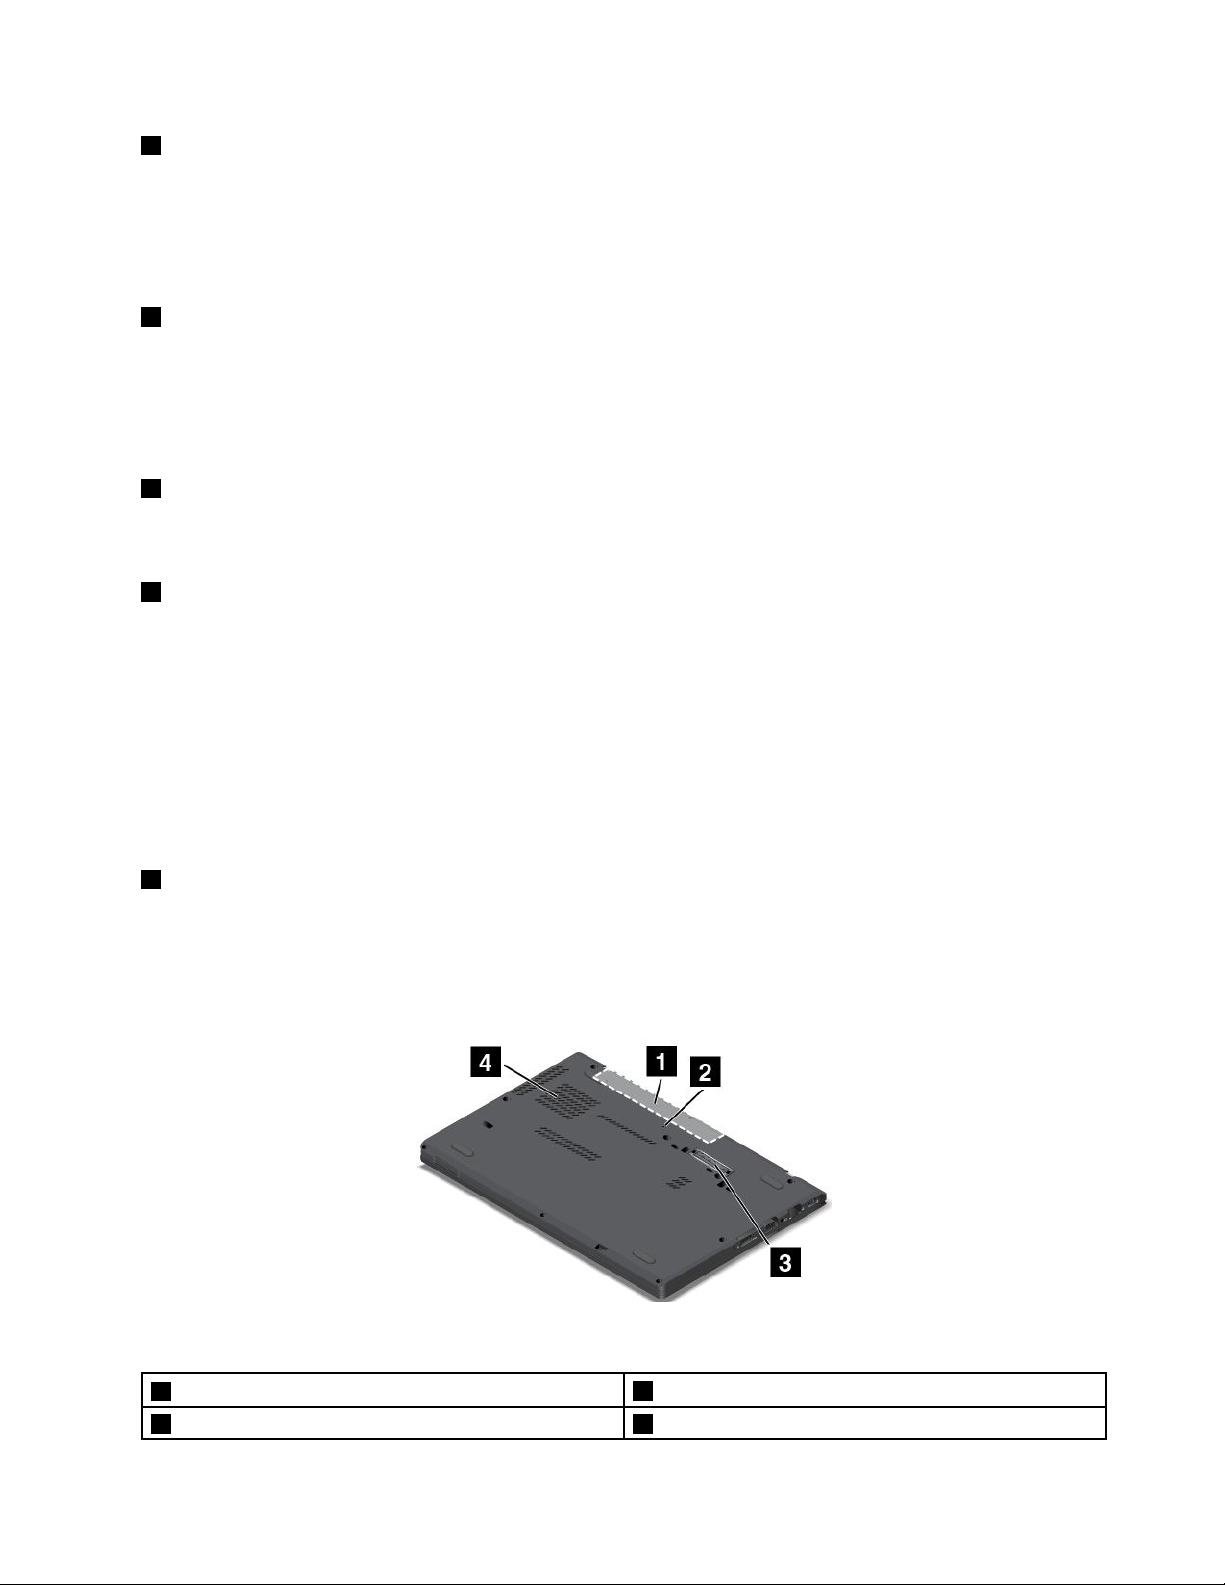
Bottomview
Figure4.Bottomview
1Speakers
2Emergencyresethole4Fanlouvers
3Dockingstationconnector
Chapter1.Productoverview5
Page 22
1Speakers
Yourcomputerisequippedwithapairofstereospeakers.
2Emergencyresethole
Ifthecomputerdoesnotrespond,removetheacpoweradapterandresetthecomputerbyinsertinga
straightenedpaperclipintotheemergencyresetholetoturnoffthecomputer.
3Dockingstationconnector
Dependingonthemodel,yourcomputermighthaveadockingstationconnector.Youcanconnectyour
computertoasupporteddockingstationtoextendthecomputercapabilitieswhenyouareattheofceor
athome.Formoreinformationaboutthesupporteddockingstations,see“ThinkPadportreplicatorsand
dockingstations”onpage79
.
Note:Ifyouconnectyourcomputertoadockingstationorreplicator,usetheEthernetconnectoronthe
dockingstationorreplicatortoconnecttoaLAN,insteadoftheoneonthecomputer.
4Fanlouvers
Theinternalfanandlouversenableairtocirculateinthecomputertoensurepropercooling,especiallythe
coolingofthemicroprocessor.
Note:Toensureproperairow,donotplaceanyobstaclesinfrontofthefanlouvers.
Rearview
Figure5.Rearview
1SIMcardtray
1SIMcardtray
IfyourcomputerhasawirelessWideAreaNetwork(WAN)feature,aSubscriberIdenticationModule(SIM)
cardmightberequiredtoestablishwirelessWANconnections.Dependingonthecountryofdelivery,the
SIMcardmightbealreadyinstalledintheSIMcardtray.
ToinstallorreplaceaSIMcard,see“InstallingorreplacingtheSIMcard”onpage60
.
Statusindicators
Thestatusindicatorsshowthecurrentstatusofyourcomputer.
6UserGuide
Page 23
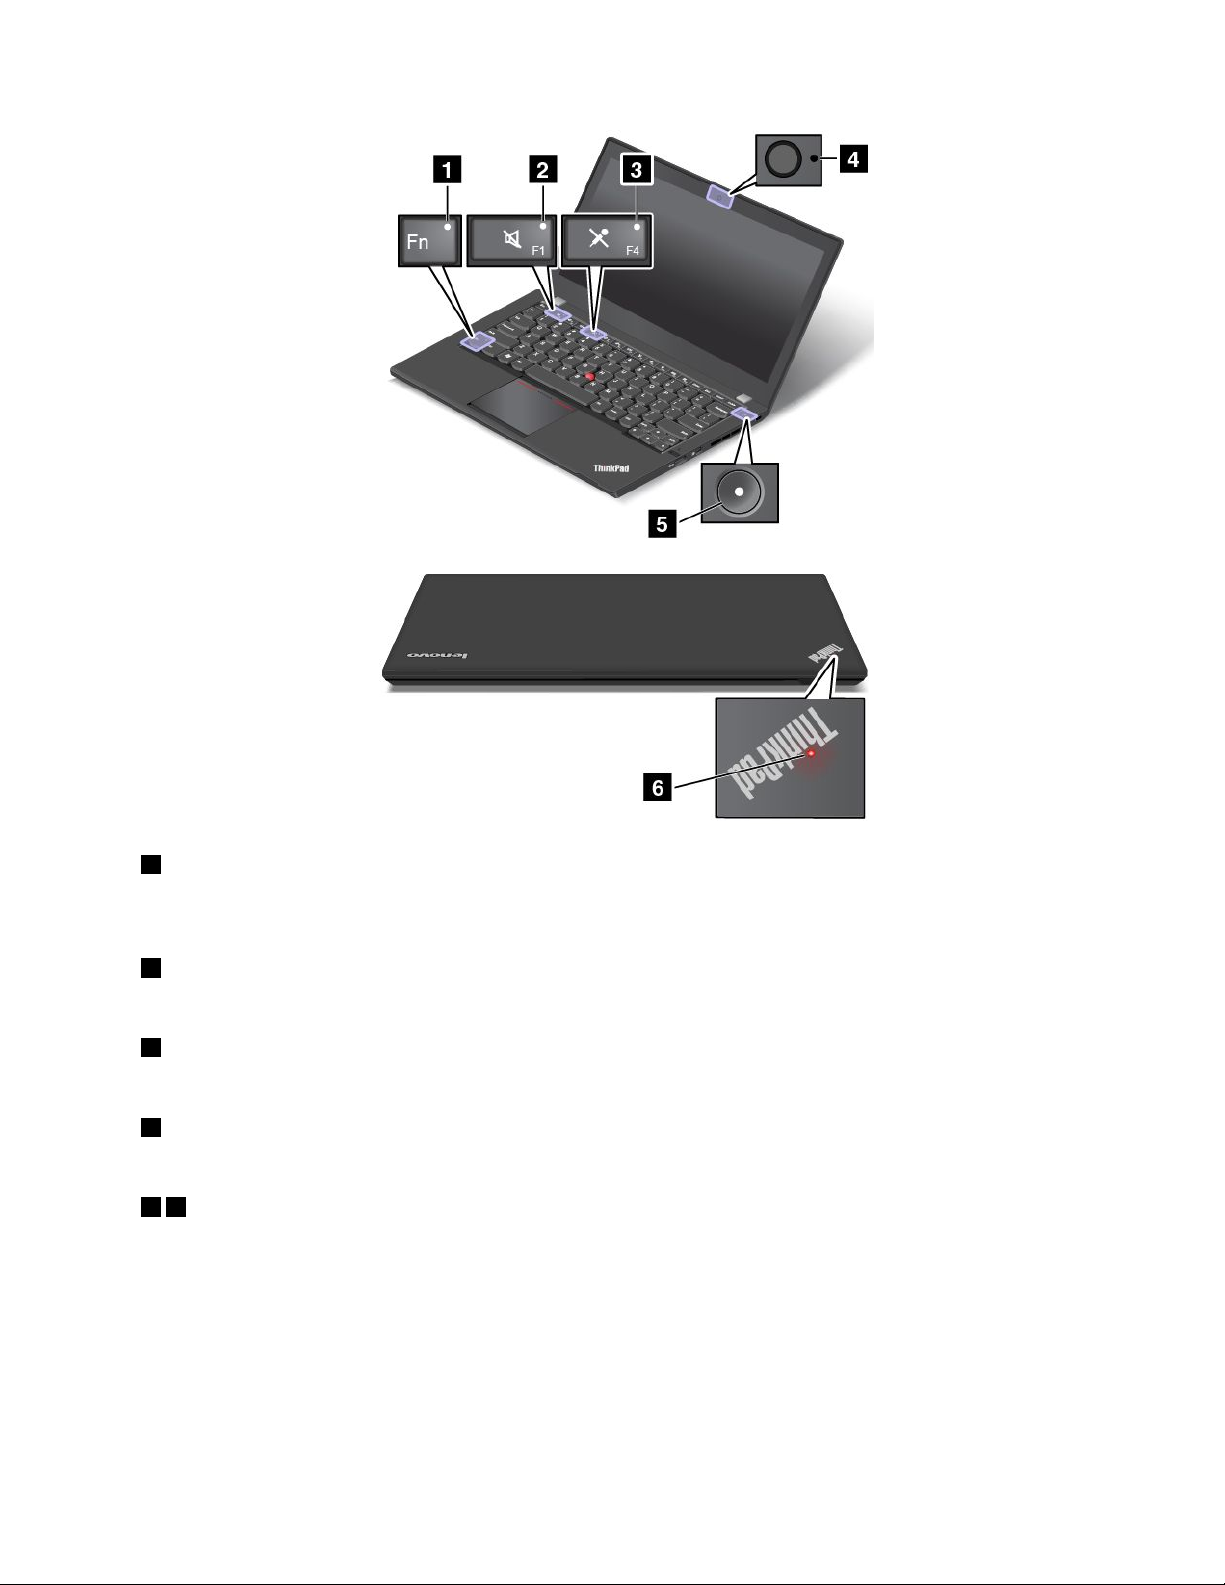
1FnLockindicator
WhentheFnLockindicatorison,itindicatesthattheFnLockfunctionisenabled.Formoreinformation,
see“Specialkeys”onpage19.
2Speaker-muteindicator
Whenthespeaker-muteindicatorison,itindicatesthatthespeakersaremuted.
3Microphone-muteindicator
Whenthemicrophone-muteindicatorison,itindicatesthatthemicrophonesaremuted.
4Camerastatusindicator
Whenthecamerastatusindicatorison,itindicatesthatthecameraisinuse.
56Systemstatusindicators
TheindicatorintheThinkPadlogoandtheindicatorinthecenterofthepowerbuttonshowthesystem
statusofthecomputer.
•Blinkingthreetimes:Thecomputerisinitiallyconnectedtopower.
•On:Thecomputerisinuse.
•Off:Thecomputerisofforinhibernationmode.
•Slowblinking:Thecomputerisinsleepmode.
•Fastblinking:Thecomputerisenteringhibernationmode.
Chapter1.Productoverview7
Page 24
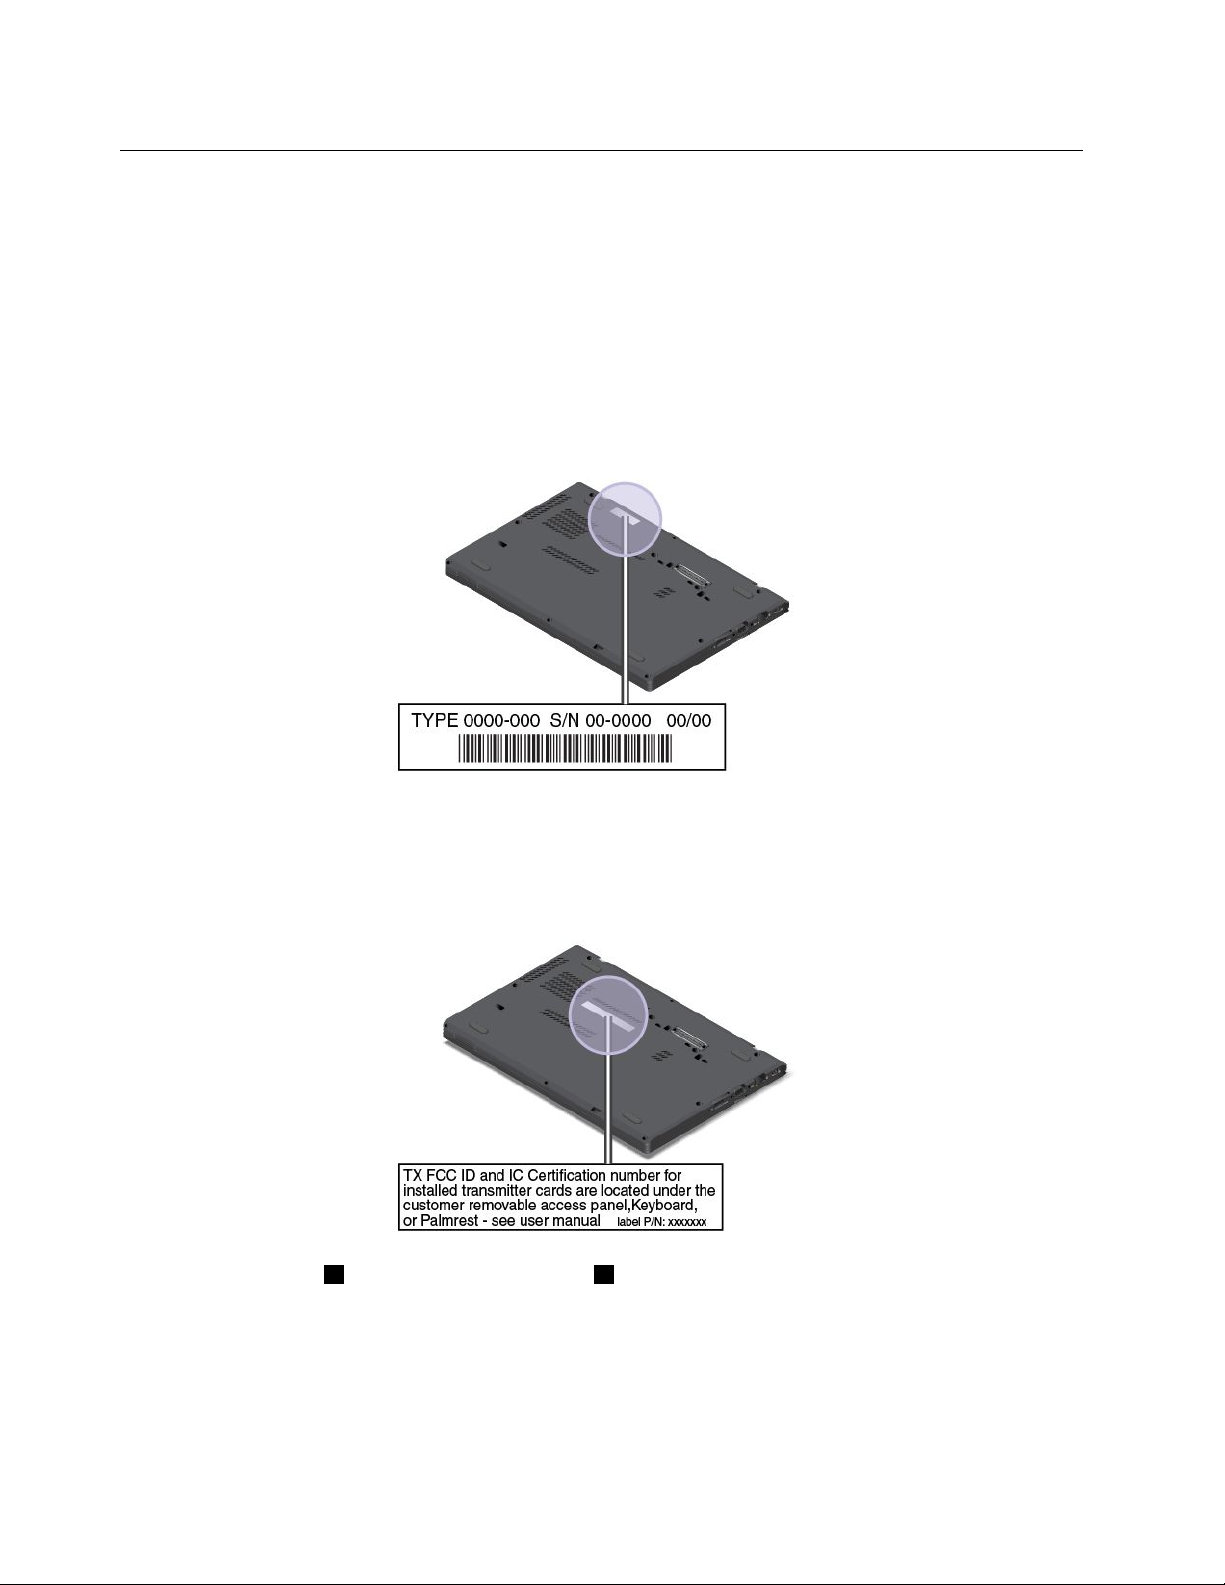
Locatingimportantproductinformation
Thissectionhelpsyoulocatethefollowingimportantinformationforyourcomputer:
•Machinetypeandmodelnumber
•FCCIDandICCerticationnumber
Machinetypeandmodelinformation
Themachinetypeandmodelnumberinformationislabeledonyourcomputer.Theinformationhelps
supporttechnicianstoidentifyyourcomputerandprovidefasterservice.
Youcanndthemachinetypeandmodelofyourcomputeronthelabelasshownbelow:
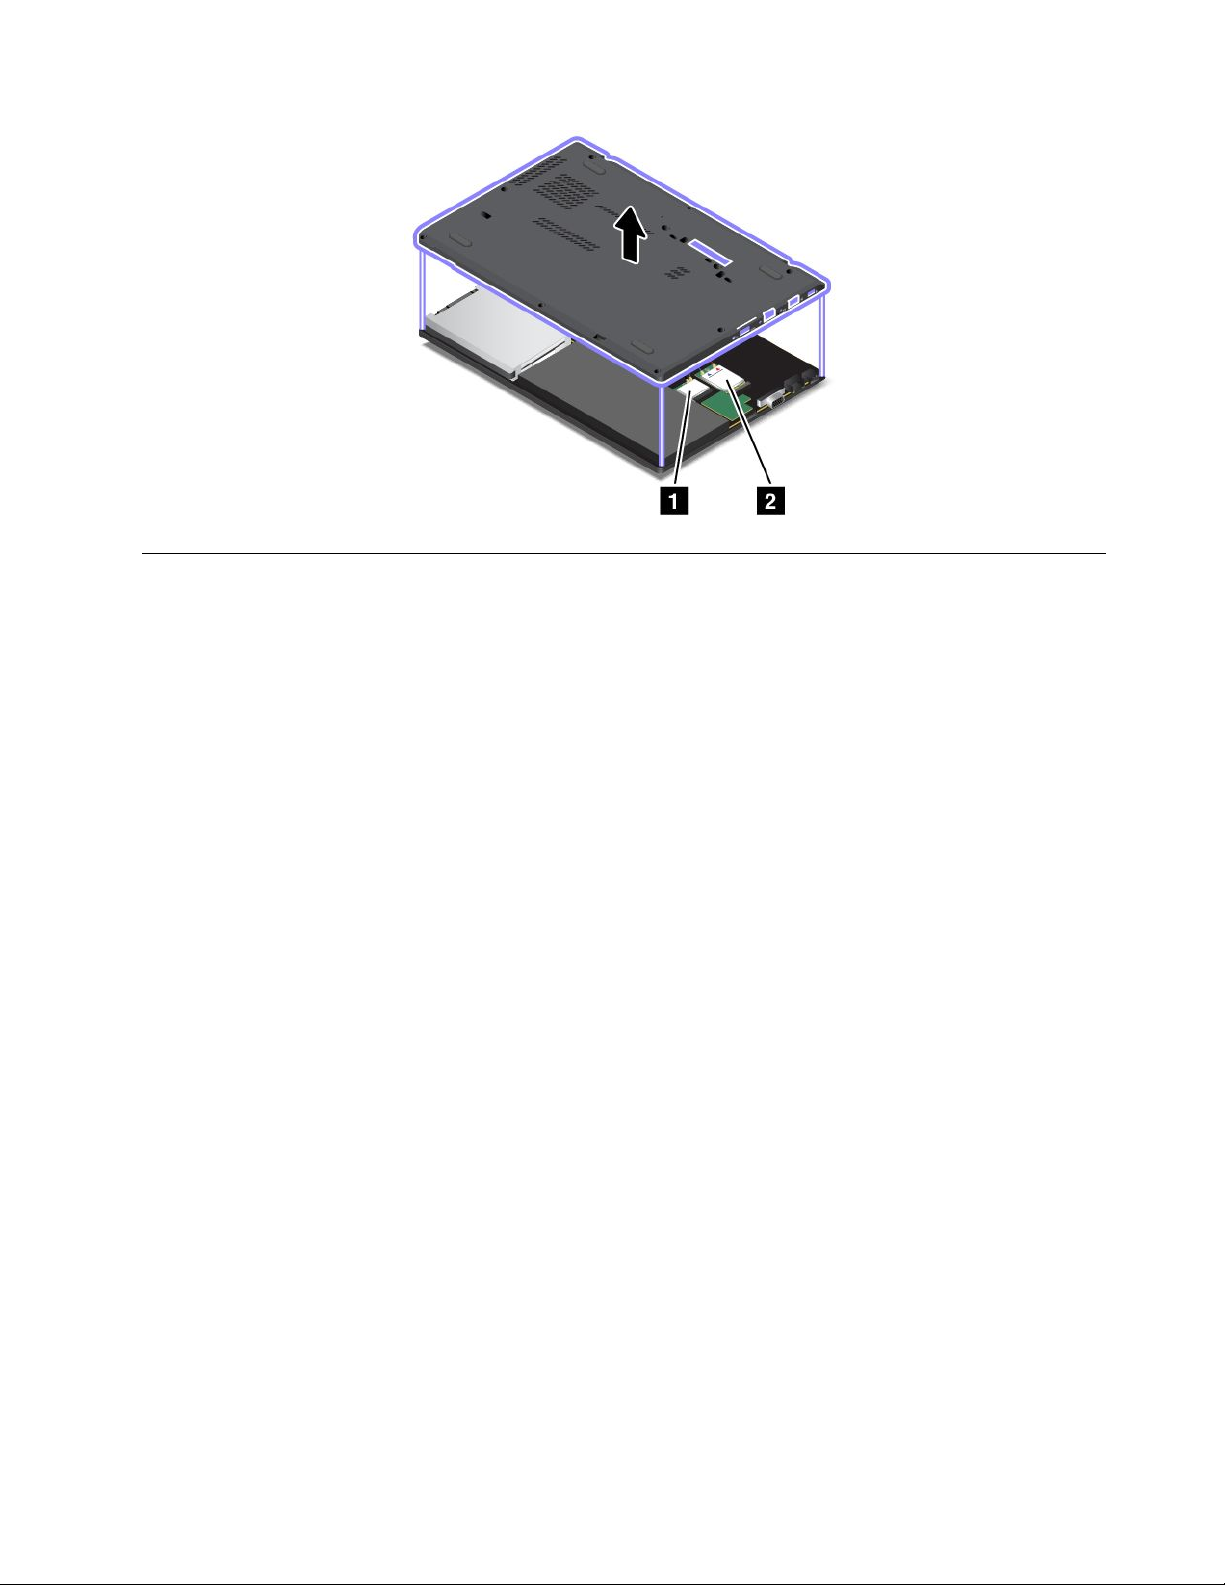
FCCIDandICCerticationinformation
ThereisnoFCCIDorICCerticationnumberforthetransmittercardsshownontheenclosureofyour
computer.TheFCCIDandICCerticationlabelsareafxedonthecorrespondingcardsinstalledinyour
computer.
ThewirelessLANcard1andthewirelessWANcard2(onsomemodels)arelocatedasshown.
8UserGuide
Page 25
Features
Thistopicliststhefeaturesofyourcomputer.
Microprocessor
Toviewthemicroprocessorinformationofyourcomputer,dothefollowing:
•ForWindows7:ClickStart,right-clickComputer,andclickProperties.
•ForWindows8:Fromthedesktop,movethecursortothetop-rightorbottom-rightcornerofthescreen
todisplaythecharms.ThenclickSettings➙PCinfo.
Memory
Doubledatarate3lowvoltagesynchronousdynamicrandomaccessmemory(DDR3LVSDRAM)
Storagedevice
•2.5-inchharddiskdrivewithaheightof7mm(0.28inch)or9mm(0.35inch)
•2.5-inchsolid-statedrivewithaheightof7mm(0.28inch)
•M.2solid-statedriveforcacheonly(onsomemodels)
Display
Colordisplaywiththethin-lmtransistor(TFT)technology.
•Size:355.60mm(14inches)
•Resolution:
–LCD:1600x900
–Externalmonitor:upto2560x1600
•Brightnesscontrol
•Camera
•Microphones
Chapter1.Productoverview9
Page 26

Keyboard
•6-rowbacklitkeyboard
•Functionkeys
•ThinkPadpointingdevice(TrackPointpointingstickandmulti-touchtouchpad)
Interface
•AlwaysonUSB3.0connector
•Comboaudiojack
•Mediacardreader
•MiniDisplayPortconnector
•RJ45Ethernetconnector
•SIMcardtray
•Smartcardreader(onsomemodels)
•USB3.0connector
•VGAconnector
Wirelessfeatures
•IntegratedwirelessBluetooth
•IntegratedwirelessLAN
•IntegratedwirelessWAN(onsomemodels)
Securityfeatures
•Fingerprintreader(onsomemodels)
Specications
Thissectionliststhephysicalspecicationsforyourcomputer.
Size
•Width:331mm(13.03inches)
•Depth:226mm(8.9inches)
•Height:20.65mm(0.81inch)
Heatoutput
45W(154Btu/hr)maximumor65W(222Btu/hr)maximum,dependingonthemodel
Powersource(acpoweradapter)
•Sine-waveinputat50to60Hz
•Inputratingofacpoweradapter:100to240Vac,50to60Hz
Batterypack
•Integratedlithium-ion(Li-Ion)batterypack
Batterystatus
10UserGuide
Page 27

•Forthepercentageofthebatterypowerremaining,checkthebatterystatusiconintheWindows
noticationarea.
Operatingenvironment
Thissectionprovidesinformationabouttheoperatingenvironmentofthecomputer.
Environment:
•Maximumaltitudewithoutpressurization:3048m(10000ft)
•Temperature
–Ataltitudesupto2438m(8000ft)
–Operating:5.0°Cto35.0°C(41°Fto95°F)
–Storage:5.0°Cto43.0°C(41°Fto109°F)
–Ataltitudesabove2438m(8000ft)
–Maximumtemperaturewhenoperatingundertheunpressurizedcondition:31.3°C(88°F)
Note:Whenyouchargethebatterypack,itstemperaturemustbeatleast10°C(50°F).
•Relativehumidity:
–Operating:8%to80%
–Storage:5%to95%
Ifpossible,placeyourcomputerinawell-ventilatedanddryareawithoutdirectexposuretosunshine.
Attention:
•Keepelectricalappliancessuchasanelectricfan,radio,airconditioner,andmicrowaveovenawayfrom
yourcomputer.Thestrongmagneticeldsgeneratedbyelectronicalappliancescandamagethemonitor
anddataontheharddiskdriveorsolid-statedrive.
•Donotplaceanybeveragesontopoforbesidethecomputerorotherattacheddevices.Ifliquidisspilled
onorinthecomputeroranattacheddevice,ashortcircuitorotherdamagemightoccur.
•Donoteatorsmokeoveryourkeyboard.Particlesthatfallintoyourkeyboardcancausedamage.
Lenovoprograms
YourcomputercomeswithLenovoprogramstohelpyouworkeasilyandsecurely.Theavailableprograms
mightvarydependingonthepreinstalledWindowsoperatingsystem.
TolearnmoreabouttheprogramsandothercomputingsolutionsofferedbyLenovo,goto:
http://www.lenovo.com/support
AccessingLenovoprogramsontheWindows7operatingsystem
OntheWindows7operatingsystem,youcanaccessLenovoprogramsfromeithertheLenovo
ThinkVantage
AccessingLenovoprogramsfromtheLenovoThinkVantageToolsprogram
ToaccessLenovoprogramsfromtheLenovoThinkVantageToolsprogram,clickStart➙AllPrograms➙
LenovoThinkVantageTools.Thendouble-clickaprogramicontoaccesstheprogram.
®
ToolsprogramorfromControlPanel.
Chapter1.Productoverview11
Page 28

Note:IfaprogramiconisdimmedinthenavigationwindowoftheLenovoThinkVantageT oolsprogram,you
needtomanuallyinstalltheprogram.Double-clicktheprogramicon,andthenfollowtheinstructionsonthe
screen.Whentheinstallationprocesscompletes,theprogramiconwillbeactivated.
ThefollowingtableliststheprogramsandtheiriconnamesintheLenovoThinkVantageT oolsprogram.
Note:Dependingonyourcomputermodel,someoftheprogramsmightnotbeavailable.
Table1.ProgramsintheLenovoThinkVantageToolsprogram
ProgramIconname
AccessConnections™InternetConnection
ActiveProtectionSystem™
ClientSecuritySolutionEnhancedSecurity
CommunicationsUtilityWebConferencing
FingerprintSoftware
LenovoSolutionCenterSystemHealthandDiagnostics
MobileBroadbandConnect3GMobileBroadband
PasswordManagerPasswordVault
PowerManager
RecoveryMediaFactoryRecoveryDisks
RescueandRecovery
SimpleTapSimpleTap
SystemUpdate
®
AirbagProtection
FingerprintReader
PowerControls
EnhancedBackupandRestore
UpdateandDrivers
AccessingLenovoprogramsfromControlPanel
ToaccessLenovoprogramsfromControlPanel,clickStart➙ControlPanel.Thendependingonthe
programyouwanttoaccess,clickthecorrespondingsectionandthenclickthecorrespondinggreentext.
Note:IfyoucannotndtheprogramyouneedinControlPanel,openthenavigationwindowoftheLenovo
ThinkVantageT oolsprogramanddouble-clickthecorrespondingdimmedicontoinstalltheprogramyou
need.Then,followtheinstructionsonthescreen.Whentheinstallationprocesscompletes,theprogram
iconwillbeactivated,andyoucanndtheprograminControlPanel.
ThefollowingtableliststheprogramsandthecorrespondingsectionsandgreentextsinControlPanel.
Note:Dependingonyourcomputermodel,someoftheprogramsmightnotbeavailable.
Table2.ProgramsinControlPanel
Program
AccessConnections
ActiveProtectionSystemSystemandSecurity
ClientSecuritySolutionSystemandSecurityLenovo-EnhancedSecurity
CommunicationsUtilityHardwareandSoundLenovo-WebConferencing
ControlPanelsectionGreentextinControlPanel
NetworkandInternet
HardwareandSound
Lenovo-InternetConnection
Lenovo-AirbagProtection
12UserGuide
Page 29

Table2.ProgramsinControlPanel(continued)
Program
FingerprintSoftwareSystemandSecurity
LenovoSolutionCenterSystemandSecurityLenovo-SystemHealthand
MessageCenterPlus
MobileBroadbandConnect
PasswordManager
PowerManager
RecoveryMedia
ControlPanelsectionGreentextinControlPanel
Lenovo-FingerprintReader
HardwareandSound
Programs
NetworkandInternet
SystemandSecurity
UserAccountsandFamilySafety
HardwareandSound
SystemandSecurity
SystemandSecurity
or
Lenovo-NotebookFingerprint
Reader
Diagnostics
MessagesfromLenovo
Lenovo-3GMobileBroadband
Lenovo-PasswordVault
Lenovo-PowerControls
Lenovo-FactoryRecoveryDisks
SimpleTap
SystemUpdateSystemandSecurity
RescueandRecovery
Programs
SystemandSecurity
Lenovo-SimpleTap
Lenovo-UpdateandDrivers
Lenovo-EnhancedBackupand
Restore
AccessingLenovoprogramsontheWindows8operatingsystem
IfyourcomputerispreinstalledwiththeWindows8operatingsystem,youcanaccessLenovoprogramsby
doingeitherofthefollowing:
•ClicktheLenovoQuickLaunchiconfromthetaskbar.Alistofprogramsisdisplayed.Double-clicka
Lenovoprogramtolaunchit.Ifadesiredprogramisnotinthelist,clicktheplusicon+.
•PresstheWindowskeytogototheStartscreen.ClickaLenovoprogramtolaunchit.Ifyoucannotnd
theprogramyouneed,movethecursortothebottom-rightcornerofthescreentodisplaythecharms.
ThenclicktheSearchcharmtosearchthedesiredprogram.
Dependingonthemodel,yourcomputermightsupportthefollowingLenovoprograms:
•ActiveProtectionSystem
•FingerprintSoftware
•LenovoCloudStorage
•LenovoCompanion
•LenovoMobileAccess
•LenovoQuickLaunch
•LenovoQuickSend
•LenovoQuickSnip
•LenovoSettings
•LenovoSolutionCenter
•LenovoSupport
•LenovoThinkVantageT ools
•PasswordManager
•SystemUpdate
Chapter1.Productoverview13
Page 30

Note:ThePasswordManagerprogramisnotpreinstalledonyourcomputer.Youcandownloadthe
PasswordmanagerprogramfromtheLenovoSupportWebsiteat:
http://www.lenovo.com/support
Lenovoprogramoverview
ThistopicprovidesinformationaboutsomeLenovoprograms.
Note:Dependingonthemodel,someoftheprogramsmightnotbeavailable.
•AccessConnections
TheAccessConnectionsprogramisaconnectivityassistantprogramforcreatingandmanaginglocation
proles.EachlocationprolestoresallthenetworkandInternetcongurationsettingsneededfor
connectingtoanetworkinfrastructurefromaspeciclocation,suchasahomeoranofce.
Byswitchingbetweenlocationprolesasyoumoveyourcomputerfromplacetoplace,youcanquickly
andeasilyconnecttoanetworkwithnoneedtorecongureyoursettingsmanuallyandrestartthe
computereachtime.
•ActiveProtectionSystem
TheActiveProtectionSystemprogramprotectsyourharddiskdrivewhentheshocksensorinsideyour
computerdetectsaconditionthatcoulddamagethedrive,suchassystemtilt,excessivevibration,or
shock.Theharddiskdriveislessvulnerabletodamagewhenitisnotoperating.Thisisbecausewhen
theharddiskdriveisnotoperating,thesystemstopsitfromspinning,andmightalsomovetheread
andwriteheadsofthedrivetoareasthatdonotcontaindata.Assoonastheshocksensorsenses
thattheenvironmentisstableagain(minimalchangeinsystemtilt,vibration,orshock),itturnsthe
harddiskdriveon.
•ClientSecuritySolution
TheClientSecuritySolutionprogramprotectsyourcomputerbysecuringclientdataanddeecting
securitybreachattempts.Italsocanhelpmanageyourpasswords,recoveraforgottenpassword,
monitorsecuritysettingsonyourcomputer,andsuggesthowtoenhanceyourcomputersecurity.
•CommunicationsUtility
TheCommunicationsUtilityprogramenablesyoutoconguresettingsforthecameraandaudiodevices.
•FingerprintSoftware
Ifyourcomputercomeswithangerprintreader,theFingerprintSoftwareprogramenablesyoutoenroll
yourngerprintandassociateitwithyourWindowspassword.Asaresult,thengerprintauthentication
canreplaceyourpasswordandenablesimpleandsecureuseraccess.
•LenovoCloudStorage
TheLenovoCloudStorageprogramenablesyoutouploadandstoreyourlocallesonaremoteLenovo
server.Youcanviewanddownloadthestoredlesatanytime.
•LenovoCompanion
ThroughtheLenovoCompanionprogram,youcangettheinformationabouttheaccessoriesforyour
computer,viewblogsandarticlesaboutyourcomputer,andcheckforotherrecommendedprograms.
•LenovoMobileAccess
SigninwithyourMicrosoftaccounttoregisterforservice,purchasedataplans,makepaymentsonline,
andmanageyourmobileaccountinformation.
•LenovoQuickLaunch
TheLenovoQuickLaunchprogramenablesyoutoquicklyaccesstheprogramsinstalledonyour
computer,includingLenovoprograms,Microsoftprograms,andotherthird-partyprograms.
•LenovoQuickSend
14UserGuide
Page 31

TheLenovoQuickSendprogramenablesyoutoinstantlysendlestoyourwirelessLANdirectcommunity.
Youcanpairwithyourfriendsandfamilynearby,andsendyourlesquickly,directly,andsecurely.
•LenovoQuickSnip
TheLenovoQuickSnipprogramenablesyoutograbandsaveascreenshot.Youcansnipthescreenshot,
anduseitinotherprograms.
•LenovoSettings
YoucanenhanceyourcomputingexperiencebyusingtheLenovoSettingsprogram.TheLenovoSettings
programenablesyoutoturnyourcomputerintoaportablehotspot,congurecameraandmicrophone
settings,optimizeyourpowersettings,andcreateandmanagemultiplenetworkproles.
•LenovoSolutionCenter
TheLenovoSolutionCenterprogramenablesyoutotroubleshootandresolvecomputerproblems.It
combinesdiagnostictests,systeminformationcollection,securitystatus,andsupportinformation,along
withhintsandtipsforoptimalsystemperformance.
•LenovoSupport
TheLenovoSupportprogramenablesyoutoregisteryourcomputerwithLenovo,checkthecomputer
healthconditionandbatterystatus,downloadandviewusermanuals,getthewarrantyinformation,and
explorehelpandsupportinformation.
•LenovoThinkVantageT ools
TheLenovoThinkVantageT oolsprogramhelpsyouworkmoreeasilyandsecurelybyprovidingeasy
accesstovarioustechnologies,suchastheFingerprintSoftwareprogram,theLenovoSolutionCenter
program,andsoon.
•MessageCenterPlus
TheMessageCenterPlusprogramautomaticallydisplaysmessagestoinformyouaboutimportantnotices
fromLenovo,suchasalertsonsystemupdatesandalertsonconditionsthatrequireyourattention.
•MobileBroadbandConnect
TheMobileBroadbandConnectprogramenablesyoutoconnectyourcomputertothemobilebroadband
(3G)networkthroughasupportedwirelessWANcard.
•PasswordManager
ThePasswordManagerprogramautomaticallycapturesandllsinauthenticationinformationfor
WindowsprogramsandWebsites.
•PowerManager
ThePowerManagerprogramprovidesconvenient,exible,andcompletepowermanagementforyour
computer.Itenablesyoutoadjustyourcomputerpowersettingstoachievethebestbalancebetween
performanceandpowersaving.
•RecoveryMedia
TheRecoveryMediaprogramenablesyoutorestorethecontentsoftheharddiskdriveorsolid-state
drivetothefactorydefaultsettings.
•RescueandRecovery
TheRescueandRecoveryprogramisaone-buttonrecoveryandrestoresolution.Itincludesasetof
self-recoverytoolstohelpyoudiagnosecomputerproblems,gethelp,andrecoverfromsystemcrashes,
evenifyoucannotstarttheWindowsoperatingsystem.
•SimpleT ap
TheSimpleTapprogramenablesyoutoquicklycustomizesomebasiccomputersettingssuchasmuting
thespeakers,adjustingthevolume,lockingthecomputeroperatingsystem,launchingaprogram,
openingaWebpage,openingale,andsoon.YoualsocanusetheSimpleTapprogramtoaccessthe
LenovoAppShop,fromwhichyoucandownloadvariousprogramsandcomputersoftware.
Chapter1.Productoverview15
Page 32

TostarttheSimpleTapprograminaquickway,clicktheredSimpleTaplaunchpointonthedesktop.
TheredlaunchpointisavailableonthedesktopafteryouhavelaunchedtheSimpleTapprogramfor
thersttime.
Note:TheSimpleTapprogramisonlyavailableoncertainmodelspreinstalledwiththeWindows7
operatingsystem.IfyourWindows7modelisnotpreinstalledwiththeSimpleTapprogram,youcan
downloaditfromtheLenovoSupportWebsiteat:
http://www.lenovo.com/support
•SystemUpdate
TheSystemUpdateprogramenablesyoutokeepthesoftwareonyourcomputerup-to-dateby
downloadingandinstallingsoftwareupdatepackages(Lenovoprograms,devicedrivers,UEFIBIOS
updates,andotherthird-partyprograms).
16UserGuide
Page 33

Chapter2.Usingyourcomputer
Thischapterprovidesinformationonusingsomeofthecomputercomponents.
Thischaptercontainsthefollowingtopics:
•“Registeringyourcomputer”onpage17
•“Frequentlyaskedquestions”onpage17
•“Specialkeys”onpage19
•“UsingtheThinkPadpointingdevice”onpage20
•“Powermanagement”onpage22
•“Connectingtothenetwork”onpage25
•“Usinganexternalmonitor”onpage29
•“UsingtheExtenddesktopfunction”onpage31
•“Settingupapresentation”onpage32
•“Usingaudiofeatures”onpage32
•“Usingthecamera”onpage33
•“Usingamediacard”onpage34
Registeringyourcomputer
Whenyouregisteryourcomputer,informationisenteredintoadatabase,whichenablesLenovotocontact
youincaseofarecallorothersevereproblem.AfteryouregisteredyourcomputerwithLenovo,youwill
alsoreceivequickerservicewhenyoucallLenovoforhelp.Inaddition,somelocationsofferextended
privilegesandservicestoregisteredusers.
ToregisteryourcomputerwithLenovo,dooneofthefollowing:
•Gotohttp://www.lenovo.com/registerandfollowtheinstructionsonthescreentoregisteryourcomputer.
•ConnectyourcomputertotheInternetandregisteryourcomputerthroughapreinstalledregistration
program:
–ForWindows7:ThepreinstalledLenovoProductRegistrationprogramlaunchesautomaticallyafteryou
haveusedyourcomputerforatime.Followtheinstructionsonthescreentoregisteryourcomputer.
–ForWindows8:PresstheWindowskeytogototheStartscreen,andopentheLenovoSupport
program.ThenclickRegistrationandfollowtheinstructionsonthescreentoregisteryourcomputer.
Frequentlyaskedquestions
Thistopicprovidesafewtipsthatwillhelpyouoptimizetheuseofyourcomputer.
Toensurethatyoureceivethebestperformancefromyourcomputer,gotothefollowingWebpage
tondinformationsuchasaidsfortroubleshootingandanswerstofrequentlyaskedquestions:
http://www.lenovo.com/support/faq
CanIgetmyuserguideinanotherlanguage?
•Todownloadtheuserguideinanotherlanguage,gotohttp://www.lenovo.com/ThinkPadUserGuides.
Thenfollowtheinstructionsonthescreen.
©CopyrightLenovo2013
17
Page 34

HowcanIusethebatterypowermoreeffectively?
•Toconservepower,ortosuspendoperationwithoutexitingprogramsorsavingles,see“Power-saving
modes”onpage24
.
•Toachievethebestbalancebetweenperformanceandpowersaving,createandapplypowerplans.
See“Managingthebatterypower”onpage24.
•Ifyourcomputerwillbeturnedoffforanextendedperiodoftime,youcanpreventbatterypower
fromdrainingbyremovingthebattery.Lookformoreinformationaboutusingthebatteryin“Power
management”onpage22.
Concernedaboutsecurityorneedtosecurelydisposeofdatastoredonyourharddiskdriveor
solid-statedrive?
•StudyChapter4Chapter4“Security”onpage39
tondouthowyoucanprotectyourcomputerfrom
theftandunauthorizeduse.
•UsethePasswordManagerprogramtoprotectthedatastoredonyourcomputer.Formoreinformation,
seethehelpinformationsystemoftheprogram.
•Beforeyoudisposeofthedataontheharddiskdriveorsolid-statedrive,ensurethatyouread“Noticeon
deletingdatafromyourharddiskdriveorsolid-statedrive”onpage48.
Isgettingconnectedindifferentlocationsachallenge?
•Totroubleshootawirelessnetworkingissue,goto:
http://www.lenovo.com/support/faq
•TakeadvantageofthenetworkingfeaturesbyuseoftheAccessConnectionsprogram(ontheWindows7
operatingsystem)orLocationAwarenessprogram(ontheWindows8operatingsystem).
•Tolearnmoreaboutusingthewirelessfeaturesofyourcomputer,referto“Wirelessconnections”on
page26
.
•Totravelmorecondently,ensurethatyoucheckthetipsin“Travelingwithyourcomputer”onpage37
•PressF8toenableordisablethewirelessfeatures.
HowdoIgivepresentationsorattachanexternalmonitoroften?
•Ensurethatyoufollowtheprocedurefor“Usinganexternalmonitor”onpage29.
•WiththeExtenddesktopfunction,youcandisplayoutputonboththecomputerdisplayandanexternal
monitor.
.
HowdoIattachorreplaceadevice?
•SeeChapter6“Replacingdevices”onpage59
formoreinformationaboutreplacingthedevicesof
yourcomputer.
Youhavebeenusingyourcomputerforsometimealready,anditisgettingslower?
•Followthe“Generaltipsforpreventingproblems”onpage109
.
•Youcandiagnoseproblemsyourselfbyusingthepreinstalleddiagnosticsoftware.
•CheckforrecoverysolutionsinChapter5“Recoveryoverview”onpage51.
Printthefollowingsectionsandkeepthemwithyourcomputerincaseyouareunabletoaccessthisonline
userguidewhennecessary.
•“Installinganewoperatingsystem”onpage89
•“Computerstopsresponding”onpage115
•“Powerproblems”onpage128
18UserGuide
Page 35

Specialkeys
Yourcomputerhasseveralspecialkeystohelpyouworkeasilyandeffectively.
Functionkeys
Thekeyboardhasseveralfunctionkeys,whichconsistoftheFnkey1,thefunctionkeys2,andsome
otherkeys.
•+EnablesordisablestheFnLockfunction.
WhentheFnLockfunctionisdisabled:TheFnLockindicatorisoff(defaultmode).Toinitiatethe
specialfunctionofeachkey,pressthefunctionkeysdirectly.ToinputF1–F12,youneedtopresstheFn
keyandthecorrespondingfunctionkey.
WhentheFnLockfunctionisenabled:TheFnLockindicatorturnson.ToinputF1–F12,pressthe
functionkeysdirectly.Toinitiatethespecialfunctionofeachkey,youneedtopresstheFnkeyandthe
correspondingfunctionkey.
•
Ifyoumutethesoundandturnoffyourcomputer,thesoundwillremainmutedwhenyouturnonyour
computeragain.Toturnonthesound,pressF2orF3.
•Decreasesthespeakervolume.
•Increasesthespeakervolume.
•Mutesorunmutesthemicrophones.
•Darkensthedisplay.
•Brightensthedisplay.
Note:Youcantemporarilychangethecomputerdisplaybrightnessbypressingthesetwokeys.
•Switchesthedisplayoutputlocationbetweenthecomputerdisplayandanexternalmonitor.
Mutesorunmutesthespeakers.
•
Enablesordisablesthewirelessfeatures.
Chapter2.Usingyourcomputer19
Page 36

•
ForWindows8:OpenstheSettingscharm.
ForWindows7:OpensControlPanel.
•
ForWindows8:OpenstheSearchcharm.
ForWindows7:OpensWindowsSearch.
•Viewstheprogramsthatyouhaveopened.
•
ForWindows8:Viewsalltheprograms.
ForWindows7:OpensComputer.
•Fn+Spacebar:Controlsthekeyboardbacklight.
Therearethreemodesforthekeyboardbacklight:Off,Low,andHigh.PressFn+Spacebartochange
themodesofthekeyboardbacklight.
•Fn+B:HasthesamefunctionastheBreakkey.
•Fn+P:HasthesamefunctionasthePausekey.
•Fn+S:HasthesamefunctionastheSysRqkey.
•Fn+K:HasthesamefunctionastheScrLKkey.
Windowskey
OntheWindows7operatingsystem,presstheWindowskeytoopentheStartmenu.OntheWindows8
operatingsystem,presstheWindowskeytoswitchbetweenthecurrentworkspaceandtheStartscreen.
YoualsocanusetheWindowskeytogetherwithanotherkeytoachieveotherfunctions.Formore
information,refertothehelpinformationsystemoftheWindowsoperatingsystem.
UsingtheThinkPadpointingdevice
TheThinkPadpointingdeviceconsistsoftheT rackPointpointingstick1andthetouchpad2.Thewhole
touchpadisanactiveareasensitivetongermovement.Theleftclickzones3andrightclickzones5
workastheleftandrightmousebuttonsonaconventionalmouse.Thescrollzone4enablesyouto
scrollWebpagesordocumentsinanydirection.
20UserGuide
Page 37

TousetheTrackPointpointingstick,applypressuretothenonslipcaponthepointingstickinanydirection
paralleltothekeyboard.Thenyoucanmovethecursor.Butthepointingstickitselfdoesnotmove.The
speedatwhichthecursormovesdependsonthepressureyouapplytothepointingstick.
Tousethetouchpad,slideyourngertipoverthetouchpadtomoverthecursor.Thetouchpadofyour
computersupportsmulti-touchfunctionwithwhichyoucanzoomin,zoomout,scrollorrotateonthescreen
whilebrowsingtheInternetorreadingoreditingadocument.
CustomizingtheThinkPadpointingdevice
YoucancustomizetheThinkPadpointingdevicesettings.Forexample,youcanenableordisablethe
ThinkPadpointingdevice,anduseanexternalmouse.
TochangetheThinkPadpointingdevicesettings,dothefollowing:
1.GotoControlPanel,thenclickHardwareandSound➙Mouse➙ThinkPad.
2.Followtheon-screeninstructionstocustomizetheThinkPadpointingdevice.
Changingthecap
Thecap1ontheendoftheT rackPointpointingstickisremovable.Y oucanreplacethecapasshownbelow.
Note:TheT rackPointcapusedinyourcomputerhasgroovesaasshowninthefollowingillustration.
EnsurethatyoureplaceitwithacorrectTrackPointcap.
Chapter2.Usingyourcomputer21
Page 38

Powermanagement
Whenyouneedtouseyourcomputerawayfromelectricaloutlets,youdependonbatterypowertokeep
yourcomputerrunning.Differentcomputercomponentsconsumepoweratdifferentrates.Themoreyou
usethepower-intensivecomponents,thefasteryouconsumebatterypower.
SpendmoretimeunpluggedwithThinkPadbatteries.Mobilityhasrevolutionizedbusinessbyenabling
youtotakeyourworkwhereveryougo.WithThinkPadbatteries,youwillbeabletoworklongerwithout
beingtiedtoanelectricaloutlet.
Checkingthebatterystatus
ThebatteryiconintheWindowsnoticationareadisplaysthepercentageofbatterypowerremaining.
Therateatwhichyouusebatterypowerdetermineshowlongyoucanusethebatteryofyourcomputer
betweencharges.Becauseofdifferentuserhabitsandneeds,itisdifculttopredicthowlongacharged
batterychargewilllast.Therearetwomainfactors:
•Howmuchenergyisstoredinthebatterywhenyoubegintowork.
•Thewayyouuseyourcomputer.Forexample:
–Howoftenyouaccesstheharddiskdriveorsolid-statedrive.
–Howbrightyoumakethecomputerdisplay.
–Howoftenyouusethewirelessfeatures.
Tocheckfordetailedbatterystatusinformation,dothefollowing:
•FortheWindows7operatingsystem:OpenthePowerManagerprogramandclicktheBatterytab.
ForinstructionsonhowtostartthePowerManagerprogram,see“AccessingLenovoprogramson
theWindows7operatingsystem”onpage11
•FortheWindows8operatingsystem:
–PresstheWindowskeytogototheStartscreen,andopentheLenovoSettingsprogramandclick
Power.
–PresstheWindowskeytogototheStartscreen,andopentheLenovoSupportprogramandclick
BatteryHealth.
22UserGuide
.
Page 39

Usingtheacpoweradapter
Thepowertorunyourcomputercancomeeitherfromthelithium-ion(Li-ion)batterypackprovidedwithit,
orfromacpowerthroughtheacpoweradapter.Whileyouuseacpower,thebatterychargesautomatically.
Theacpoweradapterthatcomeswithyourcomputerhastwobasiccomponents:
•Thetransformerpackthatconvertsacpowerforusewiththecomputer.
•Thepowercordthatplugsintotheacoutletandintothetransformerpack.
Attention:Usinganimproperpowercordcouldseverelydamageyourcomputer.
Connectingtheacpoweradapter
Toconnecttheacpoweradapter,dothefollowing:
Note:Ensurethatyouperformtheactionsintheorderinwhichtheyarelisted..
1.Connectthepowercordtoanelectricaloutlet.
2.Connectthepowercordtotheacpoweradapter.
3.Connecttheacpoweradaptertothepowerconnectorofthecomputer.
Tipsforusingtheacpoweradapter
Youcancheckthestatusofyourbatteryatanytimebylookingatthebatterymeteratthebottomofyour
display.
•Whentheacpoweradapterisnotinuse,disconnectitfromtheelectricaloutlet.
•Donotbindthepowercordtightlyaroundtheacpoweradaptertransformerpackwhenyouareusing
acpower.
•Beforeyouchargethebattery,ensurethatitstemperatureisatleast10°C(50°F).
•Youcanchargethebatterywhenthecomputerisconnectedtoacpowerandthebatteryisinstalled.
Youneedtochargethebatteryinanyofthefollowingsituations:
–Whenyouuseanewbattery.
–WhenthebatteryiconintheWindowsnoticationareashowsalowpercentageofbatterypower
remaining.
–Whenthebatteryhasnotbeenusedforalongtime
Chargingthebattery
Whenyoucheckbatterystatusandndthatthepercentageofpowerremainingislow,youneedtocharge
yourbattery.
Ifanacoutletisconvenient,plugtheacpoweradapterintoit,andtheninsertthejackintothecomputer.
Thebatterywillbefullychargedinaboutsixhours.Thisisaffectedbythebatterysizeandthephysical
environment.
Note:Tomaximizethelifeofthebattery,thecomputerdoesnotstartrechargingthebatteryiftheremaining
powerisgreaterthan95%.
Maximizingthebatterylife
Toachievethebestbalancebetweenperformanceandpowersaving,adjustyourpowerplansettings.
Toaccesspowerplansettings,dothefollowing:
•Usethebatteryuntilthechargeiscompletelydepleted.
Chapter2.Usingyourcomputer23
Page 40

•Rechargethebatterycompletelybeforeusingit.Youcanseewhetherthebatteryisfullychargedfromthe
batterystatusiconintheWindowsnoticationarea.
•Alwaysusepowermanagementfeaturessuchaspowermodes,screenblank,sleep,andhibernation.
Managingthebatterypower
Toachievethebestbalancebetweenperformanceandpowersaving,adjustyourpowerplansettings.
Toaccesspowerplansettings,dothefollowing:
•ForWindows7:StartthePowerManagerprogramandthenclickthePowerPlantab.Forinstructionson
howtostartthePowerManagerprogram,see“AccessingLenovoprogramsontheWindows7operating
system”onpage11.
•ForWindows8:ClickthebatterystatusiconfromtheWindowsnoticationareaandclickPower
Options.ThenclickChangeplansettings.
Formoreinformation,refertothehelpinformationsystem.
Power-savingmodes
Thereareseveralmodesthatyoucanuseatanytimetoconservepower.Thissectionintroduceseach
modeandgivestipsontheeffectiveuseofthebatterypower.
Aboutthepower-savingmodes
•Screenblank(forWindows7only):
Thecomputerdisplayrequiresconsiderablebatterypower.Toturnoffthepowertothedisplay,do
thefollowing:
1.Right-clickthePowerManagerbatterygaugeonthetaskbar.
2.SelectPoweroffdisplay.
•Sleep:
Insleepmode,yourworkissavedtomemory,andthenthesolid-statedriveortheharddiskdriveandthe
computerdisplayareturnedoff.Whenyourcomputerwakesup,yourworkisrestoredwithinseconds.
Toputyourcomputerintosleepmode,dooneofthefollowing:
–ForWindows7:ClickthearrowbesidetheShutdownicon,andthenselectSleep.Toreturnfrom
sleepmode,pressFnkey.
–ForWindows8:Movethecursortothebottom-rightcornerofthescreentodisplaythecharms.
ThenclickSettings➙Power➙Sleep.
Dependingonthecomputermodel,yourcomputermightsupportthe30DayStandbyfunction.When
thisfunctionisenabled,thecomputerconsumesevenlesspowerinthesleepmodeandtakesonly
secondstoresumenormaloperationwhenyoupressthepowerbutton.Formoreinformationabout
the30DayStandbyfunction,dothefollowing:
–ForWindows7:RefertothehelpinformationsystemofthePowerManagerprogram.Forinstructions
onhowtostartthePowerManagerprogram,see“AccessingLenovoprogramsontheWindows7
operatingsystem”onpage11.
–ForWindows8:PresstheWindowskeytogototheStartscreen,andopentheLenovoSettings
programandclickPower.
•Hibernation:
Byusingthismode,youcanturnoffyourcomputercompletelywithoutsavinglesorexitingany
programsthatarerunning.Whenthecomputerentershibernation,allopenprograms,folders,andles
aresavedtotheharddiskdrive,andthenthecomputerturnsoff.
24UserGuide
Page 41

Toputthecomputerintohibernationmode,changeyourpowerplansettings.Toaccesspowerplan
settings,dothefollowing:
–ForWindows7:StartthePowerManagerprogramandthenclickthePowerPlantab.Forinstructions
onhowtostartthePowerManagerprogram,see“AccessingLenovoprogramsontheWindows7
operatingsystem”onpage11
–ForWindows8:ClickthebatterystatusiconfromtheWindowsnoticationareaandclickPower
Options.ThenclickChangeplansettings.
Enablingthewake-upfunction
Thewake-upfunctionisdiasbledbydefault.Whenyouputyourcomputerintohibernationmode,the
computerdoesnotconsumeanypower.Ifthewake-upfunctionisenabled,whenyouputyourcomputer
intohibernationmode,thecomputerconsumesasmallamountofpower.
Toenablethewake-upfunction,dothefollowing:
1.GotoControlPanel.ThenclickSystemandSecurity.
2.ClickAdministrativeTools.
3.Double-clickT askScheduler.Ifyouarepromptedforanadministratorpasswordorconrmation,type
thepasswordorprovideconrmation.
4.Fromtheleftpane,selectthetaskfolderforwhichyouwanttoenablethewakeupfunction.The
scheduledtasksaredisplayed.
5.Clickascheduledtask,andthenclicktheConditionstab.
6.UnderPower,selectthecheckboxforWakethecomputertorunthistask.
.
EnablingthebatteryalarmontheWindows7operatingsystem
FortheWindows7operatingsystem,youcanprogramyourcomputersothatwhenthebatterypowerfalls
belowacertainlevel,threeeventsoccur:thealarmgoesoff,amessageisdisplayed,andtheLCDis
turnedoff.
Toenablethebatteryalarm,dothefollowing:
1.StartthePowerManagerprogram.
2.ClicktheGlobalPowerSettingstab.
3.ForLowbatteryalarmorCriticallylowbatteryalarm,setthepercentageofthepowerlevelandset
theaction.
Note:Ifyourcomputerenterssleeporhibernationmodewhenthebatteryislow,butthealarmmessage
hasnotyetbeendisplayed,themessagewillbedisplayedwhenthecomputerresumes.T oresumenormal
operation,clickOKwhenthemessageisdisplayed.
Connectingtothenetwork
YourcomputerhasoneormorenetworkcardsforconnectingtotheInternetandtoyourcompany'swired
LANorwirelessLANnetwork.
Note:SomemodelscomewithawirelessWANcardthatenablesyoutoestablishwirelessconnections
overremotepublicorprivatenetworks.
Ethernetconnections
YoucanconnecttoalocalnetworkorabroadbandconnectionbyuseoftheEthernetfeaturebuiltintoyour
computer.
Chapter2.Usingyourcomputer25
Page 42

ToconnecttoanetworkthroughEthernet,dothefollowing:
•ForWindows7:UsetheAccessConnectionsprogram.ForinstructionsonhowtostarttheAccess
Connectionsprogram,see“AccessingLenovoprogramsontheWindows7operatingsystem”onpage11
•ForWindows8:PressF9toopentheLenovoSettingsprogramandclickLocationAwareness.Then
followtheinstructionsonthescreen.
DANGER
YourcomputerhasanEthernetconnector .Toavoidtheriskofelectricalshock,donotconnect
thetelephonecabletotheEthernetconnector.
Wirelessconnections
Wirelesscommunicationisthetransferofdatawithouttheuseofcablesbutbymeansofradiowavesonly.
Dependingonthewirelessdeviceusedinyourcomputer,youmightbeabletoconnecttothefollowing
categoriesofwirelessnetworks.
WirelessLAN
AwirelessLANcoversarelativelysmallgeographicarea,suchasanofcebuildingorahouse.Devices
basedonthe802.11standardscanconnecttothisnetwork.
Yourcomputercomeswithabuilt-inwirelessnetworkcardandacongurationutilitytohelpyoumake
wirelessconnectionsandmonitorthestatusofyourconnection.Thisenablesyoutostayconnectedtoyour
networkwhileyouareattheofce,inameetingroom,orathome,withnoneedforawiredconnection.
.
TipsforusingthewirelessLANfeature
Toachievethebestconnection,usethefollowingguidelines:
•PlaceyourcomputersothatthereareasfewobstaclesaspossiblebetweenthewirelessLANaccess
pointandthecomputer.
•Openyourcomputerdisplaytoanangleofslightlymorethan90degrees.
•Ifyouusethewirelessfeature(the802.11standards)ofyourcomputersimultaneouslywithaBluetooth
option,thedatatransmissionspeedcanbedelayedandtheperformanceofthewirelessfeaturecanbe
degraded.
WirelessWAN
WirelessWideAreaNetwork(wirelessWAN),usingcellularnetworksfordatatransmission,enablesyou
toestablishwirelessconnectionsoverremotepublicorprivatenetworks.Theseconnectionscanbe
maintainedoveralargegeographicalarea,suchasacityoranentirecountry,byuseofmultipleantenna
sitesorsatellitesystemsmaintainedbywirelessserviceproviders.
SomeThinkPadnotebookcomputerscomewithabuilt-inwirelessWANcardintegratedwithsomewireless
WANtechnologies,suchas1xEV-DO,HSPA,3G,GPRS,orLTE.Byusingthebuilt-inwirelessWANcardand
thecongurationutilitythatcomeswithyourcomputer,youcanestablishwirelessWANconnectionsand
monitorthestatusofyourconnection.
Note:WirelessWANserviceisprovidedbyauthorizedserviceprovidersinsomecountries.
TipsforusingthewirelessWANfeature
Toachievethebestconnection,usethefollowingguidelines:
26UserGuide
Page 43

•Keepyourcomputerawayfromyourbody.
•Placeyourcomputeronaatsurfaceandopenyourcomputerdisplaytoanangelofslightlymore
than90degrees.
•Placeyourcomputerawayfromconcreteorbrickwallsthatmightdampencellularsignals.
•Bestreceptionwillbeavailablenearwindowsandotherlocationswherecellularphonereceptionisthe
strongest.
Bluetooth
Bluetoothisoneofanumberoftechnologiesusedtocreateawirelesspersonalareanetwork.Bluetooth
canconnectdevicesashortdistancefromoneanother,andiscommonlyusedforconnectingperipheral
devicestoacomputer,transferringdatabetweenhand-helddevicesandapersonalcomputer,orremotely
controllingandcommunicatingwithdevicessuchasmobilephones.
Establishingawirelessconnection
Toestablishawirelessconnection,dothefollowing:
1.PressF8toturnonthewirelessfeature.
2.ClickthewirelessnetworkconnectionstatusiconintheWindowsnoticationarea.Alistofavailable
wirelessnetworksisdisplayed.
3.Double-clickanetworktoconnecttoit.Providerequiredinformationifneeded.
Ifyouneedtoconnecttodifferentwirelessnetworksindifferentlocations,usethefollowingsoftwareto
managemultiplenetworkprolessothatthecomputerautomaticallyconnectstoanavailablenetworkwhen
thelocationchanges:
•ForWindows7:UsetheAccessConnectionsprogram.ForinstructionsonhowtostarttheAccess
Connectionsprogram,see“AccessingLenovoprogramsontheWindows7operatingsystem”onpage11
•ForWindows8:PressF9toopentheLenovoSettingsprogramandclickLocationAwareness.See
“AccessingLenovoprogramsontheWindows8operatingsystem”onpage13.
Attention:
•Ifyouwanttousethewirelessfeaturesonanairplane,checkthewirelessserviceswiththeairlinebefore
boardingtheairplane.
•Iftherearerestrictionsontheuseofcomputerwirelessfeaturesonanairplane,youneedtodisableyour
computerwirelessfeaturesbeforeboarding.Todisablethewirelessfeatures,see“Enablingordisabling
thewirelessfeatures”onpage29.
UsingBluetooth
SomemodelsareequippedwithaBluetoothcardthatiscompliantwithBluetoothSpecication4.0.
ToenabletheBluetoothfeatureontheWindows7operatingsystem,pressF8toopenthewirelessradio
switchboard.ThenturnontheBluetoothradio.FortheWindows8operatingsystem,theBluetoothfeature
isenabledbydefault.
TocongureaBluetoothdeviceormanageconnectionsettings,useBluetoothDevicesinControlPanel.
1.GotoControlPanel.
2.ClickHardwareandSound.
3.ClickDevicesandPrinters.
.
TosenddatatoaBluetooth-enableddevice,dothefollowing:
1.Right-clickthedatathatyouwanttosend.
Chapter2.Usingyourcomputer27
Page 44

2.SelectSendTo➙BluetoothDevices.
Note:Ifyouusethewirelessfeature(the802.11standard)ofyourcomputersimultaneouslywithaBluetooth
option,thedatatransmissionspeedcanbedelayedandtheperformanceofthewirelessfeaturecanbe
degraded.
FormoreinformationaboutusingtheBluetoothfeature,refertotheWindowshelpinformationsystemand
theBluetoothhelpinformationsystem.
Checkingthewirelessnetworkconnectionstatus
Youcancheckyourcomputerwirelessnetworkconnectionstatusandwirelesssignalstrengththroughthe
wirelessnetworkconnectionstatusiconintheWindowsnoticationarea.Themorebarsencompassed,the
betterthesignal.
FortheWindows7operatingsystem,youalsocanchecktheAccessConnectionsgauge,theAccess
Connectionsstatusicon,ortheAccessConnectionswirelessnetworkconnectionstatusiconinthe
Windowsnoticationarea.
AccessConnectionsgauge
OntheWindows7operatingsystem,theAccessConnectionsgaugeintheWindowsnoticationarea
displaysthestatusandsignalstrengthofyourwirelessconnection.
Youcanndmoreinformationaboutthestatusandsignalstrengthofthewirelessconnectionbyopeningthe
AccessConnectionsprogramorbyright-clickingtheAccessConnectionsgaugeintheWindowsnotication
areaandselectingViewStatusofWirelessConnection.
•AccessConnectionsgaugestates:wirelessLAN
–Powertothewirelessradioisoffornosignal.
–Powertothewirelessradioison.Thesignalstrengthofthewirelessconnectionispoor.To
improvethesignalstrength,moveyourcomputerclosertothewirelessaccesspoint.
–Powertothewirelessradioison.Thesignalstrengthofthewirelessconnection
ismarginal.
–
excellent.
•AccessConnectionsgaugestates:wirelessWAN
–
–
–Mediumsignal
–Strongsignal
AccessConnectionsstatusicon
TheAccessConnectionsstatusicondisplaysgeneralconnectionstatus.
•AccessConnectionsstatusiconstates
Nosignal
Weaksignal
Powertothewirelessradioison.Thesignalstrengthofthewirelessconnectionis
–Nolocationproleisactiveornoneexists.
–Currentlocationproleisdisconnected.
–Currentlocationproleisconnected.
28UserGuide
Page 45

AccessConnectionswirelessstatusicon
TheAccessConnectionswirelessstatusicondisplaysthestatusandsignalstrengthofyourwireless
connection.
Youcanndmoreinformationaboutthestatusandsignalstrengthofyourwirelessconnectionbyopening
theAccessConnectionsprogramorbydouble-clickingtheAccessConnectionswirelessstatusiconin
theWindowsnoticationarea.
•Wirelessstatusiconstates:wirelessLAN
Powertothewirelessradioisoff.
–
–Powertothewirelessradioison.Noassociation.
Powertothewirelessradioison.Nosignal.
–
–Powertothewirelessradioison.Thesignalstrengthofthewirelessconnectionisexcellent.
–Powertothewirelessradioison.Thesignalstrengthofthewirelessconnectionismarginal.
Powertothewirelessradioison.Thesignalstrengthofthewirelessconnectionispoor.Toimprove
–
thesignalstrength,moveyourcomputerclosertothewirelessaccesspoint.
•Wirelessstatusiconstates:wirelessWAN
–Powertothewirelessradioisoff.
–Noassociation
–Nosignal
–Weaksignal
–Mediumsignal
–Strongsignal
Note:Ifyouhavetroubleinmakingaconnection,trymovingyourcomputerclosertoyourwirelessaccess
point.
Enablingordisablingthewirelessfeatures
Toenableordisablethewirelessfeatures,dooneofthefollowing:
•ForWindows7:PressF8toopenthewirelessradioswitchboard.T urnonorturnoffthewirelessfeature
asdesired.
•ForWindows8:PressF8toenableordisableAirplanemode.WhenAirplanemodeisenabled,allof
yourwirelessdevicesareturnedoff.
Youalsocanusethewirelessradioswitchtoturnonorturnoffthewirelessradiosofallthewirelessdevices
onyourcomputer.
Usinganexternalmonitor
Youcanconnectanexternalmonitortoyourcomputertoexpandyourcomputercapabilities.
Note:Ifyouconnectanexternalmonitor,avideointerfacecablewithaferritecoreinstalledonthecable
isrequired.
Yourcomputersupportsamaximumvideoresolutionofupto2560x1600,providedthattheexternal
monitoralsosupportsthatresolution.Formoredetails,refertothemanualsprovidedwithyourmonitor.
Chapter2.Usingyourcomputer29
Page 46

Youcansetanyresolutionforeitherthecomputerdisplayortheexternalmonitor.Whenyouusebothatthe
sametime,theresolutionofbothisthesame.Ifyousetahigherresolutionforthecomputerdisplay,you
canseeonlypartofthescreenatatime.YoucanseeotherpartsbymovingtheimagewiththeTrackPoint
pointingstickoranotherpointingdevice.
Youcanmovethedisplayoutputtothecomputerdisplay,theexternalmonitor,orbothbyconguring
settingsintheDisplaySettingswindow.
Connectinganexternalmonitor
Ifyourcomputercannotdetecttheexternalmonitor,right-clickonthedesktop,thenselectScreen
resolution.ClicktheDetectbutton.
Toconnectanexternalmonitor,dothefollowing:
1.ConnecttheexternalmonitortotheminiDisplayPortconnectororVGAconnectorofyourcomputer.
2.Connecttheexternalmonitortoanelectricaloutlet.
3.Turnontheexternalmonitor.
4.ChangethedisplayoutputlocationbypressingF7.Thisenablesyoutoswitchbetweenviewingoutput
ontheexternalmonitor,thecomputermonitor,andbothmonitors.
Notes:
•IfthemonitorconnectorisnotcompatiblewiththeminiDisplayPortconnectororVGAconnectoronyour
computer,youcanuseaconvertertoestablishtheconnection.Convertcablesareavailableasoptions
fromLenovoat:
http://www.lenovo.com/accessories/services/index.html
•Forstablefunctionality,useDisplayPortcertiedcablewithDisplayPorticon(
)toconnectthedevice
forstablefunctionality.
Settingthemonitortype
Tosetyourmonitortype,dothefollowing:
1.Connecttheexternalmonitortoyourcomputer,andthenconnectthemonitortoanelectricaloutlet.
2.Turnontheexternalmonitor.
3.Right-clickonthedesktop,andclickScreenresolution.
Note:Ifyourcomputercannotdetecttheexternalmonitor,clicktheDetectbutton.
4.Clicktheiconforthedesiredmonitor(theMonitor-2iconisfortheexternalmonitor).
5.SetResolution.
6.ClickAdvancedSettings.
7.ClicktheMonitortab.Checkthemonitorinformationwindowtoensurethatthemonitortypeiscorrect.
Ifitis,clickOKtoclosethewindow;otherwiseproceedwiththefollowingsteps.
8.Ifmorethantwomonitortypesaredisplayed,selectGenericPnPMonitororGenericNon-PnP
Monitor.
9.ClickProperties.Ifyouarepromptedforanadministratorpasswordorconrmation,typethepassword
orprovideconrmation.
10.ClicktheDrivertab.
11.ClickUpdateDriver.
12.ClickBrowsemycomputerfordriversoftware,andthenclickLetmepickfromalistofdevice
driversonmycomputer.
13.CleartheShowcompatiblehardwarecheckbox.
30UserGuide
Page 47

14.SelectManufacturerandModelforyourmonitor.Ifyoucannotndyourmonitoronthelist,stopthe
installationofthisdriverandusethedrivershippedwithyourmonitor.
15.Afterupdatingthedriver,clickClose.
16.FortheWindows7operatingsystem,tochangethecolorsettings,right-clickonthedesktop,andclick
Screenresolution.ClickAdvancedSettings,selecttheMonitortab,thensetColors.
17.ClickOK.
Note:FortheWindows7operatingsystem,tochangethecolorsettings,right-clickonthedesktop,and
clickScreenresolution.ClickAdvancedSettings,selecttheMonitortab,thensetColors.
Considerationsforattachinganexternalmonitor
•Wheninstallinganoperatingsystem,youmustinstallthedisplaydriverforyourmonitorthatisprovided
withthecomputer,andthemonitorINFlethatisprovidedwiththeexternalmonitor.
•Ifyousetaresolutionhigherthantheresolutionyouareusingonthecomputermonitor,andusean
externalmonitorthatdoesnotsupportthatresolution,takeadvantageofthevirtualscreenfunction,
whichenablesyoutodisplayonlyapartofthehigh-resolutionscreenimageyourcomputerproduces.
YoucanseeotherpartsoftheimagebymovingthescreenwiththeT rackPointpointingstickoranother
pointingdevice.
•Iftheexternalmonitoryouareusingisoutdated,theresolutionandtherefreshratemightbelimited.
Changingdisplaysettings
Youcanchangethedisplaysettings,suchasthedisplayresolution,fontsize,andsoon.
Tochangethedisplaysettings,dothefollowing:
1.GotoControlPanelandclickAppearanceandPersonalization.
2.ClickDisplayforfurtherconguration.
UsingtheExtenddesktopfunction
YourcomputersupportsafunctionnamedtheExtenddesktop.WiththeExtenddesktopfunction,you
candisplayoutputonboththecomputerdisplayandanexternalmonitor.Y oualsocandisplaydifferent
desktopimagesoneachmonitor.
YoucanusetheExtenddesktopfunctionwithoutchanginganysettings.Ifthefunctiondoesnotwork,refer
to“EnablingtheExtenddesktopfunction”onpage31.
ConsiderationsforusingtheExtenddesktopfunction
•IfyouwanttoshowDOSxfull-screenwhileinExtenddesktopmode,onlytheprimarydisplayshows
DOS;theotherdisplayisblackedout.
•WhenaprogramusingDirectDraworDirect3Displayedinfull-screenmode,itisshownonlyonthe
primarydisplay.
•YoucannotusethedisplayswitchingfunctionwhenyouareintheExtenddesktopmode.
EnablingtheExtenddesktopfunction
ToenabletheExtenddesktopfunction,dothefollowing:
1.ConnecttheexternalmonitortotheminiDisplayPortconnectororVGAconnectorofyourcomputer;
thenconnectthemonitortoanelectricaloutlet.
2.Turnontheexternalmonitor.
3.PressF7,thenselectExtend.
Chapter2.Usingyourcomputer31
Page 48

Notes:
•IfthemonitorconnectorisnotcompatiblewiththeminiDisplayPortconnectororVGAconnectoronyour
computer,youcanuseaconvertertoestablishtheconnection.Convertcablesareavailableasoptions
fromLenovoathttp://www.lenovo.com/accessories/services/index.html.
•UseDisplayPortcertiedcablewithDisplayPorticon(
Tochangetheresolutionforeachmonitor,dothefollowing:
1.Right-clickonthedesktop,andclickScreenresolution.
2.ClicktheMonitor-1icon,whichisfortheprimarydisplay(thecomputerdisplaybydefault).
3.Settheresolutionfortheprimarydisplay.
4.ClicktheMonitor-2icon,whichisforthesecondarydisplay(theexternaldisplaybydefault).
5.Settheresolutionforthesecondarydisplay.
6.ClickOKtoapplythechanges.
Note:Tochangethecolorsettings,right-clickonthedesktop,andclickScreenresolution.ClickAdvanced
Settings,selecttheMonitortab,thensetColors.
)toconnectthedeviceforstablefunctionality.
Settingupapresentation
Tomakepresentations,youcanconnectaprojectortoyourcomputerthroughtheminiDisplayPort
connectorortheVGAconnectoronyourcomputer.
Notes:
•IftheprojectorconnectorisnotcompatibletotheminiDisplayPortconnectorortheVGAconnectoronyour
computer,youcanpurchaseaconvertercableonhttp://www.lenovo.com/accessories/services/index.html.
•UseDisplayPortcertiedcablewithDisplayPorticon(
Itmighttakeseveralsecondsbeforetheprojectordisplaystheimage.Ifyoudonotseeyourdesktop
displayedafter60seconds,pressF7toswitchbetweendifferentdisplayoutputlocations.
Yourprojectormighthaveoneormoreaudio-inputconnectors.Toprojectsound,youwillneedtoattachthe
comboaudiojackonyourcomputertotheseconnectors,usinganaudiocable(commerciallyavailable).
)toconnectthedeviceforstablefunctionality.
Usingaudiofeatures
Yourcomputerisequippedwiththefollowingitems:
•Comboaudiojack,3.5mm(1/8inch)indiameter
•Microphones
•Stereospeakers
Yourcomputeralsohasanaudiochipthatenablesyoutoenjoyvariousmultimediaaudiofeatures:
•CompliantwithIntelHighDenitionAudio
•PlaybackofaWAVleatasamplerateof44.1KHzto192KHz
•PlaybackofMIDIlesthroughaWavetablesynthesizerunderMicrosoftWindowsoperatingsystems
•PlaybackofMP3lesthroughtheWindowsMediaPlayerorasoftwareMP3player
•RecordingandplaybackofPCMandWAVlesin16-bitor24-bitformat
•Recordingfromvarioussoundsources
32UserGuide
Page 49

Note:Thecomboaudiojackdoesnotsupportaconventionalmicrophone.
Thefollowingtableshowswhichfunctionsoftheaudiodevicesattachedtothejacksonyourcomputerare
supported.
Table3.Audiofeaturelist
JackHeadsetwitha3.5-mm
(0.14-inch),4-poleplug
Comboaudiojack
Headphoneand
microphonefunctions
supported
Conventional
headphone
Headphonefunction
supported
Conventional
microphone
Notsupported
Conguringforsoundrecording
Tocongurethemicrophoneforoptimalsoundrecording,opentheRealtekHDAudioManagerwindow
bydoingthefollowing:
1.GotoControlPanel.
2.ThenclickHardwareandSound➙RealtekHDAudioManager.
3.TheRealtekHDAudioManagerwindowopens.
Usingthecamera
Ifyourcomputerhasacamera,youcanusethecameratopreviewyourvideoimageandtakeasnapshot
ofyourcurrentimage.
Tostartthecamera,dothefollowing:
•ForWindows7:PressF9toopenControlPanel.ClickLenovo-WebConferencing.
•ForWindows8:ClickCamerafromtheStartscreen.
Whenthecameraisstarted,thegreencamerastatusindicatorturnson.
Youalsocanusethecamerawithotherprogramsthatprovidefeaturessuchasphotographing,video
capturing,andvideoconferencing.Tousethecamerawithotherprograms,openoneoftheprograms
andstartthephotographing,videocapturing,orvideoconferencingfunction.Then,thecamerawillstart
automaticallyandthegreencamera-in-useindicatorwillturnon.Formoreinformationaboutusingthe
camerawithaprogram,refertothedocumentationthatcamewiththeprogram.
Conguringcamerasettings
Youcancongurethecamerasettingstomeetyourneeds,suchasadjustingthequalityofthevideooutput.
Tocongurethecamerasettings,dothefollowing:
•ForWindows7:PressF9toopenControlPanel.ClickLenovo-WebConferencingandcongurethe
camerasettingsasdesired.
•ForWindows8:Dooneofthefollowing:
–Congurethecamerasettingsdirectlyfromtheprogramthatisusingthecamera.Formoreinformation,
seethehelpinformationsystemoftheprogram.
–PressF9tostarttheLenovoSettingsprogram.ThenclickCamera.Followtheinstructionsonthe
screentocongurethecamerasettingsasdesired.
Chapter2.Usingyourcomputer33
Page 50

Usingamediacard
Yourcomputerhasonemediacardreaderslot.Themediacardreaderslotsupportsthefollowingfour
typesofcards:
•MultiMediaCard(MMC)
•SecureDigital(SD)card
•SecureDigitalHigh-Capacity(SDHC)card
•SecureDigitaleXtended-Capacity(SDXC)card
Attention:Whiletransferringdatatoorfromamediacard,suchasanSDcard,donotputyourcomputer
intosleeporhibernationmodebeforethedatatransferiscomplete;otherwise,yourdatacouldbecome
damaged.
Formoreinformationonmediacards,refertoanyofthefollowingtopics:
Insertingamediacard
Attention:Beforeyoustartinstallinganyofthefollowingcards,touchametaltableoragroundedmetal
object.Thisactionreducesanystaticelectricityfromyourbody.Thestaticelectricitycoulddamagethecard.
Toinsertamediacardintothe4-in-1mediacardreaderslot,dothefollowing:
1.Ensurethatthecardiscorrectlyoriented.
2.Insertthecardrmlyintothe4-in-1mediacardreaderslot.Pressthecardrmlyintotheslot.
Ifthemediacardisnotplugandplay,dothefollowing:
1.GotoControlPanel.ClickHardwareandSound➙DeviceManager.Ifyouarepromptedforan
administratorpasswordorconrmation,typethepasswordorprovideconrmation.
2.FromtheActionmenu,selectAddlegacyhardware.TheAddHardwareWizardstarts.
3.Followtheinstructionsonthescreen.
Removingamediacard
Attention:
•Beforeremovingthecard,stopthecardrst.Otherwise,dataonthecardmightbedamagedorlost.
•Donotremovethecardwhilethecomputerisinsleepmodeorhibernationmode.Otherwise,thesystem
mightnotrespondwhenyoutrytoresumeoperation.
Toremoveamediacard,dothefollowing:
1.ClickthetriangulariconintheWindowsnoticationareatoshowhiddenicons.Then,right-clickthe
SafelyRemoveHardwareandEjectMediaicon.
2.SelectthecorrespondingitemtoejectthecardfromtheWindowsoperatingsystem.
3.Pressthecardtoejectitfromyourcomputer.
4.Removethecardfromyourcomputerandstoreitsafelyforfutureuse.
Note:IfyoudonotremovethecardfromyourcomputerafteryouejectthecardfromtheWindows
operatingsystem,thecardcannolongerbeaccessed.Toaccessthecard,youmustremoveitonce,
theninsertitagain.
34UserGuide
Page 51

Chapter3.Youandyourcomputer
Thischapterprovidesinformationaboutaccessibility,comfort,andtravellingwithyourcomputer.
•“Accessibilityandcomfort”onpage35
•“Travelingwithyourcomputer”onpage37
Accessibilityandcomfort
Goodergonomicpracticeisimportanttogetthemostfromyourpersonalcomputerandtoavoiddiscomfort.
Arrangeyourworkplaceandtheequipmentyouusetosuityourindividualneedsandthekindofwork
thatyouperform.Inaddition,usehealthyworkhabitstomaximizeyourperformanceandcomfortwhile
usingyourcomputer.
Thefollowingtopicsprovideinformationaboutarrangingyourworkarea,settingupyourcomputer
equipment,andestablishinghealthyworkhabits.
Lenovoiscommittedtoprovidingthelatestinformationandtechnologytoourcustomerswithdisabilities.
Refertoouraccessibilityinformationwhichoutlinesoureffortsinthisarea.
Ergonomicinformation
Workinginthevirtualofcemightmeanadaptingtofrequentchangesinyourenvironment.Followingsome
simpleruleswillmakethingseasierandbringyouthemaximumbenetsofyourcomputer.Keepinginmind
suchbasicsasgoodlightingandproperseating,forexample,canhelpyouimproveyourperformance
andachievegreatercomfort.
Thisexampleshowssomeoneinaconventionalsetting.Evenwhennotinsuchasetting,youcanfollow
manyofthesetips.Developgoodhabits,andtheywillserveyouwell.
Generalposture:Makeminormodicationsinyourworkingposturetodetertheonsetofdiscomfortcaused
bylongperiodsofworkinginthesameposition.Frequentshortbreaksfromyourworkalsohelptoprevent
minordiscomfortassociatedwithyourworkingposture.
©CopyrightLenovo2013
35
Page 52

Display:Positionthedisplaytomaintainacomfortableviewingdistanceof510-760mm(20-30inches).
Avoidglareorreectionsonthedisplayfromoverheadlightingoroutsidesourcesoflight.Keepthedisplay
screencleanandsetthebrightnesstolevelsthatenableyoutoseethescreenclearly.PressF5orF6
toadjustdisplaybrightness.
Headposition:Keepyourheadandneckinacomfortableandneutral(vertical,orupright)position.
Chair:Useachairthatgivesyougoodbacksupportandseatheightadjustment.Usechairadjustmentsto
bestsuityourdesiredposture.
Armandhandposition:Ifavailable,usechairarmrestsoranareaonyourworkingsurfacetoprovide
weightsupportforyourarms.Keepyourforearms,wrists,andhandsinarelaxedandneutral(horizontal)
position.Typewithasofttouchwithoutpoundingthekeys.
Legposition:Keepyourthighsparalleltotheoorandyourfeetatontheoororonafootrest.
Whatifyouaretraveling?
Itmightnotbepossibletoobservethebestergonomicpracticeswhenyouareusingyourcomputer
whileonthemoveorinacasualsetting.Regardlessofthesetting,trytoobserveasmanyofthetipsas
possible.Sittingproperlyandusingadequatelighting,forexample,willhelpyoumaintaindesirablelevels
ofcomfortandperformance.
Questionsaboutvision?
ThevisualdisplayscreensofThinkPadnotebookcomputersaredesignedtomeetthehigheststandards
andtoprovideyouwithclear,crispimagesandlarge,brightdisplaysthatareeasytosee,yeteasyonthe
eyes.Ofcourse,anyconcentratedandsustainedvisualactivitycanbetiring.Ifyouhavequestionsoneye
fatigueorvisualdiscomfort,consultavisioncarespecialistforadvice.
Comfort
Observethefollowingguidelinestoachievegreatercomfortandimproveperformance.
Activesittingandrestbreaks:Thelongeryousitandworkwithyourcomputer,themoreimportantitisto
observeyourworkingposture.Follow“Ergonomicinformation”onpage35andpractice“activesitting”to
avoiddiscomfortassociatedwithyourworkingpostures.Makingminorvoluntaryposturalchangesand
takingshortfrequentworkbreaksarethekeyingredientsforhealthycomputing.Y ourcomputerislightand
mobile;youcaneasilyrepositionyourworkingsurfacetoaccommodatemanyposturemodications.
Workareasetupoptions:Familiarizeyourselfwithallofyourofcefurnituresothatyouknowhowto
adjustyourworksurface,seat,andotherworktoolstoaccommodateyourpreferencesforcomfort.If
yourworkareaisnotinanofcesetting,ensurethatyoutakespecialnoteofemployingactivesitting
andtakingworkbreaks.ManyThinkPadproductsolutionsareavailabletohelpyoumodifyandexpand
yourcomputertobestsuityourneeds.AccessthefollowingWebsitetoviewsomeoftheseoptions:
http://www.lenovo.com/accessories/services/index.html.Exploreyouroptionsfordockingsolutionsand
externalproductsthatprovidetheadjustabilityandfeaturesthatyouwant.
Accessibilityinformation
Lenovoiscommittedtoprovidingpeoplewithdisabilitiesgreateraccesstoinformationandtechnology.
Asaresult,thefollowinginformationprovideswaystohelpusersthathavehearing,vision,andmobility
limitationsgetthemostoutoftheircomputerexperience.
36UserGuide
Page 53

Assistivetechnologiesenableuserstoaccessinformationinthemostappropriateway.Someofthese
technologiesarealreadyprovidedinyouroperatingsystem.Otherscanbepurchasedthroughvendors,or
accessedthroughtheWorldWideWebhttp://www.lenovo.com/healthycomputing.
Assistivetechnologies
SomeaccessibilitytechnologiesareavailablethroughtheAccessibilityOptionsprogram.Depending
onyouroperatingsystem,thenumberofaccessibilityoptionsavailablevaries.Ingeneral,accessibility
optionsenhancethewayuserswithhearing,vision,ormobilitylimitationsnavigateandusetheircomputer.
Forexample,someusersmightnothavethenemotorskillsrequiredtouseamouseorselectkey
combinations.Otherusersmightrequirelargerfontsorhigh-contrastdisplaymodes.Insomecases,
magniersandbuilt-inspeechsynthesizersareavailable.Fordetailedinformationabouteachofthese
features,consulttheMicrosofthelpinformationsystem.
TousetheAccessibilityOptionsprogram,clickStart➙ControlPanel➙EaseofAccess➙Easeof
AccessCenter.
Screen-readertechnologies
Screen-readertechnologiesareprimarilyfocusedonsoftwareprograminterfaces,helpinformationsystems,
andavarietyofonlinedocuments.However,inthecasewhereascreenreadercannotreaddocuments,
thedocumentmustrstgothroughaconversionprocess.OnesolutionconvertsAdobePDFlesintoa
formatthatisreadbythescreen-readerprograms.ThissolutionisaWeb-basedserviceprovidedbyAdobe
SystemsIncorporated.Throughhttp://access.adobe.com,AdobePDFdocumentscanbeconvertedto
HTMLorplaintextinmanylanguages.OneconversionoptionconvertsPDFdocumentsontheInternet.A
secondoptionenablesuserstosubmittheURLofanAdobePDFlethroughe-mailtoconvertittoHTMLor
ASCIItext.AdobePDFlesonalocalharddiskdrive,localCD-ROM,orLANalsocanbeconvertedby
attachingtheAdobePDFletoane-mailmessage.
Travelingwithyourcomputer
Thistopicprovidesinformationtohelpyouworkwithyourcomputerwhenyouaretravelling.
Traveltips
Usethefollowingtraveltipstotravelmorecondentlyandefcientlywithyourcomputer.
•Althoughitissafetoallowyourcomputertogothroughthex-raymachinesatairportsecuritystations,it
isimportanttokeepyoureyesonthecomputeratalltimestopreventtheft.
•Considerbringinganelectricaladapterforuseinanairplaneorautomobile.
•Ifyouneedtouseyourcomputerinlessthanperfectlightingconditions,pressFn+Spacebartoilluminate
thekeyboard.
•Ifyoucarryanacpoweradapter,detachtheaccordfromittoavoiddamagingthecord.
Traveltipsonairplanes
Ifyoucarryyourcomputerintoanairplane,takenoteofthefollowingtips:
•Ifyouintendtouseyourcomputerorwirelessservices(suchasInternetandBluetooth),checkwiththe
airlineforrestrictionsandavailabilityofservicesbeforeboardingtheairplane.Iftherearerestrictions
ontheuseofcomputerswithwirelessfeaturesontheairplane,youmustabidebythoserestrictions.If
necessary,disablewirelessfeaturesbeforeboarding.
•Becarefulabouttheseatinfrontofyouonairplanes.Angleyourcomputerdisplaysothatitdoesnotget
caughtwhenthepersoninfrontofyouleansback.
•Whentakingoff,remembertoturnoffyourcomputerorputitintohibernationmode.
Chapter3.Youandyourcomputer37
Page 54

Travelaccessories
Thefollowingisachecklistofitemstoconsiderpackingwhenyouaregoingtotravel:
•ThinkPadacpoweradapter
•Externalmouse(ifyouareaccustomedtousingone)
•Ethernetcable
•Aqualitycarryingcasethatprovidesadequatecushionandprotection
•Externalstoragedevice
Ifyouaretravelingtoanothercountry,youmightneedtoconsideranacpoweradapterforthecountryto
whichyouaretravelling.
Topurchasetravelaccessories,gotohttp://www.lenovo.com/accessories.
38UserGuide
Page 55

Chapter4.Security
Thischapterprovidesinformationabouthowtoprotectyourcomputerfromtheftandunauthorizeduse.
•“Attachingamechanicallock”onpage39
•“Usingpasswords”onpage39
•“Harddisksecurity”onpage44
•“Settingthesecuritychip”onpage45
•“Usingthengerprintreader”onpage46
•“Noticeondeletingdatafromyourharddiskdriveorsolid-statedrive”onpage48
•“Usingrewalls”onpage48
•“Protectingdataagainstviruses”onpage48
Attachingamechanicallock
Youcanattachamechanicallocktoyourcomputertohelppreventitfrombeingremovedwithoutyour
permission.
Attachamechanicallocktothekeyholeofthecomputer;thensecurethechainonthelocktoastationary
object.Refertotheinstructionsshippedwiththemechanicallock.
Note:Y ouareresponsibleforevaluating,selecting,andimplementingthelockingdevicesandsecurity
features.Lenovomakesnocomments,judgments,orwarrantiesaboutthefunction,quality,orperformance
oflockingdevicesandsecurityfeatures.
Usingpasswords
Byusingpasswords,youcanhelppreventyourcomputerfrombeingusedbyothers.Onceyouseta
password,apromptisdisplayedonthescreeneachtimeyouturnonthecomputer.Enteryourpasswordat
theprompt.Youcannotusethecomputerunlessyoutypethecorrectpassword.
Passwordsandsleepmode
Ifyouhavesetpasswordsandyouputyourcomputerintosleepmode,theprocedureforresuming
operationisasfollows:
•Youarenotpromptedtotypethepasswordwhenresumingoperation.
•Ifanyharddiskdriveorsolid-statedrivehasapassword,itisunlockedautomaticallywhenyouresume
operation.
Note:IfaWindowspasswordhasbeenset,youwillbepromptedtoenterit.
Typingpasswords
Ifthisiconisdisplayed,typeapower-onpasswordorasupervisorpassword.
Ifthisiconisdisplayed,typeauserharddiskpassword.Ifyouwanttotypeamasterharddisk
password,dothefollowing:
©CopyrightLenovo2013
39
Page 56

1.PressF1.Theiconchangestothis:
2.Typethemasterharddiskpassword.
Notes:
•Toreturntotheicon,pressF1again.
•PresstheBackspacekeyifyouenterawrongpasswordwhileyouaretypingyourpassword.
Power-onpassword
Youcansetapower-onpasswordtohelpprotectyourcomputeragainstaccessbyunauthorizedusers.
Ifyousetapower-onpassword,thepasswordpromptisdisplayedonthescreenwheneveryouturnonthe
computer.Youmustenterthecorrectpasswordtostartusingthecomputer.
Settingapower-onpassword
1.Printtheseinstructions.
2.Saveallopenles,andexitallprograms.
3.Turnyourcomputeroffandthenturnitonagain.
4.Whenthelogoscreenisdisplayed,pressF1.TheThinkPadSetupprogrammainmenuopens.
5.SelectSecurity,usingthecursordirectionalkeystomovedownthemenu.
6.SelectPassword.
7.SelectPower-onPassword.
8.IntheEnterNewPasswordeld,typeadesiredpassword,andpressEnter.
9.IntheConrmNewPasswordeld,retypethepasswordandpressEnter.
Note:Youmightwanttorecordyourpasswordandstoreitinasafeplace.Otherwise,ifyouforgetit,
youhavetotakeyourcomputertoaLenovoreselleroramarketingrepresentativetohavethepassword
canceled.
10.IntheSetupNoticewindowthatisdisplayed,pressEntertocontinue.
11.PressF10.TheSetupConrmationwindowopens.SelectY estosavecongurationchangesandexit.
Changingorremovingthepower-onpassword
Tochangethepower-onpassword,followsteps1through7.Enteryourcurrentpassword.WhentheEnter
NewPasswordeldisdisplayed,typeanewpasswordintheeldandthenretypeittoverify.Toremove
thepassword,followsteps1through7.Typeyourcurrentpassword.WhentheEnterNewPasswordeld
isdisplayed,leaveitblankandpressEntertwice.
Harddiskpasswords
Twotypesofharddiskpasswordshelpprotecttheinformationstoredontheharddiskdrive:
•Userharddiskpassword
•Masterharddiskpassword,whichrequiresauserharddiskpassword
Ifauserharddiskpasswordhasbeenset,butnomasterharddiskpasswordhasbeen,theusermustenter
theuserharddiskpasswordinordertogainaccesstolesandprogramsontheharddiskdrive.
Themasterpasswordcanbesetandusedonlybyasystemadministrator.Likeamasterkey,itenablesthe
administratortogetaccesstoanyharddiskdriveinasystem.Theadministratorsetsthemasterpassword;
40UserGuide
Page 57

nooneelseknowsit.Thentheadministratorsetsauserpasswordforeachcomputerinthenetwork,and
tellseachuserthepasswordforhisorhercomputer.Theusercanthenchangetheuserpasswordas
desired,buttheadministratorstillcangetaccessbyusingthemasterpassword.
Note:Whenamasterharddiskpasswordisset,onlytheadministratorcanremovetheuserharddisk
password.
Settingaharddiskpassword
1.Printtheseinstructions.
2.Saveallopenles,andexitallprograms.
3.Turnyourcomputeroffandthenonagain.
4.Whenthelogoscreenisdisplayed,pressF1.TheThinkPadSetupprogrammainmenuopens.
5.SelectSecurity,usingthecursordirectionalkeystomovedownthemenu.
6.SelectPassword.
7.SelectHardDisk1PasswordorHardDisk2Password.
8.Apasswordwindowopens.YouarepromptedtoselectUserorUser+Master.SelectUserifyouwant
tosetonlyoneharddiskpassword.Ifyouareanadministratororsupervisor,youcanselectUser+
Mastertosettwopasswords.(Theusercanchangetheuserpasswordlater.)
•IfyouselectUser+Master,dothefollowing:
a.Whenawindowfortypingthenewuserharddiskpasswordopens,typeyournewpasswordin
theEnterNewPasswordeld.PressEnter.
b.IntheConrmNewPasswordeld,retypethepasswordyoujustenteredtoverifyit.PressEnter.
c.Amessagewindowopensandpromptsyoutosetthemasterharddiskpassword.PressEnterto
continue.
d.Awindowfortypingthenewmasterharddiskpasswordopens.Typeyournewpasswordin
theEnterNewPasswordeld.PressEnter.
e.IntheConrmNewPasswordeld,retypethepasswordyoujustenteredtoverifyit.PressEnter.
•IfyouselectUseronly,dothefollowing:
a.Whenawindowfortypingthenewpasswordopens,typeyournewpasswordintheEnterNew
Passwordeld.PressEnter.
Notes:
–YoucansettheminimumlengthofaharddiskpasswordthroughtheSecuritymenu.
–Ifyousetaharddiskpasswordofoversevencharacters,theharddiskdrivecanbeusedonly
withacomputerthatcanrecognizeaharddiskpasswordofoversevencharacters.Ifyouthen
installtheharddiskdriveinacomputerthatcannotrecognizeaharddiskpasswordthat
containsmorethansevencharacters,youcannotgetaccesstothedrive.
b.IntheConrmNewPasswordeld,retypethepasswordyoujustenteredtoverifyit.PressEnter.
Attention:Youmightwanttonotedownyourpasswordsandkeeptheminasafeplace.Otherwise,if
youforgettheuserpassword,orbothuserandmasterpasswords,Lenovocannotresetyourpasswords
orrecoverdatafromtheharddiskdrive.Y oumusttakeyourcomputertoaLenovoresellerora
marketingrepresentativetohavetheharddiskdrivereplaced.Proofofpurchaseisrequired,andafee
willbechargedforpartsandservice.
9.IntheSetupNoticewindowthatisdisplayed,pressEntertocontinue.
10.PressF10.TheSetupConrmationwindowopens.SelectY estosavecongurationchangesandexit.
Chapter4.Security41
Page 58

Thenexttimeyouturnonyourcomputer,youwillhavetotypetheuserormasterharddiskpasswordin
ordertostartyourcomputerandgetaccesstoyouroperatingsystem.
Changingorremovingaharddiskpassword
Followsteps1through7in“Settingaharddiskpassword”onpage41,typingyourpasswordtogetaccess
totheThinkPadSetupprogram.
Tochangeorremovetheuserharddiskpassword,dothefollowing:
•Tochangetheharddiskpassword,typethecurrentpasswordintheEnterCurrentPasswordeld.Then
typethenewpasswordintheEnterNewPasswordeld,andretypethepasswordyoujustenteredto
verifyitintheConrmNewPasswordeld.PressEnter,andaSetupNoticewindowisdisplayed.Press
EntertoexitfromtheSetupNoticewindow.Theuserharddiskpasswordwillbechanged.
•Toremovetheharddiskpassword,typethecurrentpasswordintheEnterCurrentPasswordeld.Then
leavetheEnterNewPasswordandConrmNewPasswordeldsblank,andpressEnter.ASetup
Noticewindowisdisplayed.PressEntertoexitfromtheSetupNoticewindow.Theuserharddisk
passwordwillberemoved.
TochangeorremovetheUser+Masterharddiskpasswords,selectUserHDPorMasterHDP.
IfyouchooseUserHDP,dothefollowing:
•Tochangetheuserharddiskpassword,typethecurrentuserharddiskpasswordorthecurrentmaster
harddiskpasswordintheEnterCurrentPasswordeld.Thentypethenewuserharddiskpasswordin
theEnterNewPasswordeld,andretypethepasswordyoujustenteredtoverifyitintheConrmNew
Passwordeld.PressEnter,andaSetupNoticewindowisdisplayed.PressEntertoexitfromtheSetup
Noticewindow.Theuserharddiskpasswordischanged.
•Toremovetheuserharddiskpassword,typethecurrentmasterharddiskpasswordintheEnterCurrent
Passwordeld.ThenleavetheEnterNewPasswordandConrmNewPasswordeldsblank,and
pressEnter.ASetupNoticewindowisdisplayed.PressEntertoexitfromtheSetupNoticewindow.
Theuserharddiskpasswordwillberemoved.
IfyouchooseMasterHDP,dothefollowing:
•Tochangethemasterharddiskpassword,typethecurrentmasterharddiskpasswordintheEnter
CurrentPasswordeld.ThentypethenewmasterharddiskpasswordintheEnterNewPassword
eld,andretypethepasswordyoujustenteredtoverifyitintheConrmNewPasswordeld.Press
Enter,andaSetupNoticewindowisdisplayed.PressEntertoexitfromtheSetupNoticewindow.The
masterharddiskpasswordischanged.
•Toremovethemasterharddiskpassword,typethecurrentmasterharddiskpasswordintheEnter
CurrentPasswordeld.ThenleavetheEnterNewPasswordandConrmNewPasswordeldsblank,
andpressEnter.ASetupNoticewindowisdisplayed.PressEntertoexitfromtheSetupNoticewindow.
Boththeuserandmasterharddiskpasswordswillberemoved.
Supervisorpassword
ThesupervisorpasswordprotectsthesysteminformationstoredinThinkPadSetup.Withoutit,noonecan
changethecongurationofthecomputer.Itprovidesthefollowingsecurityfeatures:
•Ifasupervisorpasswordisset,apasswordpromptisdisplayedwhenyoutrytostarttheThinkPadSetup
program.Unauthorizeduserscannotgetaccesstocongurationdata.
•Thesystemadministratorcanusethesupervisorpasswordtogetaccesstoacomputereveniftheuserof
thatcomputerhassetapower-onpassword.Thesupervisorpasswordoverridesthepower-onpassword.
•Ifbothasupervisorpasswordandapower-onpasswordareset,youcandothefollowingonlyifyou
havethesupervisorpassword:
42UserGuide
Page 59

–Deletingthepower-onpassword
–Changingordeletingthesupervisorpassword
–EnablingordisablingtheWakeonLANfeature
–EnablingordisablingtheInternalNetworkOptionROMfeature
–Changingdateandtime
–EnablingordisablingtheLockUEFIBIOSSettingsfeature
–EnablingordisablingthePasswordatunattendedbootfeature
–Specifyingtheminimumlengthforpower-onpasswordsandharddiskpasswords
–Changingthesettingforthesecuritychip
–EnablingordisablingtheBootDeviceListF12Optionfeature
–EnablingordisablingtheBootOrderLockfeature
–EnablingordisablingtheFlashBIOSUpdatingbyEnd-Usersfeature
–Enablingordisablingtheinternalnetworkdevice
–Enablingordisablingtheinternalwirelessdevice
–EnablingordisablingtheinternalBluetoothdevice
–EnablingordisablingtheinternalwirelessWANdevice
–EnablingordisablingtheSecuritymode
–Enablingordisablingthengerprintreaderpriority
–Erasingthengerprintdata
Notes:
•ThesystemadministratorcansetthesamesupervisorpasswordonmanyThinkPadnotebookcomputers
tomakeadministrationeasier.
•ByenablingtheLockUEFIBIOSSettingsfeatureonthePasswordmenuwhenyousetthesupervisor
password,youmakeitimpossibleforanyonebutyoutomakechanges.
Setting,changing,orremovingasupervisorpassword
Onlyasystemadministratorcanset,change,orremoveasupervisorpassword.
Toset,change,orremoveasupervisorpassword,dothefollowing:
1.Printtheseinstructions.
2.Saveallopenles,andexitallprograms.
3.Turnyourcomputeroffandthenturnitonagain.
4.Whenthelogoscreenisdisplayed,pressF1.TheThinkPadSetupprogrammainmenuopens.
5.SelectSecurity,usingthecursordirectionalkeystomovedownthemenu.
6.SelectPassword.
7.SelectSupervisorPassword.
8.Awindowopens,promptingyoutoenteranewpassword.Dependingonyourneeds,dooneofthe
following:
•Tosetapassword,dothefollowing:
a.IntheEnterNewPasswordeld,typeadesiredpasswordandpressEnter.
b.IntheConrmNewPasswordeld,retypethepasswordandpressEnter.
•Tochangeapassword,dothefollowing:
Chapter4.Security43
Page 60

a.IntheEnterCurrentPasswordeld,typethecurrentsupervisorpasswordandpressEnter.
b.IntheEnterNewPasswordeld,typethenewsupervisorpassword;thenretypethepassword
youjustenteredtoverifyitintheConrmNewPasswordeld.PressEnter.
•Toremoveapassword,dothefollowing:
a.IntheEnterCurrentPasswordeld,typethecurrentsupervisorpasswordandpressEnter.
b.LeavetheEnterNewPasswordandConrmNewPasswordeldsblank.PressEnter.
Attention:Youmightwanttonotedownyourpasswordandkeepitinasafeplace.Ifyouforgetyour
supervisorpassword,Lenovocannotresetyourpassword.Y oumusttakeyourcomputertoaLenovo
reselleroraLenovomarketingrepresentativetohavethesystemboardreplaced.Proofofpurchaseis
required,andafeewillbechargedforpartsandservice.
9.IntheSetupNoticewindowthatisdisplayed,pressEntertocontinue.
10.PressF10.TheSetupConrmationwindowopens.SelectY estosavecongurationchangesandexit.
ThenexttimeyouopentheThinkPadSetupprogram,youwillbepromptedtotypeyourpasswordtoproceed.
Harddisksecurity
Toprotectpasswordsfromunauthorizedsecurityattacks,severalofthelatesttechnologiesandalgorithms
areintegratedintoUEFIBIOSandhardwaredesignofThinkPadnotebookcomputers.
Tomaximizesecurity,dothefollowing:
•Setapower-onpasswordaswellasaharddiskpasswordforyourinternalsolid-statedriveorharddisk
drive.Refertotheproceduresin“Power-onpassword”onpage40and“Harddiskpasswords”onpage
.Forsecurity,alongerpasswordisrecommended.
40
•ToprovidereliablesecurityforUEFIBIOS,usethesecuritychipandasecurityprogramwithaTrusted
PlatformModule(TPM)managementfeature.Referto“Settingthesecuritychip”onpage45.
Note:TheMicrosoftWindows7andWindows8operatingsystemsupportstheTPMmanagementfeature.
•Ifaharddiskdriveorsolid-statedrivewithencryptiontechnologyisinstalledinyourcomputer,ensurethat
youprotectthecontentsofyourcomputermemoryfromunauthorizedaccessbyuseofdriveencryption
software,suchasMicrosoftWindowsBitLocker
EnterpriseeditionsoftheWindows7operatingsystemandProfessionalandEnterpriseeditionsofthe
Windows8operatingsystem.See“UsingWindowsBitLockerDriveEncryption”onpage44
•Beforeyoudisposeof,sell,orhandoveryourcomputer,ensurethatyoutodeletedatastoredonit.Refer
to“Noticeondeletingdatafromyourharddiskdriveorsolid-statedrive”onpage48.
Note:TheharddiskdrivebuiltintoyourcomputercanbeprotectedbyUEFIBIOS.
UsingWindowsBitLockerDriveEncryption
Tohelpprotectyourcomputeragainstunauthorizedaccess,ensurethatyoutousedriveencryption
software,suchasWindowsBitLockerDriveEncryption.
WindowsBitLockerDriveEncryptionisanintegralsecurityfeatureoftheWindows7andWindows8
operatingsystems.ItissupportedintheUltimateandEnterpriseeditionsoftheWindows7andProfessional
andEnterpriseeditionsoftheWindows8operatingsystem.
®
DriveEncryption,whichissupportedintheUltimateand
.
BitLockerusesaTrustedPlatformModuletoprovideenhancedprotectionforyourdataandtoensureearly
bootcomponentintegrity.AcompatibleTPMisdenedasaV1.2TPM.
44UserGuide
Page 61

TochecktheBitLockerstatus,gotoControlPanel,andclickSystemandSecurity➙BitLockerDrive
Encryption
FormoreinformationaboutWindowsBitLockerDriveEncryption,seetheWindowsHelpandSupport,or
searchfor“MicrosoftWindowsBitLockerDriveEncryptionStep-by-StepGuide”ontheMicrosoftWebsite.
DiskEncryptionharddiskdriveandEncryptionsolid-statedrive
SomemodelscontaintheDiskEncryptionharddiskdriveorEncryptionsolid-statedrive.Thisfeaturehelps
toprotectyourcomputeragainstsecurityattacksonmedia,NANDashordevicecontrollersbyuseofa
hardwareencryptionchip.Fortheefcientuseoftheencryptionfeature,ensurethatyoutosetaharddisk
passwordfortheinternalstoragedevice.
Settingthesecuritychip
Strictsecurityrequirementsareimposedonnetworkclientcomputersthattransfercondentialinformation
electronically.Dependingontheoptionsyouordered,yourcomputermighthaveanembeddedsecurity
chip,acryptographicmicroprocessor.Withthesecuritychip,youcandothefollowing:
•Protectyourdataandsystem
•Strengthenaccesscontrols
•Securecommunications
Settingthesecuritychip
ThechoicesofferedontheSecurityChipsubmenuundertheSecuritymenuofThinkPadSetupareas
follows:
•SecurityChip:activate,inactivate,ordisablethesecuritychip.
•SecurityReportingOptions:enableordisableeachsecurityreportingoption.
•ClearSecurityChip:cleartheencryptionkey.
Notes:
1.EnsurethatthesupervisorpasswordhasbeensetinThinkPadSetup.Otherwiseanyonecanchange
thesettingsforthesecuritychip.
2.IfyouareusingClientSecuritySolution,handlethesecuritychipbydoingthefollowing:
•Donotclearthesecuritychip.Ifyoudo,thefunctionsassignedtothekeyswillbeerased.
•Donotdisablethesecuritychip.Ifyoudo,ClientSecuritySolutionwillnotwork.
3.Ifthesecuritychipisremovedorreplaced,oranewonehasbeenadded,thecomputerwillnotstart.
Youwillhearfourcyclesoffourbeepseach.
4.Ifthesecuritychipisinactiveordisabled,theClearSecurityChipoptionwillnotbedisplayed.
5.Whenyouclearthesecuritychip,ensurethatyoutoturnyourcomputeroffandthenturnitonagain
afteryousetthesecuritychiptoActive.Otherwise,theClearSecurityChipoptionisnotdisplayed.
TosetanitemontheSecurityChipsubmenu,dothefollowing:
1.Printtheseinstructions.
2.Saveallopenles,andexitallprograms.
3.Turnyourcomputeroffandthenturnitonagain.
4.Whenthelogoscreenisdisplayed,pressF1.TheThinkPadSetupprogrammainmenuopens.
5.Usingthecursorkeys,movetoSecurity.TheSecuritymenuopens.
6.Usingthecursorkeys,movetoSecurityChip,andpressEnter.TheSecurityChipsubmenuopens.
Chapter4.Security45
Page 62

7.Usingthecursorkeys,movetoanitemyouwanttoset.Whentheitemishighlighted,pressEnter.
8.Setotheritemsthatyouwanttoset.
9.PressF10tosavechangesandexit.
10.PressEnterintheSetupConrmationwindowtoconrmtheexit.
Usingthengerprintreader
Yourcomputerhasanintegratedngerprintreader.Fingerprintauthenticationcanreplacepasswordsand
enablesimpleandsecureuseraccess.ByenrollingyourngerprintandassociatingitwithaWindows
passwordyoucanlogontothecomputerbyswipingyourngeroverthereader,withouttypingpasswords.
Enrollingyourngerprint
Tousetheintegratedngerprintreader,beginbyenrollingyourngerprintasfollows:
1.Turnonyourcomputer.
2.Doeitherofthefollowing:
•IfyoursystemisinstalledwiththeWindows7operatingsystem,tostarttheLenovoFingerprint
software,referto“AccessingLenovoprogramsontheWindows7operatingsystem”onpage11
•IfyoursystemisinstalledwiththeWindows8operatingsystem,tostarttheLenovoFingerprint
software,referto“AccessingLenovoprogramsontheWindows8operatingsystem”onpage13.
3.Followtheinstructionsonthescreentoenrollyourngerprint.Formoreinformation,refertothehelp
informationsystemfortheprogram.
.
Swipingyourngeroverthereader
Toswipeyourngeroverthereader,dothefollowing:
1.Placetheballofyournger(thecentralpartofthengerprint)onthesmallcircleabovethereader.
Ensurethattheentiretopjointofthengerisonthereader.
46UserGuide
Page 63

2.Applylightpressureandswipeyourngeracrossthereaderinonesmoothmotion.
Maintainingthengerprintreader
Thefollowingactionscoulddamagethengerprintreaderorcauseitnottoworkproperly:
•Scratchingthesurfaceofthereaderwithahard,pointedobject.
•Scrapingthesurfaceofthereaderwithyourngernailoranythinghard.
•Usingortouchingthereaderwithadirtynger.
Ifyounoticeanyofthefollowingconditions,gentlycleanthesurfaceofthereaderwithadry,soft,lint-free
cloth:
•Thesurfaceofthereaderisdirtyorstained.
•Thesurfaceofthereaderiswet.
•Thereaderoftenfailstoenrollorauthenticateyourngerprint.
Ifyourngerhasanyofthefollowingconditions,youmightnotbeabletoregisterorauthenticateit:
•Yourngeriswrinkled.
•Yourngerisrough,dry,orinjured.
•Yourngerisstainedwithdirt,mud,oroil.
•Thesurfaceofyourngerisverydifferentfromwhenyouenrolledyourngerprint.
•Yourngeriswet.
•Angerthathasnotbeenenrolledisused.
Toimprovethesituation,trythefollowing:
•Cleanorwipeyourhandstoremoveanyexcessdirtormoisturefromthengers.
•Enrollanduseadifferentngerforauthentication.
•Ifyourhandsaretoodry,applylotiontothem.
Chapter4.Security47
Page 64

Noticeondeletingdatafromyourharddiskdriveorsolid-statedrive
Ascomputersspreadintoeverycorneroflife,theyprocessmoreandmoreinformation.Thedataonyour
computer,someofwhichmightbesensitive,isstoredonaharddiskdriveorsolid-statedrive.Beforeyou
disposeof,sell,orhandoveryourcomputer,ensurethatyoutodeletedatastoredonit.
Handingyourcomputerovertosomeoneelsewithoutdeletingtheloadedsoftware,suchasoperating
systemsandprogramsoftware,mightevenviolatelicenseagreements.Youareadvisedtocheckthe
termsandconditionsofthoselicenseagreements.
Therearemethodsthatseemtodeletethedata:
•Movethedatatotherecyclebin,andthenclickEmptyrecyclebin.
•UsetheDeleteoption.
•Formatyourharddiskdriveorsolid-statedrive,usingthesoftwareforinitializingit.
•Usingtherecoveryprogram,bringtheharddiskdriveorsolid-statedrivebacktothefactorydefault
settings.
Theseoperations,however,onlychangetheleallocationofthedata;theydonotdeletethedataitself.In
otherwords,thedataretrievalprocessingisdisabledunderanoperatingsystemsuchasWindows.The
dataisstillthere,eventhoughitseemstobelost.Thus,itissometimespossibletoreadthedatabyuseof
specialsoftwarefordatarecovery.Thereisariskthatpeopleofbadfaithmightreadandmisusethecritical
dataonharddiskdrivesorsolid-statedrivesforunexpectedpurposes.
Topreventleakageofdata,itbecomesveryimportantthatyoutakeresponsibilityfordeletingallthedata
fromtheharddiskdriveorsolid-statedrivewhenyoudisposeof,sell,orhandoveryourcomputer.Y ou
candestroythedataphysicallybysmashingtheharddiskdriveorsolid-statedrivewithahammer,or
magneticallybymeansofstrongmagneticpower,thusmakingthedataunreadable.Butwerecommend
thatyoumakeuseofthesoftware(payware)orservice(payservice)specicallydevelopedforthepurpose.
Fordisposingofdataontheharddiskdriveorsolid-statedrive,LenovoprovidestheSecureDataDisposal
tool.Todownloadtheprogram,goto:
http://www.lenovo.com/support
Note:Runningeitherprogramwilltakeacoupleofhours.
Usingrewalls
Ifyoursystemispreinstalledwitharewallprogram,itprotectsagainstcomputerInternetsecuritythreats,
unauthorizedaccesses,intrusions,andInternetattacks.Italsoprotectsyourprivacy.
Formoreinformationabouthowtousetherewallprogram,refertothehelpinformationsystemthat
comeswiththeprogram.
Protectingdataagainstviruses
Yourcomputerispreinstalledwithanantivirusprogramsoyoucandetectandeliminateviruses.The
antivirusprogramisdesignedtohelpyoudetectandeliminateviruses.
Lenovoprovidesafullversionofantivirussoftwareonyourcomputerwithafree30-daysubscription.After
30days,youmustrenewthelicensetocontinuereceivingtheantivirussoftwareupdates.
48UserGuide
Page 65

Formoreinformationabouthowtouseyourantivirussoftware,refertothehelpinformationsystemof
yourantivirussoftware.
Chapter4.Security49
Page 66

50UserGuide
Page 67

Chapter5.Recoveryoverview
Thischapterprovidesinformationabouttherecoverysolutions.
•“RecoveryoverviewfortheWindows7operatingsystem”onpage51
•“RecoveryoverviewfortheWindows8operatingsystem”onpage56
RecoveryoverviewfortheWindows7operatingsystem
ThissectionprovidesinformationabouttherecoverysolutionsprovidedbyLenovoontheWindows7
operatingsystem.
Notes:
•Thereareavarietyofmethodstochoosefromwhenconsideringhowtorecoverintheeventofasoftwareorhardware-relatedproblem.Somemethodsvarydependingonthetypeofyouroperatingsystem.
•Theproductontherecoverymediamightbeusedonlyforthefollowingpurposes:
–Restoretheproductpreinstalledonyourcomputer
–Reinstalltheproduct
–ModifytheproductusingtheAdditionalFiles
Notes:Topreventpotentialperformancerisksorunexpectedbehaviorthatmightbecausedbythenew
harddiskdrivetechnology,itisrecommendedthatyouuseoneofthefollowingback-upsoftwareprograms:
•ThinkVantageRescueandRecoveryversion4.3orlater
•SymantecNortonGhostversion15orlater
Notes:Tousethisprogram,dothefollowing:
1.ClickStart➙Run.TheRunwindowopens.
2.Typecmdintheeld.ThenclickOK.
3.Typeghost-align=1mbandpressEnter.
•AcronisTrueImage2010orlater
•ParagonBackup&Recovery10Suitorlater,ParagonBackup&Recovery10Homeorlater
Creatingandusingarecoverymedia
Youcanuserecoverymediatorestoretheharddiskdrivetothefactorydefaultsettings.Recoverymedia
areusefulifyoutransferthecomputertoanotherarea,sellthecomputer,recyclethecomputer,orputthe
computerinanoperationalstateafterallothermethodsofrecoveryhavefailed.Asaprecautionarymeasure,
itisimportanttocreaterecoverymediaasearlyaspossible.
Note:Therecoveryoperationsyoucanperformusingrecoverymediavarydependingontheoperating
systemfromwhichtherecoverymediawerecreated.Therecoverymediamightcontainabootmedium
andadatamedium.YourMicrosoftWindowslicensepermitsyoutocreateonlyonedatamedium,soitis
importantthatyoustoretherecoverymediainasafeplaceafteryouhavemadethem.
Creatingrecoverymedia
Thissectionprovidesinstructionsonhowtocreaterecoverymedia.
Note:YoucancreaterecoverymediausingdiscsorexternalUSBstoragedevices.
©CopyrightLenovo2013
51
Page 68

Tocreaterecoverymedia,clickStart➙AllPrograms➙LenovoThinkVantageT ools➙FactoryRecovery
Disks.Then,followtheinstructionsonthescreen.
Usingrecoverymedia
Thissectionprovidesinstructionsonhowtouserecoverymedia.
•Youcanuserecoverymediatorestorethecomputertothefactorydefaultsettingsonly.Youcanuse
recoverymediatoputthecomputerinanoperationalstateafterallothermethodsofrecoveryhavefailed.
Attention:Whenyouuserecoverymediatorestorethecomputertothefactorydefaultsettings,allthe
lescurrentlyontheharddiskdrivewillbedeletedandreplacedbythefactorydefaultsettings.
Touserecoverymedia,dothefollowing:
1.Dependingonthetypeofyourrecoverymedia,connectthebootmedium(memorykeyorotherUSB
storagedevice)tothecomputer,orinsertthebootdiscintoanexternalopticaldrive.
2.RepeatedlypressandreleasetheF12keywhenturningonthecomputer.WhentheBootMenu
windowopens,releasetheF12key.
3.SelectthedesiredstartupdeviceandpressEnter.Therestoreprocessbegins.
4.Followtheinstructionsonthescreentocompletetheoperation.
Notes:
1.Afterrestoringyourcomputertothefactorydefaultsettings,youmighthavetoreinstalldevicedrivers
forsomedevices.See“Reinstallingpreinstalledprogramsanddevicedrivers”onpage55.
2.SomecomputerscomewithMicrosoftOfceorMicrosoftWorkspreinstalled.Ifyouneedtorecover
orreinstallyourMicrosoftOfceorMicrosoftWorksprograms,youmustusetheMicrosoftOfceCD
orMicrosoftWorksCD.ThesediscsareprovidedonlywithcomputerspreinstalledwithMicrosoft
OfceorMicrosoftWorks.
Performingbackupandrecoveryoperations
TheRescueandRecoveryprogramenablesyoutobackupallyourharddiskdrivecontentsincludingthe
operatingsystem,datales,softwareprograms,andpersonalsettings.Y oucandesignatewherethe
RescueandRecoveryprogramstoresthebackup:
•Inaprotectedareaofyourharddiskdrive
•Onthesecondaryharddiskdriveifasecondaryharddiskdriveisinstalledinyourcomputer
•OnanattachedexternalUSBharddiskdrive
•Onanetworkdrive
•Onrecordablediscs(arecordableopticaldriveisrequiredforthisoption)
Afteryouhavebackedupthecontentsontheharddiskdrive,youcanrestorethecompletecontentsofthe
harddiskdrive,restoreonlytheselectedles,orrestoreonlytheWindowsoperatingsystemandprograms.
Performingabackupoperation
ThissectionprovidesinstructionsonhowtoperformabackupoperationusingtheRescueandRecovery
program.
1.FromtheWindowsdesktop,clickStart➙AllPrograms➙LenovoThinkVantageTools➙Enhanced
BackupandRestore.TheRescueandRecoveryprogramopens.
2.IntheRescueandRecoverymainwindow,clicktheLaunchadvancedRescueandRecoveryarrow.
3.ClickBackupyourharddriveandselectbackupoperationoptions.Then,followtheinstructionson
thescreentocompletethebackupoperation.
52UserGuide
Page 69

Performingarecoveryoperation
ThissectionprovidesinstructionsonhowtoperformarecoveryoperationusingtheRescueandRecovery
program.
1.FromtheWindowsdesktop,clickStart➙AllPrograms➙LenovoThinkVantageTools➙Enhanced
BackupandRestore.TheRescueandRecoveryprogramopens.
2.IntheRescueandRecoveryprogrammainwindow,clicktheLaunchadvancedRescueandRecovery
arrow.
3.ClicktheRestoreyoursystemfromabackupicon.
4.Followtheinstructionsonthescreentocompletetherecoveryoperation.
FormoreinformationaboutperformingarecoveryoperationfromtheRescueandRecoveryworkspace,see
“UsingtheRescueandRecoveryworkspace”onpage53.
UsingtheRescueandRecoveryworkspace
TheRescueandRecoveryworkspaceresidesinaprotected,hiddenareaofyourharddiskdrivethat
operatesindependentlyfromtheWindowsoperatingsystem.Thisenablesyoutoperformrecovery
operationsevenifyoucannotstarttheWindowsoperatingsystem.Youcanperformthefollowingrecovery
operationsfromtheRescueandRecoveryworkspace:
•Rescuelesfromyourharddiskdriveorfromabackup
TheRescueandRecoveryworkspaceenablesyoutolocatelesonyourharddiskdriveandtransfer
themtoanetworkdriveorotherrecordablemedia,suchasaUSBdeviceoradisc.Thissolutionis
availableevenifyoudidnotbackupyourlesorifchangesweremadetothelessinceyourlastbackup
operation.YoualsocanrescueindividuallesfromaRescueandRecoverybackuplocatedonyourlocal
harddiskdrive,aUSBdevice,oranetworkdrive.
•RestoreyourharddiskdrivefromaRescueandRecoverybackup
IfyouhavebackedupyourharddiskdriveusingtheRescueandRecoveryprogram,youcanrestorethe
harddiskdrivefromaRescueandRecoverybackup,evenifyoucannotstarttheWindowsoperating
system.
•Restoreyourharddiskdrivetothefactorydefaultsettings
TheRescueandRecoveryworkspaceenablesyoutorestorethecompletecontentsofyourharddiskdrive
tothefactorydefaultsettings.Ifyouhavemultiplepartitionsonyourharddiskdrive,youhavetheoption
torestorethefactorydefaultsettingstotheC:partitionandleavetheotherpartitionsintact.Becausethe
RescueandRecoveryworkspaceoperatesindependentlyfromtheWindowsoperatingsystem,youcan
restorethefactorydefaultsettingsevenifyoucannotstarttheWindowsoperatingsystem.
Attention:IfyourestoretheharddiskdrivefromaRescueandRecoverybackuporrestoretheharddisk
drivetothefactorydefaultsettings,alllesontheprimaryharddiskdrivepartition(usuallydriveC:)willbe
deletedintherecoveryprocess.Ifpossible,makecopiesofimportantles.Ifyouareunabletostartthe
Windowsoperatingsystem,youcanusetherescuelesfeatureoftheRescueandRecoveryworkspaceto
copylesfromyourharddiskdrivetoothermedia.
TostarttheRescueandRecoveryworkspace,dothefollowing:
1.Makesurethatthecomputeristurnedoff.
2.RepeatedlypressandreleasetheF11keywhenturningonthecomputer.Whenyouhearbeepsor
seealogoscreen,releasetheF11key.
3.IfyouhavesetaRescueandRecoverypassword,typeyourpasswordwhenprompted.TheRescue
andRecoveryworkspaceopensafterashortdelay.
Note:IftheRescueandRecoveryworkspacefailstoopen,see“Solvingrecoveryproblems”onpage55
Chapter5.Recoveryoverview53
.
Page 70

4.Dooneofthefollowing:
•Torescuelesfromyourharddiskdriveorfromabackup,clickRescuelesandfollowthe
instructionsonthescreen.
•TorestoreyourharddiskdrivefromaRescueandRecoverybackuportorestoreyourharddiskdrive
tothefactorydefaultsettings,clickRestoreyoursystemandfollowtheinstructionsonthescreen.
FormoreinformationaboutthefeaturesoftheRescueandRecoveryworkspace,clickHelp.
Notes:
1.Afterrestoringyourharddiskdrivetothefactorydefaultsettings,youmighthavetoreinstalldevice
driversforsomedevices.See“Reinstallingpreinstalledprogramsanddevicedrivers”onpage55.
2.SomecomputerscomewithMicrosoftOfceorMicrosoftWorkspreinstalled.Ifyouneedtorecover
orreinstallyourMicrosoftOfceorMicrosoftWorksprograms,youmustusetheMicrosoftOfceCD
orMicrosoftWorksCD.ThesediscsareprovidedonlywithcomputerspreinstalledwithMicrosoft
OfceorMicrosoftWorks.
Creatingandusingarescuemedium
Witharescuemedium,suchasadiscoraUSBharddiskdrive,youcanrecoverthecomputerfromfailures
thatpreventyoufromgainingaccesstotheRescueandRecoveryworkspaceonyourharddiskdrive.
Notes:
1.Therecoveryoperationsyoucanperformusingarescuemediumvarydependingontheoperating
system.
2.Therescuedisccanbestartedinalltypesofopticaldrives.
Creatingarescuemedium
Thissectionprovidesinstructionsonhowtocreatearescuemedium.
1.FromtheWindowsdesktop,clickStart➙AllPrograms➙LenovoThinkVantageTools➙Enhanced
BackupandRestore.TheRescueandRecoveryprogramopens.
2.IntheRescueandRecoverymainwindow,clicktheLaunchadvancedRescueandRecoveryarrow.
3.ClicktheCreateRescueMediaicon.TheCreateRescueandRecoveryMediawindowopens.
4.IntheRescueMediaarea,selectthetypeoftherescuemediumyouwanttocreate.Youcancreatea
rescuemediumusingadisc,aUSBharddiskdrive,orasecondaryinternalharddiskdrive.
5.ClickOKandfollowtheinstructionsonthescreentocreatearescuemedium.
Usingarescuemedium
Thissectionprovidesinstructionsonhowtousetherescuemediumyouhavecreated.
•Ifyouhavecreatedarescuemediumusingadisc,usethefollowinginstructionstousetherescuemedium:
1.Turnoffyourcomputer.
2.RepeatedlypressandreleasetheF12keywhenturningonthecomputer.WhentheBootMenu
windowopens,releasetheF12key.
3.IntheBootMenuwindow,selectthedesiredopticaldriveastherstbootdevice.Then,insertthe
rescuediscintotheopticaldriveandpressEnter.Therescuemediumstarts.
•IfyouhavecreatedarescuemediumusingaUSBharddiskdrive,usethefollowinginstructionsto
usetherescuemedium:
1.AttachtheUSBharddiskdrivetooneoftheUSBconnectorsonyourcomputer.
2.RepeatedlypressandreleasetheF12keywhenturningonthecomputer.WhentheBootMenu
windowopens,releasetheF12key.
54UserGuide
Page 71

3.IntheBootMenuwindow,selecttheUSBharddiskdriveastherstbootdeviceandpressEnter.
Therescuemediumstarts.
Whentherescuemediumstarts,theRescueandRecoveryworkspaceopens.Thehelpinformationfor
eachfeatureisavailablefromtheRescueandRecoveryworkspace.Followtheinstructionstocomplete
therecoveryprocess.
Reinstallingpreinstalledprogramsanddevicedrivers
Yourcomputerhasprovisionsthatenableyoutoreinstallselectedfactory-installedprogramsanddevice
drivers.
Reinstallingpreinstalledprograms
Toreinstallselectedprograms,dothefollowing:
1.Turnonyourcomputer.
2.GototheC:\SWTOOLSdirectory.
3.OpentheAPPSfolder.Initareseveralsubfoldersnamedforthevariouspreinstalledprograms.
4.Openthesubfolderfortheprogramyouarereinstalling.
5.Double-clickSetup,andthenfollowtheon-screenstepstoreinstalltheprogram.
Reinstallingpreinstalleddevicedrivers
Attention:Whenyoureinstalldevicedrivers,youarechangingthecurrentcongurationofyourcomputer.
Reinstalldevicedriversonlywhenitisnecessarytocorrectaproblemwithyourcomputer.
Toreinstalladevicedriverforafactory-installeddevice,dothefollowing:
1.Turnonyourcomputer.
2.GototheC:\SWTOOLSdirectory.
3.OpentheDRIVERSfolder.WithintheDRIVERSfolderareseveralsubfoldersnamedforthevarious
devicesinstalledinyourcomputer(forexample,AUDIOandVIDEO).
4.Openthesubfolderforthedevice.
5.Reinstallthedevicedriverbyoneofthefollowingmethods:
•Inthesubfolderforthedevice,lookforatextle(alewiththeextension.txt).Thetextlecontains
informationonhowtoreinstallthatdevicedriver.
•Ifthesubfolderforthedevicecontainsaleofsetupinformation(alewiththeextension.inf),you
canusetheAddNewHardwareprogram(intheWindowsControlPanel)toreinstallthedevicedriver.
Notalldevicedriverscanbereinstalledbyuseofthisprogram.IntheAddNewHardwareprogram,
whenpromptedforthedevicedriveryouwanttoinstall,clickHaveDiskandBrowse.Thenselect
thedevicedriverlefromthedevicesubfolder.
•Inthesubfolderforthedevice,lookfortheexecutablele(alewiththeextension.exe).Double-click
thele,andfollowtheinstructionsonthescreen.
Attention:Ifyouneedupdateddevicedrivers,donotdownloadthemfromtheWindowsUpdateWebsite.
ObtainthemfromLenovo.Formoreinformation,see“Makingsuredevicedriversarecurrent”onpage110.
Solvingrecoveryproblems
IfyouareunabletoaccesstheRescueandRecoveryworkspaceortheWindowsenvironment,doone
ofthefollowing:
•UsearescuemediumtostarttheRescueandRecoveryworkspace.See“Creatingandusingarescue
medium”onpage54.
Chapter5.Recoveryoverview55
Page 72

•Userecoverymediaifallothermethodsofrecoveryhavefailedandyouneedtorestoretheharddisk
drivetothefactorydefaultsettings.See“Creatingandusingarecoverymedia”onpage51.
Note:IfyouareunabletoaccesstheRescueandRecoveryworkspaceortheWindowsenvironmentfroma
rescuemediumorrecoverymedia,youmightnothavetherescuedevice(aninternalharddiskdrive,adisc,
aUSBharddiskdrive,orotherexternaldevices)setastherstbootdeviceinthestartupdevicesequence.
Youmustrstensurethatyourrescuedeviceissetastherstbootdeviceinthestartupdevicesequencein
theThinkPadSetupprogram.See“Startupmenu”onpage103
permanentlychangingthestartupdevicesequence.
Itisimportanttocreatearescuemediumandasetofrecoverymediaasearlyaspossibleandstorethem
inasafeplaceforfutureuse.
fordetailedinformationabouttemporarilyor
RecoveryoverviewfortheWindows8operatingsystem
ThissectionprovidesinformationabouttherecoverysolutionsprovidedbyWindows8operatingsystem.
Refreshingyourcomputer
Ifyourcomputerdoesnotperformwellandtheproblemmightbecausedbyarecentlyinstalledprogram,
youcanrefreshyourcomputerwithoutlosingyourpersonallesorchangingyoursettings.
Attention:Ifyourefreshyourcomputer,theprogramsthatcamewithyourcomputerandtheprogramsthat
youinstalledfromWindowsStorewillbereinstalled,butallotherprogramswillberemoved.
Torefreshyourcomputer,dothefollowing:
1.Swipeinfromtherightedgeofthescreentodisplaythecharms.
2.TaptheSettingscharm.
3.TapChangePCsettings.
4.TapGeneral.
5.IntheRefreshyourPCwithoutaffectingyourlessection,clickGetstarted.
Resettingyourcomputertothefactorydefaultsettings
Youcanresetyourcomputertothefactorydefaultsettings.Resettingthecomputerwillreinstallthe
operatingsystem,andreinstallalltheprogramsandsettingsthatcamewithyourcomputer.
Attention:Ifyouresetyourcomputer,allyourpersonallesandsettingswillbedeleted.Toavoiddataloss,
makeabackupcopyofallthedatathatyouwanttokeep.
Toresetyourcomputer,dothefollowing:
1.Moveyourcursortothebottom-rightcornerofthescreentodisplaythecharms.ClickSettings➙
ChangePCsettings➙General.
2.IntheRemoveeverythingandreinstallWindowssection,clickGetstarted.
Advancedstartupoptions
AdvancedstartupoptionsenableyoutochangethestartupsettingsofyourWindowsoperatingsystem,
startthecomputerfromanexternaldevice,orrestoretheWindowsoperatingsystemfromasystemimage.
Tousetheadvancedstartupoptions,dothefollowing:
1.Moveyourcursortothebottom-rightcornerofthescreentodisplaythecharms.ClickSettings➙
ChangePCsettings➙General.
56UserGuide
Page 73

2.IntheAdvancedstartupsection,clickRestartnow➙T roubleshoot➙Advancedoptions.
3.Restartyourcomputerfollowingtheinstructionsonthescreen.
FormoredetailsabouttherecoverysolutionsprovidedoncomputerspreinstalledwiththeWindows8
operatingsystem,refertothehelpinformationsystemoftheWindows8operatingsystem.
Chapter5.Recoveryoverview57
Page 74

58UserGuide
Page 75

Chapter6.Replacingdevices
Thischaptercontainsthefollowingitems:
•“Staticelectricityprevention”onpage59
•“Disablingthebuilt-inbattery”onpage59
•“InstallingorreplacingtheSIMcard”onpage60
•“Replacingthebasecoverassembly”onpage61
•“Replacingtheharddiskdriveorsolid-statedrive”onpage62
•“Replacingamemorymodule”onpage64
•“ReplacinganM.2wirelessLANcard”onpage65
•“ReplacinganM.2wirelessWANcard”onpage68
•“Replacingthebackupbattery”onpage71
•“Replacingthekeyboard”onpage72
Staticelectricityprevention
Staticelectricity,althoughharmlesstoyou,canseriouslydamagecomputercomponentsandoptions.
Improperhandlingofstatic-sensitivepartscancausedamagetothepart.Whenyouunpackanoptionor
aCRU,donotopenthestatic-protectivepackagethatcontainsthepartuntiltheinstructionsdirectyou
toinstallthepart.
WhenyouhandleoptionsorCRUs,orperformanyworkinsidethecomputer,takethefollowingprecautions
toavoidstatic-electricitydamage:
•Limityourmovement.Movementcancausestaticelectricitytobuilduparoundyou.
•Alwayshandlecomponentscarefully.Handleadapters,memorymodules,andothercircuitboardsbythe
edges.Nevertouchexposedcircuitry.
•Preventothersfromtouchingcomponents.
•Whenyouinstallastatic-sensitiveoptionorCRU,touchthestatic-protectivepackagethatcontainsthe
parttoametalexpansion-slotcoverorotherunpaintedmetalsurfaceonthecomputerforatleasttwo
seconds.Thisreducesstaticelectricityinthepackageandyourbody.
•Whenpossible,removethestatic-sensitivepartfromthestatic-protectivepackagingandinstallthepart
withoutsettingitdown.Whenthisisnotpossible,placethestatic-protectivepackageonasmooth,
levelsurfaceandplacethepartonthepackage.
•Donotplacethepartonthecomputercoverorothermetalsurface.
Disablingthebuilt-inbattery
Beforereplacinganydevices,ensurethatyouhavedisabledthebuilt-inbatterybydoingthefollowing:
1.Turnoffyourcomputeranddisconnecttheacpoweradapterandallcablesfromthecomputer.
2.Turnonyourcomputer.PressF1toenterThinkPadSetupwhentheThinkPadlogoappears.
3.SelectCong➙Power.ThePowersubmenuisdisplayed.
4.SelectDisableBuilt-inBattery.
5.SelectY esintheSetupWarningwindow.Thenthecomputerwillturnoffautomatically.Waitthreeto
veminutestoletthecomputercool.Thenthebuilt-inbatteryisdisabled.
©CopyrightLenovo2013
59
Page 76

InstallingorreplacingtheSIMcard
Beforeyoustart,printtheseinstructions.
YourcomputermightrequireaSIMcardtoestablishawirelessWANconnection.Dependingonthecountry
ofdelivery,youmightneedtopurchaseaSIMcard,oraSIMcardmightalreadybeinstalledinyour
computer,ortheSIMcardispartoftheshippingcontentsthatcomewithyourcomputer.
ToinstallorreplacetheSIMcard,dothefollowing:
1.Disablethebuilt-inbattery.See“Disablingthebuilt-inbattery”onpage59.
2.Closethecomputerdisplay.
3.InsertastraightenedpaperclipintotheholeontheSIMcardtray1.TheSIMcardejects2.Then,slide
theSIMcardtrayoutofthecomputer.
60UserGuide
Page 77

4.IftherealreadyisaSIMcardinthetray,removetheSIMcard.
5.CarefullyinstallanewSIMcardintothetray.
6.InserttheSIMcardtraybackintothecomputer.
7.Connecttheacpoweradapterandallcables.
Replacingthebasecoverassembly
Beforeyoustart,printtheseinstructions.
Toreplacethebasecoverassembly,dothefollowing:
1.Disablethebuilt-inbattery.See“Disablingthebuilt-inbattery”onpage59.
2.Closethecomputerdisplay,andturnthecomputerover.
3.Loosenthe8screws1thatsecurethebasecoverassembly.Thenremovethebasecoverassembly2.
Chapter6.Replacingdevices61
Page 78

4.Reinstallthenewbasecoverassemblyandtightenthescrews.
5.Turnthecomputeroveragain.Connecttheacpoweradapterandallcables.
Replacingtheharddiskdriveorsolid-statedrive
Beforeyoustart,printtheseinstructions.
Attention:Theharddiskdriveorsolid-statedriveisverysensitive.Incorrecthandlingcancausedamage
andpermanentlossofdata.Observethefollowingguidelines:
•Replacetheharddiskdriveorsolid-statedriveonlyifyouupgradeitorhaveitrepaired.Theconnectors
andslotoftheharddiskdriveorsolid-statedrivearenotdesignedforfrequentchanges,orreplacement.
•Donotdroptheharddiskorsolid-statedriveorsubjectittophysicalshocks.Puttheharddiskdriveor
solid-statedriveonamaterial,suchassoftcloth,thatabsorbsanyphysicalshocks.
•Donotapplypressuretothecoveroftheharddiskdriveorsolid-statedrive.
•Donottouchtheconnector.
•Beforeremovingtheharddiskdriveorsolid-statedrive,makeabackupcopyofalltheinformation
onit,andthenturnoffthecomputer.
•Neverremovetheharddiskdriveorsolid-statedrivewhilethecomputerisoperating,insleepmode,
orinhibernationmode.
Toreplacetheharddiskdriveorsolid-statedrive,dothefollowing:
62UserGuide
Page 79

1.Disablethebuilt-inbattery.See“Disablingthebuilt-inbattery”onpage59.
2.Closethecomputerdisplay,andturnthecomputerover.
3.Removethebasecoverassembly.See“Replacingthebasecoverassembly”onpage61.
4.Removethescrewthatsecurestheharddiskdriveorsolid-statedrive.
5.Removetheharddiskdriveorsolid-statedrivewithbracket.
6.Removethebracketoftheharddiskdriveorsolid-statedrive.
Chapter6.Replacingdevices63
Page 80

7.Installthenewharddiskdriveorsolid-statedrivewithbracket.
8.Installthescrewtosecuretheharddiskdriveorsolid-statedrive.
9.Turnthecomputeroveragain.Connecttheacpoweradapterandallcables.
Replacingamemorymodule
Beforeyoustart,printtheseinstructions.
Increasingmemorycapacityisaneffectivewaytomakeprogramsrunfaster.Y oucanincreasememory
capacitybyreplacingoraddingamemorymodule.
Note:Theoperatingspeedofthememorymodulehasdependencyonthesystemconguration.Insome
conditions,thememorymoduleinyourcomputermightnotbeabletooperateatthemaximumspeed.
Attention:Beforeyoustartinstallingamemorymodule,touchametaltableoragroundedmetalobject.This
actionreducesanystaticelectricityfromyourbody.Staticelectricitycoulddamagethememorymodule.
Toreplaceamemorymodule,dothefollowing:
1.Disablethebuilt-inbattery.See“Disablingthebuilt-inbattery”onpage59.
2.Closethecomputerdisplay,andturnthecomputerover.
3.Removethebasecoverassembly.See“Replacingthebasecoverassembly”onpage61.
64UserGuide
Page 81

4.Ifamemorymodulealreadyisinstalledinthememoryslot,youneedtoremoveitrst.Pressouton
thelatchesonbothedgesoftheslotatthesametime1,andthenremovethememorymodule2.
Savetheremovedmemorymoduleforfutureuse.
5.Placethenotchedendofthenewmemorymoduletowardthecontactedgesideofthememoryslot,
andinsertthememorymodule1intotheslotatanangleofabout20degrees.Pivotthememory
moduledownwarduntilitsnapsintoplace2.Ensurethatthememorymoduleisrmlyinstalledin
theslotandcannotbemovedeasily.
Attention:Donottouchthecontactedgeofthememorymodule.Otherwisethememorymodule
mightbedamaged.
6.Reinstallthebasecoverassembly.See“Replacingthebasecoverassembly”onpage61.
7.Turnthecomputeroveragain.Connecttheacpoweradapterandallcables.
ReplacinganM.2wirelessLANcard
Beforeyoustart,printtheseinstructions.
DANGER
Duringelectricalstorms,donotconnectthecabletoordisconnectitfromthetelephoneoutlet
onthewall.
Chapter6.Replacingdevices65
Page 82

DANGER
Electriccurrentfrompower,telephone,andcommunicationcablesishazardous.Toavoidshock
hazard,disconnectthecablesbeforeopeningthecoverofthisslot.
Attention:BeforeyoustartinstallinganM.2wirelessLANcard,touchametaltableoragroundedmetal
object.Thisactionreducesanystaticelectricityfromyourbody.Staticelectricitycoulddamagethecard.
ToreplacetheM.2wirelessLANcard,dothefollowing:
1.Disablethebuilt-inbattery.See“Disablingthebuilt-inbattery”onpage59.
2.Closethecomputerdisplay,andturnthecomputerover.
3.Removethebasecoverassembly.See“Replacingthebasecoverassembly”onpage61.
4.Ifatoolisprovidedwiththenewcardtohelpyoudisconnectcables,usethetooltodisconnectthe
cablesfromtheoldcard.Ifnosuchatoolisprovided,holdthecableconnectorwithyourngersand
gentlydisconnecteachcablefromtheoldcard.
5.Removethescrew1.Thecardisreleasedfromthesecuredpositionandpivotsupward2.
66UserGuide
Page 83

6.CarefullyremovethewirelessLANcardoutoftheslot.
7.AlignthenotchededgeofthenewwirelessLANcardwiththekeyintheslot.Thencarefullyinsert
thecardintotheslot.
8.PivotthenewwirelessLANcarddownward1andtheninstallthescrewtosecurethecardinplace2.
Chapter6.Replacingdevices67
Page 84

9.ConnecttheantennacablestothenewwirelessLANcard.Ensurethatyouattachthegraycabletothe
mainconnectoronthecard,andtheblackcabletotheauxiliaryconnectoronthecard.
10.Reinstallthebasecoverassembly.See“Replacingthebasecoverassembly”onpage61.
11.Turnthecomputeroveragain.Connecttheacpoweradapterandallcables.
ReplacinganM.2wirelessWANcard
Beforeyoustart,printtheseinstructions.
DANGER
Duringelectricalstorms,donotconnectthecabletoordisconnectitfromthetelephoneoutlet
onthewall.
DANGER
Electriccurrentfrompower,telephone,andcommunicationcablesishazardous.Toavoidshock
hazard,disconnectthecablesbeforeopeningthecoverofthisslot.
Attention:BeforeyoustartinstallinganM.2wirelessWANcard,touchametaltableoragroundedmetal
object.Thisactionreducesanystaticelectricityfromyourbody.Staticelectricitycoulddamagethecard.
SomecomputersmightcomewithanM.2wirelessWANcard.T oreplacethewirelessWANcard,do
thefollowing:
1.Disablethebuilt-inbattery.See“Disablingthebuilt-inbattery”onpage59.
2.Closethecomputerdisplay,andturnthecomputerover.
3.Removethebasecoverassembly.See“Replacingthebasecoverassembly”onpage61.
68UserGuide
Page 85

4.Ifatoolisprovidedwiththenewcardtohelpyoudisconnectcables,usethetooltodisconnectthe
cablesfromtheoldcard.Ifnosuchatoolisprovided,holdthecableconnectorwithyourngersand
gentlydisconnecteachcablefromtheoldcard.
Note:Dependingonthesystemcongurationofyourcomputer,thecardmighthaveonlyoneconnector.
5.Removethescrew1.Thecardisreleasedfromthesecuredpositionandpivotsupward2.
6.CarefullyremovethewirelessWANcardoutoftheslot.
Chapter6.Replacingdevices69
Page 86

7.AlignthenotchededgeofthenewwirelessWANcardwiththekeyintheslot.Thencarefullyinsert
thecardintotheslot.
8.PivotthenewwirelessWANcarddownward1andtheninstallthescrewtosecurethecardinplace2.
9.ConnecttheantennacablestothenewwirelessWANcard.Ensurethatyouconnecttheredcableto
themainconnectoronthecard,andthebluecabletotheauxiliaryconnectoronthecard.
10.Reinstallthebasecoverassembly.See“Replacingthebasecoverassembly”onpage61.
11.Turnthecomputeroveragain.Connecttheacpoweradapterandallcables.
70UserGuide
Page 87

Replacingthebackupbattery
Beforeyoustart,printtheseinstructions.
DANGER
Ifthebackupbatteryisincorrectlyreplaced,thereisdangerofanexplosion.Thebackupbattery
containsasmallamountofharmfulsubstances.T oavoidpossibleinjury:
•ReplaceonlywithabatteryofthetyperecommendedbyLenovo.
•Keepthebatterypackawayfromre.
•Donotexposeittoexcessiveheat.
•Donotexposeittowaterorrain.
•Donotshort-circuitit.
•Donotdrop,crush,puncture,orsubjecttostrongforces.Batteryabuseormishandlingcan
causethebatterytooverheat,whichcancausegassesorameto“vent”fromthebattery
packorcoincell.
Toreplacethebackupbattery,dothefollowing:
1.Disablethebuilt-inbattery.See“Disablingthebuilt-inbattery”onpage59.
2.Closethecomputerdisplay,andturnthecomputerover.
3.Removethebasecoverassembly.See“Replacingthebasecoverassembly”onpage61.
4.Detachtheconnector1,andthenremovethebackupbattery2.
Chapter6.Replacingdevices71
Page 88

5.Installthenewbackupbattery1,andthenattachtheconnector2.
6.Reinstallthebasecoverassembly.See“Replacingthebasecoverassembly”onpage61.
7.Turnthecomputeroveragain.Connecttheacpoweradapterandallcables.
Replacingthekeyboard
Beforeyoustart,printtheseinstructions.
DANGER
Duringelectricalstorms,donotconnectthecabletoordisconnectitfromthetelephoneoutlet
onthewall.
DANGER
Electriccurrentfrompower,telephone,andcommunicationcablesishazardous.Toavoidshock
hazard,disconnectthecablesbeforeopeningthecoverofthisslot.
Toremovethekeyboard,dothefollowing:
1.Disablethebuilt-inbattery.See“Disablingthebuilt-inbattery”onpage59.
2.Findthekeyboardmulti-toolintheshippingpackageofthenewkeyboard.
72UserGuide
Page 89

3.Torevealthescrewheadsbeneaththekeyboardframe,slidethekeyboardframeforwardby2.5mm
(0.1inch)withthekeyboardmulti-tool.
Note:Donotpressandholdthekeyswhileslidingthekeyboardframe,otherwisethekeyboardframe
cannotbemoved.
4.Loosenthescrewsthatsecurethekeyboardwiththekeyboardmulti-tool.
5.Pivotthekeyboardslightlyupwardasshownbythearrow1untilyoucanseetheconnectorsonthe
bottomsideofthekeyboard.Thenturnoverthekeyboardasshownbythearrow2.
Chapter6.Replacingdevices73
Page 90

6.Putthekeyboardonthepalmrestanddetachtheconnectors.Thenremovethekeyboard.
Toinstallthenewkeyboard,dothefollowing:
1.Attachtheconnectorsandthenturnoverthekeyboard.
74UserGuide
Page 91

2.Insertthekeyboardintothekeyboardbezelasshown.Ensurethatthefrontedgeofthekeyboardis
undertheframeofthekeyboardbezel.
3.Ensurethatthescrewheadsareexposedcompletely.Otherwise,revealthescrewheadsbyslidingthe
keyboardframeforwardwiththekeyboardmulti-tool.
Chapter6.Replacingdevices75
Page 92

4.Tightenthescrewswiththekeyboardmulti-tooltosecurethekeyboardinplace.
5.Slidethekeyboardframebackwardby2.5mm(0.1inch)withthekeyboardmulti-tool.Hidethelatches
ofthekeyboardframeunderthekeyboardbezelbypushingthelatcheswithyourngerasshown.
Note:Donotpressandholdthekeyswhileslidingthekeyboardframe,otherwisethekeyboardframe
cannotbemoved.
6.Adjustthekeyboardframeinplacewiththekeyboardmulti-toolandensurethatallthelatchesare
securedunderthekeyboardbezel.
Note:Donotpressandholdthekeyswhileslidingthekeyboardframe,otherwisethekeyboardframe
cannotbemoved.
76UserGuide
Page 93

7.Turnthecomputeroveragain.Connecttheacpoweradapterandallcables.
Chapter6.Replacingdevices77
Page 94

78UserGuide
Page 95

Chapter7.Enhancingyourcomputer
Thissectionprovidesinformationoninstallingdevicesandtakingadvantageofyourcomputer's
high-technologyfeatures.
•“FindingThinkPadoptions”onpage135
•“ThinkPadportreplicatorsanddockingstations”onpage79
FindingThinkPadoptions
Ifyouwanttoexpandthecapabilitiesofyourcomputer,Lenovohasanumberofhardwareaccessories
andupgradestomeetyourneeds.Optionsincludememorymodules,storagedevices,networkcards,port
replicators,batteries,poweradapters,printers,scanners,keyboards,mice,andmore.
YoucanshopatLenovo24hoursaday,7daysaweekdirectlyovertheWorldWideWeb.Allyouneedisan
Internetconnectionandacreditcard.
ToshopatLenovo,goto:
http://www.lenovo.com/accessories/services/index.html
ThinkPadportreplicatorsanddockingstations
Dependingonthemodel,yourcomputermightsupportthefollowingportreplicatorsordockingstations:
•ThinkPadPortReplicatorSeries3
•ThinkPadPortReplicatorSeries3withUSB3.0
•ThinkPadMiniDockSeries3
•ThinkPadMiniDockSeries3withUSB3.0
•ThinkPadMiniDockPlusSeries3
•ThinkPadMiniDockPlusSeries3withUSB3.0
Attachyourcomputertooneoftheportreplicatorsordockingstationstoexpandtheworkingcapability.
Whenthecomputerisattachedtoaportreplicatorordockingstation,neverpickuptheassemblybytaking
holdofthecomputeralone.Alwaysholdthewholeassembly.
©CopyrightLenovo2013
79
Page 96

Frontview
ThinkPadPortReplicatorSeries3andThinkPadPortReplicatorSeries3withUSB3.0
1Powerbutton:Pressthepowerbuttontoturnthecomputeronoroff.
2Ejectbutton:Presstheejectbuttontoreleasethecomputerfromtheportreplicator.
3Slidingadjuster:Usetheslidingadjusterasaguidetoalignthedockingstationconnectoronyour
computerasyouattachtheportreplicator.
4Dockingstationconnector:Thisiswhereyouattachyourcomputer.
ThinkPadMiniDockSeries3andThinkPadMiniDockSeries3withUSB3.0
1Powerbutton:Pressthepowerbuttontoturnthecomputeronoroff.
2Keylockindicator:Thisindicatorlightswhenthesystemlockkeyisinthelockedposition.Whenthe
systemlockkeyisinthelockedposition,theejectbuttonofthedockingstationislocked;youcannot
attachorremoveyourcomputer.
3Dockingstationindicator:Thisindicatorlightswhenyourcomputerisdocked.
80UserGuide
Page 97

4Ejectbutton:Presstheejectbuttontoreleasethecomputerfromthedockingstation.
5Slidingadjuster:Usetheslidingadjusterasaguidetoalignthedockingstationconnectoronyour
computerasyouattachthedockingstation.
6Dockingstationconnector:Thisiswhereyouattachyourcomputer.
7Systemlockkey:Usethesystemlockkeytolocktheejectbutton.Whentheejectbuttonislocked,you
cannotattachorremoveyourcomputer.
ThinkPadMiniDockPlusSeries3andThinkPadMiniDockPlusSeries3withUSB3.0
1Powerbutton:Pressthepowerbuttontoturnthecomputeronoroff.
2Keylockindicator:Thisindicatorlightswhenthesystemlockkeyisinthelockedposition.Whenthe
systemlockkeyisinthelockedposition,theejectbuttonofthedockingstationislocked;youcannot
attachorremoveyourcomputer.
3Dockingstationindicator:Thisindicatorlightswhenyourcomputerisdocked.
4Ejectbutton:Presstheejectbuttontoreleasethecomputerfromthedockingstation.
5Slidingadjuster:Usetheslidingadjusterasaguidetoalignthedockingstationconnectoronyour
computerasyouattachthedockingstation.
6Dockingstationconnector:Thisiswhereyouattachyourcomputer.
7Systemlockkey:Usethesystemlockkeytolocktheejectbutton.Whentheejectbuttonislocked,you
cannotattachorremoveyourcomputer.
8Microphonejack:3.5mm(1/8inch)indiameter.Useittoconnectanexternalmicrophone.
9Headphonejack:3.5mm(1/8inch)indiameter.Useittoconnectanexternalheadphone.
Chapter7.Enhancingyourcomputer81
Page 98

Rearview
ThinkPadPortReplicatorSeries3andThinkPadPortReplicatorSeries3withUSB3.0
1powerconnector:Connecttheacpoweradapter.
2Ethernetconnector:ConnecttheportreplicatortoanEthernetLAN.Theindicatorontheconnector
isthesameasthatonthecomputer.
3USB2.0connectors:ConnectUSB2.0compatibledevices.
4USB2.0connector(ontheThinkPadPortReplicatorSeries3)orUSB3.0connector(ontheThinkPad
PortReplicatorSeries3withUSB3.0):ConnectcompatibleUSBdevices.
5Externalmonitorconnector:Connectanexternalmonitor.
6Securitykeyhole:Useasecuritycablelockthattsthiskeyholetolockyourportreplicatortoa
stationaryobjecttoprotectitfromtheft.
ThinkPadMiniDockSeries3andThinkPadMiniDockSeries3withUSB3.0
1powerconnector:Connecttheacpoweradapter.
82UserGuide
Page 99

2DisplayPortconnector:Connectadisplaydevice.
3DVIconnector:ConnectamonitorthatsupportsSingle-LinkDVI.
Note:TheDVIconnectorprovidesadigitalinterfaceonly.Thisconnectorcanonlybeusedwithacomputer
thatsupportsDVIconnectionestablishedthroughdockingstations.
4Headphonejack:3.5mm(1/8inch)indiameter.Useittoconnectanexternalheadphone.
5Microphonejack:3.5mm(1/8inch)indiameter.Useittoconnectanexternalmicrophone.
6Ethernetconnector:ConnecttheportreplicatortoanEthernetLAN.Theindicatorontheconnector
isthesameasthatonthecomputer.
7USB2.0connectors:ConnectUSB2.0compatibledevices.
8USB2.0connector(ontheThinkPadMiniDockSeries3)orUSB3.0connector(ontheThinkPadMini
DockSeries3withUSB3.0):ConnectcompatibleUSBdevices.
9Externalmonitorconnector:Connectanexternalmonitor.
10Securitykeyhole:Useasecuritycablelockthattsthiskeyholetolockyourportreplicatortoa
stationaryobjecttoprotectitfromtheft.
ThinkPadMiniDockPlusSeries3andThinkPadMiniDockPlusSeries3withUSB3.0
13DisplayPortconnector:Connectadisplaydevice.
24DVIconnector:ConnectamonitorthatsupportsSingle-LinkDVI.
Note:TheDVIconnectorprovidesadigitalinterfaceonly.Thisconnectorcanonlybeusedwithacomputer
thatsupportsDVIconnectionestablishedthroughdockingstations.
5Ethernetconnector:ConnecttheportreplicatortoanEthernetLAN.Theindicatorontheconnector
isthesameasthatonthecomputer.
6USB2.0connectors:ConnectUSB2.0compatibledevices.
7powerconnector:Connecttheacpoweradapter.
Chapter7.Enhancingyourcomputer83
Page 100

Note:FortheThinkPadMiniDockPlusSeries3(170W)andThinkPadMiniDockPlusSeries3withUSB
3.0(170W),usetheacpoweradaptershippedwithyourcomputer.
8eSATAconnectororUSB3.0connector:FortheThinkPadMiniDockPlusSeries3,thisisaneSATA
connectorforconnectinganeSATAdevice.FortheThinkPadMiniDockPlusSeries3withUSB3.0,thisisa
USB3.0connectorforconnectingaUSBcompatibledevice.
9Externalmonitorconnector:Connectanexternalmonitor.
10Securitykeyhole:Useasecuritycablelockthattsthiskeyholetolockyourportreplicatortoa
stationaryobjecttoprotectitfromtheft.
Note:IfyouattachyourcomputertoaportreplicatorordockingstationanduseanEthernetconnectoror
anexternalmonitorconnector,usetheEthernetconnectorortheexternalmonitorconnectorontheport
replicatorordockingstation,nottheoneonthecomputer.
AttachingaThinkPadportreplicatorordockingstation
ToattachyourcomputertoasupportedThinkPadportreplicatorordockingstation,dothefollowing:
Notes:
•BeforeyouattachthecomputertoasupportedThinkPadportreplicatorordockingstation,disconnect
theacpoweradapterfromthecomputer.
•Ifyourcomputerisoperating,makesurethatithasnishedanyoperationsinvolvingdevicesthatare
connectedtoaUSBconnector.AlsomakesurethatanyconnectiontoanEthernetconnectorhas
beendisconnected.
•ThefollowingillustrationsarefortheThinkPadMiniDockSeries3.Theprocedureisthesameforother
dockingstations.Forportreplicators,startwithstep2.
1.Makesurethatthesystemlockkeyisinplaceandintheunlocked(horizontal)position.
2.AttachtheSeries3DockAdaptertothedockingstation.
84UserGuide
 Loading...