

Page 1

ThinkCentre
HardwareMaintenanceManual
MachineTypes:1732,1734,1736,7074,7075,7077,7078,7556,
and7559
Page 2

Page 3

ThinkCentre
HardwareMaintenanceManual
MachineTypes:1732,1734,1736,7074,7075,7077,7078,7556,
and7559
Page 4

Note:Beforeusingthisinformationandtheproductitsupports,besuretoreadandunderstandthe
ThinkCentreEdgeSafetyandWarrantyGuideandAppendixA“Notices”onpage221.
FourthEdition(November2011)
©CopyrightLenovo2011.
LIMITEDANDRESTRICTEDRIGHTSNOTICE:IfdataorsoftwarearedeliveredpursuantaGeneralServices
Administration“GSA”contract,use,reproduction,ordisclosureissubjecttorestrictionssetforthinContractNo.
GS-35F-05925.
Page 5

Contents
Chapter1.Aboutthismanual......1
ImportantSafetyInformation..........1
Chapter2.Safetyinformation......3
Generalsafety................3
Electricalsafety...............3
Safetyinspectionguide............5
Handlingelectrostaticdischarge-sensitive
devices..................5
Groundingrequirements............6
Safetynotices(multi-lingualtranslations).....6
Chapter3.Generalinformation....29
LenovoThinkVantageT ools.........29
LenovoWelcome..............29
LenovoThinkVantageT oolbox........29
LenovoSolutionCenter...........29
SimpleTap................30
Additionalinformationresources.......30
Specications...............31
Chapter4.GeneralCheckout.....33
Problemdeterminationtips..........33
Chapter5.Troubleshootingand
diagnostics..............35
Basictroubleshooting............35
Troubleshootingprocedure..........36
Troubleshooting..............37
Audioproblems............37
CDproblems.............38
DVDproblems.............39
Intermittentproblems..........41
Keyboard,mouse,orpointingdevice
problems...............41
Monitorproblems............43
Networkingproblems..........44
Optionproblems............47
Performanceandlockupproblems.....48
Printerproblems............49
Serialportproblems...........49
Softwareproblems...........50
USBproblems.............51
Diagnostics................51
LenovoThinkVantageT oolbox.......51
LenovoSolutionCenter.........52
PC-DoctorforDOS...........52
Chapter6.UsingtheSetupUtility
program................57
StartingtheSetupUtilityprogram.......57
Viewingandchangingsettings........57
Usingpasswords..............57
Passwordconsiderations.........57
Power-OnPassword..........58
HardDiskPassword...........58
AdministratorPassword.........58
Setting,changing,anddeletingapassword.58
Enablingordisablingadevice........58
Selectingastartupdevice..........59
Selectingatemporarystartupdevice....59
Selectingorchangingthestartupdevice
sequence...............59
ExitingfromtheSetupUtilityprogram.....59
Chapter7.Symptom-to-FRUIndex..61
Harddiskdrivebooterror..........61
PowerSupplyProblems...........61
Diagnosticerrorcodes...........62
Beepsymptoms..............79
POSTerrorcodes.............79
Miscellaneouserrorconditions........80
Undeterminedproblems...........82
Chapter8.ReplacingFRUs......83
Locatingconnectors,controls,andindicatorson
thefrontofyourcomputer..........83
Usingyourcomputerinmonitormode...85
Locatingconnectorsontherearofyour
computer.................85
FRUlocations...............86
Systemboardpartsandconnectors......88
Removingandreinstallingthesystemstandhinge
cover..................88
Removingandreinstallingthesystemstand...90
Removingandreinstallingthefootstands....92
Removingthecomputercover........95
Replacingtheharddiskdrive.........95
Replacingtheopticaldrive..........97
RemovingtheVESAmountbracket......99
ReplacingtherearI/Oassembly........100
Removingandreinstallingthesystemboard
shield..................102
Removingandreinstallingthesystemfan....103
Replacingthepowersupply.........104
Replacingthemicroprocessorfan.......106
©CopyrightLenovo2011
iii
Page 6

Replacingtheheatsinkassembly.......107
Replacingthemicroprocessor........108
Replacingthecardreader..........111
Openingthesystemboardshieldwindow....112
Replacingthebattery............113
Installingorreplacingamemorymodule....114
Replacingtheinternalspeakers........116
Replacingtheintegratedcamera.......117
Replacingthesystemboard.........118
ReplacingtheLCDpanel...........120
Panelcomponentrelationships......125
ReplacingtheWI-FIcard...........125
Completingthepartsreplacement.......127
Chapter9.FRUlists.........129
Overall:MT1732,1734,1736,7074,7075,7077,
7078,7556,and7559............129
MechanicalFRUs.............144
KeyboardandMouse............150
AdaptersandmiscellaneousFRUs.......182
PowerCords...............183
Windows7HomeBasic32RecoveryCD....192
Windows7HomePremium32RecoveryCD...194
Windows7HomePremium64RecoveryCD...198
Windows7Professional32RecoveryCD....204
Windows7Professional64RecoveryCD....208
Windows7starter32RecoveryCD......214
Chapter10.AdditionalService
Information.............217
Securityfeatures..............217
HardwarecontrolledPasswords......217
Operatingsystempassword.......217
Vitalproductdata............217
BIOSlevels................217
Flashupdateprocedures..........217
Updating(ashing)theBIOSfromadisc....217
Updating(ashing)theBIOSfromyouroperating
system..................218
RecoveringfromaPOST/BIOSupdatefailure..218
Powermanagement............219
Automaticcongurationandpowerinterface
(ACPI)BIOS..............219
AutomaticPower-Onfeatures.......219
AppendixA.Notices.........221
Televisionoutputnotice...........222
EuropeanconformanceCEmark.......222
Trademarks................222
Index.................223
ivThinkCentreHardwareMaintenanceManual
Page 7

Chapter1.Aboutthismanual
ThismanualcontainsserviceandreferenceinformationforThinkCentre®computerslistedonthecover.Itis
intendedonlyfortrainedservicerswhoarefamiliarwithLenovo®computerproducts.
BeforeservicingaLenovoproduct,besuretoreadtheSafetyInformationinChapter2“Safetyinformation”
onpage3
TheSymptom-to-FRU(eldreplaceableunits)IndexandAdditionalServiceInformationchaptersarenot
specictoanymachinetypeandareapplicabletoallThinkCentreEdgecomputers.
ThismanualincludesacompleteFRUpartnumberlistingforeachmachinetypeandmodellistedonthe
cover.IfyouhaveInternetaccess,FRUpartnumbersarealsoavailableat:
http:/www.lenovo.com/support
ImportantSafetyInformation
Besuretoreadallcautionanddangerstatementsinthisbookbeforeperforminganyoftheinstructions.
VeuillezliretouteslesconsignesdetypeDANGERetATTENTIONduprésentdocumentavantd'exécuter
lesinstructions.
LesenSieunbedingtalleHinweisevomTyp"ACHTUNG"oder"VORSICHT"indieserDokumentation,bevor
SieirgendwelcheVorgängedurchführen
.
LeggereleistruzioniintrodottedaATTENZIONEePERICOLOpresentinelmanualeprimadieseguireuna
qualsiasidelleistruzioni
Certique-sedelertodasasinstruçõesdecuidadoeperigonestemanualantesdeexecutarqualquer
umadasinstruções
Esimportantequeleatodaslasdeclaracionesdeprecauciónydepeligrodeestemanualantesdeseguir
lasinstrucciones.
©CopyrightLenovo2011
1
Page 8

2ThinkCentreHardwareMaintenanceManual
Page 9

Chapter2.Safetyinformation
Thischaptercontainsthesafetyinformationthatyouneedtobefamiliarwithbeforeservicingacomputer.
Generalsafety
Followtheserulestoensuregeneralsafety:
•Observegoodhousekeepingintheareaofthemachinesduringandaftermaintenance.
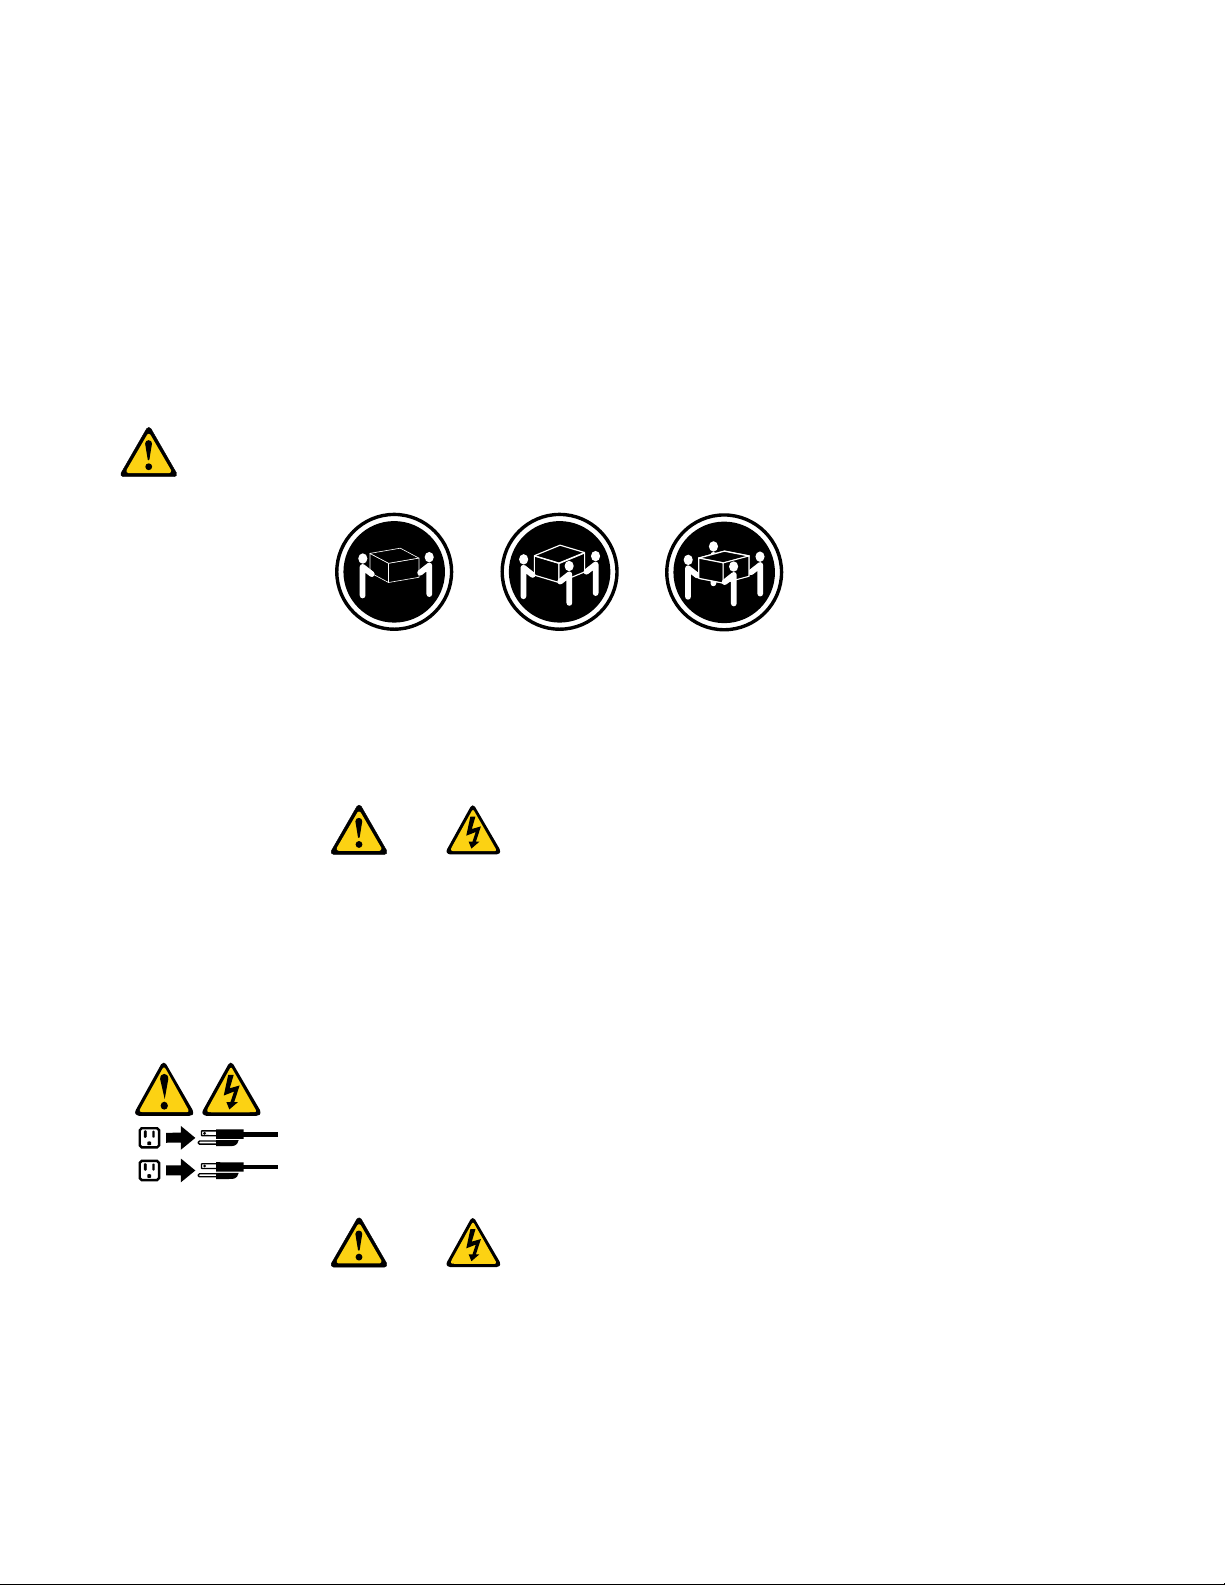
•Whenliftinganyheavyobject:
1.Ensureyoucanstandsafelywithoutslipping.
2.Distributetheweightoftheobjectequallybetweenyourfeet.
3.Useaslowliftingforce.Nevermovesuddenlyortwistwhenyouattempttolift.
4.Liftbystandingorbypushingupwithyourlegmuscles;thisactionremovesthestrainfromthe
musclesinyourback.
Donotattempttoliftanyobjectsthatweighmorethan16kg(35lb)orobjectsthatyouthinkare
tooheavyforyou.
•Donotperformanyactionthatcauseshazardstothecustomer,orthatmakestheequipmentunsafe.
•Beforeyoustartthemachine,ensurethatotherservicerepresentativesandthecustomer'spersonnelare
notinahazardousposition.
•Placeremovedcoversandotherpartsinasafeplace,awayfromallpersonnel,whileyouareservicing
themachine.
•Keepyourtoolcaseawayfromwalkareassothatotherpeoplewillnottripoverit.
•Donotwearlooseclothingthatcanbetrappedinthemovingpartsofamachine.Ensurethatyoursleeves
arefastenedorrolledupaboveyourelbows.Ifyourhairislong,fastenit.
•Inserttheendsofyournecktieorscarfinsideclothingorfastenitwithanonconductiveclip,approximately
8centimeters(3inches)fromtheend.
•Donotwearjewelry,chains,metal-frameeyeglasses,ormetalfastenersforyourclothing.
Remember:Metalobjectsaregoodelectricalconductors.
•Wearsafetyglasseswhenyouare:hammering,drilling,soldering,cuttingwire,attachingsprings,using
solvents,orworkinginanyotherconditionsthatmightbehazardoustoyoureyes.
•Afterservice,reinstallallsafetyshields,guards,labels,andgroundwires.Replaceanysafetydevice
thatiswornordefective.
•Reinstallallcoverscorrectlybeforereturningthemachinetothecustomer.
Electricalsafety
CAUTION:
Electricalcurrentfrompower,telephone,andcommunicationcablescanbehazardous.Toavoid
personalinjuryorequipmentdamage,disconnecttheattachedpowercords,telecommunication
systems,networks,andmodemsbeforeyouopenthecomputercovers,unlessinstructedotherwise
intheinstallationandcongurationprocedures.
Observethefollowingruleswhenworkingonelectricalequipment.
©CopyrightLenovo2011
3
Page 10

Important:Useonlyapprovedtoolsandtestequipment.Somehandtoolshavehandlescoveredwithasoft
materialthatdoesnotinsulateyouwhenworkingwithliveelectricalcurrents.Manycustomershave,near
theirequipment,rubberoormatsthatcontainsmallconductiveberstodecreaseelectrostaticdischarges.
Donotusethistypeofmattoprotectyourselffromelectricalshock.
•Findtheroomemergencypower-off(EPO)switch,disconnectingswitch,orelectricaloutlet.Ifanelectrical
accidentoccurs,youcanthenoperatetheswitchorunplugthepowercordquickly.
•Donotworkaloneunderhazardousconditionsornearequipmentthathashazardousvoltages.
•Disconnectallpowerbefore:
–Performingamechanicalinspection
–Workingnearpowersupplies
–RemovingorinstallingFieldReplaceableUnits(FRUs)
•Beforeyoustarttoworkonthemachine,unplugthepowercord.Ifyoucannotunplugit,askthecustomer
topower-offthewallboxthatsuppliespowertothemachineandtolockthewallboxintheoffposition.
•Ifyouneedtoworkonamachinethathasexposedelectricalcircuits,observethefollowingprecautions:
–Ensurethatanotherperson,familiarwiththepower-offcontrols,isnearyou.
Remember:Anotherpersonmustbetheretoswitchoffthepower,ifnecessary.
–Useonlyonehandwhenworkingwithpowered-onelectricalequipment;keeptheotherhandinyour
pocketorbehindyourback.
Remember:Theremustbeacompletecircuittocauseelectricalshock.Byobservingtheaboverule,
youmaypreventacurrentfrompassingthroughyourbody.
–Whenusingatester,setthecontrolscorrectlyandusetheapprovedprobeleadsandaccessoriesfor
thattester.
–Standonsuitablerubbermats(obtainedlocally,ifnecessary)toinsulateyoufromgroundssuchas
metaloorstripsandmachineframes.
Observethespecialsafetyprecautionswhenyouworkwithveryhighvoltages;theseinstructionsarein
thesafetysectionsofmaintenanceinformation.Useextremecarewhenmeasuringhighvoltages.
•Regularlyinspectandmaintainyourelectricalhandtoolsforsafeoperationalcondition.
•Donotusewornorbrokentoolsandtesters.
•Neverassumethatpowerhasbeendisconnectedfromacircuit.First,checkthatithasbeenpowered-off.
•Alwayslookcarefullyforpossiblehazardsinyourworkarea.Examplesofthesehazardsaremoistoors,
nongroundedpowerextensioncables,powersurges,andmissingsafetygrounds.
•Donottouchliveelectricalcircuitswiththereectivesurfaceofaplasticdentalmirror.Thesurfaceis
conductive;suchtouchingcancausepersonalinjuryandmachinedamage.
•Donotservicethefollowingpartswiththepoweronwhentheyareremovedfromtheirnormaloperating
placesinamachine:
–Powersupplyunits
–Pumps
–Blowersandfans
–Motorgenerators
andsimilarunits.(Thispracticeensurescorrectgroundingoftheunits.)
•Ifanelectricalaccidentoccurs:
–Usecaution;donotbecomeavictimyourself.
–Switchoffpower.
–Sendanotherpersontogetmedicalaid.
4ThinkCentreHardwareMaintenanceManual
Page 11

Safetyinspectionguide
Theintentofthisinspectionguideistoassistyouinidentifyingpotentiallyunsafeconditionsonthese
products.Eachmachine,asitwasdesignedandbuilt,hadrequiredsafetyitemsinstalledtoprotectusers
andservicepersonnelfrominjury.Thisguideaddressesonlythoseitems.However,goodjudgmentshould
beusedtoidentifypotentialsafetyhazardsduetoattachmentoffeaturesoroptionsnotcoveredbythis
inspectionguide.
Ifanyunsafeconditionsarepresent,youmustdeterminehowserioustheapparenthazardcouldbeand
whetheryoucancontinuewithoutrstcorrectingtheproblem.
Considertheseconditionsandthesafetyhazardstheypresent:
•Electricalhazards,especiallyprimarypower(primaryvoltageontheframecancauseseriousorfatal
electricalshock).
•Explosivehazards,suchasadamagedCRTfaceorbulgingcapacitor
•Mechanicalhazards,suchaslooseormissinghardware
Theguideconsistsofaseriesofstepspresentedinachecklist.Beginthecheckswiththepoweroff,and
thepowercorddisconnected.
Checklist:
1.Checkexteriorcoversfordamage(loose,broken,orsharpedges).
2.Power-offthecomputer.Disconnectthepowercord.
3.Checkthepowercordfor:
a.Athird-wiregroundconnectoringoodcondition.Useametertomeasurethird-wireground
continuityfor0.1ohmorlessbetweentheexternalgroundpinandframeground.
b.Thepowercordshouldbetheappropriatetypeasspeciedinthepartslistings.
c.Insulationmustnotbefrayedorworn.
4.Removethecover.
5.Checkforanyobviousalterations.Usegoodjudgmentastothesafetyofanyalterations.
6.Checkinsidetheunitforanyobviousunsafeconditions,suchasmetallings,contamination,wateror
otherliquids,orsignsofreorsmokedamage.
7.Checkforworn,frayed,orpinchedcables.
8.Checkthatthepower-supplycoverfasteners(screwsorrivets)havenotbeenremovedortamperedwith.
Handlingelectrostaticdischarge-sensitivedevices
Anycomputerpartcontainingtransistorsorintegratedcircuits(ICs)shouldbeconsideredsensitiveto
electrostaticdischarge(ESD).ESDdamagecanoccurwhenthereisadifferenceinchargebetweenobjects.
ProtectagainstESDdamagebyequalizingthechargesothatthemachine,thepart,theworkmat,andthe
personhandlingthepartareallatthesamecharge.
Notes:
1.Useproduct-specicESDprocedureswhentheyexceedtherequirementsnotedhere.
2.MakesurethattheESDprotectivedevicesyouusehavebeencertied(ISO9000)asfullyeffective.
WhenhandlingESD-sensitiveparts:
•Keepthepartsinprotectivepackagesuntiltheyareinsertedintotheproduct.
•Avoidcontactwithotherpeoplewhilehandlingthepart.
Chapter2.Safetyinformation5
Page 12
•Wearagroundedwriststrapagainstyourskintoeliminatestaticonyourbody.
•Preventthepartfromtouchingyourclothing.Mostclothingisinsulativeandretainsachargeevenwhen
youarewearingawriststrap.
•Usetheblacksideofagroundedworkmattoprovideastatic-freeworksurface.Thematisespecially
usefulwhenhandlingESD-sensitivedevices.
•Selectagroundingsystem,suchasthoselistedbelow,toprovideprotectionthatmeetsthespecic
servicerequirement.
Note:TheuseofagroundingsystemisdesirablebutnotrequiredtoprotectagainstESDdamage.
–AttachtheESDgroundcliptoanyframeground,groundbraid,orgreen-wireground.
–UseanESDcommongroundorreferencepointwhenworkingonadouble-insulatedor
battery-operatedsystem.Youcanusecoaxorconnector-outsideshellsonthesesystems.
–Usetheroundground-prongoftheacplugonac-operatedcomputers.
Groundingrequirements
Electricalgroundingofthecomputerisrequiredforoperatorsafetyandcorrectsystemfunction.Proper
groundingoftheelectricaloutletcanbeveriedbyacertiedelectrician.
Safetynotices(multi-lingualtranslations)
Thecautionanddangersafetynoticesinthissectionareprovidedinthefollowinglanguages:
•English
•Arabic
•Brazilian/Portuguese
•Chinese(simplied)
•Chinese(traditional)
•French
•German
•Hebrew
•Italian
•Korean
•Spanish
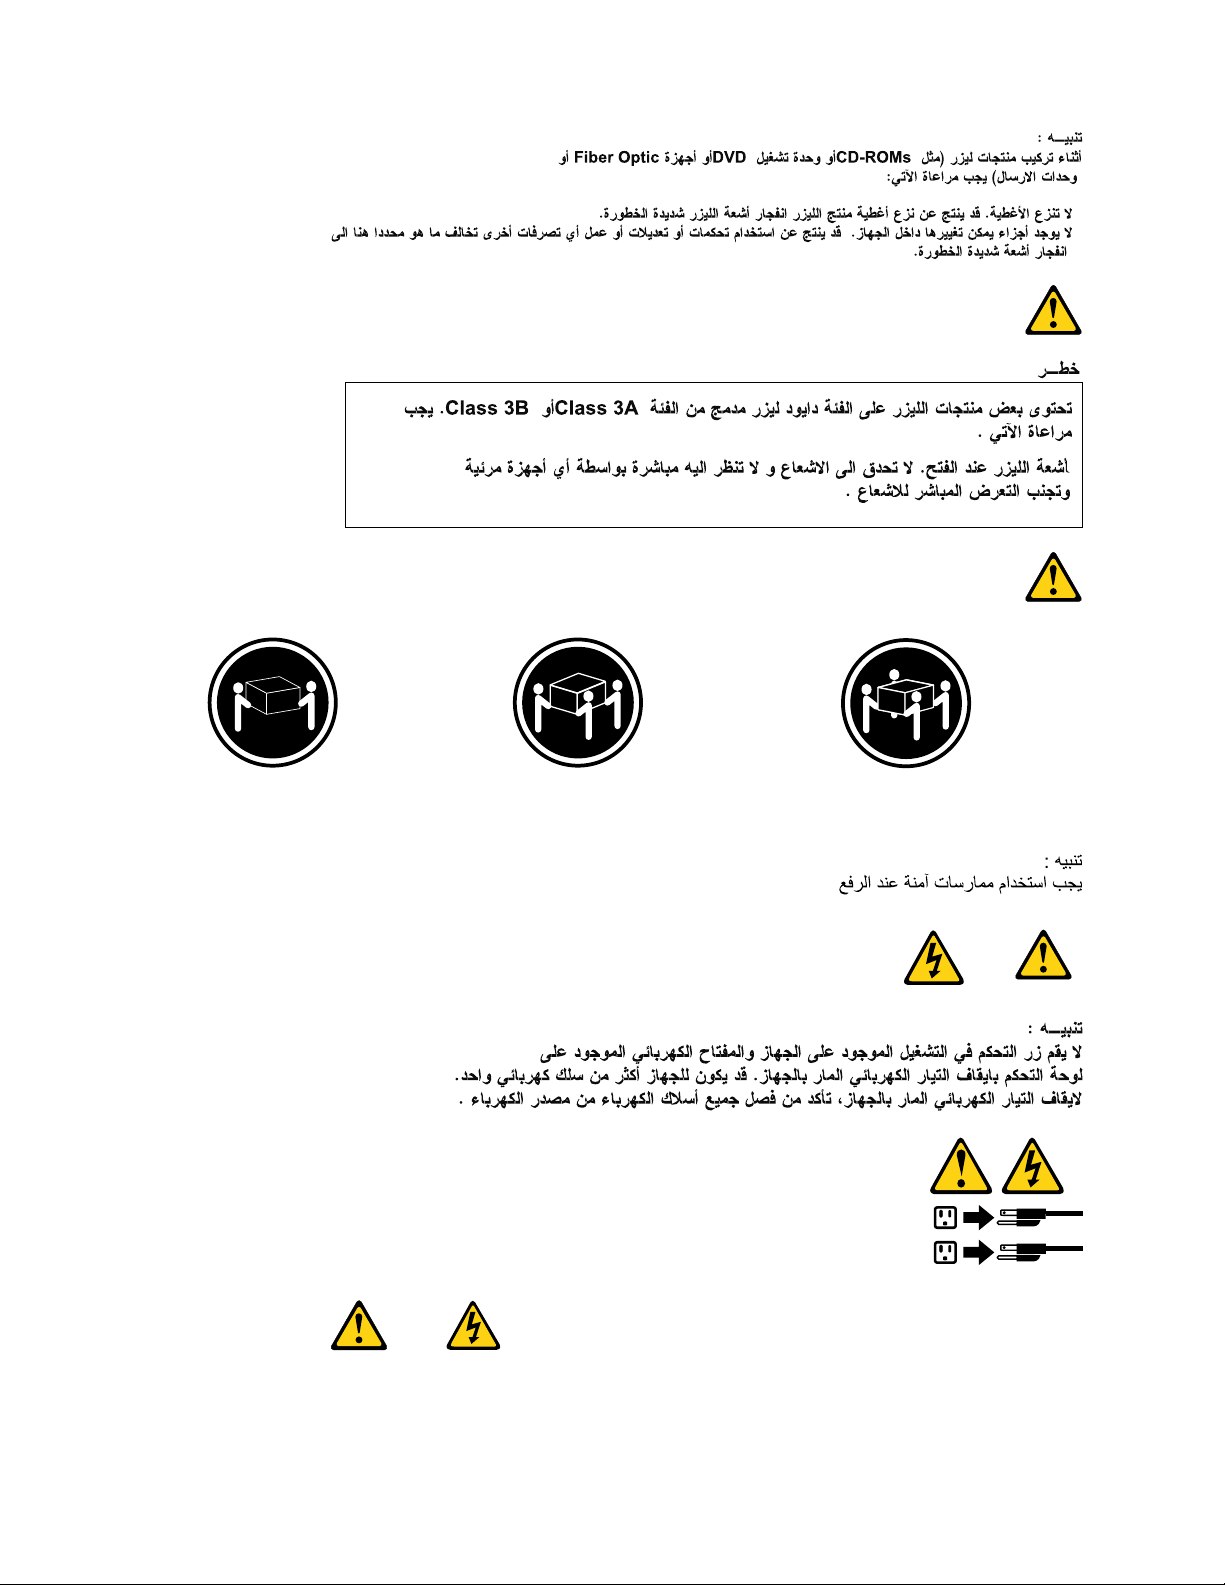
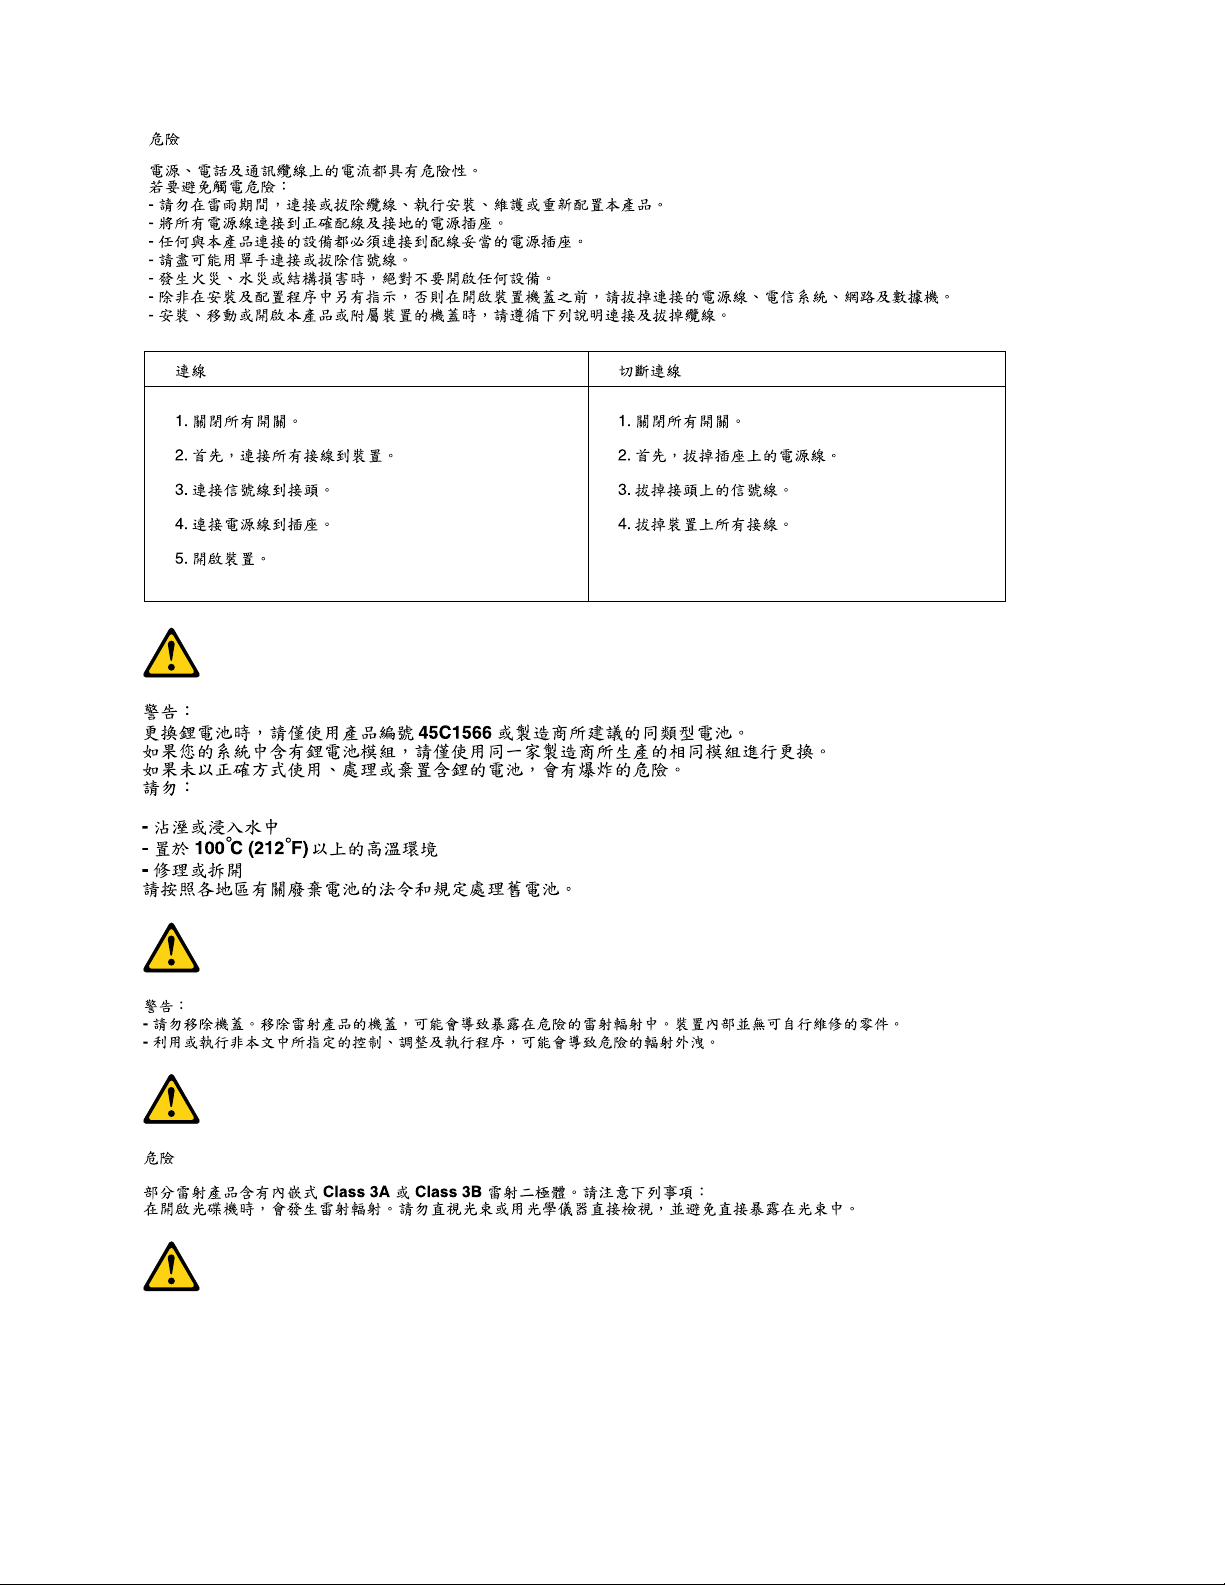
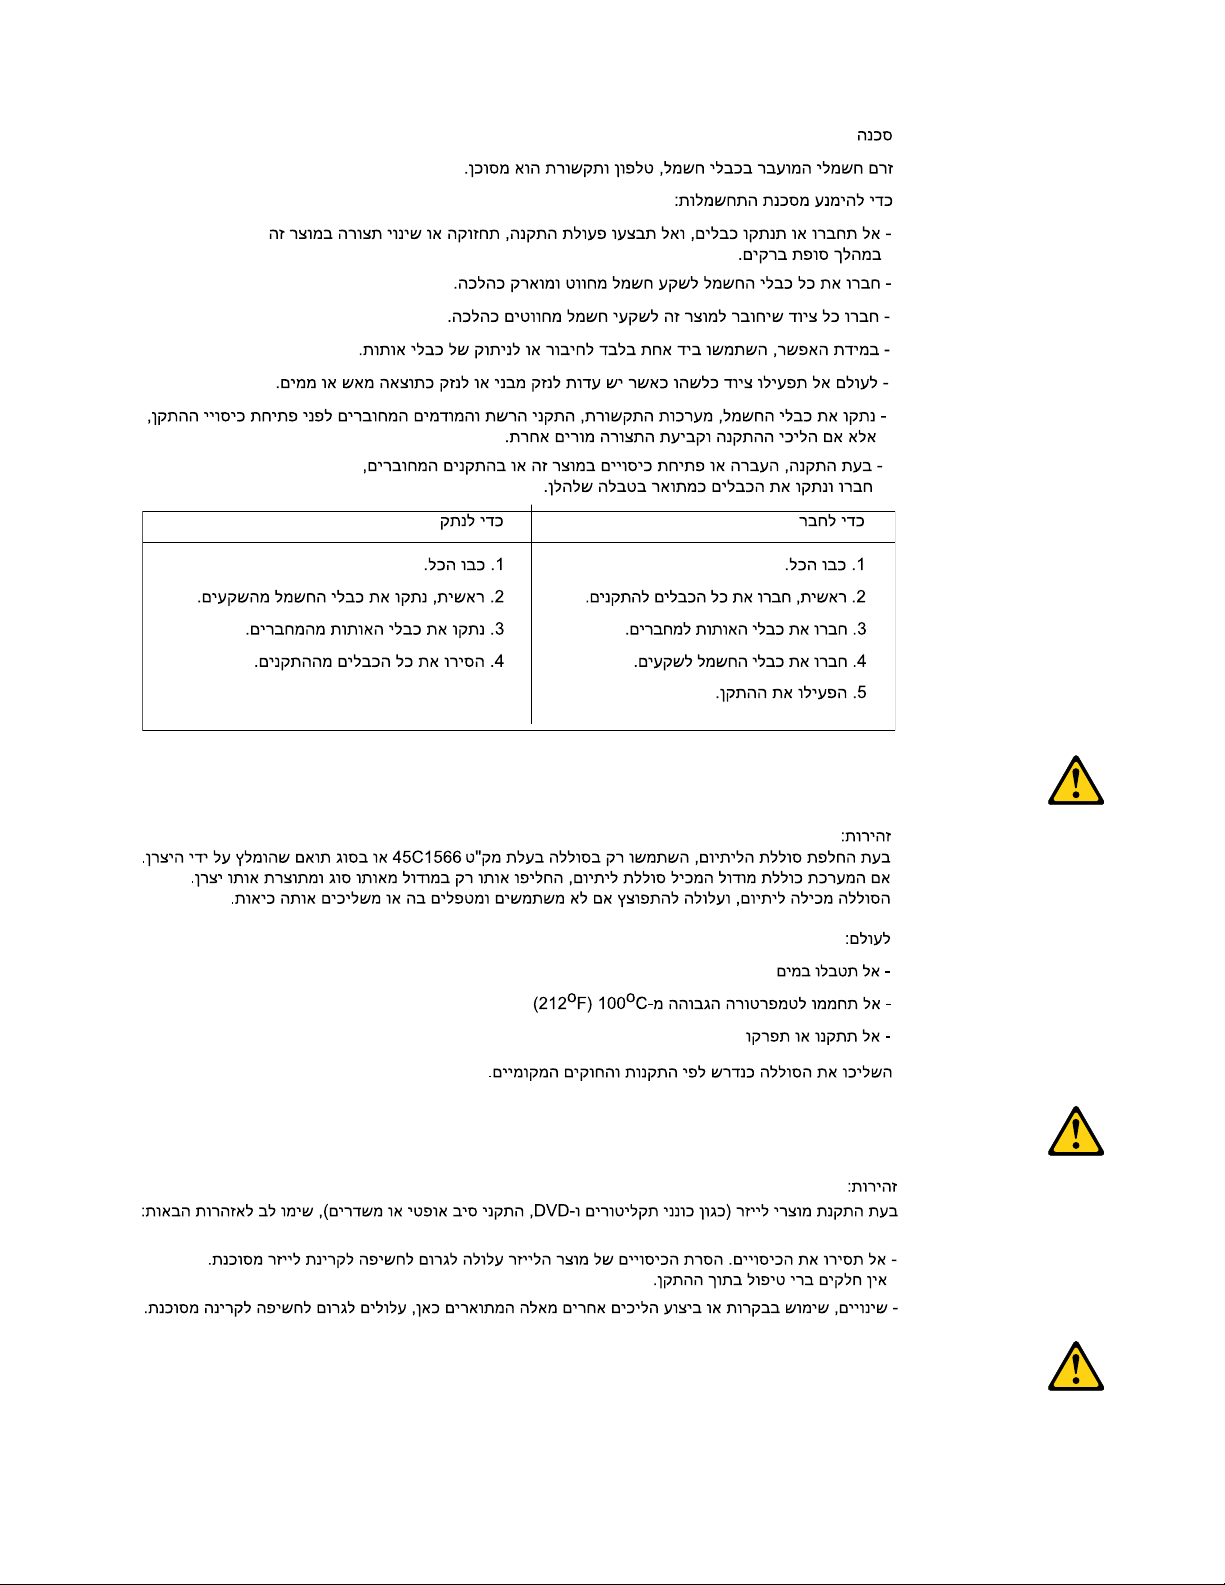
DANGER
Electricalcurrentfrompower,telephoneandcommunicationcablesishazardous.
Toavoidashockhazard:
•Donotconnectordisconnectanycablesorperforminstallation,maintenance,orreconguration
ofthisproductduringanelectricalstorm.
•Connectallpowercordstoaproperlywiredandgroundedelectricaloutlet.
•Connecttoproperlywiredoutletsanyequipmentthatwillbeattachedtothisproduct.
6ThinkCentreHardwareMaintenanceManual
Page 13
•Whenpossible,useonehandonlytoconnectordisconnectsignalcables.
•Neverturnonanyequipmentwhenthereisevidenceofre,water,orstructuraldamage.
•Disconnecttheattachedpowercords,telecommunicationssystems,networks,andmodems
beforeyouopenthedevicecovers,unlessinstructedotherwiseintheinstallationandconguration
procedures.
•Connectanddisconnectcablesasdescribedinthefollowingtableswheninstalling,moving,or
openingcoversonthisproductorattacheddevices.
ToConnectToDisconnect
1.TurneverythingOFF.
2.First,attachallcablestodevices.
3.Attachsignalcablestoconnectors.
4.Attachpowercordstooutlet.
5.TurndeviceON.
1.TurneverythingOFF.
2.First,removepowercordsfromoutlet.
3.Removesignalcablesfromconnectors.
4.Removeallcablesfromdevices.
CAUTION:
Whenreplacingthelithiumbattery,useonlyPartNumber45C1566oranequivalenttypebattery
recommendedbythemanufacturer.Ifyoursystemhasamodulecontainingalithiumbattery,replace
itonlywiththesamemoduletypemadebythesamemanufacturer.Thebatterycontainslithiumand
canexplodeifnotproperlyused,handled,ordisposedof.Donot:
•Throworimmerseintowater
•Heattomorethan100°C(212°F)
•Repairordisassemble
Disposeofthebatteryasrequiredbylocalordinancesorregulations.
CAUTION:
Whenlaserproducts(suchasCD-ROMs,DVD-ROMdrives,beropticdevices,ortransmitters)are
installed,notethefollowing:
•Donotremovethecovers.Removingthecoversofthelaserproductcouldresultinexposureto
hazardouslaserradiation.Therearenoserviceablepartsinsidethedevice.
•Useofcontrolsoradjustmentsorperformanceofproceduresotherthanthosespeciedherein
mightresultinhazardousradiationexposure.
DANGER
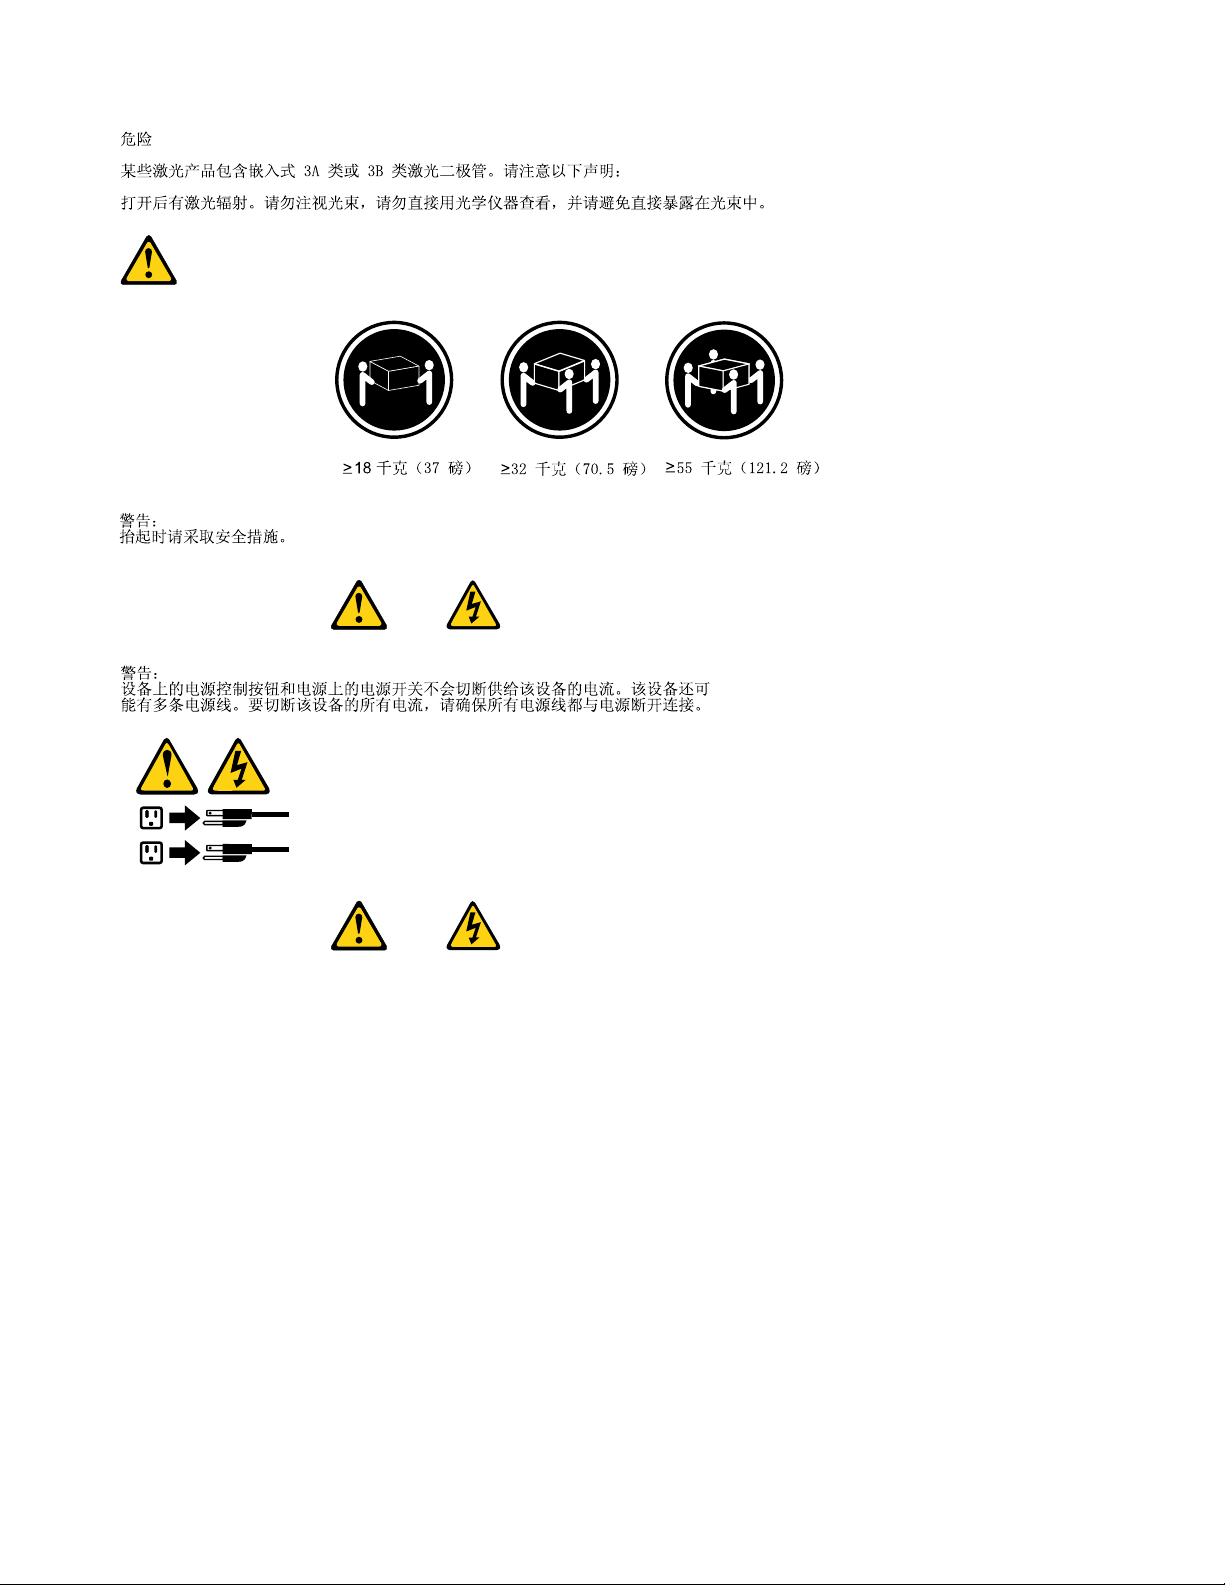
SomelaserproductscontainanembeddedClass3AorClass3Blaserdiode.Notethefollowing:
Laserradiationwhenopen.Donotstareintothebeam,donotviewdirectlywithoptical
instruments,andavoiddirectexposuretothebeam.
Chapter2.Safetyinformation7
Page 14
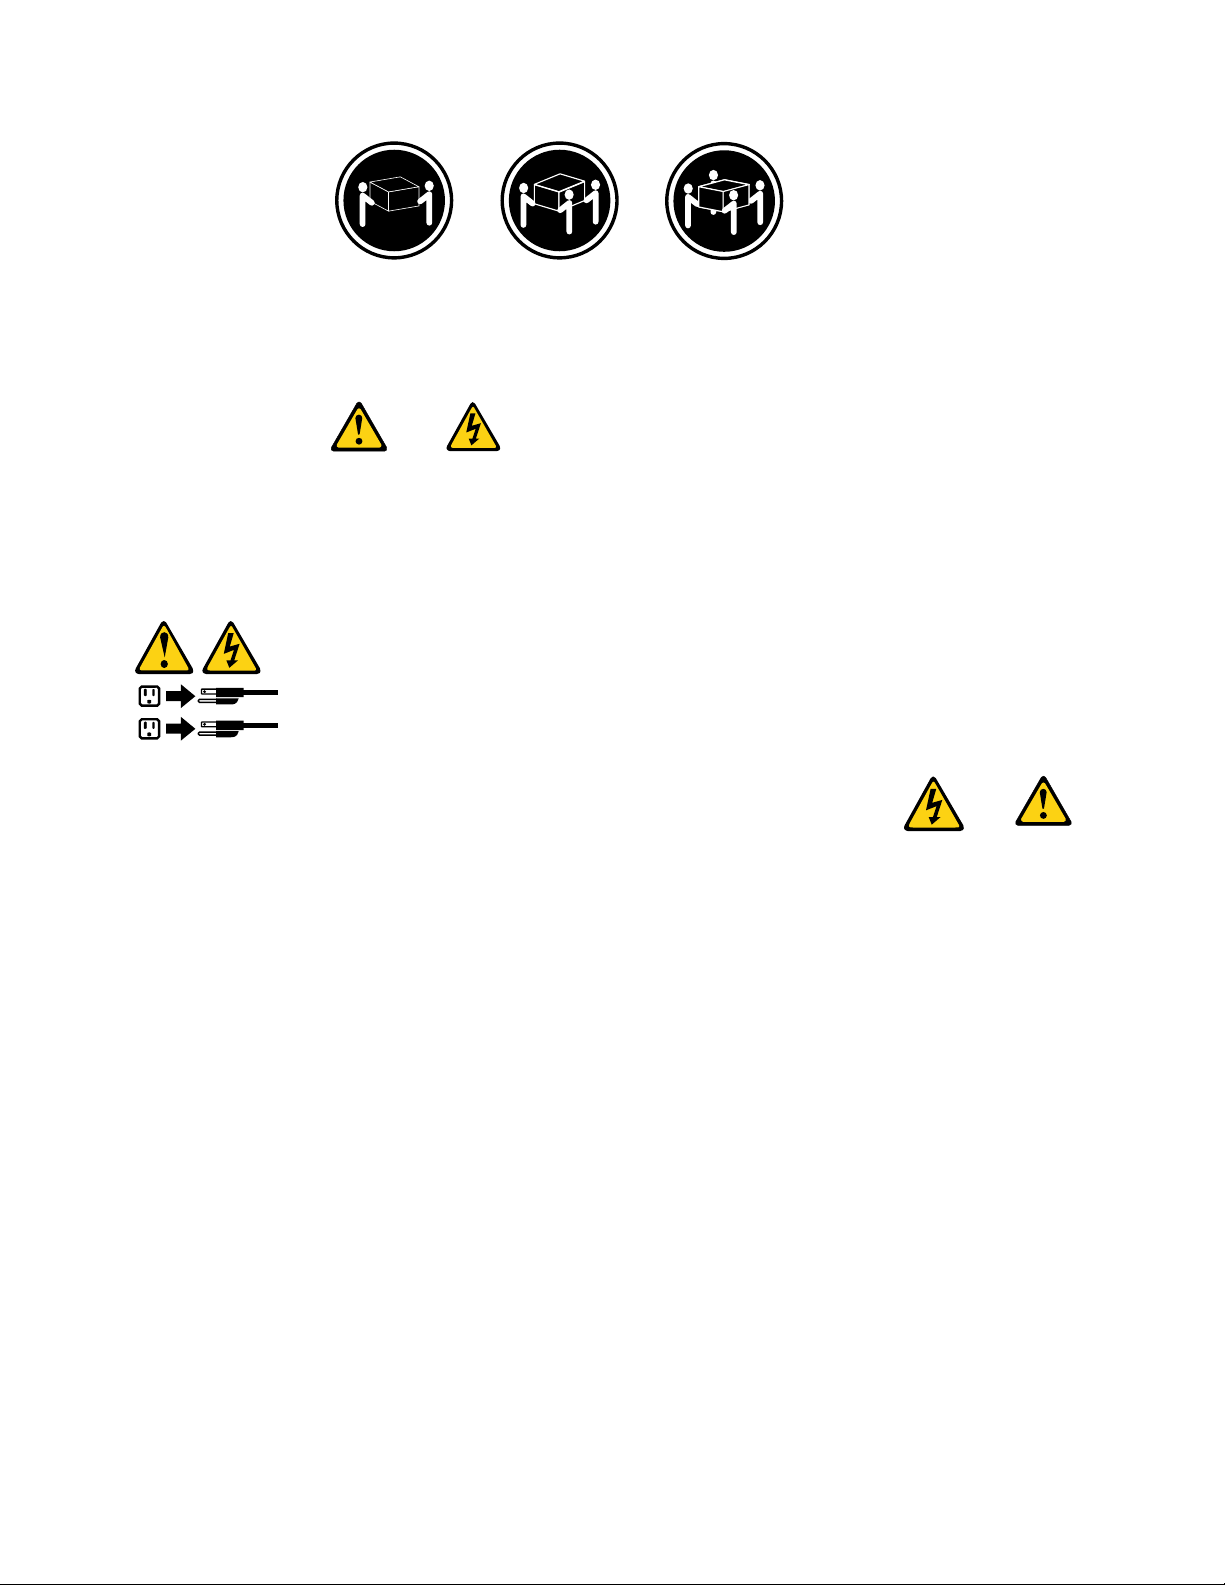
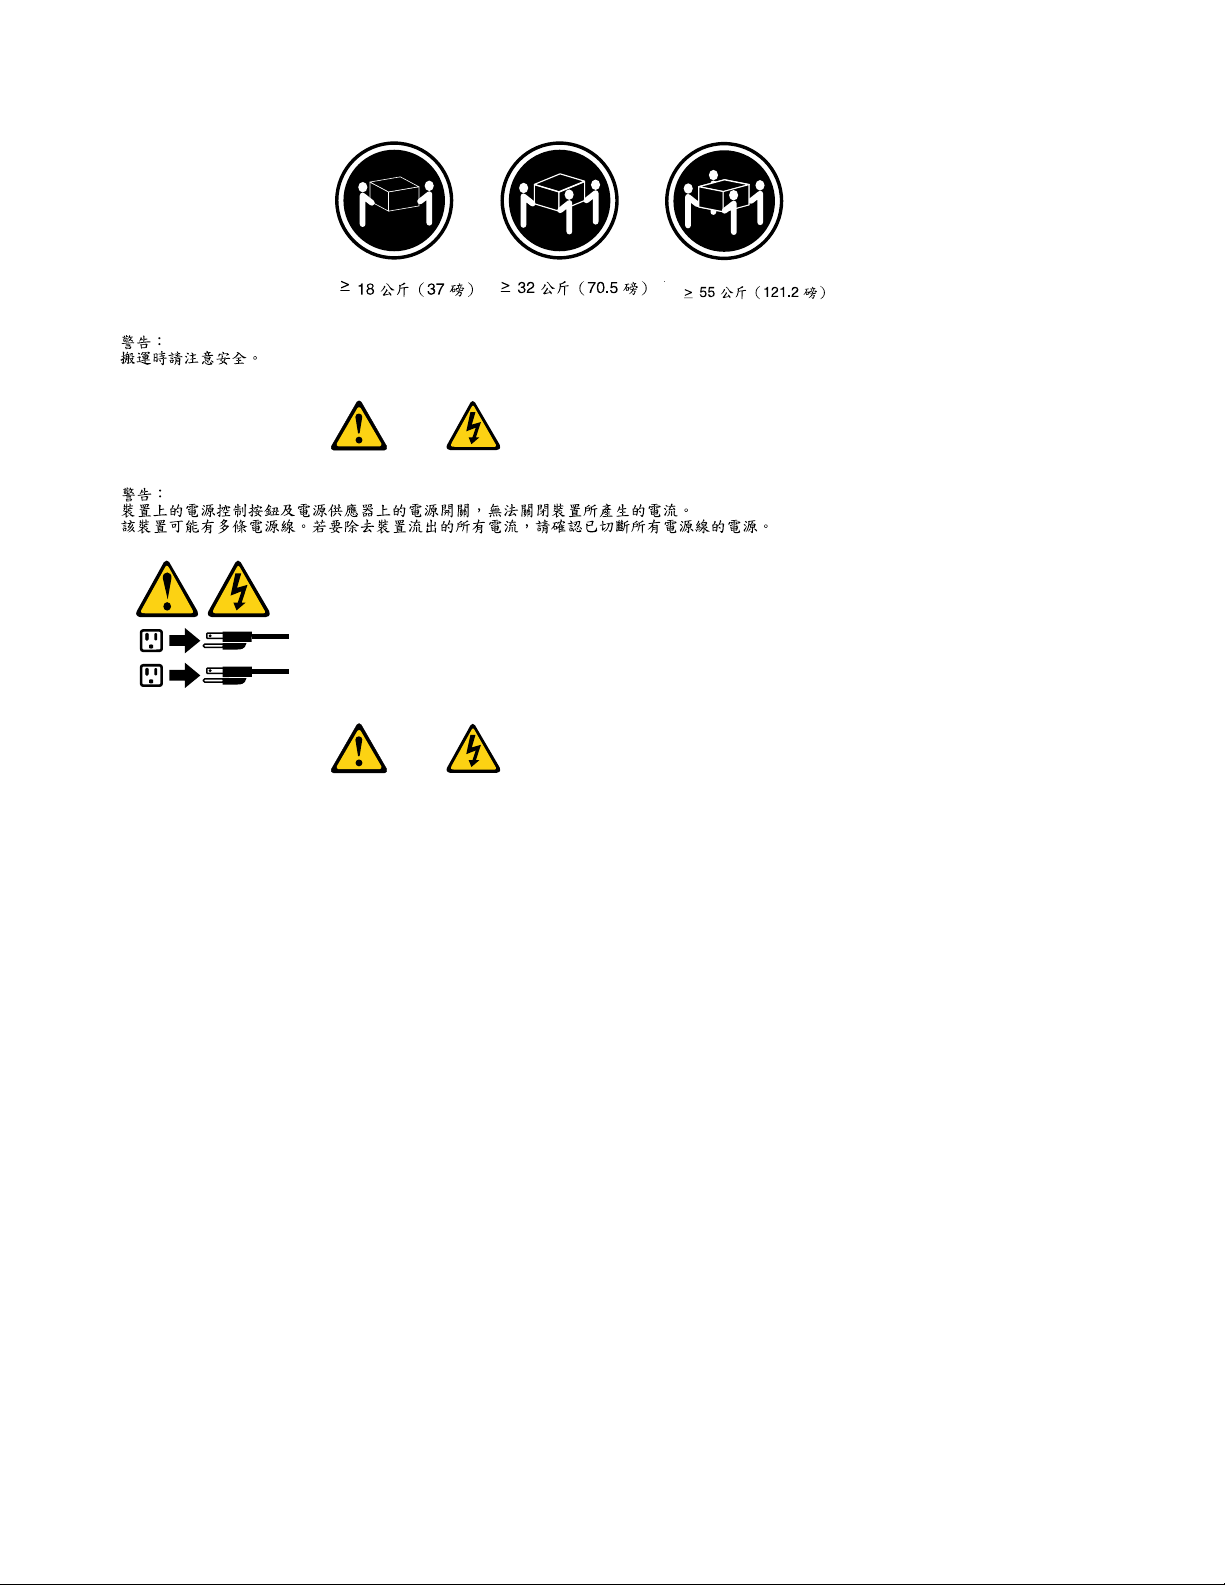
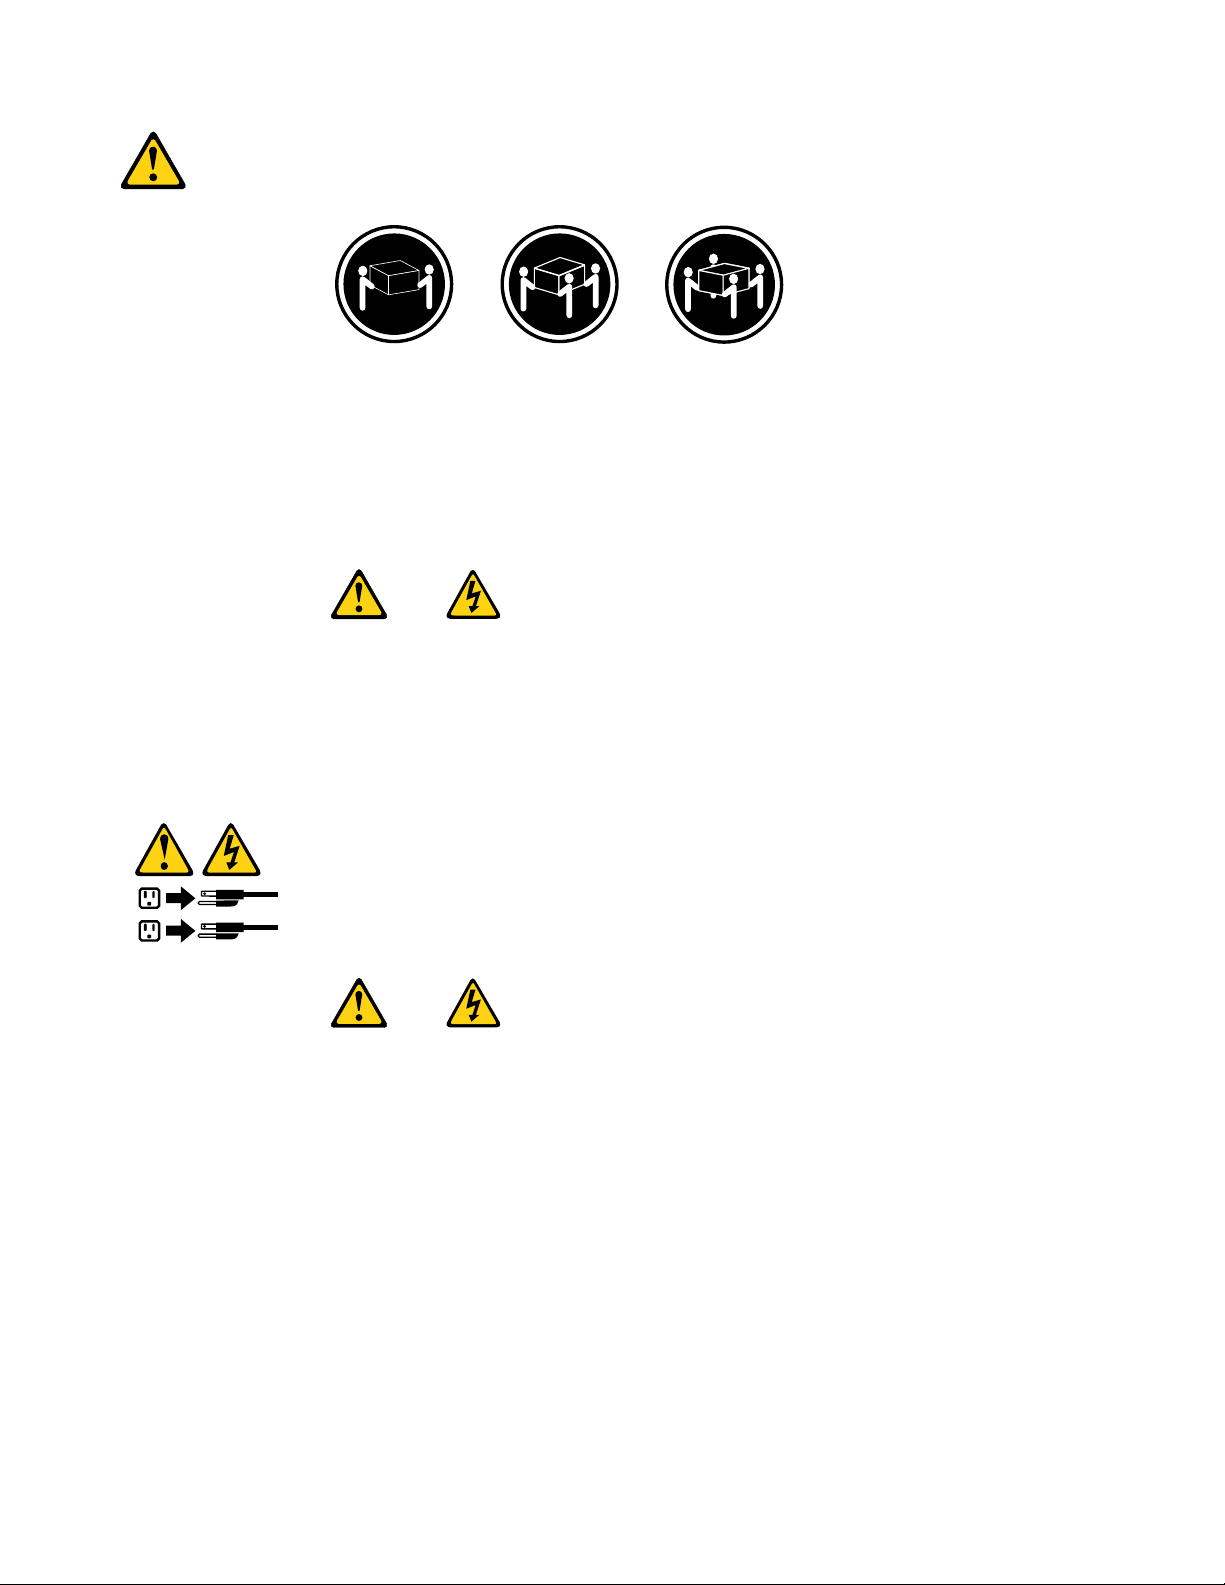
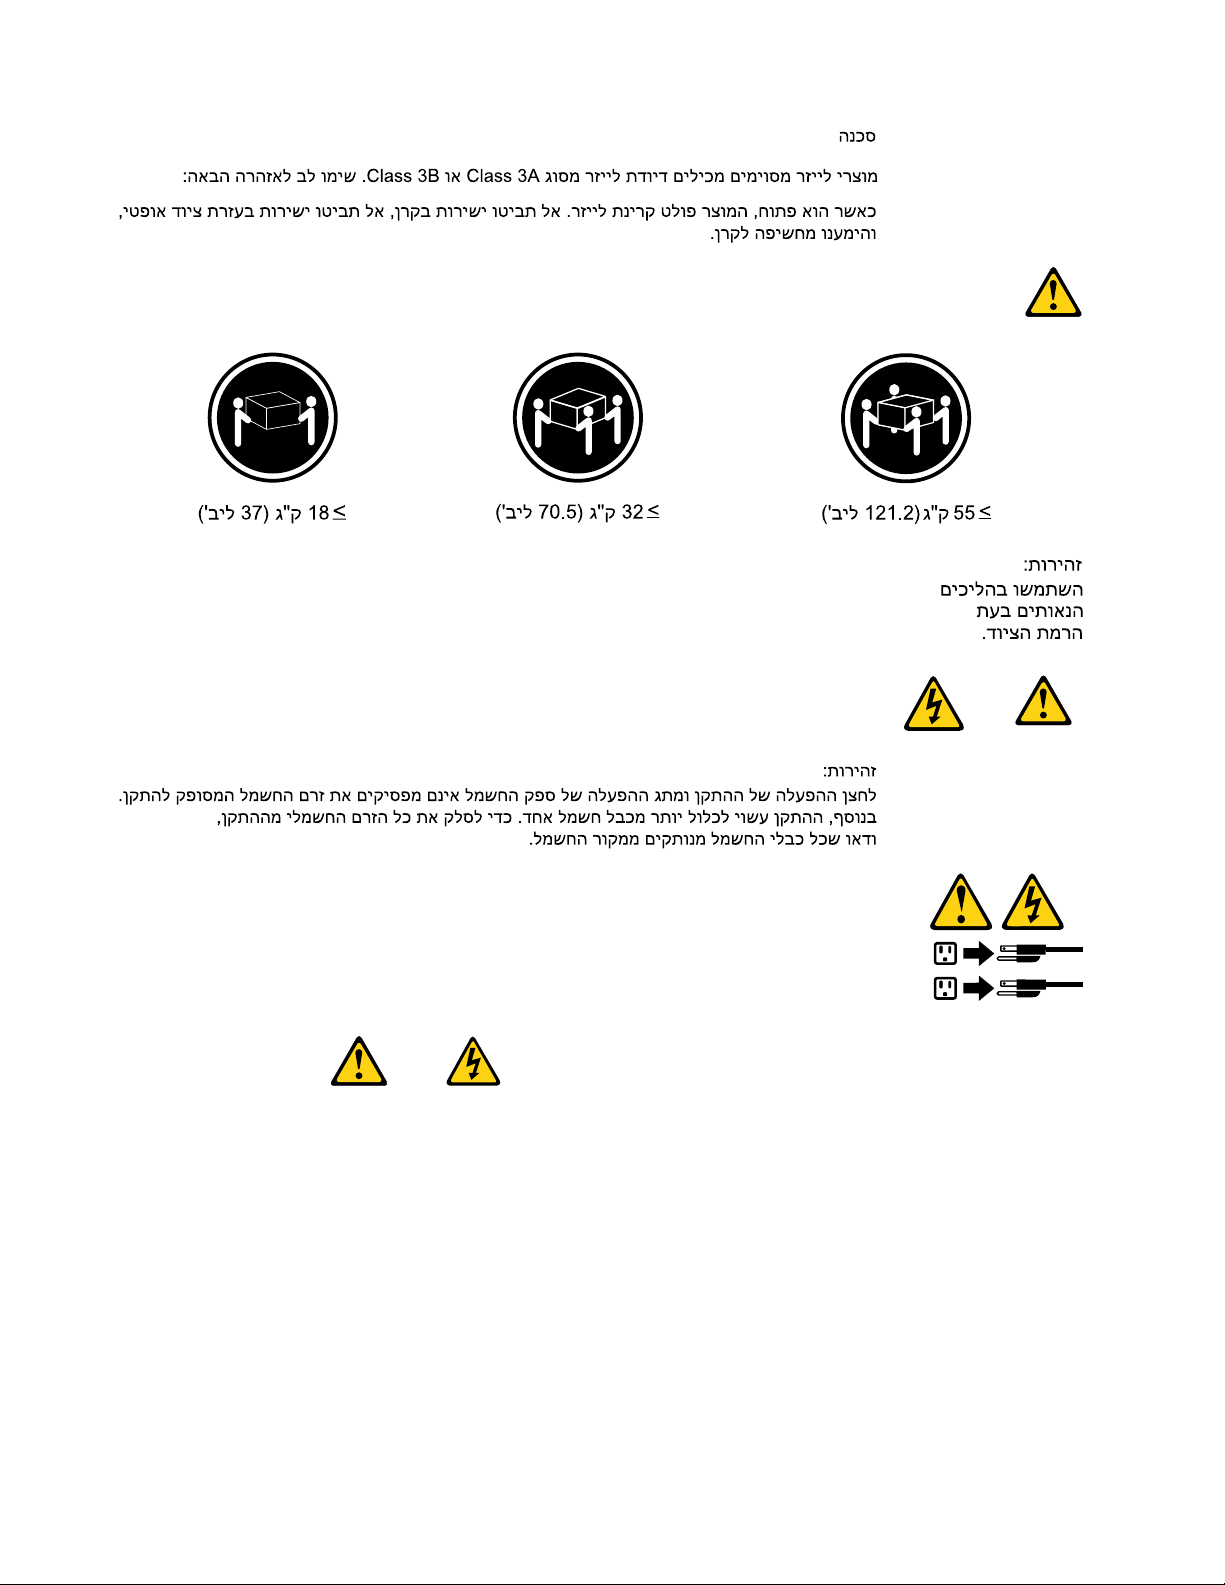
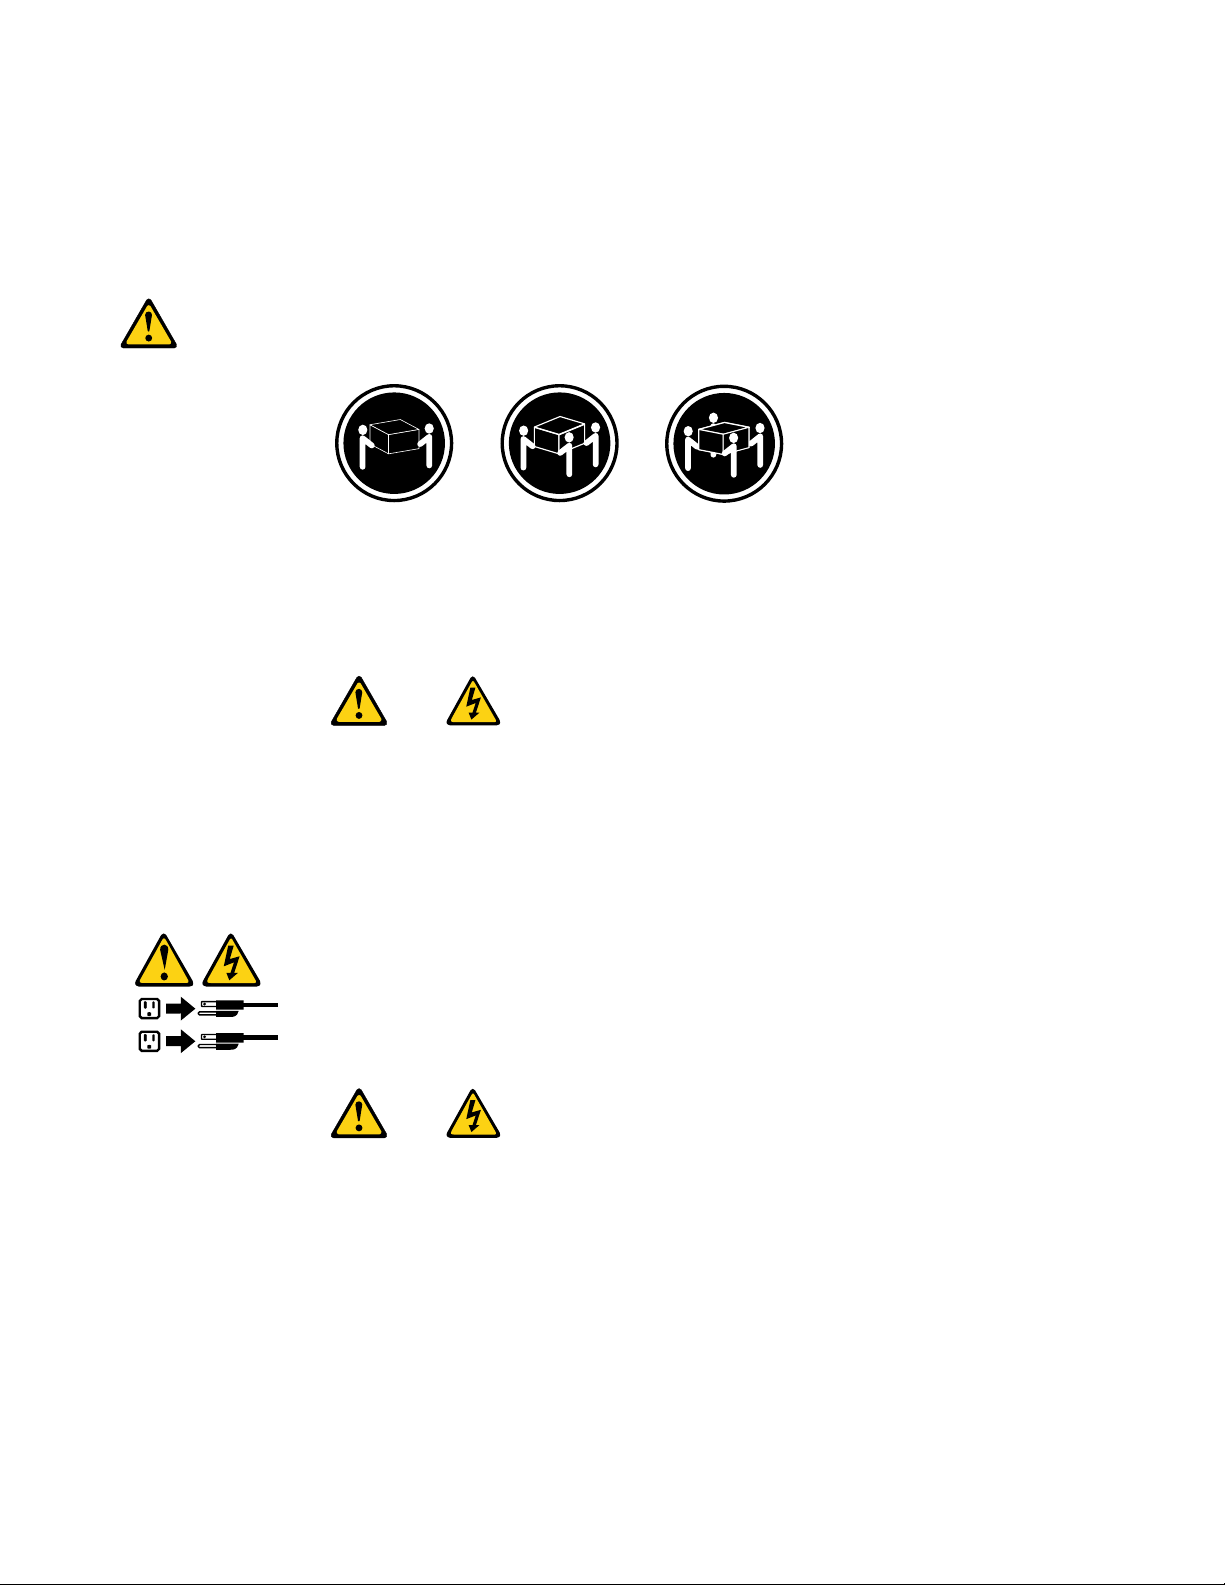
≥18kg(37lbs)≥32kg(70.5lbs)≥55kg(121.2lbs)
1
2
CAUTION:
Usesafepracticeswhenlifting.
CAUTION:
Thepowercontrolbuttononthedeviceandthepowerswitchonthepowersupplydonotturnoff
theelectricalcurrentsuppliedtothedevice.Thedevicealsomighthavemorethanonepower
cord.Toremoveallelectricalcurrentfromthedevice,ensurethatallpowercordsaredisconnected
fromthepowersource.
8ThinkCentreHardwareMaintenanceManual
Page 15

Chapter2.Safetyinformation9
Page 16
≥18kg(37lbs)≥32kg(70.5lbs)≥55kg(121.2lbs)
1
2
PERIGO
10ThinkCentreHardwareMaintenanceManual
Page 17
Acorrenteelétricaprovenientedecabosdealimentação,detelefoneedecomunicaçõeséperigosa.
Paraevitarriscodechoqueelétrico:
•Nãoconectenemdesconectenenhumcaboouexecuteinstalação,manutençãooureconguração
desteprodutoduranteumatempestadecomraios.
•Conectetodososcabosdealimentaçãoatomadaselétricascorretamenteinstaladaseaterradas.
•T odoequipamentoqueforconectadoaesteprodutodeveserconectadoatomadascorretamente
instaladas.
•Quandopossível,utilizeapenasumadasmãosparaconectaroudesconectarcabosdesinal.
•Nuncaliguenenhumequipamentoquandohouverevidênciadefogo,águaoudanosestruturais.
•Antesdeabrirtampasdedispositivos,desconectecabosdealimentação,sistemasdetelecomunicação,
redesemodemsconectados,amenosqueespecicadodemaneiradiferentenosprocedimentosde
instalaçãoeconguração.
•Conecteedesconecteoscabosconformedescritonatabelaapresentadaaseguiraoinstalar,moverou
abrirtampasdesteprodutooudedispositivosconectados.
ParaConectar:ParaDesconectar:
1.DESLIGUETudo.
2.Primeiramente,conectetodososcabosaos
dispositivos.
3.Conecteoscabosdesinalaosconectores.
4.Conecteoscabosdealimentaçãoàstomadas.
5.LIGUEosdispositivos.
1.DESLIGUETudo.
2.Primeiramente,removaoscabosdealimentaçãodas
tomadas.
3.Removaoscabosdesinaldosconectores.
4.Removatodososcabosdosdispositivos.
CUIDADO:
Aosubstituirabateriadelítio,utilizeapenasumabateriacomNúmerodePeça45C1566ouumtipo
debateriaequivalenterecomendadopeloSeoseusistemapossuiummódulocomumabateriade
lítio,substitua-oapenasporummódulodomesmotipoedomesmofabricante.Abateriacontémlítio
epodeexplodirsenãoforutilizada,manuseadaoudescartadademaneiracorreta.
Não:
•Jogueoucoloquenaágua
•Aqueçaamaisde100°C(212°F)
•Consertenemdesmonte
Descarteabateriaconformerequeridopelasleisouregulamentoslocais.
PRECAUCIÓN:
Quandoprodutosalaser(comounidadesdeCD-ROMs,unidadesdeDVD-ROM,dispositivosdebraótica
outransmissores)estivereminstalados,observeoseguinte:
Chapter2.Safetyinformation11
Page 18
•Nãoremovaastampas.Aremoçãodastampasdeumprodutoalaserpoderesultaremexposição
1
2
prejudicialàradiaçãodelaser.Nãoexistempeçasquepodemserconsertadasnointeriordodispositivo.
•Autilizaçãodecontrolesouajustesouaexecuçãodeprocedimentosdiferentesdosespecicadosaqui
poderesultaremexposiçãoprejudicialàradiação.
PERIGO
AlgunsprodutosalasercontêmdiododelaserintegradodaClasse3AoudaClasse3B.Observeoseguinte:
Radiaçãoalaserquandoaberto.Nãoolhediretamenteparaofeixeaolhonuoucominstrumentosópticose
eviteexposiçãodiretaaofeixe.
≥18kg(37lbs)≥32kg(70.5lbs)≥55kg(121.2lbs)
CUIDADO:
Utilizeprocedimentosdesegurançaparalevantarequipamentos.
CUIDADO:
Obotãodecontroledealimentaçãododispositivoeobotãoparaligar/desligardafontedealimentação
nãodesligamacorrenteelétricafornecidaaodispositivo.Odispositivotambémpodetermaisdeumcabo
dealimentação.Pararemovertodaacorrenteelétricadodispositivo,assegurequetodososcabosde
alimentaçãoestejamdesconectadosdafontedealimentação.
12ThinkCentreHardwareMaintenanceManual
Page 19
Chapter2.Safetyinformation13
Page 20
1
2
14ThinkCentreHardwareMaintenanceManual
Page 21
Chapter2.Safetyinformation15
Page 22
1
2
DANGER
Lecourantélectriqueprovenantdel'alimentation,dutéléphoneetdescâblesdetransmissionpeutprésenter
undanger.
Pourévitertoutrisquedechocélectrique:
•Nemanipulezaucuncâbleetn'effectuezaucuneopérationd'installation,d'entretienoudereconguration
deceproduitaucoursd'unorage.
•Brancheztouslescordonsd'alimentationsurunsocledeprisedecourantcorrectementcâbléetmisàla
terre.
•Branchezsurdessoclesdeprisedecourantcorrectementcâbléstoutéquipementconnectéàceproduit.
•Lorsquecelaestpossible,n'utilisezqu'uneseulemainpourconnecteroudéconnecterlescâbles
d'interface.
•Nemettezjamaisunéquipementsoustensionencasd'incendieoud'inondation,ouenprésencede
dommagesmatériels.
•Avantderetirerlescartersdel'unité,mettezcelle-cihorstensionetdéconnectezsescordons
d'alimentation,ainsiquelescâblesquilarelientauxréseaux,auxsystèmesdetélécommunicationetaux
modems(saufinstructioncontrairementionnéedanslesprocéduresd'installationetdeconguration).
•Lorsquevousinstallez,quevousdéplacez,ouquevousmanipulezleprésentproduitoudespériphériques
quiluisontraccordés,reportez-vousauxinstructionsci-dessouspourconnecteretdéconnecterles
différentscordons.
16ThinkCentreHardwareMaintenanceManual
Page 23
ConnexionDéconnexion
1.MettezlesunitésHORSTENSION.
2.Commencezparbranchertouslescordonssurles
unités.
3.Branchezlescâblesd'interfacesurdesconnecteurs.
4.Branchezlescordonsd'alimentationsurdesprises.
5.MettezlesunitésSOUSTENSION.
1.MettezlesunitésHORSTENSION.
2.Débranchezlescordonsd'alimentationdesprises.
3.Débranchezlescâblesd'interfacedesconnecteurs.
4.Débrancheztouslescâblesdesunités.
ATTENTION:
Remplacerlapileaulithiumusagéeparunepilederéférenceidentiqueexclusivement,(référence
45C1566),ousuivrelesinstructionsdufabricantquiendénitleséquivalences.Sivotresystèmeest
dotéd'unmodulecontenantunepileaulithium,vousdevezleremplaceruniquementparunmodule
identique,produitparlemêmefabricant.Lapilecontientdulithiumetpeutexploserencasde
mauvaiseutilisation,demauvaisemanipulationoudemiseaurebutinappropriée.
Nepas:
•lajeteràl'eau,
•l'exposeràdestempératuressupérieuresà100°C,
•chercheràlaréparerouàladémonter.
Nepasmettrelapileàlapoubelle.Pourlamiseaurebut,sereporteràlaréglementationenvigueur.
ATTENTION:
Sidesproduitsàlaser(telsquedesunitésdeCD-ROM,deDVD-ROM,desunitésàbresoptiques,ou
desémetteurs)sontinstallés,prenezconnaissancedesinformationssuivantes:
•Neretirezpaslecarter.Enouvrantl'unitédeCD-ROMoudeDVD-ROM,vousvousexposezau
rayonnementdangereuxdulaser.Aucunepiècedel'unitén'estréparable.
•Pourévitertoutrisqued'expositionaurayonlaser,respectezlesconsignesderéglageet
d'utilisationdescommandes,ainsiquelesprocéduresdécritesdansleprésentmanuel.
DANGER
Certainsproduitsàlasercontiennentunediodeàlaserintégréedeclasse3Aou3B.Prenez
connaissancedesinformationssuivantes:
Rayonnementlaserlorsquelecarterestouvert.Eviteztouteexpositiondirecteaurayonlaser.Evitez
deregarderxementlefaisceauoudel'observeràl'aided'instrumentsoptiques.
Chapter2.Safetyinformation17
Page 24
≥18kg(37lbs)≥32kg(70.5lbs)≥55kg(121.2lbs)
1
2
ATTENTION:
Soulevezlamachineavecprécaution.
ATTENTION:
L'interrupteurdecontrôled'alimentationdel'unitéetl'interrupteurdublocd'alimentationnecoupent
paslecourantélectriquealimentantl'unité.Enoutre,lesystèmepeutêtreéquipédeplusieurs
cordonsd'alimentation.Pourmettrel'unitéhorstension,vousdevezdéconnectertouslescordons
delasourced'alimentation.
VORSICHT
AnNetz-,Telefon-undDatenleitungenkönnengefährlicheSpannungenanliegen.
AusSicherheitsgründen:
•BeiGewitterandiesemGerätkeineKabelanschließenoderlösen.FernerkeineInstallations-,
Wartungs-oderRekongurationsarbeitendurchführen.
•GerätnuraneineSchutzkontaktsteckdosemitordnungsgemäßgeerdetemSchutzkontakt
anschließen.
•AlleangeschlossenenGeräteebenfallsanSchutzkontaktsteckdosenmitordnungsgemäß
geerdetemSchutzkontaktanschließen.
•DieSignalkabelnachMöglichkeiteinhändiganschließenoderlösen,umeinenStromschlagdurch
BerührenvonOberächenmitunterschiedlichemelektrischemPotenzialzuvermeiden.
•Geräteniemalseinschalten,wennHinweiseaufFeuer,WasseroderGebäudeschädenvorliegen.
18ThinkCentreHardwareMaintenanceManual
Page 25
•DieVerbindungzudenangeschlossenenNetzkabeln,Telekommunikationssystemen,Netzwerken
undModemsistvordemÖffnendesGehäuseszuunterbrechen,sofernindenInstallations-und
KongurationsprozedurenkeineanderslautendenAnweisungenenthaltensind.
•ZumInstallieren,TransportierenundÖffnenderAbdeckungendesComputersoderder
angeschlossenenEinheitendieKabelgemäßderfolgendenT abelleanschließenundabziehen.
ZumAnschließenderKabelgehenSiewiefolgtvorZumAbziehenderKabelgehenSiewiefolgtvor
1.SchaltenSiealleEinheitenAUS.
2.SchließenSieerstalleKabelandieEinheitenan.
3.SchließenSiedieSignalkabelandieBuchsenan.
4.SchließenSiedieNetzkabelandieSteckdosean.
5.SchaltenSiedieEinheitEIN.
1.SchaltenSiealleEinheitenAUS.
2.ZiehenSiezuerstalleNetzkabelausden
Netzsteckdosen.
3.ZiehenSiedieSignalkabelausdenBuchsen.
4.ZiehenSiealleKabelvondenEinheitenab.
CAUTION:
EineverbrauchteLithiumbatterienurdurcheineBatteriemitderTeilenummer45C1566odereine
gleichwertige,vomHerstellerempfohleneBatterieersetzen.EnthältdasSystemeinModulmiteiner
Lithiumbatterie,diesesnurdurcheinModuldesselbenTypsundvondemselbenHerstellerersetzen.
DieBatterieenthältLithiumundkannbeiunsachgemäßerVerwendung,HandhabungoderEntsorgung
explodieren.
DieBatterienicht:
•mitWasserinBerührungbringen.
•über100Cerhitzen.
•reparierenoderzerlegen.
DieörtlichenBestimmungenfürdieEntsorgungvonSondermüllbeachten.
ACHTUNG:
BeiderInstallationvonLasergeräten(wieCD-ROM-Laufwerken,DVD-aufwerken,Einheitenmit
LichtwellenleitertechnikoderSendern)Folgendesbeachten:
•DieAbdeckungennichtentfernen.DurchEntfernenderAbdeckungendesLasergerätskönnen
gefährlicheLaserstrahlungenfreigesetztwerden.DasGerätenthältkeinezuwartendenTeile.
•WerdenSteuerelemente,EinstellungenoderDurchführungenvonProzedurenandersalshier
angegebenverwendet,kanngefährlicheLaserstrahlungauftreten.
VORSICHT
EinigeLasergeräteenthalteneineLaserdiodederKlasse3Aoder3B.BeachtenSieFolgendes:
Chapter2.Safetyinformation19
Page 26
LaserstrahlungbeigeöffneterVerkleidung.NichtindenStrahlblicken.KeineLupenoderSpiegel
1
2
verwenden.Strahlungsbereichmeiden.
≥18kg≥32kg≥55kg
ACHTUNG:
ArbeitsschutzrichtlinienbeimAnhebenderMaschinebeachten.
ACHTUNG:
MitdemNetzschalteranderEinheitundamNetzteilwirddieStromversorgungfürdieEinheit
nichtunterbrochen.DieEinheitkannauchmitmehrerenNetzkabelnausgestattetsein.Umdie
StromversorgungfürdieEinheitvollständigzuunterbrechen,müssenallezumGerätführenden
NetzkabelvomNetzgetrenntwerden.
20ThinkCentreHardwareMaintenanceManual
Page 27
Chapter2.Safetyinformation21
Page 28
1
2
PERICOLO
Lacorrenteelettricaprovenientedaicavidialimentazione,deltelefonoedicomunicazionepuòessere
pericolosa.
Perevitareilrischiodiscosseelettriche:
•Noncollegareoscollegarequalsiasicavooppureeffettuarel'installazione,lamanutenzioneola
ricongurazionedelprodottoduranteuntemporale.
•Collegaretuttiilielettriciaunapresadialimentazionecorrettamentecablataedotatadimessaa
terra.
•Collegareallepreseelettricheappropriatetutteleapparecchiaturecheverrannoutilizzateper
questoprodotto.
22ThinkCentreHardwareMaintenanceManual
Page 29
•Sepossibile,utilizzaresolounamanopercollegareoscollegareicavidisegnale.
•Nonaccendereassolutamenteapparecchiatureinpresenzadiincendi,perdited'acquaodanno
strutturale.
•Scollegareicavidialimentazione,isistemiditelecomunicazione,leretieilmodemprimadi
aprireicoperchideldispositivo,salvoistruzionicontrarierelativealleprocedurediinstallazionee
congurazione.
•Collegareescollegareicavicomedescrittonellaseguentetabellaquandovengonoeffettuate
operazionidiinstallazione,spostamentooaperturadeicoperchidiquestoprodottoodelleunità
collegate.
PercollegarsiPerscollegarsi
1.SPEGNEREleapparecchiature.
2.Innanzitutto,collegaretuttiicavialleunità.
3.Collegareicavidisegnaleaiconnettori.
4.Collegareicavidialimentazioneallapresa.
5.Accenderel'unità.
1.SPEGNEREleapparecchiature.
2.Innanzitutto,rimuovereicavidialimentazionedalla
presa.
3.Rimuovereicavidisegnaledaiconnettori.
4.Rimuoveretuttiicavidalleunità.
ATTENZIONE:
Quandosisostituiscelabatteriaallitio,utilizzaresoloilNumeroparte45C1566ountipodibatteria
equivalenteconsigliatodalproduttore.Sesulsistemaèpresenteunmodulochecontieneunabatteria
allitio,sostituirlosoloconuntipodimodulodellostessotipodellastessacasadiproduzione.La
batteriacontienelitioepuòesplodereseusata,maneggiataosmaltitainmodononcorretto.
Non:
•Gettareoimmergerelabatterianell'acqua
•Riscaldarlaadunatemperaturasuperioreai100gradiC(212gradiF)
•Smontarla,ricaricarlaotentarediripararla
Lebatterieusatevannosmaltiteinaccordoallanormativainvigore(DPR915/82esuccessive
disposizioniedisposizionilocali).
ATTENZIONE:
Quandovengonoinstallatiprodottilaser(qualiCD-ROM,unitàDVD-ROM,unitàabreotticheo
trasmittenti),tenerpresentequantosegue:
•Nonrimuovereglisportelli.L'aperturadiun'unitàlaserpuòdeterminarel'esposizionearadiazioni
laserpericolose.All'internodell'unitànonvisonopartisucuieffettuarel'assistenzatecnica.
•L'utilizzodicontrolli,regolazioniol'esecuzionediprocedurenondescrittinelpresentemanuale
possonoprovocarel'esposizionearadiazionipericolose.
Chapter2.Safetyinformation23
Page 30
PERICOLO
1
2
AlcuneunitàlasercontengonoundiodolaserdiClasse3AoClasse3B.Tenerpresentequantosegue:
Aprendol'unitàvengonoemesseradiazionilaser.Nonssareilfascio,nonguardarlodirettamente
construmentiotticiedevitarel'esposizionealfascio.
≥18kg≥32kg≥55kg
ATTENZIONE:
Prestareattenzionenelsollevarel'apparecchiatura.
ATTENZIONE:
Ilpulsantedicontrollodell'alimentazionepresentesull'unitàel'interruttoredell'alimentatorenon
disattivanol'alimentazionecorrentefornitaall'unità.E'possibilechel'unitàdispongadipiùcavidi
alimentazione.Perdisattivarel'alimentazionedall'unità,accertarsichetuttiicavidialimentazione
sianoscollegatidallafontedialimentazione.
24ThinkCentreHardwareMaintenanceManual
Page 31

Chapter2.Safetyinformation25
Page 32

1
2
PELIGRO
Lacorrienteeléctricaprocedentedecablesdealimentación,teléfonosycablesdecomunicaciónpuede
serpeligrosa.
Paraevitarelriesgodedescargaeléctrica:
•Noconectenidesconecteloscablesnirealiceningunatareadeinstalación,mantenimientoo
reconguracióndeesteproductoduranteunatormentaeléctrica.
•Conectetodosloscablesdealimentaciónatomasdecorrientedebidamentecableadasy
conectadasatierra.
•Cualquierequipoqueseconecteaesteproductotambiéndebeconectarseatomasdecorriente
debidamentecableadas.
•Siemprequeseaposible,utiliceunasolamanoparaconectarodesconectarloscablesdeseñal.
•Noenciendanuncaunequipocuandohayseñalesdefuego,aguaodañosestructurales.
26ThinkCentreHardwareMaintenanceManual
Page 33

•Desconecteloscablesdealimentación,lossistemasdetelecomunicaciones,lasredesylos
módemsconectadosantesdeabrirlascubiertasdelosdispositivos,amenosqueseindiquelo
contrarioenlosprocedimientosdeinstalaciónyconguración.
•Conecteydesconecteloscables,comosedescribeenlatablasiguiente,cuandoinstale,muevao
abralascubiertasdeesteproductoodelosdispositivosconectados.
ParaconectarParadesconectar
1.APÁGUELOtodo.
2.Enprimerlugar,conectetodosloscablesalos
dispositivos.
3.Conecteloscablesdeseñalalosconectores.
4.Enchufeloscablesdealimentaciónalastomasde
corriente.
5.Enciendaeldispositivo.
1.APÁGUELOtodo.
2.Enprimerlugar,desenchufeloscablesdealimentación
delastomasdecorriente.
3.Desconecteloscablesdeseñaldelosconectores.
4.Desconectetodosloscablesdelosdispositivos.
PRECAUCIÓN:
Cuandosustituyaunabateríadelitio,utilicesolamenteunabateríanúmerodepieza45C1566uotra
detipoequivalenterecomendadaporelfabricante.Sisusistemadisponedeunmóduloquecontiene
unabateríadelitio,reemplácelosóloconelmismotipodemódulo,delmismofabricante.Labatería
contienelitioypuedeexplotarsinoseutiliza,manipulaodesechacorrectamente.
Nodebe:
•Arrojarlaalaguaosumergirlaenella
•Exponerlaatemperaturassuperioresa100°C(212°F)
•Repararlaodesmontarla
Deshágasedelabateríasegúnespeciquenlasleyesonormaslocales.
PRECAUCIÓN:
Cuandohayaproductosláser(comounidadesdeCD-ROM,unidadesdeDVD,dispositivosdebra
ópticaotransmisores)instalados,tengaencuentalosiguiente:
•Noquitelascubiertas.Siquitalascubiertasdelproductoláser,podríaquedarexpuestoaradiación
láserpeligrosa.Dentrodeldispositivonoexisteningunapiezaquerequieraserviciotécnico.
•Siusacontrolesoajustesorealizaprocedimientosquenoseanlosespecicadosaquí,podría
exponersearadiacionespeligrosas.
PELIGRO
Chapter2.Safetyinformation27
Page 34

Algunosproductoslásertienenincorporadoundiodoláserdeclase3Aoclase3B.Tengaencuentalo
1
2
siguiente:
Cuandoseabre,quedaexpuestoaradiaciónláser.Nomiredirectamentealrayoláser,nisiquieracon
instrumentosópticos,yeviteexponersedirectamentealrayoláser.
≥18kg≥32kg≥55kg
PRECAUCIÓN:
Adopteprocedimientossegurosallevantarelequipo.
PRECAUCIÓN:
Elbotóndecontroldealimentacióndeldispositivoyelinterruptordealimentacióndelafuentede
alimentaciónnodesconectanlacorrienteeléctricasuministradaaldispositivo.Además,eldispositivo
podríatenermásdeuncabledealimentación.Parasuprimirtodalacorrienteeléctricadeldispositivo,
asegúresedequetodosloscablesdealimentaciónesténdesconectadosdelatomadecorriente.
28ThinkCentreHardwareMaintenanceManual
Page 35

Chapter3.Generalinformation
Thischapterprovidesgeneralinformationthatappliestoallmachinetypessupportedbythispublication.
LenovoThinkVantageT ools
TheLenovoThinkVantage
accesstovarioustoolstohelpyouworkmoreeasilyandsecurely.
ToaccesstheLenovoThinkVantageToolsprogram,clickStart➙AllPrograms➙LenovoThinkVantage
Tools.
ThefollowingtableliststheprogramsthatyoucanaccessfromtheLenovoThinkVantageToolsprogram.To
accessaprogram,double-clickthecorrespondingicon.
Table1.ProgramiconnamesinLenovoThinkVantageTools
CreateRecoveryMedia
FingerprintSoftware(availableonsomemodels)FingerprintReader(availableonsomemodels)
LenovoThinkVantageT oolbox/LenovoSolutionCenterSystemHealthandDiagnostics
SimpleTapSimpleTap
ThinkVantagePasswordManagerPasswordVault
ThinkVantagePowerManager
ThinkVantageRescueandRecovery
ThinkVantageSystemUpdate
CommunicationsUtilityWebConferencing
ViewManagementUtility
®
Toolsprogramguidesyoutoahostofinformationsourcesandprovideseasy
ProgramnameIconnameinLenovoThinkVantageTools
FactoryRecoveryDisks
PowerControls
®
EnhancedBackupandRestore
UpdateandDrives
ScreenLayout
LenovoWelcome
TheLenovoWelcomeprogramintroducesyoutosomeinnovativebuilt-infeaturesofLenovoandguidesyou
throughafewimportantsetuptaskstohelpyoumakethemostofyourcomputer.
LenovoThinkVantageToolbox
TheLenovoThinkVantageToolboxprogramhelpsyoumaintainyourcomputer,improvecomputingsecurity,
diagnosecomputerproblems,getfamiliarwiththeinnovativetechnologiesprovidedbyLenovo,andgetmore
informationaboutyourcomputer.See“LenovoThinkVantageToolbox”onpage51
fordetailedinformation.
LenovoSolutionCenter
TheLenovoSolutionCenterprogramenablesyoutotroubleshootandresolvecomputerproblems.It
combinesdiagnostictests,systeminformationcollection,securitystatus,andsupportinformation,along
withhintsandtipsformaximumsystemperformance.See“LenovoSolutionCenter”onpage52
information.
©CopyrightLenovo2011
fordetailed
29
Page 36

SimpleTap
TheSimpleTapprogramprovidesyouwithaquickwaytocustomizesomebasiccomputersettingssuchas
mutingthespeakers,adjustingthevolume,lockingthecomputeroperatingsystem,launchingaprogram,
openingaWebpage,openingale,andsoon.YoualsocanusetheSimpleTapprogramtoaccessthe
LenovoAppShop,fromwhichyoucandownloadvariousapplicationsandcomputersoftware.
TostarttheSimpleTapprograminaquickway,doanyofthefollowing:
•ClicktheredSimpleTaplaunchpointonthedesktop.Theredlaunchpointisavailableonthedesktop
afteryouhavelaunchedtheSimpleTapprogramforthersttime.
•PresstheblueThinkVantagebuttonifyourkeyboardhasone.
Note:TheSimpleTapprogramisonlyavailableoncertainmodelspreinstalledwiththeWindows7operating
system.IfyourWindows7modelisnotpreinstalledwiththeSimpleTapprogram,youcandownloadit
fromhttp://www.lenovo.com/support.
Additionalinformationresources
IfyouhaveInternetaccess,themostup-to-dateinformationforyourcomputerisavailablefromtheWorld
WideWeb.
Youcanndthefollowinginformation:
•CRUremovalandinstallationinstructions
•Publications
•T roubleshootinginformation
•Partsinformation
•Downloadsanddrivers
•Linkstootherusefulsourcesofinformation
Toaccessthisinformation,goto:
http://www.lenovo.com/support
30ThinkCentreHardwareMaintenanceManual
Page 37

Specications
Thissectionliststhephysicalspecicationsforyourcomputer.
Dimensions
Width:545.2mm(21.46inches)
Height:414.3mm(16.31inches)
Depth:81mm(3.19inches)
Weight
Maximumcongurationasshipped:8.4kg(18.52lb)
Environment
•Airtemperature:
Operating:10°Cto35°C(50°Fto95°F)
Non-operating:-20°Cto50°C(-40°Fto140°F)
•Humidity:
Operating:20%to80%(non-condensing)
Non-operating:10%to90%(non-condensing)
•Altitude:
Operating:-50to10000ft(-15.2to3048m)
Non-operating:-50to35000ft(-15.2to10668m)
Electricalinput
•Inputvoltage:
–Lowrange:
Minimum:100Vac
Maximum:127Vac
Inputfrequencyrange:50to60Hz
–Highrange:
Minimum:200Vac
Maximum:240Vac
Inputfrequencyrange:50to60Hz
Chapter3.Generalinformation31
Page 38

32ThinkCentreHardwareMaintenanceManual
Page 39

Chapter4.GeneralCheckout
Attention
Thedrivesinthecomputeryouareservicingmighthavebeenrearrangedorthedrivestartupsequence
changed.Beextremelycarefulduringwriteoperationssuchascopying,saving,orformatting.Dataor
programscanbeoverwrittenifyouselectanincorrectdrive.
Generalerrormessagesappearifaproblemorconictisfoundbyanapplicationprogram,theoperating
system,orboth.Foranexplanationofthesemessages,refertotheinformationsuppliedwiththatsoftware
package.
BeforereplacinganyFRUs,ensurethatthelatestlevelofBIOSisinstalledonthesystem.Adown-levelBIOS
mightcausefalseerrorsandunnecessaryreplacementofthesystemboard.Formoreinformationonhowto
determineandobtainthelatestlevelBIOS,see“BIOSlevels”onpage217
Usethefollowingproceduretohelpdeterminethecauseoftheproblem:
1.Power-offthecomputerandallexternaldevices.
2.Checkallcablesandpowercords.
3.Setalldisplaycontrolstothemiddleposition.
4.Power-onallexternaldevices.
5.Power-onthecomputer.
•Lookfordisplayederrorcodes
•Listenforbeepcodes
•Lookforreadableinstructionsoramainmenuonthedisplay.
Ifyoudidnotreceivethecorrectresponse,proceedtostep6onpage33
Ifyoudoreceivethecorrectresponse,proceedtostep7onpage33.
6.Lookatthefollowingconditionsandfollowtheinstructions:
.
.
•IfyouhearbeepcodesduringPOST,goto“Beepsymptoms”onpage79
•IfthecomputerdisplaysaPOSTerror,goto“POSTerrorcodes”onpage79.
•Ifthecomputerhangsandnoerrorisdisplayed,continueatstep7onpage33.
7.RuntheDiagnosticprograms.See“Diagnostics”onpage51.
•Ifyoureceiveanerror,replacethepartthatthediagnosticprogramcallsoutorgoto“Diagnostic
errorcodes”onpage62.
•Iftheteststopsandyoucannotcontinue,replacethelastdevicetested.
.
Problemdeterminationtips
Duetothevarietyofhardwareandsoftwarecombinationsthatcanbeencountered,usethefollowing
informationtoassistyouinproblemdetermination.Ifpossible,havethisinformationavailablewhen
requestingassistancefromServiceSupportandEngineeringfunctions.
•Machinetypeandmodel
•Processororharddiskdriveupgrades
•Failuresymptom
–Dodiagnosticsindicateafailure?
–What,when,where,single,ormultiplesystems?
–Isthefailurerepeatable?
©CopyrightLenovo2011
33
Page 40

–Hasthiscongurationeverworked?
–Ifithasbeenworking,whatchangesweremadepriortoitfailing?
–Isthistheoriginalreportedfailure?
•Diagnosticsversion
–T ypeandversionlevel
•Hardwareconguration
–Print(printscreen)congurationcurrentlyinuse
–BIOSlevel
•Operatingsystemsoftware
–T ypeandversionlevel
Notes:Toeliminateconfusion,identicalsystemsareconsideredidenticalonlyifthey:
1.Aretheexactmachinetypeandmodels
2.HavethesameBIOSlevel
3.Havethesameadapters/attachmentsinthesamelocations
4.Havethesameaddressjumpers/terminators/cabling
5.Havethesamesoftwareversionsandlevels
6.HavethesameDiagnosticDiskettes(version)
7.Havethesamecongurationoptionssetinthesystem
8.Havethesamesetupfortheoperatingsystemcontrolles
Comparingthecongurationandsoftwareset-upbetween“workingandnon-working”systemswilloften
leadtoproblemresolution.
34ThinkCentreHardwareMaintenanceManual
Page 41

Chapter5.Troubleshootinganddiagnostics
Thischapterdescribessomebasictroubleshootinganddiagnosticprograms.Ifyourcomputerproblemis
notdescribedhere,see“Diagnostics”onpage51
Basictroubleshooting
Thefollowingtableprovidesinformationtohelpyoutroubleshootyourcomputerproblems.
Note:Ifyoucannotcorrecttheproblem,havethecomputerserviced.Foralistofserviceandsupport
telephonenumbers,refertotheThinkCentreEdgeSafetyandWarrantyGuidethatcomeswithyourcomputer
orgototheLenovoSupportWebsiteathttp://www.lenovo.com/support/phone.
SymptomAction
Thecomputerdoesnotstart
whenyoupressthepower
switch.
Themonitorscreenisblank.
Thekeyboarddoesnotwork.
Themousedoesnotwork.
Verifythat:
•Thepowercordiscorrectlyconnectedtotherearofthecomputerandtoa
workingelectricaloutlet.
•Ifyourcomputerhasasecondarypowerswitchontherearofthecomputer,
makesurethatitisswitchedon.
•Thepowerindicatoronthefrontofthecomputerison.
•Thecomputervoltagematchesthevoltageavailableattheelectricaloutletfor
yourcountryorregion.
Verifythat:
•Themonitorpowercordiscorrectlyconnectedtothemonitorandtoaworking
electricaloutlet.
•Themonitoristurnedonandthebrightnessandcontrastcontrolsareset
correctly.
•Thecomputervoltagematchesthevoltageavailableattheelectricaloutletfor
yourcountryorregion.
Verifythat:
•Thecomputeristurnedon.
•ThekeyboardissecurelyconnectedtoaUSBconnectoronthecomputer.
•Nokeysarestuck.
Verifythat:
•Thecomputeristurnedon.
•ThemouseissecurelyconnectedtoaUSBconnectoronthecomputer.
•Themouseisclean.
foradditionaltroubleshootingresources.
©CopyrightLenovo2011
35
Page 42

SymptomAction
Thewirelesskeyboardormouse
doesnotwork.
Theoperatingsystemdoesnot
start.
Thecomputerbeepsmultiple
timesbeforetheoperating
systemstarts.
Verifythat:
•Thecomputeristurnedon.
•Thebatteryorbatteriesinstalledinthewirelesskeyboardormouseareingood
condition.
•Thewirelesscongurationsareallsetcorrectly.Youmightneedtoreferto
thedocumentationthatcomewiththewirelesskeyboardormouse,orrefer
toyourWindowsHelpandSupportinformationsystemforwirelessrelated
instructions.Ifyourwirelessmousehasadongle,makesurethedongleis
correctlyconnectedtooneoftheUSBconnectorsonthecomputer.
•Forthewirelesskeyboard,nokeysarestuck.
•Thewirelessmouseisclean.
Verifythat:
•Thestartupsequenceincludesthedevicewheretheoperatingsystemresides.
Usually,theoperatingsystemisontheharddiskdrive.Formoreinformation,
see“Selectingastartupdevice”onpage59
Verifythatnokeysarestuck.
Troubleshootingprocedure
.
Usethefollowingprocedureasastartingpointfordiagnosingproblemsyouareexperiencingwithyour
computer:
1.Verifythatthecablesforallattacheddevicesareconnectedcorrectlyandsecurely.
2.Verifythatallattacheddevicesthatrequireacpowerareconnectedtoproperlygrounded,functioning
electricaloutlets.
3.VerifythatallattacheddevicesareenabledintheBIOSsettingsofyourcomputer.Formoreinformation
aboutaccessingandchangingtheBIOSsettings,refertoyourChapter6“UsingtheSetupUtility
program”onpage57.
4.Gotothe“T roubleshooting”onpage37andfollowtheinstructionsforthetypeofproblemyouare
experiencing.IftheTroubleshootinginformationdoesnothelpyouresolveaproblem,continuewiththe
nextstep.
5.T ryusingapreviouslycapturedcongurationtoseeifarecentchangetohardwareorsoftwaresettings
hascausedaproblem.Beforerestoringapreviousconguration,captureyourcurrentcongurationin
casetheoldercongurationsettingsdonotsolvetheproblemorhaveadverseaffects.Torestorea
capturedconguration,clickStart➙ControlPanel➙SystemandSecurity➙System➙System
Protection➙SystemRestore.Ifthisdoesnotcorrecttheproblem,continuewiththenextstep.
6.Runthediagnosticprograms.See“Diagnostics”onpage51formoreinformation.
•Ifthediagnosticprogramsdetectahardwarefailure,contacttheLenovoCustomerSupportCenter.
See“Additionalinformationresources”onpage30formoreinformation.
•Ifyouareunabletorunthediagnosticprograms,contacttheLenovoCustomerSupportCenter.See
“Additionalinformationresources”onpage30formoreinformation.
•Ifthediagnosticprogramsdonotdetectahardwarefailure,continuewiththenextstep.
7.Useanantivirusprogramtoseeifyourcomputerhasbeeninfectedbyavirus.Iftheprogramdetectsa
virus,removethevirus.
8.Ifnoneoftheseactionssolvetheproblem,seektechnicalassistance.See“Additionalinformation
resources”onpage30
formoreinformation.
36ThinkCentreHardwareMaintenanceManual
Page 43

Troubleshooting
Usethetroubleshootinginformationtondsolutionstoproblemsthathavedenitesymptoms.
Ifthesymptomyourcomputerisexperiencingoccurredimmediatelyafteranewhardwareoptionornew
softwareinstalled,dothefollowingbeforereferringtothetroubleshootinginformation:
1.Removethenewhardwareoptionorsoftware.Ifyoumustremovethecomputercovertoremovea
hardwareoption,havethecomputerserviced.Foryoursafety,donotoperatethecomputerwiththe
coverremoved.
2.Runthediagnosticprogramstoensureyourcomputerisoperatingcorrectly.
3.Reinstallthenewhardwareoptionorsoftware.
Selecttheproblemyourcomputerisexperiencingfromthefollowinglist:
•“Audioproblems”onpage37
•“CDproblems”onpage38
•“DVDproblems”onpage39
•“Intermittentproblems”onpage41
•“Keyboard,mouse,orpointingdeviceproblems”onpage41
•“Monitorproblems”onpage43
•“Networkingproblems”onpage44
•“Optionproblems”onpage47
•“Performanceandlockupproblems”onpage48
•“Printerproblems”onpage49
•“Serialportproblems”onpage49
•“Softwareproblems”onpage50
•“USBproblems”onpage51
Audioproblems
Selectyoursymptomfromthefollowinglist:
•“NoaudioinWindows”onpage37
•“AnaudiodiscorAutoPlay-enableddiscdoesnotautomaticallyplaywhenitisinsertedintoadrive”
onpage38
•“Soundcomesfromoneexternalspeakeronly”onpage38
•“NoaudioinDOSapplicationsorgames”onpage38
NoaudioinWindows
Symptom:NoaudioinWindows
Actions:
•IfyouareusingpoweredexternalspeakersthathaveanOn/Offcontrol,verifythattheOn/Offcontrolis
settotheOnpositionandthespeakerpowercableisconnectedtoaproperlygrounded,functionalac
electricaloutlet.
•Ifyourexternalspeakershaveavolumecontrol,verifythatthevolumecontrolisnotsettoolow.
•Double-clickthespeakericonintheWindowsnoticationarea.Amastervolume-controlwindowopens.
VerifythattheMutesettingsarenotcheckedandnoneofthevolumesettingsissettoolow.
Chapter5.Troubleshootinganddiagnostics37
Page 44

•Somemodelshaveafrontaudiopanelyoucanusetoadjustvolume.Ifyouhaveafrontaudiopanel,
verifythatthevolumeisnotsettoolow.
•Verifythatyourexternalspeakers(andheadphones,ifused)areconnectedtothecorrectaudioconnector
onthecomputer.Mostspeakercablesarecolor-codedtomatchtheconnector.
Note:Whenexternal-speakerorheadphonecablesareattachedtotheaudioconnector,theinternal
speaker,ifpresent,isdisabled.Inmostcases,ifanaudioadapterisinstalledinoneoftheexpansionslots,
theaudiofunctionbuiltintothesystemboardisdisabled;usetheaudiojacksontheadapter.
•MakesurethattheprogramyouarerunningisdesignedforuseintheMicrosoftWindowsoperating
system.IftheprogramisdesignedtoruninDOS,theprogramdoesnotusetheWindowssoundfeature
andmustbeconguredtouseSoundBlasterProorSoundBlasteremulation.
•Verifythattheaudiodevicedriversarecorrectlyinstalled.SeeMicrosoftWindowshelpsystemformore
information.
Iftheseactionsdonotcorrecttheproblem,runthediagnosticprograms(see“Diagnostics”onpage51
instructions).Ifyouneedtechnicalassistance,see“Additionalinformationresources”onpage30.
AnaudiodiscorAutoPlay-enableddiscdoesnotautomaticallyplaywhenitis
insertedintoadrive
Symptom:AnaudiodiscorAutoPlay-enableddiscdoesnotautomaticallyplaywhenitisinsertedintoadrive
Action:See“CDproblems”onpage38.
Soundcomesfromoneexternalspeakeronly
Symptom:Soundcomesfromoneexternalspeakeronly.
Actions:
•Ensurethatthespeakercableisinsertedcompletelyintotheconnectoronthecomputer.
•Makesurethecablethatattachestheleftspeakertotherightspeakerissecurelyconnected.
•Double-clickthespeakericonintheWindowsnoticationarea.Amastervolume-controlwindowopens.
VerifythattheBalancesettingsaresetcorrectly.
Iftheseactionsdonotcorrecttheproblem,youmighthaveafailingspeaker.Havethespeakerserviced.If
youneedtechnicalassistance,see“Additionalinformationresources”onpage30
.
NoaudioinDOSapplicationsorgames
Symptom:NoaudioinDOSapplicationsorgames
for
Actions:
•MakesuretheDOSapplicationorgameisconguredtouseSoundBlasterProorSoundBlaster
emulation.Refertothedocumentationthatcomeswiththeapplicationorgameforinstructionson
settingsound-cardsettings.
•Iftheseactionsdonotcorrecttheproblem,runthediagnosticprograms(see“Diagnostics”onpage51
forinstructions).Ifyouneedtechnicalassistance,see“Additionalinformationresources”onpage30.
CDproblems
Selectyoursymptomfromthefollowinglist:
•“AnaudiodiscorAutoPlay-enableddiscdoesnotautomaticallyplaywhenitisinsertedintoaCD
drive”onpage39
38ThinkCentreHardwareMaintenanceManual
Page 45

•“ACDorDVDdoesnotwork”onpage39
•“Unabletouseastartable(bootable)recoverymedium,suchastheProductRecoveryCD,tostart
yourcomputer”onpage39
AnaudiodiscorAutoPlay-enableddiscdoesnotautomaticallyplaywhenitis
insertedintoaCDdrive
Symptom:AnaudiodiscorAutoPlay-enableddiscdoesnotautomaticallyplaywhenitisinsertedinto
aCDdrive.
Actions:
•IfyouhavemultipleCDorDVDdrivesinstalled(oracombinationofCDandDVDdrives),tryinsertingthe
discintotheotherdrive.Insomecases,onlyoneofthedrivesisconnectedtotheaudiosubsystem.
•IfyouareusingtheWindows7operatingsystem,followtheactionfor“ACDorDVDdoesnotwork”
onpage39
.
Ifthisdoesnotcorrecttheproblem,followtheactionfor“ACDorDVDdoesnotwork”onpage39
.
ACDorDVDdoesnotwork
Symptom:ACDorDVDdoesnotwork.
Actions:
•Verifythatthediscisinsertedcorrectly,withitslabelup.
•Makesurethatthediscyouareusingisclean.Toremovedustorngerprints,wipethedisccleanwitha
softclothfromthecentertotheoutside.Wipingadiscinacircularmotionmightcauselossofdata.
•Verifythatthediscyouareusingisnotscratchedordamaged.Tryinsertinganotherdiscthatyouknow
isgood.Ifyoucannotreadfromaknown-gooddisc,youmighthaveaproblemwithyourCDorDVD
driveorthecablingtoyourCDorDVDdrive.Makesurethatthepowercableandsignalcableare
securelyconnectedtothedrive.
Unabletouseastartable(bootable)recoverymedium,suchastheProductRecovery
CD,tostartyourcomputer
Symptom:Unabletouseastartable(bootable)recoverymedium,suchastheProductRecoveryCD,
tostartyourcomputer.
Action:MakesurethattheCDorDVDdriveisinthestartupsequencebeforetheharddiskdrive.Refer
toyour“Selectingorchangingthestartupdevicesequence”onpage59
changingthestartupsequence.Notethatonsomemodelsthestartupsequenceispermanentlysetand
cannotbechanged.
forinformationonviewingand
Iftheseactionsdonotcorrecttheproblem,runthediagnosticprograms(see“Diagnostics”onpage51for
instructions).Ifyouneedtechnicalassistance,see“Additionalinformationresources”onpage30
.
DVDproblems
Selectyoursymptomfromthefollowinglist:
•“BlackscreeninsteadofDVDvideo”onpage40
•“DVDmoviewillnotplay”onpage40
•“NoaudioorintermittentaudiowhileplayingDVDmovie”onpage40
•“Playbackisverysloworchoppy”onpage40
•“Invaliddiscornodiscfoundmessage”onpage40
Chapter5.Troubleshootinganddiagnostics39
Page 46

BlackscreeninsteadofDVDvideo
Symptom:BlackscreeninsteadofDVDvideo
Actions:
•RestarttheDVDplayerprogram.
•Closeanyopenles,turnoffthecomputer,andthenrestartthecomputer.
•T ryalowerscreenresolutionorcolordepth.
Iftheseactionsdonotcorrecttheproblem,runthediagnosticprograms(see“Diagnostics”onpage51
instructions).Ifyouneedtechnicalassistance,see“Additionalinformationresources”onpage30
.
DVDmoviewillnotplay
Symptom:DVDmoviewillnotplay.
Actions:
•Makesurethatthediscsurfaceiscleanandnotscratched.
•Checkthediscorpackageforregionalcoding.Y oumightneedtopurchaseadiscwithcodingfor
theregionwhereyouareusingyourcomputer.
Iftheseactionsdonotcorrecttheproblem,runthediagnosticprograms(see“Diagnostics”onpage51for
instructions).Ifyouneedtechnicalassistance,see“Additionalinformationresources”onpage30.
NoaudioorintermittentaudiowhileplayingDVDmovie
Symptom:NoaudioorintermittentaudiowhileplayingDVDmovie.
Actions:
•Checkthevolumecontrolsettingsonyourcomputerandonyourspeakers.
•Makesurethatthediscsurfaceiscleanandnotscratched.
•Checkallcableconnectionstoandfromthespeakers.
•UsetheDVDmenuforthevideotoselectadifferentaudiotrack.
for
Iftheseactionsdonotcorrecttheproblem,runthediagnosticprograms(see“Diagnostics”onpage51
instructions).Ifyouneedtechnicalassistance,see“Additionalinformationresources”onpage30.
Playbackisverysloworchoppy
Symptom:Playbackisverysloworchoppy.
Actions:
•Disableanybackgroundprograms,suchasAntiVirusorDesktopThemes.
•Ensurethatvideoresolutionissettolessthan1152x864.
Iftheseactionsdonotcorrecttheproblem,runthediagnosticprograms(see“Diagnostics”onpage51
instructions).Ifyouneedtechnicalassistance,see“Additionalinformationresources”onpage30.
Invaliddiscornodiscfoundmessage
Symptom:Invaliddiscornodiscfoundmessage
Actions:
40ThinkCentreHardwareMaintenanceManual
for
for
Page 47

•EnsurethataDVDdiscisinthedrivewiththeshinysideofthediscfacingdown.
•Ensurethatvideoresolutionissettolessthan1152x864.
•OncomputersthathaveaCD-ROMorCD-RWdriveinadditiontoaDVD-ROMdrive,makesurethatthe
DVDdiscisinthedrivelabeled“DVD”.
Iftheseactionsdonotcorrecttheproblem,runthediagnosticprograms(see“Diagnostics”onpage51
instructions).Ifyouneedtechnicalassistance,see“Additionalinformationresources”onpage30
for
.
Intermittentproblems
Symptom:Aproblemoccursonlyoccasionallyandisdifculttorepeat.
Actions:
•Verifythatallcablesandcordsaresecurelyconnectedtothecomputerandattacheddevices.
•Verifythatwhenthecomputerison,thefanisnotblocked(thereisairowaroundthefan),andthefanis
working.Ifairowisblockedorthefanisnotworking,thecomputermightoverheat.
•IfSCSIdevicesareinstalled,verifythatthelastexternaldeviceineachSCSIchainisterminatedcorrectly.
(SeeyourSCSIdocumentation.)
Iftheseactionsdonotcorrecttheproblem,runthediagnosticprograms(see“Diagnostics”onpage51for
instructions).Ifyouneedtechnicalassistance,see“Additionalinformationresources”onpage30.
Keyboard,mouse,orpointingdeviceproblems
Selectyoursymptomfromthefollowinglist:
•“Allorsomekeysonthekeyboarddonotwork”onpage41
•“Themouseorpointingdevicedoesnotwork”onpage42
•“Thepointeronthescreendoesnotmovesmoothlywiththemouse”onpage42
•“Thengerprintreaderdoesnotwork”onpage42
•“Thewirelesskeyboarddoesnotwork”onpage42
Allorsomekeysonthekeyboarddonotwork
Symptom:Allorsomekeysonthekeyboarddonotwork.
Actions:
•Verifythatthekeyboardcableissecurelyconnectedtothecorrectconnectoronthecomputer.
•IfyouareusinganEnhancedPerformanceUSBkeyboardandoneormoreoftheRapidAccessbuttons
aretheonlykeysthatarenotworking,thesebuttonsmighthavebeendisabledorhavenotbeenassigned
toafunction.UsethehelpsystemintheEnhancedPerformanceCustomizationKeyboardprogramto
helpdiagnoseproblemswiththeRapidAccessbuttons.
•OntheWindows7operatingsystem,dothefollowing:
1.ClickStart➙ControlPanel.
2.ClickHardwareandSound.
3.ClickDevicesandPrinters.
4.Double-clickUSBEnhancedPerformanceKeyboard.TheUSBEnhancedPerformanceKeyboard
Customizationprogramstarts.
Chapter5.Troubleshootinganddiagnostics41
Page 48

Iftheseactionsdonotcorrecttheproblem,havethecomputerandkeyboardserviced.See“Additional
informationresources”onpage30fordetails.
Themouseorpointingdevicedoesnotwork
Symptom:Themouseorpointingdevicedoesnotwork.
Actions:
•Verifythatthemouseorpointing-devicecableissecurelyattachedtothecorrectconnectoronthe
computer.Dependingonthetypeofmouseyouhave,themousecablewillconnecttoeitherthe
mouse,serial,orUSBconnector.SomekeyboardshaveintegratedUSBconnectorsthatcanbeused
foraUSBmouseorpointingdevice.
•Verifythatthedevicedriversforthemouseorpointingdeviceareinstalledcorrectly.
•IfyouareusingaUSBkeyboardormouse,verifythattheUSBconnectorsareenabledintheBIOS
settings.See“Enablingordisablingadevice”onpage58
Iftheseactionsdonotcorrecttheproblem,runthediagnosticprograms(see“Diagnostics”onpage51for
instructions).Ifyouneedtechnicalassistance,see“Additionalinformationresources”onpage30.
.
Thepointeronthescreendoesnotmovesmoothlywiththemouse
Symptom:Thepointeronthescreendoesnotmovesmoothlywiththemouse.
Action:Erraticmovementofthemousepointerisgenerallycausedbyabuildupofdirt,oils,andother
contaminantsontheballinsidethemouse.Cleanthemouse.
Thengerprintreaderdoesnotwork
Symptom:Thengerprintreaderdoesnotwork.
Action:Thefollowingcouldcausethengerprintreadernottooperateproperly:
•Notenrollingyourngerprintcorrectly.
•Scratchingthesurfaceofthereaderwithahard,pointedobject.
•Scrapingthesurfaceofthereaderwithyournailoranythinghard.
•Usingortouchingthereaderwithadirtynger.
•Thesurfaceofyourngerisverydifferentfromwhenyouenrolledyourngerprint.
Thewirelesskeyboarddoesnotwork
Symptom:Thewirelesskeyboarddoesnotwork.
Action:IftheT ransceiverCommunicationsLEDisonandthewirelessKeyboarddoesnotwork,restartyour
computer.Ifrestartingyourcomputerdoesnotsolvetheproblem,verifythatthefollowingconditionsaremet:
•Thebatteriesareproperlyinstalled.
•Thebatteriesstillretaintheircurrent.
•Thewirelesskeyboardislocatedlessthantenmetersawayfromthetransceiver.
•Thetransceiverisfullyinstalled.
Action:IfthetransceivercommunicationsLEDisnoton,reconnectthetransceiverandthekeyboard.
42ThinkCentreHardwareMaintenanceManual
Page 49

Monitorproblems
Note:Manymonitorshavestatus-indicatorlightsandbuilt-incontrolsforadjustingbrightness,contrast,
width,height,andotherpictureadjustments.However,thecontrolsvaryfrommonitortypetomonitortype.
Selectyoursymptomfromthefollowinglist:
•“Wrongcharactersappearonthescreen”onpage43
•“Themonitorworkswhenyouturnonthecomputer,butgoesblankaftersomeperiodofcomputer
inactivity”onpage43
•“Themonitorworkswhenyouturnonthecomputer,butgoesblankwhenyoustartsomeapplication
programs”onpage43
•“Theimageappearstobeickering”onpage43
•“Theimageisdiscolored”onpage44
Wrongcharactersappearonthescreen
Symptom:Wrongcharactersappearonthescreen.
Action:Havethecomputerserviced.Fordetails,see“Additionalinformationresources”onpage30.
Themonitorworkswhenyouturnonthecomputer,butgoesblankaftersomeperiod
ofcomputerinactivity
Symptom:Themonitorworkswhenyouturnonthecomputer,butgoesblankaftersomeperiodofcomputer
inactivity.
Action:Thecomputerisprobablysetforenergysavingswiththepower-managementfeature.Ifthe
power-managementfeatureisenabled,disablingitorchangingthesettingsmightsolvetheproblem.
Iftheseactionsdonotcorrecttheproblem,runthediagnosticprograms(see“Diagnostics”onpage51for
instructions).Ifyouneedtechnicalassistance,see“Additionalinformationresources”onpage30.
Themonitorworkswhenyouturnonthecomputer,butgoesblankwhenyoustart
someapplicationprograms
Symptom:Themonitorworkswhenyouturnonthecomputer,butgoesblankwhenyoustartsome
applicationprograms.
Action:
Verifythatthenecessarydevicedriversfortheapplicationprogramsareinstalled.Refertothedocumentation
fortheaffectedapplicationprogramtoseeifdevicedriversarerequired.
Iftheseactionsdonotcorrecttheproblem,runthediagnosticprograms(see“Diagnostics”onpage51for
instructions).Ifyouneedtechnicalassistance,see“Additionalinformationresources”onpage30
.
Theimageappearstobeickering
Symptom:Theimageappearstobeickering.
Actions:
•Themonitormightbeoperatinginalow-refreshratedisplaymode.Setthemonitortothehighest,
noninterlacedrefreshratesupportedbyyourmonitorandthevideocontrollerinyourcomputer.
•Themonitormightbeaffectedbyinterferencefromnearbyequipment.Magneticeldsaroundother
devices,suchastransformers,appliances,uorescentlights,andothermonitorsmightbecausingthe
Chapter5.Troubleshootinganddiagnostics43
Page 50

problem.Moveuorescentdesklightingoranyequipmentthatproducesmagneticeldsfartheraway
fromthemonitor.Ifthisdoesnotcorrecttheproblem,dothefollowing:
1.T urnoffthemonitor.(Movingacolormonitorwhileitisturnedonmightcausescreendiscoloration.)
2.Adjusttheplacementofthemonitorandotherdevicessothattheyareatleast305mm(12inches)
apart.
3.T urnonthemonitor.
•Y oucanresettherefreshratethroughyouroperatingsystemControlPanel:
OntheWindows7operatingsystem,clickStart➙ControlPanel➙HardwareandSound➙Adjust
screenresolution➙AdvancedSettings.ThenclicktheMonitortabandselectanewrefreshrate.
•Seeyouroperatingsystemdocumentationorhelpforfurtherinformationonmonitorsettings.
Iftheseactionsdonotcorrecttheproblem,yourmonitormightneedservice.See“Additionalinformation
resources”onpage30fordetails.
Theimageisdiscolored
Symptom:Theimageisdiscolored.
Action:Themonitormightbeaffectedbyinterferencefromnearbyequipment.Magneticeldsaroundother
devices,suchastransformers,appliances,uorescentlights,andothermonitorsmightbecausingthe
problem.Moveuorescentdesklightingoranyequipmentthatproducesmagneticeldsfurtherawayfrom
themonitor.Ifthisdoesnotcorrecttheproblem,dothefollowing:
1.T urnoffthemonitor.(Movingacolormonitorwhileitisturnedonmightcausescreendiscoloration.)
2.Adjusttheplacementofthemonitorandotherdevicessothattheyareatleast305mm(12inches)apart.
3.T urnonthemonitor.
Iftheseactionsdonotcorrecttheproblem,yourmonitormightneedservice.See“Additionalinformation
resources”onpage30fordetails.
Networkingproblems
Thefollowingarethemostcommonnetworkingproblems.Selectyournetworkingproblemfromthe
followinglist:
•“Ethernetproblems”onpage44
•“AwirelessLANproblem”onpage46
•“AwirelessWANproblem”onpage46
•“Bluetoothproblems”onpage46
Ethernetproblems
ForEthernetproblems,selectyoursymptomfromthefollowinglist:
•“Yourcomputercannotconnecttothenetwork”onpage44
•“Theadapterstopsworkingfornoapparentreason”onpage45
•“IfyourcomputerisaGigabitEthernetmodelandyouuseaspeedof1000Mbps,theconnectionfails
orerrorsoccur”onpage45
•“IfyourcomputerisaGigabitEthernetmodel,itcannotconnecttothenetworkat1000Mbps.Instead,
itconnectsat100Mbps”onpage46
Yourcomputercannotconnecttothenetwork
Symptom:Yourcomputercannotconnecttothenetwork.
44ThinkCentreHardwareMaintenanceManual
Page 51

Actions:Makesurethat:
•Thecableisinstalledproperly.
ThenetworkcablemustbesecurelyconnectedtoboththeEthernetconnectorofyourcomputerand
theRJ45connectorofthehub.Themaximumallowabledistancefromthecomputertohubis100
meters.Ifthecableisconnectedandthedistanceiswithinacceptablelimitsbuttheproblempersists,try
adifferentcable.
•Thecableisinstalledproperly.
•Y ouareusingthecorrectdevicedriver.
OntheWindows7operatingsystem,dothefollowing:
1.ClickStart➙ControlPanel.
2.ClickHardwareandSound.
3.ClickDeviceManager.Ifyouarepromptedforanadministratorpasswordorconrmation,typethe
passwordorprovideconrmation.
4.IfanexclamationmarkisdisplayednexttoanadapternameunderNetworkadapters,youmightnot
usethecorrectdriverorthedriverisnotenabled.Toupdatethedriver,right-clickthehighlighted
adapter.
5.ClickUpdateDriverSoftware,andthenfollowtheinstructionsonthescreen.
•Theswitchportandtheadapterhavethesameduplexsetting.
Ifyouconguredtheadapterforfullduplex,makesuretheswitchportisalsoconguredforfullduplex.
Settingthewrongduplexmodecandegradeperformance,causedataloss,orresultinlostconnections.
•Y ouhaveinstalledallnetworkingsoftwarethatisnecessaryforyournetworkenvironment.
CheckwithyourLANadministratorforthenecessarynetworkingsoftware.
Theadapterstopsworkingfornoapparentreason
Symptom:Theadapterstopsworkingfornoapparentreason.
Action:Thenetworkdriverlesmaybecorruptormissing.Updatethedriverbyreferringtothe“Solution”
descriptionfortheproceduretomakesurethatthecorrectdevicedriverisinstalled.
TheWakeonLANfeatureisnotworking
Symptom:TheWakeonLAN(WOL)featureisnotworking.
Actions:
•MakesurethatWOLisenabledintheBIOSSetupUtilityprogram.
•Ifitis,checkwithyourLANadministratorforthenecessarysettings.
IfyourcomputerisaGigabitEthernetmodelandyouuseaspeedof1000Mbps,theconnection
failsorerrorsoccur
Symptom:IfyourcomputerisaGigabitEthernetmodelandyouuseaspeedof1000Mbps,theconnection
failsorerrorsoccur.
Actions:
•UseCategory5wiringandmakesurethatthenetworkcableissecurelyconnected.
•Connecttoa1000BASE-Thub/switch(not1000BASE-X).
Chapter5.Troubleshootinganddiagnostics45
Page 52

IfyourcomputerisaGigabitEthernetmodel,itcannotconnecttothenetworkat1000Mbps.Instead,
itconnectsat100Mbps
Symptom:IfyourcomputerisaGigabitEthernetmodel,itcannotconnecttothenetworkat1000Mbps.
Instead,itconnectsat100Mbps.
Actions:
•T ryanothercable.
•Makesurethatthelinkpartnerissettoauto-negotiate.
•Makesurethattheswitchis802.3ab-compliant(gigabitovercopper).
AwirelessLANproblem
Symptom:Youcannotconnectusingthebuilt-inwirelessnetworkingcard.
Actions:
•MakesurethatyourwirelessLANdriveristhelatestversion.ChecktheWebsiteandverifythedriver
versionsupportedbyAccessConnectionsisthelatestdocumentedinthereadmele.
•Makesurethatyourcomputeriswithinrangeofawirelessaccesspoint.
•Makesurethatthewirelessradioisenabledbydouble-clickingtheAccessConnectionsiconinthe
Windowsnoticationarea.
Note:IfyourcomputerispreinstalledwiththeWindows7operatingsystem,clickShowhiddeniconsin
theWindowsnoticationarea.TheAccessConnectionsiconisdisplayed.Formoreinformationabout
theicon,seetheHelpinAccessConnections.
•CheckNetworkName(SSID),andyourencryptioninformation.UseAccessConnectionstoverifythis
case-sensitiveinformation.
AwirelessWANproblem
Message:UnauthorizedWANcardispluggedin-PoweroffandremovetheWANcard.
Action:SeektechnicalassistanceforhelptoremovetheunauthorizedWANcard.See“Additional
informationresources”onpage30formoreinformation.
Note:SomecomputermodelsdonothaveawirelessWAN.
Bluetoothproblems
Bluetoothisavailablewithsomecertaincomputermodels.
ForBluetoothproblems,selectyoursymptomfromthefollowinglist:
•“SounddoesnotcomefromtheBluetoothheadphone”onpage46
•“PIMitemssentfromtheWindows7operatingsystemcannotbereceivedcorrectly”onpage47
SounddoesnotcomefromtheBluetoothheadphone
Symptom:SounddoesnotcomefromtheBluetoothheadset/headphonebutcomesfromthelocalspeaker
eventhoughtheheadset/headphoneisconnectedusingHeadsetproleorAVprole.
Action:Dothefollowing:
1.Exittheapplicationthatusesthesounddevice(forexample,WindowsMediaPlayer).
2.OpentheControlPanelbyclickingStart➙ControlPanel.
3.ClickHardwareandSound➙Sound.
46ThinkCentreHardwareMaintenanceManual
Page 53

4.SelectthePlaybacktab.
5.IfyouareusingHeadsetprole,selectBluetoothHands-freeAudioandclicktheSetDefaultbutton.If
youareusingAVprole,selectStereoAudioandclicktheSetDefaultbutton.
6.ClickOKtoclosetheSoundwindow.
PIMitemssentfromtheWindows7operatingsystemcannotbereceivedcorrectly
Symptom:PersonalInformationManager(PIM)itemssentfromtheWindows7operatingsystemcannotbe
receivedcorrectlyintotheaddressbookofanyotherBluetooth-enableddevice.
Action:TheWindows7operatingsystemsendsPIMitemsinXMLformat,butmostBluetooth-enabled
deviceshandlePIMitemsinvCardformat.IfanotherBluetooth-enableddevicecanreceivealethrough
Bluetooth,aPIMitemsentfromtheWindows7operatingsystemsystemmightbesavedasalewith
theextensioncontact.
Optionproblems
UsethisinformationtodiagnoseproblemswithLenovohardwareoptionsthatdonothavetheirown
troubleshootinginformation.
Selectyoursymptomfromthefollowinglist:
•“Anoptionthatwasjustinstalleddoesnotwork”onpage47
•“Anoptionthatpreviouslyworkeddoesnotworknow”onpage47
Anoptionthatwasjustinstalleddoesnotwork
Symptom:Anoptionthatwasjustinstalleddoesnotwork.
Action:Verifythat:
•Theoptionisdesignedforyourcomputer.
•Y oufollowedtheinstallationinstructionssuppliedwiththeoptionandtheinstallationinstructionsprovided
withyourcomputer,andalloptionles(suchasdevicedrivers,ifrequired)areinstalledcorrectly.
•Y ouhavenotloosenedotherinstalledoptionsorcables.
•Iftheoptionisanadapter,youhaveprovidedenoughhardwareresourcesfortheadaptertofunction
correctly.Seethedocumentationsuppliedwiththeadapter(aswellasthedocumentationforanyother
installedadapters)todeterminetheresourcesrequiredforeachadapter.
Iftheseactionsdonotcorrecttheproblem,runthediagnosticprograms(see“Diagnostics”onpage51
instructions).Ifyouneedtechnicalassistance,see“Additionalinformationresources”onpage30.
Anoptionthatpreviouslyworkeddoesnotworknow
Symptom:Anoptionthatpreviouslyworkeddoesnotworknow.
Actions:
•Verifythatalloptionhardwareandcableconnectionsaresecure.
•Iftheoptioncomeswithitsowntestinstructions,usethoseinstructionstotesttheoption.
•IfthefailingoptionisaSCSIoption,verifythat:
for
–ThecablesforallexternalSCSIoptionsareconnectedcorrectly.
–ThelastoptionineachSCSIchain,ortheendoftheSCSIcable,isterminatedcorrectly.
–AllexternalSCSIoptionsareturnedon.ExternalSCSIoptionsmustbeturnedonbeforethecomputer
isturnedon.Formoreinformation,seeyourSCSIdocumentation.
Chapter5.Troubleshootinganddiagnostics47
Page 54

•Verifythattheoptionandanyrequireddevicedriversareinstalledcorrectly.
Iftheseactionsdonotcorrecttheproblem,runthediagnosticprograms(see“Diagnostics”onpage51
instructions).Ifyouneedtechnicalassistance,see“Additionalinformationresources”onpage30
.
Performanceandlockupproblems
Poorperformanceandlockupproblemscanbearesultofanyofthefollowing:
•“Insufcientfreeharddiskdrivespace”onpage48
•“Excessivenumberoffragmentedles”onpage49
Makeaselectionfromtheabovelisttondoutmoreaboutthecorrectiveactionsyoucantake.
Insufcientfreeharddiskdrivespace
Symptom:Insufcientfreeharddiskdrivespace
TheWindowsoperatingsystemwillslowdownandmightproduceerrorsiftheharddiskdrivegetstoofull.
TochecktheamountoffreespaceontheWindows7operatingsystem,dothefollowing:
1.ClickStart➙Computer.
2.Right-clickyourCdriveentryandthenclickProperties.Theamountoffreediskspaceisdisplayed.
Actionstofreeupdiskspace:
•OntheWindows7operatingsystem,dooneorallofthefollowing:
for
–
1.ClickStart➙Computer.
2.Right-clickyourCdriveentryandthenclickProperties.
3.ClickDiskCleanup.
4.Alistofunnecessarylecategoriesisdisplayed.Selecteachlecategoryyouwanttodelete,and
thenclickOK.
–
1.ClickStart➙ControlPanel.
2.ClickPrograms.
3.ClickTurnWindowsfeaturesonoroff.
4.AlistofoptionalWindowscomponentsisdisplayed.Followtheinstructionsonthescreen.
–
1.ClickStart➙Computer.
2.Right-clickyourCdriveentryandthenclickProperties.
3.ClickDiskCleanup.
4.ClickCleanupsystemles.
5.ClicktheMoreOptionstab.
6.IntheProgramsandFeaturesarea,clicktheCleanupbutton.
7.Alistofinstalledapplicationsisdisplayed.Selecttheapplicationyouwanttoremove.Click
Uninstall/Change.
48ThinkCentreHardwareMaintenanceManual
Page 55

•CleanoutyourInbox,SentItems,andDeletedItemsfoldersfromyoure-mailapplication.Thefolder
namesandproceduresvarydependingonyoure-mailapplication.Ifyouneedassistance,seethe
helpsystemforyoure-mailapplication.
Excessivenumberoffragmentedles
Symptom:Excessivenumberoffragmentedles
Action:RuntheWindowsDiskDefragmenterprogram.
Note:Dependingonthesizeoftheharddiskdriveandamountofdatacurrentlystoredontheharddisk
drive,thediskdefragmentationprocessmighttakeuptoseveralhourstocomplete.
OntheWindows7operatingsystem,dothefollowing:
1.Closeanyprogramsthatarecurrentlyrunningandcloseanyopenwindows.
2.ClickStart➙Computer.
3.Right-clickyourCdriveentryandthenclickProperties.
4.ClicktheToolstab.
5.ClickDefragmentNow,thenclickContinue.
6.ClickDefragmentNowagaintostartadisk-defragmentationprocess.
Printerproblems
Printerissupportedbysomecertaincomputermodels.
Symptom:Theprinterdoesnotwork.
Actions:Verifythat:
1.Theprinteristurnedonandisonline.
2.Paperisloadedcorrectly.
3.Theprintersignalcableissecurelyconnectedtothecorrectparallel,serial,orUSBconnectoronthe
computer.
Note:Non-IEEE-approvedprintersignalcablesmightcauseunpredictableproblems.
1.Anydevicedriversandothersoftwarethatcamewiththeprinterarecorrectlyinstalled.
2.Y ouhaveassignedtheprinterportcorrectlyinyouroperatingsystem,applicationprogram,orBIOS
settings.FormoreinformationaboutBIOSsettings,seeChapter6“UsingtheSetupUtilityprogram”
onpage57.
Iftheproblempersists,runthetestsdescribedinthedocumentationthatcomeswithyourprinter.Ifyou
cannotcorrecttheproblem,havethecomputerserviced.See“Additionalinformationresources”onpage30.
Serialportproblems
Serialportisavailablewithsomecertaincomputermodels.
Usethisinformationtotroubleshoottheserialportanddevicesattachedtotheserialport.
Symptom:Serialportcannotbeaccessed.
Actions:
•Makesuretheserialcableissecurelyconnectedtotheserialportonthecomputerandtotheserialdevice.
Iftheserialdevicehasitsownpowercord,makesureitisattachedtoaproperlygroundedelectricaloutlet.
Chapter5.Troubleshootinganddiagnostics49
Page 56

•IftheserialdevicehasitsownOn/Offswitch,makesureitisintheOnposition.
•IftheserialdevicehasanOnlineswitch,makesureitisintheOnlineposition.
•Iftheserialdeviceisaprinter,makesurepaperisloadedcorrectly.
•Verifythatanysoftwaresuppliedwiththeserialdeviceiscorrectlyinstalled.Refertothedocumentation
fortheserial-deviceoption.
•Makesurethattheserial-portadapter,ifyouaddedone,isproperlyinstalledandrmlyseated.
Iftheseactionsdonotcorrecttheproblem,runthediagnosticprograms(see“Diagnostics”onpage51
instructions).Ifyouneedtechnicalassistance,see“Additionalinformationresources”onpage30.
Softwareproblems
Selectyoursymptomfromthefollowinglist:
•“Whenusingasortfeature,datesdonotsortinthecorrectorder”onpage50
•“Softwaredoesnotworkasexpected”onpage50
Whenusingasortfeature,datesdonotsortinthecorrectorder
Symptom:Whenusingasortfeature,datesdonotsortinthecorrectorder.
Action:Somesoftwaredevelopedbeforetheyear2000usedonlythelasttwodigitsofayeartosort
dates,alwaysassumingthersttwodigitswere19.Consequently,theseprogramssortdatesoutoforder.
Checkwithyoursoftwaremanufacturertoseeifanyupdatesareavailable.Manysoftwaremanufacturers
makeupdatesavailablefromtheWorldWideWeb.
Softwaredoesnotworkasexpected
Symptom:Softwaredoesnotworkasexpected.
Actions:
•Mostsoftwareprogramshavebuilt-inhelpsystemsthatprovideinstructionsformosttasks.Ifyouare
havingdifcultyperformingaspecictaskwithinasoftwareprogram,refertothehelpsystemforthat
program.Helpsystemsaretypicallyaccessiblefromamenuorbuttonintheprogram,andfrequently
fromtheF1key.
•IfyouarehavingdifcultywiththeWindowsoperatingsystemoroneofitscomponents,refertothe
Windowshelpsystem.ItisaccessiblefromtheWindowsStartmenu.
•T odetermineifproblemsarecausedbynewlyinstalledsoftware,verifythat:
for
–Y ourcomputerhastheminimummemoryrequirementsneededtousethesoftware.Seethe
informationsuppliedwiththesoftwaretoverifymemoryrequirements.(Ifyoujustinstalledanadapter
ormemory,youmighthaveamemory-addressconict.)
–Thesoftwareisdesignedtooperateonyourcomputer.
–Othersoftwareworksonyourcomputer.
–Thesoftwareyouareusingworkscorrectlyonanothercomputer.
•Ifyoureceivedanyerrormessageswhileusingthesoftwareprogram,seetheprinteddocumentation
suppliedwiththesoftwareorthehelpsystemforthatsoftwareforadescriptionofthemessagesand
solutionstotheproblem.
•Checkwithyoursoftwaremanufacturertoseeifanyupdatesareavailable.Manysoftwaremanufacturers
makeupdatesavailablefromtheWorldWideWeb.
50ThinkCentreHardwareMaintenanceManual
Page 57

•Ifthesoftwareprogramusedtoworkcorrectly,butdoesnotworkcorrectlynow,dothefollowing:
OntheWindows7operatingsystem,clickStart➙ControlPanel➙SystemandSecurity➙System➙
SystemProtection➙SystemRestore.
•Ifyouareunabletoresolvetheproblemthroughothermethods,uninstallthesoftwareprogramand
reinstallit.
Iftheseactionsdonotcorrecttheproblem,youmightneedtechnicalassistance.Contactyoursoftware
manufacturerorsee“Additionalinformationresources”onpage30fordetails.
USBproblems
Symptom:TheUSBconnectorscannotbeaccessed.
Actions:
•MakesuretheUSBcableissecurelyconnectedtotheUSBconnectorandtotheUSBdevice.IftheUSB
devicehasitsownpowercord,makesureitisattachedtoaproperlygroundedelectricaloutlet.
•IftheUSBdevicehasitsownOn/Offswitch,makesureitisintheOnposition.
•IftheUSBdevicehasanOnlineswitch,makesureitisintheOnlineposition.
•IftheUSBdeviceisaprinter,makesurepaperisloadedcorrectly.
•MakesureanydevicedriversorothersoftwaresuppliedwiththeUSBdeviceiscorrectlyinstalled.
RefertothedocumentationfortheUSBdevice.
•ResetthedevicebydetachingandreattachingtheUSBconnector.
Iftheseactionsdonotcorrecttheproblem,runthediagnosticprogramstotesttheUSBconnector(see
“Diagnostics”onpage51forinstructions).IftheUSBdevicecamewithitsowndiagnostics,runthose
diagnosticsagainsttheUSBdevice.Ifyouneedtechnicalassistance,see“Additionalinformationresources”
onpage30.
Diagnostics
Diagnosticprogramsareusedtotesthardwarecomponentsofyourcomputer.Diagnosticprogramscan
alsoreportoperating-system-controlledsettingsthatinterferewiththecorrectoperationofyoursystem.
Youcanusethepreinstalleddiagnosticprogramtodiagnosecomputerproblems,ifyourcomputeris
runningintheWindows
Notes:
1.Dependingonthedatewhenyourcomputerwasmanufactured,yourcomputerispreinstalledwith
eithertheLenovoSolutionCenterprogramortheLenovoThinkVantageToolboxprogramfordiagnostic
purposes.FormoreinformationabouttheLenovoThinkVantageToolboxprogram,see“Lenovo
ThinkVantageToolbox”onpage51
see“LenovoSolutionCenter”onpage52.
2.Y oucanalsodownloadthePC-DoctorforDOSdiagnosticprogramfromhttp://www.lenovo.com/support.
See“PC-DoctorforDOS”onpage52fordetailedinformation.
3.Ifyouareunabletoisolateandrepairtheproblemyourselfafterrunningtheprograms,saveandprint
theloglescreatedbytheprograms.YouwillneedthelogleswhenyouspeaktoaLenovotechnical
supportrepresentative.
®
operatingsystem.
.FormoreinformationabouttheLenovoSolutionCenterprogram,
LenovoThinkVantageToolbox
TheLenovoThinkVantageToolboxprogramhelpsyoumaintainyourcomputer,improvecomputingsecurity,
diagnosecomputerproblems,getfamiliarwiththeinnovativetechnologiesprovidedbyLenovo,andget
Chapter5.Troubleshootinganddiagnostics51
Page 58

moreinformationaboutyourcomputer.YoucanusethediagnosticsfeatureoftheLenovoThinkVantage
Toolboxprogramtotestdevices,diagnosecomputerproblems,createbootablediagnosticmedia,update
systemdrivers,andviewsysteminformation.
ToruntheLenovoThinkVantageToolboxprogramontheWindows7operatingsystem,clickStart➙All
Programs➙LenovoThinkVantageTools➙SystemHealthandDiagnostics.Followtheinstructionson
thescreen.
Followtheinstructionsonthescreen.Foradditionalinformation,refertotheLenovoThinkVantageToolbox
helpsystem.
LenovoSolutionCenter
TheLenovoSolutionCenterprogramenablesyoutotroubleshootandresolvecomputerproblems.It
combinesdiagnostictests,systeminformationcollection,securitystatus,andsupportinformation,along
withhintsandtipsformaximumsystemperformance.
Notes:
•TheLenovoSolutionCenterprogramisavailableonlyonmodelspreinstalledwiththeWindows7
operatingsystem.IfyourWindows7modelisnotpreinstalledwiththeprogram,youcandownloadit
fromhttp://www.lenovo.com/diagnose.
•IfyouareusingtheWindowsVistaorWindowsXPoperatingsystem,goto
http://www.lenovo.com/diagnoseforthelatestinformationondiagnosticsforyour
computer.
ToruntheLenovoSolutionCenterprogramontheWindows7operatingsystem,clickStart➙AllPrograms
➙LenovoThinkVantageTools➙SystemHealthandDiagnostics.Followtheinstructionsonthescreen.
Foradditionalinformation,refertotheLenovoSolutionCenterhelpsystem.
Note:Ifyouareunabletoisolateandrepairtheproblemyourselfafterrunningtheprogram,saveandprint
theloglescreatedbytheprogram.YouwillneedthelogleswhenyouspeaktoaLenovotechnical
supportrepresentative.
PC-DoctorforDOS
YoucanalsodownloadthelatestversionofthePC-DoctorforDOSdiagnosticprogramfrom
http://www.lenovo.com/support.ThePC-DoctorforDOSdiagnosticprogramrunsindependentlyofthe
Windowsoperatingsystem.UsethePC-DoctorforDOSdiagnosticprogramifyouareunabletostartthe
Windowsoperatingsystemorifthetwodiagnosticprogramspreinstalledonyourcomputerhavenot
beensuccessfulinisolatingapossibleproblem.YoucanrunthePC-DoctorforDOSdiagnosticprogram
fromadiagnosticdiscthatyoucreated.
Creatingadiagnosticdisc
Thissectionprovidesinstructionsonhowtocreateadiagnosticdisc.
Tocreateadiagnosticdisc,dothefollowing:
1.Downloadaself-startingbootableCD/DVDimage(knownasanISOimage)ofthediagnosticprogram
from:
http://www.lenovo.com/support
2.UseanyCD/DVDburningsoftwaretocreateadiagnosticdiscwiththeISOimage.
52ThinkCentreHardwareMaintenanceManual
Page 59

Runningthediagnosticprogramfromadiagnosticdisc
Thissectionprovidesinstructionsonhowtorunthediagnosticprogramfromadiagnosticdiscthatyou
created.
Torunthediagnosticprogramfromadiagnosticdiscthatyoucreated,dothefollowing:
1.Makesuretheopticaldriveyouwanttouseissetastherstbootdeviceinthestartupdevicesequence.
See“Selectingorchangingthestartupdevicesequence”onpage59.
2.Makesurethecomputeristurnedonandtheninsertthediscintotheopticaldrive.Thediagnostic
programopens.
Note:Youcaninsertthediscintotheopticaldrivewhenyouaresettingthestartupdevicesequence.
However,ifyouinsertthediscintotheopticaldrivewhenyouhavealreadyenteredtheoperating
system,youneedtorestartthecomputertoaccessthediagnosticprogram.
3.Followtheinstructionsonthescreentoselectthediagnostictestyouwanttorun.
Note:Foradditionalhelp,presstheF1key.
4.Removethediagnosticdiscfromtheopticaldrivewhenyoucompletethediagnosticprocess.
Navigatingthroughthediagnosticsprograms
Usethecursormovementkeystonavigatewithinthemenus.
•TheEnterkeyisusedtoselectamenuitem.
•TheEsckeyisusedtobackuptothepreviousmenu.
•Foronlinehelp,selectF1.
Runningtests
Therearefourwaystorunthediagnostictests.
•Usingthecursormovementkeys,highlightRunNormalTestorRunQuickTestfromtheDiagnostics
menuandthenpressEnter.Thisautomaticallyrunsapre-denedgroupoftestsfromeachtestcategory.
RunNormalTestrunsamoreextensivesetofteststhandoesRunQuickTestandtakeslongerto
complete.
•PressF5toautomaticallyrunallselectedtestsinallcategories.
•Fromwithinatestcategory,pressCtrl-Entertoautomaticallyrunonlytheselectedtestsinthatcategory.
•Usingthecursormovementkeys,highlightasingletestwithinatestcategory,andthenpressEnter.
Thisrunsonlythattest.
PressEscatanytimetostopthetestingprocess.
Testresults(N/A,PASSED,FAILED,ABORTED)aredisplayedintheeldbesidethetestdescriptionandin
thetestlog.See“Viewingthetestlog”onpage54.
Toselectoneormoretests,usethefollowingprocedure.
1.Openthecorrespondingtestcategory.
2.Usingthecursormovementkeys,highlightthedesiredtest.
3.Pressthespacebar.Aselectedtestismarkedby>>.Pressingthespacebaragainde-selectsatest
andremovesthe>>.
4.Repeatsteps2and3abovetoselectalldesiredtests.
Testresults
Diagnosticstestresultsproducethefollowingerrorcodeformat:
Chapter5.Troubleshootinganddiagnostics53
Page 60

FunctionCode
FailureTypeDeviceIDDate
ChkDigits
•FunctionCode:
RepresentsthefeatureorfunctionwithinthePC.
•FailureType:
Representsthetypeoferrorencountered.
•DeviceID:
Containsthecomponent'sunit-IDthatcorrespondstoeitheraxeddiskdrive,removablemediadrive,
serialorparallelport,processor,specicRIMM,oradeviceonthePCIbus.
•Date:
Containsthedatewhenthediagnostictestwasrun.ThedateisretrievedfromCMOSanddisplayed
usingtheYYYYMMDDformat.
•ChkDigits:
Containsa2-digitcheck-digitvaluetoensurethefollowing:
–Diagnosticswererunonthespecieddate.
–Diagnosticswererunonthespeciedcomputer.
–Thediagnosticerrorcodeisrecordedcorrectly.
•T ext:
Descriptionoftheerror.
Note:See“Diagnosticerrorcodes”onpage62forerrorcodelistings.
Text
QuickandFullerase-harddrive
Thediagnosticsprogramofferstwoharddriveformatutilities:
•QuickEraseHardDrive
•FullEraseHardDrive
QuickEraseHardDriveprovidesaDOSutilitythatperformsthefollowing:
•DestroystheMasterBootRecord(MBR)ontheharddrive.
•DestroysallcopiesoftheFATTableonallpartitions(boththemasterandbackup).
•Destroysthepartitiontable.
•Providesmessagesthatwarntheuserthatthisisanon-recoverableprocess.
FullEraseHardDriveprovidesaDOSutilitythatperformsthefollowing:
•PerformsallthestepsinQuickErase.
•ProvidesaDOSutilitythatwritesrandomdatatoallsectorsoftheharddrive.
•Providesanestimateoftimetocompletionalongwithavisualrepresentationofcompletionstatus.
•Providesmessagesthatwarntheuseraboutnon-recoverableprocess.
Important:MakesurethatalldataisbackedupbeforeusingtheQuickorFullErasefunctions.
ToselecttheQuickEraseorFullEraseHardDriveutility.Dothefollowing:
1.SelecttheUTILITYoptiononthetoolbarandpressEnter.
2.SelecteithertheQUICKERASEorFULLERASEHARDDISKoptionandfollowtheinstructions.
Viewingthetestlog
Errorsreportedbythediagnostictestwillbedisplayedbytheprogramasafailedtest.
54ThinkCentreHardwareMaintenanceManual
Page 61

Toviewdetailsofafailureortoviewalistoftestresults,usethefollowingprocedurefromanytestcategory
screen:
1.PressF3toactivatethelogle.
2.PressF3againtosavetheletodisketteorpressF2toprintthele.
Chapter5.Troubleshootinganddiagnostics55
Page 62

56ThinkCentreHardwareMaintenanceManual
Page 63

Chapter6.UsingtheSetupUtilityprogram
TheSetupUtilityprogramisusedtoviewandchangethecongurationsettingsofyourcomputer,regardless
ofwhichoperatingsystemyouareusing.However,theoperatingsystemsettingsmightoverrideanysimilar
settingsintheSetupUtilityprogram.
StartingtheSetupUtilityprogram
TostarttheSetupUtilityprogram,dothefollowing:
1.Makesureyourcomputeristurnedoff.
2.RepeatedlypressandreleasetheF1keywhenturningonthecomputer.Whenyouhearmultiple
beepsorseealogoscreen,releasetheF1key.
Note:IfaPower-OnPasswordoranAdministratorPasswordhasbeenset,theSetupUtilityprogram
menuwillnotbedisplayeduntilyoutypethecorrectpassword.Formoreinformation,see“Using
passwords”onpage57
WhenthePOSTdetectsthattheharddiskdrivehasbeenremovedfromyourcomputerorthememory
modulesizehasdecreased,anerrormessagewillbedisplayedwhenyoustartthecomputerandyouwillbe
promptedtodooneofthefollowing:
•PressF1toentertheSetupUtilityprogram.
Note:AfteryouentertheSetupUtilityprogram,selectSaveChangesandExitatthebottomofthe
screen.Theerrormessagewillnotbedisplayedagain.
•PressF2tobypasstheerrormessageandlogintotheoperatingsystem.
.
Viewingandchangingsettings
TheSetupUtilityprogrammenulistsvariousitemsaboutthesystemconguration.Tovieworchange
settings,starttheSetupUtilityprogram.See“StartingtheSetupUtilityprogram”onpage57.Then,follow
theinstructionsonthescreen.
YoucanuseeitherthekeyboardorthemousetonavigatethroughBIOSmenuchoices.Thekeysusedto
performvarioustasksaredisplayedatthebottomofeachscreen.
Usingpasswords
ByusingtheSetupUtilityprogram,youcansetpasswordstopreventunauthorizedaccesstoyourcomputer
anddata.Thefollowingtypesofpasswordsareavailable:
•Power-OnPassword
•AdministratorPassword
Youdonothavetosetanypasswordstouseyourcomputer.However,usingpasswordsimproves
computingsecurity.Ifyoudecidetosetanypasswords,readthefollowingsections.
Passwordconsiderations
Apasswordcanbeanycombinationofupto64alphabeticandnumericcharacters.Forsecurityreasons,it
isrecommendedtouseastrongpasswordthatcannotbeeasilycompromised.Tosetastrongpassword,
usethefollowingguidelines:
©CopyrightLenovo2011
57
Page 64

•Haveatleasteightcharactersinlength
•Containatleastonealphabeticcharacterandonenumericcharacter
•SetupUtilityprogramisnotcasesensitive
•Notbeyournameoryourusername
•Notbeacommonwordoracommonname
•Besignicantlydifferentfromyourpreviouspasswords
Power-OnPassword
WhenaPower-OnPasswordisset,youarepromptedtotypeavalidpasswordeachtimethecomputeris
turnedon.Thecomputercannotbeuseduntilthevalidpasswordistypedin.
HardDiskPassword
SettingaHardDiskPasswordpreventsunauthorizedaccesstothedataontheharddiskdrive.Whena
HardDiskPasswordisset,youarepromptedtotypeavalidpasswordeachtimeyoutrytoaccessthe
harddiskdrive.
Notes:
•AfteryousetaHardDiskPassword,yourdataontheharddiskdriveisprotectedeveniftheharddisk
driveisremovedfromonecomputerandinstalledinanother.
•IftheHardDiskPasswordisforgotten,thereisnowaytoresetthepasswordorrecoverdatafromthe
harddiskdrive.
AdministratorPassword
SettinganAdministratorPassworddetersunauthorizedusersfromchangingcongurationsettings.Ifyou
areresponsibleformaintainingthecongurationsettingsofseveralcomputers,youmightwanttosetan
AdministratorPassword.
WhenanAdministratorPasswordisset,youarepromptedtotypeavalidpasswordeachtimeyoutryto
accesstheSetupUtilityprogram.TheSetupUtilityprogramcannotbeaccesseduntilavalidpassword
istypedin.
IfboththePower-OnPasswordandAdministratorPasswordareset,youcantypeeitherpassword.However,
youmustuseyourAdministratorPasswordtochangeanycongurationsettings.
Setting,changing,anddeletingapassword
Toset,change,ordeleteapassword,dothefollowing:
1.StarttheSetupUtilityprogram.See“StartingtheSetupUtilityprogram”onpage57.
2.FromtheSetupUtilityprogrammainmenu,selectSecurity.
3.Dependingonthepasswordtype,selectSetPower-OnPasswordorSetAdministratorPassword.
4.Followtheinstructionsontherightsideofthescreentoset,change,ordeleteapassword.
Note:Apasswordcanbeanycombinationofupto64alphabeticandnumericcharacters.Formore
information,see“Passwordconsiderations”onpage57.
Enablingordisablingadevice
Thissectionprovidesinformationonhowtoenableordisableuseraccesstothefollowingdevices:
58ThinkCentreHardwareMaintenanceManual
Page 65

USBSetupUsethisoptiontoenableordisableaUSBconnector.WhenaUSBconnectoris
disabled,thedeviceconnectedtotheUSBconnectorcannotbeused.
SATAControllerWhenthisfeatureissettoDisable,alldevicesconnectedtotheSA TAconnectors
(suchasharddiskdrivesortheopticaldrive)aredisabledandcannotbeaccessed.
Toenableordisableadevice,dothefollowing:
1.StarttheSetupUtilityprogram.See“StartingtheSetupUtilityprogram”onpage57.
2.FromtheSetupUtilityprogrammainmenu,selectDevices.
3.Dependingonthedeviceyouwanttoenableordisable,dooneofthefollowing:
•SelectUSBSetuptoenableordisableaUSBdevice.
•SelectATADriveSetuptoenableordisableaninternalorexternalSATAdevice.
4.SelectthedesiredsettingsandpressEnter.
5.PressF10tosaveandexittheSetupUtilityprogram.See“ExitingfromtheSetupUtilityprogram”
onpage59.
Selectingastartupdevice
Ifyourcomputerdoesnotstartupfromadevice(suchasaharddiskdriveorthediscinanopticaldrive)as
expected,dooneofthefollowingtoselectthedesiredstartupdevice.
Selectingatemporarystartupdevice
Thissectionprovidesinstructionsonhowtoselectatemporarystartupdevice.Youcanusetheinstructions
inthissectiontostartupfromanystartupdevice.
Note:Notalldiscsandharddiskdrivesarebootable.
Toselectatemporarystartupdevice,dothefollowing:
1.T urnoffyourcomputer.
2.RepeatedlypressandreleasetheF12keywhenturningonthecomputer.WhentheStartupDevice
Menuopens,releasetheF12key.
3.SelectthedesiredstartupdeviceontheStartupDeviceMenuandpressEnter.
Note:SelectingastartupdeviceontheStartupDeviceMenudoesnotpermanentlychangethestartup
devicesequence.
Selectingorchangingthestartupdevicesequence
Tovieworpermanentlychangetheconguredstartupdevicesequence,dothefollowing:
1.StarttheSetupUtilityprogram.See“StartingtheSetupUtilityprogram”onpage57.
2.FromtheSetupUtilityprogrammainmenu,selectStartup.
3.SelectthedevicesforthePrimaryBootSequence,theAutomaticBootSequence,andtheErrorBoot
Sequence.Readtheinformationdisplayedontherightsideofthescreen.
4.PressF10tosaveandexittheSetupUtilityprogram.See“ExitingfromtheSetupUtilityprogram”
onpage59.
ExitingfromtheSetupUtilityprogram
Afteryounishviewingorchangingsettings,pressEsctoreturntotheSetupUtilityprogrammainmenu.
YoumighthavetopressEscseveraltimes.Dooneofthefollowing:
Chapter6.UsingtheSetupUtilityprogram59
Page 66

•Ifyouwanttosavethenewsettings,pressF10tosaveandexittheSetupUtilityprogram.
•Ifyoudonotwanttosavethesettings,selectExit➙DiscardChangesandExit,andthenpressEnter.
WhentheResetWithoutSavingwindowshows,selectYes,andthenpressEntertoexittheSetup
Utilityprogram.
•Ifyouwanttoreturntothedefaultsettings,pressF9toloadthedefaultsettings,andthenpressF10to
saveandexittheSetupUtilityprogram.
60ThinkCentreHardwareMaintenanceManual
Page 67

Chapter7.Symptom-to-FRUIndex
TheSymptom-to-FRUindexlistserrorsymptomsandpossiblecauses.Themostlikelycauseislistedrst.
AlwaysbeginwithChapter4“GeneralCheckout”onpage33
decidewhichFRUstohaveavailablewhenservicingacomputer.Ifyouareunabletocorrecttheproblem
usingthisindex,goto“Undeterminedproblems”onpage82.
Notes:
•Ifyouhavebothanerrormessageandanincorrectaudioresponse,diagnosetheerrormessagerst.
•Ifyoucannotrunthediagnostictestsoryougetadiagnosticerrorcodewhenrunningatest,butdidreceivea
POSTerrormessage,diagnosethePOSTerrormessagerst.
•Ifyoudidnotreceiveanyerrormessage,lookforadescriptionofyourerrorsymptomsintherstpartofthisindex.
Harddiskdrivebooterror
Aharddiskdrivebooterrorcanhavethefollowingcauses.
ErrorFRU/Action
Thestart-updriveisnotinthebootsequencein
conguration.
Nooperatingsysteminstalledonthebootdrive.Installanoperatingsystemonthebootdrive.
Thebootsectoronthestartupdriveiscorrupted.
Thedriveisdefective.
.Thisindexcanalsobeusedtohelpyou
Checkthecongurationandensurethestart-updriveis
inthebootsequence.
Thedrivemustbeformatted.Dothefollowing:
1.Attempttobackupthedataonthefailingharddisk
drive.
2.Usingtheoperatingsystemprograms,formatthe
harddiskdrive.
Replacetheharddiskdrive.
PowerSupplyProblems
Ifyoususpectapowerproblem,usethefollowingprocedures.
Check/VerifyFRU/Action
Checkthefollowingforproperinstallation.
•Powercord
•On/Offswitchconnector
•On/Offswitchpowersupplyconnector
•Systemboardpowersupplyconnectors
•Microprocessor(s)connection
Checkthepowercordforcontinuity.
Checkthepower-onswitchforcontinuity.
©CopyrightLenovo2011
Reseatconnectors
Powercord
Power-onswitch
61
Page 68

Diagnosticerrorcodes
Refertothefollowingdiagnosticerrorcodeswhenusingthediagnostictests.See“Runningtests”onpage
53forthespecictypeforinformationaboutthediagnosticprograms.
Inthefollowingindex,Xcanrepresentanynumber.
DiagnosticErrorCodeFRU/Action
000-000-XXXBIOSTestPassed
000-002-XXXBIOSTimeout1.Flashthesystem.See“Flashupdateprocedures”
000-024-XXXBIOSAddressingtestfailure1.Flashthesystem.See“Flashupdateprocedures”
000-025-XXXBIOSChecksumValueerror1.Flashthesystem.See“Flashupdateprocedures”
000-026-XXXFLASHdataerror1.Flashthesystem.See“Flashupdateprocedures”
000-027-XXXBIOSConguration/Setuperror1.RuntheSetupUtilityprogram.
000-034-XXXBIOSBufferAllocationfailure
000-035-XXXBIOSResetConditiondetected1.Flashthesystem.See“Flashupdateprocedures”
000-036-XXXBIOSRegistererror1.Flashthesystem.See“Flashupdateprocedures”
000-038-XXXBIOSExtensionfailure1.Flashthesystem.See“Flashupdateprocedures”
000-039-XXXBIOSDMIdataerror1.Flashthesystem.See“Flashupdateprocedures”
000-195-XXXBIOSTestabortedbyuser
000-196-XXXBIOStesthalt,errorthresholdexceeded
Noaction
onpage217
2.Systemboard
onpage217
2.Systemboard
onpage217.
2.Systemboard
onpage217.
2.Systemboard
2.Flashthesystem.See“Flashupdateprocedures”
onpage217.
3.Systemboard
1.Rebootthesystem.
2.Flashthesystem.See“Flashupdateprocedures”
onpage217.
3.Runmemorytest
4.Systemboard
onpage217.
2.Systemboard
onpage217.
2.Systemboard
onpage217
2.Adaptercard
3.Systemboard
onpage217.
2.Systemboard
InformationonlyRestartthetest,ifnecessary
1.PressF3toreviewthelogle.
2.Restartthetesttoresetthelogle.
.
.
.
62ThinkCentreHardwareMaintenanceManual
Page 69

DiagnosticErrorCodeFRU/Action
000-197-XXXBIOStestwarning
1.Makesurethecomponentthatiscalledoutis
connectedand/orenabled.SeeChapter6“Using
theSetupUtilityprogram”onpage57
.
2.Re-runtest.
3.Replacethecomponentthatiscalledoutinwarning
statement
4.Replacethecomponentundertest.
000-198-XXXBIOStestaborted
1.Makesurethecomponentthatiscalledoutis
connectedand/orenabled.SeeChapter6“Using
theSetupUtilityprogram”onpage57
.
2.Flashthesystemandretest.See“Flashupdate
procedures”onpage217.
3.Goto“Undeterminedproblems”onpage82.
000-199-XXXBIOStestfailed,causeunknown1.Goto“Undeterminedproblems”onpage82.
2.Flashthesystemandre-test.
3.Replacecomponentunderfunctiontest.
000-250-XXXBIOSAPMfailure1.Flashthesystem.See“Flashupdateprocedures”
onpage217.
2.Systemboard
000-270-XXXBIOSACPIfailure1.Flashthesystem.See“Flashupdateprocedures”
onpage217.
2.Systemboard
001-000-XXXSystemTestPassed
Noaction
001-00X-XXXSystemErrorSystemboard
001-01X-XXXSystemErrorSystemboard
001-024-XXXSystemAddressingtestfailureSystemboard
001-025-XXXSystemChecksumValueerror1.Flashthesystem.See“Flashupdateprocedures”
onpage217.
2.Systemboard
001-026-XXXSystemFLASHdataerror1.Flashthesystem.See“Flashupdateprocedures”
onpage217.
2.Systemboard
001-027-XXXSystemConguration/Setuperror1.RuntheSetupUtilityprogram.
2.Flashthesystem.See“Flashupdateprocedures”
onpage217.
3.Systemboard
001-032-XXXSystemDeviceControllerfailureSystemboard
001-034-XXXSystemDeviceBufferAllocationfailure
1.Rebootthesystem.
2.Flashthesystem.See“Flashupdateprocedures”
onpage217.
3.Runmemorytest.
4.Systemboard
001-035-XXXSystemDeviceResetconditiondetectedSystemboard
001-036-XXXSystemRegistererrorSystemboard
Chapter7.Symptom-to-FRUIndex63
Page 70

DiagnosticErrorCodeFRU/Action
001-038-XXXSystemExtensionfailure
001-039-XXXSystemDMIdatastructureerror1.Flashthesystem.See“Flashupdateprocedures”
001-040-XXXSystemIRQfailure1.Power-off/onsystemandre-test.
001-041-XXXSystemDMAfailure1.Power-off/onsystemandre-test.
001-195-XXXSystemTestabortedbyuser
001-196-XXXSystemtesthalt,errorthresholdexceeded
001-197-XXXSystemtestwarning
001-198-XXXSystemtestaborted
001-199-XXXSystemtestfailed,causeunknown1.Goto“Undeterminedproblems”onpage82.
001-250-XXXSystemECCerrorSystemboard
001-254-XXX001-255-XXX001-256-XXX001-257-XXX
SystemDMAerror
001-260-XXX001-264-XXXSystemIRQerrorSystemboard
001-268-XXXSystemIRQ1failure1.DeviceonIRQ1
001-269-XXXSystemIRQ2failure1.DeviceonIRQ2
001-270-XXXSystemIRQ3failure1.DeviceonIRQ3
001-271-XXXSystemIRQ4failure1.DeviceonIRQ4
001-272-XXXSystemIRQ5failure1.DeviceonIRQ5
1.Adaptercard
2.Systemboard
onpage217.
2.Systemboard
2.Systemboard
2.Systemboard
InformationonlyRestartthetest,ifnecessary
1.PressF3toreviewthelogle
2.Restartthetesttoresetthelogle
1.Makesurethecomponentthatiscalledoutis
connectedand/orenabled.SeeChapter6“Using
theSetupUtilityprogram”onpage57.
2.Re-runtest.
3.Replacethecomponentthatiscalledoutinwarning
statement.
4.Replacethecomponentundertest.
1.Ifacomponentiscalledout,makesureitis
connectedand/orenabled.SeeChapter6“Using
theSetupUtilityprogram”onpage57.
2.Flashthesystemandretest.See“Flashupdate
procedures”onpage217.
3.Goto“Undeterminedproblems”onpage82.
2.Flashthesystemandre-test.
3.Replacecomponentunderfunctiontest.
Systemboard
2.Systemboard
2.Systemboard
2.Systemboard
2.Systemboard
2.Systemboard
64ThinkCentreHardwareMaintenanceManual
Page 71

DiagnosticErrorCodeFRU/Action
001-273-XXXSystemIRQ6(diskettedrive)failure1.DisketteCable
2.Diskettedrive
3.Systemboard
001-274-XXXSystemIRQ7failure1.DeviceonIRQ7
2.Systemboard
001-275-XXXSystemIRQ8failure1.DeviceonIRQ8
2.Systemboard
001-276-XXXSystemIRQ9failure1.DeviceonIRQ9
2.Systemboard
001-277-XXXSystemIRQ10failure1.DeviceonIRQ10
2.Systemboard
001-278-XXXSystemIRQ11failure1.DeviceonIRQ11
2.Systemboard
001-279-XXXSystemIRQ12failure1.DeviceonIRQ12
2.Systemboard
001-280-XXXSystemIRQ13failure1.DeviceonIRQ13
2.Systemboard
001-281-XXXSystemIRQ14(harddiskdrive)failure
1.Harddiskdrivecable
2.Harddiskdrive
3.Systemboard
001-282-XXXSystemIRQ15failure1.DeviceonIRQ15
2.Systemboard
001-286-XXX001-287-XXX001-288-XXXSystemTimer
Systemboard
failure
001-292-XXXSystemCMOSRAMerror1.RuntheSetupUtilityprogramandre-test.
2.Systemboard
001-293-XXXSystemCMOSBattery1.CMOSBattery
2.Systemboard
001-298-XXXSystemRTCdate/timeupdatefailure1.Flashthesystem.See“Flashupdateprocedures”
onpage217.
2.Systemboard
001-299-XXXSystemRTCperiodicinterruptfailureSystemboard
001-300-XXXSystemRTCAlarmfailureSystemboard
001-301-XXXSystemRTCCenturybyteerror1.Flashthesystem.See“Flashupdateprocedures”
onpage217
.
2.Systemboard
005-000-XXXVideoTestPassedNoaction
005-00X-XXXVideoerror
1.Videocard,ifinstalled
2.Systemboard
005-010-XXX005-011-XXX005-012-XXX005-013-XXX
VideoSignalfailure
1.Videocard,ifinstalled
2.Systemboard
Chapter7.Symptom-to-FRUIndex65
Page 72

DiagnosticErrorCodeFRU/Action
005-016-XXXVideoSimplePatterntestfailure
005-024-XXXVideoAddressingtestfailure1.Videocard,ifinstalled
005-025-XXXVideoChecksumValueerror
005-027-XXXVideoConguration/Setuperror1.RuntheSetupUtilityprogram.
005-031-XXXVideoDeviceCablefailure
005-032-XXXVideoDeviceControllerfailure
005-036-XXXVideoRegistererror
005-038-XXXSystemBIOSextensionfailure
005-040-XXXVideoIRQfailure
005-195-XXXVideoTestabortedbyuser
005-196-XXXVideotesthalt,errorthresholdexceeded
005-197-XXXVideotestwarning1.Makesurethecomponentthatiscalledoutis
005-198-XXXVideotestaborted
005-199-XXXVideotestfailed,causeunknown
1.VideoRam
2.Videocard,ifinstalled
3.Systemboard
2.Systemboard
1.Videocard,ifinstalled
2.Systemboard
2.Videodriversupdate
3.Videocard,ifinstalled
4.Systemboard
1.Videocable
2.Monitor
3.Videocard,ifinstalled
4.Systemboard
1.Videocard,ifinstalled
2.Systemboard
1.Videocard,ifinstalled
2.Systemboard
1.Videocard,ifinstalled
2.Systemboard
1.Videocard,ifinstalled
2.Systemboard
InformationonlyRestartthetest,ifnecessary
1.PressF3toreviewthelogle.
2.Restartthetesttoresetthelogle.
connectedand/orenabled.SeeChapter6“Using
theSetupUtilityprogram”onpage57.
2.Re-runtest
3.Replacethecomponentcalledoutinwarning
statement.
4.Replacethecomponentundertest.
1.Ifacomponentiscalledout,makesureitis
connectedand/orenabled.SeeChapter6“Using
theSetupUtilityprogram”onpage57
2.Flashthesystemandre-test.See“Flashupdate
procedures”onpage217
3.Goto“Undeterminedproblems”onpage82.
1.Goto“Undeterminedproblems”onpage82.
2.Flashthesystemandre-test.See“Flashupdate
procedures”onpage217
3.Replacecomponentunderfunctiontest.
.
.
.
66ThinkCentreHardwareMaintenanceManual
Page 73

DiagnosticErrorCodeFRU/Action
005-2XX-XXX005-3XX-XXXVideosubsystemerror
1.Videocard,ifinstalled
2.Systemboard
006-000-XXXDisketteinterfaceTestPassed
006-0XX-XXXDisketteinterfaceerror
Noaction
1.DiskettedriveCable
2.Diskettedrive
3.Systemboard
006-195-XXXDisketteinterfaceTestabortedbyuserInformationonlyRestartthetest,ifnecessary
006-196-XXXDisketteinterfacetesthalt,errorthreshold
exceeded
1.PressF3toreviewthelogle.
2.Restartthetesttoresetthelogle.
006-197-XXXDisketteinterfacetestwarning1.Ifacomponentiscalledout,makesureitis
connectedand/orenabled.
2.Re-runtest.
3.Replacethecomponentthatiscalledoutinwarning
statement.
4.Replacethecomponentundertest.
006-198-XXXDisketteinterfacetestaborted1.Ifacomponentiscalledout,makesureitis
connectedand/orenabled.
2.Flashthesystemandre-test.See“Flashupdate
procedures”onpage217
.
3.Goto“Undeterminedproblems”onpage82.
006-199-XXXDisketteinterfacetestfailed,causeunknown
1.Goto“Undeterminedproblems”onpage82.
2.Flashthesystemandre-test.
3.Replacecomponentunderfunctiontest.
006-25X-XXXDisketteinterfaceError
1.Diskettedrivecable
2.Diskettedrive
3.Systemboard
011-000-XXXSerialportInterfaceTestPassed
011-001-XXXSerialportPresence
Noaction
1.Removeexternalserialdevice,ifpresent.
2.RuntheSetupUtilityprogram,enableport.
3.Systemboard
011-002-XXX011-003-XXXSerialportTimeout/Parity
Systemboard
error
011-013-XXX011-014-XXXSerialportControl
Systemboard
Signal/Loopbacktestfailure
011-015-XXXSerialportExternalLoopbackfailure
1.Wrapplug
2.Systemboard
011-027-XXXSerialportConguration/Setuperror1.runtheSetupUtilityprogram,enableport
2.Flashthesystem.See“Flashupdateprocedures”
onpage217.
3.Systemboard
011-03X-XXX011-04X-XXXSerialportfailureSystemboard
011-195-XXXSerialportTestabortedbyuser
InformationonlyRestartthetest,ifnecessary.
Chapter7.Symptom-to-FRUIndex67
Page 74

DiagnosticErrorCodeFRU/Action
011-196-XXXSerialporttesthalt,errorthresholdexceeded
011-197-XXXSerialporttestwarning
011-198-XXXSerialporttestaborted
011-199-XXXSerialporttestfailed,causeunknown1.Goto“Undeterminedproblems”onpage82.
011-2XX-XXXSerialportsignalfailure
014-000-XXXParallelportInterfaceTestPassed
014-001-XXXParallelportPresence
014-002-XXX014-003-XXXParallelportTimeout/Parity
error
014-013-XXX014-014-XXXParallelportControl
Signal/Loopbacktestfailure
014-015-XXXParallelportExternalLoopbackfailure
014-027-XXXParallelportConguration/Setuperror1.RuntheSetupUtilityprogram,enableport
014-03X-XXX014-04X-XXXParallelportfailure
014-195-XXXParallelportTestabortedbyuser
014-196-XXXParallelporttesthalt,errorthreshold
exceeded
1.PressF3toreviewthelogle.
2.Restartthetesttoresetthelogle.
1.Makesurethecomponentthatiscalledoutis
connectedand/orenabled.SeeChapter6“Using
theSetupUtilityprogram”onpage57
2.Re-runtest
3.Replacethecomponentthatiscalledoutinwarning
statement.
4.Replacethecomponentundertest.
1.Ifacomponentiscalledout,makesureitis
connectedand/orenabled.SeeChapter6“Using
theSetupUtilityprogram”onpage57
2.Flashthesystemandre-test.See“Flashupdate
procedures”onpage217.
3.Goto“Undeterminedproblems”onpage82.
2.Flashthesystemandre-test.See“Flashupdate
procedures”onpage217.
3.Replacecomponentunderfunctiontest.
1.Externalserialdevice
2.Systemboard
Noaction
1.Removeexternalparalleldevice,ifpresent.
2.RuntheSetupUtilityprogram,enableport
3.Systemboard
Systemboard
Systemboard
1.Wrapplug
2.Systemboard
2.Flashthesystem.See“Flashupdateprocedures”
onpage217.
3.Systemboard
Systemboard
InformationonlyRestartthetest,ifnecessary.
1.PressF3toreviewthelogle.
2.Restartthetesttoresetthelogle.
.
.
68ThinkCentreHardwareMaintenanceManual
Page 75

DiagnosticErrorCodeFRU/Action
014-197-XXXParallelporttestwarning1.Makesurethecomponentthatiscalledoutis
connectedand/orenabled.SeeChapter6“Using
theSetupUtilityprogram”onpage57
.
2.Re-runtest.
3.Replacethecomponentthatiscalledoutinwarning
statement.
4.Replacethecomponentundertest.
014-198-XXXParallelporttestaborted
1.Ifacomponentiscalledout,makesureitis
connectedand/orenabled.
2.Flashthesystemandre-test.See“Flashupdate
procedures”onpage217.
3.Goto“Undeterminedproblems”onpage82.
014-199-XXXParallelporttestfailed,causeunknown
1.Goto“Undeterminedproblems”onpage82.
2.Flashthesystemandre-test.See“Flashupdate
procedures”onpage217
.
3.Replacecomponentunderfunctiontest.
014-2XX-XXX014-3XX-XXXParallelportfailure
1.Externalparalleldevice
2.Systemboard
015-000-XXXUSBportInterfaceTestPassed
Noaction
015-001-XXXUSBportPresence1.RemoveUSBdevice(s)andre-test.
2.Systemboard
015-002-XXXUSBportTimeout1.RemoveUSBdevice(s)andre-test.
2.Systemboard
015-015-XXXUSBportExternalLoopbackfailure1.RemoveUSBdevice(s)andre-test.
2.Systemboard
015-027-XXXUSBportConguration/Setuperror1.Flashthesystem.See“Flashupdateprocedures”
onpage217.
2.Systemboard
015-032-XXXUSBportDeviceControllerfailureSystemboard
015-034-XXXUSBportbufferallocationfailure
1.Rebootthesystem
2.Flashthesystemandre-test.See“Flashupdate
procedures”onpage217.
3.Runmemorytest.
4.Systemboard
015-035-XXXUSBportResetconditiondetected1.RemoveUSBdevice(s)andre-test.
2.Systemboard
015-036-XXXUSBportRegistererrorSystemboard
015-040-XXXUSBportIRQfailure1.RuntheSetupUtilityprogramandcheckfor
conicts.
2.Flashthesystem.See“Flashupdateprocedures”
onpage217.
3.Systemboard
015-195-XXXUSBportTestabortedbyuser
InformationonlyRestartthetest,ifnecessary.
Chapter7.Symptom-to-FRUIndex69
Page 76

DiagnosticErrorCodeFRU/Action
015-196-XXXUSBporttesthalt,errorthresholdexceeded
015-197-XXXUSBporttestwarning
015-198-XXXUSBporttestaborted
015-199-XXXUSBporttestfailed,causeunknown1.Goto“Undeterminedproblems”onpage82.
018-000-XXXPCICardTestPassed
018-0XX-XXXPCICardFailure
018-195-XXXPCICardTestabortedbyuser1.PCIcard
018-196-XXXPCICardtesthalt,errorthresholdexceeded
018-197-XXXPCICardtestwarning
018-198-XXXPCICardtestaborted
018-199-XXXPCICardtestfailed,causeunknown1.Goto“Undeterminedproblems”onpage82.
1.PressF3toreviewthelogle.
2.Restartthetesttoresetthelogle.
1.Makesurethecomponentthatiscalledoutis
connectedand/orenabled.SeeChapter6“Using
theSetupUtilityprogram”onpage57
2.Re-runtest.
3.Replacethecomponentthatiscalledoutinwarning
statement.
4.Replacethecomponentundertest.
1.Ifacomponentiscalledout,makesureitis
connectedand/orenabled.SeeChapter6“Using
theSetupUtilityprogram”onpage57
2.Flashthesystemandre-test.See“Flashupdate
procedures”onpage217.
3.Goto“Undeterminedproblems”onpage82.
2.Flashthesystemandre-test.See“Flashupdate
procedures”onpage217.
3.Replacecomponentunderfunctiontest.
Noaction
1.Risercard,ifinstalled.
2.Systemboard
2.InformationonlyRestartthetest,ifnecessary
1.PressF3toreviewthelogle
2.Restartthetesttoresetthelogle
1.Makesurethecomponentthatiscalledoutis
connectedand/orenabled.SeeChapter6“Using
theSetupUtilityprogram”onpage57
2.Re-runtest.
3.Replacethecomponentthatiscalledoutinwarning
statement.
4.Replacethecomponentundertest.
1.Ifacomponentiscalledout,makesureitis
connectedand/orenabled.SeeChapter6“Using
theSetupUtilityprogram”onpage57.
2.Flashthesystemandre-test.See“Flashupdate
procedures”onpage217
3.Goto“Undeterminedproblems”onpage82.
2.Flashthesystemandre-test.See“Flashupdate
procedures”onpage217.
3.Replacecomponentunderfunctiontest.
.
.
.
.
70ThinkCentreHardwareMaintenanceManual
Page 77

DiagnosticErrorCodeFRU/Action
018-250-XXXPCICardServiceserror1.PCIcard
2.Risercard,ifinstalled.
3.Systemboard
020-000-XXXPCIInterfaceTestPassed
Noaction
020-0XX-XXXPCIInterfaceerror1.PCIcard
2.Risercard,ifinstalled.
3.Systemboard
020-195-XXXPCITestabortedbyuser
020-196-XXXPCItesthalt,errorthresholdexceeded
InformationonlyRestartthetest,ifnecessary
1.PressF3toreviewthelogle.
2.Restartthetesttoresetthelogle.
020-197-XXXPCItestwarning
1.Makesurethecomponentthatiscalledoutis
connectedand/orenabled.SeeChapter6“Using
theSetupUtilityprogram”onpage57.
2.Re-runtest.
3.Replacethecomponentthatiscalledoutinwarning
statement.
4.Replacethecomponentundertest.
020-198-XXXPCItestaborted
1.Ifacomponentiscalledout,makesureitis
connectedand/orenabled.SeeChapter6“Using
theSetupUtilityprogram”onpage57
.
2.Flashthesystemandre-test.See“Flashupdate
procedures”onpage217.
3.Goto“Undeterminedproblems”onpage82.
020-199-XXXPCItestfailed,causeunknown1.Goto“Undeterminedproblems”onpage82.
2.Flashthesystemandre-test.See“Flashupdate
procedures”onpage217.
3.Replacecomponentunderfunctiontest.
020-262-XXXPCIsystemerror1.PCIcard
2.Risercard,ifinstalled.
3.Systemboard
025-000-XXXIDEinterfaceTestPassed
025-00X-XXX025-01X-XXXIDEinterfacefailure
Noaction
1.IDEsignalcable
2.Checkpowersupplyvoltages.
3.ReseatIDEsignalcable.
4.IDEdevice
5.Systemboard
025-027-XXXIDEinterfaceConguration/Setuperror
1.IDEsignalcable
2.Flashthesystem.See“Flashupdateprocedures”
onpage217.
3.ReseatIDEsignalcable.
4.IDEdevice
5.Systemboard
Chapter7.Symptom-to-FRUIndex71
Page 78

DiagnosticErrorCodeFRU/Action
025-02X-XXX025-03X-XXX025-04X-XXXIDEInterface
failure
025-195-XXXIDEinterfaceTestabortedbyuserInformationonlyRestartthetest,ifnecessary.
025-196-XXXIDEinterfacetesthalt,errorthreshold
exceeded
025-197-XXXIDEinterfacetestwarning
025-198-XXXIDEinterfacetestaborted1.Ifacomponentiscalledout,makesureitis
025-199-XXXIDEinterfacetestfailed,causeunknown
030-000-XXXSCSIinterfaceTestPassed
030-00X-XXX030-01X-XXXSCSIinterfacefailure1.SCSIsignalcable
030-027-XXXSCSIinterfaceConguration/Setuperror1.SCSIsignalcable
030-03X-XXX030-04X-XXXSCSIinterfaceerror1.SCSIsignalcable
030-195-XXXSCSIinterfaceTestabortedbyuser
1.IDEsignalcable
2.Checkpowersupply.
3.ReseatIDEsignalcable.
4.IDEdevice
5.Systemboard
1.PressF3toreviewthelogle.
2.Restartthetesttoresetthelogle.
1.Makesurethecomponentthatiscalledoutis
connectedand/orenabled.SeeChapter6“Using
theSetupUtilityprogram”onpage57
2.Re-runtest.
3.Replacethecomponentthatiscalledoutinwarning
statement.
4.Replacethecomponentundertest.
connectedand/orenabled.SeeChapter6“Using
theSetupUtilityprogram”onpage57
2.Flashthesystemandre-test.See“Flashupdate
procedures”onpage217
3.Goto“Undeterminedproblems”onpage82.
1.Goto“Undeterminedproblems”onpage82.
2.Flashthesystemandre-test.See“Flashupdate
procedures”onpage217.
3.Replacecomponentunderfunctiontest.
Noaction
2.Checkpowersupply
3.SCSIdevice
4.SCSIadaptercard,ifinstalled.
5.Systemboard
2.Flashthesystem.See“Flashupdateprocedures”
onpage217.
3.SCSIdevice
4.SCSIadaptercard,ifinstalled.
5.Systemboard
2.Checkpowersupply
3.SCSIdevice
4.SCSIadaptercard,ifinstalled.
5.Systemboard
InformationonlyRestartthetest,ifnecessary.
.
.
.
72ThinkCentreHardwareMaintenanceManual
Page 79

DiagnosticErrorCodeFRU/Action
030-196-XXXSCSIinterfacetesthalt,errorthreshold
exceeded
030-197-XXXSCSIinterfacetestwarning
1.PressF3toreviewthelogle.
2.Restartthetesttoresetthelogle.
1.Makesurethecomponentthatiscalledoutis
connectedand/orenabled.SeeChapter6“Using
theSetupUtilityprogram”onpage57
.
2.Re-runtest.
3.Replacethecomponentthatiscalledoutinwarning
statement.
4.Replacethecomponentundertest.
030-198-XXXSCSIinterfacetestaborted
1.Ifacomponentiscalledout,makesureitis
connectedand/orenabled.SeeChapter6“Using
theSetupUtilityprogram”onpage57
.
2.Flashthesystemandre-test.See“Flashupdate
procedures”onpage217.
3.Goto“Undeterminedproblems”onpage82.
030-199-XXXSCSIinterfacetestfailed,causeunknown1.Goto“Undeterminedproblems”onpage82.
2.Flashthesystemandre-test.See“Flashupdate
procedures”onpage217.
3.Replacecomponentunderfunctiontest.
035-000-XXXRAIDinterfaceTestPassed
035-0XX-XXXRAIDinterfaceFailure
Noaction
1.RAIDsignalcable
2.RAIDdevice
3.RAIDadaptercard,ifinstalled
4.Systemboard
035-195-XXXRAIDinterfaceTestabortedbyuserInformationonlyRestartthetest,ifnecessary.
035-196-XXXRAIDinterfacetesthalt,errorthreshold
exceeded
035-197-XXXRAIDinterfacetestwarning
1.PressF3toreviewthelogle.
2.Restartthetesttoresetthelogle.
1.Makesurethecomponentthatiscalledoutis
connectedand/orenabled.SeeChapter6“Using
theSetupUtilityprogram”onpage57
.
2.Re-runtest.
3.Replacethecomponentthatiscalledoutinwarning
statement.
4.Replacethecomponentundertest.
035-198-XXXRAIDinterfacetestaborted1.Ifacomponentiscalledout,makesureitis
connectedand/orenabled.SeeChapter6“Using
theSetupUtilityprogram”onpage57
.
2.Flashthesystemandre-test.See“Flashupdate
procedures”onpage217.
3.Goto“Undeterminedproblems”onpage82.
035-199-XXXRAIDinterfacetestfailed,causeunknown
1.See“Undeterminedproblems”onpage82.
2.Flashthesystemandre-test.See“Flashupdate
procedures”onpage217.
3.Replacecomponentunderfunctiontest.
071-000-XXXAudioportInterfaceTestPassed
Noaction
Chapter7.Symptom-to-FRUIndex73
Page 80

DiagnosticErrorCodeFRU/Action
071-00X-XXX071-01X-XXX071-02X-XXXAudioporterror
071-03X-XXXAudioportfailure
071-04X-XXXAudioportfailure
071-195-XXXAudioportTestabortedbyuser
071-196-XXXAudioporttesthalt,errorthresholdexceeded
071-197-XXXAudioporttestwarning1.Makesurethecomponentthatiscalledoutis
071-198-XXXAudioporttestaborted
071-199-XXXAudioporttestfailed,causeunknown
071-25X-XXXAudioportfailure
080-000-XXXGamePortinterfaceTestPassed
080-XXX-XXXGamePortinterfaceError
080-195-XXXGamePortinterfaceTestabortedbyuser
080-196-XXXGamePortinterfacetesthalt,errorthreshold
exceeded
1.RuntheSetupUtilityprogram.
2.Flashthesystem.See“Flashupdateprocedures”
onpage217
3.Systemboard
1.Speakers
2.Microphone
3.Audiocard,ifinstalled.
4.Systemboard
1.RuntheSetupUtilityprogram.
2.Audiocard,ifinstalled.
3.Systemboard
InformationonlyRestartthetest,ifnecessary.
1.PressF3toreviewthelogle.
2.Restartthetesttoresetthelogle.
connectedand/orenabled.SeeChapter6“Using
theSetupUtilityprogram”onpage57.
2.Re-runtest.
3.Replacethecomponentthatiscalledoutinwarning
statement.
4.Replacethecomponentundertest.
1.Ifacomponentiscalledout,makesureitis
connectedand/orenabled.SeeChapter6“Using
theSetupUtilityprogram”onpage57
2.Flashthesystemandre-test.See“Flashupdate
procedures”onpage217.
3.Goto“Undeterminedproblems”onpage82.
1.See“Undeterminedproblems”onpage82.
2.Flashthesystemandre-test.See“Flashupdate
procedures”onpage217
3.Replacecomponentunderfunctiontest.
1.Speakers
2.Audiocard,ifinstalled
3.Systemboard
Noaction
1.Removethegameportdeviceandre-testthe
system.
InformationonlyRestartthetest,ifnecessary.
1.PressF3toreviewthelogle.
2.Restartthetesttoresetthelogle.
.
.
.
74ThinkCentreHardwareMaintenanceManual
Page 81

DiagnosticErrorCodeFRU/Action
080-197-XXXGamePortinterfacetestwarning
1.Makesurethecomponentthatiscalledoutis
connectedand/orenabled.SeeChapter6“Using
theSetupUtilityprogram”onpage57
.
2.Re-runtest.
3.Replacethecomponentthatiscalledoutinwarning
statement.
4.Replacethecomponentundertest.
080-198-XXXGamePortinterfacetestaborted
1.Ifacomponentiscalledout,makesureitis
connectedand/orenabled.SeeChapter6“Using
theSetupUtilityprogram”onpage57
2.Flashthesystemandre-test.See“Flashupdate
procedures”onpage217.
3.Goto“Undeterminedproblems”onpage82.
080-199-XXXGamePortinterfacetestfailed,cause
unknown
1.See“Undeterminedproblems”onpage82.
2.Flashthesystemandre-test.See“Flashupdate
procedures”onpage217
.
3.Replacecomponentunderfunctiontest.
086-000-XXXMousePortinterfaceTestPassed
086-001-XXXMousePortinterfacePresence
Noaction
1.Mouse
2.Systemboard
086-032-XXXMousePortinterfaceDevicecontrollerfailure
1.Mouse
2.Systemboard
086-035-XXXMousePortinterfaceReset
1.Mouse
2.Systemboard
086-040-XXXMousePortinterfaceIRQfailure1.RuntheSetupUtilityprogram.
2.Mouse
3.Systemboard
086-195-XXXMousePortinterfaceTestabortedbyuserInformationonlyRestartthetest,ifnecessary.
086-196-XXXMousePortinterfacetesthalt,error
thresholdexceeded
086-197-XXXMousePortinterfacetestwarning
1.PressF3toreviewthelogle.
2.Restartthetesttoresetthelogle.
1.Makesurethecomponentthatiscalledoutis
connectedand/orenabled.SeeChapter6“Using
theSetupUtilityprogram”onpage57
.
2.Re-runtest.
3.Replacethecomponentthatiscalledoutinwarning
statement.
4.Replacethecomponentundertest.
086-198-XXXMousePortinterfacetestaborted1.Ifacomponentiscalledout,makesureitis
connectedand/orenabled.SeeChapter6“Using
theSetupUtilityprogram”onpage57
.
2.Flashthesystemandre-test.See“Flashupdate
procedures”onpage217.
3.Goto“Undeterminedproblems”onpage82.
Chapter7.Symptom-to-FRUIndex75
Page 82

DiagnosticErrorCodeFRU/Action
086-199-XXXMousePortinterfacetestfailed,cause
unknown
089-000-XXXMicroprocessorTestPassedNoaction
089-XXX-XXXMicroprocessorfailure
089-195-XXXMicroprocessorTestabortedbyuser
089-196-XXXMicroprocessortesthalt,errorthreshold
exceeded
089-197-XXXMicroprocessortestwarning1.Makesurethecomponentthatiscalledoutis
089-198-XXXMicroprocessortestaborted
089-199-XXXMicroprocessortestfailed,causeunknown
170-000-XXXVoltageSensor(s)TestPassed
170-0XX-XXXVoltageSensor(s)failure
170-195-XXXVoltageSensor(s)Testabortedbyuser
170-196-XXXVoltageSensor(s)testhalt,errorthreshold
exceeded
170-197-XXXVoltageSensor(s)testwarning
170-198-XXXVoltageSensor(s)testaborted
1.See“Undeterminedproblems”onpage82.
2.Flashthesystemandre-test.See“Flashupdate
procedures”onpage217
3.Replacecomponentunderfunctiontest.
1.Microprocessor(s)
2.Systemboard
InformationonlyRestartthetest,ifnecessary.
1.PressF3toreviewthelogle.
2.Restartthetesttoresetthelogle.
connectedand/orenabled.SeeChapter6“Using
theSetupUtilityprogram”onpage57.
2.Re-runtest.
3.Replacethecomponentthatiscalledoutinwarning
statement.
4.Replacethecomponentundertest.
1.Flashthesystem.See“Flashupdateprocedures”
onpage217
2.Goto“Undeterminedproblems”onpage82.
1.See“Undeterminedproblems”onpage82.
2.Flashthesystemandre-test.See“Flashupdate
procedures”onpage217
3.Replacecomponentunderfunctiontest.
Noaction
1.Flashsystem
2.Systemboard
InformationonlyRestartthetest,ifnecessary.
1.PressF3toreviewthelogle.
2.Restartthetesttoresetthelogle.
1.Makesurethecomponentthatiscalledoutis
connectedand/orenabled.SeeChapter6“Using
theSetupUtilityprogram”onpage57
2.Re-runtest.
3.Replacethecomponentthatiscalledoutinwarning
statement.
4.Replacethecomponentundertest.
1.Ifacomponentiscalledout,makesureitis
connectedand/orenabled.SeeChapter6“Using
theSetupUtilityprogram”onpage57
2.Flashthesystemandre-test.See“Flashupdate
procedures”onpage217.
3.Goto“Undeterminedproblems”onpage82.
.
.
.
.
.
76ThinkCentreHardwareMaintenanceManual
Page 83

DiagnosticErrorCodeFRU/Action
170-199-XXXVoltageSensor(s)testfailed,causeunknown1.See“Undeterminedproblems”onpage82.
2.Flashthesystemandre-test.See“Flashupdate
procedures”onpage217
.
3.Replacecomponentunderfunctiontest.
170-250-XXX170-251-XXXVoltageSensor(s)Voltage
limiterror
170-254-XXXVoltageSensor(s)VoltageRegulatorModule
error
1.Powersupply
2.Systemboard
1.VoltageRegulatorModule(VRM)
2.Microprocessor
3.Systemboard
175-000-XXXThermalSensor(s)TestPassed
175-0XX-XXXThermalSensor(s)failure
Noaction
1.Flashsystem
2.Systemboard
175-195-XXXThermalSensor(s)Testabortedbyuser
175-196-XXXThermalSensor(s)testhalt,errorthreshold
exceeded
175-197-XXXThermalSensor(s)testwarning
InformationonlyRestartthetest,ifnecessary.
1.PressF3toreviewthelogle.
2.Restartthetesttoresetthelogle.
1.Makesurethecomponentthatiscalledoutis
connectedand/orenabled.SeeChapter6“Using
theSetupUtilityprogram”onpage57
.
2.Re-runtest.
3.Replacethecomponentthatiscalledoutinwarning
statement.
4.Replacethecomponentundertest.
175-198-XXXThermalSensor(s)testaborted
1.Ifacomponentiscalledout,makesureitis
connectedand/orenabled.
2.Flashthesystemandre-test.See“Flashupdate
procedures”onpage217.
3.Goto“Undeterminedproblems”onpage82.
175-199-XXXThermalSensor(s)testfailed,cause
unknown
1.See“Undeterminedproblems”onpage82.
2.Flashthesystemandre-test.See“Flashupdate
procedures”onpage217.
3.Replacecomponentunderfunctiontest.
175-250-XXX175-251-XXXThermalSensor(s)limiterror1.Checkfans
2.Checkpowersupplyvoltages.
3.Microprocessor
4.Systemboard
185-000-XXXAssetSecurityTestPassed
185-XXX-XXXAssetSecurityfailure
Noaction
1.Flashsystem
2.Systemboard
185-278-XXXAssetSecurityChassisIntrusion1.AssureAssetSecurityEnabled
2.C2CoverSwitch
3.Systemboard
201-000-XXXSystemMemoryTestPassed
Noaction
Chapter7.Symptom-to-FRUIndex77
Page 84

DiagnosticErrorCodeFRU/Action
201-XXX-XXXSystemMemoryerror
202-000-XXXSystemCacheTestPassed
202-XXX-XXXSystemCacheerror1.Cache,ifremovable
206-000-XXXDisketteDriveTestPassedNoaction
206-XXX-XXXDisketteDriveerror
215-000-XXXCD-ROMDriveTestPassed
215-XXX-XXXCD-ROMDriveerror1.CD-ROMDriveCable
217-000-XXXHardDiskDriveTestPassedNoaction
217-25X-XXX217-26X-XXXHardDiskDrive(IDE)error1.HardDiskDriveCable
217-28X-XXX217-29X-XXXHardDiskDrive(SCSI)error1.HardDiskDriveCable
220-000-XXXHi-CapacityCartridgeDriveTestPassed
220-XXX-XXXHi-CapacityCartridgeDriveerror1.RemovetheHi-CapacityCartridgeDriveandre-test
301-XXX-XXXKeyboarderror1.Keyboard
301-000-XXXKeyboardTestPassedNoaction
302-000-XXXMouseTestPassedNoaction
302-XXX-XXXMouseerror1.Mouse
303-000-XXXJoystickTestPassedNoaction
303-XXX-XXXJoystickerrorRemovetheJoystickandre-testthesystem.
1.Replacethememorymodulecalledoutbythetest.
2.Systemboard
Noaction
2.Systemboard
3.Microprocessor
1.DisketteDriveCable
2.Checkpowersupplyvoltages
3.Diskettedrive
4.Systemboard
Noaction
2.Checkpowersupplyvoltages
3.CD-ROMdrive
4.Systemboard
2.Checkpowersupplyvoltages
3.Reseattheharddiskdrivecable
4.HardDiskdrive(IDE)
5.Systemboard
2.Checkpowersupplyvoltages
3.Reseattheharddiskdrivecable
4.HardDiskdrive(SCSI)
5.SCSIadaptercard
6.Systemboard
Noaction
thesystem.
2.Checkandtestmouse.
3.Systemboard
2.CheckandtestKeyboard.
3.Systemboard
78ThinkCentreHardwareMaintenanceManual
Page 85

DiagnosticErrorCodeFRU/Action
305-000-XXXMonitorDDCTestPassed
305-250-XXXMonitorDDCselftestfailure1.RuntheSetupUtilityprogramtoenableDDC.
415-000-XXXModemTestPassedNoaction
415-XXX-XXXModemerrorRemovetheModemandre-testthesystem.
Noaction
2.Cable
3.Monitor
4.Videocard
5.Systemboard
Beepsymptoms
Beepsymptomsaretonesoraseriesoftonesseparatedbypauses(intervalswithoutsound)duringPOST.
Thefollowingtablesdescribesbeepsymptoms.
BeepSymptomFRU/Action
2shortbeepsCMOSsettingerrorCommonerrorcode,seethedetailfailureinformationin
.
3shortand1longbeepsDRAMmemoryerror
“POSTerrorcodes”onpage79
Performthefollowingactionsinorder.
1.Makesurethememorymodule(s)areproperlyseated
intheconnector(s).
2.Replacethememorymodule(s).
3.Replacethesystemboard.
POSTerrorcodes
Eachtimeyoupower-onthesystem,itperformsaseriesofteststhatchecktheoperationofthesystem
andsomeoptions.ThisseriesoftestsiscalledthePower-OnSelf-Test,orPOST.POSTdoesthefollowing
operations.
•Checkssomebasicsystem-boardoperations
•Checksthememoryoperation
•Startsthevideooperation
•Veriesthatthebootdriveisworking
IfthePOSTdetectsaproblem,anerrormessageappearsonthescreen.Asingleproblemcancauseseveral
errormessagestoappear.Whenyoucorrectthecauseofthersterrormessage,theothererrormessages
probablywillnotappearonthescreenthenexttimeyouturnonthesystem.
Chapter7.Symptom-to-FRUIndex79
Page 86

ErrorcodePOSTErrorMessageDescription/Action
0135
0211
0164MemorysizedecreasedPressF10toexit.
1762
0662
1820
1962
Fanfailure
Keyboardnotfound
Congurationchangehasoccurred
Congurationchangehasoccurred
Morethanoneexternalngerprint
readerareattached.Poweroffand
removeallbutthereaderthatyouset
upwithinyourmainoperatingsystem.
Nooperatingsystemfound.Press
anykeytorepeatbootsequence.
Thesystemmightbeoverheating.
PressF10toexit.
Note:Iftheproblemiscausedbythe
microprocessorfan,pressF10will
notsolvetheproblem.
Whenthereisnokeyboarddetected,
theerrormessagewillbedisplayed.
Thiserrormessageisdisplayedwhen
aharddiskdriveoropticaldrive
changehasbeenmade.
PressF10toexit.
Thiserrormessageisdisplayedwhen
aoppydrivechangehasbeenmade.
PressF10toexit.
Ifmorethanoneexternalngerprint
readerareconnectedtoacomputer,
thiserrormessagewillbedisplayed
toinformyoutoremoveallofthe
ngerprintkeyboardsexceptthe
onecompatiblewiththengerprint
applicationonyourcomputer.
ThiserroroccursonlyafterthePOST
iscompleted.
Miscellaneouserrorconditions
Message/SymptomFRU/Action
ChangingdisplaycolorsDisplay/Monitor
Computerwillnotpower-off.See“Harddiskdriveboot
error”onpage61.
ComputerwillnotRPLfromserver
1.PowerSwitch
2.SystemBoard
3.Risercard,ifinstalled.
1.Ensurethatnetworkisinstartupsequenceasrst
deviceorrstdeviceafterdiskette.
2.EnsurethatnetworkadapterisenabledforRPL.
3.Networkadapter(Advisenetworkadministratorof
newMACaddress)
Pressanykeytorepeatboot
sequence.
80ThinkCentreHardwareMaintenanceManual
Page 87

Message/SymptomFRU/Action
ComputerwillnotperformaWakeOnLAN®(ifapplicable)1.Checkpowersupplyandsignalcableconnections
tonetworkadapter.
2.Ensurethattheoperatingsystemsettingsaresetto
enableWakeonLAN.
3.EnsureWakeOnLANfeatureisenabledin
Setup/Conguration(see“StartingtheSetupUtility
program”onpage57
)
4.EnsurenetworkadministratorisusingcorrectMAC
address.
5.EnsurenointerruptorI/Oaddressconicts.
6.Networkadapter(advisenetworkadministratorof
newMACaddress)
Deadcomputer.See“Harddiskdrivebooterror”onpage
61.
Diskettedrivein-uselightremainsonordoesnotlight
whendriveisactive.
1.PowerSupply
2.SystemBoard
1.DisketteDrive
2.SystemBoard
3.DisketteDriveCable
Blankscreenexceptforashingcursor.
1.SystemBoard
2.PrimaryHardDiskDrive
3.HardDiskDriveCable
IncorrectmemorysizeduringPOST
1.RuntheMemorytests.
2.MemoryModule
3.SystemBoard
"InsertaDiskette"iconappearswithaknown-good
diagnosticsdisketteintherst3.5-inchdiskettedrive.
1.SystemBoard
2.DisketteDriveCable
3.NetworkAdapter
Intensityorcolorvariesfromlefttorightofcharacters
andcolorbars
1.Display
2.Videoadapter(ifpresent)
3.SystemBoard
Nopowerorfannotrunning
Non-systemdiskordiskerror-typemessagewitha
known-gooddiagnosticdiskette.
1.See“Harddiskdrivebooterror”onpage61.
1.DisketteDrive
2.SystemBoard
3.DisketteDriveCable
Otherdisplaysymptomsnotlistedabove(includingblank
orillegibledisplay)
Power-onindicatororharddiskdrivein-uselightnoton,
butcomputerworkscorrectly
1.Display
2.SystemBoard
1.Powerswitch/LEDassembly
2.SystemBoard
Printerproblems1.Printer
2.SystemBoard
Chapter7.Symptom-to-FRUIndex81
Page 88

Message/SymptomFRU/Action
Programloadsfromtheharddiskwithaknown-good
diagnosticsdisketteintherst3.5-inchdiskettedrive
RPLcomputercannotaccessprogramsfromitsownhard
disk.
RPLcomputerdoesnotRPLfromserver
Serialorparallelportdevicefailure(systemboardport)1.ExternalDeviceSelf-TestOK?
Serialorparallelportdevicefailure(adapterport)1.ExternalDeviceSelf-T estOK?
Someorallkeysonthekeyboarddonotwork
1.RuntheSetupUtilityprogramandcheckStartup
sequence.
2.DisketteDrive
3.DisketteDriveCable
4.SystemBoard
5.PowerSupply
1.IfnetworkadministratorisusingLCCMHybridRPL,
checkstartupsequence:
a.Firstdevice-network
b.Seconddevice-harddisk
2.Harddiskdrive
1.Checkstartupsequence.
2.CheckthenetworkadapterLEDstatus.
2.ExternalDevice
3.Cable
4.SystemBoard
2.ExternalDevice
3.Cable
4.AlternateAdapter
5.SystemBoard
1.Keyboard
2.KeyboardCable
3.SystemBoard
Undeterminedproblems
Thissectionprovidesinstructionsonhowtondoutthefailingdevicesoradapters.
1.Power-offthecomputer.
2.Removeordisconnectthefollowingcomponents(ifinstalled)oneatatime.
a.Externaldevices(modem,printer,ormouse)
b.Anyadapters
c.Memorymodules
d.Extendedvideomemory
e.ExternalCache
f.ExternalCacheRAM
g.Harddiskdrive
h.Diskettedrive
3.Power-onthecomputertore-testthesystem.
4.Repeatsteps1through3untilyoundthefailingdeviceoradapter.
Ifalldevicesandadaptershavebeenremoved,andtheproblemcontinues,replacethesystemboard.
82ThinkCentreHardwareMaintenanceManual
Page 89

Chapter8.ReplacingFRUs
ThischapterprovidesremovalorreplacementproceduresformajorFRUs.NotallFRUsaredocumented.
Important
BeforeyoureplaceanyFRU,readChapter2“Safetyinformation”onpage3.Theseprecautionsand
guidelineswillhelpyouworksafely.
FRUreplacementsaretobedonebytrainedservicetechniciansonly.
Locatingconnectors,controls,andindicatorsonthefrontofyour computer
Figure1“Frontconnector,control,andindicatorlocations”onpage84showsthelocationsofthe
connectors,controls,andindicatorsonthefrontofyourcomputer.
©CopyrightLenovo2011
83
Page 90

Figure1.Frontconnector,control,andindicatorlocations
1Integratedcameraindicator8Internalspeakers
2Integratedcamera
3Integratedmicrophones
4Powerswitch11Headphoneconnector
5Brightness-up/Auto-adjustingcontrol
6Brightness-downcontrol
7VGA-incontrol
1
Auto-adjustingcontrolisenabledonlywhilethecomputerisusedinmonitormode.
1
9Cardreader(availableinsomemodels)
10USBconnector
12Microphoneconnector
13USBconnector
84ThinkCentreHardwareMaintenanceManual
Page 91

Usingyourcomputerinmonitormode
Yourcomputercanworkintwomodes:computermodeormonitormode.Thissectionprovidesinstructions
onhowtouseyourcomputerinmonitormode.
Touseyourcomputerinmonitormode,youneedtohaveasecondcomputer.Connectoneendofthe
VGAcabletotheVGA-inconnectorontherearofyourcomputer,andconnecttheotherendtotheVGA
connectoronthesecondcomputer.Turnonyourcomputer,andthenpresstheVGA-incontrolonthefront
ofthecomputertousethecomputerinmonitormode.Pressthebrightness-up/Auto-adjustingcontrol
button,andthescreenisautomaticallyoptimized.
Note:Toreturntothecomputermode,presstheVGA-incontrolonthefrontofthecomputertoreturn
tothecomputermode.
Locatingconnectorsontherearofyourcomputer
Figure2“Rearconnectorlocations”onpage85showsthelocationsoftheconnectorsontherearofyour
computer.Someconnectorsontherearofyourcomputerarecolor-codedtohelpyoudeterminewhereto
connectthecablestoyourcomputer.
Figure2.Rearconnectorlocations
1Opticaldrive
2Integratedcablelockslot
3USBconnectors(4)
4Powercordconnector
5Ethernetconnector
6VGA-inconnector
7HDMI-outconnector
8Systemstand
Chapter8.ReplacingFRUs85
Page 92

FRUlocations
ThefollowingillustrationshowsthelocationsoftheFRUs.
Figure3.FRUlocations
1Systemstandhingecover
2Systemstand
3Computercover
4Systemboardshieldwindow18RearI/Oconnector
5Systemboardshield
6Systemfan20Controlbuttonboard
7Handlebar
8Battery22Footstand
15Internalspeaker
16Wicard
17Powersupply
19Internalspeaker
21LCDpanel
86ThinkCentreHardwareMaintenanceManual
Page 93

9Heatsinkassembly(withamicroprocessorunderneath)
10Memorymodule
11Microprocessorfan
12Systemboard26VESAmountbracket
13Cardreader
14Footstand
23Harddiskdrive
24LCDbracket
25Opticaldrive
27Integratedcamera
Chapter8.ReplacingFRUs87
Page 94

Systemboardpartsandconnectors
Thefollowingillustrationshowsthelocationsofthesystemboardpartsandconnectors.
Figure4.Systemboardpartandconnectorlocations
1Battery9Harddiskdrivepowersupplyconnector
2Memoryslots(2)10SATAconnector
3Systemfanconnector11SATAconnector
4Internalspeakercableconnector
5Controlbuttonconnector13Opticaldriveconnector
6Cardreaderconnector
7Touchpanelcontrolboardconnector(fortouch
modelonly)
8LCDpanelconnector
12Microprocessorfanconnector
14Powersupplyconnector
15Microprocessor
Removingandreinstallingthesystemstandhingecover
Attention
Donotopenyourcomputerorattemptanyrepairbeforereadingandunderstandingthe“Importantsafety
information”intheThinkCentreEdgeSafetyandWarrantyGuidethatcamewithyourcomputer.Toobtaina
88ThinkCentreHardwareMaintenanceManual
Page 95

copyoftheThinkCentreEdgeSafetyandWarrantyGuide,goto:
http://www.lenovo.com/support
Thissectionprovidesinstructionsonhowtoremoveandreinstallthesystemstandhingecover.
CAUTION:
Turnoffthecomputerandwaitthreetoveminutestoletthecomputercoolbeforeremovingthe
systemstandhingecover.
Toremoveandreinstallthesystemstandhingecover,dothefollowing:
1.Removeanymediafromthedrivesandturnoffallattacheddevicesandthecomputer.
2.Disconnectallpowercordsfromelectricaloutlets.
3.Disconnectthepowercords,Input/Outputcables,andanyothercablesthatareconnectedtothe
computer.See“Locatingconnectors,controls,andindicatorsonthefrontofyourcomputer”onpage
and“Locatingconnectorsontherearofyourcomputer”onpage85.
83
4.Placeasoft,cleantowelorclothonthedeskorotheratsurface.Holdthesidesofyourcomputerand
gentlylayitdownsothatthescreenisagainstthesurfaceandthecoverisfacingup.
5.Removethescrewthatsecuresthesystemstandhingecover,andthenliftthesystemstandhingecover
upandremoveitfromthecomputer.
Figure5.Removingthesystemstandhingecover
Chapter8.ReplacingFRUs89
Page 96

6.T oreinstallthesystemstandhingecover,placethesystemstandhingecoveronthecomputersothat
thetwoplastictabs1onthehingecoveralignwiththecorrespondingholesinthecomputer.
Figure6.Reinstallingthesystemstandhingecover
7.Reinstallthescrewtosecurethesystemstandhingecovertothecomputer.
Figure7.Reinstallingthescrewtosecurethesystemstandhingecovertothecomputer
Removingandreinstallingthesystemstand
Attention
Donotopenyourcomputerorattemptanyrepairbeforereadingandunderstandingthe“Importantsafety
information”intheThinkCentreEdgeSafetyandWarrantyGuidethatcamewithyourcomputer.Toobtaina
copyoftheThinkCentreEdgeSafetyandWarrantyGuide,goto:
http://www.lenovo.com/support
90ThinkCentreHardwareMaintenanceManual
Page 97

Thissectionprovidesinstructionsonhowtoremoveandreinstallthesystemstand.
Toremoveandreinstallthesystemstand,dothefollowing:
1.T urnoffthecomputeranddisconnectallpowercordsfromelectricaloutlets.
2.Removethesystemstandhingecover.See“Removingandreinstallingthesystemstandhingecover”
onpage88.
3.Removethetwoscrewsthatsecurethesystemstand,andthenliftthesystemstandupandremove
itfromthecomputer.
Figure8.Removingthesystemstand
4.T oreinstallthesystemstand,alignthetwoscrewholesinthesystemstandwiththecorrespondingholes
inthecomputercover,andtheninstallthetwoscrewstosecurethesystemstandtothecomputer.
Figure9.Reinstallingthesystemstand
Chapter8.ReplacingFRUs91
Page 98

5.Reinstallthesystemstandhingecover.See“Removingandreinstallingthesystemstandhingecover”
onpage88.
Removingandreinstallingthefootstands
Attention
Donotopenyourcomputerorattemptanyrepairbeforereadingandunderstandingthe“Importantsafety
information”intheThinkCentreEdgeSafetyandWarrantyGuidethatcamewithyourcomputer.Toobtaina
copyoftheThinkCentreEdgeSafetyandWarrantyGuide,goto:
http://www.lenovo.com/support
Thissectionprovidesinstructionsonhowtoremoveandreinstallthefootstands.
CAUTION:
Turnoffthecomputerandwaitthreetoveminutestoletthecomputercoolbeforeremovingthe
footstands.
Toremoveandreinstallthefootstands,dothefollowing:
1.Removeanymediafromthedrivesandturnoffallattacheddevicesandthecomputer.
2.Disconnectallpowercordsfromelectricaloutlets.
3.Disconnectthepowercords,Input/Outputcables,andanyothercablesthatareconnectedtothe
computer.See“Locatingconnectors,controls,andindicatorsonthefrontofyourcomputer”onpage
and“Locatingconnectorsontherearofyourcomputer”onpage85.
83
4.Placeasoft,cleantowelorclothonthedeskorotheratsurface.Holdthesidesofyourcomputerand
gentlylayitdownsothatthescreenisagainstthesurfaceandthecoverisfacingup.
5.Removetherubberpiecefromeachfootstand.
Figure10.Removingtherubberpiecefromeachfootstand
6.Removethescrewthatsecureseachfootstand,andthenremoveeachfootstandfromthecomputer.
92ThinkCentreHardwareMaintenanceManual
Page 99

Figure11.Removingeachfootstandfromthecomputer
7.T oreinstallthefootstands,placeeachfootstandonthecomputersothatthescrewholealignswith
thecorrespondingholeinthecomputer,andthenreinstallthescrewtosecureeachfootstandtothe
computer.
Figure12.Reinstallingeachfootstandtothecomputer
8.Reinstalltherubberpieceoneachfootstand.
Chapter8.ReplacingFRUs93
Page 100

Figure13.Reinstallingtherubberpieceoneachfootstand
94ThinkCentreHardwareMaintenanceManual
 Loading...