

Page 1
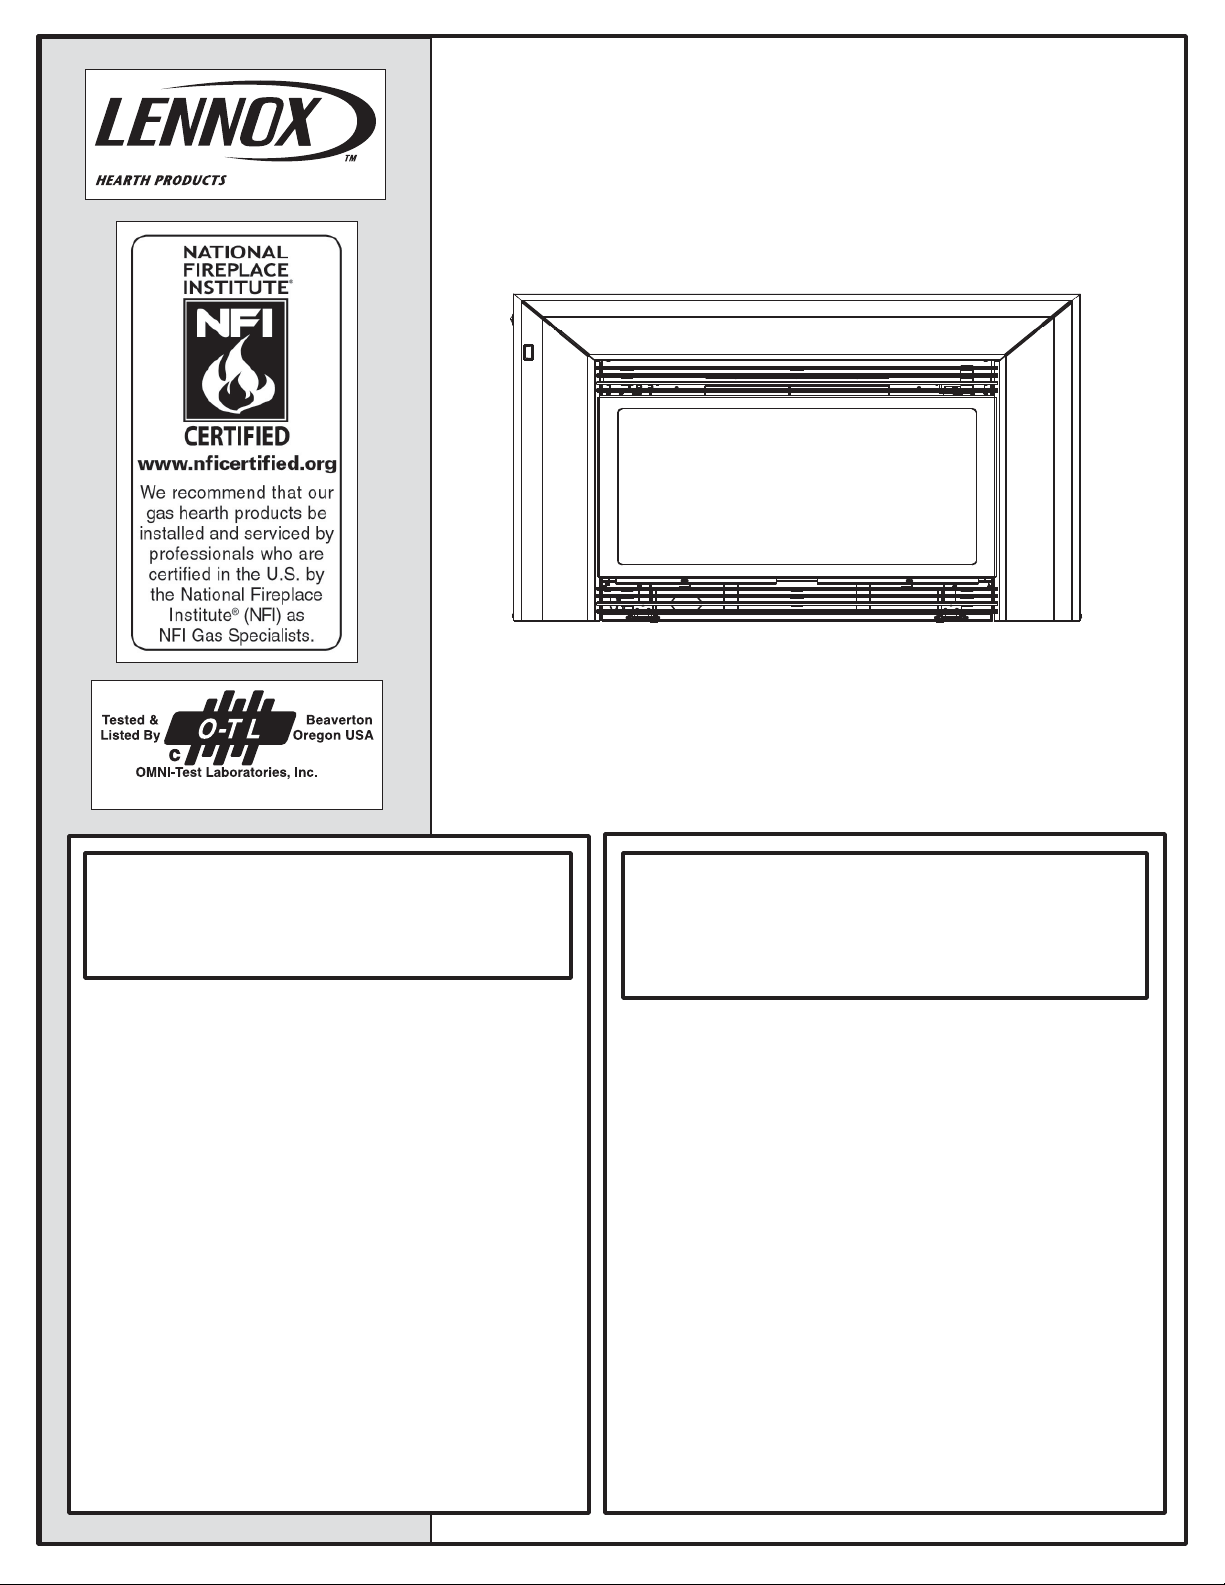
INSTALLATION INSTRUCTIONS
MANUAL
DIRECT-VENT GAS FIREPLACE HEATER INSERTS
Elite™ Series, Models: EDVI25, EDVI30 & EDVI35
Suitable for installation into masonry or factory built fi replaces.
Report No. 116-F-14-5
WARNING: IF THE INFORMATION IN THIS MANUAL
IS NOT FOLLOWED EXACTLY, A FIRE OR EXPLOSION MAY RESULT CAUSING PROPERTY DAMAGE,
PERSONAL INJURY OR LOSS OF LIFE.
FOR YOUR SAFETY: Do not store or use gasoline
or other fl ammable
s or liquids in the vicinity of this or any other
appliance.
FOR YOUR SAFETY: What to do if you smell gas:
• DO NOT light any appliance.
• DO NOT touch any electrical switches.
• Do not use any phone in your building.
• Immediately call your gas supplier from a
neighbor’s phone. Follow your gas suppliers
instructions.
• If your gas supplier cannot be reached, call
the fi re department.
Installation and service must be performed by a
qualifi ed installer, service agency or the gas supplier.
These appliances may be installed in an aftermarket permanently located,
manufactured (mobile) home, where not prohibited by local codes.
RETAIN THIS MANUAL FOR FUTURE REFERENCE
P/N 775,156M Rev. G, 3/2005
AVERTISSEMENT: ASSUREZ-VOUS DE BIEN SUIVRE
LES INSTRUCTIONS DONNÉ DANS CETTE NOTICE
POUR RÉDUIRE AU MINIMUM LE RISQUE D’INCENDIE
OU POUR ÉVITER TOUT DOMMAGE MATÉRIEL,
TOUTE BLESSURE OU LA MORT.
POUR VOTRE SÉCURITÉ: Ne pas entreposer ni utiliser
d’essence ni d’autre vapeurs ou liquides infl ammables dans
le voisinage de cet appareil ou de tout autre appareil.
POUR VOTRE SÉCURITÉ: Que faire si vous sentez une
odeur de gaz:
• Ne pas tenter d’allumer d’appareil.
• Ne touchez à aucun interrupteur. Ne pas vous servir
des téléphones se trouvant dans le batiment où vous
vous trouvez.
• Evacuez la piéce, le bâtiment ou la zone.
• Appelez immédiatement votre fournisseur de gaz depuis
un voisin. Suivez les instructions du fournisseur.
• Si vous ne pouvez rejoindre le fournisseur de gaz,
appelez le service dos incendies.
L’installation et service doit être exécuté par un qualifi é
installeur, agence de service ou le fournisseur de gaz.
Page 2

CONGRATULATIONS ON THE PURCHASE OF YOUR NEW GAS APPLIANCE MANUFACTURED BY LENNOX HEARTH PRODUCTS.
When you purchased your new gas fi red heater, you joined the ranks of thousands of
concerned individuals whose answer to their home heating needs refl ects their concern for
aesthetics, effi ciency and our environment. We extend our continued support to help you
achieve the maximum benefi t and enjoyment available from your new gas fi red heater. It
is our goal at Lennox Hearth Products to provide you, our valued customer, with an appliance that will ensure you years of trouble free warmth and pleasure.
Thank you for selecting a Lennox Hearth Products gas fi red heater as the answer to
your home heating needs.
Sincerely,
All of us at Lennox Hearth Products
TABLE OF CONTENTS
Packaging ......................................page 2
Introduction ...................................page 2
General Information .......................page 3
Questions/Building Offi cials ...........page 4
High Altitude ..................................page 4
Fireplace Requirements ..................page 4
Specifi cations .................................page 5
Clearance to Combustibles .............page 7
Step 1 Clean Fireplace ........................page 8
Step 2 Preparation ...........................page 8
Step 3 Unpack the insert. ...................page 8
Step 4 Lift Insert into Position ...........page 8
Step 5 Remove Glass Door ................page 8
Step 6 Remove Firebox Contents ......page 9
Step 7 Install LP Conv. (if necessary) page 9
Step 8 Install Venting .........................page 9
Step 9 Connect Gas Line ....................page 11
Step 10 Purge Air ...............................page 11
Step 11 Install Log Set .......................page 11
Step 12 Perform Leak Test .................page 14
Step 13 Install Opt. Surround or
Control Kit ...........................................page 14
Step 14 Install Thermostat/Remote ...page 14
Step 15 Check Appliance Operation ...page 14
Step 16 Reinstall Front Glass Door ....page 14
Step 17 Check Blower Operation .......page 14
Step 18 Adjust Burner .......................page 15
Step 19 Install Optional Accessories ..page 15
Rating Plates ....................................... page 16
This installation manual will help you obtain
a safe, effi cient, dependable installation for
your appliance and vent system.
Please read and understand these
instructions before beginning your
installation.
These Millivolt appliances are listed by
OMNI-Test Laboratories Inc. for installation in bedrooms and manufactured
(mobile) homes.
2
PACKAGING LIST
The assembled vented gas insert heater is
packaged with:
1 - One accessory package containing a
literature package (installation and operation
instruction manuals) is located on top of the
appliance.
2 - One log set, one bag of embers, one bag
of vermiculite, one propane conversion kit (if
needed to run on LP gas).
3 - One Warranty Certifi cate.
4 - One Fireplace Warning Label.
SURROUND ASSEMBLY SOLD
SEPARATELY
Model: EDVI25
SKS-25 Surround Kit, Small
(40 1/4" W x 26 1/4" H)
SKM-25, Surround Kit, Medium
(44 1/8" W x 28 1/8" H)
Model: EDVI30
SKS-30, Surround Kit, Small
(40 1/4" W x 27 1/2" H)
SKM-30, Surround Kit, Medium
(45 3/4" W x 30 1/4" H)
SKL-30, Surround Kit, Large
(49 1/4"" W x 32" H)
Model: EDVI35
SKM-35, Surround Kit, Medium
(48 1/16" W x 34 1/16")
INTRODUCTION
The Insert models covered in this manual are
Direct-Vent sealed combustion gas heaters
designed for residential application for installion
into an existing masonry or factory built solid
fuel burning fi replace. The required liners for
the air intake and exhaust are as follows:
• Air Intake: Use 3” diameter UL 1181 or UL
1777 listed liner only.
• Exhaust: Use 3” diameter UL1777 listed
gas vent liner only.
LISTED LINER.
These vent systems must be routed through
the existing fi replace fl ue system to the vent
termination.
NOTE: DIAGRAMS & ILLUSTRATIONS NOT TO SCALE.
DO NOT USE UL 1181
These appliances comply with National
Safety Standards and are tested and listed
by OMNI-Test Laboratories Inc.; Beaverton,
Oregon (Report No. 116-F-14-5) to ANSI
Z21.88 (in Canada, CSA-2.33), and CAN/
CGA-2.17-M91 in both USA and Canada, as
vented gas heaters.
Installation must conform to local codes. In
the absence of local codes, installation must
comply with the current National Fuel Gas
Code, ANSI Z223.1. (In Canada, the current
CAN-1 B149 installation code.) Electrical
wiring must comply with the National Electrical Code ANSI/ NFPA 70 - latest edition. In
Canada, the current CSA C22-1 Canadian
Electrical Code - latest edition.
When installed in a manufactured home (mobile
home), these appliances must be installed
in accordance with the current Standard for
Mobile Homes, CAN/CSA Z240 MH, or with the
Manufactured Home Construction and Safety
Standard, Title 24 CFR, Part 3280, or when
such a standard is not applicable, the current
Standard for Fire Safety Criteria for Manufactured
Home Installations, Sites and Communities,
ANSI/NFPA 501A.
These heaters are designed to be installed into
an existing masonry fi replace (built to UBC 37
or ULC S628 standards) or factory built solid
fuel, wood, burning fi replace (listed to UL 127
or ULC S610) only. All exhaust gases must be
vented outside the structure. Combustion air
is drawn from outside the structure.
DO NOT ATTEMPT TO ALTER OR MODIFY
THE CONSTRUCTION OF THE APPLIANCE OR ITS
COMPONENTS. ANY MODIFICATION OR ALTERATION MAY VOID THE WARRANTY, CERTIFICATION
AND LISTINGS OF THIS UNIT.
These millivolt appliances are designed to
operate on natural or propane gas only. Units
are factory set for use with Natural Gas and will
require fi eld conversion for use with Propane
(a propane conversion kit is located inside the
fi rebox). The use of other fuels or combination
of fuels will degrade the performance of this
system and may be dangerous.
These appliances use a millivolt type control
system consisting of a gas control valve with
regulator (control to adjust for fl ame appearance and heat output), a standing pilot burner
assembly, a thermopile, thermocouple, a piezo
igniter, and ON/OFF switch. THE GAS BURNER
SYSTEM ON THESE APPLIANCES DO NOT
REQUIRE 120 VOLT POWER TO OPERATE.
These appliances are designed as supplemental heaters. Therefore, it is advisable to
have an alternate heat source when installed
in a dwelling.
Page 3
The millivolt appliances are manually controlled and feature a spark igniter (piezo)
that allows the appliance's pilot gas to be
lit without the use of matches or batteries.
This system provides continued service in the
event of a power outage. However, the heat
circulation blower requires 120 volt power
(the appliance can be safely used with the
blower turned off). The blower operation is
controlled by a variable speed rheostat located
on the left side surround panel (if optional
surround is installed) and temperature switch
located underneath of fi rebox bottom on the
front left side.
GENERAL INFORMATION
The appliance installation, repair and annual
inspection should be performed by a qualifi ed
service person. It is imperative that the control
compartment, burner and circulating air passage way of the appliance be kept clean.
S'assurer que le brùleur et le compartiment
des commandes sont propres. Voir les
instructions d'installation et d'utilisation qui
accompagnent l'appareil.
Provide adequate clearances and adequate
accessibility clearance for service and proper
operation (see table 5 on page 7).
Table 1 shows the BTU input for each
model:
Millivolt Models with
Manually-Modulated Gas Valves
Natural Gas Propane
Model #
EDVI25
EDVI30
EDVI35
Input rate
(BTU/HR)
17,000 to
25,000
21,500 to
30,000
25,500 to
35,000
Input rate
(BTU/HR)
19,000 to
25,000
22,000 to
28,000
26,000 to
34,000
Table 1
Tables 2 and 3 show the units' gas pressure
requirements for all models:
Inlet Gas Supply Pressure (all models)
Fuel Minimum Maximum
Natural Gas
Propane
4.5” WC
(1.12 kPa)
11.0” WC
(2.73 kPa)
10.5” WC
(2.61 kPa)
13.0” WC
(3.23 kPa)
Table 2
Manifold Gas Supply Pressure (all models)
Fuel Low High
Natural Gas
Propane
(LO) 1.6” WC
(.40 kPa)
(LO) 6.3” WC
(1.57 kPa)
(HI) 3.5” WC
(.87 kPa)
(HI) 10” WC
(2.49 kPa)
Table 3
Test gauge connections are provided on the
front of the millivolt gas control valve (identifi ed IN for the inlet and OUT for the manifold
side). See Figure 36a & 36b on page 14.
Table 4 shows the units gas orifi ce size for the
elevations indicated.
Main Burner Orifice Size
Model # Nat.
EDVI25
EDVI30
EDVI35
(.096")
(.104")
(.113")
Pro- Elevation
Gas pane
#41
#37
#33
#53
(.0595")
1/16"
(.0625")
#51
(.067")
Feet (meters)
0-4500'
(0-1370 meters)
0-4500'
(0-1370 meters)
0-4500'
(0-1370 meters)
Table 4
These appliances and their individual shut-off
valves must be disconnected from the gas supply
piping system during any pressure testing of
that system at pressures greater than 1/2 psig
(3.5 kPa).
These appliances must be isolated from the
gas supply piping system (by closing their
individual manual shut-off valve) during any
pressure testing of the gas supply piping
system at test pressures equal to or less than
1/2 psig (3.5 kPa).
These appliances may be installed in an aftermarket permanently located, manufactured
home (USA only) or mobile home, where not
prohibited by local codes.
Cet appareil peut être installé dans un maison
préfabriquée (É.-U. seulement) ou mobile déjà
installée à demeure si les réglements locaux le
permettent.
THESE APPLIANCES MUST NOT BE CONNECTED TO A CHIMNEY OR FLUE SERVING A SEPARATE SOLID FUEL BURNING
APPLIANCE.
WARNING: THESE APPLIANCES MUST BE
PROPERLY CONNECTED TO A VENTING
SYSTEM. OPERATION OF THESE GAS
APPLIANCES WHEN NOT CONNECTED TO
A PROPERLY INSTALLED AND MAINTAINED
VENTING SYSTEM CAN RESULT IN CARBON
MONOXIDE (CO) POISONING AND POSSIBLE
DEATH.
CARBON MONOXIDE POISONING: EARLY
SIGNS OF CARBON MONOXIDE POISONING
ARE SIMILAR TO THE FLU WITH HEADACHES, DIZZINESS AND/OR NAUSEA. IF
YOU HAVE THESE SIGNS, OBTAIN FRESH
AIR IMMEDIATELY. TURN OFF THE GAS
SUPPLY TO THE APPLIANCE AND HAVE
IT SERVICED BY A QUALIFIED PROFESSIONAL, AS IT MAY NOT BE OPERATING
CORRECTLY.
WARNING: DO NOT PLACE CLOTHING OR
OTHER FLAMMABLE MATERIALS ON OR
NEAR THESE APPLIANCES.
WARNING: FAILURE TO COMPLY WITH THE
INSTALLATION AND OPERATING INSTRUCTIONS
PROVIDED IN THIS DOCUMENT WILL RESULT
IN AN IMPROPERLY INSTALLED AND OPERATING APPLIANCE, VOIDING ITS WARRANTY.
ANY CHANGE TO THESE APPLIANCES AND/OR
OPERATING CONTROLS IS DANGEROUS.
IMPROPER INSTALLATION OR USE OF THESE
APPLIANCES CAN CAUSE SERIOUS INJURY OR
DEATH FROM FIRE, BURNS, EXPLOSION OR
CARBON MONOXIDE
POISONING.
WARNING: CHILDREN AND ADULTS SHOULD
BE ALERTED TO THE HAZARDS OF HIGH
SURFACE TEMPERATURES. USE CAUTION
AROUND THE APPLIANCE TO AVOID BURNS
OR CLOTHING IGNITION. YOUNG CHILDREN
SHOULD BE CAREFULLY SUPERVISED
WHEN THEY ARE IN THE SAME ROOM AS
THE APPLIANCE
.
AVERTISSEMENT: SURVEILLER LES
ENFANTS. GARDER LES VÊTEMENTS,
LES MEUBLES, L'ESSENCE OU AUTRES
LIQUIDES À VAPEUR INFLAMMABLES À
COTE DE L'APPAREIL.
DO NOT USE THESE APPLIANCES IF ANY
PART HAS BEEN UNDER WATER. IMMEDIATELY CALL A QUALIFIED, PROFESSIONAL
SERVICE TECHNICIAN TO INSPECT THE
APPLIANCES AND TO REPLACE ANY PARTS
OF THE CONTROL SYSTEM AND ANY GAS
CONTROLS WHICH HAVE BEEN UNDER
WATER.
NE PAS SE SERVIR DE CET APPAREIL S'IL A
ÉTÉ PLONGÉ DANS L'EAU, COMPLÈTEMENT
OU EN PARTIE. APPELER UN TECHNICIEN
QUALIFIÉ POUR INSPECTER L'APPAREIL ET
REMPLACER TOUTE PARTIE DU SYSTÈME DE
CONTRÔLE ET TOUTE COMMANDE QUI ONT
ÉTÉ PLONGÉS DANS L'EAU.
NOTE: DIAGRAMS & ILLUSTRATIONS NOT TO SCALE.
3
Page 4

QUESTIONS TO ASK LOCAL BUILDING
OFFICIAL
These appliances must be installed per
manufacturers’ instructions. Installations
must conform to appropriate local codes and
applicable state and federal requirements.
Familiarity with these requirements before
installation is essential. Some important
considerations to discuss with local building
offi cials include:
1. Applicable codes (i.e. Uniform Mechanical
Code, State or Regional Gas Codes, National
Fuel Gas Code).
2. Local amendments
3. Recognized testing lab: OMNI-Test Laboratories Inc.; Beaverton, Oregon
4. Is a permit required - cost?
5. In some states or municipalities, a licensed
gas fi tter or plumber may be required to
install these appliances. Check with your
local building offi cial for requirements in your
area (i.e. Is a license required for installation
of gas supply line)?
6. Maximum amount of gas pipe without a
pressure test - type of test required?
7. Are below grade penetrations of the gas
line allowed?
8. Is concealed gas piping allowed?
9. Specific requirements of concealed
fi ttings?
10. Is rigid pipe to appliance required?
11. Allowed piping materials?
12. Shut-off valve required within 4 feet
of the fi rebox?
13. May the shut-off valve be concealed?
14. Rooms where the installation is not
allowed?
In the absence of local codes, installation
should conform to National Fuel Gas Code,
ANSI Z223.1 / NFPA 54-Latest Edition in the
USA or National Fuel Gas Code, CAN/CGAB149-Latest Edition in Canada.
HIGH ALTITUDE
Installations at Altitudes of 0 to 4500 feet:
These appliances have been tested and
approved for elevations of 0 to 4500 feet (0
to 1370 meters).
Installations at Altitudes above 4500 feet:
For elevations above 4500 feet (1370 meters),
install these appliances according to the
regulations of the local authorities having
jurisdiction and, in the USA, the latest edition
of the National Fuel Gas Code (ANSI Z223.1)
or, in Canada, the latest edition of the CANB149.1 and CAN-B149.2 codes.
FIREPLACE REQUIREMENTS
IMPORTANT: When installing these appliances
into a factory built fi replace or heatform, the air
fl ow within and around the fi replace shall not
be altered by the installation of the insert (i.e.
DO NOT BLOCK louvers or cooling air inlet or
outlet ports, circulating air chambers in a steel
fi replace liner or metal heat circulator).
CAUTION: The factory built fi rebox must accept
the insert without modifi cation other than
removing bolted or screwed together pieces
such as smoke shelf / defl ectors, ash lips,
screen or door tracks, log grates, refractory and
damper assemblies. Any fi replace component,
which is removed, must be retained so they
can be reinstalled to restore the fi replace to
its original operating condition. The removal
of any part must not alter the integrity of the
outer shell of the pre-engineered fi replace
cabinet in any way.
If any components are removed from (or
altered) from the existing fi replace, a Warning
Label (see below) must be affi xed inside the
fi replace fi rebox, so that it shall be visible
upon removal of the fi replace insert. Note:
RTV high temperature silicone is an approved
adhesive.
Fireplace Warning Label
(Provided in Accessory Package)
WARNING
THIS FIREPLACE HAS BEEN ALTERED TO
ACCOMMODATE A FIREPLACE INSERT AND
SHOULD BE INSPECTED BY A QUALIFIED
PERSON PRIOR TO RE-USE AS A
CONVENTIONAL FIREPLACE.
4
NOTE: DIAGRAMS & ILLUSTRATIONS NOT TO SCALE.
Page 5

SPECIFICATIONS: EDVI25
Inches (millimeters)
A
B
C
D
E
F
G
H
I
J
K
L **
M **
N
P
SM.= 41 1/16” (1043 mm) & MED.= 44 1/8” (1121 mm)
SM.= 26 1/16” (662 mm) & MED.= 27 5/8” (702 mm)
** The total glass viewing area equals approx. 270 1/2 Sq. In.
DIMENSIONS
26 5/8" (676 mm)
20 1/2" (521 mm)
19 1/2” (483 mm)
10 9/16” (268 mm)
17 1/4” (438 mm)
15 15/16” (405 mm)
10 7/8” (276 mm)
24 7/8” (632 mm)
9 5/8” (224 mm)
EDVI25
5” (127 mm)
1 15/16” (49 mm)
1 1/4” (32 mm)
14" (356 mm)
Min. / Max. BTU hr
Input - NG
Min. / Max. BTU hr
Input - LP
Co-linear DV Vent
Room Blower CFM
Top View
A
B
C
SPECIFICATIONS
Size
EFFICIENCIES
EDVI25
Steady State
Efficiency *
* The Steady State Effi ciency numbers based on
maximum vent confi guration.
EDVI25
17,000 to 25,000
19,000 to 25,000
3” Dia. Liner
(exhaust & intake)
110 cfm
65 % (NG)
66 % (LP)
86 % (NG)
89 % (LP)
N
E
I
D
Note: Due to Lennox’ ongoing commitment
to quality , all specifications, ratings
and dimensions are subject to change
without notice.
G
H
I
P
E
L
F
J
Figure 1
M
Front View
NOTE: DIAGRAMS & ILLUSTRATIONS NOT TO SCALE.
K
Side View
5
Page 6

SPECIFICATIONS: EDVI30 & EDVI35
EDVI30 EDVI35
DIMENSIONS
Inches (millimeters) Inches (millimeters)
A 32 1/16” (814 mm)
24 3/16” (614 mm)
B
C
D 40 1/4” (1022 mm)Sm.
E 27 1/2” (699 mm) Sm.
F
G 1 13/16” (46 mm)
H 9 7/8”(251 mm)
I 1 5/8” (41 mm)
J 24” (610 mm)
K
18 3/8” (467 mm)
L**
M**
N
25 15/16" (659 mm)
22 1/4" (578 mm)
5" (127 mm)
45 3/4” (1162 mm) Med.
49 1/4” (1251 mm) Lg.
30 1/4” (768 mm) Med.
30” (762 mm) Lg.
20 7/8" (530 mm)
1 13/16” (46 mm)
9 15/16” (252 mm)
1 7/16” (37 mm)
20 1/4” (514 mm)
15 1/4” (387 mm)
11 3/16” (284 mm)
23 1/4” (591 mm)
13 7/16” (341 mm)
5" (127 mm)
48 1/16” (1221 mm) Med.
34 1/16”(865 mm) Med.
26 11/16” (678 mm)
15 5/8” (397 mm)
29 7/16” (748 mm)
16 7/8” (427 mm)
Top View
A
B
EDVI30 EDVI35
Min. / Max. BTU/hr
Input - NG
Min. / Max. BTU/hr
Input - LP
Co-linear DV Vent
Size
Room Blower CFM
EDVI30 EDVI35
(based on CSA P.4.1)
Steady State
Efficiency *
** The total glass viewing area equals approx.:
EDVI30 = 290 Sq. In. & EDVI35 = 460 Sq. In.
SPECIFICATIONS
21,500 to 30,000
22,000 to 28,000
3” Dia. Liner
(exhaust & intake)
130 cfm
EFFICIENCIES
69% (NG)
70% (LP)
87% (NG)
89% (LP)
* The Steady State Effi ciency numbers based on
maximum vent confi guration.
25,500 to 35,000
26,000 to 34,000
(exhaust & intake)
3” Dia. Liner
130 cfm
66% (NG)
70% (LP)
86% (NG)
88% (LP)
C
N
Note: Due to Lennox’ ongoing commitment
to quality , all specifications, ratings
and dimensions are subject to change
without notice.
D
G
H
I
E
L
F
J
6
Figure 2
M
Front View
K
Side View
NOTE: DIAGRAMS & ILLUSTRATIONS NOT TO SCALE.
Page 7

MINIMUM CLEARANCES TO COMBUSTIBLES: EDVI25, EDVI30 & EDVI35
These appliances can be installed in most residential
fi replace confi gurations. If installed close to an adjacent
wall, ensure that the minimum clearances to combustible
surfaces are maintained. A local building inspector should
review your plans prior to installation.
Refer to Figures 3, 4a, 4b and 5 for Clearances to Combustibles. Minimum clearances include spacers/standoffs or
surfaces to combustible construction.
Notes for Table 5:
* This includes any projections such as shelves, window
sills, mantels, spacers/standoffs or surfaces to com-
bustible construction etc. above the appliance. Paint or
lacquer used to fi nish the mantel must be heat resis-
tant in order to avoid discoloration.
** If hearth is elevated, subtract 1 inch of hearth
extension required for every 2 inches of height (see
Clearances to Combustibles
A
Side Wall
B
Ceiling or Alcove Height
C *
Mantel Height
Mantel Projection from Wall
D*
E
Clearance to Floor
Hearth Protection
F**
(from Fireplace Face)
G
Hearth Protection Width
Alcove Width
H
I
Alcove Depth
Table 5
Figure 6).
Clearances
Ceiling (or)
Mantel
Alcove Height
C
Side
Wall
Top of Insert
A
B
Inches (millimeters)
EDVI25
8" (203 mm)
64" (1626 mm)
See Fig. 3 & 4b
See Fig. 4b
0" (0 mm)
**16" (406 mm)
44" (1118 mm)
45" (1143 mm)
36" (914 mm)
EDVI30
8" (203 mm)
64" (1626 mm) 64" (1626 mm)
See Fig. 3 & 4a
See Fig. 4a
0" (0 mm) 0" (0 mm)
**16" (406 mm)
49" (1245 mm) 48" (1219 mm)
50" (1270 mm)
EDVI35
8" (203 mm)
See Fig. 3 & 4a
See Fig. 4a
**16" (406 mm)
49" (1245 mm)
36" (914 mm) 36" (914 mm)
Alcove Minimum Width: The specifi ed minimum width of the
alcove cannot be reduced with the use of wall protection.
Top View Alcove
Fireplace
Insert
Hearth
I
H
Min.
Max.
Min.
Min.
Min.
MAX.
Min.
Min.
Min.
Min.
MAX.
Hearth Protection
Figure 3
Mantel Clearance, Models: EDVI30 &
EDVI35: The mantel should be located
in the shaded area (light gray) shown
below.
D
18"
17"
16"
15"
C
14"
0
10
12
11
Side View
0
2345678
9
1
Top of Insert
(see "C" on Fig. 3)
\
Figure 4a
G
E
Mantel Clearance, Model: EDVI25: The
mantel should be located in the shaded
area (light gray) shown below.
15 1/2"
13"
11"
C
8 1/2"
0
8”
Side View
Figure 4b
D
5”
Top of Insert louver
(see "C" on Fig. 3)
0
1”12”
Figure 5
\
Hearth Protection: For every 2" of hearth height,
subtract 1" of hearth extension required.
Side View
of Insert
F
Existing Fireplace Hearth
16"
15"
14"
2"
4"
6"
7"
13 1/2"
At 7" hearth height, no hearth extension is required
Figure 6
NOTE: DIAGRAMS & ILLUSTRATIONS NOT TO SCALE.
7
Page 8

MINIMUM FIREPLACE DIMENSIONS
Refer to Figures 7 and 8 for Minimum Fireplace Clearance Dimensions. See pages 5 &
6 for actual insert body dimensions.
Consult your local authority having jurisdiction for requirements in your area.
Before the fi replace insert is assembled and
installed, you must consider whether the
appliance must be converted for use with
propane gas (see step 7 on Page 9). You
must also consider the vent length requirements.
M
Top View
Figure 7
L
9"
Min.
Reference
J
Side View
Figure 8
K
Min. Fireplace
Clearance
Dimensions
J
Height
Depth
K
Width/Front
L
Width/Rear
M
Inches (millimeters)
EDVI25
19"
(483 mm)
14 1/2"
(368 mm)
27"
(686 mm)
23 1/4"
(591 mm)
EDVI30
22"
(559 mm)
14"
(356 mm)
26 1/2"
(673 mm)
22 1/2"
(572 mm)
Table 6
DETAILED INSTALLATION STEPS
Step 1: CLEAN FIREPLACE (If necessary)
Thoroughly clean the masonry or factory
built fi replace.
CAUTION: The fi replace in which this gas
insert is to be installed must be thoroughly
cleaned if it has been used to burn wood or
synthetic logs. Have the chimney and all
inside surfaces of the fi replace brushed and
vacuumed so that no soot, embers, or loose
combustion deposits can be drawn into the
heat circulation blower and blown into the
living area.
8
K
EDVI35
25"
(635 mm)
17"
(432 mm)
32 1/4"
(819 mm)
25"
(635 mm)
CAUTION: If any portion of the chimney
system shows signs of structural or mechanical weaknesses, such as: cracks, leaky
joints, corroded or warped surfaces, the
faulty portion must be repaired or replaced
prior to installing this appliance.
Step 2: PREPARATION - Plan and install gas
line. These appliances are provided with an
opening on the left hand side of the control
compartment. A 3/8" NPT gas supply pipe must
be brought near this inlet hole.
Gas Supply Line - We recommend that a
qualifi ed individual such as a plumber or gas
fi tter be used to correctly size and route the
gas supply line to the appliance. Installing a
gas supply line from the fuel supply to the
appliance involves numerous considerations of
materials, protection, sizing, locations, controls,
pressure, sediment, and more. Certainly no one
unfamiliar and unqualifi ed should attempt sizing
or installing gas piping.
The gas supply line should be plumbed from
the fuel source to the area where the appliance
is to be installed per requirements outlined
in NFPA 54 - latest edition (USA) or B149
- latest edition (Canada).
The proper gas line diameter must be used
to run from the supply regulator (at the gas
company meter) to the appliance. Never use
galvanized or plastic pipe. Refer to table 7
for suggested sizing of the gas supply line if
black iron pipe is being used.
The gas supply line should be connected to
the appliance at step 9 (page 11).
Suggested Sizing of Black Iron Pipe
Schedule 40 - Pipe Supply Line
Schedule 40 Pipe
Length (Feet)
0-10
10-40
40-100
100-150
150-200
Schedule 40 Pipe
Inside Diameter (Inches)
Natural Gas Propane Gas
1/2 3/8
1/2 1/2
1/2 1/2
3/4 1/2
3/4 1/2
Table 7
IMPORTANT NOTE: If propane is used, be aware
that if the tank size is too small (i.e. under
100-lbs, if this is the only gas appliance in the
dwelling. Ref. NPFA 58), there may be loss of
pressure, resulting in insuffi cient fuel delivery
(which can result in sooting or other malfunctions). Any damage resulting from an improper
installation, such as this, is not covered under
the limited warranty.
Step 3 UNPACK THE INSERT - Remove
the top and side cartons. Remove all the
inner packages and packing materials and
discard.
NOTE: DIAGRAMS & ILLUSTRATIONS NOT TO SCALE.
Step 4 LIFT INSERT INTO POSITION (read
Fireplace Requirements on page 4 fi rst)
Lift
insert into position in front of the fi replace where
unit is to be installed. Discard bottom carton.
Step 5: REMOVE STANDARD GLASS DOOR
ASSEMBLY.
WARNING: HANDLE GLASS DOOR WITH
EXTREME CARE! THE GLASS DOOR
ASSEMBLY IS SUSCEPTIBLE TO DAMAGE.
DO NOT SCRATCH WHILE HANDLING OR
WHILE REINSTALLING.
Remove Front Glass Enclosure as Follows:
1) Locate the spring hook under the glass
door assembly (see Figure 9). Pull hook
forward until it releases out of the bottom
door frame.
Pull door hook forward until it releases
Figure 9
Door hook is located below glass door
2) Swing the bottom of the door outward
(see Figure 10) and lift it off of fi rebox top.
Set door aside in a safe place.
Swing bottom of
Door outward
Figure 10
Lift Top of Door
Off this Flange
Figure 11
WARNING: NEVER OPERATE UNIT WITHOUT THE FRONT GLASS DOOR PANEL IN
PLACE AND SECURE.
Page 9

STEP 6: REMOVE PACKAGED MATERIALS FROM INSIDE FIREBOX AND
SET ASIDE (
log set, bag of embers, bag of vermiculite, propane
conversion kit - if needed to run on LP gas).
Step 7: INSTALL LP CONVERSION KIT (IF NECESSARY) - Install the
LP conversion kit per instructions provided with kit.
Step 8: VENTING SYSTEM INSTALLATION (Refer to Vent Manufacturer Installation Instructions)
This appliance is designed to using 3” diameter UL1181 listed aluminum liner for the Air Intake and 3” diameter UL1777 listed gas vent
liner for the Exhaust (see Figures 14 & 15). See Table 8 for miniumum
distances from roof to termination cap inlet/outlet.
Simpson Dura Vent Components
Part No. Description
980
991
923GK Chimney Liner Term. Kit
2280
Table 9b
Liner Connector Plate
Termination Cap, Standard
Termination Cap, High Wnd
Liner, Flex, 3” Dia. /. 35 feet.
Flex Liner Installation:
Exhaust
Vertical Termination Height Minimum
(Factory Built and Masonry Fireplaces)
The vent/air intake termination clearances above the high side of an
angled roof is as follows:
Feet (meters)
8 (2.4)
7 (2.1)
6 (1.8)
5 (1.5)
4 (1.2)
3 (0.9)
2 (0.6)
1 (0.3)
0 (0.0)
6/12
Roof Pitch
8/12
10/12
12/12
14/12
16/12
Table 8
2/12
4/12
WARNING: Do not substitute the heat-rated fl ex liner (UL1777)
for the Exhaust with any other type liner or a fi re may result
causing property damage, personal injury or loss of life.
Hose
Clamps
Screw
After liners are secured to collars, slide liner connector plate forward and secure with screw.
Intake
Guide
Figure 12
Positive Flue Connection (acceptable methods for sealing chimney throat)
Masonry and Factory Built Fireplaces
A qualifi ed installer should evaluate the existing fi replace to determine the
best method for achieving a positive fl ue connection between the vent and
intake liners and the chimney. The most common method is to secure a
noncombustible seal-off plate (i.e. 22-gage sheet steel) in the fi replace
throat using masonry screws. Other acceptable methods include packing
noncombustible material (i.e. rockwool) around the liners. Whichever
“seal off” method is used must effectively seal the area to prevent room
air passage to the chimney of the fi replace.
Exhaust 3" (75mm)
18/12
UL 1777. A full length
liner is required from
the exhaust outlet on
appliance to center collar
of termination cap.
Exhaust
The outside air inlet does not
require a full reline (if intake liner
is terminated in chimney and a
positive fl ue connection is achieved
as specifi ed).
Air Inlet
Existing Fireplace Flue
(chimney)
IMPORTANT NOTES:
• Adjust Leveling Bolts if Necessary: Two leg leveling bolts are installed
into existing holes in the bottom rear of appliance. Turn the leveling bolts
to adjust for correct height.
• Refer to Vent Manufacturer Installation Instructions.
Direct Vent System Components
The following "Security Secure Vent
TM
" or "Simpson Dura-Vent" brand
Collinear Direct-Vent components may be safely used with these appliances (see Figures 14 & 15).
Lennox Hearth Products – Collinear Direct-Vent Kits
Cat. No. Model Description
H0908 TKDVI
H0909 FKDVI
Termination Kit, DVI
Flex Kit, DVI 3" X 35'
Table 9a
NOTE: DIAGRAMS & ILLUSTRATIONS NOT TO SCALE.
Air Inlet Liner
(for combustion air) When
terminating the
air inlet liner
at this point,
a positive fl ue
connection is
required (to
ensure combustion air is
drawn down
the chimney
only).
Air Inlet
Positive Flue Connection (sealing fi replace
throat using a noncombustible seal-off plate
or insulation).
Masonry and Factory
Built Fireplaces
Figure 13
9
Page 10

Masonry Fireplace Installation Diagram
Masonry chimneys may take
various contours which the
fl exible liners will accomodate.
However, keep the fl exible liner
as STRAIGHT as possible, avoid
unnecessary bending.
Hook up Air
& Exhaust
as Shown
Here
Liner Requirements:
Vertical Height Min. = 8 ft. (2.44 M)
Vertical height Max. = 40 ft. (12.2 M)
See Direct Vent System Components
on Page 9.
The fl exible vent pipe must
NOT be allowed to sag behind
insert or in fi replace fl ue.
Read fi replace
requirements,
page 4
Exhaust
Air
Intake
Vertical Termination Cap
and Flashing.
Cat. No.
H0908
The standard cap
in Termination
Kit, H0908, is a
high wind cap
Clay
Chimney
Liner
Factory Built Fireplace Installation Diagram
The standard cap in Termination Kit, H0908, is a
high wind cap
Vertical Termination Cap
and Flashing, Cat. No. H0908
Liner Requirements:
Vertical Height Min. = 8 ft. (2.44 M)
Vertical height Max. = 40 ft. (12.2 M)
See Direct Vent System Components
on Page 9.
Vertical Termination
Adapter
Storm Collar
The fl exible vent pipe must
NOT be allowed to sag behind
insert or in fi replace fl ue.
Exhaust
Air
Intake
Hook up Air &
Exhaust as
Shown Here
Roof
Flashing
Use 3" diameter listed liner
(UL1181 or UL1777) for the AIR
INTAKE.
Use 3" diameter listed gas vent liner
(UL1777 ONLY) for the EXHAUST
Damper plate is
removed or fastened
in open position
Exhaust and air
Intake collars
Gear Clamps
Liner
• The Flex Kit, Cat. No. H0909 includes one 35' fl ex liner and four gear clamps.
• The Termination Kit, Cat. No. H0908 includes the termination cap with two
collinear collars for 3” fl ex attachments and fl ashing.
Make sure that both liners will pass through existing damper area. Remove or lock
damper to allow the passage of the fl exible liners. If the damper will not allow the
passage of both liners, DO NOT PROCEED FURTHER. Consult a local mason for
removal of the damper without risk of structural damage or leakage.
Figure 14
10
NOTE: DIAGRAMS & ILLUSTRATIONS NOT TO SCALE.
Read Fireplace
Requirements on
page 4
Use 3" diameter listed
liner (UL1181 or UL1777)
for the AIR INTAKE.
Use 3" diameter listed
liner (UL1777 ONLY) for
the EXHAUST
Exhaust and Air
Intake Collars
Gear Clamps
Liner
• The Flex Kit, Cat. No. H0909 includes one 35' fl ex liner and four gear clamps.
• The Termination Kit, Cat. No. H0908 includes the termination cap with two collinear
collars for 3” fl ex attachments and fl ashing.
Before running the fl exible liners, make sure that both liners will pass through
existing damper area. Remove or lock damper to allow the passage of the fl exible
liners. If the damper will not allow the passage of both liners, DO NOT PROCEED
FURTHER (the appliance may NOT be installed into the fi replace).
Figure 15
Page 11

Flex Liner Installation (see Figure 14 for
Masonry Fireplace Installations and Figure
15 for Factory Built Fireplaces):
Note: Refer to Vent Manufacturer Instal-
lation Instructions.
1) Cut the fl ex liners as required
(mark both
ends of one of the fl exible liners as INLET).
2) Connect the liner marked INLET to the inlet
side of the termination adaptor. Connect the
other liner to the exhaust side. Secure liner
to INLET collar with hose clamp.
3) Install fl ashing.
4) Insert both liners into chimney, passing
through the damper opening.
5) Install termination cap.
6) Remove the liner connector plate from the
insert top (by removing the screw shown in
Figure 17, then sliding plate backward until it
clears the retaining breackets). Liners should be
streched just enough to prevent the possibility
of sagging or coiling in the fl ue. Cut off excess
liner (see collar locations on pages 5 & 6).
7) Connect the liner marked INLET to the inlet
collar on the liner connector plate (marked
with an "I"). Connect the remaining liner to
the exhaust collar (marked with an "E") on
the liner connector plate.
Note: Both connections should be secured to collars using
gear clamps.
8) Slide the liner connector plate all the way
forward and secure into place with a screw
(provided) as shown in Figure 16 & 17.
Exhaust (outlet)
Damper
Combustion
Air (inlet)
Gear Clamp
Liner
Connector
Plate
Figure 16
Screw
Liner
Connector
Plate
Figure 17
Notes:
• Final gas connection should be made after
unit is in place to avoid damage to line when
pushing the unit into position.
• Mill-pac, high temperature silicone and/or
screws may also be used to secure the liners
to the collars (gear clamps must also be
used).
Step 9. CONNECTING GAS LINE
Make gas line connections. All codes require a
shut-off valve mounted in the supply line. Figure
18 illustrates two methods for connecting the
gas supply. The fl ex-line method is acceptable
in the U.S., however, Canadian requirements
vary depending on locality. Installation must
be in compliance with local codes.
These appliances are equipped with a gas
fl ex line for use (where permitted) in connecting the unit to the gas line. A gas fl ex
line is provided to aid in attaching the appliance to the gas supply. The gas fl ex line
can only be used where local codes permit.
See Figure 18 for fl ex line description. The
fl ex line is rated for both natural and propane gas. A manual shut off valve is also
provided with the fl ex line. The gas control
valve is located in the lower control compartment. The millivolt control valve has a 3/8"
(10 mm) NPT thread inlet port fi tting.
Gas
Valve
3EDIMENT4RAP
RECOMMENDED
³₈.IPPLE
³₈"
-IN
5NION
³₈#LOSE.IPPLE
Gas Flex Line Connector
³₈" NPT x
Flare Fitting
³₈" Flex Tubing
3HUT/FF6ALVE
³₈
¹₂" x
³₈" Flare
Shut-Off Valve
¹₂
x
³₈ "
Reducer
Gas
Stub
Figure 18 - GAS CONNECTION
NOTE: DIAGRAMS & ILLUSTRATIONS NOT TO SCALE.
Step 10. PURGING AIR
AIR PURGING PROCEDURES MUST BE
PERFORMED BY A QUALIFIED TECHNICIAN
ONLY.
Purging Air from Supply Line
a. Turn gas supply line valve off.
b. Loosen setscrew at inlet pressure tap on
control valve (see Figure 36).
c. Turn gas supply line valve on.
d. When gas fl ows, turn supply valve off.
e. Close the inlet pressure tap.
Purging Air from Appliance
Purge air from appliance by holding gas
control valve down in the pilot position
until pilot will light (see Figure 19). DO NOT
LIGHT A MATCH IF YOU SMELL GAS. Light
a match then allow gas fl ow to pilot. If the
Match “blows”, there is air in the line (purge
line). If the fl ame is straight and tall, there is
no gas pressure.
When fi rst lighting the appliance, it will take
a few minutes for the line to purge air from
the appliance. Once purging is complete, the
pilot and burner will light and operate as indicated in the instruction manual. Subsequent
lightings of the appliance will not require such
purging. Inspect the pilot fl ame (remove logs,
if necessary, handling carefully).
Figure 19
Step 11. INSTALLING LOGS, VERMICULITE AND EMBERS
The packaged log set, vermiculite and embers
are located within the fi rebox of the insert.
Note: The EDVI25/EDVI30 log set is shown
in fi gures 20-28 and the EDVI35 log set is
shown in fi gures 29-34.
Installation Instructions:
WARNING: If logs are not installed according to the directions shown here, fl ame
impingement and improper combustion
could occur and result in soot and/or excessive production of carbon monoxide (CO),
a colorless, odorless, toxic gas.
Note: If an optional Brick Liner Kit was
purchased, intall it now, per instructions
provided in kit.
11
Page 12

LOGS, VERMICULITE AND EMBERS - Models EDVI25 & EDVI30 (For
EDVI35 Log Installation Instructions, see Page 13).
The packaged log set, vermiculite and embers are located within the
fi rebox of the insert.
Installation Instructions:
WARNING: IF LOGS ARE NOT INSTALLED ACCORDING TO THE
DIRECTIONS SHOWN HERE, FLAME IMPINGEMENT AND IMPROPER
COMBUSTION COULD OCCUR AND RESULT IN SOOT AND/OR EXCESSIVE PRODUCTION OF CARBON MONOXIDE (CO), A COLORLESS,
ODORLESS, TOXIC GAS.
Notes:
• If an optional Brick Liner Kit was purchased, intall it now, per instructions provided in kit.
• Place some vermiculite around the burner as shown in Figure 28
before installing the logs (the entire bag of vermiculite will NOT be
used).
Carefully install the seven-piece log set into the fi rebox as shown in
these instructions. All logs should fi t onto corresponding pins and/or
log stoppers. This will ensure a proper fl ame and safe combustion.
1. Place the largest log onto the 2 corresponding locating pins at the
back of the fi rebox as shown in Figure 20.
3. Place the Center Log onto the 2 corresponding locating pins as
shown in Figure 22.
Figure 22
Center Log
4. Place the Front Left Log onto the 2 corresponding locating pins as
shown in Figure 23.
Figure 20
Rear Log
2. Place the Front Right Log onto the 2 corresponding locating pins
as shown in Figure 21.
Figure 21
Front Right Log
Figure 23
Front Left Log
5. Install the Top Left Log onto the corresponding locating pin and
indentation on Center Log as shown in Figure 24.
Figure 24
Top Left Log
6. Install the Front Center Log over the Front Right Log . The front
of log will rest on the burner and the back of log will rest on rear log
as shown in Figure 25.
12
NOTE: DIAGRAMS & ILLUSTRATIONS NOT TO SCALE.
Page 13

Figure 25
Front Center Log
7. Install the Top Right Log into the corresponding indentations on
Front Center Log and front right twig as shown in Figure 26.
Figure 26
Top Right Log
8. Place the glowing embers on the burner as shown in Figure 27.
One package of ember material has been included with this log set
You will not need to use the entire bag.
IMPORTANT: The quantity and placement of the ember material can
affect insert performance therefore it is very important that it be placed
as shown in Figure
a. Unpackage and divide the fi ne ember material (mineral wool) into
dime-sized fl uffy pieces.
b. Distribute the pieces over the top of the front burner ports, fi lling the
area in front of the forward logs.
27.
Figure 27
Figure 28
LOGS, VERMICULITE AND EMBERS - Model EDVI35
Embers
Vermiculite
WARNING: IF LOGS ARE NOT INSTALLED ACCORDING TO THE
DIRECTIONS SHOWN HERE, FLAME IMPINGEMENT AND IMPROPER
COMBUSTION COULD OCCUR AND RESULT IN SOOT AND/OR EXCESSIVE PRODUCTION OF CARBON MONOXIDE (CO), A COLORLESS,
ODORLESS, TOXIC GAS.
Carefully install the seven-piece log set into the fi rebox as shown in
these instructions. All logs should fi t onto corresponding pins and/or
log stoppers. This will ensure a proper fl ame and safe combustion.
1. Place some vermiculite around the burner as shown in Figure 29
(the entire bag of vermiculite will NOT be used).
2. Place the Rear Log onto the 2 corresponding locating pins at the
back of the fi rebox as shown in Figure 29.
NOTE: DIAGRAMS & ILLUSTRATIONS NOT TO SCALE.
13
Page 14

Rear Log
Figure 29
Vermiculite
3. Place the Front Right Log and the Center Left Log onto the 2 corresponding locating pins (each) as shown in Figure 30.
Figure 30
Center Left Log
Front Right Log
4. Place the Front Left Log onto the 2 corresponding locating pins,
then place the Top Left Log onto the locating pin on the Left Center
Log (the log will rest in the corresponding indent on Rear Log). See
Figure 31.
Top Left Log
Figure 32
Front Center Log
6. Install the Top Right Log into the corresponding indentations on
Front Center Log and Front Right Log as shown in Figure 33.
Figure 33
Top Right Log
7. Place the glowing embers on the burner as shown in Figure 34.
One package of ember material has been included with this log set
You will not need to use the entire bag.
IMPORTANT: The quantity and placement of the ember material can
affect stove performance therefore it is very important that it be placed
as shown in
a. Unpackage and divide the fi ne ember material (mineral wool) into
dime-sized fl uffy pieces.
Figure 34.
Front Left Log Log
Figure 31
5. Place the Front Center Log in place as shown in Figure 32. The back
of the log fi ts into the corresponding indent on Rear Log.
14
NOTE: DIAGRAMS & ILLUSTRATIONS NOT TO SCALE.
b. Distribute the pieces over the top of the front burner area in front of
the forward logs (see Figure 34).
Figure 34
Embers
VERIFY THAT THE GAS LINE HAS BEEN PURGED OF AIR (See Step
10, page 11) .
Page 15

Step 12. TEST ALL CONNECTIONS FOR
LEAKS (FACTORY AND FIELD).
Test For Gas Leaks
A. Mix a 50% dish soap, 50% water solution
(or use a gas leak detection solution).
B. Light the appliance (refer to the lighting
instructions provided in the insert control
compartment and the Homeowner's Care and
Operation Instructions).
C. Brush all joints and connections with the
soapy water or leak detection solution to check
for leaks. If bubbles are formed, or gas odor is
detected, turn the gas control knob to the “OFF”
position and close the gas shut-off valve. Either
tighten or refasten the leaking connection and
retest as described above.
D. When the gas lines are tested and leak free,
observe the individual tongues of fl ame on
the burner. Make sure all ports are open and
producing fl ame evenly across the burner. If
any ports are blocked, or partially blocked,
turn off unit, allow it to cool, then clean out
the ports.
E. Turn on gas supply and test for gas leaks using
a soapy water or gas leak detection solution.
Never use an open fl ame to check for leaks.
Step 13. INSTALL SURROUND KIT OR CONTROL KIT (see pages 12 & 13 in Homeowners
Manual).
Step 14. INSTALL WALL THERMOSTAT AND
REMOTE CONTROL (if purchased)
If an optional Wall Thermostat or Remote Control
Kit was purchased, intall it now, per instructions
provided in kit. See Figure 35. I
f a wall-mounted
thermostat is selected, mount it in a convenient location on a wall near the insert.
Wire the thermostat within the millivolt control
circuit using a maximum of 25 feet of 18 gage,
2 conductor wire. Caution: Do not connect the
optional wall thermostat, gas control valve or
control wiring system of the unit to a 120 volt
power supply (residential line voltage).
SIT & Honeywell
Millivolt Wiring Diagram
If any of the original wire as supplied must be replaced,
it must be replaced with Type AWM105°C – 18 GA. wire.
TH
TP
TH
OR REMOTE
* SWITCH
Figure 35
TP
Thermopile
* ON/OFF SWITCH, OPTIONAL
THERMOSTAT
CONTROL RECEIVER
Step 15. CHECKING APPLIANCE OPERATION
With gas line installed run initial system
checkout before closing up the front of the
unit. Follow the pilot lighting instructions provided in the Homeowner's Care and Operation
Instructions (or pull out the instruction label
located in control compartment below glass
door assembly).
MODELS: EDVI30 & EDVI35
Honeywell Gas Control Valve Diagram
PILOT
ADJUSTMENT
SCREW
TP/TH
TP
TH
WIRING
TERMINALS
Figure 36a
PIEZO
IGNITER
GAS CONTROL
KNOB
O
N
I
P
I
L
O
O
F
T
F
INLET
PRESSURE
TAP
CONVERTIBLE
HI/LO REGUL ATOR
(adjusts fl ame height
and heat output)
L
O
H
OUTLET
PRESSURE
TAP
MODEL EDVI25
SIT Millivolt Gas Valve Controls
GAS CONTROL
KNOB
T
O
L
I
F
INLET
PRESSURE
TAP
N
O
T
O
it
L
I
P
O
F
OUT
IN
OUTLET
PRESSURE
TAP
Figure 36b
Burner On/Off Switch and Rheostat Location
If optional surround is installed
Burner On/Off
Switch
Rheostat
Left Front
Surround
Panel
Figure 37
Control Compartment Access
Pull down hinged door to access control compartment
Figure 38
NOTE: DIAGRAMS & ILLUSTRATIONS NOT TO SCALE.
P
O
W
L
H
I
CONVERTIBLE
HI/LO REGUL ATOR
(adjusts fl ame height
and heat output)
PIEZO
IGNITER
Side View of Insert
Pull down lower
louver (hinged)
Millivolt Appliance Checkout
The pilot fl ame should be steady, not lifting
or fl oating. Flame should be blue in color
with traces of orange at the outer edge.
The top 3/8" (10 mm) at the pilot generator
(thermopile) and the top 1/8" minimum (tip)
of the quick drop out thermocouple should
be engulfed in the pilot fl ame. The fl ame
should project 1" (25 mm) beyond the hood
at all three ports (Figure 39).
Replace logs if removed for pilot inspection.
To light the burner, rotate the gas valve
control knob counterclockwise to the “ON”
position then turn “ON” the on/off switch
mounted on the surround assembly (see
Figure 37) or operate the burner with the
optional remote control, wall thermostat or
control switch.
Proper Pilot Flame Appearance
Thermocouple
Igniter Rod
Hood
Thermopile
TPTH TP TH
¹⁄₈" Min
(3 mm)
Pilot
Nozzels
Figure 39
Step 16. REINSTALL FRONT GLASS
DOOR ASSEMBLY.
To reinstall glass door assembly panel, reverse
instructions on Step 5 (page 8).
Step 17. CHECK BLOWER SYSTEM
OPERATION
WARNING: THE POWER CORD MUST BE
PLUGGED DIRECTLY INTO A PROPERLY
GROUNDED, 120 VOLT, 60 HZ, 3-PRONG
RECEPTACLE ELECTRICAL OUTLET. DO NOT
CUT OR REMOVE THE GROUNDING PRONG
FROM THIS PLUG. IT MUST BE ROUTED TO
AVOID CONTACT. DO NOT ROUTE POWER
CORD UNDER OR IN FRONT OF APPLIANCE.
When the insert heats up, the blower will automatically be turned on by the fan disc, located
under the fi rebox bottom on the front left side.
It will come on at the speed determined by the
rheostat, located on left surround panel (see
Figure 37). To adjust the blower speed, dial the
rheostat to the desired speed setting. Rotate
the dial down (clockwise), just past the click
(the fi rst ON position) for the highest speed
setting. Turning the knob further clockwise
will provide slower blower speeds. Note: If
the rheostat is not turned “on”, the blower
will not operate.
³⁄₈" Min
(9 mm)
15
Page 16

Blower Wiring Diagram
Burner Flame Appearance
Burner Air Shutter Adjustment
Adjusting Set Screw
120 V AC
Power Cord
Black
Fan Disc
RedBlackBlack
Rheostat
Black
Hot (Live)
Green
(Ground)
Blower
Assembly
White
(Neutral)
Figure 40
Step 18. BURNER ADJUSTMENT
Flame Appearance and Sooting
Proper fl ame appearance is a fl ame which
is blue at the base and becomes yellow /
orange in the body of the fl ame. When the
appliance is fi rst lit, the entire fl ame may be
blue and will gradually turn yellow/orange
during the fi rst 6-8 minutes of operation. If
after 6-8 minutes the fl ame stays lowered
blue, or if the fl ame is orange with evidence
of sooting (black tip), the air shutter may
require adjustment.
.
Appliances operated with air shutter openings that are too large will exhibit fl ames that
are blue and transparent. These weak, blue
and transparent fl ames are termed anemic.
If the air shutter openings are too small,
sooting may develop
16
Figure 41
EDVI35
Sooting is indicated by black puffs developing
at the tips of very long orange fl ames. Sooting
results in black deposits forming on the logs,
appliance inside surfaces and on exterior
surfaces adjacent to the vent termination.
Sooting is caused by incomplete combustion in the fl ames and lack of combustion air
entering the air shutter opening. To achieve
a warm yellow to orange fl ame that does not
soot, the shutter opening must be adjusted
between these two extremes.
No smoke or soot should be present. Reposition the logs if fl ames impinge on any of
them. If the logs are properly positioned
and sooting conditions exist, the air shutter
opening on the main burner tube should be
adjusted.
IMPORTANT: ENSURE THAT THE FRONT
GLASS PANEL IS IN PLACE AND SEALED
DURING ADJUSTMENT.
Burner Adjustment Procedure
AIR SHUTTER ADJUSTMENT SHOULD
ONLY BE PERFORMED BY AN AUTHORIZED INSTALLER AT THE TIME OF THE
INSTALLATION OR SERVICE.
CAUTION: THE ADJUSTMENT ROD AND
NEARBY APPLIANCE SURFACES ARE
HOT. EXERCISE CAUTION TO AVOID
INJURY WHILE ADJUSTING FLAME
APPEARANCE.
Initially, always position the air shutter to the
factory setting as shown in Figure 42 (adjustment rod is located in the lower control area).
This can be done by moving the adjustment
rod up or down accordingly. Allow the burner
to operate for at least 15 minutes. Observe
the fl ame continuously. If it appears weak
or sooty as previously described, adjust the
air shutter to a more open position until the
proper fl ame appearance is achieved.
NOTE: DIAGRAMS & ILLUSTRATIONS NOT TO SCALE.
Adjustment Rod Up
(1/8" Open Position)
Burner Tube
Air Shutter
Adjustment Rod Down
(full open position)
FACTORY AIR SHUTTER SETTING
INCHES (MILLIMETERS)
Models Gas Type Air Shutter Gap
EDVI25
EDVI30
EDVI35
Natural Gas
Propane
Natural Gas
Propane
Natural Gas
Propane
3/16" (4.76 mm)
3/8" (9.52 mm)
5/16" (7.94 mm)
1/2" (12.7 mm)
3/8" (9.52 mm)
1/2" (12.7 mm)
Figure 42
CAUTION: CARBON WILL BE PRODUCED IF THE
AIR SHUTTER IS CLOSED TOO MUCH.
Any damage due to carboning resulting from
improperly setting the air shutter is NOT covered
under the warranty.
The following chart (Table 10) is provided to
aid you in achieving the correct air shutter
adjustment for your installation.
Air Shutter Adjustment Guidelines:
Air shutter Gap
should be
increased
Air shutter Gap
should be
Decreased
Air Shutter
Adjustment
Amount of
Primary Air
If air shutter is
closed too far
If air shutter is
open too far
Flame will be
orange
Flame will be
blue
Flame
Color
Table 10
When satisfi ed that the appliance operates
properly, proceed to fi nish the installation.
Leave the control knob in the ON position and
the on/off switch in the OFF position.
STEP 19. INSTALL LOUVER KIT
Install louver kit per the instructions provided
with the kit.
Page 17

SAFETY / LISTING LABELS - MODELS: EDVI30 & EDVI35
MODEL NO. EDVI30
MANUFACTURED AT:
FOR USE WITH NATURAL GAS. EQUIPE POUR GAZ NATUREL
ALTITUDE
MIN. GAS SUPPLY PRESS (“WC)
PRESS MIN. D’ALIMENTATION (“ CE)
MANIFOLD PRESSURE (“WC)
PRESSION CE TUBULURE (“CE)
MANUFACTURER’S RECOMMENDED ORIFICE SIZE
DIMENSION DE L’INJECTEUR RECOMMANDE PAR
MANUFACTURIER (DMS)
MAX INPUT (BTU/HR)
ENTREE MAX
MIN INPUT (BTU/HR)
ENTREE MIN
ELECTRICAL RATING/EXIGENCES ELECTRIQUES:
MINIMUM
CLEARANCES TO
COMBUSTIBLE
MATERIAL
CEILING (FROM BOTTOM OF UNIT) 64”
M ANTEL
MANTEL FROM TOP OF UNIT
Union City, TN
-UNIT/APPAREIL: MILIVOLT
1 ph
60 HZ
120 VOLTS
LESS THAN 5 AMPS
SIDEWALL
FLOOR
(MAX)
DEPTH
0-4500 FT/PI
(0-1370M)
4.5”
3.5”
#37
30,000
21,500
18”
12”
MODEL NO. EDVI35
MANUFACTURED AT:
8”
0”
FOR USE WITH NATURAL GAS. EQUIPE POUR GAZ NATUREL
ALTITUDE
MIN. GAS SUPPLY PRESS (“WC)
PRESS MIN. D’ALIMENTATION (“ CE)
MANIFOLD PRESSURE (“WC)
PRESSION CE TUBULURE (“CE)
MANUFACTURER’S RECOMMENDED ORIFICE SIZE
DIMENSION DE L’INJECTEUR RECOMMANDE PAR
MANUFACTURIER (DMS)
MAX INPUT (BTU/HR)
ENTREE MAX
MIN INPUT (BTU/HR)
ENTREE MIN
ELECTRICAL RATING/EXIGENCES ELECTRIQUES:
MINIMUM
CLEARANCES TO
COMBUSTIBLE
MATERIAL
SIDEWALL
CEILING (FROM BOTTOM OF UNIT) 64”
MANTEL FROM TOP OF UNIT
M ANTEL DEPTH
Union City, TN
-UNIT/APPAREIL: MILIVOLT
1 ph
60 HZ
120 VOLTS
LESS THAN 5 AMPS
FLOOR
(MAX)
0-4500 FT/PI
(0-1370M)
4.5”
3.5”
#33
35,000
25,500
8”
0”
18”
12”
DEGAGEMENT MUR ADJACENTS
MINIMUM DE
MATERIAUX
COMBUSTIBLES
PROFONDEUR DU MANTEAU 305mm
VENTED GAS FIREPLACE HEATER - NOT FOR USE WITH SOLID FUEL. FOR INSTALLATION
IN SOLID FUEL FIREPLACES. THIS VENTED GAS FIREPLACE HEATER IS NOT FOR USE
FOYER AU GAZ CHAUFFANT AVEC EVACUATION - NE DOIT PAS ETRE UTILISE AVEC UN
COMBUSTIBLE SOLIDE. DOIT ETRE INSTALLE DANS UNE CHEMINEE EXISTANTE QUI
BRULE LE COMBUSTIBLE SOLIDE. NE PAS UTILISER DE FILTRE A AIR AVEC CE FOYER AU
FOR USE WITH GLASS DOOR CERTIFIED WITH THE APPLIANCE ONLY.
N’UTILISER SEULEMENT QUE LA PORTE DE VERRE CERTIFIE AVEC L’ APPAREIL.
Do not operate the appliance with glass removed, cracked or broken.
“CAUTION:
Replacement of panel should be done by a licensed or qualified service person.”
“This appliance is equipped at the factory for use with natural gas only. Units using
propane must be field converted using the LP conversion kit, Cat. No. H0920.
FINAL INSPECTION BY:
PLAFOND (DU BAS DE L’APPAREIL) 1626mm
MANTEAU
PLANCHER
DU DESSUS DE L'APPAREIL
WITH AIR FILTERS.
GAZ A EVACUATION.
(MAX)
203mm
0mm
457mm
ANSI Z21.88-2002
CSA 2.33-2002
CAN/CGA 2.17-M91
VENTED GAS FIREPLACE HEATER
FOYERA AU GAZ CHAUFFANT AVEC EVACUATION
P/N 9-1467A
SERIAL NUMBER/NOMBRE DE SERIE
XXX XXX
DEGAGEMENT MUR ADJACENTS
MINIMUM DE
MATERIAUX
COMBUSTIBLES
PROFONDEUR DU MANTEAU
VENTED GAS FIREPLACE HEATER - NOT FOR USE WITH SOLID FUEL. FOR INSTALLATION
IN SOLID FUEL FIREPLACES. THIS VENTED GAS FIREPLACE HEATER IS NOT FOR USE
FOYER AU GAZ CHAUFFANT AVEC EVACUATION - NE DOIT PAS ETRE UTILISE AVEC UN
COMBUSTIBLE SOLIDE. DOIT ETRE INSTALLE DANS UNE CHEMINEE EXISTANTE QUI
BRULE LE COMBUSTIBLE SOLIDE. NE PAS UTILISER DE FILTRE A AIR AVEC CE FOYER AU
FOR USE WITH GLASS DOOR CERTIFIED WITH THE APPLIANCE ONLY.
N’UTILISER SEULEMENT QUE LA PORTE DE VERRE CERTIFIE AVEC L’ APPAREIL.
“CAUTION:
Replacement of panel should be done by a licensed or qualified service person.”
“This appliance is equipped at the factory for use with natural gas only. Units using
Do not operate the appliance with glass removed, cracked or broken.
propane must be field converted using t he LP conversion kit,
FINAL INSPECTION BY:
PLAFOND (DU BAS DE L’APPAREIL)
MANTEAU
PLANCHER
DU DESSUS DE L'APPAREIL
WITH AIR FILTERS.
GAZ A EVACUATION.
(MAX)
203mm
0mm
1626mm
457mm
305mm
Cat. No. H0921.
ANSI Z21.88-2002
CSA 2.33-2002
CAN/CGA 2.17-M91
VENTED GAS FIREPLACE HEATER
FOYERA AU GAZ CHAUFFANT AVEC EVACUATION
P/N 9-1467B
SERIAL NUMBER/NOMBRE DE SERIE
XXX XXX
IIIIIIIIIIIIIIIIIIII
XXX
P/N 9-1467A
NOTE: DIAGRAMS & ILLUSTRATIONS NOT TO SCALE.
IIIIIIIIIIIIIIIIIIII
XXX
P/N 9-1467B
17
Page 18

SAFETY / LISTING LABEL - MODEL: EDVI25
MODEL NO. EDVI25
MANUFACTURED AT:
FOR USE WITH NATURAL GAS. EQUIPE POUR GAZ NATUREL
ALTITUDE
MIN. GAS SUPPLY PRESS (“WC)
PRESS MIN. D’ALIMENTATION (“ CE)
MANIFOLD PRESSURE (“WC)
PRESSION CE TUBULURE (“CE)
MANUFACTURER’S RECOMMENDED ORIFICE SIZE
DIMENSION DE L’INJECTEUR RECOMMANDE PAR
MANUFACTURIER (DMS)
MAX INPUT (BTU/HR)
ENTREE MAX
MIN INPUT (BTU/HR)
ENTREE MIN
ELECTRICAL RATING/EXIGENCES ELECTRIQUES:
MINIMUM
CLEARANCES TO
COMBUSTIBLE
MATERIAL
DEGAGEMENT MUR ADJACENTS
MINIMUM DE
MATERIAUX
COMBUSTIBLES
VENTED GAS FIREPLACE HEATER - NOT FOR USE WITH SOLID FUEL. FOR INSTALLATION
IN SOLID FUEL FIREPLACES. THIS VENTED GAS FIREPLACE HEATER IS NOT FOR USE
FOYER AU GAZ CHAUFFANT AVEC EVACUATION - NE DOIT PAS ETRE UTILISE AVEC UN
COMBUSTIBLE SOLIDE. DOIT ETRE INSTALLE DANS UNE CHEMINEE EXISTANTE QUI
BRULE LE COMBUSTIBLE SOLIDE. NE PAS UTILISER DE FILTRE A AIR AVEC CE FOYER AU
FOR USE WITH GLASS DOOR CERTIFIED WITH THE APPLIANCE ONLY.
N’UTILISER SEULEMENT QUE LA PORTE DE VERRE CERTIFIE AVEC L’ APPAREIL.
“CAUTION:
Replacement of panel should be done by a licensed or qualified service person.”
“This appliance is equipped at the factory for use with natural gas only. Units using
propane must be field converted using the LP conversion kit, Cat. No. H1576.
FINAL INSPECTION BY:
M ANTEL
PROFONDEUR DU MANTEAU 305mm
Do not operate the appliance with glass removed, cracked or broken.
CEILING (FROM BOTTOM OF UNIT) 64”
MANTEL FROM TOP OF UNIT
PLAFOND (DU BAS DE L’APPAREIL) 1626mm
MANTEAU
DU DESSUS DE L'APPAREIL
WITH AIR FILTERS.
GAZ A EVACUATION.
ANSI Z21.88-2002
CSA 2.33-2002
CAN/CGA 2.17-M91
Lynwood, CA
-UNIT/APPAREIL: MILIVOLT
1 ph
60 HZ
120 VOLTS
LESS THAN 5 AMPS
SIDEWALL
FLOOR
(MAX)
DEPTH
PLANCHER
(MAX)
0-4500 FT/PI
(0-1370M)
4.5”
3.5”
#41
25,000
17,000
8”
0”
15.5”
12”
203mm
0mm
394mm
18
VENTED GAS FIREPLACE HEATER
FOYERA AU GAZ CHAUFFANT AVEC EVACUATION
P/N 9-1467C
SERIAL NUMBER/NOMBRE DE SERIE
XXX XXX
IIIIIIIIIIIIIIIIIIII
XXX
P/N 9-1467C
NOTE: DIAGRAMS & ILLUSTRATIONS NOT TO SCALE.
Page 19

NOTE: THIS PAGE LEFT BLANK INTENTIONALLY.
NOTE: DIAGRAMS & ILLUSTRATIONS NOT TO SCALE.
19
Page 20

Lennox reserves the right to make changes at any time, without notice, in design,
materials, specifi cations, prices and also to discontinue colors, styles and products.
Consult your local distributor for fi replace code information.
Printed in U.S.A. © Lennox Hearth Products 2003
P/N 775,156M REV. G 3/2005
20
NOTE: DIAGRAMS & ILLUSTRATIONS NOT TO SCALE.
1110 West Taft Avenue • Orange, CA 92865
 Loading...