

Page 1
LOG PLACEMENT GUIDE
Glowing Embers
LOG PLACEMENT GUIDE FOR LENNOX DIRECT VENT AND B-VENT SERIES
MULIT-OPEN GAS FIREPLACE HEATERS
GENERAL INFORMATION
This log placement guide has been prepared to present detailed log
placement illustrations and provide instruction to assist in the placement of logs at the initial (new appliance) setup and after the annual
cleaning and inspection cycles. The information provided here is to
be used in conjunction with the Homeowner's Care and Operation Instructions provided together with this document in the appliance literature packet. Please read the Homeowner's Care and Operation Instructions completely before completing the procedures detailed in
this placement guide.
INITIAL INSTALLATION CONSIDERATIONS
If the logs are being installed for the first time, the following paragraphs apply:
DO NOT attempt to install the logs until the appliance installation has
been completed, the gas line connected and tested for leaks and the
initial burner operation has been checked out.
750,161M
REV. B 10/2004
Figure 1
EDVPF, EDVST, EDVCL, EDVCR, EBVPF,
EBVST, EBVCL AND EBVCR SERIES
Step 1. Remove the appliance front door.
Step 2. Remove the foamed log set from the interior of the firebox.
Remove the logs from their packaging. Handle logs carefully to prevent breakage.
CERAMIC FLOOR PANELS, LOGS AND GLOWING EMBER
PLACEMENT
Step 1. Install the Ceramic Floor Panels as shown in
Direct Vent fireplaces only).
Note: This appliance is provided with enough Glowing Embers for several applications, do not feel compelled to use all that is in a new bag.
For best glowing effect, replace the ember material annually. Replacement Glowing Embers are available (Catalog Number 88L53).
Step 2. Position the individual logs as shown in
on pages 3 and 4
that have notches to fit over the grate tines should be positioned with
these notches directly against the grate. Proper log placement is critical to encourage outstanding flame appearance and prevent sooting.
When positioned properly as shown, logs will be positioned between
flame peaks and will not impinge any flames.
. Logs should be placed in the order shown. All logs
Figure 3
Figures 4A and 4B
(for
Figure 2
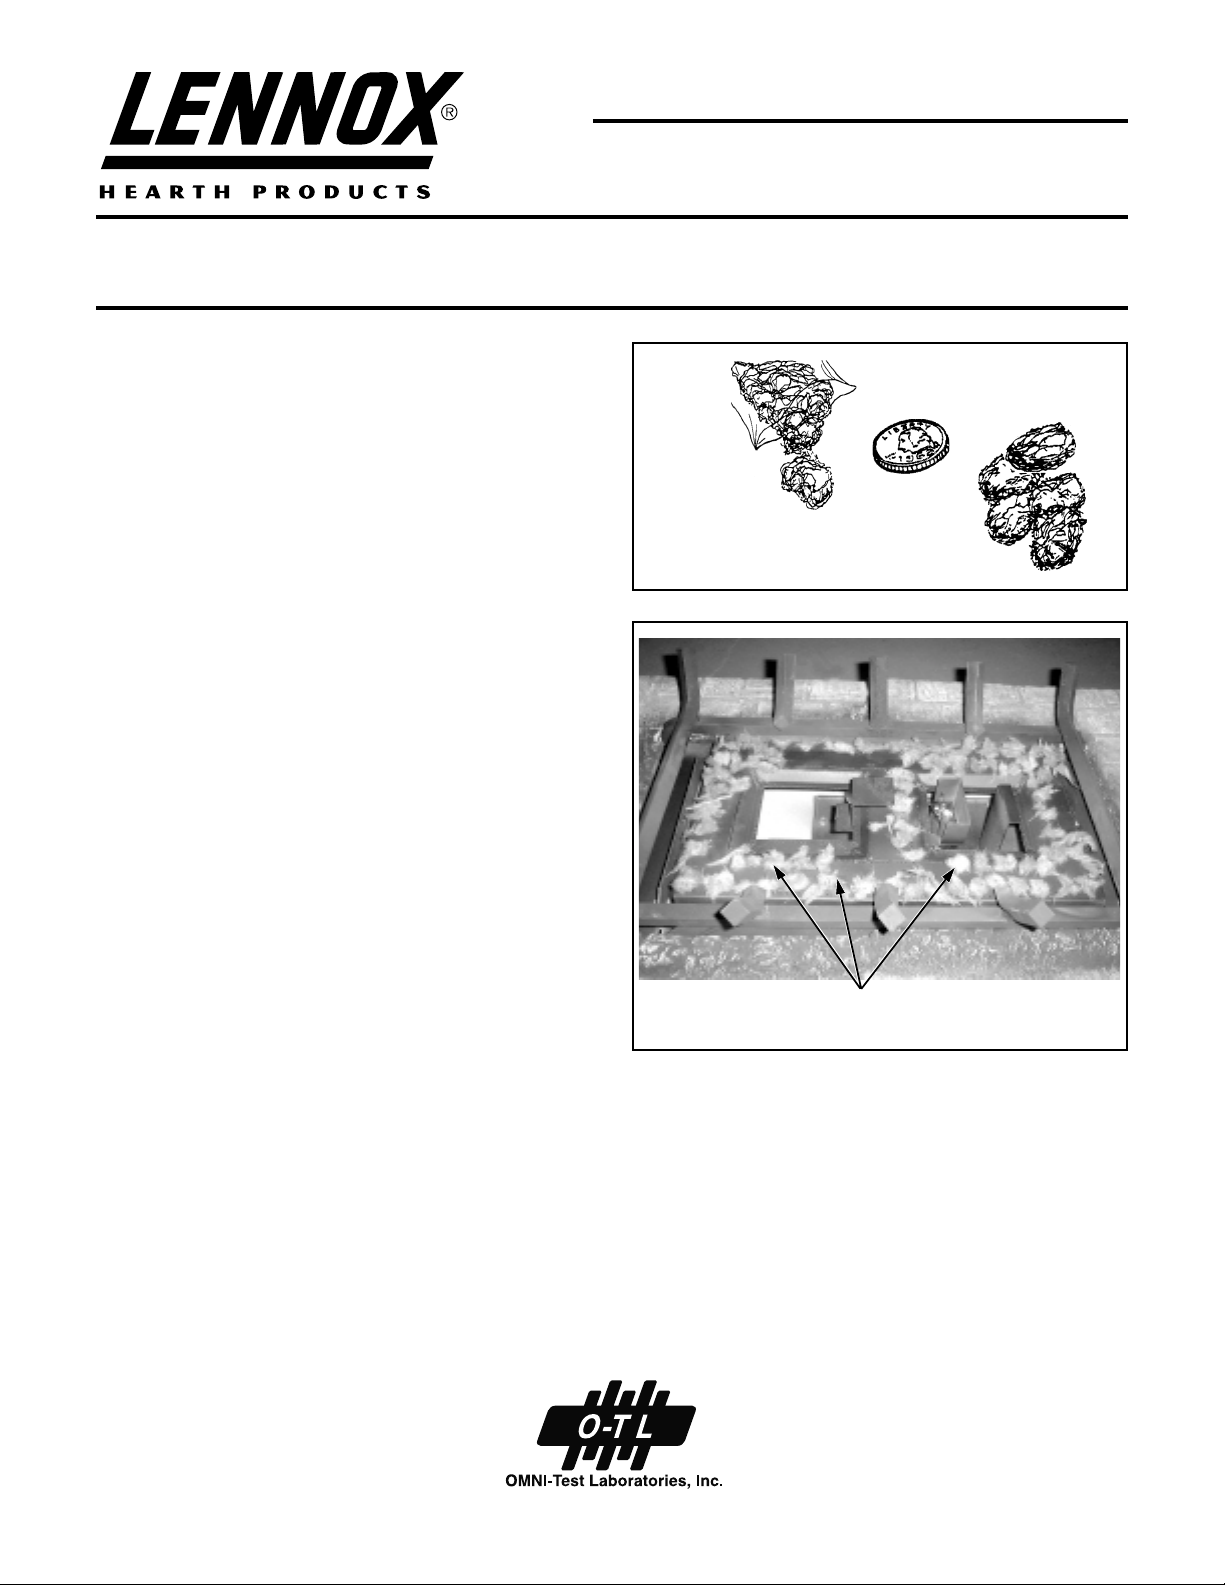
Note: Do Not place Glowing Embers (Rockwool) over burner slots.
Step 3. Separate the Glowing Ember (Rockwool) into pieces about
the size of a quarter
Distribute these pieces over the front surface of the burner, as shown
in
Figure 2
tioned, the Glowing Embers will cover approximately 65% of the front
burner and with no appreciable gaps or openings. Ensure that the
main burner ports remain uncovered by the ember material.
. Do not use more than is necessary. When properly posi-
Figure 1
. Keep the pieces fluffed up, not matted.
NOTE: DIAGRAMS & ILLUSTRATIONS NOT TO SCALE.
1
Page 2
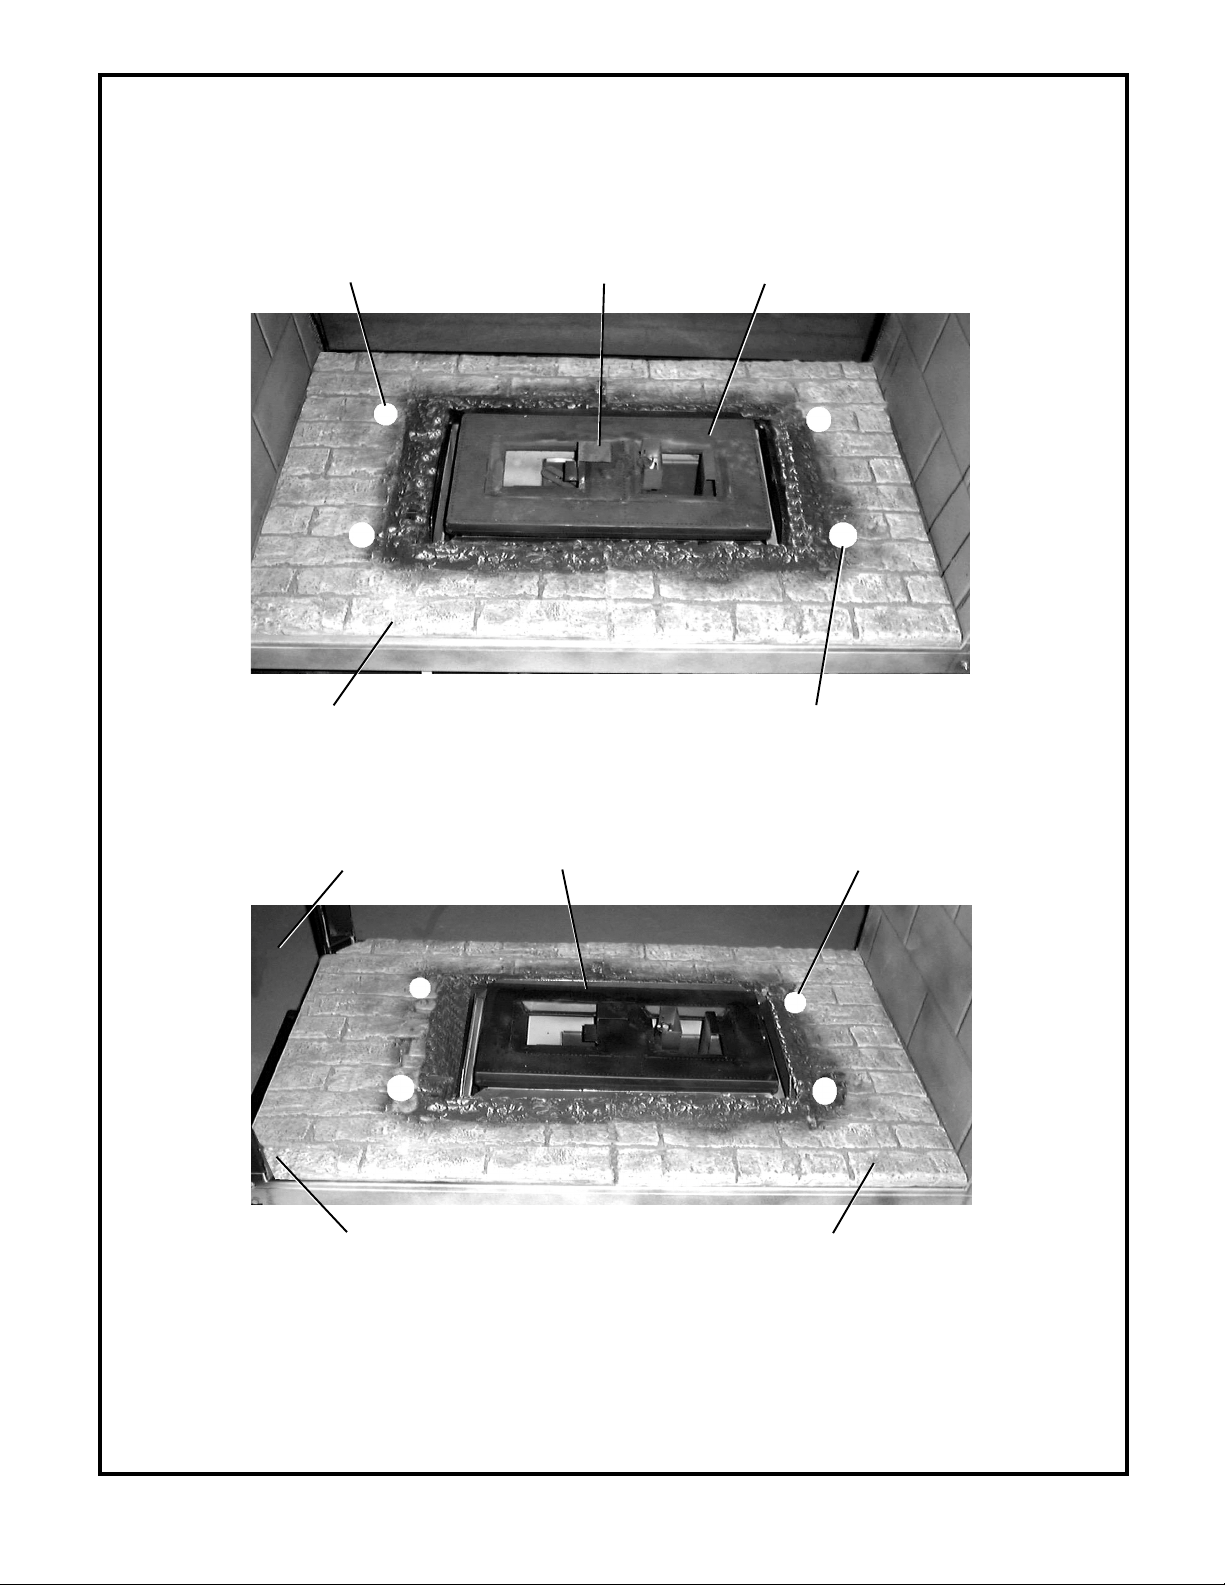
CERAMIC FLOOR PANEL PLACEMENT (Direct Vent Fireplaces Only)
Catalog Number for the Ceramic Floor Panel set: 55M4901 (For EDVPF), 55M5101 (For EDVCL),
55M5501 (For EDVST) And 55M7601 (For EDVCR).
1 1/4" Dia. Through Holes (4 Places)
Ceramic Floor Panel
Log Support
EDVST Shown
Burner
Place The Four Legs Of The Grate
Assembly In The Four Holes Of The
Ceramic Floor Panel
Small Door Opening
Chamfer Corner Pointing Toward
Burner
EDVCL Shown*
Small Door Opening
*NOTE: EDVCR & EDVPF Are Installed In Similar Fashion
With Chamfer End Pointing Toward Small Door Opening
1 1/4" Dia. Through Holes (4 Places)
Ceramic Floor Panel
Figure 3
2
NOTE: DIAGRAMS & ILLUSTRATIONS NOT TO SCALE.
Page 3

EDVPF, EDVST, EDVCL, EDVCR, EBVPF, EBVST, EBVCL & EBVCR LOG PLACEMENT
2
STEP 1
6
4
Log Part
Number Description Number
1 Log, Corner 55M1801
2 Log, Rear/Left 55M1901
3 Log, Front/Left 55M2001
4 Log, Rear/Right 55M2101
5 Log, Front/Center 55M2201
6 Log, Center/Top 55M2301
Catalog Number for the entire log set: 55M0401
3
5
1
STEP 3
Log (3) Lays Over
3
Logs 1 And 2
1
Position Groove At The
Bottom Of Log (1) Over
The Burner Log Support
Bracket
Position The Groove At The
Bottom Of Log (1) Over The
Grate And Slide It Forward
Against The Grate Here
Position Log (2) Over The Grate
Bar And Slide It Against The
STEP 2
2
Back Of The Grate Here
Position Groove At The Bottom Of Log (2)
Over The Grate Here And Slide It Against
The Back Of The Grate
Place Bottom Hole Of Log (3) On Pin In Log (2). Position
Grooves At The Bottom Of Log (3) Over The Grate.
1
STEP 4
Position And Slide Log (4)
Against The Back Of The Grate
4
Place Log (4) Over
The Flat Spot On
Log (1) Here
Figure 4A
NOTE: DIAGRAMS & ILLUSTRATIONS NOT TO SCALE.
3
Page 4

EDVPF, EDVST, EDVCL, EDVCR, EBVPF, EBVST, EBVCL & EBVCR LOG PLACEMENT (CONTINUED)
2
6
4
Log Part
Number Description Number
1 Log, Corner 55M1801
2 Log, Rear/Left 55M1901
3 Log, Front/Left 55M2001
4 Log, Rear/Right 55M2101
5 Log, Front/Center 55M2201
6 Log, Center/Top 55M2301
Catalog Number for the entire log set: 55M0401
3
5
1
Position The Round End Of Log (6)
Position Small End Of Log (6)
On The Notch Of Log (3) Here
6
Against The Notch Of Log (4) Here.
Two Charred Spots Face The Front
STEP 5
3
4
Grate
Assembly
Position The Groove In The Back
Of Log (3) Against The Grate
NOTE: DIAGRAMS & ILLUSTRATIONS NOT TO SCALE.
Lennox reserves the right to make changes at any time, without notice, in design,
materials, specifications, prices and also to discontinue colors, styles and products.
Consult your local distributor for fireplace code information.
Figure 4B
Log (5) Sits In Front
5
Of The Grate
Rest Log (5) Against
The Grate Here
Printed in U.S.A. © 2003 by Lennox
P/N 750,161M REV. B 10/2004
4
NOTE: DIAGRAMS & ILLUSTRATIONS NOT TO SCALE.
1110 West Taft Avenue • Orange, CA 92865
 Loading...