

Lenmar MSC366 User Manual
Mach 1
®
Speed Charger
TM
For 3.6 & 6.0 Volt
NiCd / NiMH Batteries
Universal Charger for NiCd / NiMH Camcorder Batteries
PLEASE READ THE INFORMATION AND FOLLOW ALL INSTRUCTIONS THOROUGHLY BEFORE USING THIS
PRODUCT.
Introduction
The Mach 1 Speed Charger is a highly advanced and fully automatic battery charger which is compatible with 3.6 & 6.0 Volt NiCd
/NiMH batteries for camcorders from Sony, JVC, Panasonic, Sharp, Hitachi, RCA and other manufacturers.
The Mach 1 Speed Charger features microprocessor controlled Neotherm
than twice as fast as other chargers. Not only will it charge the battery safely and reliably, it will prolong the battery life. Charging
progress, MAX charge and error conditions are all provided by the LED indicators.
Flexible power input allows you to use the Mach 1 Speed Charger from home or overseas with its 110V-240V AC Universal Power
Supply, or on the road using the DC Cigarette Lighter Adapter included.
Operation:
Getting Ready
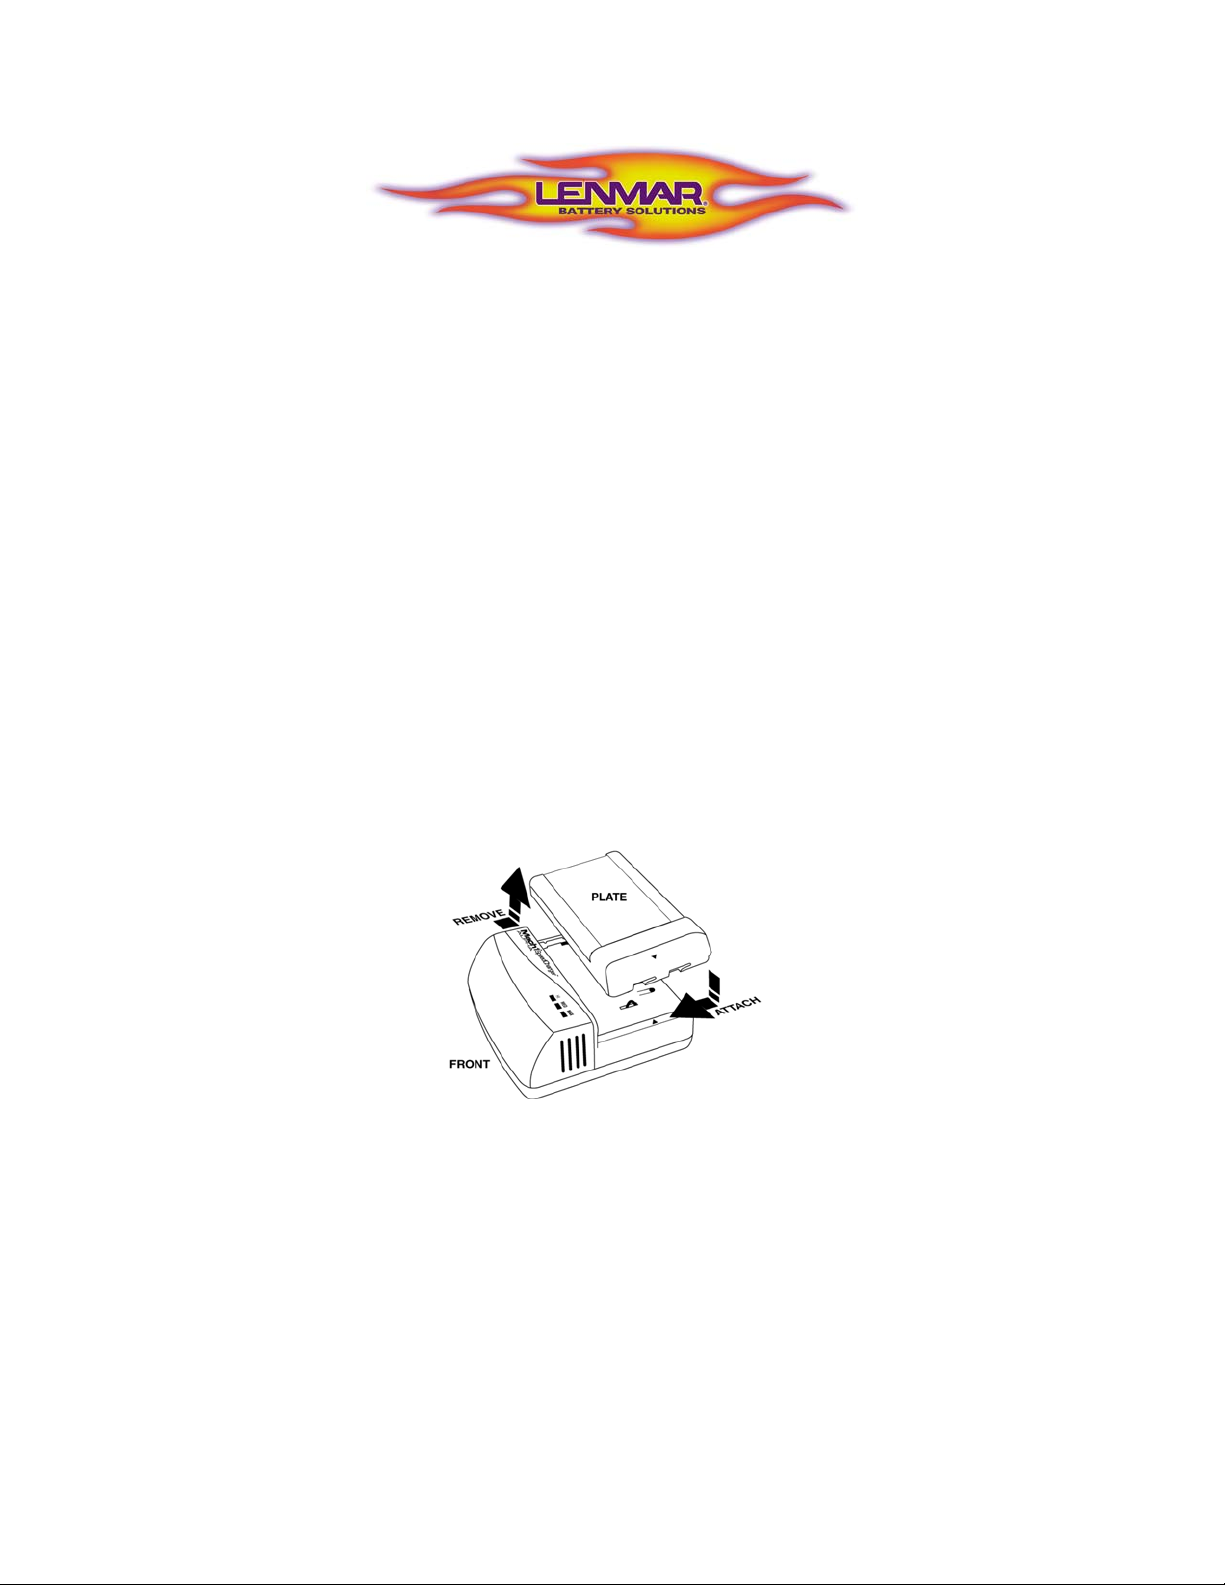
Choose the adapter plate for the type of battery you will be charging. Each of the adapter plates is labeled as to the batteries it can
work with. If the charger base does not already have the adapter plate you want attached, you will need to remove the adapter plate
first by pushing down on the plate and sliding it to the rear of the charger base (away from the LED indicators). Then, attach the
selected adapter plate to the charger unit by aligning the arrows on the sides of the adapter plates and the charger base as shown.
While pressing down lightly on the adapter plate, slide the plate toward the front of the charger base until it locks.
Plug-in, either the AC Adapter or the DC Cigarette Lighter power adapter, and connect the other end of the power adapter cable to the
power input jack on the rear of the charger unit.
®
active pulse speedcharging to charge your battery more
Status LED’s
Together, the three LED’s on the front of the Mach 1 charger will indicate the status of the battery and the charger. See the
descriptions and diagrams included in the following sections regarding the various indications and their meaning.
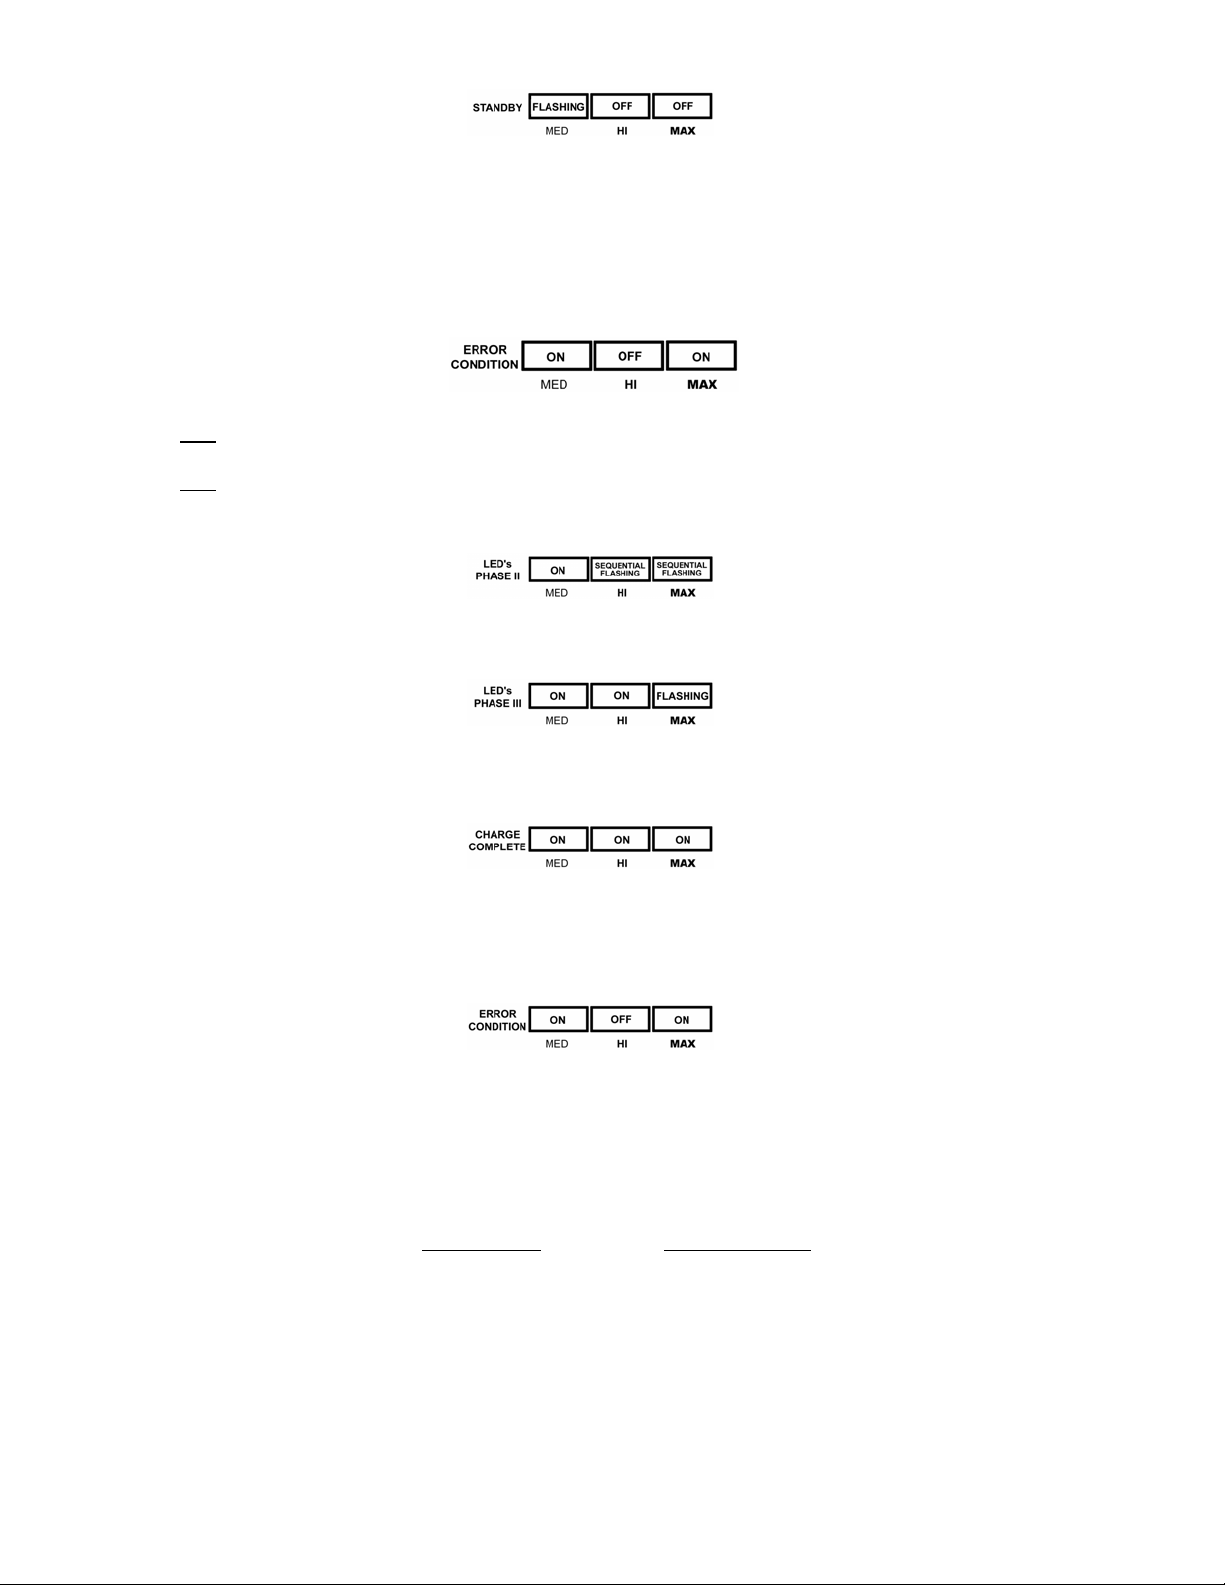
StandBy Mode: Without any battery installed, the charger will flash the LED on the left, marked MED, indicating that the charger is
standing by and waiting for a battery to be connected (see diag.-1).
Charging Your Battery
Diag.-1
Once a battery has been properly connected to the appropriate adapter plate, the charger will determine the status of the battery and
begin the proper phase of the charging cycle. There are 3 phases to the charge cycle. The battery may be removed during any of the
charging phases without harm to the battery or charger unit.
Phase I – Initial Charge: All 3 LED’s flashing in sequence from MED (left) to MAX (right) (see diag.-2). If the battery is low, this
will be the first charge phase. With high capacity batteries, this phase can sometimes be the longest of the 3 phases. Similarly, with
some low capacity batteries and batteries reaching the end of their life, this phase can be very short.
Diag.-2
Note:
When the battery is first connected, the LED’s may instantly indicate MED, HI or MAX charge depending on the charge status
of the battery. The process will continue normally from that point forward.
Note:
It is normal for the charger, AC adapter, or the battery to become warm during charging.
Phase II – MED Charge: The MED LED is on continuously and other LED’s are flashing in sequence (see diag.-3). At this point
the battery is typically about 50% charged. Some batteries, if they are worn out and near the end of their life, can be as low as 10%
charged.
Diag.-3
Phase III – HI Charge: The MED and HI LED’s are on and the MAX LED is flashing (see diag.-4). At this point the battery is
typically, about 70% charged.
Diag.-4
Charge Complete – MAX Charge: All three LED’s are on at the same time (see diag.-5). Charging has completed and the battery
is fully charged. It is recommended to remove the battery at this time.
Diag.-5
Error Condition – Charge Terminated: If the battery is removed before a complete charge has been reached, the charger will
continue indicating the last complete charging phase for up to 1 minute. After that time, an ‘Error’ indication will appear on the
LED’s, shown by the MED and MAX LED’s coming on together while the HI LED is off (see diag.-6).
Diag.-6
The Error Condition will also be indicated if the charger senses any problem with the battery being charged. To reset the error
condition, unplug the charger from the power adapter for a few seconds, then reconnect it to the power adapter. If the Error occurs
again, there may be a defect in the battery that will prevent safely charging.
Estimated Battery Charge Times:
Battery Capacity
1200mAh 45 min.
1600-1800mAh 50 min.
3800mAh 100 min.
* Actual charge times may vary depending on the battery, cell condition and capacity.
Trouble Shooting Tips:
• Batteries should be replaced when runtime becomes short.
• If the LED status indicator does not light up when the charger is plugged into either supplied power adapter, recheck the connections and make
sure that the AC socket or cigarette lighter has power.
Time to MAX Charge *
 Loading...