

Page 1
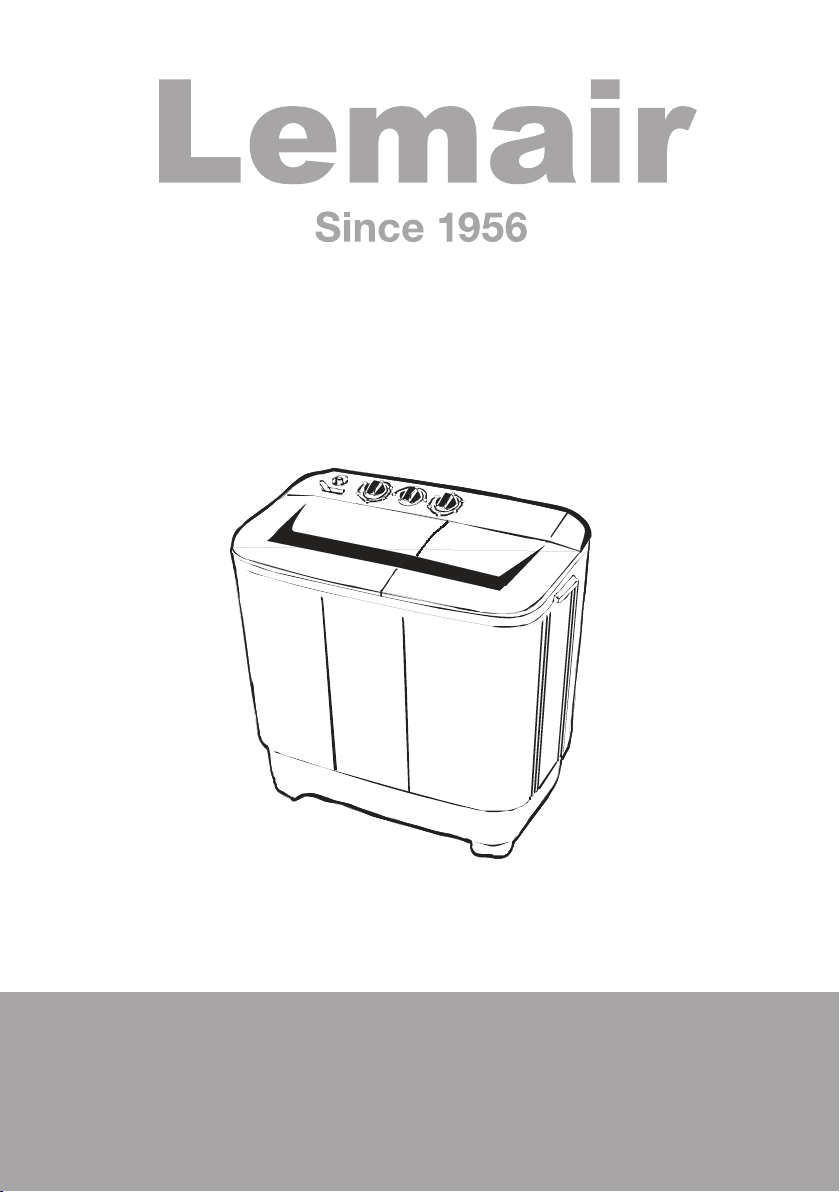
8kg Twin Tub Washing Machine
LWTT80
lemairap pliances.com.au
User Manual
Page 2
Page 3

Page 4

TABLE OF CONTENTS SAFETY PRECAUTION
Safety Precaution
Safety Pr ecaution
Attenti on To Insta llation
Lay upper d rain hose
Change th e position of the d rain hose
Install ation site
Prepara tio n Instruct ions
Referen ce of laundry qua ntity
corresp onding to differe nt ca pacities
Laundry v olume and deter gent
dosage re ference
Name Of Par ts
Accesso ries
Introdu ction Of Contro l Panel
Quick Sta rt
Was hin g Method
Rinsing M eth od
Spinnin g Met hod
Efficiency Pro gram
Special F eatures
Soak func tion
Buzzer fu nction
The dual voltage
Attenti on To Maint enance
Cabinet m aintenance
Cleanin g the lint filter
Anti-fre ezing protect ion
Operati on when objects a re
dropped i nto outside of th e spin tub
Notes
Main Tech nical Paramet ers
back cove r
1
3
3
3
3
3
4
4
5
5
5
6
6
6
7
8
8
8
8
8
9
9
9
9
For your safety, the information in this manual must be followed
to minimize the risk of fire or explosion, electric shock, or to
prevent property damage, personal injury or loss of life.
This appliance is not intended for use by persons (including children) with reduced physical,
or mental capabilities, or lack of experience and knowledge, unless they have been given
supervision or instruction concerning use of the appliance by a person responsible for their safety.
Children should be supervised to ensure that they do not play with the appliance.
If the supply cord is damaged, it must be replaced by the manufacturer, its service
agent or similarly qualified persons in order to avoid a hazard.
The new hose-sets supplied with the appliance are to be used and that old hose-sets should not
be reused.
The openings must not be obstructed by a carpet.
This appliance is intended to be used in household and similar applications such as:
− staff kitchen areas in shops, offices and other working environments;
− farm houses;
− by clients in hotels, motels and other residential type environments;
− bed and breakfast type environments;
− areas for communal use in blocks of flats or in launderettes.
WAS H RATED CAPACIT Y
SPIN R ATE D CAPACITY
MAXI MUM WATER P RESSU RE
8.0k g
4.6k g
0.6M Pa
sensory
Explanation of the symbols:
Warning!
!
This combination of symbol and signal word indicates a potentially
dangerous situation which may result in death or serious injuries
unless it’s avoided.
Caution!
This combination of symbol and signal word indicates a potentially
9
9
dangerous situation which may result in slight or minor injuries
or damage to property and the environment.
Note!
This combination of symbol and signal word indicates a potentially
dangerous situation which may result in slight or minor injuries.
-1-
Page 5

InstallationSAFETY PRECAUTION
Be sur e to c omply w it h the follo wi ng to pre ve nt damage t o bo dy and pr op erty of you a nd o thers :
The s ig n st and s fo r “p ay at te ntion ” , an d the p ic tu re of s pe cific i te ms ne ed s at ten ti on s how s in .
The s ig n st and s fo r “f orb id ”, and th e pi ctu re o f sp eci fi c items f or bid de n sh ows i n .
The s ig n st and s fo r “m ust d o” , and the p ic tur e of s pe cif ic i tems mu st b e don e sh ow s in .
Do no t disma ntle th e machi ne
by yo ursel f.
Forb id dism antli ng
Do no t let bab y sit on it o r place
hea vy thin gs on it.
Forb id
To avoi d elect ric sho ck
res ultin g from el ectri c leaka ge,
ple ase con nect gr oundi ng wire
of th e plug pr operl y.
Grou ndin g
W
ip
e o
ff di rt
y a
n
d d
u
s
t o
n t
plu
g o
f
t
en t
o p
c
o
n
t
ac
t w
i
t
h p
owe r supp
he
re
v
en
t poo r
l
y.
Do no t insta ll the ma chine i n
dam p or rain y envir onmen t to
avo id elec tric sh ock, fi re,
mac hine fa ilure ,or def ormat ion.
Avoi d dampn ess
D
o n
ot w
as
h c
l
ot
h
e
s th
r p
d a
h ke
d o
l
t
y c
a
cci d
ro
h
er fl
li
y nea
s
e
m
e
n
e
a
mm
b to th
r ru
nt
.
at ar e
, p
n
etr
a
b
e
ni
ng
s
tai n
e
d w
it
alc
o
h
o
l, a
n
s
ub
sta
nc
e.
Forb id
D
o n
ot le t bab
mac hin
e o
t
ub t
o a
v
oi
Forb id
Do no t put han ds into t he tub
bef ore it st oppin g runni ng.
Do no t place i nflam mable
mat erial s like bu rning c andle ,
mos quito i ncens e, ciga ret etc .
or he ating s ource l ike ele ctric
sto ve, cal orifi er etc. o n the
mac hine.
Forb id
Mak e sure th at the wa ter inl et
hos e is conn ected a nd the ta p
o
l
,
is op ened be fore wa shing .
l
e
If us e warm wa ter, the w ater
tem perat ure sho uld not
exc eed 50℃.
Forb id
Do no t repla ce powe r cord by
you rself .
+
Do no t spray w ater di rectl y to
the m achin e.
Avoi d spray ing wat er
Do no t excee d the max . water
lev el to avo id wate r overf lowin g
and m achin e failu re.
Forb id
Do no t wash do wn-fi lled co at,
rai ncoat o r simil ar clot hes.
Forb id
D
o n
ot da
mag e the p
and p lu
g t
o a
s
hoc k , sh
ort c
+
waterp roof
o
we
r cor d
v
o
i
d ele
c
t
ri
c
ir
cui t o
r fi
re.
Atten tion To Installation
Lay up pe r drain hos e
●●Needs a drain hose with minimum diame te r 3 cm, a nd m in im um c ar ry a wa y ca pa ci ty o f
40 liters per minute.
For upper drain system, the drain h os e mu st b e pl ac ed a t le as t 86 c m( 30 i nc he s) f ro m th e
bottom of washer , but not higher tha n 10 0 cm .
86cm<H<100cm
Change the position of the drain hose
The ex-factory installation p os it io n of t he d ra in
hose is located the spin side . According to th e
installation site, the drain ho se c an a ls o be i ns ta ll ed
at the wash side of the machine . The m et ho d is
as follows:
①
Unplug the power cord and empty wat er i n th e dr ai n
hose completely.
②
Spread a piece of soft cloth on the flo or ( e. g. a b la nk et )
and place the washing machine on it g en tl y.
③
Take the drain hose out from the buckle a t th e
spin side, and put it into the buckle a t th e wa sh s id e.
④
Hang up the drain hose kit.
at
of
FOR UPPE R DR AI N SY ST EM O NLY
Front
Drain hose
Buckle
FOR LOWER DRAIN SYSTEM ONLY
Blanket
Ins ert the p lug tig htly wh en
use .
Forb id putt ing int o
Do no t pull th e cord wh en
unp lug the p lug.
Forb id
Do no t inser t or unpl ug the pl ug
wit h wet han ds to avo id elec tric
sho ck.
Forb id wet ha nds
Forb id
Unp lug the p lug fro m socke t
aft er use.
Unp lug the p lug
Installation site
In order to avoid electrical fail ur e, d is co lo ra ti on a nd d ef or ma ti on , do n ot i ns ta ll t he machine
in the following places:
●
● Locations exposed
to direct sunlight
Locations exposed to rain
or snow
Locations with uneven
●
or unstable ground
-3--2-
Page 6

Usage method
Structure Instruction
Preparation Instructions
Plug in power and connect the water inlet hose.
●
● Lay down the lower drain hose and connect it to the sewer , or lay the upper drain hose to places as
indicated in page 2.
● Check that there are no objects such as coins, hairpins, mud or sand in the pocket.
● Strings should be knotted in advance to prevent entanglement.
● Clothes can be classified for washing according to the texture, dirty
● For small pieces (e.g.,stockings) or fluffy clothes, put them into a nylon net
Attachment: Reference of laundry quantity corresponding to different capacities
Laundry
Capacity
2.0kg Capacity about 4 pcs. about 3 pcs. about 2 pcs. about 1 pcs.
3.0kg Capacity about 6 pcs. about 4 pcs. about 3 pcs. about 1 pcs.
3.6kg Capacity about 7 pcs. about 5 pcs. about 4 pcs. about 2 pcs.
4.6kg Capacity about 9 pcs. about 6 pcs. about 5 pcs. about 2 pcs.
5.0kg Capacity about 10 pcs. about 7 pcs. about 5 pcs. about 3 pcs.
5.5kg Capacity about 11 pcs. about 8 pcs. about 6 pcs. about 3 pcs.
6.0kg Capacity about 12 pcs. about 9 pcs. about 6 pcs. about 3 pcs.
7.0kg Capacity about 14 pcs. about 10 pcs. about 7 pcs. about 4 pcs.
7.5kg Capacity about 15 pcs. about 11 pcs. about 8 pcs. about 4 pcs.
8.0kg Capacity about 16 pcs. about 11 pcs. about 8 pcs. about 4 pcs.
8.5kg Capacity about 17 pcs. about 12 pcs. about 9 pcs. about 5 pcs.
10.0kg Capacity about 20 pcs. about 15 pcs. about 10 pcs. about 6 pcs.
12.0kg Capacity about 24 pcs. about 18 pcs. about 13 pcs. about 7 pcs.
Shirt
about 500 g
Uniform
about 650 g
...... ...... ...... ...... ......
●The figure above is for reference only, specific weights are subject to actual clothes.
Attachment :Laundry volume and detergent dosage reference
Fabric type
Synthetics,silk,
Delicate fabrics
Cotton or linen
Heavy soils
●The dosage of washing detergent varies according to dirty degree and texture of laundries.
Laundry
capacity(kg)
0-5.0
5.0-6.5
0-6.5
6.5-8.0
0-6. 5
6.6-8.0
Water
level
Low
Mid
Mid
High
Mid
High
Water flow
Gentle
Gentle
Normal
degree and color.
Jeans
about 900 g
Wash time
(minutes)
3
3-5
7
7-10
10
10-35(soak 20)
for washing.
Jacket
about 1600 g
Detergent
amount(g)
About 50
About 61
About 61
About 77
About 61
About 77
Name Of Parts
Wash cover
Lint filter
Wash tub
Pulsator
Base
Control panel
(For upper drain only)
Safety cover
Cabinet
Drain hose
Spin cover
Frame
Power plug
Drain hose
(For lower drain only)
Accessories
Inner spin cover
Water inlet hose
Introduction Of Control Panel
Water inlet
Wash timer
Wash timer
Wash selector -Drain
Gentle
Normal
Wash-Drain Selector
Drain
※ he drawing above is for reference only, specific drawing is subject to actual models.T
●
Water inlet: be used to inject water.
●
Wash timer: be used to select required washing time.
●
Spin timer: be used to select required spinning time.
● Wash-Drain selector: For washing or rinsing, select “ Gentle”or“ Normal”. For Draining ,select “Drain”.
Spin timer
Spin timer
-5--4-
Page 7

Usage method
Usage method
Quick Start
1. In st al l the w as hi ng ma ch ine
2. Lo ad t he l aun dr y
3. Add det er gen t an d wa ter
int o th e wa sh tu b
4.
Tur n the w as h ti mer k no b
to se t wa sh t ime
5.
Set the w as h dra in s el ect or t o
“Dr ai n” p osi ti on a fte r wa shing
Take out th e la und ry f ro m
9.
the s pi n tu b
8.
Tur n the s pi n ti mer k no b
to se t sp in t ime
7. Move the laundry into the spin
tub and close the spin cover
6. Repeat the steps 3-5 for rinsing
B. Common rinse (rinse in the wash tub)
①To save time, water and energy, ca n do p re -s pi nn in g be fo re r in sing.
②Put laundries which have already be en d eh yd ra te d in to t he w as h tu b.
③After filling water to the desire d le ve l, t ur n of f th e wa te r tap to save water.
④Tur n th e “Wa sh s el ec to r” k no b to t he " Ge nt le ” or “ No rm al ”.
⑤Set the “wash timer”to the desire d ti me ( ab ou t 3- 5 mi nu te s) fo r ri ns in g.
⑥After rinsing, put the washing ma te ri al s in to t he s pi n tu b to s pi n fo r 1 to 5 m in ut es .
⑦Drain out the rinsing water in the wa sh t ub .
⑧The above steps can be repeated.
Spinning Method
1.Shake out the laundry and put
them into the spin tub.
3.Close the safety cover and the
spin cover.
2.Put the inner spin cover on .
Confirm the inner spin cover is placed
horizontally.
Inner
spin cover
Spin tub
Correct
4.Refer to the following table to select
spinning time.
Spin timer
the laundry
Incorrect
Washing Method
1. Insert the inlet hose into the , and choose injectingwater water inlet mouth
water to the wash tub
Put the laundry into the wash tub, an d ad d de te rg en t in to i t.
2.
When fill water to half of the desi re d wa te r le ve l, t ur n of f the
water tap and let laundries soak in t he s ol ut io n fo r mi nu te s,
then fill water to desired water le ve l.
3. Set wash program “Gentle” or “No rm al ” as p er a mo un t an d te xt ur e of l au nd ri es .
4. Turn the wash timer knob to set wash ti me .
5. After washing, set the wash drain s el ec to r to “ Dr ai n” p os it io n fo r dr ai ni ng .
.
Wash timer
HI
Wat er le ve l in dic at or
Rinsing Method
A. Spr ay ing rinse ( rinse in th e sp in tub)
Put the laundry into the spin tub aft er w as hi ng .
①
Tur n on t he w at er t ap , ch oo se to fill water into the spin tub for 3-4 minu te s, a nd t he n tu rn o ff t he w ater tap.
②
Set the spin timer for 2-5 minutes fo r ri ns in g.
③
The above steps can be repeated.
④
Note: If there is red rust in water, do not c ho os e sp ra yi ng r in se , fo r th e ru st i s ea sy t o ad he re t o
①
laundries.
Ensure that do not fill water in to s pi n tu b wh en s pi nn in g.
②
cover
Spin
Safety
cover
The appliance can not be used by chil dr en o r pe rs on s wi th r ed uc ed p hy si ca l, s en so ry o r me nt al
capabilities, or lack of experi en ce a nd k no wl ed ge , un le ss t he y ha ve b ee n gi ve n su pe rv is ion or instruction.
The new hose supplied with the applia nc e ar e to b e us ed a nd t ha t ol d ho se s ho ul d no t be u se d.
When choosing the water inflowi ng t o wa sh t ub o r sp in t ub , p le as e do n ot m ov e th e wa te r in le t va lv e
during the process of water inflo wi ng .
If strong vibration occurs in tim e of s pi nn in g, o pe n th e sp in c ov er i mm ed ia te ly. Make sure that the was hi ng
machine is placed on a flat and stabl e fl oo r ,a nd t he n ad ju st w as hi ng m at er ia ls , di st ri bu te them evenly.
To do spinning and draining together, pl ea se s pi n fo r 1 mi nu te b ef or e dr ai ni ng .
Do not wash or spin waterproof clot he s or c lo th es t ha t fl oa t ea si ly t o av oi d ab no rm al v ib ra tion or damage
to the clothes.
Washing materials
Silk
Light clothes
(fiber/blended)
Knitwear (fiber)
Underwear
(cotton)
Slipover
(cotton/linen)
Toweling coverlet
(cotton)
Spin time
About 50
seconds
About 1
minute
About 1~2
minutes
About 2~3
minutes
About 3~4
minutes
About 5
minutes
Spin timer
-7--6-
Page 8

Usage method
Maintenance
Efficiency Program
The tests were carrid out under pro gr am N or ma l. B el ow i s th e de ta il f or t es t se ti ng a nd s te ps;
1. Main wash: 30 min., H water level, w as h te mp er at ur e 40 ℃;
2. Spin: 3 mi n. , 2 ti me s; 4 k g te st l oa d fo r on e tu rn ;
3. Rinse: 3 min., L wat er l ev el, water temperature 20 ℃;
4. Spin: 3 min., 2 times; 4 kg test loa d fo r on e tu rn .
(For effi ci en cy p ro gr am o nl y )
Speci al Features
A.So ak f unction ( Fo r ma ch in es h av in g so ak f un ct io n only )
For seriously stained clothes , So ak w as h is u se fu l to a ch ie ve b et te r wa sh r es ul t.
15-35 minutes of the wash timer is fo r so ak w as h: (i ll us tr at e as f ol lo ws )
Total: 35 ( mi ns)
This m ac hine can wa sh blende d bl anket (le ss than 3 kg) m ar ked with th e "hand was hi ng"
35
about 2
Work time
Sta ti c ti me
about 5 about 5 about 5
about 1 .5
about 1 .5
15
(un it: )mins
labe l. Wash in g method is a s follows :
Dilute detergent with water (below 50℃), then pour the solu ti on i nt o
① adequate the wash tub.
Fold the blanket as shown in the figu re , an d into the wash tub.
② put it
● Fold i n ha lf alon g
the lo ng e dge
● 1/3 fo ld i n the
same d ir ection
Roll u p th e blank et●
B.Bu zz er functi on (For ma ch in es h av in g bu zz er f un ct io n on ly )
Function of the buzzer is to alarm fi ni sh o f wa sh in g, an d it i s he lp fu l to c on tr ol w as h pr oc es s.
● Buzzer will alarm the completio n of w as hi ng .
C.Th e du al voltag e (F or m ac hi ne s ha vi ng t he d ua l vo lt ag e fu nc ti on o nly)
The dual voltage washing machin e ca n wo rk a t th e vo lt ag e of 2 20 V or 1 27 V to m ee t ne ed s of d ifferent
countries and areas.
● convert the voltage from 220V60 Hz t o 12 7V 60 Hz :
①
Unplug the washing machine plug to cu t of f th e po we r su pp ly.
②
Remove the back cover.
③
Take down the nylon clip, and remove th e pl as ti c ba g.
④ “ ”
Connect the Wash127V of th e te rm in al c on ne ct or w it h “Wa sh ”, “ Sp in 12 7V ” wi th “ Sp in ” , th en t he v ol ta ge
can be converted to “127V60Hz”.
⑤
Put the wires in order, wrap them in the p la st ic b ag , an d re fi x th e ba ck c ov er. Then the washing machine
can be powered for operation.
●
If convert the voltage from 127 V6 0H z to 2 20 V6 0H z:
①②③ ① ③
Steps - are the same as above
④
Connect the “Wa sh 2 20 V” o f the terminal connector with “Wash”, “Spin 220V” with “Spin” to convert t he
voltage to .
⑤ ⑤
In the step above, should connect the te rm in al c on ne ct or s of b ot h wa sh a nd s pi n, a nd m ak e su re t o
connect correctly.
*The factory-set voltage is 2 20 V6 0H z . U se rs c an c ho se t he v ol tage according to the regional voltage ra ng e.
220V60Hz
The step is the same as above
④
“ ”
Wash timer
Soak
●
Put into the tub with
blanket edge facing down
5
35
10
15
Atten tion To Mai ntenance
Cabinet maintenance
After using the washing machine ,w ip e
the moisture and stain on it with a pie ce
of soft cloth.To avoid damage to the
surface,do not use corrosive or v ol at il e
chemicals.
◆
pull the lint filter out.
◆
in water.
◆
to insert it into place.
◆
Anti-freezing protection
▲ To prevent from freezing:
Tur n off the water tap, remove the w at er i nl et h os e an d em pt y wa te r in t he
① water inlet
hose completely.
②
Lay the drain hose and turn the drain s el ec to r kn ob t o th e "D ra in ”p os it io n to
empty the water in the tub.
▲ If the water is frozen, please take the following steps:
Put the water inlet hose into warm wa te r of a bo ut 5 0℃.
①
②
Keep about 2 liters of warm water bel ow 5 0℃ in t he w as h tu b fo r
about 10 minutes. and then lay the dr ai n ho se a nd t ur n th e
wash drain selector knob to the "Dr ai n” po si ti on t o em pt y th e wa te r .
③
Fit the water inlet hose and turn on th e wa te r ta p to
confirm water filling and drain in g wo rk p ro pe rl y.
Oper at ion whe n ob jects are
drop pe d into th e ou tside of th e sp in tub
①Remove all screws on the frame with a screw driver and
loosen the connector of the brake belt .
②Pull up the frame with both hands and turn it backwards.
③Take out the clothes dropped into the outside of the spin tub.
④Fasten the connector of the brake belt ,Press the frame to
reset and tighten screws.
Aft er y ou u se t he w as hi ng machine, never forget to do the foll ow in g tw o th in gs :
1. Disconnect the power plug.
2. Remove the water inlet hose.
-8-
Cleaning the lint filter
Press the button head, and
Tur n th e fi lt er n et i ns id e out, and rinse it
After inserting the claw, press th e bu tt on
A sound of “ba” means proper install at io n.
Button head
Claw
Frame
Cabinet
Notes
The washing machine employs alter na ti ve c ur re nt w it h ra te d vo lt ag e an d fr eq ue nc y . Wh en voltage fluctuates
between -10% and 10% of the rated vol ta ge , th e ma ch in e ca n wo rk n or ma ll y.
Connection mode of the power cord o f th is m ac hi ne i s Y-sh ap ed c on ne ct io n. Us er s
reconnect the wire by themselve s. please contact the designated s er vi ce c en te r.
If this part needs to be repaired,
should not detach or
-9--8-
Page 9

Maintenance
●Do not connect to the hot water supply.
●
After using, be sure to unplug the power plug.
Be sure to use plug that is properly grounded.
●
The maximum gradient of the supporting surface for the washing machine should not exceed 2º.
●
Do not tear down electrical wires and components in the machine by yourself.
●
There are holes on the base for ventilation. These holes should not be blocked by foreign objects
●
(carpets, etc.).
Never connect the grounding wire with the live wire, or it may lead to an electric shock.
●
If the power cord is damaged, it must be replaced by a qualified person to avoid a hazard.
●
If the following symptoms occur, please disconnect the power plug and perform the
following checks:
Symptom
The washing
machine does
not work.
The drain hose
does not work.
There is abnormal
noise during washing.
There is abnormal
noise and violent
vibration during
spinning.
Check that the power supply is in good condition.
●
Check that the power plug is inserted properly.
●
● Check that the wash timer knob or the spin timer knob is not
in the "0" position.
Check that the drain hose is not laid too high.
●
Check that the drain hose is not frozen.
●
Check that the drain hose is not blocked by foreign matter.
●
Check that there are no coins or any other foreign objects
●
dropped into the wash tub.
Check that the washing machine is placed on flat, stable floor.
●
Check that clothes are evenly distributed in the spin tub.
●
Check that there are no washing materials or foaming debris
●
dropped into the outside of the spin tub.
Reason
Main Technical Parameters
Capacity (dry Clothes)
Power Supply
Input Power (lower drain)
Input Power (upper drain)
Maximum Time
Water volume
Maximum water pressure
Overall dimension
Net weight
Pump Input Power
Wash
8.0 kg
240V/50Hz
400W
400W
15 min. 35 min.(soak wash)
HI:77L H: 72L M: 61L L: 50L
0.6Mpa
870x512x957(mm)
Upper Drain System
23.5kg
Spin
4.6kg
135W
135W
5 min.
/
30W
 Loading...